
:max_bytes(150000):strip_icc():format(webp)/how-to-watch-taylor-swift-movies-in-order-a8e26851d3d94bf183a144766801c16c.jpg)
The Article Is a Guide About the Split of the Videos in VLC. There Is Also a Particular Description of Its Alternative Wondershare Filmora. It Is Suitable as Well as Reasonable for 2024
The Article Is a Guide About the Split of the Videos in VLC. There Is Also a Particular Description of Its Alternative: Wondershare Filmora. It Is Suitable as Well as Reasonable
The VLC media player is top-rated as it is freely available and operates on different platforms efficiently. Its framework helps play almost all the audios, videos, DVDs and various resources available on your systems. Even optimizing the videos and audio as the playback from your devices is possible. There is also a possibility of integrating a number of programs along with the streaming services.
You can even search the album covers. With the functionality of the playlist, you can play a number of films one after the other. This feature is helpful when you have downloaded the whole film in parts or watched different short films. The best part is to know it is not just a video player. It is an editor; yes, you heard it right. VLC is the correct choice for splitting or cutting your videos without facing any difficulties.
The article is a guide about the split of the videos in VLC. There is also a particular description of its alternative: Wondershare Filmora. It is suitable as well as reasonable.
How can you split the video clips in VLC?
VLC Media player has all the amazing tools for playing back the audios and videos regardless of the format. It is still on top of all the media players because of its simple interface. Below are the very easy steps to split the videos in the VLC media player.
Step 1: After completing the download, install the updated version of the VLC media player if it is not on your PC. Once it is installed, you need to double click on its icon for launching it.
Step 2: This step is the activation of the advanced controls in the media player. Click on “View” visible on the menu bar. Click on the “Advanced Controls” and appears the menu of four additional buttons more than the button for play or pause.

Step 3: Now, you can easily play the video simply by clicking the “Open File” option present in the media menu. The drag and drop option is available inside the VLC media player.
You should start playing the video now and recording the parts with the help of a decoder. Look for the position from where you want to begin the recording and press both Play and Pause buttons one after the other.
Even the Frame-by-Frame button is also available. It is the last one in the advance controls for navigating the actual frame from where you want to begin the recording.

Step 4:
Press the button “Record” again whenever you want the recording to stop. This is the final step for cutting the videos in VLC. The split video from the actual video saves automatically as the MP4 video file in the folder of Libraries or Videos if you are using Windows operating system.
Almost all, playing any video and audio format is possible in VLC media player. It includes AVI, MP4, FLV, WMV, RMVB and Quick time. You can even play the videos partially or preview them even before completing the downloads.

An easier way to split the video
The whole process of splitting the video into a VLC media player is extremely easy for managing and handling without any requirement of technical knowledge. But unfortunately, you can apply the frame-by-frame technique on the short videos. Monitoring is essential during the split and looking at the complete process whenever the recording is in VLC.
This causes the loss of quality. Here, the substitute that is also available is Filmora Video Editor . It is the recommendation of the graphic designers, web developers and videographers because it is freely available and lightweight software for the systems. You can apply its features to your images and videos. This includes the cutting, rotating and resizing of your videos along with the images.
For Win 7 or later (64-bit)
For macOS 10.14 or later
Features:
- There are 300+ special effects available
- Splitting of the screens and video clips
- Adding and tracking the motion graphics
- Unlimitedly sharing of the videos
- Addition of the transitional effects
- Dragging and dropping the video contents
- Customization of the effects
You can easily split and cut the large videos in Wondershare Filmora simply. There is no loss of video quality. Follow the steps below for splitting the video from Wondershare Filmora:
Step 1:
Import your videos to Filmora Video Cutter After installing the video cutter, launch it and select New Project to enter the video editing interface. Now, you need to import the video that needs to cut into several parts.

Step 2:
Drag and drop the videos in the timeline to start the splitting. Click the Split icon (scissor icon) on the toolbar or the Split button on the playhead to split the video

Apart from splitting the videos, you can even combine and merge different videos into one. Even the rotation of the videos is possible.
Therefore, Wondershare Filmora has received recognition due to its simple features. It is available for everyone, whether for individual, educational, or business purposes. It can help you in changing the look of your brand completely. Even adding the logos in the videos is also possible, along with adjusting the sizes. There is a huge range of features without any watermark, and all the upgrades are freely available.
Also, tech support is available for any assistance you need. Edit your images and videos on the social media platforms with ease, along with the adjusting tool. The perfect video editor is Wondershare Filmora, as it has compatibility with both Windows and Mac users. Correct and match the colour with the customization tools. Start using the Wondershare Filmora today without being concerned regarding the format of the video clips. You will definitely enjoy using it.
Step 3: Now, you can easily play the video simply by clicking the “Open File” option present in the media menu. The drag and drop option is available inside the VLC media player.
You should start playing the video now and recording the parts with the help of a decoder. Look for the position from where you want to begin the recording and press both Play and Pause buttons one after the other.
Even the Frame-by-Frame button is also available. It is the last one in the advance controls for navigating the actual frame from where you want to begin the recording.
Step 4:
Press the button “Record” again whenever you want the recording to stop. This is the final step for cutting the videos in VLC. The split video from the actual video saves automatically as the MP4 video file in the folder of Libraries or Videos if you are using Windows operating system.
Almost all, playing any video and audio format is possible in VLC media player. It includes AVI, MP4, FLV, WMV, RMVB and Quick time. You can even play the videos partially or preview them even before completing the downloads.
An easier way to split the video
The whole process of splitting the video into a VLC media player is extremely easy for managing and handling without any requirement of technical knowledge. But unfortunately, you can apply the frame-by-frame technique on the short videos. Monitoring is essential during the split and looking at the complete process whenever the recording is in VLC.
This causes the loss of quality. Here, the substitute that is also available is Filmora Video Editor . It is the recommendation of the graphic designers, web developers and videographers because it is freely available and lightweight software for the systems. You can apply its features to your images and videos. This includes the cutting, rotating and resizing of your videos along with the images.
For Win 7 or later (64-bit)
For macOS 10.14 or later
Features:
- There are 300+ special effects available
- Splitting of the screens and video clips
- Adding and tracking the motion graphics
- Unlimitedly sharing of the videos
- Addition of the transitional effects
- Dragging and dropping the video contents
- Customization of the effects
You can easily split and cut the large videos in Wondershare Filmora simply. There is no loss of video quality. Follow the steps below for splitting the video from Wondershare Filmora:
Step 1:
Import your videos to Filmora Video Cutter After installing the video cutter, launch it and select New Project to enter the video editing interface. Now, you need to import the video that needs to cut into several parts.
Step 2:
Drag and drop the videos in the timeline to start the splitting. Click the Split icon (scissor icon) on the toolbar or the Split button on the playhead to split the video
Apart from splitting the videos, you can even combine and merge different videos into one. Even the rotation of the videos is possible.
Therefore, Wondershare Filmora has received recognition due to its simple features. It is available for everyone, whether for individual, educational, or business purposes. It can help you in changing the look of your brand completely. Even adding the logos in the videos is also possible, along with adjusting the sizes. There is a huge range of features without any watermark, and all the upgrades are freely available.
Also, tech support is available for any assistance you need. Edit your images and videos on the social media platforms with ease, along with the adjusting tool. The perfect video editor is Wondershare Filmora, as it has compatibility with both Windows and Mac users. Correct and match the colour with the customization tools. Start using the Wondershare Filmora today without being concerned regarding the format of the video clips. You will definitely enjoy using it.
How to Create Liquid Water Reveal Intro?
Introduction to any video content should be short, crisp, and impressive simultaneously. Hence, video content creators look for the best techniques to create fantastic introduction effects. Wondershare Filmora is the leading video editor equipped with built-in editing features with more than 200 instant modes and preset templates.
With more than 10+ billion stock media, plugin effects, advanced editing functions, etc., it is the first choice of many content creators. Wondershare Filmora comes with a built-in installer that can be quickly downloaded from the official website . Beginners and professionals can start using this creative video editing tool to make videos for personal and professional purposes.
Out of all the amazing effects available in this editing tool, it is easy to go with the liquid water reveal intro effect. It offers unique and engaging video content. Let us understand the detailed steps to create this effect in your next video easily and quickly.

Steps to create liquid water reveal intro
Wondershare Filmora offers multiple advanced capabilities to content creators. There are multiple options when it comes to creating impressive introductions. Let us explore the liquid water text reveal intro option in this section. We’ve bifurcated the different steps for quick understanding of our readers in an easy and effective way.
Free Download For Win 7 or later(64-bit)
Free Download For macOS 10.14 or later
Step1Launching Wondershare Filmora
Before starting to edit the videos with the liquid water text reveal intro, it is necessary to download, install, and launch Wondershare Filmora. It is dedicated software that can be used for Windows or Mac devices. All you need to do is go to the official website of Wondershare Filmora and start the downloading process. The quick steps for the same are:
- Go to the official website of Wondershare Filmora on your Windows or Mac device.
- Select the Windows or Mac version according to your available device.
- Next, locate the “Free Download” button on the official website. It is located on the left side of the web page. It is easy to select the version type and initiate the download process.
- Once downloaded, the Wondershare Filmora Installer package will be available on your device.
- All you need to do is double-click on the installer package and start the installation process.
- Press yes for all the pop-ups initiated, including the “Agree” on the terms and conditions pop-up.
- The installation process will start quickly.
- Once completed, Wondershare Filmora will start and run automatically on your device.

Step2Importing and select the stock video
Once Wondershare Filmora is running on your system, you can start by importing and selecting the stock video. The quick steps for the same are:
- It is easy to download the stock video from any available source.
- Now, import the stock video from the source to the Wondershare Filmora.
- Locate the “Titles” option in the menu bar located next to the “Audio” option.
- Then, drop the default title on track two.

Step3Entering the text
After the successful uploading of the stock video, it is time to add text to the intro. In this step, you can change the font style, and font size, and maintain the text spacing. The quick steps for the same are:
- Start by double-clicking on the default title.
- Enter the text in the space provided, e.g., here, we’ve entered “Liquid.”
- Start text editing by changing the font to “Billion Dreams.”
- Now, change the font size to 250.
- Then, increase the text spacing by five.
- Last, you have to rotate the text according to the needs and align its position accordingly.

Step4Selecting the color
After making the text settings according to your liking or as required in the video, the next step is to select the color. It is easy to select it from the range of options available in the “Sample Color” menu of the tool. The quick steps for the same are:
- Go to the “My Media” option.
- Here, locate the “Sample Color” option and select it.
- Drop black color on track one and take a quick screenshot of it.
- Then, delete both these files from the timeline.

Step5Adding water effect
Now is the time to create the water text effect. It is located in the “Effects” section of Wondershare Filmora, along with numerous other options. You can select it by searching for it in the search bar. The quick steps for the same are:
- Drop the stock video on track one.
- Now, double-click on this video and bring it to half of the screen.
- Next, go to the “Effects” option.
- Search for “Water” and apply the water effect on track two.
- Lastly, extend the duration of this track.

Step6Completing the water effect settings
After adding the water effect to the video, you can adjust the settings like “Emboss” and “Steps” for a realistic and creative feel. The quick steps to complete the water effect settings in the video are:
- Double-click on “Effects.”
- Increase the “Emboss” settings to 0.53.
- Decrease the “Steps” settings to seven.
- Press “OK” to apply changes.

Step7Enabling the Chroma Key and other settings
Next, you have to enable the “Chroma Key” effect in the video. Further, the color pick logo and other settings are adjusted in this step only. The detailed steps for the same are:
- Go to “My Media.”
- Drop the screenshot on track three.
- Now, increase the duration of this track.
- Double-click on it and go to the “Videos” section.
- Locate the “Chroma Key (Green Screen)” effect and enable it.
- Go to the color pick logo and select the white color from the previous screen.
- Reduce the “Edge Thickness” to negative 3.3
- Reduce the “Edge Feather” to 1.1
- Press “OK” to apply these settings.

Step8Adding the stock video clip
The next step in the process of creating liquid water text reveal intro is to add the stock video clip. Here, you can adjust the clip position also. The quick steps for the same are:
- Start by selecting the stock video clip.
- Now, double-click on the stock video clip.
- Open the “Videos” option.
- Next, change the “Y” axis position and drag the clip out of the text.

Step9Adding keyframes and adjusting playheads
Next, you have to add the keyframes and adjust the playheads in the video. In this step, it is easy to add the keyframes from the “Animations” option in Wondershare Filmora. The stock video is incorporated in this step, and playheads are added accordingly. Further, all the clips are made uniform in this step only. The quick steps for completing these features are:
- Start by opening the “Animations” tab.
- Go to the “Add” option to add a keyframe.
- Now, place the playhead at the three seconds position on the timeline.
- Then, bring the stock video to half of the text.
- Next, place the playhead in the eight seconds position and fill the text with the stock footage at the end.
- Again, place playhead but now at the ten seconds position.
- Locate the “Opacity” option and decrease it to zero.
- Last but not least, reduce all clips’ duration to ten seconds for uniformity.

Step10Previewing and export the video
Once done with all the necessary effects and settings, it is time for a quick preview of the created video. The “Render Preview” option in the Wondershare Filmora offers a fast rendering of the made video to help users with a brief overview of the file. It reduces the preview lag, as observed in other tools due to the application of heavy effects and features. After previewing, you can quickly export the video. The quick steps for the same are:
- Click the “Render Preview” option.
- Go through the preview of the created file in detail. Check for any issues or changes required.
- Now, go to the “Export” option for quick exporting of the file with the liquid water text reveal intro.

So, you’re done with creating a liquid water text reveal intro in this way. It is easy to save these steps for quick future reference.
Wrapping Up
Hence, it is easy for Wondershare Filmora users to create liquid water reveal intro in their videos. All you need to do is quickly download and install Wondershare Filmora on your Windows or Mac devices. Once done, it will launch automatically on your system. Next, you can follow all the steps mentioned above one by one to incorporate liquid water text reveal intro in videos.
So, download Wondershare Filmora for your system right now and start creating professional-grade videos today!
Free Download For macOS 10.14 or later
Step1Launching Wondershare Filmora
Before starting to edit the videos with the liquid water text reveal intro, it is necessary to download, install, and launch Wondershare Filmora. It is dedicated software that can be used for Windows or Mac devices. All you need to do is go to the official website of Wondershare Filmora and start the downloading process. The quick steps for the same are:
- Go to the official website of Wondershare Filmora on your Windows or Mac device.
- Select the Windows or Mac version according to your available device.
- Next, locate the “Free Download” button on the official website. It is located on the left side of the web page. It is easy to select the version type and initiate the download process.
- Once downloaded, the Wondershare Filmora Installer package will be available on your device.
- All you need to do is double-click on the installer package and start the installation process.
- Press yes for all the pop-ups initiated, including the “Agree” on the terms and conditions pop-up.
- The installation process will start quickly.
- Once completed, Wondershare Filmora will start and run automatically on your device.
Step2Importing and select the stock video
Once Wondershare Filmora is running on your system, you can start by importing and selecting the stock video. The quick steps for the same are:
- It is easy to download the stock video from any available source.
- Now, import the stock video from the source to the Wondershare Filmora.
- Locate the “Titles” option in the menu bar located next to the “Audio” option.
- Then, drop the default title on track two.
Step3Entering the text
After the successful uploading of the stock video, it is time to add text to the intro. In this step, you can change the font style, and font size, and maintain the text spacing. The quick steps for the same are:
- Start by double-clicking on the default title.
- Enter the text in the space provided, e.g., here, we’ve entered “Liquid.”
- Start text editing by changing the font to “Billion Dreams.”
- Now, change the font size to 250.
- Then, increase the text spacing by five.
- Last, you have to rotate the text according to the needs and align its position accordingly.
Step4Selecting the color
After making the text settings according to your liking or as required in the video, the next step is to select the color. It is easy to select it from the range of options available in the “Sample Color” menu of the tool. The quick steps for the same are:
- Go to the “My Media” option.
- Here, locate the “Sample Color” option and select it.
- Drop black color on track one and take a quick screenshot of it.
- Then, delete both these files from the timeline.
Step5Adding water effect
Now is the time to create the water text effect. It is located in the “Effects” section of Wondershare Filmora, along with numerous other options. You can select it by searching for it in the search bar. The quick steps for the same are:
- Drop the stock video on track one.
- Now, double-click on this video and bring it to half of the screen.
- Next, go to the “Effects” option.
- Search for “Water” and apply the water effect on track two.
- Lastly, extend the duration of this track.
Step6Completing the water effect settings
After adding the water effect to the video, you can adjust the settings like “Emboss” and “Steps” for a realistic and creative feel. The quick steps to complete the water effect settings in the video are:
- Double-click on “Effects.”
- Increase the “Emboss” settings to 0.53.
- Decrease the “Steps” settings to seven.
- Press “OK” to apply changes.
Step7Enabling the Chroma Key and other settings
Next, you have to enable the “Chroma Key” effect in the video. Further, the color pick logo and other settings are adjusted in this step only. The detailed steps for the same are:
- Go to “My Media.”
- Drop the screenshot on track three.
- Now, increase the duration of this track.
- Double-click on it and go to the “Videos” section.
- Locate the “Chroma Key (Green Screen)” effect and enable it.
- Go to the color pick logo and select the white color from the previous screen.
- Reduce the “Edge Thickness” to negative 3.3
- Reduce the “Edge Feather” to 1.1
- Press “OK” to apply these settings.
Step8Adding the stock video clip
The next step in the process of creating liquid water text reveal intro is to add the stock video clip. Here, you can adjust the clip position also. The quick steps for the same are:
- Start by selecting the stock video clip.
- Now, double-click on the stock video clip.
- Open the “Videos” option.
- Next, change the “Y” axis position and drag the clip out of the text.
Step9Adding keyframes and adjusting playheads
Next, you have to add the keyframes and adjust the playheads in the video. In this step, it is easy to add the keyframes from the “Animations” option in Wondershare Filmora. The stock video is incorporated in this step, and playheads are added accordingly. Further, all the clips are made uniform in this step only. The quick steps for completing these features are:
- Start by opening the “Animations” tab.
- Go to the “Add” option to add a keyframe.
- Now, place the playhead at the three seconds position on the timeline.
- Then, bring the stock video to half of the text.
- Next, place the playhead in the eight seconds position and fill the text with the stock footage at the end.
- Again, place playhead but now at the ten seconds position.
- Locate the “Opacity” option and decrease it to zero.
- Last but not least, reduce all clips’ duration to ten seconds for uniformity.
Step10Previewing and export the video
Once done with all the necessary effects and settings, it is time for a quick preview of the created video. The “Render Preview” option in the Wondershare Filmora offers a fast rendering of the made video to help users with a brief overview of the file. It reduces the preview lag, as observed in other tools due to the application of heavy effects and features. After previewing, you can quickly export the video. The quick steps for the same are:
- Click the “Render Preview” option.
- Go through the preview of the created file in detail. Check for any issues or changes required.
- Now, go to the “Export” option for quick exporting of the file with the liquid water text reveal intro.
So, you’re done with creating a liquid water text reveal intro in this way. It is easy to save these steps for quick future reference.
Wrapping Up
Hence, it is easy for Wondershare Filmora users to create liquid water reveal intro in their videos. All you need to do is quickly download and install Wondershare Filmora on your Windows or Mac devices. Once done, it will launch automatically on your system. Next, you can follow all the steps mentioned above one by one to incorporate liquid water text reveal intro in videos.
So, download Wondershare Filmora for your system right now and start creating professional-grade videos today!
10 Best Meme Text to Speech Tools [Windows, Mac, Android, iPhone&Online]
Best Text To Speech Converter and Video Editor
Filmora’s Text to Speech (TTS) function allows you to convert your text files to voiceover and bring more elements to enrich your video.
Free Download Free Download Free Download Learn More >

Technology is changing really fast. To keep up, we must be able to adapt to the current trends.
Various technological advancements have played a big role in the improvement of our daily lives. Nowadays, you no longer have to pay voice-over artists thousands of dollars each month, thanks to the invention of text-to-speech technology.
Text-to-speech helps improve accessibility as many people don’t like reading long bodies of text. Furthermore, it eliminates the language barrier and helps you reach a global audience.
In this guide, we’ll focus more on the best meme text to speech, fro their compatibility, features, pricing, and cons.
What is the best meme text to speech?
| Software | Do prices start from? | Free plan/trial | Support |
|---|---|---|---|
| Ispring Suite | $770 (per year) | ✔ | Windows |
| Murf | $13 | ✔ | Windows & IOS |
| Speechelo | $37 | ✘ | Windows & IOS |
| Synthesys | $29 | ✘ | Windows & IOS |
| Nuance Dragon | $200 | ✔ | Windows & IOS |
| Note Vibes | $99 | ✔ | Windows & IOS |
| Natural Reader | $49 | ✔ | Windows & IOS |
| Linguatec Voice Reader | $49 | ✘ | Windows & IOS |
| Capti Voice | $2 | ✔ | Windows & IOS |
| Voice Drea Reader | $9.99 | ✔ | Windows & IOS |
1. iSpring Suite
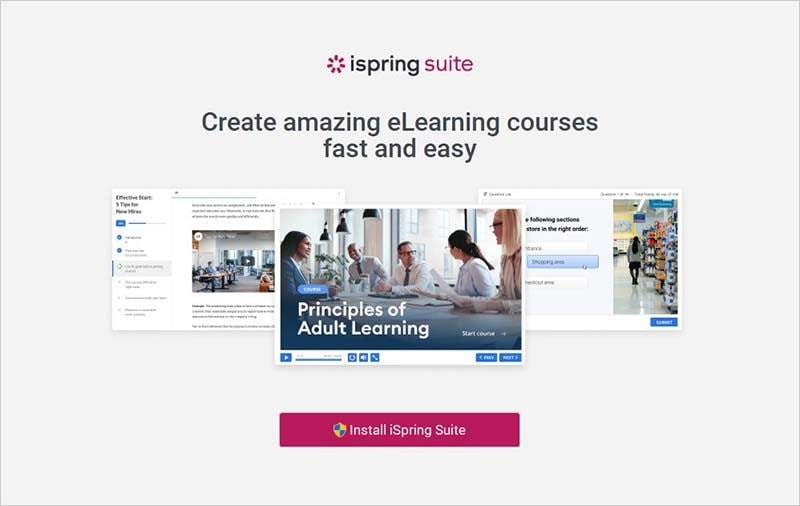
The ispring Suite is a user-friendly eLearning authoring tool whose system incorporates PowerPoint. The navigation tabs are designed with simplicity making it easier for user interaction. The system is only compatible with Windows. The technical staff is prompt and responsive to any matters arising.
Features
- The ispring Suite allows quick conversion of PowerPoint training materials to eLearning.
- Supports multiple users to attend the training and get the same information.
- Creates eLearning content with synched voice narrations and exams for certification.
- Tools such as the Quiz Maker aid a user in creating content with ease.
- Taking training slide decks and working with the ispring Suite creates magical interactivity for the user.
- The ispring Suite provides access to create SCROM content with ease.
Cons
One cannot use a shared drive and auto-sync for content creation.
It is incompatible with Mac users.
Limited options were added for accessibility.
Cost
Ispring Suite costs $770 per year
Ispring Suite Max costs $970 annually
- Murf
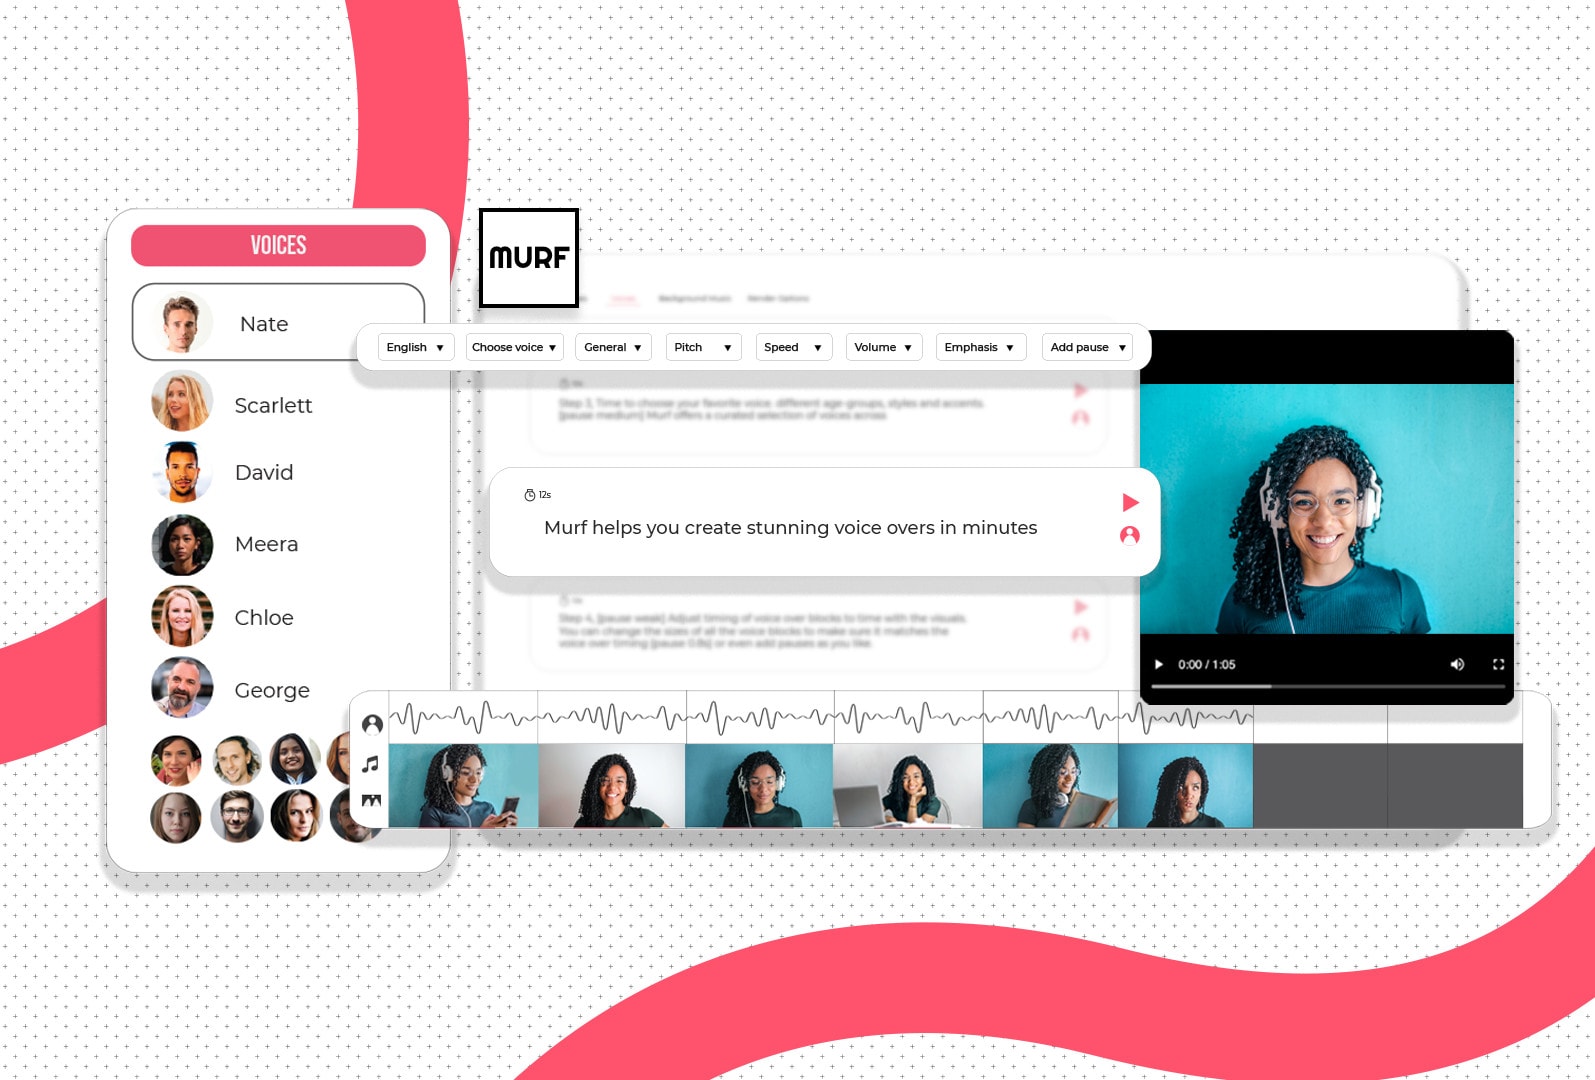
Murf is a versatile AI voice generator that converts text to natural-sounding speech. Cuts down the cost of hiring a voice-over artist, renting out a studio, and investing inexpensive resources. Its simplicity and flexibility generate a studio quality and professional sounding voice-over.
Murf studio creates and edits voice-overs from a range of 120+ natural-sounding voices in 20+ languages and accents. The Murf studio aids one in doing product reviews, promotional videos, and eLearning course modules for audiobooks. Murf’s library incorporates a list of natural-sounding voice covers across several languages.
The Murf provides powerful features to create voice-over videos by adding pause and editing. The clients rate the Murf as the best text-to-speech editor in comparison to other Software since it is cost-effective and efficient. The ability to sync high-quality voice-overs to video creates a slick video quickly.
Features
- The ability to sync voice-overs with images, videos and background music takes away the need to integrate into a third-party tool.
- Incorporates voice cloning as a service.
- Customization of voice that suits the brand position by signing for a custom voice demo.
- Features adding pauses and changing the speed of narration and emphasis help build a more realistic and natural output.
- Murf integrates advanced team collaboration features, access control, pronunciation library, and SLA.
- The text-based voice-over maker allows one to typescript and uploads voice recordings as the tool converts them into hyper-realistic AI voices. The voice converters are editable, just like a word document.
- It has the capability of syncing the time of your voice-over with the visuals.
- The interface is easy to use and super-friendly for beginners to effectively navigate.
- It runs through the system to identify multiple parameters.
- Murf provides voices trained by professional voice-over artists.
- Makes studio-quality voice-overs with no training and little time coverage.
- Supports both audio and text-based inputs.
- Allows the user to enhance e-learning content by providing an audio element to enrich content.
Cons
The soundtrack has a glitch as one cannot upload music under the voice waveform.
Using the tool to its full potential is a learning curve, but it is not that difficult.
Expensive for Individuals; the premium plans are ideal for businesses that regularly create voice-over content but may prove pricey for individuals. The free plan comes in handy in such a case.
Price
Murf pricing exists in four plans: Free, Basic ($13/month), Pro ($26/month), and Enterprise ($69/ month). The free plan package offers all 120+ voices with a share link for audio/video output. It is for a single user with 10 mins of voice generation and transcription.
The basic plan has unlimited downloads with 24 hours of voice generation with access to 60 voices which sums to 10 languages. It is a single user with commercial usage rights.
The Pro plan has 96 hours of voice generation and 48 hours of transcription per year. Supports up to 3 users with recorded voice editing.
The enterprise package has custom voice generation time and transcription time. Works with a specific number of users and collaboration features. Prompts a user to centralized invoicing and account manager.
- Speechelo
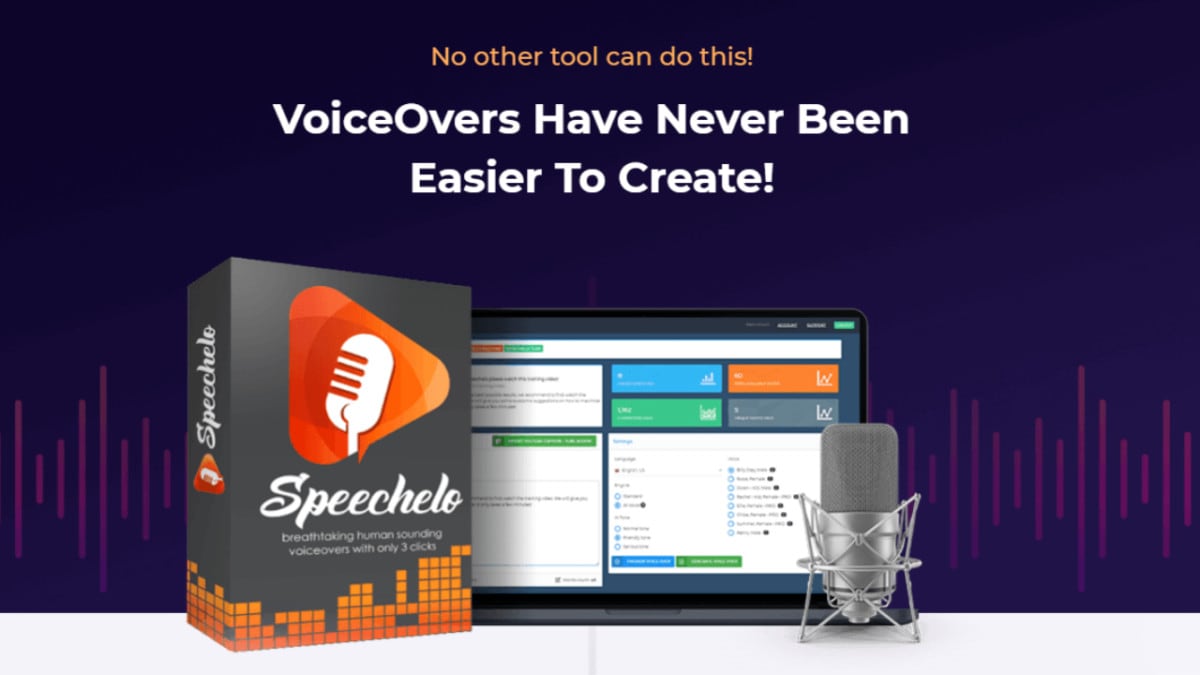
Suites Cloud-based solution to create a voice-over. Provides original voice sound with all expressions increasing the interactivity with the users. It is essential for sales videos, training videos, and educational videos. Speechelo incorporates breathing & pauses and voice tones, changing speed & pitch, and support for 23 languages.
It is a cloud-based solution to create voice-over. Speechelo remains the best text-to-speech Software on the market to help several content creators around the world create videos and podcasts that effectively engage the audience.
Features
- Add inflections in the voice with the aid of an AI engine that increases the naturalness of the audio production and allows a user to choose between tones.
- Transforms any text into speech within 5 seconds.
- Reads text in three ways, normal tone, joyful tone, and Serious tone.
- Incorporates over 30 human-sounding voices.
- Works in English and 23 other languages.
- Compatible with most video creation software such as Adobe, iMovie, Premiere, Camtasia, and Audacity.
- Has both male and female voices.
- The ability to include breathes and pauses increases the human-like quality of voice production.
- Provides an online text editor who checks through a script to identify errors (Punctuation errors).
- Offers its users over fifty voices to choose from.
- The easiest text-to-speech converter in the market comes with three clicks; you must paste the text, then choose the voice, and then download the generated audio.
Cons
Quite expensive when in need of an upgrade to the Pro version or to download an add-on.
Pricing
Speechelo has three main package plans for users: the Starter pack, Speechelo pro, and speechelo tube add-on. The starter pack offers a special discount for a first-time user. For this plan, it is a one-time payment fee of $47. It gives the user access to all features of speechelo; however, it limits the words you can convert to 700 words.
For Speechelo pro, a user pays $47 every three months of the year. This subscription limits the number of words one can convert.
The Speechelo tube add-on allows the user to link directly to YouTube. It costs $37 and gives access to YouTube templates.
- Synthesys
This tool is a large professional AI voice library, 3-click text-to-speech recognition, cloud-based, unlimited speech generation.
They generate natural-sounding voices from texts with a wide variety of tones, languages, male and female voices, and reading speeds to choose from. Takes a few steps to generate natural-sounding artificial speech to fit a wide range of commercial purposes.
First, choose the gender, accent, and tone you would like to transform into. The next step is to write the text to convert to speech into Synthesys’s AI voice-generating interface. Finally, click ‘create’ to generate the artificial speech.
With Human Synthesys , you can create sales videos, ads, demo videos, commercials, training videos, and animation videos. This opens business production to a hike as clients keep flocking. It is as easy as pie, open a YouTube channel and upload videos about your niche, sell voice-overs, ads, explainer videos, or help other businesses get more clients.
Features
- Full customization on cloud-based applications.
- Interactive user interface for editing and rendering.
- High-resolution output
- Suits explainer videos, eLearning, social media, product descriptions, and more.
- Creates room for unlimited voices with over 35 female and 30 male voices.
- It has over 66 languages to choose from, and a total voice bank of 254 unique styles.
- Offers endless possibilities in marketing
- A more compelling alternative to animations and avatars.
- Lip-syncing done by Artificial Intelligence gives it a more realistic appearance.
- Human Synthesys studio’s breakthrough technology solves all the problems, giving high quality at an affordable price.
- Supports multi-slide Videos and MP4 downloads.
- Contains a wide range of high-quality and realistic synthetic voices.
Cons
Require a user to purchase further credits after the license purchase.
Requires an active and stable internet connection.
Pricing
Audio Synthesys costs $29 per month, Human Studio Synthesys $39 per month, and both Audio and Human Studio Synthesys cost $59 per month.
- Nuance Dragon
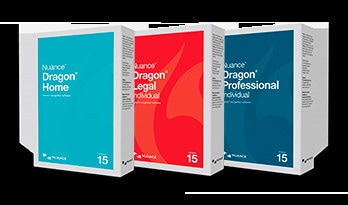
AI-powered speech recognition solution for both home and professional use. Creates cloud solutions and runs on geographically dispersed data centres. The AES 256-bit encryption sync data across devices 99% accuracy with typing. It guarantees a user superior speed and accuracy. The deep learning technology used in Dragon Nuance design ensures the Software adapts to the user’s voice and environmental variables.
Nuance Dragon software is a better pick for ambiguous projects and applications. They are reliable and offer accurate output. There are four versions of Nuance Dragon Software: Dragon Home, Professional, Legal, and Anywhere.
The Dragon Home Software suits personal use and is easy to use with deep learning technology and high accuracy. The Professional suits freelancers or businesses.
Dragon Legal is a speech recognition software for legal professionals, available in three editions with a solid command of the language. Dragon Anywhere is a cloud-based speech-to-text solution. Compatible with mobile and computer devices. Easier to create, store, and edit documents.
The Nuance Dragon Software is compatible with Windows, Android, and iOS.
Features
- Support multiple versions for professionals and individuals in different fields.
- Full voice-to-text functionality.
- Executes commands using the user’s voice.
- Deep learning of individual accents and regional intonations
- Search and browse the internet by voice.
- Fast, accurate documentation.
- Provides comprehensive security.
- Gives the user flexibility on how to convert voice to text and communicate.
- Easier to surf the web through commands and can program multi-step tasks into one simple command that triggers a Google search while using another application.
Cons
Technical glitches for updates in version 15.
No microphone in version 15.
Payments on updates.
Limited choices of languages.
Pricing
Nuance Dragon is quite affordable as the Nuance Dragon Professional is worth $500, and Nuance Dragon Home is $200 for digital downloadDownload with a 30-day money-back guarantee. Later, one can add a USB or Bluetooth headset at a cheap cost.
- Notevibes
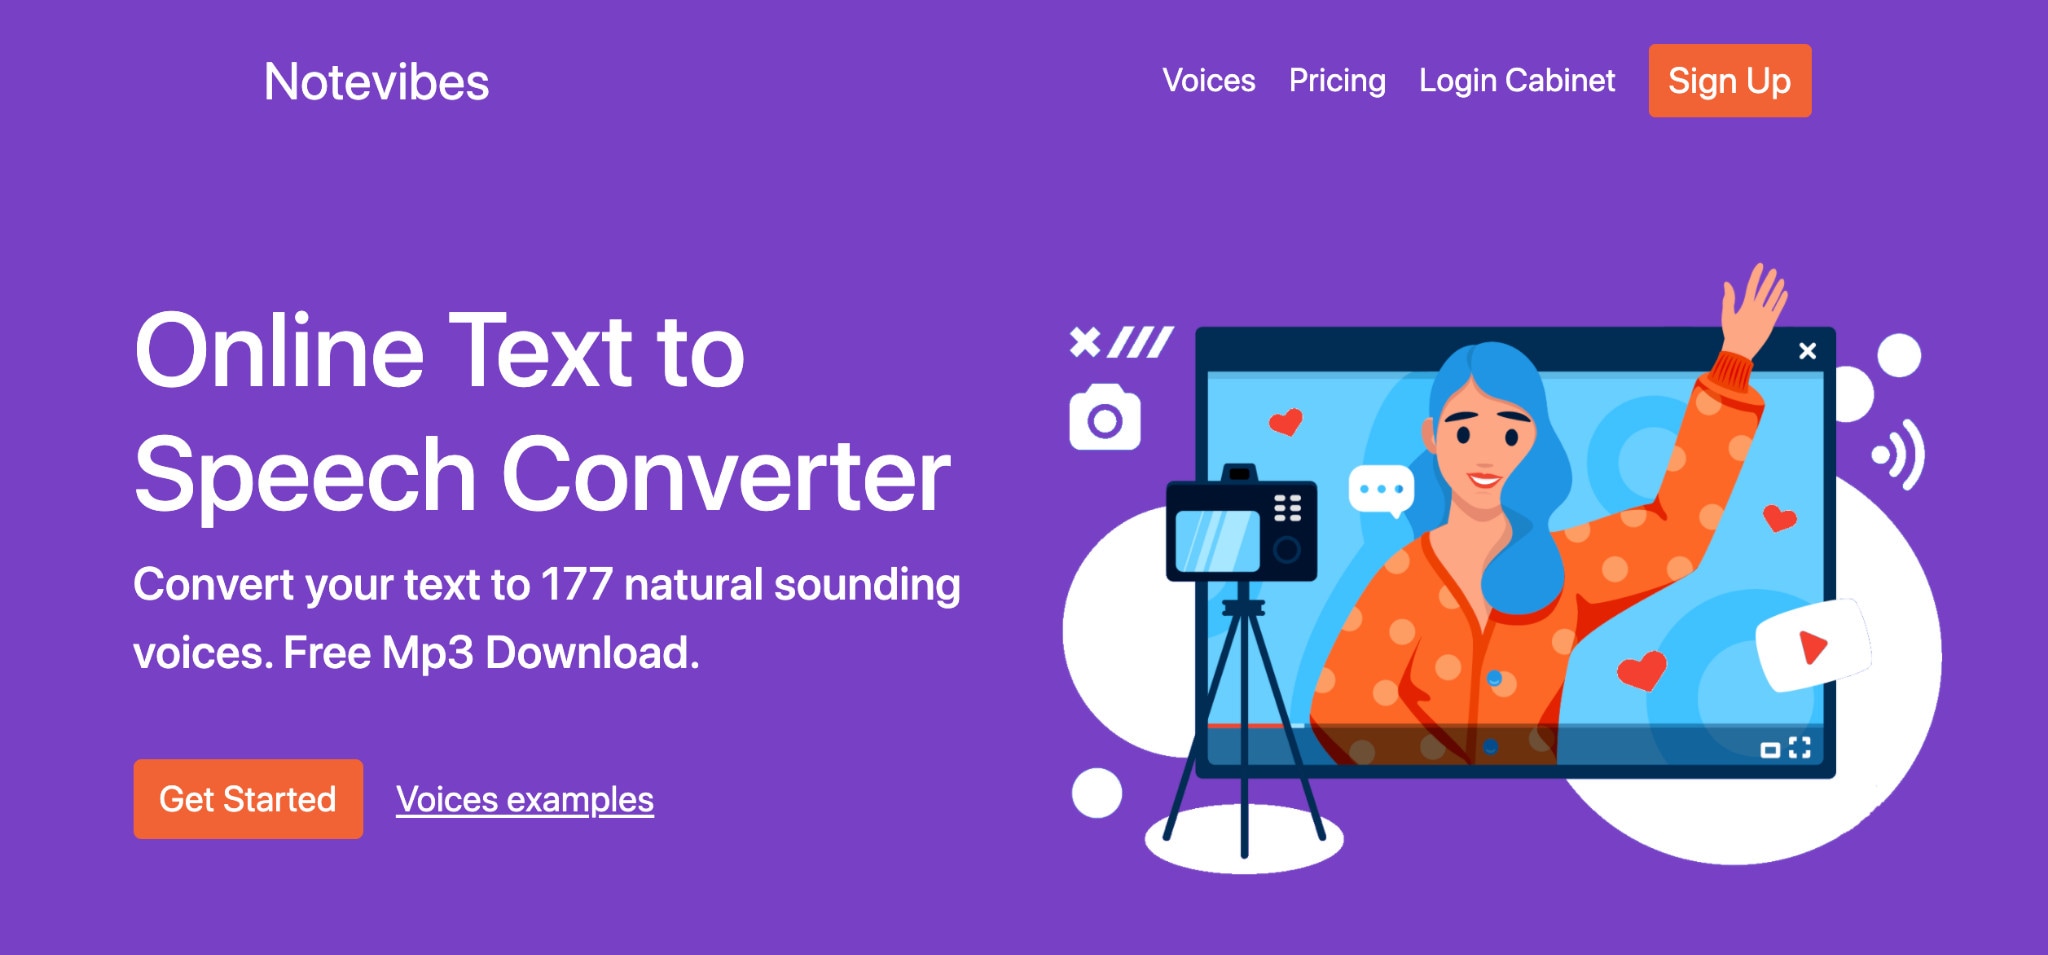
Notevibes text-to-speech software exists as a free version and a feature-rich paid version. This ensures users have all tools they need to understand a new language. Notevibes is the best text-to-speech tool in the market with e-learning and essay reading. The tools help one break down a difficult-to-read text into understandable text.
Features
- Use the text-to-voice converter to make videos with natural-sounding
- Notevibes integrates the most realistic voice generator for teams to make their work easier.
- The advanced editor is designed with simplicity and a flexible interface.
- Easy solution for multi-language teams for converting documents into natural-sounding speech.
- Available with 201 high-quality voices and 22 Languages
- Uses premium voices only for text-to-speech
- Saves Audio as MP3
- It has 47 natural voices with 200- 1000000 characters.
Cons
The voice-over and Editor page are different; switching between both pages would consume time.
It has no project-based structure, and keeping multiple files can create a mess.
It has no preview of a script. You must generate the voice-over to listen.
Cannot merge multiple audio files.
Pricing
Limited free online access
The personal pack goes for $9 per month, but when one makes an annual subscription, he or she gets a $2 discount each month.
The commercial pack goes for $90 per month and $840 annually. Supports SSML tags, MP3, Wav Download, and File Storage.
- Natural Reader
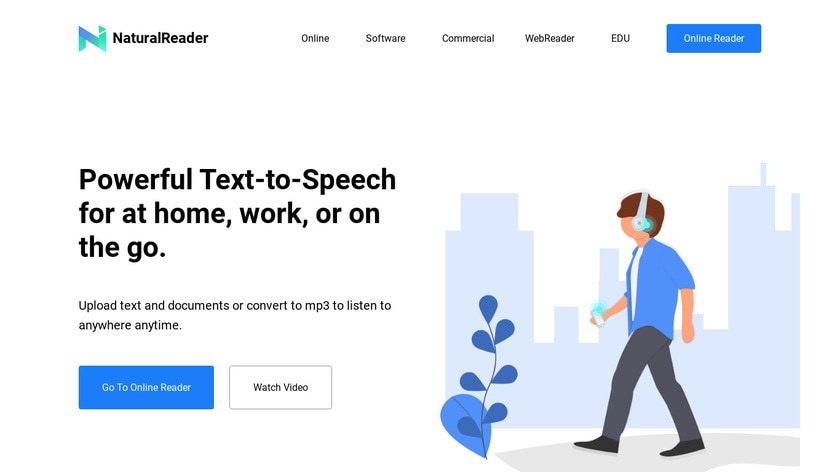
Natural Reader suits personal use and learning, especially for dyslexic readers and foreign language learners. Its design is simple to use, and it can load documents directly into its library.
The tool allows the user to manage multiple files across several formats. The inbuilt OCR enables the user to upload photos or scan texts. The Natural Reader software is compatible with both mobile and desktop versions (PC and MAC). The subscription package allows users to create and save a sound file of text and embed the tool within an application’s toolbar.
The hovering menu offers a gesture to the user that they can use assistive technology. The drag-and-drop feature makes it easier to use and intuitive. The learning curve for using Natural Reader is simplified with adjusting settings like voice and speed in comparison to a Mac inbuilt tool. The Natural Reader website has tutorial videos to guide the user on how to execute tasks.
Natural Reader can effectively help improve spelling and reduce eye strain from reading. The user can save a text and proofread it later.
Features
- It has an inbuilt OCR and browser hence compatible with files generated by scanning software.
- Incorporates the latest and most intelligent AI voices.
- Generates audio for eLearning material.
- Used in IVR systems, broadcasting, and public.
- Creates narration for YouTube videos.
- Provides a wide choice of interfaces to the users.
- It has a dyslexic-friendly font.
- Offers a good natural sounding with voice tuning.
- Supports SSML tags and MP3 downloadDownload.
- Incorporates 61 voices and 18 languages.
- It has a floating bar with one click to read.
- Flexible speeds help in memorizing tasks awaiting execution.
Cons
Require internet connectivity to access the voices.
Do not have the option to skip any text in the document.
Technical glitches for prolonged usage.
The subscription package is overpriced compared to other Software.
Pricing
Consists of a 7-day free trial, a single plan for $49, and a Team plan of 4 users going for $79.
- Linguatec Voice Reader

Suits individuals are planning to learn foreign languages. Linguatec Voice Reader creates a friendly environment to conveniently convert texts into high-quality voice recordings automatically. The design of the tool supports the needs of private users with a rich collection of improvised and natural-sounding voices. Converts texts such as Emails, Word documents, Epubs, or PDFs into audio and listen to them directly on a PC or mobile device.
Linguatec Voice Reader software is primarily for private use and not commercial. The tool helps to identify spelling mistakes by reading it out as people stumble over awkward phrasing. The visually impaired clients get accurate and effective information in the audio format. It works with great sounds within an identified niche.
Features
- Convenient and fast conversion of text to audio
- Voice customization through control of pitch, volume, and speaking speed.
- Dynamic change between male and female voices.
- Prompt and responsive systems optimized for personal use.
- Supports converting many text formats.
- Easier pronunciation correction through user dictionaries.
- High data throughput for fast, responsive time.
Cons
Provide only one language and one voice in Voice Reader Home per license.
No free personal version is available, unlike Natural Reader.
Paying for MP3 capabilities is inconvenient.
Quite expensive if needed for multiple voices or the option to use the output commercially.
No pronunciation adjustments.
Technical glitches ruin the flow and highlight the synthetic nature of the voice.
- Capti Voice
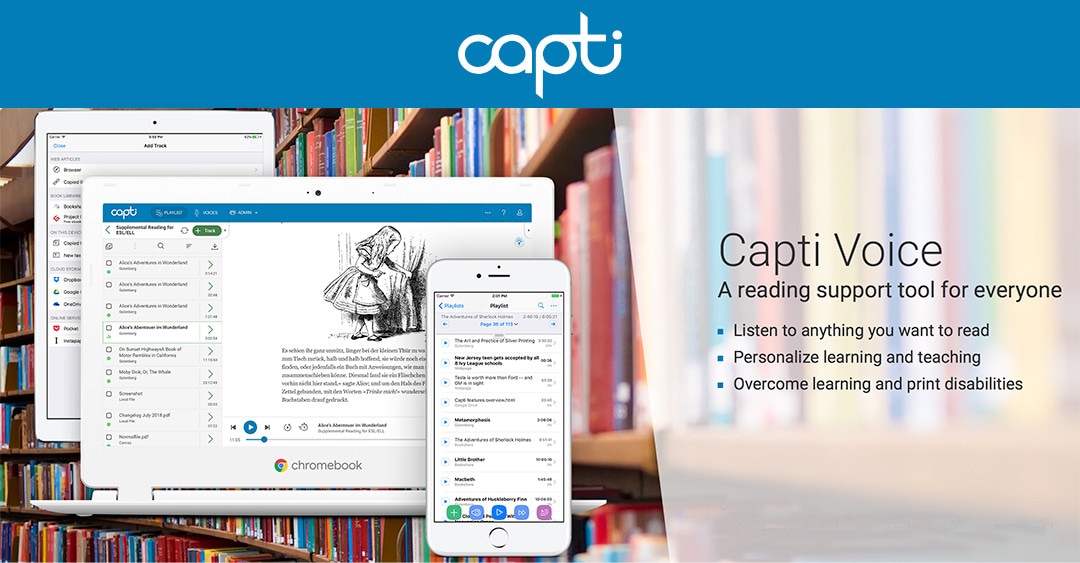
Capti is a convenient text-to-speech software which works both online and offline. It has a natural sounding with over 20 languages and integrates cloud platforms such as Google Drive, text-to-speech Dropbox, and One Drive.
Capti Voice suits learners with help provision for students to overcome language barriers. The Capti Voice narrates a large variety of text documents such as articles, eBooks, and web pages. Capti improves the productivity of learners either at school or work. Capti Voice is compatible with Windows, iOS, macOS, and Chrome OS.
Features
- Advanced text navigation
- Tracks speech word by word.
- Enables cross-device Sync.
- Available for offline use.
- Offers Screen-reader accessibility
- Features article extraction from web pages while skipping all clutter.
- Supports numerous text formats such as Pdf, Docx, Google Docs, Sheets, Slides, and many more.
Cons
The free account is limited
Offers features for people suffering from dyslexia and other print disabilities.
Its design is compatible for use for people with different age gaps.
Pricing
A week’s trial is free.
For a monthly subscription, it will cost close to $2
For six months subscription package it costs $10
For an annual subscription, it costs $20
- Voice Dream Reader
The Voice Dream Reader is compatible with mobile apps for iOS users. It integrates a premium Acapela Heather voice for its users. This Software suits Apple users as it incorporates the best features. Apart from text-to-speech conversion, the users can benefit from features like full-screen reading mode, text highlighting, dictionary lookups, and creating & pinning notes. This gives the user a listening experience with high-quality reading. It is the best text-to-speech mobile app for iOS users in comparison to other tools.
Features
- The Voice Dream Reader supports many file formats, including DAISY 3.0 text-only, DAISY 2.02 audio, DRM-free EPUB, pdf, Microsoft Word, Microsoft PowerPoint, HTML, and zipped MP3 files.
- It integrates with Bookshare and Gutenberg by loading files from Google Drive, Dropbox, or iTunes via USB or Wi-Fi.
- The Voice Dream Reader works with voices available on the device and offers in-app purchases of voices for more than 20 languages.
- Its interface is designed with simplicity and advanced features, which allocates a user premium mobile text-to-speech solution.
- It has a library management system with both audio and visual controls.
- This Software provides navigation and reading options.
- Provides iCloud Sync, which synchronizes and backs up documents in signed devices.
- Safari Extension saves online articles and files directly from Safari.
- Sets bookmark, highlights text and adds notes.
- Scan documents with QR codes require the Voice Dream Scanner.
Cons
It has a limited free version but supports buying premium voices.
No support for desktop OSs like Windows and macOS, unlike other text-to-speech Software.
Technical glitches often interfere with the user’s experience.
Pricing
There is a free version of the Software.
The iOS app software goes for $14.99, while the Android version costs $9.99.
Final Thoughts
Text-to-Speech software is not only a game-changer when it comes to the business space but also in the entertainment scene. The Software mentioned above is some of the best meme text to speech in the global Software.
Although they don’t all come at a low price, it is way better than sourcing for voice-over freelancers who charge hourly. This Software is also very convenient as it can convert any text to speech within seconds with just a click of a button.
TIP: Don’t just settle for a particular software because it’s cheap. Analyze its features, pros, and cons. Only then can you get one that gives you value for your money.
Technology is changing really fast. To keep up, we must be able to adapt to the current trends.
Various technological advancements have played a big role in the improvement of our daily lives. Nowadays, you no longer have to pay voice-over artists thousands of dollars each month, thanks to the invention of text-to-speech technology.
Text-to-speech helps improve accessibility as many people don’t like reading long bodies of text. Furthermore, it eliminates the language barrier and helps you reach a global audience.
In this guide, we’ll focus more on the best meme text to speech, fro their compatibility, features, pricing, and cons.
What is the best meme text to speech?
| Software | Do prices start from? | Free plan/trial | Support |
|---|---|---|---|
| Ispring Suite | $770 (per year) | ✔ | Windows |
| Murf | $13 | ✔ | Windows & IOS |
| Speechelo | $37 | ✘ | Windows & IOS |
| Synthesys | $29 | ✘ | Windows & IOS |
| Nuance Dragon | $200 | ✔ | Windows & IOS |
| Note Vibes | $99 | ✔ | Windows & IOS |
| Natural Reader | $49 | ✔ | Windows & IOS |
| Linguatec Voice Reader | $49 | ✘ | Windows & IOS |
| Capti Voice | $2 | ✔ | Windows & IOS |
| Voice Drea Reader | $9.99 | ✔ | Windows & IOS |
1. iSpring Suite
The ispring Suite is a user-friendly eLearning authoring tool whose system incorporates PowerPoint. The navigation tabs are designed with simplicity making it easier for user interaction. The system is only compatible with Windows. The technical staff is prompt and responsive to any matters arising.
Features
- The ispring Suite allows quick conversion of PowerPoint training materials to eLearning.
- Supports multiple users to attend the training and get the same information.
- Creates eLearning content with synched voice narrations and exams for certification.
- Tools such as the Quiz Maker aid a user in creating content with ease.
- Taking training slide decks and working with the ispring Suite creates magical interactivity for the user.
- The ispring Suite provides access to create SCROM content with ease.
Cons
One cannot use a shared drive and auto-sync for content creation.
It is incompatible with Mac users.
Limited options were added for accessibility.
Cost
Ispring Suite costs $770 per year
Ispring Suite Max costs $970 annually
- Murf
Murf is a versatile AI voice generator that converts text to natural-sounding speech. Cuts down the cost of hiring a voice-over artist, renting out a studio, and investing inexpensive resources. Its simplicity and flexibility generate a studio quality and professional sounding voice-over.
Murf studio creates and edits voice-overs from a range of 120+ natural-sounding voices in 20+ languages and accents. The Murf studio aids one in doing product reviews, promotional videos, and eLearning course modules for audiobooks. Murf’s library incorporates a list of natural-sounding voice covers across several languages.
The Murf provides powerful features to create voice-over videos by adding pause and editing. The clients rate the Murf as the best text-to-speech editor in comparison to other Software since it is cost-effective and efficient. The ability to sync high-quality voice-overs to video creates a slick video quickly.
Features
- The ability to sync voice-overs with images, videos and background music takes away the need to integrate into a third-party tool.
- Incorporates voice cloning as a service.
- Customization of voice that suits the brand position by signing for a custom voice demo.
- Features adding pauses and changing the speed of narration and emphasis help build a more realistic and natural output.
- Murf integrates advanced team collaboration features, access control, pronunciation library, and SLA.
- The text-based voice-over maker allows one to typescript and uploads voice recordings as the tool converts them into hyper-realistic AI voices. The voice converters are editable, just like a word document.
- It has the capability of syncing the time of your voice-over with the visuals.
- The interface is easy to use and super-friendly for beginners to effectively navigate.
- It runs through the system to identify multiple parameters.
- Murf provides voices trained by professional voice-over artists.
- Makes studio-quality voice-overs with no training and little time coverage.
- Supports both audio and text-based inputs.
- Allows the user to enhance e-learning content by providing an audio element to enrich content.
Cons
The soundtrack has a glitch as one cannot upload music under the voice waveform.
Using the tool to its full potential is a learning curve, but it is not that difficult.
Expensive for Individuals; the premium plans are ideal for businesses that regularly create voice-over content but may prove pricey for individuals. The free plan comes in handy in such a case.
Price
Murf pricing exists in four plans: Free, Basic ($13/month), Pro ($26/month), and Enterprise ($69/ month). The free plan package offers all 120+ voices with a share link for audio/video output. It is for a single user with 10 mins of voice generation and transcription.
The basic plan has unlimited downloads with 24 hours of voice generation with access to 60 voices which sums to 10 languages. It is a single user with commercial usage rights.
The Pro plan has 96 hours of voice generation and 48 hours of transcription per year. Supports up to 3 users with recorded voice editing.
The enterprise package has custom voice generation time and transcription time. Works with a specific number of users and collaboration features. Prompts a user to centralized invoicing and account manager.
- Speechelo
Suites Cloud-based solution to create a voice-over. Provides original voice sound with all expressions increasing the interactivity with the users. It is essential for sales videos, training videos, and educational videos. Speechelo incorporates breathing & pauses and voice tones, changing speed & pitch, and support for 23 languages.
It is a cloud-based solution to create voice-over. Speechelo remains the best text-to-speech Software on the market to help several content creators around the world create videos and podcasts that effectively engage the audience.
Features
- Add inflections in the voice with the aid of an AI engine that increases the naturalness of the audio production and allows a user to choose between tones.
- Transforms any text into speech within 5 seconds.
- Reads text in three ways, normal tone, joyful tone, and Serious tone.
- Incorporates over 30 human-sounding voices.
- Works in English and 23 other languages.
- Compatible with most video creation software such as Adobe, iMovie, Premiere, Camtasia, and Audacity.
- Has both male and female voices.
- The ability to include breathes and pauses increases the human-like quality of voice production.
- Provides an online text editor who checks through a script to identify errors (Punctuation errors).
- Offers its users over fifty voices to choose from.
- The easiest text-to-speech converter in the market comes with three clicks; you must paste the text, then choose the voice, and then download the generated audio.
Cons
Quite expensive when in need of an upgrade to the Pro version or to download an add-on.
Pricing
Speechelo has three main package plans for users: the Starter pack, Speechelo pro, and speechelo tube add-on. The starter pack offers a special discount for a first-time user. For this plan, it is a one-time payment fee of $47. It gives the user access to all features of speechelo; however, it limits the words you can convert to 700 words.
For Speechelo pro, a user pays $47 every three months of the year. This subscription limits the number of words one can convert.
The Speechelo tube add-on allows the user to link directly to YouTube. It costs $37 and gives access to YouTube templates.
- Synthesys
This tool is a large professional AI voice library, 3-click text-to-speech recognition, cloud-based, unlimited speech generation.
They generate natural-sounding voices from texts with a wide variety of tones, languages, male and female voices, and reading speeds to choose from. Takes a few steps to generate natural-sounding artificial speech to fit a wide range of commercial purposes.
First, choose the gender, accent, and tone you would like to transform into. The next step is to write the text to convert to speech into Synthesys’s AI voice-generating interface. Finally, click ‘create’ to generate the artificial speech.
With Human Synthesys , you can create sales videos, ads, demo videos, commercials, training videos, and animation videos. This opens business production to a hike as clients keep flocking. It is as easy as pie, open a YouTube channel and upload videos about your niche, sell voice-overs, ads, explainer videos, or help other businesses get more clients.
Features
- Full customization on cloud-based applications.
- Interactive user interface for editing and rendering.
- High-resolution output
- Suits explainer videos, eLearning, social media, product descriptions, and more.
- Creates room for unlimited voices with over 35 female and 30 male voices.
- It has over 66 languages to choose from, and a total voice bank of 254 unique styles.
- Offers endless possibilities in marketing
- A more compelling alternative to animations and avatars.
- Lip-syncing done by Artificial Intelligence gives it a more realistic appearance.
- Human Synthesys studio’s breakthrough technology solves all the problems, giving high quality at an affordable price.
- Supports multi-slide Videos and MP4 downloads.
- Contains a wide range of high-quality and realistic synthetic voices.
Cons
Require a user to purchase further credits after the license purchase.
Requires an active and stable internet connection.
Pricing
Audio Synthesys costs $29 per month, Human Studio Synthesys $39 per month, and both Audio and Human Studio Synthesys cost $59 per month.
- Nuance Dragon
AI-powered speech recognition solution for both home and professional use. Creates cloud solutions and runs on geographically dispersed data centres. The AES 256-bit encryption sync data across devices 99% accuracy with typing. It guarantees a user superior speed and accuracy. The deep learning technology used in Dragon Nuance design ensures the Software adapts to the user’s voice and environmental variables.
Nuance Dragon software is a better pick for ambiguous projects and applications. They are reliable and offer accurate output. There are four versions of Nuance Dragon Software: Dragon Home, Professional, Legal, and Anywhere.
The Dragon Home Software suits personal use and is easy to use with deep learning technology and high accuracy. The Professional suits freelancers or businesses.
Dragon Legal is a speech recognition software for legal professionals, available in three editions with a solid command of the language. Dragon Anywhere is a cloud-based speech-to-text solution. Compatible with mobile and computer devices. Easier to create, store, and edit documents.
The Nuance Dragon Software is compatible with Windows, Android, and iOS.
Features
- Support multiple versions for professionals and individuals in different fields.
- Full voice-to-text functionality.
- Executes commands using the user’s voice.
- Deep learning of individual accents and regional intonations
- Search and browse the internet by voice.
- Fast, accurate documentation.
- Provides comprehensive security.
- Gives the user flexibility on how to convert voice to text and communicate.
- Easier to surf the web through commands and can program multi-step tasks into one simple command that triggers a Google search while using another application.
Cons
Technical glitches for updates in version 15.
No microphone in version 15.
Payments on updates.
Limited choices of languages.
Pricing
Nuance Dragon is quite affordable as the Nuance Dragon Professional is worth $500, and Nuance Dragon Home is $200 for digital downloadDownload with a 30-day money-back guarantee. Later, one can add a USB or Bluetooth headset at a cheap cost.
- Notevibes
Notevibes text-to-speech software exists as a free version and a feature-rich paid version. This ensures users have all tools they need to understand a new language. Notevibes is the best text-to-speech tool in the market with e-learning and essay reading. The tools help one break down a difficult-to-read text into understandable text.
Features
- Use the text-to-voice converter to make videos with natural-sounding
- Notevibes integrates the most realistic voice generator for teams to make their work easier.
- The advanced editor is designed with simplicity and a flexible interface.
- Easy solution for multi-language teams for converting documents into natural-sounding speech.
- Available with 201 high-quality voices and 22 Languages
- Uses premium voices only for text-to-speech
- Saves Audio as MP3
- It has 47 natural voices with 200- 1000000 characters.
Cons
The voice-over and Editor page are different; switching between both pages would consume time.
It has no project-based structure, and keeping multiple files can create a mess.
It has no preview of a script. You must generate the voice-over to listen.
Cannot merge multiple audio files.
Pricing
Limited free online access
The personal pack goes for $9 per month, but when one makes an annual subscription, he or she gets a $2 discount each month.
The commercial pack goes for $90 per month and $840 annually. Supports SSML tags, MP3, Wav Download, and File Storage.
- Natural Reader
Natural Reader suits personal use and learning, especially for dyslexic readers and foreign language learners. Its design is simple to use, and it can load documents directly into its library.
The tool allows the user to manage multiple files across several formats. The inbuilt OCR enables the user to upload photos or scan texts. The Natural Reader software is compatible with both mobile and desktop versions (PC and MAC). The subscription package allows users to create and save a sound file of text and embed the tool within an application’s toolbar.
The hovering menu offers a gesture to the user that they can use assistive technology. The drag-and-drop feature makes it easier to use and intuitive. The learning curve for using Natural Reader is simplified with adjusting settings like voice and speed in comparison to a Mac inbuilt tool. The Natural Reader website has tutorial videos to guide the user on how to execute tasks.
Natural Reader can effectively help improve spelling and reduce eye strain from reading. The user can save a text and proofread it later.
Features
- It has an inbuilt OCR and browser hence compatible with files generated by scanning software.
- Incorporates the latest and most intelligent AI voices.
- Generates audio for eLearning material.
- Used in IVR systems, broadcasting, and public.
- Creates narration for YouTube videos.
- Provides a wide choice of interfaces to the users.
- It has a dyslexic-friendly font.
- Offers a good natural sounding with voice tuning.
- Supports SSML tags and MP3 downloadDownload.
- Incorporates 61 voices and 18 languages.
- It has a floating bar with one click to read.
- Flexible speeds help in memorizing tasks awaiting execution.
Cons
Require internet connectivity to access the voices.
Do not have the option to skip any text in the document.
Technical glitches for prolonged usage.
The subscription package is overpriced compared to other Software.
Pricing
Consists of a 7-day free trial, a single plan for $49, and a Team plan of 4 users going for $79.
- Linguatec Voice Reader
Suits individuals are planning to learn foreign languages. Linguatec Voice Reader creates a friendly environment to conveniently convert texts into high-quality voice recordings automatically. The design of the tool supports the needs of private users with a rich collection of improvised and natural-sounding voices. Converts texts such as Emails, Word documents, Epubs, or PDFs into audio and listen to them directly on a PC or mobile device.
Linguatec Voice Reader software is primarily for private use and not commercial. The tool helps to identify spelling mistakes by reading it out as people stumble over awkward phrasing. The visually impaired clients get accurate and effective information in the audio format. It works with great sounds within an identified niche.
Features
- Convenient and fast conversion of text to audio
- Voice customization through control of pitch, volume, and speaking speed.
- Dynamic change between male and female voices.
- Prompt and responsive systems optimized for personal use.
- Supports converting many text formats.
- Easier pronunciation correction through user dictionaries.
- High data throughput for fast, responsive time.
Cons
Provide only one language and one voice in Voice Reader Home per license.
No free personal version is available, unlike Natural Reader.
Paying for MP3 capabilities is inconvenient.
Quite expensive if needed for multiple voices or the option to use the output commercially.
No pronunciation adjustments.
Technical glitches ruin the flow and highlight the synthetic nature of the voice.
- Capti Voice
Capti is a convenient text-to-speech software which works both online and offline. It has a natural sounding with over 20 languages and integrates cloud platforms such as Google Drive, text-to-speech Dropbox, and One Drive.
Capti Voice suits learners with help provision for students to overcome language barriers. The Capti Voice narrates a large variety of text documents such as articles, eBooks, and web pages. Capti improves the productivity of learners either at school or work. Capti Voice is compatible with Windows, iOS, macOS, and Chrome OS.
Features
- Advanced text navigation
- Tracks speech word by word.
- Enables cross-device Sync.
- Available for offline use.
- Offers Screen-reader accessibility
- Features article extraction from web pages while skipping all clutter.
- Supports numerous text formats such as Pdf, Docx, Google Docs, Sheets, Slides, and many more.
Cons
The free account is limited
Offers features for people suffering from dyslexia and other print disabilities.
Its design is compatible for use for people with different age gaps.
Pricing
A week’s trial is free.
For a monthly subscription, it will cost close to $2
For six months subscription package it costs $10
For an annual subscription, it costs $20
- Voice Dream Reader
The Voice Dream Reader is compatible with mobile apps for iOS users. It integrates a premium Acapela Heather voice for its users. This Software suits Apple users as it incorporates the best features. Apart from text-to-speech conversion, the users can benefit from features like full-screen reading mode, text highlighting, dictionary lookups, and creating & pinning notes. This gives the user a listening experience with high-quality reading. It is the best text-to-speech mobile app for iOS users in comparison to other tools.
Features
- The Voice Dream Reader supports many file formats, including DAISY 3.0 text-only, DAISY 2.02 audio, DRM-free EPUB, pdf, Microsoft Word, Microsoft PowerPoint, HTML, and zipped MP3 files.
- It integrates with Bookshare and Gutenberg by loading files from Google Drive, Dropbox, or iTunes via USB or Wi-Fi.
- The Voice Dream Reader works with voices available on the device and offers in-app purchases of voices for more than 20 languages.
- Its interface is designed with simplicity and advanced features, which allocates a user premium mobile text-to-speech solution.
- It has a library management system with both audio and visual controls.
- This Software provides navigation and reading options.
- Provides iCloud Sync, which synchronizes and backs up documents in signed devices.
- Safari Extension saves online articles and files directly from Safari.
- Sets bookmark, highlights text and adds notes.
- Scan documents with QR codes require the Voice Dream Scanner.
Cons
It has a limited free version but supports buying premium voices.
No support for desktop OSs like Windows and macOS, unlike other text-to-speech Software.
Technical glitches often interfere with the user’s experience.
Pricing
There is a free version of the Software.
The iOS app software goes for $14.99, while the Android version costs $9.99.
Final Thoughts
Text-to-Speech software is not only a game-changer when it comes to the business space but also in the entertainment scene. The Software mentioned above is some of the best meme text to speech in the global Software.
Although they don’t all come at a low price, it is way better than sourcing for voice-over freelancers who charge hourly. This Software is also very convenient as it can convert any text to speech within seconds with just a click of a button.
TIP: Don’t just settle for a particular software because it’s cheap. Analyze its features, pros, and cons. Only then can you get one that gives you value for your money.
How to Make Stunning Glitch Effect in Photoshop? [Ultimate Guide]
Many of us are fascinated by glitch art. The aesthetic effect it adds to your content is unmatched. You can add color and class to your pictures with glitch picture effects. Someone who isn’t aware of the glitch effect is inspired by any technical mishap or digital error. The damage that the malfunctioning of a system causes is used as an art and an effect to beautify things.
You can add the glitch image effect to your photos easily. There are multiple cool templates available on the internet that could be used. You can also make your own stunning yet customized glitch effect Photoshop. If this has impressed you, then stay here because we will talk a lot about glitch photo editors.
In this article
01 Part 1. How Do You Do Photo Glitch Effect in Photoshop?
02 Part 2. 5 Awesome Glitch Effect Photoshop Actions.
Part 1. How Do You Do Photo Glitch Effect in Photoshop?
The jagged lines, the colorful pixels, frozen visuals, and also the distorted colors, everything perfectly blends to make a glitch effect. Usually, this is how all the glitch templates are, but if you get an opportunity to customize your image glitch effect and make your special effect, what will you do?
The best option to adopt in any such circumstances is Photoshop. With Photoshop, you can create a stunning and mind-blowing Photoshop VHS effect. If you want to learn about its steps, then continue reading.
Step 1: The process starts by importing the image to Photoshop on which you plan to add the photo glitch effect. Then you should always convert the image from colorful to black and white. This could be done quickly by going into the ‘Image’ menu from the menu bar. Next, go for the ‘Adjustments’ option and select ‘Desaturate.’

Step 2: Now duplicate the image by dragging it onto the New Layer icon in the Layers Panel. Then double click on the duplicated image. This will open a ‘Layer Style’ settings menu. Here, click on the icon for ‘R Channel’ and deselect it.

Step 3: Now, it’s time to add the first glitch element. For that, hold the ‘Shift’ key and move the image by using the left/right cursor keys on the keyboard. This will offset the image layer from the original.

Step 4: You can now select the ‘Mark’ tool from the left side. Make a rectangle anywhere on the image with the Mark tool and then switch back to the ‘Move’ tool. Then again, nudge the rectangular portion left or right to offset it. You can repeat this process multiple times on different areas of the image.

Step 5: At this point, make a New Layer and fill it with White. Now right-click on this white layer and select the option of ‘Convert to Smart Object.’

Step 6: Move to the menu bar at the top and go to the ‘Filter’ section. From there, select the option of ‘Filter Gallery.’ A new window will show up. Head to the ‘Sketch’ category, and there change the ‘Pattern Type’ to ‘Line.’ You can also play with the ‘Contrast’ and the ‘Size’ of the lines.

Step 7: Now, in the ‘Layers Panel,’ select the option of ‘Overlay’ from the dropdown menu so that the different layers can show through. You can adjust the visibility of the lines by adjusting the number on the scale.

Step 8: After setting everything for the glitch effect in your image, you can now add colors using the ‘Gradient Map.’ Or you can also import some graphic textures to Photoshop and add them to the image. Don’t forget to change the ‘Binding Mode’ to ‘Overlay.’ You can then play with the color and graphic settings.

Step 9: Once all the color adjustments have satisfied you, it’s time to add some text to your glitch image. For that, head to the ‘Text’ tool from the left menu and type in your text. Edit it as you did to your image so that you can make a cool glitch text effect Photoshop and with this, you are all done with making the most stunning glitch effect Photoshop.

Part 2. 5 Awesome Glitch Effect Photoshop Actions
With Photoshop, you can create your photo glitch effect as you prefer instead of using the available standard templates. What if you don’t have enough time to create the effect? Are you going to use the basic and standard templates?
If you are looking for some jaw-dropping glitch picture effects rather than using the basic effects, then this section of the article is perfect for you. We are going to talk about 5 fantastic glitch effects Photoshop action.
1. Distorted Glitch Photoshop Action
The first effect we will discuss is Distorted Glitch Photoshop Action. The effect is very easy to use. You can set it with just one click action. The effect allows you to do adjustment settings with very easy steps to edit it.
The effect has all the dark, distorted, and disturbance-related elements that make it an amazing effect to add glitch effect to image.

2. Geometric Glitch Photoshop Action
If glitch effect with lines is too mainstream for you, then this next effect will surely impress you. This effect is the Geometric Glitch Photoshop Action. You can edit this effect. All its colors, layers, and even elements are fully editable.
You can create a modern yet professional glitch image with this stunning effect. The effect lets you add shapes, abstract styles, and also glitch lines to make cool images.

3. Animated Glitch Photoshop Action
If you are looking for a glitch effect to add to animated content, then nothing is better than Animated Glitch Photoshop Action. The effect template is fully editable with 12 distinct color options. The animated effect has a very organized structure of layers, color coding, etc.
By using this effect, you can add a great vibe to your image. The template greatly shows the distortion, digital error, etc. You can play around with RGB to make it look crazy brilliant.

4. Futuristic Photoshop Action
The next effect in line to be discussed is Futuristic Photoshop Action. This effect has all the bright and neon colors. The effect could be added easily to your images regardless of the type of your content. Graphic designers and photographers use the Futuristic Effect to create stunning and professional glitch images.

5. Glitch Art Photoshop Action
The last effect template that we are going to shed light on is Glitch Art Photoshop Action. The effect is fully editable with 10 different abstract elements. The template has absolutely professional results. The effect delivers complete glitchy vibes.
The distortion, the abstract elements, the digital error, and everything else in effect represents all the glitchy vibes.

Final Words
This article is everything one person needs if they want to learn about glitch effect Photoshop. We have talked about creating a jaw-dropping glitch effect in Photoshop. The steps to create a stunning glitch effect have been mentioned above.
We then shared 5 incredible glitch effects that could be used in case you don’t want to create your own effect.
02 Part 2. 5 Awesome Glitch Effect Photoshop Actions.
Part 1. How Do You Do Photo Glitch Effect in Photoshop?
The jagged lines, the colorful pixels, frozen visuals, and also the distorted colors, everything perfectly blends to make a glitch effect. Usually, this is how all the glitch templates are, but if you get an opportunity to customize your image glitch effect and make your special effect, what will you do?
The best option to adopt in any such circumstances is Photoshop. With Photoshop, you can create a stunning and mind-blowing Photoshop VHS effect. If you want to learn about its steps, then continue reading.
Step 1: The process starts by importing the image to Photoshop on which you plan to add the photo glitch effect. Then you should always convert the image from colorful to black and white. This could be done quickly by going into the ‘Image’ menu from the menu bar. Next, go for the ‘Adjustments’ option and select ‘Desaturate.’
Step 2: Now duplicate the image by dragging it onto the New Layer icon in the Layers Panel. Then double click on the duplicated image. This will open a ‘Layer Style’ settings menu. Here, click on the icon for ‘R Channel’ and deselect it.
Step 3: Now, it’s time to add the first glitch element. For that, hold the ‘Shift’ key and move the image by using the left/right cursor keys on the keyboard. This will offset the image layer from the original.
Step 4: You can now select the ‘Mark’ tool from the left side. Make a rectangle anywhere on the image with the Mark tool and then switch back to the ‘Move’ tool. Then again, nudge the rectangular portion left or right to offset it. You can repeat this process multiple times on different areas of the image.
Step 5: At this point, make a New Layer and fill it with White. Now right-click on this white layer and select the option of ‘Convert to Smart Object.’
Step 6: Move to the menu bar at the top and go to the ‘Filter’ section. From there, select the option of ‘Filter Gallery.’ A new window will show up. Head to the ‘Sketch’ category, and there change the ‘Pattern Type’ to ‘Line.’ You can also play with the ‘Contrast’ and the ‘Size’ of the lines.
Step 7: Now, in the ‘Layers Panel,’ select the option of ‘Overlay’ from the dropdown menu so that the different layers can show through. You can adjust the visibility of the lines by adjusting the number on the scale.
Step 8: After setting everything for the glitch effect in your image, you can now add colors using the ‘Gradient Map.’ Or you can also import some graphic textures to Photoshop and add them to the image. Don’t forget to change the ‘Binding Mode’ to ‘Overlay.’ You can then play with the color and graphic settings.
Step 9: Once all the color adjustments have satisfied you, it’s time to add some text to your glitch image. For that, head to the ‘Text’ tool from the left menu and type in your text. Edit it as you did to your image so that you can make a cool glitch text effect Photoshop and with this, you are all done with making the most stunning glitch effect Photoshop.
Part 2. 5 Awesome Glitch Effect Photoshop Actions
With Photoshop, you can create your photo glitch effect as you prefer instead of using the available standard templates. What if you don’t have enough time to create the effect? Are you going to use the basic and standard templates?
If you are looking for some jaw-dropping glitch picture effects rather than using the basic effects, then this section of the article is perfect for you. We are going to talk about 5 fantastic glitch effects Photoshop action.
1. Distorted Glitch Photoshop Action
The first effect we will discuss is Distorted Glitch Photoshop Action. The effect is very easy to use. You can set it with just one click action. The effect allows you to do adjustment settings with very easy steps to edit it.
The effect has all the dark, distorted, and disturbance-related elements that make it an amazing effect to add glitch effect to image.
2. Geometric Glitch Photoshop Action
If glitch effect with lines is too mainstream for you, then this next effect will surely impress you. This effect is the Geometric Glitch Photoshop Action. You can edit this effect. All its colors, layers, and even elements are fully editable.
You can create a modern yet professional glitch image with this stunning effect. The effect lets you add shapes, abstract styles, and also glitch lines to make cool images.
3. Animated Glitch Photoshop Action
If you are looking for a glitch effect to add to animated content, then nothing is better than Animated Glitch Photoshop Action. The effect template is fully editable with 12 distinct color options. The animated effect has a very organized structure of layers, color coding, etc.
By using this effect, you can add a great vibe to your image. The template greatly shows the distortion, digital error, etc. You can play around with RGB to make it look crazy brilliant.
4. Futuristic Photoshop Action
The next effect in line to be discussed is Futuristic Photoshop Action. This effect has all the bright and neon colors. The effect could be added easily to your images regardless of the type of your content. Graphic designers and photographers use the Futuristic Effect to create stunning and professional glitch images.
5. Glitch Art Photoshop Action
The last effect template that we are going to shed light on is Glitch Art Photoshop Action. The effect is fully editable with 10 different abstract elements. The template has absolutely professional results. The effect delivers complete glitchy vibes.
The distortion, the abstract elements, the digital error, and everything else in effect represents all the glitchy vibes.
Final Words
This article is everything one person needs if they want to learn about glitch effect Photoshop. We have talked about creating a jaw-dropping glitch effect in Photoshop. The steps to create a stunning glitch effect have been mentioned above.
We then shared 5 incredible glitch effects that could be used in case you don’t want to create your own effect.
Also read:
- Updated AI Has Influenced All Video Editors to Speed up Editing. This Article Discusses the Significance of AI Slow Motion and the Tools that Offer It
- Updated Working Out All Important Details of Slowing Down Video in After Effects
- Updated Step by Step to Crop Videos with CyberLink PowerDirector
- Updated 2024 Approved Looking For The Best Slow Motion Effect in Premiere Pro
- 2024 Approved How To Import and Adjust the Video Clips on Wondershare Filmora?
- Updated To Help You Perform This Action, in This Article, We List the Steps You Will Need for Cropping Into Video Clips with PowerDirector. As an Added Bonus, We Have Also Included the Method to Perform the Same Actions in WonderShare Filmora
- In 2024, Creating a Slideshow Is Necessity of the Modern Time. Whether You Plan a Business Meeting or You Are Going to Do some Family Event with Slideshow Presentation, a Good Slideshow Maker Will Help You in This Direction
- Updated Best 5 Tips to Freeze-Frame in After Effects for 2024
- Guide Adding Audio in Wondershare Filmora for 2024
- Updated How to Color Correct in OBS
- New 8 Websites to Find 3D Text PNG
- 2024 Approved How to Download Windows Movie Maker 2012 Version
- In 2024, Want to Come up with Exciting Sony Vegas Slideshow Templates for Your Next Project on YouTube and Other Mediums Then There Is Something for You
- How to Animate Text in A Video
- Do You Want to Rotate Your TikTok Video to Stylize It More? This Article Will Provide Simple Methods of Rotating TikTok Videos to Improve the Audience Viewing Experience
- Updated In 2024, The Best Peter McKinnon LUTs for Perfect Video Editing
- Updated 2024 Approved Top 9 Sparkle Effects Photo and Video Editors You Should Know
- Updated 2024 Approved How to Create Discord Logo GIF
- Learn How to Create Inspiring Motivational Videos Using AI. Explore Tools Like Midjourney, Runway Gen2, Chat-GPT, and Filmora AI for Seamless Content Creation. Start Your Journey
- In 2024, Being a Content Creator Means Creating a Slow-Mo at some Point. Study This Piece to Learn How to Play a Video in Slow Motion on iPhone
- Updated 2024 Approved Best Video Editing Courses Online with Certificate
- Updated Top 10 Free Spanish Text To Speech Converter Websites
- New In 2024, Find The Best LUTs for Lightroom
- Updated 2024 Approved Time Bending Brilliance The Ultimate Slow Motion Video Makers
- One of the Latest Tools for Editing Video and Images Is AI Composite Video App Which Is Popular Among Users. Learn All About This Tool and Its Functioning for 2024
- Updated Full Guide to Funcall Voice Changer and Its Alternatives
- How to Convert a GIF to a Video for Instagram
- Updated In 2024, 15 Must-Use Gifs Editors
- New WebM to GIF Converters (Online and Offline Solutions)
- Updated How to Loop Videos on Android Phones
- There Are Many Vlogging Cameras You Can Find in the Market. However, to Get a Good Start in Vlogging, some Sony Vlogging Cameras and Canon Vlog Cameras Are to Consider. This Article Introduces You to the Respective List for 2024
- Updated Top 10 Free WhatsApp Video Converter 2023
- New How to Fade to Black Premiere Pro
- Best Free iPhone XS Max IMEI Checker
- In 2024, How To Leave a Life360 Group On OnePlus 12R Without Anyone Knowing? | Dr.fone
- 3 Ways to Change Location on Facebook Marketplace for Vivo V27 | Dr.fone
- In 2024, Unlock iPhone 15 Without Passcode Easily
- In 2024, How To Bypass Google Pixel 8 Pro FRP In 3 Different Ways
- A Guide Tecno Pova 6 Pro 5G Wireless and Wired Screen Mirroring | Dr.fone
- In 2024, How to Track WhatsApp Messages on Asus ROG Phone 7 Ultimate Without Them Knowing? | Dr.fone
- In 2024, 4 Ways to Transfer Music from Xiaomi Redmi Note 13 Pro+ 5G to iPhone | Dr.fone
- How To Bypass the Required Apple Store Verification For iPhone 7 | Dr.fone
- Updated 2024 Approved Authors Recommended The Best Text Voice Generators for All Platforms
- Title: The Article Is a Guide About the Split of the Videos in VLC. There Is Also a Particular Description of Its Alternative Wondershare Filmora. It Is Suitable as Well as Reasonable for 2024
- Author: Chloe
- Created at : 2024-04-24 07:08:22
- Updated at : 2024-04-25 07:08:22
- Link: https://ai-editing-video.techidaily.com/1713951211513-the-article-is-a-guide-about-the-split-of-the-videos-in-vlc-there-is-also-a-particular-description-of-its-alternative-wondershare-filmora-it-is-suitable-as-/
- License: This work is licensed under CC BY-NC-SA 4.0.
