
:max_bytes(150000):strip_icc():format(webp)/how-to-see-who-viewed-your-tiktok-5271090-e2cb663541b8484a8a2e80ffbdd98db3.jpg)
2024 Approved
Free
Today video content creators are more common than it ever was. The video editor tools are also more common software on the Internet and it’s also now very easy to pick one for free and utilize it for your purpose. All it needs is a little research and bingo you will get one.
So, why don’t we help you with our research to let you explore all those top 22 free video editing software tools available on different platforms such as Android, Windows, and Mac? In this article, we have got you all covered by letting you know of each of the software that you can use for editing video.
Contents
01 [Things to Consider When to Choose a Free Video Editor ](#Part 1)
02 [Free Video Editor for PC and Mac ](#Part 2)
03 [Free Video Editor for Mobile Phones](#Part 3)
04 [Tips and Tricks for Using Free Video Editing Tools ](#Part 4)
05 [Related FAQs about Free Video Editors](#Part 5)
Part 1: Things to Consider When to Choose a Free Video Editor
Before opting for a free video editing software there are many important things, we mostly miss that we should have known. But you don’t have to worry about it anymore let’s begin:
What are you planning to use it for?: You must know the use of video editing software before picking one. Whether you are using it for gaming or creating ordinary YouTube videos. These decisions are very important to take before opting for downloading it from the internet.
Learning curve: You should keep in mind which editing software is complex to learn and which one is easy in comparison with that. If you didn’t keep this in mind you might end up wasting your time by downloading and trying in vain.
Quality: Another important factor to consider in video editing software is the quality and format of the video. There are many formats and quality of video content, therefore it is important to choose the one which supports your video format.
Resources: Depending upon the requirements of the editing on your video, you should choose a video editor that should have all the video effects, music tracks, and other resources that you might need to apply to your video. Be careful not to select one with few resources.
Compatability: The most important point is whether your PC, Mac, or Android platform can run the video editor you have heard the name from your friend. Consult the internet for compatibility of the software by checking its minimum specification requirement on its manual or docs.
Part 2: Free Video Editor for PC and Mac
1. Active Presenter – Free video editor for eLearning purposes
Best for: Teachers and students for delivering and recording class lectures.
User rating: 4.5/5.0
System compatibility: Windows 7/ Windows 8/8.1, Windows 10, Windows 11 (only 64-bit (x64) is supported), macOS 10.12, macOS 10.13, macOS 10.14, macOS 10.15, macOS 11 (only 64-bit Intel CPU is supported)
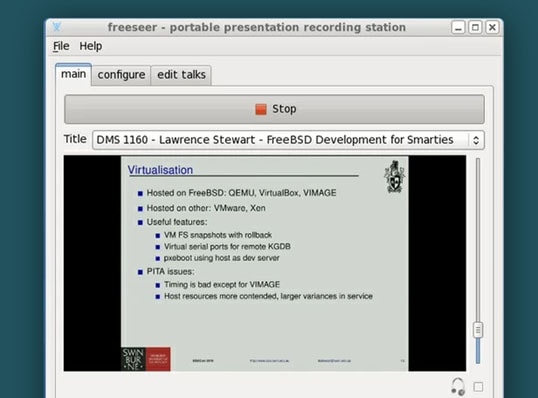
Active Presenter is multi-functional software that edits your video as well as record it. It is equipped with a variety of tools that record screens, edit screencasts videos, and create interactive content in Html5.
Moreover, the all-in-one feature lets you record your PC screen along with audio input. You can also edit your video and voice. The app also provides eLearning authority software guides, games, and simulations.
Reason to Choose:-
- User-Friendly Interface.
- Interactive features.
- Multiple Tools in one package.
Reason to Avoid:-
- Manual volume control.
- Need amendments in volume control.
2. Blender – 3D computer graphics software for videos
Best for: Graphics Designers, Photographers, and UI/UX Designers.
User rating: 4.5/5.0
System compatibility: Windows 8.1, 10, and 11, MacOS 10.13 Intel · 11.0 Apple Silicon, Linux
Blender is an amazing 3d creation platform that is open source. The software supports modeling, 3D pipelining, rigging, animation, rendering, video editing, motion tracking, game creation, and composing.
If you are a designer of 3d graphics then this software is best suitable for you. You can also edit your videos with this software for free since it is open source. Blender 3d is a good package for all types of graphics-related activities on computers.
Reason to Choose:-
- Open-Source
- Simplest Interface
- Frequent Updates
- A vast arsenal of 3d tools.
Reason to Avoid:-
- Sometimes glitchy but overall good.
- Laggy Performance on intensive editing.
- Little Complex to learn.
3. OpenShot – a free and open-source video editor for beginners
Best for: Small Business Owners and Freelancers.
User rating: 4.4/5.0
System compatibility: Linux (most distributions are supported), Windows (version 7, 8, and 10+), OS X (version 10.15+)
OpenShot is a cross-platform video editor that trims and slices videos for you. It has an animation framework of a fade, slide, and animate anything in your project. The software has an unlimited number of tracks you can use.
Moreover, the application has video effects, audio waveforms, a title editor, slow motion, and time effects. In short, it is a wonderful package for those who are interested in their videos in animated form like small business owners and freelancers, etc.
Reason to Choose:-
- The very easy graphical interface and navigation.
- Perfect for quick edits.
- Multiple languages support.
- Open-Source.
Reason to Avoid:-
- Sometimes the software crashes.
- Poor performance in high-resolution videos.
4. Lightworks – free and easy to use a pro video editing tool
Best for: Small business owners, actors, and marketers.
User rating: 3.5/5.0
System compatibility: Windows 8, Windows 8.1, and Windows 10, Mac OS X 10.11 or higher, Linux , Ubuntu / Lubuntu / Xubuntu 20.04 or higher
Lightworks is an editing system for video edits and mastering. It is one of the oldest software developed for early computer-based non-linear editing systems. After 2010, it is also available as an open source however the source code has never been released.
Lightworks has a million users around the world since it is the oldest software. This large number of users is only due to its wide acceptance overall platform’s windows, Linux, and Mac. If you are an actor, content creator, or marketeer then this software is for you.
Reason to Choose:-
- The abundance of resources for building videos.
- Free and Open-Source.
- Better Technical Support and suggestions.
Reason to Avoid:-
- Basic Editing Features
- Limited Transitions and font settings
5. VSDC Free Video Editor – best multimedia suite for video and audio editing
Best for: Business owners, mid-marketeers, and YouTubers.
User rating: 4.0/5.0
System compatibility: Windows XP/SP3/Vista/7/8/10
VSDC is a free non-linear editing tool that can edit your videos in ultra-high definitions. It is developed by Flash-Intergro LLC. VSDC is capable of many other features that video content creators usually need such as motion tracking, liver color correction, and post-production effects.
This product is available in 13 languages which makes it an easy choice for everyone around the world. It is initially released in 2011 and has a stable release in December 2021.
Reason to Choose:-
- Good quality multimedia editing
- Free and Open-Source
- Wide acceptance of video and audio formats
- Direct publishing on social media platforms
Reason to Avoid:-
- Cannot download animated transitions
- Hight memory consumption
6. Shotcut – Free video editor with high-resolution
Best for: Graphic designers, business owners, and IT marketers.
User rating: 4.2/5.0
System compatibility: Operating system: 64-bit Windows 7 – 11, Apple macOS 10.14 - 12, 64-bit Linux with at least glibc 2.27.
Shotcut is one of the free and open-source video editing platforms that is also a cross-platform editing tool. It is available on all the operating system platforms out there. Due to this, it is widely known on the internet for video editing. This editor was first developed by Dan Dennedy and based on MLT multimedia Framework.
Reason to Choose:-
- Wide-format support
- Device and transport option
- Sleek and Intuitive Interface
- Free and Open Source
Reason to Avoid:-
- The interface is complex comparatively
- Crashing is common due to driver problems
7. Hitfilm Express – The best choice for students and projects
Best for: Gamers, Youtubers, Small business owners, entrepreneurs, and graphic designers.
User rating: 4.4/5.0
System compatibility: Apple: macOS 11.0 Big Sur, macOS 10.15 Catalina or macOS 10.14 Mojave, Windows: Microsoft Windows 10 (64-bit)

Hitfilm Express is a free and open-source amazing video editing software with professional grading VF-X tools and many awesome contents such as gaming and films. This video editor is perfect for all beginners, who have just started the editing.
Hitfilm Express is a product from the Fxhome company. Its tools are industry rated and the interface is known for its user-friendly feature. The largest VFX toolkit of Hitfilm consists of more powerful libraries and is all available for free at your service.
Reason to Choose:-
- Supports HD videos.
- Multiple imports of many audios and their mixing.
- A broad variety of tools and functions.
Reason to Avoid:-
- Animation availability is limited and repetitive.
- No Instructional videos.
8. Microsoft Video Editor 2020 – Low learning curve editor for everyone
Best for: Photographers, Freelancers, and Youtubers.
User rating: 4.0/5.0
System compatibility: Microsoft Windows 98 or later or Windows NT® 4.0 or later
The Microsoft movie maker or video editor is one of the best video editors with which you can create amazing movie clips of your pictures. You can create many slideshow pictures and play music behind them.
Microsoft video editor comes with various stickers, trimming, merging, multiple trimming and filters, etc. The application is available on the Microsoft store to download. If you want something authentic n your windows then this app is for you.
Reason to Choose:-
- Interactive and easy-to-use tools.
- Perfect for video basic editing.
- Basic and very Instinctive.
Reason to Avoid:-
- Few features in comparison with others.
- Slightly outdated interface.
9. Avidemux – video editor designed for simple cutting and encoding
Best for: Digital Marketers, web designers, and business owners.
User rating: 4.4/5.0
System compatibility: Windows OS: 98 SE, XP, 2000, Vista, 7, 8, ME, macOS X, and Linux.
Avidemux is open-source software for video editing such as simple cutting, filtering, and encoding of videos into many formats. The application let you convert to many videos encoding formats like the popular ones MPEG and ASF etc.
Moreover, Avidemux does not provide editing through basic tools only but its automated task capability through queue and power scripts lets you do anything with your video. The application works on most platforms.
Reason to Choose:-
- Sleek user interface
- Wide support of codecs
- No learning curve is necessary
Reason to Avoid:-
- Confusing options
- Very few video editing features
10. iMovie – a most well-known video editor for macOS users
Best for: Apple device users, Marketers, developers, and teachers.
User rating: 4.3/5.0
System compatibility: Microsoft Windows 7, Windows 8, Windows 10, or Windows 11, All macOS
Imoview is a read-made installed software by Apple Inc on their systems. It primarily came in macOS, iOS, and iPadOS devices. Its original release came in 1999 as MAC OS 8 bundled application.
At the start, it was given free by buying a new macOS or ios device but later, in 2013 it has been issued for free to all its users. The application is known for its editing of any type and resolution of videos.
Reason to Choose:-
- User friendly
- Open-Source
- Best for HD Videos
Reason to Avoid:-
- Some glitches have been reported while recording gameplay.
- The customer support team is not always responsive.
12. Screenrec
Best for: best premium screen recorder for beginners
User rating: 4.5/5.0
System compatibility: Windows 10/8/7/XP and Linux
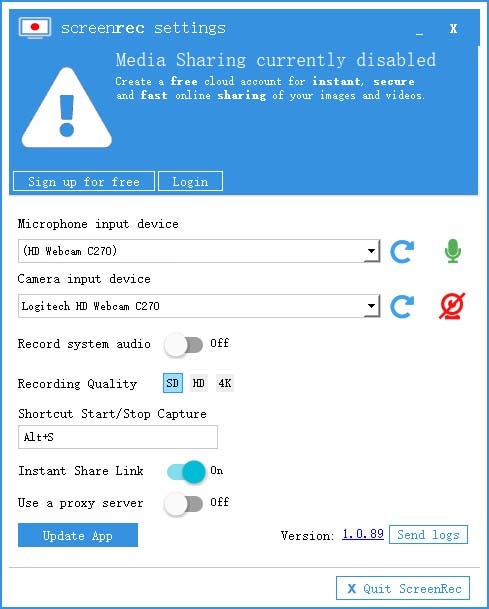
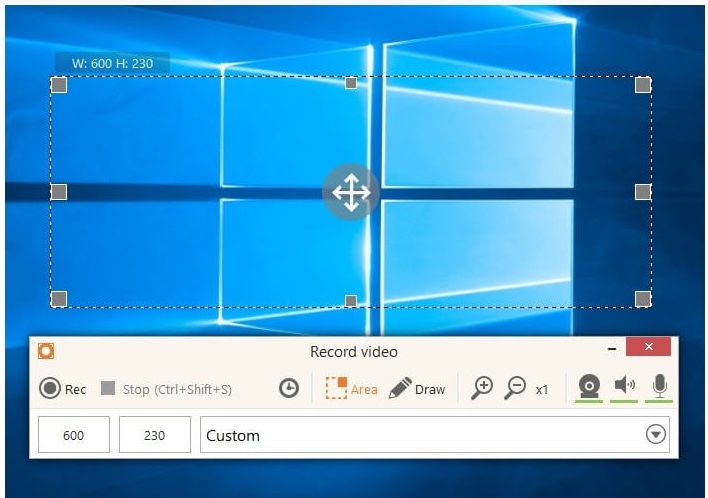
Screenrec is a premium screen recorder with a very intuitive user interface that makes it suitable for beginners. You can start and stop recording your screen with a single click. You can also record your webcam and audio from your system as well as external microphone. The software is perfect for taking screenshots and adding annotations wherever required.
The software generates a sharable link so that you can share it anywhere you want instantly. Once the link is shared, you can check its analytics. The video content management system is quite robust and the video content is fully encrypted for security and privacy.
Reason to Choose:-
- Record screen, webcam, audio with a single click.
- Very intuitive user interface with live annotation options.
- Generate instant sharable links and track analytics of videos.
- Better video content management with cloud storage.
Reason to Avoid:-
- Very limited editing options.
- Very limited customizable settings.
Part 5: Online Screen Recorders
If you do not want to install any dedicated screen recording software on your computer, you have online screen recorders to record the screen on the go. There is no software to install as you can launch the online screen recorders instantly from your web browsers. Here are the best online screen recorders for you.
1. Screencastify
Best for: best online screen recorder for those who want a browser extension.
User rating: 4.4/5.0
System compatibility: Windows, Mac and Chromebook
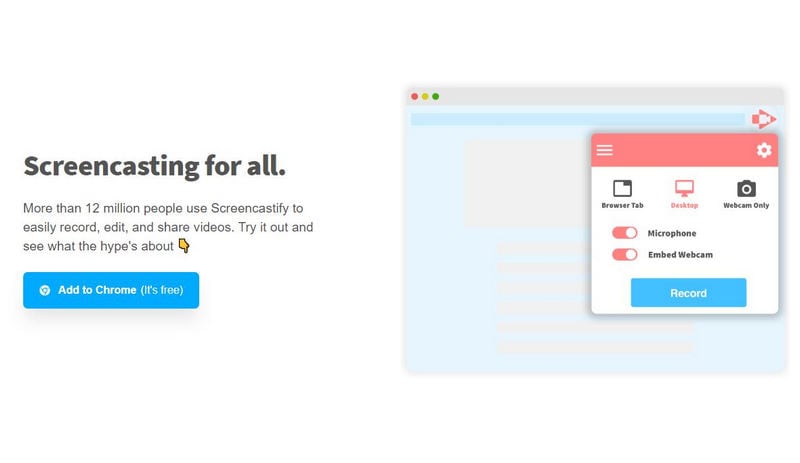
Screencastify comes in the form of a Chrome browser extension and hence, only Chrome users can use them. You can record your screen, your webcam video individually as well as together. The recording widget has options for real-time drawing while recording the video. Additionally, you can add stickers to enhance the video content.
After recording, you can upload the video on Google Drive, and you can share the video link instantly with anyone. The video editor offers you basic video editing options. You can even highlight mouse cursor. As far as saving the recorded video goes, you can export in MP4, MP3 as well as GIF file formats.
Reason to Choose:-
- Record desktop, browser, and application with webcam embedded.
- Highlight mouse movements and clicks and add stickers.
- Real-time drawing with pen and shapes and basic editing options.
- Export video to Google Drive and share video links instantly.
Reason to Avoid:-
- Limited to Chrome users only.
- Recording time limited to 5 minutes in free version.
2. Screencast-o-Matic
Best for: best online screen recorder for everyone
User rating: 4.7/5.0
System compatibility: Windows, Mac, iOS, Android and Chromebook.
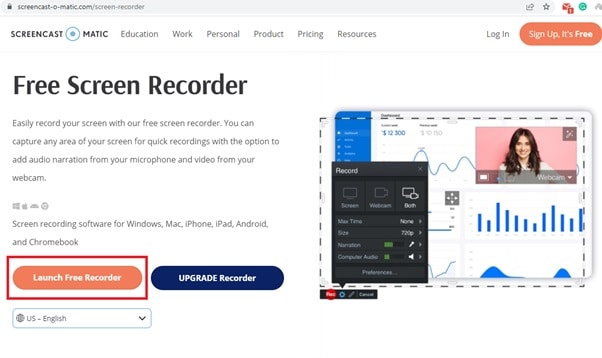
Screencast-o-Matic is the best online screen recorder in terms of features and customization. All the features are well-balanced so that everyone can use it to satisfy their requirements. You can choose screen, webcam or both for recording. You can set a maximum time so that the recording can stop automatically.
You can choose the video resolution and you can choose audio sources. You can also capture screenshots and customize the recording area. If you opt for its premium plan, you get a vast stock library to enhance your video content. In fact, you can add animations, effects, add voiceover, background audio and automated caption.
Reason to Choose:-
- Capture screen, webcam, and audio with customized recording area.
- Customize video recording parameters as per requirements.
- Real-time drawing tools and cloud hosting for instant sharing.
- Separate video editor available for free.
Reason to Avoid:-
- Advanced features are meant for premium users.
- 15-minute recording time limitation in free version.
3. Loom Online Screen Recorder
Best for: best online screen recorder for teams and collaborative works.
User rating: 4.1/5.0
System compatibility: Windows, Mac, iOS, Android and Chromebook.

Loom comes with an online screen recorder along with a Chrome extension as well as desktop app. With the online screen recorder, you can record screen only, camera only as well as screen and camera together. You can choose actual webcam as well as virtual webcam and you can select an external mic for audio recording.
The online screen recorder comes with a recording countdown and you can save your videos on the workspace that Loom provides. You can select the entire screen, the browser tab or the application window. You can instantly share the recorded video with people through emails, social media platforms and much more.
Reason to Choose:-
- Record screen and webcam together and separately.
- Save the recorded video on Loom platform and share instantly.
- Basic editing options post recording include speed change.
- Add transcription and call-to-action as well as change thumbnail.
Reason to Avoid:-
- Cannot record gameplay or select customized region.
- Very limited video parameters customization options.
4. Screencapture.com
Best for: best online screen recorder for amateurs
User rating: 4.2/5.0
System compatibility: Windows, Mac, and Chromebook.
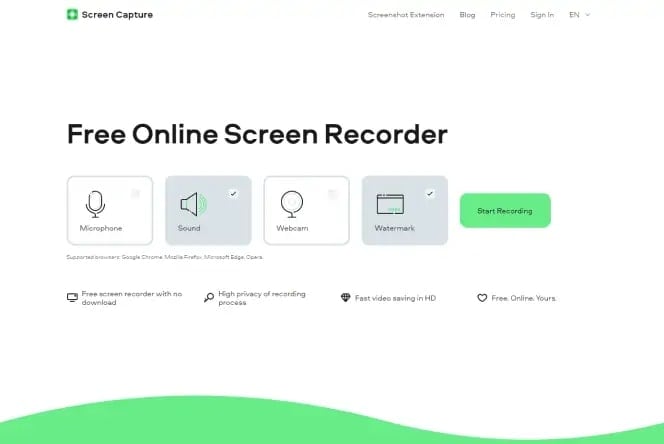
Screencapture.com is a freemium online screen recorder as it attaches a watermark to the recorded video in free mode. You can record your screen as well as your webcam and select the audio source as per your requirements. The recording is limited to HD resolution. You can capture video in Picture in Picture format.
The platforms emphasize downloading its desktop recorder where more features are available. You get the option to select the recording screen such as entire screen, browser or application window. After recording the video, you can instantly check its preview before saving or discarding. You can save the video in different file formats.
Reason to Choose:-
- Choose webcam, audio sources while recording the screen.
- Capture entire screen, application or browser screen.
- Capture video in Picture in Picture mode.
- Preview recording and save in different file formats.
Reason to Avoid:-
- Premium plan to remove watermark only.
- No customization of video parameter options.
5. Panopto
Best for: bests online screen recorder for teachers and students
User rating: 4.7/5.0
System compatibility: Windows, Mac, and Chromebook.
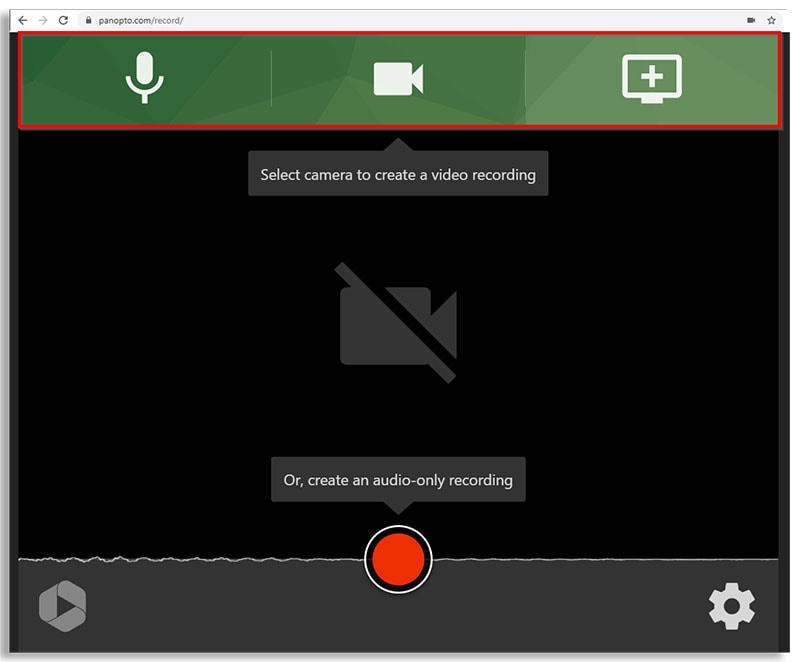
Panopto offers you a platform where you can record any video and save them on Panopto or Classroom. Therefore, it is an ideal platform for teachers and students and lecture delivery. You can even upload the recorded video on YouTube directly. You can even save the video on your local drive.
You can record any part of your screen in full HD resolution and the online recorder allows you to record webcam as well. You can also record system and external audio. The best part is that you can choose the video layout such as tile or PiP mode. Besides, you can blue the background while recording.
Reason to Choose:-
- Customize recording area and record in full HD.
- Smart camera and background selection options.
- Different saving and uploading options for recordings.
- Picture in Picture, Tile and Instant preview modes available.
Reason to Avoid:-
- The user interface is unappealing.
- No video editing options available.
6. Apowersoft Online Screen Recorder
Best for: best online screen recorder for recording demonstrative videos.
User rating: 4.8/5.0
System compatibility: Windows, Mac, and Chromebook
Apowersoft online recorder is one of the most popular and comprehensive screen recorders. You have to install its web installer on your computer for its online recorder to operate. You can record any region on your screen with the recorder. You have the option to save the recording on your local drive as well as on RecCloud. Besides, you can upload the video directly on YouTube.
The record supports different types of video output formats and you can record anything starting from live calls and video streams to demonstration videos. In fact, you can record even your webcam video along with external audio. There are also options for annotation while recording for better explanation.
Reason to Choose:-
- Record your screen, webcam, and audio smoothly.
- Customize recording area and add callouts to videos.
- Add annotation in real-time while recording.
- Save the recorded video in multiple file formats.
Reason to Avoid:-
- It lags if the computer is not a high-end one.
- No editing options are present.
Part 6: Screen Recorder for Mobile
If you want to record your mobile phone’s screen, you need to install a screen recorder app. Here is the list of the best screen video recorders for mobile users.
1. AZ screen recorder
Support OS: Android
Rating: 4.5/5.0
Download Link: https://play.google.com/store/apps/details?id=com.hecorat.screenrecorder.free&hl=en\_IN&gl=US
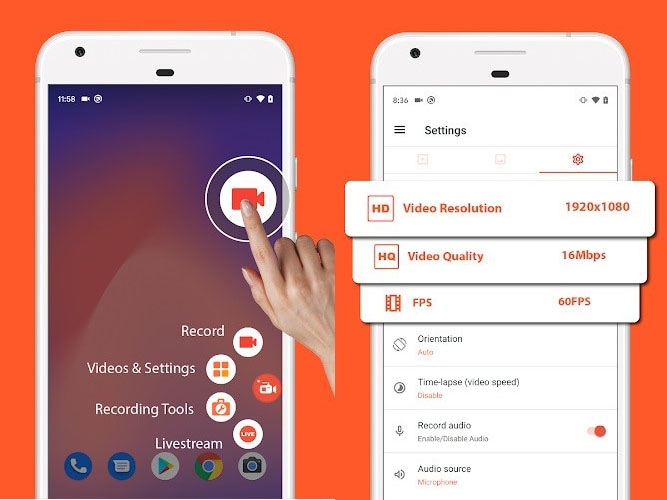
AZ screen recorder is a complete screen recorder from all perspectives. The app lets you record your screen, edit your video, go for livestream as well as take screenshots. You can record at full HD resolution and change resolution, frame rate and bitrate as required. The app can record internal sound as well as external sound through phone microphone.
You can also record your video through facecam in the overlay window. The app also comes with all the options for basic editing. You can even livestream your screen video on different video streaming platforms. Moreover, you can make GIFs from videos as well as take screenshots. The app is completely free to use without any watermark.
Reason to Choose:-
- Record screen with facecam in overlay window.
- Record gameplay with external mic audio.
- Record at 1080p resolution at 60fps.
- Floating controls, drawing tools.
- Trim, crop, merge, rotate, and convert to GIF.
Reason to Avoid:-
- It can get into glitches when recording long videos.
2. DU Recorder
Support OS: iOS and Android
Rating: 4.5/5.0
Download Link: https://apps.apple.com/us/app/du-recorder-screen-recorder/id1295647284
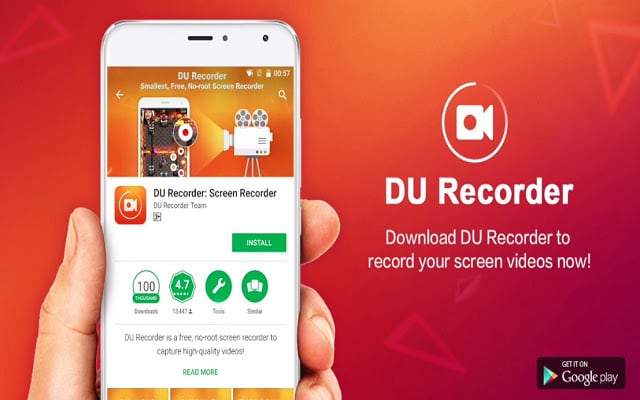
DU Recorder is a freemium app that is available for iOS and Android users. The free version attaches a watermark which is why you have to opt for DU Recorder Premium. You can record your screen and livestream your screen activities on YouTube, Twitch, and Facebook. The app can record gameplay, video calls, live shows and anything on the screen.
The recording can be in full HD resolution and you can adjust the video parameters. Besides, you can edit your video such as trimming, cropping, adding music, frames, stickers, texts and much more. Moreover, you can capture facecam video, change video speed, record internal and external audio, and convert video to GIFs. All in all, it is a great screen recorder with video editing and livestreaming features.
Reason to Choose:-
- Record screen and facecam video with internal and external audio.
- Livestream screen activities to video streaming platforms.
- Basic video editing options and insert frames, stickers, and filters.
- Add custom watermark, change speed, live themes in Pro version.
Reason to Avoid:-
- It can lag at times when you are recording high frame rate video.
- It adds watermark to your recorded video if you are using its free version.
3. XRecorder
Support OS: Android and iOS
Rating: 4.8/5.0
Download Link: https://play.google.com/store/apps/details?id=videoeditor.videorecorder.screenrecorder&hl=en\_IN&gl=US
XRecorder is a completely free screen recorder with no watermark. You can capture your screen video as well as take screenshots. The screen recorder allows you to select from 240p to 1080p resolution for video recording. The app provides you with a floating widget to record anything on the screen starting from live calls to live shows.
You can even livestream your screen and you can do basic editing on the recorded video. There is no time limit on the recording and hence, it is quite suitable for recording gameplay. You can record internal and external audio as well as record facecam in a small overlay window. Besides, you can add music as well as change video speed as per your requirements.
Reason to Choose:-
- Record screen and facecam along with system and mic audio.
- Record video at different resolutions up to 1080p.
- Floating widget, countdown buffer time, pause recording options.
- Capture screenshots, rotate video and basic video editing.
Reason to Avoid:-
- Some have reported glitches regarding audio recording.
- There could be some performance lags while recording at high resolution.
4. Mobizen Screen Recorder
Support OS: Android and iOS
Rating: 4.1/5.0
Download Link: https://play.google.com/store/apps/details?id=com.rsupport.mvagent&hl=en\_IN&gl=US
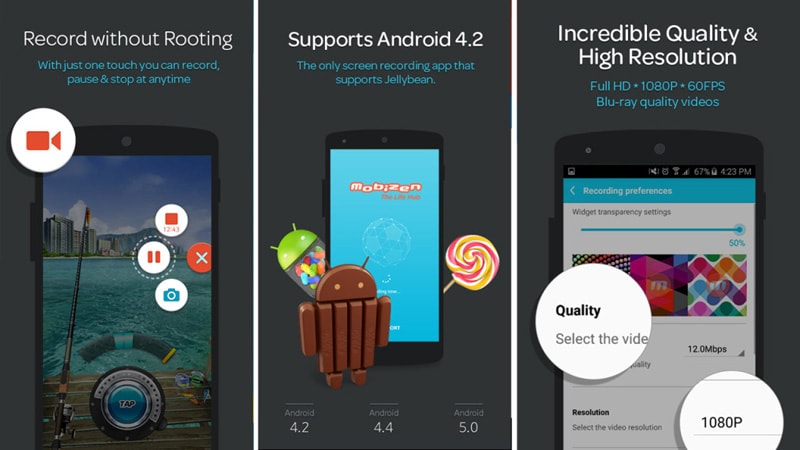
Mobizen Screen recorder belongs to the freemium app category as it adds a watermark to the recorded video in its free version. You have to purchase its premium plan to remove the watermark. Coming to its features, the app is a good combination of screen recorder and video editor. You can record your screen easily from its floating widget.
You can also add intro and outro to your recorded video as well as add background music. Besides, you can perform basic video editing. Most importantly, you can capture your screen at 2K resolution. Besides, the app allows recording through the front camera of your phone in an overlay window.
Reason to Choose:-
- Can record screen video up to 2K resolution.
- Record screen, facecam, and internal and external audio.
- Use drawing tools, control from floating widgets, and create GIFs.
- Different video editing options and customize watermark.
Reason to Avoid:-
- Free version puts a watermark on the recorded videos.
- Reports of malfunction when recording at 2K resolution.
5. ADV Screen Recorder
Support OS: Android
Rating: 4.4/5.0
Download Link: https://play.google.com/store/apps/details?id=com.blogspot.byterevapps.lollipopscreenrecorder&hl=en\_IN&gl=US
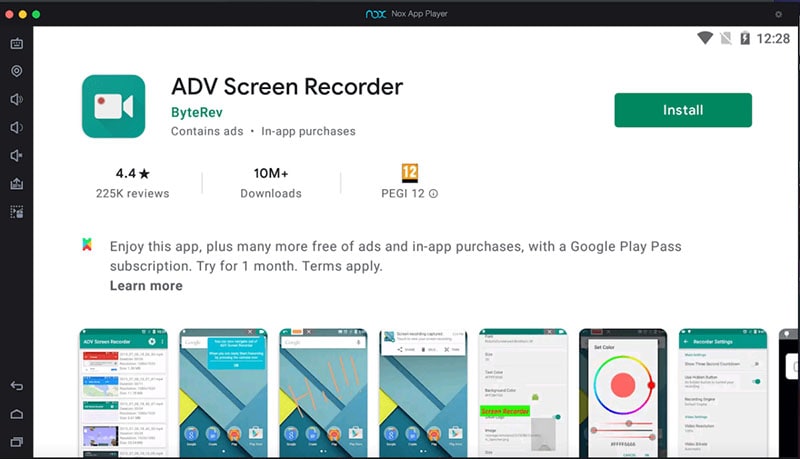
ADV screen recorder is a full-fledged app for Android users to record their screen with full customizations. You can record your front and back camera along with the screen. It operates with two different engines where the default engine has all the basic features and the advanced engine has the features for advanced users.
The app also lets you edit your recorded video and you can add texts and banners. Besides, you can draw on the video in real-time as well as trim the video as per your preference. There is also an option to pause the recording at your convenience. You can also customize the video recording parameters as required.
Reason to Choose:-
- Record your screen as well as front and back phone camera video.
- Pause recording, draw on video, and add texts.
- Trim video, add custom logo, switch between engines.
- Customize video and audio settings as required.
Reason to Avoid:-
- The user interface is not appealing.
- There are bugs reported that need to be fixed.
6. Record it
Support OS: iOS
Rating: 4.6/5.0
Download Link: https://apps.apple.com/us/app/record-it-screen-recorder/id1245356545
Record it! app is extremely useful in making tutorial videos where you need to record your screen. You can record the entire screen with a single tap. You can record gameplay and app screen along with your reaction through facecam. You can also customize the overlay window by changing its shape and position.
Besides, you can record your audio commentary while recording screen. It comes with video editing options to trim videos, add filters, change speed, rotate videos and much more. You can share your videos directly to YouTube as well as export through email and AirDrop. The user interface is quite intuitive and appealing.
Reason to Choose:-
- One-tap option to start recording at high resolution.
- Customization of facecam reaction overlay window.
- Support camera roll videos and add audio commentary.
- Basic video editing and instant sharing and exporting options.
Reason to Avoid:-
- It can lag at high frame rate and high resolution.
- There are reports of inconsistency with audio recording.
Part 7: How to Choose the Right Screen Recorder?
Here are the main parameters you need to keep in mind while choosing the best screen recorder for you.
1. Recording options: An ideal screen recorder should have all the different options for recording your screen, webcam, system audio, and external audio from microphone. Besides, it should offer you the option to customize the recording area by selection. You should be able to record full screen, application window, and browser tab accurately.
2. Price: If you are serious about recording your screen video and uploading the recorded video on online platforms, you have to opt for a premium screen recorder. While purchasing a proprietary screen recorder, you need to compare the software price with its peers and ensure that you are getting more features for the price you are paying.
3. Customer support: You need to ensure that the screen recorder you are purchasing, they have a highly responsive customer support. This is a highly neglected factor but users suffer a lot when the customer support team is not responsive. Be sure that you will need to contact the customer support team at some time to learn more about certain features and troubleshoot in emergency situations.
4. Sharing options: When your ultimate goal is to share your recorded video online, you should check for the sharing options available in the screen recorder. There are screen recorders that allow sharing recorded and edited videos on online platforms, cloud storage platforms, and video streaming platforms. It should also offer you options to let you export videos in different file formats.
5. Video editing tools: You have to edit your recorded video to trim out unnecessary parts and add effects and filters to enhance your video content and video quality. Besides, you may need options to add music and voiceover as well as intro and outro. That is why you should opt for a screen recorder where a great video editor is available.
6. Customer Reviews: Last but most importantly, you should check the customer review of the screen recording software. Even when a screen recorder has loads of features, if the customer reviews are not good enough, you should not choose you. Besides, the customer reviews reveal the pros and cons of a screen recorder for your better understanding.
Part 8: Screen Recording Tips and Tricks
1. Practice before recording: Unless you are a pro, you should practice at least once before the actual recording. This will help you to execute your plan according to your script smoothly when you actually start recording. Besides, you can check if the frame, the camera, the mic, and everything else are working perfectly.
2. Only record the required screen: Screen recorders offer you the option to record the entire screen, any specific application window or any specific tab of your browser. In fact, you can even customize the screen recording area as per your requirements for better focus and better visual experience.
3. Keep it short: It is always necessary to keep the length of the video as short as possible without skipping the relevant points and important explanations. That is where a proper script before recording is crucial so that you can have a plan and execute it properly without stretching your explanation unnecessarily.
4. Speak slowly and clearly: The way you speak in the video can attract as well as repel audiences. If you speak too fast and if you have a weird accent, it is going to repel audiences. That is why it is important for you to speak slowly and clearly so that everyone can understand everything you speak and negate your accent to a greater extent.
5. Use screen drawing tools: If you are recording a video where you need to explain something, it is always better if you use screen drawing tools. In fact, it is important that you choose the screen recorder that offers drawing tools so that the video gets visually pleasing and impactful for audiences to understand effectively.
6. Cut out dead moments: When you are recording screen videos, there are going to be a lot of dead moments and boring pauses. You have to cut out those boring and dead moments while editing so that the video stays interesting and the audiences do not lose concentration. This will also help to tighten the length of the video.
7. End with a summary: Last but most importantly, you should offer a proper conclusion before ending the video. You need to summarize everything you have discussed in the video so that the audience can get a revision of all the important points. Besides, a proper ending rather than an abrupt ending can leave a positive impact regarding your video.
Part 9: Frequently Asked Questions
How do I record Windows 10 screen?
You can use Windows Game Bar that comes pre-installed on Windows 10. However, for a better screen recording experience, we recommend Wondershare Filmora where you can edit the recording as well.
Can I screen record on my Mac?
You can use QuickTime that comes pre-installed on Mac. However, for professional screen recording experience, you can use Filmora or Camtasia where you will get more recording options and tools for editing after recording.
How do I screen record on my iPhone?
You can use DU Recorder app or Record it! app to record your iPhone screen video. Besides, the latest version of iOS comes with an in-built screen recorder option that can record the screen comfortably.
Which quality is best for screen recording?
The best quality for screen recording should be the same resolution as the screen. This means if you have a 4K monitor, the screen recording will be best at 4K resolution. In today’s scenario, 1080p or full HD is the optimal quality for screen recording.
What do most YouTubers use to record their screen?
Most YouTubers use Filmora or OBS Studio to record their screen. OBS Studio is mostly used by those who livestream their screen or gameplay. Filmora is mostly used by those who emphasize heavily on editing their recorded screen video for better output.
Does screen record ruin quality?
Your screen record quality can get ruined only when you use a screen recorder that records at a lower resolution due to its inability as well as to reduce file size. When you record your screen with a proprietary screen recorder, it can record the screen at exactly the same resolution as that of your screen. Hence, the video quality and resolution will stay intact.
What do gamers record their screens?
Gamers prefer Bandicam, Camtasia as well as Filmora to record their screens and showcase their gameplay to the world. Bandicam allows recording 2D and 3D games from gaming consoles at 4K resolution.
How do I make my recorded sound clear?
There are some screen recorders such as Filmora that offer you the option to remove background noise so that the recorded audio sound clearer. You can also use a pop filter to record clearer sound.
Part 4: Proprietary Screen Recorders
If you are serious about recording your screen and publishing the video online, you should invest in purchasing a premium screen recorder. A proprietary screen recorder is a video recorder where you have to purchase a premium plan to avail all the features. They offer all the required features for professional screen recording as well as editing the recording video. Here is the list of the best proprietary screen recorders for you.
7. Filmora Recorder
Best for: best screen recorder for all video creators
User rating: 4.8/5.0
System compatibility: Windows 11/10/8/7 and Mac 10.14+

Wondershare Filmora is one of the most popular screen recorders among video creators. You can record screen and webcam simultaneously as well as capture audio from system and external mic. Most importantly, you can record at 4K resolution without any performance lag. Besides, you can highlight mouse clicks and use greenscreen effect and customize background screen.
The main reason why Filmora is a preferred choice for recording video is that it comes with a world-class video editor. Therefore, you can enhance your video quality and content that will make the video stand out. Starting from adding audio and video effects to working with multiple video and audio clips, Filmora is undoubtedly the best screen recorder cum video editor for Windows and Mac users.
For Win 7 or later (64-bit)
For macOS 10.12 or later
Reason to Choose:-
- Record screen and webcam at high-resolution.
- Customize all video capturing settings and parameters.
- Edit the recorded video like a pro with its world-class video editor.
- Export the editing video in different file formats for maximum compatibility.
Reason to Avoid:-
- Takes long time to process high-resolution videos.
02 [Free Video Editor for PC and Mac ](#Part 2)
03 [Free Video Editor for Mobile Phones](#Part 3)
04 [Tips and Tricks for Using Free Video Editing Tools ](#Part 4)
05 [Related FAQs about Free Video Editors](#Part 5)
Part 1: Things to Consider When to Choose a Free Video Editor
Before opting for a free video editing software there are many important things, we mostly miss that we should have known. But you don’t have to worry about it anymore let’s begin:
What are you planning to use it for?: You must know the use of video editing software before picking one. Whether you are using it for gaming or creating ordinary YouTube videos. These decisions are very important to take before opting for downloading it from the internet.
Learning curve: You should keep in mind which editing software is complex to learn and which one is easy in comparison with that. If you didn’t keep this in mind you might end up wasting your time by downloading and trying in vain.
Quality: Another important factor to consider in video editing software is the quality and format of the video. There are many formats and quality of video content, therefore it is important to choose the one which supports your video format.
Resources: Depending upon the requirements of the editing on your video, you should choose a video editor that should have all the video effects, music tracks, and other resources that you might need to apply to your video. Be careful not to select one with few resources.
Compatability: The most important point is whether your PC, Mac, or Android platform can run the video editor you have heard the name from your friend. Consult the internet for compatibility of the software by checking its minimum specification requirement on its manual or docs.
Part 2: Free Video Editor for PC and Mac
1. Active Presenter – Free video editor for eLearning purposes
Best for: Teachers and students for delivering and recording class lectures.
User rating: 4.5/5.0
System compatibility: Windows 7/ Windows 8/8.1, Windows 10, Windows 11 (only 64-bit (x64) is supported), macOS 10.12, macOS 10.13, macOS 10.14, macOS 10.15, macOS 11 (only 64-bit Intel CPU is supported)
Active Presenter is multi-functional software that edits your video as well as record it. It is equipped with a variety of tools that record screens, edit screencasts videos, and create interactive content in Html5.
Moreover, the all-in-one feature lets you record your PC screen along with audio input. You can also edit your video and voice. The app also provides eLearning authority software guides, games, and simulations.
Reason to Choose:-
- User-Friendly Interface.
- Interactive features.
- Multiple Tools in one package.
Reason to Avoid:-
- Manual volume control.
- Need amendments in volume control.
2. Blender – 3D computer graphics software for videos
Best for: Graphics Designers, Photographers, and UI/UX Designers.
User rating: 4.5/5.0
System compatibility: Windows 8.1, 10, and 11, MacOS 10.13 Intel · 11.0 Apple Silicon, Linux
Blender is an amazing 3d creation platform that is open source. The software supports modeling, 3D pipelining, rigging, animation, rendering, video editing, motion tracking, game creation, and composing.
If you are a designer of 3d graphics then this software is best suitable for you. You can also edit your videos with this software for free since it is open source. Blender 3d is a good package for all types of graphics-related activities on computers.
Reason to Choose:-
- Open-Source
- Simplest Interface
- Frequent Updates
- A vast arsenal of 3d tools.
Reason to Avoid:-
- Sometimes glitchy but overall good.
- Laggy Performance on intensive editing.
- Little Complex to learn.
3. OpenShot – a free and open-source video editor for beginners
Best for: Small Business Owners and Freelancers.
User rating: 4.4/5.0
System compatibility: Linux (most distributions are supported), Windows (version 7, 8, and 10+), OS X (version 10.15+)
OpenShot is a cross-platform video editor that trims and slices videos for you. It has an animation framework of a fade, slide, and animate anything in your project. The software has an unlimited number of tracks you can use.
Moreover, the application has video effects, audio waveforms, a title editor, slow motion, and time effects. In short, it is a wonderful package for those who are interested in their videos in animated form like small business owners and freelancers, etc.
Reason to Choose:-
- The very easy graphical interface and navigation.
- Perfect for quick edits.
- Multiple languages support.
- Open-Source.
Reason to Avoid:-
- Sometimes the software crashes.
- Poor performance in high-resolution videos.
4. Lightworks – free and easy to use a pro video editing tool
Best for: Small business owners, actors, and marketers.
User rating: 3.5/5.0
System compatibility: Windows 8, Windows 8.1, and Windows 10, Mac OS X 10.11 or higher, Linux , Ubuntu / Lubuntu / Xubuntu 20.04 or higher
Lightworks is an editing system for video edits and mastering. It is one of the oldest software developed for early computer-based non-linear editing systems. After 2010, it is also available as an open source however the source code has never been released.
Lightworks has a million users around the world since it is the oldest software. This large number of users is only due to its wide acceptance overall platform’s windows, Linux, and Mac. If you are an actor, content creator, or marketeer then this software is for you.
Reason to Choose:-
- The abundance of resources for building videos.
- Free and Open-Source.
- Better Technical Support and suggestions.
Reason to Avoid:-
- Basic Editing Features
- Limited Transitions and font settings
5. VSDC Free Video Editor – best multimedia suite for video and audio editing
Best for: Business owners, mid-marketeers, and YouTubers.
User rating: 4.0/5.0
System compatibility: Windows XP/SP3/Vista/7/8/10
VSDC is a free non-linear editing tool that can edit your videos in ultra-high definitions. It is developed by Flash-Intergro LLC. VSDC is capable of many other features that video content creators usually need such as motion tracking, liver color correction, and post-production effects.
This product is available in 13 languages which makes it an easy choice for everyone around the world. It is initially released in 2011 and has a stable release in December 2021.
Reason to Choose:-
- Good quality multimedia editing
- Free and Open-Source
- Wide acceptance of video and audio formats
- Direct publishing on social media platforms
Reason to Avoid:-
- Cannot download animated transitions
- Hight memory consumption
6. Shotcut – Free video editor with high-resolution
Best for: Graphic designers, business owners, and IT marketers.
User rating: 4.2/5.0
System compatibility: Operating system: 64-bit Windows 7 – 11, Apple macOS 10.14 - 12, 64-bit Linux with at least glibc 2.27.
Shotcut is one of the free and open-source video editing platforms that is also a cross-platform editing tool. It is available on all the operating system platforms out there. Due to this, it is widely known on the internet for video editing. This editor was first developed by Dan Dennedy and based on MLT multimedia Framework.
Reason to Choose:-
- Wide-format support
- Device and transport option
- Sleek and Intuitive Interface
- Free and Open Source
Reason to Avoid:-
- The interface is complex comparatively
- Crashing is common due to driver problems
7. Hitfilm Express – The best choice for students and projects
Best for: Gamers, Youtubers, Small business owners, entrepreneurs, and graphic designers.
User rating: 4.4/5.0
System compatibility: Apple: macOS 11.0 Big Sur, macOS 10.15 Catalina or macOS 10.14 Mojave, Windows: Microsoft Windows 10 (64-bit)
Hitfilm Express is a free and open-source amazing video editing software with professional grading VF-X tools and many awesome contents such as gaming and films. This video editor is perfect for all beginners, who have just started the editing.
Hitfilm Express is a product from the Fxhome company. Its tools are industry rated and the interface is known for its user-friendly feature. The largest VFX toolkit of Hitfilm consists of more powerful libraries and is all available for free at your service.
Reason to Choose:-
- Supports HD videos.
- Multiple imports of many audios and their mixing.
- A broad variety of tools and functions.
Reason to Avoid:-
- Animation availability is limited and repetitive.
- No Instructional videos.
8. Microsoft Video Editor 2020 – Low learning curve editor for everyone
Best for: Photographers, Freelancers, and Youtubers.
User rating: 4.0/5.0
System compatibility: Microsoft Windows 98 or later or Windows NT® 4.0 or later
The Microsoft movie maker or video editor is one of the best video editors with which you can create amazing movie clips of your pictures. You can create many slideshow pictures and play music behind them.
Microsoft video editor comes with various stickers, trimming, merging, multiple trimming and filters, etc. The application is available on the Microsoft store to download. If you want something authentic n your windows then this app is for you.
Reason to Choose:-
- Interactive and easy-to-use tools.
- Perfect for video basic editing.
- Basic and very Instinctive.
Reason to Avoid:-
- Few features in comparison with others.
- Slightly outdated interface.
9. Avidemux – video editor designed for simple cutting and encoding
Best for: Digital Marketers, web designers, and business owners.
User rating: 4.4/5.0
System compatibility: Windows OS: 98 SE, XP, 2000, Vista, 7, 8, ME, macOS X, and Linux.
Avidemux is open-source software for video editing such as simple cutting, filtering, and encoding of videos into many formats. The application let you convert to many videos encoding formats like the popular ones MPEG and ASF etc.
Moreover, Avidemux does not provide editing through basic tools only but its automated task capability through queue and power scripts lets you do anything with your video. The application works on most platforms.
Reason to Choose:-
- Sleek user interface
- Wide support of codecs
- No learning curve is necessary
Reason to Avoid:-
- Confusing options
- Very few video editing features
10. iMovie – a most well-known video editor for macOS users
Best for: Apple device users, Marketers, developers, and teachers.
User rating: 4.3/5.0
System compatibility: Microsoft Windows 7, Windows 8, Windows 10, or Windows 11, All macOS
Imoview is a read-made installed software by Apple Inc on their systems. It primarily came in macOS, iOS, and iPadOS devices. Its original release came in 1999 as MAC OS 8 bundled application.
At the start, it was given free by buying a new macOS or ios device but later, in 2013 it has been issued for free to all its users. The application is known for its editing of any type and resolution of videos.
Reason to Choose:-
- User friendly
- Open-Source
- Best for HD Videos
Reason to Avoid:-
- Some glitches have been reported while recording gameplay.
- The customer support team is not always responsive.
12. Screenrec
Best for: best premium screen recorder for beginners
User rating: 4.5/5.0
System compatibility: Windows 10/8/7/XP and Linux
Screenrec is a premium screen recorder with a very intuitive user interface that makes it suitable for beginners. You can start and stop recording your screen with a single click. You can also record your webcam and audio from your system as well as external microphone. The software is perfect for taking screenshots and adding annotations wherever required.
The software generates a sharable link so that you can share it anywhere you want instantly. Once the link is shared, you can check its analytics. The video content management system is quite robust and the video content is fully encrypted for security and privacy.
Reason to Choose:-
- Record screen, webcam, audio with a single click.
- Very intuitive user interface with live annotation options.
- Generate instant sharable links and track analytics of videos.
- Better video content management with cloud storage.
Reason to Avoid:-
- Very limited editing options.
- Very limited customizable settings.
Part 5: Online Screen Recorders
If you do not want to install any dedicated screen recording software on your computer, you have online screen recorders to record the screen on the go. There is no software to install as you can launch the online screen recorders instantly from your web browsers. Here are the best online screen recorders for you.
1. Screencastify
Best for: best online screen recorder for those who want a browser extension.
User rating: 4.4/5.0
System compatibility: Windows, Mac and Chromebook
Screencastify comes in the form of a Chrome browser extension and hence, only Chrome users can use them. You can record your screen, your webcam video individually as well as together. The recording widget has options for real-time drawing while recording the video. Additionally, you can add stickers to enhance the video content.
After recording, you can upload the video on Google Drive, and you can share the video link instantly with anyone. The video editor offers you basic video editing options. You can even highlight mouse cursor. As far as saving the recorded video goes, you can export in MP4, MP3 as well as GIF file formats.
Reason to Choose:-
- Record desktop, browser, and application with webcam embedded.
- Highlight mouse movements and clicks and add stickers.
- Real-time drawing with pen and shapes and basic editing options.
- Export video to Google Drive and share video links instantly.
Reason to Avoid:-
- Limited to Chrome users only.
- Recording time limited to 5 minutes in free version.
2. Screencast-o-Matic
Best for: best online screen recorder for everyone
User rating: 4.7/5.0
System compatibility: Windows, Mac, iOS, Android and Chromebook.
Screencast-o-Matic is the best online screen recorder in terms of features and customization. All the features are well-balanced so that everyone can use it to satisfy their requirements. You can choose screen, webcam or both for recording. You can set a maximum time so that the recording can stop automatically.
You can choose the video resolution and you can choose audio sources. You can also capture screenshots and customize the recording area. If you opt for its premium plan, you get a vast stock library to enhance your video content. In fact, you can add animations, effects, add voiceover, background audio and automated caption.
Reason to Choose:-
- Capture screen, webcam, and audio with customized recording area.
- Customize video recording parameters as per requirements.
- Real-time drawing tools and cloud hosting for instant sharing.
- Separate video editor available for free.
Reason to Avoid:-
- Advanced features are meant for premium users.
- 15-minute recording time limitation in free version.
3. Loom Online Screen Recorder
Best for: best online screen recorder for teams and collaborative works.
User rating: 4.1/5.0
System compatibility: Windows, Mac, iOS, Android and Chromebook.
Loom comes with an online screen recorder along with a Chrome extension as well as desktop app. With the online screen recorder, you can record screen only, camera only as well as screen and camera together. You can choose actual webcam as well as virtual webcam and you can select an external mic for audio recording.
The online screen recorder comes with a recording countdown and you can save your videos on the workspace that Loom provides. You can select the entire screen, the browser tab or the application window. You can instantly share the recorded video with people through emails, social media platforms and much more.
Reason to Choose:-
- Record screen and webcam together and separately.
- Save the recorded video on Loom platform and share instantly.
- Basic editing options post recording include speed change.
- Add transcription and call-to-action as well as change thumbnail.
Reason to Avoid:-
- Cannot record gameplay or select customized region.
- Very limited video parameters customization options.
4. Screencapture.com
Best for: best online screen recorder for amateurs
User rating: 4.2/5.0
System compatibility: Windows, Mac, and Chromebook.
Screencapture.com is a freemium online screen recorder as it attaches a watermark to the recorded video in free mode. You can record your screen as well as your webcam and select the audio source as per your requirements. The recording is limited to HD resolution. You can capture video in Picture in Picture format.
The platforms emphasize downloading its desktop recorder where more features are available. You get the option to select the recording screen such as entire screen, browser or application window. After recording the video, you can instantly check its preview before saving or discarding. You can save the video in different file formats.
Reason to Choose:-
- Choose webcam, audio sources while recording the screen.
- Capture entire screen, application or browser screen.
- Capture video in Picture in Picture mode.
- Preview recording and save in different file formats.
Reason to Avoid:-
- Premium plan to remove watermark only.
- No customization of video parameter options.
5. Panopto
Best for: bests online screen recorder for teachers and students
User rating: 4.7/5.0
System compatibility: Windows, Mac, and Chromebook.
Panopto offers you a platform where you can record any video and save them on Panopto or Classroom. Therefore, it is an ideal platform for teachers and students and lecture delivery. You can even upload the recorded video on YouTube directly. You can even save the video on your local drive.
You can record any part of your screen in full HD resolution and the online recorder allows you to record webcam as well. You can also record system and external audio. The best part is that you can choose the video layout such as tile or PiP mode. Besides, you can blue the background while recording.
Reason to Choose:-
- Customize recording area and record in full HD.
- Smart camera and background selection options.
- Different saving and uploading options for recordings.
- Picture in Picture, Tile and Instant preview modes available.
Reason to Avoid:-
- The user interface is unappealing.
- No video editing options available.
6. Apowersoft Online Screen Recorder
Best for: best online screen recorder for recording demonstrative videos.
User rating: 4.8/5.0
System compatibility: Windows, Mac, and Chromebook
Apowersoft online recorder is one of the most popular and comprehensive screen recorders. You have to install its web installer on your computer for its online recorder to operate. You can record any region on your screen with the recorder. You have the option to save the recording on your local drive as well as on RecCloud. Besides, you can upload the video directly on YouTube.
The record supports different types of video output formats and you can record anything starting from live calls and video streams to demonstration videos. In fact, you can record even your webcam video along with external audio. There are also options for annotation while recording for better explanation.
Reason to Choose:-
- Record your screen, webcam, and audio smoothly.
- Customize recording area and add callouts to videos.
- Add annotation in real-time while recording.
- Save the recorded video in multiple file formats.
Reason to Avoid:-
- It lags if the computer is not a high-end one.
- No editing options are present.
Part 6: Screen Recorder for Mobile
If you want to record your mobile phone’s screen, you need to install a screen recorder app. Here is the list of the best screen video recorders for mobile users.
1. AZ screen recorder
Support OS: Android
Rating: 4.5/5.0
Download Link: https://play.google.com/store/apps/details?id=com.hecorat.screenrecorder.free&hl=en\_IN&gl=US
AZ screen recorder is a complete screen recorder from all perspectives. The app lets you record your screen, edit your video, go for livestream as well as take screenshots. You can record at full HD resolution and change resolution, frame rate and bitrate as required. The app can record internal sound as well as external sound through phone microphone.
You can also record your video through facecam in the overlay window. The app also comes with all the options for basic editing. You can even livestream your screen video on different video streaming platforms. Moreover, you can make GIFs from videos as well as take screenshots. The app is completely free to use without any watermark.
Reason to Choose:-
- Record screen with facecam in overlay window.
- Record gameplay with external mic audio.
- Record at 1080p resolution at 60fps.
- Floating controls, drawing tools.
- Trim, crop, merge, rotate, and convert to GIF.
Reason to Avoid:-
- It can get into glitches when recording long videos.
2. DU Recorder
Support OS: iOS and Android
Rating: 4.5/5.0
Download Link: https://apps.apple.com/us/app/du-recorder-screen-recorder/id1295647284
DU Recorder is a freemium app that is available for iOS and Android users. The free version attaches a watermark which is why you have to opt for DU Recorder Premium. You can record your screen and livestream your screen activities on YouTube, Twitch, and Facebook. The app can record gameplay, video calls, live shows and anything on the screen.
The recording can be in full HD resolution and you can adjust the video parameters. Besides, you can edit your video such as trimming, cropping, adding music, frames, stickers, texts and much more. Moreover, you can capture facecam video, change video speed, record internal and external audio, and convert video to GIFs. All in all, it is a great screen recorder with video editing and livestreaming features.
Reason to Choose:-
- Record screen and facecam video with internal and external audio.
- Livestream screen activities to video streaming platforms.
- Basic video editing options and insert frames, stickers, and filters.
- Add custom watermark, change speed, live themes in Pro version.
Reason to Avoid:-
- It can lag at times when you are recording high frame rate video.
- It adds watermark to your recorded video if you are using its free version.
3. XRecorder
Support OS: Android and iOS
Rating: 4.8/5.0
Download Link: https://play.google.com/store/apps/details?id=videoeditor.videorecorder.screenrecorder&hl=en\_IN&gl=US
XRecorder is a completely free screen recorder with no watermark. You can capture your screen video as well as take screenshots. The screen recorder allows you to select from 240p to 1080p resolution for video recording. The app provides you with a floating widget to record anything on the screen starting from live calls to live shows.
You can even livestream your screen and you can do basic editing on the recorded video. There is no time limit on the recording and hence, it is quite suitable for recording gameplay. You can record internal and external audio as well as record facecam in a small overlay window. Besides, you can add music as well as change video speed as per your requirements.
Reason to Choose:-
- Record screen and facecam along with system and mic audio.
- Record video at different resolutions up to 1080p.
- Floating widget, countdown buffer time, pause recording options.
- Capture screenshots, rotate video and basic video editing.
Reason to Avoid:-
- Some have reported glitches regarding audio recording.
- There could be some performance lags while recording at high resolution.
4. Mobizen Screen Recorder
Support OS: Android and iOS
Rating: 4.1/5.0
Download Link: https://play.google.com/store/apps/details?id=com.rsupport.mvagent&hl=en\_IN&gl=US
Mobizen Screen recorder belongs to the freemium app category as it adds a watermark to the recorded video in its free version. You have to purchase its premium plan to remove the watermark. Coming to its features, the app is a good combination of screen recorder and video editor. You can record your screen easily from its floating widget.
You can also add intro and outro to your recorded video as well as add background music. Besides, you can perform basic video editing. Most importantly, you can capture your screen at 2K resolution. Besides, the app allows recording through the front camera of your phone in an overlay window.
Reason to Choose:-
- Can record screen video up to 2K resolution.
- Record screen, facecam, and internal and external audio.
- Use drawing tools, control from floating widgets, and create GIFs.
- Different video editing options and customize watermark.
Reason to Avoid:-
- Free version puts a watermark on the recorded videos.
- Reports of malfunction when recording at 2K resolution.
5. ADV Screen Recorder
Support OS: Android
Rating: 4.4/5.0
Download Link: https://play.google.com/store/apps/details?id=com.blogspot.byterevapps.lollipopscreenrecorder&hl=en\_IN&gl=US
ADV screen recorder is a full-fledged app for Android users to record their screen with full customizations. You can record your front and back camera along with the screen. It operates with two different engines where the default engine has all the basic features and the advanced engine has the features for advanced users.
The app also lets you edit your recorded video and you can add texts and banners. Besides, you can draw on the video in real-time as well as trim the video as per your preference. There is also an option to pause the recording at your convenience. You can also customize the video recording parameters as required.
Reason to Choose:-
- Record your screen as well as front and back phone camera video.
- Pause recording, draw on video, and add texts.
- Trim video, add custom logo, switch between engines.
- Customize video and audio settings as required.
Reason to Avoid:-
- The user interface is not appealing.
- There are bugs reported that need to be fixed.
6. Record it
Support OS: iOS
Rating: 4.6/5.0
Download Link: https://apps.apple.com/us/app/record-it-screen-recorder/id1245356545
Record it! app is extremely useful in making tutorial videos where you need to record your screen. You can record the entire screen with a single tap. You can record gameplay and app screen along with your reaction through facecam. You can also customize the overlay window by changing its shape and position.
Besides, you can record your audio commentary while recording screen. It comes with video editing options to trim videos, add filters, change speed, rotate videos and much more. You can share your videos directly to YouTube as well as export through email and AirDrop. The user interface is quite intuitive and appealing.
Reason to Choose:-
- One-tap option to start recording at high resolution.
- Customization of facecam reaction overlay window.
- Support camera roll videos and add audio commentary.
- Basic video editing and instant sharing and exporting options.
Reason to Avoid:-
- It can lag at high frame rate and high resolution.
- There are reports of inconsistency with audio recording.
Part 7: How to Choose the Right Screen Recorder?
Here are the main parameters you need to keep in mind while choosing the best screen recorder for you.
1. Recording options: An ideal screen recorder should have all the different options for recording your screen, webcam, system audio, and external audio from microphone. Besides, it should offer you the option to customize the recording area by selection. You should be able to record full screen, application window, and browser tab accurately.
2. Price: If you are serious about recording your screen video and uploading the recorded video on online platforms, you have to opt for a premium screen recorder. While purchasing a proprietary screen recorder, you need to compare the software price with its peers and ensure that you are getting more features for the price you are paying.
3. Customer support: You need to ensure that the screen recorder you are purchasing, they have a highly responsive customer support. This is a highly neglected factor but users suffer a lot when the customer support team is not responsive. Be sure that you will need to contact the customer support team at some time to learn more about certain features and troubleshoot in emergency situations.
4. Sharing options: When your ultimate goal is to share your recorded video online, you should check for the sharing options available in the screen recorder. There are screen recorders that allow sharing recorded and edited videos on online platforms, cloud storage platforms, and video streaming platforms. It should also offer you options to let you export videos in different file formats.
5. Video editing tools: You have to edit your recorded video to trim out unnecessary parts and add effects and filters to enhance your video content and video quality. Besides, you may need options to add music and voiceover as well as intro and outro. That is why you should opt for a screen recorder where a great video editor is available.
6. Customer Reviews: Last but most importantly, you should check the customer review of the screen recording software. Even when a screen recorder has loads of features, if the customer reviews are not good enough, you should not choose you. Besides, the customer reviews reveal the pros and cons of a screen recorder for your better understanding.
Part 8: Screen Recording Tips and Tricks
1. Practice before recording: Unless you are a pro, you should practice at least once before the actual recording. This will help you to execute your plan according to your script smoothly when you actually start recording. Besides, you can check if the frame, the camera, the mic, and everything else are working perfectly.
2. Only record the required screen: Screen recorders offer you the option to record the entire screen, any specific application window or any specific tab of your browser. In fact, you can even customize the screen recording area as per your requirements for better focus and better visual experience.
3. Keep it short: It is always necessary to keep the length of the video as short as possible without skipping the relevant points and important explanations. That is where a proper script before recording is crucial so that you can have a plan and execute it properly without stretching your explanation unnecessarily.
4. Speak slowly and clearly: The way you speak in the video can attract as well as repel audiences. If you speak too fast and if you have a weird accent, it is going to repel audiences. That is why it is important for you to speak slowly and clearly so that everyone can understand everything you speak and negate your accent to a greater extent.
5. Use screen drawing tools: If you are recording a video where you need to explain something, it is always better if you use screen drawing tools. In fact, it is important that you choose the screen recorder that offers drawing tools so that the video gets visually pleasing and impactful for audiences to understand effectively.
6. Cut out dead moments: When you are recording screen videos, there are going to be a lot of dead moments and boring pauses. You have to cut out those boring and dead moments while editing so that the video stays interesting and the audiences do not lose concentration. This will also help to tighten the length of the video.
7. End with a summary: Last but most importantly, you should offer a proper conclusion before ending the video. You need to summarize everything you have discussed in the video so that the audience can get a revision of all the important points. Besides, a proper ending rather than an abrupt ending can leave a positive impact regarding your video.
Part 9: Frequently Asked Questions
How do I record Windows 10 screen?
You can use Windows Game Bar that comes pre-installed on Windows 10. However, for a better screen recording experience, we recommend Wondershare Filmora where you can edit the recording as well.
Can I screen record on my Mac?
You can use QuickTime that comes pre-installed on Mac. However, for professional screen recording experience, you can use Filmora or Camtasia where you will get more recording options and tools for editing after recording.
How do I screen record on my iPhone?
You can use DU Recorder app or Record it! app to record your iPhone screen video. Besides, the latest version of iOS comes with an in-built screen recorder option that can record the screen comfortably.
Which quality is best for screen recording?
The best quality for screen recording should be the same resolution as the screen. This means if you have a 4K monitor, the screen recording will be best at 4K resolution. In today’s scenario, 1080p or full HD is the optimal quality for screen recording.
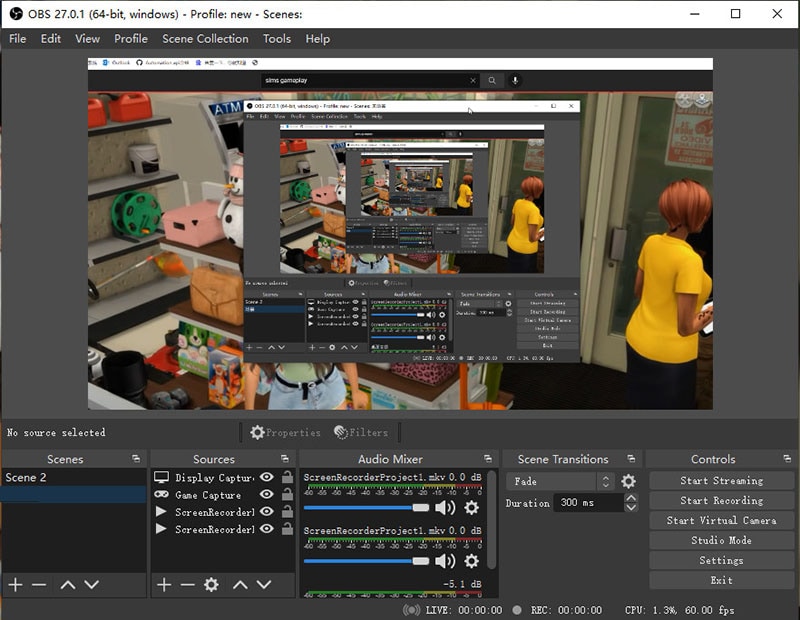
What do most YouTubers use to record their screen?
Most YouTubers use Filmora or OBS Studio to record their screen. OBS Studio is mostly used by those who livestream their screen or gameplay. Filmora is mostly used by those who emphasize heavily on editing their recorded screen video for better output.
Does screen record ruin quality?
Your screen record quality can get ruined only when you use a screen recorder that records at a lower resolution due to its inability as well as to reduce file size. When you record your screen with a proprietary screen recorder, it can record the screen at exactly the same resolution as that of your screen. Hence, the video quality and resolution will stay intact.
What do gamers record their screens?
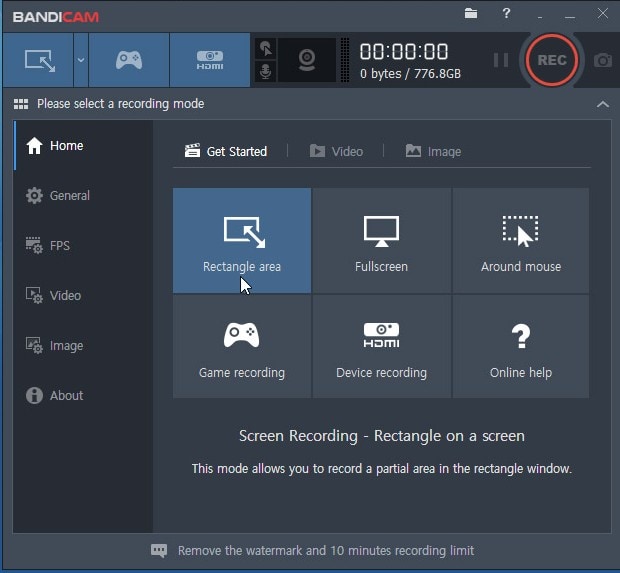
Gamers prefer Bandicam, Camtasia as well as Filmora to record their screens and showcase their gameplay to the world. Bandicam allows recording 2D and 3D games from gaming consoles at 4K resolution.
How do I make my recorded sound clear?
There are some screen recorders such as Filmora that offer you the option to remove background noise so that the recorded audio sound clearer. You can also use a pop filter to record clearer sound.
Part 4: Proprietary Screen Recorders
If you are serious about recording your screen and publishing the video online, you should invest in purchasing a premium screen recorder. A proprietary screen recorder is a video recorder where you have to purchase a premium plan to avail all the features. They offer all the required features for professional screen recording as well as editing the recording video. Here is the list of the best proprietary screen recorders for you.
7. Filmora Recorder
Best for: best screen recorder for all video creators
User rating: 4.8/5.0
System compatibility: Windows 11/10/8/7 and Mac 10.14+
Wondershare Filmora is one of the most popular screen recorders among video creators. You can record screen and webcam simultaneously as well as capture audio from system and external mic. Most importantly, you can record at 4K resolution without any performance lag. Besides, you can highlight mouse clicks and use greenscreen effect and customize background screen.
The main reason why Filmora is a preferred choice for recording video is that it comes with a world-class video editor. Therefore, you can enhance your video quality and content that will make the video stand out. Starting from adding audio and video effects to working with multiple video and audio clips, Filmora is undoubtedly the best screen recorder cum video editor for Windows and Mac users.
For Win 7 or later (64-bit)
For macOS 10.12 or later
Reason to Choose:-
- Record screen and webcam at high-resolution.
- Customize all video capturing settings and parameters.
- Edit the recorded video like a pro with its world-class video editor.
- Export the editing video in different file formats for maximum compatibility.
Reason to Avoid:-
- Takes long time to process high-resolution videos.
02 [Free Video Editor for PC and Mac ](#Part 2)
03 [Free Video Editor for Mobile Phones](#Part 3)
04 [Tips and Tricks for Using Free Video Editing Tools ](#Part 4)
05 [Related FAQs about Free Video Editors](#Part 5)
Part 1: Things to Consider When to Choose a Free Video Editor
Before opting for a free video editing software there are many important things, we mostly miss that we should have known. But you don’t have to worry about it anymore let’s begin:
What are you planning to use it for?: You must know the use of video editing software before picking one. Whether you are using it for gaming or creating ordinary YouTube videos. These decisions are very important to take before opting for downloading it from the internet.
Learning curve: You should keep in mind which editing software is complex to learn and which one is easy in comparison with that. If you didn’t keep this in mind you might end up wasting your time by downloading and trying in vain.
Quality: Another important factor to consider in video editing software is the quality and format of the video. There are many formats and quality of video content, therefore it is important to choose the one which supports your video format.
Resources: Depending upon the requirements of the editing on your video, you should choose a video editor that should have all the video effects, music tracks, and other resources that you might need to apply to your video. Be careful not to select one with few resources.
Compatability: The most important point is whether your PC, Mac, or Android platform can run the video editor you have heard the name from your friend. Consult the internet for compatibility of the software by checking its minimum specification requirement on its manual or docs.
Part 2: Free Video Editor for PC and Mac
1. Active Presenter – Free video editor for eLearning purposes
Best for: Teachers and students for delivering and recording class lectures.
User rating: 4.5/5.0
System compatibility: Windows 7/ Windows 8/8.1, Windows 10, Windows 11 (only 64-bit (x64) is supported), macOS 10.12, macOS 10.13, macOS 10.14, macOS 10.15, macOS 11 (only 64-bit Intel CPU is supported)
Active Presenter is multi-functional software that edits your video as well as record it. It is equipped with a variety of tools that record screens, edit screencasts videos, and create interactive content in Html5.
Moreover, the all-in-one feature lets you record your PC screen along with audio input. You can also edit your video and voice. The app also provides eLearning authority software guides, games, and simulations.
Reason to Choose:-
- User-Friendly Interface.
- Interactive features.
- Multiple Tools in one package.
Reason to Avoid:-
- Manual volume control.
- Need amendments in volume control.
2. Blender – 3D computer graphics software for videos
Best for: Graphics Designers, Photographers, and UI/UX Designers.
User rating: 4.5/5.0
System compatibility: Windows 8.1, 10, and 11, MacOS 10.13 Intel · 11.0 Apple Silicon, Linux
Blender is an amazing 3d creation platform that is open source. The software supports modeling, 3D pipelining, rigging, animation, rendering, video editing, motion tracking, game creation, and composing.
If you are a designer of 3d graphics then this software is best suitable for you. You can also edit your videos with this software for free since it is open source. Blender 3d is a good package for all types of graphics-related activities on computers.
Reason to Choose:-
- Open-Source
- Simplest Interface
- Frequent Updates
- A vast arsenal of 3d tools.
Reason to Avoid:-
- Sometimes glitchy but overall good.
- Laggy Performance on intensive editing.
- Little Complex to learn.
3. OpenShot – a free and open-source video editor for beginners
Best for: Small Business Owners and Freelancers.
User rating: 4.4/5.0
System compatibility: Linux (most distributions are supported), Windows (version 7, 8, and 10+), OS X (version 10.15+)
OpenShot is a cross-platform video editor that trims and slices videos for you. It has an animation framework of a fade, slide, and animate anything in your project. The software has an unlimited number of tracks you can use.
Moreover, the application has video effects, audio waveforms, a title editor, slow motion, and time effects. In short, it is a wonderful package for those who are interested in their videos in animated form like small business owners and freelancers, etc.
Reason to Choose:-
- The very easy graphical interface and navigation.
- Perfect for quick edits.
- Multiple languages support.
- Open-Source.
Reason to Avoid:-
- Sometimes the software crashes.
- Poor performance in high-resolution videos.
4. Lightworks – free and easy to use a pro video editing tool
Best for: Small business owners, actors, and marketers.
User rating: 3.5/5.0
System compatibility: Windows 8, Windows 8.1, and Windows 10, Mac OS X 10.11 or higher, Linux , Ubuntu / Lubuntu / Xubuntu 20.04 or higher
Lightworks is an editing system for video edits and mastering. It is one of the oldest software developed for early computer-based non-linear editing systems. After 2010, it is also available as an open source however the source code has never been released.
Lightworks has a million users around the world since it is the oldest software. This large number of users is only due to its wide acceptance overall platform’s windows, Linux, and Mac. If you are an actor, content creator, or marketeer then this software is for you.
Reason to Choose:-
- The abundance of resources for building videos.
- Free and Open-Source.
- Better Technical Support and suggestions.
Reason to Avoid:-
- Basic Editing Features
- Limited Transitions and font settings
5. VSDC Free Video Editor – best multimedia suite for video and audio editing
Best for: Business owners, mid-marketeers, and YouTubers.
User rating: 4.0/5.0
System compatibility: Windows XP/SP3/Vista/7/8/10
VSDC is a free non-linear editing tool that can edit your videos in ultra-high definitions. It is developed by Flash-Intergro LLC. VSDC is capable of many other features that video content creators usually need such as motion tracking, liver color correction, and post-production effects.
This product is available in 13 languages which makes it an easy choice for everyone around the world. It is initially released in 2011 and has a stable release in December 2021.
Reason to Choose:-
- Good quality multimedia editing
- Free and Open-Source
- Wide acceptance of video and audio formats
- Direct publishing on social media platforms
Reason to Avoid:-
- Cannot download animated transitions
- Hight memory consumption
6. Shotcut – Free video editor with high-resolution
Best for: Graphic designers, business owners, and IT marketers.
User rating: 4.2/5.0
System compatibility: Operating system: 64-bit Windows 7 – 11, Apple macOS 10.14 - 12, 64-bit Linux with at least glibc 2.27.
Shotcut is one of the free and open-source video editing platforms that is also a cross-platform editing tool. It is available on all the operating system platforms out there. Due to this, it is widely known on the internet for video editing. This editor was first developed by Dan Dennedy and based on MLT multimedia Framework.
Reason to Choose:-
- Wide-format support
- Device and transport option
- Sleek and Intuitive Interface
- Free and Open Source
Reason to Avoid:-
- The interface is complex comparatively
- Crashing is common due to driver problems
7. Hitfilm Express – The best choice for students and projects
Best for: Gamers, Youtubers, Small business owners, entrepreneurs, and graphic designers.
User rating: 4.4/5.0
System compatibility: Apple: macOS 11.0 Big Sur, macOS 10.15 Catalina or macOS 10.14 Mojave, Windows: Microsoft Windows 10 (64-bit)
Hitfilm Express is a free and open-source amazing video editing software with professional grading VF-X tools and many awesome contents such as gaming and films. This video editor is perfect for all beginners, who have just started the editing.
Hitfilm Express is a product from the Fxhome company. Its tools are industry rated and the interface is known for its user-friendly feature. The largest VFX toolkit of Hitfilm consists of more powerful libraries and is all available for free at your service.
Reason to Choose:-
- Supports HD videos.
- Multiple imports of many audios and their mixing.
- A broad variety of tools and functions.
Reason to Avoid:-
- Animation availability is limited and repetitive.
- No Instructional videos.
8. Microsoft Video Editor 2020 – Low learning curve editor for everyone
Best for: Photographers, Freelancers, and Youtubers.
User rating: 4.0/5.0
System compatibility: Microsoft Windows 98 or later or Windows NT® 4.0 or later
The Microsoft movie maker or video editor is one of the best video editors with which you can create amazing movie clips of your pictures. You can create many slideshow pictures and play music behind them.
Microsoft video editor comes with various stickers, trimming, merging, multiple trimming and filters, etc. The application is available on the Microsoft store to download. If you want something authentic n your windows then this app is for you.
Reason to Choose:-
- Interactive and easy-to-use tools.
- Perfect for video basic editing.
- Basic and very Instinctive.
Reason to Avoid:-
- Few features in comparison with others.
- Slightly outdated interface.
9. Avidemux – video editor designed for simple cutting and encoding
Best for: Digital Marketers, web designers, and business owners.
User rating: 4.4/5.0
System compatibility: Windows OS: 98 SE, XP, 2000, Vista, 7, 8, ME, macOS X, and Linux.
Avidemux is open-source software for video editing such as simple cutting, filtering, and encoding of videos into many formats. The application let you convert to many videos encoding formats like the popular ones MPEG and ASF etc.
Moreover, Avidemux does not provide editing through basic tools only but its automated task capability through queue and power scripts lets you do anything with your video. The application works on most platforms.
Reason to Choose:-
- Sleek user interface
- Wide support of codecs
- No learning curve is necessary
Reason to Avoid:-
- Confusing options
- Very few video editing features
10. iMovie – a most well-known video editor for macOS users
Best for: Apple device users, Marketers, developers, and teachers.
User rating: 4.3/5.0
System compatibility: Microsoft Windows 7, Windows 8, Windows 10, or Windows 11, All macOS
Imoview is a read-made installed software by Apple Inc on their systems. It primarily came in macOS, iOS, and iPadOS devices. Its original release came in 1999 as MAC OS 8 bundled application.
At the start, it was given free by buying a new macOS or ios device but later, in 2013 it has been issued for free to all its users. The application is known for its editing of any type and resolution of videos.
Reason to Choose:-
- User friendly
- Open-Source
- Best for HD Videos
Reason to Avoid:-
- Some glitches have been reported while recording gameplay.
- The customer support team is not always responsive.
12. Screenrec
Best for: best premium screen recorder for beginners
User rating: 4.5/5.0
System compatibility: Windows 10/8/7/XP and Linux
Screenrec is a premium screen recorder with a very intuitive user interface that makes it suitable for beginners. You can start and stop recording your screen with a single click. You can also record your webcam and audio from your system as well as external microphone. The software is perfect for taking screenshots and adding annotations wherever required.
The software generates a sharable link so that you can share it anywhere you want instantly. Once the link is shared, you can check its analytics. The video content management system is quite robust and the video content is fully encrypted for security and privacy.
Reason to Choose:-
- Record screen, webcam, audio with a single click.
- Very intuitive user interface with live annotation options.
- Generate instant sharable links and track analytics of videos.
- Better video content management with cloud storage.
Reason to Avoid:-
- Very limited editing options.
- Very limited customizable settings.
Part 5: Online Screen Recorders
If you do not want to install any dedicated screen recording software on your computer, you have online screen recorders to record the screen on the go. There is no software to install as you can launch the online screen recorders instantly from your web browsers. Here are the best online screen recorders for you.
1. Screencastify
Best for: best online screen recorder for those who want a browser extension.
User rating: 4.4/5.0
System compatibility: Windows, Mac and Chromebook
Screencastify comes in the form of a Chrome browser extension and hence, only Chrome users can use them. You can record your screen, your webcam video individually as well as together. The recording widget has options for real-time drawing while recording the video. Additionally, you can add stickers to enhance the video content.
After recording, you can upload the video on Google Drive, and you can share the video link instantly with anyone. The video editor offers you basic video editing options. You can even highlight mouse cursor. As far as saving the recorded video goes, you can export in MP4, MP3 as well as GIF file formats.
Reason to Choose:-
- Record desktop, browser, and application with webcam embedded.
- Highlight mouse movements and clicks and add stickers.
- Real-time drawing with pen and shapes and basic editing options.
- Export video to Google Drive and share video links instantly.
Reason to Avoid:-
- Limited to Chrome users only.
- Recording time limited to 5 minutes in free version.
2. Screencast-o-Matic
Best for: best online screen recorder for everyone
User rating: 4.7/5.0
System compatibility: Windows, Mac, iOS, Android and Chromebook.
Screencast-o-Matic is the best online screen recorder in terms of features and customization. All the features are well-balanced so that everyone can use it to satisfy their requirements. You can choose screen, webcam or both for recording. You can set a maximum time so that the recording can stop automatically.
You can choose the video resolution and you can choose audio sources. You can also capture screenshots and customize the recording area. If you opt for its premium plan, you get a vast stock library to enhance your video content. In fact, you can add animations, effects, add voiceover, background audio and automated caption.
Reason to Choose:-
- Capture screen, webcam, and audio with customized recording area.
- Customize video recording parameters as per requirements.
- Real-time drawing tools and cloud hosting for instant sharing.
- Separate video editor available for free.
Reason to Avoid:-
- Advanced features are meant for premium users.
- 15-minute recording time limitation in free version.
3. Loom Online Screen Recorder
Best for: best online screen recorder for teams and collaborative works.
User rating: 4.1/5.0
System compatibility: Windows, Mac, iOS, Android and Chromebook.
Loom comes with an online screen recorder along with a Chrome extension as well as desktop app. With the online screen recorder, you can record screen only, camera only as well as screen and camera together. You can choose actual webcam as well as virtual webcam and you can select an external mic for audio recording.
The online screen recorder comes with a recording countdown and you can save your videos on the workspace that Loom provides. You can select the entire screen, the browser tab or the application window. You can instantly share the recorded video with people through emails, social media platforms and much more.
Reason to Choose:-
- Record screen and webcam together and separately.
- Save the recorded video on Loom platform and share instantly.
- Basic editing options post recording include speed change.
- Add transcription and call-to-action as well as change thumbnail.
Reason to Avoid:-
- Cannot record gameplay or select customized region.
- Very limited video parameters customization options.
4. Screencapture.com
Best for: best online screen recorder for amateurs
User rating: 4.2/5.0
System compatibility: Windows, Mac, and Chromebook.
Screencapture.com is a freemium online screen recorder as it attaches a watermark to the recorded video in free mode. You can record your screen as well as your webcam and select the audio source as per your requirements. The recording is limited to HD resolution. You can capture video in Picture in Picture format.
The platforms emphasize downloading its desktop recorder where more features are available. You get the option to select the recording screen such as entire screen, browser or application window. After recording the video, you can instantly check its preview before saving or discarding. You can save the video in different file formats.
Reason to Choose:-
- Choose webcam, audio sources while recording the screen.
- Capture entire screen, application or browser screen.
- Capture video in Picture in Picture mode.
- Preview recording and save in different file formats.
Reason to Avoid:-
- Premium plan to remove watermark only.
- No customization of video parameter options.
5. Panopto
Best for: bests online screen recorder for teachers and students
User rating: 4.7/5.0
System compatibility: Windows, Mac, and Chromebook.
Panopto offers you a platform where you can record any video and save them on Panopto or Classroom. Therefore, it is an ideal platform for teachers and students and lecture delivery. You can even upload the recorded video on YouTube directly. You can even save the video on your local drive.
You can record any part of your screen in full HD resolution and the online recorder allows you to record webcam as well. You can also record system and external audio. The best part is that you can choose the video layout such as tile or PiP mode. Besides, you can blue the background while recording.
Reason to Choose:-
- Customize recording area and record in full HD.
- Smart camera and background selection options.
- Different saving and uploading options for recordings.
- Picture in Picture, Tile and Instant preview modes available.
Reason to Avoid:-
- The user interface is unappealing.
- No video editing options available.
6. Apowersoft Online Screen Recorder
Best for: best online screen recorder for recording demonstrative videos.
User rating: 4.8/5.0
System compatibility: Windows, Mac, and Chromebook
Apowersoft online recorder is one of the most popular and comprehensive screen recorders. You have to install its web installer on your computer for its online recorder to operate. You can record any region on your screen with the recorder. You have the option to save the recording on your local drive as well as on RecCloud. Besides, you can upload the video directly on YouTube.
The record supports different types of video output formats and you can record anything starting from live calls and video streams to demonstration videos. In fact, you can record even your webcam video along with external audio. There are also options for annotation while recording for better explanation.
Reason to Choose:-
- Record your screen, webcam, and audio smoothly.
- Customize recording area and add callouts to videos.
- Add annotation in real-time while recording.
- Save the recorded video in multiple file formats.
Reason to Avoid:-
- It lags if the computer is not a high-end one.
- No editing options are present.
Part 6: Screen Recorder for Mobile
If you want to record your mobile phone’s screen, you need to install a screen recorder app. Here is the list of the best screen video recorders for mobile users.
1. AZ screen recorder
Support OS: Android
Rating: 4.5/5.0
Download Link: https://play.google.com/store/apps/details?id=com.hecorat.screenrecorder.free&hl=en\_IN&gl=US
AZ screen recorder is a complete screen recorder from all perspectives. The app lets you record your screen, edit your video, go for livestream as well as take screenshots. You can record at full HD resolution and change resolution, frame rate and bitrate as required. The app can record internal sound as well as external sound through phone microphone.
You can also record your video through facecam in the overlay window. The app also comes with all the options for basic editing. You can even livestream your screen video on different video streaming platforms. Moreover, you can make GIFs from videos as well as take screenshots. The app is completely free to use without any watermark.
Reason to Choose:-
- Record screen with facecam in overlay window.
- Record gameplay with external mic audio.
- Record at 1080p resolution at 60fps.
- Floating controls, drawing tools.
- Trim, crop, merge, rotate, and convert to GIF.
Reason to Avoid:-
- It can get into glitches when recording long videos.
2. DU Recorder
Support OS: iOS and Android
Rating: 4.5/5.0
Download Link: https://apps.apple.com/us/app/du-recorder-screen-recorder/id1295647284
DU Recorder is a freemium app that is available for iOS and Android users. The free version attaches a watermark which is why you have to opt for DU Recorder Premium. You can record your screen and livestream your screen activities on YouTube, Twitch, and Facebook. The app can record gameplay, video calls, live shows and anything on the screen.
The recording can be in full HD resolution and you can adjust the video parameters. Besides, you can edit your video such as trimming, cropping, adding music, frames, stickers, texts and much more. Moreover, you can capture facecam video, change video speed, record internal and external audio, and convert video to GIFs. All in all, it is a great screen recorder with video editing and livestreaming features.
Reason to Choose:-
- Record screen and facecam video with internal and external audio.
- Livestream screen activities to video streaming platforms.
- Basic video editing options and insert frames, stickers, and filters.
- Add custom watermark, change speed, live themes in Pro version.
Reason to Avoid:-
- It can lag at times when you are recording high frame rate video.
- It adds watermark to your recorded video if you are using its free version.
3. XRecorder
Support OS: Android and iOS
Rating: 4.8/5.0
Download Link: https://play.google.com/store/apps/details?id=videoeditor.videorecorder.screenrecorder&hl=en\_IN&gl=US
XRecorder is a completely free screen recorder with no watermark. You can capture your screen video as well as take screenshots. The screen recorder allows you to select from 240p to 1080p resolution for video recording. The app provides you with a floating widget to record anything on the screen starting from live calls to live shows.
You can even livestream your screen and you can do basic editing on the recorded video. There is no time limit on the recording and hence, it is quite suitable for recording gameplay. You can record internal and external audio as well as record facecam in a small overlay window. Besides, you can add music as well as change video speed as per your requirements.
Reason to Choose:-
- Record screen and facecam along with system and mic audio.
- Record video at different resolutions up to 1080p.
- Floating widget, countdown buffer time, pause recording options.
- Capture screenshots, rotate video and basic video editing.
Reason to Avoid:-
- Some have reported glitches regarding audio recording.
- There could be some performance lags while recording at high resolution.
4. Mobizen Screen Recorder
Support OS: Android and iOS
Rating: 4.1/5.0
Download Link: https://play.google.com/store/apps/details?id=com.rsupport.mvagent&hl=en\_IN&gl=US
Mobizen Screen recorder belongs to the freemium app category as it adds a watermark to the recorded video in its free version. You have to purchase its premium plan to remove the watermark. Coming to its features, the app is a good combination of screen recorder and video editor. You can record your screen easily from its floating widget.
You can also add intro and outro to your recorded video as well as add background music. Besides, you can perform basic video editing. Most importantly, you can capture your screen at 2K resolution. Besides, the app allows recording through the front camera of your phone in an overlay window.
Reason to Choose:-
- Can record screen video up to 2K resolution.
- Record screen, facecam, and internal and external audio.
- Use drawing tools, control from floating widgets, and create GIFs.
- Different video editing options and customize watermark.
Reason to Avoid:-
- Free version puts a watermark on the recorded videos.
- Reports of malfunction when recording at 2K resolution.
5. ADV Screen Recorder
Support OS: Android
Rating: 4.4/5.0
Download Link: https://play.google.com/store/apps/details?id=com.blogspot.byterevapps.lollipopscreenrecorder&hl=en\_IN&gl=US
ADV screen recorder is a full-fledged app for Android users to record their screen with full customizations. You can record your front and back camera along with the screen. It operates with two different engines where the default engine has all the basic features and the advanced engine has the features for advanced users.
The app also lets you edit your recorded video and you can add texts and banners. Besides, you can draw on the video in real-time as well as trim the video as per your preference. There is also an option to pause the recording at your convenience. You can also customize the video recording parameters as required.
Reason to Choose:-
- Record your screen as well as front and back phone camera video.
- Pause recording, draw on video, and add texts.
- Trim video, add custom logo, switch between engines.
- Customize video and audio settings as required.
Reason to Avoid:-
- The user interface is not appealing.
- There are bugs reported that need to be fixed.
6. Record it
Support OS: iOS
Rating: 4.6/5.0
Download Link: https://apps.apple.com/us/app/record-it-screen-recorder/id1245356545
Record it! app is extremely useful in making tutorial videos where you need to record your screen. You can record the entire screen with a single tap. You can record gameplay and app screen along with your reaction through facecam. You can also customize the overlay window by changing its shape and position.
Besides, you can record your audio commentary while recording screen. It comes with video editing options to trim videos, add filters, change speed, rotate videos and much more. You can share your videos directly to YouTube as well as export through email and AirDrop. The user interface is quite intuitive and appealing.
Reason to Choose:-
- One-tap option to start recording at high resolution.
- Customization of facecam reaction overlay window.
- Support camera roll videos and add audio commentary.
- Basic video editing and instant sharing and exporting options.
Reason to Avoid:-
- It can lag at high frame rate and high resolution.
- There are reports of inconsistency with audio recording.
Part 7: How to Choose the Right Screen Recorder?
Here are the main parameters you need to keep in mind while choosing the best screen recorder for you.
1. Recording options: An ideal screen recorder should have all the different options for recording your screen, webcam, system audio, and external audio from microphone. Besides, it should offer you the option to customize the recording area by selection. You should be able to record full screen, application window, and browser tab accurately.
2. Price: If you are serious about recording your screen video and uploading the recorded video on online platforms, you have to opt for a premium screen recorder. While purchasing a proprietary screen recorder, you need to compare the software price with its peers and ensure that you are getting more features for the price you are paying.
3. Customer support: You need to ensure that the screen recorder you are purchasing, they have a highly responsive customer support. This is a highly neglected factor but users suffer a lot when the customer support team is not responsive. Be sure that you will need to contact the customer support team at some time to learn more about certain features and troubleshoot in emergency situations.
4. Sharing options: When your ultimate goal is to share your recorded video online, you should check for the sharing options available in the screen recorder. There are screen recorders that allow sharing recorded and edited videos on online platforms, cloud storage platforms, and video streaming platforms. It should also offer you options to let you export videos in different file formats.
5. Video editing tools: You have to edit your recorded video to trim out unnecessary parts and add effects and filters to enhance your video content and video quality. Besides, you may need options to add music and voiceover as well as intro and outro. That is why you should opt for a screen recorder where a great video editor is available.
6. Customer Reviews: Last but most importantly, you should check the customer review of the screen recording software. Even when a screen recorder has loads of features, if the customer reviews are not good enough, you should not choose you. Besides, the customer reviews reveal the pros and cons of a screen recorder for your better understanding.
Part 8: Screen Recording Tips and Tricks
1. Practice before recording: Unless you are a pro, you should practice at least once before the actual recording. This will help you to execute your plan according to your script smoothly when you actually start recording. Besides, you can check if the frame, the camera, the mic, and everything else are working perfectly.
2. Only record the required screen: Screen recorders offer you the option to record the entire screen, any specific application window or any specific tab of your browser. In fact, you can even customize the screen recording area as per your requirements for better focus and better visual experience.
3. Keep it short: It is always necessary to keep the length of the video as short as possible without skipping the relevant points and important explanations. That is where a proper script before recording is crucial so that you can have a plan and execute it properly without stretching your explanation unnecessarily.
4. Speak slowly and clearly: The way you speak in the video can attract as well as repel audiences. If you speak too fast and if you have a weird accent, it is going to repel audiences. That is why it is important for you to speak slowly and clearly so that everyone can understand everything you speak and negate your accent to a greater extent.
5. Use screen drawing tools: If you are recording a video where you need to explain something, it is always better if you use screen drawing tools. In fact, it is important that you choose the screen recorder that offers drawing tools so that the video gets visually pleasing and impactful for audiences to understand effectively.
6. Cut out dead moments: When you are recording screen videos, there are going to be a lot of dead moments and boring pauses. You have to cut out those boring and dead moments while editing so that the video stays interesting and the audiences do not lose concentration. This will also help to tighten the length of the video.
7. End with a summary: Last but most importantly, you should offer a proper conclusion before ending the video. You need to summarize everything you have discussed in the video so that the audience can get a revision of all the important points. Besides, a proper ending rather than an abrupt ending can leave a positive impact regarding your video.
Part 9: Frequently Asked Questions
How do I record Windows 10 screen?
You can use Windows Game Bar that comes pre-installed on Windows 10. However, for a better screen recording experience, we recommend Wondershare Filmora where you can edit the recording as well.
Can I screen record on my Mac?
You can use QuickTime that comes pre-installed on Mac. However, for professional screen recording experience, you can use Filmora or Camtasia where you will get more recording options and tools for editing after recording.
How do I screen record on my iPhone?
You can use DU Recorder app or Record it! app to record your iPhone screen video. Besides, the latest version of iOS comes with an in-built screen recorder option that can record the screen comfortably.
Which quality is best for screen recording?
The best quality for screen recording should be the same resolution as the screen. This means if you have a 4K monitor, the screen recording will be best at 4K resolution. In today’s scenario, 1080p or full HD is the optimal quality for screen recording.
What do most YouTubers use to record their screen?
Most YouTubers use Filmora or OBS Studio to record their screen. OBS Studio is mostly used by those who livestream their screen or gameplay. Filmora is mostly used by those who emphasize heavily on editing their recorded screen video for better output.
Does screen record ruin quality?
Your screen record quality can get ruined only when you use a screen recorder that records at a lower resolution due to its inability as well as to reduce file size. When you record your screen with a proprietary screen recorder, it can record the screen at exactly the same resolution as that of your screen. Hence, the video quality and resolution will stay intact.
What do gamers record their screens?
Gamers prefer Bandicam, Camtasia as well as Filmora to record their screens and showcase their gameplay to the world. Bandicam allows recording 2D and 3D games from gaming consoles at 4K resolution.
How do I make my recorded sound clear?
There are some screen recorders such as Filmora that offer you the option to remove background noise so that the recorded audio sound clearer. You can also use a pop filter to record clearer sound.
Part 4: Proprietary Screen Recorders
If you are serious about recording your screen and publishing the video online, you should invest in purchasing a premium screen recorder. A proprietary screen recorder is a video recorder where you have to purchase a premium plan to avail all the features. They offer all the required features for professional screen recording as well as editing the recording video. Here is the list of the best proprietary screen recorders for you.
7. Filmora Recorder
Best for: best screen recorder for all video creators
User rating: 4.8/5.0
System compatibility: Windows 11/10/8/7 and Mac 10.14+
Wondershare Filmora is one of the most popular screen recorders among video creators. You can record screen and webcam simultaneously as well as capture audio from system and external mic. Most importantly, you can record at 4K resolution without any performance lag. Besides, you can highlight mouse clicks and use greenscreen effect and customize background screen.
The main reason why Filmora is a preferred choice for recording video is that it comes with a world-class video editor. Therefore, you can enhance your video quality and content that will make the video stand out. Starting from adding audio and video effects to working with multiple video and audio clips, Filmora is undoubtedly the best screen recorder cum video editor for Windows and Mac users.
For Win 7 or later (64-bit)
For macOS 10.12 or later
Reason to Choose:-
- Record screen and webcam at high-resolution.
- Customize all video capturing settings and parameters.
- Edit the recorded video like a pro with its world-class video editor.
- Export the editing video in different file formats for maximum compatibility.
Reason to Avoid:-
- Takes long time to process high-resolution videos.
How to Make a Video with My Phone
Never before has video recording been so simple or effortless. Everybody has a smartphone, which is a capable video camera, in their pocket. In fact, the use of smartphones for mobile creation has increased to the point that some people consider it to be the main function and equally crucial to communication.
Pocket-lint has compiled ten ideas in an effort to assist you in getting whatever it is you want in the best possible way. Even if some of the advice may seem apparent, using it all should always produce fantastic videos.

1. Get ready for filming
Make sure that you have everything you need to start recording your videos, including the necessary
equipment, props, scripts, actors, and locations, before you start the recording process. In addition, ensure that your mobile device is of high quality and that it has a sufficient amount of storage space (available memory) to save the film. High definition (HD) video files can be quite large and storing them can quickly deplete a battery’s capacity.

They add a great point; you need to think about stabilization, and they’ve included a few great options for
obtaining steady video. This video by Filmic Pro titled “5 Things to Do Before You Shoot iPhone Video” covers a lot of what we’ve discussed as well, including memory storage, battery life, audio, and resolution.
2. Use good lighting
Because smartphone cameras have smaller image sensors and lenses, proper illumination has a significant impact on their performance. As much as you can, try to film your video in well-lit environments. By doing this, you can reduce the amount of unwanted shadow and grain in your video. On the other hand, you also need to be cautious to avoid pointing the camera straight towards bright light sources because this will result in useless overexposed footage and lens flare. The lighting should be consistent and steady because most smartphone image sensors take a while to respond to abrupt changes in brightness.

If shooting your video in low light is still difficult, experiment with your phone’s or app’s backlighting and white balance settings. In case your camera is focusing on the incorrect part of your composition, most phones now provide “touch focusing.” The automatic exposure control will have an easier time making minor adjustments if the lighting condition changes once the focus has been placed on the most crucial part of the video.
3. Film horizontally, not vertically
Your natural inclination may be to hold the smartphone in a vertical position when you are using it to record video, just as you do when you are using it for the vast majority of other purposes. However, if you want to edit your video and post it online and on social media, this may place certain restrictions on your ability to do so.

4. Make sure to have good audio
We’re going to go ahead and say that sound is one of the most essential components of any video. The difficulty is in the fact that the audio quality on your smartphone is not always of the highest caliber. When it comes to audio, there is a general rule that the smartphone should be as close to the speaker as is physically possible in order to obtain the clearest sound possible from it. Even if you are only a few meters away from the person whose voice you want to record on your smartphone, you won’t be able to get a good recording of them.
This is not the fault of your smartphone; rather, smartphones are intended to be used by speaking into them at close range; hence, you should think about employing the use of an external microphone in order to improve the sound quality. However, if you are unable to do so, there is no need for concern because you can use an additional smartphone in its place.
You can record audio on your mobile device by opening the voice memo app and selecting the record button. Your audio will immediately be improved if you position the phone’s microphone such that it is facing your topic and is somewhat close to them. Clap once at the beginning of the recording to serve as a reference point for both the video and the audio, which will help you save time while editing. After that, it will be simple for you to locate the point at which the clap occurred and synchronize the high-quality audio that is on the memo with the audio that is in your film.
5. Edit your video
Now that you’ve gathered all of your film, it’s time to cut it up, add some color, and get creative with effects! Fortunately, there are numerous video editing apps available that make it easier and faster than ever to use. You can edit videos on your phone just as you would on a computer using apps like Adobe Rush and iMovie, and it’s easier than you think.

You’ve probably heard of iMovie, Apple’s free video editing software that works on both your iPhone and Mac. You can add titles, music, and additional effects to your video clips, much like in Adobe Rush. iMovie is really easy to use, especially if you’re new to editing. The main distinction between Adobe Rush and iMovie is that Adobe Rush includes more professional and technical changes, whilst iMovie has a considerably larger selection of video effects and transitions.
Adobe Rush is the most user-friendly app for editing and creating high-quality films on your smartphone. One of Adobe Rush’s best features is the ability to incorporate motion graphics, video effects, text, and mix audio. If you prefer a larger screen to edit on, Adobe Rush seamlessly transfers the files to your computer, allowing you to resume editing where you left off on your smartphone. This program is simple to use, and there are numerous guidelines and tutorials available online to help you get started.
Conclusion
You probably weren’t aware of this, but your smartphone is actually a very capable piece of equipment that can be used to record videos of a high quality. You will be able to enhance the quality of your material to a greater extent by putting into practice the strategies that are discussed in this piece. Grab your smartphone and get ready to start producing content that the people in your fanbase will always come back for.
Free Download For Win 7 or later(64-bit)
Free Download For macOS 10.14 or later
Free Download For macOS 10.14 or later
Detailed Steps to Cut a Video in QuickTime
Filming a video is fun and editing is more interesting and entertaining. Today, everyone is making videos and there are tons of videos on the internet. Editing videos is required to make the video stand out and retain the audience. Video trimming helps you cut out the unwanted part of the video and leave the desired portion of the viewers.
Cutting a video means your video starts quickly and you don’t lose your audience’s attention.
The first ten seconds of the video are very important when deciding whether to stay or move on to the next video.
How to cut a video in QuickTime
Quicktime is an authentic application developed by Apple in 1991. It allows the users to edit, record, play, and share videos and pictures. If some editing software confuses you, QuickTime is just for you.
You need to download the application and here are all the features you can enjoy. It is compatible with all versions of windows whereas, if you are a Mac user it is already installed in your system.
Cutting a video is one of the basic but useful functions of QuickTime. It requires a few simple steps and some features related to cutting, splitting, and trimming a video.
Let’s start…
1. Cutting/splitting a video
Cutting a video means splitting some parts of the video to edit and rearrange the clips to make a new video. Mostly, it is used where you want to edit all clips of the video differently. It is also needed as it allows you to focus on your message and delete the portion not required and make the video large. You can remove the extra fat from the video to give clarity, direction, and hope. You can convey your message in a clear and concise way.
These steps should be followed to cut/split the video in minutes.
- In the QuickTime player, open the desired video.
- Select show clips from the view on the menu bar.
- Move the red marker from right to left to select the desired portion.
- Hit split clip from the edit

- A yellow rectangular bar appears over the edges of your video.
- You can cut the desired portion and make editing as you like.
- Repeat the sequence until you are done.
- Press the done

Cutting the video by splitting is used when you have a long video and you can easily edit them by splitting them into two parts.
2. Trimming a video
If you are cutting some parts at the beginning and the end of the video, it is called trimming a video. You can say it as removing unnecessary preparation scenes. Normally, professionals start their cameras before the film scene to ensure not to miss any part of the video. Here’s, how to trim video in the QuickTime player.
Let’s dive in…
- Launch QuickTime
- Select your video from the system.
- Select edit from the top menu.
- Select the trim or command T, or you can select the hold option from the drop-down list.

- A yellow trimming bar will appear over the edges of your video.
- Remove the unwanted area by moving from the right or left trim edges also called handles.

Everything inside the yellow bars will remain. You can preview your video anytime during the editing process.
- Hit the trim from the bottom right corner.
- Select save from the file on the top menu bar.
Trimming is critical because it is the time to convince the viewers to stick around and stay with your video.
For more advanced editing without losing the quality of the video, I recommend you to use Wonder Share Filmora 11. It’s an amazing app and very easy to use even for a layman.
An easier way to cut a video with Filmora
Wonder Share Filmora is one of the best video editing tools for beginners. It simplifies the editing process using smart and congenital features that can automate repetitive tasks. It has a lot of exciting features and has collaborated with others to make the work easier.
So here, I recommend Filmora Video Editor , an easy and very powerful, all-in-one video editor software. It enables you to cut, crop, and trim the videos in a few clicks without losing the quality of the video.
For Win 7 or later (64-bit)
For macOS 10.14 or later
Point to be noted:
The cut is removing some unwanted parts of the video.
The Split is dividing the clips into two parts.
The trim is deleting the starting or endpoints of the video.
1. Cut video using Filmora video cutter
Cutting a video is necessary even if you shot a very good video because it contains some irrelevant and unwanted clips. Removing the unnecessary part of the video will make the video short, concise, and to the point. Moreover, it helps in grabbing the attention of your valuable viewers.
If your video has multiple scenes to cut, the scene detection function would be helpful.
- Install Filmora video cutter
- Select the New project.
- Select the video in the media library.
- Right-click and select scene detection to enter the scene detection window.

- Select Detect
This will automatically detach your unwanted videos based on the change in scene.

- Click add to timeline to add the separated video into the timeline.
You can also remove the unwanted videos by clicking the delete icon.
2. Manually cut/split videos
To cut the beginning and the end portion of the video, we can use the trim feature.
Let’s start…
- Import the video and drag it into the timeline.
- Add Marker in the timeline to spot a particular clip.

Pointing the Marker will help to find the unwanted potion without wasting the important portion of the clip.
Here is all about trimming the video from beginning to end but if you want to cut the video into parts to remove the rest of the fat from the clips. You can follow these steps:
- Click the split icon above the timeline.
- Drag the play head to make a rectangle to cover the unwanted portion of the video.
- Press delete from the timeline besides the split tab.

Repeat the process and cut the video into many segments to get the desired video.
Conclusion
Video editing is a critical part of creating eye-catching movies. Along with this, cutting and trimming a video is the core of the whole process as it makes sure that your audience is hooked with your content or not. Once you have downloaded the Wonder Share Filmora app, the art of cutting the video and transforming into a new film is really amazing.
- A yellow rectangular bar appears over the edges of your video.
- You can cut the desired portion and make editing as you like.
- Repeat the sequence until you are done.
- Press the done
Cutting the video by splitting is used when you have a long video and you can easily edit them by splitting them into two parts.
2. Trimming a video
If you are cutting some parts at the beginning and the end of the video, it is called trimming a video. You can say it as removing unnecessary preparation scenes. Normally, professionals start their cameras before the film scene to ensure not to miss any part of the video. Here’s, how to trim video in the QuickTime player.
Let’s dive in…
- Launch QuickTime
- Select your video from the system.
- Select edit from the top menu.
- Select the trim or command T, or you can select the hold option from the drop-down list.
- A yellow trimming bar will appear over the edges of your video.
- Remove the unwanted area by moving from the right or left trim edges also called handles.
Everything inside the yellow bars will remain. You can preview your video anytime during the editing process.
- Hit the trim from the bottom right corner.
- Select save from the file on the top menu bar.
Trimming is critical because it is the time to convince the viewers to stick around and stay with your video.
For more advanced editing without losing the quality of the video, I recommend you to use Wonder Share Filmora 11. It’s an amazing app and very easy to use even for a layman.
An easier way to cut a video with Filmora
Wonder Share Filmora is one of the best video editing tools for beginners. It simplifies the editing process using smart and congenital features that can automate repetitive tasks. It has a lot of exciting features and has collaborated with others to make the work easier.
So here, I recommend Filmora Video Editor , an easy and very powerful, all-in-one video editor software. It enables you to cut, crop, and trim the videos in a few clicks without losing the quality of the video.
For Win 7 or later (64-bit)
For macOS 10.14 or later
Point to be noted:
The cut is removing some unwanted parts of the video.
The Split is dividing the clips into two parts.
The trim is deleting the starting or endpoints of the video.
1. Cut video using Filmora video cutter
Cutting a video is necessary even if you shot a very good video because it contains some irrelevant and unwanted clips. Removing the unnecessary part of the video will make the video short, concise, and to the point. Moreover, it helps in grabbing the attention of your valuable viewers.
If your video has multiple scenes to cut, the scene detection function would be helpful.
- Install Filmora video cutter
- Select the New project.
- Select the video in the media library.
- Right-click and select scene detection to enter the scene detection window.
- Select Detect
This will automatically detach your unwanted videos based on the change in scene.
- Click add to timeline to add the separated video into the timeline.
You can also remove the unwanted videos by clicking the delete icon.
2. Manually cut/split videos
To cut the beginning and the end portion of the video, we can use the trim feature.
Let’s start…
- Import the video and drag it into the timeline.
- Add Marker in the timeline to spot a particular clip.
Pointing the Marker will help to find the unwanted potion without wasting the important portion of the clip.
Here is all about trimming the video from beginning to end but if you want to cut the video into parts to remove the rest of the fat from the clips. You can follow these steps:
- Click the split icon above the timeline.
- Drag the play head to make a rectangle to cover the unwanted portion of the video.
- Press delete from the timeline besides the split tab.
Repeat the process and cut the video into many segments to get the desired video.
Conclusion
Video editing is a critical part of creating eye-catching movies. Along with this, cutting and trimming a video is the core of the whole process as it makes sure that your audience is hooked with your content or not. Once you have downloaded the Wonder Share Filmora app, the art of cutting the video and transforming into a new film is really amazing.
How To Make Split Screen Videos in Filmora
To show the interactions and exchanges of things between the characters are widely seen in movies. It seems they are close to each other, but they aren’t.
In this article, we will go with the video editor, Wondershare Filmora, to make split-screen videos instantly. Let’s move forward to check what you need to make these videos!
Part 1. Prerequisites To Make Split Screen Video To Interact
There is no need to make complex videos. Because nowadays, only short videos get viral and are more trending. The interaction videos should be as simple as passing props or playing with someone!
Split-screen videos are widely used in movies and films because it is a visual way to describe any story. The actions will be based on real-time interactions between the characters. The essential things you are required to make these videos are described as follows:
1. Storyboard
First of all, you have to create a story with your friends and family, with whomever you want to create a video. For this, follow the below steps:
- Make a script of a story by coordination, such as writing all dialogues and actions so that there will be no difficulty during a performance on screen.
- Practice those actions again and again to get a professional look.
- The storyboard should be based on the split screen templates available on Wondershare Filmora , or you can create your customized too.

Free Download For Win 7 or later(64-bit)
Free Download For macOS 10.14 or later
2. Characters on the screen
The friends with whom you are interacting should be on the screen and have assets to record a video wherever they are. It will be one person on one split screen or two persons on one. It all depends upon your story and script.
3. Prop to interact
A prop will be any particular thing used to show interaction and should be present in the homes of both characters.
![]()
Note: The prop can be any object like a tissue roll, mobile phone, or anything seen as a passing object from one character to another.

4. A helper at home
There will be one person at home during video shooting to pretend a friend’s or family’s hand reaching to the other character from off-camera.
For example, while performing a high-five action, insert the hand of any member with whom you are living in the scene, showing as the character adjacent to you. After setting up everything in a row, it’s time to record scenes for the video.

5. Record different takes
To give a professional look to the video, you have to record different takes for each person from different angles. After recording, everyone has to send footage to only one person to edit on Filmora.
After getting things and recording, it’s time to edit it on Wondershare Filmora. For this, follow the lines below!
Part 2. Steps To Edit Split Screen Video in Filmora
Split-screen video editing is as simple as throwing a prop toward someone. Wondershare Filmora with a premium domain will get your back!
Filmora is a more creative and instant platform to edit any video or to give birth to new ideas. One of the prominent features is having ready-to-use templates for editing split-screen video. Meanwhile, you can also do a manual setup for editing. Follow the steps mentioned below to edit a video by using split-screen effects.
Split Screen Effect With Templates
Step1Import footage to Filmora
After picking up the best footage of every character, download the Wondershare Filmora (if you have not already). Then to import the clips, perform the following steps:
Free Download For Win 7 or later(64-bit)
Free Download For macOS 10.14 or later
- First, click on the “Click here to Import Media” button, as shown below.

- Then, select the clips you want to edit from your PC, and then they’ll be shown in the media section of Filmora.
Step2Add split screen effect to the timeline
Before adding the clips to the timeline, add the split screen effect to the timeline by following the below-mentioned steps:
- Click on the two-headed arrow at the upper tab.
- Then the drop-down list of two options will pop up, as shown below.

- Click on the Split Screen option, and it will show many split screen effects.

- Select the effect, whatever suits you, and download it then.
- After downloading, drag and drop the effect on the timeline section.

Step3Add clips to the effect
After adding the effect to the timeline, it’s time to implement it on the clips or footage. For this, follow the below-mentioned steps:
- Drag and drop the clips based on your storyboard in the required section.
- Then import the takes wherever and however you want, according to the storyboard.

If you don’t want any templates to be used in your video, then you can manually make a screen split layout. To do this, check the below section.
Manual Split Screen Layout
If the storyboard is organized in such a way that you can’t find out any of the templates suitable, then you can easily create a customized one for your video. In a customized split screen, you can set the duration and adjust the frame rate according to your choice.
Step1Import the clips
First, you must create a timeline to edit your split-screen video. To do this, take a look at the below steps!
- Click on the Import icon in the main preview when you open Wondershare Filmora.
- Then, import all the clips or footage you want to edit.

Step2Add all footages to the timeline
After importing all the clips of interaction videos into Filmora, our next step is to add our videos to the timeline.
- Simply click on the imported clips present in the project media section.
- Then drag it to the timeline below and drop it in the required track of videos.
Do the above-mentioned steps with all the clips present in the project media block.

Doing so will create a working timeline you can view and edit as you go along the editing process.
Step3Adjust the frame rate of all clips
It is all set that your storyboard is customized, for this you have to resize all the clips manually. To arrange clips according to the size, follow the below-mentioned steps:
- First, double-click on the clip you want to edit in the timeline.
- The Basic settings of the video will open in which you have a lot of options to edit.
- Click on the Transform option, and its setting will pop up on the top left side.
- Find out the Scale option from the settings and check out its range.

Adjust the scale rate according to your choice by sliding from its section.

![]()
Note: Repeat this process with all other clips present in the timeline to adjust them in such a way so that the hands moving from frame to frame will line up.

Step4Adjust the timing of clips
After adjusting the frame, you now have to adjust the timing of the clips. To perform this action, follow the below steps:
- Arrange and move around the clips on the timeline so that the timing of the scene lines up between each shot.
- Drag the edge of the clip to the right side if you want to increase the timing and duration.
- While dragging the edge of the clip to the left side, if you want to decrease the timing of the clip.
![]()
Note: The most important part is the first time a hand is supposed to move from one frame to another.
What to do if there is any lag in the preview?
If you’re experiencing lag during the preview, click on the “render” button on the top right of the timeline. It will help to render for a smooth preview.

Step5Splitting the clips
If the timing in your scene starts to fall out of sync, then do the following steps:
- First, try splitting all of the clips.
- Ensure to split before they start to fall out of sync.

![]()
Note: Splitting the clip before one person’s dialogue is preferred.
Step6Full-screen moment
After splitting the clips according to adjustments and storyboard, you can now make one of the characters’ videos in full screen. For this, follow the below steps:
- First, make another cut in the clips before the next hand-crossing action.
- Take one of the characters’ videos from clips in-between moment and make them full screen.

![]()
Note: You can quickly do full screen by double-clicking on the clip and unchecking the “transform“ heading in the top left window.

Final Results
You’re now free to re-adjust your clips in the next part back into sync. If you still want to make any adjustments in duration or cutting or sizing, you can do it easily. Because it’s a customizable effect. Give a pat on your Back! You did a great job and accomplish the results!

Free Download For Win 7 or later(64-bit)
Free Download For macOS 10.14 or later
Conclusion
An instant way to make split screen video and edit it is hidden in Wondershare Filmora . You can unwrap it by following the above-mentioned steps and giving a new life to your interaction videos.
Enjoy new and creative ideas with your family and friends and make your video trendy by Filmora. If you are an influencer, you can interact with other bloggers and influencers and make split-screen videos. It will be a great treat for you and your social media followers!
Free Download For macOS 10.14 or later
2. Characters on the screen
The friends with whom you are interacting should be on the screen and have assets to record a video wherever they are. It will be one person on one split screen or two persons on one. It all depends upon your story and script.
3. Prop to interact
A prop will be any particular thing used to show interaction and should be present in the homes of both characters.
![]()
Note: The prop can be any object like a tissue roll, mobile phone, or anything seen as a passing object from one character to another.
4. A helper at home
There will be one person at home during video shooting to pretend a friend’s or family’s hand reaching to the other character from off-camera.
For example, while performing a high-five action, insert the hand of any member with whom you are living in the scene, showing as the character adjacent to you. After setting up everything in a row, it’s time to record scenes for the video.
5. Record different takes
To give a professional look to the video, you have to record different takes for each person from different angles. After recording, everyone has to send footage to only one person to edit on Filmora.
After getting things and recording, it’s time to edit it on Wondershare Filmora. For this, follow the lines below!
Part 2. Steps To Edit Split Screen Video in Filmora
Split-screen video editing is as simple as throwing a prop toward someone. Wondershare Filmora with a premium domain will get your back!
Filmora is a more creative and instant platform to edit any video or to give birth to new ideas. One of the prominent features is having ready-to-use templates for editing split-screen video. Meanwhile, you can also do a manual setup for editing. Follow the steps mentioned below to edit a video by using split-screen effects.
Split Screen Effect With Templates
Step1Import footage to Filmora
After picking up the best footage of every character, download the Wondershare Filmora (if you have not already). Then to import the clips, perform the following steps:
Free Download For Win 7 or later(64-bit)
Free Download For macOS 10.14 or later
- First, click on the “Click here to Import Media” button, as shown below.
- Then, select the clips you want to edit from your PC, and then they’ll be shown in the media section of Filmora.
Step2Add split screen effect to the timeline
Before adding the clips to the timeline, add the split screen effect to the timeline by following the below-mentioned steps:
- Click on the two-headed arrow at the upper tab.
- Then the drop-down list of two options will pop up, as shown below.
- Click on the Split Screen option, and it will show many split screen effects.
- Select the effect, whatever suits you, and download it then.
- After downloading, drag and drop the effect on the timeline section.
Step3Add clips to the effect
After adding the effect to the timeline, it’s time to implement it on the clips or footage. For this, follow the below-mentioned steps:
- Drag and drop the clips based on your storyboard in the required section.
- Then import the takes wherever and however you want, according to the storyboard.
If you don’t want any templates to be used in your video, then you can manually make a screen split layout. To do this, check the below section.
Manual Split Screen Layout
If the storyboard is organized in such a way that you can’t find out any of the templates suitable, then you can easily create a customized one for your video. In a customized split screen, you can set the duration and adjust the frame rate according to your choice.
Step1Import the clips
First, you must create a timeline to edit your split-screen video. To do this, take a look at the below steps!
- Click on the Import icon in the main preview when you open Wondershare Filmora.
- Then, import all the clips or footage you want to edit.
Step2Add all footages to the timeline
After importing all the clips of interaction videos into Filmora, our next step is to add our videos to the timeline.
- Simply click on the imported clips present in the project media section.
- Then drag it to the timeline below and drop it in the required track of videos.
Do the above-mentioned steps with all the clips present in the project media block.
Doing so will create a working timeline you can view and edit as you go along the editing process.
Step3Adjust the frame rate of all clips
It is all set that your storyboard is customized, for this you have to resize all the clips manually. To arrange clips according to the size, follow the below-mentioned steps:
- First, double-click on the clip you want to edit in the timeline.
- The Basic settings of the video will open in which you have a lot of options to edit.
- Click on the Transform option, and its setting will pop up on the top left side.
- Find out the Scale option from the settings and check out its range.
Adjust the scale rate according to your choice by sliding from its section.
![]()
Note: Repeat this process with all other clips present in the timeline to adjust them in such a way so that the hands moving from frame to frame will line up.
Step4Adjust the timing of clips
After adjusting the frame, you now have to adjust the timing of the clips. To perform this action, follow the below steps:
- Arrange and move around the clips on the timeline so that the timing of the scene lines up between each shot.
- Drag the edge of the clip to the right side if you want to increase the timing and duration.
- While dragging the edge of the clip to the left side, if you want to decrease the timing of the clip.
![]()
Note: The most important part is the first time a hand is supposed to move from one frame to another.
What to do if there is any lag in the preview?
If you’re experiencing lag during the preview, click on the “render” button on the top right of the timeline. It will help to render for a smooth preview.
Step5Splitting the clips
If the timing in your scene starts to fall out of sync, then do the following steps:
- First, try splitting all of the clips.
- Ensure to split before they start to fall out of sync.
![]()
Note: Splitting the clip before one person’s dialogue is preferred.
Step6Full-screen moment
After splitting the clips according to adjustments and storyboard, you can now make one of the characters’ videos in full screen. For this, follow the below steps:
- First, make another cut in the clips before the next hand-crossing action.
- Take one of the characters’ videos from clips in-between moment and make them full screen.
![]()
Note: You can quickly do full screen by double-clicking on the clip and unchecking the “transform“ heading in the top left window.
Final Results
You’re now free to re-adjust your clips in the next part back into sync. If you still want to make any adjustments in duration or cutting or sizing, you can do it easily. Because it’s a customizable effect. Give a pat on your Back! You did a great job and accomplish the results!
Free Download For Win 7 or later(64-bit)
Free Download For macOS 10.14 or later
Conclusion
An instant way to make split screen video and edit it is hidden in Wondershare Filmora . You can unwrap it by following the above-mentioned steps and giving a new life to your interaction videos.
Enjoy new and creative ideas with your family and friends and make your video trendy by Filmora. If you are an influencer, you can interact with other bloggers and influencers and make split-screen videos. It will be a great treat for you and your social media followers!
Also read:
- Updated Are You Wondering How to Slow Down Videos or Speed Them up, Here Are Three Ways to Do It. Speed up or Slow Down Your Videos on PC, Online, and Phone
- 2024 Approved Make Your Presentation More Attractive with Best Google Slideshows Templates. How to Make a Google Slideshow in Simple Step? Do You Know How to Create Google Images Slideshow?
- In 2024, Is Augmented Reality Conferencing the Future of Workplace Collaboratio
- Turn Your Text Into a Podcast Made Possible for 2024
- 4 Methods How To Make a Recap Video
- How to Add a Lower Third to Your Video for 2024
- Updated In 2024, Top 10 Sound Extractors to Extract Sound From Video
- Updated VN Editor A Prominent Option for Adding Luts for Video Editing
- Updated After Reading This Article, You Can Add a B-Roll Feature From Filmora and Captivate More Audience. Explanation Video B-Roll and Story-Telling B-Roll Are Well Illustrated for 2024
- New How to Turn On/Off Motion Blur in Minecraft?
- Updated 2024 Approved Bandicut Video Editor Download and Review
- Updated Best Video Grabbers for Chrome
- Updated Have You Recently Experienced Motion Blur in Games? Do You Wish to Learn More About It? This Article Provides an Overview and the Need for Motion Blur Gaming
- New How to Trim/Crop Video in Microsoft Powerpoint
- How to Speed Up Video with Canva Online Tool for 2024
- New 4 Methods How To Make a Recap Video for 2024
- New Detailed Tutorial to Merge Videos in VLC Media Player
- In 2024, Before & After Editing Trick | Wondershare Filmora Tutorial
- In 2024, Have You Ever Applied the Gaussian Blur Effect to Your Videos? Read This Article to Find a Reliable and Convenient Tool to Generate the Gaussian Blur Effect
- 2024 Approved In This Article, We Will Show You How to Rotate Videos Using Obs
- New Enhance Your Film Production with These 5 Silence Detection Tools
- Customize PowerPoint Slideshow Icon in Simple Ways
- Easy Steps to Create Intro Video with After Effects for 2024
- 2024 Approved Tutorial How To Add Motion Blur in Blender?
- Updated Do You Want to Blur Faces in Your Videos? Read This Article to Find Out the Easiest Way to Blur the Faces in Videos Using Adobe Premiere Pro
- 2024 Approved Do You Want Your Videos to Look Like Danny Gevirtz? You Can Use some Inspired Presets. There Are Different Danny Gevirtz LUTs that You Can Download and Use
- 2024 Approved Easy Steps to Slow Down a Video on iPhone and Android
- A Guide to Effective Video Marketing for 2024
- 2024 Approved Use The Best LUTs for Lightroom
- New The Ultimate Guide to Make a Text Collage for 2024
- New Add Motion Blur in After Effects
- 2024 Approved 12 Best Marketing Slideshow Templates
- New Turn Your Blog Content Into Audio Podcasts to Reach a Wider Audience and Increase Reader Participation
- In 2024, Do You Want to Apply BRAW LUTs to Your Pictures and Video Footage? Here We Will Discuss some of the Best Options Available to Help You Choose the Right One
- Minecraft Pixel Art Is a Trending Subject, and They Simply Consist of In-Game Pixel Artworks, Besides the Minecraft Houses, Farms, or Cities. Lets Explore the Fantastic World of Minecraft Pixel Art for 2024
- Updated How to Loop a Video on Android
- Updated 2024 Approved What Is Motion Tracking and How to Use It
- Easy Guide to Overlay Videos in Premiere Pro for 2024
- Updated Best Ever Ways Make Tiktok Slideshow Solved
- New 2024 Approved 4 Ways to Merge MP4 and MP3
- New In 2024, DVD Slideshow Builder Review and Tutorial
- How to Create Cooking Video Intro and Outro for YouTube Channel for 2024
- Updated Fast Method to Match Color in Photoshop for 2024
- New Easy Guide to Apply Slow Zoom Effects to Videos for 2024
- New Best 5 AI Music Video Examples and Makers to Make Them for 2024
- New Change Aspect Ratio of Video
- New Ideas That Help You Out in Converting AVI to GIF
- New Designed for You! Best Image (JPG/PNG) to GIF Converters for 2024
- Updated In 2024, Best 10 Tools To Make Quiz Videos
- How to Unlock Oppo Find N3 Flip PIN Code/Pattern Lock/Password
- In 2024, The 6 Best SIM Unlock Services That Actually Work On Your Vivo Y100i Device
- In 2024, How Can I Catch the Regional Pokémon without Traveling On Lava Storm 5G | Dr.fone
- 5 Ways to Restart Vivo T2 Pro 5G Without Power Button | Dr.fone
- Detailed guide of ispoofer for pogo installation On Honor 90 Pro | Dr.fone
- How to Turn Off Google Location to Stop Tracking You on Realme GT Neo 5 SE | Dr.fone
- In 2024, Can You Unlock Apple iPhone 13 After Forgetting the Passcode? | Dr.fone
- In 2024, 8 Best Apps for Screen Mirroring Itel S23 PC | Dr.fone
- In 2024, A Beginners Guide to Explain What 3D Animation Is
- In 2024, How to Reset Gmail Password on Nubia Red Magic 8S Pro+ Devices
- In 2024, Still Using Pattern Locks with Nubia Red Magic 8S Pro? Tips, Tricks and Helpful Advice
- In 2024, How to Change Vivo Y55s 5G (2023) Location on Skout | Dr.fone
- Fixing Foneazy MockGo Not Working On Honor 90 Lite | Dr.fone
- In 2024, Disabled Apple iPhone 14 Pro How to Unlock a Disabled Apple iPhone 14 Pro?
- 3 Best Tools to Hard Reset Tecno Spark 20 Pro | Dr.fone
- How To Enable USB Debugging on a Locked Infinix Hot 30i Phone
- In 2024, Full Guide to Bypass Nokia C210 FRP
- In 2024, How to Mirror Apple iPhone SE (2020) to PC via USB? | Dr.fone
- In 2024, iSpoofer is not working On Lava Agni 2 5G? Fixed | Dr.fone
- In 2024, PassFab iPhone 14 Backup Unlocker Top 4 Alternatives | Dr.fone
- Best Android Data Recovery - Retrieve Lost Photos from Redmi K70 Pro.
- In 2024, The Top 5 Android Apps That Use Fingerprint Sensor to Lock Your Apps On Vivo T2 Pro 5G
- In 2024, Removing Device From Apple ID For your iPhone 15 Pro
- In 2024, Three Ways to Sim Unlock OnePlus
- How To Use Special Features - Virtual Location On Oppo Find X6 Pro? | Dr.fone
- In 2024, How Do You Get Sun Stone Evolutions in Pokémon For Sony Xperia 5 V? | Dr.fone
- iPhone 14 Pro Asking for Passcode after iOS 17/14 Update, What to Do?
- 5 Hassle-Free Solutions to Fake Location on Find My Friends Of Realme 11 5G | Dr.fone
- In 2024, Forgot iPhone Passcode Again? Unlock Apple iPhone SE (2022) Without Passcode Now
- How to Downgrade Apple iPhone XS Max without Losing Data? | Dr.fone
- How To Pause Life360 Location Sharing For Honor X7b | Dr.fone
- In 2024, How To Unlock The iPhone 11 Pro Max SIM Lock 4 Easy Methods
- How to Watch Hulu Outside US On Xiaomi 13T | Dr.fone
- In 2024, How To Unlock Apple iPhone 13 mini 3 Ways To Unlock
- What are Location Permissions Life360 On Vivo S18e? | Dr.fone
- In 2024, How Do You Get Sun Stone Evolutions in Pokémon For OnePlus Nord 3 5G? | Dr.fone
- 4 Solutions to Fix Unfortunately Your App Has Stopped Error on Meizu 21 Pro | Dr.fone
- New What Is AI Voice? | Wondershare Virbo Glossary for 2024
- How to Bypass iPhone 12 mini Passcode Easily Video Inside
- Title: 2024 Approved
- Author: Chloe
- Created at : 2024-05-20 03:37:51
- Updated at : 2024-05-21 03:37:51
- Link: https://ai-editing-video.techidaily.com/2024-approved/
- License: This work is licensed under CC BY-NC-SA 4.0.
