

2024 Approved Are You Looking for Ways to Add Background to Green Screen Video Online? Worry Not, as in This Article; We Shall Discuss Using a Green Screen Background Adder in Filmora
Are You Looking for Ways to Add Background to Green Screen Video Online? Worry Not, as in This Article; We Shall Discuss Using a Green Screen Background Adder in Filmora
Versatile Video Editor - Wondershare Filmora
An easy yet powerful editor
Numerous effects to choose from
Detailed tutorials provided by the official channel
Video’s background is the most crucial part of video editing. When filming, the backgrounds cannot be more attractive with the natural background, so editors use background effects to change the background of the video and make it more appealing. Wondershare Filmora is a fantastic software to add background to a video without a green screen. The good news is that Filmora offers various tools to remove background from a video, add a background, add transition effects, and all these by using virtual reality to complete the task. It has several effects and themes and has tools to remove background effectively. Many editors are available in the market for background effects but with limitations. Filmora offers an effective way to add background without a green screen and with a green screen. You will also be able to add a background to the green screen photo online.
Let us discuss the finest tools available in Filmora to change the background easily and quickly. This article will concentrate on two methods to edit background.
● How to put a background on a video without a green screen.
● How to add background to video with green screen.
If you wonder how to add a background to a green screen in after effects, it involves a very long step and quality footage to remove the background.
In this article
01 [Add background to green screen video](#Part 1)
02 [Add background to video without a green screen.](#Part 2)
Part 1 Add background to green screen video
The green screen effect is the advanced feature in overlays. It makes the background of the clips transparent. If you want to add background to green screen video online, there are many websites available but always with some limitations in resolutions and quality while exporting the video. Filmora is a useful tool in video editing to create animatic and superimpose backgrounds like any jet craft or a bird flying. You can easily make these changes to the video using Filmora by using a green screen footage clip or a plain green screen in the background while creating the footage. We will focus on putting a background on a green screen in this part.
Let us discuss how to add background to green screen are pretty simple using Filmora.
Step1 Add Overlay clip to timeline
Select “Create New Project” to start the editing. At first, you have to choose both the overlay clip and background clip and add them to the timeline. You can either import from the library or drag the files to the timeline in the positions shown in the picture.
You can edit the overlay clip individually by adding animation, effects, filterers, mask frame, and blending modes (multiply, darken, or color burn). Let us move to the next step, how to put the background on the green screen.
Step2 Make a Green Screen
Let’s get into the first step to add background to the green screen video. In this part, you will be using a green screen to remove the background. So, import the green screen clips to the media library. Now, add the background green screen to the timeline above the video track as shown in the picture.

● Move the cursor to the green screen on the timeline and double-click on it.
● The settings box will appear on the left.
● You have to tick the Chroma key there.
The green screen effects will be applied automatically.

The video can be refined with many additional tools like Tolerance, Offset, and Alpha channel to make the video background clear. Once satisfied with the results, click on OK. Now that we have discussed how to add background to green screen video with the help of Filmora let’s now discuss how to add a background to a video without a green screen.
Part 2 Add background to video without a green screen
Let us learn how to add a background to a video without a green screen. In Filmora, there is a special effect called the Human segmentation effect to isolate people from the backgrounds without a green screen. All it takes is a few clicks. Once you remove the surround, you can add an image or a video clip to go well with your original video. Another unique feature is that after removing the background from the video clip, you can add it to the overlay of another video clip. It works well when it has a natural and single person in front of the camera.
Let’s discuss how to add background without a green screen.
Wondershare Filmora
Get started easily with Filmora’s powerful performance, intuitive interface, and countless effects Try It Free Try It Free Learn More about Filmora>

Step1 Import Media to Timeline
Import the video clip from the device. You can also drag the video clip from the timeline. You can use other effects from Filmora to make necessary changes like editing, cutting, trimming, filter and transition.

Step2 Adding Human Segmentation Effect
To see the options to add background to video without a green screen, go to Effects – AI Portrait, and you can see a list of all AI portrait effects here. You can see the human segmentation effect, drag and place it on the top of your video clip in the timeline.

Step3 Preview and Adjust
After the human segmentation effect, the people will be isolated separately from the background, shown in the picture. Double click on the effects in the timeline where you can edit, adjust, thickness, feather, and preview.

Step4 Replace and change video background
If you wish to change the background, import an image or video below your main track. Now, that is how to add a background without a green screen.

Thus, you learned to create your green screen backgrounds and add a background to a green screen video using the favorite video effect software, Filmora.
Conclusion
Thus, in this guide, you learned how to add a background to a video without a green screen, and we hope this will be useful. You can find multiple software online for adding a background to a green screen with additional background effects. However, the Human segmentation available in Filmora is the easiest way to change scenes and clone people. With support to over 100 video tracks, Filmora is by far the best tool that allows you to change the setting with and without a green screen.
Video’s background is the most crucial part of video editing. When filming, the backgrounds cannot be more attractive with the natural background, so editors use background effects to change the background of the video and make it more appealing. Wondershare Filmora is a fantastic software to add background to a video without a green screen. The good news is that Filmora offers various tools to remove background from a video, add a background, add transition effects, and all these by using virtual reality to complete the task. It has several effects and themes and has tools to remove background effectively. Many editors are available in the market for background effects but with limitations. Filmora offers an effective way to add background without a green screen and with a green screen. You will also be able to add a background to the green screen photo online.
Let us discuss the finest tools available in Filmora to change the background easily and quickly. This article will concentrate on two methods to edit background.
● How to put a background on a video without a green screen.
● How to add background to video with green screen.
If you wonder how to add a background to a green screen in after effects, it involves a very long step and quality footage to remove the background.
In this article
01 [Add background to green screen video](#Part 1)
02 [Add background to video without a green screen.](#Part 2)
Part 1 Add background to green screen video
The green screen effect is the advanced feature in overlays. It makes the background of the clips transparent. If you want to add background to green screen video online, there are many websites available but always with some limitations in resolutions and quality while exporting the video. Filmora is a useful tool in video editing to create animatic and superimpose backgrounds like any jet craft or a bird flying. You can easily make these changes to the video using Filmora by using a green screen footage clip or a plain green screen in the background while creating the footage. We will focus on putting a background on a green screen in this part.
Let us discuss how to add background to green screen are pretty simple using Filmora.
Step1 Add Overlay clip to timeline
Select “Create New Project” to start the editing. At first, you have to choose both the overlay clip and background clip and add them to the timeline. You can either import from the library or drag the files to the timeline in the positions shown in the picture.
You can edit the overlay clip individually by adding animation, effects, filterers, mask frame, and blending modes (multiply, darken, or color burn). Let us move to the next step, how to put the background on the green screen.
Step2 Make a Green Screen
Let’s get into the first step to add background to the green screen video. In this part, you will be using a green screen to remove the background. So, import the green screen clips to the media library. Now, add the background green screen to the timeline above the video track as shown in the picture.
● Move the cursor to the green screen on the timeline and double-click on it.
● The settings box will appear on the left.
● You have to tick the Chroma key there.
The green screen effects will be applied automatically.
The video can be refined with many additional tools like Tolerance, Offset, and Alpha channel to make the video background clear. Once satisfied with the results, click on OK. Now that we have discussed how to add background to green screen video with the help of Filmora let’s now discuss how to add a background to a video without a green screen.
Part 2 Add background to video without a green screen
Let us learn how to add a background to a video without a green screen. In Filmora, there is a special effect called the Human segmentation effect to isolate people from the backgrounds without a green screen. All it takes is a few clicks. Once you remove the surround, you can add an image or a video clip to go well with your original video. Another unique feature is that after removing the background from the video clip, you can add it to the overlay of another video clip. It works well when it has a natural and single person in front of the camera.
Let’s discuss how to add background without a green screen.
Wondershare Filmora
Get started easily with Filmora’s powerful performance, intuitive interface, and countless effects Try It Free Try It Free Learn More about Filmora>
Step1 Import Media to Timeline
Import the video clip from the device. You can also drag the video clip from the timeline. You can use other effects from Filmora to make necessary changes like editing, cutting, trimming, filter and transition.
Step2 Adding Human Segmentation Effect
To see the options to add background to video without a green screen, go to Effects – AI Portrait, and you can see a list of all AI portrait effects here. You can see the human segmentation effect, drag and place it on the top of your video clip in the timeline.
Step3 Preview and Adjust
After the human segmentation effect, the people will be isolated separately from the background, shown in the picture. Double click on the effects in the timeline where you can edit, adjust, thickness, feather, and preview.
Step4 Replace and change video background
If you wish to change the background, import an image or video below your main track. Now, that is how to add a background without a green screen.
Thus, you learned to create your green screen backgrounds and add a background to a green screen video using the favorite video effect software, Filmora.
Conclusion
Thus, in this guide, you learned how to add a background to a video without a green screen, and we hope this will be useful. You can find multiple software online for adding a background to a green screen with additional background effects. However, the Human segmentation available in Filmora is the easiest way to change scenes and clone people. With support to over 100 video tracks, Filmora is by far the best tool that allows you to change the setting with and without a green screen.
Create True 3D Text Effects Using After Effects
Every video creator wants to make their videos eye-catching and get the message delivered to the viewers properly. If you have regular graphic elements and texts, your video is not going to be as engaging as expected. That is why video creators always try to include trending and attention-grabbing effects and animations in the video. There is no doubt that 3D animations for texts and titles look really amazing.
Different video editors have different 3D text animations and effects that you can apply to the text on your video and get instantly noticed by your viewers. You can apply 3D text animation on premium video editors like After Effects as well as apply 3D text effect online. We will illustrate how to create stunning 3D text animations with different video editors in simple steps.
Part 1. Create True 3D Text Effects using After Effects
After Effects is a premium video editor where you can create true 3D text effect from scratch. First of all, you need to create a new composition and add your text to your video. You have to enable 3D option for the text and add depth and lighting texture to get 3D effect. Therefore, you should first create 3D text effect and thereafter, animate 3D text as per your preference. Here are the steps to create 3D text After Effects easily.
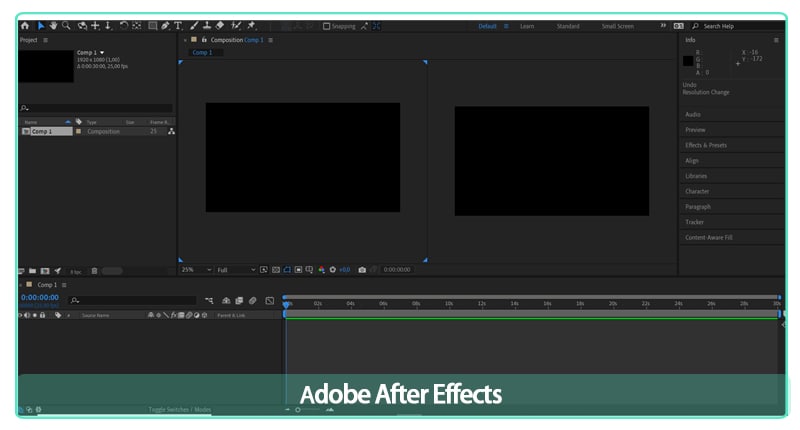
Step1Launch After Effects and click on New Composition from Project section. Set the different parameters on Composition Settings and click on Ok button.

Step2Click on Type Text icon located at the top bar and type a text on the video. After typing the text, go to the Character panel to the right and adjust the style of the text.

Step3You have to enable 3D option for the text from the 3D icon on text layer. Under text layer, click on Transform and use X-Y-Z rotation options to rotate the text from 3D perspectives.

Step4Similarly, click on Geometry Options and add depth to your text to get 3D effect on your text.

Step5You have to create a new Camera layer by right-clicking Timeline and go to New>Camera option. You will get Camera Settings window to adjust the parameters and click on Ok button.

Step6Use the Orbit Tool to rotate the text to get the true 3D effect visible on the screen.

Step7You need to get the lighting and shading for your 3D text. Right-click on Comp window and go to New> Light. Adjust the parameters from Light Settings window.

Step8You can adjust Transform and Light Options from Comp window under Light layer for better effect.

You have successfully created 3D text effect on After Effects. You will now illustrate how to animate the 3D text.
Part 2. Create 3D Camera Animation
You have prepared your text with 3D effect, and you can have multiple 3D texts on your video. It is time to animate those 3D texts so that the 3D effect becomes more prominent and the text instantly grabs attention. You do not have to create animation from scratch as there are 3D animation presets available. All you need to do is apply them to your 3D texts and they will start to animate automatically. Besides, you can create 3D camera animation to show the texts from different camera perspectives. Here are the steps to use 3d animated text generator on After Effects.
Step1Once you have created your 3D text effect, go to Effects & Presets panel.
Step2Go to Text> 3D Text and you will see all the different 3D animation presets that you can apply.

Step3Drag and drop your desired 3D animation directly to 3D text layer.
Step4If you want camera animation on your 3D text, select the Camera layer you already created. Press C to get the Orbit tool to get the starting position of the 3D text. You can also use Dolly tool and Pan & Zoom tool for adjustment.

Step5Now add a keyframe on Position option from Transform option to mark the starting point of the animation. Similarly, add another keyframe where you want the animation to end.

Step6Use the Orbit tool, Dolly tool and others to position 3D text as per how you want the animation to end.

Part 3. Make Stunning 3D Text Effects Online
Since adding 3D effects to text is a rather heavy task in video editing, there are many who think that you cannot add 3D text effects without a dedicated video editor application. But there are many renowned online video editors available where you can create amazing 3D text effects and animations with a few clicks.
In fact, you can use 3d animated text generator online to get any desired text in 3D mode. We recommend FlexClip full-featured video editor for 3D text animation online. You can select from available 3D text templates and apply different motion animations. Here are the steps to follow.
Step1Open your web browser and “flexclip.com/editor/app”. Go to Media tab and import your video and add it to the Timeline.

Step2Go to Text and click on See All for Text Styles. Scroll down and check out the 3D text templates available. Click on any desired template to apply to your video.

Step3Double-Click on 3D text present on Viewer and edit the style and text as per your preference.

Step4Click on three-dot icon at the top of Viewer and click on Motion option.

Step5Select any desired motion effect and you will see your 3D text animation on Viewer when you play the video.

Part 4. Alternative Way to Create 3D Text Animation
When you use an online video editor to create 3D text animation, there will have limited 3D text effects. We can use After Effects to create 3D text animations from scratch. But you may find the steps slightly complicated and we recommend Filmora as the best alternative way to create 3D text animation. Filmora is a premium video editor that is equally popular among amateurs and professionals. Here are the steps to create 3D text animations using Filmora in simple steps.
Step1Download and install Filmora on your computer. The video editor is available for Windows and Mac users. Click on New Project button on welcome screen or go to File> New Project option.

Step2Go to File> Import Media > Import Media Files to import the video file. Alternatively, drag and drop the video file directly into Project Media folder. Put the video file into Timeline to get started.

Step3Go to Titles tab and go to left panel, click on Titles option. Search “3D” in the search field and check out all 3d text effects and animations available.

Step4Drag and drop 3D text templates on Timeline. You should place the effect on the Timeline where you want it to appear on the video. You can also adjust the duration of the effect as per your requirements.

Step5Double-click on the text layer to customize the text and style. Play the video and click on Export button to save the edited 3D text video.

Conclusion
There is no doubt that if you include 3D text effects and animations in your video, your video will definitely stand out. The viewers will find the video engaging and understand the message that the video creator wants to get across. We have illustrated how to make stunning 3D text animations. You can also use 3d text generator online. But we recommend Filmora as the best and the easiest video editor to create 3D text animations instantly.
Free Download For Win 7 or later(64-bit)
Free Download For macOS 10.14 or later
Adobe After Effects Review
Make cinematic films, movies, intros, and transitions. Delete people from clips. Start fires or create a foggy weather. With Adobe After Effects, the industry-standard motion graphics and visual effects software, you are able to take any idea and make it come to life. Animate titles, credits, and lower thirds. Begin editing from scratch or with presets available. Combine photos and video footage to create anything you can think of.
Choose amazing effects from hundreds of options, remove unwanted parts from the frame, people or objects, and make VR videos to push your audience into the action. This software lets professionals configure keyframes, allow them to create compositing operations. Features of Adobe After Effects include a content library, digital asset management, video rendering, data import/export, and much more. In this article we will give you a brief overview of what After Effects is, what it’s used for and by who and the overall experience!
With that said, let’s get started!
1. Speed and Stability
When talking about speed and stability, After Effects has the latest release packed with improvements. All the developers have focused themselves on speed and also performance. The team at Adobe have worked very hard to make this application more responsive and when we go along in this article, that can be seen in many ways
The main improvement which is immediately clear to all users, is the renewed preview playback optimization. What we noticed is that After Effects is creating the ram preview for your projects a lot faster. However, while working with the software for this article, we did find the user interface to be more responsive, the playback is way smoother, so is it a lot more stable overall.
While using shape layers, there was a significant improvement. A few expressions are a lot faster. This alone is worth upgrading to the latest version of After Effects.

2. User Interface
The After Effects interface is constructed up of four main parts. The Timeline panel, the Project panel, the Composition panel and the Effects panel.
The Timeline Panel
In the Timeline panel, you edit all the footage and clips to create your rough cut. You can find the Timeline panel on the bottom of the workspace.
The Project Panel
It’s pretty straightforward that in the Project panel you import your footage and create your project. This is located on the top left of the standard After Effects workspace.
The Composition Panel
The Composition panel is where you will see the final product. This is located in the middle of your workspace.
The Effects Panel
In order to make creative changes to your video, use the preview, audio, effects, and Preset Panels. These panels are located on the upper right area of your workspace, each one also has its dropdown.
3. Learning Curve
The learning curve for After Effects depends on your background, the best way to find out if you like it is starting a free trial. Go through some tutorials online or paid courses. You’ll also want to spend time with the User Guide. The Search Help field in the top right corner provides you an easier search for answers to most questions that you have. Speaking of YouTube and online learning, most of the video tutorials you will find have been created by people that are experienced in After Effects and know their way around it.
4. VFX
There’s a time-period when video editors require strengthening their skills, calling it imperative software for improving editing skills is nowhere near an exaggeration. it really helps prospective professionals improve their learning experience through visual effects, camera tracking, text animation, motion tracking, color grading, etc. All of these methodologies do help in improving the VFX learning process in the long run.
Video editing happens to be a crucial part of film production. Making videos in a fantastic process can indulge in building professional videos via motion graphics animation. This is where Adobe After Effects become an excellent learning tool.
5. Motion Graphics
Motion graphics can sound quite scary. It’s a new term for a specific genre of animation. Motion graphics is the intersection between animation and graphic design. These are purpose-driven visual aspects with the goal of showing information to the viewer through the use of animated graphics or text. Sometimes they include voice-overs narrating what the text or graphics are showing. Where it gets a little complex is that the more popular the term motion graphics becomes, the more people are misaligning animations to it. They need to represent information and illustrate the idea to the viewer clearly, so they do that using animation and motion graphics.
6. Titles and Outros
Adobe released a new combination of features for you. For Adobe Stock: Graphics templates. Those pre-made templates give you a super smooth way to discover new motion graphics within Premiere Pro, without needing to spend time creating titles, overlays, or animations from scratch. The world has digitalized, and videos often need visual aspects such as titles, lower thirds, to present information. The templates not only assist video editors increase the quality of the content by showing certain information, but they also give a strong visual touch to keep the viewer engaged throughout the video. The audience nowadays is a lot more sophisticated, meaning that motion graphics are a necessity in a driven media world.
Motion Graphics templates are valuable for video editors of all levels. For the beginning content creators, the templates offer great quality, ready-made footage to help their creative goal. They can explore and work on their skills. Motion graphics that are pre-made are an excellent way to express the vision and express inspiration to new opportunities.
So now that you are aware of what After Effects templates are, we can move on to the actual workflow, why it is important, and how to use it as efficient as possible.
7. Workflow
Whether you are using Adobe After Effects to create motion graphics, or composite realistic visuals, you usually follow the same workflow, you may repeat the process of adjusting layer properties, editing, and compositing until everything looks good. You can change any property of any element, such as position, opacity and size. Make use of motion tracking to stabilize footage so that it follows the motion from another clip, and so much more!
8. Rendering Speed
When it comes to exporting your project in After Effects, you don’t need to buy an expensive workstation. You can speed up your rendering process from your own laptop without investing too much and by using the following tips we have for you below!
Tip #1: Enable Multiprocessing
What exactly is multiprocessing? That is when After Effects uses multiple cores from your CPU to export multiple frames at once. If your processor has one or more cores, you can enable this feature to reduce your rendering time. We want to mention that you need to check whether or not this option is turned on. Once enabled, you’ll see a great decrease in export time.
To enable Multiprocessing, navigate to Preferences > Memory & Multiprocessing. Then you click the check box next to ‘Render Multiple Frames Simultaneously’ and remember also to adjust the settings that you need.
Tip #2: Optimize Your RAM Usage
The RAM memory inside your workstation can be used to write and read data at a lot higher speeds than regular hard drives and portable drives. Configuring your RAM in a system is one of the easiest upgrades for better performance. Giving you affordable solutions for both desktop and laptop systems, the RAM memory upgrade does not require a lot of knowledge. The more RAM you allow applications to use, the higher the performance you will get out of it.
It also shows a noticeable increase in rendering speed. When the export time in your work is longer than needed, look at your RAM memory and see if you can make the necessary changes or upgrades.
Tip #3: Use the Media Encoder
Let’s talk about the Media Encoder. It’s the software that comes up with Adobe Creative Cloud products such as After Effects and Premiere Pro to simplify the export process. You can easily render your project from After Effects to Adobe Media Encoder and begin the project render process from that point on. The Media Encoder will increase your rendering performance and will significantly decrease rendering time.
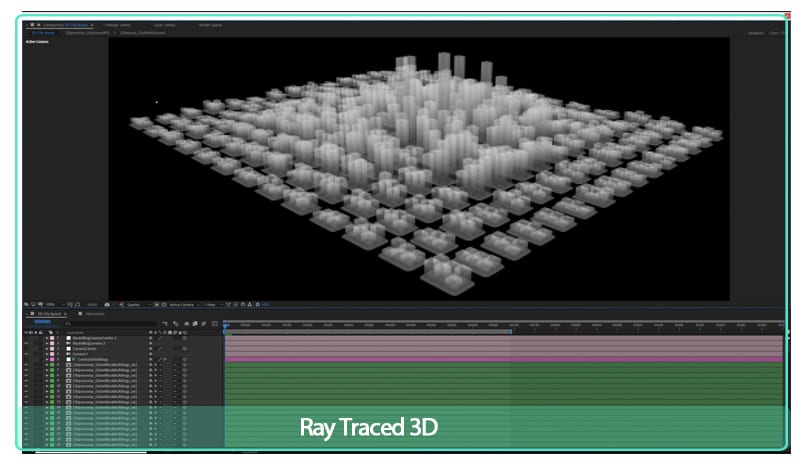
Tip #4: Disable Ray-Traced 3D
The included After Effects Ray-Traced 3D feature enables you to produce 3D models within After Effects without any struggle. Calculating all the motions and visual graphics is such a heavy process for your workstation. When you disable raytracing, you will get a faster export time. By looking that ‘Classic 3D’ is checked instead of ‘Ray-Traced 3D’ from your composition preferences, you can speed your rendering speed up to 50%. Isn’t that incredible?
Tip #5: Activate GPU Exporting with Cuda Acceleration
Exporting your videos with GPU rather than CPU will increase the efficiency of your render process. The export length will decrease a whole lot when you activate Mercury GPU Acceleration, also known as ‘CUDA’ from the ‘Project Settings’.
After Effects doesn’t really require CUDA features from a special kind of Nvidia GPU. Only the GPU accelerated 3D renderer, that is based on the raytracing algorithm, requires that. The other GPU features are running on any GPU that meets the basic minimums, including Intel and AMD GPUs.
9. System Requirements for Windows
These are the minimum specifications needed to use After Effects on PC:
OS: Windows 10 (64-bit) versions 1909 and later, or Windows 11
CPU: Intel or AMD Quad-Core Processor (Intel i5 and i7 will do the job)
RAM: 16 GB
Monitor resolution: 1280 x 1080
An internet connection
Free storage: 15 GB
GPU: Minimum 2 GB of VRAM
10. System Requirements for macOS
OS: macOS 10.13 or later
RAM: 16 GB
CPU: Intel and Apple Silicon (Rosetta2 Supported) Quad-Core Processor
GPU: 2GB of VRAM
Monitor resolution: 1440×900
Free storage: 15 GB
An internet connection
11. Keyboard Shortcuts
You can work visually when you configure your keyboard shortcuts with the visual keyboard shortcut editor within After Effects. You can use the keyboard user interface to show the keys that have been assigned to shortcuts, the available keys for assignment, and edit assigned shortcuts to make your workflow even easier.
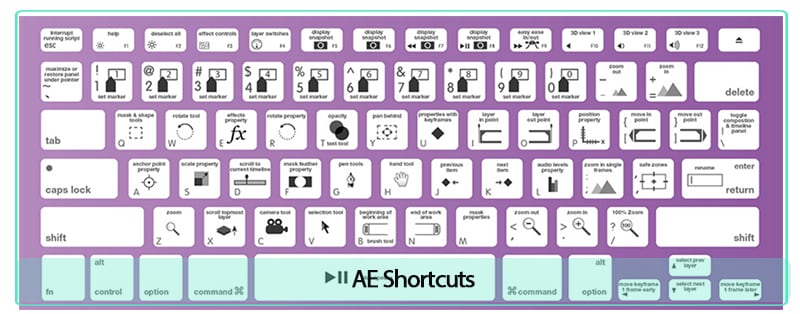
The keyboard layout:
This is a representation of your physical keyboard where you can see which keys have been assigned a shortcut, and which are available.
Command list:
The list displays all the commands that can be assigned shortcuts.
Key modifier list:
This list shows you all the modifier combinations and assigned shortcuts associated with the key you select on your physical keyboard.
After Effects does not allow you to reassign the following keys:
- A
- AA
- E
- EE
- F
- FF
- L
- LL
- M
- MM
- P
- PP
- R
- RR
- S
- SS
- T
- TT
- U
- UU
12. Should You Buy It?
Well first, you cannot buy After Effects, Premiere Pro or other software from Adobe. You have to rent them by paying monthly. After Effects is primarily a compositing and graphics software. Premiere is primarily a video editing program. In the case of After Effects and Premiere Pro, it’s not really an either/or. They’re both software with different purposes. After Effects is a lot more powerful and essentially showcases most of Premiere’s functionality, but according to our experience, the Premiere Pro interface and workflow is way more superior for video editing.
Premiere Pro is essentially built around its timeline, the region where you cut your video clips and drag and place them into your appropriate sequence. Hollywood filmmakers and professional YouTube content creators are using Premiere Pro to edit high-performing content and award-winning films. The software is very intuitive and easy for beginners to start with.
Are going to work with After Effects to create an income? Or are just going to use it for a hobby? It’s crucial to mention that question because Adobe After Effects is not something that is cheaply available. You will be investing much money on the program, and if you are working to use the software, paying a good amount, and earning nothing in return, then you might want to shift to another alternative which would cost you less. For instance, let’s assume you are using the application to earn an income, and have a few low-paying clients. In such a situation, you will have to rethink your options of software and analyze whether what you are paying in comparison to what you are getting is enough for you or not. We all are different individuals and have different preferences. Once we can see what is more important to us, or what is our need at this moment, then we will be able to judge the worth of purchasing Adobe After Effects better.
Are you going to use After Effects to earn an income? Or are just using it as a hobby? It is very important to address this question because Adobe After Effects is not something cheaply accessible. You will be investing a lot of money into this software, if you are using the software while paying a good amount and earning nothing in return yet, then you could shift to a different alternative which will cost you a lot less. Let’s say you are using After Effects to earn an income and have some low-paying work. In that case, you will have to reconsider your options of video editing software and look at whether what you are paying in comparison to what you are getting is possible for you. When we can see what is more important to us, we will be able to see the worth of buying After Effects.
Did you previously use After Effects or are you new to the program? The return that you will get using Adobe After Effects, depends on how good you know how to work with the options, functions and features in the software.
The Bottom Line
So summing it all together, Adobe After Effects takes care of all your assets and creates a final product, considering that After Effects is usually an asset-generation tool. Most video editors complete their projects in After Effects non-stop. It’s excellent for making visual videos come to life.
AE version 22.3 is very impressive. Giving you a wealth of new features created to make VFX editing a lot faster and easier. Offering new features on a regular basis, improving their subscription model making it more attractive. Especially if you’re a professional editor and designer.
Once you get comfortable with Adobe After Effects, you learn how to dynamically combine After Effects compositions to your Premiere projects. You are able to access both assets at the same time if neededFor Win 7 or later(64-bit)
Free Download For macOS 10.14 or later
Top 20 Slideshow Makers for Win/Mac/Online Review
Top Slideshow Makers for WinMacOnline Review
An easy yet powerful editor
Numerous effects to choose from
Detailed tutorials provided by the official channel
To create slideshow, multiple tools and elements are required. Generally, people look for a tool that’s easy to use and that’s rich in features. Even if such a tool is found, the immediate problem is the operating system. Not every system is compatible with Windows or Mac.
Here, this article is all about cutting the efforts to search for the best app for slide show making. All the top tools are listed in this single article that can serve the purpose for Windows and Mac users along with online users.
In this article
01 [Top 10 Slideshow Makers for Windows](#Part 1)
02 [Top 5 Slideshow Makers for Mac](#Part 2)
03 [Top 5 Online Slideshow Makers](#Part 3)
Part 1 Top 10 Slideshow Makers for Windows
01Adobe Spark
Adobe Spark or Adobe Creative Cloud Express is a top-notch software for creating a slideshow in Windows 8.1 or newer versions. As Adobe is always been a promising platform to create unique designs, with this application as well, users can flaunt their thoughts through different features.

● A simple UI assists beginners to understand all the functionalities before using it without much hassle. It also increases the speed to make a slide show with simple yet efficient tools.
● It is totally compatible with other Adobe products, making it flexible for any kind of use.
● You can create slide show on your PC without any watermark and with different existing templates and elements.
02Movavi Slideshow Maker
Movavi brings some unique features to create a slideshow with enhanced video quality and modern tool arrangement for all of the people who love to create a better presentation. Even with a seamless platform, all the necessary tools are arranged in a familiar pattern to make it comfortable.

● Full slideshow wizard is available with Movavi slide show maker to assist the beginners to create a quality presentation.
● With the screen recording feature, you can add live demonstration in the presentation with 150+ filters and visual effects.
● This slide show app includes multiple ready-made templates, music functionalities, etc. for a professional slideshow-making setup.
03MiniTool MovieMaker
MiniTool MovieMaker is a comparatively new tool as a free slideshow maker for all Windows users. It consists of quirky features like cartoon clips, animated elements, etc. along with modern transition and video processing tools.

● As this is a new platform, the latest features are added on frequently and the users can apply them for an up-to-the-minute slideshow. From trimming a video to adding a transition to a photo slideshow, everything is available on a single software.
● Even if you don’t know anything about video editing or creating a slideshow, this tool would guide you through everything with a simple arrangement and a wide range of options.
● You can export a video in different formats like MP4, MOV, WMV, etc., and get watermark-free projects.
04PhotoStage Slideshow Software
To make a slide show quickly, you can go with PhotoStage Slideshow software without any doubt. This software is not only useful for beginners but has exciting features for intermediate video editors. This slideshow app is compatible with Windows XP, Vista, 7, 8, 8.1, 10, and 11.

● There is a slideshow wizard feature to add themes, transitions, and music to the slides easily.
● Built-in DVD HD video authoring and YouTube sharing are available for wide usability of the slideshows for multiple purposes.
● Different audio tools and photo optimization tools are available to add a classy look to the presentation.
05Icecream Slideshow Maker
For the most simple yet efficient slideshow maker online, choose Icecream software that comes with a very beginner-friendly interface and options. For learning video editing and create a slideshow This software can be a good tool to start with. However, the features are very minimum and the professional creators might not find it very exciting. But for beginners or students, this would be a great choice.

● It supports various audio formats including MP3, WAV, WMA, and TIFF. Also, image formats including JPG, JPEG, and PNG are supported.
● Along with YouTube uploading, DVD transfer, cloud storage (Dropbox or Google Drive) is supported.
● slideshow is supported in this free slide show maker.
06Kizoa
It’s become a hassle often to find the suitable aspect for a slideshow for different screens like laptops, TV, or smartphone. Kizoa slide show maker is eliminating this problem with 7 different aspect ratios for the slideshows. And this can be an effective advantage when making a slideshow for any professional purpose.

● This app for slide show is available for Windows 7 or higher versions till Windows 10. There’s not been an update till now for Windows 11.
● Bulk collection of 2D and 3D transitions, effects, and GIFs are available to use in the slides as per the requirement.
● This software is intended to create slideshow only and all the features are added according to that unlike any slideshow creator cum video editor app.
07Magix Photostory Deluxe
For a high-quality professional slideshow maker online, Magix Photostory Deluxe is a good option. This editor has almost 1,500 built-in effects, 200+ decorative elements, and 100+ pre-designed templates to assist users with the slideshows in lesser time.

● Built-in DVD and Blu-ray burning features along with a 4K resolution feature are present with this application.
● Unique camera tracking and zooming features are available to add more latest elements to the slideshow.
● All-in-one platform to create slideshow, edit photos, and videos.
08Slideshow Maker
The name in itself defines this as one of the best slideshow makers with high-quality results. 4K Slideshow maker is available for Windows 7 and higher versions. Those who don’t want to compromise with the video resolution in the slideshow can try this slideshow app. However other features like tool arrangement and UI is slightly poor compared to other software.

● This software supports different file formats and makes this platform flexible for multiple uses.
● All the projects are saved in high resolution, i.e., 1080p or 4K.
09SmartSHOW 3D
SmartSHOW 3D is an efficient free slideshow maker for high-quality, 3D slideshows. This is another beginner-friendly software with multiple tools and effects. Some latest addition like pan & zoom effect creation, the audio waveform in the music section, and customized picture frames would help to add extra effect to the slideshow.

● free templates and 200+ free music tracks are available in this free slide show maker to enhance the whole presentation properly.
● You can also make mobile-optimized videos using the SmartSHOW 3D editor.
● Add a soundtrack to the slideshow and use existing templates in the free trial before buying the subscription.
● Multiple formats are supported to download the project after creating a slideshow.
Part 2 Top 5 Slideshow Makers for Mac
01PowerDirector
PowerDirector is one of the best free slideshow makers on Mac systems, enabling the pro features of the storyboard, timeline, and slideshow interfaces. There’s a wide capability of visual effects that can boost the whole quality of the slideshow in no time.

02iMovie
iMovie slide show maker is available for both macOS and iOS systems, to let the creators make some elegant and high-resolution slideshows. It includes professional-looking themes and interfaces to add a classy look to the whole presentation. It’s simple for beginners as there’s no complicated tool arrangement in the UI.

03Photostage
Photostage is a complete package for slideshow creation, including the seamless options for photo arrangement, special effects, audio set-up, etc. For beginners, it might be a bit confusing but with time, it will be easier to use. This free slide show maker is equally compatible with both Windows and Mac, unlike much other software.

04Videopad
Videopad is another top slideshow maker on Mac systems that has 50+ transition effects, third-party plugin support, and all popular file format compatibility. The slides would be made as with a movie effect on this platform with various latest templates and features.

05Keynote
For real-time collaboration and PowerPoint features, Keynote would be the best choice to create slide show. It has the integration with Adobe Photoshop which extends the creativity range more. You can also find an in-built large library for pre-made templates to apply in the slideshow. However, for beginners, Keynote can a be hurdle.

Part 3 Top 5 Online Slideshow Makers
To be independent of any system, users might also want to make slideshow online. To support this choice, the following five best slideshow creators are mentioned.
01Canva
Canva is a popular online slide show maker that has everything you need to make a perfect presentation. From various templates to elements, graphics to custom frames, special social media templates, and versatile file formats- the free version itself has many features to serve.

02Animoto
With an user-friendly interface and quick processing, Animoto is a favorite platform to make slideshow online. However, there is a problem with the watermark in some cases. You can automatically apply any modification to all the sections by applying the filters in one section. Note that, there’s no free subscription with this platform.

03FlexClip
Flexclip is a beginner-friendly online slideshow maker with numerous templates and assets to choose from. In the free version, you can download a video in 480p only. Also, there’s no undo button for slideshow creation. So, you need to be sure about any modification in this editor.

04Kapwing
Kapwing is a multipurpose online free slideshow maker for intermediate users. Different video editing tools are available along with subtitle and AI subtitle support. Note that, the content in free version is public and cannot be stored for more than 7 days.

05Visme
Visme is a quick slideshow maker with five easy steps to master. Companies like IBM and Accenture use Visme to create slideshows and infographics. Undoubtedly this can be a perfect pick for seamless, professional slideshow cration.

How to use Filmora?
Filmora is all-in-one software to create slide show for literary any purpose, in any operating system, providing all the features a creator might need while making a perfect slideshow. A slideshow can be for academic or professional purposes, to decorate some beautiful moments, or to create something unique. And for every separate aim, different tools and features are required in a slideshow maker. To fulfil all such requirements with the latest tools, Filomora has a versatile platform.
As in this article, we have already mentioned some of the best slideshow makers, you may find some restrictions like system boundaries, not being beginner-friendly, or missing the latest features in the free slideshow makers. That’s why the best possible solution is presented here with all the following advantages.
Advantages of Wondershare Filmora Video Editor Slideshow Maker:
● This software is compatible with both Windows (7 or later versions) and Mac OS (10.12 or later versions), giving flexible usability to all the slideshow enthusiasts.
For Win 7 or later (64-bit)
For macOS 10.12 or later
● It takes lesser time to create a slideshow in Filomra using the top-notch transitions and effects. Also, there’s a split-screen option to make a slideshow more efficiently.
● All the popular file formats are supported including images, audio, and video. And, it’s also easy to upload a project on any social media directly from Filmora.
● Numerous motion effects, titles, filters, effects, and overlays are available for free in this slide show app.
● The built-in audio library provides suitable music with the slideshows to make it better as a complete presentation.
● Ending Thoughts →
● This article consists of all the top slideshow makers with their features to choose the most suitable one without any doubt.
● Suggestions are available both for Windows and Mac in the case of the slideshow creators.
● You can go for any of this software based on your requirements, editing experience, and system compatibility. Gradually, the best slideshow can be created in no time.
To create slideshow, multiple tools and elements are required. Generally, people look for a tool that’s easy to use and that’s rich in features. Even if such a tool is found, the immediate problem is the operating system. Not every system is compatible with Windows or Mac.
Here, this article is all about cutting the efforts to search for the best app for slide show making. All the top tools are listed in this single article that can serve the purpose for Windows and Mac users along with online users.
In this article
01 [Top 10 Slideshow Makers for Windows](#Part 1)
02 [Top 5 Slideshow Makers for Mac](#Part 2)
03 [Top 5 Online Slideshow Makers](#Part 3)
Part 1 Top 10 Slideshow Makers for Windows
01Adobe Spark
Adobe Spark or Adobe Creative Cloud Express is a top-notch software for creating a slideshow in Windows 8.1 or newer versions. As Adobe is always been a promising platform to create unique designs, with this application as well, users can flaunt their thoughts through different features.
● A simple UI assists beginners to understand all the functionalities before using it without much hassle. It also increases the speed to make a slide show with simple yet efficient tools.
● It is totally compatible with other Adobe products, making it flexible for any kind of use.
● You can create slide show on your PC without any watermark and with different existing templates and elements.
02Movavi Slideshow Maker
Movavi brings some unique features to create a slideshow with enhanced video quality and modern tool arrangement for all of the people who love to create a better presentation. Even with a seamless platform, all the necessary tools are arranged in a familiar pattern to make it comfortable.
● Full slideshow wizard is available with Movavi slide show maker to assist the beginners to create a quality presentation.
● With the screen recording feature, you can add live demonstration in the presentation with 150+ filters and visual effects.
● This slide show app includes multiple ready-made templates, music functionalities, etc. for a professional slideshow-making setup.
03MiniTool MovieMaker
MiniTool MovieMaker is a comparatively new tool as a free slideshow maker for all Windows users. It consists of quirky features like cartoon clips, animated elements, etc. along with modern transition and video processing tools.
● As this is a new platform, the latest features are added on frequently and the users can apply them for an up-to-the-minute slideshow. From trimming a video to adding a transition to a photo slideshow, everything is available on a single software.
● Even if you don’t know anything about video editing or creating a slideshow, this tool would guide you through everything with a simple arrangement and a wide range of options.
● You can export a video in different formats like MP4, MOV, WMV, etc., and get watermark-free projects.
04PhotoStage Slideshow Software
To make a slide show quickly, you can go with PhotoStage Slideshow software without any doubt. This software is not only useful for beginners but has exciting features for intermediate video editors. This slideshow app is compatible with Windows XP, Vista, 7, 8, 8.1, 10, and 11.
● There is a slideshow wizard feature to add themes, transitions, and music to the slides easily.
● Built-in DVD HD video authoring and YouTube sharing are available for wide usability of the slideshows for multiple purposes.
● Different audio tools and photo optimization tools are available to add a classy look to the presentation.
05Icecream Slideshow Maker
For the most simple yet efficient slideshow maker online, choose Icecream software that comes with a very beginner-friendly interface and options. For learning video editing and create a slideshow This software can be a good tool to start with. However, the features are very minimum and the professional creators might not find it very exciting. But for beginners or students, this would be a great choice.
● It supports various audio formats including MP3, WAV, WMA, and TIFF. Also, image formats including JPG, JPEG, and PNG are supported.
● Along with YouTube uploading, DVD transfer, cloud storage (Dropbox or Google Drive) is supported.
● slideshow is supported in this free slide show maker.
06Kizoa
It’s become a hassle often to find the suitable aspect for a slideshow for different screens like laptops, TV, or smartphone. Kizoa slide show maker is eliminating this problem with 7 different aspect ratios for the slideshows. And this can be an effective advantage when making a slideshow for any professional purpose.
● This app for slide show is available for Windows 7 or higher versions till Windows 10. There’s not been an update till now for Windows 11.
● Bulk collection of 2D and 3D transitions, effects, and GIFs are available to use in the slides as per the requirement.
● This software is intended to create slideshow only and all the features are added according to that unlike any slideshow creator cum video editor app.
07Magix Photostory Deluxe
For a high-quality professional slideshow maker online, Magix Photostory Deluxe is a good option. This editor has almost 1,500 built-in effects, 200+ decorative elements, and 100+ pre-designed templates to assist users with the slideshows in lesser time.
● Built-in DVD and Blu-ray burning features along with a 4K resolution feature are present with this application.
● Unique camera tracking and zooming features are available to add more latest elements to the slideshow.
● All-in-one platform to create slideshow, edit photos, and videos.
08Slideshow Maker
The name in itself defines this as one of the best slideshow makers with high-quality results. 4K Slideshow maker is available for Windows 7 and higher versions. Those who don’t want to compromise with the video resolution in the slideshow can try this slideshow app. However other features like tool arrangement and UI is slightly poor compared to other software.
● This software supports different file formats and makes this platform flexible for multiple uses.
● All the projects are saved in high resolution, i.e., 1080p or 4K.
09SmartSHOW 3D
SmartSHOW 3D is an efficient free slideshow maker for high-quality, 3D slideshows. This is another beginner-friendly software with multiple tools and effects. Some latest addition like pan & zoom effect creation, the audio waveform in the music section, and customized picture frames would help to add extra effect to the slideshow.
● free templates and 200+ free music tracks are available in this free slide show maker to enhance the whole presentation properly.
● You can also make mobile-optimized videos using the SmartSHOW 3D editor.
● Add a soundtrack to the slideshow and use existing templates in the free trial before buying the subscription.
● Multiple formats are supported to download the project after creating a slideshow.
Part 2 Top 5 Slideshow Makers for Mac
01PowerDirector
PowerDirector is one of the best free slideshow makers on Mac systems, enabling the pro features of the storyboard, timeline, and slideshow interfaces. There’s a wide capability of visual effects that can boost the whole quality of the slideshow in no time.
02iMovie
iMovie slide show maker is available for both macOS and iOS systems, to let the creators make some elegant and high-resolution slideshows. It includes professional-looking themes and interfaces to add a classy look to the whole presentation. It’s simple for beginners as there’s no complicated tool arrangement in the UI.
03Photostage
Photostage is a complete package for slideshow creation, including the seamless options for photo arrangement, special effects, audio set-up, etc. For beginners, it might be a bit confusing but with time, it will be easier to use. This free slide show maker is equally compatible with both Windows and Mac, unlike much other software.
04Videopad
Videopad is another top slideshow maker on Mac systems that has 50+ transition effects, third-party plugin support, and all popular file format compatibility. The slides would be made as with a movie effect on this platform with various latest templates and features.
05Keynote
For real-time collaboration and PowerPoint features, Keynote would be the best choice to create slide show. It has the integration with Adobe Photoshop which extends the creativity range more. You can also find an in-built large library for pre-made templates to apply in the slideshow. However, for beginners, Keynote can a be hurdle.
Part 3 Top 5 Online Slideshow Makers
To be independent of any system, users might also want to make slideshow online. To support this choice, the following five best slideshow creators are mentioned.
01Canva
Canva is a popular online slide show maker that has everything you need to make a perfect presentation. From various templates to elements, graphics to custom frames, special social media templates, and versatile file formats- the free version itself has many features to serve.
02Animoto
With an user-friendly interface and quick processing, Animoto is a favorite platform to make slideshow online. However, there is a problem with the watermark in some cases. You can automatically apply any modification to all the sections by applying the filters in one section. Note that, there’s no free subscription with this platform.
03FlexClip
Flexclip is a beginner-friendly online slideshow maker with numerous templates and assets to choose from. In the free version, you can download a video in 480p only. Also, there’s no undo button for slideshow creation. So, you need to be sure about any modification in this editor.
04Kapwing
Kapwing is a multipurpose online free slideshow maker for intermediate users. Different video editing tools are available along with subtitle and AI subtitle support. Note that, the content in free version is public and cannot be stored for more than 7 days.
05Visme
Visme is a quick slideshow maker with five easy steps to master. Companies like IBM and Accenture use Visme to create slideshows and infographics. Undoubtedly this can be a perfect pick for seamless, professional slideshow cration.
How to use Filmora?
Filmora is all-in-one software to create slide show for literary any purpose, in any operating system, providing all the features a creator might need while making a perfect slideshow. A slideshow can be for academic or professional purposes, to decorate some beautiful moments, or to create something unique. And for every separate aim, different tools and features are required in a slideshow maker. To fulfil all such requirements with the latest tools, Filomora has a versatile platform.
As in this article, we have already mentioned some of the best slideshow makers, you may find some restrictions like system boundaries, not being beginner-friendly, or missing the latest features in the free slideshow makers. That’s why the best possible solution is presented here with all the following advantages.
Advantages of Wondershare Filmora Video Editor Slideshow Maker:
● This software is compatible with both Windows (7 or later versions) and Mac OS (10.12 or later versions), giving flexible usability to all the slideshow enthusiasts.
For Win 7 or later (64-bit)
For macOS 10.12 or later
● It takes lesser time to create a slideshow in Filomra using the top-notch transitions and effects. Also, there’s a split-screen option to make a slideshow more efficiently.
● All the popular file formats are supported including images, audio, and video. And, it’s also easy to upload a project on any social media directly from Filmora.
● Numerous motion effects, titles, filters, effects, and overlays are available for free in this slide show app.
● The built-in audio library provides suitable music with the slideshows to make it better as a complete presentation.
● Ending Thoughts →
● This article consists of all the top slideshow makers with their features to choose the most suitable one without any doubt.
● Suggestions are available both for Windows and Mac in the case of the slideshow creators.
● You can go for any of this software based on your requirements, editing experience, and system compatibility. Gradually, the best slideshow can be created in no time.
Also read:
- Updated How to Rotate AVI in Vertical/Portrait Orientation Windows, Mac,Android, iPhone & Online for 2024
- Updated In 2024, Techniques You Never Heard of for Learning AI Marketing YouTube
- Updated Best 7 Color Match Paint Apps
- In 2024, Best Tips for Better Event Videography
- How to Edit FLV Video Files with FLV Editor Windows, Mac,Android, iPhone & Online
- Want to Add Motion Effects to Your Texts in Your Video? Learn the Simple Steps to Create Motion Text Effects in Popular Video Editors
- New 2024 Approved Make A Countdown Video
- Updated In 2024, How Long Does It Take To Edit Videos
- VSCO Slow Motion
- New In 2024, 12 Best GIF Editors to Use
- New 2024 Approved Comprehensive Guide to Add LUTs in Premiere Pro with Ease
- In 2024, How to Use Filmora Slideshow Maker for Making Slideshow? What Is Slideshow Filmora? Know the Steps to Make Filmora Slideshow. What Are Steps to Make Filmora Slideshow Template?
- New Techniques You Never Heard of for Learning AI Marketing YouTube for 2024
- Updated In 2024, Where To Find The Best Free Canon LUTs? Learn More
- In This Article, We Introduce You Our Top 5 Picks of Video to Ppt Converter for 2024
- How to Create a DIY Green Screen Video Effect for 2024
- Updated 2024 Approved 4 Ways to Loop a Video on Vimeo
- Updated A Guide to Color Grade Your Picture in LightRoom for 2024
- 2024 Approved Step by Step to Rotate Video Using KMPlayer
- New How to Create a Special Animated Transition in Filmora in Just 2 Minutes. This Simple Step-by-Step Guide Will Show You the Easy Way
- New How Does the YouTube AI Algorithm Work - AI EXPLAINED for 2024
- New How to Polish Your Music Video Edits Using Filmora for 2024
- Do You Waste Time Making Transparent Background in Paint
- In This Article, You Will Learn How to Create an Attractive and Engaging Slideshow Video Using Tools Available in the Wondershare Filmora for 2024
- New How To Create A YouTube Intro for 2024
- New In 2024, Adobe Lightroom Color Grading Tutorial
- How To Transfer Data From Apple iPhone XS To Other iPhone 12 Pro Max devices? | Dr.fone
- Top 5 Tracking Apps to Track Samsung Galaxy S24+ without Them Knowing | Dr.fone
- In 2024, Methods to Transfer from Apple iPhone 15 Plus to Android | Dr.fone
- How to Unlock Poco C65 Bootloader Easily
- 2024 Approved How to Make Whiteboard Animation Videos
- In 2024, List of Pokémon Go Joysticks On Vivo Y100A | Dr.fone
- Thinking About Changing Your Netflix Region Without a VPN On Oppo A18? | Dr.fone
- In 2024, Ways to trade pokemon go from far away On Oppo Reno 8T 5G? | Dr.fone
- In 2024, How PGSharp Save You from Ban While Spoofing Pokemon Go On Lava Storm 5G? | Dr.fone
- Hacks to do pokemon go trainer battles For Nokia C12 Plus | Dr.fone
- How to Unlock Xiaomi Redmi Note 12 Pro+ 5G Phone without Google Account?
- How to Detect and Stop mSpy from Spying on Your Samsung Galaxy A05s | Dr.fone
- 2 Ways to Transfer Text Messages from Samsung Galaxy S23 FE to iPhone 15/14/13/12/11/X/8/ | Dr.fone
- How to recover deleted pictures from HTC .
- Title: 2024 Approved Are You Looking for Ways to Add Background to Green Screen Video Online? Worry Not, as in This Article; We Shall Discuss Using a Green Screen Background Adder in Filmora
- Author: Chloe
- Created at : 2024-06-18 14:30:54
- Updated at : 2024-06-19 14:30:54
- Link: https://ai-editing-video.techidaily.com/2024-approved-are-you-looking-for-ways-to-add-background-to-green-screen-video-online-worry-not-as-in-this-article-we-shall-discuss-using-a-green-screen-bac/
- License: This work is licensed under CC BY-NC-SA 4.0.
