
:max_bytes(150000):strip_icc():format(webp)/kentuckyderby-5c7ed5d646e0fb00011bf3da.jpg)
2024 Approved Best 8 Augmented Reality Video Games
Best 8 Augmented Reality Video Games
Top 8 Augmented Reality Video Games
An easy yet powerful editor
Numerous effects to choose from
Detailed tutorials provided by the official channel
Augmented reality video games are the latest sensation in the gamer fraternity. Be here to know everything about the top 8 AR video games of all times!
In this article
01 [What Is AR in Gaming? Is AR the Future of Gaming?](#Part 1)
02 [What Is the Most Popular AR Game Now?](#Part 2)
03 [8 Best Augmented Reality Games (For iOS & Android)](#Part 3)
Part 1 What Is AR in Gaming? Is AR the Future of Gaming?
Before taking a dive into the most appealing augmented reality gaming alternatives, it would be better to have a generalized understanding of the concept behind the AR utility. Sticking to digital terms, augmented reality refers to an enhanced presentation of your real world environment with the use of suitable digital equipments. The most basic example in this regard is using your smartphone camera to view the nearby environment in a considerably upgraded graphic setting through an AR application.
When thinking to experiment with the diversity of graphic elements in augmented reality, you can explore the digital overlays by trying hands at one or more of the following enhancements:
● Changing the color perspectives of the screen backgrounds, along with applying suitable filters to produce the effect of high quality chromatic scaling in the graphic elements.
● Superimposition of 3D graphic models, images and other elements conveying snippets of digital information.
● Add labels to screen elements for precise recognition and convenient location, when using the augmented reality concept for gaming purposes.
● Integrate the AR concept to with social media platforms, like using SnapChat and Instagram’s image filters to modify the player’s appearance within the game surroundings.
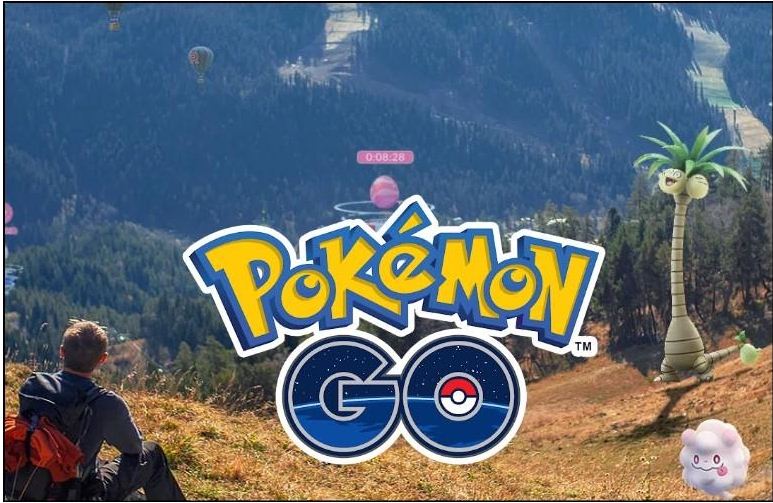
Moving ahead to the specific discussion on augmented reality video games, the concept was introduced in 2016, with Pokemon GO being the inaugural AR experiment. Since then, the gaming fraternity is dedicated towards providing a real-time perception of different gaming environments with high quality graphic imagery, matchless storytelling and an exquisite range of gaming hardware.
About the latest trends in the domain, you will land across a diversity of immersive augmented reality games introduced by some of the most pronounced game developing companies. These games are a complete entertainment package, where you gave the surety of getting a maximized real-time gameplay experience with enhanced capacities of headsets and motion controls.
Most of the aforesaid games use a GPS tracking system to create a more responsive and realistic gaming environment, allowing the player to undertake a flawless transition amid the real world and its technological replica.
● Augmented Reality: The Future of Console Gaming
Talking about the modern day console gaming prospects, a lot needs to be owed to the revolutions encountered in the gaming technology in the past decade. While the integration of augmented reality into conventional video gaming has come up with upgraded concepts of real-time gaming that has definitely given a boost to the present time gaming aspects.
Augmented reality is being regarded as a potential candidate in the domain of computer based gaming platforms, considering the fact that the latter has brought about an integration of real-world elements into gaming alternatives with minimal prerequisites. As of now, AR based games are all set to provide you with the most immersive gaming experience you have ever had.
As far as the future if console gaming in the light of augmented reality is concerned, it would be a rather quick judgment to define the latter’s prospects within any constraints. With the technology being a relatively newer entrant to the world of gaming, the realm of feature-based enhancement is wide open.
All said and done, the bottom line of the discussion is that the future would have a huge storehouse of immersive gaming alternatives, with the most realistic AR approaches, which would further be supplemented by the day to day technological advancements in the IT and communication industry. The introduction of high tech 5G devices will further let players embrace the real world through their console, thus ensuring a perfect synchronization of virtual gaming technology with the real-time environment.
Part 2 What Is the Most Popular AR Game Now?
Since its advent in 2016, augmented reality gaming has mastered the art of ruling the hearts of gamers around the world. Right from graphical enhancement to real-time modulation, and top quality futures to convenient gameplay, AR gaming has everything to keep you glued to your consoles and smartphones for hours that refuse to end!
AR video games are the talk of the trend, and boast of presenting an enormous variety of gaming choices in front of dedicated players. While it is quite obvious to have a tough time choosing your best AR game, you can begin your gaming streak with Pokemon GO, the first and the most popular entry into the series, till you make a new choice.
Diving into the game specifications, Pokemon GO is a location centered, augmented reality game, which is conveniently compatible to any of your smartphones. The game marked the entry of the augmented reality concept into the realm of video game development with its release in July 2016 as a new member of the Pokemon franchise. Talking of the game’s popularity, the latter became successful in becoming an absolute favorite among global gamers and is known to have generated the maximum revenue at the time of its release, taking the credit of being recognized as the first mainstream console game based on augmented reality.
As reviewed by the players, Pokemon GO is loaded with excellent features of storyline flow, game controls and interface mechanics, sociability and of course, the undeniably appealing legacy of the Pokemon brand. Other attractions of the game with special reference to augmented reality include, a free access revenue model and adequate information safety.
Part 2 Best Augmented Reality Games (For iOS & Android)
Having discussed enough about the advent and credibility of augmented reality based console gaming, you might easily feel motivated to try hands at the popular and appealing integration of technology and entertainment. Adhering to the concern, let us browse through the most interactive choices of augmented reality infused games that you would love to relish on your iOS and Android devices:
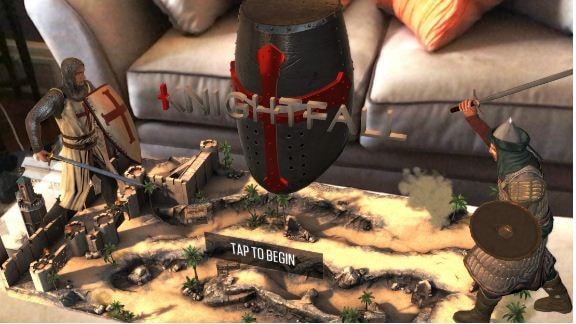
01Knightfall AR
Set in the fictional region of The Knights Templar, this one is a combat oriented AR video game that tasks you with the responsibility of defending the land of Acre against a rival army invasion, while protecting the Holy Grail, which is the most valuable relic of Christianity. When playing the game, you will be grouped into teams of Knights and Warriors to proceed with the quest.
This AR game promises you of an everlasting real-time action gaming experience, where you can fire bullets to kill enemies, collect gold and reconstruct your defense system. You need to win battles, while unlocking features and challenges to proceed through the gameplay. You are also allowed to choose a character in the game’s Photo mode for entertainment purposes.
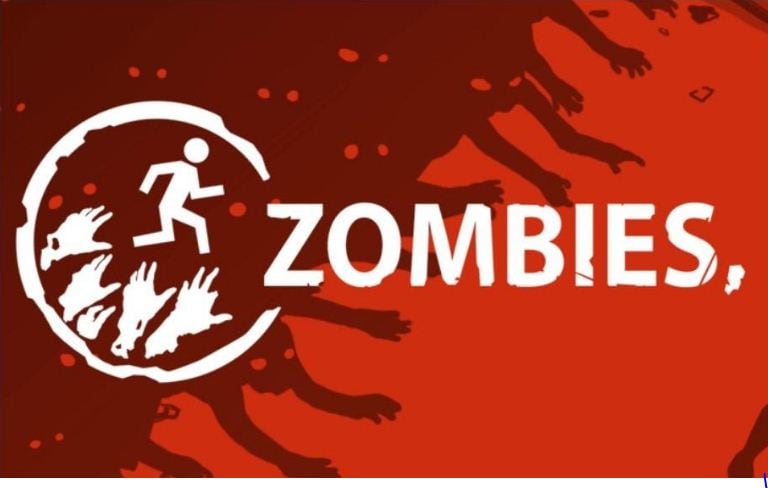
02Zombie, Run
If you have a soft corner for your morning jog routine, get ready dive into the most thrilling sporty adventure with the aforesaid augmented reality gaming application. The gameplay put you amid a world of attacking zombies, where you are required to run and simultaneously collect specified game items to escape the fatal attacks of the nasty creatures.
You are entitled to enjoy an amplified experience of your regular morning jogs with the game’s motivating narration and complementing background music that boosts your gaming as well as exercising willpower.
03Temple Treasure Hunt
This one is the perfect game for you if the idea of treasure hunting and mystery solving turns you on. Using the concept of geo-location to inculcate the augmented reality characteristic, Temple Treasure Hunt is a simple yet exciting game with a diversity of legends to hear, mysteries to solve and adventures to experience.
As a player of the game, you are allowed to make a choice between assuming the role of either a treasure protector or a hunter. While the former requires you to create challenging treasure tests that would make it difficult for the hunters to locate the same, the latter, on the other hand demands you to hunt the protected treasure to win the game. Regardless of the role you pick, you are required to follow a route map to proceed through the game.

04Jurassic World Alive
The aforesaid game is a treat for those who have always been the secret admirers of the gigantic creatures of the prehistoric period. The thrilling gameplay of Jurassic World Alive lets you have an encounter with the freely wandering prehistoric beings within the modern day civilizations. Packed with well designed graphics, the game is all set to give its players an exciting and unforgettable augmented reality experience.
Landing into the game, you are given the liberty to explore the diversity of elements in the realms of the Jurassic World, while completing the game’s task if collecting DNA samples of the giant mammoths, Pteranodons and dinosaurs. If that is not enough, you are free to create a customized raptor of your own, and share the same while competing with similar counterparts in real-time.

05Harry Potter: Wizards Unite
Who amongst us is not a die-hard fan of the magically fantasizing Harry Potter series! Thanks to augmented reality, the love of the same can now be relished in real-time. Talking of the aforesaid Wizards Unite edition, this one is a fantasy adventure game that requires the players to relieve Harry Potter’s magical universe from the drastic doom that has struck upon the land with an aim of ultimate destruction.
When playing the game, you are supposed to slip into the role of a Wizard and proceed through the game by overcoming challenges and combating enemies. With the integration of realistic graphics, players get to experience wizard magic in true sense.

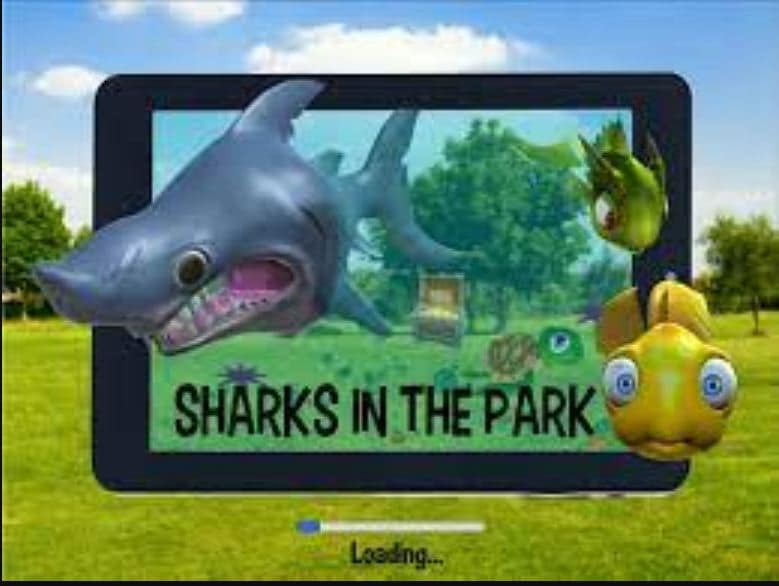
06Sharks in the Park
This one is a fun centered augmented reality game, set within an oceanic ecosystem. When traversing through the exquisite regions of the aquatic world, you will come across a hoard of newly found water species, which you need to interact with, in real-time for addressing the different aspects of the game quest.
The game accesses the GPS functionality of your smartphone to help you to walk through the ocean while you are on your expedition of discovering the different forms of aquatic life under the sea. The game further utilizes smartphone sensors for a synchronized movement tracking of the players, which means that your movements in real-time will be exactly replicated in the digital environment.
07Beer Pong AR
This game is conveniently regarded as the digital prototype of board games in the future and showcases the fusion of augmented reality into the already entertaining world of console gaming. The gameplay begins with the players getting a choice to select a preferred set of surroundings for installing the beer. This is followed by throwing ping pong balls from the most suitable angle.
Talking of the games another attraction is the perfect sync between the real and digital worlds and the non-messy post game experience. If you are keen on enjoying augmented reality gaming on an Android phone, Beer Pong AR is possibly the best alternative you can rely on.

08Dark: Subject One
If you are more comfortable in the adventure and mystery centered gameplay genres, consider trying hands at this game in the environment of augmented reality. The gameplay unfolds a horror storyline, where the player being the hero of the game, adheres to the task of searching for his disappeared friend. As the game progresses, the player is directed to a parallel universe, where he is welcomed by terrifying encounters.
Beating through the eerie landscapes and overcoming scary hurdles, the player lands across clues and hints to unravel the mystery of the case. The top class augmented reality elements promise you of an escalated horrid feel all through the gameplay.
09Experiencing Augmented Reality With Filmora
When looking for suitable alternatives to edit augmented reality video games, you can rely on the Wondershare Filmora Video Editor software without a second thought. Right from welcoming you with the most user-cohesive working interface to presenting a diverse library of top class video editing effects, this application has visibly everything that an editor of augmented reality video game will ever need.
For Win 7 or later (64-bit)
For macOS 10.12 or later
The software program even furnishes you with an additional in-built screen recorder program that allows you to record and edit video games with the most stunning audio-visual editing effects and filters within the app’s editing library.
● Ending Thoughts →
● The advent of augmented reality has put console gaming on a different level with the integration of real-time features.
● When looking for the best alternatives for landing into AR gaming, there are a variety of Android and iOS compatible games to choose from.
● To address the need of editing an AR video game, you can conveniently seek the help of Wondershare Filmora for the best quality editing output.
Augmented reality video games are the latest sensation in the gamer fraternity. Be here to know everything about the top 8 AR video games of all times!
In this article
01 [What Is AR in Gaming? Is AR the Future of Gaming?](#Part 1)
02 [What Is the Most Popular AR Game Now?](#Part 2)
03 [8 Best Augmented Reality Games (For iOS & Android)](#Part 3)
Part 1 What Is AR in Gaming? Is AR the Future of Gaming?
Before taking a dive into the most appealing augmented reality gaming alternatives, it would be better to have a generalized understanding of the concept behind the AR utility. Sticking to digital terms, augmented reality refers to an enhanced presentation of your real world environment with the use of suitable digital equipments. The most basic example in this regard is using your smartphone camera to view the nearby environment in a considerably upgraded graphic setting through an AR application.
When thinking to experiment with the diversity of graphic elements in augmented reality, you can explore the digital overlays by trying hands at one or more of the following enhancements:
● Changing the color perspectives of the screen backgrounds, along with applying suitable filters to produce the effect of high quality chromatic scaling in the graphic elements.
● Superimposition of 3D graphic models, images and other elements conveying snippets of digital information.
● Add labels to screen elements for precise recognition and convenient location, when using the augmented reality concept for gaming purposes.
● Integrate the AR concept to with social media platforms, like using SnapChat and Instagram’s image filters to modify the player’s appearance within the game surroundings.
Moving ahead to the specific discussion on augmented reality video games, the concept was introduced in 2016, with Pokemon GO being the inaugural AR experiment. Since then, the gaming fraternity is dedicated towards providing a real-time perception of different gaming environments with high quality graphic imagery, matchless storytelling and an exquisite range of gaming hardware.
About the latest trends in the domain, you will land across a diversity of immersive augmented reality games introduced by some of the most pronounced game developing companies. These games are a complete entertainment package, where you gave the surety of getting a maximized real-time gameplay experience with enhanced capacities of headsets and motion controls.
Most of the aforesaid games use a GPS tracking system to create a more responsive and realistic gaming environment, allowing the player to undertake a flawless transition amid the real world and its technological replica.
● Augmented Reality: The Future of Console Gaming
Talking about the modern day console gaming prospects, a lot needs to be owed to the revolutions encountered in the gaming technology in the past decade. While the integration of augmented reality into conventional video gaming has come up with upgraded concepts of real-time gaming that has definitely given a boost to the present time gaming aspects.
Augmented reality is being regarded as a potential candidate in the domain of computer based gaming platforms, considering the fact that the latter has brought about an integration of real-world elements into gaming alternatives with minimal prerequisites. As of now, AR based games are all set to provide you with the most immersive gaming experience you have ever had.
As far as the future if console gaming in the light of augmented reality is concerned, it would be a rather quick judgment to define the latter’s prospects within any constraints. With the technology being a relatively newer entrant to the world of gaming, the realm of feature-based enhancement is wide open.
All said and done, the bottom line of the discussion is that the future would have a huge storehouse of immersive gaming alternatives, with the most realistic AR approaches, which would further be supplemented by the day to day technological advancements in the IT and communication industry. The introduction of high tech 5G devices will further let players embrace the real world through their console, thus ensuring a perfect synchronization of virtual gaming technology with the real-time environment.
Part 2 What Is the Most Popular AR Game Now?
Since its advent in 2016, augmented reality gaming has mastered the art of ruling the hearts of gamers around the world. Right from graphical enhancement to real-time modulation, and top quality futures to convenient gameplay, AR gaming has everything to keep you glued to your consoles and smartphones for hours that refuse to end!
AR video games are the talk of the trend, and boast of presenting an enormous variety of gaming choices in front of dedicated players. While it is quite obvious to have a tough time choosing your best AR game, you can begin your gaming streak with Pokemon GO, the first and the most popular entry into the series, till you make a new choice.
Diving into the game specifications, Pokemon GO is a location centered, augmented reality game, which is conveniently compatible to any of your smartphones. The game marked the entry of the augmented reality concept into the realm of video game development with its release in July 2016 as a new member of the Pokemon franchise. Talking of the game’s popularity, the latter became successful in becoming an absolute favorite among global gamers and is known to have generated the maximum revenue at the time of its release, taking the credit of being recognized as the first mainstream console game based on augmented reality.
As reviewed by the players, Pokemon GO is loaded with excellent features of storyline flow, game controls and interface mechanics, sociability and of course, the undeniably appealing legacy of the Pokemon brand. Other attractions of the game with special reference to augmented reality include, a free access revenue model and adequate information safety.
Part 2 Best Augmented Reality Games (For iOS & Android)
Having discussed enough about the advent and credibility of augmented reality based console gaming, you might easily feel motivated to try hands at the popular and appealing integration of technology and entertainment. Adhering to the concern, let us browse through the most interactive choices of augmented reality infused games that you would love to relish on your iOS and Android devices:
01Knightfall AR
Set in the fictional region of The Knights Templar, this one is a combat oriented AR video game that tasks you with the responsibility of defending the land of Acre against a rival army invasion, while protecting the Holy Grail, which is the most valuable relic of Christianity. When playing the game, you will be grouped into teams of Knights and Warriors to proceed with the quest.
This AR game promises you of an everlasting real-time action gaming experience, where you can fire bullets to kill enemies, collect gold and reconstruct your defense system. You need to win battles, while unlocking features and challenges to proceed through the gameplay. You are also allowed to choose a character in the game’s Photo mode for entertainment purposes.
02Zombie, Run
If you have a soft corner for your morning jog routine, get ready dive into the most thrilling sporty adventure with the aforesaid augmented reality gaming application. The gameplay put you amid a world of attacking zombies, where you are required to run and simultaneously collect specified game items to escape the fatal attacks of the nasty creatures.
You are entitled to enjoy an amplified experience of your regular morning jogs with the game’s motivating narration and complementing background music that boosts your gaming as well as exercising willpower.
03Temple Treasure Hunt
This one is the perfect game for you if the idea of treasure hunting and mystery solving turns you on. Using the concept of geo-location to inculcate the augmented reality characteristic, Temple Treasure Hunt is a simple yet exciting game with a diversity of legends to hear, mysteries to solve and adventures to experience.
As a player of the game, you are allowed to make a choice between assuming the role of either a treasure protector or a hunter. While the former requires you to create challenging treasure tests that would make it difficult for the hunters to locate the same, the latter, on the other hand demands you to hunt the protected treasure to win the game. Regardless of the role you pick, you are required to follow a route map to proceed through the game.
04Jurassic World Alive
The aforesaid game is a treat for those who have always been the secret admirers of the gigantic creatures of the prehistoric period. The thrilling gameplay of Jurassic World Alive lets you have an encounter with the freely wandering prehistoric beings within the modern day civilizations. Packed with well designed graphics, the game is all set to give its players an exciting and unforgettable augmented reality experience.
Landing into the game, you are given the liberty to explore the diversity of elements in the realms of the Jurassic World, while completing the game’s task if collecting DNA samples of the giant mammoths, Pteranodons and dinosaurs. If that is not enough, you are free to create a customized raptor of your own, and share the same while competing with similar counterparts in real-time.
05Harry Potter: Wizards Unite
Who amongst us is not a die-hard fan of the magically fantasizing Harry Potter series! Thanks to augmented reality, the love of the same can now be relished in real-time. Talking of the aforesaid Wizards Unite edition, this one is a fantasy adventure game that requires the players to relieve Harry Potter’s magical universe from the drastic doom that has struck upon the land with an aim of ultimate destruction.
When playing the game, you are supposed to slip into the role of a Wizard and proceed through the game by overcoming challenges and combating enemies. With the integration of realistic graphics, players get to experience wizard magic in true sense.
06Sharks in the Park
This one is a fun centered augmented reality game, set within an oceanic ecosystem. When traversing through the exquisite regions of the aquatic world, you will come across a hoard of newly found water species, which you need to interact with, in real-time for addressing the different aspects of the game quest.
The game accesses the GPS functionality of your smartphone to help you to walk through the ocean while you are on your expedition of discovering the different forms of aquatic life under the sea. The game further utilizes smartphone sensors for a synchronized movement tracking of the players, which means that your movements in real-time will be exactly replicated in the digital environment.
07Beer Pong AR
This game is conveniently regarded as the digital prototype of board games in the future and showcases the fusion of augmented reality into the already entertaining world of console gaming. The gameplay begins with the players getting a choice to select a preferred set of surroundings for installing the beer. This is followed by throwing ping pong balls from the most suitable angle.
Talking of the games another attraction is the perfect sync between the real and digital worlds and the non-messy post game experience. If you are keen on enjoying augmented reality gaming on an Android phone, Beer Pong AR is possibly the best alternative you can rely on.
08Dark: Subject One
If you are more comfortable in the adventure and mystery centered gameplay genres, consider trying hands at this game in the environment of augmented reality. The gameplay unfolds a horror storyline, where the player being the hero of the game, adheres to the task of searching for his disappeared friend. As the game progresses, the player is directed to a parallel universe, where he is welcomed by terrifying encounters.
Beating through the eerie landscapes and overcoming scary hurdles, the player lands across clues and hints to unravel the mystery of the case. The top class augmented reality elements promise you of an escalated horrid feel all through the gameplay.
09Experiencing Augmented Reality With Filmora
When looking for suitable alternatives to edit augmented reality video games, you can rely on the Wondershare Filmora Video Editor software without a second thought. Right from welcoming you with the most user-cohesive working interface to presenting a diverse library of top class video editing effects, this application has visibly everything that an editor of augmented reality video game will ever need.
For Win 7 or later (64-bit)
For macOS 10.12 or later
The software program even furnishes you with an additional in-built screen recorder program that allows you to record and edit video games with the most stunning audio-visual editing effects and filters within the app’s editing library.
● Ending Thoughts →
● The advent of augmented reality has put console gaming on a different level with the integration of real-time features.
● When looking for the best alternatives for landing into AR gaming, there are a variety of Android and iOS compatible games to choose from.
● To address the need of editing an AR video game, you can conveniently seek the help of Wondershare Filmora for the best quality editing output.
Little Known Ways of Adding Emojis to Photos on iPhone & Android
Little Known Ways of Adding Emojis to Photos on iPhone & Android
An easy yet powerful editor
Numerous effects to choose from
Detailed tutorials provided by the official channel
Emojis are catchy graphic elements that can add life to your photos, videos and allied artworks within a wink. Be here to know about the most exciting how-tos!
In this article
01 [Best 6 Tools to Put Emojis on Pictures on iPhone](#Part 1)
02 [Best 6 Tools to Put Emojis on Pictures on Android](#Part 2)
03 [Best 5 Tools to Put Emojis on Pictures on Computer](#Part 3)
Part 1 Best 6 Tools to Put Emojis on Pictures on iPhone
Emojis have managed to secure enough significance in our social and professional lives across social media platforms in the current time. Be it a fun-filled conversation with friends and family on a chat service program, or a high end and professionally sound business strategy, these mini caricature pieces of graphic art can add the much needed highlight to almost every aspect of your digital communication concerns.
Now that you are aware of the utility of working with emojis to make your digital contents, let us take a dive into some of the best ways and means to make your iPhone images come alive in the following section:
01Emoji Picture Editor- Add Emojis to Your Photos
If you like to imbibe the images on your iPhone media gallery with a hoard of funny and cool emojis, this one is a perfect app to address the concern. The tool’s library houses the latest collection of emoji categories to be in line with a diversity of photo styles, themes and backgrounds. You can take your pick from the huge inventory of over 1500 different emojis to level up your photos.
Talking about the app interface and usage controls, you are granted full liberty to add emojis to your emojis, while changing their positions through a finger drag, or scale and rotate them by expanding, pinching and twisting your fingers. The app additionally allows you to send bigger emoji stickers on chats and conversations.
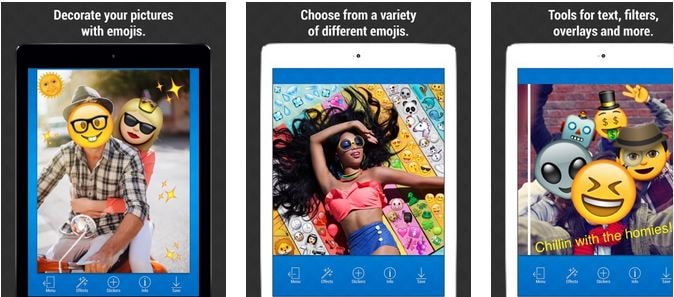
02Insta Emoji Photo Editor
When looking for an interesting and reliable application to set straight the concern of how to put emojis on pictures, the Insta Emoji Photo Editor is an affordable pick. Loaded with an enormous and updated emoji library, the app presents before you over 3200 fascinating emoji options to select from and add to your images.
The inclusion process is intuitively simple, with you just having to upload the desired images to the app’s working interface and choose from your most favorite emoji elements to make the stills come alive with added fun and spark. The app houses an interesting ’Emoji Paint’ feature for the extensively creative ones to let them create catchy drawings with the coolest emojis.
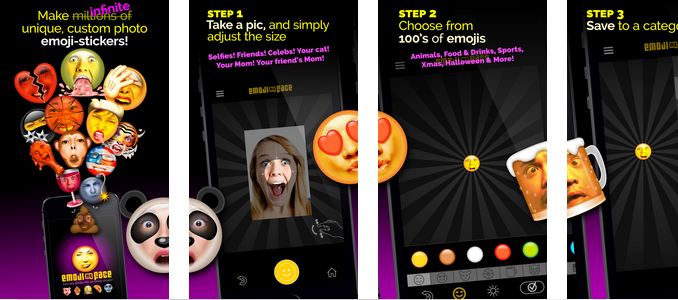
03Emoji My Face
Moving ahead in the list comes the aforesaid app, which you can conveniently rely on to get through the photo edit emoji task in less than a few seconds. What’s unique about the utility is its feature that lets you add emoji stickers on the faces of your image elements. Working with the app, you can transform the skinned appearances of your friends and family into hilarious emoji faces.
While the app permits you to pick any number of preferences from its latest and updated emoji collection, you can additionally, save and share your emoji centered image edits across a diversity of media sharing platforms and chat service programs.
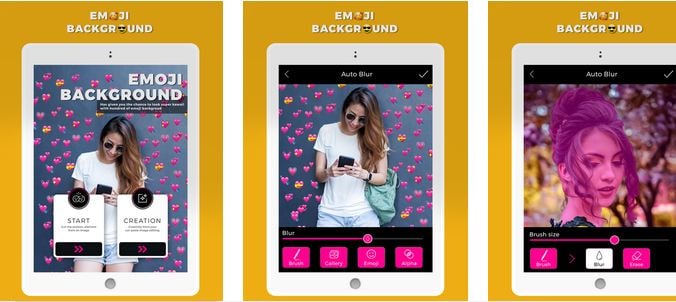
04Emoji Background Photo Maker
While there are hoards of IT alternatives to add emojis to pictures, the following utility caters to the concern in a slightly different style, ahead of just picking and pasting emojis to still captures. Working with the tool, you can experiment with changing the customary and fundamental image backgrounds into funny and appealing emoji centered themes. You are allowed to either work with a desired image from your iPhone’s media gallery, or take a fresh shot from your device’s camera, followed by uploading the same to the app’s editing interface.
Focusing on the tool’s expanse of usage features, you get tom work with a straightforward interface, and select from a wide variety of expressive and thematic emoji backgrounds. You can further, preview and save the edited images in HD quality, and share the same with friends and family across social media handles.
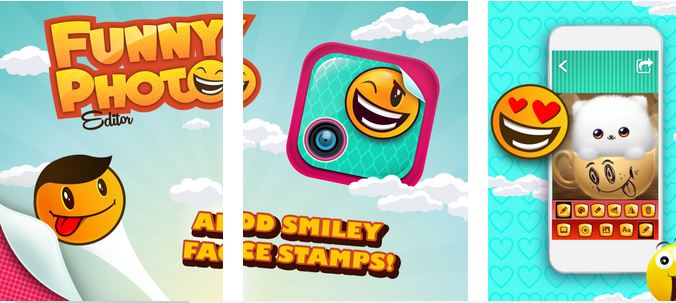
05Funny Photo Editor With Emoji Stickers Camera
This one is an innovative image editing tool that lets you create funny image transformations with classic emoji stickers, while addressing the query of how to add emojis to pictures. If your peer group consists of crazy creators who are selfie freaks, try hands at uplifting your live camera shots with this application by adding the funkiest emojis and sharing them across the regular communication platforms.
The app’s default camera feature lets you capture a straight forward image and convert the same into a hilarious edit with the latest range of free emoji stickers, caricature smileys and lots more. You can additionally beautify the edits with choosing from a decent range of emoji skin tones to suit the image background.
06Instamoji- Emoji Photo Editor
If you have been searching for an affordable solution to walk through the concern of , how to add emoji to photo on your iPhone, try working with the Instamoji application to highlight your customary images with classic emoji stickers and elements within the blink of an eye. The app welcomes you with a clean and intuitive interface to work upon, and is completely free to use.
Talking about the utility’s emoji centered image editing features, you are permitted to select from a decent collection of vibrant, funny and cool emojis, assorted under a diversity of categories to complement your images with, while exporting them across your digital communication accounts with utmost ease. The app promises you of the finest quality edited image output.
Part 2 Best 6 Tools to Put Emojis on Pictures on Android
Emojis are best known to spark up graphic artworks with an element of fun and entertainment. While the introduction of social media and digital communication utilities have brought emojis to the fingertips of modern day smartphone users, the IT market never lags behind at putting the latest transformations regarding emoji usage at your disposal.
Discussing along the line, let us talk about some interesting applications that address the concern of how to add an emoji to a photo using an Android device in what follows next:
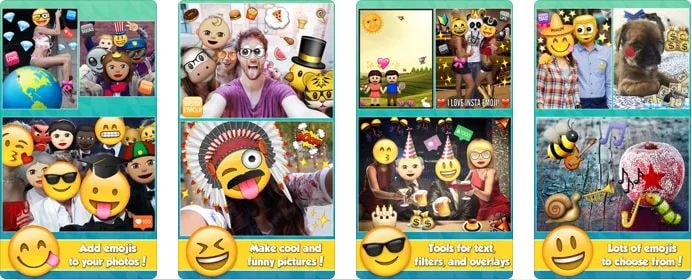
01Add Emoji Stickers- Pics Editor and Photo Maker
This one is a smart photo editing tool that you can choose to customize the otherwise ordinary images on the local media gallery of your Android smartphone. The app greets you with an extensive range of updated emoji alternatives to suit your most specific editing requirements for complementing your elementary photos with the perfect feel and emotion.
The emojis work to add the missing fun to your social media posts with image edits funny enough to make your peers roll over with laughter. Not just smiley faces, the app delivers to you a categorized set of emojis that are a perfect fit to any graphic theme. Some of the most preferred ones include Nature, Travel, Food & Drinks, and many more. So why wait? Just get the free utility and begin to edit and share!
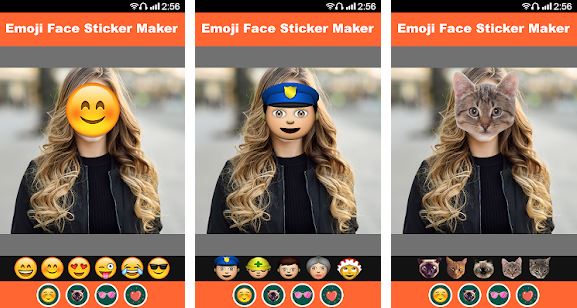
02Emoji Face Sticker
If you are creativity freak and love to experiment with your editing skills to put emoji on picture, try hands at working with this free image editor utility to add a fun element to your photos and give a laughter dose to your friends and family on social media. The app caters to transform your uploaded images faces to the cutest emoji look alike ever.
If that’s not enough, you can work with the app to change your smartphone’s regular camera into an emoji camera app that works to create the best caricature emoji montages from your snapped selfies. Navigating through the latte’s editing library, you will get to choose from among the craziest and coolest emoji stickers to create emoji photos out of normal stills. All in all, the app allows you to put forward your emotions in a relatively funnier way.
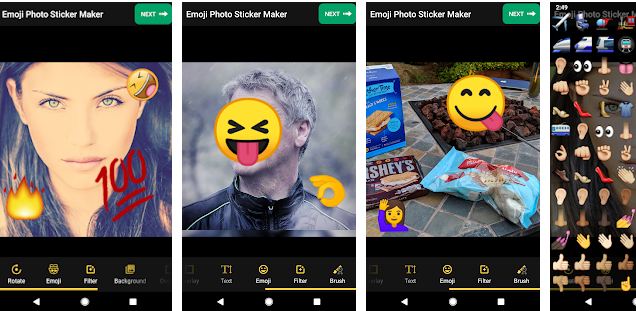
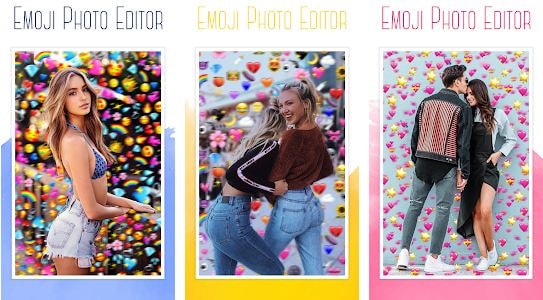
03Emoji Photo Editor
Are you bored of looking at those customary color backgrounds behind your images? Consider sparking them up with the cutest and most expressive emoji backgrounds. As you pick the app to edit your images, the latter grants you a complete access to its free emoji library that houses a decent collection of over 50 different emoji backgrounds to select from. A few of the most popular ones comprise of the flower and heart crown stickers, dog face camera among others.
Editing images within the app is seamless enough to last for a few seconds. You can use the created emoji background edits in a series of ways, like, preferring a local save or going for an image export to your favorite social media handle. Another cool way to show off your creativity can be making a device screen wallpaper of the emoji background image.
04Auto Face Stamp- Cover Face With Emoji
Looking forward to use an SNS services for media sharing purposes, but bothered about privacy concerns? While it is a common practice to share pictures via SNS and allied public platforms, most of us are often worried about keeping our faces hidden. Under normal circumstances, the face masking task is something you would ideally want to escape; the aforesaid app caters to the same in a funny and enjoyable manner.
Working with the utility, you can mask your image faces with over 100 different types of emoji stickers. The app aids you further in the task through its accurate face recognition ability that takes into consideration the smallest of faces with utmost precision. All you need to do is, select a desired emoji sticker and tap on the face you wish to mask with the same.
You can further, choose to directly export the masked images to media sharing handles right from the app’s editing workspace. The app is available to you absolutely free of cost and greets its users with a responsive working interface.

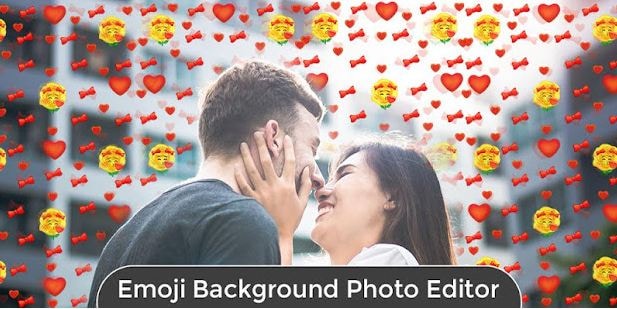
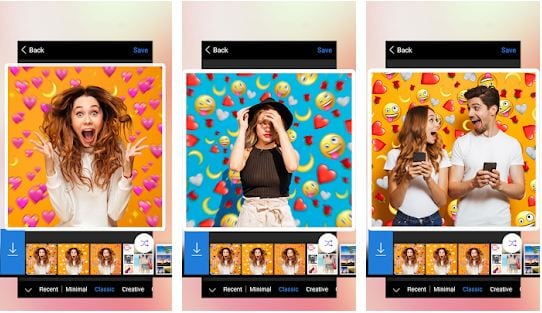
05Emoji Background Photo Editor
If the ordinary thematic backgrounds of your images do not suit you any longer, try working with this application to transmute the same into vibrant and expressive emoji alternatives. The aforesaid photo editing utility caters to make your images stand out of the crowd with beautiful emoji landscapes that render creative image edits of a matchless class, while maintaining a high-definition output image quality.
Extending the dimension of features to a longer stretch, the app grants you the liberty to adjust the position and transparency of the added emojis, set emoji frames and customize the emoji centered backgrounds with stunning effects and filters. As you finish with the editing process, the app lets you share your creations directly to a preferred social media platform, while also keeping them safe in your device’s local media gallery.
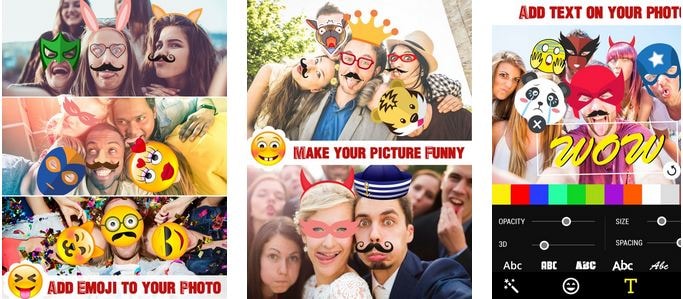
06Face Emoji Photo Effect
Reaching the end of the list, here comes the Face Emoji Photo Effect application that is all set to upgrade the level of your regular images with its classic and beautiful emoji backgrounds and stickers. The app’s editing library houses a diverse range of latest and elusive emojis to highlight your otherwise normal captures. The app additionally facilitates you with an expanded set of image editing features and effects to turn them into a graphic masterpiece.
The app welcomes you with a clean and responsive interface that makes the emoji inclusion process a quick and fun activity. All you need to do is, pick up an image from your locally saved alternatives and upload them to the app’s working interface, followed by browsing the latter’s emoji library to select a cohesive emoji background to complement the same.
You can further, download the premium emoji packs through a minimal payment to enhance the app’s library if the preset options do not match your requirements. The inbuilt emoji choices are however, free to work with.
Part 3 Best 5 Tools to Put Emojis on Pictures on Computer
All of us are familiar to and love using emojis everywhere, right from commenting on regular social media posts and chat service conversations, to creating professionally sound and strategic, business centered company presentations. While the most diverse use of these graphic utilities is reported on mobile devices, you may sometimes land across an instance that demands working with emojis on a computer.
Moving ahead with our discussion to address the aforesaid concern, let us talk about some of the prominent software and online solutions to set aside the issue of how to put emojis on photos while working on a computer in the upcoming section of this article:
01Kapwing
Entering into the domain of online image editing tools, the Kapwing website easily lands among the highly preferred choices. To address the concern of adding emojis to pictures on your PC or desktop systems, this one is an affordable tool to rely on. Talking of the underlying reasons behind the app’s high rated user preference, the latter allows you to access its huge inventory of emoji stickers, distributed across a heap of categories to choose from.
Next in the line is the tool’s spic and span editing process that lets you add and customize emojis on the uploaded images with a series of effects and filters in a matter of counted seconds. You can either pick and import images from your system, or work with the app’s in house emoji templates to edit the photos. As you are done with uploading images and adding emojis, proceed to place them at the desired position within the image.
The app allows you to add multiple emoji layers to the images by facilitating the creation of duplicate copies of your favorite emojis. Once you are done with the editing process, you are free to export your creation across media handles, or save them locally to your system.

02Editor.pho.to
If you are a newbie to the world of graphic editing and want to experiment with your creative skills to sort out the need of how to add an emoji to a picture, prefer landing on this free online website to work on your images. Considering the fact that not everyone around you is a tech savvy, the aforesaid online photo editing tool is designed to house the simplest of interfaces ever. The tool is available to you absolutely free of cost, without any unfair hidden purchases.
Ahead of the basic customization features, the tool grants you the freedom to expand your graphic skills on a wider canvas with presenting before you a plethora of emoji faces, stickers and backgrounds to complement the uploaded images with. Once you have added the emoji, the tool lets you work on the latter’s position and transparency adjustments, create emoji layers and overlays and save the edits to your system in a visibly high output quality.

03Add Emoji to Photo
When looking for dependable solutions to work towards the task of how to put an emoji on a photo, you can conveniently trust the aforementioned online tool to create classic emoji photo edits from the customary still alternatives son your computer. This one is a free to use image editor facility that allows you to decorate your otherwise unnoticed images with an extensive range of preset and custom emojis to make them expressive and speak out your emotions.
The tool caters to render a high definition edited image output within seconds through the simplest of customization processes. You just need to upload a desired image from your system to the tool’s working interface, followed by picking a suitable emoji from the tool’s editing library to add it to the image. If however, the available options don’t seem to address your specific requirements, you can proceed to create custom emojis of your own within the tool.
You can also create multiple emoji layers to add to the uploaded image and make adjustments to their transparency and position within the photo. As you finish the editing process, the tool grants you the liberty to download the customized image to your system in either of the PNG or JPG file formats.
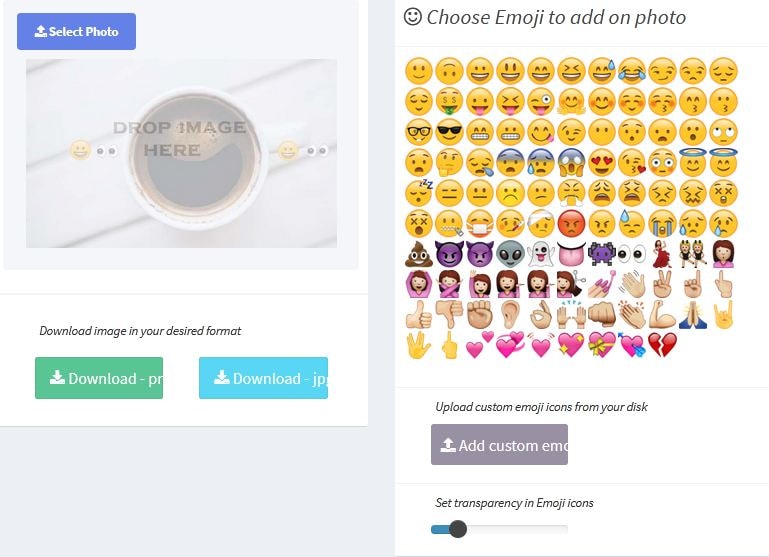
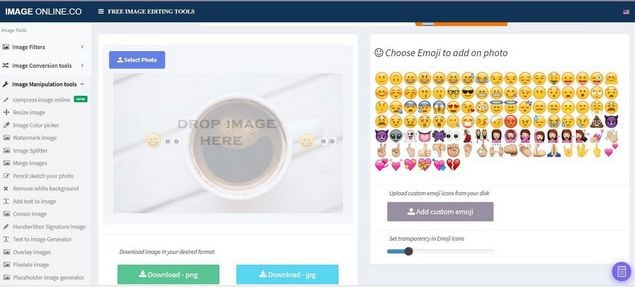
04Image Online
Another entry into the list of solutions to answer the query of how to put emojis on a photo, the Image Online tool promises you of a quality constrained image editing process to complement the basic still captures in the local media gallery of your computer with the latest collection of emoji elements. Welcoming you with a decent interface, the tool caters to sort out your emoji centered picture editing requirements within a blink’s time.
To add emoji to image with this tool, you just need to upload the selected photo to the latter’s workspace, followed by selecting a preferred emoji from the editing library, or create a custom emoji of your own, to put on the image. You can customize the emoji settings in terms of position, size and transparency, and download the edits to your device in JPG and PNG image formats.
05Canva
Last in the list is the Canva graphic editing tool which you can conveniently work with to add an emoji to a picture. Having a slightly different image editing process in comparison to its online counterparts, the utility requires you to sign up to its working interface to begin editing your photos. To start with, you need to select a preset image template or pick customized dimensions to upload the desired image.
To add emojis to your picture, you will have to download the latter’s application by navigating to and tapping the ‘More’ icon, followed by choosing the ‘Emoji’ option from the drop down menu that appears next. Once the ‘Emoji’ tab shows up in the tool’s main interface, proceed to upload your image and pick a suitable emoji from the list to add to the uploaded image. You can further, add layers of emojis to the picture, while resizing and adjusting the skin tones of the same.

Part 4 Adding Emoji to Photo Q&A
● What is the total number of emoji characters till date?
As of September 2021, a total of 3,633 emojis are known to have been introduced so far. Talking of the latest emoji package, there comes the Emoji 14.0, adding 112 emoji variations to the existing count. The aforesaid is a cumulative figure, including the skin tone, gender and flag sequences.
● What are the different types of emoji categories?
During the current time, the emoji characterization is known to house 8 different categories, namely, Flags, Symbols, Objects, Travel, Activity, Food & Drink, Animals & Nature and Smileys & People.
● What is the difference between Emoji and Emoticons?
Emoticons are specifically, graphic interpretations of the various human emotions that come with a keyboard command combination. Emojis on the other hand, are a standard set of various characters, often having a different artwork, but a universal meaning.
● Is it possible to self-create custom emojis?
As of now, having self-created variants of emojis is not possible. If at all, you become successful in design a character that resembles an emoji, you can use it as an image at the most. In an attempt to share it as an emoji, you will end up sending text combinations.
● What is the best software alternative to add emojis to pictures?
When looking for an affordable software solution for catering to the concern of how to add emojis to a photo, you can go for picking the Wondershare Filmora Video Editor graphic editing program, whose editing library literally houses the largest and the latest collection of emoji categories and varieties for sparking up your images with the best possible customized appearance.
For Win 7 or later (64-bit)
For macOS 10.12 or later
● Ending Thoughts →
● Adding emojis to pictures has landed among the latest and most preferred graphic editing trends of current times.
● When beginning to address the concern of how do you add emojis to pictures, the IT market puts a diversity of software and online solutions before you.
● If you are confused about making the best choice, you can pick the Wondershare Filmora graphic editor program without having to think twice.
Emojis are catchy graphic elements that can add life to your photos, videos and allied artworks within a wink. Be here to know about the most exciting how-tos!
In this article
01 [Best 6 Tools to Put Emojis on Pictures on iPhone](#Part 1)
02 [Best 6 Tools to Put Emojis on Pictures on Android](#Part 2)
03 [Best 5 Tools to Put Emojis on Pictures on Computer](#Part 3)
Part 1 Best 6 Tools to Put Emojis on Pictures on iPhone
Emojis have managed to secure enough significance in our social and professional lives across social media platforms in the current time. Be it a fun-filled conversation with friends and family on a chat service program, or a high end and professionally sound business strategy, these mini caricature pieces of graphic art can add the much needed highlight to almost every aspect of your digital communication concerns.
Now that you are aware of the utility of working with emojis to make your digital contents, let us take a dive into some of the best ways and means to make your iPhone images come alive in the following section:
01Emoji Picture Editor- Add Emojis to Your Photos
If you like to imbibe the images on your iPhone media gallery with a hoard of funny and cool emojis, this one is a perfect app to address the concern. The tool’s library houses the latest collection of emoji categories to be in line with a diversity of photo styles, themes and backgrounds. You can take your pick from the huge inventory of over 1500 different emojis to level up your photos.
Talking about the app interface and usage controls, you are granted full liberty to add emojis to your emojis, while changing their positions through a finger drag, or scale and rotate them by expanding, pinching and twisting your fingers. The app additionally allows you to send bigger emoji stickers on chats and conversations.
02Insta Emoji Photo Editor
When looking for an interesting and reliable application to set straight the concern of how to put emojis on pictures, the Insta Emoji Photo Editor is an affordable pick. Loaded with an enormous and updated emoji library, the app presents before you over 3200 fascinating emoji options to select from and add to your images.
The inclusion process is intuitively simple, with you just having to upload the desired images to the app’s working interface and choose from your most favorite emoji elements to make the stills come alive with added fun and spark. The app houses an interesting ’Emoji Paint’ feature for the extensively creative ones to let them create catchy drawings with the coolest emojis.
03Emoji My Face
Moving ahead in the list comes the aforesaid app, which you can conveniently rely on to get through the photo edit emoji task in less than a few seconds. What’s unique about the utility is its feature that lets you add emoji stickers on the faces of your image elements. Working with the app, you can transform the skinned appearances of your friends and family into hilarious emoji faces.
While the app permits you to pick any number of preferences from its latest and updated emoji collection, you can additionally, save and share your emoji centered image edits across a diversity of media sharing platforms and chat service programs.
04Emoji Background Photo Maker
While there are hoards of IT alternatives to add emojis to pictures, the following utility caters to the concern in a slightly different style, ahead of just picking and pasting emojis to still captures. Working with the tool, you can experiment with changing the customary and fundamental image backgrounds into funny and appealing emoji centered themes. You are allowed to either work with a desired image from your iPhone’s media gallery, or take a fresh shot from your device’s camera, followed by uploading the same to the app’s editing interface.
Focusing on the tool’s expanse of usage features, you get tom work with a straightforward interface, and select from a wide variety of expressive and thematic emoji backgrounds. You can further, preview and save the edited images in HD quality, and share the same with friends and family across social media handles.
05Funny Photo Editor With Emoji Stickers Camera
This one is an innovative image editing tool that lets you create funny image transformations with classic emoji stickers, while addressing the query of how to add emojis to pictures. If your peer group consists of crazy creators who are selfie freaks, try hands at uplifting your live camera shots with this application by adding the funkiest emojis and sharing them across the regular communication platforms.
The app’s default camera feature lets you capture a straight forward image and convert the same into a hilarious edit with the latest range of free emoji stickers, caricature smileys and lots more. You can additionally beautify the edits with choosing from a decent range of emoji skin tones to suit the image background.
06Instamoji- Emoji Photo Editor
If you have been searching for an affordable solution to walk through the concern of , how to add emoji to photo on your iPhone, try working with the Instamoji application to highlight your customary images with classic emoji stickers and elements within the blink of an eye. The app welcomes you with a clean and intuitive interface to work upon, and is completely free to use.
Talking about the utility’s emoji centered image editing features, you are permitted to select from a decent collection of vibrant, funny and cool emojis, assorted under a diversity of categories to complement your images with, while exporting them across your digital communication accounts with utmost ease. The app promises you of the finest quality edited image output.
Part 2 Best 6 Tools to Put Emojis on Pictures on Android
Emojis are best known to spark up graphic artworks with an element of fun and entertainment. While the introduction of social media and digital communication utilities have brought emojis to the fingertips of modern day smartphone users, the IT market never lags behind at putting the latest transformations regarding emoji usage at your disposal.
Discussing along the line, let us talk about some interesting applications that address the concern of how to add an emoji to a photo using an Android device in what follows next:
01Add Emoji Stickers- Pics Editor and Photo Maker
This one is a smart photo editing tool that you can choose to customize the otherwise ordinary images on the local media gallery of your Android smartphone. The app greets you with an extensive range of updated emoji alternatives to suit your most specific editing requirements for complementing your elementary photos with the perfect feel and emotion.
The emojis work to add the missing fun to your social media posts with image edits funny enough to make your peers roll over with laughter. Not just smiley faces, the app delivers to you a categorized set of emojis that are a perfect fit to any graphic theme. Some of the most preferred ones include Nature, Travel, Food & Drinks, and many more. So why wait? Just get the free utility and begin to edit and share!
02Emoji Face Sticker
If you are creativity freak and love to experiment with your editing skills to put emoji on picture, try hands at working with this free image editor utility to add a fun element to your photos and give a laughter dose to your friends and family on social media. The app caters to transform your uploaded images faces to the cutest emoji look alike ever.
If that’s not enough, you can work with the app to change your smartphone’s regular camera into an emoji camera app that works to create the best caricature emoji montages from your snapped selfies. Navigating through the latte’s editing library, you will get to choose from among the craziest and coolest emoji stickers to create emoji photos out of normal stills. All in all, the app allows you to put forward your emotions in a relatively funnier way.
03Emoji Photo Editor
Are you bored of looking at those customary color backgrounds behind your images? Consider sparking them up with the cutest and most expressive emoji backgrounds. As you pick the app to edit your images, the latter grants you a complete access to its free emoji library that houses a decent collection of over 50 different emoji backgrounds to select from. A few of the most popular ones comprise of the flower and heart crown stickers, dog face camera among others.
Editing images within the app is seamless enough to last for a few seconds. You can use the created emoji background edits in a series of ways, like, preferring a local save or going for an image export to your favorite social media handle. Another cool way to show off your creativity can be making a device screen wallpaper of the emoji background image.
04Auto Face Stamp- Cover Face With Emoji
Looking forward to use an SNS services for media sharing purposes, but bothered about privacy concerns? While it is a common practice to share pictures via SNS and allied public platforms, most of us are often worried about keeping our faces hidden. Under normal circumstances, the face masking task is something you would ideally want to escape; the aforesaid app caters to the same in a funny and enjoyable manner.
Working with the utility, you can mask your image faces with over 100 different types of emoji stickers. The app aids you further in the task through its accurate face recognition ability that takes into consideration the smallest of faces with utmost precision. All you need to do is, select a desired emoji sticker and tap on the face you wish to mask with the same.
You can further, choose to directly export the masked images to media sharing handles right from the app’s editing workspace. The app is available to you absolutely free of cost and greets its users with a responsive working interface.
05Emoji Background Photo Editor
If the ordinary thematic backgrounds of your images do not suit you any longer, try working with this application to transmute the same into vibrant and expressive emoji alternatives. The aforesaid photo editing utility caters to make your images stand out of the crowd with beautiful emoji landscapes that render creative image edits of a matchless class, while maintaining a high-definition output image quality.
Extending the dimension of features to a longer stretch, the app grants you the liberty to adjust the position and transparency of the added emojis, set emoji frames and customize the emoji centered backgrounds with stunning effects and filters. As you finish with the editing process, the app lets you share your creations directly to a preferred social media platform, while also keeping them safe in your device’s local media gallery.
06Face Emoji Photo Effect
Reaching the end of the list, here comes the Face Emoji Photo Effect application that is all set to upgrade the level of your regular images with its classic and beautiful emoji backgrounds and stickers. The app’s editing library houses a diverse range of latest and elusive emojis to highlight your otherwise normal captures. The app additionally facilitates you with an expanded set of image editing features and effects to turn them into a graphic masterpiece.
The app welcomes you with a clean and responsive interface that makes the emoji inclusion process a quick and fun activity. All you need to do is, pick up an image from your locally saved alternatives and upload them to the app’s working interface, followed by browsing the latter’s emoji library to select a cohesive emoji background to complement the same.
You can further, download the premium emoji packs through a minimal payment to enhance the app’s library if the preset options do not match your requirements. The inbuilt emoji choices are however, free to work with.
Part 3 Best 5 Tools to Put Emojis on Pictures on Computer
All of us are familiar to and love using emojis everywhere, right from commenting on regular social media posts and chat service conversations, to creating professionally sound and strategic, business centered company presentations. While the most diverse use of these graphic utilities is reported on mobile devices, you may sometimes land across an instance that demands working with emojis on a computer.
Moving ahead with our discussion to address the aforesaid concern, let us talk about some of the prominent software and online solutions to set aside the issue of how to put emojis on photos while working on a computer in the upcoming section of this article:
01Kapwing
Entering into the domain of online image editing tools, the Kapwing website easily lands among the highly preferred choices. To address the concern of adding emojis to pictures on your PC or desktop systems, this one is an affordable tool to rely on. Talking of the underlying reasons behind the app’s high rated user preference, the latter allows you to access its huge inventory of emoji stickers, distributed across a heap of categories to choose from.
Next in the line is the tool’s spic and span editing process that lets you add and customize emojis on the uploaded images with a series of effects and filters in a matter of counted seconds. You can either pick and import images from your system, or work with the app’s in house emoji templates to edit the photos. As you are done with uploading images and adding emojis, proceed to place them at the desired position within the image.
The app allows you to add multiple emoji layers to the images by facilitating the creation of duplicate copies of your favorite emojis. Once you are done with the editing process, you are free to export your creation across media handles, or save them locally to your system.
02Editor.pho.to
If you are a newbie to the world of graphic editing and want to experiment with your creative skills to sort out the need of how to add an emoji to a picture, prefer landing on this free online website to work on your images. Considering the fact that not everyone around you is a tech savvy, the aforesaid online photo editing tool is designed to house the simplest of interfaces ever. The tool is available to you absolutely free of cost, without any unfair hidden purchases.
Ahead of the basic customization features, the tool grants you the freedom to expand your graphic skills on a wider canvas with presenting before you a plethora of emoji faces, stickers and backgrounds to complement the uploaded images with. Once you have added the emoji, the tool lets you work on the latter’s position and transparency adjustments, create emoji layers and overlays and save the edits to your system in a visibly high output quality.
03Add Emoji to Photo
When looking for dependable solutions to work towards the task of how to put an emoji on a photo, you can conveniently trust the aforementioned online tool to create classic emoji photo edits from the customary still alternatives son your computer. This one is a free to use image editor facility that allows you to decorate your otherwise unnoticed images with an extensive range of preset and custom emojis to make them expressive and speak out your emotions.
The tool caters to render a high definition edited image output within seconds through the simplest of customization processes. You just need to upload a desired image from your system to the tool’s working interface, followed by picking a suitable emoji from the tool’s editing library to add it to the image. If however, the available options don’t seem to address your specific requirements, you can proceed to create custom emojis of your own within the tool.
You can also create multiple emoji layers to add to the uploaded image and make adjustments to their transparency and position within the photo. As you finish the editing process, the tool grants you the liberty to download the customized image to your system in either of the PNG or JPG file formats.
04Image Online
Another entry into the list of solutions to answer the query of how to put emojis on a photo, the Image Online tool promises you of a quality constrained image editing process to complement the basic still captures in the local media gallery of your computer with the latest collection of emoji elements. Welcoming you with a decent interface, the tool caters to sort out your emoji centered picture editing requirements within a blink’s time.
To add emoji to image with this tool, you just need to upload the selected photo to the latter’s workspace, followed by selecting a preferred emoji from the editing library, or create a custom emoji of your own, to put on the image. You can customize the emoji settings in terms of position, size and transparency, and download the edits to your device in JPG and PNG image formats.
05Canva
Last in the list is the Canva graphic editing tool which you can conveniently work with to add an emoji to a picture. Having a slightly different image editing process in comparison to its online counterparts, the utility requires you to sign up to its working interface to begin editing your photos. To start with, you need to select a preset image template or pick customized dimensions to upload the desired image.
To add emojis to your picture, you will have to download the latter’s application by navigating to and tapping the ‘More’ icon, followed by choosing the ‘Emoji’ option from the drop down menu that appears next. Once the ‘Emoji’ tab shows up in the tool’s main interface, proceed to upload your image and pick a suitable emoji from the list to add to the uploaded image. You can further, add layers of emojis to the picture, while resizing and adjusting the skin tones of the same.
Part 4 Adding Emoji to Photo Q&A
● What is the total number of emoji characters till date?
As of September 2021, a total of 3,633 emojis are known to have been introduced so far. Talking of the latest emoji package, there comes the Emoji 14.0, adding 112 emoji variations to the existing count. The aforesaid is a cumulative figure, including the skin tone, gender and flag sequences.
● What are the different types of emoji categories?
During the current time, the emoji characterization is known to house 8 different categories, namely, Flags, Symbols, Objects, Travel, Activity, Food & Drink, Animals & Nature and Smileys & People.
● What is the difference between Emoji and Emoticons?
Emoticons are specifically, graphic interpretations of the various human emotions that come with a keyboard command combination. Emojis on the other hand, are a standard set of various characters, often having a different artwork, but a universal meaning.
● Is it possible to self-create custom emojis?
As of now, having self-created variants of emojis is not possible. If at all, you become successful in design a character that resembles an emoji, you can use it as an image at the most. In an attempt to share it as an emoji, you will end up sending text combinations.
● What is the best software alternative to add emojis to pictures?
When looking for an affordable software solution for catering to the concern of how to add emojis to a photo, you can go for picking the Wondershare Filmora Video Editor graphic editing program, whose editing library literally houses the largest and the latest collection of emoji categories and varieties for sparking up your images with the best possible customized appearance.
For Win 7 or later (64-bit)
For macOS 10.12 or later
● Ending Thoughts →
● Adding emojis to pictures has landed among the latest and most preferred graphic editing trends of current times.
● When beginning to address the concern of how do you add emojis to pictures, the IT market puts a diversity of software and online solutions before you.
● If you are confused about making the best choice, you can pick the Wondershare Filmora graphic editor program without having to think twice.
Easy Way to Inset Text in Video
Adding text to any video can serve to improve the quality of the video or emphasize a section of the video. But unlike adding text to an image, adding even simple text to a video can be quite difficult. But there are video editing tools that can significantly simplify this process.
Before we look at one of the best video editing tools that you can use to add text to your video, let’s first look at why adding text to your video may be important.
Why Insert Titles to Videos?
Adding a title or any other kind of text to your video can be important for several reasons, including the following;
1. Content Becomes Memorable
Adding text to the video can serve to make the whole content of the video or a section of the video more memorable. If there is a section of the content that you want your audience to remember, adding a colorful bit of text may make the content easier to grasp and therefore more memorable.
2. Call to Actions
Any marketer understands the value of a well-positioned call to action and the best way to add a customized call to action is to add text to the video. Calls to action can help you sell products or get your audience to sign up for a service or event.
3. Brand Awareness
Text that you add to the video can also be used to enhance brand awareness and visibility. These can be in the form of the company’s slogan and logos that can serve to remind your audience of the value of your brand and its trustworthiness.
4. Aesthetic Value
When done correctly, titles and texts in videos can turn a bland ordinary-looking video into an aesthetically pleasing art piece that your audience will only be too happy to engage with. The more appealing your video is, the greater the chance that your target audience will be willing to engage with your brand and click on your calls to action.
How to Insert Title to Video
Adding text and titles to any video can be made easier by the software you choose to use. One of the best tools to edit any aspect of any video is Wondershare Filmora . Filmora is a great choice because it makes adding text and titles that match your video’s content very easy. It is therefore an ideal tool to choose if you want to add titles that will enhance your brand’s visibility.
Free Download For Win 7 or later(64-bit)
Free Download For macOS 10.14 or later
The following guide will help you easily add text, titles, openers, and end credits to any video using Filmora .
Step1 Install Filmora on your computer and launch the program. Then open the video that you want to edit in Filmora. You can do that by simply dragging and dropping the video into the program’s main interface.
Step2 To add a title to the video, click on the “Titles” tab at the top and select a title that best suits your video project. You can use the preview function to see what it looks like before adding it to the video.

If you are happy with the title that you have selected, drag and drop it onto the timeline or right-click on it and select “Apply.”
Step3 To add an opener to the video, click on the “Openers” menu under “Titles.” Then choose the specific opener that you want to add and select “Apply” to add it to the video.
Step4 To add end credits to the video, simply select “End Credit” under “Titles” and when you find the type of end credits that you want to use, right-click on it and select “Apply.”
You can then click on the titles, end credits, and openers to edit the text by changing the color and fonts to match your brand.
How to Improve Title Effects in Video
Simply adding a title or text to the video will not do much to improve the quality of the video. You need to add effects that will not only make the videos more appealing but will also correspond with your brand colors.
Thankfully, Filmora makes adding various kinds of effects to the text very easy. The following are some of the options that you have;
Editing Title and Text Effect Duration
Typically, when you add a text effect to a video using Filmora , the duration is set at 5 seconds. You can however very easily change this duration to suit your video’s needs.
The easiest way to do that is to drag one of its edges. But you can also select the text and click on the duration icon to enter the new direction in the dialogue box that appears.
You can also change the default duration so that the new timing applies to all the text effects that you create when editing videos. To do that, go to File> Preferences > Editing < Effect Duration
Customize Text Effect
To customize the text that you added to the video, double-click on it in the timeline. This will open the text editing panel where you can change the font style including the font, size, color, and alignment as well as the animation of the text.
Apply Text Animations
Filmora offers more than 80 animation presets to choose from. You can access the “Animation” tab in the text editing panel to see a list of all available animations. Double-click on the animation you want to use and use the “Preview” window to see how it works out/

If you are happy with the animation and would like to include it in your project, click on “OK” to use it.
Advanced Title Editing
If you would like to go just a little bit further in editing your text, click on the “Advanced” button to open the Advanced Text Editing panel.

Here, you will see more options including the ability to add more elements such as adding new text boxed shapes or images.
With each of these elements, you can also change the font color, animation, opacity, border, fill and shadow.
Related FAQs about Text Video Editing
1. Can I Edit the Text in a Video?
Yes. Once you have added the title or text to the video, you can just as easily edit it in various ways. As we have seen, Filmora gives you a wealth of options to customize the title in various ways including changing the font size, color, and type all from the text editing panel. You can even completely remove the title from the video and add a new one. The preview window in Filmora allows you to see any changes that you make in real-time and adjust them accordingly to fit into your project.
2. Why Should I add Text to my Video?
Adding text and titles to any video can be very important for several reasons. For instance, you can decide to add text to emphasize a point, add a call to action and even help your audience to follow along with the content when the audio is turned off. Titles and any other text that you add to a video can also make the content more understandable, engaging, and clearer. But the effectiveness of the text will depend on how and where you place the text within the video and the video editor you choose can be very instrumental in this regard.
3. How Can I Make the Text in My Video Look Good?
First, you need to decide on the color, effects, and animations that you would like to use, and to decide these things you will need to take your brand and colors into consideration. Once you have all these details, you then need to choose a video editor that offers a wide range of fonts and colors to choose from. Thankfully, Filmora offers all the colors, fonts, and animations you could ever need, allowing you to customize the text any way you want.
4. How Do I Replace Text on my Video?
Sometimes you just need to remove the text that you already have on the video and replace it with new text. Again, how successful you are in this will depend on the tool you choose to use. Some video editors will only allow you to add new text but fall short when you need to remove the text or replace it with something else.
Filmora is one of the few tools that makes it easy to delete a title. You can just click on the title and then select the “Delete” icon in the toolbar to remove it. Then you can simply use the text editing panel to add new text again.
Free Download For macOS 10.14 or later
The following guide will help you easily add text, titles, openers, and end credits to any video using Filmora .
Step1 Install Filmora on your computer and launch the program. Then open the video that you want to edit in Filmora. You can do that by simply dragging and dropping the video into the program’s main interface.
Step2 To add a title to the video, click on the “Titles” tab at the top and select a title that best suits your video project. You can use the preview function to see what it looks like before adding it to the video.
If you are happy with the title that you have selected, drag and drop it onto the timeline or right-click on it and select “Apply.”
Step3 To add an opener to the video, click on the “Openers” menu under “Titles.” Then choose the specific opener that you want to add and select “Apply” to add it to the video.
Step4 To add end credits to the video, simply select “End Credit” under “Titles” and when you find the type of end credits that you want to use, right-click on it and select “Apply.”
You can then click on the titles, end credits, and openers to edit the text by changing the color and fonts to match your brand.
How to Improve Title Effects in Video
Simply adding a title or text to the video will not do much to improve the quality of the video. You need to add effects that will not only make the videos more appealing but will also correspond with your brand colors.
Thankfully, Filmora makes adding various kinds of effects to the text very easy. The following are some of the options that you have;
Editing Title and Text Effect Duration
Typically, when you add a text effect to a video using Filmora , the duration is set at 5 seconds. You can however very easily change this duration to suit your video’s needs.
The easiest way to do that is to drag one of its edges. But you can also select the text and click on the duration icon to enter the new direction in the dialogue box that appears.
You can also change the default duration so that the new timing applies to all the text effects that you create when editing videos. To do that, go to File> Preferences > Editing < Effect Duration
Customize Text Effect
To customize the text that you added to the video, double-click on it in the timeline. This will open the text editing panel where you can change the font style including the font, size, color, and alignment as well as the animation of the text.
Apply Text Animations
Filmora offers more than 80 animation presets to choose from. You can access the “Animation” tab in the text editing panel to see a list of all available animations. Double-click on the animation you want to use and use the “Preview” window to see how it works out/
If you are happy with the animation and would like to include it in your project, click on “OK” to use it.
Advanced Title Editing
If you would like to go just a little bit further in editing your text, click on the “Advanced” button to open the Advanced Text Editing panel.
Here, you will see more options including the ability to add more elements such as adding new text boxed shapes or images.
With each of these elements, you can also change the font color, animation, opacity, border, fill and shadow.
Related FAQs about Text Video Editing
1. Can I Edit the Text in a Video?
Yes. Once you have added the title or text to the video, you can just as easily edit it in various ways. As we have seen, Filmora gives you a wealth of options to customize the title in various ways including changing the font size, color, and type all from the text editing panel. You can even completely remove the title from the video and add a new one. The preview window in Filmora allows you to see any changes that you make in real-time and adjust them accordingly to fit into your project.
2. Why Should I add Text to my Video?
Adding text and titles to any video can be very important for several reasons. For instance, you can decide to add text to emphasize a point, add a call to action and even help your audience to follow along with the content when the audio is turned off. Titles and any other text that you add to a video can also make the content more understandable, engaging, and clearer. But the effectiveness of the text will depend on how and where you place the text within the video and the video editor you choose can be very instrumental in this regard.
3. How Can I Make the Text in My Video Look Good?
First, you need to decide on the color, effects, and animations that you would like to use, and to decide these things you will need to take your brand and colors into consideration. Once you have all these details, you then need to choose a video editor that offers a wide range of fonts and colors to choose from. Thankfully, Filmora offers all the colors, fonts, and animations you could ever need, allowing you to customize the text any way you want.
4. How Do I Replace Text on my Video?
Sometimes you just need to remove the text that you already have on the video and replace it with new text. Again, how successful you are in this will depend on the tool you choose to use. Some video editors will only allow you to add new text but fall short when you need to remove the text or replace it with something else.
Filmora is one of the few tools that makes it easy to delete a title. You can just click on the title and then select the “Delete” icon in the toolbar to remove it. Then you can simply use the text editing panel to add new text again.
Let’s Create a New Premiere Pro Project, Import some Video, and Control Video Playback Speed. Also, Find Alternative Software (WonderShare Filmora) to Control Playback Speed in Minutes
Versatile Video Editor - Wondershare Filmora
An easy and powerful editor
Numerous effects to choose from
Detailed tutorials are provided by the official channel
According to the business, Adobe Premiere Pro is one of the most widely used video editing products on the market today. The option to speed up or slow down individual clips is one of the most important capabilities of Premiere Pro.

In terms of video editing, Adobe Premiere Pro is one of the most powerful applications on the market, and it’s well-known for its versatility. Speeding up movies is one of the program’s many features required for the insertion of special effects and transitions. A lot of ways are there for you to pick from while using premiere pro to speed up the film as desired.

You can’t overwrite or replace your media files by doing anything in Premiere Pro, which means that nothing you do will have an effect on your media files. The point remains: a copy of your project and all its media assets should always be kept on hand just in case.
Adobe Premiere Pro is an excellent editing tool in terms of its functionality and capabilities. Still, it has a steep hill to climb that makes it difficult for newbies and users without previous editing experience. To get the most out of Adobe Premiere Pro, one must thoroughly understand the product.

No need to worry, folks; as in this article, we will be looking at how we can alter premiere pro speed.
Fast Forward or Speed up Playback Speed in Premiere Pro
On analog editing systems, the speed of film could permanently be altered; but, because of the limitations of the technology, if you slowed anything down too much, the frame rate at which it was taken may become evident, and the image quality would begin to suffer as a consequence.
Adobe Premiere Pro is a feature-rich and professional video editor designed for the Macintosh platform. It has a variety of editing features built-in. Adobe Premiere Pro lets you change and control the speed at which movies are played back.
Premiere provides three choices for adjusting the tempo of a movie or speeding it up. We’ll go over them one by one as we scroll down the page.

Method 1
- Download and Install Adobe Premiere Pro. Launch the application on your system.
- Once you’ve set up a new project in Adobe Premiere Pro, import the video you want to edit.
- In order to place the video where you want it, drag the necessary video clips into the timeline. In the end, you’ll have a new series to call your own.
- Using the right-click menu, you may choose the whole movie or only a portion of it that you wish to edit.
- The popup dialog box will display if you choose Speed/Duration from the context menu list.
- Choose Clip> Speed Duration instead from the program’s drop-down menu.
- The Speed field should be raised, and then the OK button should be pressed to accept the change.
Method 2: Rate Stretch Tool
Adobe Premiere Pro has a Rate Stretch feature that lets you manually alter the movie’s tempo by sliding the trim bar along the timeline. To utilize the Rate Stretch tool to speed up a video clip, you must first divide the movie into pieces.
Here’s a quick method for altering the video speed so that it fits under the time limit:
- Launch the application on your respective systems.
- Drag and drop the selected video onto the timeline in Premiere Pro.
- Then, choose the Ripple Edit Tool from the toolbar, followed by the Rate Stretch Tool by clicking and holding the Ripple Edit Tool. Click the Rate Stretch button on the timeline’s left side to begin a timer.
- You may also use the R key on your keyboard to activate the Rate Stretch Tool, which is a shortcut key.
- Drag the video’s start and endpoints to their respective ends on the right and left sides to prolong or reduce the duration. As a consequence, the video speed will be improved. The bigger the period of time the video is dragged inwards, the faster it rises.
Method 3: Time Remapping Tool
In Adobe Premiere Pro, the time remapping tool is where you go to speed up a selected video section. With a video clip, this function may be utilized to create the illusion of speed and slowness.
- It’s time to fire up Adobe Premiere Pro and start fiddling with your footage.
- Simply right-click on it to bring up the context menu, and then choose Show Clip Keyframes from the display list. Afterward, choose Time Remapping from the context menu that opens.
- Click on it to make it go faster. The video will be colored blue, and a horizontal rubber band line will be drawn down its center if this option is selected. One of the video’s frame rate lines may be found here.
- A white speed-control track may be seen just below the title bar in the upper part of the video. If you can’t see it well when zooming in, you may try again. The rubber band may be dragged higher in Premiere Pro to speed up the video.
The tooltip will show how long it has been since the change happened compared to the original speed. As the movie progresses, so does the speed at which it is shown, and the duration of the video fluctuates as well. The audio remains unaltered and tied to the video when using Time Remapping.
How to Slow Down A Video in Premiere Pro?
Now, let’s discuss how to slow down a video in premiere pro
Time stretch
A one-second video clip at 60 frames per second is an example of this situation. When the game is being played at a reasonable speed on any given platform or software, 60 frames will be shown. Because of this, each frame will take twice as long to play at a 0.5X slower pace.
To put it another way, you’d see 30 frames in a second that weren’t repeated. A second has been added to the video’s duration, which will now be 2 seconds instead of 1. There will be no deterioration in quality in this situation.
- Create a new project in Premiere Pro on your PC.
- To import a video file, choose Import from the File menu at the top of the screen. After that, drag the video into either the timeline or the project panel, whichever you like.
- Right-clicking and choosing the Duration/Speed option causes the video to begin playing.
- This stage necessitates a decrease in speed from 100% to a lower percentage.
Using Keyframes
When you attempt to slow down a video by adjusting the frame rate, you are essentially eliminating frames from the video stream. This procedure will allow you to slow down a movie to your desired speed without sacrificing quality.
- After downloading and installing Adobe Premiere Pro, the first step is to launch the program. Later, you’ll need to choose a specific video that you’d want to have slowed down.
- After you’ve chosen it, you may upload it to Premiere Pro. After importing the video, you must drag and drop it into the timeline in Premiere.
- By right-clicking the mouse, choose Modify > Interpret from the drop-down menu.
- You’ll need to make some changes to the frame information now. Hit the Assume this frame rate button and input a value that is lower than the original video frame rate.
Utlizing Time Remapping
The remapping tool is a very common tool for creating slow-motion videos. It may be found in many video editing programs. It gives you the option of selecting a particular section of a video clip and then slowing down the video clip.
- Launching Adobe Premiere Pro is the initial step once it has been downloaded and installed on your computer. A particular video that you’d want slow-motioned will need to be selected later on in the process.
- After dragging the video to the timeline, you’ll need to choose the area of the movie that you want to slow down.
- Now you must choose the Key Frames and Speed from your video by clicking on the video’s right-click menu.
- Only the “Pen Tool” must be used to lock the specific region you wish to slow down in order to push the Speed Line through the Selection tool to slow down the video during this phase.
Why Is Premiere Pro Playback Fast?
If this issue arises in your program, you’ll notice choppy playback, a character that speaks too rapidly, and audio that skips frames in the narration.
The multimedia editor Premiere Pro is one of the best currently available on the market. In addition to creating YouTube videos, feature films, music videos, and other sorts of content, many professionals turn to it.
It is said that Adobe Premiere Pro suffers from a playback issue. It has the ability to make the video creation process more complicated and demanding than it should be. Let me show you how to fix this easy error in just two simple steps.
Start the program on your computer’s operating system.
Select Edit from the drop-down menu.
Look towards preference
Afterward, choose audio hardware.
No input should be used as the default input, regardless of what it is currently set to.
When you click on Playback your film, you will notice that the issue has been rectified.

How can we Alter the speed of Videos in WonderShare Filmora?
Before understanding the process of speed altering in WonderShare Filmora, let’s have an overview of “what WonderShare Filmora is”.
What is Wondershare Filmora?

Wondershare Filmora is the best video editor for content creators who are just getting started and those who want to produce Hollywood-quality visuals and content without having to invest years in training and certification. WonderShare Filmora streamlines the video editing process through the use of intelligent, intuitive features that can automate repetitive tasks and save time.
Individuals can subscribe to WonderShare Filmora for a one-year fee of $68.98 per year. Filmora is well-known as a straightforward video editor designed for novice users and social media influencers who want to devote more time to their creative endeavors. A few new features have been added, and we can now create professional-looking videos without having to go through a lengthy learning curve.
Features that Stand Out
For both new and experienced film creators, WonderShare Filmora has been designed to offer a scalable environment. Even if you’ve never edited a movie before, you can start doing so right now.
Millions of Free Media to Choose From:
Over 10 million media files are available in the stock media library of WonderShare Filmora, making it easy for filmmakers to bring their visions to life. Speed ramping and auto beat sync are also included.
Toolbar Quick Access:
After the application is installed on your computer, the toolbar allows rapid access to all the program’s capabilities. These features include media and audio files, titles, effects, split-screen formatting, components, transitions, and other elements.
Quick Editing Feature:
For content producers who don’t want to spend hours on video editing and instead want to concentrate on other areas of their work, WonderShare Filmora is the appropriate solution.
Use Animated Transitions to Bring Life into Your Videos:
Your video may get tedious if you repeatedly use the same frame. Animated transitions may be added to video and photo collages using the Split Screen feature. Using this feature, you may divide your screen into as many as six individual displays.
Improved Speed Ramping Function:
WonderShare Filmora’s new speed ramping functionality is one of the most intriguing new additions. The speed of a video clip may be gradually increased or decreased with this tool, and the transition between the various speed levels is smooth.
Capture Every Scene with Ease:
Using a slew of cameras, skilled videographers may capture the same topic from a variety of vantage points. A single camera may be used in certain circumstances to record the whole scene and a close-up, while others may be used to capture a variety of views and expressions.
Automation at its Best:
With WonderShare Filmora, you don’t have to manually synchronize the audio and video from many cameras, saving you time and effort.
Enhance Your Creativity with Masking:
Masking” is a new feature that is included in this version. Using a mask to combine different clips helps you to expand your creative horizons. You could get something fantastic, particularly if you use effects that are used in commercial ads.”
Hundred’s of Themes to Choose from:
WonderShare Filmora has 115 video themes, including business, travel, vlogging, slideshows, and many more. It’s possible to make a whole movie using Filmora AI by letting it figure out the best way to edit your video.
In short, the most popular features that it offers are:
- Motion Tracking
- Split Screen
- Audio Ducking
- Speed Ramping
- Green screen
- Color Grading
- Third-Party Stock media
- Auto Synchronization
- Masking
- Color Match
How to speed up Playback in Filmora?
In Filmora, you can also modify the length of the video clip, which allows you to change the video speed.
For a “close up in time,” the slow-motion effect may be the best choice, while the fast-forward effect may be used to make dramatic or humorous videos, depending on your tastes.
Filmora’s user-friendly interface and simple editing capabilities have made it a popular choice for professionals throughout the globe. As a result, many people prefer it over alternative editing software.
Steps
- Download and Install The latest version of Filmora.
- Launch the application on your respective system

Among the many formats that Wondershare Filmora can handle are MP4 and AVI, WMV and MOV, and even FLV and M4V. Go to your computer’s media library and choose Import from the Import menu to begin the process of bringing in videos from your computer.
Alternatively, you may just drag & drop the file you want.
Drag movies from your User’s Album onto a video track on the Timeline to access the Speed and Duration settings for that track’s duration.

- A pop-up window will appear. In order to determine the speed at which a motion effect is moving, you may use the speed numbers provided. After then, it’s up to you how fast or slow you want to go. To see how sped-up or slowed-down videos will seem, just click on the preview box. It’s a good balance if you think the present speed is too high: 0.5 speed.


- The speed at which video is played back affects the speed at which audio is played back in a similar manner. Remove the video’s audio if you want the video’s audio to play at the same speed as it did before.

- You must first double-click an audio clip in the audio editing window to begin making changes to it. Fade in and out effects, as well as reducing background noise may all be added or removed. ‘

- Once you’ve finished adjusting the speed of your movie, click “Export.” When editing a movie, choose Format from the File menu to save it in a standard format.

- It can also post your videos to sites like YouTube and Vimeo, as well as create a DVD if you so like.

- Using the drop-down menu, choose the proper symbol for your iPod, iPhone, or iPad to view your new video output (if you have one of these devices).
Conclusion
This tutorial looked at how to slow down a video in Premiere Pro using the Video Speed Controller plugin for Windows. It also emphasizes how Filmora may assist you in achieving your goal in a more efficient manner.
Aside from video effects like as rapid motion and slow motion, Filmora also allows you to do some simple and complex editing tasks such as rotating, reversing, chroma-keying, etc.
WonderShare Filmora is a substantial improvement and redesign of the previous Filmora Video Editor, released in 2008. One of the most endearing aspects of Filmora has always been that, although having a robust set of functions, the developers stayed committed to making the program essential in the design and straightforward to learn and use.
A large number of new features have been included in WonderShare Filmora to meet customer demand, and it has been necessary to incorporate access to those functions into the user interface as well.
According to the business, Adobe Premiere Pro is one of the most widely used video editing products on the market today. The option to speed up or slow down individual clips is one of the most important capabilities of Premiere Pro.
In terms of video editing, Adobe Premiere Pro is one of the most powerful applications on the market, and it’s well-known for its versatility. Speeding up movies is one of the program’s many features required for the insertion of special effects and transitions. A lot of ways are there for you to pick from while using premiere pro to speed up the film as desired.
You can’t overwrite or replace your media files by doing anything in Premiere Pro, which means that nothing you do will have an effect on your media files. The point remains: a copy of your project and all its media assets should always be kept on hand just in case.
Adobe Premiere Pro is an excellent editing tool in terms of its functionality and capabilities. Still, it has a steep hill to climb that makes it difficult for newbies and users without previous editing experience. To get the most out of Adobe Premiere Pro, one must thoroughly understand the product.
No need to worry, folks; as in this article, we will be looking at how we can alter premiere pro speed.
Fast Forward or Speed up Playback Speed in Premiere Pro
On analog editing systems, the speed of film could permanently be altered; but, because of the limitations of the technology, if you slowed anything down too much, the frame rate at which it was taken may become evident, and the image quality would begin to suffer as a consequence.
Adobe Premiere Pro is a feature-rich and professional video editor designed for the Macintosh platform. It has a variety of editing features built-in. Adobe Premiere Pro lets you change and control the speed at which movies are played back.
Premiere provides three choices for adjusting the tempo of a movie or speeding it up. We’ll go over them one by one as we scroll down the page.
Method 1
- Download and Install Adobe Premiere Pro. Launch the application on your system.
- Once you’ve set up a new project in Adobe Premiere Pro, import the video you want to edit.
- In order to place the video where you want it, drag the necessary video clips into the timeline. In the end, you’ll have a new series to call your own.
- Using the right-click menu, you may choose the whole movie or only a portion of it that you wish to edit.
- The popup dialog box will display if you choose Speed/Duration from the context menu list.
- Choose Clip> Speed Duration instead from the program’s drop-down menu.
- The Speed field should be raised, and then the OK button should be pressed to accept the change.
Method 2: Rate Stretch Tool
Adobe Premiere Pro has a Rate Stretch feature that lets you manually alter the movie’s tempo by sliding the trim bar along the timeline. To utilize the Rate Stretch tool to speed up a video clip, you must first divide the movie into pieces.
Here’s a quick method for altering the video speed so that it fits under the time limit:
- Launch the application on your respective systems.
- Drag and drop the selected video onto the timeline in Premiere Pro.
- Then, choose the Ripple Edit Tool from the toolbar, followed by the Rate Stretch Tool by clicking and holding the Ripple Edit Tool. Click the Rate Stretch button on the timeline’s left side to begin a timer.
- You may also use the R key on your keyboard to activate the Rate Stretch Tool, which is a shortcut key.
- Drag the video’s start and endpoints to their respective ends on the right and left sides to prolong or reduce the duration. As a consequence, the video speed will be improved. The bigger the period of time the video is dragged inwards, the faster it rises.
Method 3: Time Remapping Tool
In Adobe Premiere Pro, the time remapping tool is where you go to speed up a selected video section. With a video clip, this function may be utilized to create the illusion of speed and slowness.
- It’s time to fire up Adobe Premiere Pro and start fiddling with your footage.
- Simply right-click on it to bring up the context menu, and then choose Show Clip Keyframes from the display list. Afterward, choose Time Remapping from the context menu that opens.
- Click on it to make it go faster. The video will be colored blue, and a horizontal rubber band line will be drawn down its center if this option is selected. One of the video’s frame rate lines may be found here.
- A white speed-control track may be seen just below the title bar in the upper part of the video. If you can’t see it well when zooming in, you may try again. The rubber band may be dragged higher in Premiere Pro to speed up the video.
The tooltip will show how long it has been since the change happened compared to the original speed. As the movie progresses, so does the speed at which it is shown, and the duration of the video fluctuates as well. The audio remains unaltered and tied to the video when using Time Remapping.
How to Slow Down A Video in Premiere Pro?
Now, let’s discuss how to slow down a video in premiere pro
Time stretch
A one-second video clip at 60 frames per second is an example of this situation. When the game is being played at a reasonable speed on any given platform or software, 60 frames will be shown. Because of this, each frame will take twice as long to play at a 0.5X slower pace.
To put it another way, you’d see 30 frames in a second that weren’t repeated. A second has been added to the video’s duration, which will now be 2 seconds instead of 1. There will be no deterioration in quality in this situation.
- Create a new project in Premiere Pro on your PC.
- To import a video file, choose Import from the File menu at the top of the screen. After that, drag the video into either the timeline or the project panel, whichever you like.
- Right-clicking and choosing the Duration/Speed option causes the video to begin playing.
- This stage necessitates a decrease in speed from 100% to a lower percentage.
Using Keyframes
When you attempt to slow down a video by adjusting the frame rate, you are essentially eliminating frames from the video stream. This procedure will allow you to slow down a movie to your desired speed without sacrificing quality.
- After downloading and installing Adobe Premiere Pro, the first step is to launch the program. Later, you’ll need to choose a specific video that you’d want to have slowed down.
- After you’ve chosen it, you may upload it to Premiere Pro. After importing the video, you must drag and drop it into the timeline in Premiere.
- By right-clicking the mouse, choose Modify > Interpret from the drop-down menu.
- You’ll need to make some changes to the frame information now. Hit the Assume this frame rate button and input a value that is lower than the original video frame rate.
Utlizing Time Remapping
The remapping tool is a very common tool for creating slow-motion videos. It may be found in many video editing programs. It gives you the option of selecting a particular section of a video clip and then slowing down the video clip.
- Launching Adobe Premiere Pro is the initial step once it has been downloaded and installed on your computer. A particular video that you’d want slow-motioned will need to be selected later on in the process.
- After dragging the video to the timeline, you’ll need to choose the area of the movie that you want to slow down.
- Now you must choose the Key Frames and Speed from your video by clicking on the video’s right-click menu.
- Only the “Pen Tool” must be used to lock the specific region you wish to slow down in order to push the Speed Line through the Selection tool to slow down the video during this phase.
Why Is Premiere Pro Playback Fast?
If this issue arises in your program, you’ll notice choppy playback, a character that speaks too rapidly, and audio that skips frames in the narration.
The multimedia editor Premiere Pro is one of the best currently available on the market. In addition to creating YouTube videos, feature films, music videos, and other sorts of content, many professionals turn to it.
It is said that Adobe Premiere Pro suffers from a playback issue. It has the ability to make the video creation process more complicated and demanding than it should be. Let me show you how to fix this easy error in just two simple steps.
Start the program on your computer’s operating system.
Select Edit from the drop-down menu.
Look towards preference
Afterward, choose audio hardware.
No input should be used as the default input, regardless of what it is currently set to.
When you click on Playback your film, you will notice that the issue has been rectified.
How can we Alter the speed of Videos in WonderShare Filmora?
Before understanding the process of speed altering in WonderShare Filmora, let’s have an overview of “what WonderShare Filmora is”.
What is Wondershare Filmora?
Wondershare Filmora is the best video editor for content creators who are just getting started and those who want to produce Hollywood-quality visuals and content without having to invest years in training and certification. WonderShare Filmora streamlines the video editing process through the use of intelligent, intuitive features that can automate repetitive tasks and save time.
Individuals can subscribe to WonderShare Filmora for a one-year fee of $68.98 per year. Filmora is well-known as a straightforward video editor designed for novice users and social media influencers who want to devote more time to their creative endeavors. A few new features have been added, and we can now create professional-looking videos without having to go through a lengthy learning curve.
Features that Stand Out
For both new and experienced film creators, WonderShare Filmora has been designed to offer a scalable environment. Even if you’ve never edited a movie before, you can start doing so right now.
Millions of Free Media to Choose From:
Over 10 million media files are available in the stock media library of WonderShare Filmora, making it easy for filmmakers to bring their visions to life. Speed ramping and auto beat sync are also included.
Toolbar Quick Access:
After the application is installed on your computer, the toolbar allows rapid access to all the program’s capabilities. These features include media and audio files, titles, effects, split-screen formatting, components, transitions, and other elements.
Quick Editing Feature:
For content producers who don’t want to spend hours on video editing and instead want to concentrate on other areas of their work, WonderShare Filmora is the appropriate solution.
Use Animated Transitions to Bring Life into Your Videos:
Your video may get tedious if you repeatedly use the same frame. Animated transitions may be added to video and photo collages using the Split Screen feature. Using this feature, you may divide your screen into as many as six individual displays.
Improved Speed Ramping Function:
WonderShare Filmora’s new speed ramping functionality is one of the most intriguing new additions. The speed of a video clip may be gradually increased or decreased with this tool, and the transition between the various speed levels is smooth.
Capture Every Scene with Ease:
Using a slew of cameras, skilled videographers may capture the same topic from a variety of vantage points. A single camera may be used in certain circumstances to record the whole scene and a close-up, while others may be used to capture a variety of views and expressions.
Automation at its Best:
With WonderShare Filmora, you don’t have to manually synchronize the audio and video from many cameras, saving you time and effort.
Enhance Your Creativity with Masking:
Masking” is a new feature that is included in this version. Using a mask to combine different clips helps you to expand your creative horizons. You could get something fantastic, particularly if you use effects that are used in commercial ads.”
Hundred’s of Themes to Choose from:
WonderShare Filmora has 115 video themes, including business, travel, vlogging, slideshows, and many more. It’s possible to make a whole movie using Filmora AI by letting it figure out the best way to edit your video.
In short, the most popular features that it offers are:
- Motion Tracking
- Split Screen
- Audio Ducking
- Speed Ramping
- Green screen
- Color Grading
- Third-Party Stock media
- Auto Synchronization
- Masking
- Color Match
How to speed up Playback in Filmora?
In Filmora, you can also modify the length of the video clip, which allows you to change the video speed.
For a “close up in time,” the slow-motion effect may be the best choice, while the fast-forward effect may be used to make dramatic or humorous videos, depending on your tastes.
Filmora’s user-friendly interface and simple editing capabilities have made it a popular choice for professionals throughout the globe. As a result, many people prefer it over alternative editing software.
Steps
- Download and Install The latest version of Filmora.
- Launch the application on your respective system
Among the many formats that Wondershare Filmora can handle are MP4 and AVI, WMV and MOV, and even FLV and M4V. Go to your computer’s media library and choose Import from the Import menu to begin the process of bringing in videos from your computer.
Alternatively, you may just drag & drop the file you want.
Drag movies from your User’s Album onto a video track on the Timeline to access the Speed and Duration settings for that track’s duration.
- A pop-up window will appear. In order to determine the speed at which a motion effect is moving, you may use the speed numbers provided. After then, it’s up to you how fast or slow you want to go. To see how sped-up or slowed-down videos will seem, just click on the preview box. It’s a good balance if you think the present speed is too high: 0.5 speed.
- The speed at which video is played back affects the speed at which audio is played back in a similar manner. Remove the video’s audio if you want the video’s audio to play at the same speed as it did before.
- You must first double-click an audio clip in the audio editing window to begin making changes to it. Fade in and out effects, as well as reducing background noise may all be added or removed. ‘
- Once you’ve finished adjusting the speed of your movie, click “Export.” When editing a movie, choose Format from the File menu to save it in a standard format.
- It can also post your videos to sites like YouTube and Vimeo, as well as create a DVD if you so like.
- Using the drop-down menu, choose the proper symbol for your iPod, iPhone, or iPad to view your new video output (if you have one of these devices).
Conclusion
This tutorial looked at how to slow down a video in Premiere Pro using the Video Speed Controller plugin for Windows. It also emphasizes how Filmora may assist you in achieving your goal in a more efficient manner.
Aside from video effects like as rapid motion and slow motion, Filmora also allows you to do some simple and complex editing tasks such as rotating, reversing, chroma-keying, etc.
WonderShare Filmora is a substantial improvement and redesign of the previous Filmora Video Editor, released in 2008. One of the most endearing aspects of Filmora has always been that, although having a robust set of functions, the developers stayed committed to making the program essential in the design and straightforward to learn and use.
A large number of new features have been included in WonderShare Filmora to meet customer demand, and it has been necessary to incorporate access to those functions into the user interface as well.
Also read:
- New 10 Top Suggestions for AI Video Interviews for 2024
- 2024 Approved A Wedding Is One of the Exciting Parts that Will Happen in Your Life. Its Not that Easy to Plan a Wedding, Theres a Lot to Be Consider Like Wedding Dress, Food, Venue, Videographer Etc
- 2024 Approved Best PDF to GIF Converters
- Updated Blender Is a 3D Animation Software that Can Be Used to Create Stunning 3D Models and Videos
- Updated 2024 Approved Best 31 Video Trimmers for Computer, Phone and Online
- How to Make a YouTube Intro by Filmora for 2024
- New Whether Youre a Professional Animator or a Beginner Into This. If You Want to Use the OBS Studio Chroma Key, Weve Presented some Efficient Ways to Proceed. Learn More Here
- Updated In 2024, Funny Content Ideas for YouTube Videos
- Updated 2024 Approved How to Apply Video Filters
- Add Amazing Filters and Effects for Fun to Watch GIFs Using Adobe After Effects. Read on to Discover an Easy-to-Learn After Effects Alternative for 2024
- New Get The Perfect Drone Footage With Free Drone LUTs for 2024
- New In 2024, How to Brighten a Video in Windows 10 Easily
- New LumaFusion – One of the Best Video Editors for iOS
- Updated Do You Want to Use the Best LUTs for Your Media Content but Need Help Finding Them? Here Is the Overview of the Best Free LUTs for You to Use
- Updated MP3 Cutter Download
- In 2024, Create Realistic Fire Effects by Filmora
- Top 10 AirPlay Apps in Samsung Galaxy M54 5G for Streaming | Dr.fone
- Fixing Foneazy MockGo Not Working On Nokia C210 | Dr.fone
- Super Easy Ways To Deal with Samsung Galaxy S23 FE Unresponsive Screen | Dr.fone
- In 2024, How to Cast Apple iPhone 6s Plus to Chromecast? | Dr.fone
- Trouble with Apple iPhone SE (2020) Swipe-Up? Try These 11 Solutions
- Full Guide to Bypass Nokia 130 Music FRP
- In 2024, How To Fix Apple iPhone 6s Plus Unavailable Issue With Ease
- Best Tecno Spark 20 Pro+ Pattern Lock Removal Tools Remove Android Pattern Lock Without Losing Data
- In 2024, 10 Easy-to-Use FRP Bypass Tools for Unlocking Google Accounts On Nokia C22
- What To Do When Infinix Note 30 Pro Has Black Screen of Death? | Dr.fone
- 3 Effective Methods to Fake GPS location on Android For your Xiaomi 13 Ultra | Dr.fone
- How to Unlock Oppo Reno 11 5G Bootloader Easily
- Title: 2024 Approved Best 8 Augmented Reality Video Games
- Author: Chloe
- Created at : 2024-05-20 03:38:25
- Updated at : 2024-05-21 03:38:25
- Link: https://ai-editing-video.techidaily.com/2024-approved-best-8-augmented-reality-video-games/
- License: This work is licensed under CC BY-NC-SA 4.0.
