
:max_bytes(150000):strip_icc():format(webp)/0010_21-best-teen-movies-on-netflix-5104880-b0e9832746854cabb4f33cafef96214b.jpg)
2024 Approved Detailed Tutorial to Rotate Videos in Cyberlink PowerDirector
Detailed Tutorial to Rotate Videos in Cyberlink PowerDirector
Video Editing is a craft that is highly dependent on various characteristics of your video. But the way one presents it or goes about filming clips also has a profound effect on the end product. And as you may know, not every aspect of a video production activity always goes without hiccups. But editing can come in clutch as it can easily solve minor problems like skewed footage that was shot at the wrong angle or is upside down (an issue that can happen while using mobile phones).
Thus, with this article, we will be looking at steps to rotate a video in Cyberlink PowerDirector to help you when required. We have also mentioned the steps you will need to follow in Wondershare Filmora.
Note: We documented the steps in this guide with PowerDirector 365 and WonderShare Filmora X.
Steps to Rotate Videos with CyberLink PowerDirector
Put yourself in a situation where you’ve just finished filming a project with your smartphone but end up realizing that the footage isn’t in the right orientation by default. While the error has an easy fix on most smartphones, you can also perform this action with video editing tools.
Also, while this form of rotating might be the most basic implementation of the feature, you can often use the feature to add a dynamic nature to your video with Keyframes.
Definition: Keyframes in Video Editing is a software feature that allows an editor to set start and endpoints (denoted by In and Out Markers), presenting the opportunity to custom clip properties between the two positions. The set changes occur gradually as the playhead continues moving through the clip. Properties that can undergo modification with this method are zoom, rotation, colors, positions, etc.
The process of rotating clips is fairly straightforward; once you have PowerDirector 365 open, follow the steps listed below.
If you do not have CyberLink PowerDirector 365, download the software by visiting Cyberlink’s official website.
Step 1: Create a new video project in Cyberlink PowerDirector 365 and choose Full Mode.

Note: Full Mode in Cyberlink PowerDirector 365 will provide users access to a full-featured video editing tool similar in function to Wondershare Filmora. The other option available is Ad Designer.
Step 2: Now, import media onto the Timeline from the Media Library.
For this guide, we used the pre-existing stock footage in Cyberlink PowerDirector.

Step 3: Now, click on the video file on the Timeline; this will activate the video in the Preview Window. And it will provide you with access to the rotation circle, allowing you to change the orientation of the source file.

EXTRA
Rotation added in the PiP Designer will function as a keyframe-based rotation action. Right-click on the video in the preview window, choose Edit and then Modify to access this menu.

Following this, you can click on the Motion Tab, go into Rotation Settings, and modify the angle with greater precision. In the Preview Window, you will now be able to see the rotating video.

An Easier Way to Crop Video with Wondershare Filmora
Though Cyberlink PowerDirector 365 is a powerful video editing tool, we felt its menus were not as simple to navigate. Accessing the rotate function while available in the forefront, the use of PiP Designer didn’t feel intuitive.
In Wondershare Filmora Video Editor , rotating footage only happens via the Edit Option, and this straightforward approach felt simple. As for those who want to use Keyframes, the integration of this feature right above the Timeline is an appreciated convenience.
This emphasis on quick accessibility is present with almost every function in Filmora, and we believe this to be a significant advantage. The use of modern and unique iconography also increases familiarity, an aspect that will always be welcoming to new and budding creators.
If you do not already have Wondershare Filmora, you can download the software by visiting the official website.
To help you learn how to use the rotate function and show you an example of the easy accessibility in Filmora, here is how you can use the feature to get the output you desire.
For Win 7 or later (64-bit)
For macOS 10.14 or later
Once you have a new project open in Filmora, follow the steps listed below.
Step 1: Import a Media File to edit into your Video Project.

Step 2: Drag the video clip onto the Timeline and then select it with a mouse click to activate further interactions.

Step 3: Choose the Edit Option (marked in Red).
This will bring up the Edit Window in the left-top corner of your screen.

Step 4: Click on the Transform Menu and use the Rotation Slider to edit the orientation.

Having read this stretch of the guide, we believe you may have noticed how Filmora is more user-friendly and accessible due to its menu layout.
BONUS
Click on the Keyframe Button (marked in Green) to access the Keyframe Menu that allows you to set points between which a decided amount of rotation can happen.

The Bottom Line
This marks the end of our guide on how to rotate video in PowerDirector 365 and Wondershare Filmora X. Now, while both software are high-capable tools, we feel the keyframe-based working on rotation in Filmora is a lot more intuitive and easy to use. The ability to only have number-based rotation within the edit menu is also a positive, as rotating with a swivel like in PowerDirector isn’t always the most accurate.
And lastly, the modern iconography-based design of Wondershare Filmora is a factor to keep in mind, as this increases usability manifolds.
Note: Full Mode in Cyberlink PowerDirector 365 will provide users access to a full-featured video editing tool similar in function to Wondershare Filmora. The other option available is Ad Designer.
Step 2: Now, import media onto the Timeline from the Media Library.
For this guide, we used the pre-existing stock footage in Cyberlink PowerDirector.
Step 3: Now, click on the video file on the Timeline; this will activate the video in the Preview Window. And it will provide you with access to the rotation circle, allowing you to change the orientation of the source file.
EXTRA
Rotation added in the PiP Designer will function as a keyframe-based rotation action. Right-click on the video in the preview window, choose Edit and then Modify to access this menu.
Following this, you can click on the Motion Tab, go into Rotation Settings, and modify the angle with greater precision. In the Preview Window, you will now be able to see the rotating video.
An Easier Way to Crop Video with Wondershare Filmora
Though Cyberlink PowerDirector 365 is a powerful video editing tool, we felt its menus were not as simple to navigate. Accessing the rotate function while available in the forefront, the use of PiP Designer didn’t feel intuitive.
In Wondershare Filmora Video Editor , rotating footage only happens via the Edit Option, and this straightforward approach felt simple. As for those who want to use Keyframes, the integration of this feature right above the Timeline is an appreciated convenience.
This emphasis on quick accessibility is present with almost every function in Filmora, and we believe this to be a significant advantage. The use of modern and unique iconography also increases familiarity, an aspect that will always be welcoming to new and budding creators.
If you do not already have Wondershare Filmora, you can download the software by visiting the official website.
To help you learn how to use the rotate function and show you an example of the easy accessibility in Filmora, here is how you can use the feature to get the output you desire.
For Win 7 or later (64-bit)
For macOS 10.14 or later
Once you have a new project open in Filmora, follow the steps listed below.
Step 1: Import a Media File to edit into your Video Project.
Step 2: Drag the video clip onto the Timeline and then select it with a mouse click to activate further interactions.
Step 3: Choose the Edit Option (marked in Red).
This will bring up the Edit Window in the left-top corner of your screen.
Step 4: Click on the Transform Menu and use the Rotation Slider to edit the orientation.
Having read this stretch of the guide, we believe you may have noticed how Filmora is more user-friendly and accessible due to its menu layout.
BONUS
Click on the Keyframe Button (marked in Green) to access the Keyframe Menu that allows you to set points between which a decided amount of rotation can happen.
The Bottom Line
This marks the end of our guide on how to rotate video in PowerDirector 365 and Wondershare Filmora X. Now, while both software are high-capable tools, we feel the keyframe-based working on rotation in Filmora is a lot more intuitive and easy to use. The ability to only have number-based rotation within the edit menu is also a positive, as rotating with a swivel like in PowerDirector isn’t always the most accurate.
And lastly, the modern iconography-based design of Wondershare Filmora is a factor to keep in mind, as this increases usability manifolds.
| Live Stream on YouTube Using Zoom
Abundant Video Effects - Wondershare Filmora
Provide abundant video effects - A creative video editor
Powerful color correction and grading
Detailed tutorials provided by the official channel
Zoom sessions have made daily meetings a lot easier as it offers great flexibility to the people. You can conduct long and important business meetings or educational class lessons in the comfort of your home. As Zoom meetings are widely adopted as a new medium of communication, many people have started to stream live Zoom sessions across various online platforms.
One of the popular online platforms is YouTube, so one must know how to Zoom YouTube live streaming instantly. Through this article, you will come to know about simple and basic steps regarding stream Zoom to YouTube flawlessly.
In this article
Part 1: Software Requirements
Part 2: Live Stream on YouTube Using Zoom
Part 1: Software Requirements
In this part, we will mention software requirements for Zoom meetings and webinars to conduct Zoom live streams on YouTube comfortably on your devices.
Streaming for Zoom Meeting
- Pro, Business, Education, or Enterprise Account
- The Host is Licensed
- Zoom Desktop Client
- **Windows:**Version 4.4.53582 or Higher
- **macOS:**Version 4.4.53582 or Higher
- Zoom Mobile Client
- **Android:**Version 5.4.0 or Higher
- **iOS:**Version 5.4.0 or Higher
- Live streaming is enabled on YouTube
Streaming for Zoom Webinar
- Pro, Business, Education, or Enterprise Account
- The Host is Assigned a Zoom Webinar License
- Zoom Desktop Client
- **Windows:**Version 4.0 or Higher
- **macOS:**Version 4.0 or Higher
- Zoom Mobile Client
- **Android:**Version 5.4.0 or Higher
- **iOS:**Version 5.4.0 or Higher
- Live Streaming Enabled on YouTube
Part 2: Live Stream on YouTube Using Zoom
To Zoom YouTube live, this part contains detailed steps that will assist you throughout the whole process.
Steps to Execute Before Live Streaming
Before going live on YouTube, the first step is to schedule the meeting in Zoom for successful live streaming. To do so, open your Zoom account and schedule a suitable time for the meeting or webinar you want to conduct.

Activating the Live Streaming Option
Step 1: To begin, first sign in to your Zoom account and then navigate to “Zoom meeting settings.” On this menu, scroll down to find the option “In Meeting (Advanced)” on the left side.
Step 2: Now turn on the toggle of “Allow live streaming meetings” to activate the feature of live streaming. Afterward, you would see four checkboxes on your screen through which you can control where to stream Zoom meetings.
Step 3: Start by unchecking the Facebook box if you don’t want to want live stream Zoom on the Facebook platform. Then, tap on the checkbox of YouTube to allow the live streaming of Zoom meetings on your YouTube account.
Step 4: Now, click on the checkbox for “Custom live streaming service” to enable the live streaming before your meeting starts. Also, on the displayed text box, you can enter any instructions for the host who will live stream your Zoom meeting. Once done with all the changes, tap on “Save” and continue with the steps given below.

Settings Up Live Streaming of Scheduled Meeting
If you want to live stream the scheduled Zoom meeting through the option of “Custom live streaming,” you should have your stream key, stream URL, and the URL of the live streaming page of your streaming site. Now read the below instructions to set up live streaming settings on YouTube.
Step 1: Navigate to the site Youtube.com by entering the internet ID and password. Then tap on the button “Create a video or post” displayed in the top right corner.

Step 2: From the displayed options, click on “Go Live” and create your channel for the live streaming videos. Verify your account from the phone call or received text message. Now from the YouTube home page, tap on the “Create a video or post” button to proceed further.

Step 3: After clicking on the option of “Go Live” again, enter the information about your live streaming video in the pop-up window. For this, you should navigate to the “Stream” tab to build an “Event title.” You can also enter a description along with the title. Now you can control the viewability of your live stream video such as public, private and unlisted.

Step 4: From the appeared drop-down menu, tap on the category of your live stream video. You can also turn on the toggle of “Schedule for later” if you want to live stream later and enter the date and time simultaneously.
Step 5: You can also add a thumbnail to your live stream video so that people can easily search. Afterward, choose the option either “Yes” or “No” of the heading saying, “Is this video made for kids?”. Once done, tap on the “Create Stream” button.
Step 6: A new window will appear containing your “Stream URL” and “Stream Key.” Copy and save this information for pre-scheduled live streaming on a text file. Now tap on the “Share” option from the top right and then also copy the “Livestream URL” and save it in a text file.

How to Set Up the Live Stream on Zoom
Step 1: On your Zoom account, go to the lists of upcoming meetings and locate your scheduled meeting. After finding the scheduled meeting, choose the meeting topic to continue.

Step 2: Now scroll down the page to select the option called “Live Streaming.” Click on this tab and then click on the option saying “configure live stream settings.”

Step 3: On the pop-up screen, enter all the information you saved before, such as “Stream key,” “Stream URL,” and “Live streaming page URL” on their respective boxes. Once done, click on the “Save” button.

Guidelines to Perform Quickly Before Your Live Stream
Step 1: Start this process before half an hour of your meeting and click to begin your Zoom meeting. Then tap on the “More” option displayed on the toolbar.

Step 2: From the more options, select “Live on custom live streaming service.” Now proceed with the live streaming on your streaming platform.

Step 3: If you are utilizing YouTube live from the settings of “Live on custom live streaming service,” navigate to your YouTube live window. If you don’t have this window open, tap on the “Create a video or post” button and click on “Go Live.” From the “Manage” tab, select the title of your live stream video and then tap on the “Go Live” option from the top right corner.

How to Go Live from Your Zoom Meeting
Step 1: Through your Zoom meeting, tap on the “More” button and then click on “Live on YouTube.” A new window will display the form where you select your account.

Step 2: On the next page, enter the title of the YouTube live stream video and choose the viewability options such as public, private and unlisted. Once done with privacy options, tap on the “Go Live” button.

How to Stop the Stop the Live Stream and End the Zoom Meeting
Ending the Live Stream through Custom Streaming Service
For live-streaming YouTube videos through “Live on custom live streaming service,” tap on the “End Stream” button displayed in the top right corner that will end your live session.
Ending the Live Stream and Zoom Meeting
From your Zoom meeting, tap on the “More” button and tap on the option called “Stop live stream.” Afterward, select the “End Meeting” option to end the Zoom meeting for all participants. Then tap on the “End Meeting for All” option for confirmation.

Conclusion
Many people across the world use online platforms like YouTube to live stream their videos for more connectivity. As Zoom meetings and webinars are getting recognition, it’s a great idea to stream Zoom to YouTube live to have a larger audience. Using this article, you can find easy and simple steps to Zoom YouTube live according to your convenience.
Zoom sessions have made daily meetings a lot easier as it offers great flexibility to the people. You can conduct long and important business meetings or educational class lessons in the comfort of your home. As Zoom meetings are widely adopted as a new medium of communication, many people have started to stream live Zoom sessions across various online platforms.
One of the popular online platforms is YouTube, so one must know how to Zoom YouTube live streaming instantly. Through this article, you will come to know about simple and basic steps regarding stream Zoom to YouTube flawlessly.
In this article
Part 1: Software Requirements
Part 2: Live Stream on YouTube Using Zoom
Part 1: Software Requirements
In this part, we will mention software requirements for Zoom meetings and webinars to conduct Zoom live streams on YouTube comfortably on your devices.
Streaming for Zoom Meeting
- Pro, Business, Education, or Enterprise Account
- The Host is Licensed
- Zoom Desktop Client
- **Windows:**Version 4.4.53582 or Higher
- **macOS:**Version 4.4.53582 or Higher
- Zoom Mobile Client
- **Android:**Version 5.4.0 or Higher
- **iOS:**Version 5.4.0 or Higher
- Live streaming is enabled on YouTube
Streaming for Zoom Webinar
- Pro, Business, Education, or Enterprise Account
- The Host is Assigned a Zoom Webinar License
- Zoom Desktop Client
- **Windows:**Version 4.0 or Higher
- **macOS:**Version 4.0 or Higher
- Zoom Mobile Client
- **Android:**Version 5.4.0 or Higher
- **iOS:**Version 5.4.0 or Higher
- Live Streaming Enabled on YouTube
Part 2: Live Stream on YouTube Using Zoom
To Zoom YouTube live, this part contains detailed steps that will assist you throughout the whole process.
Steps to Execute Before Live Streaming
Before going live on YouTube, the first step is to schedule the meeting in Zoom for successful live streaming. To do so, open your Zoom account and schedule a suitable time for the meeting or webinar you want to conduct.
Activating the Live Streaming Option
Step 1: To begin, first sign in to your Zoom account and then navigate to “Zoom meeting settings.” On this menu, scroll down to find the option “In Meeting (Advanced)” on the left side.
Step 2: Now turn on the toggle of “Allow live streaming meetings” to activate the feature of live streaming. Afterward, you would see four checkboxes on your screen through which you can control where to stream Zoom meetings.
Step 3: Start by unchecking the Facebook box if you don’t want to want live stream Zoom on the Facebook platform. Then, tap on the checkbox of YouTube to allow the live streaming of Zoom meetings on your YouTube account.
Step 4: Now, click on the checkbox for “Custom live streaming service” to enable the live streaming before your meeting starts. Also, on the displayed text box, you can enter any instructions for the host who will live stream your Zoom meeting. Once done with all the changes, tap on “Save” and continue with the steps given below.
Settings Up Live Streaming of Scheduled Meeting
If you want to live stream the scheduled Zoom meeting through the option of “Custom live streaming,” you should have your stream key, stream URL, and the URL of the live streaming page of your streaming site. Now read the below instructions to set up live streaming settings on YouTube.
Step 1: Navigate to the site Youtube.com by entering the internet ID and password. Then tap on the button “Create a video or post” displayed in the top right corner.
Step 2: From the displayed options, click on “Go Live” and create your channel for the live streaming videos. Verify your account from the phone call or received text message. Now from the YouTube home page, tap on the “Create a video or post” button to proceed further.
Step 3: After clicking on the option of “Go Live” again, enter the information about your live streaming video in the pop-up window. For this, you should navigate to the “Stream” tab to build an “Event title.” You can also enter a description along with the title. Now you can control the viewability of your live stream video such as public, private and unlisted.
Step 4: From the appeared drop-down menu, tap on the category of your live stream video. You can also turn on the toggle of “Schedule for later” if you want to live stream later and enter the date and time simultaneously.
Step 5: You can also add a thumbnail to your live stream video so that people can easily search. Afterward, choose the option either “Yes” or “No” of the heading saying, “Is this video made for kids?”. Once done, tap on the “Create Stream” button.
Step 6: A new window will appear containing your “Stream URL” and “Stream Key.” Copy and save this information for pre-scheduled live streaming on a text file. Now tap on the “Share” option from the top right and then also copy the “Livestream URL” and save it in a text file.
How to Set Up the Live Stream on Zoom
Step 1: On your Zoom account, go to the lists of upcoming meetings and locate your scheduled meeting. After finding the scheduled meeting, choose the meeting topic to continue.
Step 2: Now scroll down the page to select the option called “Live Streaming.” Click on this tab and then click on the option saying “configure live stream settings.”
Step 3: On the pop-up screen, enter all the information you saved before, such as “Stream key,” “Stream URL,” and “Live streaming page URL” on their respective boxes. Once done, click on the “Save” button.
Guidelines to Perform Quickly Before Your Live Stream
Step 1: Start this process before half an hour of your meeting and click to begin your Zoom meeting. Then tap on the “More” option displayed on the toolbar.
Step 2: From the more options, select “Live on custom live streaming service.” Now proceed with the live streaming on your streaming platform.
Step 3: If you are utilizing YouTube live from the settings of “Live on custom live streaming service,” navigate to your YouTube live window. If you don’t have this window open, tap on the “Create a video or post” button and click on “Go Live.” From the “Manage” tab, select the title of your live stream video and then tap on the “Go Live” option from the top right corner.
How to Go Live from Your Zoom Meeting
Step 1: Through your Zoom meeting, tap on the “More” button and then click on “Live on YouTube.” A new window will display the form where you select your account.
Step 2: On the next page, enter the title of the YouTube live stream video and choose the viewability options such as public, private and unlisted. Once done with privacy options, tap on the “Go Live” button.
How to Stop the Stop the Live Stream and End the Zoom Meeting
Ending the Live Stream through Custom Streaming Service
For live-streaming YouTube videos through “Live on custom live streaming service,” tap on the “End Stream” button displayed in the top right corner that will end your live session.
Ending the Live Stream and Zoom Meeting
From your Zoom meeting, tap on the “More” button and tap on the option called “Stop live stream.” Afterward, select the “End Meeting” option to end the Zoom meeting for all participants. Then tap on the “End Meeting for All” option for confirmation.
Conclusion
Many people across the world use online platforms like YouTube to live stream their videos for more connectivity. As Zoom meetings and webinars are getting recognition, it’s a great idea to stream Zoom to YouTube live to have a larger audience. Using this article, you can find easy and simple steps to Zoom YouTube live according to your convenience.
The Definite Guide to Craig Bot Discord
The Definite Guide to Craig Bot Discord
An easy yet powerful editor
Numerous effects to choose from
Detailed tutorials provided by the official channel
Discord is a free text and audio communication tool for gamers and other communities. The voice channel in the Discord server allows users to speak with many people. On the other hand, Discord does not have a voice recording feature. Users can use third-party solutions to capture their discord audio when speaking via voice chat. When recording someone else’s discussion, be sure you have their permission. We’ll show you how to record discord audio with the Craig Discord bot and record discord audio using Craig in this article. Craig can record discord calls also. Let’s get started!
In this article
01 [What is Craig Bot Discord?](#Part 1)
02 [Is Craig Discord Bot Safe?](#Part 2)
03 [How Do I Enable Craig in Discord?](#Part 3)
04 [How to Record Discord Audio Using Craig](#Part 4)
05 [Craig Bot Discord Q&A](#Part 5)
Part 1 What is Craig Bot Discord?
Craig is a “Discord voice channel recording bot” with multi-track/multi-channel recording capabilities. In short, that means each speaker gets their audio file when Craig records your Discord voice channel.
Craig Recorder keeps track of all your recordings. You may use Craig Bot to record your calls in high-quality audio and video as a server owner.
Craig will record continuously for up to six hours. You can download a copy of the audio to examine the status of a recording until you download the file. The Craig website has a complete set of Craig bot commands, which you may immediately access by typing: Craig, help in a Discord channel.
Part 2 Is Craig Discord Bot Safe?
All Craig web services, like most websites, log all users’ IP addresses to identify and prevent criminal activity. Craig does not keep track of anyone who does not speak in a recorded channel, use any Craig bot commands, or participate in an EnnuiCastr recording.
Part 3 How Do I Enable Craig in Discord?
All Craig web services, like most websites, log all users’ IP addresses to identify and prevent criminal activity. Anyone who does not talk in a recorded channel, use any Discord Craig commands, or engage in a recording using the Craig web app is anonymous to Craig.
Part 4 How to Record Discord Audio Using Craig
Craig will not record without a visible label indicating that it is getting recorded. It records your conversation with others, but it also records each user as a unique audio track, making it much easier to edit or remove specific speakers if necessary.
Follow these simple steps to use a Discord recording bot.
Step 1: Invite Craig
You must first invite Craig to your server to use him. Visit Craig’s website and click the “Invite Craig to Your Discord Server” option to get started.
Now, begin the joining procedure by pressing Invite Craig to your Discord Server. This action will take you to the authorization page for the Discord server. However, before using your server, you must first grant Craig permission to join it.

Step 2: Go to “Add Bot To”
Go to the “Add Bot To” section and select your server, then click “Authorize” to allow the bot to join. Select your Discord server, then click Authorize to enable the Craig bot to join.

Step 3: Join Craig
You should notice a join notification for “Craig” in your server if the process is successful. That’s it! You don’t have to do more; you may start recording your audio channels right away with Craig.
Enter an audio channel and type: Craig:; join to get started.

Step 4: Begin Your Recording
Craig will join the channel and start recording the audio instantly and the bot’s username will update to confirm this. Besides, you’ll also hear an voice from the bot saying, “now recording.”

Step 5: Exit to End Recording
Type: Craig, exit to end a Craig recording. It will force Craig to quit the current channel and stop recording. However, recordings in other channels will continue.

Step 6: Type “: Craig:, Stop”
If you wish to compel Craig to cease recording on all channels, type: Craig:, stop.
You can use this instead of the leave command to end a Craig recording if you’re only recording in one channel.

Step 7: Download or Delete Link
The Craig bot will send you a private message with links to download or delete your talks when you start recording.

Craig will record continuously for up to six hours. You can download a copy of the audio to examine the status of a recording until you download the file.
Part 5 Craig Bot Discord Q&A
Here are some frequently asked questions you need to go through to explore Craig discord bot:
Q: Is Craig bot capable of recording video?
A: Craig recorder keeps track of all your recordings. You may use Craig bot to record your calls in high-quality audio and video as a server owner.
Q: On Discord, how can I record my calls?
A: Select ‘Start Recording’ from the ‘Controls’ area. Discord now allows you to record calls.
Q: How do I make Craig active?
A: Enter an audio channel and type: Craig:, join to get started. Craig will join the channel and begin recording right away; update the bot’s username to reflect this. To confirm, you’ll hear an audio notice from the bot saying, “now recording.” Type: Craig:, exit to end a Craig recording.
Q: Is Craig safe?
A: Craig is in the 17th percentile for safety, which means that 83 percent of cities are safer while 17 percent are riskier. Only Craig’s appropriate borders are considered in this analysis. For a list of adjacent towns, see the table below. During a particular year, the crime rate in Craig is 48.61 per 1,000 residents.
Q: What is the best option to stop a Craig bot?
A: First, type in the audio channel and type: Craig:, join to begin. Craig will join the channel and start recording the bot immediately. You must see the updated bot’s username. After that, you’ll hear an audio note from the bot saying, “now recording.” Type: Craig:, leave to stop a Craig recording bot from all channels**.**

Wondershare Filmora Video Editor doesn’t feature multi-cam support or the latest VR technologies. However, its friendly UI and many effects can help you edit your Discord videos.
For Win 7 or later (64-bit)
For macOS 10.12 or later
PROS
● User-friendly interface
● Inexpensive
● There are numerous effects and overlays.
● Good text and title tools
● In the test, the rendering is quick.
● Regular updates with new effects for video-making and tweaking tools.
● Try it for free option before purchasing.
CONS
● The user interface is not touch-friendly.
● There is no DVD menu authoring or chapter authoring.
● Ending Thoughts →
● What Craig bot is, is it safe to use, and how you can activate it.
● Besides, you also went through the steps to use the Craig bot on Discord and some FAQs.
● Finally, we introduced Filmora, the best video editing software to get excellent results for the Discord platform.
● Thus, now with Discord Craig bot you can make recordings easily using the simple laud down steps. Ensure that you get familiar with the Craig bot commands for a seamless process. Also, get a fantastic video editor by Wondershare; this video editor helps you create amazing videos with effects giving your video that professional touch.
Discord is a free text and audio communication tool for gamers and other communities. The voice channel in the Discord server allows users to speak with many people. On the other hand, Discord does not have a voice recording feature. Users can use third-party solutions to capture their discord audio when speaking via voice chat. When recording someone else’s discussion, be sure you have their permission. We’ll show you how to record discord audio with the Craig Discord bot and record discord audio using Craig in this article. Craig can record discord calls also. Let’s get started!
In this article
01 [What is Craig Bot Discord?](#Part 1)
02 [Is Craig Discord Bot Safe?](#Part 2)
03 [How Do I Enable Craig in Discord?](#Part 3)
04 [How to Record Discord Audio Using Craig](#Part 4)
05 [Craig Bot Discord Q&A](#Part 5)
Part 1 What is Craig Bot Discord?
Craig is a “Discord voice channel recording bot” with multi-track/multi-channel recording capabilities. In short, that means each speaker gets their audio file when Craig records your Discord voice channel.
Craig Recorder keeps track of all your recordings. You may use Craig Bot to record your calls in high-quality audio and video as a server owner.
Craig will record continuously for up to six hours. You can download a copy of the audio to examine the status of a recording until you download the file. The Craig website has a complete set of Craig bot commands, which you may immediately access by typing: Craig, help in a Discord channel.
Part 2 Is Craig Discord Bot Safe?
All Craig web services, like most websites, log all users’ IP addresses to identify and prevent criminal activity. Craig does not keep track of anyone who does not speak in a recorded channel, use any Craig bot commands, or participate in an EnnuiCastr recording.
Part 3 How Do I Enable Craig in Discord?
All Craig web services, like most websites, log all users’ IP addresses to identify and prevent criminal activity. Anyone who does not talk in a recorded channel, use any Discord Craig commands, or engage in a recording using the Craig web app is anonymous to Craig.
Part 4 How to Record Discord Audio Using Craig
Craig will not record without a visible label indicating that it is getting recorded. It records your conversation with others, but it also records each user as a unique audio track, making it much easier to edit or remove specific speakers if necessary.
Follow these simple steps to use a Discord recording bot.
Step 1: Invite Craig
You must first invite Craig to your server to use him. Visit Craig’s website and click the “Invite Craig to Your Discord Server” option to get started.
Now, begin the joining procedure by pressing Invite Craig to your Discord Server. This action will take you to the authorization page for the Discord server. However, before using your server, you must first grant Craig permission to join it.
Step 2: Go to “Add Bot To”
Go to the “Add Bot To” section and select your server, then click “Authorize” to allow the bot to join. Select your Discord server, then click Authorize to enable the Craig bot to join.
Step 3: Join Craig
You should notice a join notification for “Craig” in your server if the process is successful. That’s it! You don’t have to do more; you may start recording your audio channels right away with Craig.
Enter an audio channel and type: Craig:; join to get started.
Step 4: Begin Your Recording
Craig will join the channel and start recording the audio instantly and the bot’s username will update to confirm this. Besides, you’ll also hear an voice from the bot saying, “now recording.”
Step 5: Exit to End Recording
Type: Craig, exit to end a Craig recording. It will force Craig to quit the current channel and stop recording. However, recordings in other channels will continue.
Step 6: Type “: Craig:, Stop”
If you wish to compel Craig to cease recording on all channels, type: Craig:, stop.
You can use this instead of the leave command to end a Craig recording if you’re only recording in one channel.
Step 7: Download or Delete Link
The Craig bot will send you a private message with links to download or delete your talks when you start recording.
Craig will record continuously for up to six hours. You can download a copy of the audio to examine the status of a recording until you download the file.
Part 5 Craig Bot Discord Q&A
Here are some frequently asked questions you need to go through to explore Craig discord bot:
Q: Is Craig bot capable of recording video?
A: Craig recorder keeps track of all your recordings. You may use Craig bot to record your calls in high-quality audio and video as a server owner.
Q: On Discord, how can I record my calls?
A: Select ‘Start Recording’ from the ‘Controls’ area. Discord now allows you to record calls.
Q: How do I make Craig active?
A: Enter an audio channel and type: Craig:, join to get started. Craig will join the channel and begin recording right away; update the bot’s username to reflect this. To confirm, you’ll hear an audio notice from the bot saying, “now recording.” Type: Craig:, exit to end a Craig recording.
Q: Is Craig safe?
A: Craig is in the 17th percentile for safety, which means that 83 percent of cities are safer while 17 percent are riskier. Only Craig’s appropriate borders are considered in this analysis. For a list of adjacent towns, see the table below. During a particular year, the crime rate in Craig is 48.61 per 1,000 residents.
Q: What is the best option to stop a Craig bot?
A: First, type in the audio channel and type: Craig:, join to begin. Craig will join the channel and start recording the bot immediately. You must see the updated bot’s username. After that, you’ll hear an audio note from the bot saying, “now recording.” Type: Craig:, leave to stop a Craig recording bot from all channels**.**
Wondershare Filmora Video Editor doesn’t feature multi-cam support or the latest VR technologies. However, its friendly UI and many effects can help you edit your Discord videos.
For Win 7 or later (64-bit)
For macOS 10.12 or later
PROS
● User-friendly interface
● Inexpensive
● There are numerous effects and overlays.
● Good text and title tools
● In the test, the rendering is quick.
● Regular updates with new effects for video-making and tweaking tools.
● Try it for free option before purchasing.
CONS
● The user interface is not touch-friendly.
● There is no DVD menu authoring or chapter authoring.
● Ending Thoughts →
● What Craig bot is, is it safe to use, and how you can activate it.
● Besides, you also went through the steps to use the Craig bot on Discord and some FAQs.
● Finally, we introduced Filmora, the best video editing software to get excellent results for the Discord platform.
● Thus, now with Discord Craig bot you can make recordings easily using the simple laud down steps. Ensure that you get familiar with the Craig bot commands for a seamless process. Also, get a fantastic video editor by Wondershare; this video editor helps you create amazing videos with effects giving your video that professional touch.
How to Zoom Picture in Picture [Easy Solution]
Zoom is one of the greatest options on the market for video conferencing. It doesn’t matter whether you use it at home or in an office environment; it will quickly link the team members. One of the most popular video conferencing programs is Zoom. When in-person meetings aren’t feasible, it enables you to communicate electronically with employees, and it’s been a major popularity for social occasions as well. In case you’re not acquainted, picture-in-picture mode enables you to watch videos from one app while using your PC normally. The movie will keep playing in a tiny thumbnail window so that two applications may work simultaneously on your smartphone.
You may create virtual audio and video conferences, webinars, live chats, screen sharing, and other collaboration tools with Zoom, a cloud-based video communications solution. Zoom’s most recent iPhone apps let you dismiss a Zoom Meeting while keeping the Zoom video call open in a picture-in-picture mode. To join a Zoom conference, you don’t need an account, and because the software works with Mac, Windows, Linux, iOS, and Android devices, nearly anybody can use it. Since using Zoom’s picture-in-picture mode is the same as using it with other applications, you shouldn’t have any trouble if you often use PiP mode. Here are the top 4 methods you can refer to picture in picture in Zoom.
Method 1: Swap Shared Screen with Video
You may move the Zoom Meeting PiP window across the screen, change the thumbnail’s size, and utilize other applications while it remains open, just like any other picture-in-picture window. Before leaving the meeting if you’re not giving a presentation or speaking, you should definitely mute Zoom on your iPhone to prevent noises from your typing or other activities from entering the conversation. Additionally, keep in mind to switch off the camera if you’re engaged in something distracting, at least for the duration of your activity. To reopen the Zoom Meeting and go back to the Zoom app, touch the Picture-in-Picture mode pane. Here are some actions to keep in mind:
Steps to Swap Shared Screen for Zoom Picture in Picture
Step1Launch or enter a Zoom meeting. Keep the video on your main screen at all times, closing the chat and participant list as necessary.
Step2Tap the Home button or swipe up from the bottom of the screen.
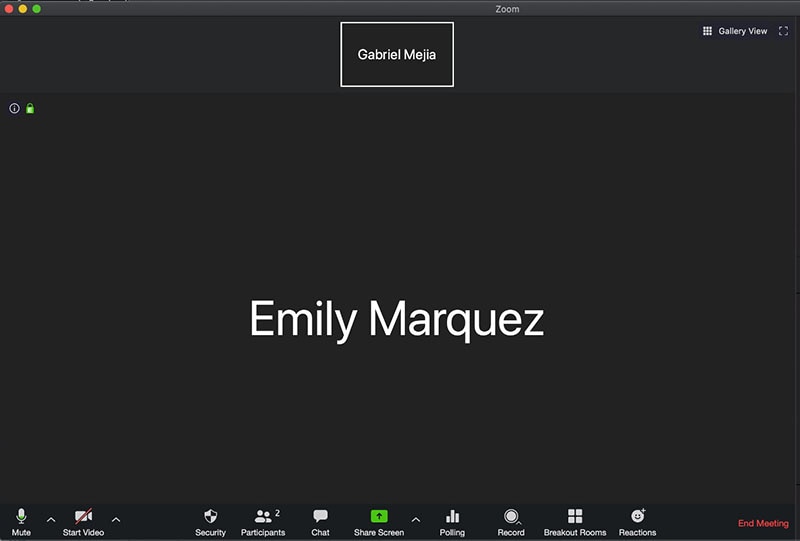
Step3Picture-in-picture mode should be activated automatically throughout the meeting.
Method 2: Use Ecamm Live
Live streaming is a fantastic way to provide original content and stand out from the crowd. To prevent any operational difficulties, a more sophisticated virtual camera is absolutely necessary. You now have magical abilities thanks to Ecamm virtual cam, including the ability to add text, animations, observe a live stream, post viewer comments, play music, share your screen, use sound effects, and many more. It offers the Ecamm live virtual camera zoom function for video conferences so you may improve your Zoom discussions by sending output to other PC programs. You could see a quality difference between what you view in Ecamm Live and what your Zoom visitors see while utilizing virtual camera with Zoom. The quality of a Zoom video stream cannot be improved using Ecamm Live. Simply broadcast the Zoom app using Ecamm Live’s Screen Share mode to utilize Ecamm Live for picture-in-picture virtual presentations on Zoom.
Steps to Use Ecamm Live for Zoom Picture in Picture
Step1Download the Ecamm Application
Install Ecamm Live on your computer, then choose the center button in the source switcher at the top of the main window to enter Screen Share mode.
Step2Create Scenes
With the use of Ecamm Live’s Virtual Camera and Virtual Mic capabilities, you may transfer Ecamm Live’s output to almost any other Mac software, including Zoom. After setting, create the scenes in the program to quickly switch between various cameras.
Step3Select Ecamm on Zoom
You may also utilize Ecamm Live’s Sharing Window capability to feed Ecamm Live output into Zoom. Simply activate the virtual camera, and then, as seen below, choose Ecamm Live Virtual Camera in Zoom’s video settings:
Step4Begin Your Presentation
Finally, click the PC share option to show your Zoom app to your audience. To conceal a picture-in-picture window that displays your camera image while live streaming, click the PIP button.
Method 3: Use Filmora as A Switcher
Zoom has solutions that will make your meetings simple and secure. It gives your remote staff a secure setting to interact and share crucial information. Ideal control over your film and configuration options to make them aesthetically pleasing is something Zoom lacks. To overcome the drawbacks and improve the quality of your online meetings, you may take use of the capabilities of Zoom in conjunction with Filmora. Filmora was developed with the intention of easing user burden and supporting applications. Though complicated, the program is simple to use. The perhaps most popular web information that may be saved on your computer can be easily captured by just angling your screen. For more information on how to record and save your Zoom for picture in picture, see the guide here.
To broadcast a variety of situations in a grid style, you may also combine inputs from your camera, microphone, computer screen, and web conferencing software. Wondershare -the finest desktop application for recording a Zoom Picture in Picture meeting- is Filmora. With the majority of cameras, this app’s screen recording capability is both user-friendly and feature-rich. Here, users may either choose a particular region to record or record their zoom meetings in Fullscreen mode. Additionally, you may choose the camera and input microphone that will be used while recording a video overlay. The addition of relevant comments like phrases, lines, drawings, symbols, etc. is also possible by users. The detailed procedure for recording a Zoom Picture-in-Picture meeting using a Filmora recorder is given below:
Free Download For Win 7 or later(64-bit)
Free Download For macOS 10.14 or later
Step1Download and Install Filmora Zoom Recorder
You may find both types, i.e., the most recent Windows and Mac versions, by first visiting the usual website and then using this Zoom. Install the program on your computer once you download it to get started.

Step2Initiate Filmora Recorder
After finishing the installation process for this Reside Zoom recorder, launch it from the main menus and choose “New Task” when prompted. It will take you to Filmora’s streamlined user interface where you can immediately start filming. Then, as seen in the picture below, you may adjust the screen recording using your preferred camera, microphone, and system settings:

Step3Begin/End the Recording
When you are through configuring this Zoom picture in picture recorder, click the Record button, and it will immediately begin recording your customized screen. Similar to that, after you’re done recording, click Stop, which will take you inside the video editor where you may edit your recorded information.

Step4Share Recordings
When you have everything ready, export your recording right away. After you’re done with the editing part, you do have a lot of options to choose from when displaying your screen capture and webcam stories. To do so, click the Export button in the item user interface’s top-right corner as shown below:
You may easily choose your preferred way to share from there if you choose to upload your work of zoom picture in picture recordings straight to the YouTube or other reputable websites right now. Simply refer to the Sharing plug-ins in the Export window to find out more.
Method 4: Use Hardware Switcher ATEM Mini Pro
Particularly on Zoom, the ATEM Mini is excellent for video conferences. The Blackmagic ATEM Mini is a USB video interface and HDMI switcher. Four HDMI inputs, or four cameras that can produce an HDMI video stream, may be switched between live. This device integrates Zoom meetings fast and makes it incredibly simple to set up your audio, a sometimes-forgotten aspect of video broadcasting. This sophisticated video switcher promises to offer broadcast-quality multi-camera footage with ease and is targeted at gamers, streamers, and online reviewers. It connects to a computer via a USB-C to USB-A connection. The video feed may then be sent to distant colleagues via a number of well-liked videos streaming services, including Zoom.
Step1The ATEM Mini Pro is a basic control switcher with pro-broadcast performance. Your ATEM Mini Pro is really simple to set up. You can connect a full setup with several cameras and microphones in around 30 minutes.
Step2You may connect several camera sources to the inputs of the ATEM Mini Pro. The 4 HDMI inputs each have a separate standards converter built in. As a result, the ATEM Mini can automatically convert inputs that are 1080p, 1080i, or 720p to the switcher’s video standard. You may make quick changes between inputs with no latency or disruption to your video output by using the ergonomic buttons.
Step3As a third option, Zoom offers ATEM Mini, which enables you to switch between several inputs, add custom visuals, and adjust audio levels all from a single interface. To improve the quality of your production, you may even use smooth transitions like wipes or fades. You can even test any input stream before making it live.
Conclusion
When you are doing a Zoom Meeting and share your screen, only to discover that what the other attendees see is a split screen with your material and the other Attendee cams, it is highly annoying. You may move the Zoom Meeting PiP window across the screen, change the thumbnail’s size, and utilize other applications while it remains open, just like any other picture-in-picture window. Someone must be sharing information in the Zoom conference for the Picture in Picture, or “Split Screen” option, to be active. We’ve listed the top techniques for doing it effectively above. To do this work without difficulty, use them as your guide.
Free Download For macOS 10.14 or later
Step1Download and Install Filmora Zoom Recorder
You may find both types, i.e., the most recent Windows and Mac versions, by first visiting the usual website and then using this Zoom. Install the program on your computer once you download it to get started.
Step2Initiate Filmora Recorder
After finishing the installation process for this Reside Zoom recorder, launch it from the main menus and choose “New Task” when prompted. It will take you to Filmora’s streamlined user interface where you can immediately start filming. Then, as seen in the picture below, you may adjust the screen recording using your preferred camera, microphone, and system settings:
Step3Begin/End the Recording
When you are through configuring this Zoom picture in picture recorder, click the Record button, and it will immediately begin recording your customized screen. Similar to that, after you’re done recording, click Stop, which will take you inside the video editor where you may edit your recorded information.
Step4Share Recordings
When you have everything ready, export your recording right away. After you’re done with the editing part, you do have a lot of options to choose from when displaying your screen capture and webcam stories. To do so, click the Export button in the item user interface’s top-right corner as shown below:
You may easily choose your preferred way to share from there if you choose to upload your work of zoom picture in picture recordings straight to the YouTube or other reputable websites right now. Simply refer to the Sharing plug-ins in the Export window to find out more.
Method 4: Use Hardware Switcher ATEM Mini Pro
Particularly on Zoom, the ATEM Mini is excellent for video conferences. The Blackmagic ATEM Mini is a USB video interface and HDMI switcher. Four HDMI inputs, or four cameras that can produce an HDMI video stream, may be switched between live. This device integrates Zoom meetings fast and makes it incredibly simple to set up your audio, a sometimes-forgotten aspect of video broadcasting. This sophisticated video switcher promises to offer broadcast-quality multi-camera footage with ease and is targeted at gamers, streamers, and online reviewers. It connects to a computer via a USB-C to USB-A connection. The video feed may then be sent to distant colleagues via a number of well-liked videos streaming services, including Zoom.
Step1The ATEM Mini Pro is a basic control switcher with pro-broadcast performance. Your ATEM Mini Pro is really simple to set up. You can connect a full setup with several cameras and microphones in around 30 minutes.
Step2You may connect several camera sources to the inputs of the ATEM Mini Pro. The 4 HDMI inputs each have a separate standards converter built in. As a result, the ATEM Mini can automatically convert inputs that are 1080p, 1080i, or 720p to the switcher’s video standard. You may make quick changes between inputs with no latency or disruption to your video output by using the ergonomic buttons.
Step3As a third option, Zoom offers ATEM Mini, which enables you to switch between several inputs, add custom visuals, and adjust audio levels all from a single interface. To improve the quality of your production, you may even use smooth transitions like wipes or fades. You can even test any input stream before making it live.
Conclusion
When you are doing a Zoom Meeting and share your screen, only to discover that what the other attendees see is a split screen with your material and the other Attendee cams, it is highly annoying. You may move the Zoom Meeting PiP window across the screen, change the thumbnail’s size, and utilize other applications while it remains open, just like any other picture-in-picture window. Someone must be sharing information in the Zoom conference for the Picture in Picture, or “Split Screen” option, to be active. We’ve listed the top techniques for doing it effectively above. To do this work without difficulty, use them as your guide.
Also read:
- 2024 Approved Top 15 Slow Motion CapCut Templates to Work With
- Updated 2024 Approved Video Editing Tips to Know Before Editing First Draft
- Updated In 2024, Easy Way to Combine Several Xvid Files Into One Windows, Mac,Android
- New In 2024, Find Out The Best Dark Moody LUTs During Editing
- New 10 Best Vlogging Cameras for Beginners
- Updated 2024 Approved 10 Matching Color Combination That Works Together
- Updated In 2024, General Knowledge About MP4 Format and Best MP4 Video Editor
- New Create the Night-to-Day Effect Videos for 2024
- Updated In 2024, 10 Best Camera for YouTube Beginners
- New 5 Ways to Denoise a Video for 2024
- 2024 Approved An Ultimate Guide to Flexclip Online Trimmer
- Voice Changer for Discord | Use Voicemod on Discord for 2024
- New How To Make a Video by Mouse in Filmora, In 2024
- Updated How to Color Correct in OBS
- In 2024, Reviewing Efectum App For Smartphone Users Create Slow Motion Videos
- In 2024, Try These 10 Music Video Templates To Make Your Work Easy
- Updated 2024 Approved How to Make a Video Slideshow in iMovie
- New Have You Ever Applied the Gaussian Blur Effect to Your Videos? Read This Article to Find a Reliable and Convenient Tool to Generate the Gaussian Blur Effect
- How to Create a Clideo Slideshow for 2024
- Do You Wish to Design the Perfect Slow-Motion Video on Your Smartphone? Learn some Top-Rated Free Slow-Mo Apps for Android and iOS Users in This Article for 2024
- New In 2024, An Ultimate Guide To Edit a Music Video Aspect Ratio and First Cut
- 2024 Approved How To Remove Audio From Video
- Updated 2024 Approved Best Text Animations In After Effects
- In 2024, How to Put Emoji on Mac That Take Less Than 10 Mins
- In 2024, Enhance Social Media Posts with Transparent GIFs that Leave Your Peers in Awe
- New The Easiest Way to Make Time-Lapse Videos. Yes, You Can Make a Time-Lapse Video with Your Phone. It Powers a Very Simple and Easy Way to Make Time-Lapse Videos
- New In 2024, OBS Green Screen Guide
- You Can Make Attractive Videos by Adding Text Behind Objects. This Article Will Explain How to Use Wondershare Filmora to Create These Videos
- Updated How to Use GIMP GREEN SCREEN
- Updated 2024 Approved How To Cut Videos For Instagram On Mac
- New Are You Looking to Find Out How to Loop YouTube Videos on iPhone? Learn How to Loop Your Favorite YouTube Video on Your iPhone, so You Can Play that Part over and Over
- New Do You Want to Know How to Edit a Time Lapse Video on iPhone, Interesting Ideas, and some Tips and Pointers for Shooting a Professional Time Lapse Video? Find Out Everything in This Guide
- Updated Tiktok Video Aspect Ratio
- How to Make Stunning Glitch Effect in Photoshop? Ultimate Guide for 2024
- 2024 Approved
- How to Add a Spooky Shadow Effect
- Updated Easy Way to Inset Text in Video
- New An Ultimate Guide to Flexclip Online Trimmer
- Are You Aware that AV1 Has the Potential to Change the Way We Watch Videos Online? Read on to Learn More About AV1 and How It Could Impact Your Life for 2024
- Best Free LUTs To Use in Shotcut for 2024
- Why Apple Account Disabled From your iPhone XS Max? How to Fix
- How to Cast Oppo A78 Screen to PC Using WiFi | Dr.fone
- In 2024, 8 Best Apps for Screen Mirroring Tecno Pova 6 Pro 5G PC | Dr.fone
- In 2024, Here Are Some Reliable Ways to Get Pokemon Go Friend Codes For Apple iPhone 14 Plus | Dr.fone
- How to fix iCloud lock from your iPhone 13 and iPad
- 5 Ways to Track Realme GT Neo 5 without App | Dr.fone
- In 2024, How to Mirror Your OnePlus 12R Screen to PC with Chromecast | Dr.fone
- What to do if your Apple iPhone 7 Plus has bad ESN or blacklisted IMEI?
- In 2024, How I Transferred Messages from Poco M6 Pro 5G to iPhone 12/XS (Max) in Seconds | Dr.fone
- Can I recover my data if my iPhone screen turns black? | Stellar
- In 2024, Is Fake GPS Location Spoofer a Good Choice On Realme 10T 5G? | Dr.fone
- How and Where to Find a Shiny Stone Pokémon For Poco X6 Pro? | Dr.fone
- Title: 2024 Approved Detailed Tutorial to Rotate Videos in Cyberlink PowerDirector
- Author: Chloe
- Created at : 2024-05-20 03:38:01
- Updated at : 2024-05-21 03:38:01
- Link: https://ai-editing-video.techidaily.com/2024-approved-detailed-tutorial-to-rotate-videos-in-cyberlink-powerdirector/
- License: This work is licensed under CC BY-NC-SA 4.0.
