
:max_bytes(150000):strip_icc():format(webp)/001_2654847-5b99b903c9e77c005077d0d8.jpg)
2024 Approved How to Create an Alternate Reality Effect
How to Create an Alternate Reality Effect
Ditch boring one-dimensional videos and create a mesmerizing video with this alternative reality effect you can easily create using Wondershare Filmora.
This cool effect enables you to show a dream-like scene where two mirrored footages appear within the same frame using the Masking feature. But why stop there?
Keep reading to find out how you can use this style of effect to spice up your daily vlog bumper intro or even for your upcoming sci-fi content.

Preparing the footage
There are not many restrictions on preparing the footage for this effect. However, depending on the results you’re aiming for, you might need to consider a few things.
First, a wider view and some camera panning, or tilting will deliver a better result as it provides angle variations. This will later enhance the dynamic of the scene, making it feels even more uncanny.
Then, while you’re at it, you need to also figure out the purpose of the video itself. If you want to upload it to certain platforms where vertical videos are more popular, you will want to work on that as well. When you’re shooting your footage, make sure that you’re taking it at the correct angle that would fit the ratio you’re aiming for.
Last but not least, consider the length of the footage. If you’re planning to make a bumper video, you might want a quick yet comprehensive shot of the objects you want to highlight. You can always trim and adjust the timing later, but it is better to also plan it early.
Editing the video
If you have your footage or stock video ready, then you can start editing. Follow this simple step-by-step guide to create your own alternate reality using Filmora .
Free Download For Win 7 or later(64-bit)
Free Download For macOS 10.14 or later
Step 1: Drag and drop the video footage into the timeline - this will be the bottom part of the scene. Go to Effect > Utility > Image Mask. Drag and drop it onto the video footage.

Step 2: Adjust the mask by double-clicking the video footage. Go to Setting > Mask Setting and choose any shape you like. Set the feather number to 100.

Step 3: Scroll up the Setting > Transform. Adjust the position of the video footage on the x and y-axis to ensure that the mask shows the bottom of the landscape view. Click Ok.

Step 4: Drag and drop the same video footage onto the timeline next to the first video footage. Place an Image Mask as well on this footage. This will be the upper part of the scene.

Step 5: Double-click the second footage to open the Setting menu on the top left. Choose Transform > Vertical Flip.

Step 6: Scroll down the Setting menu to find the mask settings. Choose an opposing mask shape for this second footage then set the feather number to 100 as well.

Step 7: Adjust the video footage position by dragging the second footage to the second video track and aligning it with the first video footage.

Step 8: Double-click to open the Setting > Transform, then, adjust the x and y-axis numbers to ensure that the mask reveals only the top half of the landscape. Click Ok.

You can recheck the preview at this stage and just save it as it is if you’re already satisfied with the result. However, if you want a more dynamic alternate reality scene, continue reading to see advanced tips you can follow to make your video looks even more otherworldly.
Enhancing the effect with rotation keyframes
If you’re using stock videos or encountering limitations when making your footage, chances are your alternate reality is not looking as dynamic as you want it to be. Go all out by adding the rotation keyframes to the video footage so that the alternate reality looks more unreal.
Step 1: Double-click the video footage on the first video track to open the Animation Settings > Customize.

Step 2: Move the playhead to the beginning of the first video footage and add a keyframe by clicking on the Add button. Set the rotation of this keyframe at 0 and the scale at 100.

Step 3: Now move the playhead to the end of the video footage and add another keyframe. This time, set the rotation to 20 and adjust the scale number to 115.

Step 4: Do Steps 1 to 3 to the second video footage. Don’t forget to preview the result to see if both footages are rotated properly.

Your alternate reality is now more dynamic with more movement. You can also add more filters or effects to further enhance the sci-fi ambiance. Once you’re satisfied, you can export the file to a format that is compatible with your destination platform.
Conclusion
Wondershare Filmora aims to empower your inner video creator with its robust yet easy-to-use editing suite. You can easily mimic the scenes from the latest blockbuster superhero movies with some simple clicks.
Not only it offers a strapping video editing menu with simple visual effects plug-ins and beginner-friendly smart templates, but you can also access its rich royalty-free stock media library. You can operate the program on both Windows and Mac. Install the program and let it do wonders to your content.
Free Download For macOS 10.14 or later
Step 1: Drag and drop the video footage into the timeline - this will be the bottom part of the scene. Go to Effect > Utility > Image Mask. Drag and drop it onto the video footage.
Step 2: Adjust the mask by double-clicking the video footage. Go to Setting > Mask Setting and choose any shape you like. Set the feather number to 100.
Step 3: Scroll up the Setting > Transform. Adjust the position of the video footage on the x and y-axis to ensure that the mask shows the bottom of the landscape view. Click Ok.
Step 4: Drag and drop the same video footage onto the timeline next to the first video footage. Place an Image Mask as well on this footage. This will be the upper part of the scene.
Step 5: Double-click the second footage to open the Setting menu on the top left. Choose Transform > Vertical Flip.
Step 6: Scroll down the Setting menu to find the mask settings. Choose an opposing mask shape for this second footage then set the feather number to 100 as well.
Step 7: Adjust the video footage position by dragging the second footage to the second video track and aligning it with the first video footage.
Step 8: Double-click to open the Setting > Transform, then, adjust the x and y-axis numbers to ensure that the mask reveals only the top half of the landscape. Click Ok.
You can recheck the preview at this stage and just save it as it is if you’re already satisfied with the result. However, if you want a more dynamic alternate reality scene, continue reading to see advanced tips you can follow to make your video looks even more otherworldly.
Enhancing the effect with rotation keyframes
If you’re using stock videos or encountering limitations when making your footage, chances are your alternate reality is not looking as dynamic as you want it to be. Go all out by adding the rotation keyframes to the video footage so that the alternate reality looks more unreal.
Step 1: Double-click the video footage on the first video track to open the Animation Settings > Customize.
Step 2: Move the playhead to the beginning of the first video footage and add a keyframe by clicking on the Add button. Set the rotation of this keyframe at 0 and the scale at 100.
Step 3: Now move the playhead to the end of the video footage and add another keyframe. This time, set the rotation to 20 and adjust the scale number to 115.
Step 4: Do Steps 1 to 3 to the second video footage. Don’t forget to preview the result to see if both footages are rotated properly.
Your alternate reality is now more dynamic with more movement. You can also add more filters or effects to further enhance the sci-fi ambiance. Once you’re satisfied, you can export the file to a format that is compatible with your destination platform.
Conclusion
Wondershare Filmora aims to empower your inner video creator with its robust yet easy-to-use editing suite. You can easily mimic the scenes from the latest blockbuster superhero movies with some simple clicks.
Not only it offers a strapping video editing menu with simple visual effects plug-ins and beginner-friendly smart templates, but you can also access its rich royalty-free stock media library. You can operate the program on both Windows and Mac. Install the program and let it do wonders to your content.
How to Zoom in on PowerPoint [Easy Ways]
How often have you wished you could zoom in to more fully illustrate a point on a slide during a PowerPoint presentation? If you use PowerPoint for Windows and are a subscription to Microsoft 365, you have access to that function! There is a lot going on in some Microsoft PowerPoint presentations. It may include a lot of little details or significant information like PowerPoint slide zoom, and altering it would be impractical. If this occurs, you may make a zoom shape and utilize the expand animation to focus on the information you’re describing in more depth. By doing this, you can maintain the overall picture while concentrating on the key points of the talk.
You are giving a presentation at a meeting and have a number of possibilities. Zoom in PowerPoint Presentation enables you to create an introduction slide that includes thumbnails for the slides you wish to skip to in any order to discuss those choices throughout your meeting. It builds a navigable interactive dashboard for your presentation. When you leave the opening slide and go through all the slides in a part, you are immediately returned to the beginning. So where does PowerPoint’s magic reside? PowerPoint The most recent addition to the lengthy and ever-expanding list of new functions is Zoom. Zoom is incredible since it effectively turns a slide or many slides from your project into a changeable hotspot. A hotspot is a clickable item that connects to a certain area, in case you forgot. You will thus be directed to that slide if you choose it as a hotspot when you click on the item.
Part 1: 3 Techniques to Zoom PowerPoint Presentations
Microsoft is always developing new tools to help you create and construct amazing presentations. The PowerPoint Zoom function is one of them. It is not the straightforward zoom capability that has been a part of PowerPoint for a long time. Zoom in PowerPoint is a useful feature that enables you to go right to the information you want and promotes an interactive presentation that is seamless. You just need to be aware of three distinct sorts of Zooms to do it quickly and easily. They are described below:
1. Use the View tab Zoom command
PowerPoint’s Zoom feature is a clever tool for creating and watching presentations. When the text or item you wish to deal with is too tiny for you to view, the Zoom tool might be useful. On the screen, a slide will look bigger as you zoom in, and smaller when you zoom away. Choose the appropriate zoom level in the “Zoom” dialog box by typing a number into the “Percent:” spinner or selecting an option from the “Zoom to” section. Click the “OK” button to apply the chosen magnification level after setting it.
Step1Zoom in with the View Dialog Box
Additionally, you may access the Zoom dialog box and choose a different zoom level by clicking the Zoom button on the View tab of the ribbon. choose the Ribbon’s “View” tab. the “Zoom” button from the “Zoom” button group, and then.

Step2Click the Zoom Button
Zoom in by going to the View tab attributes. Select Zoom in from the View menu after clicking. There will be a Zoom window where you may choose or input the zoom level. More options for adjusting the zoom level are available under the Zoom group on the View tab of the ribbon.

Step3Click Fit to Window
Additionally, if you choose Fit, Presentation will resize the window to a proper size.

2. Use the Zoom Slider at The Bottom of the Screen
In PowerPoint, the Status Bar’s lower-right application window has the Zoom slider. This tool lets you adjust the slide’s magnification level. This just modifies your sense of how near or far away the slide looks onscreen; the slide itself is unaffected in any way.
Step1Click the Zoom In (+) button on the status bar
The horizontal scroll bar will then display underneath the slide if you zoom in on the slide until it can no longer fit horizontally on the screen. The slide may then be thoroughly examined at the selected magnification level by using it to scroll left and right.

Step2Click the Zoom Out (-) button on the status bar
Changing the magnification level is simple using PowerPoint’s Zoom slider. Click and move the slider left, toward the minus sign, to reduce the magnification level. To the left of the zoom slider is a percentage that represents the magnification level.
Step3Fit to the Window
Click the “Fit slide to current window” button to the right of the Zoom slider to force the slide to fit inside the view’s available slide area.

3. The Ctrl + Mouse Spin Wheel Shortcut
Ctrl + scroll wheel is a typical shortcut for zooming in Windows. Open the worksheet or presentation you wish to save with the desired zoom level, then complete the procedures listed below:
Step1Launch PowerPoint on your Windows computer and go to the slide of the presentation you want to zoom in or out on.
Step2To zoom in on a slide in PowerPoint, just hold the CTRL key on your keyboard while spinning your mouse wheel in an upwards direction.

Step3In a similar manner, to zoom out on your presentation, hold down the CTRL key on your computer while dragging the mouse wheel downward as seen below.

After that, you will be able to get the desired value to Zoom in or out on your PowerPoint presentation.
Conclusion
Are you prepared to use the new PowerPoint zoom feature in Microsoft Office to bring your presentation to life? To comprehend it, you must first view the aforementioned ways. A zoom bar or zoom slider may be used in Microsoft Office programs, such as PowerPoint, to rapidly and efficiently zoom in and out of documents. The zoom slider should look like the image on this page and is often in the bottom right corner of the program window. You will continue with the presentation when you have finished the zoom. This implies that you will be able to skip through undesired slides and material.
How often have you wished you could zoom in to more fully illustrate a point on a slide during a PowerPoint presentation? If you use PowerPoint for Windows and are a subscription to Microsoft 365, you have access to that function! There is a lot going on in some Microsoft PowerPoint presentations. It may include a lot of little details or significant information like PowerPoint slide zoom, and altering it would be impractical. If this occurs, you may make a zoom shape and utilize the expand animation to focus on the information you’re describing in more depth. By doing this, you can maintain the overall picture while concentrating on the key points of the talk.
You are giving a presentation at a meeting and have a number of possibilities. Zoom in PowerPoint Presentation enables you to create an introduction slide that includes thumbnails for the slides you wish to skip to in any order to discuss those choices throughout your meeting. It builds a navigable interactive dashboard for your presentation. When you leave the opening slide and go through all the slides in a part, you are immediately returned to the beginning. So where does PowerPoint’s magic reside? PowerPoint The most recent addition to the lengthy and ever-expanding list of new functions is Zoom. Zoom is incredible since it effectively turns a slide or many slides from your project into a changeable hotspot. A hotspot is a clickable item that connects to a certain area, in case you forgot. You will thus be directed to that slide if you choose it as a hotspot when you click on the item.
Part 1: 3 Techniques to Zoom PowerPoint Presentations
Microsoft is always developing new tools to help you create and construct amazing presentations. The PowerPoint Zoom function is one of them. It is not the straightforward zoom capability that has been a part of PowerPoint for a long time. Zoom in PowerPoint is a useful feature that enables you to go right to the information you want and promotes an interactive presentation that is seamless. You just need to be aware of three distinct sorts of Zooms to do it quickly and easily. They are described below:
1. Use the View tab Zoom command
PowerPoint’s Zoom feature is a clever tool for creating and watching presentations. When the text or item you wish to deal with is too tiny for you to view, the Zoom tool might be useful. On the screen, a slide will look bigger as you zoom in, and smaller when you zoom away. Choose the appropriate zoom level in the “Zoom” dialog box by typing a number into the “Percent:” spinner or selecting an option from the “Zoom to” section. Click the “OK” button to apply the chosen magnification level after setting it.
Step1Zoom in with the View Dialog Box
Additionally, you may access the Zoom dialog box and choose a different zoom level by clicking the Zoom button on the View tab of the ribbon. choose the Ribbon’s “View” tab. the “Zoom” button from the “Zoom” button group, and then.
Step2Click the Zoom Button
Zoom in by going to the View tab attributes. Select Zoom in from the View menu after clicking. There will be a Zoom window where you may choose or input the zoom level. More options for adjusting the zoom level are available under the Zoom group on the View tab of the ribbon.
Step3Click Fit to Window
Additionally, if you choose Fit, Presentation will resize the window to a proper size.
2. Use the Zoom Slider at The Bottom of the Screen
In PowerPoint, the Status Bar’s lower-right application window has the Zoom slider. This tool lets you adjust the slide’s magnification level. This just modifies your sense of how near or far away the slide looks onscreen; the slide itself is unaffected in any way.
Step1Click the Zoom In (+) button on the status bar
The horizontal scroll bar will then display underneath the slide if you zoom in on the slide until it can no longer fit horizontally on the screen. The slide may then be thoroughly examined at the selected magnification level by using it to scroll left and right.
Step2Click the Zoom Out (-) button on the status bar
Changing the magnification level is simple using PowerPoint’s Zoom slider. Click and move the slider left, toward the minus sign, to reduce the magnification level. To the left of the zoom slider is a percentage that represents the magnification level.
Step3Fit to the Window
Click the “Fit slide to current window” button to the right of the Zoom slider to force the slide to fit inside the view’s available slide area.
3. The Ctrl + Mouse Spin Wheel Shortcut
Ctrl + scroll wheel is a typical shortcut for zooming in Windows. Open the worksheet or presentation you wish to save with the desired zoom level, then complete the procedures listed below:
Step1Launch PowerPoint on your Windows computer and go to the slide of the presentation you want to zoom in or out on.
Step2To zoom in on a slide in PowerPoint, just hold the CTRL key on your keyboard while spinning your mouse wheel in an upwards direction.
Step3In a similar manner, to zoom out on your presentation, hold down the CTRL key on your computer while dragging the mouse wheel downward as seen below.
After that, you will be able to get the desired value to Zoom in or out on your PowerPoint presentation.
Conclusion
Are you prepared to use the new PowerPoint zoom feature in Microsoft Office to bring your presentation to life? To comprehend it, you must first view the aforementioned ways. A zoom bar or zoom slider may be used in Microsoft Office programs, such as PowerPoint, to rapidly and efficiently zoom in and out of documents. The zoom slider should look like the image on this page and is often in the bottom right corner of the program window. You will continue with the presentation when you have finished the zoom. This implies that you will be able to skip through undesired slides and material.
In This Article, You Will Learn About the Top 5 Editors for Windows, Top 5 Editors for iPhone/Android, and Top 5 Editors for Animated GIF Editing
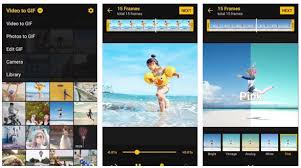
15 Must-Use Gifs Editors in 2024
An easy yet powerful editor
Numerous effects to choose from
Detailed tutorials provided by the official channel
Several websites and companies use the graphics interchange format that is the GIF. It can be seen to be used by a wide number of people on the internet and its format is supported by all platforms. The common goal of all the users can be satisfied.
Are you looking to create and edit gifs online or on your laptop but cannot find a suitable way out?
Finding the best and most user friendly GIF maker is not very hard, especially considering that free gif editor software is offered by so many providers. But if you’re only starting your journey with apps to make GIFs, it can be a difficult choice.
In this article
01 [How to Make GIF Interesting?](#Part 1)
02 [Top 5 Editors for Windows](#Part 2)
03 [Top 5 Editors for iPhone/Android](#Part 3)
04 [Top 5 Editors for Animated GIF Editing](#Part 4)
Part 1 How to Make GIF Interesting?
There are several ways by which a GIF can be made interesting. You can use colorful graphics and drop duplicate frames. Using fewer colors lets you make longer and more involved gifs.
Part 2 Top 5 Editors for Windows
Below are the top 5 editors which will help you to form GIFs for Windows: -
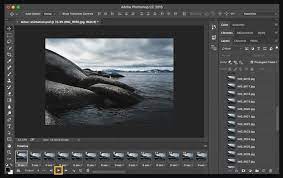
01Adobe Photoshop
Adobe Photoshop could be a useful device for making videos, image redaction, and GIF editing. This GIF code for Windows can allow you to import a GIF file so begin with the modification process.
Therefore, GIF editing is a breeze as you’ll alter the effects, modification the frame animation within the Timeline section, and do plenty a lot with this tool. You’ll simply utilize the free trial version to urge accustomed to the tool initial and then opt for the premium version to try to a lot more.
02EaseUS Video Editor
In the context of GIF makers, EaseUS Video Editor can also be said as one of the best. Free templates of texts, filters, elements, overlays, transitions, and music are available here which its users create GIF images with easily. You can also create lively and fully animated images, convert MP4 to GIFs and share it on YouTube, or other social media platforms.
The capabilities of this animated GIF maker for Windows are not restrained to this alone, as it can be used to edit all kinds of images, audio, and videos.
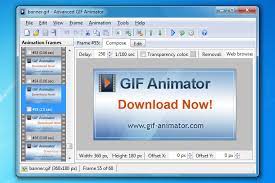
03GIF Animator
GIF animator editor is one of the first-rate GIF makers and is an awesome device for you if you desire to create GIF images, banners, buttons, and GIF videos. The device is very convenient to use and is a favorite of animators and designers.
The measurement of the photo can be modified and alongside that, it is feasible to control the frames, hastily cross texts, and enhance. Corrections to the movies can be brought and the built-in photograph editor can be used to rectify photographs and pictures, you can draw on them and you can convert movies to GIFs by the usage of the fragmented section of the video files.
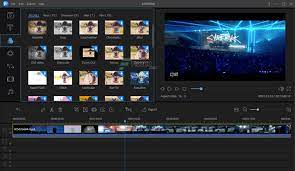
04**Wondershare Filmora Video Editor **
If you are searching for nice animated GIF makers for Windows computers, then Wondershare Filmora’s animated movies and GIF editor device may want to be a brilliant choice. That’s due to the fact with this GIF maker Windows device lets you add a video, convert it to the GIF structure and then edit it later with its super features.
The interactive UI helps customers manner greater than one hundred fifty file codecs easily. With this device, you can crop, pace up a video, alter the body size, and caption it. Additionally, you add texts, add animation consequences to the images, and alter the pictures and movies in a few steps.

Wondershare Filmora - Best Video Editor for Mac/Windows
5,481,435 people have downloaded it.
Build unique custom animations without breaking a sweat.
Focus on creating epic stories and leave the details to Filmora’s auto features.
Start a creative adventure with drag & drop effects and endless possibilities.
Filmora simplifies advanced features to save you time and effort.
Filmora cuts out repetition so you can move on to your next creative breakthrough.
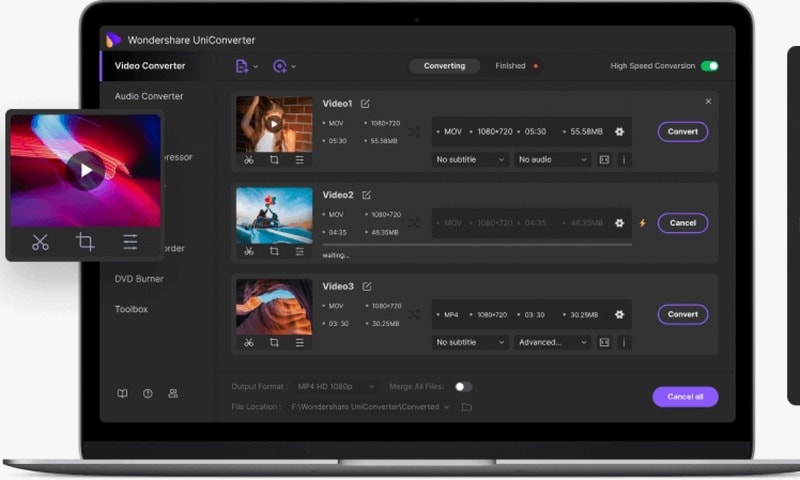
05Wondershare UniConverter
Wondershare UniConverter is one of the fine image, audio, and video editor and converter out there, and ranked the excellent GIF maker here. This GIF editor app is easy for customers and will furnish a pleasant platform for novices to operate their tasks. And when performed to create and edit GIF files, a person can export the GIF archives to both Android or iPhone barring having to use iTunes.
Part 3 Top 5 Editors for iPhone/Android
01PixelStudio
Pixel Studio is an animation app for pixel artwork fans. You can draw your little creations with pixel art. It additionally comes with a textual content tool, aid for matters like Samsung S-Pen, and it auto-saves so you don’t lose work. You can export your creations to GIF as nicely and that makes Pixel Studio one of the quality apps for customized GIFs. It’s normally an artwork app so meme lords may additionally want to put in a little greater effort than usual, however, the consequences are normally well worth it.
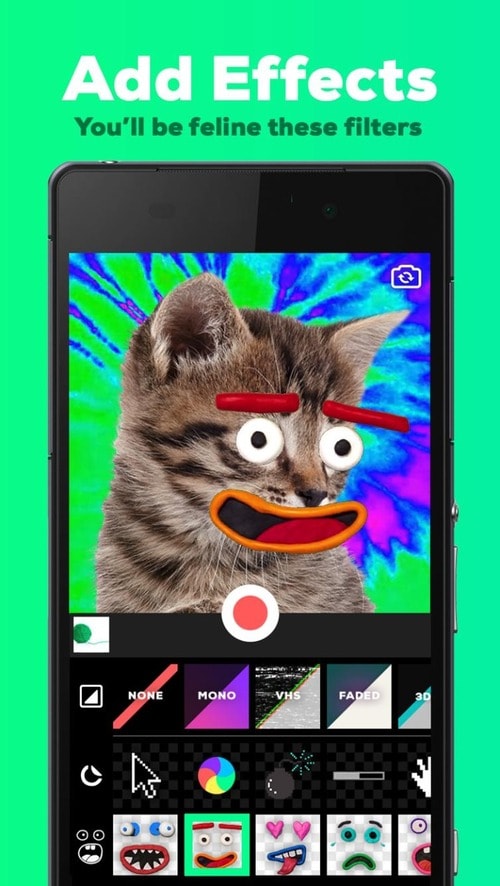
02Giphy Cam
Giphy Cam is one of the more recent gif editing apps. The digicam data is a brief phase of video. You can alter that video with lots of filters, different effects, stickers, text, and more. It additionally has a five-shot burst mode alongside its video mode. This is likely the excellent GIF/camera app hybrid. It doesn’t have any digital camera features; however, it does GIFs higher than the others by way of a large margin. It’s free with no in-app purchases.
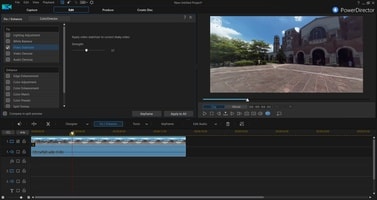
03PowerDirector
PowerDirector is one of many videos modifying apps with GIF support. This one simply takes place to be higher than most of the different ones. It’s a video editor app. Thus, it’ll have comparable features. However, two of the export codecs encompass GIF nonetheless pix and animated GIFs. This will work first-class for turning a video into a shorter GIF. The app is free to download and play with. You may additionally want to buy extra aspects by using in-app purchases.
04ImgPlay – GIF Maker
ImgPlay is a popular GIF editing app that is available for Android and iOS. You have the option of using an existing video or shooting one using your phone’s camera. In GIFs, you can apply 30 effects, crop a portion of your choice, and modify the frame rate.
05Motion Stills
Motion Stills is a Google app that allows you to record short films and turn them into looping GIFs. You can use the app to take a short 3s clip with a single tap or utilize the Fast Forward feature to condense an existing video into a short one. To make yips GIFs even better, you may add motion text and emoticons. After that, save it as a GIF and send it to your friends.
Part 4 Top 5 Editors for Animated GIF Editing
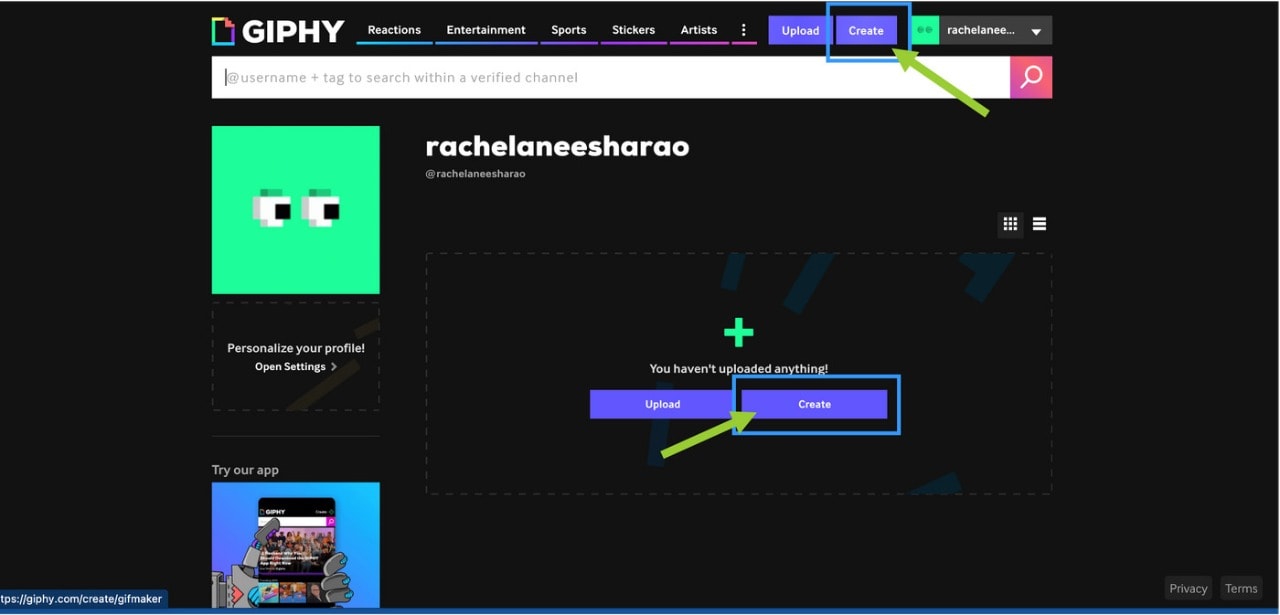
01Giphy
GIPHY is a designing tool that helps customers to create extraordinary GIFs, stickers, and backdrops. You can edit your plan with filters, captions, stickers, and different plan elements. The popular codecs for GIF uploads are JPG, PNG, GIF, MP4, or MOV, whilst the conventional file codecs to convert to stickers are JPG or PNG.
GIPHY permits you to paste URLs from specific sources such as Vimeo, YouTube, GIPHY, and others. The animated GIF maker software program makes it convenient for customers to edit and organize the uploaded archives in the favored order.
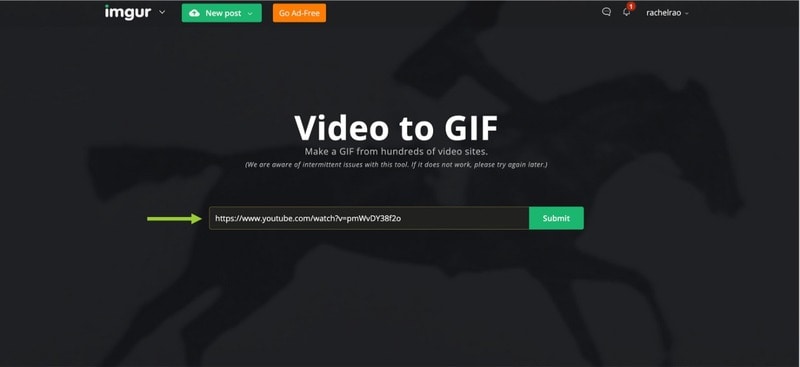
02Imgur
It’s a website that makes it simple to make GIFs. Simply paste the video URL into the web app and wait for it to process. After that, all you must do now is set the start time and duration of your GIF.
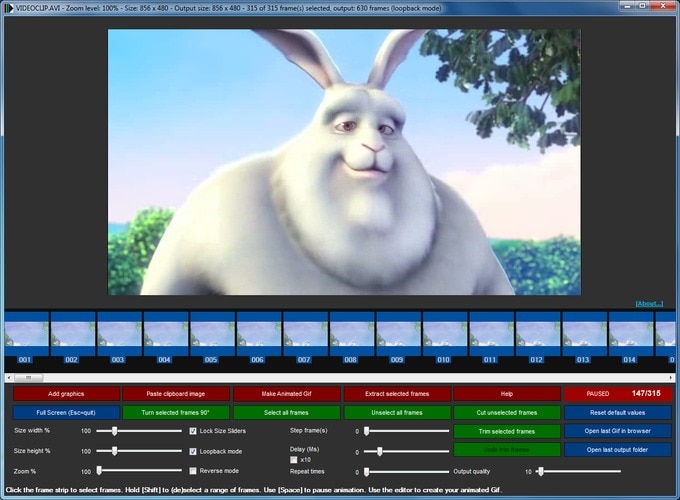
03KickMyGraphics
The utility comes with a humble person interface and it approves you to create animated GIFs from neighborhood images. In addition, you can additionally paste snapshots from your clipboard at once to the application. The utility additionally helps video files; however, you want to convert the video earlier than you can edit it. The utility affords a stay preview so you can see how your animation appears at any time. You can additionally see all handy frames and dispose of useless frames with ease.
As for editing, you can’t add your textual content or alter the brightness of your frames, however, you can trade their width, peak, and zoom level. You can additionally allow Loopback or Reverse mode and set delay, step frames, and a variety of repeats. You can additionally configure output first-class right from the application.
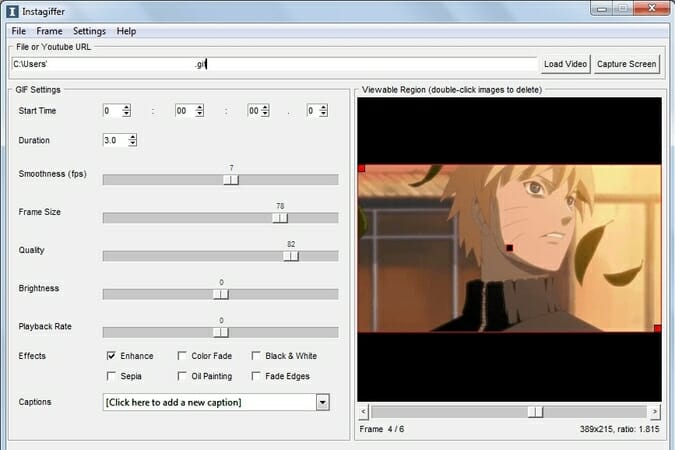
04Instagiffer
Instagiffer is some other easy software that lets you create animated GIFs on your PC. This utility affords a humble consumer interface; however, it makes up for it with an extensive variety of features. The software approves you to convert nearby movies to GIFs, however, you can additionally paste a YouTube URL and convert an online video to GIF with ease. According to the developer, the software additionally works with different video web hosting websites.
05GIMP
The software is free, so you can download and use it except for any restrictions. GIMP is best for picture designers and it comes with all preferences that an image editor needs. You can without problems edit your images, exchange their color, hue, saturation, or brightness, and add exceptional outcomes to them.
In addition, you can create special creations thanks to the built-in layer system. It’s worth citing that the software additionally helps programming algorithms so you can effortlessly edit your photos with the use of scripts.

● Key Takeaways from This Episode →
● If you are typically worried about how you can be able to come up with fascinating GIFs, you ought to hold in thought that you don’t have to create them from scratch.
● You can be capable to advance inspiring GIFs from current movies and photos eight after GIF editor software program free download.
● Hopefully, you are now capable to pick out a perfect GIF creator to use for your modifying tasks.
Several websites and companies use the graphics interchange format that is the GIF. It can be seen to be used by a wide number of people on the internet and its format is supported by all platforms. The common goal of all the users can be satisfied.
Are you looking to create and edit gifs online or on your laptop but cannot find a suitable way out?
Finding the best and most user friendly GIF maker is not very hard, especially considering that free gif editor software is offered by so many providers. But if you’re only starting your journey with apps to make GIFs, it can be a difficult choice.
In this article
01 [How to Make GIF Interesting?](#Part 1)
02 [Top 5 Editors for Windows](#Part 2)
03 [Top 5 Editors for iPhone/Android](#Part 3)
04 [Top 5 Editors for Animated GIF Editing](#Part 4)
Part 1 How to Make GIF Interesting?
There are several ways by which a GIF can be made interesting. You can use colorful graphics and drop duplicate frames. Using fewer colors lets you make longer and more involved gifs.
Part 2 Top 5 Editors for Windows
Below are the top 5 editors which will help you to form GIFs for Windows: -
01Adobe Photoshop
Adobe Photoshop could be a useful device for making videos, image redaction, and GIF editing. This GIF code for Windows can allow you to import a GIF file so begin with the modification process.
Therefore, GIF editing is a breeze as you’ll alter the effects, modification the frame animation within the Timeline section, and do plenty a lot with this tool. You’ll simply utilize the free trial version to urge accustomed to the tool initial and then opt for the premium version to try to a lot more.
02EaseUS Video Editor
In the context of GIF makers, EaseUS Video Editor can also be said as one of the best. Free templates of texts, filters, elements, overlays, transitions, and music are available here which its users create GIF images with easily. You can also create lively and fully animated images, convert MP4 to GIFs and share it on YouTube, or other social media platforms.
The capabilities of this animated GIF maker for Windows are not restrained to this alone, as it can be used to edit all kinds of images, audio, and videos.
03GIF Animator
GIF animator editor is one of the first-rate GIF makers and is an awesome device for you if you desire to create GIF images, banners, buttons, and GIF videos. The device is very convenient to use and is a favorite of animators and designers.
The measurement of the photo can be modified and alongside that, it is feasible to control the frames, hastily cross texts, and enhance. Corrections to the movies can be brought and the built-in photograph editor can be used to rectify photographs and pictures, you can draw on them and you can convert movies to GIFs by the usage of the fragmented section of the video files.
04**Wondershare Filmora Video Editor **
If you are searching for nice animated GIF makers for Windows computers, then Wondershare Filmora’s animated movies and GIF editor device may want to be a brilliant choice. That’s due to the fact with this GIF maker Windows device lets you add a video, convert it to the GIF structure and then edit it later with its super features.
The interactive UI helps customers manner greater than one hundred fifty file codecs easily. With this device, you can crop, pace up a video, alter the body size, and caption it. Additionally, you add texts, add animation consequences to the images, and alter the pictures and movies in a few steps.
Wondershare Filmora - Best Video Editor for Mac/Windows
5,481,435 people have downloaded it.
Build unique custom animations without breaking a sweat.
Focus on creating epic stories and leave the details to Filmora’s auto features.
Start a creative adventure with drag & drop effects and endless possibilities.
Filmora simplifies advanced features to save you time and effort.
Filmora cuts out repetition so you can move on to your next creative breakthrough.
05Wondershare UniConverter
Wondershare UniConverter is one of the fine image, audio, and video editor and converter out there, and ranked the excellent GIF maker here. This GIF editor app is easy for customers and will furnish a pleasant platform for novices to operate their tasks. And when performed to create and edit GIF files, a person can export the GIF archives to both Android or iPhone barring having to use iTunes.
Part 3 Top 5 Editors for iPhone/Android
01PixelStudio
Pixel Studio is an animation app for pixel artwork fans. You can draw your little creations with pixel art. It additionally comes with a textual content tool, aid for matters like Samsung S-Pen, and it auto-saves so you don’t lose work. You can export your creations to GIF as nicely and that makes Pixel Studio one of the quality apps for customized GIFs. It’s normally an artwork app so meme lords may additionally want to put in a little greater effort than usual, however, the consequences are normally well worth it.
02Giphy Cam
Giphy Cam is one of the more recent gif editing apps. The digicam data is a brief phase of video. You can alter that video with lots of filters, different effects, stickers, text, and more. It additionally has a five-shot burst mode alongside its video mode. This is likely the excellent GIF/camera app hybrid. It doesn’t have any digital camera features; however, it does GIFs higher than the others by way of a large margin. It’s free with no in-app purchases.
03PowerDirector
PowerDirector is one of many videos modifying apps with GIF support. This one simply takes place to be higher than most of the different ones. It’s a video editor app. Thus, it’ll have comparable features. However, two of the export codecs encompass GIF nonetheless pix and animated GIFs. This will work first-class for turning a video into a shorter GIF. The app is free to download and play with. You may additionally want to buy extra aspects by using in-app purchases.
04ImgPlay – GIF Maker
ImgPlay is a popular GIF editing app that is available for Android and iOS. You have the option of using an existing video or shooting one using your phone’s camera. In GIFs, you can apply 30 effects, crop a portion of your choice, and modify the frame rate.
05Motion Stills
Motion Stills is a Google app that allows you to record short films and turn them into looping GIFs. You can use the app to take a short 3s clip with a single tap or utilize the Fast Forward feature to condense an existing video into a short one. To make yips GIFs even better, you may add motion text and emoticons. After that, save it as a GIF and send it to your friends.
Part 4 Top 5 Editors for Animated GIF Editing
01Giphy
GIPHY is a designing tool that helps customers to create extraordinary GIFs, stickers, and backdrops. You can edit your plan with filters, captions, stickers, and different plan elements. The popular codecs for GIF uploads are JPG, PNG, GIF, MP4, or MOV, whilst the conventional file codecs to convert to stickers are JPG or PNG.
GIPHY permits you to paste URLs from specific sources such as Vimeo, YouTube, GIPHY, and others. The animated GIF maker software program makes it convenient for customers to edit and organize the uploaded archives in the favored order.
02Imgur
It’s a website that makes it simple to make GIFs. Simply paste the video URL into the web app and wait for it to process. After that, all you must do now is set the start time and duration of your GIF.
03KickMyGraphics
The utility comes with a humble person interface and it approves you to create animated GIFs from neighborhood images. In addition, you can additionally paste snapshots from your clipboard at once to the application. The utility additionally helps video files; however, you want to convert the video earlier than you can edit it. The utility affords a stay preview so you can see how your animation appears at any time. You can additionally see all handy frames and dispose of useless frames with ease.
As for editing, you can’t add your textual content or alter the brightness of your frames, however, you can trade their width, peak, and zoom level. You can additionally allow Loopback or Reverse mode and set delay, step frames, and a variety of repeats. You can additionally configure output first-class right from the application.
04Instagiffer
Instagiffer is some other easy software that lets you create animated GIFs on your PC. This utility affords a humble consumer interface; however, it makes up for it with an extensive variety of features. The software approves you to convert nearby movies to GIFs, however, you can additionally paste a YouTube URL and convert an online video to GIF with ease. According to the developer, the software additionally works with different video web hosting websites.
05GIMP
The software is free, so you can download and use it except for any restrictions. GIMP is best for picture designers and it comes with all preferences that an image editor needs. You can without problems edit your images, exchange their color, hue, saturation, or brightness, and add exceptional outcomes to them.
In addition, you can create special creations thanks to the built-in layer system. It’s worth citing that the software additionally helps programming algorithms so you can effortlessly edit your photos with the use of scripts.
● Key Takeaways from This Episode →
● If you are typically worried about how you can be able to come up with fascinating GIFs, you ought to hold in thought that you don’t have to create them from scratch.
● You can be capable to advance inspiring GIFs from current movies and photos eight after GIF editor software program free download.
● Hopefully, you are now capable to pick out a perfect GIF creator to use for your modifying tasks.
An Easy-to-Understand Guide on How to Loop a Video on Canva. This Article Is Sure to Help You if This Is Your First Time Attempting a Loop Video
Looping a video is a great way to make your content stand out from the competition. The looped video will repeat the same section of the video, which gives it an eerie feeling like an old-timely music box. For example, if you are creating a series of videos about a product launch, you could use loops to create anticipation for when the product will be available.
You can use this feature on Canva to create an eye-catching looped video that you can use in your social media posts and ads. It is great if you need to use a video in your project, but don’t have time to do the editing. In this article, we’ll walk you through how to Loop a video on Canva.
Part 1: How to Loop Video in Canva
Canva is a great video editing tool that allows users to create stunning videos. It has a simple interface that makes it easy to use even for beginners. Looping a video is a great way to make your content more engaging. You can add a looping effect to any video, whether it’s yours or one you find online. Creating the looping video is super easy!
Canva is a great way to create custom designs for your business. It’s also a great way to make a video for your brand. The looping feature in Canva is a great way to create more engaging infographics. By using this feature, you can create a custom loop, which allows you to create an infographic that repeats itself in the same or different sizes.
Step 1: Create an account on Canva and select the video:
Log in to Canva and click on “Create a design”. Import your video into Canva. You can find the import button on the right side of the screen when you’re editing a new project or opening an existing project by clicking “Open.”, then click on the “Add Video” button. The new video will appear underneath your other assets.

Step 2: Choose the “Present” option by clicking on Share:
Click on the drop-down arrow next to the title bar and select “Present” from the list of available options. Then you can select the feature of Present that how your video will appear in front of you or your audience.

Step 3: Loop your video by choosing the feature “Start auto play”:
A new window will pop up and allow you to customize where in your project this loop will be placed: by default, it will start at 0 seconds and play until it reaches 500 seconds; however, you can change this if needed!

Why should we need the Loop video in Canva?
If you’re looking for a way to make your video stand out from the crowd, then you’ve come to the right place! Here are three ways that you can use looping videos in Canva software to create a more compelling piece of content.
- It adds more value to your content because viewers can watch it over and over again without having to do anything else.
- It helps attract new viewers because they’ll feel compelled to watch the whole thing or at least take action after watching part of it (like clicking on a button).
- It increases retention rates because people will remember something much better than just a static image or text string because there’s movement involved in each frame of the image.
Part 2: Alternative Way to Loop a Video
If you’re using a video editing software like Adobe Premiere or Final Cut Pro, it is likely that you have seen the generic technique of looping a video is by splitting it in two and pasting it together again. What if you need to put on repeat just one individual cut? This is where Filmora steps in! It is a handy tool for trimming and adding clips into your recordings.
The Filmora software can be used to quickly create continual sequences of any duration, irrespective of how long the footage is. It makes possible to synchronize sound and video clips, splice them into one another, and even add titles and motion graphics for a special effect. If you utilize Filmora, you do not need to be an expert in video editing to make professional-looking results. Let us explore why Filmora is necessary for video editing.
Filmora is a video editing software that allows you to make professional-looking videos from your footage. It has a loop feature that lets you create seamless loops where each clip in the sequence plays over and over until you stop it. This can be useful for creating music videos, for example, or for creating small clips that loop seamlessly through the whole video.
The loop feature in Filmora software is a great way to put your video editing skills to the test. It allows you to edit a clip of any length and then play it back over and over again, which can be useful when you’re looking for an ideal looping point or want to see how long a clip is before going back to find out why it didn’t work.
Let’s have a look that how can we loop the video on Filmora:
Step 1: Download Filmora for free and Create a project in it:
Free Download For Win 7 or later(64-bit)
Free Download For macOS 10.14 or later
Download the Filmora software from any browser. After installation opens the software and clicks on create a project. Just add a video in your timeline that you would like to loop. With the Loop tool, you can easily add titles and credits, as well as transitions and effects to your videos.

Step 2: Select the video and make copies of it:
Move the play head to the end of your clip and press right-click to copy the video then use CTRL + V to paste the clip and continue pasting as many copies as you want to create.

Step 3: Add Transition to the video to make it more seamless
Lastly, If you want to make your loop more seamless then go to the Transitions tab and type dissolve in the search bar. Drag the dissolve transition between the two clips on the timeline. This can be useful when you want viewers to watch the video repeatedly.

Part 3: FAQs About Video Loop
1. Can you loop animation in Canva?
Yes, we can make loop animation in Canva. Looping animation in Canva software is not difficult, but it does require a little bit of practice. To loop animation in Canva, follow these steps:
- Go to the Animation tab on the left side of the screen.
- Click on the New Animation button in the top right corner of your screen.
- Select the type of animation you want to create from the drop-down menu next to “Create New Animation From.” This will open up a window that allows you to select between several different options for how your animation will appear, choose one that appeals most to you!
2. How do I loop an mp4 video?
Looping the mp4 video is a fairly simple process. First, you need to import the video into your computer. The easiest way to do this is using the .mp4 files that come with your camera or phone. You can also use any other audio file or a preview of the video as an indicator of where you want to start and end your looping.
Once you have imported your video, you can begin looping it. To do this, click on the “play” button and wait until all the videos have been played. Then, click on one of the two buttons below. The bottom button will play one frame forward in time while the top button will play one frame backward in time.
3. How do I make Canva videos longer?
We’ve got a special function in Canva that lets you crop your video while making it longer. Here’s how:
- Go to the video editor by clicking the cog icon on the top right of your screen.
- Select “Crop Video” from the menu.
- Choose how much footage you want to cut out and press “OK.”
- You’re done! Your video is now cropped and longer than before!
Wondershare Filmora Easy Video Looper Software for PC and Mac Users.
Free Download Free Download Learn More

![]()
Conclusion
Looping video generates interest and emotion in the minds of viewers and it is a great tool. According to research, over 80% of internet users watch videos online to get information or because they want to gain knowledge. People’s attention span has diminished significantly, since the invention of gadgets and all these must-have devices. The video will seem like you are editing the video in real-time.
Free Download For macOS 10.14 or later
Download the Filmora software from any browser. After installation opens the software and clicks on create a project. Just add a video in your timeline that you would like to loop. With the Loop tool, you can easily add titles and credits, as well as transitions and effects to your videos.
Step 2: Select the video and make copies of it:
Move the play head to the end of your clip and press right-click to copy the video then use CTRL + V to paste the clip and continue pasting as many copies as you want to create.
Step 3: Add Transition to the video to make it more seamless
Lastly, If you want to make your loop more seamless then go to the Transitions tab and type dissolve in the search bar. Drag the dissolve transition between the two clips on the timeline. This can be useful when you want viewers to watch the video repeatedly.
Part 3: FAQs About Video Loop
1. Can you loop animation in Canva?
Yes, we can make loop animation in Canva. Looping animation in Canva software is not difficult, but it does require a little bit of practice. To loop animation in Canva, follow these steps:
- Go to the Animation tab on the left side of the screen.
- Click on the New Animation button in the top right corner of your screen.
- Select the type of animation you want to create from the drop-down menu next to “Create New Animation From.” This will open up a window that allows you to select between several different options for how your animation will appear, choose one that appeals most to you!
2. How do I loop an mp4 video?
Looping the mp4 video is a fairly simple process. First, you need to import the video into your computer. The easiest way to do this is using the .mp4 files that come with your camera or phone. You can also use any other audio file or a preview of the video as an indicator of where you want to start and end your looping.
Once you have imported your video, you can begin looping it. To do this, click on the “play” button and wait until all the videos have been played. Then, click on one of the two buttons below. The bottom button will play one frame forward in time while the top button will play one frame backward in time.
3. How do I make Canva videos longer?
We’ve got a special function in Canva that lets you crop your video while making it longer. Here’s how:
- Go to the video editor by clicking the cog icon on the top right of your screen.
- Select “Crop Video” from the menu.
- Choose how much footage you want to cut out and press “OK.”
- You’re done! Your video is now cropped and longer than before!
Wondershare Filmora Easy Video Looper Software for PC and Mac Users.
Free Download Free Download Learn More
![]()
Conclusion
Looping video generates interest and emotion in the minds of viewers and it is a great tool. According to research, over 80% of internet users watch videos online to get information or because they want to gain knowledge. People’s attention span has diminished significantly, since the invention of gadgets and all these must-have devices. The video will seem like you are editing the video in real-time.
Also read:
- Updated 2024 Approved Phone Aspect Ratio Vertical Definition, Types and Tips
- In 2024, Find Out The Best Dark Moody LUTs During Editing
- How To Synchronize Your Audio And Videos Properly for 2024
- Updated 2024 Approved How to Loop Video in Canva
- Detailed Tutorial to Crop a Video in KineMaster for 2024
- New Fixing The Slow Playback Issues in DaVinci Resolve for 2024
- Updated In 2024, How to Add Miniature Effect in Video with Filmora
- New Easily Combine Videos and Audios with 5 Simple Online Tools for 2024
- Updated 2024 Approved 20 Best Video Background Templates
- What Is the Best MP4 Cutters for YouTubers on Mac?
- Blender Is a 3D Animation Software that Can Be Used to Create Stunning 3D Models and Videos
- New 2024 Approved 4 Ways to Add White Border to Video on Mobile and Desktop
- 2024 Approved 11 Tools To Create Radial Blur Photo Mobile And Desktop
- Updated Some of the Top Sites to Replace a Sky Background in Videos for 2024
- Updated How to Create Cinematic Style Videos, In 2024
- In 2024, Have You Ever Heard Hyperlapse and Tume Lapse Videos? Do You Know the Differences Between Them? This Article Will Introduce the Concepts, Features and Differnces of Them
- Updated 2024 Approved Easy Guide to Overlay Videos in Premiere Pro
- In 2024, This Article Aims to Show You How to Improve Your Lighting in the Sun
- New Right Tools for Converting 60FPS Frame Rate in Videos
- 3 In-Camera Transitions Tricks To Make Videos Like a Pro
- Vintage Film Effect 1990S - How to Make
- How to Make Discord GIF Avatar in Depth Guide for 2024
- Updated In 2024, Best Guide of 8 Photo Collage Apps for PC
- Hacks to do pokemon go trainer battles For Nokia XR21 | Dr.fone
- New Top 10 AI-Talking Avatars Revolutionizing Communication
- 5 Best Route Generator Apps You Should Try On Nokia G310 | Dr.fone
- Top 11 Free Apps to Check IMEI on Huawei P60 Phones
- How To Fake GPS On Samsung Galaxy A23 5G For Mobile Legends? | Dr.fone
- How to get the dragon scale and evolution-enabled pokemon On Honor Magic5 Ultimate? | Dr.fone
- In 2024, Fake Android Location without Rooting For Your Realme 12+ 5G | Dr.fone
- How Can I Use a Fake GPS Without Mock Location On OnePlus 12? | Dr.fone
- Ultimate Guide on iPhone XS Max iCloud Activation Lock Bypass
- In 2024, 3 Facts You Need to Know about Screen Mirroring Vivo Y56 5G | Dr.fone
- In 2024, Complete Fixes To Solve iPhone 13 Randomly Asking for Apple ID Password | Dr.fone
- In 2024, 7 Top Ways To Resolve Apple ID Not Active Issue For iPhone XS Max | Dr.fone
- In 2024, Ultimate Guide on Asus FRP Bypass
- How To Change Xiaomi 13 Ultra Lock Screen Password?
- A Guide Itel P55T Wireless and Wired Screen Mirroring | Dr.fone
- In 2024, Top 11 Free Apps to Check IMEI on Apple iPhone 7 Plus
- Title: 2024 Approved How to Create an Alternate Reality Effect
- Author: Chloe
- Created at : 2024-05-20 03:38:06
- Updated at : 2024-05-21 03:38:06
- Link: https://ai-editing-video.techidaily.com/2024-approved-how-to-create-an-alternate-reality-effect/
- License: This work is licensed under CC BY-NC-SA 4.0.
