

2024 Approved How to Create Cooking Video Intro and End Screen for YouTube Channel?
How to Create Cooking Video Intro and End Screen for YouTube Channel?
With the number of YouTube content creators increasing every minute, the competition will be strong and unmatched. If you are a chef owning a YouTube cooking channel, this article might be your calling.
The revolutionary cooking video intros and promising outro for the channels are the need of the hour. It has become crucial to give your competitors a powerful match via robust content, incredible cooking background music, and a great end. The article covers creating a café meal intro and cooking channel YouTube end screen. So, time to begin? Shall we?
In this article
01 How to Create a Cafe Meal Intro?
02 How to Create a Cooking Channel YouTube End Screen?
03 3 Recommended Sites to Download Cooking Background Music
Part 1: How to Create a Cafe Meal Intro?
Are you a chef in a restaurant in Paris? Do you need to create a café meal intro that grabs the attention of all food fanatics worldwide? Worry no more, as this section has got you covered.
Wondershare Filmora is a one of its kind software to create an astonishing café meal intro in seconds. Let us initiate the step-by-step
For Win 7 or later (64-bit)
For macOS 10.12 or later
Step 1: Double click on Wondershare Filmora to open the software. Head to the “Audio” tab and tap “Young and Bright.” The process will launch interesting music from there.

Step 2: Pick one and drag it to the timeline. Navigate to the “Media” tab to drag the cooking video to the first track. You can also import the video from your system.

Step 3: It is time to use the “Split Screen” to show more scenes in one video. Pick one and drag it to the timeline. It will create three vertical divisions on the preview window. Drop three different videos in each division and adjust the height using the Zoom settings.

Step 4: Import another cooking video and import it to the first track. Navigate to the “Elements” section and drag one of it as a background to the end of the first track. Look for another “café” related element to drag it to the end of the second track.

Step 5: Moving on, scroll to the “Titles” panel to pick a “restaurant” related idea and drag it to the timeline. The position of the title can be adjusted, and the name of the title can be altered by placing it in the preview window.

Step 6: Use the big titles for the beginning of the video and drag them to the second track. The title can be adjusted and renamed effortlessly. Pick another title for the middle of the video and perform the same procedure. The process is completed, and you can export the video.

Part 2: How to Create a Cooking Channel YouTube End Screen?
Are you an impeccable chef? Do you own a YouTube channel with limited subscribers?
The background music for cooking videos is essential to capture the attention of food addicts in the world. Your cooking channel’s stunning YouTube end screen is your perfect shot at improving subscribers’ range. The subsection shall reflect upon the procedure to effortlessly use Wondershare Filmora. So, let us have a look
For Win 7 or later (64-bit)
For macOS 10.12 or later
Step 1: Open Wondershare Filmora from your computer and import the video that you need for the YouTube outro. Drag the video to the first track of your timeline. Head to the “Titles” tab and find the ideal title related to the restaurant idea. Now, drag it on to the second track.

Step 2: Now, it is time to use the “Transitions” tab to pick one and drag it to the end of the second track. First, import another video and drag it to the first track. After that, select the “Titles” and search YouTube pack lower-thirds. Hit one and drag it to the second track. Make required alterations related to the position, allocation, title name, size, and color.

Step 3: Navigate to the “Transitions” and click on one. Drag it and drop between the two clips. Screenshot the picture from the preview window and drag it from the “Media” tab to the first track. Pick the “YouTube end screen template” from titles and drag it to the second track.

Step 4: Modify your text from the “Advanced Settings.” Now, it is time to pick another media from your system to be used as a YouTube channel avatar. Place it on to the third track. It is time to adjust the photo on the end screen.

Step 5: To do so, go to the “Effects” and pick an image mask from it. Drag it to the photo avatar in the preview window. After that, double click on the track, and settings will appear. Select “Image Mask” options to adjust the size of the circle as needed.

Step 6: Adjust the position of the avatar on your preview window. Moving on, pick the keyframe to animate the position of the avatar. Change the rotation, escalation, and opacity as needed.

Step 7: It is time to add another image to the fourth track and perform the same procedure as the profile image. It will be displayed as the recent video on the end screen. Animate the imagery as done previously. You have created a creative end screen for your cooking YouTube channel.

Part 3: 3 Recommended Sites to Download Cooking Background Music
The background music for cooking videos is an important part of a cooking video intro and outro. Therefore, we can introduce three sites that offer great cooking background music free of copyright infringement issues. So, are you with us? Let us start!
Envato Elements
The first one of the lot is Envato Elements. There are different genres of music linked with cooking videos. The website filters can be tailored according to the theme of one’s cooking YouTube channel. Additionally, there are cooking moods music as well.

MobCup
MobCup has made it easy to browse the related cooking background music. The cooking music soup, monster hunt, cooking instrumental, and cooking effects are famous music options. The user can download them by hitting the “Download” button effortlessly.

SoundCloud
SoundCloud is another remarkable source for cooking videos to get hands-on background music. The royalty-free music for food, cooking music, and uplifting background music can be incorporated in the videos to give an essence of the cooking tutorials. The link can be copied, and the track can be downloaded in seconds.

Concluding Remarks
The marketing industry is getting more fame than the actual brand services due to multiple reasons. The animations and transitions are used to attract the attention of potential users and clients. If you own a restaurant with a YouTube cooking channel, the exciting cooking background music will work best for you.
The article discussed creating a café meal intro and cooking channel YouTube end screen through Filmora. The three recommended sites to download the music were also this write-up’s crux.
Wondershare Filmora
Get started easily with Filmora’s powerful performance, intuitive interface, and countless effects Try It Free Try It Free Learn More >

02 How to Create a Cooking Channel YouTube End Screen?
03 3 Recommended Sites to Download Cooking Background Music
Part 1: How to Create a Cafe Meal Intro?
Are you a chef in a restaurant in Paris? Do you need to create a café meal intro that grabs the attention of all food fanatics worldwide? Worry no more, as this section has got you covered.
Wondershare Filmora is a one of its kind software to create an astonishing café meal intro in seconds. Let us initiate the step-by-step
For Win 7 or later (64-bit)
For macOS 10.12 or later
Step 1: Double click on Wondershare Filmora to open the software. Head to the “Audio” tab and tap “Young and Bright.” The process will launch interesting music from there.
Step 2: Pick one and drag it to the timeline. Navigate to the “Media” tab to drag the cooking video to the first track. You can also import the video from your system.
Step 3: It is time to use the “Split Screen” to show more scenes in one video. Pick one and drag it to the timeline. It will create three vertical divisions on the preview window. Drop three different videos in each division and adjust the height using the Zoom settings.
Step 4: Import another cooking video and import it to the first track. Navigate to the “Elements” section and drag one of it as a background to the end of the first track. Look for another “café” related element to drag it to the end of the second track.
Step 5: Moving on, scroll to the “Titles” panel to pick a “restaurant” related idea and drag it to the timeline. The position of the title can be adjusted, and the name of the title can be altered by placing it in the preview window.
Step 6: Use the big titles for the beginning of the video and drag them to the second track. The title can be adjusted and renamed effortlessly. Pick another title for the middle of the video and perform the same procedure. The process is completed, and you can export the video.
Part 2: How to Create a Cooking Channel YouTube End Screen?
Are you an impeccable chef? Do you own a YouTube channel with limited subscribers?
The background music for cooking videos is essential to capture the attention of food addicts in the world. Your cooking channel’s stunning YouTube end screen is your perfect shot at improving subscribers’ range. The subsection shall reflect upon the procedure to effortlessly use Wondershare Filmora. So, let us have a look
For Win 7 or later (64-bit)
For macOS 10.12 or later
Step 1: Open Wondershare Filmora from your computer and import the video that you need for the YouTube outro. Drag the video to the first track of your timeline. Head to the “Titles” tab and find the ideal title related to the restaurant idea. Now, drag it on to the second track.
Step 2: Now, it is time to use the “Transitions” tab to pick one and drag it to the end of the second track. First, import another video and drag it to the first track. After that, select the “Titles” and search YouTube pack lower-thirds. Hit one and drag it to the second track. Make required alterations related to the position, allocation, title name, size, and color.
Step 3: Navigate to the “Transitions” and click on one. Drag it and drop between the two clips. Screenshot the picture from the preview window and drag it from the “Media” tab to the first track. Pick the “YouTube end screen template” from titles and drag it to the second track.
Step 4: Modify your text from the “Advanced Settings.” Now, it is time to pick another media from your system to be used as a YouTube channel avatar. Place it on to the third track. It is time to adjust the photo on the end screen.
Step 5: To do so, go to the “Effects” and pick an image mask from it. Drag it to the photo avatar in the preview window. After that, double click on the track, and settings will appear. Select “Image Mask” options to adjust the size of the circle as needed.
Step 6: Adjust the position of the avatar on your preview window. Moving on, pick the keyframe to animate the position of the avatar. Change the rotation, escalation, and opacity as needed.
Step 7: It is time to add another image to the fourth track and perform the same procedure as the profile image. It will be displayed as the recent video on the end screen. Animate the imagery as done previously. You have created a creative end screen for your cooking YouTube channel.
Part 3: 3 Recommended Sites to Download Cooking Background Music
The background music for cooking videos is an important part of a cooking video intro and outro. Therefore, we can introduce three sites that offer great cooking background music free of copyright infringement issues. So, are you with us? Let us start!
Envato Elements
The first one of the lot is Envato Elements. There are different genres of music linked with cooking videos. The website filters can be tailored according to the theme of one’s cooking YouTube channel. Additionally, there are cooking moods music as well.
MobCup
MobCup has made it easy to browse the related cooking background music. The cooking music soup, monster hunt, cooking instrumental, and cooking effects are famous music options. The user can download them by hitting the “Download” button effortlessly.
SoundCloud
SoundCloud is another remarkable source for cooking videos to get hands-on background music. The royalty-free music for food, cooking music, and uplifting background music can be incorporated in the videos to give an essence of the cooking tutorials. The link can be copied, and the track can be downloaded in seconds.
Concluding Remarks
The marketing industry is getting more fame than the actual brand services due to multiple reasons. The animations and transitions are used to attract the attention of potential users and clients. If you own a restaurant with a YouTube cooking channel, the exciting cooking background music will work best for you.
The article discussed creating a café meal intro and cooking channel YouTube end screen through Filmora. The three recommended sites to download the music were also this write-up’s crux.
Wondershare Filmora
Get started easily with Filmora’s powerful performance, intuitive interface, and countless effects Try It Free Try It Free Learn More >
How to Split a Clip in DaVinci Resolve [Step by Step]
The DaVinci resolve is an amazing video editing software that attracts professionals and beginners to work on it. You can also fulfil your wish to edit or split the video clips in it without facing any difficulty.
But, some of them are looking for guidance to work on DaVinci resolve correctly. This article discusses the splitting of the video clips in DaVinci Resolve explicitly. There is also a brief description of its best alternative, Wondershare Filmora. This is also practically relevant and reasonable as well.
How you can split the video clips in DaVinci resolve
DaVinci resolve is a comprehensive program that allows you to deliver different solutions. It can be related to editing the videos, correcting the colours, and producing the videos and audio. Just follow the simple steps below for splitting the videos in the DaVinci resolve:
Part 1 - Splitting of one clip:
Step 1: After installing the DaVinci resolve, launch it in your system.

Step 2: Import and place the media file on the timeline from the library. This is the clip you want to split. Select the blade tool from where you want to split the clip. Use the timeline from the menu and go to Split Clip. Shortcut keys are also available that are Ctrl+\ or Cmd+\ or Cmd+B. Now the split clip is easily visible to you. You can use this clip wherever you want to use it.

Part 2- Splitting of more than one clip on various tracks:
You can also split the number of video and audio clips at the exact timings in DaVinci resolve.
Step 1: When there are piles of clips one after the other, the selection of both of the clips is essential, which have to be split. Keep moving the playhead to the exact area where there is a requirement for the changes.
Step 2: Just keep pressing Command or Control + \ keys, or click on timeline> Split Clip. The selected clips of audio and video get split together now. No more slitting of the clips individually. This option is more appropriate for you when creating and managing different parts of massive projects.

An easier way to split the video clips
Without any doubt, DaVinci resolve is an advanced level software for video editing at the professional level. Moreover, the pricing of DaVinci resolve is $299, and it shows that it is quite expensive for many people. Due to this, you need an economical solution that is Filmora Video Editor .
Most graphic designers and video editors recommend Wondershare Fimora because it is lighter for the systems. All the tools are simplified in using like trimming or splitting the clips. You can convert split video clips into other formats in Wondershare Filmora. Add and apply all the special effects on your videos and export them wherever you want.
For Win 7 or later (64-bit)
For macOS 10.14 or later
Features:
- Splitting or trimming of the video clips
- Removing the noise
- Addition of the transition effects
- Availability of controls for the audio, sound and video
- Separating the audio from the video
Part 1 - Splitting the clips in Wondershare Filmora
If you want to split the clips or trim some parts of the videos, Wondershare Filmora is the right choice. Below are detailed steps for trimming the videos quickly and easily.
Step :1
Drag or drop the files from Media Library or Click on “Import” after selecting the video clips to make the clip visible on the timeline. No need to worry regarding the formats as Wondershare Filmora is highly supportive towards it/

Step:2
Keep hanging the mouse on the corner of the video until and unless the trimming icon appears. So, you can drag ahead or in a backward direction at the endpoints of the video you want to trim.

Step: 3
You don’t want the video parts in the centre of the video clips. First, split the video and delete it. For splitting the video, click on the icon of the scissor.

Step: 4
For deleting the part of the undesired part of the video, click on the dustbin icon. If there is any deletion by mistake, there is no need to worry about it. Click on the undo icon to make the video appear on the timeline again.

Part 2 - Splitting and trimming the clips in Wondershare Filmora:
Apart from the above steps for trimming and splitting the videos in Wondershare Filmora, the position of the video has to be in the place head of the frame that you are willing to trim. Right-click on the clip and select the option of “Trim Start to Playhead or Trim End to Playhead “ for deleting the content of the video ahead or back of it.

In the latest version of the Wondershare Filmora, you can even trim the video without adding it to the timeline. A similar video can easily split multiple times and load only the required one. Go through the following steps to split the clips in a faster way:
- You can easily preview the video first from the library of your media files.
- Select the clip which you want to split or trim by selecting from the beginning till the end
- After dragging, you can view the trim section
- Keep repeating the steps mentioned above for splitting the videos

Although various editing software is available, Wondershare Filmora has to be on the top. It is the best choice to bring your imagination into reality, whether it is transitioning, applying the effects or importing/exporting the videos. All the options are suitable in front and visible on your timeline. Wondershare Filmora supports different operating systems as well. Even no proper training is required, so start using Wondershare Filmora today to get your editing done.
Step 2: Import and place the media file on the timeline from the library. This is the clip you want to split. Select the blade tool from where you want to split the clip. Use the timeline from the menu and go to Split Clip. Shortcut keys are also available that are Ctrl+\ or Cmd+\ or Cmd+B. Now the split clip is easily visible to you. You can use this clip wherever you want to use it.
Part 2- Splitting of more than one clip on various tracks:
You can also split the number of video and audio clips at the exact timings in DaVinci resolve.
Step 1: When there are piles of clips one after the other, the selection of both of the clips is essential, which have to be split. Keep moving the playhead to the exact area where there is a requirement for the changes.
Step 2: Just keep pressing Command or Control + \ keys, or click on timeline> Split Clip. The selected clips of audio and video get split together now. No more slitting of the clips individually. This option is more appropriate for you when creating and managing different parts of massive projects.
An easier way to split the video clips
Without any doubt, DaVinci resolve is an advanced level software for video editing at the professional level. Moreover, the pricing of DaVinci resolve is $299, and it shows that it is quite expensive for many people. Due to this, you need an economical solution that is Filmora Video Editor .
Most graphic designers and video editors recommend Wondershare Fimora because it is lighter for the systems. All the tools are simplified in using like trimming or splitting the clips. You can convert split video clips into other formats in Wondershare Filmora. Add and apply all the special effects on your videos and export them wherever you want.
For Win 7 or later (64-bit)
For macOS 10.14 or later
Features:
- Splitting or trimming of the video clips
- Removing the noise
- Addition of the transition effects
- Availability of controls for the audio, sound and video
- Separating the audio from the video
Part 1 - Splitting the clips in Wondershare Filmora
If you want to split the clips or trim some parts of the videos, Wondershare Filmora is the right choice. Below are detailed steps for trimming the videos quickly and easily.
Step :1
Drag or drop the files from Media Library or Click on “Import” after selecting the video clips to make the clip visible on the timeline. No need to worry regarding the formats as Wondershare Filmora is highly supportive towards it/
Step:2
Keep hanging the mouse on the corner of the video until and unless the trimming icon appears. So, you can drag ahead or in a backward direction at the endpoints of the video you want to trim.
Step: 3
You don’t want the video parts in the centre of the video clips. First, split the video and delete it. For splitting the video, click on the icon of the scissor.
Step: 4
For deleting the part of the undesired part of the video, click on the dustbin icon. If there is any deletion by mistake, there is no need to worry about it. Click on the undo icon to make the video appear on the timeline again.
Part 2 - Splitting and trimming the clips in Wondershare Filmora:
Apart from the above steps for trimming and splitting the videos in Wondershare Filmora, the position of the video has to be in the place head of the frame that you are willing to trim. Right-click on the clip and select the option of “Trim Start to Playhead or Trim End to Playhead “ for deleting the content of the video ahead or back of it.
In the latest version of the Wondershare Filmora, you can even trim the video without adding it to the timeline. A similar video can easily split multiple times and load only the required one. Go through the following steps to split the clips in a faster way:
- You can easily preview the video first from the library of your media files.
- Select the clip which you want to split or trim by selecting from the beginning till the end
- After dragging, you can view the trim section
- Keep repeating the steps mentioned above for splitting the videos
Although various editing software is available, Wondershare Filmora has to be on the top. It is the best choice to bring your imagination into reality, whether it is transitioning, applying the effects or importing/exporting the videos. All the options are suitable in front and visible on your timeline. Wondershare Filmora supports different operating systems as well. Even no proper training is required, so start using Wondershare Filmora today to get your editing done.
10 Best Cartoon Video Makers (Online and Desktop Solution)
Abundant Video Effects - Wondershare Filmora
Provide abundant video effects - A creative video editor
Powerful color correction and grading
Detailed tutorials are provided by the official channel
Introduction
There are some issues common to the video production process. However, animated or cartoon videos have helped to combat such issues. You do not need to scout for locations, go through a seemingly endless casting process, or rent the pricey equipment. A cartoon is simply a type of animation or an illustration that usually appears in a semi-realistic or an unreal style. In addition, it uses simple, satirical, and humorous drawing language to tell the story.
Although there are restrictions, there are a lot of possibilities cartoon video makers still offer to their users. Therefore, this article will share the top 10 best cartoon video makers online and on PC that you can use before diving into an animated video world.
So, here is what we shall learn about cartoon makers today:
In this article
01 Best 5 Online Cartoon Makers
02 Cartoon Video Maker for Desktop (Win and Mac)
03 How Can I Create My Own Cartoon Using Wondershare Anireel
Part 1: Best 5 Online Cartoon Makers
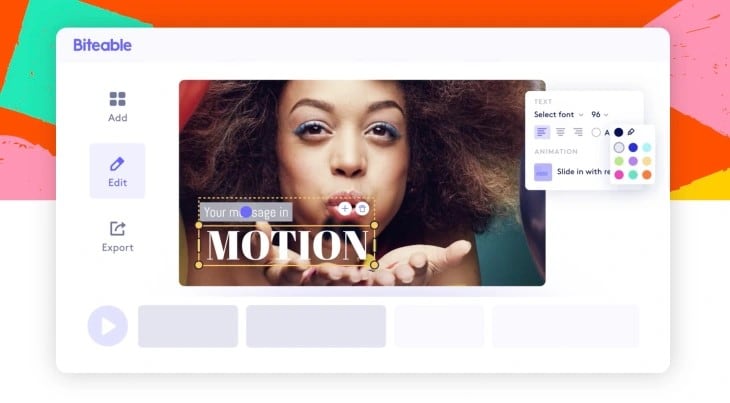
1. Biteable
Biteable provides a seemingly endless list of template categories to cater to your online media marketing needs. Aside from offering entertaining cartoon-making templates, the platform also allows users to create motion graphics or content, and Facebook covers for their social media channels.
Price: Free, $23 per month, billed annually.
Features:
- Offering library with lots of templates to choose from
- Free to use, except you are looking for additional features
- Five simple steps to an incredible cartoon video
- It has an easily customizable template
Pros
- It is a perfect option for social media managers
- Quickly create entertaining cartoons
- Used by biggies like Amazon, Microsoft, Google, Disney, BBC, Shopify, Samsung, and salesforce.
- Over 9 million users
Cons
- There is a mandatory registration
- There are no audio editing options
- The file-sharing capabilities are limited to YouTube and Facebook
- The download option is disabled in the free version
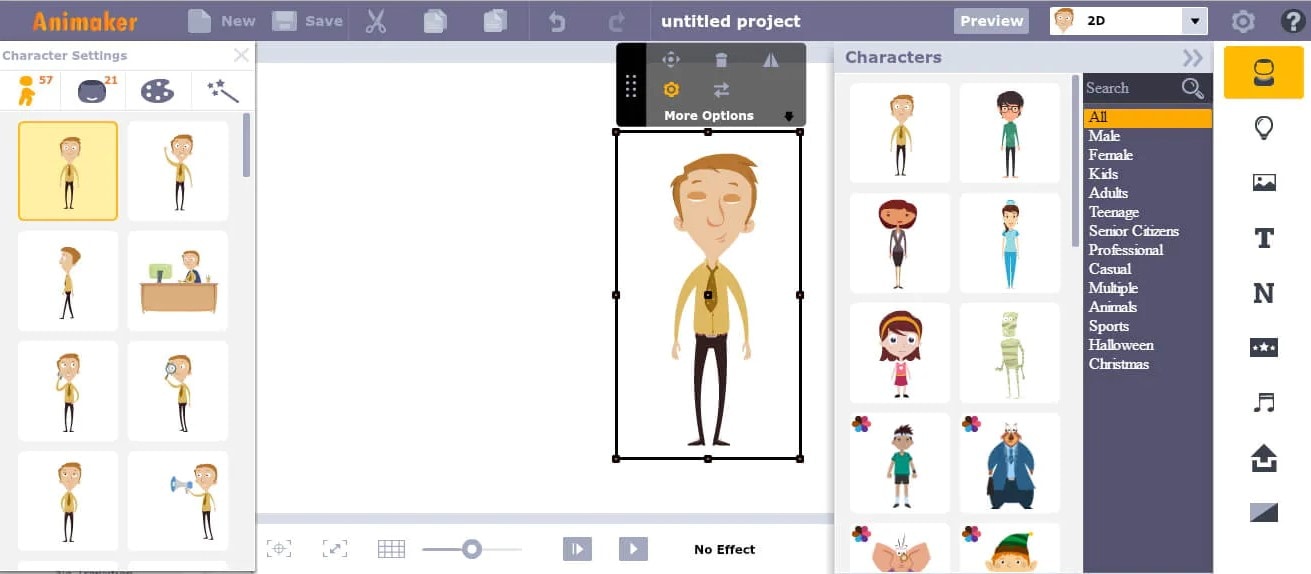
2. Animaker
With this animated maker, you get access to hundreds of animated characters, maps, and backgrounds. There are six (6) video styles available in this cartoon maker: Typography, Infographic, or 2D for different types of projects.
Price: Free version available. Subscription plans start at $12 per month/billed annually.
Features
- Different video styles, marketing, explainer, or 2D animation.
- Posts itself as the number 1 cartoon maker
- No need for a credit card to start.
- Four-step process; select template, customize it, add music, and download or share.
- 200+ voices, 25+ languages, and loads of customizable options.
- It offers auto-lip sync with advanced animation effects.
- There is a rich selection of 1000+ templates
Pros:
- Superb audio editing options
- Excellent and quick animation tools.
- Over 10 million users so far and still counting.
- Currently used by Amazon, Bosch, HP, Nokia, and Philips.
Cons:
- The monthly fee is pricey
- Account creation is mandatory for a free version
- The free version contains a watermark
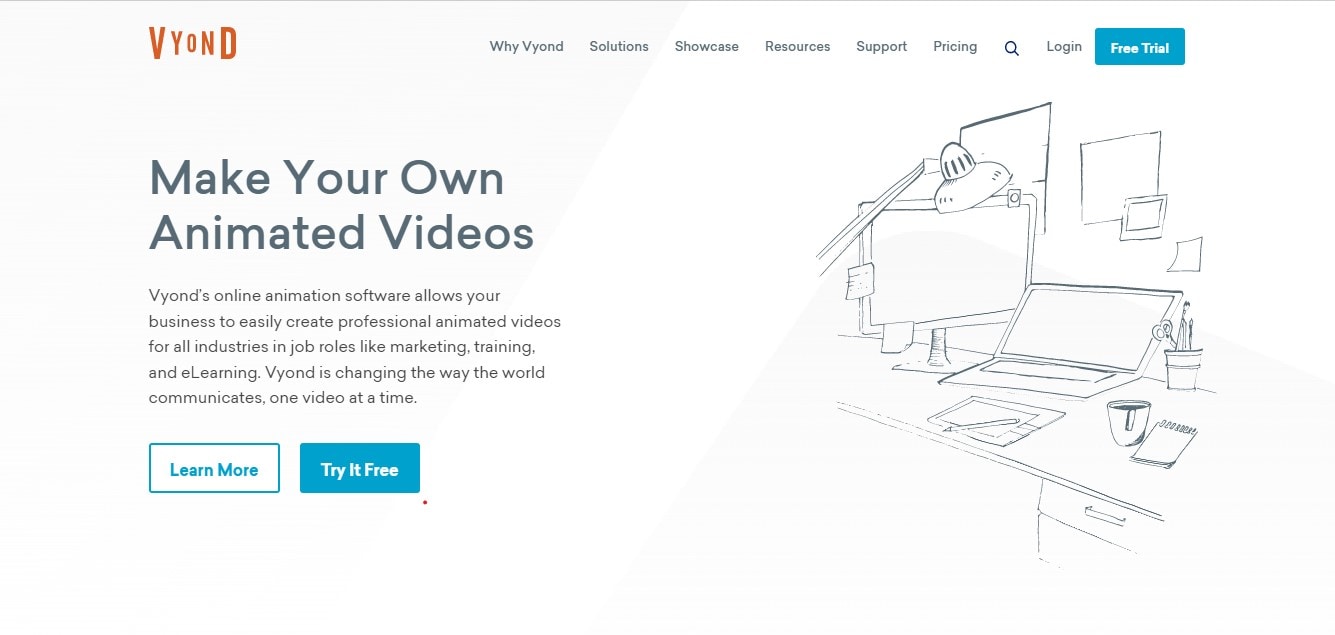
3. Vyond
Vyond, the cartoon creator launched in 2007, is probably one of the oldest online cartoon video makers. Additionally, it is still one of the most popular online destinations meant for anyone who wants to create an animated video quickly.
Price: Subscription plans start from $39 per month, billed annually.
Features:
- Perfect for animated video creation
- There is automatic character lip-syncing
- Try it for free before purchasing
- Make videos for training, e-learning, marketing, human resources, etc.
- The maximum duration of the video is 120 minutes
Pros:
- It has a fully customizable template
- There are high-end object and character animated features
- Certified by GDPR, TrustArc, BSI, and CCPA
- A wholesome cartoon makerfor enterprise and individual
- Data security and privacy assurance by BSI, CCPA, and GPDR.
Cons:
- It is quite expensive
- Vyond is not the best option for inexperienced animators
- The features depend on the subscription model
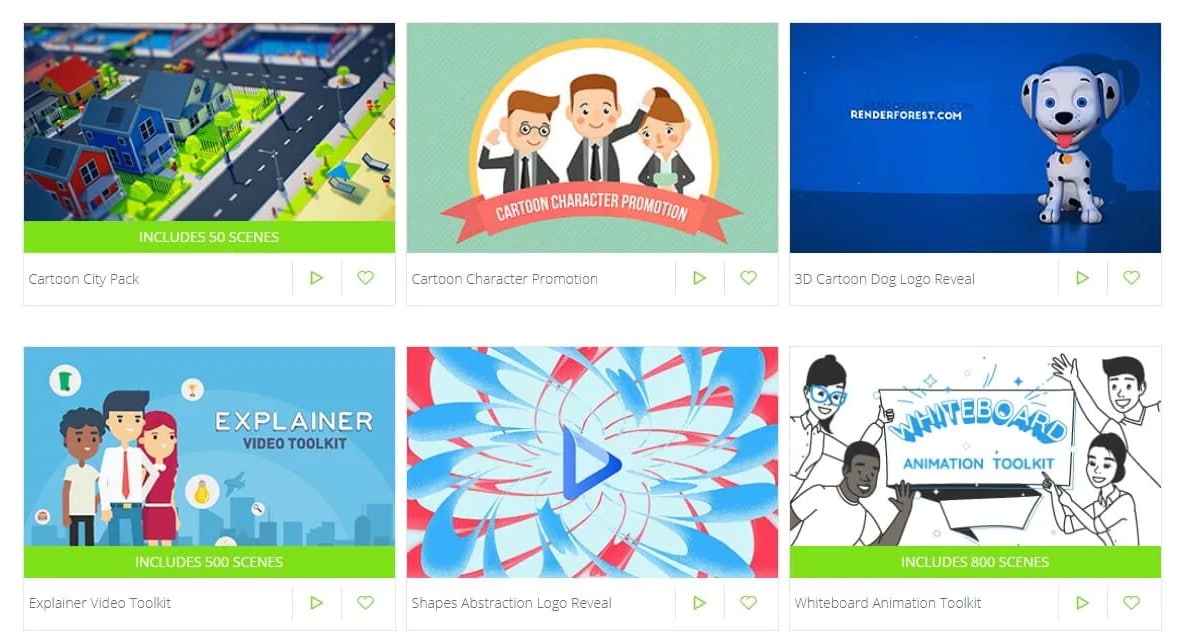
4. Renderforest
This is a famous online cartoon video maker for many purposes. Among the numerous options, the platform offers to its user. They include; 3D explainer videos, logo animations, or professional presentations.
Price: Free version available. Subscription plans start at $16 per month, billed annually.
Features:
- There is an extensive library of templates with numerous options
- Has a large online storage
- Was among the top 100 software companies in 2019.
- Top ranked solution holder for 2020
- Up to 250GB of online storage space
- Use the in-built template to make a story, customize the video, and then export it to share with your friends.
- Amadeus, Bose, BBC, Vodafone, Sony Music, and many others use Renderforest.
Pros:
- Produce videos like a pro
- Comes with an ultimate animation pack.
- Trusted by millions and one of the oldest cartoon makers.
Cons:
- A limited amount of commercial music tracks
- There are modest export options
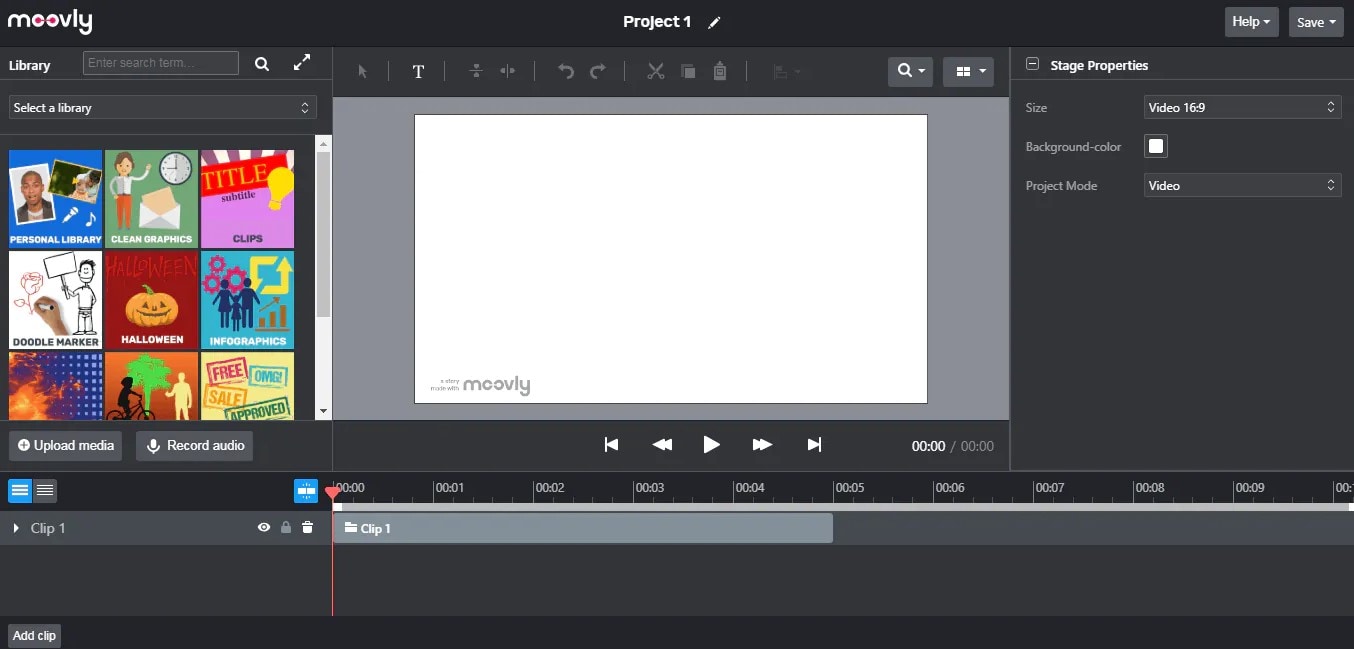
5. Moovly
With this cartoon maker, users must first log in. However, there is no need to create a new account as you can use your LinkedIn or Google account to sign in quickly.
Price: Free 30-day trial, $24.92 per month billed annually.
Features:
- Moovly is the perfect cartoon video maker for sales&marketing, human resources, internal communication, learning&development, agencies, and education.
- Apply expert features in one click with Moovly.
- Create videos and edit with browser-based or drag and drop features without installing software.
- Moovly has over 1.3 million free media, like images, sounds, music, and royalty-free stock videos at no extra charge.
- Besides, it offers 100 million extra media you can try and then purchase.
- You can add your images, music, and videos to create unique clips in style.
- Add text, remove color, add subtitles or generate them, auto-translate your text and subtitles, import PPT files, structure your content, record yourself or your computer screen, edit, mix, etc.
Pros:
- Even if users need to log in, they don’t need to create an account
- Allows users to import content from online sources like Storyblock, Shutterstock, etc.
- It is the number 1 customizable and straightforward solution to making cartoons.
- Use by Colgate-Palmolive, NHS, Teradata, Amadeus, Cisco, Continental, and Logitech.
- The interface is intuitive and user-friendly.
Cons:
- Watermarked videos during the free trial
- To export videos in HD 1080p quality, one needs to purchase one of the available plans.
Renderforest is the best cartoon maker online of the listed five in this article due to the vast library template and large online bandwidth.
Part 2: Cartoon Video Maker for Desktop (Win and Mac)
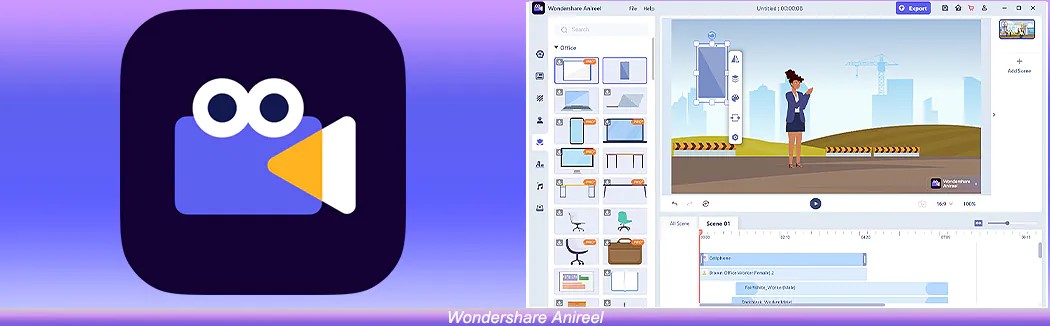
1. Wondershare Anireel
Anireel is one of the top animation software on the internet that allows users to bring their imaginations to life with a huge range of customizable elements and features.
Price: $9.99 per month billed annually and $19.99 monthly
Features:
- 40+ customizable templates
- Top animation software
- Compatible with Windows 11/10/8.1 (64 bit OS)
- Only three steps to an excellent animated video.
- Import images, videos, and sound in almost all formats.
- Create unique avatar, logo images, and more specific to your brand.
- The Deep Learning tech offers quick text-to-speech conversion.
- Animate camera movements, entry and exit effects, motion path, etc.
- Use the one-click option and change scripts to clips.
- Anireel cartoon video makercan lip-sync your characters with perfection.
- Quick and easy drag and drop editing.
Pros:
- It is convenient and simple to use
- Anireel has an intuitive interface
- The cartoon makeroffers a practical and seamless animated video editing
- It comes at an affordable and competitive price
Cons:
- It has a limited amount of assets
- Not suitable for too professional people to use.
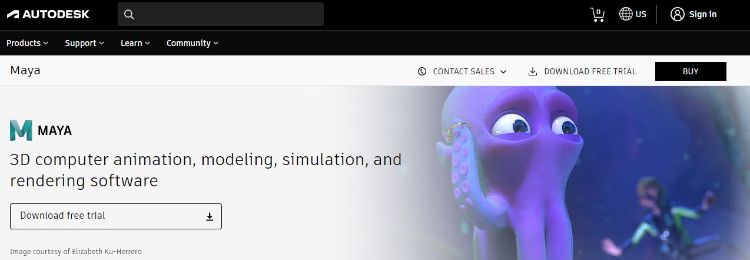
2. Autodesk Maya
Autodesk Maya is one of the best animation tools used to create animation pictures, video games, and add 3D effects in motion pictures. Plus, this cartoon maker is the best if you require a high-quality visual impact.
Price: Free trial, $225 billed monthly.
Features:
- It offers AutoDesk financing for new buyers.
- Maya is the go-to shop for architects, engineers, designers, media, and entertainment.
- Shape 3D objects and add realistic effects with Maya cartoon maker’s NURBS modeling.
- The Integrated Arnold rendering technology lets you view scene changes in real-time.
- Maya has been part of the top movie makers, including the MCU.
- This cartoon video maker offers geometry-based polygon modeling and helps create accurate simulations for visual programming.
- Maya can load and change vast data sets at a faster pace.
Pros:
- It makes complex hand-made animation tasks extremely easy
- Efficient color management
- Allows the creation of realistic effects like cloth simulations and explosions
- 30-day free trial and 30-day money-back guarantee
- Meet deadlines, add fine details to develop even the most complex shots or characters.
- Excellent tool for professionals
Cons:
- The pro is quite expensive
3. Adobe Animate
This is one of the most powerful animation software products on the internet that has been available for decades. It can animate images used for games, film, or online and produce HTML 5, WebGL, or Flash content.
Price: This cartoon creator offers three pricing plans starting at US$24.14/month
Features:
- Excellent for complex animation
- The capability of freehand drawing
- Animate, illustrate, and make 3D typography.
- Import and add vector drawings for further editing.
- Export your work as HTML5 Canvas, WebGL, Flash/Adobe AIR, GIF, or QuickTime movie.
- With the Bone tool, make your cartoon characters fluid and natural.
- Synchronize sounds and music for your project.
- Choose parts of the clip to be animated.
Pros:
- It has Puppeting features
- It is an excellent choice for complex animations
- It includes freehand drawing capability
Cons:
- It is not suitable for beginners
- Other Adobe software may be required while working on a project
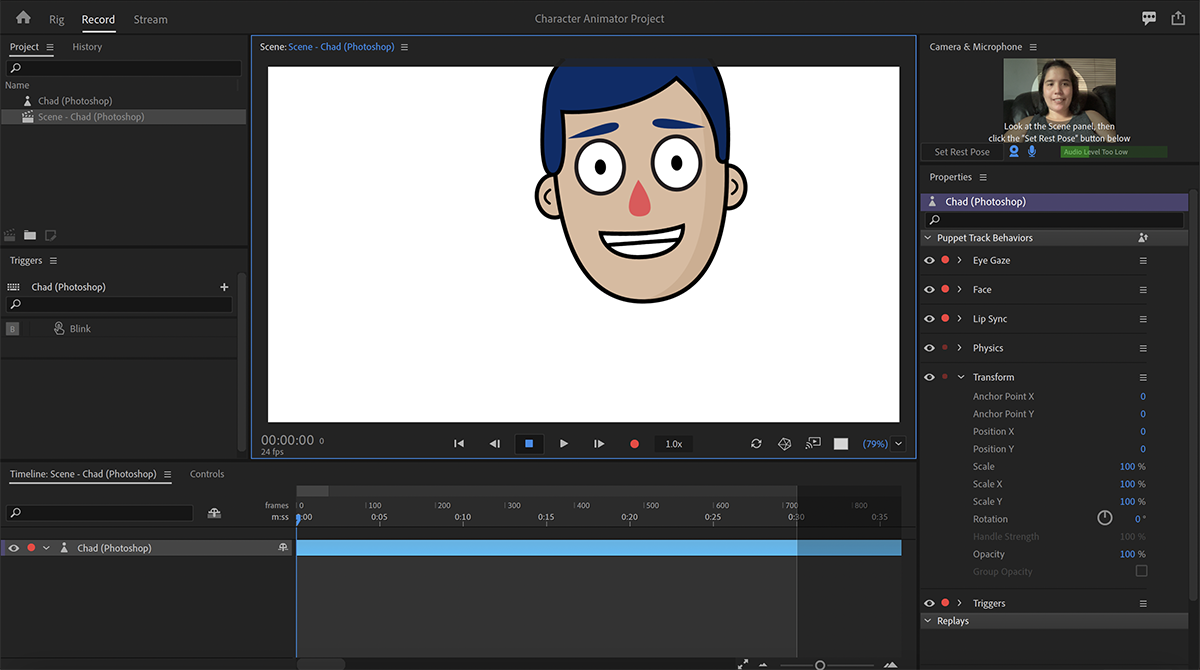
4. Adobe Character Animator
Adobe Character Animator is another type of Adobe’s animation software stack that allows users to use motion to capture and create live animations of their 2D characters.
Price: Adobe Character Animator has two pricing plans starting at US$34,49/month for the first year
Features:
- This product requires other Adobe products to function
- Lots of options to export and import.
- Make your real-life cartoon using the Motion Capture feature in five steps.
- The Avatar will walk, talk, and copy your expressions in real-time.
- Integrate and add assets from other Adobe Creative Cloud apps.
- Auto lip-syncing and real-time facial movement capture.
- Works on iOS and Android.
Pros:
- Easy to replicate real-life movements and expressions with facial tracking.
- There are various import and export options.
Cons:
- It is not a standalone product.
- Users need to have a webcam and microphone to use the motion capture feature.
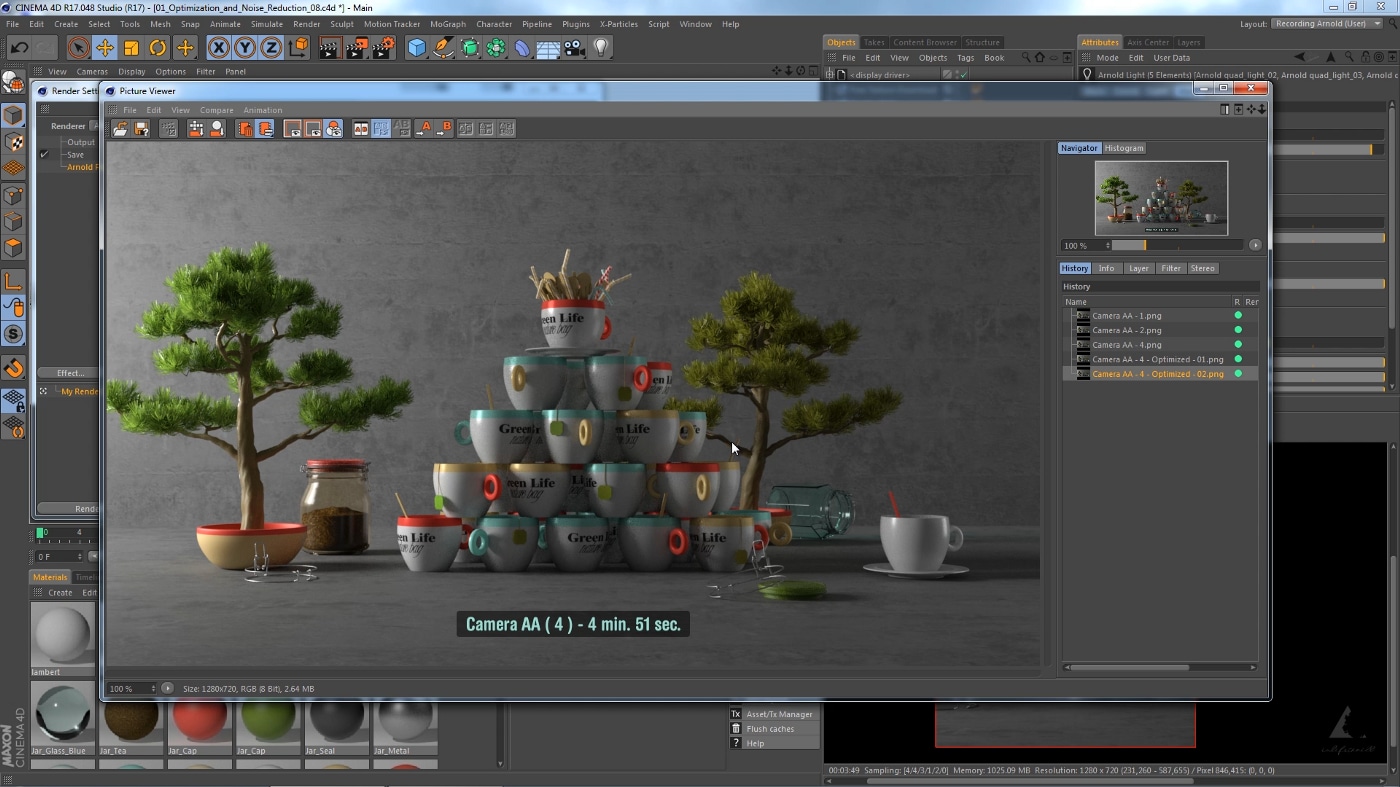
5. Cinema 4D
This cartoon maker has a 3D application interface that offers a keyframe animation, life-like characters, simulation building, object tracking, flexible rig building, cartoon styling, and animation basics.
Price: 4 pricing plans, starting at $99.91/month and $1199.00 billed annually.
Features:
- Keyframing animation effect
- It has a 3d interface
- The ZRemesher for retopology and new tools for modeling add to the new features.
- The Cloth Simulation features help make your cartoon more real.
- It supports CPU rendering with Redshift, which helps you preview, import, and export in high quality.
Pros:
- It is pretty easy to use.
- Lots of exciting design templates are available
- Many editing features are available
Cons
- It is pretty expensive compared to other software
- Not good for beginners
Wondershare Anireel is the best cartoon maker of the five listed in this article. It has lots of advanced features and templates to choose from.
Part 3: How Can I Create My Own Cartoon Using Wondershare Anireel
As stated, Wondershare Anireel has become our top cartoon creator pick due to its affordable pricing, secure server, and ease of use.
So, let us view the simple steps to create your cartoon using the Anireel software.
Step 1: Download, install and Create Character
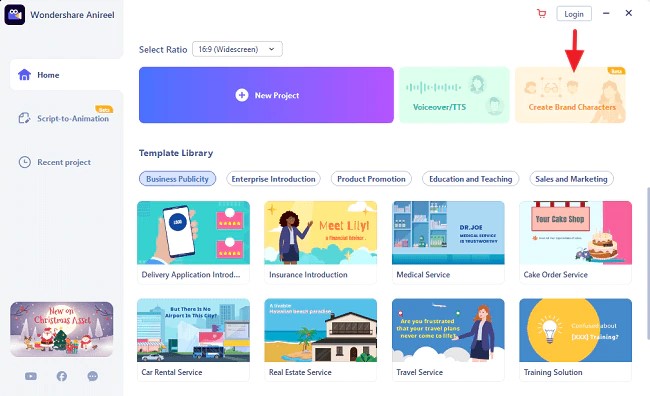
Run Anireel on your device, visit Characters Tab and then click on Create a Character option, or you may click on the Create Brand Characters tab on the home screen.
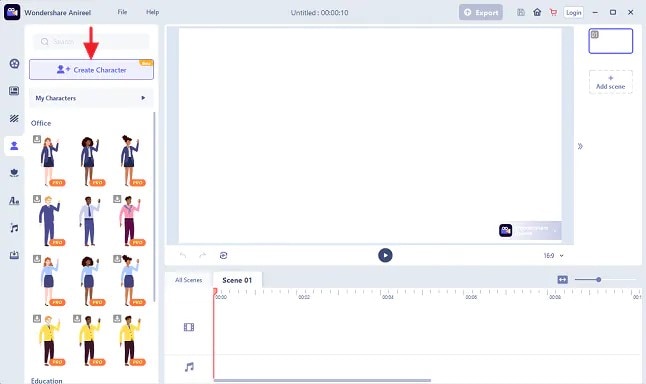
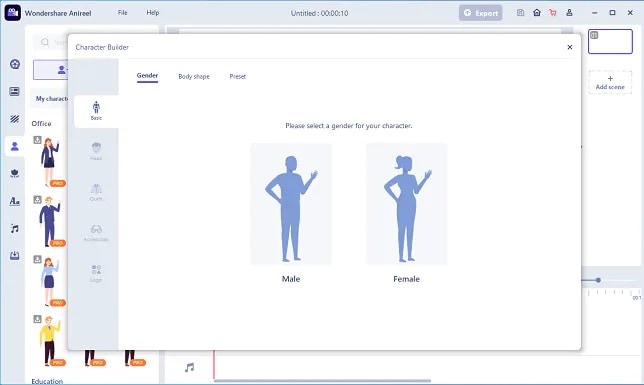
Step 2: Start Creating your Cartoon Character
Choose your gender and body shape, and apply some preset suits.
Now, you can start building facial features using the Head tab to customize the shape of the face, eyes, hairstyle, nose, mouth, ears, and eyebrows.
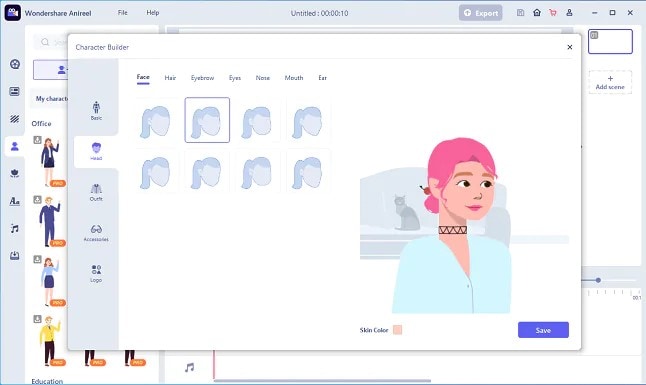
You can also choose to change the skin tone to match yours.
Step 3: Add an Outfit and Accessories
Choose the Outfit tab in Character Builder to select the base layer, outfit, bottom wear, and footwear. Pick what you want to use on your cartoon and keep adding.
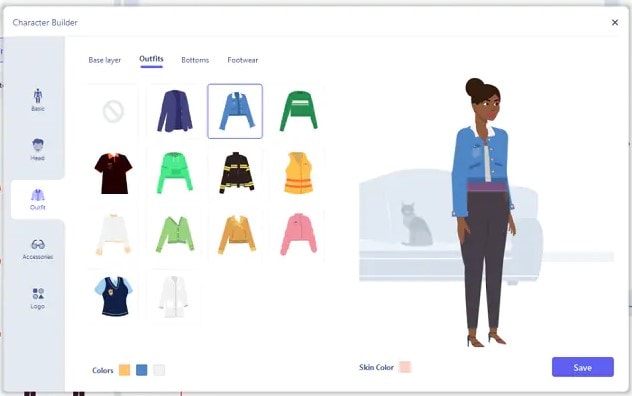
Next, reach the Accessories tab to add glasses, necklaces, and more to your cartoon character.
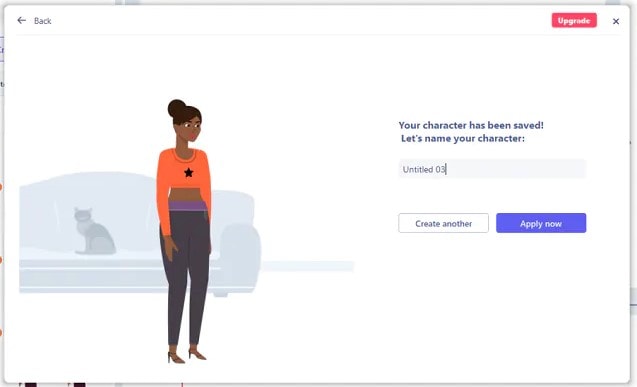
Step 4: Name your Cartoon and Apply
Click on Save and add a name to your cartoon when all done. Finally, click Apply Now to add your cartoon character to your Anireel cartoon maker canvas or My Characters tab.
Part 4: People Also Want to Know
Below are some answers to a few queries about cartoon creators. Let us look at them one by one.
1. What is the best free cartoon maker?
Wondershare Anireel is the best cartoon maker for Android as it is free to use with lots of advanced features and templates to choose from.
2. What is the best app to make a cartoon?
Wondershare Anireel’s Microsoft app is also one of the best cartoon applications that are very flexible and easy to use on the go.
Conclusion
In this article, we explained the best cartoon creators in the industry. Also, we gave the best cartoon video maker from the list. Thus, as you saw, in this report, we have summarized a few essential points regarding cartoon video makers. You learned:
- The cartoon video maker for free that you should know of.
- The ten best cartoon video makers.
- Why are Wondershare Anireel and Renderforest excellent online cartoon video makers?
- How does Anireel, cartoon creator, work?
- Finally, a few FAQs for users to better understand the cartoon maker
Introduction
There are some issues common to the video production process. However, animated or cartoon videos have helped to combat such issues. You do not need to scout for locations, go through a seemingly endless casting process, or rent the pricey equipment. A cartoon is simply a type of animation or an illustration that usually appears in a semi-realistic or an unreal style. In addition, it uses simple, satirical, and humorous drawing language to tell the story.
Although there are restrictions, there are a lot of possibilities cartoon video makers still offer to their users. Therefore, this article will share the top 10 best cartoon video makers online and on PC that you can use before diving into an animated video world.
So, here is what we shall learn about cartoon makers today:
In this article
01 Best 5 Online Cartoon Makers
02 Cartoon Video Maker for Desktop (Win and Mac)
03 How Can I Create My Own Cartoon Using Wondershare Anireel
Part 1: Best 5 Online Cartoon Makers
1. Biteable
Biteable provides a seemingly endless list of template categories to cater to your online media marketing needs. Aside from offering entertaining cartoon-making templates, the platform also allows users to create motion graphics or content, and Facebook covers for their social media channels.
Price: Free, $23 per month, billed annually.
Features:
- Offering library with lots of templates to choose from
- Free to use, except you are looking for additional features
- Five simple steps to an incredible cartoon video
- It has an easily customizable template
Pros
- It is a perfect option for social media managers
- Quickly create entertaining cartoons
- Used by biggies like Amazon, Microsoft, Google, Disney, BBC, Shopify, Samsung, and salesforce.
- Over 9 million users
Cons
- There is a mandatory registration
- There are no audio editing options
- The file-sharing capabilities are limited to YouTube and Facebook
- The download option is disabled in the free version
2. Animaker
With this animated maker, you get access to hundreds of animated characters, maps, and backgrounds. There are six (6) video styles available in this cartoon maker: Typography, Infographic, or 2D for different types of projects.
Price: Free version available. Subscription plans start at $12 per month/billed annually.
Features
- Different video styles, marketing, explainer, or 2D animation.
- Posts itself as the number 1 cartoon maker
- No need for a credit card to start.
- Four-step process; select template, customize it, add music, and download or share.
- 200+ voices, 25+ languages, and loads of customizable options.
- It offers auto-lip sync with advanced animation effects.
- There is a rich selection of 1000+ templates
Pros:
- Superb audio editing options
- Excellent and quick animation tools.
- Over 10 million users so far and still counting.
- Currently used by Amazon, Bosch, HP, Nokia, and Philips.
Cons:
- The monthly fee is pricey
- Account creation is mandatory for a free version
- The free version contains a watermark
3. Vyond
Vyond, the cartoon creator launched in 2007, is probably one of the oldest online cartoon video makers. Additionally, it is still one of the most popular online destinations meant for anyone who wants to create an animated video quickly.
Price: Subscription plans start from $39 per month, billed annually.
Features:
- Perfect for animated video creation
- There is automatic character lip-syncing
- Try it for free before purchasing
- Make videos for training, e-learning, marketing, human resources, etc.
- The maximum duration of the video is 120 minutes
Pros:
- It has a fully customizable template
- There are high-end object and character animated features
- Certified by GDPR, TrustArc, BSI, and CCPA
- A wholesome cartoon makerfor enterprise and individual
- Data security and privacy assurance by BSI, CCPA, and GPDR.
Cons:
- It is quite expensive
- Vyond is not the best option for inexperienced animators
- The features depend on the subscription model
4. Renderforest
This is a famous online cartoon video maker for many purposes. Among the numerous options, the platform offers to its user. They include; 3D explainer videos, logo animations, or professional presentations.
Price: Free version available. Subscription plans start at $16 per month, billed annually.
Features:
- There is an extensive library of templates with numerous options
- Has a large online storage
- Was among the top 100 software companies in 2019.
- Top ranked solution holder for 2020
- Up to 250GB of online storage space
- Use the in-built template to make a story, customize the video, and then export it to share with your friends.
- Amadeus, Bose, BBC, Vodafone, Sony Music, and many others use Renderforest.
Pros:
- Produce videos like a pro
- Comes with an ultimate animation pack.
- Trusted by millions and one of the oldest cartoon makers.
Cons:
- A limited amount of commercial music tracks
- There are modest export options
5. Moovly
With this cartoon maker, users must first log in. However, there is no need to create a new account as you can use your LinkedIn or Google account to sign in quickly.
Price: Free 30-day trial, $24.92 per month billed annually.
Features:
- Moovly is the perfect cartoon video maker for sales&marketing, human resources, internal communication, learning&development, agencies, and education.
- Apply expert features in one click with Moovly.
- Create videos and edit with browser-based or drag and drop features without installing software.
- Moovly has over 1.3 million free media, like images, sounds, music, and royalty-free stock videos at no extra charge.
- Besides, it offers 100 million extra media you can try and then purchase.
- You can add your images, music, and videos to create unique clips in style.
- Add text, remove color, add subtitles or generate them, auto-translate your text and subtitles, import PPT files, structure your content, record yourself or your computer screen, edit, mix, etc.
Pros:
- Even if users need to log in, they don’t need to create an account
- Allows users to import content from online sources like Storyblock, Shutterstock, etc.
- It is the number 1 customizable and straightforward solution to making cartoons.
- Use by Colgate-Palmolive, NHS, Teradata, Amadeus, Cisco, Continental, and Logitech.
- The interface is intuitive and user-friendly.
Cons:
- Watermarked videos during the free trial
- To export videos in HD 1080p quality, one needs to purchase one of the available plans.
Renderforest is the best cartoon maker online of the listed five in this article due to the vast library template and large online bandwidth.
Part 2: Cartoon Video Maker for Desktop (Win and Mac)
1. Wondershare Anireel
Anireel is one of the top animation software on the internet that allows users to bring their imaginations to life with a huge range of customizable elements and features.
Price: $9.99 per month billed annually and $19.99 monthly
Features:
- 40+ customizable templates
- Top animation software
- Compatible with Windows 11/10/8.1 (64 bit OS)
- Only three steps to an excellent animated video.
- Import images, videos, and sound in almost all formats.
- Create unique avatar, logo images, and more specific to your brand.
- The Deep Learning tech offers quick text-to-speech conversion.
- Animate camera movements, entry and exit effects, motion path, etc.
- Use the one-click option and change scripts to clips.
- Anireel cartoon video makercan lip-sync your characters with perfection.
- Quick and easy drag and drop editing.
Pros:
- It is convenient and simple to use
- Anireel has an intuitive interface
- The cartoon makeroffers a practical and seamless animated video editing
- It comes at an affordable and competitive price
Cons:
- It has a limited amount of assets
- Not suitable for too professional people to use.
2. Autodesk Maya
Autodesk Maya is one of the best animation tools used to create animation pictures, video games, and add 3D effects in motion pictures. Plus, this cartoon maker is the best if you require a high-quality visual impact.
Price: Free trial, $225 billed monthly.
Features:
- It offers AutoDesk financing for new buyers.
- Maya is the go-to shop for architects, engineers, designers, media, and entertainment.
- Shape 3D objects and add realistic effects with Maya cartoon maker’s NURBS modeling.
- The Integrated Arnold rendering technology lets you view scene changes in real-time.
- Maya has been part of the top movie makers, including the MCU.
- This cartoon video maker offers geometry-based polygon modeling and helps create accurate simulations for visual programming.
- Maya can load and change vast data sets at a faster pace.
Pros:
- It makes complex hand-made animation tasks extremely easy
- Efficient color management
- Allows the creation of realistic effects like cloth simulations and explosions
- 30-day free trial and 30-day money-back guarantee
- Meet deadlines, add fine details to develop even the most complex shots or characters.
- Excellent tool for professionals
Cons:
- The pro is quite expensive
3. Adobe Animate
This is one of the most powerful animation software products on the internet that has been available for decades. It can animate images used for games, film, or online and produce HTML 5, WebGL, or Flash content.
Price: This cartoon creator offers three pricing plans starting at US$24.14/month
Features:
- Excellent for complex animation
- The capability of freehand drawing
- Animate, illustrate, and make 3D typography.
- Import and add vector drawings for further editing.
- Export your work as HTML5 Canvas, WebGL, Flash/Adobe AIR, GIF, or QuickTime movie.
- With the Bone tool, make your cartoon characters fluid and natural.
- Synchronize sounds and music for your project.
- Choose parts of the clip to be animated.
Pros:
- It has Puppeting features
- It is an excellent choice for complex animations
- It includes freehand drawing capability
Cons:
- It is not suitable for beginners
- Other Adobe software may be required while working on a project
4. Adobe Character Animator
Adobe Character Animator is another type of Adobe’s animation software stack that allows users to use motion to capture and create live animations of their 2D characters.
Price: Adobe Character Animator has two pricing plans starting at US$34,49/month for the first year
Features:
- This product requires other Adobe products to function
- Lots of options to export and import.
- Make your real-life cartoon using the Motion Capture feature in five steps.
- The Avatar will walk, talk, and copy your expressions in real-time.
- Integrate and add assets from other Adobe Creative Cloud apps.
- Auto lip-syncing and real-time facial movement capture.
- Works on iOS and Android.
Pros:
- Easy to replicate real-life movements and expressions with facial tracking.
- There are various import and export options.
Cons:
- It is not a standalone product.
- Users need to have a webcam and microphone to use the motion capture feature.
5. Cinema 4D
This cartoon maker has a 3D application interface that offers a keyframe animation, life-like characters, simulation building, object tracking, flexible rig building, cartoon styling, and animation basics.
Price: 4 pricing plans, starting at $99.91/month and $1199.00 billed annually.
Features:
- Keyframing animation effect
- It has a 3d interface
- The ZRemesher for retopology and new tools for modeling add to the new features.
- The Cloth Simulation features help make your cartoon more real.
- It supports CPU rendering with Redshift, which helps you preview, import, and export in high quality.
Pros:
- It is pretty easy to use.
- Lots of exciting design templates are available
- Many editing features are available
Cons
- It is pretty expensive compared to other software
- Not good for beginners
Wondershare Anireel is the best cartoon maker of the five listed in this article. It has lots of advanced features and templates to choose from.
Part 3: How Can I Create My Own Cartoon Using Wondershare Anireel
As stated, Wondershare Anireel has become our top cartoon creator pick due to its affordable pricing, secure server, and ease of use.
So, let us view the simple steps to create your cartoon using the Anireel software.
Step 1: Download, install and Create Character
Run Anireel on your device, visit Characters Tab and then click on Create a Character option, or you may click on the Create Brand Characters tab on the home screen.
Step 2: Start Creating your Cartoon Character
Choose your gender and body shape, and apply some preset suits.
Now, you can start building facial features using the Head tab to customize the shape of the face, eyes, hairstyle, nose, mouth, ears, and eyebrows.
You can also choose to change the skin tone to match yours.
Step 3: Add an Outfit and Accessories
Choose the Outfit tab in Character Builder to select the base layer, outfit, bottom wear, and footwear. Pick what you want to use on your cartoon and keep adding.
Next, reach the Accessories tab to add glasses, necklaces, and more to your cartoon character.
Step 4: Name your Cartoon and Apply
Click on Save and add a name to your cartoon when all done. Finally, click Apply Now to add your cartoon character to your Anireel cartoon maker canvas or My Characters tab.
Part 4: People Also Want to Know
Below are some answers to a few queries about cartoon creators. Let us look at them one by one.
1. What is the best free cartoon maker?
Wondershare Anireel is the best cartoon maker for Android as it is free to use with lots of advanced features and templates to choose from.
2. What is the best app to make a cartoon?
Wondershare Anireel’s Microsoft app is also one of the best cartoon applications that are very flexible and easy to use on the go.
Conclusion
In this article, we explained the best cartoon creators in the industry. Also, we gave the best cartoon video maker from the list. Thus, as you saw, in this report, we have summarized a few essential points regarding cartoon video makers. You learned:
- The cartoon video maker for free that you should know of.
- The ten best cartoon video makers.
- Why are Wondershare Anireel and Renderforest excellent online cartoon video makers?
- How does Anireel, cartoon creator, work?
- Finally, a few FAQs for users to better understand the cartoon maker
How to Resize FLV Video Efficiently [Windows, Mac,Android, iPhone & O
FLV Videos are Flash Video files with a .flv file extension. FLV video files were once one of the most popular video file types and the standard video format used for embedding videos on the internet and streaming. Even though video files like mp4 and mkv have gained more popularity today, you can still come across many Flv videos on the internet.
In this article, you’ll be learning How to Resize FLV Videos Efficiently on all the platforms. But wait, what exactly does the resizing mean? When you are working with videos, resizing can mean two things: one is changing the aspect ratio or resolution of the video and another is changing the file size of the video. So let’s see how we can resize the flv videos efficiently on different platforms:
Best FLV Editor to Resize FLV Videos on Windows and Mac – Filmora Video Editor [with steps]
Among many different video editors available today, Filmora Video Editor is the one that climbs up the rank to the top. It is the best FLV editor on Windows and Mac for resizing and editing flv videos. Different social media platforms require videos of different sizes, resolutions, and aspect ratios. For eg: YouTube requires horizontal video, TikTok requires vertical, Emails have a size limit for every file, etc. That’s when the Filmora Video Editor comes into play for fast and easy resizing of any video for different platforms.
For Win 7 or later (64-bit)
For macOS 10.14 or later
Why choose Filmora Video Editor for resizing FLV videos, you say?
- Simple UI and easy interface
- Easily crop or change the aspect ratio of the video
- Not all video editors support FLV video format, but the Filmora does
- Advanced export options to compress or change the file size of video
- Suitable for beginners as well as professionals
- Regular software updates and improvements
Plus, Filmora Video Editor has a free version, so you can instantly download the program, install it, and get started on resizing FLV Videos. Below is a step-by-step guide to resize FLV Videos on Windows and Mac with Wondershare Filmora Video Editor, so you can follow along!
Steps to resize FLV videos with Filmora Video Editor:
- Launch Filmora and open a new project
Run the Wondershare Filmora application on Windows or Mac after installing it. Then you should automatically be inside a new project. If not, you can manually open a new project by going to File on the top left corner and then clicking on ‘**New Project**’.

- Import the FLV video and add it to timeline
Click on ‘**Import Media Files**’ and import the flv video into project media from your computer’s file explorer. Then add the video to the timeline by dragging it inside the timeline.

- Edit and perform desired modifications (Optional)
If you are just looking to resize the FLV video file, then you can skip this step and move to step no. 4. Otherwise, you can do various editings on the video like cropping, muting, trimming, animating, etc. before resizing the video. Filmora provides a wide range of features for editing and adding effects to the video.

- Resize the video by changing the aspect ratio
Aspect ratio defines the shape of your video like if you want the video to be horizontal, vertical, square, or custom. Generally, the term ‘resizing video’ refers to changing the aspect ratio of the video. For that, go to the File and then to the Project Settings. Then on the Aspect Ratio box, select the one that you prefer or you can try custom scaling. You can choose your preferred resolution of the project too while you’re at it.

- Resize the video by cropping
When you change the aspect ratio of the project, some parts of your flv video might not fit or it might be shrunk small to fit. So you need to resize the flv video by cropping so that you can crop and focus on the part of the video you like. To crop the video, select the flv video clip in the timeline and click on the crop icon in the timeline toolbar. Now choose the ratio you want to crop and select the part you’d like to keep. Then click OK and your flv video will be resized.

- Adjust the file size of the video through export settings
After you’ve cropped and resized the Flv video, you need to export it by clicking the Export button on the top center part. There are different settings available for exporting the video. Click on the Settings button near the resolution and you’ll be shown some detailed preferences for exporting. Every setting here like frame rate, resolution, bitrate, etc. can affect the size of the output video.

Filmora Video Editor really makes the task of editing and resizing FLV videos easier, simpler, and faster. Since you now know the steps, it’s time you try it and resize your own FLV videos with this best FLV Editor for Windows and Mac.
Alternative Way to Resize FLV Videos on Windows
In case you want to try something different than Filmora, here are two alternative software (one paid and another free) that you can use to resize your FLV Videos on Windows:
- Movavi Video Editor Plus

Movavi Video Editor Plus is one of the best easy-to-use video editors that can help you to resize FLV videos as well as edit them on Windows. Its interface and functionalities are somewhat similar to that of the Filmora Video Editor. This is a paid software available for download on both Windows and Mac but you can try it for free with their 7 days trial version.
Steps to resize FLV videos on Windows with Movavi Video Editor:
- Install Movavi Video Editor and run the software on your PC. Then you should automatically be inside a new project in it.

- Import the FLV video file you want to resize through the ‘File Import’ tab on the left and drag it to the timeline.

- To resize the aspect ratio, expand the resolution options near the preview screen above the export button and select the preferred ratio.

- To crop or resize the video, select the clip in the timeline and use the crop tool to make adjustments as you wish. Then hit Apply to save changes.

- After the video is ready, export it with the Export button on the right side of the screen. Then choose your preferred settings for output and click on Start after which your video will be rendered and saved to your PC.

- VSDC Free Video Editor

VSDC Free Video Editor is another alternative to Filmora for resizing FLV videos on Windows. It is a free video editor that packs a wide range of editing features without any restrictions. However, it does have a paid version with some advanced features and hardware acceleration.
Steps to resize FLV videos on Windows with VSDC Free Video Editor:
- Install and open VSDC video editor on your PC. Then create a new project with preferred settings through the ‘Projects’ tab on the top left corner.

- Import the video file into the project by dragging and dropping it directly into the timeline.

- To resize the aspect ratio, click on the Projects Explorer and click on your project name. Then in the Properties windows on the right, manually adjust width, height, resolution, etc. according to your preferences.

- To crop and reposition your video, select the clip in the timeline and go to the Editor tab on the top. Then use the crop tool and adjust your video accordingly.

- Finally export your design through the Export project tab at the top with preferred settings.

Alternative Way to Resize FLV Videos on Mac
Wondershare Filmora Video Editor is also available for Mac operating system which is recommended to resize FLV videos but if you want to try out some other alternatives, then below are the two ways to resize FLV videos on Mac:
- VideoProc Converter

VideoProc is a powerful video editor/ converter that helps you edit, convert, and resize any kind of video. It also supports a wide range of codecs and video formats including flv. It is a paid software but you can also try their free trial version with some limitations.
Steps to resize FLV videos on Mac with VideoProc:
- Launch VideoProc on a Mac device and go inside the Video

- Add files in VideoProc by drag and drop method or directly through the ‘Add Video’ option.

- Then click on the Options (codec) on the right side of the video and change the resolutions and aspect ratio of the video as you want. You can also manage export settings like quality, codec, fps, bitrate, etc. from this tab.

- Then go to the Crop section inside the Edit Video tab and crop the video as you like with preview and different other options.

- Finally click Done to go back and hit the Run This’ll start rendering the video and will save it to your Mac device.

- Shotcut

Shotcut is another alternative to Filmora Video Editor for resizing FLV videos on Mac. It is a free, open-source, and cross-platform video editor that has a sleek and intuitive interface with many useful editing features which really makes it suitable for both beginners as well as advanced editors.
Steps to resize FLV videos on Mac with Shotcut:
- Run the Shotcut program on your Mac after installing it and create a new project.

- Import the Flv video file to the project by drag and drop method into the timeline.

- To change the resolution and aspect ratio of the video, go to the Settings tab, then Video mode, and choose the format you want.

- To crop the video, select the clip in the timeline and go to the Filters Now click on the ‘**+**’ icon and select Size, Position & Rotate under the Favorite section. Then adjust crop settings as you like.

- Finally, go to the Export section at the top and click on Advanced. Then configure the output settings as you like and click on Export File.

2 Ways to Resize FLV Videos on Android
Wouldn’t it be great if you could resize FLV videos on your android device rather than having to open your computer for every small task? Previously, this was a major issue due to a lack of good video editors for android with flv support but that’s no longer the case. Below are two ways to resize FLV videos on android:
- Inshot

InShot is a powerful all-in-one video editor for android which acts both as a basic video editor as well as an advanced video editor with its simple design yet powerful features. There aren’t many video editors in Android that supports Flv or some older codecs, but InShot is one of the very few editors that support these video formats. It is a paid app but also has a limited free version to try.
Steps to resize FLV videos on Android with InShot:
- Open the Inshot app on your android device and click on Video.

- Now select the FLV video file and click on the tick icon near the bottom right.

- Then tap on the Crop option from the tools at the bottom.

- Now select the aspect ratio you like and crop accordingly.

- To save the video, tap on the Save button at the top right. Then choose the resolution and finally save the video to your device.

- AndroVid – Video Editor, Video Maker

AndroVid is an easy-to-use, full-featured video editor especially developed to edit videos for social media like YouTube, TikTok, Facebook, Instagram, etc. It is not a very popular application with just over 300k+ downloads in Google Play Store, but after testing it out, we thought it deserves to be in this article. It is available for free to download from Google Play Store.
Steps to resize FLV videos on Android with AndroVid Video Editor:
- Open AndroVid Video Editor on an android phone and go inside the Videos

- Now select the FLV video file that you want to resize.

- Inside editor, tap on the Crop tool in the toolbar at the top.

- Then select the preferred Aspect ratio from the top right, reposition the video area and tap on the tick icon to save the video.

- If you need to change the resolution too, click on the three dots at the top right after the video is saved successfully. Then choose the preferred resolution, quality, and format and click on the tick icon to export.

2 Ways to Resize FLV Videos on iPhone
Like Android, you can also resize FLV videos on your iPhone on the go without needing to use your computer. Doing such editing on mobile phones can really save your time and effort, so here are 2 ways for you to resize FLV videos on iPhone:
- Cyberlink Powerdirector

Cyberlink Powerdirector is one of the most popular as well as powerful video editors for Android and iOS. It is a full-featured mobile video editor with over 130M+ downloads on the App Store which allows you to do an advanced level of editing. It is a paid software but also has a free version available for download.
Steps to resize FLV videos on iPhone with PowerDirector:
- Launch the PowerDirector app on your iPhone and create a new project. Unlike other apps, you cannot change the aspect ratio later, so you need to set the aspect ratio you want while creating a new project.

- Now add the FLV video file into the timeline by tapping on the ‘**+**’ icon on the video. Then tap on the play button at the top right to enter the editor.

- To resize the video, select the video clip in the timeline and tap on the pencil icon at the bottom left. Then use different crop tools available to resize your video as you want.

- After you resize the video, tap on the export button on the top right to export it. Then tap on Produce and Share, and produce resized video with preferred settings.

- Splice – Video Editor & Maker

Splice – Video Editor & Maker is a simple yet powerful application that makes it easy to create fully customized and professional-looking videos on iPhone. It is another great app for resizing FLV videos on iPhone with over 70M+ downloads on App Store and it is available for free.
Steps to resize FLV videos on iPhone with Splice:
- Open the Splice app on the iPhone and tap on the ‘**+**’ icon to create a new project.

- Now select the flv video file to add and start the project.

- To resize the video, tap on the gear icon at the top right corner which opens up Project settings from where you can change the aspect ratio.

- To crop the video, select the clip in the timeline and tap on the Crop option in the toolbar. You can crop and reposition the video from there.

- Then click on the Export icon at the top right corner to export the video with preferred configurations.

2 Ways to Resize FLV Videos Online
Resizing is not that big of a task and you might just want to quickly resize your Flv video and share it. So why bother installing and running large video editing programs on your computer or even mobile phones when you can easily resize your videos in the web browser? Yes, you read that right, and below are the 2 ways for you to resize FLV videos online:
- io

Veed is a simple online video editing tool that you can access from any device with the help of a web browser. It can help you resize your Flv videos easily within just a few clicks. It has a clean and beautiful interface with a responsive design which provides you with a good editing experience while using it. It is a paid tool but you can also try it for free before purchasing it.
Steps to resize FLV videos online with Veed.io:
- Go to veed.io on your web browser and click on ‘Upload Your Video’ to get started without any account.

- Now upload the FLV video or you can directly drag and drop the video there.

- After you upload the video, you’ll be taken inside the Veed editor. To change the aspect ratio, go to the Size section inside Project Settings and choose the size you want to resize to.

- To crop the video, select the clip in the timeline and directly resize the video from the preview area. And you can also use settings like ‘Fill the canvas’ and ‘Fit the canvas’ at the left side for ease.

- Then click on the Export button at the top right corner to open Export settings. Configure the settings as you like and click on ‘Export Video’ to render and download the video.

- Clideo

When it comes to resizing or editing videos online, Clideo is one of the best tools you can rely on. Like Veed.io, it has a clean and responsive interface and supports many video formats including flv. Clideo is free to use but also comes with various subscription plans for extra functionalities.
Steps to resize FLV videos online with Clideo:
- Go to clideo.com/resize-video and upload your video through ‘Choose file’ button.

- To resize the aspect ratio, choose your desired formats in the ‘Resize for’ section. You can also manually set the aspect ratio.

- Then just below that, you’ll find various cropping options. Use them to crop or resize the video as you like.

- Finally, click on the Export button at the bottom right corner to export the video. You can download the video or can directly save to cloud storage like Drive, Dropbox, etc.

FAQs about Resizing FLV Video
Here are some of the Frequently Asked Questions (FAQs) related to resizing FLV videos that you might be interested in:
- How do I make FLV files smaller?
You can make FLV files smaller with the help of any video editor that supports Flv video format by cutting and cropping out unnecessary parts, decreasing the resolution, and bitrate, and converting flv into another lighter file format.
- Which video editors support FLV file format?
There are few video editors like Filmora, Movavi, VSDC, etc. that support the FLV file format. But when it comes to editing FLV videos, Filmora Video Editor is the best choice.
- How do I view an FLV file?
FLV is one of the oldest video formats due to which most new and modern video players don’t recognize it or can’t play it. However, there are few programs like VLC media players which can help you view an FLV file. Or you can also convert the FLV file into other supported video formats with the help of a video converter.
- Can I convert a horizontal FLV video into a vertical one?
Yes, and that’s a piece of cake when you use Filmora Video Editor or other similar video editors. You just need to change the aspect ratio of the video or the project from horizontal (generally 16:9) to vertical (generally 9:16).
- Can I resize FLV video files on my mobile?
Though video editors on mobile are not as powerful as those on PC, there are some that are still capable enough to let you easily resize FLV video files on mobile devices. Some examples are InShot, Splice, Powerdirector, etc.
For macOS 10.14 or later
Why choose Filmora Video Editor for resizing FLV videos, you say?
- Simple UI and easy interface
- Easily crop or change the aspect ratio of the video
- Not all video editors support FLV video format, but the Filmora does
- Advanced export options to compress or change the file size of video
- Suitable for beginners as well as professionals
- Regular software updates and improvements
Plus, Filmora Video Editor has a free version, so you can instantly download the program, install it, and get started on resizing FLV Videos. Below is a step-by-step guide to resize FLV Videos on Windows and Mac with Wondershare Filmora Video Editor, so you can follow along!
Steps to resize FLV videos with Filmora Video Editor:
- Launch Filmora and open a new project
Run the Wondershare Filmora application on Windows or Mac after installing it. Then you should automatically be inside a new project. If not, you can manually open a new project by going to File on the top left corner and then clicking on ‘**New Project**’.
- Import the FLV video and add it to timeline
Click on ‘**Import Media Files**’ and import the flv video into project media from your computer’s file explorer. Then add the video to the timeline by dragging it inside the timeline.
- Edit and perform desired modifications (Optional)
If you are just looking to resize the FLV video file, then you can skip this step and move to step no. 4. Otherwise, you can do various editings on the video like cropping, muting, trimming, animating, etc. before resizing the video. Filmora provides a wide range of features for editing and adding effects to the video.
- Resize the video by changing the aspect ratio
Aspect ratio defines the shape of your video like if you want the video to be horizontal, vertical, square, or custom. Generally, the term ‘resizing video’ refers to changing the aspect ratio of the video. For that, go to the File and then to the Project Settings. Then on the Aspect Ratio box, select the one that you prefer or you can try custom scaling. You can choose your preferred resolution of the project too while you’re at it.
- Resize the video by cropping
When you change the aspect ratio of the project, some parts of your flv video might not fit or it might be shrunk small to fit. So you need to resize the flv video by cropping so that you can crop and focus on the part of the video you like. To crop the video, select the flv video clip in the timeline and click on the crop icon in the timeline toolbar. Now choose the ratio you want to crop and select the part you’d like to keep. Then click OK and your flv video will be resized.
- Adjust the file size of the video through export settings
After you’ve cropped and resized the Flv video, you need to export it by clicking the Export button on the top center part. There are different settings available for exporting the video. Click on the Settings button near the resolution and you’ll be shown some detailed preferences for exporting. Every setting here like frame rate, resolution, bitrate, etc. can affect the size of the output video.
Filmora Video Editor really makes the task of editing and resizing FLV videos easier, simpler, and faster. Since you now know the steps, it’s time you try it and resize your own FLV videos with this best FLV Editor for Windows and Mac.
Alternative Way to Resize FLV Videos on Windows
In case you want to try something different than Filmora, here are two alternative software (one paid and another free) that you can use to resize your FLV Videos on Windows:
- Movavi Video Editor Plus
Movavi Video Editor Plus is one of the best easy-to-use video editors that can help you to resize FLV videos as well as edit them on Windows. Its interface and functionalities are somewhat similar to that of the Filmora Video Editor. This is a paid software available for download on both Windows and Mac but you can try it for free with their 7 days trial version.
Steps to resize FLV videos on Windows with Movavi Video Editor:
- Install Movavi Video Editor and run the software on your PC. Then you should automatically be inside a new project in it.
- Import the FLV video file you want to resize through the ‘File Import’ tab on the left and drag it to the timeline.
- To resize the aspect ratio, expand the resolution options near the preview screen above the export button and select the preferred ratio.
- To crop or resize the video, select the clip in the timeline and use the crop tool to make adjustments as you wish. Then hit Apply to save changes.
- After the video is ready, export it with the Export button on the right side of the screen. Then choose your preferred settings for output and click on Start after which your video will be rendered and saved to your PC.
- VSDC Free Video Editor
VSDC Free Video Editor is another alternative to Filmora for resizing FLV videos on Windows. It is a free video editor that packs a wide range of editing features without any restrictions. However, it does have a paid version with some advanced features and hardware acceleration.
Steps to resize FLV videos on Windows with VSDC Free Video Editor:
- Install and open VSDC video editor on your PC. Then create a new project with preferred settings through the ‘Projects’ tab on the top left corner.
- Import the video file into the project by dragging and dropping it directly into the timeline.
- To resize the aspect ratio, click on the Projects Explorer and click on your project name. Then in the Properties windows on the right, manually adjust width, height, resolution, etc. according to your preferences.
- To crop and reposition your video, select the clip in the timeline and go to the Editor tab on the top. Then use the crop tool and adjust your video accordingly.
- Finally export your design through the Export project tab at the top with preferred settings.
Alternative Way to Resize FLV Videos on Mac
Wondershare Filmora Video Editor is also available for Mac operating system which is recommended to resize FLV videos but if you want to try out some other alternatives, then below are the two ways to resize FLV videos on Mac:
- VideoProc Converter
VideoProc is a powerful video editor/ converter that helps you edit, convert, and resize any kind of video. It also supports a wide range of codecs and video formats including flv. It is a paid software but you can also try their free trial version with some limitations.
Steps to resize FLV videos on Mac with VideoProc:
- Launch VideoProc on a Mac device and go inside the Video
- Add files in VideoProc by drag and drop method or directly through the ‘Add Video’ option.
- Then click on the Options (codec) on the right side of the video and change the resolutions and aspect ratio of the video as you want. You can also manage export settings like quality, codec, fps, bitrate, etc. from this tab.
- Then go to the Crop section inside the Edit Video tab and crop the video as you like with preview and different other options.
- Finally click Done to go back and hit the Run This’ll start rendering the video and will save it to your Mac device.
- Shotcut
Shotcut is another alternative to Filmora Video Editor for resizing FLV videos on Mac. It is a free, open-source, and cross-platform video editor that has a sleek and intuitive interface with many useful editing features which really makes it suitable for both beginners as well as advanced editors.
Steps to resize FLV videos on Mac with Shotcut:
- Run the Shotcut program on your Mac after installing it and create a new project.
- Import the Flv video file to the project by drag and drop method into the timeline.
- To change the resolution and aspect ratio of the video, go to the Settings tab, then Video mode, and choose the format you want.
- To crop the video, select the clip in the timeline and go to the Filters Now click on the ‘**+**’ icon and select Size, Position & Rotate under the Favorite section. Then adjust crop settings as you like.
- Finally, go to the Export section at the top and click on Advanced. Then configure the output settings as you like and click on Export File.
2 Ways to Resize FLV Videos on Android
Wouldn’t it be great if you could resize FLV videos on your android device rather than having to open your computer for every small task? Previously, this was a major issue due to a lack of good video editors for android with flv support but that’s no longer the case. Below are two ways to resize FLV videos on android:
- Inshot
InShot is a powerful all-in-one video editor for android which acts both as a basic video editor as well as an advanced video editor with its simple design yet powerful features. There aren’t many video editors in Android that supports Flv or some older codecs, but InShot is one of the very few editors that support these video formats. It is a paid app but also has a limited free version to try.
Steps to resize FLV videos on Android with InShot:
- Open the Inshot app on your android device and click on Video.
- Now select the FLV video file and click on the tick icon near the bottom right.
- Then tap on the Crop option from the tools at the bottom.
- Now select the aspect ratio you like and crop accordingly.
- To save the video, tap on the Save button at the top right. Then choose the resolution and finally save the video to your device.
- AndroVid – Video Editor, Video Maker
AndroVid is an easy-to-use, full-featured video editor especially developed to edit videos for social media like YouTube, TikTok, Facebook, Instagram, etc. It is not a very popular application with just over 300k+ downloads in Google Play Store, but after testing it out, we thought it deserves to be in this article. It is available for free to download from Google Play Store.
Steps to resize FLV videos on Android with AndroVid Video Editor:
- Open AndroVid Video Editor on an android phone and go inside the Videos
- Now select the FLV video file that you want to resize.
- Inside editor, tap on the Crop tool in the toolbar at the top.
- Then select the preferred Aspect ratio from the top right, reposition the video area and tap on the tick icon to save the video.
- If you need to change the resolution too, click on the three dots at the top right after the video is saved successfully. Then choose the preferred resolution, quality, and format and click on the tick icon to export.
2 Ways to Resize FLV Videos on iPhone
Like Android, you can also resize FLV videos on your iPhone on the go without needing to use your computer. Doing such editing on mobile phones can really save your time and effort, so here are 2 ways for you to resize FLV videos on iPhone:
- Cyberlink Powerdirector
Cyberlink Powerdirector is one of the most popular as well as powerful video editors for Android and iOS. It is a full-featured mobile video editor with over 130M+ downloads on the App Store which allows you to do an advanced level of editing. It is a paid software but also has a free version available for download.
Steps to resize FLV videos on iPhone with PowerDirector:
- Launch the PowerDirector app on your iPhone and create a new project. Unlike other apps, you cannot change the aspect ratio later, so you need to set the aspect ratio you want while creating a new project.
- Now add the FLV video file into the timeline by tapping on the ‘**+**’ icon on the video. Then tap on the play button at the top right to enter the editor.
- To resize the video, select the video clip in the timeline and tap on the pencil icon at the bottom left. Then use different crop tools available to resize your video as you want.
- After you resize the video, tap on the export button on the top right to export it. Then tap on Produce and Share, and produce resized video with preferred settings.
- Splice – Video Editor & Maker
Splice – Video Editor & Maker is a simple yet powerful application that makes it easy to create fully customized and professional-looking videos on iPhone. It is another great app for resizing FLV videos on iPhone with over 70M+ downloads on App Store and it is available for free.
Steps to resize FLV videos on iPhone with Splice:
- Open the Splice app on the iPhone and tap on the ‘**+**’ icon to create a new project.
- Now select the flv video file to add and start the project.
- To resize the video, tap on the gear icon at the top right corner which opens up Project settings from where you can change the aspect ratio.
- To crop the video, select the clip in the timeline and tap on the Crop option in the toolbar. You can crop and reposition the video from there.
- Then click on the Export icon at the top right corner to export the video with preferred configurations.
2 Ways to Resize FLV Videos Online
Resizing is not that big of a task and you might just want to quickly resize your Flv video and share it. So why bother installing and running large video editing programs on your computer or even mobile phones when you can easily resize your videos in the web browser? Yes, you read that right, and below are the 2 ways for you to resize FLV videos online:
- io
Veed is a simple online video editing tool that you can access from any device with the help of a web browser. It can help you resize your Flv videos easily within just a few clicks. It has a clean and beautiful interface with a responsive design which provides you with a good editing experience while using it. It is a paid tool but you can also try it for free before purchasing it.
Steps to resize FLV videos online with Veed.io:
- Go to veed.io on your web browser and click on ‘Upload Your Video’ to get started without any account.
- Now upload the FLV video or you can directly drag and drop the video there.
- After you upload the video, you’ll be taken inside the Veed editor. To change the aspect ratio, go to the Size section inside Project Settings and choose the size you want to resize to.
- To crop the video, select the clip in the timeline and directly resize the video from the preview area. And you can also use settings like ‘Fill the canvas’ and ‘Fit the canvas’ at the left side for ease.
- Then click on the Export button at the top right corner to open Export settings. Configure the settings as you like and click on ‘Export Video’ to render and download the video.
- Clideo
When it comes to resizing or editing videos online, Clideo is one of the best tools you can rely on. Like Veed.io, it has a clean and responsive interface and supports many video formats including flv. Clideo is free to use but also comes with various subscription plans for extra functionalities.
Steps to resize FLV videos online with Clideo:
- Go to clideo.com/resize-video and upload your video through ‘Choose file’ button.
- To resize the aspect ratio, choose your desired formats in the ‘Resize for’ section. You can also manually set the aspect ratio.
- Then just below that, you’ll find various cropping options. Use them to crop or resize the video as you like.
- Finally, click on the Export button at the bottom right corner to export the video. You can download the video or can directly save to cloud storage like Drive, Dropbox, etc.
FAQs about Resizing FLV Video
Here are some of the Frequently Asked Questions (FAQs) related to resizing FLV videos that you might be interested in:
- How do I make FLV files smaller?
You can make FLV files smaller with the help of any video editor that supports Flv video format by cutting and cropping out unnecessary parts, decreasing the resolution, and bitrate, and converting flv into another lighter file format.
- Which video editors support FLV file format?
There are few video editors like Filmora, Movavi, VSDC, etc. that support the FLV file format. But when it comes to editing FLV videos, Filmora Video Editor is the best choice.
- How do I view an FLV file?
FLV is one of the oldest video formats due to which most new and modern video players don’t recognize it or can’t play it. However, there are few programs like VLC media players which can help you view an FLV file. Or you can also convert the FLV file into other supported video formats with the help of a video converter.
- Can I convert a horizontal FLV video into a vertical one?
Yes, and that’s a piece of cake when you use Filmora Video Editor or other similar video editors. You just need to change the aspect ratio of the video or the project from horizontal (generally 16:9) to vertical (generally 9:16).
- Can I resize FLV video files on my mobile?
Though video editors on mobile are not as powerful as those on PC, there are some that are still capable enough to let you easily resize FLV video files on mobile devices. Some examples are InShot, Splice, Powerdirector, etc.
Also read:
- Updated Confused About Which GoPro Should You Use? This Article Introduces and Provides a Detailed Overview of the Best GoPro for YouTubers You Can Find in the Market for Vlogging
- 2024 Approved Do You Know How to Create Video Loops on PowerPoint? If Not Then Read This Article to Learn More Details
- Do You Want to Know About Efficient Motion Blur Plugins for Adobe Effects? Read This Article to Find Out How to Use Motion Blur Plugins for Enhanced Results for 2024
- How to Turn On/Off Motion Blur in Dying Light 2, In 2024
- In 2024, How to Create Intro with Renderforest
- New 2024 Approved What Are the Best 15 Slideshow Presentation Examples Your Audience Will Love
- In 2024, Everything That You Need to Know About Video Montages- Ideas, Techniqu
- New In 2024, 4 Solutions to Add White Border to Video on Mobile and Desktop
- How to Create Your Own LOL Montage Video for 2024
- Updated 2024 Approved How to Find a High-Quality Video Marketing Agency?
- After Reading This Article, You Can Add a B-Roll Feature From Filmora and Captivate More Audience. Explanation Video B-Roll and Story-Telling B-Roll Are Well Illustrated
- Denoise Video in Adobe Premiere Pro – Audio and Video Noise Removal
- New In 2024, How To Make Boring Videos Look Cool By B Rolls
- How Windows Movie Maker Save MP4 File
- New 2024 Approved How to Crop a Video in Davinci Resolve Step by Step
- In 2024, Is Windows Movie Maker Still Available?
- New Best 8 Online MPEG to GIF Converters for 2024
- 2024 Approved How To Change Sky Background With Adobe Photoshop Best Ways
- In 2024, What Is a Memoji and How to Make a Memoji? You Can Learn Top 8 Memoji Makers for PC, Android, or iOS, and the Steps to Make a Memoji
- Bored of Extraneous Software Downloads and Program Installations to Edit Your Videos? The Best Video Editing Online Utilities Are Here at Your Rescue
- New Ways to Make Canva Collages
- Updated List of Supported Whatsapp Video Format You May Want to Know for 2024
- Updated In 2024, 20 Fantastic Video Background Templates to Make Your Video Go Viral
- Detailed Tutorial to Crop Videos Using Openshot?
- Guide on How To Erase Apple iPhone 12 Data Completely | Dr.fone
- In 2024, How to Unlock Verizon iPhone SE (2020)
- Does find my friends work on Xiaomi 14 Ultra | Dr.fone
- 3 Ways to Change Location on Facebook Marketplace for Samsung Galaxy A25 5G | Dr.fone
- In 2024, Complete Tutorial to Use VPNa to Fake GPS Location On Meizu 21 Pro | Dr.fone
- In 2024, How To Remove Phone Number From Your Apple ID from Your Apple iPhone 15 Pro Max?
- In 2024, How To Use Allshare Cast To Turn On Screen Mirroring On Lava Agni 2 5G | Dr.fone
- What are Location Permissions Life360 On OnePlus Open? | Dr.fone
- In 2024, Top 10 Samsung Galaxy A05s Android SIM Unlock APK
- Will the iPogo Get You Banned and How to Solve It On Xiaomi Redmi Note 13 Pro+ 5G | Dr.fone
- Advance Repair for Bad and Corrupt Video Files of Vivo X100 Pro
- New 10 Best Tools to Make Pic Collage for Windows for 2024
- In 2024, How to Erase an Apple iPhone 6s Plus without Apple ID?
- Complete Guide to Hard Reset Your Infinix Hot 40 | Dr.fone
- Fixing Persistent Pandora Crashes on Poco F5 5G | Dr.fone
- A Complete Guide To OEM Unlocking on Vivo Y100A
- Title: 2024 Approved How to Create Cooking Video Intro and End Screen for YouTube Channel?
- Author: Chloe
- Created at : 2024-06-18 14:31:14
- Updated at : 2024-06-19 14:31:14
- Link: https://ai-editing-video.techidaily.com/2024-approved-how-to-create-cooking-video-intro-and-end-screen-for-youtube-channel/
- License: This work is licensed under CC BY-NC-SA 4.0.
