
:max_bytes(150000):strip_icc():format(webp)/family-hanging-out-watching-videos-online-1166432791-309c6f7ac8cb4cc99875db5a77fd6f35.jpg)
2024 Approved How to Make a Movie with Windows Movie Maker?
How to Make a Movie with Windows Movie Maker?
Are you interested in making movies? Well, If your answer is yes, you’re in luck! Windows Movie Maker is a great way to make movies on your computer. You can use it to create family videos, school projects, or even movies for fun. This might seem like too much work, but trust us, it’s not! With this amazing program, anyone can make movies on windows. There are only a few things to keep in mind, and you’ll be on your way to becoming a movie maker in no time.
Video Windows Movie Maker makes it easy to put your movies together. You just have to drag and drop the video clips you want to use into the movie maker. Then, you need to follow certain steps to complete your project. In the section below, we will discuss in detail the steps to make a movie from Windows Movie Maker.
Let’s get started.
How to Make a Video with Windows Movie Maker
Here are the steps you need to take to make movies on windows 10:
Step1 Import Media Into Movie Maker

The first thing you need to do is get all of your video footage and images into Windows Movie Maker.
Media file formats can be imported into this program:
- Audio Files: aif, .aifc, .aiff, .asf, .au, .mp2, .mp3, .mpa, .snd, .wav, and .wma
- Image Files: .bmp, .dib, .emf, .gif, .jfif, .jpe, .jpeg, .jpg, .png, .tif, .tiff, and .wmf
- Movie Files: asf, .avi, dvr-ms, .m1v, .mp2, .mp2v, .mpe, .mpeg, .mpg, .mpv2, .wm, and .wmv
To import media:
- Click “File” > “Import into collections.”
- Browse to the location of the file you want to import, select it, and then click “Open.”
Your selected file will now appear in the “Collections” pane. You can double-click on the imported file to preview it. If you’re happy with what you see, great! You can now move on to step two. If the files are not good, no worries - you can always delete them and try again. Just right-click on the file and select “Delete,” or press the “Delete” key on your keyboard.
Step2 Basic Editing from Timeline

After you have imported all of your desired clips and images into Windows Movie Maker, it is time to start editing them into your movie. Here are the things that you need to do to edit your clips and images:
- For cutting the image, you need to select the part of the image that you want to cut. To do this, just click on the image and drag it to where you want it to be cut. The cutting process will automatically happen when you release your mouse button.
- To combine the images, you need to select the images that you want to combine. To do this, click on one image and then hold down the “Ctrl” key while clicking on the other images that you want to combine. Once you have selected all the images you want to combine, just right-click on any of the selected images and choose “Combine Clips.”
- To split clips in the timeline, select the clip you want to split by clicking on it. Then, position your mouse cursor to where you want to split the clip and click on the “Split Clip” button. The clip will be automatically split into two separate clips.
By doing these minor things, you can edit your clips and images in the timeline according to your preference. Now, you are one step closer to creating your very own movie!
Step3 Add Video Effects

Video effects are a great way to make your movies look more professional. Windows Movie Maker has various built-in effects that you can use to improve the quality of your videos. These effects can be applied to your movie’s video and audio tracks. Moreover, they can add transitions between clips and even change the way your video looks.
There are hundreds of different effects that you can use in Windows Movie Maker. So experiment with them until you find a style that suits your needs. With a bit of practice, you’ll be making movies that look like they were made by a professional in no time!
To add video effects in the video movie maker windows:
- Select the clip you want to modify, and then click on the “Effects” tab. From there, you can browse through the available effects and preview them before adding them to your project.
- Once you’ve found an effect you like, simply drag and drop it onto the clip.
- You can also add multiple effects to a single clip if you want.
- Just remember that too many effects can make your video look cluttered and difficult to watch. So be sure to use them sparingly.
When you’re happy with your added effects, click on the “Ok” button to save your changes.
Step4 Edit Audio & Titles

Audio and Title are both crucial aspects when you want to make movie windows 10 movie perfectly. You can edit both of these in Windows Movie Maker. Editing is one of the most creative aspects of making a movie. In Windows Movie Maker, you easily edit your audio and titles in the video. Even if you want to do the editing multiple times, you can do so without any problem. All you need to do is have the latest version of Windows Movie Maker installed on your computer.
To Edit the Audio & Tiles:
- Go to the ‘Home’ tab and click on the ‘Add music’ button.
- Find the audio file that you want to add to your movie. You can either use a song from your personal collection or look for one online.
- Once you have found the perfect audio, drag and drop it into the timeline.
- If you want to edit the audio, right-click on it and select ‘Edit’. You can then make changes to the audio, such as volume, duration, etc.
- To add titles, go to the ‘Home’ tab and click on the ‘Add title’ button.
- A new window will open where you can type in the text for your title. You can also change the font, color, and size of the text.
- Once you are happy with your title, click on the ‘OK’ button, and it will be added to your timeline.
- If you want to edit the title, simply double-click on it and make changes as needed.
Step5 Export and Save Video
The last step that you need to follow after completing the video is to export and save it. It is always important to save your work so that you can access it later or make changes if needed.
To export and save the video:
- Click on File
- Click on Save movie
- Choose the quality and file size that you want
- Give the video a name
- Save it to your computer
Movie Maker Alternative to Create Videos
Filmora is a video creating and editing software developed by Wondershare. Although it is not as widely known as some of its competitors, it has many features that make it a great alternative to Windows Movie Maker. Anyone can use this software to create high-quality videos, from beginners to professionals. The software is compatible with both Windows and Mac operating systems.
One of the great things about Filmora is that it is very user-friendly. The interface is straightforward and easy to navigate and comes with top-notch editing features and rich effects. So, if you have never used video editing software before, you can figure out how to use Filmora easily. Another plus is that free trials are available to try out the software before you commit to buying it.
Steps to Edit Video with Filmora
Now that you know a little bit more about this movie maker alternative, let’s go over the steps to edit videos with Filmora.
Free Download For Win 7 or later(64-bit)
Free Download For macOS 10.14 or later
Step1 Import your video into the software. You can do this by clicking on “Import” and selecting the file from your computer.

Step2 Once your video is imported, you can see it in the “Project Library”. You can drag and drop it from here into the “Video Timeline” located at the bottom of the screen.

Step3 Now that your video is in the timeline, you can start editing it. To do this, simply click on the item in the timeline you want to edit and then make your changes in the “Video Inspector” panel on the screen’s right-hand side.

You can make changes, including cropping the video, adjusting the volume, adding filters and effects, and more.
Step4 Once you are happy with your edits, you can preview your video by clicking on the “Play” button in the tight and save it if it seems perfect to you.
If you are satisfied with what you see, then you can go ahead and export your video. To do this, click on “File” located in the top left-hand corner of the screen and then select “Export”. From here, you can choose what format you want to export your video and where you want to save it on your computer.
Conclusion
If you’re looking for an easy way to make movies on your Windows computer, then you should definitely check out Windows Movie Maker. This free from Microsoft makes it simple to create and edit videos, and it’s perfect for beginners. Another alternative for making movies on Windows is to use the Filmora video editor. This program is more robust and has multiple features just like Movie Maker.
Free Download For macOS 10.14 or later
Step1 Import your video into the software. You can do this by clicking on “Import” and selecting the file from your computer.
Step2 Once your video is imported, you can see it in the “Project Library”. You can drag and drop it from here into the “Video Timeline” located at the bottom of the screen.
Step3 Now that your video is in the timeline, you can start editing it. To do this, simply click on the item in the timeline you want to edit and then make your changes in the “Video Inspector” panel on the screen’s right-hand side.
You can make changes, including cropping the video, adjusting the volume, adding filters and effects, and more.
Step4 Once you are happy with your edits, you can preview your video by clicking on the “Play” button in the tight and save it if it seems perfect to you.
If you are satisfied with what you see, then you can go ahead and export your video. To do this, click on “File” located in the top left-hand corner of the screen and then select “Export”. From here, you can choose what format you want to export your video and where you want to save it on your computer.
Conclusion
If you’re looking for an easy way to make movies on your Windows computer, then you should definitely check out Windows Movie Maker. This free from Microsoft makes it simple to create and edit videos, and it’s perfect for beginners. Another alternative for making movies on Windows is to use the Filmora video editor. This program is more robust and has multiple features just like Movie Maker.
What Is TS Format and How To Play TS Files? [Basic Tips]
Have you been downloading videos and looking at the files having the ‘.ts’ extension at the end? We guess you have seen them. The question is, do you know what the TS file format is? Many compressed video files have TS format. Do you want to learn more about the file format?
Take our help. Allow us to tell you what this extension means, along with what work they do. We will also tell you its difference with other formats. So, to learn in detail about TS video format, continue reading.
In this article
02 Pros and Coins about TS Video Format
03 How to Play TS Video Files with VLC Media Player?
04 How to Edit TS Video Files with Filmora Video Editor?
05 TS VS. MP4: What’s the Difference?
Part 1. What Is TS Video Format?
A TS format file is a Video Transport Stream file. The TS file extension is used to store video data, mostly on DVDs. The video files are standardly compressed with .MPEG video compression. If you are looking for a file extension to save streamed or broadcast videos, TS video format is ideal for this. Are you worried about how to play a TS file?

Well, a video file with this format can easily be played on a certain media player or video editing program . Various video playback apps, video development tools, and also DVD creation programs support the TS format. The .ts file extension can also contain any data, and TS files don’t always need to store media or documents.
Part 2. Pros and Coins about TS Video Format
Everything has its beneficial factors and disadvantages, so does TS video format has. Are you ready to know more about the TS file format? After learning about the format, it’s time to share its advantages and drawbacks with you. Let’s get started!
Advantages of TS File Format
A great thing about TS format is that, after each keyframe, the file information is added automatically. The format is impressive when it comes to maintaining transmission integrity. This is because of all the elementary streams, synchronization patterns, and error corrections; everything is encapsulated in a container format.
Do you know what else benefits TS format has? It is widely used for broadcasting because broadcasting doesn’t need the complete stream for playing it. You can easily share large files over the communication media in real-time as tiny chunks of the audio or video file are sent. Along with this, the error is easily detected as extra information is shared with every chunk, helping in error detection.
Drawbacks of TS File Format
Moving on to its disadvantages, let’s start with the device compatibility. The biggest drawback of using the TS file format is that it is not compatible with many devices. For instance, a built-in media player like Windows Media Player does not support the format; eventually, users must change the file format.
Do you know another significant disadvantage? You cannot share TS files online. Different platforms like Facebook, YouTube, etc., support other famous formats, so hence, sharing TS video files requires a format converter. Do you know how much space does a TS file occupies? Well, it acquires a significant storage space, more than other file formats.
Part 3. How to Play TS Video Files with VLC Media Player?
As mentioned, only specific programs support and play TS video format, so VLC Media Player is one of those. The software is famous among its competitors because it supports a wide range of file formats.
VLC is an open-source, free cross-platform media player that lets you play various multimedia files and DVDs, VCDs, Audio CDs, and other streaming protocols. VLC also plays most codecs like MPEG-2, MPEG-4, MKV, MP3, etc. The media player runs on Windows, macOS, Linux, Unix, iOS, and Android.
Do you know a great thing about VLC? Surprisingly, the software has no spyware, no user tracking, and no ads. VLC is a simple yet super-fast and powerful media player of all time. Learn how to play TS files on VLC by following the steps below:
Step 1: Install or Update VLC
To play TS file format, first of all, download and install the VLC media player on your respective device. If you have already installed the media player, update it to the latest version. With this, all the codecs will be working properly. Move to the ‘Help’ section from the top menu and hit ‘Check for Updates.’

Step 2: Open the TS File
Now, launch the VLC media player and head over to the ‘Media’ option. From the menu list, select the ‘Open File’ option, locate the TS file from your device and add it to the media player. You can also directly drag the TS video file to VLC to play it.

Step 3: Enjoy Watching TS File
After your file has been successfully imported to the VLC media player, you can now enjoy watching the TS Video format without any trouble.

Part 4. How to Edit TS Video Files with Filmora Video Editor?
Now that you know how to play TS video format with a VLC media player let’s also share how you can edit your TS videos. With Wondershare Filmora , you can edit a stunning video. The video editor offers more features than you can imagine. The software comes with features like Record PC Screen, Color Match, Silence Detection, Scene Detection, etc.
For Win 7 or later (64-bit)
For macOS 10.12 or later
Some more advanced editing tools are offered, like Power Tool, Stabilize Video, Auto Reframe, Auto Highlight, and whatnot. If you are interested in editing your TS file format videos with Filmora, take help from the steps shared below.
Step 1: Import TS File
After you have launched Wondershare Filmora on your device, import the media file so that you can start the editing; for that, head to the ‘File’ tab and hover on the ‘Import Media’ option. By doing this, a sub-menu will appear, select the ‘Import Media Files’ option and locate the TS video.

Step 2: TS Audio Edit
After importing the media file, drag it to the timeline to start the editing. With Filmora, add cool sound effects to your videos from the ‘Audio’ section. You get various effects like Happy, Jazz, Young & Bright, and other options.

Step 3: Use Transitions and Effects
What is a video without Effects and Transitions? Filmora comes with a wide range of options to add unique effects and transitions to your videos.

Step 4: Add Elements
Head to the ‘Elements’ section to add amazing little fun things to your video and make it interesting. You get elements like Laser Eye, various Emoji options, and a lot more.

Step 5: Export TS Video
Once all the editing is complete and satisfied with the final result, export the video. Hit the ‘Export’ button and select TS file format from the ‘Locals’ tab as the output format.

Part 5. TS VS. MP4: What’s the Difference?
What is the difference between the TS file format and MP4? Allow us to tell you some. You might have read about both formats, but a few differences are discussed as follows:
TS
TS format is used in DVD and Blu-ray discs that you have on your respective device. It does the same work as MP4, but the TS file breaks the data into tiny chinks. TS format comprises a few elements, making it a faster transporter for MPEG-2 format compressed video data. It is used widely in broadcasting and streaming.
MP4
MP4 is considered more compatible as compared to TS format, as not all the software allows the ‘.ts’ extension. If the file is not transmitted properly or is not closed properly, it can lose the data it has. MP4 is divided into two parts, one has the media data, and the other has metadata. Due to compression differences in both formats, it has a smaller size than the TS format.
Bottom Line
The article has shared great details about the TS format. We talked about how you can play TS files on VLC and also shed light on its pros and cons. Moreover, we also shared a video editor to edit your TS file format videos. Now, let’s talk about Wondershare Filmora.
Wondershare Filmora is a great video editor and is perfect for creating brilliant videos. The comprehensive list of features that you get from Filmora makes it unique and unforgettable. AI Portrait, Auto Normalization, Video Snapshot, Animation Keyframing, and many others are among its various features. For creating good videos, Filmora is an ideal option.
Wondershare Filmora
Get started easily with Filmora’s powerful performance, intuitive interface, and countless effects!
Try It Free Try It Free Try It Free Learn More >

02 Pros and Coins about TS Video Format
03 How to Play TS Video Files with VLC Media Player?
04 How to Edit TS Video Files with Filmora Video Editor?
05 TS VS. MP4: What’s the Difference?
Part 1. What Is TS Video Format?
A TS format file is a Video Transport Stream file. The TS file extension is used to store video data, mostly on DVDs. The video files are standardly compressed with .MPEG video compression. If you are looking for a file extension to save streamed or broadcast videos, TS video format is ideal for this. Are you worried about how to play a TS file?
Well, a video file with this format can easily be played on a certain media player or video editing program . Various video playback apps, video development tools, and also DVD creation programs support the TS format. The .ts file extension can also contain any data, and TS files don’t always need to store media or documents.
Part 2. Pros and Coins about TS Video Format
Everything has its beneficial factors and disadvantages, so does TS video format has. Are you ready to know more about the TS file format? After learning about the format, it’s time to share its advantages and drawbacks with you. Let’s get started!
Advantages of TS File Format
A great thing about TS format is that, after each keyframe, the file information is added automatically. The format is impressive when it comes to maintaining transmission integrity. This is because of all the elementary streams, synchronization patterns, and error corrections; everything is encapsulated in a container format.
Do you know what else benefits TS format has? It is widely used for broadcasting because broadcasting doesn’t need the complete stream for playing it. You can easily share large files over the communication media in real-time as tiny chunks of the audio or video file are sent. Along with this, the error is easily detected as extra information is shared with every chunk, helping in error detection.
Drawbacks of TS File Format
Moving on to its disadvantages, let’s start with the device compatibility. The biggest drawback of using the TS file format is that it is not compatible with many devices. For instance, a built-in media player like Windows Media Player does not support the format; eventually, users must change the file format.
Do you know another significant disadvantage? You cannot share TS files online. Different platforms like Facebook, YouTube, etc., support other famous formats, so hence, sharing TS video files requires a format converter. Do you know how much space does a TS file occupies? Well, it acquires a significant storage space, more than other file formats.
Part 3. How to Play TS Video Files with VLC Media Player?
As mentioned, only specific programs support and play TS video format, so VLC Media Player is one of those. The software is famous among its competitors because it supports a wide range of file formats.
VLC is an open-source, free cross-platform media player that lets you play various multimedia files and DVDs, VCDs, Audio CDs, and other streaming protocols. VLC also plays most codecs like MPEG-2, MPEG-4, MKV, MP3, etc. The media player runs on Windows, macOS, Linux, Unix, iOS, and Android.
Do you know a great thing about VLC? Surprisingly, the software has no spyware, no user tracking, and no ads. VLC is a simple yet super-fast and powerful media player of all time. Learn how to play TS files on VLC by following the steps below:
Step 1: Install or Update VLC
To play TS file format, first of all, download and install the VLC media player on your respective device. If you have already installed the media player, update it to the latest version. With this, all the codecs will be working properly. Move to the ‘Help’ section from the top menu and hit ‘Check for Updates.’
Step 2: Open the TS File
Now, launch the VLC media player and head over to the ‘Media’ option. From the menu list, select the ‘Open File’ option, locate the TS file from your device and add it to the media player. You can also directly drag the TS video file to VLC to play it.
Step 3: Enjoy Watching TS File
After your file has been successfully imported to the VLC media player, you can now enjoy watching the TS Video format without any trouble.
Part 4. How to Edit TS Video Files with Filmora Video Editor?
Now that you know how to play TS video format with a VLC media player let’s also share how you can edit your TS videos. With Wondershare Filmora , you can edit a stunning video. The video editor offers more features than you can imagine. The software comes with features like Record PC Screen, Color Match, Silence Detection, Scene Detection, etc.
For Win 7 or later (64-bit)
For macOS 10.12 or later
Some more advanced editing tools are offered, like Power Tool, Stabilize Video, Auto Reframe, Auto Highlight, and whatnot. If you are interested in editing your TS file format videos with Filmora, take help from the steps shared below.
Step 1: Import TS File
After you have launched Wondershare Filmora on your device, import the media file so that you can start the editing; for that, head to the ‘File’ tab and hover on the ‘Import Media’ option. By doing this, a sub-menu will appear, select the ‘Import Media Files’ option and locate the TS video.
Step 2: TS Audio Edit
After importing the media file, drag it to the timeline to start the editing. With Filmora, add cool sound effects to your videos from the ‘Audio’ section. You get various effects like Happy, Jazz, Young & Bright, and other options.
Step 3: Use Transitions and Effects
What is a video without Effects and Transitions? Filmora comes with a wide range of options to add unique effects and transitions to your videos.
Step 4: Add Elements
Head to the ‘Elements’ section to add amazing little fun things to your video and make it interesting. You get elements like Laser Eye, various Emoji options, and a lot more.
Step 5: Export TS Video
Once all the editing is complete and satisfied with the final result, export the video. Hit the ‘Export’ button and select TS file format from the ‘Locals’ tab as the output format.
Part 5. TS VS. MP4: What’s the Difference?
What is the difference between the TS file format and MP4? Allow us to tell you some. You might have read about both formats, but a few differences are discussed as follows:
TS
TS format is used in DVD and Blu-ray discs that you have on your respective device. It does the same work as MP4, but the TS file breaks the data into tiny chinks. TS format comprises a few elements, making it a faster transporter for MPEG-2 format compressed video data. It is used widely in broadcasting and streaming.
MP4
MP4 is considered more compatible as compared to TS format, as not all the software allows the ‘.ts’ extension. If the file is not transmitted properly or is not closed properly, it can lose the data it has. MP4 is divided into two parts, one has the media data, and the other has metadata. Due to compression differences in both formats, it has a smaller size than the TS format.
Bottom Line
The article has shared great details about the TS format. We talked about how you can play TS files on VLC and also shed light on its pros and cons. Moreover, we also shared a video editor to edit your TS file format videos. Now, let’s talk about Wondershare Filmora.
Wondershare Filmora is a great video editor and is perfect for creating brilliant videos. The comprehensive list of features that you get from Filmora makes it unique and unforgettable. AI Portrait, Auto Normalization, Video Snapshot, Animation Keyframing, and many others are among its various features. For creating good videos, Filmora is an ideal option.
Wondershare Filmora
Get started easily with Filmora’s powerful performance, intuitive interface, and countless effects!
Try It Free Try It Free Try It Free Learn More >
How to Overlay Video in Premiere Pro
In order to make it simple to combine the shot’s components into a sequence, video overlays are pieces of film that are often recorded in a dark studio. Using image overlays on a video production is fairly frequent. However, adding pictures to every video you export might be tiresome and time-consuming if you have several films to send. For instance, an overlay video in Premiere Pro might be preferred by you rather than a manual addition of the overlay media.
There is a quick and easy method to know how to overlay a video on a video in Premiere Pro and we’ve got it covered. However, depending on the kind of element, there may be some color blending that affects the components themselves. Overlays may be filmed on either a green screen or a blue screen. Snow components photographed against a green screen may have a green hue shift, necessitating further color grading before the footage might be used.
Part 1. How to Overlay Video in Premiere Pro
Videos sometimes need a splash of color to elevate them. With the built-in color effects in Adobe Premiere Pro, you can apply overlays to any video, whether you want to add a little drama to a clip or a splash of color to a social media post. We’ll demonstrate how to overlay videos in this article. To liven up your intros, make your outros stand out, and spruce up your summer social media posts, add a gradient video overlay effect. Adobe Premiere Pro and gorgeous video clips are all you need.
Steps to Overlay Video in Premiere Pro
Step1Activate Premiere Pro
To build a new sequence, start a new project in Premiere, import your footage, then drag your clip onto the timeline. The clip’s parameters will be reflected in the sequence.

Step2Select Overlay Effect
Secondly, choose the Effects workspace (located near the top of your window). This will guarantee that the tools we need are accessible. Alternately, you may go to Window > Workspaces > Effects.

Step3Create a layer of adjustments
Go to File > New > Adjustment Layer to begin. Make sure your Project panel is chosen if the option is not accessible. Your clip and sequence will show up in your Project panel with the adjustment layer. Add the timeline with the adjustment layer selected.

Step4Create the Video Overlay
Transitions, generators, audio effects, and video effects are all included under the Effects panel. We’ll begin by selecting the 4-Color Gradient from the “Generate” folder, which contains generators for patterns and gradients, to produce the video overlay effect. Right-click on the adjustment layer in the timeline and drag the appropriate effect there.

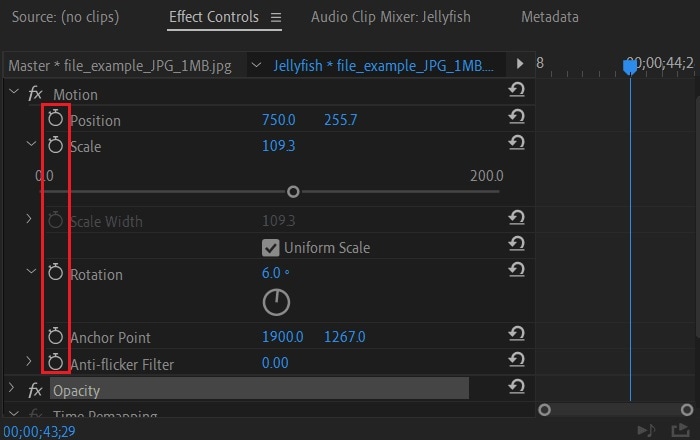
Step5Change the Effect Control
In the Effect Controls panel, you may manage and adjust effects. You may change the default effect settings for each element in your timeline, such as size and opacity, under the Effect Controls panel along with any additional effects you’ve added. To access an item’s effect controls, click on it in the timeline.

By selecting the ‘Show all properties’ next to the adjustment layer in your timeline, you can get a before-and-after comparison. Increase the value by selecting “blend with original.” To change the effect’s strength, move this up and down.
Step6Save the Project
Try switching the linear mode to radial. You can make a color transition for circles by doing this. You will be able to highlight various things with color after this transition. The circle’s starting point may be animated to follow a certain item in the scene.

To the right of the Presets drop-down menu, choose the Auto Save button. Check the Save Effects Settings box when the Choose a Name dialog box appears. Future exports made with this preset will automatically take into account any Image Overlay settings you’ve configured.
Part 2. Premiere Pro Easy Alternative to Overlay Video [Filmora ]
Any professional video editor may be interested in it since it offers the strength, complexity, and adaptability they need. Users need to be well-versed in a variety of editing techniques in order to use the tools properly. Therefore, it’s not really the best option for a novice or someone who hasn’t mastered video editing. We advise using Filmora as a substitute because of this. It is user-friendly for all users and is crammed with numerous theme effects shops to spruce up your video effects, such as transitions, filters, overlays, titles, etc.
Filmora is a powerful and creative video editing program that is really simple to use. With a wide variety of sophisticated video editing tools, Filmora boasts a highly user-friendly interface. Both novice and experienced video editors may utilize the many creative features that Filmora offers. Filmora is the best option if you’re looking for a video editing program that’s not only inexpensive but also offers a variety of features and functions. The program not only has a fantastic user interface, but it also offers strong capabilities that let video editors create precisely the films they desire.
Free Download For Win 7 or later(64-bit)
Free Download For macOS 10.14 or later
Steps to Use Filmora to Overlay Videos:
Step1Launch Filmora
Run the software and switch to Video editor mode. Next, add the image or movie to the media library. Now drag and drop the primary video into the video track or click the “Import Media” button to add it.
Step2Import Media to Overlay
Find the image or video in the media library that you want to overlay over the backdrop video and right-click on it. The image or video overlay may be resized and positioned here as desired.

Step3Spice up with Effects
There are several choices available for adding extra effects to the video. By selecting the effect tab, you may look for more effects as well. The decision to switch to a green screen or include other components into the film is entirely up to you.

Step4Customize Effects and Save
Inside the Effects window, press Ok and once you have applied the required effects to see the modifications appear on the screen. You may also add element movements to make the video seem more entertaining. Once the editing and effect adding are complete, you may export the video on the go.
Conclusion
An image or animation that you contribute to your movies as a video overlay will display below the video and cover the video. Overlay editing is the kind of editing that is most often utilized. It just covers over whatever is in the timeline at the location where you wish to add that clip. If necessary, you may also review the comprehensive instructions for adding images or movies as an overlay to a video, which helps in improving the video quality. With Filmora , video overlays allow for the sharing of additional information without interfering with the viewing of the video.
Free Download For macOS 10.14 or later
Steps to Use Filmora to Overlay Videos:
Step1Launch Filmora
Run the software and switch to Video editor mode. Next, add the image or movie to the media library. Now drag and drop the primary video into the video track or click the “Import Media” button to add it.
Step2Import Media to Overlay
Find the image or video in the media library that you want to overlay over the backdrop video and right-click on it. The image or video overlay may be resized and positioned here as desired.
Step3Spice up with Effects
There are several choices available for adding extra effects to the video. By selecting the effect tab, you may look for more effects as well. The decision to switch to a green screen or include other components into the film is entirely up to you.
Step4Customize Effects and Save
Inside the Effects window, press Ok and once you have applied the required effects to see the modifications appear on the screen. You may also add element movements to make the video seem more entertaining. Once the editing and effect adding are complete, you may export the video on the go.
Conclusion
An image or animation that you contribute to your movies as a video overlay will display below the video and cover the video. Overlay editing is the kind of editing that is most often utilized. It just covers over whatever is in the timeline at the location where you wish to add that clip. If necessary, you may also review the comprehensive instructions for adding images or movies as an overlay to a video, which helps in improving the video quality. With Filmora , video overlays allow for the sharing of additional information without interfering with the viewing of the video.
How to Add Motion Titles
Do you want to make your videos eye-catching instantly? Looking for some cool title animations to make your texts stand out? You should definitely opt for motion title templates that are widely available in popular video editors. Motion title templates come preloaded with animated texts, engaging graphic elements, and even background effects.
You can add them directly to your video and customize them as per you requirements so that your video looks exactly the way you desire. Different video editors have different motion titles, and therefore, you should check them out one by one to find out the templates you are looking for. We will illustrate title motion graphics in all the leading video editors.
Part 1. Add Motion Title with Filmora
The easiest way to add motion title to your video on your computer is through Wondershare Filmora . Filmora is a professional video editor that is available for Windows and Mac users. Filmora has the best collection of motion title templates, and the user interface is super intuitive and anyone can use without any prior experience. Here are the steps to add motion title with Filmora.
Step1Install and launch Wondershare Filmora on your computer. Click on New Project option on the welcome screen or go to File menu and click on New Project option.
Step2Go to File menu and Import Media option to import your video file. Otherwise, you can simply drop the video file into Project Media folder.
Step3Drag the video file from Project Media folder and drop it into the Timeline.
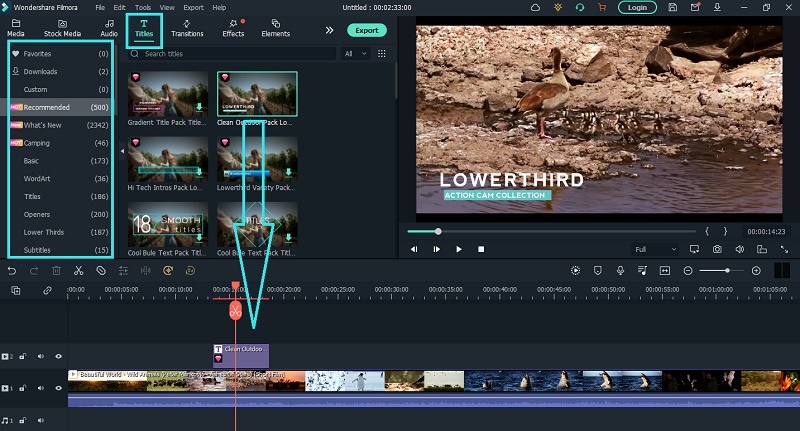
Step4Go to Titles at the top and go to the left panel. You can different categories of motion title templates. Select any desired text effect and drop into the Timeline above the video layer wherever you want.
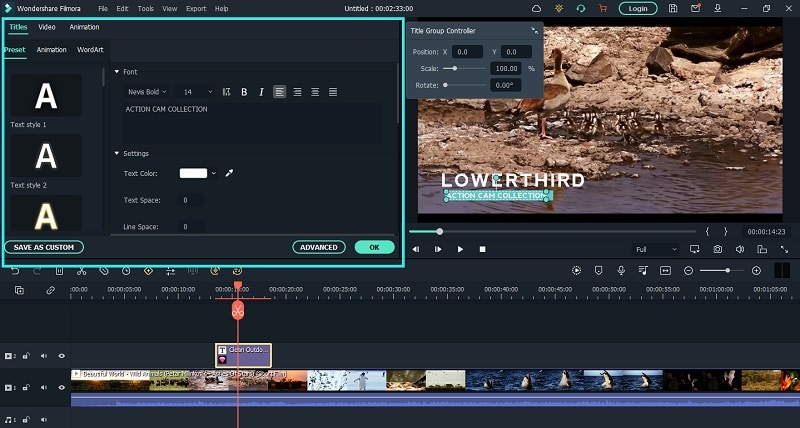
Step5Double clicking on the text layer on Timeline to edit the text and change the styles. Under Preset tab, you can change font, size, and color. Finally, click on OK button to save the edits done.
Part 2. Add Motion Title with Premiere Pro
Adobe Premiere Pro is a renowned video editor that is mostly used by professionals to edit videos and add effects and animations. Even though Premiere Pro has a steep learning curve, you can create motion title in simple steps. You can write any text on the video and select from different effects and animations to create motion title graphics. Here are the steps to add title motion graphics Premiere Pro free.
Step1Launch Premiere Pro and go to New> Project option. Import the video file and drop it into Timeline.
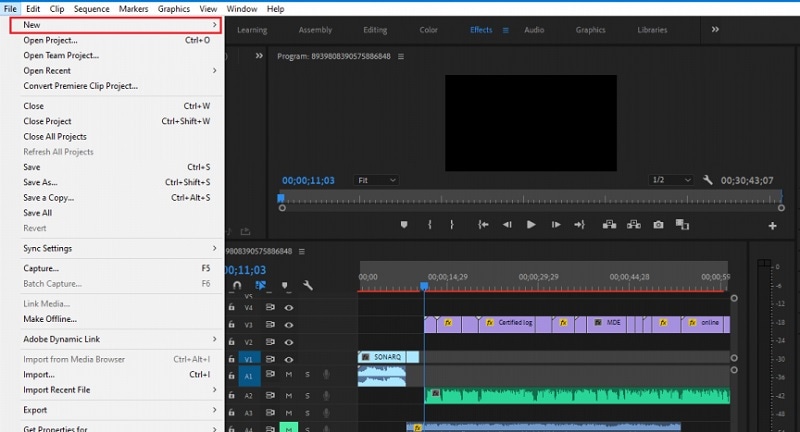
Step2Go to Title> New Title> Default Still option and follow the on-screen instructions.

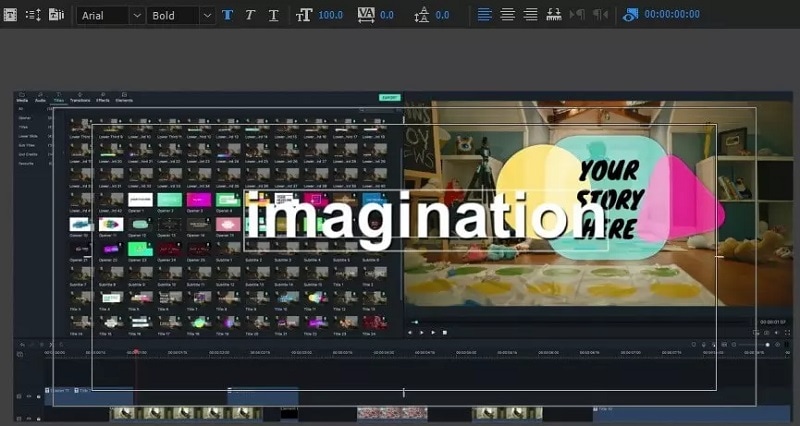
Step3You will see different types of title styles and designs to choose from as you feel.

Step4Click on Type Tool option and click on the area on the video where you want the text to appear. You can customize them from the right panel from Title Styles, Title Properties, Tools and Title Actions.
Step5To add motion to the title, click on Effects Control window. Click on any desired animation and turn to Stopwatch icon to apply the effect to the text. There is a dedicated Motion option available.
Part 3. Make motion title with Studio
Studio is a popular video editing software where you can not only apply motion title presets but also create motion title presets from scratch. The reason why video editors choose Studio is because it allows users to customize everything and create different templates and animations for personalization. Here are the steps to create title motion graphics in Studio as per your requirements.
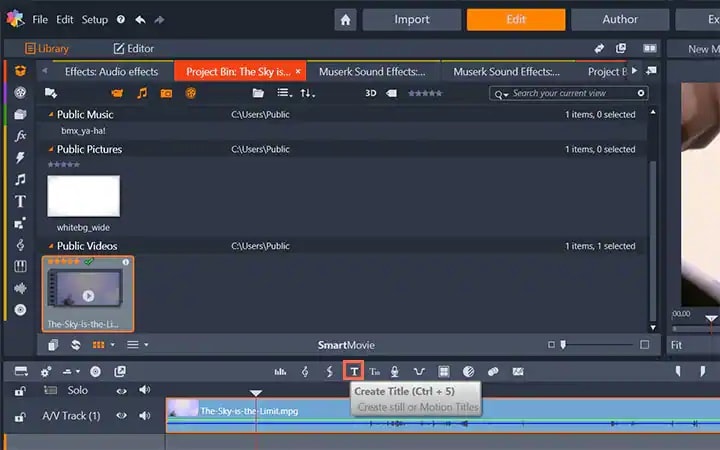
Step1Launch Studio. Import your video file, and you can import single frames such as images from a live video for stop motion titles. Once you have imported, go to the header bar above the Timeline. Click on Create Title option to open Title Editor to create title motion.
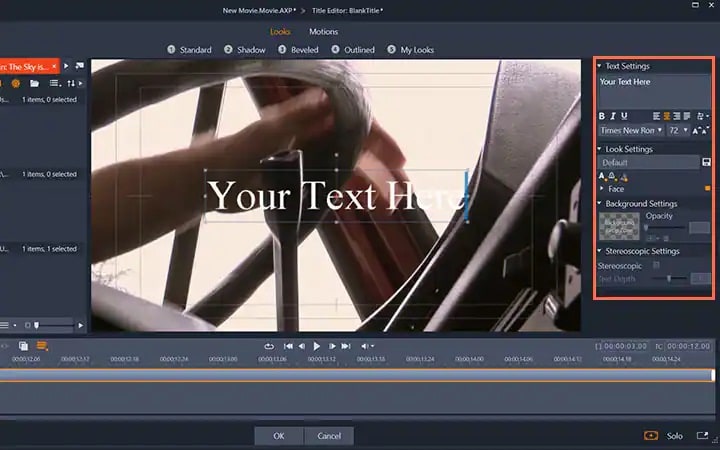
Step2Add your preferred text under Title Editor and adjust font, size, and style as you feel. Go to the right side to make changes to Look, Background, and Stereoscopic Settings to get the perfect text style from the wide range of choices available.
Step3Click on Motion option at the top to add motion to the text. Choose from the different motion title templates as per your preference.
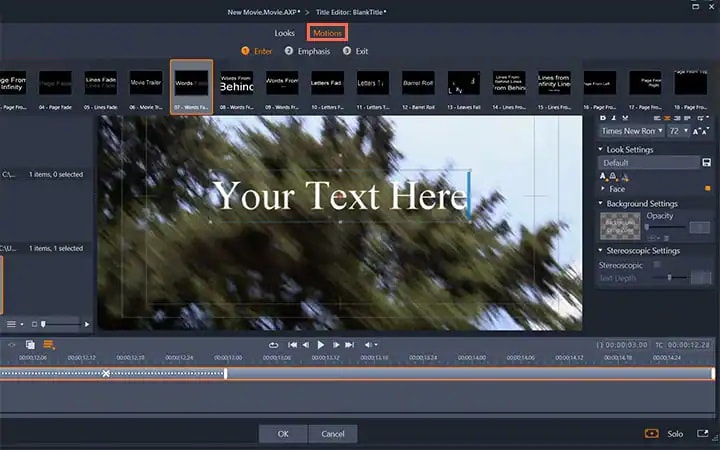
Step4You can adjust the duration of the motion effect from the right panel and click on Ok button.

Part 4. Add Motion Title with WeVideo
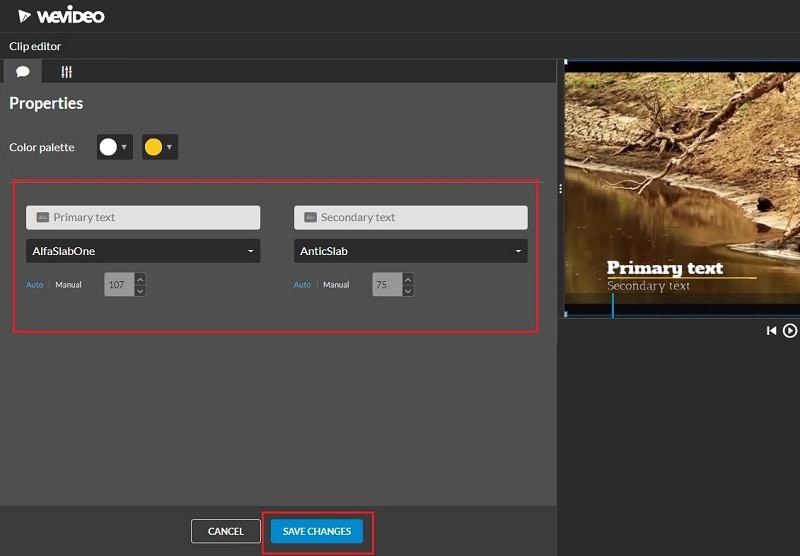
WeVideo is a popular online video editor that you can use to add title motion graphics Premiere Pro free. You can find many motion titles on WeVideo for free like you get in Premiere Pro and there are many exclusive motion text templates available. You need to create a free account with WeVideo to get started. You can create your video from scratch by selecting from the available video templates. You can even import your recorded video and add motion texts and animations as per your preference. Here are the steps to add motion title with WeVideo.
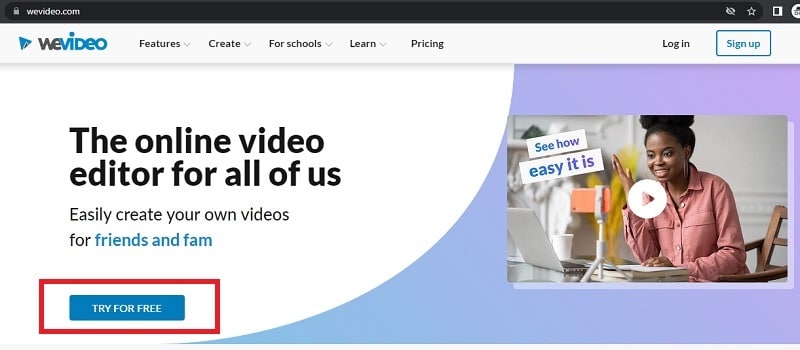
Step1Open your web browser and visit “wevideo.com”. Click on Try For Free button. Sign up for free and go to WeVideo video editor.
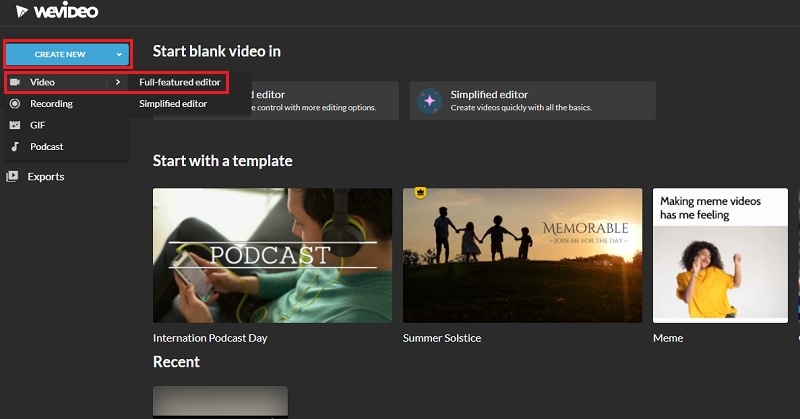
Step2Click on Create New button and select Video option. Click on Full-featured editor option.
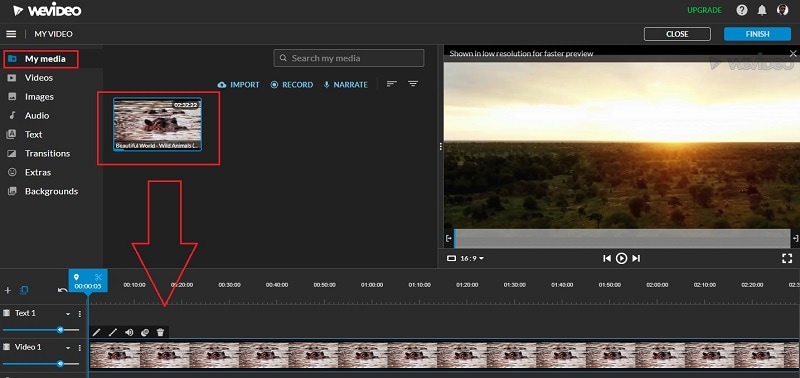
Step3Drag and drop your video file into My Media folder and bring it to Timeline.
Step4Go to Text tab and you will see all the motion animated titles under Titles section. Click on them to check out their previews in Viewer. If you have selected anyone, drag and drop it into Timeline.
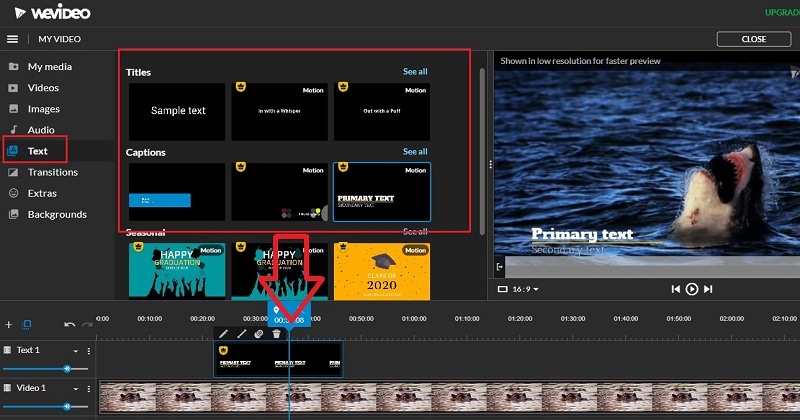
Step5Adjust the position where you want the title to appear on the video and stretch the duration as required. Double-click on the title to edit and customize it as per your preference. Finally, click on Save Changes button.
The Bottom Line
Motion titles are extremely important for any video because they bring in a variety to your video. They make the video eye-catching and help in getting the message across by grabbing the attention of the viewers. We have illustrated how to add motion titles Premiere Pro and Studio. You can also use WeVideo online video editor. We recommend Wondershare Filmora for its extensive collection of motion title templates to choose from and apply to your text.
Free Download For Win 7 or later(64-bit)
Free Download For macOS 10.14 or later
Also read:
- Updated 2024 Approved 2 Ways to Add Custom Subtitles to Netflix
- 2024 Approved How to Make Eye Zoom Transition Effect with Filmora
- Updated Guide on VHS Technology and Its Influence on Video Editing
- Using AI to Replace Skies Finding the Right Methods
- New In 2024, Final Cut Pro - How to Download and Install It?
- In 2024, Using The AI Auto Reframe Feature | Wondershare Filmora Tutorial
- Updated Best Filmic Pro LUTs For Video Editing for 2024
- Updated Converting VTT to SRT, or in Other Words, Converting a Document File Format Web to Subtitles File with the SRT Format Can Be a Cumbersome Process for Many. It Becomes Difficult when You Are New to This and Dont Have Prior Guidance
- Shoot Video with Virtual Green Screen
- New In 2024, Top Things People Know About Wedding Slideshow
- Updated 4 Ways to Add White Borders on Mobile and Desktop
- New How to Change Video Resolution in Filmora
- 2024 Approved Recording Slow-Motion Videos Is Not More Difficult Using a Smartphone. Learn Everything From How to Record Slow-Motion Video and Edit a Video to Slow Down It
- In 2024, Top 8 Memoji Makers to Make a Memoji on PC, Android & iPhone
- Lets Create a New Premiere Pro Project, Import some Video, and Control Video Playback Speed. Also, Find Alternative Software (WonderShare Filmora) to Control Playback Speed in Minutes
- Good Ways to Make Sure Your Video Editing Course Is Worthing to Watch
- What Is TS Format and How To Play TS Files? Basic Tips
- New If You Are Experiencing a Color Distortion in Your Video, You Are in the Right Place. We Have Provided a Detailed Guide with Three Methods that Will Help You Correct This Issue
- How to Create Datamoshing Effect to Your Footage in After Effects?
- Updated In 2024, How to Add Subtitles in QuickTime Player?
- 2024 Approved Step by Step to Rotate Video in Google Photos
- New Do You Want to Add a Slow-Mo Effect in Your Videos? In This Guide, We Will Discuss How to Add Slow-Motion Effects in the Videos with After Effects in an Efficient Way
- In This Article, We Will Cover the Stages of Film Production You Need to Keep in Mind.Without Further Ado, Lets Get Started for 2024
- In 2024, Practical Ways to Resize Video in Handbrake
- New 2024 Approved Best MOV to GIF Converters
- How to Change Video Resolution in Filmora
- New 10 Best Slow-Motion Cameras to Try for 2024
- New Want to Save Your Edited Video File in MP4 Format in Windows Movie Maker? Here Are the Simple Steps Along with a Better Alternative
- Updated 2024 Approved How to Add Motion Blur in After Effects
- Updated There Are Several Video Players that You Can Use to Watch Videos on Your PC. To Have a Better Experience Viewing Videos and Enhancing Them Across a Similar Platform, You Can Try Out VLC Media Player for PC
- New 2 Actionable Ways to Extract Subtitles From MKV Videos without Quality Loss for 2024
- New In 2024, 10 Best Free Text to Speech Software Windows, Mac,Android, iPhone & Online
- Updated 2024 Approved How To Export Video in Filmora
- In 2024, Motion Tracking Is the Process of Tracking the Movements of a Project in a Video. This Article Will Show You How to Apply Motion Tracking Effect Into Videos
- Updated Color Lut Is an Easy and Powerful Tool to Make Your Video Stands Out From the Crowd. Check This Article to Learn the Details About Color Lut
- Updated 2024 Approved 10 Best Slow-Motion Cameras to Try
- New 8 Best Free Title Maker You Must Try and Put to Use for 2024
- Updated 2024 Approved 6 Best Text to Speech Generators for YouTube Videos Windows, Mac, Android, iPhone & Online
- New 2024 Approved 7 Best Green Screen Software for Beginners on Mac
- Updated 10 Matching Color Combination That Works Together Greatly
- New 2024 Approved How to Convert Images Into Video - Kapwing Tutorial
- 2024 Approved Different Ways To Trim Video In Premiere Pro
- In 2024, Are You a Videographer or Video Content Creator? Is Enhancing Your Videography Skills Your Priority? Do You Want to Learn the Basics of LumaFusion Color Grading? Read on to Find All the Information You Need
- In 2024, Solutions to Spy on Apple iPhone 6s Plus with and without jailbreak | Dr.fone
- In 2024, Step-by-Step Tutorial How To Bypass Motorola Razr 40 FRP
- 5 Ways to Restart Honor 90 Without Power Button | Dr.fone
- 5 Ways to Track Xiaomi Mix Fold 3 without App | Dr.fone
- Repair damaged, unplayable video files of Vivo on Windows
- Why Your WhatsApp Location is Not Updating and How to Fix On Motorola G54 5G | Dr.fone
- How to Transfer Data After Switching From Huawei P60 to Latest Samsung | Dr.fone
- In 2024, How to Cast Infinix Hot 40 Pro Screen to PC Using WiFi | Dr.fone
- In 2024, The Ultimate Guide to Unlocking Apple Watch Or Apple iPhone 12 Pro from iCloud
- How to Nokia 105 Classic Get Deleted Pictures Back with Ease and Safety?
- In 2024, Why Your WhatsApp Location is Not Updating and How to Fix On Realme GT 5 Pro | Dr.fone
- 5 Best Route Generator Apps You Should Try On Motorola Defy 2 | Dr.fone
- In 2024, How Do You Get Sun Stone Evolutions in Pokémon For OnePlus Ace 2 Pro? | Dr.fone
- What To Do When Xiaomi Redmi Note 13 5G Has Black Screen of Death? | Dr.fone
- In 2024, How to Enable, Disable, and Change Safari Location on Apple iPhone 12 Pro Max | Dr.fone
- How to Delete iCloud Account From iPhone 14 Pro without Password?
- Latest way to get Shiny Meltan Box in Pokémon Go Mystery Box On Poco C51 | Dr.fone
- How to Unlock Realme C53 PIN Code/Pattern Lock/Password
- In 2024, Easy Tutorial for Activating iCloud from iPhone 15 Plus Safe and Legal
- In 2024, How to Share/Fake Location on WhatsApp for Samsung Galaxy Z Fold 5 | Dr.fone
- In 2024, How to Track Motorola Moto G73 5G Location by Number | Dr.fone
- New In-Depth Review of Ivona Text to Speech by NextUp Technologies for 2024
- In 2024, Top 5 Car Locator Apps for Vivo Y02T | Dr.fone
- Forgotten The Voicemail Password Of Vivo V30 Lite 5G? Try These Fixes
- Title: 2024 Approved How to Make a Movie with Windows Movie Maker?
- Author: Chloe
- Created at : 2024-04-24 07:08:04
- Updated at : 2024-04-25 07:08:04
- Link: https://ai-editing-video.techidaily.com/2024-approved-how-to-make-a-movie-with-windows-movie-maker/
- License: This work is licensed under CC BY-NC-SA 4.0.
