
:max_bytes(150000):strip_icc():format(webp)/001_2654847-5b99b903c9e77c005077d0d8.jpg)
2024 Approved How to Resize FLV Video EfficientlyWindows, Mac, Android, iPhone &
How to Resize FLV Video Efficiently[Windows, Mac, Android, iPhone &
FLV Videos are Flash Video files with a .flv file extension. FLV video files were once one of the most popular video file types and the standard video format used for embedding videos on the internet and streaming. Even though video files like mp4 and mkv have gained more popularity today, you can still come across many Flv videos on the internet.
In this article, you’ll be learning How to Resize FLV Videos Efficiently on all the platforms. But wait, what exactly does the resizing mean? When you are working with videos, resizing can mean two things: one is changing the aspect ratio or resolution of the video and another is changing the file size of the video. So let’s see how we can resize the flv videos efficiently on different platforms:
Best FLV Editor to Resize FLV Videos on Windows and Mac – Filmora Video Editor [with steps]
Among many different video editors available today, Filmora Video Editor is the one that climbs up the rank to the top. It is the best FLV editor on Windows and Mac for resizing and editing flv videos. Different social media platforms require videos of different sizes, resolutions, and aspect ratios. For eg: YouTube requires horizontal video, TikTok requires vertical, Emails have a size limit for every file, etc. That’s when the Filmora Video Editor comes into play for fast and easy resizing of any video for different platforms.
For Win 7 or later (64-bit)
For macOS 10.14 or later
Why choose Filmora Video Editor for resizing FLV videos, you say?
- Simple UI and easy interface
- Easily crop or change the aspect ratio of the video
- Not all video editors support FLV video format, but the Filmora does
- Advanced export options to compress or change the file size of video
- Suitable for beginners as well as professionals
- Regular software updates and improvements
Plus, Filmora Video Editor has a free version, so you can instantly download the program, install it, and get started on resizing FLV Videos. Below is a step-by-step guide to resize FLV Videos on Windows and Mac with Wondershare Filmora Video Editor, so you can follow along!
Steps to resize FLV videos with Filmora Video Editor:
- Launch Filmora and open a new project
Run the Wondershare Filmora application on Windows or Mac after installing it. Then you should automatically be inside a new project. If not, you can manually open a new project by going to File on the top left corner and then clicking on ‘**New Project**’.

- Import the FLV video and add it to timeline
Click on ‘**Import Media Files**’ and import the flv video into project media from your computer’s file explorer. Then add the video to the timeline by dragging it inside the timeline.

- Edit and perform desired modifications (Optional)
If you are just looking to resize the FLV video file, then you can skip this step and move to step no. 4. Otherwise, you can do various editings on the video like cropping, muting, trimming, animating, etc. before resizing the video. Filmora provides a wide range of features for editing and adding effects to the video.

- Resize the video by changing the aspect ratio
Aspect ratio defines the shape of your video like if you want the video to be horizontal, vertical, square, or custom. Generally, the term ‘resizing video’ refers to changing the aspect ratio of the video. For that, go to the File and then to the Project Settings. Then on the Aspect Ratio box, select the one that you prefer or you can try custom scaling. You can choose your preferred resolution of the project too while you’re at it.

- Resize the video by cropping
When you change the aspect ratio of the project, some parts of your flv video might not fit or it might be shrunk small to fit. So you need to resize the flv video by cropping so that you can crop and focus on the part of the video you like. To crop the video, select the flv video clip in the timeline and click on the crop icon in the timeline toolbar. Now choose the ratio you want to crop and select the part you’d like to keep. Then click OK and your flv video will be resized.

- Adjust the file size of the video through export settings
After you’ve cropped and resized the Flv video, you need to export it by clicking the Export button on the top center part. There are different settings available for exporting the video. Click on the Settings button near the resolution and you’ll be shown some detailed preferences for exporting. Every setting here like frame rate, resolution, bitrate, etc. can affect the size of the output video.

Filmora Video Editor really makes the task of editing and resizing FLV videos easier, simpler, and faster. Since you now know the steps, it’s time you try it and resize your own FLV videos with this best FLV Editor for Windows and Mac.
Alternative Way to Resize FLV Videos on Windows
In case you want to try something different than Filmora, here are two alternative software (one paid and another free) that you can use to resize your FLV Videos on Windows:
- Movavi Video Editor Plus

Movavi Video Editor Plus is one of the best easy-to-use video editors that can help you to resize FLV videos as well as edit them on Windows. Its interface and functionalities are somewhat similar to that of the Filmora Video Editor. This is a paid software available for download on both Windows and Mac but you can try it for free with their 7 days trial version.
Steps to resize FLV videos on Windows with Movavi Video Editor:
- Install Movavi Video Editor and run the software on your PC. Then you should automatically be inside a new project in it.

- Import the FLV video file you want to resize through the ‘File Import’ tab on the left and drag it to the timeline.

- To resize the aspect ratio, expand the resolution options near the preview screen above the export button and select the preferred ratio.

- To crop or resize the video, select the clip in the timeline and use the crop tool to make adjustments as you wish. Then hit Apply to save changes.

- After the video is ready, export it with the Export button on the right side of the screen. Then choose your preferred settings for output and click on Start after which your video will be rendered and saved to your PC.

- VSDC Free Video Editor

VSDC Free Video Editor is another alternative to Filmora for resizing FLV videos on Windows. It is a free video editor that packs a wide range of editing features without any restrictions. However, it does have a paid version with some advanced features and hardware acceleration.
Steps to resize FLV videos on Windows with VSDC Free Video Editor:
- Install and open VSDC video editor on your PC. Then create a new project with preferred settings through the ‘Projects’ tab on the top left corner.

- Import the video file into the project by dragging and dropping it directly into the timeline.

- To resize the aspect ratio, click on the Projects Explorer and click on your project name. Then in the Properties windows on the right, manually adjust width, height, resolution, etc. according to your preferences.

- To crop and reposition your video, select the clip in the timeline and go to the Editor tab on the top. Then use the crop tool and adjust your video accordingly.

- Finally export your design through the Export project tab at the top with preferred settings.

Alternative Way to Resize FLV Videos on Mac
Wondershare Filmora Video Editor is also available for Mac operating system which is recommended to resize FLV videos but if you want to try out some other alternatives, then below are the two ways to resize FLV videos on Mac:
- VideoProc Converter

VideoProc is a powerful video editor/ converter that helps you edit, convert, and resize any kind of video. It also supports a wide range of codecs and video formats including flv. It is a paid software but you can also try their free trial version with some limitations.
Steps to resize FLV videos on Mac with VideoProc:
- Launch VideoProc on a Mac device and go inside the Video

- Add files in VideoProc by drag and drop method or directly through the ‘Add Video’ option.

- Then click on the Options (codec) on the right side of the video and change the resolutions and aspect ratio of the video as you want. You can also manage export settings like quality, codec, fps, bitrate, etc. from this tab.

- Then go to the Crop section inside the Edit Video tab and crop the video as you like with preview and different other options.

- Finally click Done to go back and hit the Run This’ll start rendering the video and will save it to your Mac device.

- Shotcut

Shotcut is another alternative to Filmora Video Editor for resizing FLV videos on Mac. It is a free, open-source, and cross-platform video editor that has a sleek and intuitive interface with many useful editing features which really makes it suitable for both beginners as well as advanced editors.
Steps to resize FLV videos on Mac with Shotcut:
- Run the Shotcut program on your Mac after installing it and create a new project.

- Import the Flv video file to the project by drag and drop method into the timeline.

- To change the resolution and aspect ratio of the video, go to the Settings tab, then Video mode, and choose the format you want.

- To crop the video, select the clip in the timeline and go to the Filters Now click on the ‘**+**’ icon and select Size, Position & Rotate under the Favorite section. Then adjust crop settings as you like.

- Finally, go to the Export section at the top and click on Advanced. Then configure the output settings as you like and click on Export File.

2 Ways to Resize FLV Videos on Android
Wouldn’t it be great if you could resize FLV videos on your android device rather than having to open your computer for every small task? Previously, this was a major issue due to a lack of good video editors for android with flv support but that’s no longer the case. Below are two ways to resize FLV videos on android:
- AndroVid – Video Editor, Video Maker

AndroVid is an easy-to-use, full-featured video editor especially developed to edit videos for social media like YouTube, TikTok, Facebook, Instagram, etc. It is not a very popular application with just over 300k+ downloads in Google Play Store, but after testing it out, we thought it deserves to be in this article. It is available for free to download from Google Play Store.
Steps to resize FLV videos on Android with AndroVid Video Editor:
- Open AndroVid Video Editor on an android phone and go inside the Videos

- Now select the FLV video file that you want to resize.

- Inside editor, tap on the Crop tool in the toolbar at the top.

- Then select the preferred Aspect ratio from the top right, reposition the video area and tap on the tick icon to save the video.

- If you need to change the resolution too, click on the three dots at the top right after the video is saved successfully. Then choose the preferred resolution, quality, and format and click on the tick icon to export.

2 Ways to Resize FLV Videos on iPhone
Like Android, you can also resize FLV videos on your iPhone on the go without needing to use your computer. Doing such editing on mobile phones can really save your time and effort, so here are 2 ways for you to resize FLV videos on iPhone:
- Cyberlink Powerdirector

Cyberlink Powerdirector is one of the most popular as well as powerful video editors for Android and iOS. It is a full-featured mobile video editor with over 130M+ downloads on the App Store which allows you to do an advanced level of editing. It is a paid software but also has a free version available for download.
Steps to resize FLV videos on iPhone with PowerDirector:
- Launch the PowerDirector app on your iPhone and create a new project. Unlike other apps, you cannot change the aspect ratio later, so you need to set the aspect ratio you want while creating a new project.

- Now add the FLV video file into the timeline by tapping on the ‘**+**’ icon on the video. Then tap on the play button at the top right to enter the editor.

- To resize the video, select the video clip in the timeline and tap on the pencil icon at the bottom left. Then use different crop tools available to resize your video as you want.

- After you resize the video, tap on the export button on the top right to export it. Then tap on Produce and Share, and produce resized video with preferred settings.

- Splice – Video Editor & Maker

Splice – Video Editor & Maker is a simple yet powerful application that makes it easy to create fully customized and professional-looking videos on iPhone. It is another great app for resizing FLV videos on iPhone with over 70M+ downloads on App Store and it is available for free.
Steps to resize FLV videos on iPhone with Splice:
- Open the Splice app on the iPhone and tap on the ‘**+**’ icon to create a new project.

- Now select the flv video file to add and start the project.

- To resize the video, tap on the gear icon at the top right corner which opens up Project settings from where you can change the aspect ratio.

- To crop the video, select the clip in the timeline and tap on the Crop option in the toolbar. You can crop and reposition the video from there.

- Then click on the Export icon at the top right corner to export the video with preferred configurations.

2 Ways to Resize FLV Videos Online
Resizing is not that big of a task and you might just want to quickly resize your Flv video and share it. So why bother installing and running large video editing programs on your computer or even mobile phones when you can easily resize your videos in the web browser? Yes, you read that right, and below are the 2 ways for you to resize FLV videos online:
- io

Veed is a simple online video editing tool that you can access from any device with the help of a web browser. It can help you resize your Flv videos easily within just a few clicks. It has a clean and beautiful interface with a responsive design which provides you with a good editing experience while using it. It is a paid tool but you can also try it for free before purchasing it.
Steps to resize FLV videos online with Veed.io:
- Go to veed.io on your web browser and click on ‘Upload Your Video’ to get started without any account.

- Now upload the FLV video or you can directly drag and drop the video there.

- After you upload the video, you’ll be taken inside the Veed editor. To change the aspect ratio, go to the Size section inside Project Settings and choose the size you want to resize to.

- To crop the video, select the clip in the timeline and directly resize the video from the preview area. And you can also use settings like ‘Fill the canvas’ and ‘Fit the canvas’ at the left side for ease.

- Then click on the Export button at the top right corner to open Export settings. Configure the settings as you like and click on ‘Export Video’ to render and download the video.

- Clideo

When it comes to resizing or editing videos online, Clideo is one of the best tools you can rely on. Like Veed.io, it has a clean and responsive interface and supports many video formats including flv. Clideo is free to use but also comes with various subscription plans for extra functionalities.
Steps to resize FLV videos online with Clideo:
- Go to clideo.com/resize-video and upload your video through ‘Choose file’ button.

- To resize the aspect ratio, choose your desired formats in the ‘Resize for’ section. You can also manually set the aspect ratio.

- Then just below that, you’ll find various cropping options. Use them to crop or resize the video as you like.

- Finally, click on the Export button at the bottom right corner to export the video. You can download the video or can directly save to cloud storage like Drive, Dropbox, etc.

FAQs about Resizing FLV Video
Here are some of the Frequently Asked Questions (FAQs) related to resizing FLV videos that you might be interested in:
- How do I make FLV files smaller?
You can make FLV files smaller with the help of any video editor that supports Flv video format by cutting and cropping out unnecessary parts, decreasing the resolution, and bitrate, and converting flv into another lighter file format.
- Which video editors support FLV file format?
There are few video editors like Filmora, Movavi, VSDC, etc. that support the FLV file format. But when it comes to editing FLV videos, Filmora Video Editor is the best choice.
- How do I view an FLV file?
FLV is one of the oldest video formats due to which most new and modern video players don’t recognize it or can’t play it. However, there are few programs like VLC media players which can help you view an FLV file. Or you can also convert the FLV file into other supported video formats with the help of a video converter.
- Can I convert a horizontal FLV video into a vertical one?
Yes, and that’s a piece of cake when you use Filmora Video Editor or other similar video editors. You just need to change the aspect ratio of the video or the project from horizontal (generally 16:9) to vertical (generally 9:16).
- Can I resize FLV video files on my mobile?
Though video editors on mobile are not as powerful as those on PC, there are some that are still capable enough to let you easily resize FLV video files on mobile devices. Some examples are Splice, Powerdirector, etc.
For macOS 10.14 or later
Why choose Filmora Video Editor for resizing FLV videos, you say?
- Simple UI and easy interface
- Easily crop or change the aspect ratio of the video
- Not all video editors support FLV video format, but the Filmora does
- Advanced export options to compress or change the file size of video
- Suitable for beginners as well as professionals
- Regular software updates and improvements
Plus, Filmora Video Editor has a free version, so you can instantly download the program, install it, and get started on resizing FLV Videos. Below is a step-by-step guide to resize FLV Videos on Windows and Mac with Wondershare Filmora Video Editor, so you can follow along!
Steps to resize FLV videos with Filmora Video Editor:
- Launch Filmora and open a new project
Run the Wondershare Filmora application on Windows or Mac after installing it. Then you should automatically be inside a new project. If not, you can manually open a new project by going to File on the top left corner and then clicking on ‘**New Project**’.
- Import the FLV video and add it to timeline
Click on ‘**Import Media Files**’ and import the flv video into project media from your computer’s file explorer. Then add the video to the timeline by dragging it inside the timeline.
- Edit and perform desired modifications (Optional)
If you are just looking to resize the FLV video file, then you can skip this step and move to step no. 4. Otherwise, you can do various editings on the video like cropping, muting, trimming, animating, etc. before resizing the video. Filmora provides a wide range of features for editing and adding effects to the video.
- Resize the video by changing the aspect ratio
Aspect ratio defines the shape of your video like if you want the video to be horizontal, vertical, square, or custom. Generally, the term ‘resizing video’ refers to changing the aspect ratio of the video. For that, go to the File and then to the Project Settings. Then on the Aspect Ratio box, select the one that you prefer or you can try custom scaling. You can choose your preferred resolution of the project too while you’re at it.
- Resize the video by cropping
When you change the aspect ratio of the project, some parts of your flv video might not fit or it might be shrunk small to fit. So you need to resize the flv video by cropping so that you can crop and focus on the part of the video you like. To crop the video, select the flv video clip in the timeline and click on the crop icon in the timeline toolbar. Now choose the ratio you want to crop and select the part you’d like to keep. Then click OK and your flv video will be resized.
- Adjust the file size of the video through export settings
After you’ve cropped and resized the Flv video, you need to export it by clicking the Export button on the top center part. There are different settings available for exporting the video. Click on the Settings button near the resolution and you’ll be shown some detailed preferences for exporting. Every setting here like frame rate, resolution, bitrate, etc. can affect the size of the output video.
Filmora Video Editor really makes the task of editing and resizing FLV videos easier, simpler, and faster. Since you now know the steps, it’s time you try it and resize your own FLV videos with this best FLV Editor for Windows and Mac.
Alternative Way to Resize FLV Videos on Windows
In case you want to try something different than Filmora, here are two alternative software (one paid and another free) that you can use to resize your FLV Videos on Windows:
- Movavi Video Editor Plus
Movavi Video Editor Plus is one of the best easy-to-use video editors that can help you to resize FLV videos as well as edit them on Windows. Its interface and functionalities are somewhat similar to that of the Filmora Video Editor. This is a paid software available for download on both Windows and Mac but you can try it for free with their 7 days trial version.
Steps to resize FLV videos on Windows with Movavi Video Editor:
- Install Movavi Video Editor and run the software on your PC. Then you should automatically be inside a new project in it.
- Import the FLV video file you want to resize through the ‘File Import’ tab on the left and drag it to the timeline.
- To resize the aspect ratio, expand the resolution options near the preview screen above the export button and select the preferred ratio.
- To crop or resize the video, select the clip in the timeline and use the crop tool to make adjustments as you wish. Then hit Apply to save changes.
- After the video is ready, export it with the Export button on the right side of the screen. Then choose your preferred settings for output and click on Start after which your video will be rendered and saved to your PC.
- VSDC Free Video Editor
VSDC Free Video Editor is another alternative to Filmora for resizing FLV videos on Windows. It is a free video editor that packs a wide range of editing features without any restrictions. However, it does have a paid version with some advanced features and hardware acceleration.
Steps to resize FLV videos on Windows with VSDC Free Video Editor:
- Install and open VSDC video editor on your PC. Then create a new project with preferred settings through the ‘Projects’ tab on the top left corner.
- Import the video file into the project by dragging and dropping it directly into the timeline.
- To resize the aspect ratio, click on the Projects Explorer and click on your project name. Then in the Properties windows on the right, manually adjust width, height, resolution, etc. according to your preferences.
- To crop and reposition your video, select the clip in the timeline and go to the Editor tab on the top. Then use the crop tool and adjust your video accordingly.
- Finally export your design through the Export project tab at the top with preferred settings.
Alternative Way to Resize FLV Videos on Mac
Wondershare Filmora Video Editor is also available for Mac operating system which is recommended to resize FLV videos but if you want to try out some other alternatives, then below are the two ways to resize FLV videos on Mac:
- VideoProc Converter
VideoProc is a powerful video editor/ converter that helps you edit, convert, and resize any kind of video. It also supports a wide range of codecs and video formats including flv. It is a paid software but you can also try their free trial version with some limitations.
Steps to resize FLV videos on Mac with VideoProc:
- Launch VideoProc on a Mac device and go inside the Video
- Add files in VideoProc by drag and drop method or directly through the ‘Add Video’ option.
- Then click on the Options (codec) on the right side of the video and change the resolutions and aspect ratio of the video as you want. You can also manage export settings like quality, codec, fps, bitrate, etc. from this tab.
- Then go to the Crop section inside the Edit Video tab and crop the video as you like with preview and different other options.
- Finally click Done to go back and hit the Run This’ll start rendering the video and will save it to your Mac device.
- Shotcut
Shotcut is another alternative to Filmora Video Editor for resizing FLV videos on Mac. It is a free, open-source, and cross-platform video editor that has a sleek and intuitive interface with many useful editing features which really makes it suitable for both beginners as well as advanced editors.
Steps to resize FLV videos on Mac with Shotcut:
- Run the Shotcut program on your Mac after installing it and create a new project.
- Import the Flv video file to the project by drag and drop method into the timeline.
- To change the resolution and aspect ratio of the video, go to the Settings tab, then Video mode, and choose the format you want.
- To crop the video, select the clip in the timeline and go to the Filters Now click on the ‘**+**’ icon and select Size, Position & Rotate under the Favorite section. Then adjust crop settings as you like.
- Finally, go to the Export section at the top and click on Advanced. Then configure the output settings as you like and click on Export File.
2 Ways to Resize FLV Videos on Android
Wouldn’t it be great if you could resize FLV videos on your android device rather than having to open your computer for every small task? Previously, this was a major issue due to a lack of good video editors for android with flv support but that’s no longer the case. Below are two ways to resize FLV videos on android:
- AndroVid – Video Editor, Video Maker
AndroVid is an easy-to-use, full-featured video editor especially developed to edit videos for social media like YouTube, TikTok, Facebook, Instagram, etc. It is not a very popular application with just over 300k+ downloads in Google Play Store, but after testing it out, we thought it deserves to be in this article. It is available for free to download from Google Play Store.
Steps to resize FLV videos on Android with AndroVid Video Editor:
- Open AndroVid Video Editor on an android phone and go inside the Videos
- Now select the FLV video file that you want to resize.
- Inside editor, tap on the Crop tool in the toolbar at the top.
- Then select the preferred Aspect ratio from the top right, reposition the video area and tap on the tick icon to save the video.
- If you need to change the resolution too, click on the three dots at the top right after the video is saved successfully. Then choose the preferred resolution, quality, and format and click on the tick icon to export.
2 Ways to Resize FLV Videos on iPhone
Like Android, you can also resize FLV videos on your iPhone on the go without needing to use your computer. Doing such editing on mobile phones can really save your time and effort, so here are 2 ways for you to resize FLV videos on iPhone:
- Cyberlink Powerdirector
Cyberlink Powerdirector is one of the most popular as well as powerful video editors for Android and iOS. It is a full-featured mobile video editor with over 130M+ downloads on the App Store which allows you to do an advanced level of editing. It is a paid software but also has a free version available for download.
Steps to resize FLV videos on iPhone with PowerDirector:
- Launch the PowerDirector app on your iPhone and create a new project. Unlike other apps, you cannot change the aspect ratio later, so you need to set the aspect ratio you want while creating a new project.
- Now add the FLV video file into the timeline by tapping on the ‘**+**’ icon on the video. Then tap on the play button at the top right to enter the editor.
- To resize the video, select the video clip in the timeline and tap on the pencil icon at the bottom left. Then use different crop tools available to resize your video as you want.
- After you resize the video, tap on the export button on the top right to export it. Then tap on Produce and Share, and produce resized video with preferred settings.
- Splice – Video Editor & Maker
Splice – Video Editor & Maker is a simple yet powerful application that makes it easy to create fully customized and professional-looking videos on iPhone. It is another great app for resizing FLV videos on iPhone with over 70M+ downloads on App Store and it is available for free.
Steps to resize FLV videos on iPhone with Splice:
- Open the Splice app on the iPhone and tap on the ‘**+**’ icon to create a new project.
- Now select the flv video file to add and start the project.
- To resize the video, tap on the gear icon at the top right corner which opens up Project settings from where you can change the aspect ratio.
- To crop the video, select the clip in the timeline and tap on the Crop option in the toolbar. You can crop and reposition the video from there.
- Then click on the Export icon at the top right corner to export the video with preferred configurations.
2 Ways to Resize FLV Videos Online
Resizing is not that big of a task and you might just want to quickly resize your Flv video and share it. So why bother installing and running large video editing programs on your computer or even mobile phones when you can easily resize your videos in the web browser? Yes, you read that right, and below are the 2 ways for you to resize FLV videos online:
- io
Veed is a simple online video editing tool that you can access from any device with the help of a web browser. It can help you resize your Flv videos easily within just a few clicks. It has a clean and beautiful interface with a responsive design which provides you with a good editing experience while using it. It is a paid tool but you can also try it for free before purchasing it.
Steps to resize FLV videos online with Veed.io:
- Go to veed.io on your web browser and click on ‘Upload Your Video’ to get started without any account.
- Now upload the FLV video or you can directly drag and drop the video there.
- After you upload the video, you’ll be taken inside the Veed editor. To change the aspect ratio, go to the Size section inside Project Settings and choose the size you want to resize to.
- To crop the video, select the clip in the timeline and directly resize the video from the preview area. And you can also use settings like ‘Fill the canvas’ and ‘Fit the canvas’ at the left side for ease.
- Then click on the Export button at the top right corner to open Export settings. Configure the settings as you like and click on ‘Export Video’ to render and download the video.
- Clideo
When it comes to resizing or editing videos online, Clideo is one of the best tools you can rely on. Like Veed.io, it has a clean and responsive interface and supports many video formats including flv. Clideo is free to use but also comes with various subscription plans for extra functionalities.
Steps to resize FLV videos online with Clideo:
- Go to clideo.com/resize-video and upload your video through ‘Choose file’ button.
- To resize the aspect ratio, choose your desired formats in the ‘Resize for’ section. You can also manually set the aspect ratio.
- Then just below that, you’ll find various cropping options. Use them to crop or resize the video as you like.
- Finally, click on the Export button at the bottom right corner to export the video. You can download the video or can directly save to cloud storage like Drive, Dropbox, etc.
FAQs about Resizing FLV Video
Here are some of the Frequently Asked Questions (FAQs) related to resizing FLV videos that you might be interested in:
- How do I make FLV files smaller?
You can make FLV files smaller with the help of any video editor that supports Flv video format by cutting and cropping out unnecessary parts, decreasing the resolution, and bitrate, and converting flv into another lighter file format.
- Which video editors support FLV file format?
There are few video editors like Filmora, Movavi, VSDC, etc. that support the FLV file format. But when it comes to editing FLV videos, Filmora Video Editor is the best choice.
- How do I view an FLV file?
FLV is one of the oldest video formats due to which most new and modern video players don’t recognize it or can’t play it. However, there are few programs like VLC media players which can help you view an FLV file. Or you can also convert the FLV file into other supported video formats with the help of a video converter.
- Can I convert a horizontal FLV video into a vertical one?
Yes, and that’s a piece of cake when you use Filmora Video Editor or other similar video editors. You just need to change the aspect ratio of the video or the project from horizontal (generally 16:9) to vertical (generally 9:16).
- Can I resize FLV video files on my mobile?
Though video editors on mobile are not as powerful as those on PC, there are some that are still capable enough to let you easily resize FLV video files on mobile devices. Some examples are Splice, Powerdirector, etc.
We Will Give You the Best-Suggested List of Color Match Generators to Help You Choose From an Efficient Collection Rather than Finding It Aimlessly
A Roster of 8 Best Color Match Generators
An easy yet powerful editor
Numerous effects to choose from
Detailed tutorials provided by the official channel
Did you face difficulty in putting a bunch of colors together and making them work well in a visual design? Yeah! It is not easy and complicated as throwing colors here and there. No doubt, for creating a graphic design, a story with imagery is delivered. To highlight things, the colors and the text are essential parts. This is where perfection is needed, so there are many color palette generators to make these tasks easier. A color match generator generates a random color palette or helps users create a selection of colors. This selection will define a specified shade. So, what makes an excellent color matching, and how can it be made? We’ve put some best color match generators together.

From today’s discussion, you’ll learn some must-know color match generates solutions. So, browse through mentioned eight-color match generators and create your color combinations and matching colors generator. Let’s get started!
In this article
01 [8 Color Match Generators](#Part 1)
02 [The Best Solution of Color Match Generators: Filmora 11 Video Editor](#Part 2)
Part 1 8 Color Match Generators
Let’s check out our well-researched findings on the 8 best color match generators for creating the perfect color combination and matching color with these matching colors generators.
01Coolors
‘Coolors’ help users create the perfect palette. Along with an intuitive and robust color match generator, it offers thousands of beautiful color schemes. ‘Coolors’ tool is available as an iOS app, Instagram page, and Chrome extension. You can also find this accessible and ad-supported tool on the web. You can easily use this tool to explore palettes based on keywords and create your color palette from an uploaded image. Users will find the option to see the RGB, HEX codes, and CYMK color values. It will help them ensure that they have used the exact color shade while choosing and working with the available colors.
Features:
● Generate the palettes by exploring popular palettes.
● Easily pick up option for taking palette from photo.
● Create a collage.
● Explore gradients and create a gradient.
● Contrast checker.

02Adobe Color
Adobe Color offers several free outstanding color shades that allow all users to show creativity. Adobe Color offers the color wheel to create color schemes as the wheel has different color harmony rules. Adobe Color helps extract themes from pictures, create gradients from uploaded ones, and create color palettes individually. Users can take subscriptions or not to Adobe products. Users can have color choices to ensure their shades for colorblind people as a background for text. Adobe Color extracts a color theme as well as a gradient from images. You can save the color themes if you have accessed Adobe’s Creative Cloud and use those themes directly in your projects.
Features:
● Create accessible themes by checking the background and text colors contrast ratio.
● Easily compare themes to Web Content Accessibility Guidelines (WCAG).
● Colorblind safe themes to ensure better experiences.
● A large number of Color Harmony Rules to apply.
● Accessible theme suggestions and color education availability.

03 Palettton
Paletton offers a different approach compared to most color matching tools. This quite technical-looking and free color match generator is backed. Paletton can be seemed intimidating because of its interface. You will also get a few base colors set by brand guidelines in web design. This tool is excellent for adding a base color and tuning the gradients until a smooth color scheme. You can modify selections individually to know the shifts of shades. It can take the presets that create adjacent and monochromatic options. To choose the shades to match the primary color, you can adjust the color wheel distance.
Features:
● All color palettes have an offered base color.
● Eyedropper tool to extract a color or two from any of the selected images.
● Multiple color combinations.
● Using Paletton’s feature for vision simulation.
● Presets option available according to the base color.

04 ColorHunt
Color Hunt offers a vast collection of color palettes. This designer’s color palettes individually include a large number of colors shades. This tool contains different color palettes to explore according to popularity or trends. The tool has an option to let users create their color palettes. Other designers do craft these color palettes. The palettes are so visual to users to pick a palette easily and begin your design. Here, a little experience will assist you more in selecting the best color for the pallet. This artist-generated color palette library offers trendy, new, or random tools access.
Features:
● Allow discovering the newest hand-picked palettes.
● Create your four-color palette.
● A sheer number of created color palettes.
● Copy the HEX values for the colors or generate an image.
● Sharing options to get your colleagues.

05 BrandColors
BrandColors has the most extensive collection of several multiple brand color codes. This color-exploration tool offers much more than a good color palette generator. Serially there will be numerous color shades to choose from. This free tool shows the official brand color shades in purpose to use for hundreds of sports teams, companies, and other firms as well. For organizations, BrandColors has well-featured tools to develop their brand identity. You can scroll through the options to use color shades for applicable brands. You can easily select the color codes to quickly mimic or share a link.
Features:
● Offer a helpful reference for the brand color codes.
● More than 600 brands, including 1600 colors.
● Featured by CSS-Tricks, Smashing Magazine, Tuts+, Web Design Depot, and over 2 million page views.
● Offers color shades serially and views in letter form.
● Best to avoid conflict with a competitor while finding a color that will look different.

06Culrs
‘Culrs’ color match generator offers customized features so that you can be able to customize your color palette fully. ‘Culrs’ can generate color shades from a randomly selected image using Flickr. It offers free and simple-to-use color shades library along with different colors. It allows searching more than 17K color schemes and helps you to match words according to the color relativity. It serves methods including contrasting, monochromatic, or complementary. You will find the easiest way to explore color from the monochromatic palettes. There is not necessary to put pressure on your brain to find the right color combinations.
Features:
● Work can be curated and fashioned into quality palettes.
● Find must-have color by copying the HEX code.
● Mix colors up and warm shades and blend well.
● Explore categories from analogous, monochromatic, triad, and tetradic.
● Multiple hue options to see beautiful palettes.

07 ColourCode
‘ColourCode’ will offer you multiple color shades to create palettes and harmonies. The color shading options remain side by side, and you can choose the brighter or lighter versions of your chosen colors with others. And there are options for creating palettes and exporting formats in several image formats. ‘ColourCode’ will offer several palettes so that you can generate harmonies. You can get several file formats to export and download with the most straightforward interface. All available options are easily accessible from its main interface.
Features:
● Click and add the color on the screen browser
● Create palettes on the same cursor according to the previous site’s interface.
● Generate color palettes in analog, triad, quad, monochrome, complement, monochromatic light, etc. categories.
● Export image files and save themes in LESS, SCSS, and PNG formats.
● The created color schemes are downloadable in multiple languages.

08Colour Lovers
Color Lovers helps create patterns and palettes for matching color generators with a vital social component, offering multiple numbers of color palettes and over a million colorful user bases to match. ColourLovers is a creative cornerstone of the online color community for artists to share their created palettes and patterns, including multiple design elements. You can generate extraordinary color editing tasks with palettes, patterns, shapes, and more. A basic generator version is more straightforward, and its free color palette is quite technical.
Features:
● Create and share colors, palettes, and patterns with offered color shades.
● Palettes like Fugitive Colour, Son of Ariel, etc., are available.
● Patterns include Southern Hemisphere, Wonderment, The Limbic System, and more.
● Multiple shapes, groups, trends, etc., are available.
● Guide through several blog posts on multiple topics like wedding, home, fashion, web, etc.

Part 2 The Best Solution of Color Match Generators: Filmora 11 Video Editor
While it is the topic of color match generators, how can we avoid the most well-known and used tool, Filmora, under matching color generators? Wondershare Filmora Video Editor is an all-in-one combination of many color shades generating tools and multiple other features.
Filmora 11 lets you transform your video into a piece of unique and most attractive art with a drag and drop interface, simple and powerful arts, colors, and editing tools. This color match generator has numerous functions to help you generate your own story with color perfection. You will find several effects to edit and other basic and advanced tools to beautify your videos. This powerful editor and color generator provide quality performance and ensure the appropriate color and editing match your expectations. You can use its color matching features and color palettes to match color accurately. Take a brief overview of features:
● 3D color grading pallets.
● Enhance videos’ beauty with more than 800 stunning effects
● Unleash creativity with offered Hollywood effects.
● Adjust the color tuning balance and dynamic range of the clips.
● Overlays and filters to transform a video into something spectacular.
● Clip adjustment with color tuning option.
For Win 7 or later (64-bit)
For macOS 10.12 or later
● Key Takeaways from This Episode →
● From our today’s discussion in this article, we have got overviews of the below things:
● We learned about 8 top Color Match Generators.
● Offered features of Color Match Generators
● The best solution for matching color generators isFilmora 11 and its proposed features.
Did you face difficulty in putting a bunch of colors together and making them work well in a visual design? Yeah! It is not easy and complicated as throwing colors here and there. No doubt, for creating a graphic design, a story with imagery is delivered. To highlight things, the colors and the text are essential parts. This is where perfection is needed, so there are many color palette generators to make these tasks easier. A color match generator generates a random color palette or helps users create a selection of colors. This selection will define a specified shade. So, what makes an excellent color matching, and how can it be made? We’ve put some best color match generators together.
From today’s discussion, you’ll learn some must-know color match generates solutions. So, browse through mentioned eight-color match generators and create your color combinations and matching colors generator. Let’s get started!
In this article
01 [8 Color Match Generators](#Part 1)
02 [The Best Solution of Color Match Generators: Filmora 11 Video Editor](#Part 2)
Part 1 8 Color Match Generators
Let’s check out our well-researched findings on the 8 best color match generators for creating the perfect color combination and matching color with these matching colors generators.
01Coolors
‘Coolors’ help users create the perfect palette. Along with an intuitive and robust color match generator, it offers thousands of beautiful color schemes. ‘Coolors’ tool is available as an iOS app, Instagram page, and Chrome extension. You can also find this accessible and ad-supported tool on the web. You can easily use this tool to explore palettes based on keywords and create your color palette from an uploaded image. Users will find the option to see the RGB, HEX codes, and CYMK color values. It will help them ensure that they have used the exact color shade while choosing and working with the available colors.
Features:
● Generate the palettes by exploring popular palettes.
● Easily pick up option for taking palette from photo.
● Create a collage.
● Explore gradients and create a gradient.
● Contrast checker.
02Adobe Color
Adobe Color offers several free outstanding color shades that allow all users to show creativity. Adobe Color offers the color wheel to create color schemes as the wheel has different color harmony rules. Adobe Color helps extract themes from pictures, create gradients from uploaded ones, and create color palettes individually. Users can take subscriptions or not to Adobe products. Users can have color choices to ensure their shades for colorblind people as a background for text. Adobe Color extracts a color theme as well as a gradient from images. You can save the color themes if you have accessed Adobe’s Creative Cloud and use those themes directly in your projects.
Features:
● Create accessible themes by checking the background and text colors contrast ratio.
● Easily compare themes to Web Content Accessibility Guidelines (WCAG).
● Colorblind safe themes to ensure better experiences.
● A large number of Color Harmony Rules to apply.
● Accessible theme suggestions and color education availability.
03 Palettton
Paletton offers a different approach compared to most color matching tools. This quite technical-looking and free color match generator is backed. Paletton can be seemed intimidating because of its interface. You will also get a few base colors set by brand guidelines in web design. This tool is excellent for adding a base color and tuning the gradients until a smooth color scheme. You can modify selections individually to know the shifts of shades. It can take the presets that create adjacent and monochromatic options. To choose the shades to match the primary color, you can adjust the color wheel distance.
Features:
● All color palettes have an offered base color.
● Eyedropper tool to extract a color or two from any of the selected images.
● Multiple color combinations.
● Using Paletton’s feature for vision simulation.
● Presets option available according to the base color.
04 ColorHunt
Color Hunt offers a vast collection of color palettes. This designer’s color palettes individually include a large number of colors shades. This tool contains different color palettes to explore according to popularity or trends. The tool has an option to let users create their color palettes. Other designers do craft these color palettes. The palettes are so visual to users to pick a palette easily and begin your design. Here, a little experience will assist you more in selecting the best color for the pallet. This artist-generated color palette library offers trendy, new, or random tools access.
Features:
● Allow discovering the newest hand-picked palettes.
● Create your four-color palette.
● A sheer number of created color palettes.
● Copy the HEX values for the colors or generate an image.
● Sharing options to get your colleagues.
05 BrandColors
BrandColors has the most extensive collection of several multiple brand color codes. This color-exploration tool offers much more than a good color palette generator. Serially there will be numerous color shades to choose from. This free tool shows the official brand color shades in purpose to use for hundreds of sports teams, companies, and other firms as well. For organizations, BrandColors has well-featured tools to develop their brand identity. You can scroll through the options to use color shades for applicable brands. You can easily select the color codes to quickly mimic or share a link.
Features:
● Offer a helpful reference for the brand color codes.
● More than 600 brands, including 1600 colors.
● Featured by CSS-Tricks, Smashing Magazine, Tuts+, Web Design Depot, and over 2 million page views.
● Offers color shades serially and views in letter form.
● Best to avoid conflict with a competitor while finding a color that will look different.
06Culrs
‘Culrs’ color match generator offers customized features so that you can be able to customize your color palette fully. ‘Culrs’ can generate color shades from a randomly selected image using Flickr. It offers free and simple-to-use color shades library along with different colors. It allows searching more than 17K color schemes and helps you to match words according to the color relativity. It serves methods including contrasting, monochromatic, or complementary. You will find the easiest way to explore color from the monochromatic palettes. There is not necessary to put pressure on your brain to find the right color combinations.
Features:
● Work can be curated and fashioned into quality palettes.
● Find must-have color by copying the HEX code.
● Mix colors up and warm shades and blend well.
● Explore categories from analogous, monochromatic, triad, and tetradic.
● Multiple hue options to see beautiful palettes.
07 ColourCode
‘ColourCode’ will offer you multiple color shades to create palettes and harmonies. The color shading options remain side by side, and you can choose the brighter or lighter versions of your chosen colors with others. And there are options for creating palettes and exporting formats in several image formats. ‘ColourCode’ will offer several palettes so that you can generate harmonies. You can get several file formats to export and download with the most straightforward interface. All available options are easily accessible from its main interface.
Features:
● Click and add the color on the screen browser
● Create palettes on the same cursor according to the previous site’s interface.
● Generate color palettes in analog, triad, quad, monochrome, complement, monochromatic light, etc. categories.
● Export image files and save themes in LESS, SCSS, and PNG formats.
● The created color schemes are downloadable in multiple languages.
08Colour Lovers
Color Lovers helps create patterns and palettes for matching color generators with a vital social component, offering multiple numbers of color palettes and over a million colorful user bases to match. ColourLovers is a creative cornerstone of the online color community for artists to share their created palettes and patterns, including multiple design elements. You can generate extraordinary color editing tasks with palettes, patterns, shapes, and more. A basic generator version is more straightforward, and its free color palette is quite technical.
Features:
● Create and share colors, palettes, and patterns with offered color shades.
● Palettes like Fugitive Colour, Son of Ariel, etc., are available.
● Patterns include Southern Hemisphere, Wonderment, The Limbic System, and more.
● Multiple shapes, groups, trends, etc., are available.
● Guide through several blog posts on multiple topics like wedding, home, fashion, web, etc.
Part 2 The Best Solution of Color Match Generators: Filmora 11 Video Editor
While it is the topic of color match generators, how can we avoid the most well-known and used tool, Filmora, under matching color generators? Wondershare Filmora Video Editor is an all-in-one combination of many color shades generating tools and multiple other features.
Filmora 11 lets you transform your video into a piece of unique and most attractive art with a drag and drop interface, simple and powerful arts, colors, and editing tools. This color match generator has numerous functions to help you generate your own story with color perfection. You will find several effects to edit and other basic and advanced tools to beautify your videos. This powerful editor and color generator provide quality performance and ensure the appropriate color and editing match your expectations. You can use its color matching features and color palettes to match color accurately. Take a brief overview of features:
● 3D color grading pallets.
● Enhance videos’ beauty with more than 800 stunning effects
● Unleash creativity with offered Hollywood effects.
● Adjust the color tuning balance and dynamic range of the clips.
● Overlays and filters to transform a video into something spectacular.
● Clip adjustment with color tuning option.
For Win 7 or later (64-bit)
For macOS 10.12 or later
● Key Takeaways from This Episode →
● From our today’s discussion in this article, we have got overviews of the below things:
● We learned about 8 top Color Match Generators.
● Offered features of Color Match Generators
● The best solution for matching color generators isFilmora 11 and its proposed features.
Little Known Ways of Adding Emojis to Photos on iPhone & Android
Little Known Ways of Adding Emojis to Photos on iPhone & Android
An easy yet powerful editor
Numerous effects to choose from
Detailed tutorials provided by the official channel
Emojis are catchy graphic elements that can add life to your photos, videos and allied artworks within a wink. Be here to know about the most exciting how-tos!
In this article
01 [Best 6 Tools to Put Emojis on Pictures on iPhone](#Part 1)
02 [Best 6 Tools to Put Emojis on Pictures on Android](#Part 2)
03 [Best 5 Tools to Put Emojis on Pictures on Computer](#Part 3)
Part 1 Best 6 Tools to Put Emojis on Pictures on iPhone
Emojis have managed to secure enough significance in our social and professional lives across social media platforms in the current time. Be it a fun-filled conversation with friends and family on a chat service program, or a high end and professionally sound business strategy, these mini caricature pieces of graphic art can add the much needed highlight to almost every aspect of your digital communication concerns.
Now that you are aware of the utility of working with emojis to make your digital contents, let us take a dive into some of the best ways and means to make your iPhone images come alive in the following section:
01Emoji Picture Editor- Add Emojis to Your Photos
If you like to imbibe the images on your iPhone media gallery with a hoard of funny and cool emojis, this one is a perfect app to address the concern. The tool’s library houses the latest collection of emoji categories to be in line with a diversity of photo styles, themes and backgrounds. You can take your pick from the huge inventory of over 1500 different emojis to level up your photos.
Talking about the app interface and usage controls, you are granted full liberty to add emojis to your emojis, while changing their positions through a finger drag, or scale and rotate them by expanding, pinching and twisting your fingers. The app additionally allows you to send bigger emoji stickers on chats and conversations.
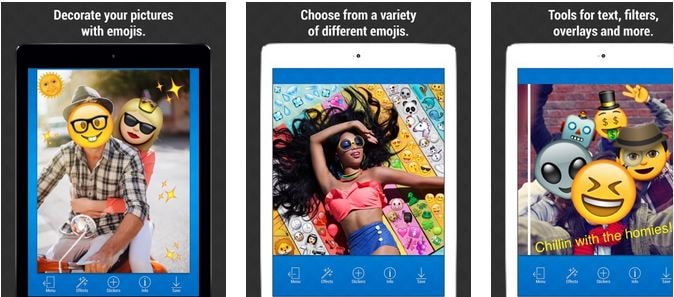
02Insta Emoji Photo Editor
When looking for an interesting and reliable application to set straight the concern of how to put emojis on pictures, the Insta Emoji Photo Editor is an affordable pick. Loaded with an enormous and updated emoji library, the app presents before you over 3200 fascinating emoji options to select from and add to your images.
The inclusion process is intuitively simple, with you just having to upload the desired images to the app’s working interface and choose from your most favorite emoji elements to make the stills come alive with added fun and spark. The app houses an interesting ’Emoji Paint’ feature for the extensively creative ones to let them create catchy drawings with the coolest emojis.
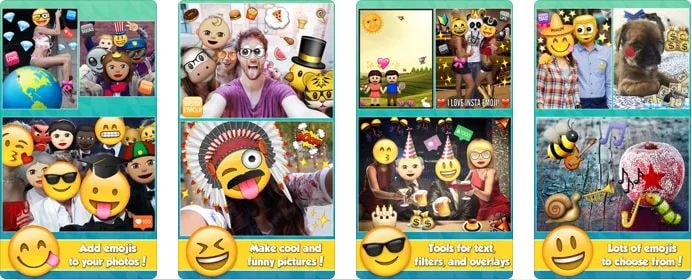
03Emoji My Face
Moving ahead in the list comes the aforesaid app, which you can conveniently rely on to get through the photo edit emoji task in less than a few seconds. What’s unique about the utility is its feature that lets you add emoji stickers on the faces of your image elements. Working with the app, you can transform the skinned appearances of your friends and family into hilarious emoji faces.
While the app permits you to pick any number of preferences from its latest and updated emoji collection, you can additionally, save and share your emoji centered image edits across a diversity of media sharing platforms and chat service programs.
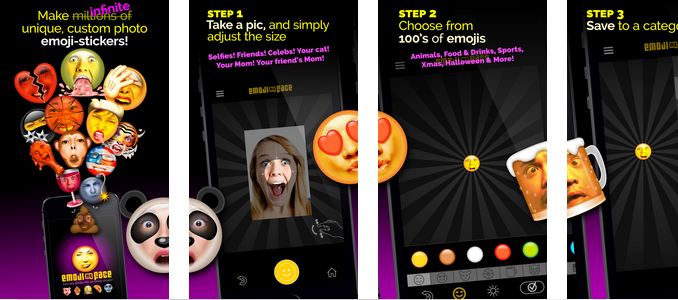
04Emoji Background Photo Maker
While there are hoards of IT alternatives to add emojis to pictures, the following utility caters to the concern in a slightly different style, ahead of just picking and pasting emojis to still captures. Working with the tool, you can experiment with changing the customary and fundamental image backgrounds into funny and appealing emoji centered themes. You are allowed to either work with a desired image from your iPhone’s media gallery, or take a fresh shot from your device’s camera, followed by uploading the same to the app’s editing interface.
Focusing on the tool’s expanse of usage features, you get tom work with a straightforward interface, and select from a wide variety of expressive and thematic emoji backgrounds. You can further, preview and save the edited images in HD quality, and share the same with friends and family across social media handles.
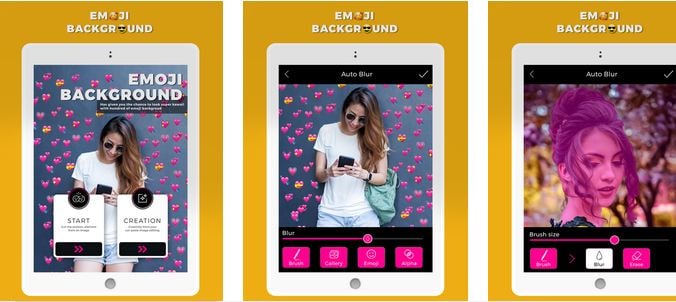
05Funny Photo Editor With Emoji Stickers Camera
This one is an innovative image editing tool that lets you create funny image transformations with classic emoji stickers, while addressing the query of how to add emojis to pictures. If your peer group consists of crazy creators who are selfie freaks, try hands at uplifting your live camera shots with this application by adding the funkiest emojis and sharing them across the regular communication platforms.
The app’s default camera feature lets you capture a straight forward image and convert the same into a hilarious edit with the latest range of free emoji stickers, caricature smileys and lots more. You can additionally beautify the edits with choosing from a decent range of emoji skin tones to suit the image background.
06Instamoji- Emoji Photo Editor
If you have been searching for an affordable solution to walk through the concern of , how to add emoji to photo on your iPhone, try working with the Instamoji application to highlight your customary images with classic emoji stickers and elements within the blink of an eye. The app welcomes you with a clean and intuitive interface to work upon, and is completely free to use.
Talking about the utility’s emoji centered image editing features, you are permitted to select from a decent collection of vibrant, funny and cool emojis, assorted under a diversity of categories to complement your images with, while exporting them across your digital communication accounts with utmost ease. The app promises you of the finest quality edited image output.
Part 2 Best 6 Tools to Put Emojis on Pictures on Android
Emojis are best known to spark up graphic artworks with an element of fun and entertainment. While the introduction of social media and digital communication utilities have brought emojis to the fingertips of modern day smartphone users, the IT market never lags behind at putting the latest transformations regarding emoji usage at your disposal.
Discussing along the line, let us talk about some interesting applications that address the concern of how to add an emoji to a photo using an Android device in what follows next:
01Add Emoji Stickers- Pics Editor and Photo Maker
This one is a smart photo editing tool that you can choose to customize the otherwise ordinary images on the local media gallery of your Android smartphone. The app greets you with an extensive range of updated emoji alternatives to suit your most specific editing requirements for complementing your elementary photos with the perfect feel and emotion.
The emojis work to add the missing fun to your social media posts with image edits funny enough to make your peers roll over with laughter. Not just smiley faces, the app delivers to you a categorized set of emojis that are a perfect fit to any graphic theme. Some of the most preferred ones include Nature, Travel, Food & Drinks, and many more. So why wait? Just get the free utility and begin to edit and share!
02Emoji Face Sticker
If you are creativity freak and love to experiment with your editing skills to put emoji on picture, try hands at working with this free image editor utility to add a fun element to your photos and give a laughter dose to your friends and family on social media. The app caters to transform your uploaded images faces to the cutest emoji look alike ever.
If that’s not enough, you can work with the app to change your smartphone’s regular camera into an emoji camera app that works to create the best caricature emoji montages from your snapped selfies. Navigating through the latte’s editing library, you will get to choose from among the craziest and coolest emoji stickers to create emoji photos out of normal stills. All in all, the app allows you to put forward your emotions in a relatively funnier way.
03Emoji Photo Editor
Are you bored of looking at those customary color backgrounds behind your images? Consider sparking them up with the cutest and most expressive emoji backgrounds. As you pick the app to edit your images, the latter grants you a complete access to its free emoji library that houses a decent collection of over 50 different emoji backgrounds to select from. A few of the most popular ones comprise of the flower and heart crown stickers, dog face camera among others.
Editing images within the app is seamless enough to last for a few seconds. You can use the created emoji background edits in a series of ways, like, preferring a local save or going for an image export to your favorite social media handle. Another cool way to show off your creativity can be making a device screen wallpaper of the emoji background image.
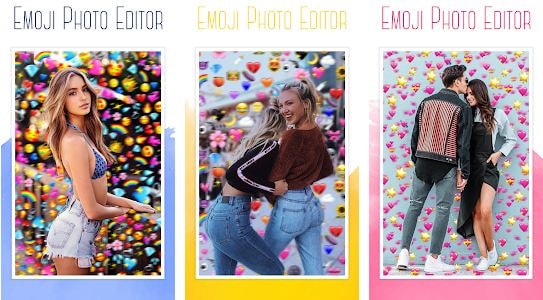
04Auto Face Stamp- Cover Face With Emoji
Looking forward to use an SNS services for media sharing purposes, but bothered about privacy concerns? While it is a common practice to share pictures via SNS and allied public platforms, most of us are often worried about keeping our faces hidden. Under normal circumstances, the face masking task is something you would ideally want to escape; the aforesaid app caters to the same in a funny and enjoyable manner.
Working with the utility, you can mask your image faces with over 100 different types of emoji stickers. The app aids you further in the task through its accurate face recognition ability that takes into consideration the smallest of faces with utmost precision. All you need to do is, select a desired emoji sticker and tap on the face you wish to mask with the same.
You can further, choose to directly export the masked images to media sharing handles right from the app’s editing workspace. The app is available to you absolutely free of cost and greets its users with a responsive working interface.

05Emoji Background Photo Editor
If the ordinary thematic backgrounds of your images do not suit you any longer, try working with this application to transmute the same into vibrant and expressive emoji alternatives. The aforesaid photo editing utility caters to make your images stand out of the crowd with beautiful emoji landscapes that render creative image edits of a matchless class, while maintaining a high-definition output image quality.
Extending the dimension of features to a longer stretch, the app grants you the liberty to adjust the position and transparency of the added emojis, set emoji frames and customize the emoji centered backgrounds with stunning effects and filters. As you finish with the editing process, the app lets you share your creations directly to a preferred social media platform, while also keeping them safe in your device’s local media gallery.
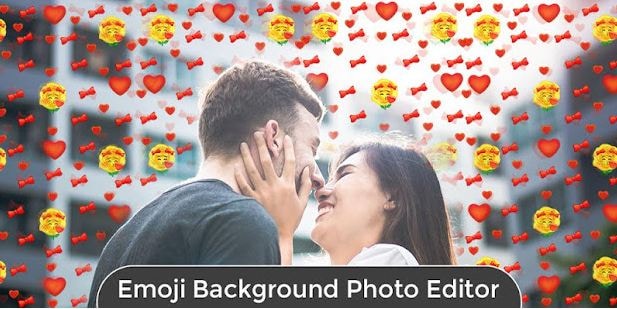
06Face Emoji Photo Effect
Reaching the end of the list, here comes the Face Emoji Photo Effect application that is all set to upgrade the level of your regular images with its classic and beautiful emoji backgrounds and stickers. The app’s editing library houses a diverse range of latest and elusive emojis to highlight your otherwise normal captures. The app additionally facilitates you with an expanded set of image editing features and effects to turn them into a graphic masterpiece.
The app welcomes you with a clean and responsive interface that makes the emoji inclusion process a quick and fun activity. All you need to do is, pick up an image from your locally saved alternatives and upload them to the app’s working interface, followed by browsing the latter’s emoji library to select a cohesive emoji background to complement the same.
You can further, download the premium emoji packs through a minimal payment to enhance the app’s library if the preset options do not match your requirements. The inbuilt emoji choices are however, free to work with.
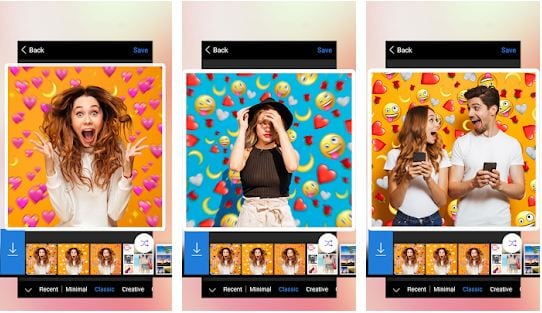
Part 3 Best 5 Tools to Put Emojis on Pictures on Computer
All of us are familiar to and love using emojis everywhere, right from commenting on regular social media posts and chat service conversations, to creating professionally sound and strategic, business centered company presentations. While the most diverse use of these graphic utilities is reported on mobile devices, you may sometimes land across an instance that demands working with emojis on a computer.
Moving ahead with our discussion to address the aforesaid concern, let us talk about some of the prominent software and online solutions to set aside the issue of how to put emojis on photos while working on a computer in the upcoming section of this article:
01Kapwing
Entering into the domain of online image editing tools, the Kapwing website easily lands among the highly preferred choices. To address the concern of adding emojis to pictures on your PC or desktop systems, this one is an affordable tool to rely on. Talking of the underlying reasons behind the app’s high rated user preference, the latter allows you to access its huge inventory of emoji stickers, distributed across a heap of categories to choose from.
Next in the line is the tool’s spic and span editing process that lets you add and customize emojis on the uploaded images with a series of effects and filters in a matter of counted seconds. You can either pick and import images from your system, or work with the app’s in house emoji templates to edit the photos. As you are done with uploading images and adding emojis, proceed to place them at the desired position within the image.
The app allows you to add multiple emoji layers to the images by facilitating the creation of duplicate copies of your favorite emojis. Once you are done with the editing process, you are free to export your creation across media handles, or save them locally to your system.
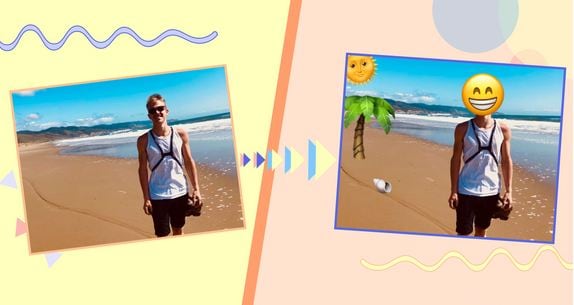
02Editor.pho.to
If you are a newbie to the world of graphic editing and want to experiment with your creative skills to sort out the need of how to add an emoji to a picture, prefer landing on this free online website to work on your images. Considering the fact that not everyone around you is a tech savvy, the aforesaid online photo editing tool is designed to house the simplest of interfaces ever. The tool is available to you absolutely free of cost, without any unfair hidden purchases.
Ahead of the basic customization features, the tool grants you the freedom to expand your graphic skills on a wider canvas with presenting before you a plethora of emoji faces, stickers and backgrounds to complement the uploaded images with. Once you have added the emoji, the tool lets you work on the latter’s position and transparency adjustments, create emoji layers and overlays and save the edits to your system in a visibly high output quality.
03Add Emoji to Photo
When looking for dependable solutions to work towards the task of how to put an emoji on a photo, you can conveniently trust the aforementioned online tool to create classic emoji photo edits from the customary still alternatives son your computer. This one is a free to use image editor facility that allows you to decorate your otherwise unnoticed images with an extensive range of preset and custom emojis to make them expressive and speak out your emotions.
The tool caters to render a high definition edited image output within seconds through the simplest of customization processes. You just need to upload a desired image from your system to the tool’s working interface, followed by picking a suitable emoji from the tool’s editing library to add it to the image. If however, the available options don’t seem to address your specific requirements, you can proceed to create custom emojis of your own within the tool.
You can also create multiple emoji layers to add to the uploaded image and make adjustments to their transparency and position within the photo. As you finish the editing process, the tool grants you the liberty to download the customized image to your system in either of the PNG or JPG file formats.
04Image Online
Another entry into the list of solutions to answer the query of how to put emojis on a photo, the Image Online tool promises you of a quality constrained image editing process to complement the basic still captures in the local media gallery of your computer with the latest collection of emoji elements. Welcoming you with a decent interface, the tool caters to sort out your emoji centered picture editing requirements within a blink’s time.
To add emoji to image with this tool, you just need to upload the selected photo to the latter’s workspace, followed by selecting a preferred emoji from the editing library, or create a custom emoji of your own, to put on the image. You can customize the emoji settings in terms of position, size and transparency, and download the edits to your device in JPG and PNG image formats.
05Canva
Last in the list is the Canva graphic editing tool which you can conveniently work with to add an emoji to a picture. Having a slightly different image editing process in comparison to its online counterparts, the utility requires you to sign up to its working interface to begin editing your photos. To start with, you need to select a preset image template or pick customized dimensions to upload the desired image.
To add emojis to your picture, you will have to download the latter’s application by navigating to and tapping the ‘More’ icon, followed by choosing the ‘Emoji’ option from the drop down menu that appears next. Once the ‘Emoji’ tab shows up in the tool’s main interface, proceed to upload your image and pick a suitable emoji from the list to add to the uploaded image. You can further, add layers of emojis to the picture, while resizing and adjusting the skin tones of the same.
Part 4 Adding Emoji to Photo Q&A
● What is the total number of emoji characters till date?
As of September 2021, a total of 3,633 emojis are known to have been introduced so far. Talking of the latest emoji package, there comes the Emoji 14.0, adding 112 emoji variations to the existing count. The aforesaid is a cumulative figure, including the skin tone, gender and flag sequences.
● What are the different types of emoji categories?
During the current time, the emoji characterization is known to house 8 different categories, namely, Flags, Symbols, Objects, Travel, Activity, Food & Drink, Animals & Nature and Smileys & People.
● What is the difference between Emoji and Emoticons?
Emoticons are specifically, graphic interpretations of the various human emotions that come with a keyboard command combination. Emojis on the other hand, are a standard set of various characters, often having a different artwork, but a universal meaning.
● Is it possible to self-create custom emojis?
As of now, having self-created variants of emojis is not possible. If at all, you become successful in design a character that resembles an emoji, you can use it as an image at the most. In an attempt to share it as an emoji, you will end up sending text combinations.
● What is the best software alternative to add emojis to pictures?
When looking for an affordable software solution for catering to the concern of how to add emojis to a photo, you can go for picking the Wondershare Filmora Video Editor graphic editing program, whose editing library literally houses the largest and the latest collection of emoji categories and varieties for sparking up your images with the best possible customized appearance.
For Win 7 or later (64-bit)
For macOS 10.12 or later
● Ending Thoughts →
● Adding emojis to pictures has landed among the latest and most preferred graphic editing trends of current times.
● When beginning to address the concern of how do you add emojis to pictures, the IT market puts a diversity of software and online solutions before you.
● If you are confused about making the best choice, you can pick the Wondershare Filmora graphic editor program without having to think twice.
Emojis are catchy graphic elements that can add life to your photos, videos and allied artworks within a wink. Be here to know about the most exciting how-tos!
In this article
01 [Best 6 Tools to Put Emojis on Pictures on iPhone](#Part 1)
02 [Best 6 Tools to Put Emojis on Pictures on Android](#Part 2)
03 [Best 5 Tools to Put Emojis on Pictures on Computer](#Part 3)
Part 1 Best 6 Tools to Put Emojis on Pictures on iPhone
Emojis have managed to secure enough significance in our social and professional lives across social media platforms in the current time. Be it a fun-filled conversation with friends and family on a chat service program, or a high end and professionally sound business strategy, these mini caricature pieces of graphic art can add the much needed highlight to almost every aspect of your digital communication concerns.
Now that you are aware of the utility of working with emojis to make your digital contents, let us take a dive into some of the best ways and means to make your iPhone images come alive in the following section:
01Emoji Picture Editor- Add Emojis to Your Photos
If you like to imbibe the images on your iPhone media gallery with a hoard of funny and cool emojis, this one is a perfect app to address the concern. The tool’s library houses the latest collection of emoji categories to be in line with a diversity of photo styles, themes and backgrounds. You can take your pick from the huge inventory of over 1500 different emojis to level up your photos.
Talking about the app interface and usage controls, you are granted full liberty to add emojis to your emojis, while changing their positions through a finger drag, or scale and rotate them by expanding, pinching and twisting your fingers. The app additionally allows you to send bigger emoji stickers on chats and conversations.
02Insta Emoji Photo Editor
When looking for an interesting and reliable application to set straight the concern of how to put emojis on pictures, the Insta Emoji Photo Editor is an affordable pick. Loaded with an enormous and updated emoji library, the app presents before you over 3200 fascinating emoji options to select from and add to your images.
The inclusion process is intuitively simple, with you just having to upload the desired images to the app’s working interface and choose from your most favorite emoji elements to make the stills come alive with added fun and spark. The app houses an interesting ’Emoji Paint’ feature for the extensively creative ones to let them create catchy drawings with the coolest emojis.
03Emoji My Face
Moving ahead in the list comes the aforesaid app, which you can conveniently rely on to get through the photo edit emoji task in less than a few seconds. What’s unique about the utility is its feature that lets you add emoji stickers on the faces of your image elements. Working with the app, you can transform the skinned appearances of your friends and family into hilarious emoji faces.
While the app permits you to pick any number of preferences from its latest and updated emoji collection, you can additionally, save and share your emoji centered image edits across a diversity of media sharing platforms and chat service programs.
04Emoji Background Photo Maker
While there are hoards of IT alternatives to add emojis to pictures, the following utility caters to the concern in a slightly different style, ahead of just picking and pasting emojis to still captures. Working with the tool, you can experiment with changing the customary and fundamental image backgrounds into funny and appealing emoji centered themes. You are allowed to either work with a desired image from your iPhone’s media gallery, or take a fresh shot from your device’s camera, followed by uploading the same to the app’s editing interface.
Focusing on the tool’s expanse of usage features, you get tom work with a straightforward interface, and select from a wide variety of expressive and thematic emoji backgrounds. You can further, preview and save the edited images in HD quality, and share the same with friends and family across social media handles.
05Funny Photo Editor With Emoji Stickers Camera
This one is an innovative image editing tool that lets you create funny image transformations with classic emoji stickers, while addressing the query of how to add emojis to pictures. If your peer group consists of crazy creators who are selfie freaks, try hands at uplifting your live camera shots with this application by adding the funkiest emojis and sharing them across the regular communication platforms.
The app’s default camera feature lets you capture a straight forward image and convert the same into a hilarious edit with the latest range of free emoji stickers, caricature smileys and lots more. You can additionally beautify the edits with choosing from a decent range of emoji skin tones to suit the image background.
06Instamoji- Emoji Photo Editor
If you have been searching for an affordable solution to walk through the concern of , how to add emoji to photo on your iPhone, try working with the Instamoji application to highlight your customary images with classic emoji stickers and elements within the blink of an eye. The app welcomes you with a clean and intuitive interface to work upon, and is completely free to use.
Talking about the utility’s emoji centered image editing features, you are permitted to select from a decent collection of vibrant, funny and cool emojis, assorted under a diversity of categories to complement your images with, while exporting them across your digital communication accounts with utmost ease. The app promises you of the finest quality edited image output.
Part 2 Best 6 Tools to Put Emojis on Pictures on Android
Emojis are best known to spark up graphic artworks with an element of fun and entertainment. While the introduction of social media and digital communication utilities have brought emojis to the fingertips of modern day smartphone users, the IT market never lags behind at putting the latest transformations regarding emoji usage at your disposal.
Discussing along the line, let us talk about some interesting applications that address the concern of how to add an emoji to a photo using an Android device in what follows next:
01Add Emoji Stickers- Pics Editor and Photo Maker
This one is a smart photo editing tool that you can choose to customize the otherwise ordinary images on the local media gallery of your Android smartphone. The app greets you with an extensive range of updated emoji alternatives to suit your most specific editing requirements for complementing your elementary photos with the perfect feel and emotion.
The emojis work to add the missing fun to your social media posts with image edits funny enough to make your peers roll over with laughter. Not just smiley faces, the app delivers to you a categorized set of emojis that are a perfect fit to any graphic theme. Some of the most preferred ones include Nature, Travel, Food & Drinks, and many more. So why wait? Just get the free utility and begin to edit and share!
02Emoji Face Sticker
If you are creativity freak and love to experiment with your editing skills to put emoji on picture, try hands at working with this free image editor utility to add a fun element to your photos and give a laughter dose to your friends and family on social media. The app caters to transform your uploaded images faces to the cutest emoji look alike ever.
If that’s not enough, you can work with the app to change your smartphone’s regular camera into an emoji camera app that works to create the best caricature emoji montages from your snapped selfies. Navigating through the latte’s editing library, you will get to choose from among the craziest and coolest emoji stickers to create emoji photos out of normal stills. All in all, the app allows you to put forward your emotions in a relatively funnier way.
03Emoji Photo Editor
Are you bored of looking at those customary color backgrounds behind your images? Consider sparking them up with the cutest and most expressive emoji backgrounds. As you pick the app to edit your images, the latter grants you a complete access to its free emoji library that houses a decent collection of over 50 different emoji backgrounds to select from. A few of the most popular ones comprise of the flower and heart crown stickers, dog face camera among others.
Editing images within the app is seamless enough to last for a few seconds. You can use the created emoji background edits in a series of ways, like, preferring a local save or going for an image export to your favorite social media handle. Another cool way to show off your creativity can be making a device screen wallpaper of the emoji background image.
04Auto Face Stamp- Cover Face With Emoji
Looking forward to use an SNS services for media sharing purposes, but bothered about privacy concerns? While it is a common practice to share pictures via SNS and allied public platforms, most of us are often worried about keeping our faces hidden. Under normal circumstances, the face masking task is something you would ideally want to escape; the aforesaid app caters to the same in a funny and enjoyable manner.
Working with the utility, you can mask your image faces with over 100 different types of emoji stickers. The app aids you further in the task through its accurate face recognition ability that takes into consideration the smallest of faces with utmost precision. All you need to do is, select a desired emoji sticker and tap on the face you wish to mask with the same.
You can further, choose to directly export the masked images to media sharing handles right from the app’s editing workspace. The app is available to you absolutely free of cost and greets its users with a responsive working interface.
05Emoji Background Photo Editor
If the ordinary thematic backgrounds of your images do not suit you any longer, try working with this application to transmute the same into vibrant and expressive emoji alternatives. The aforesaid photo editing utility caters to make your images stand out of the crowd with beautiful emoji landscapes that render creative image edits of a matchless class, while maintaining a high-definition output image quality.
Extending the dimension of features to a longer stretch, the app grants you the liberty to adjust the position and transparency of the added emojis, set emoji frames and customize the emoji centered backgrounds with stunning effects and filters. As you finish with the editing process, the app lets you share your creations directly to a preferred social media platform, while also keeping them safe in your device’s local media gallery.
06Face Emoji Photo Effect
Reaching the end of the list, here comes the Face Emoji Photo Effect application that is all set to upgrade the level of your regular images with its classic and beautiful emoji backgrounds and stickers. The app’s editing library houses a diverse range of latest and elusive emojis to highlight your otherwise normal captures. The app additionally facilitates you with an expanded set of image editing features and effects to turn them into a graphic masterpiece.
The app welcomes you with a clean and responsive interface that makes the emoji inclusion process a quick and fun activity. All you need to do is, pick up an image from your locally saved alternatives and upload them to the app’s working interface, followed by browsing the latter’s emoji library to select a cohesive emoji background to complement the same.
You can further, download the premium emoji packs through a minimal payment to enhance the app’s library if the preset options do not match your requirements. The inbuilt emoji choices are however, free to work with.
Part 3 Best 5 Tools to Put Emojis on Pictures on Computer
All of us are familiar to and love using emojis everywhere, right from commenting on regular social media posts and chat service conversations, to creating professionally sound and strategic, business centered company presentations. While the most diverse use of these graphic utilities is reported on mobile devices, you may sometimes land across an instance that demands working with emojis on a computer.
Moving ahead with our discussion to address the aforesaid concern, let us talk about some of the prominent software and online solutions to set aside the issue of how to put emojis on photos while working on a computer in the upcoming section of this article:
01Kapwing
Entering into the domain of online image editing tools, the Kapwing website easily lands among the highly preferred choices. To address the concern of adding emojis to pictures on your PC or desktop systems, this one is an affordable tool to rely on. Talking of the underlying reasons behind the app’s high rated user preference, the latter allows you to access its huge inventory of emoji stickers, distributed across a heap of categories to choose from.
Next in the line is the tool’s spic and span editing process that lets you add and customize emojis on the uploaded images with a series of effects and filters in a matter of counted seconds. You can either pick and import images from your system, or work with the app’s in house emoji templates to edit the photos. As you are done with uploading images and adding emojis, proceed to place them at the desired position within the image.
The app allows you to add multiple emoji layers to the images by facilitating the creation of duplicate copies of your favorite emojis. Once you are done with the editing process, you are free to export your creation across media handles, or save them locally to your system.
02Editor.pho.to
If you are a newbie to the world of graphic editing and want to experiment with your creative skills to sort out the need of how to add an emoji to a picture, prefer landing on this free online website to work on your images. Considering the fact that not everyone around you is a tech savvy, the aforesaid online photo editing tool is designed to house the simplest of interfaces ever. The tool is available to you absolutely free of cost, without any unfair hidden purchases.
Ahead of the basic customization features, the tool grants you the freedom to expand your graphic skills on a wider canvas with presenting before you a plethora of emoji faces, stickers and backgrounds to complement the uploaded images with. Once you have added the emoji, the tool lets you work on the latter’s position and transparency adjustments, create emoji layers and overlays and save the edits to your system in a visibly high output quality.
03Add Emoji to Photo
When looking for dependable solutions to work towards the task of how to put an emoji on a photo, you can conveniently trust the aforementioned online tool to create classic emoji photo edits from the customary still alternatives son your computer. This one is a free to use image editor facility that allows you to decorate your otherwise unnoticed images with an extensive range of preset and custom emojis to make them expressive and speak out your emotions.
The tool caters to render a high definition edited image output within seconds through the simplest of customization processes. You just need to upload a desired image from your system to the tool’s working interface, followed by picking a suitable emoji from the tool’s editing library to add it to the image. If however, the available options don’t seem to address your specific requirements, you can proceed to create custom emojis of your own within the tool.
You can also create multiple emoji layers to add to the uploaded image and make adjustments to their transparency and position within the photo. As you finish the editing process, the tool grants you the liberty to download the customized image to your system in either of the PNG or JPG file formats.
04Image Online
Another entry into the list of solutions to answer the query of how to put emojis on a photo, the Image Online tool promises you of a quality constrained image editing process to complement the basic still captures in the local media gallery of your computer with the latest collection of emoji elements. Welcoming you with a decent interface, the tool caters to sort out your emoji centered picture editing requirements within a blink’s time.
To add emoji to image with this tool, you just need to upload the selected photo to the latter’s workspace, followed by selecting a preferred emoji from the editing library, or create a custom emoji of your own, to put on the image. You can customize the emoji settings in terms of position, size and transparency, and download the edits to your device in JPG and PNG image formats.
05Canva
Last in the list is the Canva graphic editing tool which you can conveniently work with to add an emoji to a picture. Having a slightly different image editing process in comparison to its online counterparts, the utility requires you to sign up to its working interface to begin editing your photos. To start with, you need to select a preset image template or pick customized dimensions to upload the desired image.
To add emojis to your picture, you will have to download the latter’s application by navigating to and tapping the ‘More’ icon, followed by choosing the ‘Emoji’ option from the drop down menu that appears next. Once the ‘Emoji’ tab shows up in the tool’s main interface, proceed to upload your image and pick a suitable emoji from the list to add to the uploaded image. You can further, add layers of emojis to the picture, while resizing and adjusting the skin tones of the same.
Part 4 Adding Emoji to Photo Q&A
● What is the total number of emoji characters till date?
As of September 2021, a total of 3,633 emojis are known to have been introduced so far. Talking of the latest emoji package, there comes the Emoji 14.0, adding 112 emoji variations to the existing count. The aforesaid is a cumulative figure, including the skin tone, gender and flag sequences.
● What are the different types of emoji categories?
During the current time, the emoji characterization is known to house 8 different categories, namely, Flags, Symbols, Objects, Travel, Activity, Food & Drink, Animals & Nature and Smileys & People.
● What is the difference between Emoji and Emoticons?
Emoticons are specifically, graphic interpretations of the various human emotions that come with a keyboard command combination. Emojis on the other hand, are a standard set of various characters, often having a different artwork, but a universal meaning.
● Is it possible to self-create custom emojis?
As of now, having self-created variants of emojis is not possible. If at all, you become successful in design a character that resembles an emoji, you can use it as an image at the most. In an attempt to share it as an emoji, you will end up sending text combinations.
● What is the best software alternative to add emojis to pictures?
When looking for an affordable software solution for catering to the concern of how to add emojis to a photo, you can go for picking the Wondershare Filmora Video Editor graphic editing program, whose editing library literally houses the largest and the latest collection of emoji categories and varieties for sparking up your images with the best possible customized appearance.
For Win 7 or later (64-bit)
For macOS 10.12 or later
● Ending Thoughts →
● Adding emojis to pictures has landed among the latest and most preferred graphic editing trends of current times.
● When beginning to address the concern of how do you add emojis to pictures, the IT market puts a diversity of software and online solutions before you.
● If you are confused about making the best choice, you can pick the Wondershare Filmora graphic editor program without having to think twice.
How to Create the Stranger Things Upside Down Effect
With stranger things season 4 ending, it seems like great timing to make a stranger things style transition to the Upside Down. In the Netflix series Stranger Things, there is an opposite version of our world called the Upside Down. The Upside Down is dark, creepy, and possibly filled with aliens, monsters, creatures, and other things.
Now, you can also apply the Stranger Things Upside Down Effect to your video! This effect combines camera tricks and video editing within Filmora to transition from the normal world into the Upside Down.
How-to Guide
1) Preparation
To make this effect, you will need two footage shots: one with the camera moving down and one with the camera coming back up.
When shooting for the footage, follow the steps below:
First shot
- Find any item close enough to the ground that we can block our frame with.

- Once you have your talent lined up, rotate your camera while lowering it below the foreground item at a constant speed and leaving the camera there. The key is making sure when you go behind the object, the frame is nothing but black.

For the next scene, have your actor change positions, or you can change the set around to look like the Upside Down. For instance, adding fake plants and flickering lights.
Second shot
Start bringing your camera back up at the same speed and rotate it again in the direction it was moving.

2) Steps
After you have all the footage, you can start editing it on Filmora. If you haven’t installed it yet, you can download Filmora at their official website at https://filmora.wondershare.com .
Free Download For Win 7 or later(64-bit)
Free Download For macOS 10.14 or later
Now, launch Filmora on your PC and follow the steps below:
Step1 Take your first clip in the “normal” world and drag it down to a video track on the timeline. Trim the edge of the clip, so it ends on pure black and in a downward motion.

Step2 Drag the second clip (in the Upside Down) onto the video track on the timeline after the first clip. Trim this video, so it begins in pure black and an upward motion.

Cut the clips to get the timing right since it should be a very fast transition. You can cut in the black frames so they won’t be too apparent.
If you don’t have a perfectly smooth transition, you can add a dissolve by going to Transitions > Basic > Dissolve.

Color Grading and Effects
After the transition, you can make the clip look a lot more like the Upside Down from the show with a color grade and Filmora effects. Follow the steps below:
Step1 Double-click on your second clip, then go to Color > Advanced. For a quick edit, you can try one of the presets available, such as “cool film.” It will give you the colder blue tones that Stranger Things used for the Upside Down.

Step2 You can further edit the color grading in the white balance menu. Drag the slider to the left to get a blue, cold vibe for the Upside Down.
The “cool” or “warm” color grading technically talks about color temperature. A “warmer” look will be more orange, and a “colder” look will be bluer. You can also use the tint slider to fine-tune the look.

Step3 Next, move down to the color, lower the brightness and increase contrast. It makes the scene darker and more sinister than the normal world.

Step4 Finally, go down to the vignette and drag the amount slider a tiny bit to give a Vinnette around your clip.

3) Pro Tips
You can still make your clip look even more like Upside Down with some Filmora elements.
Go to Elements > Smoke > Smokescreen 2. Drag this element on top of your Upside Down clip and trim it, so it starts at the same time the clip leaves the black frame.

You can adjust the opacity by double-clicking the smoke effect to open the setting.
Finally, go to the Transition > Basic > Dissolve to the start of the smoke and adjust it when the smoke gradually appears.

Resources from Filmostock
You can also use filmstock effects to bring our video to the next level. Go to Elements > Fire > Large Scale 12 and drag it down on top of your clip and the smoke.

Double-click the clip and change the scale of the effect to your needs. Then, go to compositing to change the blending mode to the screen to help the effect blend in more.

Now, go to color and open the white balance menu. Drag the two sliders to change the color of the particles to match your clip.

Summary
That is all you need to make a Stranger Things Upside Down effects to your video. Let us know if there are any other effects from tv shows you want to learn how to make.
Free Download For macOS 10.14 or later
Now, launch Filmora on your PC and follow the steps below:
Step1 Take your first clip in the “normal” world and drag it down to a video track on the timeline. Trim the edge of the clip, so it ends on pure black and in a downward motion.
Step2 Drag the second clip (in the Upside Down) onto the video track on the timeline after the first clip. Trim this video, so it begins in pure black and an upward motion.
Cut the clips to get the timing right since it should be a very fast transition. You can cut in the black frames so they won’t be too apparent.
If you don’t have a perfectly smooth transition, you can add a dissolve by going to Transitions > Basic > Dissolve.
Color Grading and Effects
After the transition, you can make the clip look a lot more like the Upside Down from the show with a color grade and Filmora effects. Follow the steps below:
Step1 Double-click on your second clip, then go to Color > Advanced. For a quick edit, you can try one of the presets available, such as “cool film.” It will give you the colder blue tones that Stranger Things used for the Upside Down.
Step2 You can further edit the color grading in the white balance menu. Drag the slider to the left to get a blue, cold vibe for the Upside Down.
The “cool” or “warm” color grading technically talks about color temperature. A “warmer” look will be more orange, and a “colder” look will be bluer. You can also use the tint slider to fine-tune the look.
Step3 Next, move down to the color, lower the brightness and increase contrast. It makes the scene darker and more sinister than the normal world.
Step4 Finally, go down to the vignette and drag the amount slider a tiny bit to give a Vinnette around your clip.
3) Pro Tips
You can still make your clip look even more like Upside Down with some Filmora elements.
Go to Elements > Smoke > Smokescreen 2. Drag this element on top of your Upside Down clip and trim it, so it starts at the same time the clip leaves the black frame.
You can adjust the opacity by double-clicking the smoke effect to open the setting.
Finally, go to the Transition > Basic > Dissolve to the start of the smoke and adjust it when the smoke gradually appears.
Resources from Filmostock
You can also use filmstock effects to bring our video to the next level. Go to Elements > Fire > Large Scale 12 and drag it down on top of your clip and the smoke.
Double-click the clip and change the scale of the effect to your needs. Then, go to compositing to change the blending mode to the screen to help the effect blend in more.
Now, go to color and open the white balance menu. Drag the two sliders to change the color of the particles to match your clip.
Summary
That is all you need to make a Stranger Things Upside Down effects to your video. Let us know if there are any other effects from tv shows you want to learn how to make.
Also read:
- In 2024, Powerpoint Slideshow Icon, Slide Sorter View Icon, Slideshow Icon Powerpoint, Slide Show View Icon
- The Ultimate Guide to Use LUTS to Color Grade on iPhone for 2024
- Updated 2024 Approved How Can You Deny These Top 10 Free Speech to Text Software
- Want to Imbibe Your Graphic Expertise with Designing Classic iMovie Presentations? Be Here to Work Through the Process Within the Quickest Possible Time Span for 2024
- New How to Use Twixtor Effect to Create Super Slow-Motion Video, In 2024
- In 2024, Good Ways to Make Sure Your Video Editing Course Is Worthing to Watch
- New 2024 Approved How To Trim Video In Premiere Pro in Different Ways
- Updated Want to Know the Simplest Way to Match the Colors of Your Photos in Photoshop? The Following Discussion Will Help Match Color in Photoshop, Almost Effortlessly
- Updated In 2024, 10 Mind-Blowing Video Collage Maker for PC
- In 2024, How to Make a YouTube Intro by Filmora
- Updated Is Augmented Reality Conferencing the Future of Workplace Collaboration for 2024
- New 2024 Approved Best Free LUTs To Use in Shotcut
- 2024 Approved How to Concatenate Videos Using FFmpeg
- Updated How D AI Video Games Act More Human Than Human?
- New In 2024, Zoom In and Out on Discord
- New 2024 Approved How To Create Quiz Videos Detailed Guide
- Updated How to Export Video From iMovie
- In 2024, AVI Editor for Windows 11/10/8.1/8/7 Easily Edit AVI Files on PC
- 2024 Approved Want to Learn How to Crop or Trim Video in PowerPoint? We Have Got You Covered; We Have Given a Step-by-Step Guide that Will Allow You to Trim and Crop Videos Using This Presentation Program
- Updated Separate Audio From Video in DaVinci Resolve Step by Step
- Updated 2024 Approved 2 Ways to Fade in Text in Premiere Pro
- Hassle-Free Ways to Remove FRP Lock from Nokia 105 Classic Phones with/without a PC
- How Do I Stop Someone From Tracking My Apple iPhone 7? | Dr.fone
- Can I recover permanently deleted photos from Realme Narzo 60x 5G
- How To Remove the Two Factor Authentication On Apple iPhone XS Max
- Top 4 Android System Repair Software for Realme GT Neo 5 Bricked Devices | Dr.fone
- How To Fix OEM Unlock Missing on Infinix Hot 30 5G?
- Catch or Beat Sleeping Snorlax on Pokemon Go For Lava Agni 2 5G | Dr.fone
- In 2024, How to Hide/Fake Snapchat Location on Your Motorola Razr 40 | Dr.fone
- How To Reset iPhone 14 Pro Without iTunes? | Dr.fone
- How To Create an Apple Developer Account From Apple iPhone XS
- How to Soft Reset Oppo A1x 5G phone? | Dr.fone
- Best Ways on How to Unlock/Bypass/Swipe/Remove Infinix GT 10 Pro Fingerprint Lock
- In 2024, Best Anti Tracker Software For Vivo Y100i | Dr.fone
- Why Your WhatsApp Live Location is Not Updating and How to Fix on your Realme V30 | Dr.fone
- Title: 2024 Approved How to Resize FLV Video EfficientlyWindows, Mac, Android, iPhone &
- Author: Chloe
- Created at : 2024-04-24 07:08:12
- Updated at : 2024-04-25 07:08:12
- Link: https://ai-editing-video.techidaily.com/2024-approved-how-to-resize-flv-video-efficientlywindows-mac-android-iphone-and/
- License: This work is licensed under CC BY-NC-SA 4.0.
