
:max_bytes(150000):strip_icc():format(webp)/GettyImages-753288077-5bb0f9b2cff47e00261aa8fc.jpg)
2024 Approved How to Shoot Cinematic Footage From a Smartphone
How to Shoot Cinematic Footage From a Smartphone
Creating cinematic videos is easy if you have expensive equipment like a film set with high-quality cameras. But many of us can’t afford this, so read this article to get an alternative.
You can use smartphones to record cinematic shots if you don’t have expensive lenses. You’ll learn about filming and editing those shots into Wondershare Filmora to get professional results in the below lines.
But before we get into the filming process, having a general idea about the topic can help a lot. So first, let’s understand what cinematic videos are!
Part 1. What Is a Cinematic Video?
The world of cinema has developed and has high recording quality. A cinematic video is a video that is recorded to look more like a movie. These shots excel in all aspects of a video, such as Color, aspect ratio, and lighting techniques.
Most of the cinematic footage required unique cameras, i.e., IMAX cameras for movies. But these cameras are really costly and only suitable for large-scale production.
With the understanding of cinematic videos, you can now use alternative ways to record a cinematic video without an expensive camera. You can also record a cinematic video using only a smartphone with a few requirements.
Scroll below to learn more about what you need to record a cinematic video!
Part 2. Requirements to Record a Cinematic Video
To record a professional video with cinematic effects, you must have the following equipment in your studio:
1. A Gimbal Stabilizer
When you are recording footage from your smartphone, a significant issue that can disturb your video quality is the shaking of your phone. You may have to record while walking, or it could even be a static shot.
If the phone is held in your hands without support, you will end up with shaky footage. This will eventually ruin your video.
A gimbal stabilizer allows you to stabilize your footage with a handheld stand. Many gimbal stabilizers are available in the market, but for reference, we would be looking at the Q3 Gimbal from Zhiyun.

You can also connect the Gimbal from its app. Scroll below to learn more about the app!
Zhiyun Cami App
Zhiyun Q3 stabilizer also connects with the Zhiyun cami app. This app will allow users to access the filming features more intuitively and comprehensively. You can connect your Gimbal with the app via Bluetooth.

Zhiyun Stabilizer Shooting Modes
There are many modes on different Gimbals, but the Locking and the POV mode are the most useful, which are illustrated as shown below:
- The Locking mode: This mode allows you to lock all three motors of the Gimbal and allows your phone to remain fixed at a certain angle. Due to this, you can shoot your footage from multiple positions while keeping the camera fixed at one angle.
- The POV mode will allow you to unlock all the axes. This mode will also adjust in all three axes when moving around. This feature gives you more freedom of movement.

Extra Features of Zhiyun Q3 Stabilizer
When you are shooting a video using the Gimbal stabilizer, you come across a point where you want extra light. Thus, the Q3 stabilizer comes with a built-in flashlight.
This flashlight will not only light up those small corners of a dark room but also make a huge difference. If you are recording to focus on an object, such as a product, this flashlight will greatly help you.

You can also turn the flashlight towards yourself if you are recording a Vlog or taking a selfie. The light’s temperature is 4300K, giving a relatively warm light on the subject.

2. A Good Smartphone
Most smartphones these days are equipped with cameras with varying powers of recording. Some smartphone cameras focus on Mega Pixels, while others focus on the capture sensor. You need a smartphone camera that balances out all these qualities to record cinematic footage.
The recently released iPhone 14 pro camera is an excellent example of a good quality camera you can use to record cinematic videos.

3. Video Editing Software
There is no better software in the video editing field than the infamous Wondershare Filmora. It allows you to edit high-quality videos with creative features.
Wondershare Filmora allows access to the range of effects and filters you can apply to your videos to give them a more cinematic look. It also allows you to access the vast library of audio to utilize in your videos. Moreover, its engaging UI allows beginners to access to features of Wondershare Filmora easily.

Now that we have learned about the requirements for recording a cinematic video. Let’s look at the different cinematic movements you can use to record from your Smartphone.
Part 3. Top 3 Cinematic Movements to Record From a Smartphone
You may have watched many movies or TV shows, but the general audience usually ignores the effort put into a shot. Only an experienced videographer can detect the difference between a great cinematic shot and a poor one.
Of the great cinematic shots, some are described in this article. These shots can easily record by using a smartphone. The cinematic movements explained below are the best choice. Here we will look at the three camera movements you can record on your smartphone.
- The Reveal Movement.
- The 180° Presentation Movement.
- The Following Movement.
First, let’s take a look at the Reveal movement.
1. The Reveal Movement
This is the most popular movement used in cinematic shooting from your smartphone. With a Gimbal, the Reveal movement is one of the easiest shots to master. But for this, you will need to learn it first.
The Reveal Movement is a shot taken with an object as a perspective. The shot starts from a static object in the foreground. It could be focused at first, but as the camera moves, the focus will be diverted to reveal our target object. This is known as the Reveal Movement.
To shoot the reveal movement, follow the steps mentioned as shown:
- First, ensure your phone is connected properly to the Gimbal.
- Align your Smartphone camera behind the static object.
- Guide the target individual to be ready as you move the camera to reveal them.
- Slowly move the camera, focusing on the static object to change its focus on your main object.

![]()
Note: Make sure to practice and experiment a lot with the steps. Try to be more creative and innovative. With every video you shoot, you gain experience with the errors.
Another thing to remember is that when you are shooting a Reveal movement using the Gimbal, it is best to put it in Locking mode. This mode works the best as it allows the camera to stay fixed in one frame making your footage seem balanced and of quality.

2. The 180° Presentation Movement
The next movement we will be looking at will be the 180° presentation movement. The 180° presentation will move in a half-circle fashion. It will move from one side of the subject to the other side. This will allow you to cover the overall subject’s view.
Apart from that, it will allow you to capture the background with much clarity and detail to maintain a general sense of the ambiance. Making a 180° presentation shot is fairly easy to do so. With its multiple uses, you can use this method in any scenario.
As we will move from one side to the other in a circular manner, we need to fix the frame of our video to move along. Using the POV mode of the Zhiyun Gimbal stabilizer will be the best option in this sense.

Setting the Gimbal in POV mode will allow you to shoot the video from more than one angle while keeping the video balanced. Follow the steps mentioned to shoot a 180° presentation video:
- First, start recording from one side of the subject while keeping the Gimbal in the POV mode.
- Slowly start moving in front of the subject in an arch.
- When you face the subject, do not stop and keep moving to complete the arch.
- When you reach the end of the arch, close the video.

By following the steps mentioned, you can create the 180° presentation movement using a smartphone. Now, move forward to learn about “The Following movement.”
3. The Following Movement
You can use “The following movement” when recording a scene in which the object moves in random directions. Or when there is a high degree of movement of your object in the video, and you want to fix the focus of your footage to that object.
The Following movement is not technically a movement, but a setting that will allow you to record the footage while keeping the object and the video frame focused. In this type of footage, we will use the Zhiyun Cami app to focus on our target object.

To focus on our subject in the video by Cami app, follow the steps mentioned below:
- When recording the video, make sure to put the Gimbal on a tripod stand.
- After that, open the Cami app and draw a square over the object you want to keep in focus.
- Now, the camera will shift its angle to its perspective wherever the object goes.

This is how you will create the following movement.
Part 4. Edit the Clips with Wondershare Filmora
Now that we have recorded our footage, it is time to arrange it and apply the finishing touches. We are going to use Wondershare Filmora for editing the recorded footage.
Free Download For Win 7 or later(64-bit)
Free Download For macOS 10.14 or later
Follow the steps mentioned below to edit on Wondershare Filmora!
Step1 Download Wondershare Filmora
To download Wondershare Filmora, follow the steps outlined below:
- First, download the Wondershare Filmora.
- When the download is finished, click on the setup.
- The Wondershare Filmora installer will begin to load.
- Then you will have installed Wondershare Filmora on your PC or Mac.
If you want to purchase the premium plan’s features, check out the Wondershare Filmora Premium plans.
Step2 Add clips to the timeline
After downloading the Wondershare Filmora app, we must create a workplace. To do so, follow the steps mentioned:
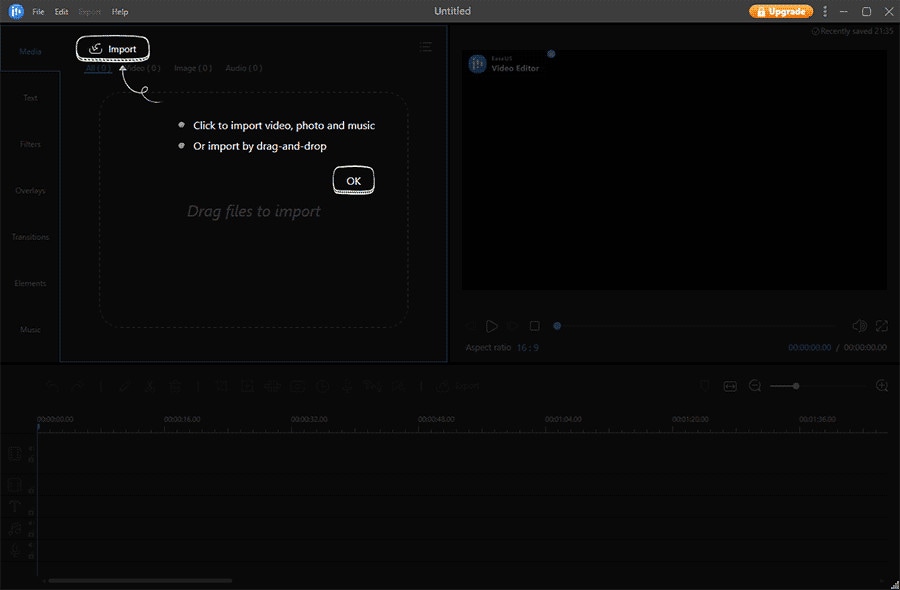
- First of all, click on the import icon in the upper left corner of the home interface of Wondershare Filmora. This will open up your PC library.
- Then Import your footage in the import window.
- Click and drag to drop the footage in the Timeline.

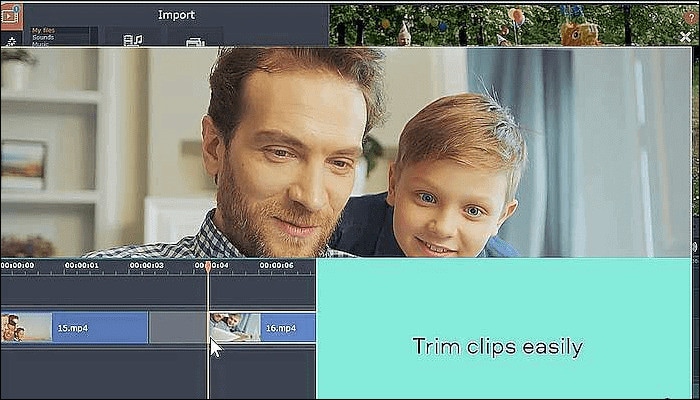
Step3 Trim the Video Clips
After you have added the clips to the timeline, you may have some extra footage you don’t want. Go through the clips you added and trim them according to your wish.
Step4 Add The Effects
After you have trimmed the clips now, you will have to add the finishing touches. To perform this, follow the below instructions:
- Go to the effects icon on the upper bar above the import window.
- Here, you can see the range of effects Wondershare Filmora Provides. Select the one you want for your video.
- You can also search for effects from the search bar.
- Once you have found the effect you want, download it if not been downloaded before.
- Click and drag it to drop below your clips to add the effect.
- Double-click on the effect that you added to adjust its settings.
- Here, you can adjust the opacity to your liking.

Now that we have added the Effects, it is time to add the Overlays!
Step5 Add Overlays
You can also add overlays on your videos to make them pop up even more. You can add Overlays by the following steps:
- In the effects icon on the bar above the import window, you can see the multiple effects of Wondershare Filmora.
- In the left column, you can also see the Filters and Overlays.
- Go to the Overlay
- Select the Overlay that you want.
- Then click and drag it above your video.
- You can also add a border to your video by searching “Border” in the search bar and dragging it below your clips.

Step6 Add Some Music
To finish off your editing, you can also add audio music from the Wondershare Filmora Audio library:
- Before adding the audio music, make sure to lower the volume of your video clips.
- You can do so by dragging below the audio tab on your video clips in the timeline.
- Go to the Audio icon on the bar above the import window.
- Here, you can see the multiple audio available.
- Browse through the library till you find suitable audio.
- Download it and drag it below on the timeline.

Now play the Video from the beginning to see the final looks.

Congratulations! You have now successfully created a cinematic video using Wondershare Filmora.
Conclusion
Using expensive equipment to record a cinematic video can be a reliable step. But it is not in everyone’s budget. You can also use a smartphone to record a cinematic video by the steps mentioned above and give it a professional look by editing on Wondershare Filmora.
Although it might seem strange initially, but the time is close when everyone will create cinematic videos from their smartphones.
Another thing to remember is that when you are shooting a Reveal movement using the Gimbal, it is best to put it in Locking mode. This mode works the best as it allows the camera to stay fixed in one frame making your footage seem balanced and of quality.
2. The 180° Presentation Movement
The next movement we will be looking at will be the 180° presentation movement. The 180° presentation will move in a half-circle fashion. It will move from one side of the subject to the other side. This will allow you to cover the overall subject’s view.
Apart from that, it will allow you to capture the background with much clarity and detail to maintain a general sense of the ambiance. Making a 180° presentation shot is fairly easy to do so. With its multiple uses, you can use this method in any scenario.
As we will move from one side to the other in a circular manner, we need to fix the frame of our video to move along. Using the POV mode of the Zhiyun Gimbal stabilizer will be the best option in this sense.
Setting the Gimbal in POV mode will allow you to shoot the video from more than one angle while keeping the video balanced. Follow the steps mentioned to shoot a 180° presentation video:
- First, start recording from one side of the subject while keeping the Gimbal in the POV mode.
- Slowly start moving in front of the subject in an arch.
- When you face the subject, do not stop and keep moving to complete the arch.
- When you reach the end of the arch, close the video.
By following the steps mentioned, you can create the 180° presentation movement using a smartphone. Now, move forward to learn about “The Following movement.”
3. The Following Movement
You can use “The following movement” when recording a scene in which the object moves in random directions. Or when there is a high degree of movement of your object in the video, and you want to fix the focus of your footage to that object.
The Following movement is not technically a movement, but a setting that will allow you to record the footage while keeping the object and the video frame focused. In this type of footage, we will use the Zhiyun Cami app to focus on our target object.
To focus on our subject in the video by Cami app, follow the steps mentioned below:
- When recording the video, make sure to put the Gimbal on a tripod stand.
- After that, open the Cami app and draw a square over the object you want to keep in focus.
- Now, the camera will shift its angle to its perspective wherever the object goes.
This is how you will create the following movement.
Part 4. Edit the Clips with Wondershare Filmora
Now that we have recorded our footage, it is time to arrange it and apply the finishing touches. We are going to use Wondershare Filmora for editing the recorded footage.
Free Download For Win 7 or later(64-bit)
Free Download For macOS 10.14 or later
Follow the steps mentioned below to edit on Wondershare Filmora!
Step1 Download Wondershare Filmora
To download Wondershare Filmora, follow the steps outlined below:
- First, download the Wondershare Filmora.
- When the download is finished, click on the setup.
- The Wondershare Filmora installer will begin to load.
- Then you will have installed Wondershare Filmora on your PC or Mac.
If you want to purchase the premium plan’s features, check out the Wondershare Filmora Premium plans.
Step2 Add clips to the timeline
After downloading the Wondershare Filmora app, we must create a workplace. To do so, follow the steps mentioned:
- First of all, click on the import icon in the upper left corner of the home interface of Wondershare Filmora. This will open up your PC library.
- Then Import your footage in the import window.
- Click and drag to drop the footage in the Timeline.
Step3 Trim the Video Clips
After you have added the clips to the timeline, you may have some extra footage you don’t want. Go through the clips you added and trim them according to your wish.
Step4 Add The Effects
After you have trimmed the clips now, you will have to add the finishing touches. To perform this, follow the below instructions:
- Go to the effects icon on the upper bar above the import window.
- Here, you can see the range of effects Wondershare Filmora Provides. Select the one you want for your video.
- You can also search for effects from the search bar.
- Once you have found the effect you want, download it if not been downloaded before.
- Click and drag it to drop below your clips to add the effect.
- Double-click on the effect that you added to adjust its settings.
- Here, you can adjust the opacity to your liking.
Now that we have added the Effects, it is time to add the Overlays!
Step5 Add Overlays
You can also add overlays on your videos to make them pop up even more. You can add Overlays by the following steps:
- In the effects icon on the bar above the import window, you can see the multiple effects of Wondershare Filmora.
- In the left column, you can also see the Filters and Overlays.
- Go to the Overlay
- Select the Overlay that you want.
- Then click and drag it above your video.
- You can also add a border to your video by searching “Border” in the search bar and dragging it below your clips.
Step6 Add Some Music
To finish off your editing, you can also add audio music from the Wondershare Filmora Audio library:
- Before adding the audio music, make sure to lower the volume of your video clips.
- You can do so by dragging below the audio tab on your video clips in the timeline.
- Go to the Audio icon on the bar above the import window.
- Here, you can see the multiple audio available.
- Browse through the library till you find suitable audio.
- Download it and drag it below on the timeline.
Now play the Video from the beginning to see the final looks.
Congratulations! You have now successfully created a cinematic video using Wondershare Filmora.
Conclusion
Using expensive equipment to record a cinematic video can be a reliable step. But it is not in everyone’s budget. You can also use a smartphone to record a cinematic video by the steps mentioned above and give it a professional look by editing on Wondershare Filmora.
Although it might seem strange initially, but the time is close when everyone will create cinematic videos from their smartphones.
Top 15 Best Free MP4 Video Rotators [Windows, Mac, Android, iPhone & Online]
Have you ever encountered a problem where you saved a video in the wrong orientation? So you ask yourself what’s the best tool to rotate. There are tools that help to flip videos recorded so that you don’t get frustrated while you watch them later on your pc or phone. So why don’t you take a look at the best video rotators that are available for Android, iOs, Windows, Mac, and online tools?
Best MP4 Video Rotators to Rotate MP4 Video on Windows and Mac - Filmroa Video Editor
Filmora Video Editor allows you to rotate your video to any angle. You can also zoom in and crop out the parts of the video that you don’t want to see. It also includes predefined aspect ratios such as 16:9, 9:16, 4:5, 1:1, and others to help you quickly discover the ideal aspect ratio for YouTube, Instagram, and other sites. Let’s look at how to modify the orientation of a video in Filmora.
For Win 7 or later (64-bit)
For macOS 10.14 or later
How to change the video orientation in Filmora
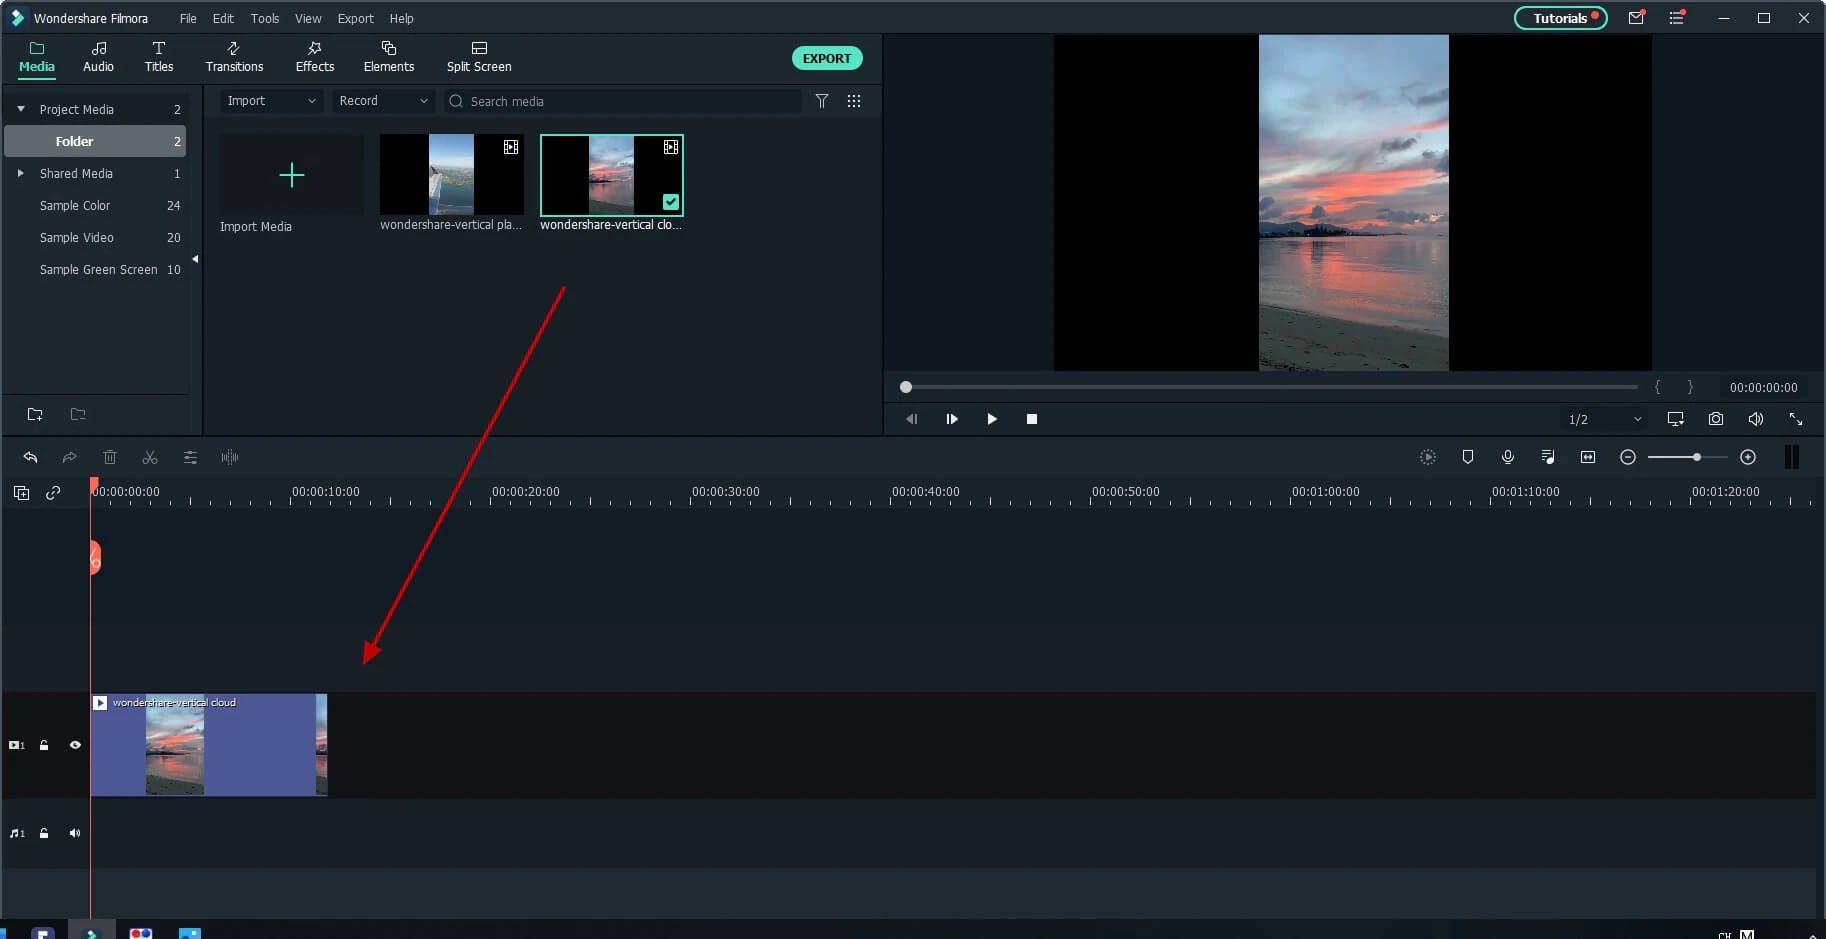
Step 1:Import the video file into Filmora, and then drag it to the timeline.
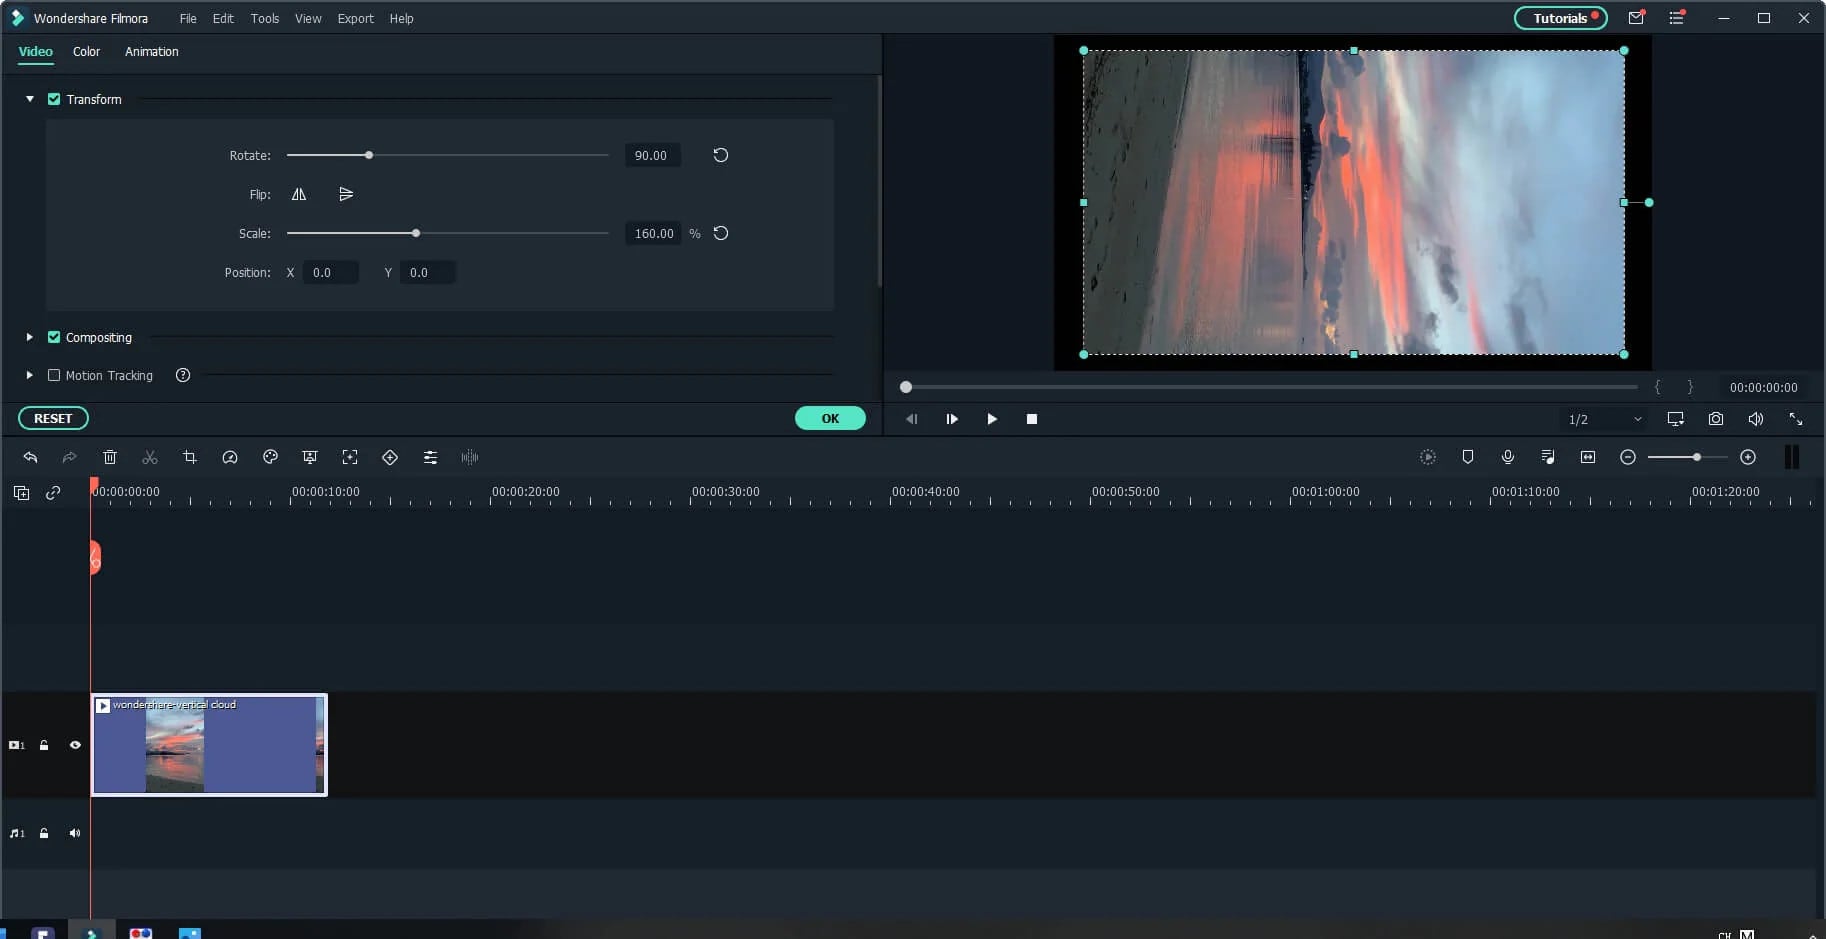
Step 2: To enter the video editing panel, double-click the video clip in the timeline. Locate the “Rotate” option under the “Transform” menu. You can drag the slider or enter a specific number to adjust the rotation value. You can rotate up to 360 degrees. When you enter “90” in the box, the video clip will be rotated 90 degrees.
By dragging the “Scale” slider, you can make the full image screen, or you can directly adjust its position, size, shape, etc., in the Viewer panel.
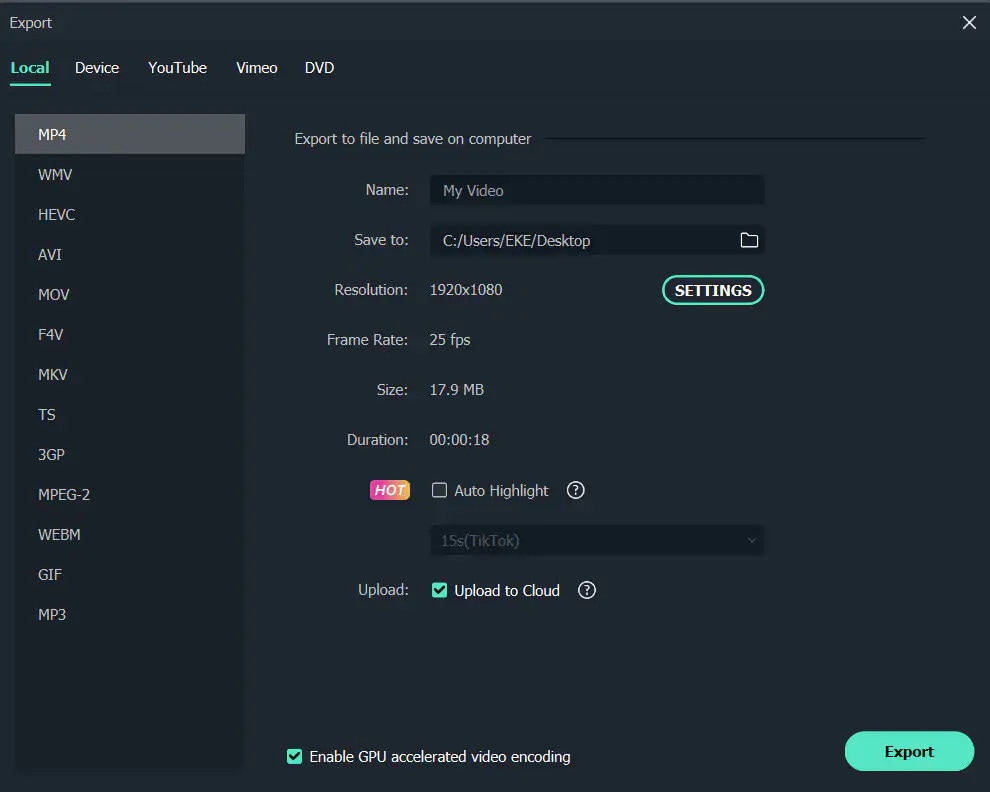
Step 3: After you are satisfied, click the export button. You can change the format here, or you can upload the file to YouTube.
Top 3 Free MP4 Video Rotators on Windows
Looking for the best free video rotator?
If you are looking for a free video rotator for windows, then this article has got you covered. A list of the top 3 free video rotators for windows has been listed.
- VSDC Free Video Editor

It is a highly functional video editing suite with easy controls. It provides anyone who is a beginner to easily access and edit the video easily.
It helps you rotate the videos in increments of 90 degrees, be it clockwise or anticlockwise )
VSDC is a free video editor with non-linear editing capabilities. Users may swiftly convert video and audio files from one format to another with VSDC. A built-in disk burning tool for DVDs is also included in the software. This free program, designed for educational purposes, can be used by businesses or individuals.
VSDC Free Video Editor features
- Built-In DVD Burning Tool
- Colour Blending And Filters
- Specific Multimedia Devices Creation
- Desktop Video Capture
- Export To Social Networking Sites
- Masking
- Non-Linear Video Editing
- Subpixel Accuracy
- Supports Popular Formats
- Video File Converter
Pros
- It’s completely free.
- There is no watermark.
- There are numerous free video editing programs available.
- Support a wide range of file formats
Cons
There isn’t a macOS version available.
Take a severe learning curve into consideration.
There are numerous premium-only features.
The timeline isn’t the same as most NLE editing software.
- Windows Movie Maker
The most well-known video rotator and editor are probably Windows Movie Maker. Most of us who grew up with Microsoft’s various operating systems have had access to it because it comes as a free download with most Microsoft products. It can handle a wide range of files and is generally simple to use. Adding features like sound, music, special effects, or even speeding up the video is simple, and you’ll love the variety of skins available.
For beginners, Windows Video Maker is ideal. It is available for free on Windows PCs and includes basic capabilities and workflow aspects found in professional video editing systems. Its user-friendly interface resembles a simplified version of a video editor timeline and is simple enough for even inexperienced editors to understand.
Features of Windows Movie Maker
- Customization Tool’s title
- Auto Movie Options
- Credit Customization Tool
- Special Effects Options
- Overlays for Transitions
Pros:
- Various video editing functions;
- A variety of output possibilities
Cons:
- Many different versions of the same product;
- No longer included in the Windows operating system.
3.EaseUS Video Editor
EaseUS Video Editor is one of the few most popular video rotators we have today. Its video editing provides tools that can change the video orientation by 90 degrees anticlockwise and clockwise, which can flip vertically and horizontally.
In terms of videos, adding great filters, sound, music, subtitles and other elements to have a great video output can be achieved using the EaseUS. Moreover, it accepts video formats and can convert files to MP4 and other great features.
Features of EaseUS Video Editor
- Can easily trim, cut, split, merge, rotate, and mix video clips.
- Ability to apply stylish video effects
- Can add or remove the watermark and reduce background or wind noise from a video.
Pros:
- User-friendly interface, perfect for beginners
- Easily trim, cut, split, merge, rotate, mix video clips
- A full range of free visual and audio effects
- Change of contrast, exposure, brightness, and other video aspects
- Use the voiceover function to add your comments to the video
Cons:
- The software has no version for macOS
Top 3 Free MP4 Video Rotators on Mac
- iMovie
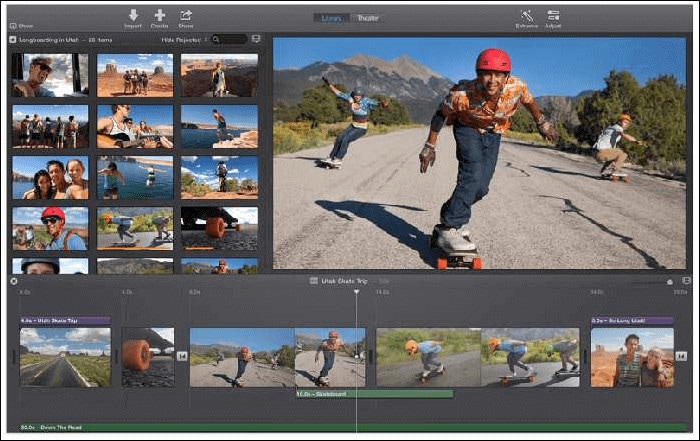
The iMovie for Mac users is an exceptional video rotator. You can turn any video or movie you may have into an amazing masterpiece with more features due to the special after-effects it has. Simple application to use and navigate easily, although when importing video takes a while at certain times.
Features of the iMovie include
- Full range of options to modify
- Ability to enhance colour settings
- Easily crop and edit video clips ease
- Ability to change the speed of clips.
Pros:
- Nice interface;
- The function is to create fun Movie Trailers.
Cons:
- Supports only a few video formats;
- Pre-processing and import trans-coding can be time-consuming.
- Movavi Video Editor
Movavi has a free version that is easy to use, especially for beginners. It allows you to add titles, filters, transitions, and special effects to your videos and photographs to make attractive movies. You can use the animation to smoothly move things around the screen in your film. On the multi-track timeline, you can add as many tracks as you wish. From the expanded built-in collection, you can get more example video clips, stickers, and audio tracks.
Features of Movavi Video Editor
- You can upload files and photographs in almost any format.
- To make videos automatically, use the Montage Wizard.
- Transition Wizard allows you to quickly put together slideshows.
- Enhance image quality by cutting, cropping, and rotating videos on the timeline.
- Apply artistic filters, and make transitions between portions as smooth as possible.
- Create animated headlines, stickers, callouts, and video overlays:
Pros:
- It’s appropriate for newcomers and casual users alike.
- A number of video formats are supported, including.mov (QuickTime)
- Chroma Key and Slow Motion are examples of special effects.
Cons
- Only the premium version supports the advanced features.
- It uses the basic colour grading tool
- QuickTime Player
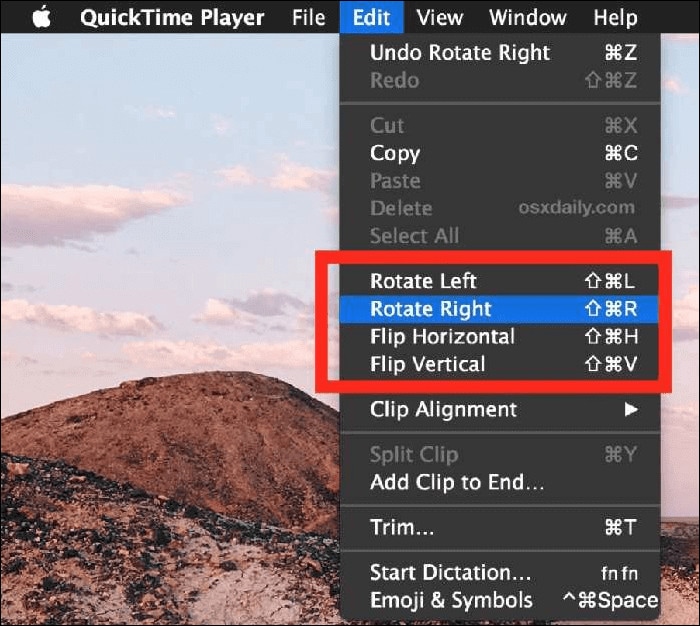
The key advantage of Apple’s QuickTime is that it comes pre-installed on your Mac’s macOS operating system. It’s powerful enough to rotate your clip, yet it’s simple enough for beginners to do. iTunes files can be played and edited with QuickTime. After rotation, it exports a new video file, leaving the old clip on the Mac. The output video will be compressed slightly, resulting in a smaller rotational video file than the original.
Features of QuickTime Player
- Anything can be recorded, including video, audio, and the screen.
- Cropping, audio detachment, combining, and rotation are all simple video editing techniques.
- From 4K to 480p video compression
- Quickly share your video: directly upload videos to YouTube
Pros:
- With macOS, it comes pre-installed.
- Work with iTunes files Streaming video player with no configuration
Cons:
- Only QuickTime Pro 7 unlocks the editing feature.
- There will be no more Windows versions.
- It isn’t compatible with standard subtitle files.
Top 3 Free MP4 Video Rotators on Android
When we use a smartphone to capture a video or download one from a website, we occasionally discover that the video has been inverted. As a result, we’ll require a video rotator app to correct the problem. On the market, there are many different sorts of tools for various platforms. However, you may have discovered that separating the wheat from the chaff can be difficult at times. To save you time, I’ve compiled a list of 3 video rotator applications for Android
- VivaVideo
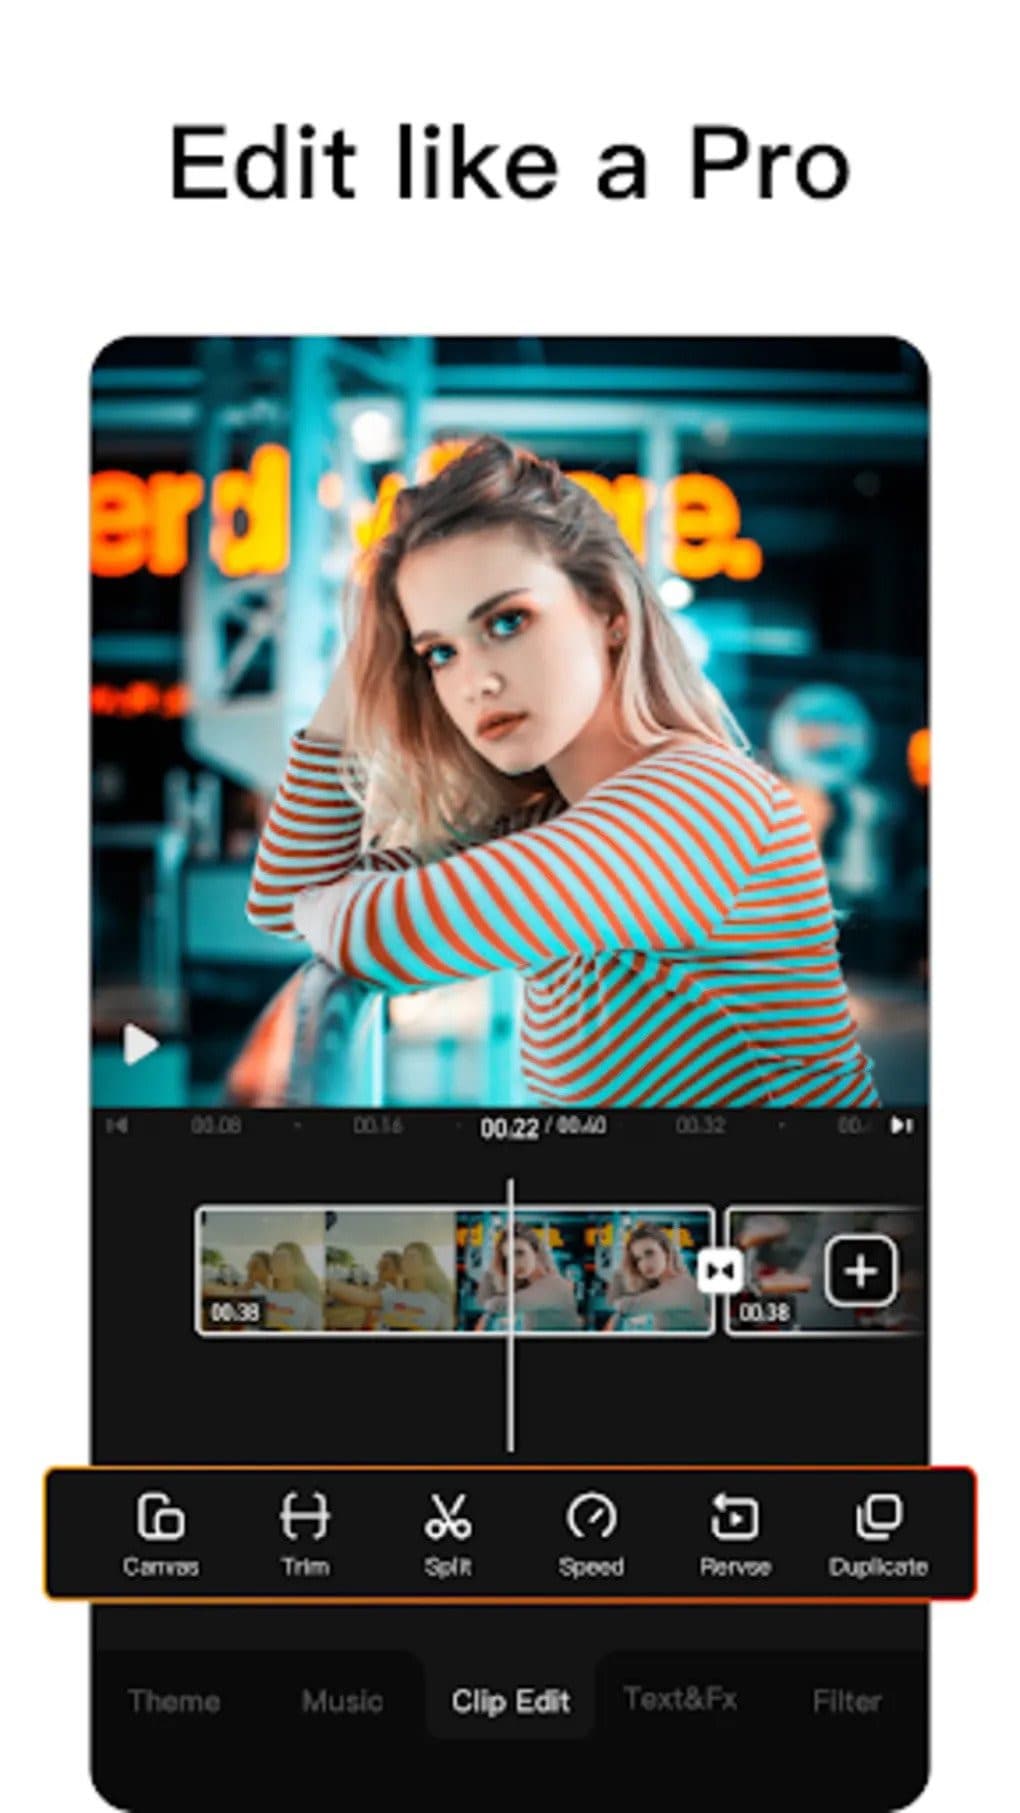
VivaVideo is one of the top movie producers and free video rotators for Android devices as a media editor. This application allows you to alter the orientation of your videos. Aside from rotating videos, this software also includes cropping, combining, cutting, and other editing features. “The best video editor software is VivaVideo - Video Maker App,” an Android expert previously said. This program is a video producer as well as an editor.
Features of VivaVideo
- It allows you to add music to videos.
- Combine videos clips into one video
- Can apply video effects.
- After you’ve finished editing your videos, you may save and share them on YouTube and TikTok! To rotate video, use this program!
Pros
- It has an In-app camera with live effects previews for capturing videos.
- More than 60 effects to choose from with additional downloadable effects.
- Enhance the videos using themes.
- Ability to Merge videos and create montages with storyboarding features
- Edit frames within a video
Cons
- There is no negative review to say about this app
2.Google Photos
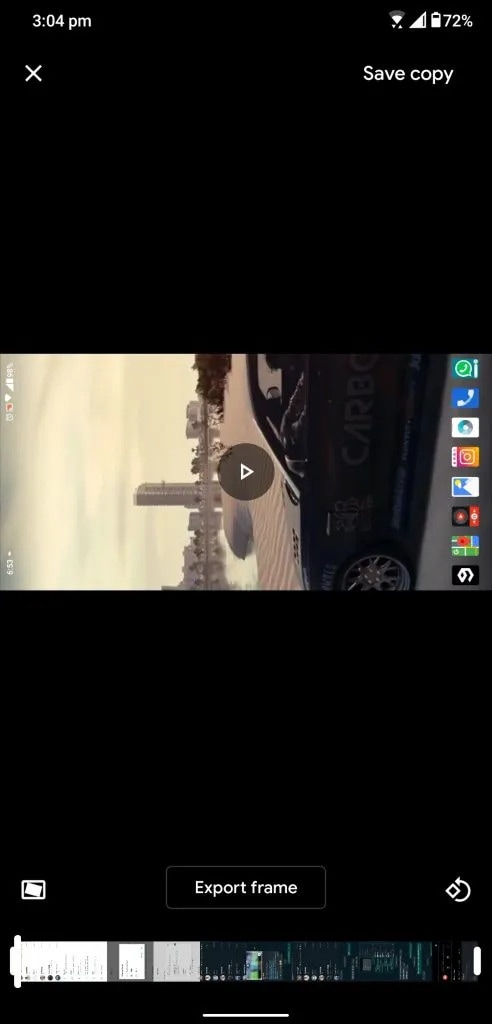
This app may already be installed on your smartphone, but you are unaware of its full potential. This program includes a built-in picture and video editor in addition to backing up your photos. This program includes three essential video editing tools that are extremely basic and easy to use.
The first is to stabilize the video; if your video is unsteady, you can use this option in Google Photos to stabilize it. You may also use the timeline below the video to cut the video. If you mistakenly captured the video in the wrong orientation, there is a tool to rotate it.
Features of Google Photos
- You can modify photographs and videos in Google Photos.
- On Google Photos, make a collage or a movie.
- Recover photos or videos that were recently erased.
- Clear off some space on Google Photos…
- Place photos in the Archive.
Pros
Google Images automatically backs up all of your device’s photos and videos.
Despite its many advantages, the reason I choose Google Photos is that it helps me save space on my smartphone.
The original quality of images stored in Google Photos is really high. Photos and videos are saved in the same resolution as when they were taken.
Over time, Google has improved the Google Photos interface, and it now incorporates AI to provide consumers with even better performance.
Cons
There aren’t many effects, and there aren’t any other editing tools.
The lack of a password-protection option in Google Photos is annoying. Some photos are private, and you may not wish to share them with others.
Users of Google Photos will no longer have limitless storage.
3Adobe Rush
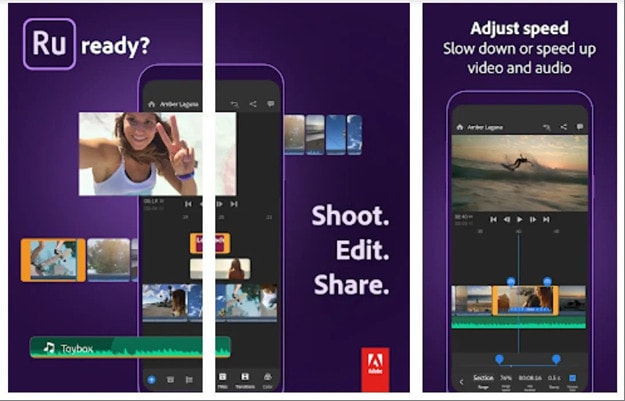
Adobe Rush is a new video editor that Adobe released via a partnership with Samsung’s latest flagship smartphone. This app is a simple yet powerful tool for editing videos on the go, on your smartphone.
This app comes with some powerful tools which you find on some high-end video editing apps. You get a timeline interface to edit your videos perfectly, and you get some music recommendations right into the app.
Features Of Adobe Rush
- In the timeline, you can make changes to your video.
- Audio can be added and refined.
- Change the colour, size, and position of the video.
- Make a title.
- Add transitions, pan and zoom effects, and reframe your clips automatically.
- Change the clip’s attributes.
- Change your video’s aspect ratio.
- Create the illusion of a picture-in-picture effect.
Pros
- It has a user-friendly UI that is responsive and snappy.
- It’s easy to use and provides helpful advice for newcomers.
- It enables Adobe users to quickly and easily produce stunning videos that are customized to their preferences.
- When compared to its competitors, exporting files is a breeze.
- Unlike most of its competitors, it comes with good colour and title tools.
- YouTube, Facebook, Vimeo, Snapchat, Instagram, and Twitter are just a few of the social media channels where the finished files can be simply shared.
- It synchronizes projects between desktop and mobile devices, making them more accessible.
Cons
- When compared to its competitors, it is a little costly.
- It renders projects slowly and only supports three transitions.
- The app does not have storyboard templates and cannot specify the exact structure for output files.
- It only comes with a few video and audio editing capabilities.
- Many standard video effects are missing.
Top 3 Free MP4 Video Rotators on iPhone
1.Splice

Trimming, cropping, effects, titles, speed adjustments, animation, transitions, and music are all available in this well-known video editor, which has a cultish following of dedicated Splicers.
Splice’s music library is one of its strongest assets. It offers a large selection of free music and sound effects to layer over your video, as well as the ability to sync your movie to the beat of your soundtrack.
Features of Splice
Clips should be cropped and trimmed to focus on the highlights.
With an Audio Library and iTunes Integration, you may add music to your videos.
To smooth transitions between clips and images, use transitions.
Enhance videos with effects.
Pros:
- Developed by GoPro, award-winning, highly regarded.
Cons:
- Only available on iOS devices.
2. Clips

It’s easy to miss pre-loaded apps like Apple’s Clips, but this video editing tool has lots of impressive features to enjoy, thanks to the weight of the tech giant’s greatest brains behind it. Take, for example, their live tiles setting. You can use this to generate animated captions and titles that appear as you speak.
To liven things up, you may add animated emojis and backgrounds, and music tracks dynamically sync to the length of your video.
Features of Clips
- Ability to generate animated captions
- Full access to Animated emojis and backgrounds
- Ability to have your music sync to your videos
Pros:
- Simple to use, unique features, and Apple’s support.
Cons:
- It’s only for iOS devices (obviously! ), and it has trouble with a big number of clips.
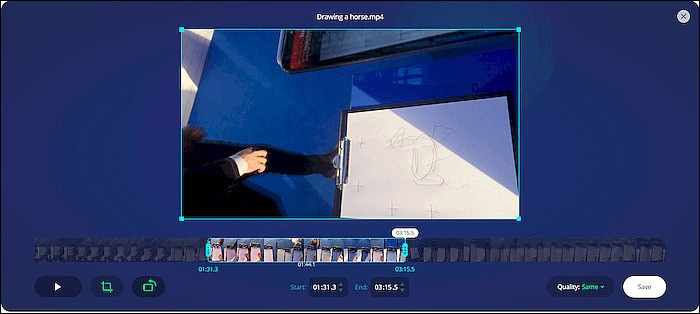
3. Quik

You may apply transitions and effects to up to 200 photographs and video clips from your photo library or GoPro Plus with this free software. You may not only crop, zoom, and rotate photos and video clips, but you can also customize them with 26 different themes, fonts, effects, and artwork.
You may make HD 1080p or 720p films for social sharing in cinema, square, or portrait formats, and you can store your draft creations for up to seven days.
Features of Quik
- Everything that is available for free.
- There are no limits to the number of mural events.
- Editing is unrestricted.
- There are now a total of 25 more photo and video filters.
Pros:
- Tons of features, including access to 100+ free songs,
- Flashbacks and QuikStories, which make videos based on your most recent footage,
- syncs footage to the beat of your soundtrack, and AI editing help.
Cons:
- Limited control and no trimming option; customers have claimed that it is occasionally glitchy.
Top 3 Free MP4 Video Rotators Online
1.Online Video Cutter
This web tool comes in helpful when you need to rapidly edit a small video file. It is not necessary to install it; you may use it right from your browser. The clip can only be rotated 90, 180, or 270 degrees. It’ll come in handy, especially if you’ve closed the video in portrait mode and want to watch it on a big screen. The service’s provider says that the files will be automatically erased from the servers a few hours after you accomplish your task, resulting in a high level of security.
Features of Online Video cutter.
- It Supports Any Video Format. …
- Completely Online for you to access
- Additional Settings to make more edits to videos
- Easy to use, User-friendly interface.
Pros:
It has a very simple user interface.
You do not need to pay for a license to utilize it.
Almost every video format is supported.
Cons:
Only suitable for little clips
Performing simply the most basic functions, such as rotating and cropping
2.EzGif
This unique internet tool not only creates animated GIFs but can also rotate video. You simply choose the clip from your local folder. However, the file’s maximum size is limited to 100MB. A basic tool for rotating the video through 90, 180, and 270 degrees. You can also vertically and horizontally flip the video before exporting it in a different format and encoding.
Features of EzGif
- A simple user interface to find your way around the website.
- Ability to do resizing and rotating of videos and images.
- Capable of video conversions and editing
Pros:
- Many video formats are supported, including MP4, WebM, AVI, MPEG, FLV, MOV, and 3GP.
- The rotation procedure is quick and simple to utilize.
- After rotating, provide a preview function.
Cons:
- The maximum file size is 100 megabytes.
- There are no filters or transitions, and only basic editing functions are available.
3.Videorotate
- This is a free online video rotator that is simple and quick to use. You can upload your video from a local folder or import a recorded clip from major cloud services like Dropbox, Google Drive, and One Drive, just like the other online services (there are buttons for each of them). You can flip the clip or rotate it left and right. Other video capabilities available on the site include cropping, stabilizing, and slicing.
Features of Videorotate
- Ability to crop, stabilize and slice videos.
Pros:
- Simple and straightforward to use
- Clips from your Dropbox, Google Drive, and OneDrive accounts can be uploaded.
- A specific “Reset” button is available.
Cons:
- For basic operations, a service for newcomers is available.
- Only a few video file formats are supported.
FAQs about Video Rotator
- What is the best way to rotate a video?
Use an easy-to-use video editing program. It’s easy to rotate a video, even if you’ve never edited one before. You can also use some media players.
- How do I rotate a video permanently?
In this guide, we will show you exactly how to rotate video in Windows with EaseUS Video Editor and save it permanently.
3.How can I rotate a video for free on the internet?
It’s simple to rotate a video online, and there are various services that offer free online video rotators.
- Videorotate
- Ezgif
- Video cutter on the internet
- How do I mirror a video on the internet?
The websites that support video rotation also offer the ability to “flip” the video vertically and horizontally. You’ll have “mirroring” frames in this manner as if you’re filming your pals in the mirror.
For macOS 10.14 or later
How to change the video orientation in Filmora
Step 1:Import the video file into Filmora, and then drag it to the timeline.
Step 2: To enter the video editing panel, double-click the video clip in the timeline. Locate the “Rotate” option under the “Transform” menu. You can drag the slider or enter a specific number to adjust the rotation value. You can rotate up to 360 degrees. When you enter “90” in the box, the video clip will be rotated 90 degrees.
By dragging the “Scale” slider, you can make the full image screen, or you can directly adjust its position, size, shape, etc., in the Viewer panel.
Step 3: After you are satisfied, click the export button. You can change the format here, or you can upload the file to YouTube.
Top 3 Free MP4 Video Rotators on Windows
Looking for the best free video rotator?
If you are looking for a free video rotator for windows, then this article has got you covered. A list of the top 3 free video rotators for windows has been listed.
- VSDC Free Video Editor
It is a highly functional video editing suite with easy controls. It provides anyone who is a beginner to easily access and edit the video easily.
It helps you rotate the videos in increments of 90 degrees, be it clockwise or anticlockwise )
VSDC is a free video editor with non-linear editing capabilities. Users may swiftly convert video and audio files from one format to another with VSDC. A built-in disk burning tool for DVDs is also included in the software. This free program, designed for educational purposes, can be used by businesses or individuals.
VSDC Free Video Editor features
- Built-In DVD Burning Tool
- Colour Blending And Filters
- Specific Multimedia Devices Creation
- Desktop Video Capture
- Export To Social Networking Sites
- Masking
- Non-Linear Video Editing
- Subpixel Accuracy
- Supports Popular Formats
- Video File Converter
Pros
- It’s completely free.
- There is no watermark.
- There are numerous free video editing programs available.
- Support a wide range of file formats
Cons
There isn’t a macOS version available.
Take a severe learning curve into consideration.
There are numerous premium-only features.
The timeline isn’t the same as most NLE editing software.
- Windows Movie Maker
The most well-known video rotator and editor are probably Windows Movie Maker. Most of us who grew up with Microsoft’s various operating systems have had access to it because it comes as a free download with most Microsoft products. It can handle a wide range of files and is generally simple to use. Adding features like sound, music, special effects, or even speeding up the video is simple, and you’ll love the variety of skins available.
For beginners, Windows Video Maker is ideal. It is available for free on Windows PCs and includes basic capabilities and workflow aspects found in professional video editing systems. Its user-friendly interface resembles a simplified version of a video editor timeline and is simple enough for even inexperienced editors to understand.
Features of Windows Movie Maker
- Customization Tool’s title
- Auto Movie Options
- Credit Customization Tool
- Special Effects Options
- Overlays for Transitions
Pros:
- Various video editing functions;
- A variety of output possibilities
Cons:
- Many different versions of the same product;
- No longer included in the Windows operating system.
3.EaseUS Video Editor
EaseUS Video Editor is one of the few most popular video rotators we have today. Its video editing provides tools that can change the video orientation by 90 degrees anticlockwise and clockwise, which can flip vertically and horizontally.
In terms of videos, adding great filters, sound, music, subtitles and other elements to have a great video output can be achieved using the EaseUS. Moreover, it accepts video formats and can convert files to MP4 and other great features.
Features of EaseUS Video Editor
- Can easily trim, cut, split, merge, rotate, and mix video clips.
- Ability to apply stylish video effects
- Can add or remove the watermark and reduce background or wind noise from a video.
Pros:
- User-friendly interface, perfect for beginners
- Easily trim, cut, split, merge, rotate, mix video clips
- A full range of free visual and audio effects
- Change of contrast, exposure, brightness, and other video aspects
- Use the voiceover function to add your comments to the video
Cons:
- The software has no version for macOS
Top 3 Free MP4 Video Rotators on Mac
- iMovie
The iMovie for Mac users is an exceptional video rotator. You can turn any video or movie you may have into an amazing masterpiece with more features due to the special after-effects it has. Simple application to use and navigate easily, although when importing video takes a while at certain times.
Features of the iMovie include
- Full range of options to modify
- Ability to enhance colour settings
- Easily crop and edit video clips ease
- Ability to change the speed of clips.
Pros:
- Nice interface;
- The function is to create fun Movie Trailers.
Cons:
- Supports only a few video formats;
- Pre-processing and import trans-coding can be time-consuming.
- Movavi Video Editor
Movavi has a free version that is easy to use, especially for beginners. It allows you to add titles, filters, transitions, and special effects to your videos and photographs to make attractive movies. You can use the animation to smoothly move things around the screen in your film. On the multi-track timeline, you can add as many tracks as you wish. From the expanded built-in collection, you can get more example video clips, stickers, and audio tracks.
Features of Movavi Video Editor
- You can upload files and photographs in almost any format.
- To make videos automatically, use the Montage Wizard.
- Transition Wizard allows you to quickly put together slideshows.
- Enhance image quality by cutting, cropping, and rotating videos on the timeline.
- Apply artistic filters, and make transitions between portions as smooth as possible.
- Create animated headlines, stickers, callouts, and video overlays:
Pros:
- It’s appropriate for newcomers and casual users alike.
- A number of video formats are supported, including.mov (QuickTime)
- Chroma Key and Slow Motion are examples of special effects.
Cons
- Only the premium version supports the advanced features.
- It uses the basic colour grading tool
- QuickTime Player
The key advantage of Apple’s QuickTime is that it comes pre-installed on your Mac’s macOS operating system. It’s powerful enough to rotate your clip, yet it’s simple enough for beginners to do. iTunes files can be played and edited with QuickTime. After rotation, it exports a new video file, leaving the old clip on the Mac. The output video will be compressed slightly, resulting in a smaller rotational video file than the original.
Features of QuickTime Player
- Anything can be recorded, including video, audio, and the screen.
- Cropping, audio detachment, combining, and rotation are all simple video editing techniques.
- From 4K to 480p video compression
- Quickly share your video: directly upload videos to YouTube
Pros:
- With macOS, it comes pre-installed.
- Work with iTunes files Streaming video player with no configuration
Cons:
- Only QuickTime Pro 7 unlocks the editing feature.
- There will be no more Windows versions.
- It isn’t compatible with standard subtitle files.
Top 3 Free MP4 Video Rotators on Android
When we use a smartphone to capture a video or download one from a website, we occasionally discover that the video has been inverted. As a result, we’ll require a video rotator app to correct the problem. On the market, there are many different sorts of tools for various platforms. However, you may have discovered that separating the wheat from the chaff can be difficult at times. To save you time, I’ve compiled a list of 3 video rotator applications for Android
- VivaVideo
VivaVideo is one of the top movie producers and free video rotators for Android devices as a media editor. This application allows you to alter the orientation of your videos. Aside from rotating videos, this software also includes cropping, combining, cutting, and other editing features. “The best video editor software is VivaVideo - Video Maker App,” an Android expert previously said. This program is a video producer as well as an editor.
Features of VivaVideo
- It allows you to add music to videos.
- Combine videos clips into one video
- Can apply video effects.
- After you’ve finished editing your videos, you may save and share them on YouTube and TikTok! To rotate video, use this program!
Pros
- It has an In-app camera with live effects previews for capturing videos.
- More than 60 effects to choose from with additional downloadable effects.
- Enhance the videos using themes.
- Ability to Merge videos and create montages with storyboarding features
- Edit frames within a video
Cons
- There is no negative review to say about this app
2.Google Photos
This app may already be installed on your smartphone, but you are unaware of its full potential. This program includes a built-in picture and video editor in addition to backing up your photos. This program includes three essential video editing tools that are extremely basic and easy to use.
The first is to stabilize the video; if your video is unsteady, you can use this option in Google Photos to stabilize it. You may also use the timeline below the video to cut the video. If you mistakenly captured the video in the wrong orientation, there is a tool to rotate it.
Features of Google Photos
- You can modify photographs and videos in Google Photos.
- On Google Photos, make a collage or a movie.
- Recover photos or videos that were recently erased.
- Clear off some space on Google Photos…
- Place photos in the Archive.
Pros
Google Images automatically backs up all of your device’s photos and videos.
Despite its many advantages, the reason I choose Google Photos is that it helps me save space on my smartphone.
The original quality of images stored in Google Photos is really high. Photos and videos are saved in the same resolution as when they were taken.
Over time, Google has improved the Google Photos interface, and it now incorporates AI to provide consumers with even better performance.
Cons
There aren’t many effects, and there aren’t any other editing tools.
The lack of a password-protection option in Google Photos is annoying. Some photos are private, and you may not wish to share them with others.
Users of Google Photos will no longer have limitless storage.
3Adobe Rush
Adobe Rush is a new video editor that Adobe released via a partnership with Samsung’s latest flagship smartphone. This app is a simple yet powerful tool for editing videos on the go, on your smartphone.
This app comes with some powerful tools which you find on some high-end video editing apps. You get a timeline interface to edit your videos perfectly, and you get some music recommendations right into the app.
Features Of Adobe Rush
- In the timeline, you can make changes to your video.
- Audio can be added and refined.
- Change the colour, size, and position of the video.
- Make a title.
- Add transitions, pan and zoom effects, and reframe your clips automatically.
- Change the clip’s attributes.
- Change your video’s aspect ratio.
- Create the illusion of a picture-in-picture effect.
Pros
- It has a user-friendly UI that is responsive and snappy.
- It’s easy to use and provides helpful advice for newcomers.
- It enables Adobe users to quickly and easily produce stunning videos that are customized to their preferences.
- When compared to its competitors, exporting files is a breeze.
- Unlike most of its competitors, it comes with good colour and title tools.
- YouTube, Facebook, Vimeo, Snapchat, Instagram, and Twitter are just a few of the social media channels where the finished files can be simply shared.
- It synchronizes projects between desktop and mobile devices, making them more accessible.
Cons
- When compared to its competitors, it is a little costly.
- It renders projects slowly and only supports three transitions.
- The app does not have storyboard templates and cannot specify the exact structure for output files.
- It only comes with a few video and audio editing capabilities.
- Many standard video effects are missing.
Top 3 Free MP4 Video Rotators on iPhone
1.Splice
Trimming, cropping, effects, titles, speed adjustments, animation, transitions, and music are all available in this well-known video editor, which has a cultish following of dedicated Splicers.
Splice’s music library is one of its strongest assets. It offers a large selection of free music and sound effects to layer over your video, as well as the ability to sync your movie to the beat of your soundtrack.
Features of Splice
Clips should be cropped and trimmed to focus on the highlights.
With an Audio Library and iTunes Integration, you may add music to your videos.
To smooth transitions between clips and images, use transitions.
Enhance videos with effects.
Pros:
- Developed by GoPro, award-winning, highly regarded.
Cons:
- Only available on iOS devices.
2. Clips
It’s easy to miss pre-loaded apps like Apple’s Clips, but this video editing tool has lots of impressive features to enjoy, thanks to the weight of the tech giant’s greatest brains behind it. Take, for example, their live tiles setting. You can use this to generate animated captions and titles that appear as you speak.
To liven things up, you may add animated emojis and backgrounds, and music tracks dynamically sync to the length of your video.
Features of Clips
- Ability to generate animated captions
- Full access to Animated emojis and backgrounds
- Ability to have your music sync to your videos
Pros:
- Simple to use, unique features, and Apple’s support.
Cons:
- It’s only for iOS devices (obviously! ), and it has trouble with a big number of clips.
3. Quik
You may apply transitions and effects to up to 200 photographs and video clips from your photo library or GoPro Plus with this free software. You may not only crop, zoom, and rotate photos and video clips, but you can also customize them with 26 different themes, fonts, effects, and artwork.
You may make HD 1080p or 720p films for social sharing in cinema, square, or portrait formats, and you can store your draft creations for up to seven days.
Features of Quik
- Everything that is available for free.
- There are no limits to the number of mural events.
- Editing is unrestricted.
- There are now a total of 25 more photo and video filters.
Pros:
- Tons of features, including access to 100+ free songs,
- Flashbacks and QuikStories, which make videos based on your most recent footage,
- syncs footage to the beat of your soundtrack, and AI editing help.
Cons:
- Limited control and no trimming option; customers have claimed that it is occasionally glitchy.
Top 3 Free MP4 Video Rotators Online
1.Online Video Cutter
This web tool comes in helpful when you need to rapidly edit a small video file. It is not necessary to install it; you may use it right from your browser. The clip can only be rotated 90, 180, or 270 degrees. It’ll come in handy, especially if you’ve closed the video in portrait mode and want to watch it on a big screen. The service’s provider says that the files will be automatically erased from the servers a few hours after you accomplish your task, resulting in a high level of security.
Features of Online Video cutter.
- It Supports Any Video Format. …
- Completely Online for you to access
- Additional Settings to make more edits to videos
- Easy to use, User-friendly interface.
Pros:
It has a very simple user interface.
You do not need to pay for a license to utilize it.
Almost every video format is supported.
Cons:
Only suitable for little clips
Performing simply the most basic functions, such as rotating and cropping
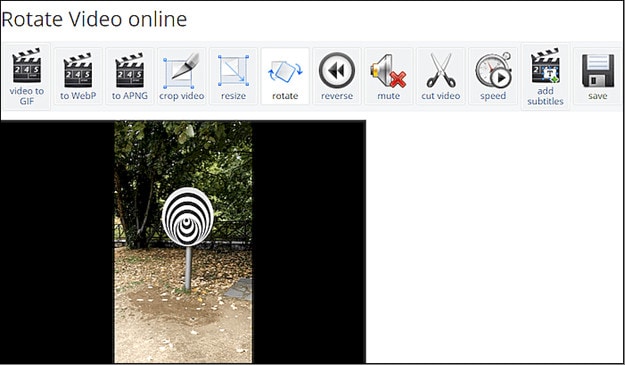
2.EzGif
This unique internet tool not only creates animated GIFs but can also rotate video. You simply choose the clip from your local folder. However, the file’s maximum size is limited to 100MB. A basic tool for rotating the video through 90, 180, and 270 degrees. You can also vertically and horizontally flip the video before exporting it in a different format and encoding.
Features of EzGif
- A simple user interface to find your way around the website.
- Ability to do resizing and rotating of videos and images.
- Capable of video conversions and editing
Pros:
- Many video formats are supported, including MP4, WebM, AVI, MPEG, FLV, MOV, and 3GP.
- The rotation procedure is quick and simple to utilize.
- After rotating, provide a preview function.
Cons:
- The maximum file size is 100 megabytes.
- There are no filters or transitions, and only basic editing functions are available.
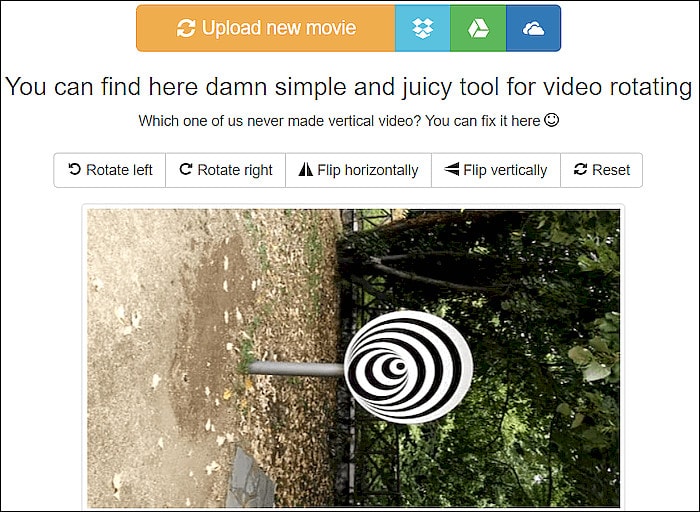
3.Videorotate
- This is a free online video rotator that is simple and quick to use. You can upload your video from a local folder or import a recorded clip from major cloud services like Dropbox, Google Drive, and One Drive, just like the other online services (there are buttons for each of them). You can flip the clip or rotate it left and right. Other video capabilities available on the site include cropping, stabilizing, and slicing.
Features of Videorotate
- Ability to crop, stabilize and slice videos.
Pros:
- Simple and straightforward to use
- Clips from your Dropbox, Google Drive, and OneDrive accounts can be uploaded.
- A specific “Reset” button is available.
Cons:
- For basic operations, a service for newcomers is available.
- Only a few video file formats are supported.
FAQs about Video Rotator
- What is the best way to rotate a video?
Use an easy-to-use video editing program. It’s easy to rotate a video, even if you’ve never edited one before. You can also use some media players.
- How do I rotate a video permanently?
In this guide, we will show you exactly how to rotate video in Windows with EaseUS Video Editor and save it permanently.
3.How can I rotate a video for free on the internet?
It’s simple to rotate a video online, and there are various services that offer free online video rotators.
- Videorotate
- Ezgif
- Video cutter on the internet
- How do I mirror a video on the internet?
The websites that support video rotation also offer the ability to “flip” the video vertically and horizontally. You’ll have “mirroring” frames in this manner as if you’re filming your pals in the mirror.
For macOS 10.14 or later
How to change the video orientation in Filmora
Step 1:Import the video file into Filmora, and then drag it to the timeline.
Step 2: To enter the video editing panel, double-click the video clip in the timeline. Locate the “Rotate” option under the “Transform” menu. You can drag the slider or enter a specific number to adjust the rotation value. You can rotate up to 360 degrees. When you enter “90” in the box, the video clip will be rotated 90 degrees.
By dragging the “Scale” slider, you can make the full image screen, or you can directly adjust its position, size, shape, etc., in the Viewer panel.
Step 3: After you are satisfied, click the export button. You can change the format here, or you can upload the file to YouTube.
Top 3 Free MP4 Video Rotators on Windows
Looking for the best free video rotator?
If you are looking for a free video rotator for windows, then this article has got you covered. A list of the top 3 free video rotators for windows has been listed.
- VSDC Free Video Editor
It is a highly functional video editing suite with easy controls. It provides anyone who is a beginner to easily access and edit the video easily.
It helps you rotate the videos in increments of 90 degrees, be it clockwise or anticlockwise )
VSDC is a free video editor with non-linear editing capabilities. Users may swiftly convert video and audio files from one format to another with VSDC. A built-in disk burning tool for DVDs is also included in the software. This free program, designed for educational purposes, can be used by businesses or individuals.
VSDC Free Video Editor features
- Built-In DVD Burning Tool
- Colour Blending And Filters
- Specific Multimedia Devices Creation
- Desktop Video Capture
- Export To Social Networking Sites
- Masking
- Non-Linear Video Editing
- Subpixel Accuracy
- Supports Popular Formats
- Video File Converter
Pros
- It’s completely free.
- There is no watermark.
- There are numerous free video editing programs available.
- Support a wide range of file formats
Cons
There isn’t a macOS version available.
Take a severe learning curve into consideration.
There are numerous premium-only features.
The timeline isn’t the same as most NLE editing software.
- Windows Movie Maker
The most well-known video rotator and editor are probably Windows Movie Maker. Most of us who grew up with Microsoft’s various operating systems have had access to it because it comes as a free download with most Microsoft products. It can handle a wide range of files and is generally simple to use. Adding features like sound, music, special effects, or even speeding up the video is simple, and you’ll love the variety of skins available.
For beginners, Windows Video Maker is ideal. It is available for free on Windows PCs and includes basic capabilities and workflow aspects found in professional video editing systems. Its user-friendly interface resembles a simplified version of a video editor timeline and is simple enough for even inexperienced editors to understand.
Features of Windows Movie Maker
- Customization Tool’s title
- Auto Movie Options
- Credit Customization Tool
- Special Effects Options
- Overlays for Transitions
Pros:
- Various video editing functions;
- A variety of output possibilities
Cons:
- Many different versions of the same product;
- No longer included in the Windows operating system.
3.EaseUS Video Editor
EaseUS Video Editor is one of the few most popular video rotators we have today. Its video editing provides tools that can change the video orientation by 90 degrees anticlockwise and clockwise, which can flip vertically and horizontally.
In terms of videos, adding great filters, sound, music, subtitles and other elements to have a great video output can be achieved using the EaseUS. Moreover, it accepts video formats and can convert files to MP4 and other great features.
Features of EaseUS Video Editor
- Can easily trim, cut, split, merge, rotate, and mix video clips.
- Ability to apply stylish video effects
- Can add or remove the watermark and reduce background or wind noise from a video.
Pros:
- User-friendly interface, perfect for beginners
- Easily trim, cut, split, merge, rotate, mix video clips
- A full range of free visual and audio effects
- Change of contrast, exposure, brightness, and other video aspects
- Use the voiceover function to add your comments to the video
Cons:
- The software has no version for macOS
Top 3 Free MP4 Video Rotators on Mac
- iMovie
The iMovie for Mac users is an exceptional video rotator. You can turn any video or movie you may have into an amazing masterpiece with more features due to the special after-effects it has. Simple application to use and navigate easily, although when importing video takes a while at certain times.
Features of the iMovie include
- Full range of options to modify
- Ability to enhance colour settings
- Easily crop and edit video clips ease
- Ability to change the speed of clips.
Pros:
- Nice interface;
- The function is to create fun Movie Trailers.
Cons:
- Supports only a few video formats;
- Pre-processing and import trans-coding can be time-consuming.
- Movavi Video Editor
Movavi has a free version that is easy to use, especially for beginners. It allows you to add titles, filters, transitions, and special effects to your videos and photographs to make attractive movies. You can use the animation to smoothly move things around the screen in your film. On the multi-track timeline, you can add as many tracks as you wish. From the expanded built-in collection, you can get more example video clips, stickers, and audio tracks.
Features of Movavi Video Editor
- You can upload files and photographs in almost any format.
- To make videos automatically, use the Montage Wizard.
- Transition Wizard allows you to quickly put together slideshows.
- Enhance image quality by cutting, cropping, and rotating videos on the timeline.
- Apply artistic filters, and make transitions between portions as smooth as possible.
- Create animated headlines, stickers, callouts, and video overlays:
Pros:
- It’s appropriate for newcomers and casual users alike.
- A number of video formats are supported, including.mov (QuickTime)
- Chroma Key and Slow Motion are examples of special effects.
Cons
- Only the premium version supports the advanced features.
- It uses the basic colour grading tool
- QuickTime Player
The key advantage of Apple’s QuickTime is that it comes pre-installed on your Mac’s macOS operating system. It’s powerful enough to rotate your clip, yet it’s simple enough for beginners to do. iTunes files can be played and edited with QuickTime. After rotation, it exports a new video file, leaving the old clip on the Mac. The output video will be compressed slightly, resulting in a smaller rotational video file than the original.
Features of QuickTime Player
- Anything can be recorded, including video, audio, and the screen.
- Cropping, audio detachment, combining, and rotation are all simple video editing techniques.
- From 4K to 480p video compression
- Quickly share your video: directly upload videos to YouTube
Pros:
- With macOS, it comes pre-installed.
- Work with iTunes files Streaming video player with no configuration
Cons:
- Only QuickTime Pro 7 unlocks the editing feature.
- There will be no more Windows versions.
- It isn’t compatible with standard subtitle files.
Top 3 Free MP4 Video Rotators on Android
When we use a smartphone to capture a video or download one from a website, we occasionally discover that the video has been inverted. As a result, we’ll require a video rotator app to correct the problem. On the market, there are many different sorts of tools for various platforms. However, you may have discovered that separating the wheat from the chaff can be difficult at times. To save you time, I’ve compiled a list of 3 video rotator applications for Android
- VivaVideo
VivaVideo is one of the top movie producers and free video rotators for Android devices as a media editor. This application allows you to alter the orientation of your videos. Aside from rotating videos, this software also includes cropping, combining, cutting, and other editing features. “The best video editor software is VivaVideo - Video Maker App,” an Android expert previously said. This program is a video producer as well as an editor.
Features of VivaVideo
- It allows you to add music to videos.
- Combine videos clips into one video
- Can apply video effects.
- After you’ve finished editing your videos, you may save and share them on YouTube and TikTok! To rotate video, use this program!
Pros
- It has an In-app camera with live effects previews for capturing videos.
- More than 60 effects to choose from with additional downloadable effects.
- Enhance the videos using themes.
- Ability to Merge videos and create montages with storyboarding features
- Edit frames within a video
Cons
- There is no negative review to say about this app
2.Google Photos
This app may already be installed on your smartphone, but you are unaware of its full potential. This program includes a built-in picture and video editor in addition to backing up your photos. This program includes three essential video editing tools that are extremely basic and easy to use.
The first is to stabilize the video; if your video is unsteady, you can use this option in Google Photos to stabilize it. You may also use the timeline below the video to cut the video. If you mistakenly captured the video in the wrong orientation, there is a tool to rotate it.
Features of Google Photos
- You can modify photographs and videos in Google Photos.
- On Google Photos, make a collage or a movie.
- Recover photos or videos that were recently erased.
- Clear off some space on Google Photos…
- Place photos in the Archive.
Pros
Google Images automatically backs up all of your device’s photos and videos.
Despite its many advantages, the reason I choose Google Photos is that it helps me save space on my smartphone.
The original quality of images stored in Google Photos is really high. Photos and videos are saved in the same resolution as when they were taken.
Over time, Google has improved the Google Photos interface, and it now incorporates AI to provide consumers with even better performance.
Cons
There aren’t many effects, and there aren’t any other editing tools.
The lack of a password-protection option in Google Photos is annoying. Some photos are private, and you may not wish to share them with others.
Users of Google Photos will no longer have limitless storage.
3Adobe Rush
Adobe Rush is a new video editor that Adobe released via a partnership with Samsung’s latest flagship smartphone. This app is a simple yet powerful tool for editing videos on the go, on your smartphone.
This app comes with some powerful tools which you find on some high-end video editing apps. You get a timeline interface to edit your videos perfectly, and you get some music recommendations right into the app.
Features Of Adobe Rush
- In the timeline, you can make changes to your video.
- Audio can be added and refined.
- Change the colour, size, and position of the video.
- Make a title.
- Add transitions, pan and zoom effects, and reframe your clips automatically.
- Change the clip’s attributes.
- Change your video’s aspect ratio.
- Create the illusion of a picture-in-picture effect.
Pros
- It has a user-friendly UI that is responsive and snappy.
- It’s easy to use and provides helpful advice for newcomers.
- It enables Adobe users to quickly and easily produce stunning videos that are customized to their preferences.
- When compared to its competitors, exporting files is a breeze.
- Unlike most of its competitors, it comes with good colour and title tools.
- YouTube, Facebook, Vimeo, Snapchat, Instagram, and Twitter are just a few of the social media channels where the finished files can be simply shared.
- It synchronizes projects between desktop and mobile devices, making them more accessible.
Cons
- When compared to its competitors, it is a little costly.
- It renders projects slowly and only supports three transitions.
- The app does not have storyboard templates and cannot specify the exact structure for output files.
- It only comes with a few video and audio editing capabilities.
- Many standard video effects are missing.
Top 3 Free MP4 Video Rotators on iPhone
1.Splice
Trimming, cropping, effects, titles, speed adjustments, animation, transitions, and music are all available in this well-known video editor, which has a cultish following of dedicated Splicers.
Splice’s music library is one of its strongest assets. It offers a large selection of free music and sound effects to layer over your video, as well as the ability to sync your movie to the beat of your soundtrack.
Features of Splice
Clips should be cropped and trimmed to focus on the highlights.
With an Audio Library and iTunes Integration, you may add music to your videos.
To smooth transitions between clips and images, use transitions.
Enhance videos with effects.
Pros:
- Developed by GoPro, award-winning, highly regarded.
Cons:
- Only available on iOS devices.
2. Clips
It’s easy to miss pre-loaded apps like Apple’s Clips, but this video editing tool has lots of impressive features to enjoy, thanks to the weight of the tech giant’s greatest brains behind it. Take, for example, their live tiles setting. You can use this to generate animated captions and titles that appear as you speak.
To liven things up, you may add animated emojis and backgrounds, and music tracks dynamically sync to the length of your video.
Features of Clips
- Ability to generate animated captions
- Full access to Animated emojis and backgrounds
- Ability to have your music sync to your videos
Pros:
- Simple to use, unique features, and Apple’s support.
Cons:
- It’s only for iOS devices (obviously! ), and it has trouble with a big number of clips.
3. Quik
You may apply transitions and effects to up to 200 photographs and video clips from your photo library or GoPro Plus with this free software. You may not only crop, zoom, and rotate photos and video clips, but you can also customize them with 26 different themes, fonts, effects, and artwork.
You may make HD 1080p or 720p films for social sharing in cinema, square, or portrait formats, and you can store your draft creations for up to seven days.
Features of Quik
- Everything that is available for free.
- There are no limits to the number of mural events.
- Editing is unrestricted.
- There are now a total of 25 more photo and video filters.
Pros:
- Tons of features, including access to 100+ free songs,
- Flashbacks and QuikStories, which make videos based on your most recent footage,
- syncs footage to the beat of your soundtrack, and AI editing help.
Cons:
- Limited control and no trimming option; customers have claimed that it is occasionally glitchy.
Top 3 Free MP4 Video Rotators Online
1.Online Video Cutter
This web tool comes in helpful when you need to rapidly edit a small video file. It is not necessary to install it; you may use it right from your browser. The clip can only be rotated 90, 180, or 270 degrees. It’ll come in handy, especially if you’ve closed the video in portrait mode and want to watch it on a big screen. The service’s provider says that the files will be automatically erased from the servers a few hours after you accomplish your task, resulting in a high level of security.
Features of Online Video cutter.
- It Supports Any Video Format. …
- Completely Online for you to access
- Additional Settings to make more edits to videos
- Easy to use, User-friendly interface.
Pros:
It has a very simple user interface.
You do not need to pay for a license to utilize it.
Almost every video format is supported.
Cons:
Only suitable for little clips
Performing simply the most basic functions, such as rotating and cropping
2.EzGif
This unique internet tool not only creates animated GIFs but can also rotate video. You simply choose the clip from your local folder. However, the file’s maximum size is limited to 100MB. A basic tool for rotating the video through 90, 180, and 270 degrees. You can also vertically and horizontally flip the video before exporting it in a different format and encoding.
Features of EzGif
- A simple user interface to find your way around the website.
- Ability to do resizing and rotating of videos and images.
- Capable of video conversions and editing
Pros:
- Many video formats are supported, including MP4, WebM, AVI, MPEG, FLV, MOV, and 3GP.
- The rotation procedure is quick and simple to utilize.
- After rotating, provide a preview function.
Cons:
- The maximum file size is 100 megabytes.
- There are no filters or transitions, and only basic editing functions are available.
3.Videorotate
- This is a free online video rotator that is simple and quick to use. You can upload your video from a local folder or import a recorded clip from major cloud services like Dropbox, Google Drive, and One Drive, just like the other online services (there are buttons for each of them). You can flip the clip or rotate it left and right. Other video capabilities available on the site include cropping, stabilizing, and slicing.
Features of Videorotate
- Ability to crop, stabilize and slice videos.
Pros:
- Simple and straightforward to use
- Clips from your Dropbox, Google Drive, and OneDrive accounts can be uploaded.
- A specific “Reset” button is available.
Cons:
- For basic operations, a service for newcomers is available.
- Only a few video file formats are supported.
FAQs about Video Rotator
- What is the best way to rotate a video?
Use an easy-to-use video editing program. It’s easy to rotate a video, even if you’ve never edited one before. You can also use some media players.
- How do I rotate a video permanently?
In this guide, we will show you exactly how to rotate video in Windows with EaseUS Video Editor and save it permanently.
3.How can I rotate a video for free on the internet?
It’s simple to rotate a video online, and there are various services that offer free online video rotators.
- Videorotate
- Ezgif
- Video cutter on the internet
- How do I mirror a video on the internet?
The websites that support video rotation also offer the ability to “flip” the video vertically and horizontally. You’ll have “mirroring” frames in this manner as if you’re filming your pals in the mirror.
How to Add Subtitles in VLC Media Play
VLC is a free, open-source, and easy-to-use cross-platform multimedia player that supports numerous audio and video file formats. You can use the program on different devices, including smartphones, TVs, and PCs.
With the VLC media player, you can not only watch your favorite movie or video clip but can also add subtitles to them. This can be useful to improve your video-watching experience, especially if you are playing a foreign film or one with poor audio quality. Moreover, subtitles can also help people with hearing impairments to follow along.
Want to learn how to add subtitles in the VLC media player? Keep reading to find out!
How To Add Subtitle Files In VLC Media Player?
You can download subtitles for the language you want from a subtitle site and enjoy them while watching the movie or video clip in VLC Media Player. However, this method won’t add the SRT file permanently to your videos.
Here’s how you can add subtitles in the VLC media player on your video clip:
Step1 Visit the subtitles website of your choice and download the file for the video you are watching.
Step2 Save the SRT file along with your video in the same folder.
Step3 Right-click the video, click “Open With,” and choose VLC media player. Alternatively, launch the player, click “Media,” and select “Open file…” to import the video.

Step4 VLC Media Player will automatically detect and add the subtitles file. If not, click the “Subtitles” option in the toolbar, select “Sub Track,” and choose the relevant file within the listing.
Step5 The VLC player will now display the subtitles along with your video. However, if it is still unable to find the subtitles file, click “Subtitles” > “Add Subtitles” and manually add the file you’ve downloaded.

![]()
Note: If the subtitles are not playing correctly along the video, you can adjust the playback delay using the G and H keys on your keyboard. This will toggle between 50ms delays.
How To Add Subtitles To Video In VLC Media Player Permanently?
Since the above method only adds subtitles temporarily, you might be looking for a solution to permanently attach the SRT file to your clip to provide a better viewing experience to your viewers or add extra information for those who have difficulty understanding the audio.
Below we’ve provided step-by-step methods to add subtitles to video in the VLC media player on your Windows and Mac.
On Windows
You can permanently embed the subtitles to your video in the VLC media player on your Windows in the following way:
Step1 Launch the VLC media player on your Windows PC/laptop and click “Media.” Scroll down and click the “Stream” option.

Step2 Now, click “Add” in the pop-up menu and choose the video you want to play. To add a subtitles file, check the “Use a Subtitles File” option and click “Browse.” Now, add the relevant SRT file you’ve downloaded.

Step3 Next, click the “Stream” option and choose “Next.” To set the destination for your video, select “File” and click “Add.” A new window will open, click the “Browse” option and enter your footage/video name.
Make sure to set the format as .mp4 or any other video format. Choose the folder for your video and click “Save.” Click the “Next” option to proceed further.
Step4 Check the box next to “Active Transcoding,” click the Wrench icon, and head to the “Subtitles” tab. Check the boxes next to “Subtitles” and “Overlay Subtitles on the Video.
Finally, click the “Save” option, select “Next,” and click “Stream” in the new window. Wait for the processing to complete, and your video with subtitles will be saved to the folder you’ve selected.

On Mac
Here’s how you can permanently add subtitles to your video clip in the VLC media player on your Mac:
Step1 Launch the VLC media player on your Mac and click the “File” option from the top toolbar. Click “Advanced Open File.”

Step2 Now, click “Browse” on the next page and add the video to which you want to attach the subtitles. Checkmark the “Add Subtitles File” option and click “Choose.” Browse and add the SRT file. Click “OK” to confirm.
Step3 Checkmark the “Stream Outputs” option and click “Settings.” Next, click “Browse” in the next window to configure the output file name and folder. Afterward, click “Save” and set the Encapsulation method as “MPEG 4.”
Under the Transcoding tab, checkmark the boxes next to Video and Audio. Next, click “OK” and select “Open.” You can now turn on the subtitles by navigating to “Subtitles” > “Subtitles Track.”

How To Create Subtitles In VLC Media Player?
It is possible to create subtitles in the VLC media player if you’re unable to find an appropriate SRT file online or want to add some extra details by editing the existing one. For this method to work, you will first need to format your file in the SRT format.
Furthermore, you have to rank the text in order with a number and add timestamps in minutes, seconds, and milliseconds to determine the duration. To avoid plain text, you can also add effects to the subtitles by using HTML.
Step1 Launch a text editoron your PC, import your video to the editor, and save it in .srt format.

Step2 Open the VLC media player and play the video. Now, edit the subtitles while matching them with the timestamps.
Step3 Next, add a new line, timestamp, and subtitle for each caption.
Step4 Repeat the process to create and add all the required subtitles.
Bonus Tips: How To Add And Edit Subtitles In The Best VLC Alternative
If you find the above method difficult to understand, we recommend using Filmora . With this software program, you can not only edit your videos to make them engaging and appealing to watch but can also add and edit subtitles to them using the ten pre-build subtitles templates.
Free Download For Win 7 or later(64-bit)
Free Download For macOS 10.14 or later
Filmora can help you to format the subtitles to match your video and add various font styles, such as WordArt, Basic, Titles, and more. In addition, you can create text with different parameters, including color fills, gradient fills, and 12 shadow effects. You can also make your captions alive with the animation effects.
Here’s how you can add and edit subtitles on your videos using Filmora:
Step1 Launch the Filmora software on your PC and click “Create New Project.” Drag and drop your video or select “Click here to import media” to add your video.

Step2 Add the video to the timeline and play it. Listen to the voiceover and press the “M” key to add a marker.
Now, click the “Titles” option and head to the “Subtitles” tab from the left menu. Double-click a subtitle to download and preview it.

Step3 Drag and drop the subtitle you want to use in the timeline and adjust it along the marker point.
Next, double-click the subtitle box in the timeline and type the text from the voiceover. Add color, text template, and adjust the text space.

Step4 Head to the “Advanced” tab, delete the preset text and adjust the one you’ve just typed. You can also add animation effects from the “Animation” tab and click “OK.”

Repeat the process to add and edit the subtitles on your video till the end. Once you are satisfied, click “Export” and save the file on your PC.
Conclusion
In this article, we’ve explored different methods to show you how to add subtitles in the VLC media player to make your videos more engaging and easy to understand, even for those with hearing impairment.
We’ve also provided step-by-step instructions to use Filmora as an alternative to add and edit the subtitles on your video real quickly.
Hopefully, you’ve enjoyed reading this article and can now enjoy watching a video in any language with ease.
How To Add Subtitles To Video In VLC Media Player Permanently?
Since the above method only adds subtitles temporarily, you might be looking for a solution to permanently attach the SRT file to your clip to provide a better viewing experience to your viewers or add extra information for those who have difficulty understanding the audio.
Below we’ve provided step-by-step methods to add subtitles to video in the VLC media player on your Windows and Mac.
On Windows
You can permanently embed the subtitles to your video in the VLC media player on your Windows in the following way:
Step1 Launch the VLC media player on your Windows PC/laptop and click “Media.” Scroll down and click the “Stream” option.
Step2 Now, click “Add” in the pop-up menu and choose the video you want to play. To add a subtitles file, check the “Use a Subtitles File” option and click “Browse.” Now, add the relevant SRT file you’ve downloaded.
Step3 Next, click the “Stream” option and choose “Next.” To set the destination for your video, select “File” and click “Add.” A new window will open, click the “Browse” option and enter your footage/video name.
Make sure to set the format as .mp4 or any other video format. Choose the folder for your video and click “Save.” Click the “Next” option to proceed further.
Step4 Check the box next to “Active Transcoding,” click the Wrench icon, and head to the “Subtitles” tab. Check the boxes next to “Subtitles” and “Overlay Subtitles on the Video.
Finally, click the “Save” option, select “Next,” and click “Stream” in the new window. Wait for the processing to complete, and your video with subtitles will be saved to the folder you’ve selected.
On Mac
Here’s how you can permanently add subtitles to your video clip in the VLC media player on your Mac:
Step1 Launch the VLC media player on your Mac and click the “File” option from the top toolbar. Click “Advanced Open File.”
Step2 Now, click “Browse” on the next page and add the video to which you want to attach the subtitles. Checkmark the “Add Subtitles File” option and click “Choose.” Browse and add the SRT file. Click “OK” to confirm.
Step3 Checkmark the “Stream Outputs” option and click “Settings.” Next, click “Browse” in the next window to configure the output file name and folder. Afterward, click “Save” and set the Encapsulation method as “MPEG 4.”
Under the Transcoding tab, checkmark the boxes next to Video and Audio. Next, click “OK” and select “Open.” You can now turn on the subtitles by navigating to “Subtitles” > “Subtitles Track.”
How To Create Subtitles In VLC Media Player?
It is possible to create subtitles in the VLC media player if you’re unable to find an appropriate SRT file online or want to add some extra details by editing the existing one. For this method to work, you will first need to format your file in the SRT format.
Furthermore, you have to rank the text in order with a number and add timestamps in minutes, seconds, and milliseconds to determine the duration. To avoid plain text, you can also add effects to the subtitles by using HTML.
Step1 Launch a text editoron your PC, import your video to the editor, and save it in .srt format.
Step2 Open the VLC media player and play the video. Now, edit the subtitles while matching them with the timestamps.
Step3 Next, add a new line, timestamp, and subtitle for each caption.
Step4 Repeat the process to create and add all the required subtitles.
Bonus Tips: How To Add And Edit Subtitles In The Best VLC Alternative
If you find the above method difficult to understand, we recommend using Filmora . With this software program, you can not only edit your videos to make them engaging and appealing to watch but can also add and edit subtitles to them using the ten pre-build subtitles templates.
Free Download For Win 7 or later(64-bit)
Free Download For macOS 10.14 or later
Filmora can help you to format the subtitles to match your video and add various font styles, such as WordArt, Basic, Titles, and more. In addition, you can create text with different parameters, including color fills, gradient fills, and 12 shadow effects. You can also make your captions alive with the animation effects.
Here’s how you can add and edit subtitles on your videos using Filmora:
Step1 Launch the Filmora software on your PC and click “Create New Project.” Drag and drop your video or select “Click here to import media” to add your video.
Step2 Add the video to the timeline and play it. Listen to the voiceover and press the “M” key to add a marker.
Now, click the “Titles” option and head to the “Subtitles” tab from the left menu. Double-click a subtitle to download and preview it.
Step3 Drag and drop the subtitle you want to use in the timeline and adjust it along the marker point.
Next, double-click the subtitle box in the timeline and type the text from the voiceover. Add color, text template, and adjust the text space.
Step4 Head to the “Advanced” tab, delete the preset text and adjust the one you’ve just typed. You can also add animation effects from the “Animation” tab and click “OK.”
Repeat the process to add and edit the subtitles on your video till the end. Once you are satisfied, click “Export” and save the file on your PC.
Conclusion
In this article, we’ve explored different methods to show you how to add subtitles in the VLC media player to make your videos more engaging and easy to understand, even for those with hearing impairment.
We’ve also provided step-by-step instructions to use Filmora as an alternative to add and edit the subtitles on your video real quickly.
Hopefully, you’ve enjoyed reading this article and can now enjoy watching a video in any language with ease.
How to Make Dynamic Video Collages?
Videos are a crucial component in everyone’s lives. Even businesses rely on videos to promote their products and services in the most effective and engaging manner. People love to capture their day-to-day life and share it with the world to attract more and more followers. If you also want to get active on social media and share your life with other people, dynamic videos are your chance.
Don’t know what dynamic videos are? No problem, because from definition to editors, this article will help you to make dynamic videos. Jump ahead and find what you need in further discussion.
Part 1: Understanding Video Collages
Getting into video collages without understanding their basic purpose or what they can do for you is not the best thing to do. Before using anything and investing your precious time in it, you should know what benefits it can provide for you or what its applications are.
Don’t panic if you don’t know anything because this part will help you a lot. Here we will guide you through the basics of dynamic videos to upgrade your functionality:
- Definition of Dynamic Video Collages
- Purpose of Dynamic Video Collages
- Benefits of Dynamic Video Collages
- Applications of Dynamic Video Collages
Definition of Dynamic Video Collages
Combining multiple videos, clips, images, or other intuitive visual elements into a cohesive presentation is termed a “video collage.” Several types of video collages are present on the web, and one of them is Dynamic Video Collages.
From layering to the arrangement of the visual metrics, you can customize everything as per your need. It is one of the most engaging factors that can help you attract more users and share multiple multimedia content with the world innovatively.
Purpose of Dynamic Video Collages
Now that you are aware of what Dynamic Video Collages are, you must be wondering what their core purpose is. It is not wrong to say that the purpose of these collages solely depends on the context or interpretation of the intention of the creator. However, some of the core purposes of Dynamic Video Collages are discussed here:
1. Storytelling and Presentation
With the usage of video collages, you can present your stories in a more eye-catching manner. Moreover, these collages can also be used to present the business model in the most understandable way.
2. Mosaics and Highlights
You will notice that video collages are often used to showcase memorable events and highlight important occupations. From sports to entertainment, every person can use video collages to present something such as performance, achievements, etc.
3. Effects and Expressions
These collages can also play a significant role as a platform to present artistic expressions and effects. You can combine diversified visual elements, such as graphics, images, texture, and more. Along with this, it can also help to evoke presentable emotion in the audience.
4. Promotion and Projects
If you wish to provide a visually rich experience for the audience, you can get assistance from video collages. It helps to showcase the projects in visually appealing formats. You also have an opportunity to promote your products and services in an optimized manner with video collages.
Benefits of Dynamic Video Collages
The benefits of visual collages are not limited to some specific areas. It can offer diversified productive benefits for you. A few of them can be seen in the understated points:
1. Engagement and Communication
The video collages help to provide a visually engaging experience with the combination of multiple videos. It also assists in capturing attention and acts as an effective communication medium.
2. Emotional and Expressional Impact
You can get creative freedom with video collages with impactful compositions. Above all, it also integrates the potential to evoke high-level and realistic expressions and emotions.
3. Flexibility and Marketing
Video collages are easier to share on multiple platforms and benefit more than blogs. You can also use this as a medium of omnichannel marketing in multiple domains. Moreover, the flexibility of video collages across multiple domains is also part of this.
4. Easy To Create
You don’t need to master specific skills to create dynamic video collages. These video colleges are easy to create, and you can present them to the world without issues.
Make Dynamic Video Collages
Use simple video editing tips to make cool and wonderful videos with Wondershare Filmora features and effects.
Make Dynamic Video Collages Apply VHS Effect Learn More >


Applications of Dynamic Video Collages
In this content-driven world, you can find diversified applications for dynamic video collages. You can use it to engage with others or share your daily activities without issues. If you are still curious about its applications, the below-given points will satisfy your queries:
1. Digital Marketing
One of the common uses of video colleges is digital marketing. You can showcase products, highlight their features, and convey explicit brand messages.
2. Content for Social Media
Besides digital marketing, you can also use these video collages to create specified content for your social media. It lets you compile multiple photos and videos to share more in a limited time with the world.
3. Personal Use
It is not compulsory to use video collages for business purposes because you can also use them for personal use. From birthdays to weddings, you can create personalized video collages for every occasion.
4. Artistic Projects
Another considerable application of video collages is the creation and composition of artistic content. You can use it for visual storytelling along with boosting of immersive experience.
Part 2: The Purpose of Split Screen
Research is a basic component of creating unmatchable, immersive, engaging content for blogs and sites. If you are a content writer or a multimedia content editor, you may face problems while acquiring the specific content to write or apply. However, as technology and the need for digital content emerge, so do the techniques for this.
One of the basic yet effective techniques mostly used by content creators is Split Screen. When you divide your desktop or laptop’s content in half, it is known as a split screen. Other than the previously discussed content, there are some other purposes of split screen. Some of them are discussed here:
01of 06Effective Comparison
From content writing to video editing, you need to compare the content to ensure creativity. If you are using the split screen, it can be helpful for you because you can compare content on both windows in real time.
02of 06Different Storyline Perspectives
You can get aid from a split screen to depict the actions or happenings in different locations. Moreover, you can also follow multiple storylines simultaneously and experience a broader range of perspectives.
03of 06Clone Visual Effects
Clone visual effects mean applying the effect in one part of the video and creating its modified version. To clone the visual effects in real time, the split screen is the best option.
04of 06Content Preview
Every video editor needs to see how your video will look after editing to analyze its engaging and modified metric. With split screens, you can have optimized content previews without any problem.
05of 06Compression and Constraints
Split screens are genuinely effective in maximizing the productivity of the users. You can also compress the time limits with a split screen and can also utilize this for technical constraints.
06of 06Personal Preference
Some users find it difficult to open the windows every time they wish to search for information. For this reason, they use the split screen because it lets you explore the windows without minimizing the first one. So, it can be said that a split screen’s usability depends upon the users’ perspective.
Part 3: 5 Best Video Collage Makers
Knowing the effectiveness of dynamic video collages without knowing the video collage makers is like getting thirsty but not drinking water. You can create studio-friendly dynamic videos to ensure higher functionality and share more in a limited time.
The most trusted and reliable video collage makers that can help you in creating cinematic dynamic video collages are listed here. From description to features, you can find valuable information about these video collage makers here:
1. Filmora Video Editor
With over 100 million users, Wondershare Filmora never fails to amaze users with its optimized functionality ratio. You can use this premium-grade video collage maker on several platforms such as desktop, tablet, or mobile phone. Filmora also integrates the Split Screen so you can maximize your productivity without losing focus.
It also encompasses uncountable preset templates to fabricate the cinematic level video in a limited time. One of the best things about Wondershare Filmora is that it comprehends the nondestructive and layer base edition and video-creating procedure.

Free Download For Win 7 or later(64-bit)
Free Download For macOS 10.14 or later
Key Features of Wondershare Filmora
- Using its AI Copywriting feature, you can create inspiring and descriptive content in a limited time.
- With the built-in Instant Mode of Filmora, you can create videos by adding media files. No specialized skill is required to make a video with Filmora.
- By using the Title Editing feature, you can create expressive titles for your videos. Moreover, it also allows you to edit multiple videos at once.
Pros of Wondershare Filmora
- It offers free cloud storage through which you can back up and store your needed media resources easily.
- You can also do motion tracking in the video collages without impacting the content in videos.
Con of Wondershare Filmora
- Some of the features of Filmora are limited to the paid version, so you cannot use them unless you are a premium user.
2. Canva
In Canva, you can find a huge array of layouts and grids to create perfect video collages. It also integrates several free templates, which are also used to create high-level videos. If you are a startup, you can also use this tool to create the logo for your brand. Arguably, Canva is one of the most used platforms for creating intuitive video collages.

Key Features of Canva
- In Canva, you can find uncountable elements and illustrations for every type of project. It also integrates royalty-free images.
- Canva also offers several intuitive and engaging filters and effects to make multimedia files more upgraded and cinematic.
- You can remove the unattractive background from photos and videos and can also replace them with the backgrounds of your choice.
Pros of Canva
- It can encompass a modernized editing feature through which you can turn simple videos into engaging videos.
- There is an extensive library of pictures, themes, templates, and other visual elements which can make your work easier than ever.
Con of Canva
- Canva is an online tool, so you cannot use its exclusive features and make high-level video collages if you don’t have a reliable internet connection.
3. Kapwing
Kapwing lets you create premium-grade dynamic video collages, and you can export them in the desired formats without any issue. It helps you in creating and editing videos to generate the best content. While making video collages, you can also use its built-in collage templates from its versatile library. It supports timeline-based editing, which gives you full control over several metrics of your videos.

Key Features of Kapwing
- With Kapwing, you can edit videos in real time with your team members and friends. It saves you from sharing the video every time after editing.
- It also offers you the chance to add expressive and accurate subtitles in the videos and auto-sync them to your videos.
- There are hundreds and thousands of royalty-free stock assets in this. It includes GIFs, photos, videos, audio, and other things.
Pros of Kapwing
- It supports Smart Cut, through which you can remove the unrequired silences from videos to get rid of boring parts.
- There are unlimited overlays in it that give you unlimited possibilities of making your video more cutting-edge in a limited time.
Cons of Kapwing
- Users can face irritable restrictions and limitations while exporting their dynamic video collages on devices.
4. Adobe Express
It is one of the most reliable tools through which you can create intuitive, dynamic video collages on the web, mobiles, and desktop devices. It offers modernized capabilities to leverage your branding videos in no time. You can also access Adobe fonts and assets with this video collage maker. The built-in layouts and grids of this tool are also well-optimized and modernized.

Key Features of Adobe Express
- You can use professionally designed templates to create the most efficient and engaging content without investing extra effort.
- It also offers the integration of designing with AI, so you can also transfer text to images with this tool.
- No matter if you are working alone or with a team, it lets you synchronize your projects with other people so you can work in a collaborative manner.
Pros of Adobe Express
- There are endless customizing possibilities in Adobe Express that help you to make collages without compromising your creativity.
- You can remove the background from images and videos or cam edit it in multiple ways effortlessly.
Con of Adobe Express
- It does not support the SVG format, which can be a major restriction for many users.
5. Veed.io
Do you wish to make dynamic video collages of professional quality? There is nothing to be concerned about because Veed.io got you covered in this domain. It’s a game-changing tool because you can create gorgeous promotional content with this. Moreover, it also supports the auto resizing option, through which you can resize the collages in multiple dimensions.

Key Features of Veed.io
- io helps you to record engaging videos, and you can also edit them directly on Veed.io without any restriction to download them on your device.
- This tool helps you in adding accurate and synchronized subtitles, and you can also transcribe the audio of the video into text.
- As it also comprehends the Video Converter, you can convert your video file of one format into another.
Pros of Veed.io
- In case your video collage has a large size, you can use the built-in video compressor for compressing videos in lossless quality.
- The Video Merger of Veed.io can assist you in merging multiple videos together to create one optimized masterpiece.
Con of Veed.io
- There is no broader range of audiograms in Veed.io. It can be stressful for users that want to add audio to videos.
Part 4: How to Make a Video Collage in Filmora?
The best video collage maker among the tools listed above is Wondershare Filmora. It offers higher functionality along with innovative features. Do you want to make dynamic video collages with Wondershare Filmora? Do you want to know how to create video collages with split screens and overlays? No worries because the instructions listed here can help you a lot:
Free Download For Win 7 or later(64-bit)
Free Download For macOS 10.14 or later
Method 1: Split Screen
Here is the procedure for making dynamic video collages with the help of a split screen:
Step 1Launch Filmora and Add Clips
Initially, install and launch Wondershare Filmora on your device and click the “New Project” option. To continue, go to the “Click here to import media” section and add the videos. Next, drag the video to “Timeline” to enable its editing.

Step 2Select a Collage Layout
Following this. open “Wondershare Filmstock” and search for the “Video Collage Layouts” from the “Search Bar.” Once you find the best layout, click the “Download” button to download it. Next, go to the tab related to the college you have downloaded. This may include “Titles,” “Transitions,” “Effects,” and other metrics.

Step 3Add Clips to Collage Layout
After adding the collage layout, add the clips of your choice in the customized arrangements. You are also free to manage the “Start Time” and “Duration” of the video. Along with that, you can access “Effects,” “Transitions,” or “Stickers” to check the Filmstock package that is downloaded into Filmora.

Step 4Export the Dynamic Video Collages
After making all the modifications, click the “Export” button from the top right of the screen. To proceed, change its “Name,” “Save to” location, “Preset,” “Resolution,” and other metrics. Finally, hit the “Export” button to save the video collage on the device.

Method 2: Overlay
Another significant method to make dynamic video collages with Wondershare Filmora is to use its overlays. Don’t know how to use it? The understated steps will guide you about this:
Step 1Import Video Clips to Filmora
To start, open Wondershare Filmora on your device and hit the “New Project” option. Following this, select the “Click here to import media” option and add the video clips you want to make a collage. Don’t forget to drag the imported video in “Timeline.”

Step 2Select an Overlay
Next, go to “Effects” and search for a specific overlay with the help of the “Search Bar.” Following this, select the effect of your liking and drag it on the video in the timeline.

Step 3Add Clips to Overlays
Next, customize the overlay in your desired size and dimension and add the “Video Clips” to add in collage. You can also manage the arrangement of clips in collages.

Step 4Export the Video Collage into the Device
Afterward, click the “Export” button from the above panel and use the on-screen “Output Settings” to modify and personalize the video collage. Once done, select the “Export” button and save the video collage on your device.

Part 5: Boost Your Video Collage
Several factors play an important role in boosting and improving the quality of your video. Luckily, Wondershare Filmora also supports several factors that can enhance your video’s productivity. These factors include the followings.
Free Download For Win 7 or later(64-bit)
Free Download For macOS 10.14 or later
Transitions
The transitions in videos create a smooth flow and add a sense of consistency. Moreover, It also helps to make the videos more visually appealing and engage users. It acts like the smoothest break in the scenes that attract the users and capture their attention. In addition, you can also give a great storytelling experience to users with transitions.

Video Effects and LUTs
LUTs stand for Look Up Tables, and they are used to maximize video engagement. Moreover, video effects can also make videos more cinematic and studio friendly. It can add versatility and flexibility that ensures the longevity of videos. You can also make corrective adjustments in videos and express your creativity to the world.

Title Effects
Titles Effects are extremely crucial components of videos because they express the theme and purpose of the video. The audience is likely to guess the content of videos from the title because it’s the first thing they will see. You have to keep it informative and attention-grabbing, along with keeping professionalism in mind. It can also help in boosting the retention of videos.

Conclusion
In this article, you have learned about dynamic video collages, their definition, purposes, benefits, and application. It can be said that it is an optimized option to attract more users and boost your video retention. You can use video collages for both personal and professional purposes. It also helps you to share your artistic and creative side with the world.
To enhance your productivity ratio, you can also use Split Screen. To learn more about the split screens, you can look at the above discussion. The best tools that can help you make videos without any issues are also discussed above for your ease. However, the best among them is Wondershare Filmora. It also integrates LUTs, transitions, and effects.
Frequently Asked Questions
To make video collages on your laptop, you can take assistance from the most useful tool named Wondershare Filmora. It is a feature-rich tool, so also modify your video to make them more engaging.
Users think that making collages with pictures and videos is not easy. However, it is not true in the case of the reliable collage maker. Several collage makers claim to be best when creating customized content, yet the most beneficial and effective one is Filmora. You just need to import clips in Filmora, add overlays, customize their settings, arrange clips, and export them in the desired output format.
With video collages, you can experience visual variety and effective storytelling. Moreover, it also helps to generate the best presentation and highlight multiple events. Sharing more content in limited time and effort is also a specialty of Filmora.
If you wish to know the most reliable and feature-rich app through which you can make a video collage, the answer is Wondershare Filmora. It also encompasses tons of reputable and innovative features that can make your videos more upgraded.
One of the highly reputable and significant college makers that offer straightforward procedures is Wondershare Filmora. It also comprehends integrations with Filmstock that help access more content to make cinematic-level collages.
Definition of Dynamic Video Collages
Combining multiple videos, clips, images, or other intuitive visual elements into a cohesive presentation is termed a “video collage.” Several types of video collages are present on the web, and one of them is Dynamic Video Collages.
From layering to the arrangement of the visual metrics, you can customize everything as per your need. It is one of the most engaging factors that can help you attract more users and share multiple multimedia content with the world innovatively.
Purpose of Dynamic Video Collages
Now that you are aware of what Dynamic Video Collages are, you must be wondering what their core purpose is. It is not wrong to say that the purpose of these collages solely depends on the context or interpretation of the intention of the creator. However, some of the core purposes of Dynamic Video Collages are discussed here:
1. Storytelling and Presentation
With the usage of video collages, you can present your stories in a more eye-catching manner. Moreover, these collages can also be used to present the business model in the most understandable way.
2. Mosaics and Highlights
You will notice that video collages are often used to showcase memorable events and highlight important occupations. From sports to entertainment, every person can use video collages to present something such as performance, achievements, etc.
3. Effects and Expressions
These collages can also play a significant role as a platform to present artistic expressions and effects. You can combine diversified visual elements, such as graphics, images, texture, and more. Along with this, it can also help to evoke presentable emotion in the audience.
4. Promotion and Projects
If you wish to provide a visually rich experience for the audience, you can get assistance from video collages. It helps to showcase the projects in visually appealing formats. You also have an opportunity to promote your products and services in an optimized manner with video collages.
Benefits of Dynamic Video Collages
The benefits of visual collages are not limited to some specific areas. It can offer diversified productive benefits for you. A few of them can be seen in the understated points:
1. Engagement and Communication
The video collages help to provide a visually engaging experience with the combination of multiple videos. It also assists in capturing attention and acts as an effective communication medium.
2. Emotional and Expressional Impact
You can get creative freedom with video collages with impactful compositions. Above all, it also integrates the potential to evoke high-level and realistic expressions and emotions.
3. Flexibility and Marketing
Video collages are easier to share on multiple platforms and benefit more than blogs. You can also use this as a medium of omnichannel marketing in multiple domains. Moreover, the flexibility of video collages across multiple domains is also part of this.
4. Easy To Create
You don’t need to master specific skills to create dynamic video collages. These video colleges are easy to create, and you can present them to the world without issues.
Make Dynamic Video Collages
Use simple video editing tips to make cool and wonderful videos with Wondershare Filmora features and effects.
Make Dynamic Video Collages Apply VHS Effect Learn More >
Applications of Dynamic Video Collages
In this content-driven world, you can find diversified applications for dynamic video collages. You can use it to engage with others or share your daily activities without issues. If you are still curious about its applications, the below-given points will satisfy your queries:
1. Digital Marketing
One of the common uses of video colleges is digital marketing. You can showcase products, highlight their features, and convey explicit brand messages.
2. Content for Social Media
Besides digital marketing, you can also use these video collages to create specified content for your social media. It lets you compile multiple photos and videos to share more in a limited time with the world.
3. Personal Use
It is not compulsory to use video collages for business purposes because you can also use them for personal use. From birthdays to weddings, you can create personalized video collages for every occasion.
4. Artistic Projects
Another considerable application of video collages is the creation and composition of artistic content. You can use it for visual storytelling along with boosting of immersive experience.
Part 2: The Purpose of Split Screen
Research is a basic component of creating unmatchable, immersive, engaging content for blogs and sites. If you are a content writer or a multimedia content editor, you may face problems while acquiring the specific content to write or apply. However, as technology and the need for digital content emerge, so do the techniques for this.
One of the basic yet effective techniques mostly used by content creators is Split Screen. When you divide your desktop or laptop’s content in half, it is known as a split screen. Other than the previously discussed content, there are some other purposes of split screen. Some of them are discussed here:
01of 06Effective Comparison
From content writing to video editing, you need to compare the content to ensure creativity. If you are using the split screen, it can be helpful for you because you can compare content on both windows in real time.
02of 06Different Storyline Perspectives
You can get aid from a split screen to depict the actions or happenings in different locations. Moreover, you can also follow multiple storylines simultaneously and experience a broader range of perspectives.
03of 06Clone Visual Effects
Clone visual effects mean applying the effect in one part of the video and creating its modified version. To clone the visual effects in real time, the split screen is the best option.
04of 06Content Preview
Every video editor needs to see how your video will look after editing to analyze its engaging and modified metric. With split screens, you can have optimized content previews without any problem.
05of 06Compression and Constraints
Split screens are genuinely effective in maximizing the productivity of the users. You can also compress the time limits with a split screen and can also utilize this for technical constraints.
06of 06Personal Preference
Some users find it difficult to open the windows every time they wish to search for information. For this reason, they use the split screen because it lets you explore the windows without minimizing the first one. So, it can be said that a split screen’s usability depends upon the users’ perspective.
Part 3: 5 Best Video Collage Makers
Knowing the effectiveness of dynamic video collages without knowing the video collage makers is like getting thirsty but not drinking water. You can create studio-friendly dynamic videos to ensure higher functionality and share more in a limited time.
The most trusted and reliable video collage makers that can help you in creating cinematic dynamic video collages are listed here. From description to features, you can find valuable information about these video collage makers here:
1. Filmora Video Editor
With over 100 million users, Wondershare Filmora never fails to amaze users with its optimized functionality ratio. You can use this premium-grade video collage maker on several platforms such as desktop, tablet, or mobile phone. Filmora also integrates the Split Screen so you can maximize your productivity without losing focus.
It also encompasses uncountable preset templates to fabricate the cinematic level video in a limited time. One of the best things about Wondershare Filmora is that it comprehends the nondestructive and layer base edition and video-creating procedure.
Free Download For Win 7 or later(64-bit)
Free Download For macOS 10.14 or later
Key Features of Wondershare Filmora
- Using its AI Copywriting feature, you can create inspiring and descriptive content in a limited time.
- With the built-in Instant Mode of Filmora, you can create videos by adding media files. No specialized skill is required to make a video with Filmora.
- By using the Title Editing feature, you can create expressive titles for your videos. Moreover, it also allows you to edit multiple videos at once.
Pros of Wondershare Filmora
- It offers free cloud storage through which you can back up and store your needed media resources easily.
- You can also do motion tracking in the video collages without impacting the content in videos.
Con of Wondershare Filmora
- Some of the features of Filmora are limited to the paid version, so you cannot use them unless you are a premium user.
2. Canva
In Canva, you can find a huge array of layouts and grids to create perfect video collages. It also integrates several free templates, which are also used to create high-level videos. If you are a startup, you can also use this tool to create the logo for your brand. Arguably, Canva is one of the most used platforms for creating intuitive video collages.
Key Features of Canva
- In Canva, you can find uncountable elements and illustrations for every type of project. It also integrates royalty-free images.
- Canva also offers several intuitive and engaging filters and effects to make multimedia files more upgraded and cinematic.
- You can remove the unattractive background from photos and videos and can also replace them with the backgrounds of your choice.
Pros of Canva
- It can encompass a modernized editing feature through which you can turn simple videos into engaging videos.
- There is an extensive library of pictures, themes, templates, and other visual elements which can make your work easier than ever.
Con of Canva
- Canva is an online tool, so you cannot use its exclusive features and make high-level video collages if you don’t have a reliable internet connection.
3. Kapwing
Kapwing lets you create premium-grade dynamic video collages, and you can export them in the desired formats without any issue. It helps you in creating and editing videos to generate the best content. While making video collages, you can also use its built-in collage templates from its versatile library. It supports timeline-based editing, which gives you full control over several metrics of your videos.
Key Features of Kapwing
- With Kapwing, you can edit videos in real time with your team members and friends. It saves you from sharing the video every time after editing.
- It also offers you the chance to add expressive and accurate subtitles in the videos and auto-sync them to your videos.
- There are hundreds and thousands of royalty-free stock assets in this. It includes GIFs, photos, videos, audio, and other things.
Pros of Kapwing
- It supports Smart Cut, through which you can remove the unrequired silences from videos to get rid of boring parts.
- There are unlimited overlays in it that give you unlimited possibilities of making your video more cutting-edge in a limited time.
Cons of Kapwing
- Users can face irritable restrictions and limitations while exporting their dynamic video collages on devices.
4. Adobe Express
It is one of the most reliable tools through which you can create intuitive, dynamic video collages on the web, mobiles, and desktop devices. It offers modernized capabilities to leverage your branding videos in no time. You can also access Adobe fonts and assets with this video collage maker. The built-in layouts and grids of this tool are also well-optimized and modernized.
Key Features of Adobe Express
- You can use professionally designed templates to create the most efficient and engaging content without investing extra effort.
- It also offers the integration of designing with AI, so you can also transfer text to images with this tool.
- No matter if you are working alone or with a team, it lets you synchronize your projects with other people so you can work in a collaborative manner.
Pros of Adobe Express
- There are endless customizing possibilities in Adobe Express that help you to make collages without compromising your creativity.
- You can remove the background from images and videos or cam edit it in multiple ways effortlessly.
Con of Adobe Express
- It does not support the SVG format, which can be a major restriction for many users.
5. Veed.io
Do you wish to make dynamic video collages of professional quality? There is nothing to be concerned about because Veed.io got you covered in this domain. It’s a game-changing tool because you can create gorgeous promotional content with this. Moreover, it also supports the auto resizing option, through which you can resize the collages in multiple dimensions.
Key Features of Veed.io
- io helps you to record engaging videos, and you can also edit them directly on Veed.io without any restriction to download them on your device.
- This tool helps you in adding accurate and synchronized subtitles, and you can also transcribe the audio of the video into text.
- As it also comprehends the Video Converter, you can convert your video file of one format into another.
Pros of Veed.io
- In case your video collage has a large size, you can use the built-in video compressor for compressing videos in lossless quality.
- The Video Merger of Veed.io can assist you in merging multiple videos together to create one optimized masterpiece.
Con of Veed.io
- There is no broader range of audiograms in Veed.io. It can be stressful for users that want to add audio to videos.
Part 4: How to Make a Video Collage in Filmora?
The best video collage maker among the tools listed above is Wondershare Filmora. It offers higher functionality along with innovative features. Do you want to make dynamic video collages with Wondershare Filmora? Do you want to know how to create video collages with split screens and overlays? No worries because the instructions listed here can help you a lot:
Free Download For Win 7 or later(64-bit)
Free Download For macOS 10.14 or later
Method 1: Split Screen
Here is the procedure for making dynamic video collages with the help of a split screen:
Step 1Launch Filmora and Add Clips
Initially, install and launch Wondershare Filmora on your device and click the “New Project” option. To continue, go to the “Click here to import media” section and add the videos. Next, drag the video to “Timeline” to enable its editing.
Step 2Select a Collage Layout
Following this. open “Wondershare Filmstock” and search for the “Video Collage Layouts” from the “Search Bar.” Once you find the best layout, click the “Download” button to download it. Next, go to the tab related to the college you have downloaded. This may include “Titles,” “Transitions,” “Effects,” and other metrics.
Step 3Add Clips to Collage Layout
After adding the collage layout, add the clips of your choice in the customized arrangements. You are also free to manage the “Start Time” and “Duration” of the video. Along with that, you can access “Effects,” “Transitions,” or “Stickers” to check the Filmstock package that is downloaded into Filmora.
Step 4Export the Dynamic Video Collages
After making all the modifications, click the “Export” button from the top right of the screen. To proceed, change its “Name,” “Save to” location, “Preset,” “Resolution,” and other metrics. Finally, hit the “Export” button to save the video collage on the device.
Method 2: Overlay
Another significant method to make dynamic video collages with Wondershare Filmora is to use its overlays. Don’t know how to use it? The understated steps will guide you about this:
Step 1Import Video Clips to Filmora
To start, open Wondershare Filmora on your device and hit the “New Project” option. Following this, select the “Click here to import media” option and add the video clips you want to make a collage. Don’t forget to drag the imported video in “Timeline.”
Step 2Select an Overlay
Next, go to “Effects” and search for a specific overlay with the help of the “Search Bar.” Following this, select the effect of your liking and drag it on the video in the timeline.
Step 3Add Clips to Overlays
Next, customize the overlay in your desired size and dimension and add the “Video Clips” to add in collage. You can also manage the arrangement of clips in collages.
Step 4Export the Video Collage into the Device
Afterward, click the “Export” button from the above panel and use the on-screen “Output Settings” to modify and personalize the video collage. Once done, select the “Export” button and save the video collage on your device.
Part 5: Boost Your Video Collage
Several factors play an important role in boosting and improving the quality of your video. Luckily, Wondershare Filmora also supports several factors that can enhance your video’s productivity. These factors include the followings.
Free Download For Win 7 or later(64-bit)
Free Download For macOS 10.14 or later
Transitions
The transitions in videos create a smooth flow and add a sense of consistency. Moreover, It also helps to make the videos more visually appealing and engage users. It acts like the smoothest break in the scenes that attract the users and capture their attention. In addition, you can also give a great storytelling experience to users with transitions.
Video Effects and LUTs
LUTs stand for Look Up Tables, and they are used to maximize video engagement. Moreover, video effects can also make videos more cinematic and studio friendly. It can add versatility and flexibility that ensures the longevity of videos. You can also make corrective adjustments in videos and express your creativity to the world.
Title Effects
Titles Effects are extremely crucial components of videos because they express the theme and purpose of the video. The audience is likely to guess the content of videos from the title because it’s the first thing they will see. You have to keep it informative and attention-grabbing, along with keeping professionalism in mind. It can also help in boosting the retention of videos.
Conclusion
In this article, you have learned about dynamic video collages, their definition, purposes, benefits, and application. It can be said that it is an optimized option to attract more users and boost your video retention. You can use video collages for both personal and professional purposes. It also helps you to share your artistic and creative side with the world.
To enhance your productivity ratio, you can also use Split Screen. To learn more about the split screens, you can look at the above discussion. The best tools that can help you make videos without any issues are also discussed above for your ease. However, the best among them is Wondershare Filmora. It also integrates LUTs, transitions, and effects.
Frequently Asked Questions
To make video collages on your laptop, you can take assistance from the most useful tool named Wondershare Filmora. It is a feature-rich tool, so also modify your video to make them more engaging.
Users think that making collages with pictures and videos is not easy. However, it is not true in the case of the reliable collage maker. Several collage makers claim to be best when creating customized content, yet the most beneficial and effective one is Filmora. You just need to import clips in Filmora, add overlays, customize their settings, arrange clips, and export them in the desired output format.
With video collages, you can experience visual variety and effective storytelling. Moreover, it also helps to generate the best presentation and highlight multiple events. Sharing more content in limited time and effort is also a specialty of Filmora.
If you wish to know the most reliable and feature-rich app through which you can make a video collage, the answer is Wondershare Filmora. It also encompasses tons of reputable and innovative features that can make your videos more upgraded.
One of the highly reputable and significant college makers that offer straightforward procedures is Wondershare Filmora. It also comprehends integrations with Filmstock that help access more content to make cinematic-level collages.
Also read:
- New LumaFusion Offers Various Look Up Table Presets, or LUTs, Such as FiLMiC deLog and FiLMiC DeFlat, and Several Stylistic LUTs for Use with Neutral Use Video. You Can Also Manually Add the LUTs
- New Split Videos in the Lightworks Step by Step
- Learn the Step-by-Step Process of Slowing Down Time-Lapse Videos on Your iPhone for 2024
- Updated 2024 Approved How to Apply Gaussian Blur Effect to Videos In Premiere Pro?
- Updated In 2024, 10 Best Vlogging Cameras for Beginners
- In 2024, Using One of the Best Converter Tools to Turn GIFs Into PNG or JPG. Here, Learn About the Ten Best Ones for Different Operating Systems, with Details on Features, Prices, and More
- Updated Basic Knowledge About WMV Format and Best WMV Video Editor
- 2024 Approved In This Article We Will Be Covering the Most Important Topics You Have to Remember when Becoming a Successful YouTube-Star
- New In 2024, Step by Step to Rotate Videos Using Handbrake
- Updated In 2024, An Ultimate Guide To Edit a Music Video Aspect Ratio and First Cut
- Mask Tracking Is Believed to Be a Helpful Procedure for Marking Proper Areas in Videos. Learn How to Perform Premiere Pro Mask Tracking in This Guide for 2024
- New Best Text Animations In After Effects
- Updated In 2024, Best Tips for Camtasia Freeze-Frame
- 4 Ways to Add White Border to Video on Mobile and Desktop
- In 2024, How to Find a High-Quality Video Marketing Agency?
- New In Todays Article, We Are Going to Show You How Adding a Simple Lower Third to Your Video Can Add a Degree of Professionalism and Polish to Your Videos While Giving It a Higher Perceived Value
- Updated 2024 Approved How to Edit Facebook Video Ads for E-Commerce Business
- How to Edit Facebook eCommerce Video Ads for 2024
- New How to Do Datamoshing Effect in After Effects?
- In 2024, If You Are a Beginner and Want to Familiarise Yourself with Steps and Terms Used in Video Editing, in This Article, We Will Go Through the Steps You Will Need to Cut Your Video File in Adobe Premiere Pro and Wondershare Filmora
- Add Zoom Blur Effect In Photoshop Step by Step for 2024
- In 2024, The Ultimate Wedding Videography Checklist
- New In 2024, Best Cinematic LUTs For Premiere Pro You Can Come Across
- How to Make Dynamic Video Collages?
- New How to Create Datamoshing Effect to Your Footage in After Effects?
- Offering The Best Understanding of Performing iMovie Slow Motion Video for 2024
- Updated In 2024, 6 Tips for Your First Facebook Ads
- New How to Create Cooking Video Intro and End Screen for YouTube Channel, In 2024
- In 2024, Best Video Editing Courses Online with Certificate
- New Wondering How to Add Custom Transitions in OBS Studio? Here Are the Steps to Add Stinger Transitions to OBS. Get a Better OBS Alternative to Add Transitions
- 2024 Approved Guide to Create Intro Video with KineMaster
- Focusing On The Best Ways To Convert Slow-Motion Video to Normal
- New In 2024, Best Way To Color Grading & Color Correction in Filmora
- 2024 Approved Special Animated Transition Tutorial【SUPER EASY】
- New In 2024, Create a Movie with Windows Movie Maker
- Top 8 Video Editor with Useful Masking
- Stuck at Android System Recovery Of Nubia Red Magic 9 Pro+ ? Fix It Easily | Dr.fone
- Best Fixes For Poco X6 Pro Hard Reset | Dr.fone
- 4 Methods to Turn off Life 360 On OnePlus Nord N30 SE without Anyone Knowing | Dr.fone
- Recover your pictures after Poco X5 has been deleted.
- What Pokémon Evolve with A Dawn Stone For OnePlus Ace 2 Pro? | Dr.fone
- How to Fix Android App Not Installed Error on Vivo X100 Quickly? | Dr.fone
- Top 9 Choices for Video Auto Translate for 2024
- Wireless Methods to MirrorApple iPhone 13 Pro & iPad to Fire Stick With Ease | Dr.fone
- 6 Solutions to Fix Error 505 in Google Play Store on Samsung Galaxy S24 Ultra | Dr.fone
- Spotify Keeps Crashing A Complete List of Fixes You Can Use on Vivo V27 | Dr.fone
- Your Account Has Been Disabled in the App Store and iTunes On Apple iPhone 14 Pro?
- In 2024, How to Unlock Honor Magic 6 Pro Phone without Any Data Loss
- How To Use Allshare Cast To Turn On Screen Mirroring On Itel P55 | Dr.fone
- Why Apple Account Disabled On your Apple iPhone 15 Pro? How to Fix
- In 2024, How Can We Bypass Samsung Galaxy Z Flip 5 FRP?
- How to Turn Off Google Location to Stop Tracking You on Motorola Moto G34 5G | Dr.fone
- How To Change Poco M6 Pro 5G Lock Screen Password?
- In 2024, How to Check Distance and Radius on Google Maps For your Vivo V27 | Dr.fone
- In 2024, Easy Guide to Motorola Moto G24 FRP Bypass With Best Methods
- Three Solutions to Hard Reset Nokia C12 Plus? | Dr.fone
- How to recover deleted photos from Android Gallery without backup on Meizu 21
- How do I reset my Realme GT 5 Phone without technical knowledge? | Dr.fone
- Change Location on Yik Yak For your Huawei Nova Y91 to Enjoy More Fun | Dr.fone
- How to Stop My Spouse from Spying on My Apple iPhone 11 Pro Max | Dr.fone
- In 2024, How To Pause Life360 Location Sharing For Motorola Moto G23 | Dr.fone
- In 2024, How to Unlock Xiaomi Redmi 12 5G Phone Password Without Factory Reset?
- In 2024, Fixing Foneazy MockGo Not Working On Apple iPhone 12 mini | Dr.fone
- Title: 2024 Approved How to Shoot Cinematic Footage From a Smartphone
- Author: Chloe
- Created at : 2024-05-20 03:38:12
- Updated at : 2024-05-21 03:38:12
- Link: https://ai-editing-video.techidaily.com/2024-approved-how-to-shoot-cinematic-footage-from-a-smartphone/
- License: This work is licensed under CC BY-NC-SA 4.0.
