
2024 Approved How To Slow Down GIF Building an Understanding
How To Slow Down GIF: Building an Understanding
Graphic interchange format, mostly known as GIF, is extensively used to convey information. GIF is a communication tool in bitmap image format that clearly conveys your online content. When sharing GIF images, playback speed is the most important thing to count. If the playback speed of the GIF is faster than usual, viewers may skip their focus essential data.
As a solution, you must learn how to adjust slow motion GIF’s speed. This article will teach you the stepwise methods to achieve a slow-motion GIF. Before heading towards the methods, learn about some GIF video platforms. By the end, you will be able to make a matchless slow-mo GIF through a desktop solution.
Slow Motion Video Maker Slow your video’s speed with better control of your keyframes to create unique cinematic effects!
Make A Slow Motion Video Make A Slow Motion Video More Features

Part 1: Where Can I Get Impressive Slow-Motion GIFs for Myself?
Slowing down GIFs brings viewers’ attention to specific actions in video content. It exaggerates facial expressions or movements in the videos, leading to humorous results. Creators choose to slow down GIFs to convey particular moods and styles. Different contexts require different slow-mo GIF videos; below are some platforms to cater to all of them.
1. Giphy
One of the famous platforms for GIFs is Giphy, which offers an extensive collection of GIFs. If you want a GIF that can add humor to your content, pick the entertainment category from Giphy. It provides different domains of GIFs for your ease of selection. Some of its categories include sports, gaming, animals, and cartoons.

Key Features
- Using this platform, you can not only get a GIF but also upload one. Graphics designers or GIF creators can use this place to publish their work globally.
- After selecting one GIF, you can share it on any platform. It allows you to embed the GIF directly on websites or share it through links.
- Every GIF on Giphy provides in-depth details like size, frame, and source. This way, you can instantly choose one that matches your project’s requirements.
2. Tenor
Another popular platform to get high-quality GIFs is Tenor. It supports multiple languages in its interface so international users can better comprehend it. Apart from that, there are many categories in the trending searches of GIFs. It shows which domain of GIFs is ranking the most. Some trending tenors include cars, snow, happy holidays, good nights, and GIFs.

Key Features
- When you pick one GIF, you can change its format before downloading. In this regard, you can choose HD, MP4, and SD quality options.
- This platform detects your selection and suggests relevant GIFs afterward. For instance, if you pick a cat GIF, then you will find a cat GIF when scrolling down.
- Tenor provides GIF specification details under each. Besides, you can share the selected GIF image through the URL and embedded link.
Part 2: What to Do If You Want to Slow Down GIFs: The Best Tools
Knowing platforms, as mentioned above, makes it easier for you to avail the desired GIF. After grabbing one of your choices, you can make it a slow-motion GIF, if required. To do so, there are several tools in the market. Some of them are explained below, along with step-by-step instructions on how to use them.
List of Best Tools to Slow Down GIFs
1. Ezgif.com
This tool is primarily responsible for online GIF making and image editing. Besides, it can convert your video into GIF, resize, cut, crop, and optimize them. Moreover, you can add effects and text to your videos or GIFs to make them appealing. GIF animation speed changers are the real game changers among online solutions:
Step 1
Browse the official site of Ezgif.com and tap on the “Effects” section. Afterward, choose the “Adjust GIF Speed” section to proceed to further options. There, click the “Choose File” white button and look for the file you want to slow down. Optionally, paste the URL link in the given section and tap “Upload” to continue.

Step 2
Scroll down the window and insert the digits on which percentage you want to slow down the speed. Afterward, click the “Change Speed” button and find a slow-motion GIF in the output image.

2. VEED.io
VEED.io is a preferred choice by many creators for professional or high-quality videos. It offers screen recording, video editing, and subtitle translation services. Apart from that, it can fix GIF speed with the GIF speed changer feature. After changing speed, you can add transitions and animation effects in Veed.io. For now, let’s just stick to the slow-mo GIF in the following steps:
Step 1
Access the “GIF Speed Changer” in VEED.io, start by tapping “Choose GIF File” and enter the editing screen.

Step 2
From the next screen, you will get a pop-up menu first. You have to hit the “Upload a File” option and select a GIF file to import into VEED.io. Under the video preview, click on the “Speed” icon next to the “Sound” symbol. Then, choose “0.5x” and get a slow-down GIF preview in front of you.

3. Canva
Students must be aware of this platform as a presentation template provider. Canva is a tool that provides stunning templates to customize with its cloud storage system. Gradually, it’s turning more into a video editing platform. Regarding slow-motion GIFs, it can change the GIF speed online. After slowing down the GIF, you can convert it into MP4 or enhance it by adding graphics.
Step 1
Reach out to the GIF Speed Changer feature of Canva’s video editing. Then, tap the “Change GIF Speed” button to access the editing screen.

Step 2
Navigate towards the left-side panel and hit the “Upload Files.” Now, search and select your GIF to import in Canva’s editing window. Afterward, go to the “Playback” option at the top left and then direct to the left panel. Move the “Video Speed” slider to the left for a Slow-mo GIF. Click on the video for a preview, or look for any other playback adjustments.

Part 3: Make Impressive Slow Mo GIFs Using Desktop Solution
Are you getting customized speed adjustment options using any of the above tools? The answer is quite clear: no online tools do not offer personalization for slow-motion GIFs. That’s where you need Wondershare Filmora as a better alternative. It is currently the best video editor that transforms your videos into art pieces.
With more than 10 billion stock media, you don’t have to browse different sites. Filmora is an all-in-all platform that can not only edit your video but also aims to polish it to the next level. Besides, editors can use Filmora anywhere with just a password.
Free Download For Win 7 or later(64-bit)
Free Download For macOS 10.14 or later
How to Make Slow-motion GIF with Filmora
After discovering the top-notch features of Filmora, it’s time to use it. Although it’s very simple to operate, this step-by-step guide will help you process faster:
Step 1Launch Filmora and Import GIF to the Timeline
Download Wondershare Filmora from its official site. After a successful launch, you will enter its main screen. Look for the “New Project” option from the main interface. Tapping on the New Project, you will find the editing screen. Import your GIF in the media panel and drag it into the timeline section to begin the process.

Step 2Slow Down the GIF with Optical Flow
Right-click on the video and pick the “Uniform Speed” option from the list. This way, you will find an editing panel on the right side. Now, you can move the “Speed” slider towards the left. You can press the space bar and get the slow-motion GIF preview. Direct downward and choose the “Optical Flow” option from the extended menu of “AI Interpolation.”

Step 3Continue to Edit or Head to Export the Media
Finally, you will get a slow but high-quality GIF. Now, it’s up to you to continue exploring other features of Filmora or head to save the file. To save the file, go to the top right corner and press the “Export” button.

Key Features Marking Filmora’s Greatness
Filmora is proven to be the easiest software with the most powerful editing features. As proof, you can read the main features of Filmora to comprehend its functionalities better.
1. Speed Ramping
Create a unique cinematic effect in your video by adjusting keyframes. Filmora offers speed ramping features to bring a smooth transition in slow-motion or fast motions. In speed ramping, you get 6 templates, such as bullet time, montage, and jumper. Using those templates, you don’t need to manually adjust keyframes for speed ramping. Also, you can retain the original pitch of the audio after changing the speed.
2. AI Copilot Editing
To boost productivity, Filmora provides an AI Copilot editor option. It saves time that could be wasted searching for some feature or making the editing perfect. Users can ask anything to copilot in natural language. They can take help from an already existing question in the copilot editors. This feature will guide you toward practical actions through navigation buttons.
3. AI Music Generator
Who else is fed up with finding the perfect music for Vlog? Commonly, you didn’t find a video of exact length and mood. Thus, Filmora enables you to generate a soundtrack according to your mood and video length. Using it, you just have to prompt with the number of tracks, mood, and length. The AI-generated music will not require copyrights, so you can use it freely anywhere.
4. AI Image
Have you ever heard that any video editor can convert your text prompts into images? Filmora is offering this option, especially for people who are struggling to get their desired image. For this purpose, they need to describe images in simple language. Afterward, they are required to pick one style for accurate results.
5. AI Copywriting
Do you have a deadline for script submission, but it is not ready yet? Leave this headache to Filmora’s AI copywriting feature, which aims to produce engaging scripts. With ChatGPT integration, it can generate YouTube titles and descriptions. Furthermore, you can ask AI to convert your script into an appealing video.
Conclusion
To summarize, slowing down is the ultimate solution to retain the viewer’s attention. In this article, you have seen the top-notch platforms for slow-motion GIFs. They are not enough for remarkable videos because of the limited speed adjustment options. So, using Filmora remains the best option in providing easier ways to customize the speed of GIFs.
Make A Slow Motion Video Make A Slow Motion Video More Features
Part 1: Where Can I Get Impressive Slow-Motion GIFs for Myself?
Slowing down GIFs brings viewers’ attention to specific actions in video content. It exaggerates facial expressions or movements in the videos, leading to humorous results. Creators choose to slow down GIFs to convey particular moods and styles. Different contexts require different slow-mo GIF videos; below are some platforms to cater to all of them.
1. Giphy
One of the famous platforms for GIFs is Giphy, which offers an extensive collection of GIFs. If you want a GIF that can add humor to your content, pick the entertainment category from Giphy. It provides different domains of GIFs for your ease of selection. Some of its categories include sports, gaming, animals, and cartoons.
Key Features
- Using this platform, you can not only get a GIF but also upload one. Graphics designers or GIF creators can use this place to publish their work globally.
- After selecting one GIF, you can share it on any platform. It allows you to embed the GIF directly on websites or share it through links.
- Every GIF on Giphy provides in-depth details like size, frame, and source. This way, you can instantly choose one that matches your project’s requirements.
2. Tenor
Another popular platform to get high-quality GIFs is Tenor. It supports multiple languages in its interface so international users can better comprehend it. Apart from that, there are many categories in the trending searches of GIFs. It shows which domain of GIFs is ranking the most. Some trending tenors include cars, snow, happy holidays, good nights, and GIFs.
Key Features
- When you pick one GIF, you can change its format before downloading. In this regard, you can choose HD, MP4, and SD quality options.
- This platform detects your selection and suggests relevant GIFs afterward. For instance, if you pick a cat GIF, then you will find a cat GIF when scrolling down.
- Tenor provides GIF specification details under each. Besides, you can share the selected GIF image through the URL and embedded link.
Part 2: What to Do If You Want to Slow Down GIFs: The Best Tools
Knowing platforms, as mentioned above, makes it easier for you to avail the desired GIF. After grabbing one of your choices, you can make it a slow-motion GIF, if required. To do so, there are several tools in the market. Some of them are explained below, along with step-by-step instructions on how to use them.
List of Best Tools to Slow Down GIFs
1. Ezgif.com
This tool is primarily responsible for online GIF making and image editing. Besides, it can convert your video into GIF, resize, cut, crop, and optimize them. Moreover, you can add effects and text to your videos or GIFs to make them appealing. GIF animation speed changers are the real game changers among online solutions:
Step 1
Browse the official site of Ezgif.com and tap on the “Effects” section. Afterward, choose the “Adjust GIF Speed” section to proceed to further options. There, click the “Choose File” white button and look for the file you want to slow down. Optionally, paste the URL link in the given section and tap “Upload” to continue.
Step 2
Scroll down the window and insert the digits on which percentage you want to slow down the speed. Afterward, click the “Change Speed” button and find a slow-motion GIF in the output image.
2. VEED.io
VEED.io is a preferred choice by many creators for professional or high-quality videos. It offers screen recording, video editing, and subtitle translation services. Apart from that, it can fix GIF speed with the GIF speed changer feature. After changing speed, you can add transitions and animation effects in Veed.io. For now, let’s just stick to the slow-mo GIF in the following steps:
Step 1
Access the “GIF Speed Changer” in VEED.io, start by tapping “Choose GIF File” and enter the editing screen.
Step 2
From the next screen, you will get a pop-up menu first. You have to hit the “Upload a File” option and select a GIF file to import into VEED.io. Under the video preview, click on the “Speed” icon next to the “Sound” symbol. Then, choose “0.5x” and get a slow-down GIF preview in front of you.
3. Canva
Students must be aware of this platform as a presentation template provider. Canva is a tool that provides stunning templates to customize with its cloud storage system. Gradually, it’s turning more into a video editing platform. Regarding slow-motion GIFs, it can change the GIF speed online. After slowing down the GIF, you can convert it into MP4 or enhance it by adding graphics.
Step 1
Reach out to the GIF Speed Changer feature of Canva’s video editing. Then, tap the “Change GIF Speed” button to access the editing screen.
Step 2
Navigate towards the left-side panel and hit the “Upload Files.” Now, search and select your GIF to import in Canva’s editing window. Afterward, go to the “Playback” option at the top left and then direct to the left panel. Move the “Video Speed” slider to the left for a Slow-mo GIF. Click on the video for a preview, or look for any other playback adjustments.
Part 3: Make Impressive Slow Mo GIFs Using Desktop Solution
Are you getting customized speed adjustment options using any of the above tools? The answer is quite clear: no online tools do not offer personalization for slow-motion GIFs. That’s where you need Wondershare Filmora as a better alternative. It is currently the best video editor that transforms your videos into art pieces.
With more than 10 billion stock media, you don’t have to browse different sites. Filmora is an all-in-all platform that can not only edit your video but also aims to polish it to the next level. Besides, editors can use Filmora anywhere with just a password.
Free Download For Win 7 or later(64-bit)
Free Download For macOS 10.14 or later
How to Make Slow-motion GIF with Filmora
After discovering the top-notch features of Filmora, it’s time to use it. Although it’s very simple to operate, this step-by-step guide will help you process faster:
Step 1Launch Filmora and Import GIF to the Timeline
Download Wondershare Filmora from its official site. After a successful launch, you will enter its main screen. Look for the “New Project” option from the main interface. Tapping on the New Project, you will find the editing screen. Import your GIF in the media panel and drag it into the timeline section to begin the process.
Step 2Slow Down the GIF with Optical Flow
Right-click on the video and pick the “Uniform Speed” option from the list. This way, you will find an editing panel on the right side. Now, you can move the “Speed” slider towards the left. You can press the space bar and get the slow-motion GIF preview. Direct downward and choose the “Optical Flow” option from the extended menu of “AI Interpolation.”
Step 3Continue to Edit or Head to Export the Media
Finally, you will get a slow but high-quality GIF. Now, it’s up to you to continue exploring other features of Filmora or head to save the file. To save the file, go to the top right corner and press the “Export” button.
Key Features Marking Filmora’s Greatness
Filmora is proven to be the easiest software with the most powerful editing features. As proof, you can read the main features of Filmora to comprehend its functionalities better.
1. Speed Ramping
Create a unique cinematic effect in your video by adjusting keyframes. Filmora offers speed ramping features to bring a smooth transition in slow-motion or fast motions. In speed ramping, you get 6 templates, such as bullet time, montage, and jumper. Using those templates, you don’t need to manually adjust keyframes for speed ramping. Also, you can retain the original pitch of the audio after changing the speed.
2. AI Copilot Editing
To boost productivity, Filmora provides an AI Copilot editor option. It saves time that could be wasted searching for some feature or making the editing perfect. Users can ask anything to copilot in natural language. They can take help from an already existing question in the copilot editors. This feature will guide you toward practical actions through navigation buttons.
3. AI Music Generator
Who else is fed up with finding the perfect music for Vlog? Commonly, you didn’t find a video of exact length and mood. Thus, Filmora enables you to generate a soundtrack according to your mood and video length. Using it, you just have to prompt with the number of tracks, mood, and length. The AI-generated music will not require copyrights, so you can use it freely anywhere.
4. AI Image
Have you ever heard that any video editor can convert your text prompts into images? Filmora is offering this option, especially for people who are struggling to get their desired image. For this purpose, they need to describe images in simple language. Afterward, they are required to pick one style for accurate results.
5. AI Copywriting
Do you have a deadline for script submission, but it is not ready yet? Leave this headache to Filmora’s AI copywriting feature, which aims to produce engaging scripts. With ChatGPT integration, it can generate YouTube titles and descriptions. Furthermore, you can ask AI to convert your script into an appealing video.
Conclusion
To summarize, slowing down is the ultimate solution to retain the viewer’s attention. In this article, you have seen the top-notch platforms for slow-motion GIFs. They are not enough for remarkable videos because of the limited speed adjustment options. So, using Filmora remains the best option in providing easier ways to customize the speed of GIFs.
Turn Your Text Into a Podcast Made Possible
Being a content creator, either writing or generating videos, requires podcast text-to-speech knowledge. The impact of content depends on how many people see it. It means finding new ways to get it into real and virtual places where customers and users might be.
Depending on the context, podcasting can be a perfect alternative for sharing content.
This article will address your questions about the easiest way to turn a blog into a podcast. Let’s begin with the reasons why you should do a podcast.
Part 1. Why You Should Podcast
Podcasts are one of the simplest and most cost-effective ways. It helps to advertise yourself and your products to a highly targeted audience. Podcasts are also excellent for engaging with potential clients interested in your content. In your field, you can achieve fame and expertise.

Repurposing of Content
Podcasters can maximize their potential for successful episodes and repurposing their podcast into multiple content pieces.
This podcasting strategy can help you reach more people by putting your podcasts on more channels and engaging more people who might be interested.
More Fulfilling than Articles
Unlike music, news, TV, and social media, podcast listeners don’t have to watch the screen like they do with YouTube videos or TV shows. This means they can listen while walking or driving home from work.
Podcasts are the best way to get people to pay attention and make fundamental societal changes. They can keep people interested for a long time, so you can go into detail and get personal without turning off your audience.
Minimal Start-Up Costs
To start a podcast, you can spend a little money. Even some of the most famous podcasts use a microphone, a computer, and software for recording. But it’s common to spend more money on advertising and better hosting.
Starting a podcast doesn’t cost much, as you can get everything you need for about $145.
Expansion of Search Potential
In the past few years, many big brands and small to medium-sized businesses have started using podcasts as a marketing strategy. This is because podcasts are becoming more and more popular and can help raise your company’s profile.
Podcasting is another way to disseminate your study to a broader audience, whether that audience consists of policymakers or interested citizens.
Potential to Monetize
Using an affiliate program podcast, you can earn money. Businesses can increase their income by offering paid advertising sponsorships to monetize podcasts. Suppose you accept an affiliate offer to sell ads. In that case, you become the company’s voice and put recorded ads in your podcast episodes.
The most common way to make money from a podcast is through sponsorship. It’s also the easiest way to make money because you don’t have to make or sell anything. You just have to make a deal with a sponsor.
Part 2. Why Are Writers Hesitant to Start a Podcast?
Even after knowing all these benefits, writers are still hesitant to start a podcast. One of the main reasons a writer may be reluctant to launch a podcast is the cost of the necessary equipment. You will need at least $80 to $500 for this unpromissing business.
However, let me tell you a secret that many podcastors didn’t buy any audio equipment for the launch of their podcast channel on Spotify.
Moreover, many writers don’t want to show their voice through recordings. This is because they couldn’t just make a recording and hand it off to a sound specialist. Besides, finding their voice through the stories they write is the routine.
But we all need to get the truth that many podcastors don’t record a single word of the podcast with their own voice. Due to a solution: text-to-speech, technology like this has been around for a while and continues to improve.
The two important issues have been solved, so what are you waiting for? Platform building has always relied heavily on content marketing. With blog posts and social media, additional support was provided, and now podcasts are becoming more commonplace.
Part 3. How to Turn a Text Into a Podcast?
Text To Speech
To turn your text into audible content, Text-to-speech (TTS) is an assistive technology. With a single click, TTS reads your written text aloud. Many people also use it for writing and editing to maintain audience concentration.
Text-to-speech technology is compatible with all digital devices, including computers, tablets, and smartphones. Increasing numbers of websites and products now have developed this function. For example, you can find it within the trusted video editing software like Filmora. With Filmora’s Text to Speech (TTS) feature , you may add extra aspects to your video by turning your text files into voiceovers.
Why we regard text to speech as a good
For writers, imagination is the only tool to construct their stories. To bring our stories to life, all we need is a laptop. The same holds for text-to-speech technologies, which can significantly assist writing and editing by allowing the author to hear their words without using their voice.
- Text-to-speech applications can assist you in repurposing your material.
Your written work can be converted into spoken language or a podcast. A podcast can be converted into a YouTube video with a few alterations. All of these factors can help you reach new audiences.
Repurposing material permits your audience to consume it in a variety of ways. The audience can read, listen to, or view your content.
- Text-to-speech systems enable authors to create information that is accessible.
As per World Health Organization, there are almost 285 million visually impaired persons and 39 million blind people. We writers can create a more inclusive world by constantly keeping accessibility in mind.
The limitations of text to speech
Text-to-speech software is becoming increasingly lifelike thanks to technological advancements. However, it cannot still express genuine human emotions. However, this should allow you to utilize these tools. The positives significantly exceed the disadvantages, and technology is continually improving.
Easiest Fix: Turn Texts Into Podcasts With TTS in Filmora
So how can you use text-to-speech? Andhow you can turn your texts into audio podcasts in a daily routine? Filmora , a all-in-one video editor, gets you the solution.
Free Download For Win 7 or later(64-bit)
Free Download For macOS 10.14 or later
Step1 Download and install Filmora on your PC or Mac.

Step2 Open Filmora and select the video on which you wish to add audio.

Step3 After adding your selected video, select the option “Titles” to add text to your video.

Step4 Select your favorite position for text in the video, like “lower third,” which is used the most in video titles.

Step5 Add text to the timeline and click “Ok.” You can move the red timeline marker if you want your text in a certain spot.

Click the “+” button marked in the picture below to add text.

You can also edit the text by changing its style, color, and font or by animating it.

Step6 Press the “Text-to-Speech” button in the lower right side and choose your preferred voice. For example, Lilly’s voice resembles Siri.

You can also choose another language other than English.

Click “Ok” once you’ve selected everything according to your requirements.
Step7 Once the transcription is completed, go ahead and test the video and audio to see if it’s synching.

And that’s done. This is how easy it is to turn your texts into speech using Filmora.
Part 4. Hot FAQs on Podcast Text to Speech
How do I convert podcasts to text?
With the help of the smartphone app Google Recorder you can easily convert podcasts to texts for free.
- Open the app on your phone, start recording to it, and start recording your podcast simultaneously.
- The words will be automatically recorded and entered into the application as you talk into your phone’s microphone.
- After you click stop on the app, you can store and share the files once you finish your recording.
You have an option of sharing the text, the audio, or both. Alternatively, you can save them to your Google Drive if you don’t want to share them.
How to turn my podcast into a sound?
To convert your video podcasts into audio through Filmora. Follow these steps:
- Drag the imported video from the media library into the video timeline.
- To extract the audio from the video, right-click the video clip and select “Audio Detach.”
- After a while, audio and video will be seen on separate tracks.
Can I save the sound after converting text to speech?
Once the text has been converted to speech, you can save the sound. Select your preferred format after clicking the “export” option in Filmora.
Conclusion
Many of us wish to launch a podcast and blog. A productive podcast’s essence is turning writing into audio using various podcasting techniques. AI-powered text-to-speech softwares can quickly convert articles into podcasts. Or, you can invite significant people to your podcast to personalize it. Podcasting can give outdated content a new life.
Free Download For macOS 10.14 or later
Step1 Download and install Filmora on your PC or Mac.
Step2 Open Filmora and select the video on which you wish to add audio.
Step3 After adding your selected video, select the option “Titles” to add text to your video.
Step4 Select your favorite position for text in the video, like “lower third,” which is used the most in video titles.
Step5 Add text to the timeline and click “Ok.” You can move the red timeline marker if you want your text in a certain spot.
Click the “+” button marked in the picture below to add text.
You can also edit the text by changing its style, color, and font or by animating it.
Step6 Press the “Text-to-Speech” button in the lower right side and choose your preferred voice. For example, Lilly’s voice resembles Siri.
You can also choose another language other than English.
Click “Ok” once you’ve selected everything according to your requirements.
Step7 Once the transcription is completed, go ahead and test the video and audio to see if it’s synching.
And that’s done. This is how easy it is to turn your texts into speech using Filmora.
Part 4. Hot FAQs on Podcast Text to Speech
How do I convert podcasts to text?
With the help of the smartphone app Google Recorder you can easily convert podcasts to texts for free.
- Open the app on your phone, start recording to it, and start recording your podcast simultaneously.
- The words will be automatically recorded and entered into the application as you talk into your phone’s microphone.
- After you click stop on the app, you can store and share the files once you finish your recording.
You have an option of sharing the text, the audio, or both. Alternatively, you can save them to your Google Drive if you don’t want to share them.
How to turn my podcast into a sound?
To convert your video podcasts into audio through Filmora. Follow these steps:
- Drag the imported video from the media library into the video timeline.
- To extract the audio from the video, right-click the video clip and select “Audio Detach.”
- After a while, audio and video will be seen on separate tracks.
Can I save the sound after converting text to speech?
Once the text has been converted to speech, you can save the sound. Select your preferred format after clicking the “export” option in Filmora.
Conclusion
Many of us wish to launch a podcast and blog. A productive podcast’s essence is turning writing into audio using various podcasting techniques. AI-powered text-to-speech softwares can quickly convert articles into podcasts. Or, you can invite significant people to your podcast to personalize it. Podcasting can give outdated content a new life.
How to Use LUTs in VN Editor – Complete Guide and Best LUTs Download
Hello and welcome to another article full of information and excitement. The topic of this article is LUT for the VN editor. So it will be exciting for those who want to use LUTs in their video to make them look nice and well. As we will discuss today that what is VN editor and how you can add LUTs to your videos using it on the devices it is compatible for. Moreover, where you can download some fantastic LUTs like moody LUTs, which help your videos to look nice, and which software you should use for this purpose if you are running a device on which the VN editor is not compatible. So let’s begin!
Part 1. What is VN editor?
VN editor is one of the best choices for video editing on mobiles and Mac. Fast editing, transitions, effects, filters, colors, subtitles, music, and many other features make the VN video editing app a great tool for producing and editing videos. It aims to make editing shorter and more feature-rich, empowering everyone to take control of their own lives. You cannot only produce great videos but good films as well. In the following, we will discuss how you can add LUTs to your videos using it.

Part 2. How to use LUTs in VN editor?
First, we must know that it is compatible with which platforms. So, it is now available for Android, iOS, and Mac OS only. However, you can also use it on Windows with some Android or iOS emulators, but it is not a very continent way in our suggestions. Even after doing this, it does not work well on your Windows. Maybe you will face some glitches or malfunctioning problems. So it is better to use it on only those platforms for which it is primarily available. Please read the instructions below since we will go through how to use LUTs in it later on.
On Mac:
First of all, we will learn how you can do it on Mac:
- Download the VN Editor for Mac and open it.
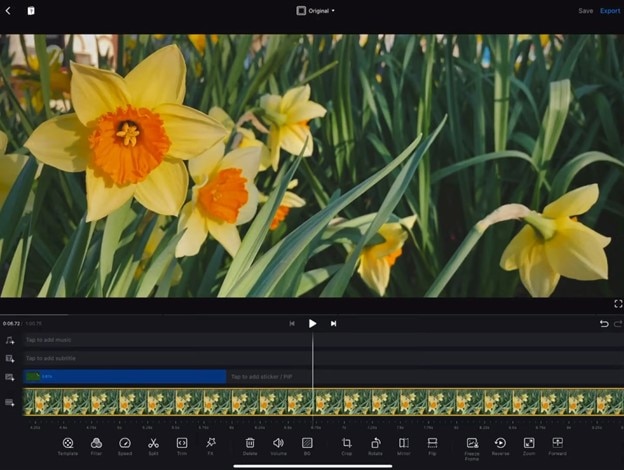
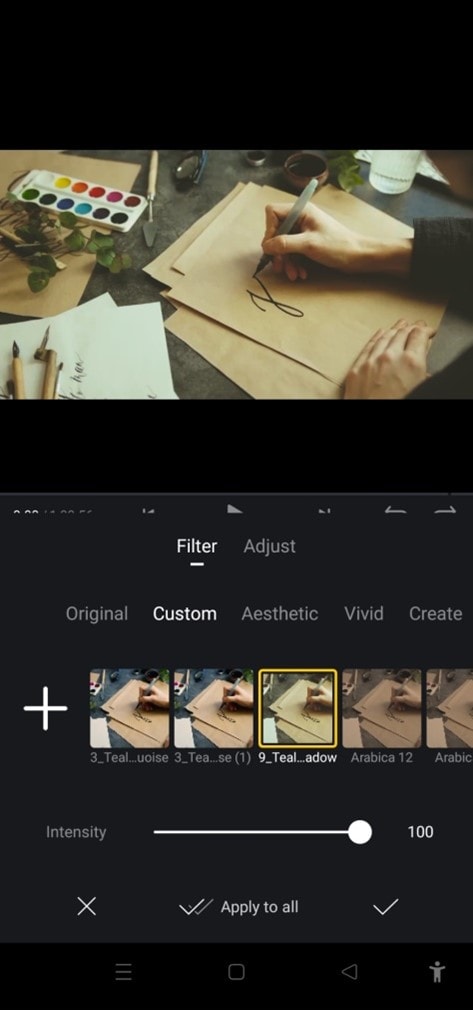
- Add your video and then tap the filters option.
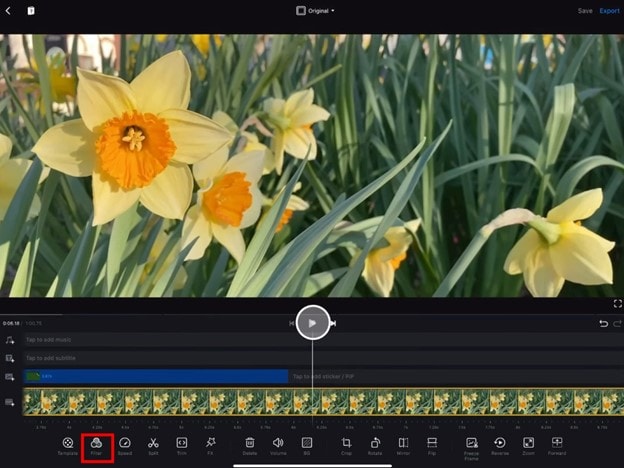
- Now choose custom filters and then select the LUTs pack.

- Select the desired LUT and apply.
On Mobile:
Secondly, we will discuss how we can do this on our mobiles (Android or iOS). The procedure on both devices (Android or iOS) is almost comparable. Therefore, we will discuss the steps from the perspective of both of these here:
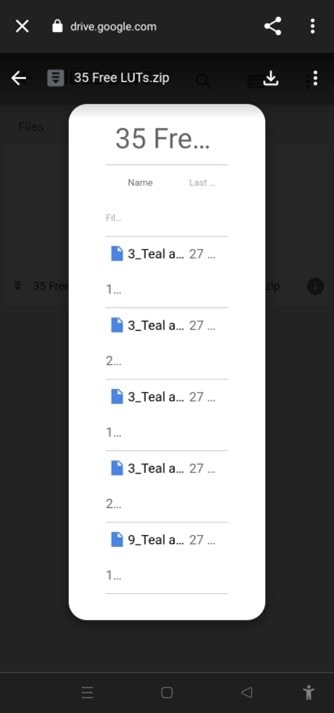
- First, download the VN editor from your mobile app store (Android or iOS) and the LUTs pack you want to use in your video.
- After downloading them on your mobile, open the VN editor application.
- Create a new project and add your video to it.

- Then click on the Filters option and select add external or custom filters option next to the existing filters.
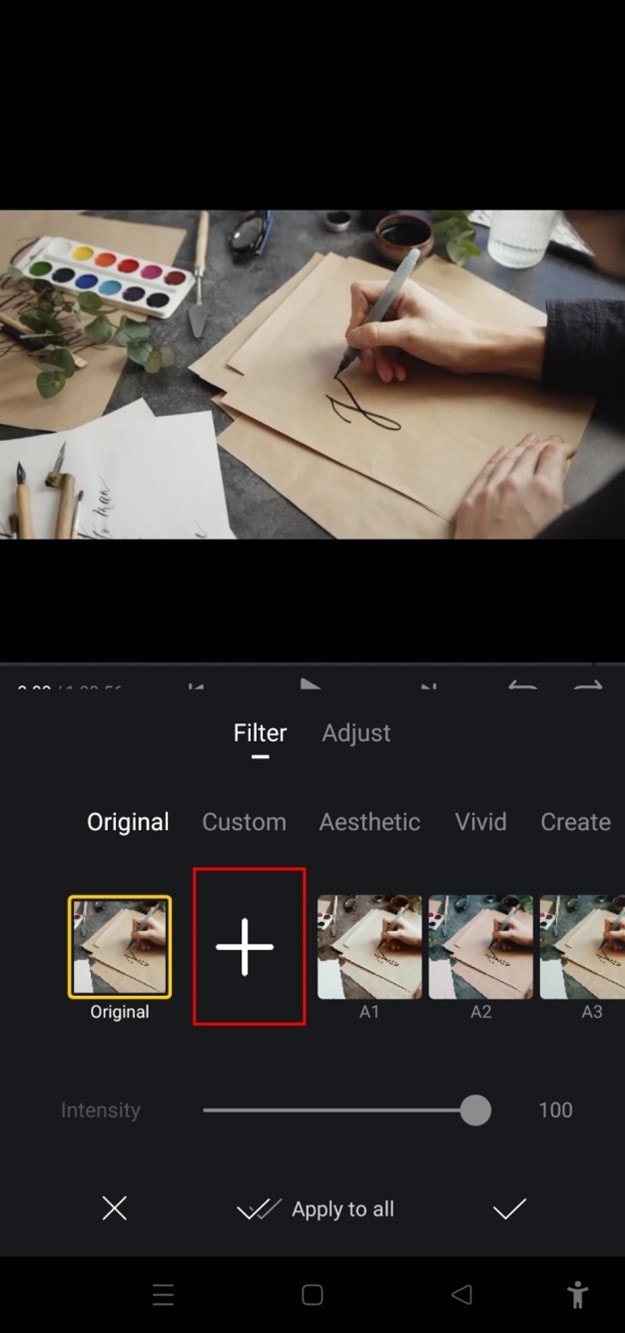
- It will take you to the File manager of your mobile, from which you have to find the folder in which you have stored your LUTs.
- After finding them, you can select those LUTs you want to use in your video and then click on the done or select button.
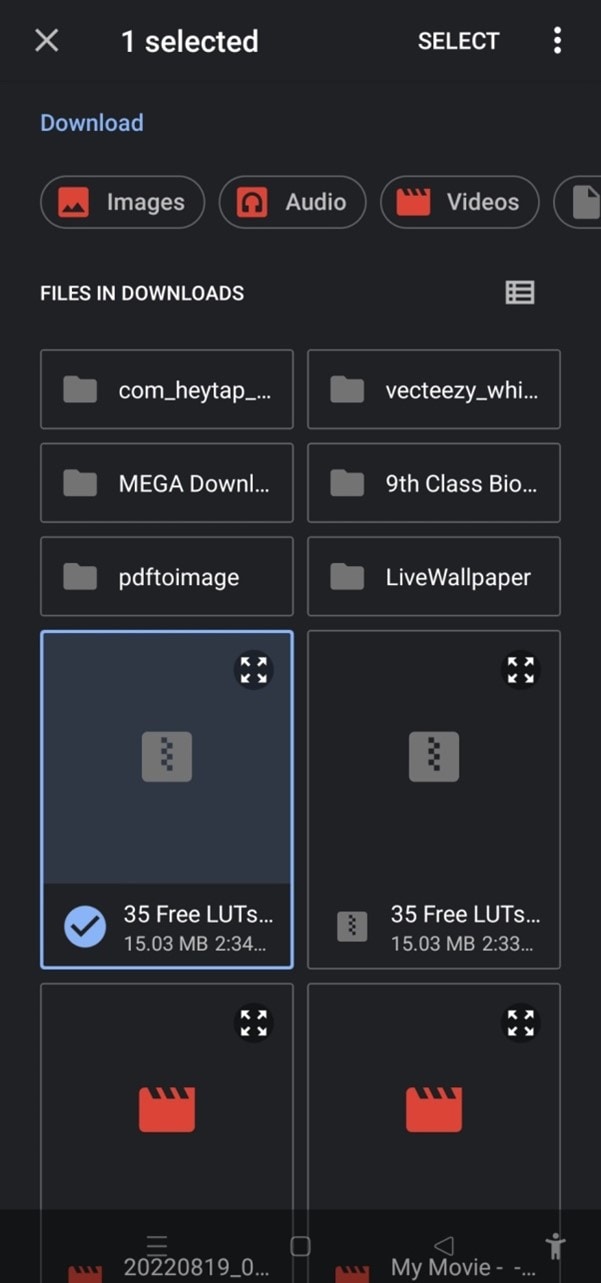
- Your downloaded LUTs start showing in the VN editor, and you can use them in your videos as you want.
Part 3. Best LUTs resource for VN video editor
1. Presets Store
Presets Store is an online platform that helps you with various Filters, LUTs, and other presets. So you can download LUTs for your videos for the VN editor using it. However, it’s not a free service. You have to pay for the LUTs you want to download from here. You can visit their YouTube channel to follow the latest LUTs, Filters and other presets on this platform.
2. Apna Editz
Apna Editz is another online platform you can use for this purpose. It also provides you with a fantastic variety of Presets like LUTs, Filters, and many other similar effects, which you can use in your video using the VN editor. The main Pros of this recommendation are that it’s a free website. So you can download LUTs for your videos from it for free. Keep an eye on their YouTube channel to be updated about the latest LUTs.
3. Lut Preset
Lut Preset is another alternative to all the above ones. You can get almost all your favorite LUTs for VN editor for free here and then use them in your videos as you want. They also share the latest LUTs on their YouTube Channel.
4. Pencil Hub
Pencil Hub is also a good option in this concern. However, it does not have too much variety of VN LUTs, but you can still use it to download some of the best LUTs for VN editors. To get informed of their every new effect and LUTs, their YouTube channel is the primary source.
5. YRP EDITZ
YRP ETIDZ is another good option if you are still looking for some fantastic VN LUTs. They, too not have a large variety of presets and LUTs. However, if you want some most commonly used LUTs for VN Editor, then they are a good option. You’ll notify of their most website updates by checking their YouTube channel.
Part 4. How to add LUTs to the best alternative to the VN editor?
VN Editor is undoubtedly an excellent choice to add LUTs to your videos. However, the VN editor is best suitable for mobile devices. To enhance your LUTs and effects, it would be great if you used some desktop software. Wondershare Filmora offers a great variety of built-in LUTs to choose from. Let’s look at how we can use Filmora to add LUTs:
- Add your video and tap the tools, then click the Color option.
- Now select the Color Correction option and then choose 3D LUT.
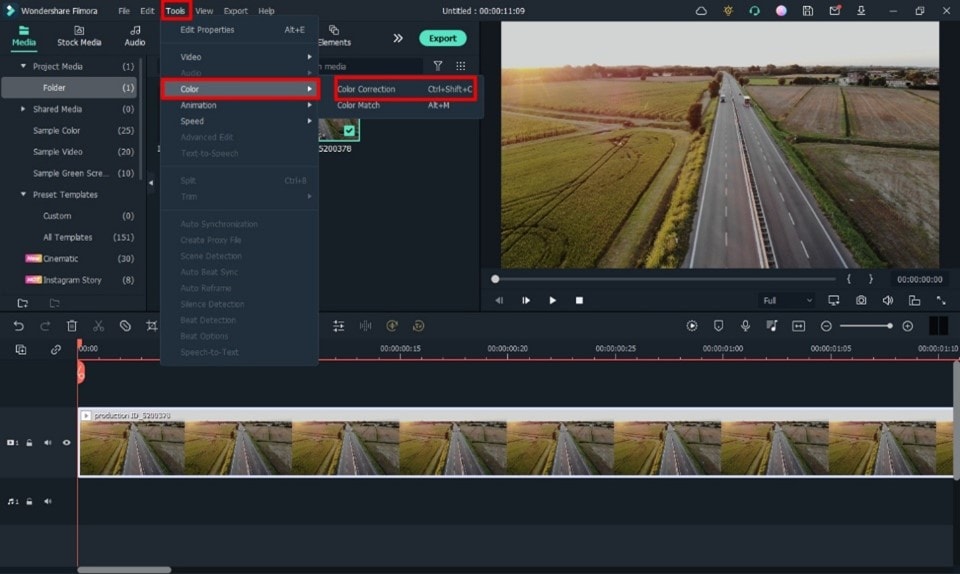
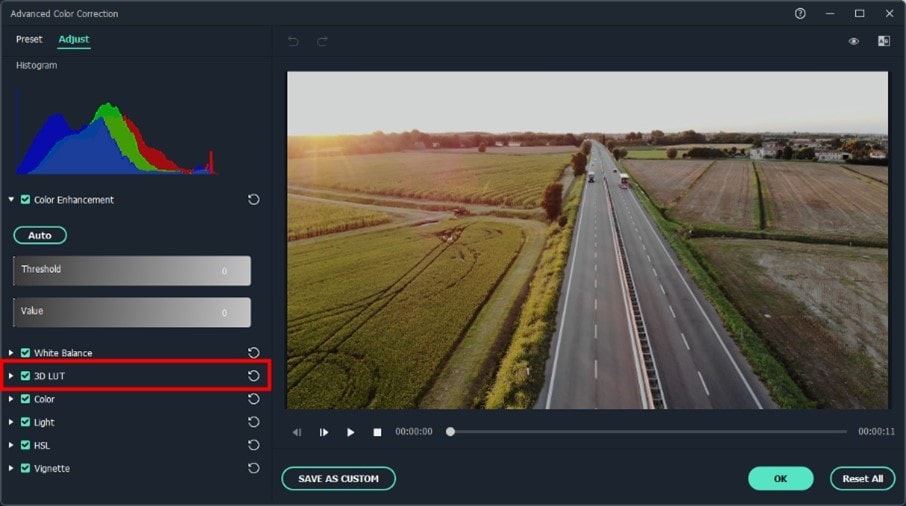
- Click the drop-down menu and select the Load new LUT option. Here you can import other downloaded preset LUTs to use
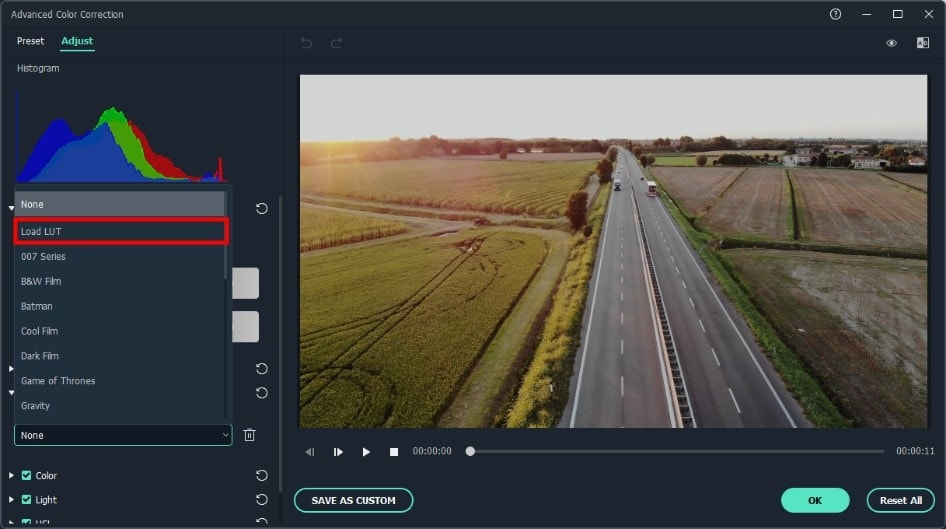
- Choose the LUT and click OK. Your new fantastic video is ready now.

Closing Thoughts
This post recommends several lut resources and demonstrates how to import them if you are a devoted user of VN editor and want to learn how to utilize it for video color grading. The more potent desktop editor Wondershare Filmora, which offers a range of built-in LUT sources and supports color grading settings, is of course recommended if you want to take your videos to the next level. Thanks for reading.
Free Download For Win 7 or later(64-bit)
Free Download For macOS 10.14 or later
2. Apna Editz
Apna Editz is another online platform you can use for this purpose. It also provides you with a fantastic variety of Presets like LUTs, Filters, and many other similar effects, which you can use in your video using the VN editor. The main Pros of this recommendation are that it’s a free website. So you can download LUTs for your videos from it for free. Keep an eye on their YouTube channel to be updated about the latest LUTs.
3. Lut Preset
Lut Preset is another alternative to all the above ones. You can get almost all your favorite LUTs for VN editor for free here and then use them in your videos as you want. They also share the latest LUTs on their YouTube Channel.
4. Pencil Hub
Pencil Hub is also a good option in this concern. However, it does not have too much variety of VN LUTs, but you can still use it to download some of the best LUTs for VN editors. To get informed of their every new effect and LUTs, their YouTube channel is the primary source.
5. YRP EDITZ
YRP ETIDZ is another good option if you are still looking for some fantastic VN LUTs. They, too not have a large variety of presets and LUTs. However, if you want some most commonly used LUTs for VN Editor, then they are a good option. You’ll notify of their most website updates by checking their YouTube channel.
Part 4. How to add LUTs to the best alternative to the VN editor?
VN Editor is undoubtedly an excellent choice to add LUTs to your videos. However, the VN editor is best suitable for mobile devices. To enhance your LUTs and effects, it would be great if you used some desktop software. Wondershare Filmora offers a great variety of built-in LUTs to choose from. Let’s look at how we can use Filmora to add LUTs:
- Add your video and tap the tools, then click the Color option.
- Now select the Color Correction option and then choose 3D LUT.
- Click the drop-down menu and select the Load new LUT option. Here you can import other downloaded preset LUTs to use
- Choose the LUT and click OK. Your new fantastic video is ready now.
Closing Thoughts
This post recommends several lut resources and demonstrates how to import them if you are a devoted user of VN editor and want to learn how to utilize it for video color grading. The more potent desktop editor Wondershare Filmora, which offers a range of built-in LUT sources and supports color grading settings, is of course recommended if you want to take your videos to the next level. Thanks for reading.
Free Download For Win 7 or later(64-bit)
Free Download For macOS 10.14 or later
How To Quickly Create A Screen Print Effect In Photoshop: Detailed Gui
Screen printing is a unique method that uses a mesh to transfer ink onto a surface and is commonly used to print designs onto t-shirts or other garments, such as hoodies, tote bags, and even sneakers.
Nowadays, digital means such as Photoshop or Illustrator are used to create the screen print effect, which is achieved by using a layer mask to cut out a portion of the image and filling it with the color or pattern of your choice. The design is then printed onto fabric using water-based CMYK (cyan, magenta, yellow, black) inks with inkjet printers.
Suppose you’ve ever wanted to create the screen print effect in Photoshop to give that artistic look to your pictures and embed them in your clothes or other accessories but don’t know where to start or are not familiar with the process. In that case, this guide can surely help you figure this out quickly!
So without any delay, let’s get on with it!
How To Use Photoshop To Create The Print Effect
Below we’ve provided a detailed guide using Adobe Photoshop to create the print effect with easy step-by-step instructions.
What Are The Requirements For Creating the Print Effect In PhotoShop?
Before we discuss the complete process of creating the print effect while using Photoshop, here are the resources you have to arrange.
- Picture of the object: We will cut out the object from the original image using the Lasso tool and unsaturate it. However, you have to ensure that the object is clear and easily detectable within the picture.
- A background image: You will need a background image to add the object to. For this, you can use a solid background, capture scenery, etc.
- Fonts: You can also add fonts to the final image to add your ideas or thoughts, making your final project more eye-catching and engaging.
- Photoshop latest version: For this tutorial, we will use the Photoshop CC 2021 version, so make sure to download and install it to your computer immediately!
What Are The Steps To Create Print Effect in PhotoShop?
Now that you know the necessary resources, the following are the steps to create the print effect in Photoshop:
Step1 Launch thePhotoshop program on your laptop/desktop and click “Create New” on the software dashboard. Next, select the page size, such as “letter,” and click “Open.”

Now, click the “File” option in the top toolbar, and from the drop-down menu, select “Open.” Next, choose the image you want to apply the screen print effect by browsing to its location on your computer.

Step2 Next, click the “Lasso” tool from the left-side menu to create the selection around the object in the image.

Press the CMD/Ctrl + C on your computer’s keyboard to copy the selection. Next, click the “Layer“ option in the top toolbar, select “New,” and click “Layer via Copy.”

Step3 Now, hide the background layer in the “Layers” panel on the right-hand side, and you will get your object without any BG. Click the “Image” option in the top toolbar and select “Adjustments.”
Click “Threshold…” from the drop-down menu, and set the “Threshold level.” Alternatively, you can click “Cmd/ctrl+Shift+U” on the keyboard to desaturate the image.

Step4 Next, select the “Magic Eraser Tool” from the left-side menu and remove the white parts to smooth down the background. Afterward, choose the “Move Tool” from the menu and drag your object to a new layer.
To add the background image, click “File” and select “Open.” Next, select the file and again click “Open.”
Step5 Select the object using the “Move Tool” and drag it to the background image layer. If the thing is too large and you want to resize it, select the object using the “CMD/Ctrl” key and click “Edit” from the top toolbar. From the drop-down menu, choose “Transform” and click “Scale.”

Next, drag the handles to adjust the size of the object on the Background image.
Step6 Click the “T” icon from the left-hand side menu and set the font style, color, and size. You can also click the “3D” option to convert your text to a three-dimensional form.

Try removing the left-out white patches on the object using the “Magic Eraser Tool” to give a polished look to the print screen effect. Once you are satisfied, click the “File” option from the top toolbar panel and select “Save As.”
Type in the file name and select the file type from the drop-down menu next to “Save As Type.” Choose the storage location, click “Save” to export your final project, and you’re done!
Conclusion
In this article, we’ve explored what the screen print effect is and how it is used in digital art. We’ve also discussed the requirements and resources you need to use and then demonstrated a step-by-step process of how to create the screen print effect in Photoshop with simple and easy-to-follow instructions.
To make things easy for you, we also added original screenshots while creating a sample project on the software.
Hopefully, this article helped resolve your queries, and you can now give a vintage or retro look to your images using the screen print effect in Photoshop.
Free Download For Win 7 or later(64-bit)
Free Download For macOS 10.14 or later
Free Download For macOS 10.14 or later
Also read:
- [New] 2024 Approved Beyond Cyberlink Hunt for the Ultimate Screen Recording App
- [New] Skyward Gazing Inside the World of X4 FPV Quads
- [Updated] Prime Selection - 8 Best Free Mobile MP3 Downloaders
- [Updated] The Art of Video Presentation in Adobe Captivate for 2024
- 2024 Approved Behind the Scenes Unpacking Instagram Stories
- 2024 Approved Leaders in Next-Gen Sensory Devices
- Cut Down Input Lag in Cyberpunk 2077: Tips & Tricks to Enhance Your Gaming Experience
- Ensure the Document Remains Informative and Comprehensive After Simplification, Using No More than Two Sentences for Analogies
- Heroic Measures Against a Corrupted Disk in Steam Games: A Simple Fix Guide
- Natural Magic: Spells, Enchantments & Self-Development | Free Book
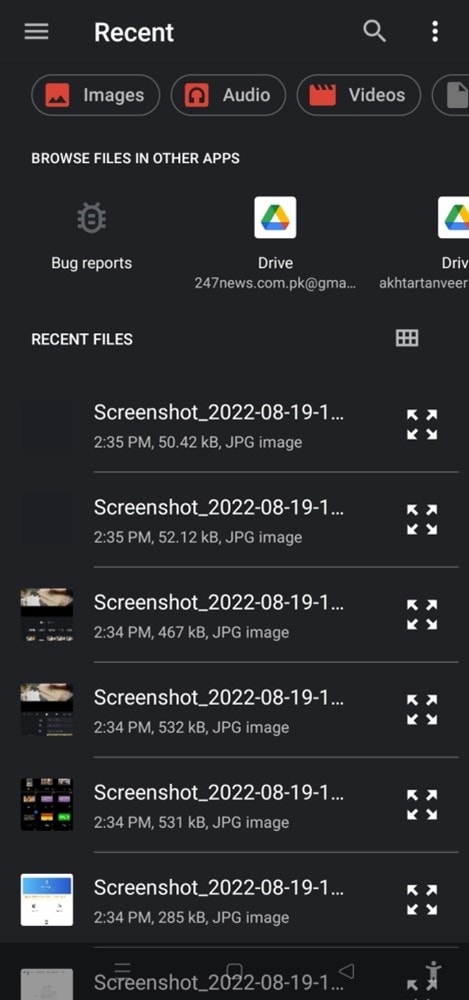
- Navigating Android Quick Settings for Maximum Convenience
- Navigating the World of Artificially Intelligent Conversational Agents: Discover How Censorship Shapes User Experiences
- Pursuing Popularity on Platforms Elevating Your Youtube Profile
- Resolve Call of Duty: WWII Display Problems - Fixes for PC Users
- Resolved: Troubleshooting Guide - Overcoming 'World of Warcraft Won't Start' On PC
- Review Exposé on Netgear's Advanced X6 Wifi Mesh Enhancer – A Deep Dive Into Its Innovative Traits
- Solutions for Fixing Misinstalled Ryzen Master Driver on Your PC
- Solved! Troubleshooting Resident Evil Village PC Instability Issues
- Troubleshoot Your Apex Legends Engine Glitches with These Easy Steps
- Title: 2024 Approved How To Slow Down GIF Building an Understanding
- Author: Chloe
- Created at : 2024-12-07 17:59:29
- Updated at : 2024-12-12 12:20:15
- Link: https://ai-editing-video.techidaily.com/2024-approved-how-to-slow-down-gif-building-an-understanding/
- License: This work is licensed under CC BY-NC-SA 4.0.