
:max_bytes(150000):strip_icc():format(webp)/178665671_HighRes-56a532a83df78cf77286de1b.jpg)
2024 Approved Ideas That Help You Out in Making Transparent Image
Ideas That Help You Out in Making Transparent Image
Ideas That Will Help You Out in Making Transparent Image
An easy yet powerful editor
Numerous effects to choose from
Detailed tutorials provided by the official channel
Want to explore your graphic creativity with transparent images? Stay tuned for the most trending ideas to fill in your social media handles with unlimited likes!
In this article
01 [What Is a Transparent PNG Background?](#Part 1)
02 [Differences Among PNG vs JPG vs GIF](#Part 2)
03 [How to Make an Image Background Transparent](#Part 3)
04 [How to Convert JPG to Transparent PNG](#Part 4)
Part 1 What Is a Transparent PNG Background?
Transparent backgrounds are essentially faded overlays to any graphic content, like, an image or a video, that are useful in emphasizing the main element in the substance. Compatible to a variety of image and video formats, these are the talk of the trend, owing to their excellent content promotion utility. These are the latest and creative examples of information presentation, along with being among the best branding tools that can potentially make your content fresh and unique.
Using a transparent background as a brand promotion tool helps to project forward the major highlights of your product with a supportive background image, like the brand logo. This helps the audience to have a general idea of your brand. Apart from this, you can also assure the authenticity and quality of your brand by using a watermark in the background image.
Images with transparent backgrounds are the current promotion trends, owing to their convenient compatibility with any web design and the flexibility to mix with the most diverse color palettes and different elements on the product webpage. These can further be easily rendered in 3D to present realistic product images.
Part 2 Differences Among PNG vs JPG vs GIF
Diversity in requirement and usage has led to the advent of a variety of image formats, each suited to a specific purpose. On account of this variation, it becomes a confusing task to select the best image format that can fetch the most affordable images results in cohesion with exact user needs.
It is recommenced to use the JPG image format for natural stills that have a smooth variations in intensity and color. If your content requires image transparency, or contains texts and elements that have a sharp contrast image, like a brand logo, you should ideally prefer the PNG image format, while the GIF format is best suited for presenting animated content. As an explanation to the above usage constraints, here’s a comparison of the popular PNG, JPG and GIF image formats in the light of some common credibility parameters.
01Compression
Image compression facilitates a quick data transmission across different web based platforms, owing to the reduced file size. While compression can be either lossy or lossless, choose an image format that maintains the size credibility in resonance with your data needs. A lossless compression guarantees the retrieval of original image, but a lossy compression fails to do so.
JPG
The JPG format is a lossy compressor that plays on your ability to perceive. The format has the credibility of a 1:10 compression ratio, without comprising with the original image quality. However, a further increased compression ratio may generate perceivable differences in image quality.
The JPG compression utilizes the concept of Discrete Cosine Transform, i.e., a color averaging of the image pixels in close proximity. Hence, it is suitable to use this format for natural and scenic stills, having a smooth color and intensity transition. Preferring this image format for a transmission of high contrast and sharpened images is however, not advisable.
PNG
This format supports the Deflate Compression technique and neither introduces artefacts, nor cuts down on the image quality. Choose the PNG image format for a lossless and high quality compression in comparison to JPG. This one is a more effective format with higher image quality, sharper image presentation and occupies a larger memory space on your device.
You can rely on PNG images for presenting data with text, shapes and logos with high contrast pixelation. It is however, not a good choice for transferring digital images that have a high resolution.
GIF
Working on the LZW Compression Algorithm, this image format was originally used to showcase simple website graphics, when the PNG format was still at a developing stage. However, with the advancement of PNG as a more effective compression format, the use of GIF is now restricted to animated content sharing.
02Transparency
Transparency is tern used to describe some invisible content. This is suitable to use in image backgrounds when you need to lay extra stress on the main content, like the logo of your product with a cohesive brand text, etc. the transparent background used here facilitates the use of a particular image with a series of background and color variations.
JPG
The JPG format has a limitation of not being compatible with image transparency, and hence is not suitable for related applications.
PNG
The PNG format gives you the liberty to use image transparency in two selective ways. You can either choose to make your image partially transparent by an alpha channel insertion for a smooth edge-background blend, or use index transparency to make the pixels of any particular color as transparent. PNG8 AND PNG24 versions of the format are supportive of index and alpha channel transparencies respectively.
GIF
This format inherently supports index transparency and declares a chosen color on the palette as transparent. Owing to the absence of alpha channel transparency, there is an unsatisfactory blend of edges with the image background. The unevenness becomes more prominent in case of highly detailed and rounded images.
While it is possible to mitigate this loss to some extent with the use of image dithering, the GIF format is still not a preferred choice for creating images with transparent backgrounds. The PNG format is instead, more credible on that aspect.
03Color
Color is a visibly strong parameter of difference among the JPG, PNG and GIF image formats, with each one supporting as specific number of colors on the palette.
JPG
The color palette of JPG images is a huge inventory of 16 million colors, rendering them suitable for storing natural stills having a smooth color transition.
PNG
The two versions of PNG format differ on color variance. While PNG8 permits 256 colors, the PNG24 format supports 16 million colors, similar to the JPG format. Consider using the PNG8 format for an image with simple shapes and lesser variations in color. It is, on the other hand better to use the PNG24 format for images with transparent backgrounds, high image quality and complex shapes with detailed edges.
GIF
The GIF format is a host to 256 colors, one of which becomes transparent on using index transparency and the other 255 support different color variations.
04Animation
Animation here, is not necessarily restricted to having frame rates, but refers to a certain periodic movement of specific image sections with time. Out of JPG, PNG and GIF, only the last one is compatible with GIFs. You can use this utility to crate and share eye catching banners and advertisements. The advent of GIF specific content platforms, such as, GIPHY, Tumblr, etc., has further uplifted GIF reach and usage.
A variety of image formats are available to choose from for catering to specific content requirements. However, you can always optimize the format selection in cohesion with the current need.
Part 3 How to Make an Image Background Transparent
Having known enough about the credibility of transparent background images, it sounds quite interesting to try your hands at creating these of your own. The software market offers some over the top tools for creating stunning examples of images with transparent backgrounds. When looking for alternatives on how to make an image with a transparent background, some of your best choices are discussed below:
01Canva
This one is a top class image creator and editor tool, which you can use to add that extra tint to your website design material, watermark images or even display your image creativity for fun and entertainment purposes. The tool comes with a simple and quick process to make transparent background images.
This tool grants you the liberty to choose from various s transparency levels, image layers and effects to give the perfect professional look to your creation. The tool further promises you of a clean and subtle transparent background image that is bound to attract viewer attention.
This graphic design tool is available for a free usage, if you limit yourself within image design and effect play. However, if you want to experience the fun of creating transparent background images with this tool, you need to take its paid subscription.
How to Make Canva Transparent Background
Here’s the know how to add transparent background in still images with this tool:
Step 1: Account Creation
In order to use this graphic tool for image design, you need to have its official account. Visit the tool’s official site, launch the same on your system, create a Canva account and log in.

Step 2: Image Selection
Consider browsing through your device to choose an image for creating a transparent background artwork.

Step 3: Background Removal
You now need to remove the background color of the selected image. In the tool’s welcome interface, navigate to ‘Effects’ in the top toolbar and select ‘Background Remover’ from the available options to remove the background layer and make a transparent design.

Step 4: Save Your Image
After removing the image background, download it into your system. To do this, navigate to the ‘Download’ icon at the top right and click on it.

Step 5: File Format Selection
Here, you need to select the PNG file format to get a transparent background image.

Step 6: Transparency
It is now time to make your image background transparent. You can do this by clicking the ‘Transparency’ checkbox below the ‘File Format‘selection dialog box.

Step 7: Download Your Creation
When you are happy with setting the above parameters, hit the ‘Download’ tab to import your artwork to your device gallery.

02Photoshop
This one is excellent image editor and graphic designer tool that allows you to add diversification and class to your brand images. You can play with a variety of display features to enhance and objectify your image to your heart’s content.
Using Photoshop allows a presentation of your content against a dynamic color background, thus favoring a background interaction selective to the viewer’s serene size. Photoshop can create transparent logos for the products on your site, that are suitable to be placed anywhere on the webpage, regardless of the latter’s background color.
How to Make Photoshop Transparent Background
See through the following section of this article for a guided tutorial to create a transparent background image in Photoshop:

Step 1: Download Adobe Photoshop
Navigate to Adobe’s official website and download the Photoshop application in your device. Install and launch the same to reach the app’s welcome interface.

Step 2: Make a Layered Image File
In the main interface, open a selected image and navigate to the ‘Layers Panel’ in the right of the image window. However, if the ‘Layers Panel’ does not show up by default, reach to the top toolbar and hit the ‘Window’ tab. From the drop sown menu that follows, select ‘Layers’.

In this panel, double tap the ‘Background‘layer. This causes the ‘Rename Layer’ dialog box to appear. You can either enter a suitable name or continue with the default ‘Layer 0’ name. When you are done, click on ‘OK’.

Step 3: Let’s Get Creating!
In the application interface, navigate to the toolbar at the left and choose the ‘Magic Wand’ tool. Again, reach to the ‘Options’ bar at the top and choose ‘Select Subject’. This will facilitate the selection of the min object of the image, irrespective of its background and the selection will be visible as ‘marching ants’ around the object.

If you find the selection to be improper, use the ‘Magic Wand’ to ward off excessive background portions by choosing the ’Subtract From Selection’ option, or even add some extra product portions, suited to your requirement. While making your selection, take care to include any holes in the product image.

Step 4: Background Deletion
When you are left with only the selected product, navigate to the top toolbar and hit the ’Select’ tab and choose ‘Inverse’ from the drop down menu that follows. You can alternatively use the ‘Shift+Ctrl+I’ command for a Windows device, or enter ‘Shift+Command+I’ command, in case you are using a Mac supported device.

Make a selection of the inverse background and tap ‘Backspace’ or ‘Delete’ in your Windows and Mac devices respectively. This will cause your background to get transparent. In the Photoshop application, a gray-white checkerboard represents a transparent background.
In case you require deselecting any selection, enter ‘Ctrl+D’ in Windows or ‘Command+D’ in a Mac device.

Step 5: Save Your Creation in a Web Compatible Format
When you are done creating the transparent background artwork, it becomes equally important to save your creation in a web compatible format to export them on different media platforms and product websites.
Talking of the preferable image format, it is highly recommended to use the PNG24 one, owing to its flexibility of alpha channel transparency, which permits partially transparent image backgrounds along with layered transparency. This in turn makes it possible to integrate the image with varying color backgrounds on different sites and platforms without hollow pixelation.
To save your artwork in the PNG24 file format, navigate to the application toolbar bat the top and hit the ‘File’ tab and choose the ‘Export’ option from the drop sown menu that appears. Select the ‘Export As’ option from the ‘Export’ popup menu.
For an older Photoshop version, hit the ‘Export’ tab and choose ‘Save for Web’ from the dropdown menu, followed by selecting the PNG24 option. A format dialog box appears where you can set the transparency settings. To do this, navigate to ‘File Settings’ at the right, choose the PNG file format and check the ‘Transparency’ box. Avoid checking the ‘Smaller Size’ box, else the image will get saved in the PNG8 format.

In the left of the screen, the image file size is displayed. Maintain an affordable file size, preferably within 200 KB, to avoid slower image loading on the sharing platform. You can adjust this in the ‘Image Size’ option at the right.

Set a conveniently reduced dimension, while taking care not to set an extremely small size, else it will produce a pixelated output on the site. It is preferable to set a 50-100% larger image size for a convenient display across different devices.
Step 6: Final Save
Once you are satisfied with all the image settings, tap ‘Export All’ to save your artwork locally in your device. In the ‘File Save’ dialog box, choose a preferred device location, enter a suitable file name and choose the .png extension. At last, click on ‘Save’.
03Filmora
Launched by Wondershare, this is excellent image editor and creator software that you can rely on to make stunning artworks in a variety of file formats. Talking of background transparency in particular, the software comes with a unique ‘Green Screen’ feature to create high quality, transparent background images in a matter of a few clicks. You can further, give a professional touch to your creation with a storehouse of classic video and image editing effects that are just perfect to stand out in the crowd.
How to Make Filmora Transparent Background
A stepwise tutorial on how to create image with transparent background images using Filmora is discussed below:
Step 1: Download the Software
Visit the official website of Wondershare Filmora Video Editor to download and install the software in any of your Windows or Mac devices.
For Win 7 or later (64-bit)
For macOS 10.12 or later
Step 2: Import Media File
Launch the app to reach the main interface, where you will find the ‘Import’ tab. Hit it and choose ‘Import Media File’ from the drop down menu that follows. This will upload your selected image to the software’s media library.

Step 2: Timeline Dragging
You now need to insert the selected image from Filmora’s media library to the software’s editing timeline. You can do this either by right clicking the selected image, followed by choosing the ‘Insert’ option, or a simple ’Drag and Drop’ method.

Step 3: Transparency Adjustments
In the editor timeline, double click your selected image to open the ‘Settings’ tab. Scroll down the tab options to locate ‘Chroma Key Settings’. Make a right toggle to enable the ‘Chroma Key’ and you will see the image get transparent with the default ’Green’ background color.
You can alternatively, navigate to the ‘Select Color’ option and choose ‘Color Picker’ at its right, reach the image section you wish to make transparent and make a single click.

In case you get a partially transparent background, you can make further adjustments in the ‘Chroma Key’ settings, such as, tolerance, edge thickness, offset, edge feather, etc., to ascertain complete background transparency. When you are satisfied with your work, click on ‘OK’.

Step 4: Media Export
You can now try adding the transparent image to any video or export the same to any media platform. To do this, hit the ‘Export’ tab at the top right corner in the editor timeline.

Part 4 How to Convert JPG to Transparent PNG
Taking into account the diverse information sharing and content specification requirements, an obvious need to switch between different file formats may arise at a number of instants. One such example is the conversion of images in JPG format into that of a transparent PNG image. When looking through convenient alternatives to set the issue straight, the software market has a pouring flood of choices.
Discussed below are some of the best JPG to transparent PNG converter solutions you can pick to convert color background JPG stills into transparent PNG background images, while sorting the concern of how to save PNG with transparent background:
Filmora JPG to Transparent PNG Converter
Filmora is top rated and highly preferred graphic design software that caters to all of your video and image design and conversion needs in the most convenient manner. Developed by Wondershare, this is the worthiest pick for all graphic editing. While the software is packed with extensive and over the top features to provide a professional elegance to almost and design artwork, the transparent image backgrounds created by Filmora are simply remarkable.
If you are done with those usual and commonplace captures, try hands at creating transparent background images with this software, which promises you of a stand out result on account of the following features:
● Filmora comes with a distinguished ‘Green Screen’ feature that is known to create transparent background images in time instants shorter than an eye blink. You just need to upload an image in the software timeline and adjust a few chroma settings, and that’s really the end!
● Apart from this, you can play with a diverse inventory of results and image filters, like, graphic and text overlays, subtitles and tons of audio-visual upshots to create an absolute graphic masterpiece.
● The software further, is free to use and welcomes you with a clean, cohesive and responsive user interface, guiding you at each step of the design task.
● Ending Thoughts →
● Transparent image backgrounds are the current in house trends of content branding and product promotion alternatives. While there are varieties of requirement specific image file formats, the PNG format is best suited for creating a transparent background image.
● The software market is an in depth pool of choices for graphic and image editing tools, Wondershare Filmora happens to be a distinguished name among all to create and convert images with transparent backgrounds.
Want to explore your graphic creativity with transparent images? Stay tuned for the most trending ideas to fill in your social media handles with unlimited likes!
In this article
01 [What Is a Transparent PNG Background?](#Part 1)
02 [Differences Among PNG vs JPG vs GIF](#Part 2)
03 [How to Make an Image Background Transparent](#Part 3)
04 [How to Convert JPG to Transparent PNG](#Part 4)
Part 1 What Is a Transparent PNG Background?
Transparent backgrounds are essentially faded overlays to any graphic content, like, an image or a video, that are useful in emphasizing the main element in the substance. Compatible to a variety of image and video formats, these are the talk of the trend, owing to their excellent content promotion utility. These are the latest and creative examples of information presentation, along with being among the best branding tools that can potentially make your content fresh and unique.
Using a transparent background as a brand promotion tool helps to project forward the major highlights of your product with a supportive background image, like the brand logo. This helps the audience to have a general idea of your brand. Apart from this, you can also assure the authenticity and quality of your brand by using a watermark in the background image.
Images with transparent backgrounds are the current promotion trends, owing to their convenient compatibility with any web design and the flexibility to mix with the most diverse color palettes and different elements on the product webpage. These can further be easily rendered in 3D to present realistic product images.
Part 2 Differences Among PNG vs JPG vs GIF
Diversity in requirement and usage has led to the advent of a variety of image formats, each suited to a specific purpose. On account of this variation, it becomes a confusing task to select the best image format that can fetch the most affordable images results in cohesion with exact user needs.
It is recommenced to use the JPG image format for natural stills that have a smooth variations in intensity and color. If your content requires image transparency, or contains texts and elements that have a sharp contrast image, like a brand logo, you should ideally prefer the PNG image format, while the GIF format is best suited for presenting animated content. As an explanation to the above usage constraints, here’s a comparison of the popular PNG, JPG and GIF image formats in the light of some common credibility parameters.
01Compression
Image compression facilitates a quick data transmission across different web based platforms, owing to the reduced file size. While compression can be either lossy or lossless, choose an image format that maintains the size credibility in resonance with your data needs. A lossless compression guarantees the retrieval of original image, but a lossy compression fails to do so.
JPG
The JPG format is a lossy compressor that plays on your ability to perceive. The format has the credibility of a 1:10 compression ratio, without comprising with the original image quality. However, a further increased compression ratio may generate perceivable differences in image quality.
The JPG compression utilizes the concept of Discrete Cosine Transform, i.e., a color averaging of the image pixels in close proximity. Hence, it is suitable to use this format for natural and scenic stills, having a smooth color and intensity transition. Preferring this image format for a transmission of high contrast and sharpened images is however, not advisable.
PNG
This format supports the Deflate Compression technique and neither introduces artefacts, nor cuts down on the image quality. Choose the PNG image format for a lossless and high quality compression in comparison to JPG. This one is a more effective format with higher image quality, sharper image presentation and occupies a larger memory space on your device.
You can rely on PNG images for presenting data with text, shapes and logos with high contrast pixelation. It is however, not a good choice for transferring digital images that have a high resolution.
GIF
Working on the LZW Compression Algorithm, this image format was originally used to showcase simple website graphics, when the PNG format was still at a developing stage. However, with the advancement of PNG as a more effective compression format, the use of GIF is now restricted to animated content sharing.
02Transparency
Transparency is tern used to describe some invisible content. This is suitable to use in image backgrounds when you need to lay extra stress on the main content, like the logo of your product with a cohesive brand text, etc. the transparent background used here facilitates the use of a particular image with a series of background and color variations.
JPG
The JPG format has a limitation of not being compatible with image transparency, and hence is not suitable for related applications.
PNG
The PNG format gives you the liberty to use image transparency in two selective ways. You can either choose to make your image partially transparent by an alpha channel insertion for a smooth edge-background blend, or use index transparency to make the pixels of any particular color as transparent. PNG8 AND PNG24 versions of the format are supportive of index and alpha channel transparencies respectively.
GIF
This format inherently supports index transparency and declares a chosen color on the palette as transparent. Owing to the absence of alpha channel transparency, there is an unsatisfactory blend of edges with the image background. The unevenness becomes more prominent in case of highly detailed and rounded images.
While it is possible to mitigate this loss to some extent with the use of image dithering, the GIF format is still not a preferred choice for creating images with transparent backgrounds. The PNG format is instead, more credible on that aspect.
03Color
Color is a visibly strong parameter of difference among the JPG, PNG and GIF image formats, with each one supporting as specific number of colors on the palette.
JPG
The color palette of JPG images is a huge inventory of 16 million colors, rendering them suitable for storing natural stills having a smooth color transition.
PNG
The two versions of PNG format differ on color variance. While PNG8 permits 256 colors, the PNG24 format supports 16 million colors, similar to the JPG format. Consider using the PNG8 format for an image with simple shapes and lesser variations in color. It is, on the other hand better to use the PNG24 format for images with transparent backgrounds, high image quality and complex shapes with detailed edges.
GIF
The GIF format is a host to 256 colors, one of which becomes transparent on using index transparency and the other 255 support different color variations.
04Animation
Animation here, is not necessarily restricted to having frame rates, but refers to a certain periodic movement of specific image sections with time. Out of JPG, PNG and GIF, only the last one is compatible with GIFs. You can use this utility to crate and share eye catching banners and advertisements. The advent of GIF specific content platforms, such as, GIPHY, Tumblr, etc., has further uplifted GIF reach and usage.
A variety of image formats are available to choose from for catering to specific content requirements. However, you can always optimize the format selection in cohesion with the current need.
Part 3 How to Make an Image Background Transparent
Having known enough about the credibility of transparent background images, it sounds quite interesting to try your hands at creating these of your own. The software market offers some over the top tools for creating stunning examples of images with transparent backgrounds. When looking for alternatives on how to make an image with a transparent background, some of your best choices are discussed below:
01Canva
This one is a top class image creator and editor tool, which you can use to add that extra tint to your website design material, watermark images or even display your image creativity for fun and entertainment purposes. The tool comes with a simple and quick process to make transparent background images.
This tool grants you the liberty to choose from various s transparency levels, image layers and effects to give the perfect professional look to your creation. The tool further promises you of a clean and subtle transparent background image that is bound to attract viewer attention.
This graphic design tool is available for a free usage, if you limit yourself within image design and effect play. However, if you want to experience the fun of creating transparent background images with this tool, you need to take its paid subscription.
How to Make Canva Transparent Background
Here’s the know how to add transparent background in still images with this tool:
Step 1: Account Creation
In order to use this graphic tool for image design, you need to have its official account. Visit the tool’s official site, launch the same on your system, create a Canva account and log in.
Step 2: Image Selection
Consider browsing through your device to choose an image for creating a transparent background artwork.
Step 3: Background Removal
You now need to remove the background color of the selected image. In the tool’s welcome interface, navigate to ‘Effects’ in the top toolbar and select ‘Background Remover’ from the available options to remove the background layer and make a transparent design.
Step 4: Save Your Image
After removing the image background, download it into your system. To do this, navigate to the ‘Download’ icon at the top right and click on it.
Step 5: File Format Selection
Here, you need to select the PNG file format to get a transparent background image.
Step 6: Transparency
It is now time to make your image background transparent. You can do this by clicking the ‘Transparency’ checkbox below the ‘File Format‘selection dialog box.
Step 7: Download Your Creation
When you are happy with setting the above parameters, hit the ‘Download’ tab to import your artwork to your device gallery.
02Photoshop
This one is excellent image editor and graphic designer tool that allows you to add diversification and class to your brand images. You can play with a variety of display features to enhance and objectify your image to your heart’s content.
Using Photoshop allows a presentation of your content against a dynamic color background, thus favoring a background interaction selective to the viewer’s serene size. Photoshop can create transparent logos for the products on your site, that are suitable to be placed anywhere on the webpage, regardless of the latter’s background color.
How to Make Photoshop Transparent Background
See through the following section of this article for a guided tutorial to create a transparent background image in Photoshop:
Step 1: Download Adobe Photoshop
Navigate to Adobe’s official website and download the Photoshop application in your device. Install and launch the same to reach the app’s welcome interface.
Step 2: Make a Layered Image File
In the main interface, open a selected image and navigate to the ‘Layers Panel’ in the right of the image window. However, if the ‘Layers Panel’ does not show up by default, reach to the top toolbar and hit the ‘Window’ tab. From the drop sown menu that follows, select ‘Layers’.
In this panel, double tap the ‘Background‘layer. This causes the ‘Rename Layer’ dialog box to appear. You can either enter a suitable name or continue with the default ‘Layer 0’ name. When you are done, click on ‘OK’.
Step 3: Let’s Get Creating!
In the application interface, navigate to the toolbar at the left and choose the ‘Magic Wand’ tool. Again, reach to the ‘Options’ bar at the top and choose ‘Select Subject’. This will facilitate the selection of the min object of the image, irrespective of its background and the selection will be visible as ‘marching ants’ around the object.
If you find the selection to be improper, use the ‘Magic Wand’ to ward off excessive background portions by choosing the ’Subtract From Selection’ option, or even add some extra product portions, suited to your requirement. While making your selection, take care to include any holes in the product image.
Step 4: Background Deletion
When you are left with only the selected product, navigate to the top toolbar and hit the ’Select’ tab and choose ‘Inverse’ from the drop down menu that follows. You can alternatively use the ‘Shift+Ctrl+I’ command for a Windows device, or enter ‘Shift+Command+I’ command, in case you are using a Mac supported device.
Make a selection of the inverse background and tap ‘Backspace’ or ‘Delete’ in your Windows and Mac devices respectively. This will cause your background to get transparent. In the Photoshop application, a gray-white checkerboard represents a transparent background.
In case you require deselecting any selection, enter ‘Ctrl+D’ in Windows or ‘Command+D’ in a Mac device.
Step 5: Save Your Creation in a Web Compatible Format
When you are done creating the transparent background artwork, it becomes equally important to save your creation in a web compatible format to export them on different media platforms and product websites.
Talking of the preferable image format, it is highly recommended to use the PNG24 one, owing to its flexibility of alpha channel transparency, which permits partially transparent image backgrounds along with layered transparency. This in turn makes it possible to integrate the image with varying color backgrounds on different sites and platforms without hollow pixelation.
To save your artwork in the PNG24 file format, navigate to the application toolbar bat the top and hit the ‘File’ tab and choose the ‘Export’ option from the drop sown menu that appears. Select the ‘Export As’ option from the ‘Export’ popup menu.
For an older Photoshop version, hit the ‘Export’ tab and choose ‘Save for Web’ from the dropdown menu, followed by selecting the PNG24 option. A format dialog box appears where you can set the transparency settings. To do this, navigate to ‘File Settings’ at the right, choose the PNG file format and check the ‘Transparency’ box. Avoid checking the ‘Smaller Size’ box, else the image will get saved in the PNG8 format.
In the left of the screen, the image file size is displayed. Maintain an affordable file size, preferably within 200 KB, to avoid slower image loading on the sharing platform. You can adjust this in the ‘Image Size’ option at the right.
Set a conveniently reduced dimension, while taking care not to set an extremely small size, else it will produce a pixelated output on the site. It is preferable to set a 50-100% larger image size for a convenient display across different devices.
Step 6: Final Save
Once you are satisfied with all the image settings, tap ‘Export All’ to save your artwork locally in your device. In the ‘File Save’ dialog box, choose a preferred device location, enter a suitable file name and choose the .png extension. At last, click on ‘Save’.
03Filmora
Launched by Wondershare, this is excellent image editor and creator software that you can rely on to make stunning artworks in a variety of file formats. Talking of background transparency in particular, the software comes with a unique ‘Green Screen’ feature to create high quality, transparent background images in a matter of a few clicks. You can further, give a professional touch to your creation with a storehouse of classic video and image editing effects that are just perfect to stand out in the crowd.
How to Make Filmora Transparent Background
A stepwise tutorial on how to create image with transparent background images using Filmora is discussed below:
Step 1: Download the Software
Visit the official website of Wondershare Filmora Video Editor to download and install the software in any of your Windows or Mac devices.
For Win 7 or later (64-bit)
For macOS 10.12 or later
Step 2: Import Media File
Launch the app to reach the main interface, where you will find the ‘Import’ tab. Hit it and choose ‘Import Media File’ from the drop down menu that follows. This will upload your selected image to the software’s media library.
Step 2: Timeline Dragging
You now need to insert the selected image from Filmora’s media library to the software’s editing timeline. You can do this either by right clicking the selected image, followed by choosing the ‘Insert’ option, or a simple ’Drag and Drop’ method.
Step 3: Transparency Adjustments
In the editor timeline, double click your selected image to open the ‘Settings’ tab. Scroll down the tab options to locate ‘Chroma Key Settings’. Make a right toggle to enable the ‘Chroma Key’ and you will see the image get transparent with the default ’Green’ background color.
You can alternatively, navigate to the ‘Select Color’ option and choose ‘Color Picker’ at its right, reach the image section you wish to make transparent and make a single click.
In case you get a partially transparent background, you can make further adjustments in the ‘Chroma Key’ settings, such as, tolerance, edge thickness, offset, edge feather, etc., to ascertain complete background transparency. When you are satisfied with your work, click on ‘OK’.
Step 4: Media Export
You can now try adding the transparent image to any video or export the same to any media platform. To do this, hit the ‘Export’ tab at the top right corner in the editor timeline.
Part 4 How to Convert JPG to Transparent PNG
Taking into account the diverse information sharing and content specification requirements, an obvious need to switch between different file formats may arise at a number of instants. One such example is the conversion of images in JPG format into that of a transparent PNG image. When looking through convenient alternatives to set the issue straight, the software market has a pouring flood of choices.
Discussed below are some of the best JPG to transparent PNG converter solutions you can pick to convert color background JPG stills into transparent PNG background images, while sorting the concern of how to save PNG with transparent background:
Filmora JPG to Transparent PNG Converter
Filmora is top rated and highly preferred graphic design software that caters to all of your video and image design and conversion needs in the most convenient manner. Developed by Wondershare, this is the worthiest pick for all graphic editing. While the software is packed with extensive and over the top features to provide a professional elegance to almost and design artwork, the transparent image backgrounds created by Filmora are simply remarkable.
If you are done with those usual and commonplace captures, try hands at creating transparent background images with this software, which promises you of a stand out result on account of the following features:
● Filmora comes with a distinguished ‘Green Screen’ feature that is known to create transparent background images in time instants shorter than an eye blink. You just need to upload an image in the software timeline and adjust a few chroma settings, and that’s really the end!
● Apart from this, you can play with a diverse inventory of results and image filters, like, graphic and text overlays, subtitles and tons of audio-visual upshots to create an absolute graphic masterpiece.
● The software further, is free to use and welcomes you with a clean, cohesive and responsive user interface, guiding you at each step of the design task.
● Ending Thoughts →
● Transparent image backgrounds are the current in house trends of content branding and product promotion alternatives. While there are varieties of requirement specific image file formats, the PNG format is best suited for creating a transparent background image.
● The software market is an in depth pool of choices for graphic and image editing tools, Wondershare Filmora happens to be a distinguished name among all to create and convert images with transparent backgrounds.
Easy Step by Step Tutorial on Creating a Lightroom Collage
Easy Step by Step Tutorial on Creating a Lightroom Collage
An easy yet powerful editor
Numerous effects to choose from
Detailed tutorials provided by the official channel
Do you love photography and taking pictures? The best way to make sure that your photos don’t end up on the hard drive is to hang them up in an artful, stylish photo lightroom collage.
Lightroom Collages are a great way to display a collection of your best photos in one place. They can also be an effective way of putting together a datebook or keeping track as you go through your full-time year.
In this article
01 [What’s Lightroom Used for?](#Part 1)
02 [The Value of a Lightroom Collage](#Part 2)
03 [Core Considerations for a Lightroom Collage](#Part 3)
04 [How to Create a Lightroom Collage](#Part 4)
Part 1 What’s Lightroom Used for?
Adobe Lightroom is one of the favorite non-linear editing tools for photographers. It offers a plenty of features for image manipulation and more. Get all the photography essentials with this software.
You can easily create beautiful photo collages in Lightroom and share them with your friends and loved ones. Moreover, it can be used for the storage and organization of photos after uploading them to the database.
Explore some amazing ways to bring out the best in your photographs, whether you’re perfecting one image or organizing thousands in Lightroom.
Part 2 The Value of a Lightroom Collage
In a single picture, you can only see part of a story, but collage lightroom tells you more about that. It helps by refreshing all the memories of a trip, function, and more in a single frame.
They have gained huge popularity in the last few years as the digital space has grown. You may have already seen social media users posting their photo collages on their timelines. Instagram is far ahead of the competition in this regard. It has played a crucial role in establishing the photo collage as a normal trend.
For the photographer
With a photo collage, a photographer can best showcase his talent. It shows that you can do a lot more than your capabilities, like representing stories by blending colors and elements perfectly. This will help you attract your prospects and convert them into your paying customers.
How do photo collages provide value to the clients?
A photo collage provides visual value to the clients by enhancing the creative process. It can have a profound effect on the way they perceive your art of photography. In fact, your clients will love to see all their memories collected in an attractive photo collage. There are a lot of people that even love to present collages to their loved ones.
Part 3 Core Considerations for a Lightroom Collage
The secret to designing an eye-catching lightroom collage is to know how to blend all the elements together properly. Professional Lightroom users concentrate on a few key graphic design considerations to keep their photo collage looking its best.In other words, every element should be in the right proportion, such as dimension, alignment, proximity, and theme.
Balance
Balance refers to the arrangement of all elements. It includes the division of pictures into equal or different dimensions according to the collage size. Maintaining balance enhances the overall appearance of a photo collage in lightroom. Some lightroom experts prefer symmetrical balance, but you can get better quality collages through asymmetrical balance.
Alignment
Don’t underestimate the importance of alignment in Lightroom collage. How your pictures are aligned can have a drastic effect on their overall look. It provides a definitive structure and delivers a well-finished product to the client.
In graphic design, two kinds of elements exist: edge and centre alignment. These are applied to visual design and text as well.
Proximity
Proximity signifies the relationship between various elements on the basis of the distance between them. It follows two basic principles:
● Realistic pictures should be put together.
● Unrelatable images should be separated.
Moreover, the border width needs to be consistent throughout, irrespective of the number of pictures.
Theme
The theme, also known as tone or style, matters when it comes to collage design. Each image must have a similar style, as this idea can personify all the captured memories. It will completely beautify your artistic perspective, but it’s not as measurable as others.
Part 4 How to Create a Lightroom Collage
Before introducing you to the ways of creating a lightroom collage, let’s meet Wondershare Filmora Video Editor . You can use it as an alternative to Lightroom for creating video collages. Recently, Wondershare has brought the latest update of Filmora to give some retouching to your videos.
Wondershare Filmora
Get started easily with Filmora’s powerful performance, intuitive interface, and countless effects!
Try It Free Try It Free Try It Free Learn More >

Now, you can narrate your story with incredible text and title templates in this full-featured video editor. It now features an animated split-screen effect that converts multiple videos into a single compelling collage. You only have to import the clips that you want in the split-screen preview window to make the video collage. But, for photo collages, the best tool ever is Adobe Lightroom.
You get two options for creating photo collages in Lightroom: using a pre-designed template or creating a new one. It will be a time-consuming process to make an original template, but we will still focus on both. If you want to create a lightroom collage of pictures, follow the steps given below.
Create a Photo Collage with a New Template
For a beginner, designing their own template can be a complex and hectic process. But, it’s worth it in the end because the final collage will be the result of all your hard work. In addition, you can show your own creative style by designing a new layout template. This way, you can also deliver a unique creation to your client. Maybe they will end up paying you more as a reward. If you are up for it, then go read the steps to do so.
Step 1: Import and Edit Photographs
Your first step should be to import the photos into your lightroom before proceeding further. Next, to get a perfect collage, your pictures deserve a final touch, which you can do conveniently with the batch editing feature.

Step 2: Establishing the Workspace
After importing and editing the photos, it’s time to create a workspace. Go to the “Print” panel and then to the “Print Job” menu. At this point, you can adjust the dimension of your collage. Make sure to provide ample space for the photos and borders.
Step 3: Create a Photo Layout
As you have photos in hand and space for distributing them, start forming individual spaces to place them. Try using individual boxes as per the required size or your choice with the “Add to Package” section. You can find it under the Cell of Print menu. Feel free to experiment with the size, placement, and more.
Step 4: Add Photos to the Layout
If you are satisfied with the collage template, now bring all your photos to the layout. It’s pretty easy to do because you just have to click on the photo and drag it to where you want. At the end, rearrange as you want until the final design doesn’t seem pleasing to your eyes.
Create a Photo Collage with a Pre-designed Template
Want to save some time without compromising on the final quality of the collage? Make a collage in Lightroom using a pre-designed template. But remember, you won’t get enough freedom to customize the template. If you are up for creating a collage in Lightroom using a pre-designed template, go through the following points.
Step 1: Import the photos into the program
Here also, you can’t create the collage without adding your photos to Lightroom. Simply click on “File” > “Add Photos” and choose the file location.
Step 2: Download the collage layout
Adobe Lightroom offers free as well as paid templates to make a photo collage in Lightroom. You are free to download any one that appeals to you.
Step 3: Bring in the Template
Click on the “Print” module > “Template Browser” > “Lightroom Templates” menu. Now, import the extracted Lightroom collage template using the “Import” button.

Step 4: Insert Photos
After finishing up the import of the template, start adding the photos to them. You can reposition them in whatever way you want. And now, you are done. Export the collage if you are satisfied with the position, color, and everything else.
● Key Takeaways from This Episode →
●Formatting the pictures is the easy part. The real struggle is in creating the collage. That takes a bit more time, but it’s worth it in the end.
●You can follow any of the above steps to get your desired photo collage. So now, you can reduce your burden with Adobe Lightroom or Wondershare Filmora .
●We hope you followed along with this tutorial and have enjoyed reading it. Thanks for your efforts and time.
Do you love photography and taking pictures? The best way to make sure that your photos don’t end up on the hard drive is to hang them up in an artful, stylish photo lightroom collage.
Lightroom Collages are a great way to display a collection of your best photos in one place. They can also be an effective way of putting together a datebook or keeping track as you go through your full-time year.
In this article
01 [What’s Lightroom Used for?](#Part 1)
02 [The Value of a Lightroom Collage](#Part 2)
03 [Core Considerations for a Lightroom Collage](#Part 3)
04 [How to Create a Lightroom Collage](#Part 4)
Part 1 What’s Lightroom Used for?
Adobe Lightroom is one of the favorite non-linear editing tools for photographers. It offers a plenty of features for image manipulation and more. Get all the photography essentials with this software.
You can easily create beautiful photo collages in Lightroom and share them with your friends and loved ones. Moreover, it can be used for the storage and organization of photos after uploading them to the database.
Explore some amazing ways to bring out the best in your photographs, whether you’re perfecting one image or organizing thousands in Lightroom.
Part 2 The Value of a Lightroom Collage
In a single picture, you can only see part of a story, but collage lightroom tells you more about that. It helps by refreshing all the memories of a trip, function, and more in a single frame.
They have gained huge popularity in the last few years as the digital space has grown. You may have already seen social media users posting their photo collages on their timelines. Instagram is far ahead of the competition in this regard. It has played a crucial role in establishing the photo collage as a normal trend.
For the photographer
With a photo collage, a photographer can best showcase his talent. It shows that you can do a lot more than your capabilities, like representing stories by blending colors and elements perfectly. This will help you attract your prospects and convert them into your paying customers.
How do photo collages provide value to the clients?
A photo collage provides visual value to the clients by enhancing the creative process. It can have a profound effect on the way they perceive your art of photography. In fact, your clients will love to see all their memories collected in an attractive photo collage. There are a lot of people that even love to present collages to their loved ones.
Part 3 Core Considerations for a Lightroom Collage
The secret to designing an eye-catching lightroom collage is to know how to blend all the elements together properly. Professional Lightroom users concentrate on a few key graphic design considerations to keep their photo collage looking its best.In other words, every element should be in the right proportion, such as dimension, alignment, proximity, and theme.
Balance
Balance refers to the arrangement of all elements. It includes the division of pictures into equal or different dimensions according to the collage size. Maintaining balance enhances the overall appearance of a photo collage in lightroom. Some lightroom experts prefer symmetrical balance, but you can get better quality collages through asymmetrical balance.
Alignment
Don’t underestimate the importance of alignment in Lightroom collage. How your pictures are aligned can have a drastic effect on their overall look. It provides a definitive structure and delivers a well-finished product to the client.
In graphic design, two kinds of elements exist: edge and centre alignment. These are applied to visual design and text as well.
Proximity
Proximity signifies the relationship between various elements on the basis of the distance between them. It follows two basic principles:
● Realistic pictures should be put together.
● Unrelatable images should be separated.
Moreover, the border width needs to be consistent throughout, irrespective of the number of pictures.
Theme
The theme, also known as tone or style, matters when it comes to collage design. Each image must have a similar style, as this idea can personify all the captured memories. It will completely beautify your artistic perspective, but it’s not as measurable as others.
Part 4 How to Create a Lightroom Collage
Before introducing you to the ways of creating a lightroom collage, let’s meet Wondershare Filmora Video Editor . You can use it as an alternative to Lightroom for creating video collages. Recently, Wondershare has brought the latest update of Filmora to give some retouching to your videos.
Wondershare Filmora
Get started easily with Filmora’s powerful performance, intuitive interface, and countless effects!
Try It Free Try It Free Try It Free Learn More >
Now, you can narrate your story with incredible text and title templates in this full-featured video editor. It now features an animated split-screen effect that converts multiple videos into a single compelling collage. You only have to import the clips that you want in the split-screen preview window to make the video collage. But, for photo collages, the best tool ever is Adobe Lightroom.
You get two options for creating photo collages in Lightroom: using a pre-designed template or creating a new one. It will be a time-consuming process to make an original template, but we will still focus on both. If you want to create a lightroom collage of pictures, follow the steps given below.
Create a Photo Collage with a New Template
For a beginner, designing their own template can be a complex and hectic process. But, it’s worth it in the end because the final collage will be the result of all your hard work. In addition, you can show your own creative style by designing a new layout template. This way, you can also deliver a unique creation to your client. Maybe they will end up paying you more as a reward. If you are up for it, then go read the steps to do so.
Step 1: Import and Edit Photographs
Your first step should be to import the photos into your lightroom before proceeding further. Next, to get a perfect collage, your pictures deserve a final touch, which you can do conveniently with the batch editing feature.
Step 2: Establishing the Workspace
After importing and editing the photos, it’s time to create a workspace. Go to the “Print” panel and then to the “Print Job” menu. At this point, you can adjust the dimension of your collage. Make sure to provide ample space for the photos and borders.
Step 3: Create a Photo Layout
As you have photos in hand and space for distributing them, start forming individual spaces to place them. Try using individual boxes as per the required size or your choice with the “Add to Package” section. You can find it under the Cell of Print menu. Feel free to experiment with the size, placement, and more.
Step 4: Add Photos to the Layout
If you are satisfied with the collage template, now bring all your photos to the layout. It’s pretty easy to do because you just have to click on the photo and drag it to where you want. At the end, rearrange as you want until the final design doesn’t seem pleasing to your eyes.
Create a Photo Collage with a Pre-designed Template
Want to save some time without compromising on the final quality of the collage? Make a collage in Lightroom using a pre-designed template. But remember, you won’t get enough freedom to customize the template. If you are up for creating a collage in Lightroom using a pre-designed template, go through the following points.
Step 1: Import the photos into the program
Here also, you can’t create the collage without adding your photos to Lightroom. Simply click on “File” > “Add Photos” and choose the file location.
Step 2: Download the collage layout
Adobe Lightroom offers free as well as paid templates to make a photo collage in Lightroom. You are free to download any one that appeals to you.
Step 3: Bring in the Template
Click on the “Print” module > “Template Browser” > “Lightroom Templates” menu. Now, import the extracted Lightroom collage template using the “Import” button.
Step 4: Insert Photos
After finishing up the import of the template, start adding the photos to them. You can reposition them in whatever way you want. And now, you are done. Export the collage if you are satisfied with the position, color, and everything else.
● Key Takeaways from This Episode →
●Formatting the pictures is the easy part. The real struggle is in creating the collage. That takes a bit more time, but it’s worth it in the end.
●You can follow any of the above steps to get your desired photo collage. So now, you can reduce your burden with Adobe Lightroom or Wondershare Filmora .
●We hope you followed along with this tutorial and have enjoyed reading it. Thanks for your efforts and time.
Top 12 Best Freeze Frame Video Editing Examples
Top 12 Best Freeze Frame Video Editing Examples
An easy yet powerful editor
Numerous effects to choose from
Detailed tutorials provided by the official channel
Freeze frame effect in video editing is a skill that requires more practice to master. It adds drama and impact to movies. If you want to see more energy and acting in the videos you watch, then you should see more freeze-frame examples.
Sometimes we notice that a particular action stays on longer than necessary in a movie or video. The filmmakers use this skill to emphasize some intense moments further to sustain or pique your interest.
The freeze-frame video editing feature is a valuable skill that helps filmmakers make excellent movies. We have a list of the top 12 examples of freeze-frame effects in movies for you.
In this article
01 [What is freeze-frame video editing?](#Part 1)
02 [Ways to use freeze-frame video editing](#Part 2)
03 [What are the best freeze-frame video editing examples?](#Part 3)
Part 1 What Is Freeze Frame Video Editing?
Freeze frame video editing is a video editing technique that halts movement in a video for a given period. It converts moving pictures into still photography for some time. These video editor effects help filmmakers gear attention to the video editing or filmmaking process. In other words, they are self-reflexive.
Part 2 Ways to Use Freeze Frame in Video editing
Freeze frames can be helpful in 3 significant ways in video editing;
● At the beginning of a movie/video: Freeze-frame at the beginning helps you pique the audience’s interest and give them a sneak peek of what to expect in the movie. This freeze-frame technique was used in the film ‘Good Fellas’ to pique the audience’s interests.
● At the end: Using a freeze-frame allows the audience to choose or decide how the movie ends, whether it is obvious. The ‘breakfast club’ filmmakers use a freeze-frame at the end to emphasize the young boy.
● In the middle, subtly capturing intense moments like in the movie ‘The Departed.’
Part 3 What are the Best Freeze-Frame Video Editing Examples?
It takes a great deal of skill to employ freeze frame with the best results correctly. It might bore the audience or give another impression other than the intended when not done effectively.
But several movie directors have effectively used the freeze-frame video editing technique that wowed the audience.
Here is a list of the best freeze frame examples you would love;
01The Departed

In this 2006 movie, an undercover cop and a mole try to identify each other. Scorsese shows his editing prowess once again as he uses freeze-frame more subtly.
He changes the frame speed instead of stopping on one frame for a considerably longer time. This emphasizes some memorable moments that you may overlook on a first watch.
02Rocky III

The freeze-frame came in during the final match between Apollo and Balboa in this movie.
During the first 3 Rocky movies, Apollo and Balboa had an intriguing rivalry. At the end of Rocky III, the duo decides to engage in a friendly battle to determine who was the Lord in boxing.
The movie ends in a freeze-frame with Rocky swinging a right hook after Apollo imitates the bell, saying, “Ding Dong.”
The freeze-frame allows the audience to guess who the winner will be, thus a longer time to think of the movie after watching.
03400 Blows

In 400 Blows, the main character Antoine, a young Parisian, was hardly out of trouble.
In an attempt to end his troubles, he arrives at the beach after running away from a soccer match.
He is faced with either jumping right in or going back. The movie ends in a freeze-frame as no one finds out. The decision was left to the audience.
04Thelma and Louise

Thelma and Louise is about two (2) friends, Thelma Dickinson and Louise Sawyer. They both rise to defend themselves in a male-dominated world. In the film, Thelma and Louise are both running from the authorities. Louise killed a man who almost raped her friend, Thelma, thus the run. Things get out of control as they try to escape to Mexico, away from the authorities.
While on the run, they get ambushed by the police towards the grand canyon. The audience, at this point, is in suspense as to whether the ladies will survive or not.
Instead of surrendering, they drive right into the grand canyon, and the movie ends in a freeze-frame as they get caught hanging in the air while plunging into the canyon.
Regular movies might decide to give us all the details of the car plunging and exploding.
05The Wolf of Wall Street

Scorsese uses freeze-frame at the beginning of this movie, just as he did in Good Fellas. The freeze-frame effect here helps introduce the character and shows us the plot of the movie hence piquing the audience’s interests immediately.
06Out of Sight

This movie is another excellent example of freeze-frame video editing. What other way to pique the audience’s interest significantly and emphasize them than capture them in a freeze-frame.
07Death Proof

In this movie, the freeze-frame stays till the very end. It captures three women as they raise their hands-on celebration after successfully beating to death a psychopath who has been killing young women.
08Butch Cassidy and the Sundance Kid

This movie follows two train robbers, Butch Cassidy and Harry Longabaugh, known as the ‘Sundance Kid.’ After conducting several robberies, they go on the run as the authorities pursue them. After a gun battle with the authorities, they take cover inside a building, but they get surrounded with no other escape route.
Thus they decide to engage in the last fight instead of surrendering, and you see them in a gun battle with the authorities. The movie ends with them caught in a freeze-frame brandishing their guns at the officers instead of actual bloodshed. Though we all know they will get killed.
09Good Fellas

Initially, we mentioned that a freeze-frame could be of use at the beginning of a movie. Scorsese used this effectively in ‘Good Fellas’ to emphasize the movie plot.
In the opening scene, the characters Henry, Jimmy, and Tonny, played by Ray Liotta, Robert De Niro, and Joe Pesci, respectively, stop their car in the middle of the road.
They open their truck and see a man badly wounded and beaten, Tonny stabs him, and Jimmy shoots him. Henry then closes the truck and looks on in a freeze-frame before uttering the lines, “As far back as I can remember, I have always wanted to be a gangster.”
This lets us know right away what will happen in the movie. That person will get killed, and this is the mob territory.
10Harry Potter and the Prisoner of Azkaban

During a bad and weird year at Hogwarts, Harry potter experiences an extremely joyous moment when he goes anti-gravity on his new Firebolt broom.
He becomes overjoyed and his expression gets captured in a freeze-frame.
11The Breakfast Club

The Breakfast Club is an 80s movie showing teenagers trying to find their identity in life and overcoming the challenges of these years.
This is another freeze frame example where the filmmakers showed great expertise. The character John Bender is caught in a freeze-frame, punching the air to celebrate his victory.
He has just shared a kiss with the class sweetheart Claire. He and his classmates have also just won over the authoritative principal, Mr. Vernon.
12Pulp Fiction: Pumpkin and Honey Bunny.

Pulp Fiction is another movie such as ‘Good Fellas’ with its freeze-frame edition done at the movie’s beginning.
Pumpkin and Honey Bunny are shown at the movie’s beginning, sitting together in a diner. They argue whether it will be safer to rub a bank or a restaurant. In the end, they settle for a diner — the same one they are sitting in.
They kiss and pull out their guns, and the images freeze before the credits roll out.
The freeze-frame gives us a sneak peek of the violence to experience in the movie, and indeed, we were not disappointed.
For Win 7 or later (64-bit)
For macOS 10.12 or later
With Wondershare Filmora Video Editor ‘s speed ramping feature, you can adjust your video speed while controlling the keyframes to create fascinating cinematic videos.
Filmora is a video editing tool developed by wondershare and has exciting features. Filmora makes video editing easy and seamless yet produces professional results.
Filmora’s freeze-frame feature helps bring dynamism and energy to your videos using its keyframe feature.
● Ending Thoughts →
● It is an inexplicable feeling that we get every time we remember a movie we watched a long time ago, the ones whereas kept debating with our friends as to what would have happened.
● That is the purpose of adding freeze-frame effects at the end of videos. So you keep thinking about them.
● Now that you know this effect, you can figure out which freeze-frame video examples you still find very interesting. Also, do not hesitate to try out the new features of Filmora. It would bring out the best of your video to the audience.
Freeze frame effect in video editing is a skill that requires more practice to master. It adds drama and impact to movies. If you want to see more energy and acting in the videos you watch, then you should see more freeze-frame examples.
Sometimes we notice that a particular action stays on longer than necessary in a movie or video. The filmmakers use this skill to emphasize some intense moments further to sustain or pique your interest.
The freeze-frame video editing feature is a valuable skill that helps filmmakers make excellent movies. We have a list of the top 12 examples of freeze-frame effects in movies for you.
In this article
01 [What is freeze-frame video editing?](#Part 1)
02 [Ways to use freeze-frame video editing](#Part 2)
03 [What are the best freeze-frame video editing examples?](#Part 3)
Part 1 What Is Freeze Frame Video Editing?
Freeze frame video editing is a video editing technique that halts movement in a video for a given period. It converts moving pictures into still photography for some time. These video editor effects help filmmakers gear attention to the video editing or filmmaking process. In other words, they are self-reflexive.
Part 2 Ways to Use Freeze Frame in Video editing
Freeze frames can be helpful in 3 significant ways in video editing;
● At the beginning of a movie/video: Freeze-frame at the beginning helps you pique the audience’s interest and give them a sneak peek of what to expect in the movie. This freeze-frame technique was used in the film ‘Good Fellas’ to pique the audience’s interests.
● At the end: Using a freeze-frame allows the audience to choose or decide how the movie ends, whether it is obvious. The ‘breakfast club’ filmmakers use a freeze-frame at the end to emphasize the young boy.
● In the middle, subtly capturing intense moments like in the movie ‘The Departed.’
Part 3 What are the Best Freeze-Frame Video Editing Examples?
It takes a great deal of skill to employ freeze frame with the best results correctly. It might bore the audience or give another impression other than the intended when not done effectively.
But several movie directors have effectively used the freeze-frame video editing technique that wowed the audience.
Here is a list of the best freeze frame examples you would love;
01The Departed
In this 2006 movie, an undercover cop and a mole try to identify each other. Scorsese shows his editing prowess once again as he uses freeze-frame more subtly.
He changes the frame speed instead of stopping on one frame for a considerably longer time. This emphasizes some memorable moments that you may overlook on a first watch.
02Rocky III
The freeze-frame came in during the final match between Apollo and Balboa in this movie.
During the first 3 Rocky movies, Apollo and Balboa had an intriguing rivalry. At the end of Rocky III, the duo decides to engage in a friendly battle to determine who was the Lord in boxing.
The movie ends in a freeze-frame with Rocky swinging a right hook after Apollo imitates the bell, saying, “Ding Dong.”
The freeze-frame allows the audience to guess who the winner will be, thus a longer time to think of the movie after watching.
03400 Blows
In 400 Blows, the main character Antoine, a young Parisian, was hardly out of trouble.
In an attempt to end his troubles, he arrives at the beach after running away from a soccer match.
He is faced with either jumping right in or going back. The movie ends in a freeze-frame as no one finds out. The decision was left to the audience.
04Thelma and Louise
Thelma and Louise is about two (2) friends, Thelma Dickinson and Louise Sawyer. They both rise to defend themselves in a male-dominated world. In the film, Thelma and Louise are both running from the authorities. Louise killed a man who almost raped her friend, Thelma, thus the run. Things get out of control as they try to escape to Mexico, away from the authorities.
While on the run, they get ambushed by the police towards the grand canyon. The audience, at this point, is in suspense as to whether the ladies will survive or not.
Instead of surrendering, they drive right into the grand canyon, and the movie ends in a freeze-frame as they get caught hanging in the air while plunging into the canyon.
Regular movies might decide to give us all the details of the car plunging and exploding.
05The Wolf of Wall Street
Scorsese uses freeze-frame at the beginning of this movie, just as he did in Good Fellas. The freeze-frame effect here helps introduce the character and shows us the plot of the movie hence piquing the audience’s interests immediately.
06Out of Sight
This movie is another excellent example of freeze-frame video editing. What other way to pique the audience’s interest significantly and emphasize them than capture them in a freeze-frame.
07Death Proof
In this movie, the freeze-frame stays till the very end. It captures three women as they raise their hands-on celebration after successfully beating to death a psychopath who has been killing young women.
08Butch Cassidy and the Sundance Kid
This movie follows two train robbers, Butch Cassidy and Harry Longabaugh, known as the ‘Sundance Kid.’ After conducting several robberies, they go on the run as the authorities pursue them. After a gun battle with the authorities, they take cover inside a building, but they get surrounded with no other escape route.
Thus they decide to engage in the last fight instead of surrendering, and you see them in a gun battle with the authorities. The movie ends with them caught in a freeze-frame brandishing their guns at the officers instead of actual bloodshed. Though we all know they will get killed.
09Good Fellas
Initially, we mentioned that a freeze-frame could be of use at the beginning of a movie. Scorsese used this effectively in ‘Good Fellas’ to emphasize the movie plot.
In the opening scene, the characters Henry, Jimmy, and Tonny, played by Ray Liotta, Robert De Niro, and Joe Pesci, respectively, stop their car in the middle of the road.
They open their truck and see a man badly wounded and beaten, Tonny stabs him, and Jimmy shoots him. Henry then closes the truck and looks on in a freeze-frame before uttering the lines, “As far back as I can remember, I have always wanted to be a gangster.”
This lets us know right away what will happen in the movie. That person will get killed, and this is the mob territory.
10Harry Potter and the Prisoner of Azkaban
During a bad and weird year at Hogwarts, Harry potter experiences an extremely joyous moment when he goes anti-gravity on his new Firebolt broom.
He becomes overjoyed and his expression gets captured in a freeze-frame.
11The Breakfast Club
The Breakfast Club is an 80s movie showing teenagers trying to find their identity in life and overcoming the challenges of these years.
This is another freeze frame example where the filmmakers showed great expertise. The character John Bender is caught in a freeze-frame, punching the air to celebrate his victory.
He has just shared a kiss with the class sweetheart Claire. He and his classmates have also just won over the authoritative principal, Mr. Vernon.
12Pulp Fiction: Pumpkin and Honey Bunny.
Pulp Fiction is another movie such as ‘Good Fellas’ with its freeze-frame edition done at the movie’s beginning.
Pumpkin and Honey Bunny are shown at the movie’s beginning, sitting together in a diner. They argue whether it will be safer to rub a bank or a restaurant. In the end, they settle for a diner — the same one they are sitting in.
They kiss and pull out their guns, and the images freeze before the credits roll out.
The freeze-frame gives us a sneak peek of the violence to experience in the movie, and indeed, we were not disappointed.
For Win 7 or later (64-bit)
For macOS 10.12 or later
With Wondershare Filmora Video Editor ‘s speed ramping feature, you can adjust your video speed while controlling the keyframes to create fascinating cinematic videos.
Filmora is a video editing tool developed by wondershare and has exciting features. Filmora makes video editing easy and seamless yet produces professional results.
Filmora’s freeze-frame feature helps bring dynamism and energy to your videos using its keyframe feature.
● Ending Thoughts →
● It is an inexplicable feeling that we get every time we remember a movie we watched a long time ago, the ones whereas kept debating with our friends as to what would have happened.
● That is the purpose of adding freeze-frame effects at the end of videos. So you keep thinking about them.
● Now that you know this effect, you can figure out which freeze-frame video examples you still find very interesting. Also, do not hesitate to try out the new features of Filmora. It would bring out the best of your video to the audience.
How to Make A Jaw-Dropping Time Lapse Video?
Are you looking for a handy tutorial that will give you a full-fledged time lapse video? Well, here’s some two cents of what would be the ideal guide that you shall refer to! Learn more about the complete steps involved in making your time lapse video. Find out more here:
Part 1: What is Time Lapse?
1. Technical basics of Time Lapse Photography and Videography
Time-lapse is a specialized type of shot that can be achieved in-camera, through editing, or a combination of both. Time-lapse is a technique where frames are shot much slower than a normal rate (e.g., 24 frames per minute instead of per second).
Professional time-lapses are a series of raw photos even though they are sometimes perceived as videos. In a nutshell, a time-lapse is a short video that processes by revealing the evolution of a series of events, invisible to the eye.
The simplest and most useful formula is time per frame (TPF), multiplied by frames per second (FPS), multiplied by 60 seconds. Using this formula will tell you how long to record to end up with your desired time lapse length or “recording time” (RT). TPF x FPS x 60 = RT
2. What is a Time-lapse video used for?
The use of time-lapse photography and video is an excellent storytelling technique since compelling stories are essential to effective marketing. A time-lapse can also offer excellent insight into the advancement of developmental projects.
① Scientific research
- Time-lapses may be utilized to spread the word about scientific investigations to a wide audience. You can use time-lapse photography to gain money by selling the material of interesting scientific investigations to documentary makers or instructional websites.
- Scientists can visualize processes that would be challenging or sometimes even impossible to study in real life, thanks to time-lapse photography
② Individual enjoyment
Time-lapses are also utilized by filmmakers for scenes requiring extended durations of time with little significant activity occurring during the shot (such as night slowly turning into day).
③ Commercial use
- Time-lapse videos are a wonderful instrument for enhancing the perception of your brand because they are. As a result, many consumers find it interesting.
- Time-lapse videos are the epitome of the old saying that “good things come in small packages” for any brand.
3. How to Make a Time-lapse video?
Start with a stable tripod or surface and adjust the settings on your phone camera or DSLR. Use slow shutter speed, use still mode, and don’t forget to use the timer. Find a stable surface and place your camera this way, you can get your hands on a creative time-lapse video.
Part 2: Record or Shoot Your Time-Lapse Video
1. Select Your Subject
The best way to create a time-lapse video is to pick your subject very carefully. Movement is the most crucial factor to consider while selecting a time-lapse subject. Any movement—whether it be caused by people, animals, vehicles, water, clouds, or anything else—can create an exciting and captivating time-lapse.
- Some of the iconic ideas of filming a time-lapse include:
- A stunning glimpse of the day and night cycle of life at sea.
- Construction of a building from ground till its completion
- Capturing the traffic movement
- Ice melting
- Sun setting
- A great shot of a galaxy
2. Prepare Right Equipment
Choose your equipment before heading out to capture time lapses. There are several options available for time-lapse cameras and applications, ranging from basic and affordable to sophisticated and pricy.
① Camera
You cannot make a time-lapse without owning a camera, whether it is a mobile phone, a compact, or a DSLR. The quality of the final result will be as good as the quality of the equipment you use.
- Smartphone camera apps (iPhone/Android)
All good smartphones now possess a built-in camera with good optical quality, for example: recently Apple Company launched its new iPhone 14 with a magnificent 48-megapixel camera. By using such cameras we have been able to produce really good pictures, although not in negative conditions, such as those with low-light, etc.
For apple: use IguanaLapse or TimeLapse to create your great time-lapses
For Android: use Time-Lapse – Lite
- Point-and-shoot cameras
Even though smartphone cameras have taken over in this digital era, it is still not possible to say that point-and-shoot cameras are not doing their magic. A point-and-shoot camera is really handy.
Some examples of point-and-shoot cameras which are best for creating fun time-lapse videos include Olympus Tough TG-6, Nikon Coolpix W300, Fujifilm XP140, Panasonic Lumix ZS70 / TZ90, and many others in the list.
- Action cameras
Action cameras, also known as action cams are compact, rugged, handheld, or mountable digital cameras that are designed to capture what you see when you are immersing in a movement. The action camera is usually mounted to your helmet, chest, handlebars of a bike or motorcycle, or tripod to record life.
The best action cameras for creating time-lapses include GoPro Hero11 Black, Insta360 ONE RS Twin Edition, DJI Action 2, DJI Pocket 2, and GoPro Hero9 Black.
- DSLR cameras
This is the best choice in terms of cost/benefit: it produces excellent results and high image quality. The best and top-rated DSLRs for creating terrific time-lapses include Nikon D850, Canon 80D, Canon EOS 90D, Sony A7 III, and others.
② Tripod/Gimbal/other stabilizers
Owning a solid and stable tripod is essential for the success of a time-lapse video. A good tripod will support the load without any problems and will keep the arsenal stable for the duration of the shooting session. The best way to use a tripod for filming a time-lapse is to use orient on a tripod that is quite high (at least 170cm).
Some best tripods used to record time-lapses include BONFOTO B671c, Patekfly Flexible Tripod, Sirui Easy Traveler ET-2204, and Vanguard Alta Pro 263AB 100.
A gimbal is a tool that uses motors and intelligent sensors to support and stabilize a camera. The best gimbal and other stabilizers used to film time-lapses include Moza Air 2, DJI RS 2, Zhiyun Crane-2S, Benro RedDog R1, iKan EC1 Beholder, and Feiyu AK4500.
③ Intervalometer/other camera shutter triggers
An intervalometer is a small device able to trigger the shutter of your camera every ‘n’ second, ‘n’ times (also infinite). It can be external, or as we saw earlier, integrated into the camera.
Some of the best intervalometer include Nikon Integrated Intervalometer. With a Nikon D3, you can go into Shooting Menu, and then activate” Interval Timer Shooting”.
3. List Pro Tips for Time-lapse Recording
- Make sure batteries are fully charged
- Set interval to match the movement in the scene
- Select music before shooting the time-lapse
- Use your backup camera
- Shoot in manual mode to avoid flicker
- Lock down focus
- Shoot in RAW format
- Add motion to the time-lapse
- Get comfortable, shoot longer
- Avoid bumping or moving the tripod
- Show shadow movement
- Use apps to plan your shots
- Shoot lots of images
Part 3: Edit Your Time Lapse Video
1. 3 Best Ways to Create Time Lapse from Photos
① Windows Photos App (Windows)
If you are using Windows, you probably are familiar with the general features of the Photos App. One of its distinguishing features is to import the photos and create a mind-blowing time-lapse out of those photos. To create time-lapse on your Windows Photos App, you must follow some simple steps:
- Open the Windows Photos app and import the pictures which you want to transform into a time-lapse.
- Go to Menu > Edit > Speed. For proper time-lapse, select a speed between 4x and 12x.
- Go to Save movie > save the video on your desktop or other device and you’re done with filming a great time-lapse video.
② QuickTime Player (Mac)
In your Apple devices (iPhones, iPads, and MacBook), you can create time-lapses by converting an image sequence to a movie or time-lapse video in QuickTime Player. For this, follow the simple steps and you will get a great time-lapse at the tip of your fingertips.
- Go to QuickTime App on your mac devices and open File > open image sequence.
- Select the image sequence folder and choose media.
- Adjust the quality of the movie by clicking on the options and choosing the resolution, frame rate, and video format.
- Click ‘open’ and time-lapse will be ready for access.
③ Filmora (Windows & Mac)
Through Wondershare Filmora software, it is now possible to drag your favorite image sequence into the timeline and transform it into a cool-looking time-lapse. If you’re looking for easy and efficient software to create attractive time-lapses, Filmora is your best go-to software. Using drag-and-drop, you can create time-lapse effects with Filmora’s built-in slow/fast motion effects. Filmora has over 150 free filters available for you if you wish to apply filters to your movie.
Filmora Video Editor creates a masterpiece for your video with the easiest interface for Windows & Mac users. Wondershare created the Filmora family of video editing and production software. Products on Filmora are available for a variety of users, from novice to expert. A timeline, preview window, and effects library are some of Filmora’s common features. These may all be accessed and managed using a drag-and-drop interface. Both Windows and macOS machines can use the Filmora software library.
How to Create a Time-lapse using Filmora
To create a time-lapse from photos in Filmora software, follow the mentioned steps:
Step 1: Download and install Wondershare Filmora
Go to google chrome and download the setup for Filmora. Install into your desktop.
Free Download For Win 7 or later(64-bit)
Free Download For macOS 10.14 or later
Step 2: Launch Filmora video editor
After downloading and installing, launch the Filmora timeline and import the photos to the media library.
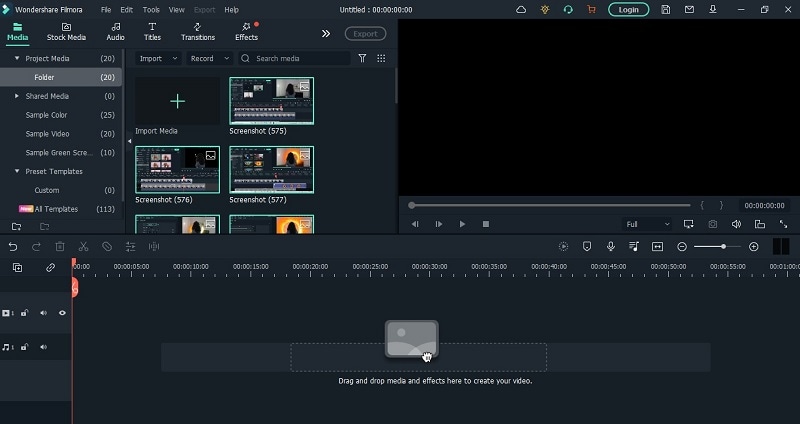
Step 3: Preview and adjust the photos.
Drag the images down to the timeline and move the pointer to reset and order the images according to your required time-lapse video. Don’t forget to resize and match the sizes of all the pictures so make a uniform time-lapse.

Step 4: Adjust the Speed
Select one of the photos in the timeline and right-click. Click on Speed and Duration > Custom Speed panel > Duration > change the duration of the photo to 00:00:00:01 and hit OK.
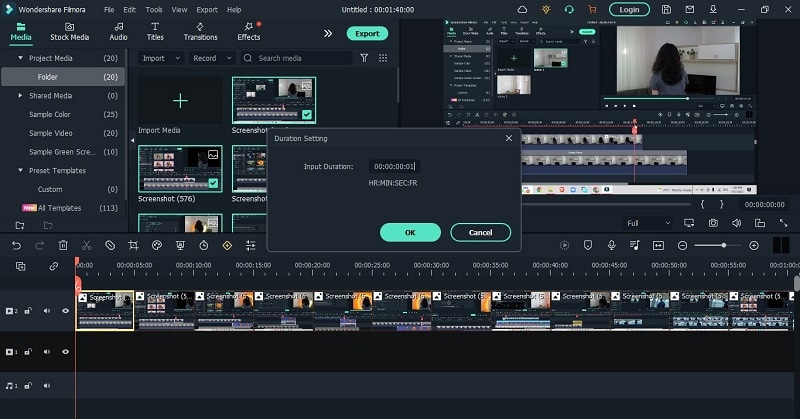
Step 5: Add effects and audio
Even though this step is optional, still it is recommended that to make your time-lapse more presentable, go to effects and choose your favorite pre-set. Go to Audio menu to choose from the music library or add your own custom audio by importing audio file into the timeline.
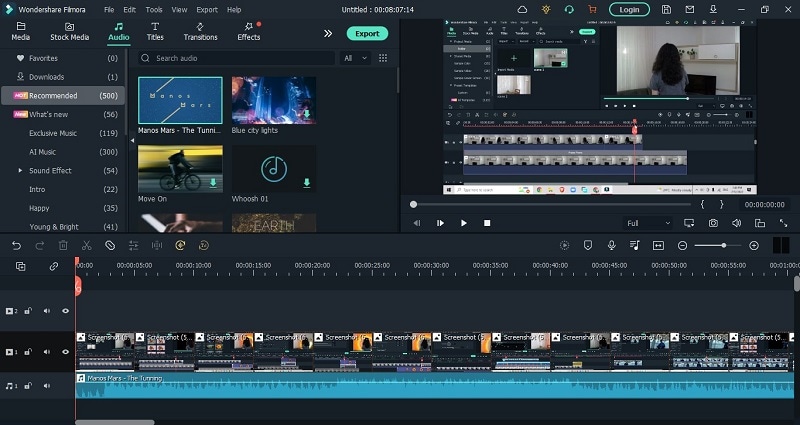
Step 6 Render and Export media
Export your file after rendering it in the full screen. Always check if there are any additional changes required before exporting the media file.

Step 7: Save into your desktop
Change the video format and video and audio parameters such as Bit Rate, Encoder, and Resolution of the video.
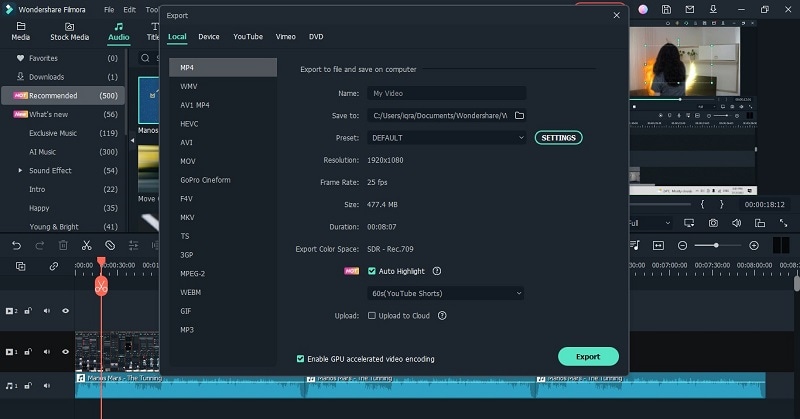
Other software for creating time-lapse
Besides Filmora, there are some interesting options for the users which involve:
o iMovie
o LRTimelapse
o Lightroom
o Adobe Premiere Pro
o After Effects
o Photoshop
2. 3 Best Ways to Convert Video to Time Lapse
① Filmora(Windows & Mac)
Filmora offers yet another very distinguishing feature through which it can convert video footage into an excellent time-lapse video. This feature of Filmora empowers the users and boosts their content and increases audience engagement as well.
In a few simple steps, you can get a creative time-lapse on your windows and mac devices.
- Download and install Filmora 11
- Launch Filmora timeline on your device and import the footage to the media library
- Drag your video onto the video column in the timeline. Select the loaded video and click the “Play” button. While playing the video, drag the slider bar at the start time and hit the “Split” icon to cut out the part you want to do time-lapse editing.
- Right-click on the video clip in the timeline to select Speed and Duration. Find the Speed option and drag the slider bar to the right to increase the speed.
- Click the Play button to preview the result. Filmora now supports up to 100x fast motion and 0.01x slow mo.
- Export your video
② Lapse It Pro (Android & iPhone)
One of the top apps for time-lapse photography is Lapse It Pro. A collection of further time lapses made by other people is available on Lapse It. You can post your videos and favorite those of others while using this social function, which also lets you watch other people’s videos. Through user control, the software makes the smartphone’s capacity to record time lapses as effective as possible.
The lapse It pro version is currently not free, although the Lapse its app is free and it is available on both, Android and Apple.
Steps to Use Lapse It Pro:
- Download the app on your android or apple device
- Configure the time interval between the shots and set a time or photo-based limit while clicking pictures.
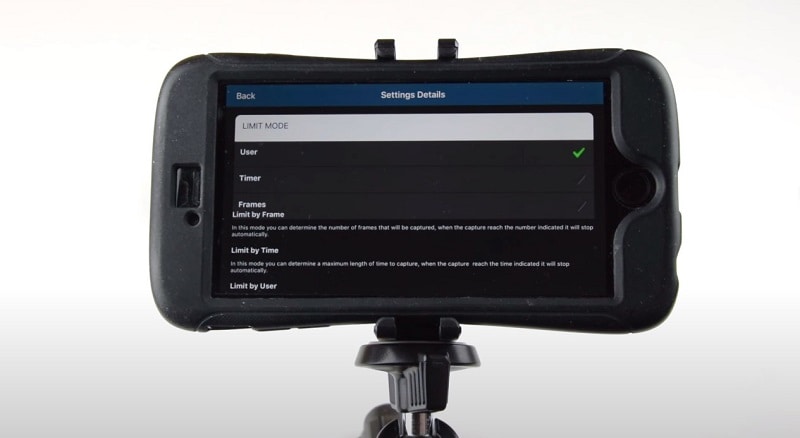
- Adjust the resolution of your camera before taking pictures.
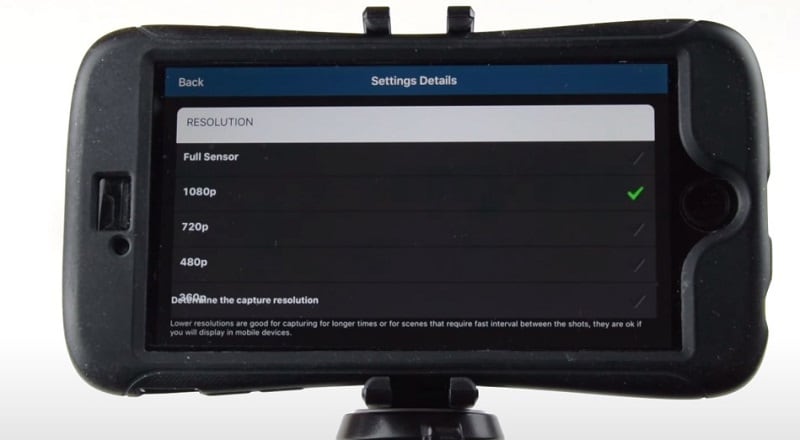
- Take a lot of pictures through the app using your device’s inbuilt camera
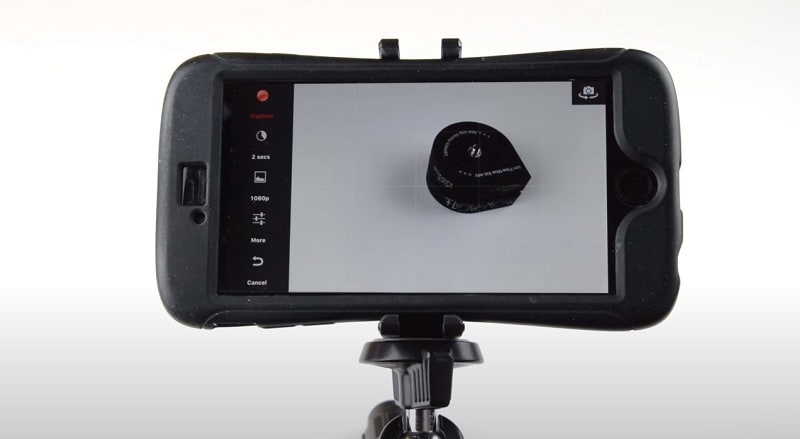
- Edit the order of the pictures
- Stitch the pictures together to form a time-lapse
- Add filters and adjust color settings
- Render and preview
- Export the file to your device
③ Invideo (Online)
InVideo is a do-it-yourself (DIY) video creation platform that enables users to turn their ideas into videos in real time. The platform lets users create, edit, preview, and share videos with team members. It’s a fantastic solution for combining your time-lapse footage into an amazing video project.
InVideo provides three distinct methods for creating videos:
- Text-to-Video: Upload your footage and let InVideo turn it into a series of scenes that you can customize
- Blank Templates: Start with a stripped-down template and craft an amazing video from scratch
- Premade Templates: Pick a template from an extensive library of premade templates
Steps to Use InVideo:
To create a time-lapse through InVideo, follow the mentioned steps:
Step 1. Download and install InVideo
Step 2. Sign up and sign in to your InVideo account
Step 3. Upload your footage to the ‘Add your media files here’ tab.
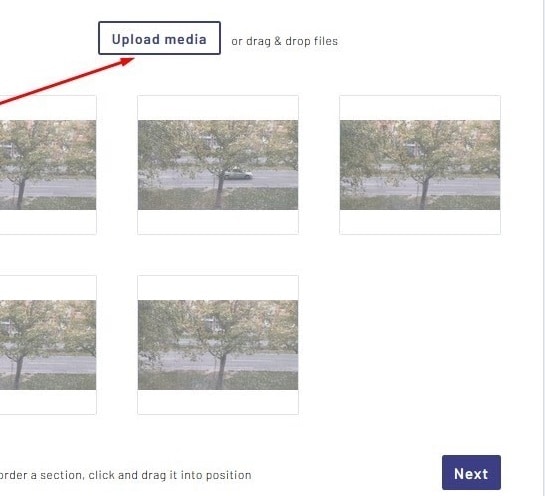
Step 4. Do not upload footage exceeding 200 MBs.
Step 5. Click ‘Next’ and you will be redirected to the Storyboard.
Step 6. Preview all your scenes in Storyboard mode. Rearrange them, add new ones in between, and delete any that you don’t want to use in your project. You can also duplicate scenes if necessary.
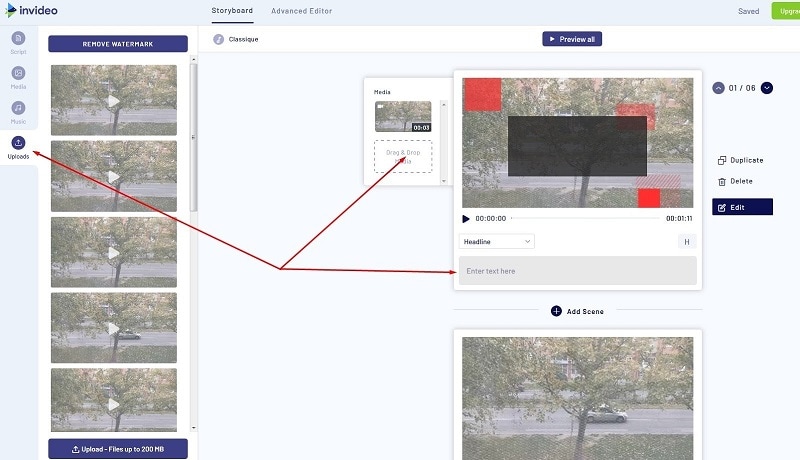
Step 7: You can also add captions to your scenes. To view all the captions you’ve created, go to the Scripts tab. You’ll be able to customize your captions further in the Advanced Editor mode.
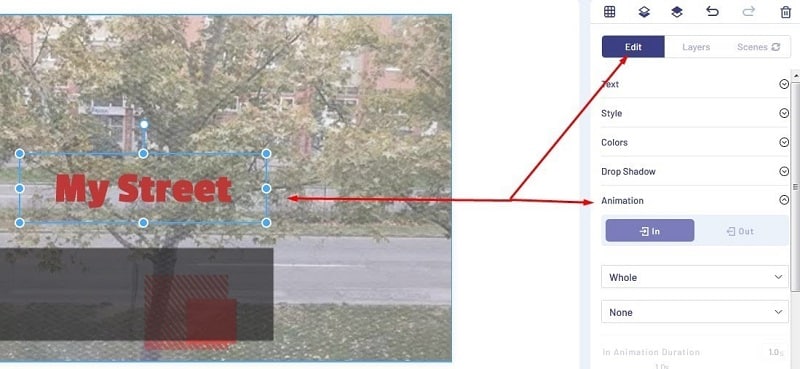
Step 8. To add audio files to your video, go to the Music tab.
Step 9. Edit your video by clicking on Advanced Editor.

Step 10. Apply filters and review the timeline, export, save the video and you’re good to go.
3. Which Way is Right for You to Edit a Time-Lapse Video?
There are many ways to edit a time-lapse video, with varying degrees of success. Each application and software has its pros and cons. Although some best and most useful methods to create and edit time-lapse videos have been discussed earlier in this essay it is crucial to highlight that Filmora is regarded as software that possesses almost all the assets that we need while we edit our time-lapse videos.
Through Filmora, you can effortlessly make a pro-level time-lapse video either from still images or existing video. Most of the software would offer only one feature at a time so it is tremendous that Filmora lets you easily access multiple options to create a seamless time-lapse video in a spur of some minutes.
Besides multiple ways to create time-lapse, Filmora also offers basic & advanced editing features for time-lapse production. After creating a time-lapse in Filmora, you can drag through the multiple post-production editing features which include: Split Screen, Keyframing, Motion Tracking, Speed Ramping, Screen Recorder, Instant Mode, Pre-set Templates, and Auto Beat Sync. And many others.
Besides these ways of editing your time-lapses, Filmora also offers no disturbing pop-up ad experience while editing which provides a smooth editing platform for editors.
Part 4: Share & Enjoy the Best Time-Lapse Video
1. Share Your Quality Time-Lapse Video Across Social Platforms
Time-lapse & social media serve as the perfect combination in today’s times when social media publicity has become an incredibly important avenue for businesses. You can share your time lapses on different social media platforms including:
- YouTube
When people talk about today’s most popular social sharing websites, YouTube often gets left out of the conversation in favor of sites like Facebook and Twitter. But don’t be fooled: YouTube has a lot going for it.
By uploading your time-lapses on YouTube, you can create a YouTube link and share it with your friends and social circle so they can easily access your content, you can get found in search by uploading your own written transcript about the time-lapse, adding an end screen or cards to promote your time-lapse video, and add creative effects to your time-lapses with YouTube Enhancements.
- TikTok
TikTok is a social media platform for creating, sharing, and discovering short videos. The app is used by young people as an outlet to express themselves through singing, dancing, comedy, and lip-syncing, and allows users to create videos and share them across a community.
Since the duration of the time-lapse videos is mostly kept short, TikTok is the best app to approach if you want to increase your audience engagement.
The Meta app, Instagram is the most used app as per 2022 statistics. Through this app, people used to update their day-to-day routine and check-ins by uploading pictures. Now, the platform has added a ‘Reels’ section which plays the short videos to keep the audience hooked to the app, more than ever.
Upload your time-lapses on Instagram as Reels and see your content boost within hours.
2. Promote Your Time-Lapse Video on Popular Websites
Professional video editors and photographers who are looking for a paid platform to promote their business can access the most widely used and reliable websites which include the following:
- Shutterstock
With this app on your mobile phones and other devices, you can Transform Your Marketing Campaigns, Social Media, Websites, and Designs. Uploading your time-lapse content to earn good money on Shutterstock will work best in your favor.
- Pond5
Pond5 is the world’s largest marketplace for HD & 4K stock video, plus millions of music tracks, SFX, motion graphics, and images. Signing up and posting your time-lapse to promote your digital work can be a good choice if you’re looking for earning money online.
- Adobe Stock
Adobe Stock is a new service that provides designers and businesses with access to millions of high-quality, curated, royalty-free images and videos. This is also a good choice for professional photographers and videographers to post their time-lapses.
- Getty
Getty is an American visual media company and is a supplier of stock images, editorial photography, video, and music for business. By uploading your time lapses on this platform, you can be provided with exceptional opportunities to engage employees, entertain clients, and promote your brand.
3. Enjoy the Attractive Time-Lapse Video Examples
Over the internet, you will find numerous creatively designed time-lapses but a few of them still top the list. Some of the iconic time-lapses created to date include the following:
- Multiverse By Hiroshi Kondo, a mind-bending TimeLapse video of Taiwan
- Paris Day & Night by Teeter-Totter-Tam is a 5-minutes TimeLapse journey through one of the prettiest cities in the world, Paris from day to night.
- Solar Panel Installation from a Crane - David Dupuy
- Death Is the Road to Awe is a sample of TimeLapse video footage from that film shot in the American Southwest.
Part 5: FAQs – Time-Lapse Video Creation
① How to easily make a time-lapse video like a pro?
Most smartphone cameras have their time-lapse feature built in. To shoot your time-lapse video, simply open up the camera on your phone and select the “Time-Lapse” feature.
Place your phone in a secure spot where it won’t move around a lot. Then, tap the record button to start recording your time-lapse. When you’re done, tap it again. Your video will play back compressed into a shorter period for a time lapse effect.
PRO TIP: If you’re planning to make a landscape video, turn your phone so your time-lapse video is wide instead of tall
② What are the best time lapse editors or software?
The top five Best Free TimeLapse Software include:
- Wondershare Filmora- Windows and Mac
- Adobe Premiere Pro – Professional software
- Final Cut Pro – Mac software for time-lapse videos
- iMovie – User-friendly
- LRTimelapse – Sophisticated tool for more experienced users
③ Can I speed up or slow down a time-lapse video using Filmora?
Filmora also allows you to adjust the duration of the video clip to change the video speed. After importing the video clip to the timeline, right-click it and choose Speed and Duration to open the custom speed pop-up. Go to the Duration section and you will see the original duration of the video. Adjusting the duration of the video longer will add a slow-motion effect to the video. Changing the duration of the video to a shorter time will speed up the playback speed of the video. Just directly input the number in the field to speed up/slow down the video.
④ How to make my time-lapse video look better?
- Using a Slow Shutter
One solution to making your time lapses look more natural is to use a slow shutter so that each frame has a bit of motion.
- Blend in Video
Capture a time-lapse with fast movement and then mask in video with slow movement, maybe I could have the best of both worlds.
- Use filters
You can use Filters to spruce up the content with the time-lapse.
- Add Audio
Audio is an essential part if you want to leverage the content reach of your time-lapse video.
Conclusion
Time lapse videos are among the most powerful marketing tactics available in the mass media age of today. Similar to aerial photography, time-lapse videos can tell an engaging story for a low production cost, and they can be viewed fast by the audience. Filmora has helped the professionals as well as the beginners in the photography and videography to boost their content through online platforms.
This article will guide you through the most useful software and ways to promote your content and boost your audience engagement through creating mind-blowing time-lapses. Software like above mentioned ones take extremely little time and focus to comprehend the tale in a time lapse, which is a huge advantage in today’s competitive industry.
Free Download For macOS 10.14 or later
Step 2: Launch Filmora video editor
After downloading and installing, launch the Filmora timeline and import the photos to the media library.
Step 3: Preview and adjust the photos.
Drag the images down to the timeline and move the pointer to reset and order the images according to your required time-lapse video. Don’t forget to resize and match the sizes of all the pictures so make a uniform time-lapse.
Step 4: Adjust the Speed
Select one of the photos in the timeline and right-click. Click on Speed and Duration > Custom Speed panel > Duration > change the duration of the photo to 00:00:00:01 and hit OK.
Step 5: Add effects and audio
Even though this step is optional, still it is recommended that to make your time-lapse more presentable, go to effects and choose your favorite pre-set. Go to Audio menu to choose from the music library or add your own custom audio by importing audio file into the timeline.
Step 6 Render and Export media
Export your file after rendering it in the full screen. Always check if there are any additional changes required before exporting the media file.
Step 7: Save into your desktop
Change the video format and video and audio parameters such as Bit Rate, Encoder, and Resolution of the video.
Other software for creating time-lapse
Besides Filmora, there are some interesting options for the users which involve:
o iMovie
o LRTimelapse
o Lightroom
o Adobe Premiere Pro
o After Effects
o Photoshop
2. 3 Best Ways to Convert Video to Time Lapse
① Filmora(Windows & Mac)
Filmora offers yet another very distinguishing feature through which it can convert video footage into an excellent time-lapse video. This feature of Filmora empowers the users and boosts their content and increases audience engagement as well.
In a few simple steps, you can get a creative time-lapse on your windows and mac devices.
- Download and install Filmora 11
- Launch Filmora timeline on your device and import the footage to the media library
- Drag your video onto the video column in the timeline. Select the loaded video and click the “Play” button. While playing the video, drag the slider bar at the start time and hit the “Split” icon to cut out the part you want to do time-lapse editing.
- Right-click on the video clip in the timeline to select Speed and Duration. Find the Speed option and drag the slider bar to the right to increase the speed.
- Click the Play button to preview the result. Filmora now supports up to 100x fast motion and 0.01x slow mo.
- Export your video
② Lapse It Pro (Android & iPhone)
One of the top apps for time-lapse photography is Lapse It Pro. A collection of further time lapses made by other people is available on Lapse It. You can post your videos and favorite those of others while using this social function, which also lets you watch other people’s videos. Through user control, the software makes the smartphone’s capacity to record time lapses as effective as possible.
The lapse It pro version is currently not free, although the Lapse its app is free and it is available on both, Android and Apple.
Steps to Use Lapse It Pro:
- Download the app on your android or apple device
- Configure the time interval between the shots and set a time or photo-based limit while clicking pictures.
- Adjust the resolution of your camera before taking pictures.
- Take a lot of pictures through the app using your device’s inbuilt camera
- Edit the order of the pictures
- Stitch the pictures together to form a time-lapse
- Add filters and adjust color settings
- Render and preview
- Export the file to your device
③ Invideo (Online)
InVideo is a do-it-yourself (DIY) video creation platform that enables users to turn their ideas into videos in real time. The platform lets users create, edit, preview, and share videos with team members. It’s a fantastic solution for combining your time-lapse footage into an amazing video project.
InVideo provides three distinct methods for creating videos:
- Text-to-Video: Upload your footage and let InVideo turn it into a series of scenes that you can customize
- Blank Templates: Start with a stripped-down template and craft an amazing video from scratch
- Premade Templates: Pick a template from an extensive library of premade templates
Steps to Use InVideo:
To create a time-lapse through InVideo, follow the mentioned steps:
Step 1. Download and install InVideo
Step 2. Sign up and sign in to your InVideo account
Step 3. Upload your footage to the ‘Add your media files here’ tab.
Step 4. Do not upload footage exceeding 200 MBs.
Step 5. Click ‘Next’ and you will be redirected to the Storyboard.
Step 6. Preview all your scenes in Storyboard mode. Rearrange them, add new ones in between, and delete any that you don’t want to use in your project. You can also duplicate scenes if necessary.
Step 7: You can also add captions to your scenes. To view all the captions you’ve created, go to the Scripts tab. You’ll be able to customize your captions further in the Advanced Editor mode.
Step 8. To add audio files to your video, go to the Music tab.
Step 9. Edit your video by clicking on Advanced Editor.
Step 10. Apply filters and review the timeline, export, save the video and you’re good to go.
3. Which Way is Right for You to Edit a Time-Lapse Video?
There are many ways to edit a time-lapse video, with varying degrees of success. Each application and software has its pros and cons. Although some best and most useful methods to create and edit time-lapse videos have been discussed earlier in this essay it is crucial to highlight that Filmora is regarded as software that possesses almost all the assets that we need while we edit our time-lapse videos.
Through Filmora, you can effortlessly make a pro-level time-lapse video either from still images or existing video. Most of the software would offer only one feature at a time so it is tremendous that Filmora lets you easily access multiple options to create a seamless time-lapse video in a spur of some minutes.
Besides multiple ways to create time-lapse, Filmora also offers basic & advanced editing features for time-lapse production. After creating a time-lapse in Filmora, you can drag through the multiple post-production editing features which include: Split Screen, Keyframing, Motion Tracking, Speed Ramping, Screen Recorder, Instant Mode, Pre-set Templates, and Auto Beat Sync. And many others.
Besides these ways of editing your time-lapses, Filmora also offers no disturbing pop-up ad experience while editing which provides a smooth editing platform for editors.
Part 4: Share & Enjoy the Best Time-Lapse Video
1. Share Your Quality Time-Lapse Video Across Social Platforms
Time-lapse & social media serve as the perfect combination in today’s times when social media publicity has become an incredibly important avenue for businesses. You can share your time lapses on different social media platforms including:
- YouTube
When people talk about today’s most popular social sharing websites, YouTube often gets left out of the conversation in favor of sites like Facebook and Twitter. But don’t be fooled: YouTube has a lot going for it.
By uploading your time-lapses on YouTube, you can create a YouTube link and share it with your friends and social circle so they can easily access your content, you can get found in search by uploading your own written transcript about the time-lapse, adding an end screen or cards to promote your time-lapse video, and add creative effects to your time-lapses with YouTube Enhancements.
- TikTok
TikTok is a social media platform for creating, sharing, and discovering short videos. The app is used by young people as an outlet to express themselves through singing, dancing, comedy, and lip-syncing, and allows users to create videos and share them across a community.
Since the duration of the time-lapse videos is mostly kept short, TikTok is the best app to approach if you want to increase your audience engagement.
The Meta app, Instagram is the most used app as per 2022 statistics. Through this app, people used to update their day-to-day routine and check-ins by uploading pictures. Now, the platform has added a ‘Reels’ section which plays the short videos to keep the audience hooked to the app, more than ever.
Upload your time-lapses on Instagram as Reels and see your content boost within hours.
2. Promote Your Time-Lapse Video on Popular Websites
Professional video editors and photographers who are looking for a paid platform to promote their business can access the most widely used and reliable websites which include the following:
- Shutterstock
With this app on your mobile phones and other devices, you can Transform Your Marketing Campaigns, Social Media, Websites, and Designs. Uploading your time-lapse content to earn good money on Shutterstock will work best in your favor.
- Pond5
Pond5 is the world’s largest marketplace for HD & 4K stock video, plus millions of music tracks, SFX, motion graphics, and images. Signing up and posting your time-lapse to promote your digital work can be a good choice if you’re looking for earning money online.
- Adobe Stock
Adobe Stock is a new service that provides designers and businesses with access to millions of high-quality, curated, royalty-free images and videos. This is also a good choice for professional photographers and videographers to post their time-lapses.
- Getty
Getty is an American visual media company and is a supplier of stock images, editorial photography, video, and music for business. By uploading your time lapses on this platform, you can be provided with exceptional opportunities to engage employees, entertain clients, and promote your brand.
3. Enjoy the Attractive Time-Lapse Video Examples
Over the internet, you will find numerous creatively designed time-lapses but a few of them still top the list. Some of the iconic time-lapses created to date include the following:
- Multiverse By Hiroshi Kondo, a mind-bending TimeLapse video of Taiwan
- Paris Day & Night by Teeter-Totter-Tam is a 5-minutes TimeLapse journey through one of the prettiest cities in the world, Paris from day to night.
- Solar Panel Installation from a Crane - David Dupuy
- Death Is the Road to Awe is a sample of TimeLapse video footage from that film shot in the American Southwest.
Part 5: FAQs – Time-Lapse Video Creation
① How to easily make a time-lapse video like a pro?
Most smartphone cameras have their time-lapse feature built in. To shoot your time-lapse video, simply open up the camera on your phone and select the “Time-Lapse” feature.
Place your phone in a secure spot where it won’t move around a lot. Then, tap the record button to start recording your time-lapse. When you’re done, tap it again. Your video will play back compressed into a shorter period for a time lapse effect.
PRO TIP: If you’re planning to make a landscape video, turn your phone so your time-lapse video is wide instead of tall
② What are the best time lapse editors or software?
The top five Best Free TimeLapse Software include:
- Wondershare Filmora- Windows and Mac
- Adobe Premiere Pro – Professional software
- Final Cut Pro – Mac software for time-lapse videos
- iMovie – User-friendly
- LRTimelapse – Sophisticated tool for more experienced users
③ Can I speed up or slow down a time-lapse video using Filmora?
Filmora also allows you to adjust the duration of the video clip to change the video speed. After importing the video clip to the timeline, right-click it and choose Speed and Duration to open the custom speed pop-up. Go to the Duration section and you will see the original duration of the video. Adjusting the duration of the video longer will add a slow-motion effect to the video. Changing the duration of the video to a shorter time will speed up the playback speed of the video. Just directly input the number in the field to speed up/slow down the video.
④ How to make my time-lapse video look better?
- Using a Slow Shutter
One solution to making your time lapses look more natural is to use a slow shutter so that each frame has a bit of motion.
- Blend in Video
Capture a time-lapse with fast movement and then mask in video with slow movement, maybe I could have the best of both worlds.
- Use filters
You can use Filters to spruce up the content with the time-lapse.
- Add Audio
Audio is an essential part if you want to leverage the content reach of your time-lapse video.
Conclusion
Time lapse videos are among the most powerful marketing tactics available in the mass media age of today. Similar to aerial photography, time-lapse videos can tell an engaging story for a low production cost, and they can be viewed fast by the audience. Filmora has helped the professionals as well as the beginners in the photography and videography to boost their content through online platforms.
This article will guide you through the most useful software and ways to promote your content and boost your audience engagement through creating mind-blowing time-lapses. Software like above mentioned ones take extremely little time and focus to comprehend the tale in a time lapse, which is a huge advantage in today’s competitive industry.
Also read:
- 2024 Approved The Best 10 GIF to JPGPNG Converters
- New Separate Audio From Video in DaVinci Resolve Step by Step
- New In 2024, 15 Best Free MP4 Video Rotators Windows,Mac, Android, iPhone & Online
- Updated How to Use Kahoot! On Zoom
- 2024 Approved In This Article, We Will Be Discussing How to Crop a Video on Android, but Since Most Android Devices Dont Have This Option, You Will Need to Do It Externally, by Downloading and Using Different Apps
- In 2024, Funny Content Ideas for YouTube Videos
- Updated How to Zoom Desktop Screen
- In 2024, Best Video Editors to Add Text to a Video
- Updated Slowing Down GIF With The Best Available Methods
- In 2024, Learn to Use Montage with These Movies
- 2024 Approved Easiest Fix Included! Top 5 Ways to Convert HDR to SDR Videos
- Updated How to Customize Your Loading Text Effect for 2024
- Overview of Best LUTs for Vlog
- 2024 Approved How To Use Slow Zoom Effect in Your Video?
- 2024 Approved Ultimate Guide on Magic Effects Video Making
- In 2024, A Complete Guide to the Best Brand Story Videos
- Updated 8 Tips to Apply Cinematic Color Grading to Your Video
- How to Create Intro Video with KineMaster for 2024
- Updated How To Add Text In After Effects for 2024
- Updated Enhance Your Video Color Accuracy with Video Scopes
- New 8 Excellent Video and Photo Mergers on Desktop/Mobile/Online for 2024
- Updated Benefits of Live Streaming on YouTube
- Updated Learn How to Change Aspect Ratio in iMovie on Mac, iPad, and iPhone in This Guide. And You Can Also Use iMovie Alternatives Like Wondershare Filmora to Edit Your Videos
- Updated In 2024, How to Create a Video Slideshow in iMovie
- New How to Use Frame Blending in Adobe Premiere Pro
- New How to Use Rules of Thirds
- New 2024 Approved Guide To Slowing Down Videos in Snapchat Discussing the Details
- 2024 Approved Looking for Efficient Ways to Create a Slow-Motion Video? Read the Article for Reliable Solutions that Provide Excellent Results
- Updated 2024 Approved Ultimate Guidelines to Help You Better Use VLC Media Player
- New Want to Add the Radial Blur Image Effect to Your Photos to Make Them Stand Out? Read on to Find the 11 Best Tools for Creating Stunning Image Editing Projects
- In 2024, Best Cloud Storage Service for Videos
- New 20 Best Text To Speech Software Windows, Mac, Android, iPhone & O
- 2024 Approved Add Effects to Video Online
- 2024 Approved Applying the Effect of Camera Shake in Video Creation
- Updated 2024 Approved How to Do Velocity Edits on PC
- 2024 Approved When It Comes to Video Editing, There Are Countless Software Options Available on the Market. However, Not All of Them Come with Useful Masking Tools. In This Article, We Will Be Discussing the Top 8 Video Editor with Useful Masking Tools
- New 3D Ray Traced Settings In After Effects A Comprehensive Guide for 2024
- In This Article I Will Share to You My Tips and Experiences on How to Become a YouTube Vlogger and Things You Need to Consider Being a Vlogger for 2024
- New 2024 Approved Frame Rates, Speed, and Wondershare Filmora An Overview
- New 3 Different Methods to Correct Color Distortion in Videos for 2024
- Updated In 2024, 8 Best Sites to Get Glitch Transition for Premiere Pro
- Updated Guide To Using Free Luts for OBS for 2024
- How to Color-Correct an S-Log Footage
- Updated In 2024, | How to Change Quicktime Player Speed on Mac?
- New Best 5 Tips to Freeze-Frame in After Effects for 2024
- New 10 Top Innovative AR Video Effects to Check Out
- New In 2024, How to Create a DIY Green Screen Video Effect?
- 2024 Approved You Might Have Difficulty Rotating a Video without an Efficient Media Player or Editing Tool. Below Is a Detailed Guide on Rotating a Video on Any Axes
- Updated How to Animate Your Designs With Canva GIF for 2024
- Tiktok Aspect Ratio Is a Crucial Element to Succeeding in the Tiktok Algorithm. Here Are some Suggestions to Improve Video Quality and Land on the for You Page for 2024
- Ways To Find Unlocking Codes For Motorola Moto G24 Phones
- How to Fix & Retrieve Pictures/Videos From a Water Damaged iPhone 14 Pro That Wont Turn on | Stellar
- In 2024, How to Bypass iCloud Lock on Apple iPhone 15 Plus
- List of Pokémon Go Joysticks On Sony Xperia 10 V | Dr.fone
- In 2024, 10 Free Location Spoofers to Fake GPS Location on your Poco X6 Pro | Dr.fone
- Updated Top 10 Robotic Voice Generators for 2024
- Troubleshooting Guide How to Fix an Unresponsive Infinix Note 30i Screen | Dr.fone
- Life360 Learn How Everything Works On OnePlus Nord CE 3 Lite 5G | Dr.fone
- In 2024, Apple ID Locked or Disabled On iPhone 7 Plus? 7 Mehtods You Cant-Miss
- The 6 Best SIM Unlock Services That Actually Work On Your Nokia C110 Device
- How can I get more stardust in pokemon go On Oppo F25 Pro 5G? | Dr.fone
- How Can I Use a Fake GPS Without Mock Location On Realme 12 Pro+ 5G? | Dr.fone
- 10 Easy-to-Use FRP Bypass Tools for Unlocking Google Accounts On Itel P55
- In 2024, Unlock Apple iPhone 15 Pro Max With Forgotten Passcode Different Methods You Can Try | Dr.fone
- In 2024, Effective Ways To Fix Checkra1n Error 31 From iPhone 14
- How to Show Wi-Fi Password on Nubia Z50S Pro
- Can Life360 Track Or See Text Messages? What Can You Do with Life360 On Itel P55? | Dr.fone
- Unlock Your Samsung Galaxy A54 5G Phone with Ease The 3 Best Lock Screen Removal Tools
- Is GSM Flasher ADB Legit? Full Review To Bypass Your OnePlus 11RFRP Lock
- In 2024, How to Make the Most of Your Apple iPhone 11 Pro Lock Screen with Notifications? | Dr.fone
- New 2024 Approved What Is an AI Art Generator?
- A Guide Infinix Smart 7 HD Wireless and Wired Screen Mirroring | Dr.fone
- What is Fake GPS Location Pro and Is It Good On Poco X6? | Dr.fone
- In 2024, Unlocking iPhone SE (2022) Lock Screen 3 Foolproof Methods that Actually Work | Dr.fone
- Set Your Preferred Job Location on LinkedIn App of your Vivo Y02T | Dr.fone
- In 2024, How to Change Lock Screen Wallpaper on Vivo Y78 5G
- How to Fix Android.Process.Media Has Stopped on Tecno Phantom V Fold | Dr.fone
- In 2024, Can I Bypass a Forgotten Phone Password Of Infinix Note 30?
- How To Do Tecno Phantom V Flip Screen Sharing | Dr.fone
- How to Flash Dead Realme Narzo 60 Pro 5G Safely | Dr.fone
- Title: 2024 Approved Ideas That Help You Out in Making Transparent Image
- Author: Chloe
- Created at : 2024-04-24 07:08:13
- Updated at : 2024-04-25 07:08:13
- Link: https://ai-editing-video.techidaily.com/2024-approved-ideas-that-help-you-out-in-making-transparent-image/
- License: This work is licensed under CC BY-NC-SA 4.0.
