
:max_bytes(150000):strip_icc():format(webp)/GettyImages-184415451-9f59b82b64ac421cad0f28540a515b5f.jpg)
2024 Approved Introduction to LUTs Their Overview and Benefits
An Introduction to LUTs | Their Overview and Benefits
In video editing, you mainly face problems related to color grading and lower attractiveness of video. To cater to these issues, you can use the LUTs because they can upscale the performance of your video in no time. Yet, if you are not familiar with the concept of LUTs, this article is for you. Here, we will discuss the meaning of having LUTs in editing and other metrics of this exceptional element.
By the end of this article, you will also discover a tool that will help you with LUTs video editing. Thus, let’s get below to learn more about LUTs.
Part 1: What Do You Know About LUTs?
LUTs are data files that stand for Look-Up Tables. These are used in video editing because they have mathematical algorithms that can color-transform both videos and photos. LUTs can also upscale the contrast and color grading of simple videos and make them color-friendly. If you are a filmmaker or a videographer, you should be familiar with the concept of LUTs.

LUTs video editing also ensures that white balance and all the color metrics in your videos are consistent so they can be used for professional purposes. Moreover, you can also implement your creativity in the video with them. There are several formats of LUTs, such as 3DL, CUBE, DAT, CSP, and more, that you can discover in various editing tools. You can find them across several platforms, such as Adobe Photoshop, DaVinci Resolve, and more.
Empower your videos with a new mood using different LUTs. Filmora now offers 100+ top-quality 3D LUTs cover a broad range of scenarios. Transform your videos with Filmora’s powerful 3D LUTs.
Apply LUT on Videos Apply LUT on Videos Learn More


Part 2: What Are the Different Types of LUTs Available for Utility?
To fully understand LUT editing, you need to be aware of the types of LUTs. In this section, we will discuss the types of LUTs. Have a look below to find out more about them:
Technical LUTs
You can use technical LUTs for postproduction editing. It can help with gamma correction, white balance adjustments, and color grading. Moreover, the main purpose of using this LUT is to ensure consistency in the videos.
Creative LUTs
If you are an artist and want to work on art photos and videos, you can use creative LUTs. With this, you can adjust colors and contrast to customize the outlook of your media. Moreover, it can also create cozy and environment-friendly looks in your videos.
Camera Specific LUTs
As the name indicates, you can use camera-specific LUTs to work with different camera brands. The camera can lead to several color dysfunctionality, but you can correct them with camera-specific LUTs. It never compromises the quality of the video, so you can use it without any issues.
Display LUTs
If you wish to customize the colors of videos or photos for a specific display device, this is your best option. It can modify the video as per the computer or television specifications. Above all, you can match the output look of your video with your intentional look with this.
Input LUTs
With this, you can manage the colors of your video from the beginning. It can help you to apply a consistent starting point to your video in an optimized manner.
Part 3: Why Are LUTs Beneficial in the Current Video Editing Fraternity?
There are several reasons that show that LUTs are beneficial for the current video editing fraternity. While you have learned some important points explaining what are LUTs, here are some of the reasons explaining their importance:
Improved Color Grading
By using LUTs, you can apply predesigned colors to the videos and photos. It can save you both time and effort and fasten the procedure of working. Thus, if you are working on tight deadlines, this can be your savior.
Highest Consistency
If you don’t have consistency in your videos, no one will watch them for a long time. To solve this issue, you can use LUTs because they can add a sense of consistency to any type of video.
Creativity Ratio
There is a wide array of creative options in LUTs. From adding vibrant colors to modifying styles, LUTs can help you with everything. Thus, it is an optimized solution to add creativity to videos.
Compatibility of LUTs
LUTs are compatible with a considerable number of video editing software. So, you can also streamline your workflow efficiency with the help of LUTs while editing your favorite videos.
Part 4: What Do You Believe About The Future of LUTs in the Video Industry?
In this digital world, you need to work with the most modernized solutions to solve your digital problems. We all make videos and photos, but bad colors can degrade their performance and attractiveness. For this reason, you can use LUTs editing. However, to import or apply LUTs, you need to know the best video editing platform.
The best and most optimized platform that can be used for this purpose is Wondershare Filmora . With this tool, you can apply LUTs to the videos and can also preview them before actually downloading the video. Other than this, it also has an effect mask by which you can apply special effect filters to the videos. It also offers video cover and export process optimization.
Add LUTs on Video For Win 7 or later(64-bit)
Add LUTs on Video For macOS 10.14 or later

Key Features of Wondershare Filmora
Wondershare Filmora has built much in LUTs video editing over time. From changing its existence from a category to a dedicated section, Filmora has come a long way. Find out some important features about Filmora and its exceptional functionality:
- With Filmora, you can optimize the cache file management along with using the feedback channels.
- You can make the interface adjustments and can also customize the intensity of LUTs from 0 to 100%.
- There are several adjustment filters in it, and you can also work on several types of videos with it, including travel and more.
Conclusion
In the following article, you have learned what are LUTs in video editing. From the definition to the compatible video editing software, you can find everything about LUTs above. Moreover, there are several types of LUTs, and you can use them as per your need. If you are looking for a platform to apply LUTs to the video, the answer is Wondershare Filmora.
Apply LUT on Videos Apply LUT on Videos Learn More
Part 2: What Are the Different Types of LUTs Available for Utility?
To fully understand LUT editing, you need to be aware of the types of LUTs. In this section, we will discuss the types of LUTs. Have a look below to find out more about them:
Technical LUTs
You can use technical LUTs for postproduction editing. It can help with gamma correction, white balance adjustments, and color grading. Moreover, the main purpose of using this LUT is to ensure consistency in the videos.
Creative LUTs
If you are an artist and want to work on art photos and videos, you can use creative LUTs. With this, you can adjust colors and contrast to customize the outlook of your media. Moreover, it can also create cozy and environment-friendly looks in your videos.
Camera Specific LUTs
As the name indicates, you can use camera-specific LUTs to work with different camera brands. The camera can lead to several color dysfunctionality, but you can correct them with camera-specific LUTs. It never compromises the quality of the video, so you can use it without any issues.
Display LUTs
If you wish to customize the colors of videos or photos for a specific display device, this is your best option. It can modify the video as per the computer or television specifications. Above all, you can match the output look of your video with your intentional look with this.
Input LUTs
With this, you can manage the colors of your video from the beginning. It can help you to apply a consistent starting point to your video in an optimized manner.
Part 3: Why Are LUTs Beneficial in the Current Video Editing Fraternity?
There are several reasons that show that LUTs are beneficial for the current video editing fraternity. While you have learned some important points explaining what are LUTs, here are some of the reasons explaining their importance:
Improved Color Grading
By using LUTs, you can apply predesigned colors to the videos and photos. It can save you both time and effort and fasten the procedure of working. Thus, if you are working on tight deadlines, this can be your savior.
Highest Consistency
If you don’t have consistency in your videos, no one will watch them for a long time. To solve this issue, you can use LUTs because they can add a sense of consistency to any type of video.
Creativity Ratio
There is a wide array of creative options in LUTs. From adding vibrant colors to modifying styles, LUTs can help you with everything. Thus, it is an optimized solution to add creativity to videos.
Compatibility of LUTs
LUTs are compatible with a considerable number of video editing software. So, you can also streamline your workflow efficiency with the help of LUTs while editing your favorite videos.
Part 4: What Do You Believe About The Future of LUTs in the Video Industry?
In this digital world, you need to work with the most modernized solutions to solve your digital problems. We all make videos and photos, but bad colors can degrade their performance and attractiveness. For this reason, you can use LUTs editing. However, to import or apply LUTs, you need to know the best video editing platform.
The best and most optimized platform that can be used for this purpose is Wondershare Filmora . With this tool, you can apply LUTs to the videos and can also preview them before actually downloading the video. Other than this, it also has an effect mask by which you can apply special effect filters to the videos. It also offers video cover and export process optimization.
Add LUTs on Video For Win 7 or later(64-bit)
Add LUTs on Video For macOS 10.14 or later
Key Features of Wondershare Filmora
Wondershare Filmora has built much in LUTs video editing over time. From changing its existence from a category to a dedicated section, Filmora has come a long way. Find out some important features about Filmora and its exceptional functionality:
- With Filmora, you can optimize the cache file management along with using the feedback channels.
- You can make the interface adjustments and can also customize the intensity of LUTs from 0 to 100%.
- There are several adjustment filters in it, and you can also work on several types of videos with it, including travel and more.
Conclusion
In the following article, you have learned what are LUTs in video editing. From the definition to the compatible video editing software, you can find everything about LUTs above. Moreover, there are several types of LUTs, and you can use them as per your need. If you are looking for a platform to apply LUTs to the video, the answer is Wondershare Filmora.
How to Use Frame Blending in Adobe Premiere Pro
Create High-Quality Video - Wondershare Filmora
An easy and powerful YouTube video editor
Numerous video and audio effects to choose from
Detailed tutorials are provided by the official channel
Frame blending is a video editing technique used to create smooth transitions between two video frames. This process is often used to create special effects or transition between two different video clips. Frame blending can be done manually or with the help of software.
When frame blending is done manually, the editor will take two consecutive frames and blend them. This is done by using a process called cross-fading. Cross-fading is when the first frame gradually fades out while the second frame gradually fades in. The result is a seamless transition between the two frames.
Frame blending can also be done with the help of software. Many software programs offer frame blending capabilities Like Adobe Premiere Pro and more. These software programs typically have a user interface that allows the user to select the two frames that they want to blend. The software will then perform the cross-fading process automatically.

In this article
01 What is frame blending in Premiere Pro?
02 How to Choose from Frame Blending/ Frame Sampling/ Optical Flow
03 How to use Frame Blanding in Adobe Premiere Pro?
What is frame blending in Premiere Pro?
In Adobe Premiere Pro, frame blending is a built-in feature that can be used to create smooth transitions between two video frames. This feature can be accessed by selecting the “Effects” tab and choosing the “Frame Blending” option.
When using frame blending in Premiere Pro, the user will first need to select the two frames they want to blend. The user can then specify the amount of cross-fade they want to apply. The software will then automatically perform the frame blending process.

How to Choose from Frame Blending/ Frame Sampling/ Optical Flow
The different types of frame blending are:
- Frame Sampling: best for smooth movements, no image distortion.
- Optical Flow: smoother results but can cause image distortion.
- Frame Blending: a mix of the two, some image distortion but smoother results.
So, choosing which type of frame blending to use depends on the footage and the desired results. If you want smooth results with no image distortion, frame sampling is the best option. However, if you don’t mind some image distortion in exchange for smoother results, optical flow or frame blending would be better choices.
How to decide which option is the best for your use? Let’s explain more, and It depends on the footage and the desired results. If you want smooth results with no image distortion, frame sampling is the best option. However, if you don’t mind some image distortion in exchange for smoother results, optical flow or frame blending would be better choices.

How to use Frame Blanding in Adobe Premiere Pro?
Step 1\
Using frame blending in Adobe Premiere Pro is a simple process. First, the user will need to select the two frames that they want to blend. The user can then specify the amount of cross-fade they want to apply. The software will then automatically perform the frame blending process.
Open up Adobe Premiere Pro and load the two frames that you want to blend to get started. Once the frames are loaded, select the “Effects” tab and then choose the “Frame Blending” option.
Step 2\
Next, select the two frames that you want to blend. You can perform this by clicking on the first frame and then holding down the “Shift” key while clicking on the second frame.
Once the two frames are selected, specify the amount of cross-fade that you want to apply. You can do this by adjusting the “Crossfade Duration” slider. The software will then automatically perform the frame blending process.

Frame blending is a simple and effective way to create smooth transitions between two video frames. This technique can create a variety of different effects, such as dissolves, fades, and more. Frame blending is a built-in feature in Adobe Premiere Pro and can be accessed by selecting the “Effects” tab and then choosing the “Frame Blending” option. To use frame blending, simply select the two frames you want to blend and specify the amount of cross-fade you want to apply. The software will then automatically perform the frame blending process.
You can also consider Filmora for Blending Frame
Filmora is a video editing software that allows you to create, edit, and export videos. The software includes various features, such as the ability to add text, transitions, and effects. You can also use Filmora to create titles, lower thirds, etc.
How to use Filmora?
To use Filmora, simply load the video you want to edit and make the changes you want. Once you’re happy with the results, export the video, and it will be saved in the format of your choice.
How to use Frame Blending in Filmora?
There are things to keep in mind when using frame blending in Filmora.
First, the software only supports AVI and WMV files. Second, the frame blending feature is only available in the paid version of the software. Lastly, frame blending can only be used on two video frames at a time.
The video is made up of distinct layers blended together to create a unique and appealing look. There is a craft of making a running frame out of more than one video or picture. Even though the technique is considerably older, and individuals undertake it with much work, it has recently become simpler. We now have the easier method of combining two or more clips in a single frame, which we term Blend Modes.

How to composite with blending modes?
- Choose the videos and effects that you wish to overlay.
- Double-click the overlay clip on the timeline to view and adjust the video options for the split-screen effect.
- Go to the Compositing section and choose Blending Mode from the drop-down menu to apply an effect. Select Screen from the drop-down menu if you’d like to overlay an effect over a video.
Frame blending is a simple and effective way to create smooth transitions between two video frames. This technique can create a variety of different effects, such as dissolves, fades, and more. Frame blending is a built-in feature in Filmora and can be accessed by loading the video you want to edit and then making the changes you want. Once you’re happy with the results, export the video, and it will be saved in the format of your choice.
Advance features in Filmora 11
The latest version of Filmora (11.2.1) includes several new and improved features, such as:
- The ability to add textured background images
- An updated user interface
- A wider variety of title templates
- More video and audio effects
- Improved performance and stability
Filmora is a good choice for video editors who want to do more with their software. The program contains all of the essential functions of a video editor, such as the ability to add text, transitions, and effects. In addition, Filmora also includes some more advanced features, such as the ability to add textured background images and the ability to create titles, lower thirds, and more.
For Win 7 or later (64-bit)
For macOS 10.12 or later
Conclusion
● Frame blending is a simple and effective way to create smooth transitions between two video frames. This technique can be used to create a variety of different effects, such as dissolves, fades, and more. Frame blending is a built-in feature in Filmora and can be accessed by loading the video you want to edit and then making the changes you want. Once you’re happy with the results, export the video, and it will be saved in the format of your choice.
Frame blending is a video editing technique used to create smooth transitions between two video frames. This process is often used to create special effects or transition between two different video clips. Frame blending can be done manually or with the help of software.
When frame blending is done manually, the editor will take two consecutive frames and blend them. This is done by using a process called cross-fading. Cross-fading is when the first frame gradually fades out while the second frame gradually fades in. The result is a seamless transition between the two frames.
Frame blending can also be done with the help of software. Many software programs offer frame blending capabilities Like Adobe Premiere Pro and more. These software programs typically have a user interface that allows the user to select the two frames that they want to blend. The software will then perform the cross-fading process automatically.
In this article
01 What is frame blending in Premiere Pro?
02 How to Choose from Frame Blending/ Frame Sampling/ Optical Flow
03 How to use Frame Blanding in Adobe Premiere Pro?
What is frame blending in Premiere Pro?
In Adobe Premiere Pro, frame blending is a built-in feature that can be used to create smooth transitions between two video frames. This feature can be accessed by selecting the “Effects” tab and choosing the “Frame Blending” option.
When using frame blending in Premiere Pro, the user will first need to select the two frames they want to blend. The user can then specify the amount of cross-fade they want to apply. The software will then automatically perform the frame blending process.
How to Choose from Frame Blending/ Frame Sampling/ Optical Flow
The different types of frame blending are:
- Frame Sampling: best for smooth movements, no image distortion.
- Optical Flow: smoother results but can cause image distortion.
- Frame Blending: a mix of the two, some image distortion but smoother results.
So, choosing which type of frame blending to use depends on the footage and the desired results. If you want smooth results with no image distortion, frame sampling is the best option. However, if you don’t mind some image distortion in exchange for smoother results, optical flow or frame blending would be better choices.
How to decide which option is the best for your use? Let’s explain more, and It depends on the footage and the desired results. If you want smooth results with no image distortion, frame sampling is the best option. However, if you don’t mind some image distortion in exchange for smoother results, optical flow or frame blending would be better choices.
How to use Frame Blanding in Adobe Premiere Pro?
Step 1\
Using frame blending in Adobe Premiere Pro is a simple process. First, the user will need to select the two frames that they want to blend. The user can then specify the amount of cross-fade they want to apply. The software will then automatically perform the frame blending process.
Open up Adobe Premiere Pro and load the two frames that you want to blend to get started. Once the frames are loaded, select the “Effects” tab and then choose the “Frame Blending” option.
Step 2\
Next, select the two frames that you want to blend. You can perform this by clicking on the first frame and then holding down the “Shift” key while clicking on the second frame.
Once the two frames are selected, specify the amount of cross-fade that you want to apply. You can do this by adjusting the “Crossfade Duration” slider. The software will then automatically perform the frame blending process.
Frame blending is a simple and effective way to create smooth transitions between two video frames. This technique can create a variety of different effects, such as dissolves, fades, and more. Frame blending is a built-in feature in Adobe Premiere Pro and can be accessed by selecting the “Effects” tab and then choosing the “Frame Blending” option. To use frame blending, simply select the two frames you want to blend and specify the amount of cross-fade you want to apply. The software will then automatically perform the frame blending process.
You can also consider Filmora for Blending Frame
Filmora is a video editing software that allows you to create, edit, and export videos. The software includes various features, such as the ability to add text, transitions, and effects. You can also use Filmora to create titles, lower thirds, etc.
How to use Filmora?
To use Filmora, simply load the video you want to edit and make the changes you want. Once you’re happy with the results, export the video, and it will be saved in the format of your choice.
How to use Frame Blending in Filmora?
There are things to keep in mind when using frame blending in Filmora.
First, the software only supports AVI and WMV files. Second, the frame blending feature is only available in the paid version of the software. Lastly, frame blending can only be used on two video frames at a time.
The video is made up of distinct layers blended together to create a unique and appealing look. There is a craft of making a running frame out of more than one video or picture. Even though the technique is considerably older, and individuals undertake it with much work, it has recently become simpler. We now have the easier method of combining two or more clips in a single frame, which we term Blend Modes.
How to composite with blending modes?
- Choose the videos and effects that you wish to overlay.
- Double-click the overlay clip on the timeline to view and adjust the video options for the split-screen effect.
- Go to the Compositing section and choose Blending Mode from the drop-down menu to apply an effect. Select Screen from the drop-down menu if you’d like to overlay an effect over a video.
Frame blending is a simple and effective way to create smooth transitions between two video frames. This technique can create a variety of different effects, such as dissolves, fades, and more. Frame blending is a built-in feature in Filmora and can be accessed by loading the video you want to edit and then making the changes you want. Once you’re happy with the results, export the video, and it will be saved in the format of your choice.
Advance features in Filmora 11
The latest version of Filmora (11.2.1) includes several new and improved features, such as:
- The ability to add textured background images
- An updated user interface
- A wider variety of title templates
- More video and audio effects
- Improved performance and stability
Filmora is a good choice for video editors who want to do more with their software. The program contains all of the essential functions of a video editor, such as the ability to add text, transitions, and effects. In addition, Filmora also includes some more advanced features, such as the ability to add textured background images and the ability to create titles, lower thirds, and more.
For Win 7 or later (64-bit)
For macOS 10.12 or later
Conclusion
● Frame blending is a simple and effective way to create smooth transitions between two video frames. This technique can be used to create a variety of different effects, such as dissolves, fades, and more. Frame blending is a built-in feature in Filmora and can be accessed by loading the video you want to edit and then making the changes you want. Once you’re happy with the results, export the video, and it will be saved in the format of your choice.
How to Windows Online Movie Maker [Complete Guide]
The likelihood is that video will soon play a significant role in your content marketing approach, if it hasn’t already – and for that using windows online movie maker is inevitable. You are an emerging brand, a sole proprietor, or even a podcaster. Knowing the importance of video marketing to content producers and agencies is second nature if you’re an astute digital marketer It may be costly and challenging to utilize video editing software. Fortunately, there are free online video editors available.
Before very recently, video editing needed highly specialized skills and was done manually using different tools. Windows Movie Maker used to be a standard component of every Windows user’s toolbox and was a highly recommended video editing product for novices. With the windows movie maker online, the application was well-liked for its ease of use and entertaining special effects, but most significantly - it was free. It came pre-installed on all Windows machines. You may do that with the help of our handy list of the top three online video creators.
Part 1. How to Make a Video Online [Use Movie Maker Windows Online]
Using the help of Movie Maker, you may create videos online with your browser. It enables you to create professional-caliber videos without having to purchase video editing tools at professional-caliber costs. For every genre and need, this web program includes stock video, animated text, audio tracks, and on-screen effects. Your own video clips are uploaded. Then, use the simple drag-and-drop online video editor in Movie Maker to edit footage and add special effects and music to make your movie shine.
Making fantastic compilation films from your already-existing photographs and videos doesn’t need you to be a skilled editor. Even for amateur video makers, the platform’s UI is simple to use and straightforward to navigate. The customizing choices in Movie Maker are many. You have the option of uploading your own fonts and logos. You may also watermark your films and alter the text’s color. Additionally, there are a ton of very unique components like stickers, vector shapes, and masks that may enhance the visual appeal of your video productions and widen your creative boundaries.
Steps to Make Video with Movie Maker Online
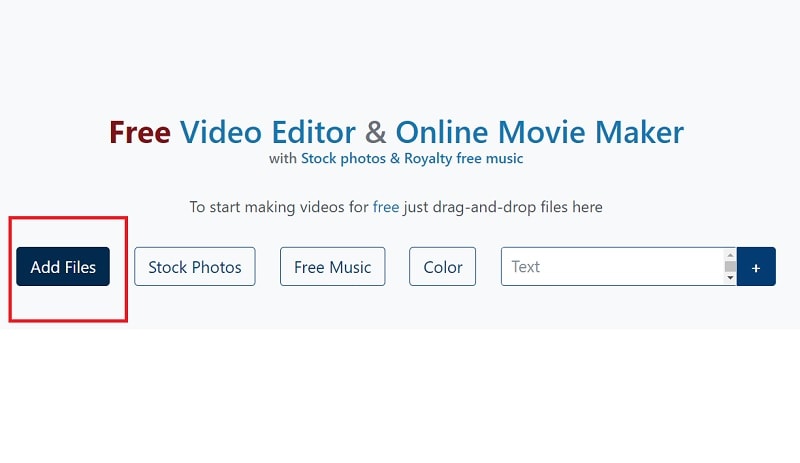
Step1 Go to Movie Maker Online
Using Movie Maker Online, you can quickly and easily make incredibly interesting compilation films using your already-posted photographs and videos. You’ll immediately be sent to the editor, where you can begin organizing your films. Here’s the official link to the toolkit:
Step2 Upload Files to Web
Your photographs, videos, and text may all be uploaded. If you like the default music, you may skip the step to change it; otherwise, you can choose another song from our library or upload your own MP3 file. Files from a variety of sources and devices may be added. Click the Import Media button to start importing your own media. Click Open after locating the video you wish to modify.
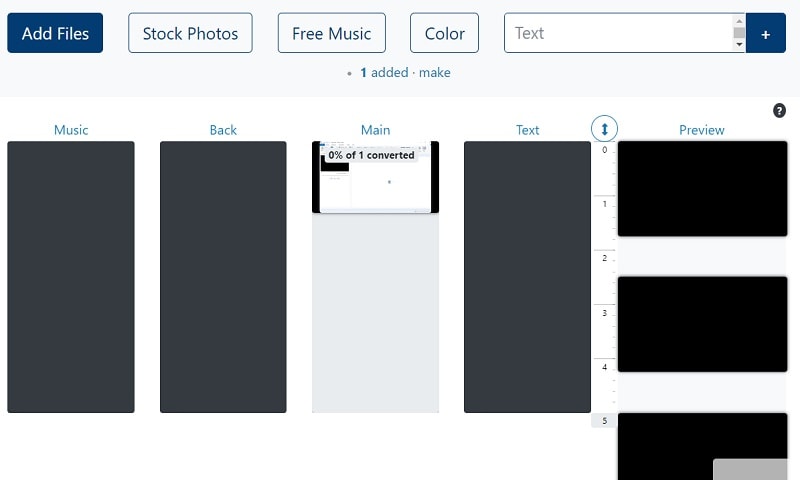
Step3 Create an online video
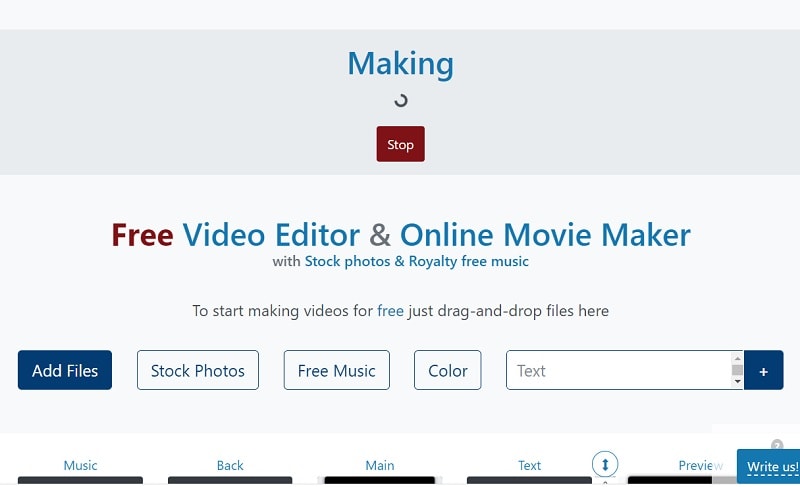
Add your music to your video compilation after all of your clips have been placed on the timeline. To accomplish that, choose a song depending on the genre or mood you want by clicking on the Music option on the left menu panel. To listen to the music track, click the little icon to the left of it. Text, colors, pictures, and video may all be customized to your heart’s delight. Add effects, drag, cut, etc. Press the Make Video button.
Step4 Save and Share with Others
Sharing your films on Facebook, Instagram, YouTube, and other platforms is made effortless. You may also send your loved ones the URLs to your videos. When you are happy with the changes, click the Save & Share option in the upper right corner, choose the quality you want to download your movie in, and then click the Export button. Download the updated video, then post it.
Part 2. Other Windows Online Movie Makers to Use [Top 3]
1. Kizoa
Link: Kizoa
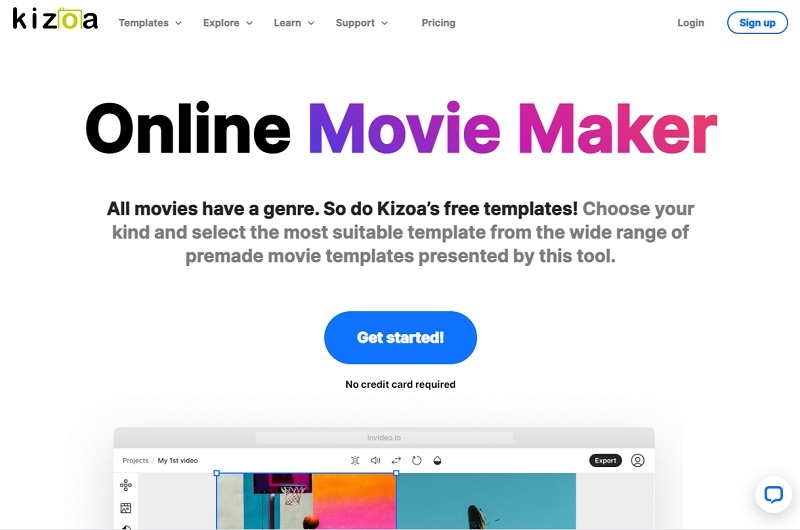
Customizing the appearance of your film is one of the finest ways to make it seem like it is your own. With the Kizoa tool, you may trim, apply a crossfade effect, choose the required resolution, and format for an output video in addition to merging files. Utilize Kizoa’s online video creator to produce eye-catching videos that will hold your audience’s attention. Create any kind of video, from personal family video slideshows to expert films to advertise your company. With the drag-and-drop movie production tool from Kizoa, you can create your very own video in a matter of minutes.
Use a video template as your starting point if you need inspiration. Key framing, animated overlays, noise reduction, transitions, and titles are just a few of the features it provides to help you produce excellent footage. For rapid video editing, there is a video production wizard. Windows Movie Maker’s auto movie themes pale in comparison to those provided by this program. Its extensive collection of stock footage and audio tracks helps you to concentrate on the crucial elements without having to drastically decrease the length of your film or the number of scenes.
2. FlexClip
Link: FlexClip
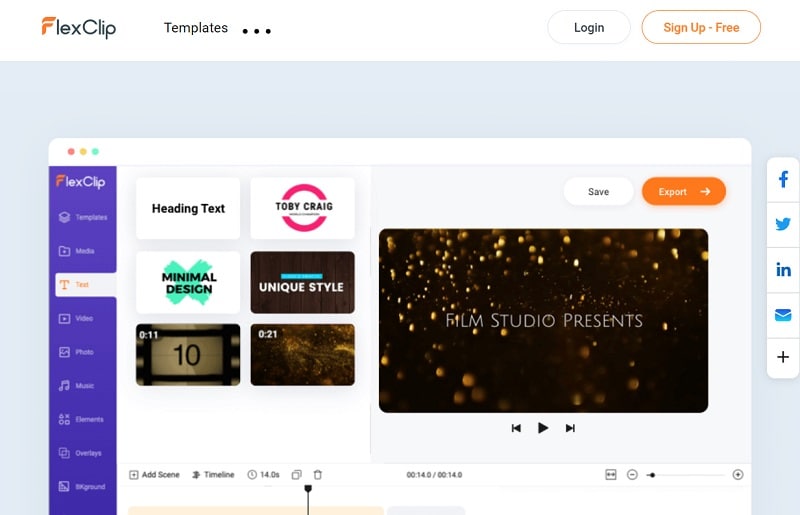
With the aid of the online video effects tool FlexClip, you may quickly and easily make entertaining short films. It has a ton of video editing features that you may use without logging in or creating an account, like merging, compressing, compiling, adding text, creating memes, etc. For those that are muted, you may use FlexClip to add animated text that blends in with the style of your film. Additionally, you may add your logo so that everyone is aware of who created the masterpiece they just saw.
An online video editor called FlexClip is mainly focused on producing high-quality marketing, advertising, and promotional films for companies. Recording a single video that will function on all social networking and video-sharing websites is almost impossible. Instagram, YouTube, and Facebook Marketing are among the partners of FlexClip that have received expert approval. It is used by marketers and enthusiasts to quickly create looping movies and stop motion animation. But as it only provides very basic functionality, it may not be the greatest choice for more intricate, demanding editing.
3. Veed.Io
Link: Veed.Io
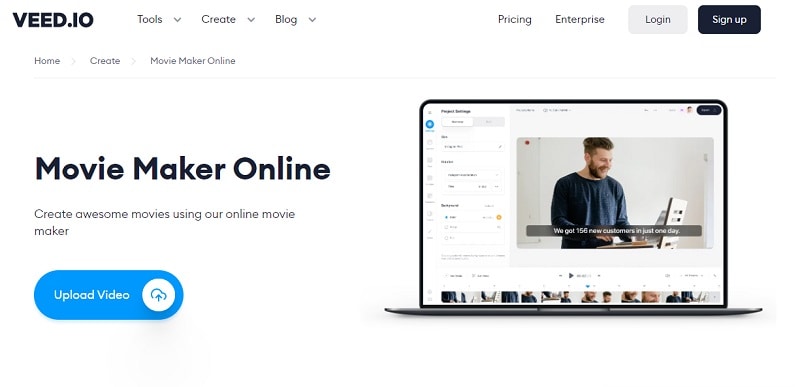
With only a few mouse clicks, users of the browser-based video editing program VEED may create professional-caliber movies. The greatest movie-making tools, including filters, effects, and stickers, are available on VEED. There are no intricate timelines, layers, or intricacy since it is a simple program that runs in your web browser. Simple drag-and-drop functionality is all you need to convey your tales. You may modify your video using its features. Using the video track below, you may combine, divide, or cut your files. Visit our website to see all of our filters, stickers, add-ons, and other tools.
Any device, whether an iPhone or Android phone, a MacBook, a Windows or Linux computer, may use VEED’s online video editor. You have access to all the resources you need to make amazing videos using VEED’s online video editor. Our user-friendly interface is very simple to use and is contemporary and intuitive. The native video sizes on each of the publishing sites, including Facebook, YouTube, and Vimeo, may all be altered using Veed. Finally, click “Export” in the editor’s upper-right corner, and your video will render quickly. Share some!
Conclusion
Use this editing list to produce more compelling video mashups for YouTube and other social media platforms in order to expand your audience, cultivate real connections with them, and eventually increase conversion rates. Because they combine the complex capabilities of the expensive, professional video suites with the user-friendliness and cost that appeal to novices, these online makers are a popular among editors of all skill levels. Make an investment in one of these video editing tools and own it.
Free Download For Win 7 or later(64-bit)
Free Download For macOS 10.14 or later
Part 1. How to Make a Video Online [Use Movie Maker Windows Online]
Using the help of Movie Maker, you may create videos online with your browser. It enables you to create professional-caliber videos without having to purchase video editing tools at professional-caliber costs. For every genre and need, this web program includes stock video, animated text, audio tracks, and on-screen effects. Your own video clips are uploaded. Then, use the simple drag-and-drop online video editor in Movie Maker to edit footage and add special effects and music to make your movie shine.
Making fantastic compilation films from your already-existing photographs and videos doesn’t need you to be a skilled editor. Even for amateur video makers, the platform’s UI is simple to use and straightforward to navigate. The customizing choices in Movie Maker are many. You have the option of uploading your own fonts and logos. You may also watermark your films and alter the text’s color. Additionally, there are a ton of very unique components like stickers, vector shapes, and masks that may enhance the visual appeal of your video productions and widen your creative boundaries.
Steps to Make Video with Movie Maker Online
Step1 Go to Movie Maker Online
Using Movie Maker Online, you can quickly and easily make incredibly interesting compilation films using your already-posted photographs and videos. You’ll immediately be sent to the editor, where you can begin organizing your films. Here’s the official link to the toolkit:
Step2 Upload Files to Web
Your photographs, videos, and text may all be uploaded. If you like the default music, you may skip the step to change it; otherwise, you can choose another song from our library or upload your own MP3 file. Files from a variety of sources and devices may be added. Click the Import Media button to start importing your own media. Click Open after locating the video you wish to modify.
Step3 Create an online video
Add your music to your video compilation after all of your clips have been placed on the timeline. To accomplish that, choose a song depending on the genre or mood you want by clicking on the Music option on the left menu panel. To listen to the music track, click the little icon to the left of it. Text, colors, pictures, and video may all be customized to your heart’s delight. Add effects, drag, cut, etc. Press the Make Video button.
Step4 Save and Share with Others
Sharing your films on Facebook, Instagram, YouTube, and other platforms is made effortless. You may also send your loved ones the URLs to your videos. When you are happy with the changes, click the Save & Share option in the upper right corner, choose the quality you want to download your movie in, and then click the Export button. Download the updated video, then post it.
Part 2. Other Windows Online Movie Makers to Use [Top 3]
1. Kizoa
Link: Kizoa
Customizing the appearance of your film is one of the finest ways to make it seem like it is your own. With the Kizoa tool, you may trim, apply a crossfade effect, choose the required resolution, and format for an output video in addition to merging files. Utilize Kizoa’s online video creator to produce eye-catching videos that will hold your audience’s attention. Create any kind of video, from personal family video slideshows to expert films to advertise your company. With the drag-and-drop movie production tool from Kizoa, you can create your very own video in a matter of minutes.
Use a video template as your starting point if you need inspiration. Key framing, animated overlays, noise reduction, transitions, and titles are just a few of the features it provides to help you produce excellent footage. For rapid video editing, there is a video production wizard. Windows Movie Maker’s auto movie themes pale in comparison to those provided by this program. Its extensive collection of stock footage and audio tracks helps you to concentrate on the crucial elements without having to drastically decrease the length of your film or the number of scenes.
2. FlexClip
Link: FlexClip
With the aid of the online video effects tool FlexClip, you may quickly and easily make entertaining short films. It has a ton of video editing features that you may use without logging in or creating an account, like merging, compressing, compiling, adding text, creating memes, etc. For those that are muted, you may use FlexClip to add animated text that blends in with the style of your film. Additionally, you may add your logo so that everyone is aware of who created the masterpiece they just saw.
An online video editor called FlexClip is mainly focused on producing high-quality marketing, advertising, and promotional films for companies. Recording a single video that will function on all social networking and video-sharing websites is almost impossible. Instagram, YouTube, and Facebook Marketing are among the partners of FlexClip that have received expert approval. It is used by marketers and enthusiasts to quickly create looping movies and stop motion animation. But as it only provides very basic functionality, it may not be the greatest choice for more intricate, demanding editing.
3. Veed.Io
Link: Veed.Io
With only a few mouse clicks, users of the browser-based video editing program VEED may create professional-caliber movies. The greatest movie-making tools, including filters, effects, and stickers, are available on VEED. There are no intricate timelines, layers, or intricacy since it is a simple program that runs in your web browser. Simple drag-and-drop functionality is all you need to convey your tales. You may modify your video using its features. Using the video track below, you may combine, divide, or cut your files. Visit our website to see all of our filters, stickers, add-ons, and other tools.
Any device, whether an iPhone or Android phone, a MacBook, a Windows or Linux computer, may use VEED’s online video editor. You have access to all the resources you need to make amazing videos using VEED’s online video editor. Our user-friendly interface is very simple to use and is contemporary and intuitive. The native video sizes on each of the publishing sites, including Facebook, YouTube, and Vimeo, may all be altered using Veed. Finally, click “Export” in the editor’s upper-right corner, and your video will render quickly. Share some!
Conclusion
Use this editing list to produce more compelling video mashups for YouTube and other social media platforms in order to expand your audience, cultivate real connections with them, and eventually increase conversion rates. Because they combine the complex capabilities of the expensive, professional video suites with the user-friendliness and cost that appeal to novices, these online makers are a popular among editors of all skill levels. Make an investment in one of these video editing tools and own it.
Free Download For Win 7 or later(64-bit)
Free Download For macOS 10.14 or later
Adobe Premiere Pro Rec 709 LUTs: Finding The Best Options
Different styles of LUTs exist because each style serves a specific purpose in color correction and grading. LUTs are designed to replicate various cinematic styles and to change lighting conditions. By using different styles of LUTs, you can effortlessly achieve the desired color grading for your media. There are many types of LUTs to download, each with unique color composition.
However, Rec 709 LUT is a type of LUT commonly used in video editing software like Premiere Pro. Additionally, this LUT ensures that your video appears accurate and consistent on various HD screens. Moreover, it helps maintain the right balance of colors, contrast, and brightness. Furthermore, Rec 709 LUT Premiere Pro is suitable for broadcast, web streaming, or other HD content platforms.
Part 1: What are the Benefits of Using Premiere Pro Rec 709 LUTs in Video Editing?
Do you know the advantages of using Rec 709 Premiere Pro LUTs? Using Rec 709 LUTs in video editing with software like Adobe Premiere Pro can offer several benefits:
Color Accuracy
Rec 709 is the color space standard used for broadcast and video production. Furthermore, applying Rec 709 LUTs ensures accurate color representation of your media. Additionally, it maintains consistency and accuracy across different devices and platforms. It helps to achieve a standardized color look that conforms to industry standards.
Efficient Color Correction
Rec 709 LUTs streamline your color correction process. They provide a starting point for adjusting your videos’ color balance, contrast, and saturation. Moreover, if you apply this LUT at the start of your project, you can bring your video within the acceptable color range. Eventually, it will save you time and effort in the editing process.
Previewing Final Look
When you apply these LUTs, you can preview how your footage will look after color grading. Similarly, it helps you visualize your content to make changes for further adjustments. In addition, it also allows you to assess the tone and mood of the video in real-time.
Consistency and Compatibility
Such LUTs promote consistency across different cameras, lighting conditions, and sources. When working with multiple sources, you can apply this LUT for a consistent look. Furthermore, these LUTs also ensure compatibility with various display devices and platforms. It makes this tool compatible with different platforms and software.
Creative Control
Furthermore, these LUTs also serve as a starting point for further creative grading. You can layer additional adjustments on top of the LUT. In this way, you can achieve a specific artistic style to create a unique look for your project. Additionally, Rec 709 LUT creates a foundation for you to color-grade your content creatively.
Speeding Up Workflow
By using Rec 709 LUTs as a starting point, you can speed up your editing workflow. Using these LUTs, you don’t need to adjust each clip individually manually. In addition, you can apply a LUT to multiple clips simultaneously to color-correct your media files. Moreover, it saves you time when working on larger video projects.
Empower your videos with a new mood using different LUTs. Filmora now offers 100+ top-quality 3D LUTs cover a broad range of scenarios. Transform your videos with Filmora’s powerful 3D LUTs.
Apply LUT on Videos Apply LUT on Videos Learn More
Part 2: How to Use LUTs in Premiere Pro: A Guide
You can apply your Rec 709 LUT for Premiere Pro without needing any prior experience. All you have to do is to follow these simple steps to apply your favorite LUT.
Step 1: To apply a LUT using Adobe Premiere Pro, import your video by clicking the “File” button and selecting the “Import” option. You can also click on “Import media to start” in the Project Tab. Once your file is imported, drag the clip onto the timeline and move into the “Color” workspace.

Step 2: In continuation, click the “Adjustment Layer” button in the Project tab. Select your adjustment layer and drop it on top of your video clip in the timeline. Click on the layer and go to the “Video Effects” in the Effects option in the Project window. Then, navigate to “Color Correction” and select “Lumetri Color.”

Step 3: In the new window that appears, find the “Input LUT” option under the Basic Correction tab. Browse the LUT you want to apply to your video. Additionally, you can explore more creative LUTs by going to the “Creative” tab in the Lumetri Color window. In the “Look” section, browse for different creative LUTs for your video. You can adjust the intensity of the selected LUT using the slider.

Part 3: The Top Notch Premiere Pro LUTs Rec 709
There are many Premiere Pro Rec 709 LUTs available that you can download and purchase. In the list below are some of the best Rec 709 LUTs you can use.
1. LOOK Creative LUT Pack
The LOOK Creative LUT Pack is a collection of 10 creative LUTs. It includes a range of LUTs, including some popular ones like teal and orange and old noir. These LUTs provide a quick and easy way to add a specific color tone or mood to your footage. In addition to the basic LUTs, it also offers unique and creative options. For example, you’ll find LUTs like Subtle Sci-Fi, Grunge Green, and others.

2. Cinematic LUTs V2
Cinematic LUTs V2 is a pack of modern cinematic-style LUTs. This incredible LUTs pack is designed to give your videos a cinematic touch. With this pack, you get access to 10 different cinematic LUTs to color grade your videos. Furthermore, you can use these LUTs for your LOG footage as well. Additionally, with these LUTs, you can add richness and depth to your videos.

3. NATURAL Rec709
The NATURAL Rec709 LUT pack offers 17 different styles of LUTs. It includes ones inspired by Tobacco, Crunchy Gold, and Black & White filters. These LUTs can enhance the colors and tones in your videos, providing a natural look. Furthermore, you can customize the intensity of the LUTs. Moreover, each LUT in this pack offers a unique color scheme for your videos.

4. 35 Free LUTs for Color Grading Videos
It is an amazing LUT pack that offers you a variety of 35 different styles of LUTs. With these LUTs, you can achieve a vintage look or a cinematic vibe for your videos. These LUTs can work perfectly with Rec 709 footage with accurate and vibrant colors. Furthermore, this pack is compatible with different software, including Premiere Pro.

5. S-Log 3 to Rec.709 LUT
The S-Log3 to Rec.709 LUT pack is designed to enhance your footage by adding vibrance. Applying this LUT boosts saturation, giving your video a more natural and realistic look. Additionally, you can bring out the full potential of your videos captured in S-Log3 gamma. Moreover, this LUT amplifies the colors and is compatible with the Rec.709 color space.

6. DJI OSMO POCKET Creative LUTs Pack
The DJI Osmo Pocket Creative LUTs Pack offers a collection of various creative LUTs. You can choose from different styles and color overlays for your media files. Moreover, you can use this LUT pack for both pictures and videos. In addition to this, it is also compatible with popular editing software. Furthermore, this tool pack supports both .3dl and .cube formats.

7. Blockbuster HLG And Standard LUTs
Another amazing pack of LUTs that you can use is Blockbuster HLG and Standard LUTs. This pack includes 21 Rec 709 LUTs with unique color toning and style. Furthermore, applying these LUTs will make your color grading more professional. Additionally, you can get rich and deep tones for your digital medial files. Similarly, you can change the feel of your content in a more professional style.

Conclusion
In conclusion, LUTs are perfect tools to enhance your media by altering its colors and tones. Different styles of LUTs cater to various creative needs. Furthermore, LUTs allow you to achieve specific looks and moods for your digital content. Moreover, the Rec 709 LUT Premiere Pro ensures your video appears accurate and consistent on HD displays. Additionally, you can achieve professional-grade results as well.
To add more LUTs on video, you can try Wondershare Filmora !
Add LUTs on Video For Win 7 or later(64-bit)
Add LUTs on Video For macOS 10.14 or later
Apply LUT on Videos Apply LUT on Videos Learn More
Part 2: How to Use LUTs in Premiere Pro: A Guide
You can apply your Rec 709 LUT for Premiere Pro without needing any prior experience. All you have to do is to follow these simple steps to apply your favorite LUT.
Step 1: To apply a LUT using Adobe Premiere Pro, import your video by clicking the “File” button and selecting the “Import” option. You can also click on “Import media to start” in the Project Tab. Once your file is imported, drag the clip onto the timeline and move into the “Color” workspace.
Step 2: In continuation, click the “Adjustment Layer” button in the Project tab. Select your adjustment layer and drop it on top of your video clip in the timeline. Click on the layer and go to the “Video Effects” in the Effects option in the Project window. Then, navigate to “Color Correction” and select “Lumetri Color.”
Step 3: In the new window that appears, find the “Input LUT” option under the Basic Correction tab. Browse the LUT you want to apply to your video. Additionally, you can explore more creative LUTs by going to the “Creative” tab in the Lumetri Color window. In the “Look” section, browse for different creative LUTs for your video. You can adjust the intensity of the selected LUT using the slider.
Part 3: The Top Notch Premiere Pro LUTs Rec 709
There are many Premiere Pro Rec 709 LUTs available that you can download and purchase. In the list below are some of the best Rec 709 LUTs you can use.
1. LOOK Creative LUT Pack
The LOOK Creative LUT Pack is a collection of 10 creative LUTs. It includes a range of LUTs, including some popular ones like teal and orange and old noir. These LUTs provide a quick and easy way to add a specific color tone or mood to your footage. In addition to the basic LUTs, it also offers unique and creative options. For example, you’ll find LUTs like Subtle Sci-Fi, Grunge Green, and others.
2. Cinematic LUTs V2
Cinematic LUTs V2 is a pack of modern cinematic-style LUTs. This incredible LUTs pack is designed to give your videos a cinematic touch. With this pack, you get access to 10 different cinematic LUTs to color grade your videos. Furthermore, you can use these LUTs for your LOG footage as well. Additionally, with these LUTs, you can add richness and depth to your videos.
3. NATURAL Rec709
The NATURAL Rec709 LUT pack offers 17 different styles of LUTs. It includes ones inspired by Tobacco, Crunchy Gold, and Black & White filters. These LUTs can enhance the colors and tones in your videos, providing a natural look. Furthermore, you can customize the intensity of the LUTs. Moreover, each LUT in this pack offers a unique color scheme for your videos.
4. 35 Free LUTs for Color Grading Videos
It is an amazing LUT pack that offers you a variety of 35 different styles of LUTs. With these LUTs, you can achieve a vintage look or a cinematic vibe for your videos. These LUTs can work perfectly with Rec 709 footage with accurate and vibrant colors. Furthermore, this pack is compatible with different software, including Premiere Pro.
5. S-Log 3 to Rec.709 LUT
The S-Log3 to Rec.709 LUT pack is designed to enhance your footage by adding vibrance. Applying this LUT boosts saturation, giving your video a more natural and realistic look. Additionally, you can bring out the full potential of your videos captured in S-Log3 gamma. Moreover, this LUT amplifies the colors and is compatible with the Rec.709 color space.
6. DJI OSMO POCKET Creative LUTs Pack
The DJI Osmo Pocket Creative LUTs Pack offers a collection of various creative LUTs. You can choose from different styles and color overlays for your media files. Moreover, you can use this LUT pack for both pictures and videos. In addition to this, it is also compatible with popular editing software. Furthermore, this tool pack supports both .3dl and .cube formats.
7. Blockbuster HLG And Standard LUTs
Another amazing pack of LUTs that you can use is Blockbuster HLG and Standard LUTs. This pack includes 21 Rec 709 LUTs with unique color toning and style. Furthermore, applying these LUTs will make your color grading more professional. Additionally, you can get rich and deep tones for your digital medial files. Similarly, you can change the feel of your content in a more professional style.
Conclusion
In conclusion, LUTs are perfect tools to enhance your media by altering its colors and tones. Different styles of LUTs cater to various creative needs. Furthermore, LUTs allow you to achieve specific looks and moods for your digital content. Moreover, the Rec 709 LUT Premiere Pro ensures your video appears accurate and consistent on HD displays. Additionally, you can achieve professional-grade results as well.
To add more LUTs on video, you can try Wondershare Filmora !
Add LUTs on Video For Win 7 or later(64-bit)
Add LUTs on Video For macOS 10.14 or later
Also read:
- 2024 Approved Top-Search The Best Game Screen Recording Tools for PC
- Updated How to Get VHS Filter and Glitch Filter to Your Images or Videos for 2024
- 2024 Approved What Is MKV Format and How To Play MKV Video?
- Updated Learn to Create Custom Sequence Presets in Premiere Pro for Efficient Video Editing. Ensure Consistency and Speed up Your Workflow with Personalized Settings
- Updated How To Film a Slow Motion Video
- 2024 Approved Clearly, the Efectum App Download without a Watermark Option Is on Android Phones. Thus, Read This Review on the Efectum App and Find Replacements for Good
- Best Tricks for Learning Photo Slideshow for 2024
- Updated How to Convert Videos to Slow Motion, In 2024
- Slow-Motion Innovation with Sony S&Q Feature for 2024
- In 2024, Discover the Top 6 Online Video Speed Controllers Compatible with Chrome, Safari, Firefox for Enhanced Video Playback and Viewing Experience
- Updated How to Make a Slow Motion Video in Wondershare Filmora for 2024
- In 2024, Progressive Solutions to Add VHS Effects to Video with Ease
- Updated Doable Ways to Create Transparent Background in Procreate for 2024
- Updated How To Blur Background in Adobe Premiere Pro Detailed Guide for 2024
- 2024 Approved Learn Topaz Video Enhance AI Review and Achieve Powerful Video Conversion
- Updated How to Create a Slideshow with Movavi Slideshow Maker for 2024
- Updated Best 10 3D Slideshow Software Review for 2024
- Updated How to Create One Click Video Reverse Effect in Filmora
- Updated 6 Websites to Free Download Motivational Video Footage
- New Final Cut Pro for iPad- Is It Available, In 2024
- How to Make a Time-Lapse Video Online
- If Youre Considering Starting a Podcast Video Recording, You Need to Read This Article and Learn All You Need to Know About Making a Successful Podcast
- Updated 10 Crazy-Cool Examples of AR Video for 2024
- Updated What Are AR Emoji Stickers & How to Add Them to Your Video for 2024
- New Green Screen Is a Widely Used Effect in After Effects. Many Professional Photographers Use It to Make Creative Video Effects. This Guide Will Show You How to Use Green Screen to Videos in After Effects
- How To Repair Apple iPhone SE System Issues? | Dr.fone
- How to Change Netflix Location to Get More Country Version On Samsung Galaxy A24 | Dr.fone
- In 2024, How To Activate and Use Life360 Ghost Mode On Oppo F23 5G | Dr.fone
- New In 2024, Want to Make a Meme GIF? Heres How to Do
- All About Factory Reset, What Is It and What It Does to Your Oppo Reno 8T 5G? | Dr.fone
- Simple ways to get lost messages back from Y02T
- Unlocking Apple iPhone 12 mini Passcode without a Computer | Dr.fone
- In 2024, Recommended Best Applications for Mirroring Your Realme GT 3 Screen | Dr.fone
- Best Fixes For Vivo Y27s Hard Reset | Dr.fone
- 3 Ways to Export Contacts from Apple iPhone 11 Pro Max to Excel CSV & vCard Easily | Dr.fone
- How to get back lost photos from Motorola Edge 40 Pro.
- In 2024, Can I Bypass a Forgotten Phone Password Of Realme GT Neo 5?
- How to Lock Apps on Infinix Smart 8 HD to Protect Your Individual Information
- Does Airplane Mode Turn off GPS Location On Realme V30T? | Dr.fone
- Hard Resetting an Samsung Galaxy S21 FE 5G (2023) Device Made Easy | Dr.fone
- 3 Easy Solutions to Hard Reset Nokia G42 5G | Dr.fone
- Fixing Foneazy MockGo Not Working On Honor Magic 6 Pro | Dr.fone
- In 2024, The Best iSpoofer Alternative to Try On Motorola G24 Power | Dr.fone
- In 2024, How to Unlock Realme Note 50 Phone with Broken Screen
- How to Bypass Google FRP Lock on Oppo Reno 10 5G Devices
- How to Track Oppo Find X7 Ultra by Phone Number | Dr.fone
- How to Sign .uot file document with Digital Signature - (Tutorial)
- 4 solution to get rid of pokemon fail to detect location On Poco M6 Pro 4G | Dr.fone
- In 2024, Xiaomi 13T Pro ADB Format Tool for PC vs. Other Unlocking Tools Which One is the Best?
- Title: 2024 Approved Introduction to LUTs Their Overview and Benefits
- Author: Chloe
- Created at : 2024-04-24 07:08:13
- Updated at : 2024-04-25 07:08:13
- Link: https://ai-editing-video.techidaily.com/2024-approved-introduction-to-luts-their-overview-and-benefits/
- License: This work is licensed under CC BY-NC-SA 4.0.
