
:max_bytes(150000):strip_icc():format(webp)/best-instagram-captions-4171697-ae21b04e6866470c80a50c9bef1cc26e.png)
2024 Approved Motion Tracking Is the Process of Tracking the Movements of a Project in a Video. This Article Will Show You How to Apply Motion Tracking Effect Into Videos
Motion Tracking Is the Process of Tracking the Movements of a Project in a Video. This Article Will Show You How to Apply Motion Tracking Effect Into Videos
Motion tracking makes it easier to follow the movement of objects and provide the sensed data to a program for additional processing. Motion tracking involves recording an object’s movements that match a previously stored motion template. This has a wide range of uses, including in robotics, entertainment, sports, the military, and the entertainment industry. Additionally, it is utilized in the creation of video games and films. While motion tracking is frequently referred to as match movement in the film and video game industries, motion tracking is frequently referred to as motion capture in other contexts.
With that said, let’s begin!
Part 1. Learning to Understand Motion Tracking
We need to ask the really crucial question now that we have a fundamental understanding of what it is. What in the world am I going to do with this? In order to do that, let’s quickly review some excellent applications for motion tracking. You could,
Utilize tracking information to stabilize motion
Add text or solids as additional compositional elements
Add 3D elements to 2D footage
Use effects or color gradation methods
Replace the screens on your computer, mobile device, or television
These are just a few examples of how motion tracking might be useful. You need to be able to track motion in compositions of any complexity.
Part 2. What software do you need?
There are numerous options for motion tracking applications. With advantages and downsides, we’ve compiled a list of the finest motion tracking programs. The following are the best video editors for motion tracking in our opinion:
Filmora
Wondershare created Filmora to enable you to fully express your creativity. FilmoraPro is the best option if you want to make some high-level modifications to your video. In addition to the pre-sets offered, it allows you to tweak the effects for a more expertly edited appearance.
![]()
Motion tracking is currently its best feature. You may track a skater as they race across the ice or follow a boat as it travels. Use the motion tracking feature to add drama to your videos. You won’t have to worry about getting lost because FilmoraPro features an amazingly simple UI. Simply click on the person or object you wish to track and choose Motion Track from the Effects menu.
Free Download For Win 7 or later(64-bit)
Free Download For macOS 10.14 or later
Blender
Open-source and cost-free motion tracking software is called Blender. It’s an excellent 3D creating tool. Modeling, rigging, animation, simulation, rendering, compositing, video editing, 2D animation, and of course motion tracking is all supported.

Kdenlive
A motion tracker was recently added to Kdenlive, an open source and free video editing tool, under its Effects section. This program analyzes an object’s tracking information and automatically generates a map of the object’s motion. Following that, you can align a title, an image, an icon, and any other 2D elements to the moving object using this track. Motion Tracker’s regularly updated algorithms are one of its key characteristics, which leads to a higher tracking success rate and faster tracking speed.

HitFilm Express
The free edition of HitFilm Express is a wonderful place to start if you’re learning the fundamentals of 2D motion tracking. To get superior tracking results, it offers two motion tracking types: Single Point for tracking simply position and Double Points for tracking position, scale, or rotation of an object. You can either steady the video with the tracking data or change the point with a CG object.

Its optical flow tracking technique is outstanding. It successfully tracks a moving item that changes into multiple shapes or is veiled for a few frames by figuring out the brightness flow of the moving object. Beginners can therefore save a great deal of time and effort when designing settings to deal with complex frames.
VEGAS Pro
In VEGAS Pro 18 and later, auto motion tracking is a freshly upgraded function. Despite its late birth, it included the Mocha masking and planar tracking technology, winner of an Academy Award. It enables you to accurately attach images and messages and even adjust for shifting perspective. You can hide faces, license information, and any private objects using this capability.

Adobe Premiere Pro
Because of its superior editing capabilities, Premiere Pro seems to be a requirement for anyone learning video editing. Premiere Pro, however, has a limited number of presets and automatic tools in order to provide consumers the most control.

When masking and blurring a face, motion tracking only works with the auto option. If not, you will need to enter and alter multiple keyframes to add text or resize the video, or you will need to install an extension to convert the mask’s tracks to any transformed parts.
PowerDirector
Due to its simplicity of use, PowerDirector is unquestionably among the greatest motion tracking programs currently available. It accomplishes complex effects without having an advanced learning curve, in contrast to other video editing tools. As demonstrated in the introductory video up top, a simple interface may be used to easily track and manage one or more motion-tracked items.

With this program, creating a simple motion track may be done in only three easy steps. This editor is for you if you want to finish the job swiftly and painlessly and are new to intermediate video editing.
Part 3. Differences between camera tracking and motion tracking?
Making the audience forget that there is a camera in the room is one of the primary goals of filmmaking. To engage the audience, tracking shots like camera tracking and motion tracking are helpful. Tracking shots provide filmmakers the chance to immerse their audience more deeply in the storyline of their characters. I discovered that there is some ambiguity around how motion tracking and camera tracking differ from one another. I’ll explain where the confusion might have originated and give you examples of how to use both strategies.
What distinguishes motion tracking from camera tracking? Their differences are due to how they view the course of action. From a camera’s perspective, motion tracking monitors an object’s movement. The scenario is more immersive thanks to camera tracking, which detects the movement of the camera and presents it as though you are in a virtual or augmented reality environment.
We’ll examine tracking’s development in the movie and its significance to the business. What it is and how it affects the cinematography industry. Along with the many software used for both motion tracking and camera tracking, we’ll also look at some of the popular applications for both.
Motion tracking
Motion tracking is similar to a car pursuit on the highway in an action movie. Let’s use a SimCity environment as another illustration: your Sim’s movement is monitored against the steady scene of your home. The frame is set on your Sim, regardless of what your Sim does.
Camera tracking
When the camera must move and the object being “tracked” must remain stationary, camera tracking might be utilized instead of motion tracking. Information from a recorded live shot taken with a live camera is used for camera tracking. Then, using this data, a parallel virtual camera is projected in a three-dimensional composition frame. fresh 3D pieces are added while scenes are recreated.
On the Internet of Vehicles, motion tracking will be crucial. IoV will project the motion of your vehicle along the 2D path. Then, utilizing the information about your surroundings, you are informed of any potential roadblocks.
The same basic idea underlies motion tracking and stabilization. Both follow a moving target. When stabilizing, you choose the location where you wish to remain concentrated and centered despite movement. You track the object you wish to concentrate on while moving when you use motion tracking.
Sports videos frequently use basketball and football and use motion tracking. wherein the player is surrounded by a circle as he circles the court or the field for basketball.
Conclusion
In video editing, techniques like motion tracking and camera tracking are frequently employed. Even though they are frequently compared, both employ various vantage angles to depict motion. By following the moving object’s movement throughout the frame, motion tracking maintains the moving object in focus. A post-production technique called camera tracking uses data from a pre-shot movie to project a parallel virtual camera that displays a 3D perspective. If motion tracking and camera tracking have anything in common, it’s the way they draw the viewer into the tale and make them feel like a part of it. This gives your audience a sense of immersion in the story and enables your movie to linger in their minds emotionally and visually long after the credits have rolled.
Part 1. Learning to Understand Motion Tracking
We need to ask the really crucial question now that we have a fundamental understanding of what it is. What in the world am I going to do with this? In order to do that, let’s quickly review some excellent applications for motion tracking. You could,
Utilize tracking information to stabilize motion
Add text or solids as additional compositional elements
Add 3D elements to 2D footage
Use effects or color gradation methods
Replace the screens on your computer, mobile device, or television
These are just a few examples of how motion tracking might be useful. You need to be able to track motion in compositions of any complexity.
Part 2. What software do you need?
There are numerous options for motion tracking applications. With advantages and downsides, we’ve compiled a list of the finest motion tracking programs. The following are the best video editors for motion tracking in our opinion:
Filmora
Wondershare created Filmora to enable you to fully express your creativity. FilmoraPro is the best option if you want to make some high-level modifications to your video. In addition to the pre-sets offered, it allows you to tweak the effects for a more expertly edited appearance.
![]()
Motion tracking is currently its best feature. You may track a skater as they race across the ice or follow a boat as it travels. Use the motion tracking feature to add drama to your videos. You won’t have to worry about getting lost because FilmoraPro features an amazingly simple UI. Simply click on the person or object you wish to track and choose Motion Track from the Effects menu.
Free Download For Win 7 or later(64-bit)
Free Download For macOS 10.14 or later
Blender
Open-source and cost-free motion tracking software is called Blender. It’s an excellent 3D creating tool. Modeling, rigging, animation, simulation, rendering, compositing, video editing, 2D animation, and of course motion tracking is all supported.
Kdenlive
A motion tracker was recently added to Kdenlive, an open source and free video editing tool, under its Effects section. This program analyzes an object’s tracking information and automatically generates a map of the object’s motion. Following that, you can align a title, an image, an icon, and any other 2D elements to the moving object using this track. Motion Tracker’s regularly updated algorithms are one of its key characteristics, which leads to a higher tracking success rate and faster tracking speed.
HitFilm Express
The free edition of HitFilm Express is a wonderful place to start if you’re learning the fundamentals of 2D motion tracking. To get superior tracking results, it offers two motion tracking types: Single Point for tracking simply position and Double Points for tracking position, scale, or rotation of an object. You can either steady the video with the tracking data or change the point with a CG object.
Its optical flow tracking technique is outstanding. It successfully tracks a moving item that changes into multiple shapes or is veiled for a few frames by figuring out the brightness flow of the moving object. Beginners can therefore save a great deal of time and effort when designing settings to deal with complex frames.
VEGAS Pro
In VEGAS Pro 18 and later, auto motion tracking is a freshly upgraded function. Despite its late birth, it included the Mocha masking and planar tracking technology, winner of an Academy Award. It enables you to accurately attach images and messages and even adjust for shifting perspective. You can hide faces, license information, and any private objects using this capability.
Adobe Premiere Pro
Because of its superior editing capabilities, Premiere Pro seems to be a requirement for anyone learning video editing. Premiere Pro, however, has a limited number of presets and automatic tools in order to provide consumers the most control.
When masking and blurring a face, motion tracking only works with the auto option. If not, you will need to enter and alter multiple keyframes to add text or resize the video, or you will need to install an extension to convert the mask’s tracks to any transformed parts.
PowerDirector
Due to its simplicity of use, PowerDirector is unquestionably among the greatest motion tracking programs currently available. It accomplishes complex effects without having an advanced learning curve, in contrast to other video editing tools. As demonstrated in the introductory video up top, a simple interface may be used to easily track and manage one or more motion-tracked items.
With this program, creating a simple motion track may be done in only three easy steps. This editor is for you if you want to finish the job swiftly and painlessly and are new to intermediate video editing.
Part 3. Differences between camera tracking and motion tracking?
Making the audience forget that there is a camera in the room is one of the primary goals of filmmaking. To engage the audience, tracking shots like camera tracking and motion tracking are helpful. Tracking shots provide filmmakers the chance to immerse their audience more deeply in the storyline of their characters. I discovered that there is some ambiguity around how motion tracking and camera tracking differ from one another. I’ll explain where the confusion might have originated and give you examples of how to use both strategies.
What distinguishes motion tracking from camera tracking? Their differences are due to how they view the course of action. From a camera’s perspective, motion tracking monitors an object’s movement. The scenario is more immersive thanks to camera tracking, which detects the movement of the camera and presents it as though you are in a virtual or augmented reality environment.
We’ll examine tracking’s development in the movie and its significance to the business. What it is and how it affects the cinematography industry. Along with the many software used for both motion tracking and camera tracking, we’ll also look at some of the popular applications for both.
Motion tracking
Motion tracking is similar to a car pursuit on the highway in an action movie. Let’s use a SimCity environment as another illustration: your Sim’s movement is monitored against the steady scene of your home. The frame is set on your Sim, regardless of what your Sim does.
Camera tracking
When the camera must move and the object being “tracked” must remain stationary, camera tracking might be utilized instead of motion tracking. Information from a recorded live shot taken with a live camera is used for camera tracking. Then, using this data, a parallel virtual camera is projected in a three-dimensional composition frame. fresh 3D pieces are added while scenes are recreated.
On the Internet of Vehicles, motion tracking will be crucial. IoV will project the motion of your vehicle along the 2D path. Then, utilizing the information about your surroundings, you are informed of any potential roadblocks.
The same basic idea underlies motion tracking and stabilization. Both follow a moving target. When stabilizing, you choose the location where you wish to remain concentrated and centered despite movement. You track the object you wish to concentrate on while moving when you use motion tracking.
Sports videos frequently use basketball and football and use motion tracking. wherein the player is surrounded by a circle as he circles the court or the field for basketball.
Conclusion
In video editing, techniques like motion tracking and camera tracking are frequently employed. Even though they are frequently compared, both employ various vantage angles to depict motion. By following the moving object’s movement throughout the frame, motion tracking maintains the moving object in focus. A post-production technique called camera tracking uses data from a pre-shot movie to project a parallel virtual camera that displays a 3D perspective. If motion tracking and camera tracking have anything in common, it’s the way they draw the viewer into the tale and make them feel like a part of it. This gives your audience a sense of immersion in the story and enables your movie to linger in their minds emotionally and visually long after the credits have rolled.
Top 12 AI Video Generators to Pick
Top 12 AI Video Generators to Pick
An easy yet powerful editor
Numerous effects to choose from
Detailed tutorials provided by the official channel
It is a fact that video editing can sometimes be laborious and time-consuming. Even when using the best video editing software, it still requires human effort to get an impressive result. But luckily for us, the invention of the AI video generator has now made a lot of things easier. The AI video generators are the next level as they allow users to automate video creation and editing without compromising quality.
This article will discuss the best AI text to video generators for free that will help make your life easier. Thus, this will soon help you create engaging videos for your personal or business use in just a few clicks.
In this article
01 [What Is an AI Video Generator](#Part 1)
02 [How Does the AI Video Maker Work](#Part 2)
03 [The 12 Best AI Video Generator](#Part 3)
Part 1 What Is an AI Video Generator
AI video generator is the process of using artificial intelligence (AI) to create professional videos. With an AI video generator for free, you do not need any equipment, an editing studio, or a premium video editing application to be able to create a video.
All that is required is that you feed input to the AI tool, and it will automatically help you generate a video. You can edit a blog post into a video within a few minutes with any of these tools listed. In addition, it won’t incur any high costs for video productions because the AI tool will help you carry out most of the tasks.
Part 2 How Does the AI Video Maker Work
Professional AI video editors, are trained by showing them various examples and then providing them feedback by telling them what is wrong and good. The machine then takes note of it and remembers it. However, as the machine continues to learn, it picks the results and then improves itself based on the feedback. Ultimately the device becomes very good or even better than the human that creates it. Here are some breakdowns of the ways video editors work:
● The AI video maker tool, can augment your videos with AR effects, including AR masks, face and color filters, face touch-ups, etc. The tool uses neural networks and computer vision to interrupt, extract, and understand the video content.
● This AI subtitle generator can allow interviews to be delivered and analyzed to the editor fully transcribed, searchable by word or even sentences. Video editors can use AI for keyword extraction, speech-to-text conversion, facial recognition, sentiment analysis, image recognition, and emotion detection.
● AI-video editors can pull sections of a video clip from any source automatically. These AI systems can also detect emotions that allow the creation of warm, appealing videos.
Part 3 The 12 Best AI Video Generator
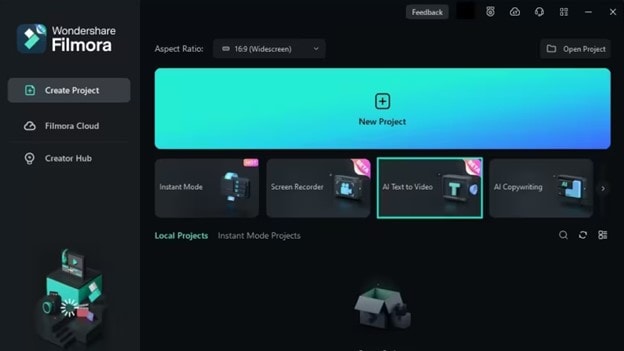
There are top AI video generators for free that you can choose from for your video editing. These video editors complete work quickly and easily. In addition, if you need video editing software to help you edit your generated videos after generating them, we recommend that you try out Filmora from Wondershare. Wondershare Filmora Video Editor is a perfect video editing software with tons of new features, like keyframing, split video, and adding animations and effects to help you carry out your video editing seamlessly.
For Win 7 or later (64-bit)
For macOS 10.12 or later
01Sora
Sora is an artificial intelligence model that generates videos with textual descriptions, developed by OpenAI. It is a US-based artificial intelligence research organization. Sora stands out as a game-changing platform. It can seamlessly convert text into captivating videos, blending convenience with creativity.
Features
● With Sora, transforming written content into engaging videos is swift and efficient.
● Unlike traditional video editing tools, Sora is designed for users of all levels, eliminating the need for prior video production experience.
● Sora offers a plethora of customization options.
● Generates videos up to 60 seconds long
● Generates complex scenes with multiple characters, motions, and accurate details of the subject
● Creates multiple shots within a single generated video
● Generating videos from text instructions by utilizing the recaptioning technique from DALL·E 3
Pros
● Highly realistic video generation with impressive visual quality
● Text-based control over the content of the video, allowing for precise video generation
● A highly versatile tool that handles a wide range of prompts and styles
Cons
● Lacks implicit understanding of the rules of physics
This software is best realistic and imaginative scenes.
02Wondershare Filmora
Wondershare Filmora is a highly efficient video editing software that comes with AI text to video generation. The software is friendly to both beginner and intermediate creations, offering you a wide range of intuitive features.
Pricing
● Subscription Plan: US$19.99 per month
● Cross-Platform Plan: US$69.99 per year
● Perpetual Plan: US$19.99 Onetime Payment
Features
● User-friendly interface that is easy to learn and use
● Wide range of features for creating and editing videos, including transitions, effects, and text overlays.
● Large stock library of royalty-free music and stock footage
● Readily available templates and presets to quickly generate videos
● Easily export videos directly to popular platforms like YouTube and TikTok
Pros
● User-friendly interface with a learning curve suitable for all kinds of creators
● Extensive library of free and paid assets to enhance your videos
● Wide range of features for video editing
Cons
● Lacks advanced features for AI video prompt generation
This software is best for video creation and editing for freelancers, SMBs, markters.
For Win 7 or later (64-bit)
For macOS 10.12 or later
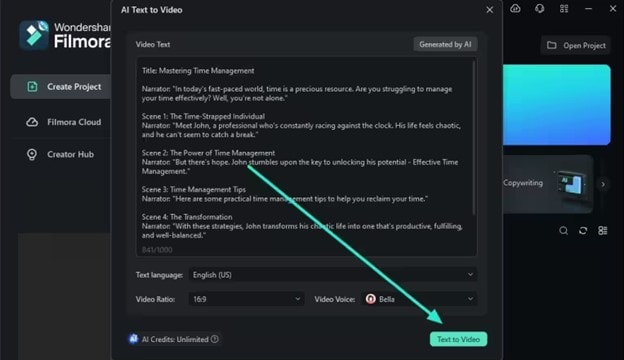
How to Use Filmora’s AI to Video Feature : AI Video Prompt Sample
Here is a brief step-by-step guide on how to use Filmora to generate AI videos. The process is as simple as writing a text prompt and getting the video ready:
Step 1: Lauch Filmora AI Text-to-Video Features
Once you launch on your PC Filmora, click the AI Text-to-Video option to start the video generation process.
Step 2: Add a Text Prompt or Video Script
On the AI Text-to-Video video, add your text prompt. You can also modify other settings such as text language and video voice. Then click the Text to Video button at the bottom to prompt Filmora to generate the video.
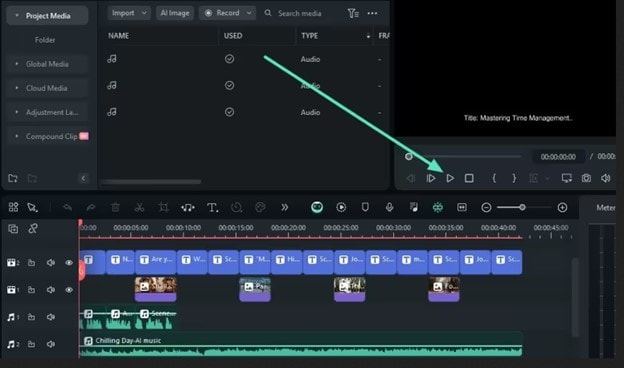
Step 3: Preview the Generated Video
Filmora generates the video based on your prompt and a new editing window. You can now a preview video and make any further editing needed.
AI Video Prompt Sample Using Filmora
Prompt: A young man at his 20s is sitting on a piece of cloud in the sky, reading a book.
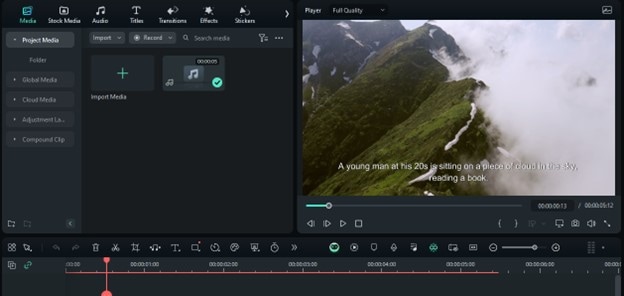
When prompted to generate a video of a young man in his 20s sitting on a piece of cloud in the sky, reading a book, Filmora generated a narration video from the point of view of the young man as shown above.
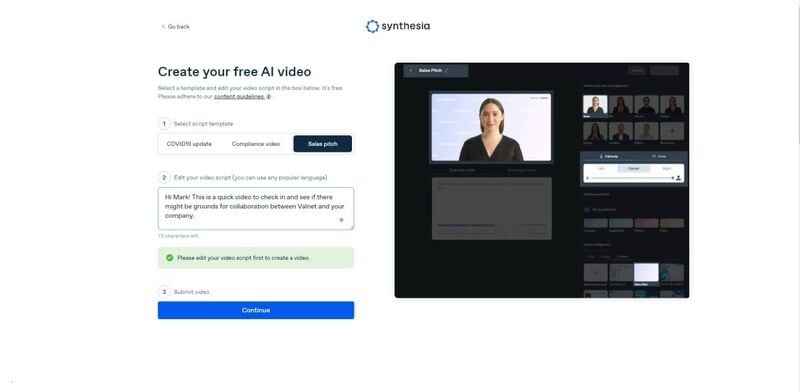
03Synthesia
This is a web-app video generator AI from a text supporting AI-driven video creation used by experts and beginners. Rather than filming content utilizing a microphone and camera, this software AI technology helps to simulate human presenters and real-life videos. Thus, it saves video creators hours of work.
Pricing
● Personal Plan: $30 monthly
● Corporate Plan: custom pricing
Features
● Over 40 supported languages
● Allows template customizations
● Allows users to make their avatars
● It has 50 built-in presenters
● Allows you to create realistic AI videos
● Offers live chat support
● Allows download in Mp4
● Enables users to create videos automatically using integrations with APIs
● Allows the addition of backgrounds
● Users can share their videos on other social media platforms
● Allows the addition of images, shapes, and texts to videos
Pros
● Great for beginners are you do not need prior knowledge
Cons
● It supports only front-facing poses
This software is best for freelancers, agencies, marketers, and content creators looking to create high-quality video content.
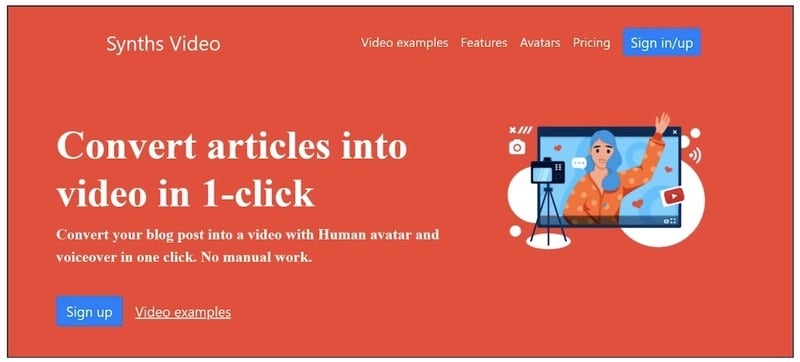
04Synths Video
This is an AI video-generating tool primarily concerned with helping users drive leads and traffic from YouTube. It is an AI YouTube title generator that allows users to create professional-looking videos from blog posts on YouTube.
Pricing
● YouTube Start: $399 monthly.
● Premium Custom Package: Custom Pricing.
Features
● Video generation from URLs
● It has built-in integration with YouTube
● 20+ avatars are available
● Allows video upload in HD quality
● Over 40+ languages supported
Cons
● No free plan is available
Best for the owners of YouTube channels.
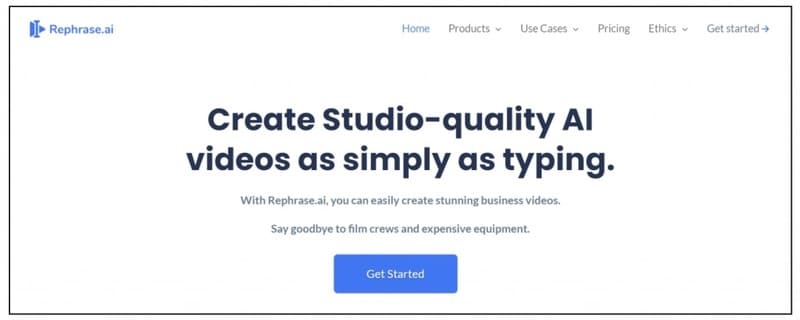
05Rephrase.ai
Rephrase.ai is a video editing software that uses a sophisticated deep learning engine to create professional videos.
Pricing
● Starter plan: $25 monthly
● Enterprise plan: Custom Pricing
Features
● Produces high-resolution videos
● Supports functionality for presenter customization
● Multiple-use cases supported
● Allows users to select their preferred AI voice
● Support varieties of video editing tools
Cons
● It has a complex pricing plan
It is best for agencies seeking to create customizable and personalized professional videos for marketing and advertising.
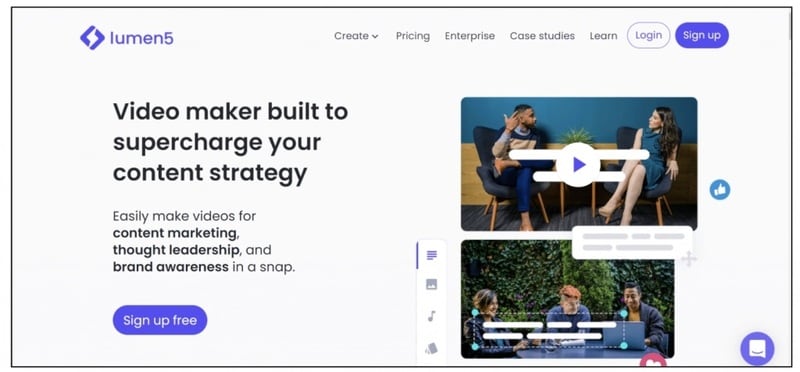
06Lumen5
Lumen5 is one of the top AI video-creating tools available for beginners and uses Natural Language Processing algorithms to convert text into high-quality videos.
Pricing
● Free Plan
● Creator plan: $15 monthly.
● Premium plan: $79 monthly.
● Business plan: $199 monthly.
● Enterprise plan: Custom Pricing.
Features
● Transforms text to video within minutes
● Numerous templates are available
● Allows customization of videos resolution, color, and font
Cons
● Limited features in the free plan
Best for beginners who are looking to generate short-duration of videos for social media platforms.
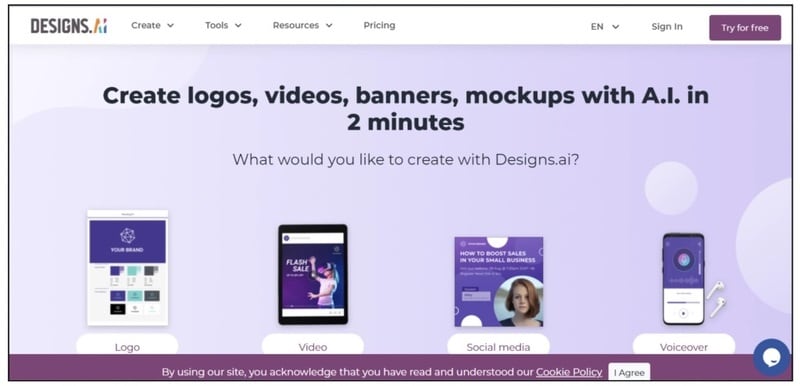
07Designs.ai
This is an AI-powered video maker that is useful for users that do not have any experience in design.
Pricing
● Basic plan: $29 monthly
● Pro plan: $69 monthly
● Enterprise plan: Custom Pricing
Features
● It has an attractive and modern user interface
● Allows the creation of videos from pre-designed templates
● Helps video creation from your custom video files
● Over 20 languages supported
● Coverts texts to video
Cons
● Only allows video download in a paid plan.
This tool is best for creators and designers who are willing to create quick AI videos.
08InVideo
This is a perfect AI generator used for creating explainers or marketing videos easily and quickly. The platform helps produce high-quality videos with varieties of style options to make the ideal video according to your requirements.
Pricing
● Free: Free with watermarks on your videos.
● Business: $15 monthly with no watermarks.
● Unlimited: $30 monthly with unlimited video exports.
Features
● Very affordable
● Comprises an online drag-and-drop video editor
● Over 50 AI-powered themes that help to convert text to video in 3 minutes
● Full iStock media library available in all plans
Cons
● Requires internet connection to use
09Pictory.ai
This AI subtitle generator converts your text and turns it into an AI-generated video. This program is simple and easy to get started, requiring no software download. Paste your text into the editor and get started.
Pricing
● Free trial: Only use 3 videos.
● Standard Plan: $29 per month.
● Premium Plan: $59 per month.
Features
● It has a simple user interface.
● Over 6M licensed Shutterstock available
● Unlimited and affordable videos in the premium plan
Cons
● It is quite expensive compared to other tools
10Veed.io
Veed.io is not specifically an AI video generator but a video editing tool that utilizes AI to simplify the entire process and allows users to create high-quality videos within seconds.
Pricing
● Free: Free with watermarks!
● Basic: $18 monthly.
● Pro: $30 monthly
Features
● It has lots of video templates and a music library to choose
● Easy to learn, user-friendly interface
● Video rendering times are quite fast
● The basic plan has a high-quality resolution
Cons
● Not a typical AI video generator
● Not for beginners
11Wisecut
This free AI video generator platform allows you to turn your text into video. Type in your text and choose a voice actor, and then Wisecut will take care of the rest. It offers excellent editing tools for users to tweak your video until it’s just right.
Pricing
● Basic: Free.
● Professional: $57 per month.
Features
● This platform is easy to use
● It has a simple drag and drops user-interface
● Allows auto subtitles and auto cut silences
● Allows integration with YouTube
● Subtitles auto-translation
● Excellent video quality
Cons
● Has limited effects
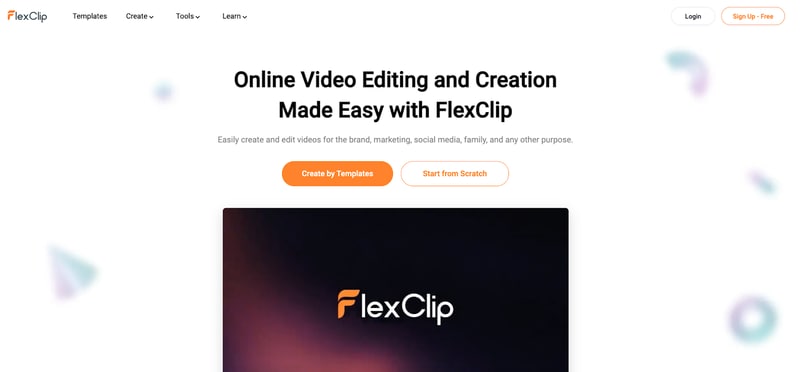
12Flexclip
FlexClip makes video creation and editing easy with-it millions of royalty-free stock media and thousands of templates for you to choose from.
Pricing
● Free
● Basic: $5.99 per month.
● Plus: $9.99 per month
● Business: $19.99 per month.
Features
● Thousands of available templates
● Simple tool for creating and editing videos
● Use for creating engaging videos
● Provides millions of royalty stock media
● Versatile and Flexible
Cons
● Not for beginners
● Ending Thoughts →
● In this post, we have listed the top text to video generators that you can choose from to help you perform tasks within minutes.
● The report also explains all you need to know about video AI generators and recommends Filmora as a perfect tool for editing your videos.
It is a fact that video editing can sometimes be laborious and time-consuming. Even when using the best video editing software, it still requires human effort to get an impressive result. But luckily for us, the invention of the AI video generator has now made a lot of things easier. The AI video generators are the next level as they allow users to automate video creation and editing without compromising quality.
This article will discuss the best AI text to video generators for free that will help make your life easier. Thus, this will soon help you create engaging videos for your personal or business use in just a few clicks.
In this article
01 [What Is an AI Video Generator](#Part 1)
02 [How Does the AI Video Maker Work](#Part 2)
03 [The 12 Best AI Video Generator](#Part 3)
Part 1 What Is an AI Video Generator
AI video generator is the process of using artificial intelligence (AI) to create professional videos. With an AI video generator for free, you do not need any equipment, an editing studio, or a premium video editing application to be able to create a video.
All that is required is that you feed input to the AI tool, and it will automatically help you generate a video. You can edit a blog post into a video within a few minutes with any of these tools listed. In addition, it won’t incur any high costs for video productions because the AI tool will help you carry out most of the tasks.
Part 2 How Does the AI Video Maker Work
Professional AI video editors, are trained by showing them various examples and then providing them feedback by telling them what is wrong and good. The machine then takes note of it and remembers it. However, as the machine continues to learn, it picks the results and then improves itself based on the feedback. Ultimately the device becomes very good or even better than the human that creates it. Here are some breakdowns of the ways video editors work:
● The AI video maker tool, can augment your videos with AR effects, including AR masks, face and color filters, face touch-ups, etc. The tool uses neural networks and computer vision to interrupt, extract, and understand the video content.
● This AI subtitle generator can allow interviews to be delivered and analyzed to the editor fully transcribed, searchable by word or even sentences. Video editors can use AI for keyword extraction, speech-to-text conversion, facial recognition, sentiment analysis, image recognition, and emotion detection.
● AI-video editors can pull sections of a video clip from any source automatically. These AI systems can also detect emotions that allow the creation of warm, appealing videos.
Part 3 The 12 Best AI Video Generator
There are top AI video generators for free that you can choose from for your video editing. These video editors complete work quickly and easily. In addition, if you need video editing software to help you edit your generated videos after generating them, we recommend that you try out Filmora from Wondershare. Wondershare Filmora Video Editor is a perfect video editing software with tons of new features, like keyframing, split video, and adding animations and effects to help you carry out your video editing seamlessly.
For Win 7 or later (64-bit)
For macOS 10.12 or later
01Sora
Sora is an artificial intelligence model that generates videos with textual descriptions, developed by OpenAI. It is a US-based artificial intelligence research organization. Sora stands out as a game-changing platform. It can seamlessly convert text into captivating videos, blending convenience with creativity.
Features
● With Sora, transforming written content into engaging videos is swift and efficient.
● Unlike traditional video editing tools, Sora is designed for users of all levels, eliminating the need for prior video production experience.
● Sora offers a plethora of customization options.
● Generates videos up to 60 seconds long
● Generates complex scenes with multiple characters, motions, and accurate details of the subject
● Creates multiple shots within a single generated video
● Generating videos from text instructions by utilizing the recaptioning technique from DALL·E 3
Pros
● Highly realistic video generation with impressive visual quality
● Text-based control over the content of the video, allowing for precise video generation
● A highly versatile tool that handles a wide range of prompts and styles
Cons
● Lacks implicit understanding of the rules of physics
This software is best realistic and imaginative scenes.
02Wondershare Filmora
Wondershare Filmora is a highly efficient video editing software that comes with AI text to video generation. The software is friendly to both beginner and intermediate creations, offering you a wide range of intuitive features.
Pricing
● Subscription Plan: US$19.99 per month
● Cross-Platform Plan: US$69.99 per year
● Perpetual Plan: US$19.99 Onetime Payment
Features
● User-friendly interface that is easy to learn and use
● Wide range of features for creating and editing videos, including transitions, effects, and text overlays.
● Large stock library of royalty-free music and stock footage
● Readily available templates and presets to quickly generate videos
● Easily export videos directly to popular platforms like YouTube and TikTok
Pros
● User-friendly interface with a learning curve suitable for all kinds of creators
● Extensive library of free and paid assets to enhance your videos
● Wide range of features for video editing
Cons
● Lacks advanced features for AI video prompt generation
This software is best for video creation and editing for freelancers, SMBs, markters.
For Win 7 or later (64-bit)
For macOS 10.12 or later
How to Use Filmora’s AI to Video Feature : AI Video Prompt Sample
Here is a brief step-by-step guide on how to use Filmora to generate AI videos. The process is as simple as writing a text prompt and getting the video ready:
Step 1: Lauch Filmora AI Text-to-Video Features
Once you launch on your PC Filmora, click the AI Text-to-Video option to start the video generation process.
Step 2: Add a Text Prompt or Video Script
On the AI Text-to-Video video, add your text prompt. You can also modify other settings such as text language and video voice. Then click the Text to Video button at the bottom to prompt Filmora to generate the video.
Step 3: Preview the Generated Video
Filmora generates the video based on your prompt and a new editing window. You can now a preview video and make any further editing needed.
AI Video Prompt Sample Using Filmora
Prompt: A young man at his 20s is sitting on a piece of cloud in the sky, reading a book.
When prompted to generate a video of a young man in his 20s sitting on a piece of cloud in the sky, reading a book, Filmora generated a narration video from the point of view of the young man as shown above.
03Synthesia
This is a web-app video generator AI from a text supporting AI-driven video creation used by experts and beginners. Rather than filming content utilizing a microphone and camera, this software AI technology helps to simulate human presenters and real-life videos. Thus, it saves video creators hours of work.
Pricing
● Personal Plan: $30 monthly
● Corporate Plan: custom pricing
Features
● Over 40 supported languages
● Allows template customizations
● Allows users to make their avatars
● It has 50 built-in presenters
● Allows you to create realistic AI videos
● Offers live chat support
● Allows download in Mp4
● Enables users to create videos automatically using integrations with APIs
● Allows the addition of backgrounds
● Users can share their videos on other social media platforms
● Allows the addition of images, shapes, and texts to videos
Pros
● Great for beginners are you do not need prior knowledge
Cons
● It supports only front-facing poses
This software is best for freelancers, agencies, marketers, and content creators looking to create high-quality video content.
04Synths Video
This is an AI video-generating tool primarily concerned with helping users drive leads and traffic from YouTube. It is an AI YouTube title generator that allows users to create professional-looking videos from blog posts on YouTube.
Pricing
● YouTube Start: $399 monthly.
● Premium Custom Package: Custom Pricing.
Features
● Video generation from URLs
● It has built-in integration with YouTube
● 20+ avatars are available
● Allows video upload in HD quality
● Over 40+ languages supported
Cons
● No free plan is available
Best for the owners of YouTube channels.
05Rephrase.ai
Rephrase.ai is a video editing software that uses a sophisticated deep learning engine to create professional videos.
Pricing
● Starter plan: $25 monthly
● Enterprise plan: Custom Pricing
Features
● Produces high-resolution videos
● Supports functionality for presenter customization
● Multiple-use cases supported
● Allows users to select their preferred AI voice
● Support varieties of video editing tools
Cons
● It has a complex pricing plan
It is best for agencies seeking to create customizable and personalized professional videos for marketing and advertising.
06Lumen5
Lumen5 is one of the top AI video-creating tools available for beginners and uses Natural Language Processing algorithms to convert text into high-quality videos.
Pricing
● Free Plan
● Creator plan: $15 monthly.
● Premium plan: $79 monthly.
● Business plan: $199 monthly.
● Enterprise plan: Custom Pricing.
Features
● Transforms text to video within minutes
● Numerous templates are available
● Allows customization of videos resolution, color, and font
Cons
● Limited features in the free plan
Best for beginners who are looking to generate short-duration of videos for social media platforms.
07Designs.ai
This is an AI-powered video maker that is useful for users that do not have any experience in design.
Pricing
● Basic plan: $29 monthly
● Pro plan: $69 monthly
● Enterprise plan: Custom Pricing
Features
● It has an attractive and modern user interface
● Allows the creation of videos from pre-designed templates
● Helps video creation from your custom video files
● Over 20 languages supported
● Coverts texts to video
Cons
● Only allows video download in a paid plan.
This tool is best for creators and designers who are willing to create quick AI videos.
08InVideo
This is a perfect AI generator used for creating explainers or marketing videos easily and quickly. The platform helps produce high-quality videos with varieties of style options to make the ideal video according to your requirements.
Pricing
● Free: Free with watermarks on your videos.
● Business: $15 monthly with no watermarks.
● Unlimited: $30 monthly with unlimited video exports.
Features
● Very affordable
● Comprises an online drag-and-drop video editor
● Over 50 AI-powered themes that help to convert text to video in 3 minutes
● Full iStock media library available in all plans
Cons
● Requires internet connection to use
09Pictory.ai
This AI subtitle generator converts your text and turns it into an AI-generated video. This program is simple and easy to get started, requiring no software download. Paste your text into the editor and get started.
Pricing
● Free trial: Only use 3 videos.
● Standard Plan: $29 per month.
● Premium Plan: $59 per month.
Features
● It has a simple user interface.
● Over 6M licensed Shutterstock available
● Unlimited and affordable videos in the premium plan
Cons
● It is quite expensive compared to other tools
10Veed.io
Veed.io is not specifically an AI video generator but a video editing tool that utilizes AI to simplify the entire process and allows users to create high-quality videos within seconds.
Pricing
● Free: Free with watermarks!
● Basic: $18 monthly.
● Pro: $30 monthly
Features
● It has lots of video templates and a music library to choose
● Easy to learn, user-friendly interface
● Video rendering times are quite fast
● The basic plan has a high-quality resolution
Cons
● Not a typical AI video generator
● Not for beginners
11Wisecut
This free AI video generator platform allows you to turn your text into video. Type in your text and choose a voice actor, and then Wisecut will take care of the rest. It offers excellent editing tools for users to tweak your video until it’s just right.
Pricing
● Basic: Free.
● Professional: $57 per month.
Features
● This platform is easy to use
● It has a simple drag and drops user-interface
● Allows auto subtitles and auto cut silences
● Allows integration with YouTube
● Subtitles auto-translation
● Excellent video quality
Cons
● Has limited effects
12Flexclip
FlexClip makes video creation and editing easy with-it millions of royalty-free stock media and thousands of templates for you to choose from.
Pricing
● Free
● Basic: $5.99 per month.
● Plus: $9.99 per month
● Business: $19.99 per month.
Features
● Thousands of available templates
● Simple tool for creating and editing videos
● Use for creating engaging videos
● Provides millions of royalty stock media
● Versatile and Flexible
Cons
● Not for beginners
● Ending Thoughts →
● In this post, we have listed the top text to video generators that you can choose from to help you perform tasks within minutes.
● The report also explains all you need to know about video AI generators and recommends Filmora as a perfect tool for editing your videos.
[Top-Search] The Best Game Screen Recording Tools for PC
You’re likely familiar with recording gameplays if you’re involved in the gaming community. The desire to share our gameplay adventures has never been more widely spread. YouTube and Twitch serve as popular hubs for gamers to showcase their skills and build communities.
However, with various game recorders, finding the perfect fit for your next gameplay recording can be challenging. We’ve tested many options to ease your search and made a list to enhance your gaming experience.
In this article
- Part 1. Discussing the Advancements in Game Recording in the Digital Realm
- Part 2. Top Best Game Recorders To Consider for Efficient Recording
- Part 3. Make Screen Recording Simple and Easy: Wondershare Filmora
- Conclusion
Part 1: Discussing the Advancements in Game Recording in the Digital Realm
Game recording has evolved from basic methods to sophisticated tools. In the past, gamers used VHS recorders connected to consoles. Moreover, screen capture software like Fraps became popular in the early 2000s. Afterward, built-in recording features within PlayStation 4 and Xbox One simplified the process.
Platforms like Twitch emerged for live streaming in the late 2010s. Cloud gaming services have revolutionized recording by allowing gameplay on remote servers. Finally, modern game recorders emerged to provide instant replay and webcam integration.
Chronological Understanding of the Advancements in Game Recordings
- Users can now capture gameplay in stunning 4K resolution for top-notch visual quality.
- Frame rate settings ensure smooth playback of recorded videos.
- Bitrate settings let you control recording quality and file size.
- Players can use GPU power for faster and more efficient video encoding.
- Multi-channel audio recording lets you record gameplay audio, microphone input, and other sources. Also, it separates tracks for easy editing and control.
- An infusion of overlays in the webcam adds a personalized touch to gameplay videos, building competition in quality offering.
- Network switching within software is possible without any cross-platform shift, from recording to live streaming.
Example
PewDiePie is one of the leading stars in YouTube stardom. His game screen recording is proof of how online entertainment has changed. He earned his initial fame by playing horror games with funny commentary. People loved his infectious personality and unique style. Furthermore, he expanded his content to include games, vlogs, and entertaining stuff. Now, he has a fan base of 111M, positioning him as the most influential figure in online gaming.
Part 2: Top Best Game Recorders To Consider for Efficient Recording
Most of us play games for fun while wanting to share the gameplay with friends. The game screen recorder helps you share the screen with others to enjoy with them. Let’s go through the options of tools that can record gameplay screens efficiently:
Best Game Recorders for PC
1.Movavi
2.OBS
3.Bandicam
4.XSplit
5.Aqua Demo
6.GoPlay
7.Action! Game Recorder
8.Wondershare DemoCreator
1.Movavi
Movavi lets you do full-screen or custom area recording with various functionalities. Using this tool, you can annotate the screen while recording for real-time experience. For improving viewer’s attention, you can also illuminate mouse cursor and keystrokes within the recording screen. It also features a noise reduction feature to get rid of intrusive voices. Movavi can take scrolling screenshots to capture content that doesn’t fit on one screen.

Pros
- This game screen recording tool has a user-friendly interface and is easy to use without the need for training.
- The tool allows you to capture audio and video simultaneously and separately.
Con
- It offers limited features when it comes to video manipulation while recording games.
2.OBS Studio
Open Broadcaster Software is the best screen recorder for games when it comes to finding open-source recorders. This recorder enables you to record multiple scenes at a time. It offers seamless transitions to switch between the scenes. Users can use the audio mixer feature of the tool for noise suppression and gain. The tool also provides the configuration option to add new sources and replace existing ones.

Pros
- You can capture multiple windows simultaneously with the help of this tool, giving diversified opportunities.
- This screen recorder allows you to preview sources and scenes before live streaming.
Con
- OBS is challenging for beginners due to its steep learning curve.
3.Bandicam
Gamers can record high-resolution gameplay in 4K UHD and 480FPS with Bandicam. Upon utilizing this tool, they record gameplay and voice to share with friends on YouTube. This Lolio game recorder uses a webcam and mic to record gameplay with the player’s live face and voice. Plus, you can also save the audio track of the gameplay record in separate WAV files.

Pros
- This game recorder compresses high-quality video to save space.
- Bandicam supports the latest hardware acceleration from AMD, Intel, and NVIDIA.
Con
- It only works on Windows and does not support Mac, Android, or Linux.
4.XSplit
Content creators and game players can use this all-in-one streaming and recording tool. This video game recorder allows you to switch from a solo camera to a podcast easily. You can start streaming to any broadcast platform with the native plugin of the tool. XSplit Broadcaster enables you to add multiple animation and broadcast effects to your scenes.

Pros
- Users can record multiple scenes at the same time with this screen recorder. This helps you in covering more content in similar timeframes.
- You can do custom transitions of various scenes with the help of this tool.
Con
- Installing XSplit Broadcaster in your system slows down the running of the PC dramatically.
5.Aqua Demo
Aqua Demo is the best way to record gameplay on a PC to produce high-quality video. You can easily record gameplay as the interface of the tool is intuitive and easy to use. It supports various video formats, including AVI, MP4, and MOV, to save the recordings. Users can do editing while recording to make it engaging and interactive.

Image Name: best-game-recorder-for-pc-2024-5.jpg
Image Alt:
Pros
- This tool allows you to record video using the sound of a PC, microphone, or both.
- You can easily schedule when video recording should take place with this tool.
Con
- AceThinker Aqua Demo offers a limited trial version to its users for screen recording.
6.GoPlay
GoPlay is the best software to record gameplay as it allows you to record yourself while gaming. With the help of this software, users can do basic editing of the video before live streaming. Plus, it allows you to record fast-paced games up to 60fps for smooth results. The software offers the feature to remove unwanted noise in the video.

Pros
- This screen recorder offers you the option to dub your own voice within the video recording.
- It helps to adjust the audio of each track on the timeline.
Con
- Unlike other screen recorders, it has a small number of transitions and effects.
7.Action! – Game Recorder
Action! stands out as one of the best screen recorder for games, as it uses low CPU space. Gamers can record smooth HD video of gameplay up to 120fps. You can make 20 times smaller video recordings with the help of this tool. Also, users are able to apply different editing effects to the recorder clips. This tool even enables you to control video recording with a smartphone.

Image Name: best-game-recorder-for-pc-2024-7.jpg
Image Alt:
Pros
- Action supports the webcam and microphone commentary during recording.
- It displays current and average FPS while playing games and saves benchmark results.
Con
- People face usability issues like problems with frame rate drops while recording.
8.Wondershare DemoCreator
Users can use DemoCreator on Windows and Mac to record the screen of gameplay. No doubt, it is a cool game recording software available to users. It also offers lag-free recording for uninterrupted gameplay records. You can plan and automate recording sessions with the help of this software. This game recorder provides a dynamic cursor effect for a visual guide of your audience.

Pros
- Wondershare DemoCreator offers dual monitor recording for an expanded view.
- User can create their own virtual avatars for presenting the content through video.
Con
- The tool has limited functionality in the free version, so you have to buy its premium subscription.
10+ Screen Recorder without Watermark
https://www.youtube.com/watch?v=CVmVxhxfnlU
Part 3: Make Screen Recording Simple and Easy: Wondershare Filmora
Gaming has made a significant impact on people as the associated industry keep producing new games with the latest technology. Moreover, the popularity of streaming games online has also increased. In this case, gamers need an effective game recorder software. Wondershare Filmora is the most efficient solution to effective screen recording. This video game recorder tool can capture any area of your selection.
Filmora also has various built-in editing tools and recording effects. You can also customize the ratio and size of your recording screen by changing the height and width. This tool records the screen and captures the audio from your microphone at the same time. Gamers can schedule their recording with the Record Timer feature. Moreover, you can customize your keystrokes and make hotkey combinations.
Other Features of Wondershare Filmora
- Split Screen: The Split Screen feature has up to 250+ pre-made templates that help you create animated video collages. You can have up to 6 screens for gameplaying or live chat channels on your screen. There are thousands of effects and filters you add to each of the screens.

- AI Thumbnail Creator: Filmora provides a Thumbnail feature that can generate exclusive thumbnails for your videos. It supports advanced text and image editing tools with 58+ templates. You can get stunning thumbnails for your gameplay in seconds with the help of AI.

- AI Vocal Remover: If you are having trouble with unnecessary background noise, remove it with the AI vocal remover feature. Streamers can separate the vocals from their microphone and gameplay. Also, you can dub videos freely without losing audio quality.

Steps-by-Step Guide to Screen Record With Wondershare Filmora
Wondershare Filmora provides the best way to record gameplay on your PC, as it gives you the necessary features. So, let’s discuss the steps on how to record a professional gameplay recording. The following are the steps to record gameplay with Filmora:
Step 1 Launch and Create a New Project on Filmora
After downloading Filmora on your PC and launching the software, go to the “Create Project” tab on the left-side panel. Here, you can click the “New Project” option to open the main editing interface.

Step 2 Record Gameplay on Your PC
On the main interface, click the “Record” option above the media panel. From the drop-down panel, select the “Record PC Screen” option. After that, a small panel screen with the name “Wondershare Screen Recorder” will appear on your PC.

Step 3 Adjust Recording Settings for Gaming
Now, adjust the screen recording settings according to your preference. You can change the screen’s dimensions from full screen to target window. Also, choose to turn on the microphone, audio, and camera by clicking on their icons. Now, hit the dropdown menu of “Settings,” and change the frame rate and other video options. Once you are satisfied with the settings, hit the “Start Recording” button to start.

Conclusion
Gamers need to find the best tool to share their gaming moments in 2024. Filmora is a standout choice among the game recording software for PCs. The software is reliable and enriched with features that are easy to use. You can record, edit, and share your exciting gameplay adventures with the audience. If you’re on the lookout for the best game recorder for your PC, Filmora is a solid recommendation.
- Part 2. Top Best Game Recorders To Consider for Efficient Recording
- Part 3. Make Screen Recording Simple and Easy: Wondershare Filmora
- Conclusion
Part 1: Discussing the Advancements in Game Recording in the Digital Realm
Game recording has evolved from basic methods to sophisticated tools. In the past, gamers used VHS recorders connected to consoles. Moreover, screen capture software like Fraps became popular in the early 2000s. Afterward, built-in recording features within PlayStation 4 and Xbox One simplified the process.
Platforms like Twitch emerged for live streaming in the late 2010s. Cloud gaming services have revolutionized recording by allowing gameplay on remote servers. Finally, modern game recorders emerged to provide instant replay and webcam integration.
Chronological Understanding of the Advancements in Game Recordings
- Users can now capture gameplay in stunning 4K resolution for top-notch visual quality.
- Frame rate settings ensure smooth playback of recorded videos.
- Bitrate settings let you control recording quality and file size.
- Players can use GPU power for faster and more efficient video encoding.
- Multi-channel audio recording lets you record gameplay audio, microphone input, and other sources. Also, it separates tracks for easy editing and control.
- An infusion of overlays in the webcam adds a personalized touch to gameplay videos, building competition in quality offering.
- Network switching within software is possible without any cross-platform shift, from recording to live streaming.
Example
PewDiePie is one of the leading stars in YouTube stardom. His game screen recording is proof of how online entertainment has changed. He earned his initial fame by playing horror games with funny commentary. People loved his infectious personality and unique style. Furthermore, he expanded his content to include games, vlogs, and entertaining stuff. Now, he has a fan base of 111M, positioning him as the most influential figure in online gaming.
Part 2: Top Best Game Recorders To Consider for Efficient Recording
Most of us play games for fun while wanting to share the gameplay with friends. The game screen recorder helps you share the screen with others to enjoy with them. Let’s go through the options of tools that can record gameplay screens efficiently:
Best Game Recorders for PC
1.Movavi
2.OBS
3.Bandicam
4.XSplit
5.Aqua Demo
6.GoPlay
7.Action! Game Recorder
8.Wondershare DemoCreator
1.Movavi
Movavi lets you do full-screen or custom area recording with various functionalities. Using this tool, you can annotate the screen while recording for real-time experience. For improving viewer’s attention, you can also illuminate mouse cursor and keystrokes within the recording screen. It also features a noise reduction feature to get rid of intrusive voices. Movavi can take scrolling screenshots to capture content that doesn’t fit on one screen.
Pros
- This game screen recording tool has a user-friendly interface and is easy to use without the need for training.
- The tool allows you to capture audio and video simultaneously and separately.
Con
- It offers limited features when it comes to video manipulation while recording games.
2.OBS Studio
Open Broadcaster Software is the best screen recorder for games when it comes to finding open-source recorders. This recorder enables you to record multiple scenes at a time. It offers seamless transitions to switch between the scenes. Users can use the audio mixer feature of the tool for noise suppression and gain. The tool also provides the configuration option to add new sources and replace existing ones.
Pros
- You can capture multiple windows simultaneously with the help of this tool, giving diversified opportunities.
- This screen recorder allows you to preview sources and scenes before live streaming.
Con
- OBS is challenging for beginners due to its steep learning curve.
3.Bandicam
Gamers can record high-resolution gameplay in 4K UHD and 480FPS with Bandicam. Upon utilizing this tool, they record gameplay and voice to share with friends on YouTube. This Lolio game recorder uses a webcam and mic to record gameplay with the player’s live face and voice. Plus, you can also save the audio track of the gameplay record in separate WAV files.
Pros
- This game recorder compresses high-quality video to save space.
- Bandicam supports the latest hardware acceleration from AMD, Intel, and NVIDIA.
Con
- It only works on Windows and does not support Mac, Android, or Linux.
4.XSplit
Content creators and game players can use this all-in-one streaming and recording tool. This video game recorder allows you to switch from a solo camera to a podcast easily. You can start streaming to any broadcast platform with the native plugin of the tool. XSplit Broadcaster enables you to add multiple animation and broadcast effects to your scenes.
Pros
- Users can record multiple scenes at the same time with this screen recorder. This helps you in covering more content in similar timeframes.
- You can do custom transitions of various scenes with the help of this tool.
Con
- Installing XSplit Broadcaster in your system slows down the running of the PC dramatically.
5.Aqua Demo
Aqua Demo is the best way to record gameplay on a PC to produce high-quality video. You can easily record gameplay as the interface of the tool is intuitive and easy to use. It supports various video formats, including AVI, MP4, and MOV, to save the recordings. Users can do editing while recording to make it engaging and interactive.
Image Name: best-game-recorder-for-pc-2024-5.jpg
Image Alt:
Pros
- This tool allows you to record video using the sound of a PC, microphone, or both.
- You can easily schedule when video recording should take place with this tool.
Con
- AceThinker Aqua Demo offers a limited trial version to its users for screen recording.
6.GoPlay
GoPlay is the best software to record gameplay as it allows you to record yourself while gaming. With the help of this software, users can do basic editing of the video before live streaming. Plus, it allows you to record fast-paced games up to 60fps for smooth results. The software offers the feature to remove unwanted noise in the video.
Pros
- This screen recorder offers you the option to dub your own voice within the video recording.
- It helps to adjust the audio of each track on the timeline.
Con
- Unlike other screen recorders, it has a small number of transitions and effects.
7.Action! – Game Recorder
Action! stands out as one of the best screen recorder for games, as it uses low CPU space. Gamers can record smooth HD video of gameplay up to 120fps. You can make 20 times smaller video recordings with the help of this tool. Also, users are able to apply different editing effects to the recorder clips. This tool even enables you to control video recording with a smartphone.
Image Name: best-game-recorder-for-pc-2024-7.jpg
Image Alt:
Pros
- Action supports the webcam and microphone commentary during recording.
- It displays current and average FPS while playing games and saves benchmark results.
Con
- People face usability issues like problems with frame rate drops while recording.
8.Wondershare DemoCreator
Users can use DemoCreator on Windows and Mac to record the screen of gameplay. No doubt, it is a cool game recording software available to users. It also offers lag-free recording for uninterrupted gameplay records. You can plan and automate recording sessions with the help of this software. This game recorder provides a dynamic cursor effect for a visual guide of your audience.
Pros
- Wondershare DemoCreator offers dual monitor recording for an expanded view.
- User can create their own virtual avatars for presenting the content through video.
Con
- The tool has limited functionality in the free version, so you have to buy its premium subscription.
10+ Screen Recorder without Watermark
https://www.youtube.com/watch?v=CVmVxhxfnlU
Part 3: Make Screen Recording Simple and Easy: Wondershare Filmora
Gaming has made a significant impact on people as the associated industry keep producing new games with the latest technology. Moreover, the popularity of streaming games online has also increased. In this case, gamers need an effective game recorder software. Wondershare Filmora is the most efficient solution to effective screen recording. This video game recorder tool can capture any area of your selection.
Filmora also has various built-in editing tools and recording effects. You can also customize the ratio and size of your recording screen by changing the height and width. This tool records the screen and captures the audio from your microphone at the same time. Gamers can schedule their recording with the Record Timer feature. Moreover, you can customize your keystrokes and make hotkey combinations.
Other Features of Wondershare Filmora
- Split Screen: The Split Screen feature has up to 250+ pre-made templates that help you create animated video collages. You can have up to 6 screens for gameplaying or live chat channels on your screen. There are thousands of effects and filters you add to each of the screens.
- AI Thumbnail Creator: Filmora provides a Thumbnail feature that can generate exclusive thumbnails for your videos. It supports advanced text and image editing tools with 58+ templates. You can get stunning thumbnails for your gameplay in seconds with the help of AI.
- AI Vocal Remover: If you are having trouble with unnecessary background noise, remove it with the AI vocal remover feature. Streamers can separate the vocals from their microphone and gameplay. Also, you can dub videos freely without losing audio quality.
Steps-by-Step Guide to Screen Record With Wondershare Filmora
Wondershare Filmora provides the best way to record gameplay on your PC, as it gives you the necessary features. So, let’s discuss the steps on how to record a professional gameplay recording. The following are the steps to record gameplay with Filmora:
Step 1 Launch and Create a New Project on Filmora
After downloading Filmora on your PC and launching the software, go to the “Create Project” tab on the left-side panel. Here, you can click the “New Project” option to open the main editing interface.
Step 2 Record Gameplay on Your PC
On the main interface, click the “Record” option above the media panel. From the drop-down panel, select the “Record PC Screen” option. After that, a small panel screen with the name “Wondershare Screen Recorder” will appear on your PC.
Step 3 Adjust Recording Settings for Gaming
Now, adjust the screen recording settings according to your preference. You can change the screen’s dimensions from full screen to target window. Also, choose to turn on the microphone, audio, and camera by clicking on their icons. Now, hit the dropdown menu of “Settings,” and change the frame rate and other video options. Once you are satisfied with the settings, hit the “Start Recording” button to start.
Conclusion
Gamers need to find the best tool to share their gaming moments in 2024. Filmora is a standout choice among the game recording software for PCs. The software is reliable and enriched with features that are easy to use. You can record, edit, and share your exciting gameplay adventures with the audience. If you’re on the lookout for the best game recorder for your PC, Filmora is a solid recommendation.
Tutorial | How to Make a Smooth Speed Ramping in Premiere Pro?
Versatile Video Editor - Wondershare Filmora
An easy and powerful editor
Numerous effects to choose from
Detailed tutorials are provided by the official channel
Speed ramping is a popular Premiere Pro effect for good reason: it looks fantastic! When utilized simultaneously to spice up a video clip, slow motion and quick motion may both be great aesthetic choices. This practice may save you time by enabling you to show more about what you want to see in your edit without using harsh jump cuts.

This effect may be used for a number of reasons, including clip transitions, speeding up a clip to make it shorter, and slowing down a clip to make it longer. Speed ramping may be used with a number of various effects.
According to the business, Adobe Premiere Pro is one of the most widely used video editing products on the market today. The ability to alter the speed of individual clips is one of Premiere Pro’s most important capabilities. While speed ramping is often used in sports highlights, changing the speed of video may be useful for a number of other types of material.
You’ll learn how to construct a spectacular speed ramp in Adobe Premiere Pro, beginning with capturing the proper kind of video and moving to advanced tips and methods. Following that, we’ll go through some ideas and inspiration for when to use a speed ramp in your circumstance.
What is Speed Ramping?
A speed ramp is used to gradually increase the speed of a video clip as it accelerates or decelerates. It is guaranteed that a smooth transition between two separate speeds will take place. The method is crucial in changing the tempo of the film and, as a consequence, creating a dramatic impression. The film’s required velocity is achieved by the employment of super-fast visual effects.
A speed ramp, as opposed to a rapid shift in speed, provides for a more smooth transition between two drastically differing speeds. This method is used to focus attention on certain parts of your video, which has a huge impact on your editing. It provides just the right amount of zing to keep your audience interested and excited about your presentation.
Examples of Speed Ramping
It works especially well when utilized to focus the viewer’s attention on a certain moment or action in your videos, such as a tough jump or an impending bullet. Another name for this approach speeds ramping (sometimes known as time remapping). It may also be used to create a visually pleasing transition between two clips or pictures inside a single movie.
You may also use Speed Ramping to alter the runtime of your video to fit the time limits of other social media sites, such as Instagram and Vine. If you just have 30 seconds to deliver your video, the following are the two most common places where people apply speed ramping techniques:
Assume you are shooting a person walking and want the clip to play in slow motion so that viewers can clearly see the person’s face. In this scenario, speed ramping is precisely what you need since it enables you to do precisely that.
Do you remember the famous movie “The Matrix” scene, when Neo dodges the bullets? It’s not some typical scene; it’s a pretty good example of speed ramping.
How to Create Speed Ramping/Time Remapping in Premiere Pro?
Speed Ramping premiere pro is an excellent tool for speeding up video clips. ‘ In order to speed up or slow down the speed of a video clip, this effect may be employed. In this article, you’ll learn how to make the most of this fantastic tool in Adobe Premiere Pro.

While using Premiere Pro, the ability to change a clip’s speed without altering its pitch is a very useful feature. An example of how this feature comes in helpful is when you have a clip that shows someone or something moving from left to right or vice versa.
Advanced Premiere Pro Time Remapping
The fact that this effect is so simple to use is its main benefit. By moving handles around on the clip, you may quickly choose different regions of the clip to be influenced by the adjustment when you apply it. This makes achieving the required result extremely quick and easy.

If you want to go deep into the game, Speed Ramp offers some more advanced options that give you even more control over your speed modifications. The properties section allows you to designate which portions of the timeline are affected by the ramp, as well as change factors like the curve type and bias.
Steps To Use Speed Ramping In Premiere Pro
Follow the below-mentioned steps to learn how to use speed ramping in premiere pro:
- Download and install Adobe Premiere Pro. Once installed, launch the application.
- Create a new project in Premiere by clicking the New Project button. After that, import the film that you want to speed ramp. It is the simplest and most straightforward method of importing film into Premiere to just click and drag the clip into the project window.
- Before commencing any work with speed, click and drag the video track in the timeline to make it taller by increasing the height of the track. This will guarantee that you can see the speed ramp as you go to the next stages.
- To create a sequence if you don’t already have one, drag a clip into the timeline and drop it where you want it to appear. Using the clip’s parameters, Premiere will automatically generate a sequence with the necessary settings.
- Decide when you want to apply the speed ramp and mark the spot on the screen where you will do so. The key to a pleasant speed ramp is movement, so choose a time when the environment is very active. You can specify in and out points, cut the clip with “Command+K,” or divide the clip into parts using the razor blade tool (which is accessible through the “Command+K” shortcut).
- Keyframes will be created at this point. It’s first and foremost important that the keyframes be clearly visible. Access the proper view by selecting “Show Clip Keyframes” from the context menu when you right-click on your clip.
- Another drop-down option will appear, from which you’ll choose “Time Remapping” and then press the “Enter” key.
- Select “Speed” from the drop-down menu.
- To create a keyframe, choose the pen from the toolbar (or just use the “P” key on your keyboard) and click on the white line running across the video track. If you wish to make a speed ramp, you’ll need at least two keyframes: one to indicate where the speed ramp should begin and another to indicate where it should terminate.
- If you wish to create more sophisticated speed ramps, you may do so by including more keyframes in your animation.
- Switch back to the selection tool when you’ve finished placing your keyframes. “V” is the shortcut key for this.
- Now comes the critical moment: it’s time to change the speed. This is a task that Premiere Pro makes rather simple. The only thing you have to do now is click on the white line between the keyframes you have created and drag it either up or down, depending on your preference for speed or slowness.
- It’s not finished yet; we still need to smooth it out a little more. With the selection tool selected, click and drag one of the keyframe markers to the other side of the screen. The number of frames across which the speed shift will occur will be stretched out as a result of this. The longer and more gradual the speed ramp will be, the greater the distance between the two sides of the keyframe indication is separated.
- Complete the process with the other keyframe, and your speed ramp will be complete!
Techniques to Make Speed Ramping Smooth
In this section, we will be viewing some advanced time remapping features of Adobe Premiere Pro, which are as follows.
Keyframe Interpolation
When creating a speed ramp, keyframes are used to indicate the beginning and finishing points of the speed shift. However, there are a number of methods in which Premiere may transport the clip from point A to point B.
In the video industry, filling in the data between the two locations is known as keyframe interpolation.
- Simply dragging to divide a keyframe, like in the previous example, results in an equitable speed increase between the keyframes in the animation. Linear interpolation is the term used to describe this process.
- Instead of using Bezier Interpolation, you may utilize it to produce a smoother, more natural speed ramp. With Bezier Interpolation, the pace at which the speed increases will likewise accelerate, giving the effect of a more pronounced ramp.
- To build an S-curve shape, choose a keyframe and drag the Bezier handles to the desired position. Make adjustments until you are satisfied with the outcome.
Speed Ramp Transition
Speed ramp transitions are easy to make and may be utilized to add visual interest to a wide range of video genres. This effect is achieved by boosting the clip speed at the end of a clip before transitioning into a cut.
- In the second clip, the tempo is abruptly boosted and subsequently decreased to provide a smooth transition between situations. It may symbolize the passage of time, a character’s perplexity, or simply add flair to a commercial film.
- Using Premiere Pro, create a ramp-up at the end of your first clip and a ramp-down at the start of your second clip. The speed rubber band will be curved like a bell curve across the two clips when finished.
Adding speed ramps to films in Premiere Pro may improve the usefulness and looks of a variety of movies, from narrative features to social media posts. In Premiere, you may easily create and adjust speed duration directly in the timeline to meet any needs.
Speed Ramping In Wondershare Filmora
We understood how to do speed ramping in Premiere Pro. You can also get the same results using a much easier software that is “Wondershare Filmora”.
What is Wondershare Filmora?
Filmora is a video editor that is best suited for social video editors, vloggers, home movies, and other video projects. In addition, it may be used on both Macs and PCs. To begin using Filmora, you just need to pay a one-time registration fee of $0! You’ll notice a watermark when you export from the free version. For $59.99, Filmora’s latest version is a one-time purchase that doesn’t need a subscription!
Amazing Features
Filmora is an award-winning video editing program, that allows users to create visually stunning videos without the need for complex editing techniques.
Video playback in Filmora’s latest version may be accelerated by the graphics card (GPU). It’s accelerating at an alarming rate right now. It’s also possible to lower the resolution of a 4K or higher video for quicker playing. Cuts and splits are a snap using Filmora. Make a cut by dragging your play head to the location where you want to split the footage. Then, to remove the additional clip from the clip, use the delete key.
Even those with the most basic PC hardware may use this video editing software to create high-quality movies. Moreover, the most anticipated features that Filmora’s latest version offers are as follows:
- Motion Tracking
- Keyframing Animations
- Audio Ducking
- Split Screen
- Video Transitions
- Speed Control
- Color Grading
- Filmstock Effects
- Multiple Formats Exporting
Users may utilize the color tuning option to change the white balance and dynamic range of their video clip, among other things. You may alter the audio levels of each track using the audio mixer tool. The advanced Text Editor function allows you to adjust the color, size, font, and even the motion of text. The screen recording tool enables you to capture your computer’s screen as well as your webcam in excellent quality. The video stabilization feature lowers or eliminates the effect of camera shake on video.
Speed Ramping In Filmora
The method is crucial in changing the tempo of the film and, as a consequence, creating a dramatic impression. The film’s required speed is achieved by the employment of super-fast visual effects.
When using a camera with a much higher frame rate, the speed ramping approach may provide excellent effects. It aids in the production of the most dramatic impression.
Speed ramping effects are available in six presets, which include Montage, Hero Moment, Bullet Time, Jumper, and Flash In, all of which will add a theatrical element to your movie that will leave your viewers in awe.

Creative pros can swiftly and effectively speed up a movie with Wondershare Filmora. However, in order to get the intended results, it is essential to completely understand and adhere to the approach.
Wondershare Filmora 11 has a variety of tools and features to help you create a visually stunning film in a short period of time. Its Instant Mode allows you to produce a video creation from start to finish in less than 5 minutes.
Steps
- Download and Install Filmora. Launch the application on your system.

- Navigate to the chosen video and open it in the program to speed up and lengthen it. You may also add the movie to the interface by dragging and dropping it there.

- When the video appears in the timeline, right-click it to begin playback. As a consequence, a context menu is displayed.

- Select Speed from the pop-up editing window, and then select Speed Ramping from the drop-down menu.

- Alternatively, right-click on the video or audio clip, choose Speed from the drop-down menu, and select Speed Ramping.

- In the Speed Ramping panel, you may adjust the speed or choose from a number of presets, including Montage, Hero Moment, Bullet Time, Jumper, Flash in, and Flash out, to use as templates. You have the option of using the Preset speed ramps. Alternatively, you may personalize your own innovative ones.

- Move the play head to the point where you wish to increase or decrease the speed of the video or audio. Then, to add speed keyframes, choose the Add icon from the toolbar. The video or audio clips will be marked as Speed Ramping when the speed ramp has been added by Filmora.

- If you want to delete a keyframe, you can do so by selecting that particular keyframe and selecting the delete button like in the image:

- As we go on to the video keyframe speed adjustment, just slide the keyframe dot upward or downward to alter the point speed of the movie. Aside from that, you can keep the audio pitch constant regardless of how fast or slow the video is moving.

- The settings will be saved if you are pleased with them after you make the necessary modifications. In any other case, you may use the Reset button to return to the original configuration.
- When you’ve finished your work, go to the “File” panel and choose “Save Project” from the list of options that display. Change the name of the project and then click “Save.”
- Additionally, the movie may be exported using Filmora’s “Export” feature; just choose “Export” and then specify a new name for the file. The video may be exported to a device, a system, or even YouTube. After that, choose “Export.”

Speed Ramping Tips
- High Frame Rate: The frame rate is an important consideration when it comes to speed ramping. If you wish to slow down the video after it’s been recorded, shoot it at a frame rate higher than 60 frames per second. When a video is slowed down, there should be enough frames to guarantee that the video passes the 24 frames per second threshold frame rate.
- Choose The Appropriate Frame Resolution: Another possibility is to modify your video’s frame resolution. The tip has the ability to edit the clip’s properties from the Slowing down the video is achieved by changing the frame rate in the clip’s parameters from 120 to 24 frames per second. As a consequence, the frames will be expanded to the proper frame rate. As a consequence, the video is slowed down but not jerked.
- Purposeful Time Remapping: Instead of keeping the same pace throughout the film, a deliberate speed ramp should be implemented. A video has emotional, mysterious, exciting, and slow-motion Why is this the case? The usage of the same video speed throughout the film may have a negative influence on the watching experience. As a result, it is critical that videos be separated into genres and that the tempo of the videos is modified accordingly.
Conclusion
The use of the ideal cinematic effect at the right time boosts the audience and engagement with the material. This respective article explored speed ramping in-depth and oughts to teach creative pros how to slow down a video and speed up a movie. It covers speed raming in premiere pro and then moves toward Wondershare Filmora which seems a bit easier. Wondershare Filmora is a good choice for completing the task as quickly as possible. You will have access to all of the effects and tools mentioned, as well as the ability to keep the audio pitch consistent throughout the effect, which is critical while altering the video speed.
Speed ramping is a popular Premiere Pro effect for good reason: it looks fantastic! When utilized simultaneously to spice up a video clip, slow motion and quick motion may both be great aesthetic choices. This practice may save you time by enabling you to show more about what you want to see in your edit without using harsh jump cuts.
This effect may be used for a number of reasons, including clip transitions, speeding up a clip to make it shorter, and slowing down a clip to make it longer. Speed ramping may be used with a number of various effects.
According to the business, Adobe Premiere Pro is one of the most widely used video editing products on the market today. The ability to alter the speed of individual clips is one of Premiere Pro’s most important capabilities. While speed ramping is often used in sports highlights, changing the speed of video may be useful for a number of other types of material.
You’ll learn how to construct a spectacular speed ramp in Adobe Premiere Pro, beginning with capturing the proper kind of video and moving to advanced tips and methods. Following that, we’ll go through some ideas and inspiration for when to use a speed ramp in your circumstance.
What is Speed Ramping?
A speed ramp is used to gradually increase the speed of a video clip as it accelerates or decelerates. It is guaranteed that a smooth transition between two separate speeds will take place. The method is crucial in changing the tempo of the film and, as a consequence, creating a dramatic impression. The film’s required velocity is achieved by the employment of super-fast visual effects.
A speed ramp, as opposed to a rapid shift in speed, provides for a more smooth transition between two drastically differing speeds. This method is used to focus attention on certain parts of your video, which has a huge impact on your editing. It provides just the right amount of zing to keep your audience interested and excited about your presentation.
Examples of Speed Ramping
It works especially well when utilized to focus the viewer’s attention on a certain moment or action in your videos, such as a tough jump or an impending bullet. Another name for this approach speeds ramping (sometimes known as time remapping). It may also be used to create a visually pleasing transition between two clips or pictures inside a single movie.
You may also use Speed Ramping to alter the runtime of your video to fit the time limits of other social media sites, such as Instagram and Vine. If you just have 30 seconds to deliver your video, the following are the two most common places where people apply speed ramping techniques:
Assume you are shooting a person walking and want the clip to play in slow motion so that viewers can clearly see the person’s face. In this scenario, speed ramping is precisely what you need since it enables you to do precisely that.
Do you remember the famous movie “The Matrix” scene, when Neo dodges the bullets? It’s not some typical scene; it’s a pretty good example of speed ramping.
How to Create Speed Ramping/Time Remapping in Premiere Pro?
Speed Ramping premiere pro is an excellent tool for speeding up video clips. ‘ In order to speed up or slow down the speed of a video clip, this effect may be employed. In this article, you’ll learn how to make the most of this fantastic tool in Adobe Premiere Pro.
While using Premiere Pro, the ability to change a clip’s speed without altering its pitch is a very useful feature. An example of how this feature comes in helpful is when you have a clip that shows someone or something moving from left to right or vice versa.
Advanced Premiere Pro Time Remapping
The fact that this effect is so simple to use is its main benefit. By moving handles around on the clip, you may quickly choose different regions of the clip to be influenced by the adjustment when you apply it. This makes achieving the required result extremely quick and easy.
If you want to go deep into the game, Speed Ramp offers some more advanced options that give you even more control over your speed modifications. The properties section allows you to designate which portions of the timeline are affected by the ramp, as well as change factors like the curve type and bias.
Steps To Use Speed Ramping In Premiere Pro
Follow the below-mentioned steps to learn how to use speed ramping in premiere pro:
- Download and install Adobe Premiere Pro. Once installed, launch the application.
- Create a new project in Premiere by clicking the New Project button. After that, import the film that you want to speed ramp. It is the simplest and most straightforward method of importing film into Premiere to just click and drag the clip into the project window.
- Before commencing any work with speed, click and drag the video track in the timeline to make it taller by increasing the height of the track. This will guarantee that you can see the speed ramp as you go to the next stages.
- To create a sequence if you don’t already have one, drag a clip into the timeline and drop it where you want it to appear. Using the clip’s parameters, Premiere will automatically generate a sequence with the necessary settings.
- Decide when you want to apply the speed ramp and mark the spot on the screen where you will do so. The key to a pleasant speed ramp is movement, so choose a time when the environment is very active. You can specify in and out points, cut the clip with “Command+K,” or divide the clip into parts using the razor blade tool (which is accessible through the “Command+K” shortcut).
- Keyframes will be created at this point. It’s first and foremost important that the keyframes be clearly visible. Access the proper view by selecting “Show Clip Keyframes” from the context menu when you right-click on your clip.
- Another drop-down option will appear, from which you’ll choose “Time Remapping” and then press the “Enter” key.
- Select “Speed” from the drop-down menu.
- To create a keyframe, choose the pen from the toolbar (or just use the “P” key on your keyboard) and click on the white line running across the video track. If you wish to make a speed ramp, you’ll need at least two keyframes: one to indicate where the speed ramp should begin and another to indicate where it should terminate.
- If you wish to create more sophisticated speed ramps, you may do so by including more keyframes in your animation.
- Switch back to the selection tool when you’ve finished placing your keyframes. “V” is the shortcut key for this.
- Now comes the critical moment: it’s time to change the speed. This is a task that Premiere Pro makes rather simple. The only thing you have to do now is click on the white line between the keyframes you have created and drag it either up or down, depending on your preference for speed or slowness.
- It’s not finished yet; we still need to smooth it out a little more. With the selection tool selected, click and drag one of the keyframe markers to the other side of the screen. The number of frames across which the speed shift will occur will be stretched out as a result of this. The longer and more gradual the speed ramp will be, the greater the distance between the two sides of the keyframe indication is separated.
- Complete the process with the other keyframe, and your speed ramp will be complete!
Techniques to Make Speed Ramping Smooth
In this section, we will be viewing some advanced time remapping features of Adobe Premiere Pro, which are as follows.
Keyframe Interpolation
When creating a speed ramp, keyframes are used to indicate the beginning and finishing points of the speed shift. However, there are a number of methods in which Premiere may transport the clip from point A to point B.
In the video industry, filling in the data between the two locations is known as keyframe interpolation.
- Simply dragging to divide a keyframe, like in the previous example, results in an equitable speed increase between the keyframes in the animation. Linear interpolation is the term used to describe this process.
- Instead of using Bezier Interpolation, you may utilize it to produce a smoother, more natural speed ramp. With Bezier Interpolation, the pace at which the speed increases will likewise accelerate, giving the effect of a more pronounced ramp.
- To build an S-curve shape, choose a keyframe and drag the Bezier handles to the desired position. Make adjustments until you are satisfied with the outcome.
Speed Ramp Transition
Speed ramp transitions are easy to make and may be utilized to add visual interest to a wide range of video genres. This effect is achieved by boosting the clip speed at the end of a clip before transitioning into a cut.
- In the second clip, the tempo is abruptly boosted and subsequently decreased to provide a smooth transition between situations. It may symbolize the passage of time, a character’s perplexity, or simply add flair to a commercial film.
- Using Premiere Pro, create a ramp-up at the end of your first clip and a ramp-down at the start of your second clip. The speed rubber band will be curved like a bell curve across the two clips when finished.
Adding speed ramps to films in Premiere Pro may improve the usefulness and looks of a variety of movies, from narrative features to social media posts. In Premiere, you may easily create and adjust speed duration directly in the timeline to meet any needs.
Speed Ramping In Wondershare Filmora
We understood how to do speed ramping in Premiere Pro. You can also get the same results using a much easier software that is “Wondershare Filmora”.
What is Wondershare Filmora?
Filmora is a video editor that is best suited for social video editors, vloggers, home movies, and other video projects. In addition, it may be used on both Macs and PCs. To begin using Filmora, you just need to pay a one-time registration fee of $0! You’ll notice a watermark when you export from the free version. For $59.99, Filmora’s latest version is a one-time purchase that doesn’t need a subscription!
Amazing Features
Filmora is an award-winning video editing program, that allows users to create visually stunning videos without the need for complex editing techniques.
Video playback in Filmora’s latest version may be accelerated by the graphics card (GPU). It’s accelerating at an alarming rate right now. It’s also possible to lower the resolution of a 4K or higher video for quicker playing. Cuts and splits are a snap using Filmora. Make a cut by dragging your play head to the location where you want to split the footage. Then, to remove the additional clip from the clip, use the delete key.
Even those with the most basic PC hardware may use this video editing software to create high-quality movies. Moreover, the most anticipated features that Filmora’s latest version offers are as follows:
- Motion Tracking
- Keyframing Animations
- Audio Ducking
- Split Screen
- Video Transitions
- Speed Control
- Color Grading
- Filmstock Effects
- Multiple Formats Exporting
Users may utilize the color tuning option to change the white balance and dynamic range of their video clip, among other things. You may alter the audio levels of each track using the audio mixer tool. The advanced Text Editor function allows you to adjust the color, size, font, and even the motion of text. The screen recording tool enables you to capture your computer’s screen as well as your webcam in excellent quality. The video stabilization feature lowers or eliminates the effect of camera shake on video.
Speed Ramping In Filmora
The method is crucial in changing the tempo of the film and, as a consequence, creating a dramatic impression. The film’s required speed is achieved by the employment of super-fast visual effects.
When using a camera with a much higher frame rate, the speed ramping approach may provide excellent effects. It aids in the production of the most dramatic impression.
Speed ramping effects are available in six presets, which include Montage, Hero Moment, Bullet Time, Jumper, and Flash In, all of which will add a theatrical element to your movie that will leave your viewers in awe.
Creative pros can swiftly and effectively speed up a movie with Wondershare Filmora. However, in order to get the intended results, it is essential to completely understand and adhere to the approach.
Wondershare Filmora 11 has a variety of tools and features to help you create a visually stunning film in a short period of time. Its Instant Mode allows you to produce a video creation from start to finish in less than 5 minutes.
Steps
- Download and Install Filmora. Launch the application on your system.
- Navigate to the chosen video and open it in the program to speed up and lengthen it. You may also add the movie to the interface by dragging and dropping it there.
- When the video appears in the timeline, right-click it to begin playback. As a consequence, a context menu is displayed.
- Select Speed from the pop-up editing window, and then select Speed Ramping from the drop-down menu.
- Alternatively, right-click on the video or audio clip, choose Speed from the drop-down menu, and select Speed Ramping.
- In the Speed Ramping panel, you may adjust the speed or choose from a number of presets, including Montage, Hero Moment, Bullet Time, Jumper, Flash in, and Flash out, to use as templates. You have the option of using the Preset speed ramps. Alternatively, you may personalize your own innovative ones.
- Move the play head to the point where you wish to increase or decrease the speed of the video or audio. Then, to add speed keyframes, choose the Add icon from the toolbar. The video or audio clips will be marked as Speed Ramping when the speed ramp has been added by Filmora.
- If you want to delete a keyframe, you can do so by selecting that particular keyframe and selecting the delete button like in the image:
- As we go on to the video keyframe speed adjustment, just slide the keyframe dot upward or downward to alter the point speed of the movie. Aside from that, you can keep the audio pitch constant regardless of how fast or slow the video is moving.
- The settings will be saved if you are pleased with them after you make the necessary modifications. In any other case, you may use the Reset button to return to the original configuration.
- When you’ve finished your work, go to the “File” panel and choose “Save Project” from the list of options that display. Change the name of the project and then click “Save.”
- Additionally, the movie may be exported using Filmora’s “Export” feature; just choose “Export” and then specify a new name for the file. The video may be exported to a device, a system, or even YouTube. After that, choose “Export.”
Speed Ramping Tips
- High Frame Rate: The frame rate is an important consideration when it comes to speed ramping. If you wish to slow down the video after it’s been recorded, shoot it at a frame rate higher than 60 frames per second. When a video is slowed down, there should be enough frames to guarantee that the video passes the 24 frames per second threshold frame rate.
- Choose The Appropriate Frame Resolution: Another possibility is to modify your video’s frame resolution. The tip has the ability to edit the clip’s properties from the Slowing down the video is achieved by changing the frame rate in the clip’s parameters from 120 to 24 frames per second. As a consequence, the frames will be expanded to the proper frame rate. As a consequence, the video is slowed down but not jerked.
- Purposeful Time Remapping: Instead of keeping the same pace throughout the film, a deliberate speed ramp should be implemented. A video has emotional, mysterious, exciting, and slow-motion Why is this the case? The usage of the same video speed throughout the film may have a negative influence on the watching experience. As a result, it is critical that videos be separated into genres and that the tempo of the videos is modified accordingly.
Conclusion
The use of the ideal cinematic effect at the right time boosts the audience and engagement with the material. This respective article explored speed ramping in-depth and oughts to teach creative pros how to slow down a video and speed up a movie. It covers speed raming in premiere pro and then moves toward Wondershare Filmora which seems a bit easier. Wondershare Filmora is a good choice for completing the task as quickly as possible. You will have access to all of the effects and tools mentioned, as well as the ability to keep the audio pitch consistent throughout the effect, which is critical while altering the video speed.
Also read:
- VN Video Editor Templates A Game-Changer for Your Videos
- 2024 Approved Little Known Ways of Adding Emojis to Photos on iPhone & Android
- Updated Splitting Video in VSDC Step by Step
- In 2024, Easy Guide to Apply Slow Zoom Effects to Videos
- Updated Want to Immediately Know All About Discord GIF, In 2024
- In 2024, Do You Want to Learn About the iPhone LUT? Have You Used Them on Your iOS Device? Use This Article to Get Valuable Insights on the Same
- Updated 2 Effective Ways to Add Text Behind Objects
- Do You Know How to Create a Lol Montage Video? Had You Ever Tried that Video Type Before? Connect with This Article to Study the Tips and Tricks Associated with the Making of Montage Videos
- New The Way to Make Dynamic Video Collages for 2024
- Do You Want to Create Slow-Motion Videos? This Article Shows Methods to Create Slow-Mo Videos without Changing the Medias Quality for 2024
- New In 2024, Getting Into The Details A Review of Kodak LUTs
- Learning How to Create LUTs with LUTs Generator for 2024
- Updated 2024 Approved How to Do Perfect Match Paint 100 the Easy Way
- Updated Want to Add Motion Effects to Your Texts in Your Video? Learn the Simple Steps to Create Motion Text Effects in Popular Video Editors
- New In 2024, How to Create a Slideshow with Movavi Slideshow Maker
- New 2024 Approved Adding a Spooky Shadow Effect with Filmora
- How to Remove Echo with Premiere Pro? Full Guide Here for 2024
- Do You Want to Know About Efficient Motion Blur Plugins for Adobe Effects? Read This Article to Find Out How to Use Motion Blur Plugins for Enhanced Results
- Updated 2024 Approved 7 Best MP4 Editors on Mac Edit MP4 in Mac
- In 2024, Discover How to Download Mobile Phone Green Screen Videos and Pictures for Free. Elevate Your Content with HD Quality Green Screen Frames
- Updated Guide to Add Transition Effects in Premiere Pro for 2024
- Updated Tips That Show Anybody How To Create Youtube Slideshow – Guaranteed
- New 2024 Approved Reviewing Efectum App and The Best Alternatives for Smartphone Users
- New Backup and Organize Your Footage in Minutes for 2024
- Updated Best Video Editors to Add Text to a Video for 2024
- Updated 2024 Approved How to Add Filters on iMovie
- New In 2024, Top 9 Best Solutions To Go For When Creating an AI Thumbnail
- Some of the Top Sites to Replace a Sky Background in Videos
- Updated In 2024, What Slideshow Templates Can Teach You About Aesthetic
- Updated In 2024, Top List 20 Best LUTs for Music Videos
- New In 2024, | Top GIF to MP4 Converters
- In 2024, How to Make Random Letter Reveal Intro?
- If You Are Looking for Reliable Solutions to Export Your Musical Slideshow Through a DVD Burning Process, Take a Breath, You Have Landed at the Right Place
- 2024 Approved Finding LUTs Made by Danny Gevirtz
- Updated 8 Ways to Merge SRT with MP4
- New Do You Know What Is Motion Blur in Fortnite? Read This Article to Find Out How to Apply Motion Blur in Fortnite Efficiently and with Ease
- 2024 Approved 8 Free Title Makers to Use
- 2024 Approved Best Online YouTube Video Trimmer
- 2024 Approved What Is MKV Format and How To Play MKV Video?
- Learn About some of the Best Photo Collage with Music Tools
- In 2024, How to Do Datamoshing Effect in After Effects?
- LumaFusion Color Grading Achieving It Through LUTs for 2024
- Updated In 2024, Best Dark Moody LUTs During Editing
- In 2024, 4 Methods How To Make a Recap Video
- Updated In 2024, Recording Video in Slow Motion Some Considerable Points
- In 2024, How To Track IMEI Number Of Samsung Galaxy M14 5G Through Google Earth?
- iPogo will be the new iSpoofer On Vivo X Flip? | Dr.fone
- Updated Launching Your Live Room for 2024
- How To Recover Data From Lost or Stolen iPhone 13 mini In Easy Steps | Stellar
- In 2024, Complete Tutorial to Use VPNa to Fake GPS Location On Xiaomi Mix Fold 3 | Dr.fone
- Top 9 Samsung Galaxy XCover 7 Monitoring Apps for Parental Controls | Dr.fone
- In 2024, How to Cast Xiaomi Redmi A2+ to Computer for iPhone and Android? | Dr.fone
- Planning to Use a Pokemon Go Joystick on Honor X50i? | Dr.fone
- Recover your music after Redmi Note 13 Pro 5G has been deleted
- In 2024, Pokemon Go No GPS Signal? Heres Every Possible Solution On OnePlus Nord CE 3 Lite 5G | Dr.fone
- In 2024, List of Pokémon Go Joysticks On Motorola Razr 40 Ultra | Dr.fone
- A Detailed Guide on Faking Your Location in Mozilla Firefox On Xiaomi Redmi 13C | Dr.fone
- In 2024, Sim Unlock Nokia C22 Phones without Code 2 Ways to Remove Android Sim Lock
- How to Change Location on TikTok to See More Content On your Oppo F23 5G | Dr.fone
- Set Your Preferred Job Location on LinkedIn App of your Vivo Y100A | Dr.fone
- Detailed Review of doctorSIM Unlock Service For iPhone 12 Pro
- 3 Things You Must Know about Fake Snapchat Location On Apple iPhone 6s Plus | Dr.fone
- In 2024, Pokémon Go Cooldown Chart On Vivo Y02T | Dr.fone
- Unlock android phone if you don't have V30 fingerprint
- Why Stellar Data Recovery for iPhone 11 Pro takes time in scanning my iPhone? | Stellar
- In 2024, How to Fix Pokemon Go Route Not Working On Apple iPhone 15 Pro Max? | Dr.fone
- In 2024, 3 Effective Methods to Fake GPS location on Android For your Xiaomi Redmi Note 12 Pro+ 5G | Dr.fone
- Calls on Oppo A58 4G Go Straight to Voicemail? 12 Fixes | Dr.fone
- In 2024, How Can We Bypass Samsung Galaxy S23+ FRP?
- 8 Workable Fixes to the SIM not provisioned MM#2 Error on Nokia G42 5G | Dr.fone
- Title: 2024 Approved Motion Tracking Is the Process of Tracking the Movements of a Project in a Video. This Article Will Show You How to Apply Motion Tracking Effect Into Videos
- Author: Chloe
- Created at : 2024-04-24 07:08:22
- Updated at : 2024-04-25 07:08:22
- Link: https://ai-editing-video.techidaily.com/2024-approved-motion-tracking-is-the-process-of-tracking-the-movements-of-a-project-in-a-video-this-article-will-show-you-how-to-apply-motion-tracking-effec/
- License: This work is licensed under CC BY-NC-SA 4.0.
