
:max_bytes(150000):strip_icc():format(webp)/free-language-exchange-websites-1357059-d87c92dbdba3429dbf17d51ba313b1ff.png)
2024 Approved Slow-Motion Edits Are Pretty Mesmerizing, and Weve All Imagined Ourselves in One of Those Visually Appealing, Slowed-Down Movies. Well Teach You How to Make a Smooth Slo-Mo Video Using Twixtor in This Article. Stay Tuned Until the End
Slow-Motion Edits Are Pretty Mesmerizing, and We’ve All Imagined Ourselves in One of Those Visually Appealing, Slowed-Down Movies. We’ll Teach You How to Make a Smooth Slo-Mo Video Using Twixtor in This Article. Stay Tuned Until the End
Twixtor is a plug-in program for the After Effects software that allows you to create slow-motion effects from any video clip by adjusting the settings of the plug-in software. But what Twixtor is and why it is utilized are the topics we will cover in this article.
In addition, we will learn how to manipulate its characteristics to get the best possible outcome for our working composition in the Premiere Pro and After Effects plug-ins. Without any further ado, let’s get straight to the business!
In this article
01 What is Twixtor and How Does It Work?
02 How to Use Twixtor to Create Super Slow-Mo in Adobe Premiere Pro?
03 How to Create Super Slow Motion in After Effects with Twixtor?
04 How to Get the Twixtor Style Effect on iPhone?
Part 1: What is Twixtor and How Does It Work?
Twixtor is a plug-in developed by RevisionFX. It is available for purchase. The plug-in gives users the ability to speed up, slow down, or convert the frame rate of picture sequences, all with special effects. Twixtor can visually estimate what a video is meant to look like in a slow-motion setting using video analysis and interoperability.
Due to the need for unparalleled image quality, RE: Vision Effects developed unique tracking technology that determines every individual pixel’s motion. This technology allows Twixtor to synthesize new innovative frames by warping and interpolating frames from the original sequence, resulting in unprecedented image quality.
Reset the clock to a single-speed setting. Always remember that you can customize the retiming on a frame-by-frame basis!
When items are crossing in the scene, Twixtor is more accurate and shows fewer artifacts than other rendering engines. This reduces the ripping and stretching of items when they cross the frame or exit it completely.
But how does Twixtor work is the million-dollar question! While Premiere includes the ability to slow down your film and has a newer, better-quality version dubbed Optical Flow, it cannot zoom in on your footage (called Pixel Motion in After Effects).
The slow-motion quality is undoubtedly superior to that of simple frame blending, but it is not the finest grade slow motion available. The TWIXTOR from Re: Vision Effects has long been the go-to solution for the most excellent post-slow motion. It is pricey, but it is well worth it.
The Pro edition provides you with the opportunity to fine-tune the pitch of the auto track, as well as the option to employ mattes and alphas to enrich your tracks and the ability to deal with motion vectors from a 3D system, among other features.
Part 2: How to Use Twixtor to Create Super Slow-Mo in Adobe Premiere Pro?
As we’ve already mentioned, we will be analyzing how Twixtor makes slow mos; we will be starting with the Adobe Premiere Pro. The following are the steps you need to learn to perform it yourself.
Step 1: After importing the video to the timeline, do some basic editing such as trimming and removing audio from the video.

Step 2: Nest the sequence to convert the video into a new sequence automatically.
Step 3: Go to the Effects tab and search for Twixtor, and then drop the Twixtor Pro to the video clip in the timeline.

Step 5: Right-click the video in the timeline again and scroll down to Show Clip Keyframes to enable the Speed option under Time Remapping. You can now enable the GPU acceleration to fast rendering.
Step 6: Click the Keyframe icon to mark the points where you want to begin with the slow-motion effect, and then mark the end part of the slow-motion effect video.

Step 7: Now, drag the line lower to add a slo-mo effect to video.

Remember that your video can sometimes lag if you set the video speed at a meager percentage. To avoid that, utilize settings in a better way to ensure your video works flawlessly.
Part 3: How to Create Super Slow Motion in After Effects with Twixtor?
When working with After Effects software, Twixtor is a convenient plug-in since it allows us to create slow-motion effects from any video source.
We’ll look at an example to better comprehend what we’re talking about in this post. Before we begin our study of the Twixtor plug-in, let us get acquainted with the software’s operating screen to quickly understand the content of this article as we go through our assessment of the Twixtor plug-in.
Step 1: When you launch After Effects, go to File>Import>File to import your footage. Here you can see the actual frame rate of your film. You may drag your film onto the timeline by right-clicking it and selecting New Comp from Selection.
Step 2: Select your video from the timeline in the composition, then go to Effects & Presets pane to search Twixtor, and you will find Twixtor or Twixtor Pro under RE: Vision plug-ins, depending on your version. Drag and drop it to the video in the timeline.

Step 3: In the Twixtor effect controls, enter the frame rate of the film you found previously. The faster and better your slowed footage will become, the higher the frame rate.
For organizational reasons, After Effects employs the “tree-ing“ concept, sometimes known as drop-down menus. Click on the yellow number next to Input: Frame Rate under Source Control. It should be set to 29.97 by default. Please set it to the frame rate you discovered previously in the tutorial.

You can then adjust the speed and time remap mode accordingly. For more information, you can watch the video tutorial below to find out how to create smooth Twixtor effects in Adobe After Effects.
Part 4: How to Get the Twixtor Style Effect on iPhone?
It is possible to shoot videos in slow motion and then play them back at average speed using SloPro – 1000fps Slow Motion Video from Sand Mountain Studios, a fantastic video editing effects tool.
Inserting slow motion cues and changing playback speeds without waiting is possible with renderless editing. It allows you to produce slow-motion films and enables you to insert extremely rapid sequences and cycle between various speeds.
SloPro even enables you to edit your films as they are being recorded, allowing you to choose between slow and fast motion while recording.
This program provides complete support for sharing through social media platforms such as Facebook, Twitter, and YouTube, allowing you to show off your impressive video creations to the rest of the world. It has already been established that SloPro is one of the few videos editing software that includes optical flow as a stand-alone effect.

Step 1: After you’ve imported your video, click on the red Edit button in the top-right corner of the screen to bring up the editing window.
Step 2: Trim the video down to the section that you wish to modify if required using the Clip In and Clip Out functions. It is divided into clips using the speed in and speeds out controls.
Step 3: Tap on the top-left box to bring up a list of fast and slow speed choices. Drag the cursor over the clip to bring up a fast and slow speed options list.
Step 4: If you want to use a slow speed, press the box in the upper right corner and choose Optical Flow from the menu.
This will render the clip with optical flow, resulting in the smooth Twixtor effect you are familiar with. There will be a watermark on your video if you use the program’s free version, but you can easily crop it out.
Conclusion
Slow-Mo videos are undoubtedly watch-worthy. They allow us to observe the fine details and appreciate the video content. But creating one isn’t child’s play. So, we decided to compile this article to inform our worthy readers on how they can get started using Twixtor on Adobe Premiere Pro and After Effects. We hope you had a fun time learning!
02 How to Use Twixtor to Create Super Slow-Mo in Adobe Premiere Pro?
03 How to Create Super Slow Motion in After Effects with Twixtor?
04 How to Get the Twixtor Style Effect on iPhone?
Part 1: What is Twixtor and How Does It Work?
Twixtor is a plug-in developed by RevisionFX. It is available for purchase. The plug-in gives users the ability to speed up, slow down, or convert the frame rate of picture sequences, all with special effects. Twixtor can visually estimate what a video is meant to look like in a slow-motion setting using video analysis and interoperability.
Due to the need for unparalleled image quality, RE: Vision Effects developed unique tracking technology that determines every individual pixel’s motion. This technology allows Twixtor to synthesize new innovative frames by warping and interpolating frames from the original sequence, resulting in unprecedented image quality.
Reset the clock to a single-speed setting. Always remember that you can customize the retiming on a frame-by-frame basis!
When items are crossing in the scene, Twixtor is more accurate and shows fewer artifacts than other rendering engines. This reduces the ripping and stretching of items when they cross the frame or exit it completely.
But how does Twixtor work is the million-dollar question! While Premiere includes the ability to slow down your film and has a newer, better-quality version dubbed Optical Flow, it cannot zoom in on your footage (called Pixel Motion in After Effects).
The slow-motion quality is undoubtedly superior to that of simple frame blending, but it is not the finest grade slow motion available. The TWIXTOR from Re: Vision Effects has long been the go-to solution for the most excellent post-slow motion. It is pricey, but it is well worth it.
The Pro edition provides you with the opportunity to fine-tune the pitch of the auto track, as well as the option to employ mattes and alphas to enrich your tracks and the ability to deal with motion vectors from a 3D system, among other features.
Part 2: How to Use Twixtor to Create Super Slow-Mo in Adobe Premiere Pro?
As we’ve already mentioned, we will be analyzing how Twixtor makes slow mos; we will be starting with the Adobe Premiere Pro. The following are the steps you need to learn to perform it yourself.
Step 1: After importing the video to the timeline, do some basic editing such as trimming and removing audio from the video.
Step 2: Nest the sequence to convert the video into a new sequence automatically.
Step 3: Go to the Effects tab and search for Twixtor, and then drop the Twixtor Pro to the video clip in the timeline.
Step 5: Right-click the video in the timeline again and scroll down to Show Clip Keyframes to enable the Speed option under Time Remapping. You can now enable the GPU acceleration to fast rendering.
Step 6: Click the Keyframe icon to mark the points where you want to begin with the slow-motion effect, and then mark the end part of the slow-motion effect video.
Step 7: Now, drag the line lower to add a slo-mo effect to video.
Remember that your video can sometimes lag if you set the video speed at a meager percentage. To avoid that, utilize settings in a better way to ensure your video works flawlessly.
Part 3: How to Create Super Slow Motion in After Effects with Twixtor?
When working with After Effects software, Twixtor is a convenient plug-in since it allows us to create slow-motion effects from any video source.
We’ll look at an example to better comprehend what we’re talking about in this post. Before we begin our study of the Twixtor plug-in, let us get acquainted with the software’s operating screen to quickly understand the content of this article as we go through our assessment of the Twixtor plug-in.
Step 1: When you launch After Effects, go to File>Import>File to import your footage. Here you can see the actual frame rate of your film. You may drag your film onto the timeline by right-clicking it and selecting New Comp from Selection.
Step 2: Select your video from the timeline in the composition, then go to Effects & Presets pane to search Twixtor, and you will find Twixtor or Twixtor Pro under RE: Vision plug-ins, depending on your version. Drag and drop it to the video in the timeline.
Step 3: In the Twixtor effect controls, enter the frame rate of the film you found previously. The faster and better your slowed footage will become, the higher the frame rate.
For organizational reasons, After Effects employs the “tree-ing“ concept, sometimes known as drop-down menus. Click on the yellow number next to Input: Frame Rate under Source Control. It should be set to 29.97 by default. Please set it to the frame rate you discovered previously in the tutorial.
You can then adjust the speed and time remap mode accordingly. For more information, you can watch the video tutorial below to find out how to create smooth Twixtor effects in Adobe After Effects.
Part 4: How to Get the Twixtor Style Effect on iPhone?
It is possible to shoot videos in slow motion and then play them back at average speed using SloPro – 1000fps Slow Motion Video from Sand Mountain Studios, a fantastic video editing effects tool.
Inserting slow motion cues and changing playback speeds without waiting is possible with renderless editing. It allows you to produce slow-motion films and enables you to insert extremely rapid sequences and cycle between various speeds.
SloPro even enables you to edit your films as they are being recorded, allowing you to choose between slow and fast motion while recording.
This program provides complete support for sharing through social media platforms such as Facebook, Twitter, and YouTube, allowing you to show off your impressive video creations to the rest of the world. It has already been established that SloPro is one of the few videos editing software that includes optical flow as a stand-alone effect.
Step 1: After you’ve imported your video, click on the red Edit button in the top-right corner of the screen to bring up the editing window.
Step 2: Trim the video down to the section that you wish to modify if required using the Clip In and Clip Out functions. It is divided into clips using the speed in and speeds out controls.
Step 3: Tap on the top-left box to bring up a list of fast and slow speed choices. Drag the cursor over the clip to bring up a fast and slow speed options list.
Step 4: If you want to use a slow speed, press the box in the upper right corner and choose Optical Flow from the menu.
This will render the clip with optical flow, resulting in the smooth Twixtor effect you are familiar with. There will be a watermark on your video if you use the program’s free version, but you can easily crop it out.
Conclusion
Slow-Mo videos are undoubtedly watch-worthy. They allow us to observe the fine details and appreciate the video content. But creating one isn’t child’s play. So, we decided to compile this article to inform our worthy readers on how they can get started using Twixtor on Adobe Premiere Pro and After Effects. We hope you had a fun time learning!
An Overview of the Best Free LUTs to Use
Photo and video editing has always been an important aspect of creative work. However, the availability of new tools and software has transformed how editing is done. Today, you can choose different editing software from personal to professional usage. These tools support multiple add-ons and plugins to make editing easier and more creative.
One of the most recent additions to the editing toolbox is LUTs (Lookup Tables). LUTs are pre-made color grading presets that allow you to adjust the colors and tones. The integration of LUTs has made editing easy and gives you so much to explore with different presets. This overview of the best free LUTs can help you to choose the best ones.
Part 1: What Are LUTs?
LUTs, or Lookup Tables, are a preset used in digital image and video editing software. These are used to adjust the color and tone of your images and videos. They work by using a pre-defined table of color values to map the colors in your content to new colors. It is like having a set of filters that you can apply to your content to achieve a specific look or feel.
Moreover, you can download free LUTs to get different effects in your content. There are various LUTs available, each with its own unique characteristics and effects. It provides you with consistent results with different styles.
Empower your videos with a new mood using different LUTs. Filmora now offers 100+ top-quality 3D LUTs cover a broad range of scenarios. Transform your videos with Filmora’s powerful 3D LUTs.
Apply LUT on Videos Apply LUT on Videos Learn More


Part 2: Best Cinematic LUTs to Use in 2024
If you want to give your media content a cinematic look, use cinematic LUTs. There are many cinematic-looking paid and free LUTs that you can choose from, out of which some are discussed below:
1. Teal and Orange
The Teal and Orange LUT is a popular choice among content creators. It can enhance the colors in your images and videos to give them a cinematic look. This LUT works by highlighting teal and orange colors, often found in cinematic productions. Moreover, this LUT can also help to enhance skin tones and make them look more vibrant and natural.

2. Cinematic LUTs Pack 2023
If you want to add a cinematic look to photos, consider using the Cinematic LUTs Pack 2023. This pack contains many different LUTs, each designed to create a unique cinematic look. It offers different options like Dark Noir, Light Cinematic, Red Pop, and more. Cinematic LUTs highlight certain colors to give your content a cinematic feel.

3. Custom Stylized LUTs
In addition to the standard LUTs, there are also custom-stylized LUTs for cinematic-looking media. These custom LUTs come in packs with many different options. For instance, the OrangeAndBlue LUT highlights the orange and blue color, making it look more professional. These photo and video LUTs allow you to achieve a specific cinematic mood or tone in your content.

4. Vintage Vibe
Vintage Vibe is a popular LUT that can give your digital content a cinematic look with a vintage twist. This LUT adds a colorful film look to your photos and videos to make them look great. Using Vintage Vibe can help you achieve a professional-looking final product. The Vintage Vibe of this LUT can make digital files feel like they were taken with an older camera.

5. Sandstorm
If you want to add a cinematic look to your photos and videos, consider using the Sandstorm LUT. This preset is designed to enhance the gold or sand colors in your content. It creates a warm and inviting atmosphere by highlighting specific details in your content. By adding this LUT to your digital media files, you can give them a professional cinematic look.

6. Cinematic
Cinematic LUT is perfect for digital media files to have a cinematic look. It gives your content a bit of a rusty look by fading and highlighting certain colors. This LUT is known for providing one of the best cinematic-looking color grading options. It is also available in both CUBE and 3DL versions, making it easy to integrate into editing software.

7. Free Cinematic LUTs Pack
The Free Cinematic LUTs Pack can add a cinematic look to your digital media files. You can transform the color and shading of your images and videos to give them a movie-like feel. Moreover, this free LUT pack gives your content a dramatic effect. With this LUT pack, you can take your digital media files to the next level and create professional-looking content.

8. 15 Cinematic LUTs for free
This pack is a great option if you want to download free LUTs. This pack contains a range of LUTs that can give your content a dramatic, professional-looking color grading. With 15 different options, this pack offers a variety of cinematic looks. This pack will enhance the colors and tones in your photos and videos, giving them a more cinematic feel.

9. Cinematic LUTs PRO LEVEL
Cinematic LUTs PRO LEVEL is a pack of LUTs designed to add a cinematic look to your edits. You can choose the desired look from the pack and apply it to your media files. This pack provides one of the best cinematic and professional looks with its shading and color effects. By using this pack, you can add a professional-looking cinematic feel to your digital content.

10. 20 FREE Travel LUTs for Cinematic Looks
Add a cinematic touch to your travel videos and photos by using this 20 FREE Travel LUTs pack. This pack includes 20 different LUTs, and each LUT in the pack is designed to add a different type of cinematic look. The LUTs in the pack darken the shadows and add golden warmth to your content. Similarly, this pack will enhance your travel footage and create a more cinematic look.

Part 3: Best Vintage LUTs to Use in 2024
With so many options to make your photos and videos more unique, vintage LUTs are a good option too. One of the best LUTs packs is discussed here for an informed selection.
1. Color Grading Central
With this pack, you can add a vintage look to your photos and videos. The Color Grading Central LUT pack contains 7 free LUTs that you can use to give your content a unique look. These LUTs are designed to add a grainy and faded effect, giving your files a vintage vibe. Additionally, they can add a muddy or burned effect to your media files, giving them an artistic look.

2. SmallHD
SmallHD is a LUT pack that provides a set of seven free LUTs to give your images and videos a vintage look. These LUTs can add grains, faded colors, and warm tones to your content, giving them an old and retro feel. The pack also adds an intense contrast and desaturated effect to your media files. With the SmallHD LUT pack, you can effortlessly add a vintage touch to your files.

3. KODACHROME – K-Tone LUT
Check out the Free Vintage LUT pack by Frank Glencairn to give your media files a vintage feel. It highlights red, blue, and yellow tones to give a vintage look. Moreover, it even adds warmth and contrast to your digital files making it a classic version of Hollywood movies. Additionally, this LUT pack will give your content a nostalgic feel by highlighting the greens of the summer.

4. Cineplus Perfekta LUT
Cineplus Perfekta LUT is a LUT pack that is designed to give your images and videos a vintage look. It uses an infrared foliage effect to create a look that resembles classic Hollywood movies. By enhancing green and brown colors, this LUTs video and photo pack gives your content a retro feel to your files. Besides this, you can give your files a unique vintage look that will make them look different.

5. Vintage LUTs
Vintage LUTs is a pack of 86 retro-looking LUTs that can give your files a classic look. These LUTs highlight the brown color and sharpen the contrast to produce a vintage look. You can create a unique and distinctive style by applying these LUTs to your photos and videos. In addition to the classic vintage look, the faded color and warm LUTs can also add a nostalgic touch to your files.

6. Vintage
Vintage is a popular LUT that can be used to give your digital media a classic and nostalgic feel. It highlights your content’s orange and green colors, giving it an old film look. With Vintage LUT, you can give your photos and videos a timeless look that is perfect for a variety of projects. This LUT is a great choice for those who want to create a vintage aesthetic in their content.

7. Dark Brown
Dark Brown is a popular LUT that can give your digital media a classic Hollywood movie feel. This LUT highlights the dark brown color and fades into the other colors. This color grading creates a burned and faded effect that looks more vintage and classic. This free LUT pack can transform your digital files into something that looks like it was shot on film decades ago.

8. B&W
B&W, which is a classic LUT, has the ability to transform your photos and videos into a black-and-white version. This effect creates a timeless, vintage look that can add a touch of nostalgia to your content. The LUT works by changing every color in your image or video into an old, classic black-and-white shade. Overall, B&W is a good classic LUT that can add an old touch to your content.

9. Vintage LUTs by Shmelevideo
Vintage LUTs by Shmelevideo is a popular classic LUT that creates a faded and burned effect in your photos and videos. This LUT is perfect for those looking to achieve a vintage look in their content. The color correction LUTs highlight the muddiness and increase the contrast to your files. Furthermore, this pack also adds warmth to your photos and videos to give a retro look.

10. Vintage LUTs by Creators Studio
Vintage LUTs by Creators Studio is a pack of over 20 LUTs that can help you achieve a vintage look to your content. These LUTs offer different color correction options that give your content the feel of being taken with an old Kodak camera. Besides this, they add grains to your photos and videos, giving them a more classical look. Vintage LUTs are a great option for retro-style color correction.

Empower your videos with a new mood using different LUTs. Filmora now offers 100+ top-quality 3D LUTs cover a broad range of scenarios. Transform your videos with Filmora’s powerful 3D LUTs.
Apply LUT on Videos Apply LUT on Videos Learn More
Part 4: Best Moody LUTs to Use in 2024
Do you want LUTs that go with your mood? Here are some of the most popular moody LUTs color grading packs you can download and use.
1. 20 Dark Moody LUTs Pack
The 20 Dark Moody LUTs Pack is a collection of over 20 Moody LUTs that improve the colors of your files. These LUTs offer a variety of color corrections that can sync with your mood. With these LUTs, you can create a dark and moody atmosphere for your photos and videos. This pack can help you achieve the perfect look for your content, from soft dark shades to sharper dark colors.

2. Dark Moody Elite LUTs Pack
You can add a dramatic and moody look to your photos and videos with the Dark Moody Elite LUTs Pack. This pack includes over 16 LUTs, each with a different dark and moody style. When applied to your content, these LUTs can help highlight dark colors. Additionally, it adds a professional-looking touch and cinematic feel to your photos and videos.

3. 15 Dark Moody LUTs
Dark Moody LUTs is a pack of over 15 LUTs designed for color correction in photo and video editing. This pack includes a variety of dark and moody LUTs that can give your media a dramatic look. It highlights the orange and blue tones to create a moody look. Moreover, these LUTs can also darken the highlights and shadows to add depth and emotion to your files.

4. Dark and Moody LUT
Dark and Moody LUT is a pack of 3 professional LUTs that can give your photos and videos a moodier and more dramatic feel. These LUTs work by underexposing and fading the colors, which can create a sense of nostalgia for your content. By using these LUTs, you can give your content the look and feel of expired and old film stocks. Moreover, it highlights teal and orange to add depth to your content.

5. Dark and Moody Cinematic 3D LUTs
Dark and Moody Cinematic 3D LUTs is a pack of over 8 LUTs that add a dark and dramatic feel to your media files. This LUT pack fades the dark colors, underexposes the shadows, and darkens the highlights. Using this LUTs pack can help you achieve an intense and cinematic look for your content. You can add emotion and mood to your videos and photos using this pack.

Part 5: Try Wondershare Filmora for Accessing the Best Free LUTs
If you want to access high-quality LUTs for your photo and video editing projects, you might want to try Wondershare Filmora . This software offers over 200 free LUTs that you can use for your digital content. Additionally, you’ll have access to the best free LUTs you can use to achieve different effects and styles. Whether you’re going for a vintage look or a cinematic feel, you’re sure to find the right LUT to suit your needs.
Furthermore, with more updates, you can look forward to even more professional-looking free LUTs to download. Furthermore, another amazing feature offered by Filmora is silence detection. This feature analyzes your video and automatically removes awkward silences and pauses in the video. It is evident that Wondershare Filmora makes your video editing experience worth a while.

Conclusion
In conclusion, LUTs are a powerful tool for adding a creative touch to your photo and video editing projects. When it comes to finding the best LUT packs, Wondershare Filmora is a great option. With its growing library of free LUTs and presets, you can create amazing digital content. With these professional LUTs for color correction, you can make unique and fantastic media files.
Add LUTs on Video For Win 7 or later(64-bit)
Add LUTs on Video For macOS 10.14 or later
Apply LUT on Videos Apply LUT on Videos Learn More
Part 2: Best Cinematic LUTs to Use in 2024
If you want to give your media content a cinematic look, use cinematic LUTs. There are many cinematic-looking paid and free LUTs that you can choose from, out of which some are discussed below:
1. Teal and Orange
The Teal and Orange LUT is a popular choice among content creators. It can enhance the colors in your images and videos to give them a cinematic look. This LUT works by highlighting teal and orange colors, often found in cinematic productions. Moreover, this LUT can also help to enhance skin tones and make them look more vibrant and natural.
2. Cinematic LUTs Pack 2023
If you want to add a cinematic look to photos, consider using the Cinematic LUTs Pack 2023. This pack contains many different LUTs, each designed to create a unique cinematic look. It offers different options like Dark Noir, Light Cinematic, Red Pop, and more. Cinematic LUTs highlight certain colors to give your content a cinematic feel.
3. Custom Stylized LUTs
In addition to the standard LUTs, there are also custom-stylized LUTs for cinematic-looking media. These custom LUTs come in packs with many different options. For instance, the OrangeAndBlue LUT highlights the orange and blue color, making it look more professional. These photo and video LUTs allow you to achieve a specific cinematic mood or tone in your content.
4. Vintage Vibe
Vintage Vibe is a popular LUT that can give your digital content a cinematic look with a vintage twist. This LUT adds a colorful film look to your photos and videos to make them look great. Using Vintage Vibe can help you achieve a professional-looking final product. The Vintage Vibe of this LUT can make digital files feel like they were taken with an older camera.
5. Sandstorm
If you want to add a cinematic look to your photos and videos, consider using the Sandstorm LUT. This preset is designed to enhance the gold or sand colors in your content. It creates a warm and inviting atmosphere by highlighting specific details in your content. By adding this LUT to your digital media files, you can give them a professional cinematic look.
6. Cinematic
Cinematic LUT is perfect for digital media files to have a cinematic look. It gives your content a bit of a rusty look by fading and highlighting certain colors. This LUT is known for providing one of the best cinematic-looking color grading options. It is also available in both CUBE and 3DL versions, making it easy to integrate into editing software.
7. Free Cinematic LUTs Pack
The Free Cinematic LUTs Pack can add a cinematic look to your digital media files. You can transform the color and shading of your images and videos to give them a movie-like feel. Moreover, this free LUT pack gives your content a dramatic effect. With this LUT pack, you can take your digital media files to the next level and create professional-looking content.
8. 15 Cinematic LUTs for free
This pack is a great option if you want to download free LUTs. This pack contains a range of LUTs that can give your content a dramatic, professional-looking color grading. With 15 different options, this pack offers a variety of cinematic looks. This pack will enhance the colors and tones in your photos and videos, giving them a more cinematic feel.
9. Cinematic LUTs PRO LEVEL
Cinematic LUTs PRO LEVEL is a pack of LUTs designed to add a cinematic look to your edits. You can choose the desired look from the pack and apply it to your media files. This pack provides one of the best cinematic and professional looks with its shading and color effects. By using this pack, you can add a professional-looking cinematic feel to your digital content.
10. 20 FREE Travel LUTs for Cinematic Looks
Add a cinematic touch to your travel videos and photos by using this 20 FREE Travel LUTs pack. This pack includes 20 different LUTs, and each LUT in the pack is designed to add a different type of cinematic look. The LUTs in the pack darken the shadows and add golden warmth to your content. Similarly, this pack will enhance your travel footage and create a more cinematic look.
Part 3: Best Vintage LUTs to Use in 2024
With so many options to make your photos and videos more unique, vintage LUTs are a good option too. One of the best LUTs packs is discussed here for an informed selection.
1. Color Grading Central
With this pack, you can add a vintage look to your photos and videos. The Color Grading Central LUT pack contains 7 free LUTs that you can use to give your content a unique look. These LUTs are designed to add a grainy and faded effect, giving your files a vintage vibe. Additionally, they can add a muddy or burned effect to your media files, giving them an artistic look.
2. SmallHD
SmallHD is a LUT pack that provides a set of seven free LUTs to give your images and videos a vintage look. These LUTs can add grains, faded colors, and warm tones to your content, giving them an old and retro feel. The pack also adds an intense contrast and desaturated effect to your media files. With the SmallHD LUT pack, you can effortlessly add a vintage touch to your files.
3. KODACHROME – K-Tone LUT
Check out the Free Vintage LUT pack by Frank Glencairn to give your media files a vintage feel. It highlights red, blue, and yellow tones to give a vintage look. Moreover, it even adds warmth and contrast to your digital files making it a classic version of Hollywood movies. Additionally, this LUT pack will give your content a nostalgic feel by highlighting the greens of the summer.
4. Cineplus Perfekta LUT
Cineplus Perfekta LUT is a LUT pack that is designed to give your images and videos a vintage look. It uses an infrared foliage effect to create a look that resembles classic Hollywood movies. By enhancing green and brown colors, this LUTs video and photo pack gives your content a retro feel to your files. Besides this, you can give your files a unique vintage look that will make them look different.
5. Vintage LUTs
Vintage LUTs is a pack of 86 retro-looking LUTs that can give your files a classic look. These LUTs highlight the brown color and sharpen the contrast to produce a vintage look. You can create a unique and distinctive style by applying these LUTs to your photos and videos. In addition to the classic vintage look, the faded color and warm LUTs can also add a nostalgic touch to your files.
6. Vintage
Vintage is a popular LUT that can be used to give your digital media a classic and nostalgic feel. It highlights your content’s orange and green colors, giving it an old film look. With Vintage LUT, you can give your photos and videos a timeless look that is perfect for a variety of projects. This LUT is a great choice for those who want to create a vintage aesthetic in their content.
7. Dark Brown
Dark Brown is a popular LUT that can give your digital media a classic Hollywood movie feel. This LUT highlights the dark brown color and fades into the other colors. This color grading creates a burned and faded effect that looks more vintage and classic. This free LUT pack can transform your digital files into something that looks like it was shot on film decades ago.
8. B&W
B&W, which is a classic LUT, has the ability to transform your photos and videos into a black-and-white version. This effect creates a timeless, vintage look that can add a touch of nostalgia to your content. The LUT works by changing every color in your image or video into an old, classic black-and-white shade. Overall, B&W is a good classic LUT that can add an old touch to your content.
9. Vintage LUTs by Shmelevideo
Vintage LUTs by Shmelevideo is a popular classic LUT that creates a faded and burned effect in your photos and videos. This LUT is perfect for those looking to achieve a vintage look in their content. The color correction LUTs highlight the muddiness and increase the contrast to your files. Furthermore, this pack also adds warmth to your photos and videos to give a retro look.
10. Vintage LUTs by Creators Studio
Vintage LUTs by Creators Studio is a pack of over 20 LUTs that can help you achieve a vintage look to your content. These LUTs offer different color correction options that give your content the feel of being taken with an old Kodak camera. Besides this, they add grains to your photos and videos, giving them a more classical look. Vintage LUTs are a great option for retro-style color correction.
Empower your videos with a new mood using different LUTs. Filmora now offers 100+ top-quality 3D LUTs cover a broad range of scenarios. Transform your videos with Filmora’s powerful 3D LUTs.
Apply LUT on Videos Apply LUT on Videos Learn More
Part 4: Best Moody LUTs to Use in 2024
Do you want LUTs that go with your mood? Here are some of the most popular moody LUTs color grading packs you can download and use.
1. 20 Dark Moody LUTs Pack
The 20 Dark Moody LUTs Pack is a collection of over 20 Moody LUTs that improve the colors of your files. These LUTs offer a variety of color corrections that can sync with your mood. With these LUTs, you can create a dark and moody atmosphere for your photos and videos. This pack can help you achieve the perfect look for your content, from soft dark shades to sharper dark colors.
2. Dark Moody Elite LUTs Pack
You can add a dramatic and moody look to your photos and videos with the Dark Moody Elite LUTs Pack. This pack includes over 16 LUTs, each with a different dark and moody style. When applied to your content, these LUTs can help highlight dark colors. Additionally, it adds a professional-looking touch and cinematic feel to your photos and videos.
3. 15 Dark Moody LUTs
Dark Moody LUTs is a pack of over 15 LUTs designed for color correction in photo and video editing. This pack includes a variety of dark and moody LUTs that can give your media a dramatic look. It highlights the orange and blue tones to create a moody look. Moreover, these LUTs can also darken the highlights and shadows to add depth and emotion to your files.
4. Dark and Moody LUT
Dark and Moody LUT is a pack of 3 professional LUTs that can give your photos and videos a moodier and more dramatic feel. These LUTs work by underexposing and fading the colors, which can create a sense of nostalgia for your content. By using these LUTs, you can give your content the look and feel of expired and old film stocks. Moreover, it highlights teal and orange to add depth to your content.
5. Dark and Moody Cinematic 3D LUTs
Dark and Moody Cinematic 3D LUTs is a pack of over 8 LUTs that add a dark and dramatic feel to your media files. This LUT pack fades the dark colors, underexposes the shadows, and darkens the highlights. Using this LUTs pack can help you achieve an intense and cinematic look for your content. You can add emotion and mood to your videos and photos using this pack.
Part 5: Try Wondershare Filmora for Accessing the Best Free LUTs
If you want to access high-quality LUTs for your photo and video editing projects, you might want to try Wondershare Filmora . This software offers over 200 free LUTs that you can use for your digital content. Additionally, you’ll have access to the best free LUTs you can use to achieve different effects and styles. Whether you’re going for a vintage look or a cinematic feel, you’re sure to find the right LUT to suit your needs.
Furthermore, with more updates, you can look forward to even more professional-looking free LUTs to download. Furthermore, another amazing feature offered by Filmora is silence detection. This feature analyzes your video and automatically removes awkward silences and pauses in the video. It is evident that Wondershare Filmora makes your video editing experience worth a while.
Conclusion
In conclusion, LUTs are a powerful tool for adding a creative touch to your photo and video editing projects. When it comes to finding the best LUT packs, Wondershare Filmora is a great option. With its growing library of free LUTs and presets, you can create amazing digital content. With these professional LUTs for color correction, you can make unique and fantastic media files.
Add LUTs on Video For Win 7 or later(64-bit)
Add LUTs on Video For macOS 10.14 or later
Best Ideas on Using Filmora Green Screen
Green screener chroma key is commonly used in film, tv shows, and social media videos nowadays. This article will show you how to light film and edit a green screen. Additionally, you can have some fun ideas with a chroma key. Therefore, keep reading this article to know all the information.
Part 1: Cool Ideas to Use Green Screen
1. The Magic Box

2. Liquid Transformation

3. Key Out a Body Part

4. T-shirt TV Screen

Part 2: Setting Up The Green Screen
Filming with the green screen is getting easier and easier. Anyone can do it, but before you get started, we will share some do’s and don’ts to help you get the best results.
In fact, there are many ways to set up a green screen, but the most cost-efficient way is with a green screen fabric. If you are using a green fabric as a DIY green screen, make sure you steam or iron it out, whether taping it to a wall or hanging it off the rack. Keep in mind the green screen should not leave any wrinkles.
It is because wrinkles will make lighting the green screen a nightmare, and uneven lighting will leave you with shadows and disappointing results. It would help if you also pulled the green screen tight to get a seamless background. The better you do with the setup, the easier it will be the key it out later
Part 3: Lighting a Green Screen
It doesn’t matter how nice your green screen is. You won’t get good results if you don’t light it properly. When you light a green screen, be aware of these things.
- Make sure there are at least six feet of space between you and your green screen; therefore, you’re not casting a shadow that cannot be keyed out later.
- Remember, any shadow on the green screen is bad. The lighting on the screen should be flat, even, and one-dimensional meaning. Please don’t place the screen leaning at an angle since they’ll make it harder to light evenly.
- Do light yourself and your background separately. It will ensure your subject wouldn’t bleed into the green, which will create a halo around them.
- After you key out the green screen and lighting, your subjects should emulate the lighting from your final footage. For example, if you know sunlight is coming from the left light, your subject is from the left direction as well.
Part 4. Keying out your green screen
Once your footage is good, go into Filmora and import it into your timeline, then double-click it to find the chroma key menu. However, don’t stop there. Clicking the chroma key button is not enough to guarantee perfectly keyed footage, so play around with the offset tolerance edge thickness and edge feather. Lastly, adjust it to make sure your edit looks as good as possible.
Free Download For Win 7 or later(64-bit)
Free Download For macOS 10.14 or later

Summary
Aside from a video background, there are many things you can use chrome key effects on. For example, you can make liquid transformation, you can make a magic box, etc. In the meantime, it doesn’t matter how good your green screen, it won’t have a good results if are not light it properly. You can use Filmora to keying out your green screen. It just take a few clicks to be able keying out your green screen by following the tutorial above.
Free Download For macOS 10.14 or later
Summary
Aside from a video background, there are many things you can use chrome key effects on. For example, you can make liquid transformation, you can make a magic box, etc. In the meantime, it doesn’t matter how good your green screen, it won’t have a good results if are not light it properly. You can use Filmora to keying out your green screen. It just take a few clicks to be able keying out your green screen by following the tutorial above.
How To Fade Audio In Kinemaster
If you have been looking for video and audio editing tools then you have probably heard of Kinemaster. It is a great video editing app that allows users to edit all aspects of the video including any audio or music that may accompany the video. It has a lot of very useful features and the user interface is fairly easy to use.
One of the things that you can do with Kinemaster is to fade out audio, a useful feature that can help the ending of any video appear more authentic. In this article, we will be looking at how you can use Kinemaster to fade audio.
Kinemaster Fade Audio Steps
The following steps show you how you can easily fade audio in Kinemaster;
Step1If you don’t have Kinemaster already, start by downloading and installing the video editor on your computer.
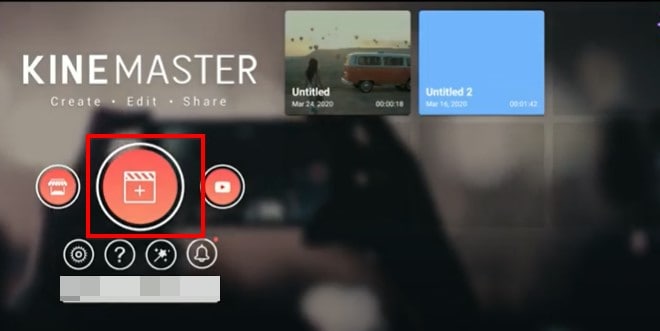
Step2Open Kinemaster on your computer and then click on the “New Project” icon to start. Select the aspect ratio that you would like to use. If you are not sure, we recommend choosing the “16:9” aspect ratio.
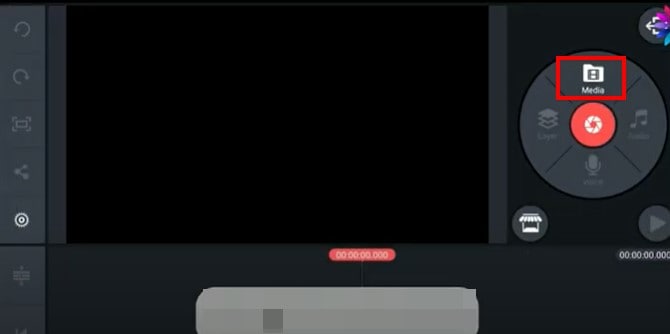
Step3In the next window, click on “Media” to select the clip you would like to add to the Kinemaster project that you have just created.
Step4To fade in and fade out the audio in the project, click on the gear icon from the options to the left of the screen.
![]()
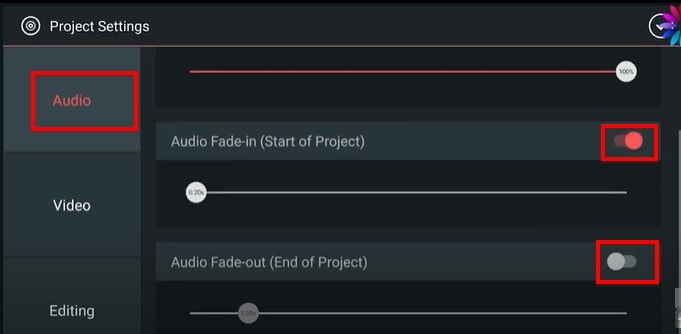
Step5Select the “Audio” tab on the next screen and then turn on the switch next to “Audio Fade-in (Start of Project)” and “Audio Fade-out (End of Project).” This will add a fade-in and fade-out effect at the beginning of the audio and at the end of it.
Step6You can then easily set the duration of the “Audio fade-in” and “Audio fade-out” by dragging the slider below each option. We recommend setting the duration to just a few seconds.
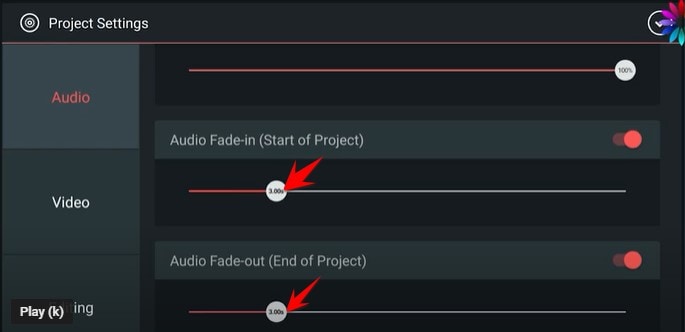
Don’t forget to save the project when you’re done.
Kinemaster Alternative to Edit Audio
Kinemaster is a good way to edit both audio and video on your computer, but the following options are just as good;
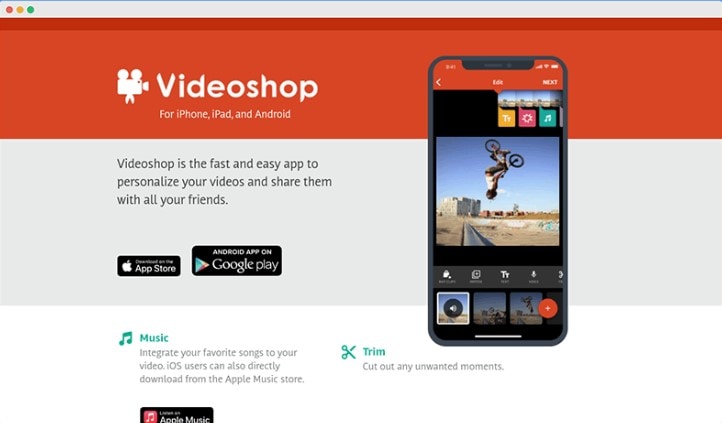
1. VideoShop
VideoShop is a simple to use and highly effective program that you can use to create and edit videos on your computer. The interface makes it easy to import any video project that you have into the program and the wealth of very useful features can help you edit the video in various ways.
For example, you can change the speed of the video, add transitions at various points in the video, add and remove text, add and remove music and so much more. Although there is a free trial version, you will only be able to access some of the more useful features when you purchase the premium version.
The Pro version of VideoShop goes for $3.99 a month, but you can get lifetime access to the program for only $39.99. One thing that VideoShop has over Kinemaster is that it is very easy to use, even beginner users find video editing a breeze with this tool.
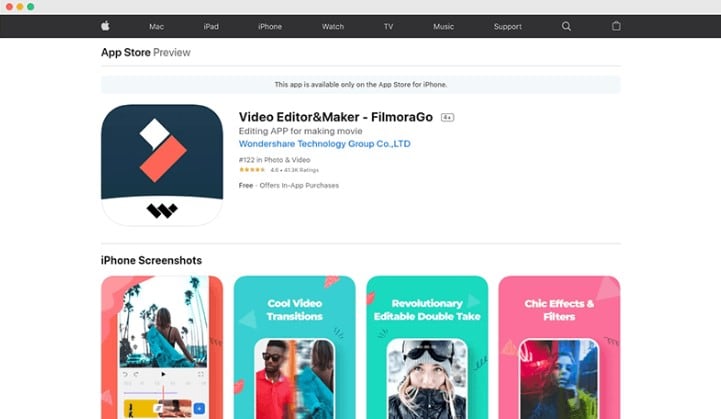
2. Filmora
If you are looking for a simple way to edit videos on Android or iOS devices, Filmora is one of the best options in the market. This mobile version of the very popular Filmora video editor is just as easy to use as its parent program. You can use it to create video projects from scratch or upload a video and make changes to it.
It offers you a lot of choices when it comes to editing features including trimming sections of the video, adding filters, adding music, adding or removing text, and even changing the canvas or the background of the video. Advanced options such as changing the speed of the video are also available.
One of the things that we love about Filmora is that you don’t even have to create an account to use it or remove the watermark added to the completed video project, watching a video ad can be enough. But this option is only available once every 24 hours, meaning that you can only remove a watermark on the free version once a day. Filmora is available for both iOS and Android and the yearly premium plan will cost you just $19.90.
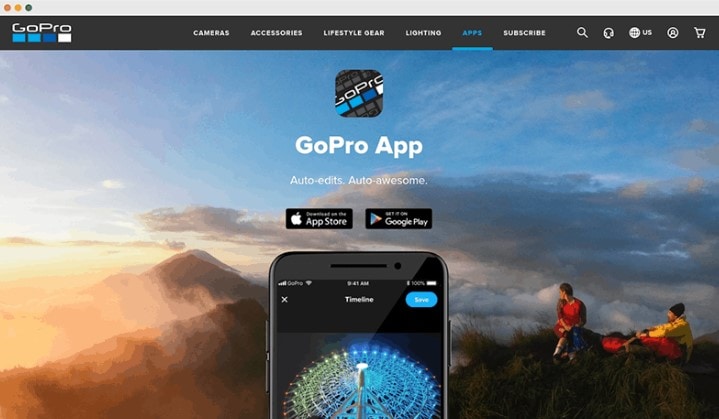
3. Quik
Quik is a video editing program created by GoPro for the purpose of editing GoPro videos, but that doesn’t mean that you will not be able to use it to edit other types of videos. You can use Quik to create a new project or edit an existing video and gives users a lot of different options when it comes to video editing.
One of the main benefits of using Quik is that you can easily add music, audio, and special effects to a video as well as change the length of the video, fade audio in and out and even change when the music starts. It is also one of the best ways to use images to create collages and slideshows very easily. There are a lot of slideshow and collage templates to choose from, and you can edit them easily by adding your music and images. Quik is completely free to use and you can upload your creation to the cloud ad share the link with others.
Conclusion
Kinemaster is one of the most popular video editing tools, especially since it simplifies the video editing process to make it very easy. All the alternative tools we have outlined here in this article are selected because they can make video editing quite simple.
Free Download For Win 7 or later(64-bit)
Free Download For macOS 10.14 or later
Also read:
- Updated How Can You Deny These Top 10 Free Speech to Text Software for 2024
- 2024 Approved Free Titles For Final Cut Pro
- New Every Compositor Should Know The Trick of Color Match in After Effects for 2024
- How to Edit a TikTok Video After Posting
- New In 2024, Online Video Makers
- New 2024 Approved The Ultimate Guide to Make a Text Collage
- New Cropping Video in VLC Step by Step for 2024
- In 2024, 8 Top Premiere Pro Slideshow Templates
- Do You Want to Know How to Remove Audio From a Video without a Watermark? Keep Reading This Article Since We Have the Answers for You. Complete with the Guide on How to Do It
- Some Leading AI Tools to Replace Sky Backgrounds for 2024
- In 2024, Create an Awesome Logo Reveal with Logo Intro Templates
- New In 2024, Zoom In and Zoom Out on YouTube
- 2024 Approved Quick Answer What Is a Transparent Logo and Why Do You Need It
- In 2024, Cropping Videos in VLC Step by Step
- Updated Best Ways to Convert Video Frame Rate to 60FPS Software and Online Choices
- New 2 Effective Ways to Make SRT File Translation Like a Pro
- New Converting Files Is Easy with the Right Tools, and Likewise, GIF to JPG Conversion Is. Choose the Best Tool and Get the Expected Results Within the Blink of an Eye
- 2024 Approved A Countdown Effect Is Widely Used in Gaming and Report Videos. So How to Create Your Own Countdown Video? This Article Will Tell You some Ideas About Contdown Video Editing
- New In 2024, 10 Best Free Spanish Text To Speech Converter Software Windows, Mac, Android, iPhone, & Online
- In 2024, For People Wanting to Mock GPS on Lava Storm 5G Devices | Dr.fone
- In 2024, Ultimate Guide on Apple iPhone 13 Pro iCloud Activation Lock Bypass
- In 2024, Unova Stone Pokémon Go Evolution List and How Catch Them For Samsung Galaxy A14 5G | Dr.fone
- How to fix iCloud lock from your Apple iPhone 12 and iPad
- How to Reset a Vivo Y27 4G Phone that is Locked?
- 2024 Approved A Guide on Starting Private Live Streams on YouTube
- In 2024, How to Watch Hulu Outside US On Poco X6 Pro | Dr.fone
- In 2024, How to Unlock Apple iPhone 14 with a Mask On | Dr.fone
- Change Location on Yik Yak For your Vivo X90S to Enjoy More Fun | Dr.fone
- How To Pause Life360 Location Sharing For Motorola Moto G13 | Dr.fone
- Undeleted lost videos from Oppo A58 4G
- Hassle-Free Ways to Remove FRP Lock from ZTE Phones with/without a PC
- FRP Hijacker by Hagard Download and Bypass your Samsung FRP Locks
- Title: 2024 Approved Slow-Motion Edits Are Pretty Mesmerizing, and Weve All Imagined Ourselves in One of Those Visually Appealing, Slowed-Down Movies. Well Teach You How to Make a Smooth Slo-Mo Video Using Twixtor in This Article. Stay Tuned Until the End
- Author: Chloe
- Created at : 2024-04-24 07:08:22
- Updated at : 2024-04-25 07:08:22
- Link: https://ai-editing-video.techidaily.com/2024-approved-slow-motion-edits-are-pretty-mesmerizing-and-weve-all-imagined-ourselves-in-one-of-those-visually-appealing-slowed-down-movies-well-teach-you-/
- License: This work is licensed under CC BY-NC-SA 4.0.
