
:max_bytes(150000):strip_icc():format(webp)/GettyImages-1253176532-e5ce8e507433489f87c8b37818c13a01.jpg)
2024 Approved Splitting Audio From Video in Sony Vegas Step by Step
Splitting Audio From Video in Sony Vegas [Step by Step]
The Sony Vegas Pro is software for professionally editing videos. There are many tools and effects available for audio and video that you can add respective to your requirements. The stabilization engine is available in Sony Vegas Pro to reduce the movements that you can observe the shaking in the videos. It helps in improving the quality of your content thoroughly. Sony Vegas pro also helps pin the texts or grading of the colours to apply objects in various dimensions.
You can use this software for editing, organizing or viewing the projects that are going on and present on the timeline. Even sharing the small parts of the video is possible. As a user of Sony Vegas Pro, it is a total choice of handling the colouring exposure to maintain the workflow. Here, the main discussion is regarding the split of the audio from the video in the Sony Vegas Pro. There are also some details about the substitute, which is Wondershare Filmora.
How can you separate audio from the video clips in Sony Vegas Pro?
The best features of Sony Vegas Pro help create, edit, trim or even crop the videos. You can use them in making videos worth viewing for your audience. Sony Vegas Pro can make your work on multiple screens at the same time. The most important characteristic is the extraction of the audio from the video.
Step 1: When you have finished the installation of the Sony Vegas Pro on your device, now import the video clip from which you want to extract the audio.

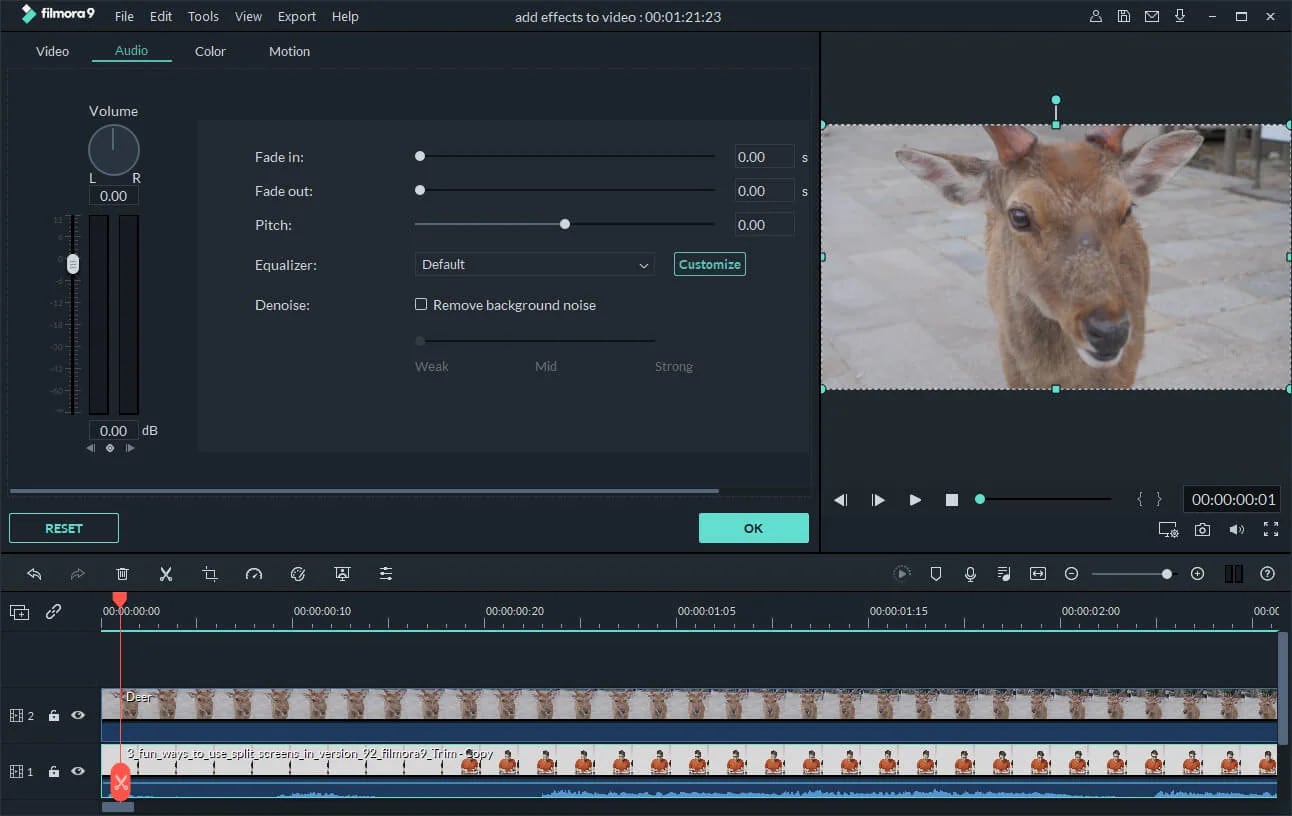
Step 2: Drag and drop your video clip in the editing area. Here, you can easily see the video and audio tracks are all together. Whatever effect you apply, both will show the results.

Step 3: You have to separate the audio from the video files in this step. After selecting the track, whether audio or video, simply press the “U” letter on your keyboard. In this step, keep holding the cursor. It permits you to keep moving the video clips quickly. Now, it is easy to download audio files from this area.
Step 4: The tracks are separate now, so you can move, delete or edit them individually. Definitely, it doesn’t affect the other track.
An easier way to split the audio from the video
Most graphic designers and video editors consider the Sony Vegas Pro as the professional level software for editing purposes. Due to the user interface of advanced level, high pricing and availability only for the Mac users make people look for options as the editing tool and accessible on both devices using Windows and Mac.
Filmora Video Editor is the best consideration among all of the editors. You can also use the Wondershare Filmora in dark mode as well. This feature helps the user edit in his comfort zone without causing any harm to the eyes. In the following steps, you can easily separate the audio from the videos in Wondershare Filmora.
For Win 7 or later (64-bit)
For macOS 10.14 or later
Features
- Simple interface and all the tools are easily available
- Just need a few clicks along the drag and drop to perform the functionalities
- Unlimited sharing of the videos on YouTube, Vimeo and many others
- Splitting of the clips and screen
- Easy to split up the audio from the video
Step 1: After running the Wondershare Filmora, select the ratio of your choice 4:3 or 16:9 for entering in the mode of editing. Click on the “Import” so you can add the photos, video and audio from the folder of your system. After importing the videos, drag and drop in the timeline. As a default, all the files get merged with one another with no gap.

Step 2: Right-click on the video clip from which you want to extract the audio. Select the option of “Detach Audio” from the menu. Instantly, an audio file is visible on the screen, and it is the original one from the source.

Step 3: Now, the audio track gets separated from the video successfully. Wondershare Filmora also offers to add one more audio file. Yes, it is also possible with this software.
Step 4: After separating the audio from the video, it is simple to delete the track, whether it is audio or video that is not in use or want to use. Click on the “Export” option for saving your required audio tracks, or you can even select the “iPod” for playing the audio. You can also save the audio file separately as the new file on your hard drive. After exporting the audio tracks, load the project file again that has the frames for the video and later export the video file.

Whenever you think about the compatibility of editing software with different operating systems, Wondershare Filmora comes to mind as the first choice. All the new features of Wondershare Filmora in its latest version have received positive feedback and reviews. Definitely, it is the actual replacement of the previously used editors such as video editor in Windows or iMovie in Mac.
Wondershare Filmora not only adds the animation but as well offers customization. Adding the keyframes is very easy for the user to change the positions, scale or rotate the clips. The feature of colour matching is also available so you can match the clips from one frame to another. Even the shortcut keys are available for all the commands that bring effective and efficient editing tasks.
Just little guidance and assistance can help you use the Wondershare Filmora as the options are suitable in front of your screen. No more waiting and thinking; start using this most straightforward editor and enjoy all the features of Wondershare Filmora.
Step 2: Drag and drop your video clip in the editing area. Here, you can easily see the video and audio tracks are all together. Whatever effect you apply, both will show the results.
Step 3: You have to separate the audio from the video files in this step. After selecting the track, whether audio or video, simply press the “U” letter on your keyboard. In this step, keep holding the cursor. It permits you to keep moving the video clips quickly. Now, it is easy to download audio files from this area.
Step 4: The tracks are separate now, so you can move, delete or edit them individually. Definitely, it doesn’t affect the other track.
An easier way to split the audio from the video
Most graphic designers and video editors consider the Sony Vegas Pro as the professional level software for editing purposes. Due to the user interface of advanced level, high pricing and availability only for the Mac users make people look for options as the editing tool and accessible on both devices using Windows and Mac.
Filmora Video Editor is the best consideration among all of the editors. You can also use the Wondershare Filmora in dark mode as well. This feature helps the user edit in his comfort zone without causing any harm to the eyes. In the following steps, you can easily separate the audio from the videos in Wondershare Filmora.
For Win 7 or later (64-bit)
For macOS 10.14 or later
Features
- Simple interface and all the tools are easily available
- Just need a few clicks along the drag and drop to perform the functionalities
- Unlimited sharing of the videos on YouTube, Vimeo and many others
- Splitting of the clips and screen
- Easy to split up the audio from the video
Step 1: After running the Wondershare Filmora, select the ratio of your choice 4:3 or 16:9 for entering in the mode of editing. Click on the “Import” so you can add the photos, video and audio from the folder of your system. After importing the videos, drag and drop in the timeline. As a default, all the files get merged with one another with no gap.
Step 2: Right-click on the video clip from which you want to extract the audio. Select the option of “Detach Audio” from the menu. Instantly, an audio file is visible on the screen, and it is the original one from the source.
Step 3: Now, the audio track gets separated from the video successfully. Wondershare Filmora also offers to add one more audio file. Yes, it is also possible with this software.
Step 4: After separating the audio from the video, it is simple to delete the track, whether it is audio or video that is not in use or want to use. Click on the “Export” option for saving your required audio tracks, or you can even select the “iPod” for playing the audio. You can also save the audio file separately as the new file on your hard drive. After exporting the audio tracks, load the project file again that has the frames for the video and later export the video file.
Whenever you think about the compatibility of editing software with different operating systems, Wondershare Filmora comes to mind as the first choice. All the new features of Wondershare Filmora in its latest version have received positive feedback and reviews. Definitely, it is the actual replacement of the previously used editors such as video editor in Windows or iMovie in Mac.
Wondershare Filmora not only adds the animation but as well offers customization. Adding the keyframes is very easy for the user to change the positions, scale or rotate the clips. The feature of colour matching is also available so you can match the clips from one frame to another. Even the shortcut keys are available for all the commands that bring effective and efficient editing tasks.
Just little guidance and assistance can help you use the Wondershare Filmora as the options are suitable in front of your screen. No more waiting and thinking; start using this most straightforward editor and enjoy all the features of Wondershare Filmora.
How to Create a Slideshow GIF?
How to Make a Slideshow GIF?
An easy yet powerful editor
Numerous effects to choose from
Detailed tutorials provided by the official channel
In this world of advanced technology and inventions, nothing is impossible. And we have found different exciting ways of making the world around us a more interesting a fun place to live. And all this is because of the rapidly advancing technology.
The simplest things around us have become more exciting and fun to deal with. The mere mode of communication has shifted to the digital platform and has improved so much than before. We can now express how we feel through the different emotions as precisely as possible.
And adding to that, now, we have the GIFs to make our conversation funnier and more engaging. So, what if we integrate these gifs in slideshows? It will be much more exciting and a huge plus point. So, let us look into what are GIFs, how can we use them and lastly, what tool is the best for creating some fantastic and amazing GIFs and videos.
So, let us now start our discussion without any further delay!
In this article
01 [What Is a GIF and When to Use a GIF?](#Part 1)
02 [How to Edit a GIF in Google Slides?](#Part 2)
03 [How to Make a Slideshow GIF?](#Part 3)
Part 1 What Is a GIF and When to Use a GIF?
It is essential that we discuss what a GIF is? Firstly, GIF is the abbreviation for Graphics Interchange Format. Steve Wilhite, an American computer scantiest, was responsible for developing this bitmap image format with the team at the online services provider CompuServe.
The GIFs are images and animations whose sizes are reduced. The animations are much shorter in duration than the regular animation videos. It makes the animations look more expressive. The message, information, or expression to be portrayed through the animation gets better expressed due to its speed.
Therefore, the GIFs’ animations are much more exciting and engaging. A question might arise t you: Why should you use GIFs in slideshows, or how can they be beneficial. Let us put forth some benefits of GIFs that will help you know and understand their importance. Here are the benefits of using Gifs.
● Gifs slideshow slides tend to engage the audience much more. Firstly, they are one of the most unique ways of presenting a slideshow or any other content. So, being unique will automatically positively attract more attention.
● Your content and slideshow will stand out among the crowd. Firstly, GIFs are some of the most inimitable components to fit in a slideshow. Additionally, each GIF has its characteristic features different from the others. Each of them is interesting and engaging in their way. So, you always have the chance of being better than the rest when you use GIFs in slideshows.
● As google slides spread, a sensation of laughter, which, consequently, prevails in a positive environment. This, in turn, helps make your slideshow more appealing and more enjoyable. The more fun you add to anything, the more attractive it will be. And adding GIFs in slideshows can be the best way of doing so.
Now, let us discuss the next important question about using the GIFs: when should we use them? You must know that gifs on google slides can be used in a limited way. So, here are the different ways you can really and readily integrate GIFs in your slideshows.
● Use them in the first slide as a title slide. Whenever you use a GIF in the first or the introductory slide, you automatically initiate your presentation with something unique. And as a result, you successfully grab the audience’ leave a good impression. Additionally, from the first slide itself, you tend to have a comfortable and positive environment to continue your presentation more impeccably.
● Use URL GIFs. There are plenty of them; therefore, you can have abundant choices and choose the best among them, especially the more relatable and engaging ones. The URL GIFs are plentily used in chat. So, adding them to your slides makes it more interesting, relatable and praiseworthy. However, it would be best to be careful about the copyright aspect. Ensure not to use URL GIFs that can face you with copyright issues.
● You can also use the screengrabs; you can easily pull the attention of your audience to different parts of your content, one after the another, most systematically and effectively. As a result, you can explain and express your content in the most detailed way possible.
● Either type of GIF that you can use are charts and graphs. In the first place, putting graphs and charts tend to make your presentation more organised, factual and professional. So, when you include GIFs of charts and graphs, you take the beneficial qualities of your display a notch higher.
Part 2 How to Edit a GIF in Google Slides?
There are numerous ways to edit the GIFs in google slides. If you want to edit a GIF in google slides, you will have to follow specific steps. It is alright if you are unaware of the steps because we will discuss the actions that will help you edit gifs in google slides.
01For cropping the GIFs
Sometimes, you may not want the entire Gif to be in your slideshow. And for that, you need to cut off the unnecessary portion of the GIF. You can ideally do so with the help of cropping the GIF, and it helps attain better focus on the part of the GIF that is relatable and, therefore, makes your slide enhanced and improved.
How to crop a GIF in google slide?
Step 1: Tap on the GIF twice and then pull the black tabs in the size you want your GIF to be.
Step 2: Press “Enter” to crop the GIF in your selected size.
02For cropping GIFs in a particular shape
You might want to make your GIFs into a particular shape, and it can be a triangle, square or even a heart shape. This will make your slideshow look more eye-catching and worked on.
How to crop the GIFs in a particular shape in google slides?
Step 1: Select the arrow present next to the “Crop” option.
Step 2: Select the option “shape”.
Step 3: A list of shapes will be shown. Choose the one you would want your GIF to have.

03For putting borders in the GIFs
To make your gifs more countered, eye-catching and prominent, you can put a border around them. You can readily do so in google slides in the simplest way possible.
How to put borders in GIFs in google slides?
Step 1: Select your GIF. Head to the “Menu Bar”.
Step 2: go to “Border Colour” and select the colour of the border you want to put around your GIF.
Step 3: Go to the “Border Weight” option and select the thickness of the border your GIF would have.

04For formatting your GIFs
GIFs can be readily formatted in google slides, which is in the following ways.
Rotating the GIFs
If you want to rotate your GIFs vertically or horizontally, you have to-
Step 1: Select the GIF and go to the “Format” options in the toolbar.
Step 2: Select the option “Rotate” and select to rotate it vertically or horizontally.
Recolouring the GIFs
You might want to match the colours of your GIFs with your presentation. And you can do so by-.
Step 1: Select the GIF and go to the “Recolour” option.
Step 2: Select the colour that you want.
Part 1 How to Make a Slideshow GIF?
As we had mentioned earlier, we will be introducing you to the best tool that will help you make the most incredible GIFs as well as video edits; it is the Filmora. It includes plenty of features that will help the professionals nurture their skills and the beginners.
But, how can you use Wondershare Filmora Video Editor for making google slides animated gifs? Here are the steps for it.

Wondershare Filmora - Best Video Editor for Mac/Windows
5,481,435 people have downloaded it.
Build unique custom animations without breaking a sweat.
Focus on creating epic stories and leave the details to Filmora’s auto features.
Start a creative adventure with drag & drop effects and endless possibilities.
Filmora simplifies advanced features to save you time and effort.
Filmora cuts out repetition so you can move on to your next creative breakthrough.
Step 1: import the media files that you want
Step 2: Drag the media files to the times to edit the animation of it.

Step 3: Edit the media files the way you want. Crop, rotate, recolour the way you want it to appear.
Step 4: You can integrate some texts into it if you want.

Step 5: Save the edit and export it for further use.

● Key Takeaways from This Episode →
● Therefore, in the above discussion, we have enveloped numerous important aspects about GIFs and their utility in the google slides. We started with discussing and underrating what a GIF is and why is slider gif essential for us.
● Next, discuss the various ways you can edit the GIFs in your slideshows, along with the steps accordingly. Lastly, we introduced and discussed the best tool you can use for editing videos making GIFs and videos.
● So, if you are a beginner or a professional who wants to use the more advanced features of editing videos, Filmora is the best platform and tool for you. Access it for free through its free trial options. And once you find how amazing it is, you can readily access its paid features to enjoy the sphere of editing more profoundly!
In this world of advanced technology and inventions, nothing is impossible. And we have found different exciting ways of making the world around us a more interesting a fun place to live. And all this is because of the rapidly advancing technology.
The simplest things around us have become more exciting and fun to deal with. The mere mode of communication has shifted to the digital platform and has improved so much than before. We can now express how we feel through the different emotions as precisely as possible.
And adding to that, now, we have the GIFs to make our conversation funnier and more engaging. So, what if we integrate these gifs in slideshows? It will be much more exciting and a huge plus point. So, let us look into what are GIFs, how can we use them and lastly, what tool is the best for creating some fantastic and amazing GIFs and videos.
So, let us now start our discussion without any further delay!
In this article
01 [What Is a GIF and When to Use a GIF?](#Part 1)
02 [How to Edit a GIF in Google Slides?](#Part 2)
03 [How to Make a Slideshow GIF?](#Part 3)
Part 1 What Is a GIF and When to Use a GIF?
It is essential that we discuss what a GIF is? Firstly, GIF is the abbreviation for Graphics Interchange Format. Steve Wilhite, an American computer scantiest, was responsible for developing this bitmap image format with the team at the online services provider CompuServe.
The GIFs are images and animations whose sizes are reduced. The animations are much shorter in duration than the regular animation videos. It makes the animations look more expressive. The message, information, or expression to be portrayed through the animation gets better expressed due to its speed.
Therefore, the GIFs’ animations are much more exciting and engaging. A question might arise t you: Why should you use GIFs in slideshows, or how can they be beneficial. Let us put forth some benefits of GIFs that will help you know and understand their importance. Here are the benefits of using Gifs.
● Gifs slideshow slides tend to engage the audience much more. Firstly, they are one of the most unique ways of presenting a slideshow or any other content. So, being unique will automatically positively attract more attention.
● Your content and slideshow will stand out among the crowd. Firstly, GIFs are some of the most inimitable components to fit in a slideshow. Additionally, each GIF has its characteristic features different from the others. Each of them is interesting and engaging in their way. So, you always have the chance of being better than the rest when you use GIFs in slideshows.
● As google slides spread, a sensation of laughter, which, consequently, prevails in a positive environment. This, in turn, helps make your slideshow more appealing and more enjoyable. The more fun you add to anything, the more attractive it will be. And adding GIFs in slideshows can be the best way of doing so.
Now, let us discuss the next important question about using the GIFs: when should we use them? You must know that gifs on google slides can be used in a limited way. So, here are the different ways you can really and readily integrate GIFs in your slideshows.
● Use them in the first slide as a title slide. Whenever you use a GIF in the first or the introductory slide, you automatically initiate your presentation with something unique. And as a result, you successfully grab the audience’ leave a good impression. Additionally, from the first slide itself, you tend to have a comfortable and positive environment to continue your presentation more impeccably.
● Use URL GIFs. There are plenty of them; therefore, you can have abundant choices and choose the best among them, especially the more relatable and engaging ones. The URL GIFs are plentily used in chat. So, adding them to your slides makes it more interesting, relatable and praiseworthy. However, it would be best to be careful about the copyright aspect. Ensure not to use URL GIFs that can face you with copyright issues.
● You can also use the screengrabs; you can easily pull the attention of your audience to different parts of your content, one after the another, most systematically and effectively. As a result, you can explain and express your content in the most detailed way possible.
● Either type of GIF that you can use are charts and graphs. In the first place, putting graphs and charts tend to make your presentation more organised, factual and professional. So, when you include GIFs of charts and graphs, you take the beneficial qualities of your display a notch higher.
Part 2 How to Edit a GIF in Google Slides?
There are numerous ways to edit the GIFs in google slides. If you want to edit a GIF in google slides, you will have to follow specific steps. It is alright if you are unaware of the steps because we will discuss the actions that will help you edit gifs in google slides.
01For cropping the GIFs
Sometimes, you may not want the entire Gif to be in your slideshow. And for that, you need to cut off the unnecessary portion of the GIF. You can ideally do so with the help of cropping the GIF, and it helps attain better focus on the part of the GIF that is relatable and, therefore, makes your slide enhanced and improved.
How to crop a GIF in google slide?
Step 1: Tap on the GIF twice and then pull the black tabs in the size you want your GIF to be.
Step 2: Press “Enter” to crop the GIF in your selected size.
02For cropping GIFs in a particular shape
You might want to make your GIFs into a particular shape, and it can be a triangle, square or even a heart shape. This will make your slideshow look more eye-catching and worked on.
How to crop the GIFs in a particular shape in google slides?
Step 1: Select the arrow present next to the “Crop” option.
Step 2: Select the option “shape”.
Step 3: A list of shapes will be shown. Choose the one you would want your GIF to have.
03For putting borders in the GIFs
To make your gifs more countered, eye-catching and prominent, you can put a border around them. You can readily do so in google slides in the simplest way possible.
How to put borders in GIFs in google slides?
Step 1: Select your GIF. Head to the “Menu Bar”.
Step 2: go to “Border Colour” and select the colour of the border you want to put around your GIF.
Step 3: Go to the “Border Weight” option and select the thickness of the border your GIF would have.
04For formatting your GIFs
GIFs can be readily formatted in google slides, which is in the following ways.
Rotating the GIFs
If you want to rotate your GIFs vertically or horizontally, you have to-
Step 1: Select the GIF and go to the “Format” options in the toolbar.
Step 2: Select the option “Rotate” and select to rotate it vertically or horizontally.
Recolouring the GIFs
You might want to match the colours of your GIFs with your presentation. And you can do so by-.
Step 1: Select the GIF and go to the “Recolour” option.
Step 2: Select the colour that you want.
Part 1 How to Make a Slideshow GIF?
As we had mentioned earlier, we will be introducing you to the best tool that will help you make the most incredible GIFs as well as video edits; it is the Filmora. It includes plenty of features that will help the professionals nurture their skills and the beginners.
But, how can you use Wondershare Filmora Video Editor for making google slides animated gifs? Here are the steps for it.
Wondershare Filmora - Best Video Editor for Mac/Windows
5,481,435 people have downloaded it.
Build unique custom animations without breaking a sweat.
Focus on creating epic stories and leave the details to Filmora’s auto features.
Start a creative adventure with drag & drop effects and endless possibilities.
Filmora simplifies advanced features to save you time and effort.
Filmora cuts out repetition so you can move on to your next creative breakthrough.
Step 1: import the media files that you want
Step 2: Drag the media files to the times to edit the animation of it.
Step 3: Edit the media files the way you want. Crop, rotate, recolour the way you want it to appear.
Step 4: You can integrate some texts into it if you want.
Step 5: Save the edit and export it for further use.
● Key Takeaways from This Episode →
● Therefore, in the above discussion, we have enveloped numerous important aspects about GIFs and their utility in the google slides. We started with discussing and underrating what a GIF is and why is slider gif essential for us.
● Next, discuss the various ways you can edit the GIFs in your slideshows, along with the steps accordingly. Lastly, we introduced and discussed the best tool you can use for editing videos making GIFs and videos.
● So, if you are a beginner or a professional who wants to use the more advanced features of editing videos, Filmora is the best platform and tool for you. Access it for free through its free trial options. And once you find how amazing it is, you can readily access its paid features to enjoy the sphere of editing more profoundly!
Are You Looking to Enhance Your Video or Photo Colors Using Premiere LUTs? Get to Know About the Best Free LUT Effects to Get Started
Videos and images are essential digital media for storing memories, moments, and special occasions. Hence, you cannot compromise on the quality of your visual content. So, it’s necessary to use free LUTs Premiere Pro that upgrades content visual quality. In this article, you will find 15 different types of LUT effects . So, start making your videos and photos attractive again.
Part 1: What Are LUTs? What Are They Used For?
LUTs, known as Look-Up Tables, enhance the quality of photos and videos. Meanwhile, LUTs are involved in color grading, computer graphics, and image processing. In color grading, you can use Premiere Pro LUTs for color correction and enhancement. Within computer graphics, LUTs have been used within color hue, saturation, and brightness. In image processing, you can use LUTs for color thresholding and inversion.
Uses of LUT Premiere Pro
- Color Enhancement: With available color wheels, LUTs allow for enhancing the colors of photos and videos. This way, users can highlight the shadows, highlights, and mid-tones. For vlogs or landscape films, color wheels are essential in enhancing visual quality.
- Effects & Filters: By using special effects and filters, add a new touch to your visual content. Hence, your video or photo will be improved with appropriate reflections, lighting, and colors. With a unique appearance, make your visual content more enchanting.
- Adjust Intensity: LUTs allow customizing intensity within applied filters and color gradients. So, users can adjust hue, brightness, and saturation within the 0 – 100% range. Thus, as a user, you can set a darker or lighter tone for your visual media.
- Theme Personalization: Apply visualized LUTs themes within different resources in high-quality color schemas. Hence, you can make your photo or video look blurry, colorful, retro, sharpening, etc.
Empower your videos with a new mood using different LUTs. Filmora now offers 800+ top-quality 3D LUTs cover a broad range of scenarios. Transform your videos with Filmora’s powerful 3D LUTs.
Apply LUT on Videos Apply LUT on Videos Learn More


Part 2: LUTs are Good for Which Profession and Why?
With the advancement of digital technology, the need for enhanced graphical media is rising. Meanwhile, LUT Adobe Premiere Pro is great for upscaling photo and video quality. Hence, LUTs can be an ideal solution for optimizing work in different professions, including:
1. Video Production
Within film industries, video and film production is common. Thereafter, using LUTs Adobe Premiere Pro is a perfect option for color grading. Hence, film directors can correct, adjust, or enhance colors across scenes. This saves time during the video editing process.
2. Advertising
LUTs are a great source of visual enhancement for the advertising industry. Since they allow adjusting colors of advertising content like clips, posters, and brochures. When marketing content is appealing, there will be more audience engagement and sales.
3. Photography
Photographers can use LUTs to add special styles and effects to their photographs. This way, they can increase their photography standards with more enchanting looks. With improved color vision, correction, and grading, LUTs are great for photography.
4. Broadcasting
The broadcasters are required to adjust the colors of their live shows or streaming. Thus, using LUTs can save time from deep video editing. Using LUTs, they can apply filters to improve the visual quality of live videos.
Part 3: Best Free LUTs For Premiere Pro That Can Be Used
The internet has many options when choosing the best free LUTs for Premiere Pro. Similarly, you can get confused as a user. After all, selecting suitable LUTs can be difficult. Thus, here you’ll find 15 top colors preset Premiere Pro LUTs:
1. Custom Styled LUTs
If you have log footage with flat looks, these custom-styled LUTs are a great solution. There’re 13 different LUT profiles in this LUT Premiere Pro free pack. Meanwhile, you can easily customize video color gradients. The color presets are unique with their standard color curve. By tweaking settings and adjusting intensity, you can customize LUTs.

2. Cinematic LUTs for Premiere Pro
Improvise your video colors with Cinematic LUTs for Premiere Pro. This LUTs Premiere Pro pack comes with unique cinematic effects. This means you can improve your video engagement with cinematic style and color. There are 8 special filters that are very easy to implement into your videos. So even if you’re a beginner, you can use this LUT pack.

3. Free Vintage LUT for Premiere Pro
This Premiere Pro-free LUTs pack is a perfect solution for video styling. So you can enhance your videos with special colors and unique gradients. This way, you can add natural looks to your video with personalized saturation. With a range of color filters, this LUT pack can offer enhanced video upscaling.

4. Fashion LUTs
If you’re inspired by fashion, blend fashionable looks into your videos. Hence, your videos will look more professional with these Fashion LUTs. There are 15 Premiere LUTs presets for extending video color grading. This way, your videos will look more cinematic with extended styling. Meanwhile, it’s easy to download LUTs for Premiere Pro on your device.

5. Free Reign Sample LUT
Blend creativity into your videos with Free Reign Sample LUT. This LUT color preset Premiere Pro pack has multiple color presets. With each preset, there comes a unique filter with a different color gradient. So you can style your videos in appealing textures, teal, and saturation. For photography or videography, this LUT pack is an ideal solution.

6. Carbon Sample LUT
Add carbon contrast to your videos using the carbon Premiere Pro LUTs free pack. There are special carbon effects that utilize advanced color grading. This way, you can make your videos more interesting and engaging. The availability of different color arts ensures cinematic looks with specialized saturation. This LUT can be integrated into any video type.

7. Grecian Ideal LUTs
With 9 different color gradients, upgrade your videos using this LUTs pack. Meanwhile, you can use these LUTs in Adobe Premiere Pro or any program. By using these LUTs, you’ll experience unique color styling in your videos. If you are a photographer, these LUTs will help enhance your pictures and snaps. After all, there are special filters in this LUT pack Premiere Pro.

8. Instagram LUTs Color Filters Preset
Instagram is a popular video and image-sharing platform. Thus, it’s essential to transform your visual media with specialized Instagram LUTs. After all, these LUTs transform your content with special filters in unique colors. In total, there are 12 filters, and all of them are unique. So you can choose any filter preset in this free LUTs premiere pack.

9. Lutify Me 7 Free LUTs
Add life to your visual content with the Lutify LUTs pack. There are 7 different LUTs for upscaling color schemas in your photos and videos. All these LUTs utilize unique and enticing cinematography with extended color grading. Thus, you can adjust tone and contrast as needed. Meanwhile, you will not face any problems using this free premiere LUTs pack.

10. IWLTBAP 10 Free LUTs
Experience ultimate cinematic effects with IWLTBAP Free LUTs. There are 10 free LUTs, and more than 290 color presets. Thus, you can easily enhance the visual quality of your photos and videos. This LUTs for Premiere Pro free download pack is an ideal choice for color grading. Meanwhile, all the color elements are based on providing cinematic touch.

11. Free Edgy LUT Pack
Edge your favorite visual content with enchanting looks. This free-edge LUT pack comprises 5 different LUTs to make your videos special. With unique color correction, these LUTs have magical gradients in them. Thus, the quality of your pictures and videos will improve. The color schemas will also improve using this LUTs Premiere Pro pack.

12. Sports LUTs
Lift your sports enthusiasm with a special sports LUTs pack. By using these free LUTs for Premiere Pro, add sports-like filters to videos. After all, there are special filters with color presets to enhance visual quality. This way, your videos will start looking more attractive with retouching colors. Even your darker videos will appear more transparent.

13. Universal LUTs Pack
Make your video starting more visually appealing with Universal LUTs Pack. After all, there are a bunch of filters presets that offer color correction and enhancement. Hence, your videos will be transformed into special art. Meanwhile, your videography could get a huge boost with scintillating colors. Using this LUT color preset Premiere Pro is simple and convenient.

14. SB Wedding LUTs Pack
Weddings are momentous occasions, and they involve both videography and photography. By using the SB Wedding LUTs pack, now add different color elements to wedding visuals. There are unique romantic tones, color schemas, and 12 video LUTs. All these video LUTs are unique, with special color presets in different styles. Making weddings memorable is what this free LUTs premiere pack achieves.

15. 8 Movie Look LUTs
Movies are entertaining and unique because of cinematic color styles. With this movie LUTs pack, experience 8 different movie color presets. The identification of LUTs is taken from movies. Thus, they can turn your simple videos into ultimate movies. Meanwhile, this LUTs Adobe Premiere Pro pack can upscale video colors in multiple schemas.

Bonus Part: Finding the Best Free LUTs in Wondershare Filmora
Video editing is a way to enhance the quality of videos in an optimal way. Wondershare Filmora is a perfect video editor that provides instant solutions to upscale video. There are different elements, effects, stickers, and other filters to upgrade your video’s visual look. Meanwhile, the availability of LUTs allows users to extend the color patterns and textures of their videos.
Add LUTs on Video For Win 7 or later(64-bit)
Add LUTs on Video For macOS 10.14 or later
Wondershare Filmora contained more than 800 LUTs in different styles and tones. However, the exquisite video editing software has added more, taking its number above 800+ LUTs for optimizing color enhancement in your videos.

Key Features of Wondershare Filmora
- Color Sharpening: Filmora allows you to adjust the color sharpness of videos. It’s done by setting color blur and base as required. The feature is ideal if you want to record events or broadcast videos.
- Cover Optimization: You can create and optimize your video covers with Wondershare Filmora. Enhancing video covers with special LUTs, elements, text styles, and other effects is simpler.
- Effect Mask: There is also an option to use masking effects. You can use video overlays to modify, duplicate, hide, or reveal footage. The objects in the video can be covered using different shapes.
Conclusion
Colors are unique pieces of elements that gain attention at a glance. Similarly, adding colors to videos can make them more impressive and appealing. By using LUTs, you can optimize the color styling of your videos. After all, LUTs can enhance color saturation, brightness, lightning, and tone. Meanwhile, Wondershare Filmora equips the best LUTs for Premiere Pro in many gradients.
Apply LUT on Videos Apply LUT on Videos Learn More
Part 2: LUTs are Good for Which Profession and Why?
With the advancement of digital technology, the need for enhanced graphical media is rising. Meanwhile, LUT Adobe Premiere Pro is great for upscaling photo and video quality. Hence, LUTs can be an ideal solution for optimizing work in different professions, including:
1. Video Production
Within film industries, video and film production is common. Thereafter, using LUTs Adobe Premiere Pro is a perfect option for color grading. Hence, film directors can correct, adjust, or enhance colors across scenes. This saves time during the video editing process.
2. Advertising
LUTs are a great source of visual enhancement for the advertising industry. Since they allow adjusting colors of advertising content like clips, posters, and brochures. When marketing content is appealing, there will be more audience engagement and sales.
3. Photography
Photographers can use LUTs to add special styles and effects to their photographs. This way, they can increase their photography standards with more enchanting looks. With improved color vision, correction, and grading, LUTs are great for photography.
4. Broadcasting
The broadcasters are required to adjust the colors of their live shows or streaming. Thus, using LUTs can save time from deep video editing. Using LUTs, they can apply filters to improve the visual quality of live videos.
Part 3: Best Free LUTs For Premiere Pro That Can Be Used
The internet has many options when choosing the best free LUTs for Premiere Pro. Similarly, you can get confused as a user. After all, selecting suitable LUTs can be difficult. Thus, here you’ll find 15 top colors preset Premiere Pro LUTs:
1. Custom Styled LUTs
If you have log footage with flat looks, these custom-styled LUTs are a great solution. There’re 13 different LUT profiles in this LUT Premiere Pro free pack. Meanwhile, you can easily customize video color gradients. The color presets are unique with their standard color curve. By tweaking settings and adjusting intensity, you can customize LUTs.
2. Cinematic LUTs for Premiere Pro
Improvise your video colors with Cinematic LUTs for Premiere Pro. This LUTs Premiere Pro pack comes with unique cinematic effects. This means you can improve your video engagement with cinematic style and color. There are 8 special filters that are very easy to implement into your videos. So even if you’re a beginner, you can use this LUT pack.
3. Free Vintage LUT for Premiere Pro
This Premiere Pro-free LUTs pack is a perfect solution for video styling. So you can enhance your videos with special colors and unique gradients. This way, you can add natural looks to your video with personalized saturation. With a range of color filters, this LUT pack can offer enhanced video upscaling.
4. Fashion LUTs
If you’re inspired by fashion, blend fashionable looks into your videos. Hence, your videos will look more professional with these Fashion LUTs. There are 15 Premiere LUTs presets for extending video color grading. This way, your videos will look more cinematic with extended styling. Meanwhile, it’s easy to download LUTs for Premiere Pro on your device.
5. Free Reign Sample LUT
Blend creativity into your videos with Free Reign Sample LUT. This LUT color preset Premiere Pro pack has multiple color presets. With each preset, there comes a unique filter with a different color gradient. So you can style your videos in appealing textures, teal, and saturation. For photography or videography, this LUT pack is an ideal solution.
6. Carbon Sample LUT
Add carbon contrast to your videos using the carbon Premiere Pro LUTs free pack. There are special carbon effects that utilize advanced color grading. This way, you can make your videos more interesting and engaging. The availability of different color arts ensures cinematic looks with specialized saturation. This LUT can be integrated into any video type.
7. Grecian Ideal LUTs
With 9 different color gradients, upgrade your videos using this LUTs pack. Meanwhile, you can use these LUTs in Adobe Premiere Pro or any program. By using these LUTs, you’ll experience unique color styling in your videos. If you are a photographer, these LUTs will help enhance your pictures and snaps. After all, there are special filters in this LUT pack Premiere Pro.
8. Instagram LUTs Color Filters Preset
Instagram is a popular video and image-sharing platform. Thus, it’s essential to transform your visual media with specialized Instagram LUTs. After all, these LUTs transform your content with special filters in unique colors. In total, there are 12 filters, and all of them are unique. So you can choose any filter preset in this free LUTs premiere pack.
9. Lutify Me 7 Free LUTs
Add life to your visual content with the Lutify LUTs pack. There are 7 different LUTs for upscaling color schemas in your photos and videos. All these LUTs utilize unique and enticing cinematography with extended color grading. Thus, you can adjust tone and contrast as needed. Meanwhile, you will not face any problems using this free premiere LUTs pack.
10. IWLTBAP 10 Free LUTs
Experience ultimate cinematic effects with IWLTBAP Free LUTs. There are 10 free LUTs, and more than 290 color presets. Thus, you can easily enhance the visual quality of your photos and videos. This LUTs for Premiere Pro free download pack is an ideal choice for color grading. Meanwhile, all the color elements are based on providing cinematic touch.
11. Free Edgy LUT Pack
Edge your favorite visual content with enchanting looks. This free-edge LUT pack comprises 5 different LUTs to make your videos special. With unique color correction, these LUTs have magical gradients in them. Thus, the quality of your pictures and videos will improve. The color schemas will also improve using this LUTs Premiere Pro pack.
12. Sports LUTs
Lift your sports enthusiasm with a special sports LUTs pack. By using these free LUTs for Premiere Pro, add sports-like filters to videos. After all, there are special filters with color presets to enhance visual quality. This way, your videos will start looking more attractive with retouching colors. Even your darker videos will appear more transparent.
13. Universal LUTs Pack
Make your video starting more visually appealing with Universal LUTs Pack. After all, there are a bunch of filters presets that offer color correction and enhancement. Hence, your videos will be transformed into special art. Meanwhile, your videography could get a huge boost with scintillating colors. Using this LUT color preset Premiere Pro is simple and convenient.
14. SB Wedding LUTs Pack
Weddings are momentous occasions, and they involve both videography and photography. By using the SB Wedding LUTs pack, now add different color elements to wedding visuals. There are unique romantic tones, color schemas, and 12 video LUTs. All these video LUTs are unique, with special color presets in different styles. Making weddings memorable is what this free LUTs premiere pack achieves.
15. 8 Movie Look LUTs
Movies are entertaining and unique because of cinematic color styles. With this movie LUTs pack, experience 8 different movie color presets. The identification of LUTs is taken from movies. Thus, they can turn your simple videos into ultimate movies. Meanwhile, this LUTs Adobe Premiere Pro pack can upscale video colors in multiple schemas.
Bonus Part: Finding the Best Free LUTs in Wondershare Filmora
Video editing is a way to enhance the quality of videos in an optimal way. Wondershare Filmora is a perfect video editor that provides instant solutions to upscale video. There are different elements, effects, stickers, and other filters to upgrade your video’s visual look. Meanwhile, the availability of LUTs allows users to extend the color patterns and textures of their videos.
Add LUTs on Video For Win 7 or later(64-bit)
Add LUTs on Video For macOS 10.14 or later
Wondershare Filmora contained more than 800 LUTs in different styles and tones. However, the exquisite video editing software has added more, taking its number above 800+ LUTs for optimizing color enhancement in your videos.
Key Features of Wondershare Filmora
- Color Sharpening: Filmora allows you to adjust the color sharpness of videos. It’s done by setting color blur and base as required. The feature is ideal if you want to record events or broadcast videos.
- Cover Optimization: You can create and optimize your video covers with Wondershare Filmora. Enhancing video covers with special LUTs, elements, text styles, and other effects is simpler.
- Effect Mask: There is also an option to use masking effects. You can use video overlays to modify, duplicate, hide, or reveal footage. The objects in the video can be covered using different shapes.
Conclusion
Colors are unique pieces of elements that gain attention at a glance. Similarly, adding colors to videos can make them more impressive and appealing. By using LUTs, you can optimize the color styling of your videos. After all, LUTs can enhance color saturation, brightness, lightning, and tone. Meanwhile, Wondershare Filmora equips the best LUTs for Premiere Pro in many gradients.
How to Edit FLV Video Files with FLV Editor [Windows, Mac,Android, iPhone & Online]
FLV is a common container format for transferring digital video and audio information over the Internet. A.flv file is a flash video that may be seen on your computer with Adobe Flash Player, Adobe Air, or some third-party Adobe Flash plugins.
FLV has become the standard video format for web-based streaming video service providers such as Hulu and VEVO due to its superior functionality and tiny size. It’s also the default format for Quicktime on Mac systems.
If you wish to edit FLV videos without any problems, you should utilize a multipurpose video editor that supports the FLV file format.
Best FLV Editor to Edit FlV Video on Windows and Mac - Filmroa Video Editor
Filmora Video Editor is a professional FLV video editing application. This software allows you to edit 4K video files, share completed films directly on social media platforms, and add subtitles and audio files.
You may mix multiple films and enhance your footage with numerous transitions and other effects using this FLV video editing software. Furthermore, the free Filmora application is ideal for adding audio files or video clips from the wide library and uploading your soundtrack.
For Win 7 or later (64-bit)
For macOS 10.14 or later
Therefore, you can use the following steps to edit FLV video on Windows and Mac:
Step 1: Import file:

Step 2: Edit the FLV file:
Acquire the perfect tool in your palm for anything you want to do, such as clipping, cropping, rotating, and more.
Furthermore, all editing capabilities in the toolbar allow drag-and-drop, making it even easier to touch up your films quickly. Consider the following scenario:
- Drag and drop a transition into the video/photo, or right-click it and select “Apply to All.”
- Please drag & drop a title template to the position where you want it to appear, then adjust it.
- To use the effects, select one from the 50+ available video effects, select it, and apply it to your photos/videos instantaneously.
Step 3: Save or Export the file:

When you’re done, export your modified MP4 files to Windows/Mac and quickly share them on YouTube, with the option of sending a message to Facebook and Twitter. When you click Create in the program window’s middle right corner, you’ll be taken to the Output window below.
Alternative Way to Edit FlV Video on Windows
1. VSDC
VSDC is a free video editor along with a lot of advanced features. Cut, combine, trim, crop, and other editing capabilities are available to help you polish your FLV films.
Although it may not look logical, learning the editing capabilities hidden within modular boxes is simple. One noteworthy aspect of VSDC is its ability to produce good visual effects using many trendy video effects, transitions, and filters.
Furthermore, strong chroma keys, color correction, object modification, and other editing tools can be utilized to edit FLV videos. It not only creates excellent FLV videos, but it also supports a wide range of media conversion, allowing you to convert FLV files to various formats and export them without a watermark.
Therefore, follow the below mentioned steps to edit FLV video using VSDC:
Step 1: Install the software on the Windows. Open the application and import the video.
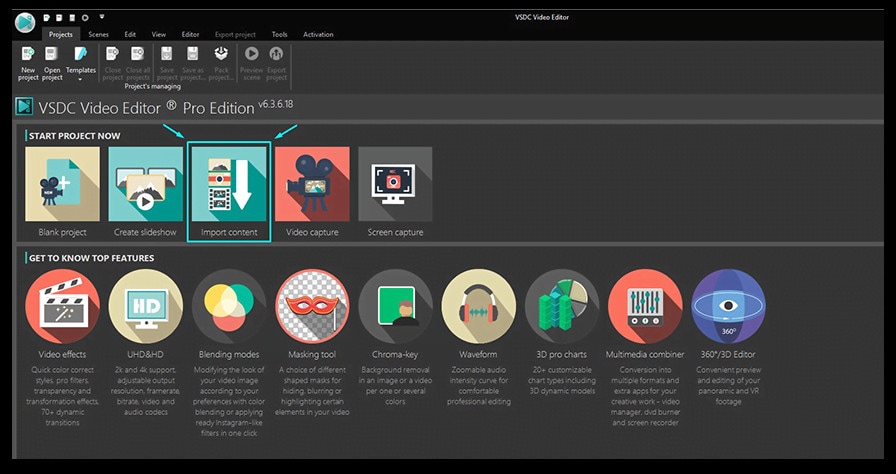
Step 2: Use cutting and splitting tools to edit the video.
The first icon is a picture of a pair of scissors, which is a cutting tool. It’s very useful when you need to cut the beginning or end of a film. Place the cursor exactly where you want to cut, then select “Trim start” or “Trim finish” from the dropdown cutting menu (the small triangle next to the scissors icon).
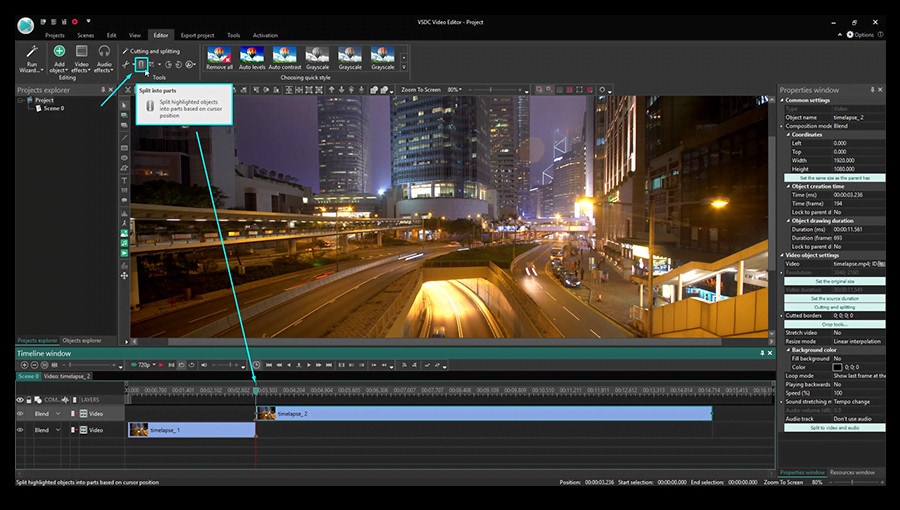
Cropping is also simple. If you have too much additional space around the scene object recorded, just choose the file you want to trim and select the cropping icon from the “Cutting and Splitting” option. A new window will appear, allowing you to select the region of the scene that should stay.
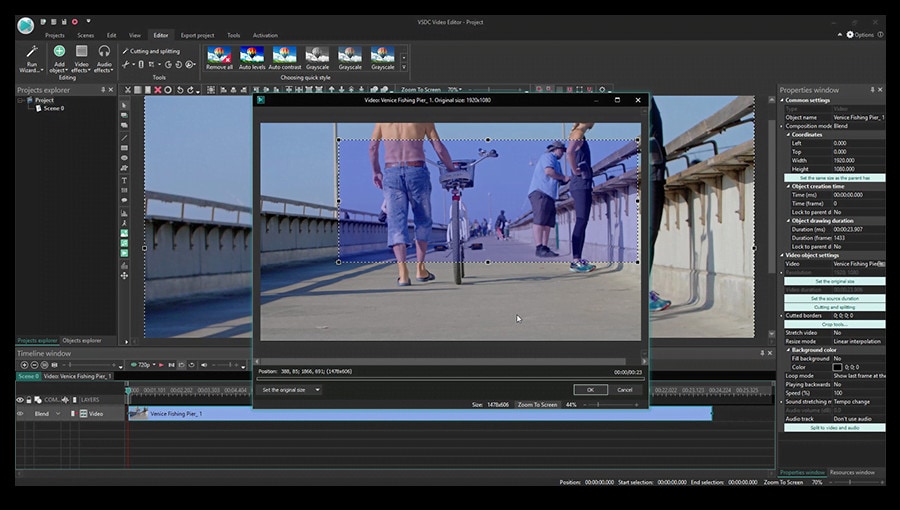
Step 3: Apply effects and transitions.
To use one, first select the video file you wish to edit, then go to the Video effects tab and select the effect you want to use. On the timeline, a new tab will appear, containing all of the effects done to the selected object. You can alter the effect’s duration and position in time by dragging it with the mouse there. The properties pane on the right-hand side can be used to change other parameters.
Transitions follow the same rule. Place your cursor where you want the transition to begin, then choose a transition from the Video effects dropdown menu and manually adjust the duration.
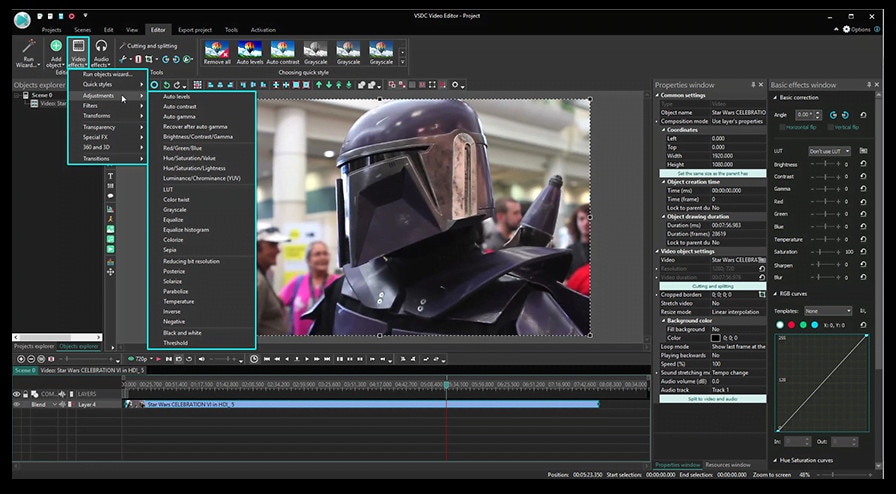
Step 4: Save changes and export video.
Make sure your movie appears exactly how you want it to before exporting it. If the video appears choppy, use the red preview button and lower the preview quality. When the PC’s resources are insufficient to process the video in real time, lagging can occur. Keep in mind that it has no bearing on the outcome. When you’re finished, navigate to the Export project tab and select an export format.
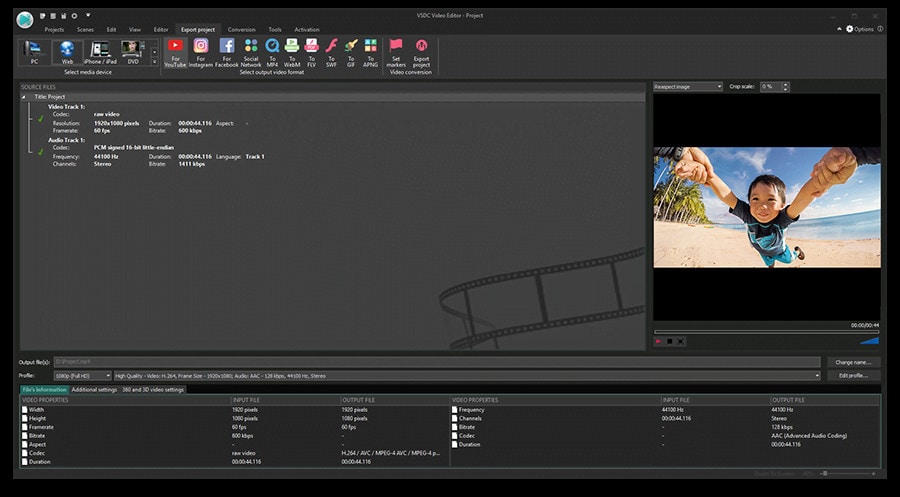
2. Adobe Premiere Pro:
Professional video editors use Premiere Pro to make everything from YouTube videos to Hollywood films like Mank, a 2021 Oscar candidate. It’s also widely utilized in the workflows of designers, animators, and VFX artists, and we can see why after lengthy testing.
We found the software’s UI to be simple to use, and it increased our productivity by separating things into various workspaces, such as editing, effects, and audio. When we tested it on both Mac and PC, we discovered that each workspace helps handle a specific activity while minimizing distraction.
Edit the FLV video with Adobe Premiere Pro using the following steps:
Step 1: Import the video and create initial sequence.
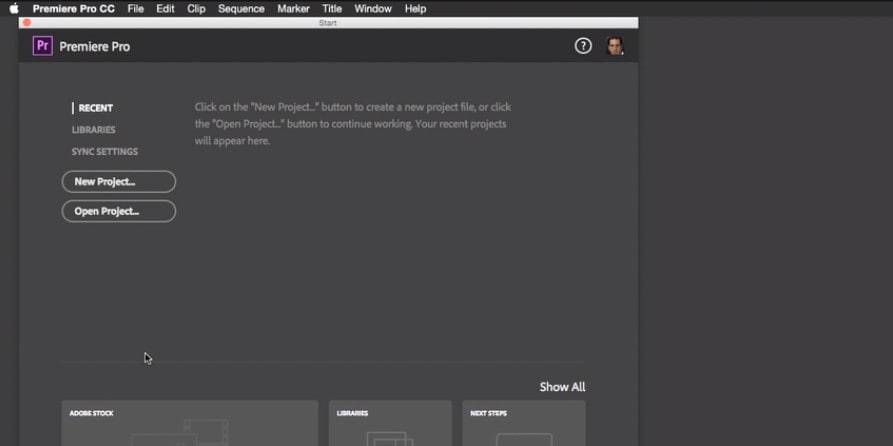
Step 2: In the Timeline, trim and rearrange clips, add audio, and transitions.
Step 3: Add title and graphics.
In Premiere Pro, you may make onscreen titles, as well as stylize and animate your images.
Step 4: Export your video.

Alternative Way to Edit FlV Video on Mac
1. Blender:
Under the GNU General Public License, Blender is a free, open-source 3D content production program that runs on all major operating systems. Blender is one of the greatest video editors for both Windows and Mac, with advanced features such as modifier-based modeling tools, powerful character animation capabilities, a node-based material, etc.
Because it is developed for professionals, it is tough to use as a beginner. However, it is unrestricted in its use and distribution. In addition, color options are changeable and versatile in the UI.
In contrast, this free video editor is perfect for semi-pros or those who want to enhance their video editing skills. However, you’ll need a lot of time and effort to learn it.
Step 1: Open the application.
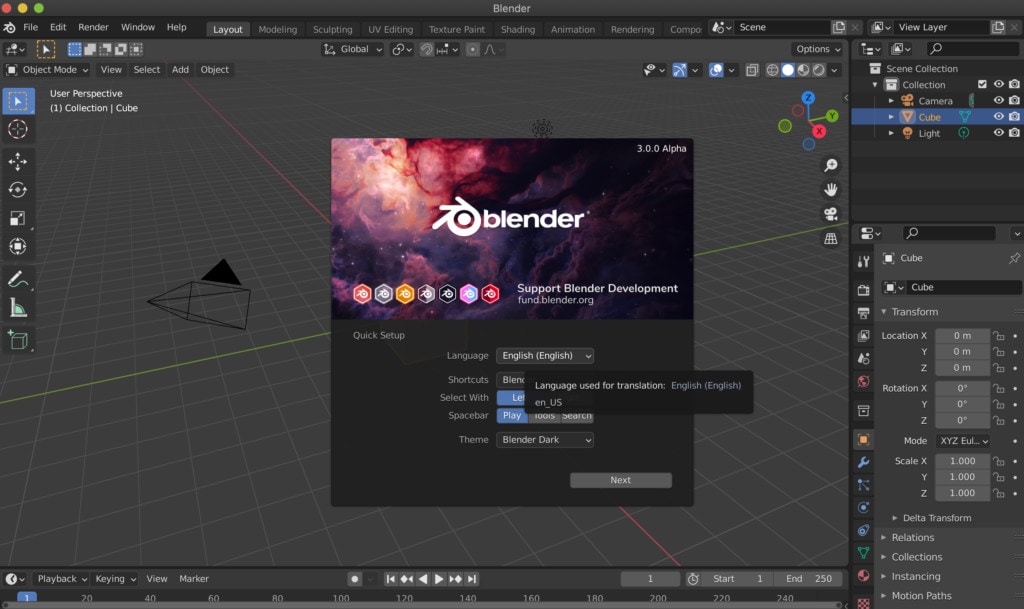
Step 2: Then, go into File->New->Video Editing to open the video editor.
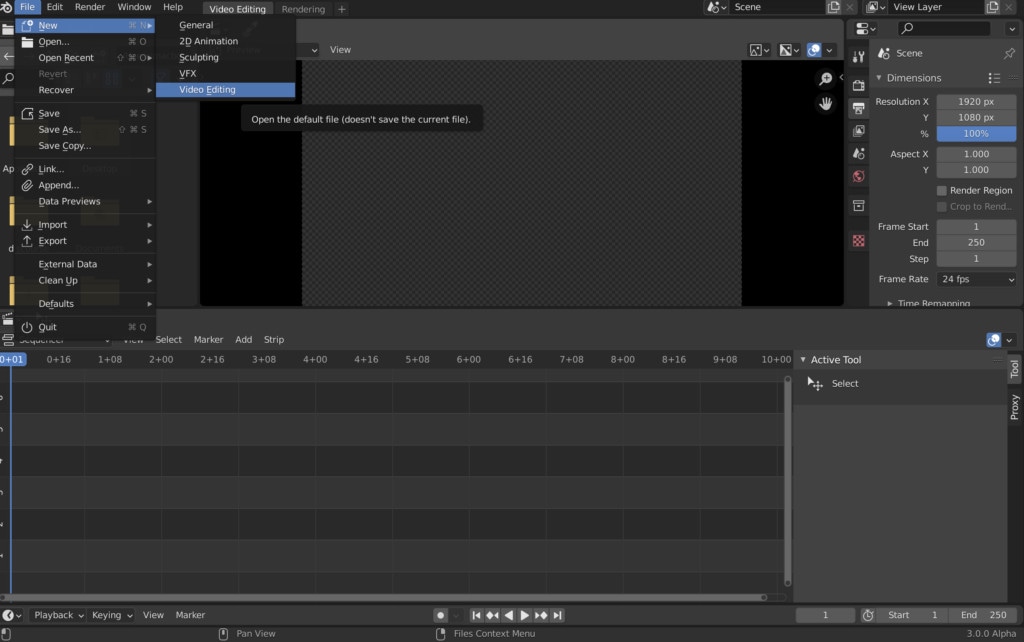
Step 3: Import the video and start editing using the editing tools.
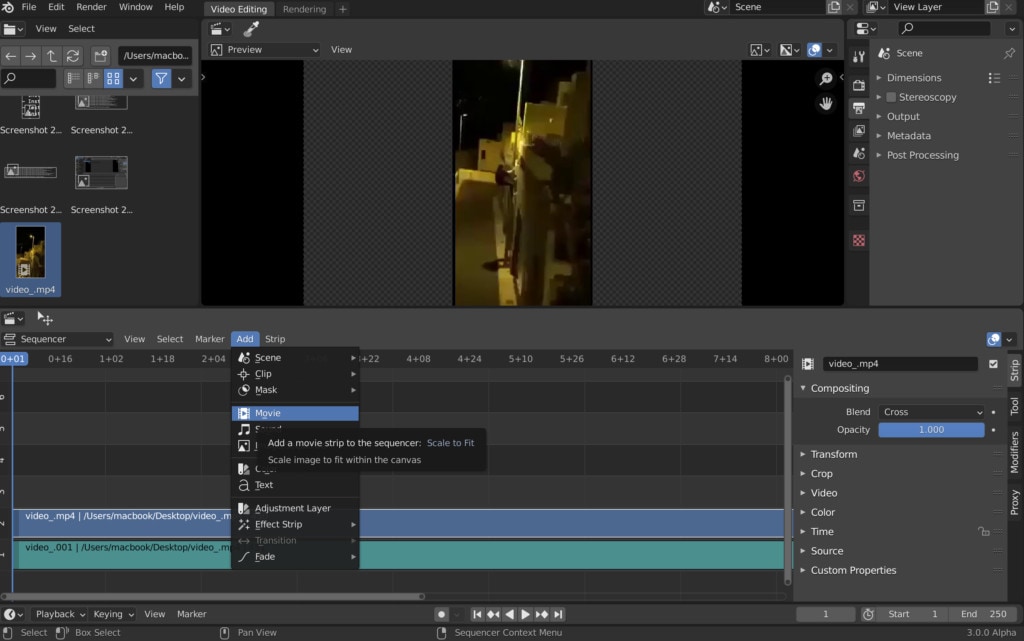
Step 4: Save and export the video.

2. Final Cut Pro:
When it comes to video editing software, Apple’s Final Cut Pro is one of the industry standards. As a result, it’s widely utilized in the television and film industries - at least among Mac users. However, one of the truly convincing reasons to choose it over Premiere Pro is because it is subscription-free: you only pay once.
The software’s Magnetic Timeline, grouping tools, a vast selection of effects, solid organizational capabilities, and simple ways to add and edit audio make it a favorite among professional video editors. 360° video, HDR, and powerful color correcting tools are among the other capabilities. It’s a strong software with a lot of features.
Follow the steps to edit FLV video using Final Cut Pro:
Step 1: Create Project.
To make a movie in Final Cut Pro, you must first establish a project, which keeps track of your editing selections and the media you utilize.
Step 2: Select and add clips to the timeline:
The second stage in making a movie with Final Cut Pro is to add and arrange clips in your project. In the timeline, you can move and reorder clips.
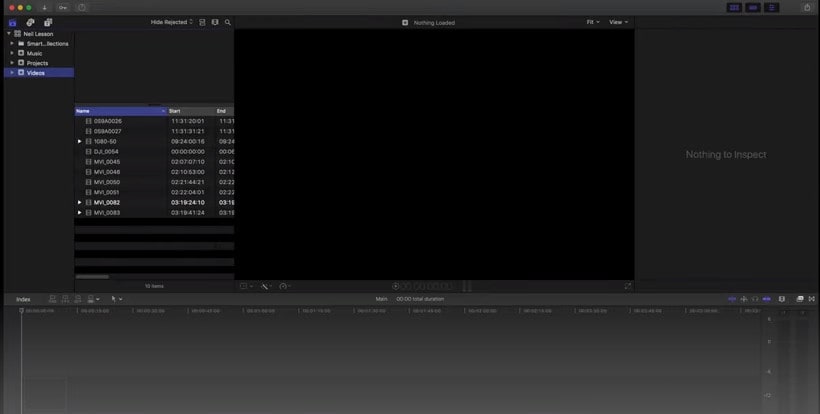
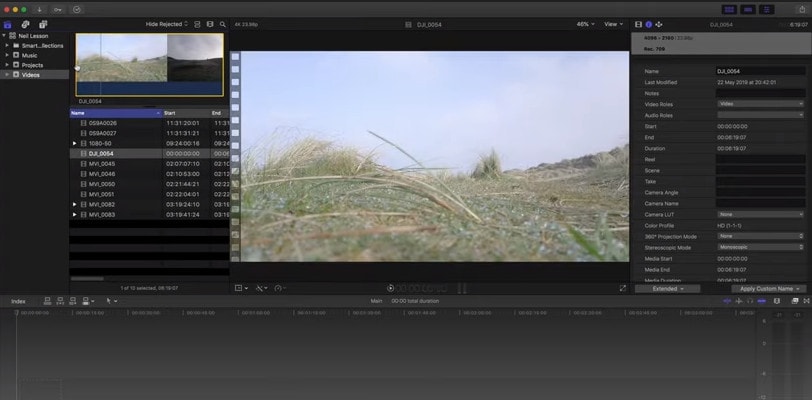
Step 3: Cut and trim video:
Final Cut Pro has a number of features for altering the start and stop points of clips in the timeline, as well as regulating the pacing of shots from one to the next.
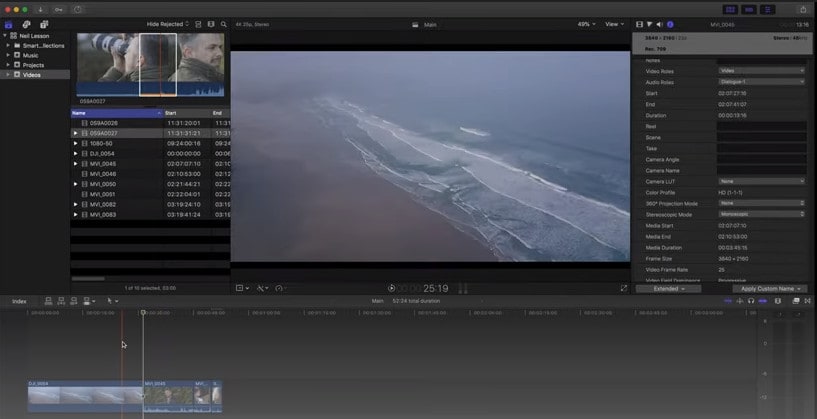
Step 4: Edit the video by adding effects and transitions:
Final Cut Pro includes a number of advanced editing features that make it simple to create a professional film. Visual enhancements and colour correction are among the finishing touches.

Step 5: Save and export video:
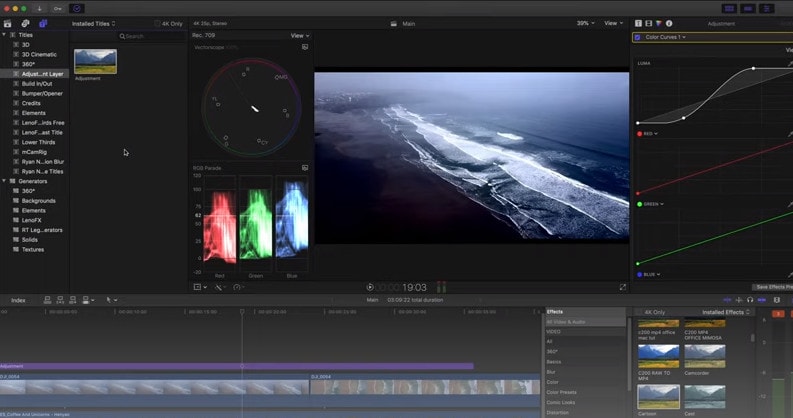
2 Ways to Edit FlV Video on Android:
1. Inshot:
For Android users, Inshot is a fantastic image and video editor. This Android video editor allows you to add popular stickers and emoticons to your films, making them more fashionable and unique.
The program supports HD video output, allowing you more control over your footage. Moreover, the additional sound and video can be synchronized with the available video chronology.
You can quickly blend more than two movies into one with rich effects and sound with this Android editor app. In addition, you can generate a watermark using unique text provided in the app, and subtitles support allow you to produce one with a variety of fonts.
Following are the steps that you can follow to edit FLV video using Inshot:
Step 1: Open the app and import the video.
Tap “Video” to open your phone’s gallery folder and begin editing a video in the InShot app. Select a video to work with. Adjust the canvass after your video has been loaded into the InShot App. For your other social media accounts, there are aspect ratios and sizes that work well with the video. It also has the option of being in portrait or landscape mode.
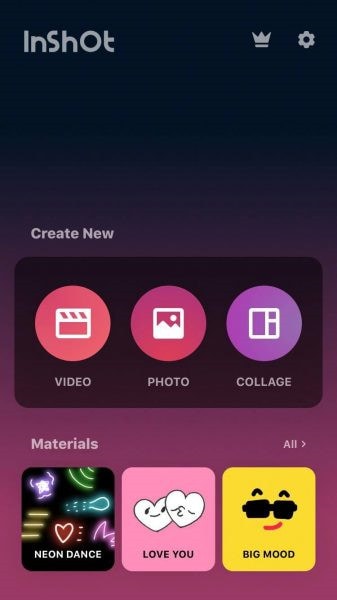
Step 2: Trim and split videos.
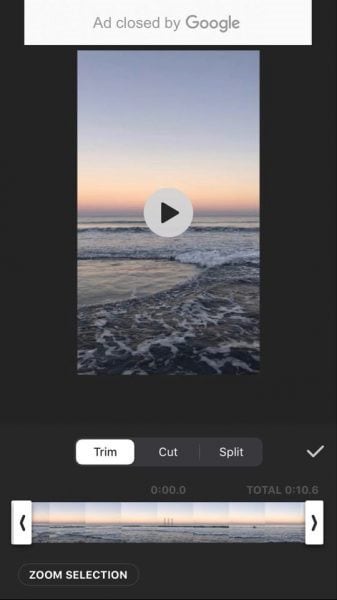
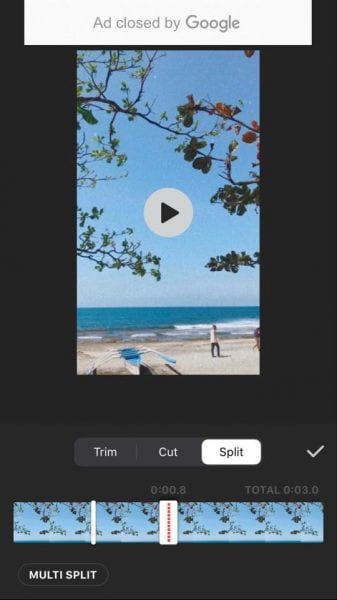
Step 3: Merge videos (optional):
By combining clips, you can combine them into a single film or project. Simply choose the videos you want to import from the drop-down menu. By tapping the “+” button on the lower left of the screen, you can insert and merge more videos. Your project will then be updated using the selected video.
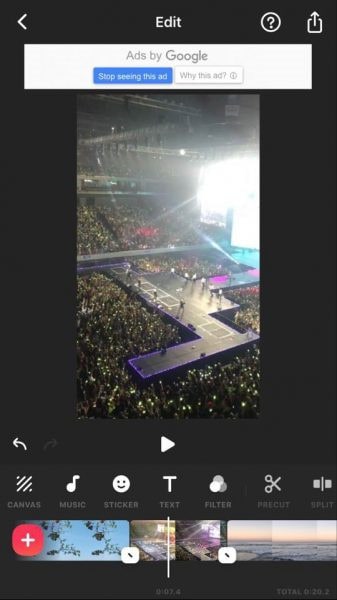
Step 4: Apply filters, add music, text and stickers.
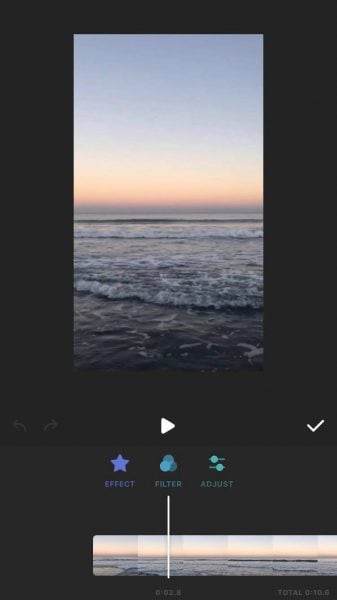
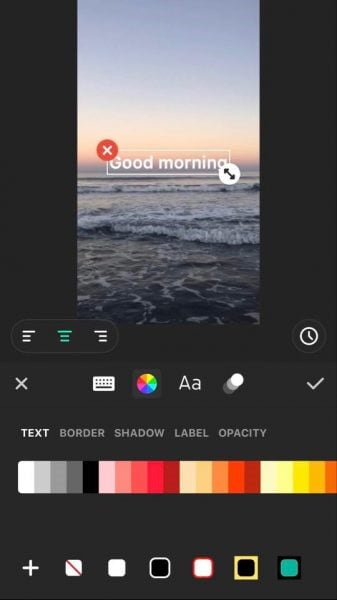
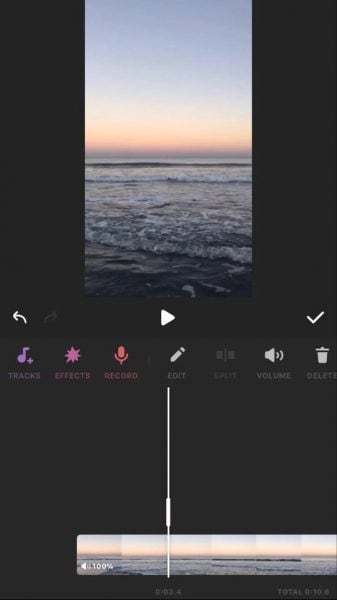
Step 5: Once you are done with the editing process, save the file.
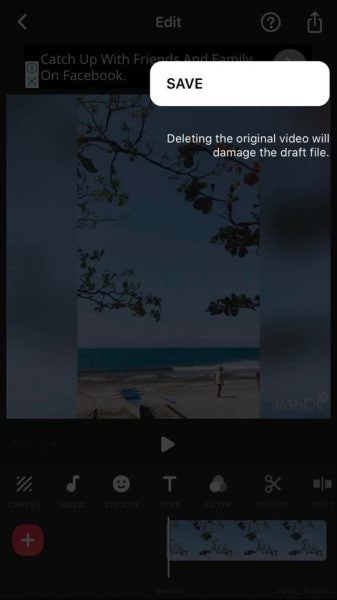
2. Videoshow:
VideoShow has a lot of video editing options. It is a simple and practical video editing program and movie scene maker for art directors and beginners. Using this video cutter, you may reverse, blur, duplicate, edit, merge and split collage clips or films.
You can also use VideoShow to adjust the audio or add subtitles to any video. It also allows you to use different filters on any video on your device. Over 50 intricate themes are included in the program, allowing you to create gorgeous music videos, slide shows, and vlogs in no time.
The annual subscription package is for $135.19, or you can also make a one-time purchase for $225.78.
However, to edit the video, you can use the following steps:
Step 1: Download and install the videoshow application and open it. Upload the video that you want to edit.
Step 2: Edit the video by applying filters or cutting and trimming the part of the video that you want to remove.
Step 3: Save changes and export the video to your preferred location.
2 Ways to Edit FlV Video on iPhone:
1. LumaFusion:
No other software program on the iPhone comes close to the feature set that LumaFusion offers for video editing. It is the only premium app on this list, and it is well worth every penny.
But, of course, YouTubers aren’t the only ones who use the program; mobile journalists and professional video producers who don’t want to lug along their bulky camera equipment and editing apparatus also use it.
LumaFusion deals with up to six video and audio tracks for photographs, movies, audio, titles, and graphics, and six audio tracks for narration, music, and sound effects. You also receive a magnetic timeline; importing clips is a breeze once they’ve been imported.
There are many transitions and effects to choose from, all of which can be layered. Finally, it includes much royalty-free music, sound effects, and other assets. So if you need a professional video editing tool for your iPhone, LumaFusion ($29.99) is the way to go.
Follow these steps to edit FLV video using LumaFusion:
Step 1: To create your first project, press + at the bottom of the screen. You can create a new project by tapping that area or by tapping the Plus button.
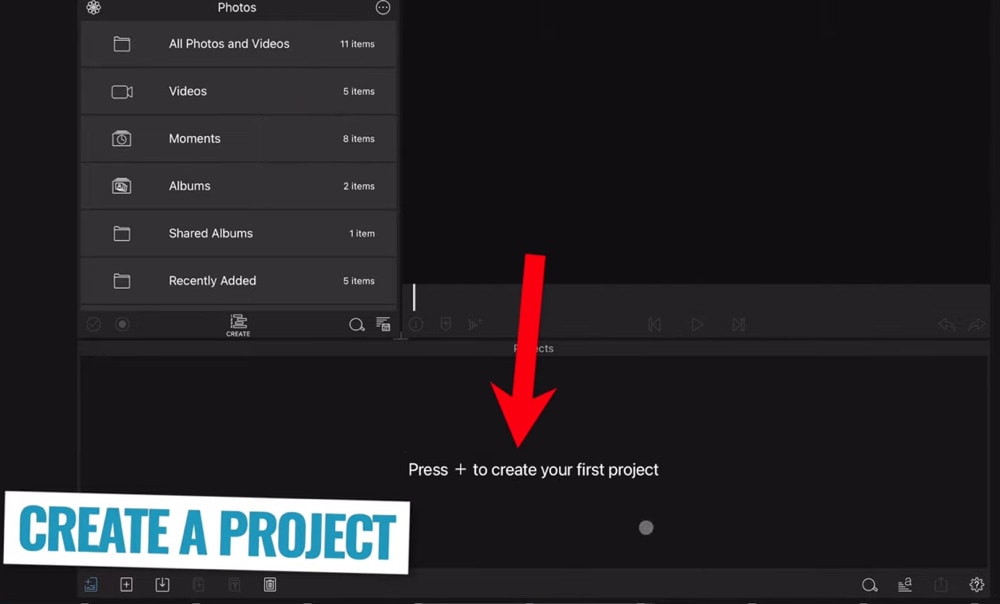
Step 2: Import video:
The Import section is located in the top left corner of the screen. This defaults to the Photos tab when you initially launch a new project. All of the photographs and videos can be seen here.
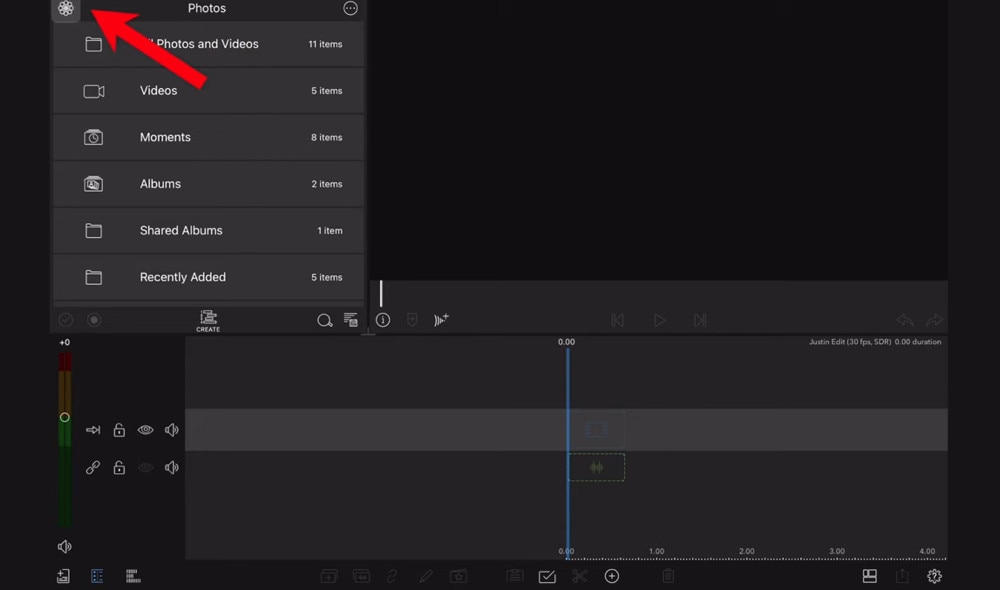
Step 3: Check layout and adjust volume levels
Step 4: Edit the video and add titles.
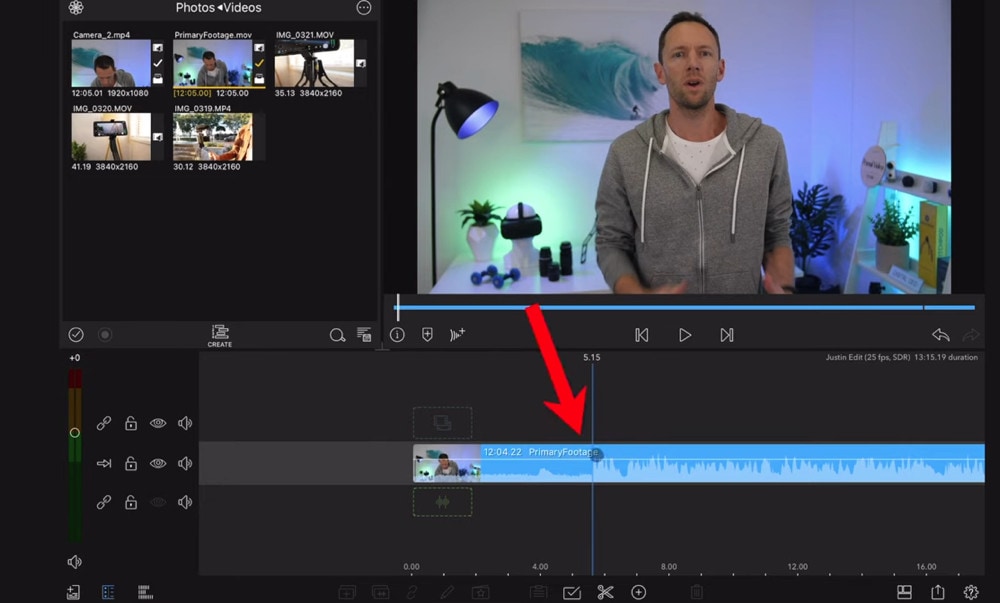
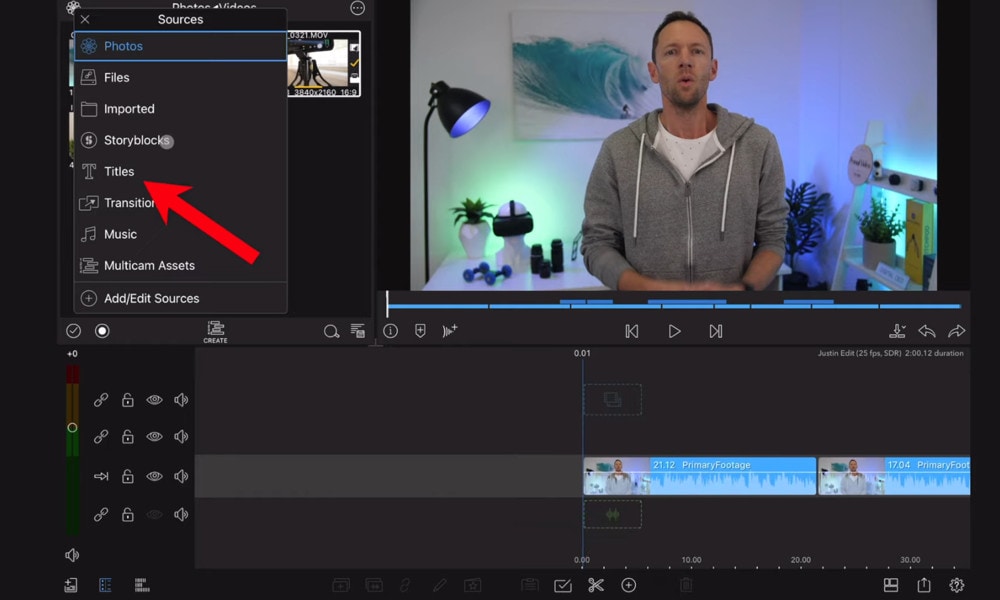
Step 5: Export the video.
2. Filmora Go:
Without a doubt, Filmora is one of the greatest free video editors for iPhone that does not contain any watermarks. In addition, it’s compatible with both iPhones and Android devices and has a simple user interface.
Filmora is the greatest iPhone video editor for beginners, with themed filters and effects that add flair to your videos without any work.
Filmora has many unique features, including themes for your videos and ‘Materials,’ which are visual effects created by the program. Unfortunately, materials are only available with Filmora Pro, so keep that in mind.
Aside from that, you’ll find all of the typical features here. You can also add titles to videos, utilize stickers and effects, and add music to the background of your movie. You may also add another clip in picture-in-picture mode, which is beneficial.
Below are the following steps to edit FLV video:
Step 1: Open the application and select ‘Create new video’. Now, import the video by choosing the video icon.
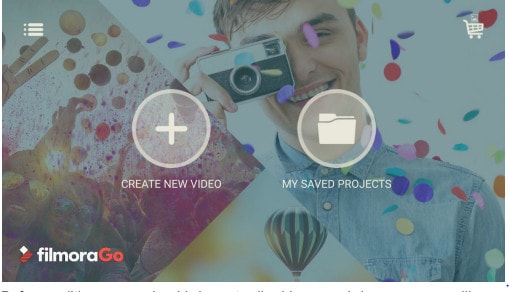
Step 2: Edit the video. Within the edit tool, you can trim and split the video. You can also improve the video quality by adding titles, transitions, and music, and voiceovers.

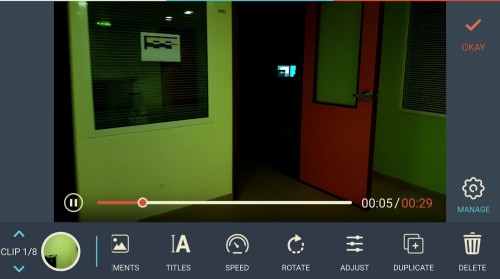

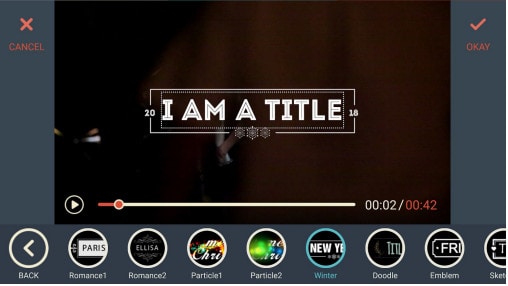
Step 3: After editing the video, select ‘SAVE’ and export the video or download it.
2 Ways to Edit FlV Video Online:
1. Fastreel:
If you’re seeking the finest free online video editor, Fastreel is a terrific tool to start with. This online video editing software provides a wide range of editing options. It can merge, edit, crop, and compress videos to make sharing easier.
It also includes many pre-made templates that you can change to create titles and transitions and other editing features like reverse, looping, and rotating. It’s also quite simple to use, and you can have polished videos in minutes.
There are also numerous pricing options to suit different customers, ranging from a completely free plan with watermarks to paid subscriptions with no limitations.
Use the following steps to edit FLV video:
Step 1: Open Fastreel web and import the video.
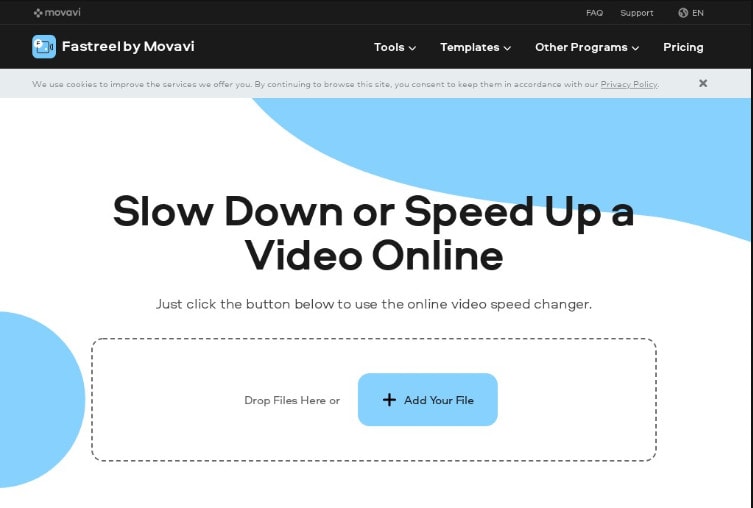
Step 2: Use templates to make it look attractive.
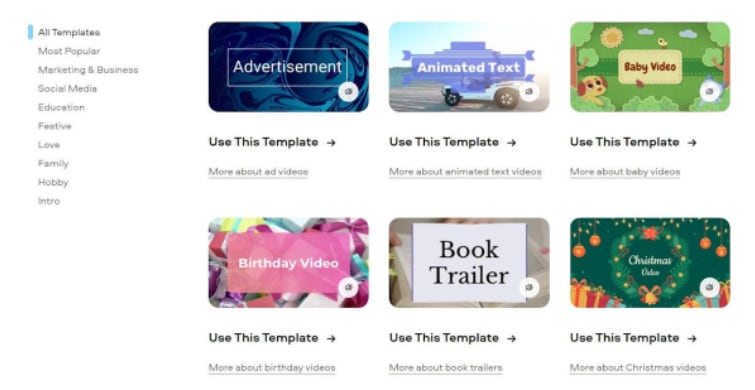
Step 3: Edit the video using the template.
Templates are unfinished videos with all of the effects already applied, such as backdrops, transitions, animated stickers, and titles. There are blank spots for your photos or videos, and you can arrange them in any sequence you like. You can also add music from the Fastreel library or upload your own track after entering your text.
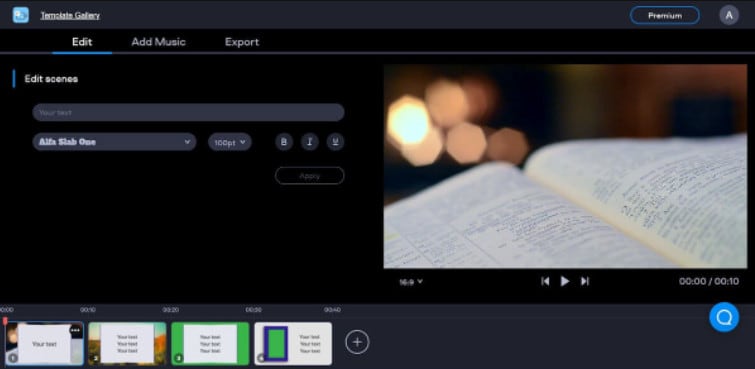
Step 4: Once you are done with edits, save the video and export it.
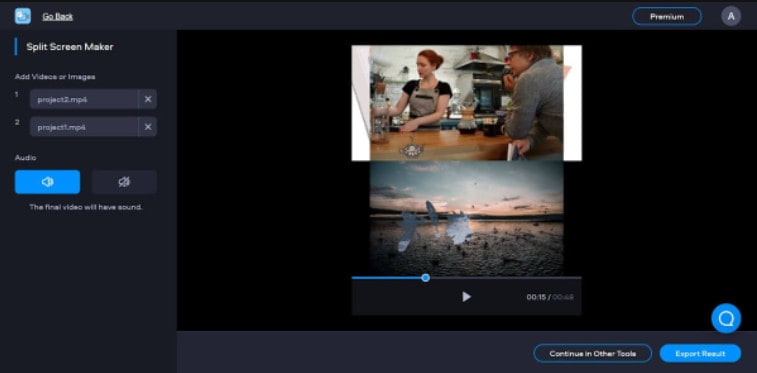
2. WeVideo:
When you’re seeking the greatest video producer online, another wonderful choice to explore is WeVideo.
Google, Dropbox, Rover, and Roche are just a few of the huge names that trust our online editor. Its fast, versatile editing engine and vast stock content collection for adding stock movies, photos, and audio tracks to your productions are ideal for business users.
WeVideo also stands out since it provides unlimited cloud storage for all of your videos, which you can download and watch on any device. The only drawback is that all of this comes at a price, with WeVideo offering a variety of payment plans ranging from $4.99 to $36.99 a month.
Follow the steps to edit videos using WeVideo:
Step 1: Open WeVideo and import the video file.
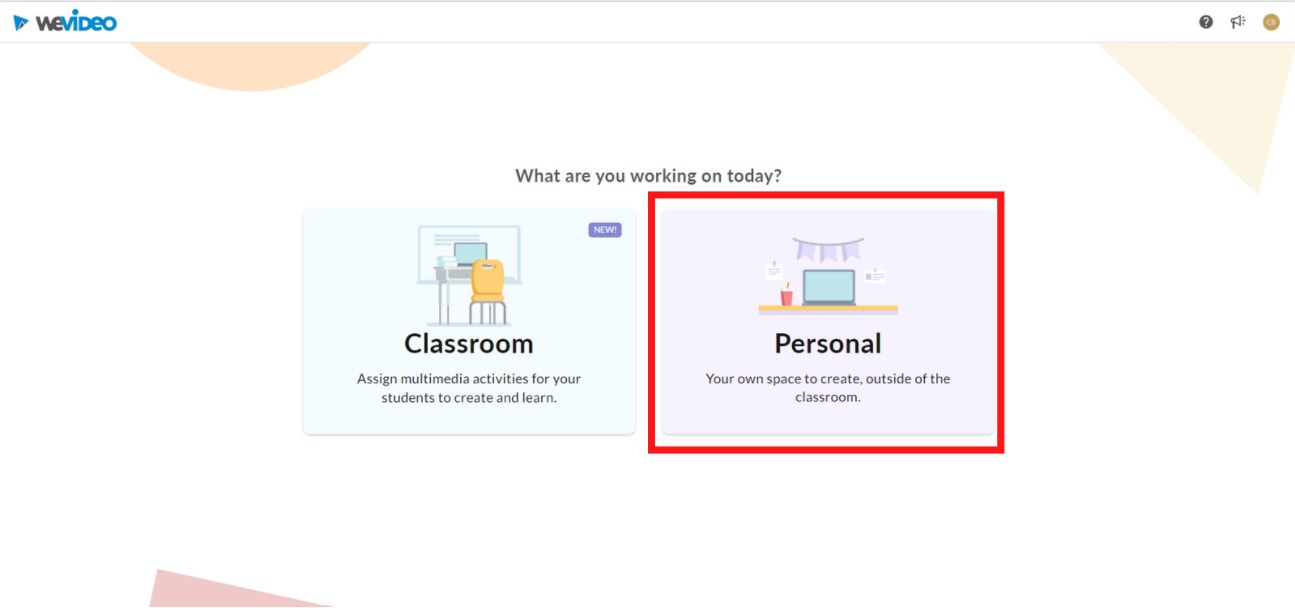
Step 2: Click on create new video in the left-hand corner of the screen.
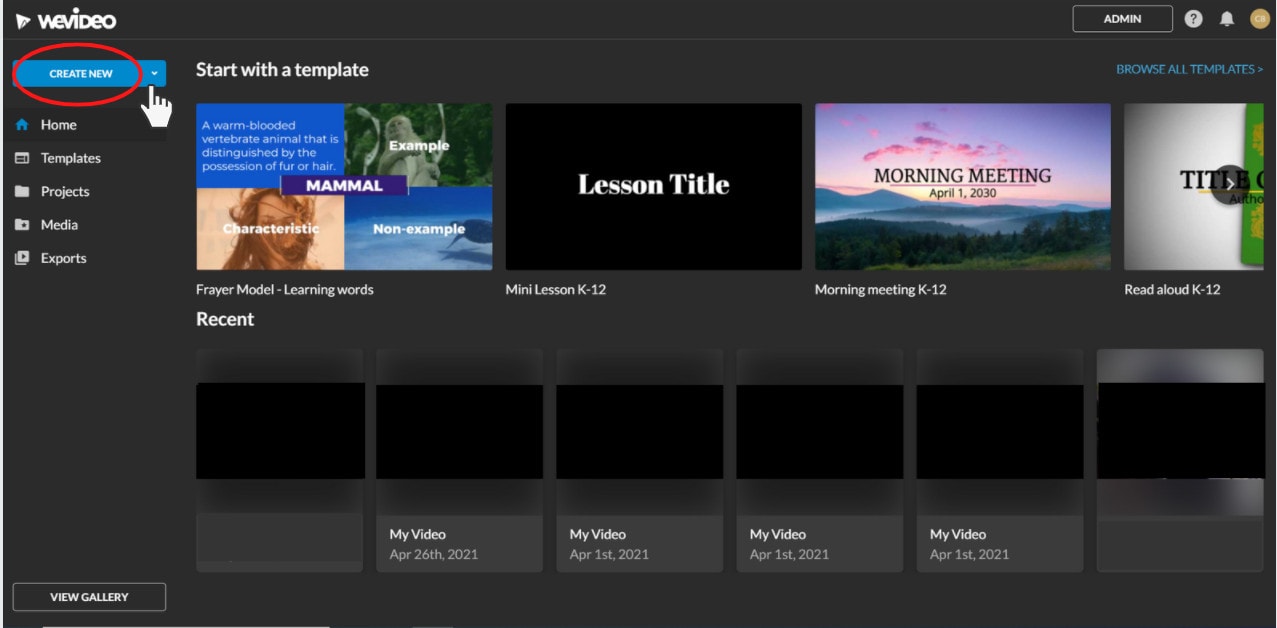
Step 3: Edit the video.
The video clip you imported will appear in the viewing window to the right once you click on it. By moving the arrows and either end, you can edit out the beginning or end of your footage.
- Drag the clip into your timeline from your media pool.
- Place the clip on your timeline by dragging and dropping it.
- Click the scissor symbol after moving the blue marker to the spot where you want to cut your clip.
- Once the material has been chopped, you can erase bits of it by selecting it with your mouse and then pressing delete on your keyboard or rearrange the clips in the timeline by dragging and dropping them to other positions.
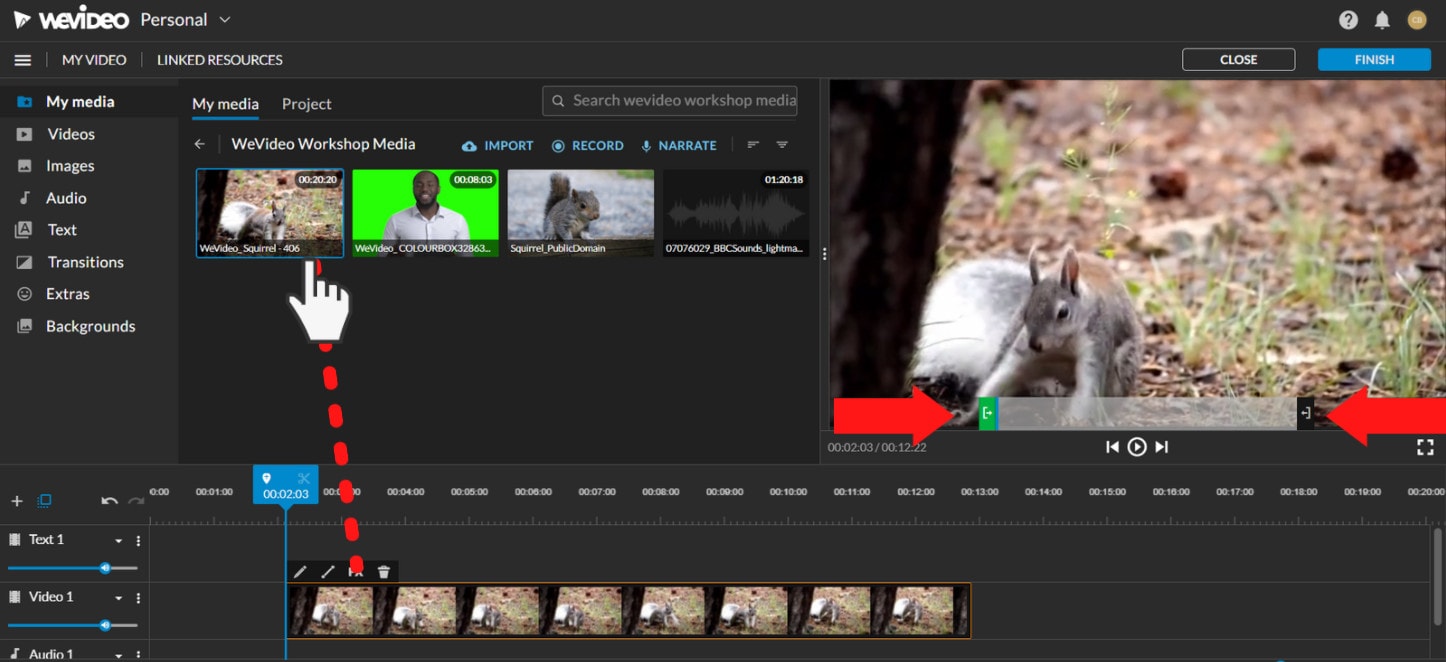
Step 4: Add effects, transitions, and music to the video.
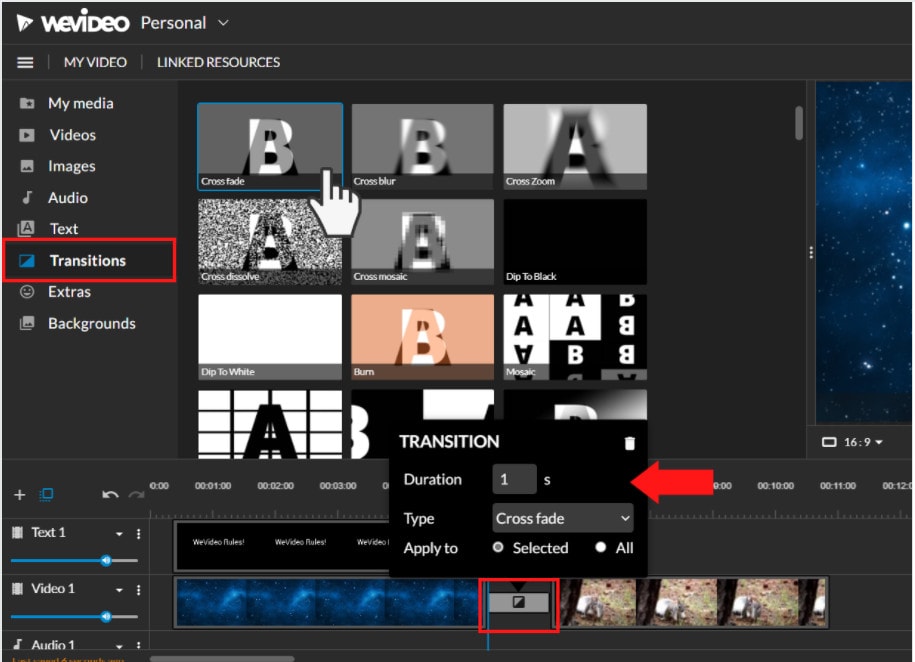
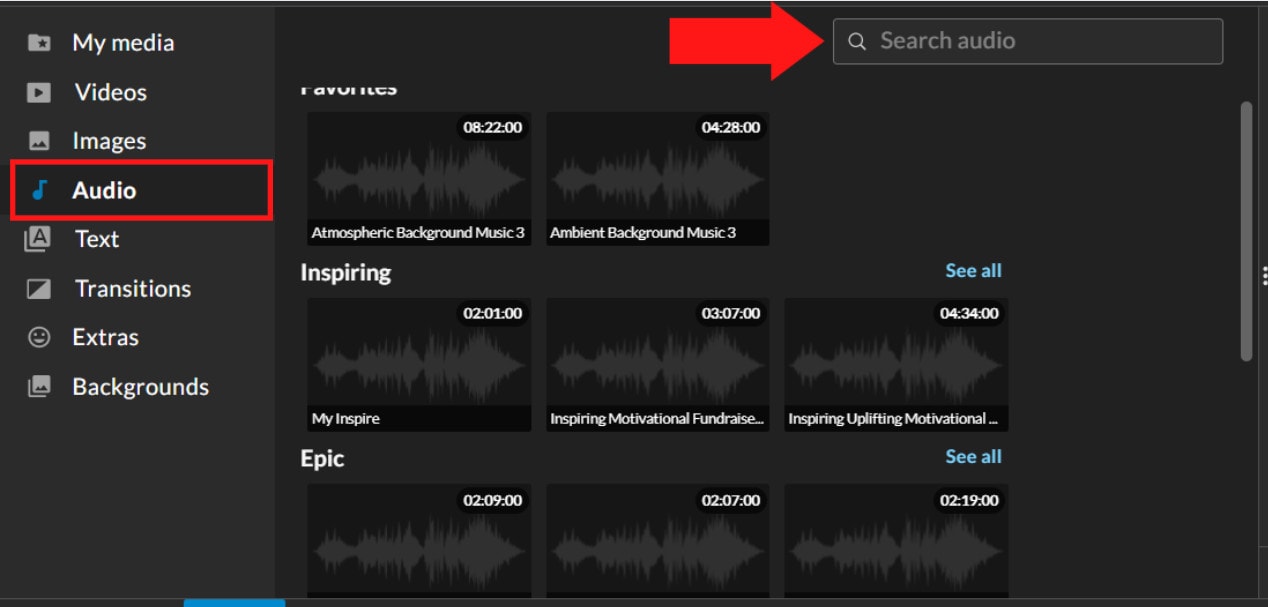
Step 5: Save and export the video by clicking on the Finish tab.
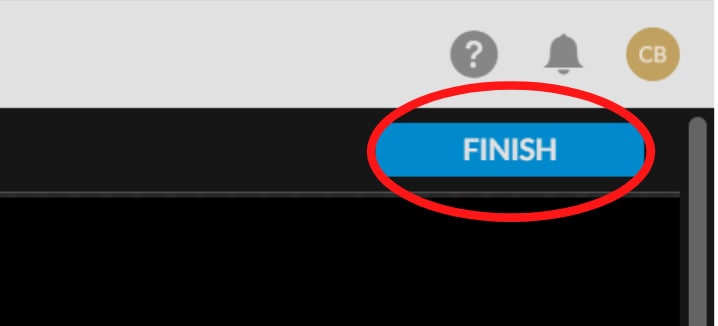
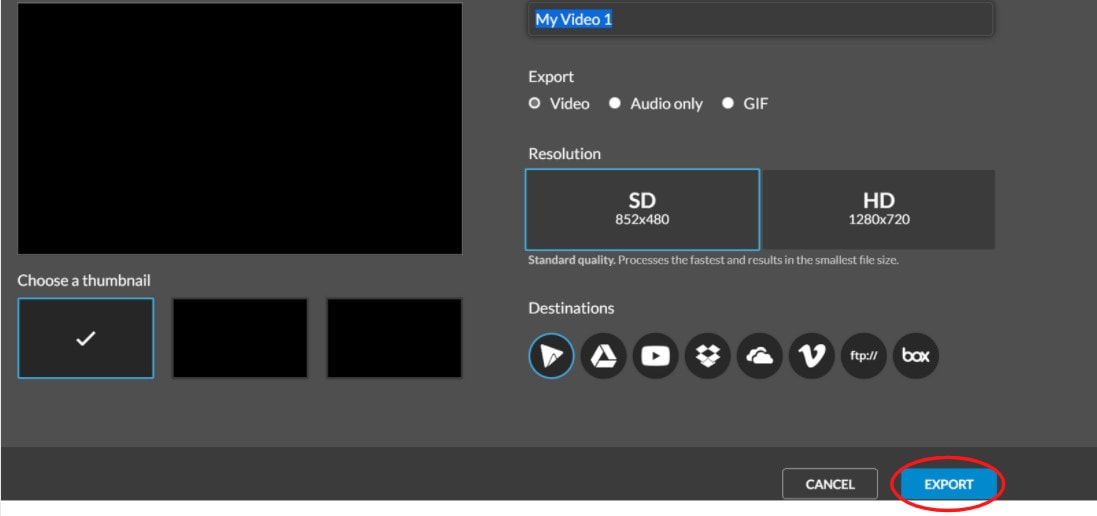
FAQs about editing FLV video
- How to open FLV files?
Any FLV player is required to view FLV files. Various players are available, including VLC, FLV Player, Sothink FLV Player for Mac, Tonec Free FLV Player, Any FLV Player, and others.
- Is Filmora compatible with Mac?
Filmora requires macOS Sierra (version 10.12) or later and the Big Sur (version 11) and Apple M1 chips. Touch Bar compatibility for MacBook Pro users and custom shortcuts to speed up editing.
- What is the best online FLV editor?
There are numerous free online editors to choose from. Fastreel, WeVideo, and FlexClip Video Maker are a few of the most popular.
- Is FLV better than MP4?
Because FLV and MP4 are the two most popular video file formats, it’s crucial to know which one is preferable. Adobe’s proprietary format is FLV. Both formats employ video and audio codecs and have equal performance levels. In their unprocessed state, MP4 files are more adaptable. You can, however, use an FLV file at the same time if you have the correct player.
- How do I choose a video editor?
When comparing video editing software, there are six crucial elements to consider.
- Budget and cost
- Ease of use/learning curve
- Multi-GPGPU acceleration and video format support
- Tools for advanced editing
- Music, special effects, and other goodies
- Customer service is second to none.
For macOS 10.14 or later
Therefore, you can use the following steps to edit FLV video on Windows and Mac:
Step 1: Import file:
Step 2: Edit the FLV file:
Acquire the perfect tool in your palm for anything you want to do, such as clipping, cropping, rotating, and more.
Furthermore, all editing capabilities in the toolbar allow drag-and-drop, making it even easier to touch up your films quickly. Consider the following scenario:
- Drag and drop a transition into the video/photo, or right-click it and select “Apply to All.”
- Please drag & drop a title template to the position where you want it to appear, then adjust it.
- To use the effects, select one from the 50+ available video effects, select it, and apply it to your photos/videos instantaneously.
Step 3: Save or Export the file:
When you’re done, export your modified MP4 files to Windows/Mac and quickly share them on YouTube, with the option of sending a message to Facebook and Twitter. When you click Create in the program window’s middle right corner, you’ll be taken to the Output window below.
Alternative Way to Edit FlV Video on Windows
1. VSDC
VSDC is a free video editor along with a lot of advanced features. Cut, combine, trim, crop, and other editing capabilities are available to help you polish your FLV films.
Although it may not look logical, learning the editing capabilities hidden within modular boxes is simple. One noteworthy aspect of VSDC is its ability to produce good visual effects using many trendy video effects, transitions, and filters.
Furthermore, strong chroma keys, color correction, object modification, and other editing tools can be utilized to edit FLV videos. It not only creates excellent FLV videos, but it also supports a wide range of media conversion, allowing you to convert FLV files to various formats and export them without a watermark.
Therefore, follow the below mentioned steps to edit FLV video using VSDC:
Step 1: Install the software on the Windows. Open the application and import the video.
Step 2: Use cutting and splitting tools to edit the video.
The first icon is a picture of a pair of scissors, which is a cutting tool. It’s very useful when you need to cut the beginning or end of a film. Place the cursor exactly where you want to cut, then select “Trim start” or “Trim finish” from the dropdown cutting menu (the small triangle next to the scissors icon).
Cropping is also simple. If you have too much additional space around the scene object recorded, just choose the file you want to trim and select the cropping icon from the “Cutting and Splitting” option. A new window will appear, allowing you to select the region of the scene that should stay.
Step 3: Apply effects and transitions.
To use one, first select the video file you wish to edit, then go to the Video effects tab and select the effect you want to use. On the timeline, a new tab will appear, containing all of the effects done to the selected object. You can alter the effect’s duration and position in time by dragging it with the mouse there. The properties pane on the right-hand side can be used to change other parameters.
Transitions follow the same rule. Place your cursor where you want the transition to begin, then choose a transition from the Video effects dropdown menu and manually adjust the duration.
Step 4: Save changes and export video.
Make sure your movie appears exactly how you want it to before exporting it. If the video appears choppy, use the red preview button and lower the preview quality. When the PC’s resources are insufficient to process the video in real time, lagging can occur. Keep in mind that it has no bearing on the outcome. When you’re finished, navigate to the Export project tab and select an export format.
2. Adobe Premiere Pro:
Professional video editors use Premiere Pro to make everything from YouTube videos to Hollywood films like Mank, a 2021 Oscar candidate. It’s also widely utilized in the workflows of designers, animators, and VFX artists, and we can see why after lengthy testing.
We found the software’s UI to be simple to use, and it increased our productivity by separating things into various workspaces, such as editing, effects, and audio. When we tested it on both Mac and PC, we discovered that each workspace helps handle a specific activity while minimizing distraction.
Edit the FLV video with Adobe Premiere Pro using the following steps:
Step 1: Import the video and create initial sequence.
Step 2: In the Timeline, trim and rearrange clips, add audio, and transitions.
Step 3: Add title and graphics.
In Premiere Pro, you may make onscreen titles, as well as stylize and animate your images.
Step 4: Export your video.
Alternative Way to Edit FlV Video on Mac
1. Blender:
Under the GNU General Public License, Blender is a free, open-source 3D content production program that runs on all major operating systems. Blender is one of the greatest video editors for both Windows and Mac, with advanced features such as modifier-based modeling tools, powerful character animation capabilities, a node-based material, etc.
Because it is developed for professionals, it is tough to use as a beginner. However, it is unrestricted in its use and distribution. In addition, color options are changeable and versatile in the UI.
In contrast, this free video editor is perfect for semi-pros or those who want to enhance their video editing skills. However, you’ll need a lot of time and effort to learn it.
Step 1: Open the application.
Step 2: Then, go into File->New->Video Editing to open the video editor.
Step 3: Import the video and start editing using the editing tools.
Step 4: Save and export the video.
2. Final Cut Pro:
When it comes to video editing software, Apple’s Final Cut Pro is one of the industry standards. As a result, it’s widely utilized in the television and film industries - at least among Mac users. However, one of the truly convincing reasons to choose it over Premiere Pro is because it is subscription-free: you only pay once.
The software’s Magnetic Timeline, grouping tools, a vast selection of effects, solid organizational capabilities, and simple ways to add and edit audio make it a favorite among professional video editors. 360° video, HDR, and powerful color correcting tools are among the other capabilities. It’s a strong software with a lot of features.
Follow the steps to edit FLV video using Final Cut Pro:
Step 1: Create Project.
To make a movie in Final Cut Pro, you must first establish a project, which keeps track of your editing selections and the media you utilize.
Step 2: Select and add clips to the timeline:
The second stage in making a movie with Final Cut Pro is to add and arrange clips in your project. In the timeline, you can move and reorder clips.
Step 3: Cut and trim video:
Final Cut Pro has a number of features for altering the start and stop points of clips in the timeline, as well as regulating the pacing of shots from one to the next.
Step 4: Edit the video by adding effects and transitions:
Final Cut Pro includes a number of advanced editing features that make it simple to create a professional film. Visual enhancements and colour correction are among the finishing touches.
Step 5: Save and export video:
2 Ways to Edit FlV Video on Android:
1. Inshot:
For Android users, Inshot is a fantastic image and video editor. This Android video editor allows you to add popular stickers and emoticons to your films, making them more fashionable and unique.
The program supports HD video output, allowing you more control over your footage. Moreover, the additional sound and video can be synchronized with the available video chronology.
You can quickly blend more than two movies into one with rich effects and sound with this Android editor app. In addition, you can generate a watermark using unique text provided in the app, and subtitles support allow you to produce one with a variety of fonts.
Following are the steps that you can follow to edit FLV video using Inshot:
Step 1: Open the app and import the video.
Tap “Video” to open your phone’s gallery folder and begin editing a video in the InShot app. Select a video to work with. Adjust the canvass after your video has been loaded into the InShot App. For your other social media accounts, there are aspect ratios and sizes that work well with the video. It also has the option of being in portrait or landscape mode.
Step 2: Trim and split videos.
Step 3: Merge videos (optional):
By combining clips, you can combine them into a single film or project. Simply choose the videos you want to import from the drop-down menu. By tapping the “+” button on the lower left of the screen, you can insert and merge more videos. Your project will then be updated using the selected video.
Step 4: Apply filters, add music, text and stickers.
Step 5: Once you are done with the editing process, save the file.
2. Videoshow:
VideoShow has a lot of video editing options. It is a simple and practical video editing program and movie scene maker for art directors and beginners. Using this video cutter, you may reverse, blur, duplicate, edit, merge and split collage clips or films.
You can also use VideoShow to adjust the audio or add subtitles to any video. It also allows you to use different filters on any video on your device. Over 50 intricate themes are included in the program, allowing you to create gorgeous music videos, slide shows, and vlogs in no time.
The annual subscription package is for $135.19, or you can also make a one-time purchase for $225.78.
However, to edit the video, you can use the following steps:
Step 1: Download and install the videoshow application and open it. Upload the video that you want to edit.
Step 2: Edit the video by applying filters or cutting and trimming the part of the video that you want to remove.
Step 3: Save changes and export the video to your preferred location.
2 Ways to Edit FlV Video on iPhone:
1. LumaFusion:
No other software program on the iPhone comes close to the feature set that LumaFusion offers for video editing. It is the only premium app on this list, and it is well worth every penny.
But, of course, YouTubers aren’t the only ones who use the program; mobile journalists and professional video producers who don’t want to lug along their bulky camera equipment and editing apparatus also use it.
LumaFusion deals with up to six video and audio tracks for photographs, movies, audio, titles, and graphics, and six audio tracks for narration, music, and sound effects. You also receive a magnetic timeline; importing clips is a breeze once they’ve been imported.
There are many transitions and effects to choose from, all of which can be layered. Finally, it includes much royalty-free music, sound effects, and other assets. So if you need a professional video editing tool for your iPhone, LumaFusion ($29.99) is the way to go.
Follow these steps to edit FLV video using LumaFusion:
Step 1: To create your first project, press + at the bottom of the screen. You can create a new project by tapping that area or by tapping the Plus button.
Step 2: Import video:
The Import section is located in the top left corner of the screen. This defaults to the Photos tab when you initially launch a new project. All of the photographs and videos can be seen here.
Step 3: Check layout and adjust volume levels
Step 4: Edit the video and add titles.
Step 5: Export the video.
2. Filmora Go:
Without a doubt, Filmora is one of the greatest free video editors for iPhone that does not contain any watermarks. In addition, it’s compatible with both iPhones and Android devices and has a simple user interface.
Filmora is the greatest iPhone video editor for beginners, with themed filters and effects that add flair to your videos without any work.
Filmora has many unique features, including themes for your videos and ‘Materials,’ which are visual effects created by the program. Unfortunately, materials are only available with Filmora Pro, so keep that in mind.
Aside from that, you’ll find all of the typical features here. You can also add titles to videos, utilize stickers and effects, and add music to the background of your movie. You may also add another clip in picture-in-picture mode, which is beneficial.
Below are the following steps to edit FLV video:
Step 1: Open the application and select ‘Create new video’. Now, import the video by choosing the video icon.
Step 2: Edit the video. Within the edit tool, you can trim and split the video. You can also improve the video quality by adding titles, transitions, and music, and voiceovers.
Step 3: After editing the video, select ‘SAVE’ and export the video or download it.
2 Ways to Edit FlV Video Online:
1. Fastreel:
If you’re seeking the finest free online video editor, Fastreel is a terrific tool to start with. This online video editing software provides a wide range of editing options. It can merge, edit, crop, and compress videos to make sharing easier.
It also includes many pre-made templates that you can change to create titles and transitions and other editing features like reverse, looping, and rotating. It’s also quite simple to use, and you can have polished videos in minutes.
There are also numerous pricing options to suit different customers, ranging from a completely free plan with watermarks to paid subscriptions with no limitations.
Use the following steps to edit FLV video:
Step 1: Open Fastreel web and import the video.
Step 2: Use templates to make it look attractive.
Step 3: Edit the video using the template.
Templates are unfinished videos with all of the effects already applied, such as backdrops, transitions, animated stickers, and titles. There are blank spots for your photos or videos, and you can arrange them in any sequence you like. You can also add music from the Fastreel library or upload your own track after entering your text.
Step 4: Once you are done with edits, save the video and export it.
2. WeVideo:
When you’re seeking the greatest video producer online, another wonderful choice to explore is WeVideo.
Google, Dropbox, Rover, and Roche are just a few of the huge names that trust our online editor. Its fast, versatile editing engine and vast stock content collection for adding stock movies, photos, and audio tracks to your productions are ideal for business users.
WeVideo also stands out since it provides unlimited cloud storage for all of your videos, which you can download and watch on any device. The only drawback is that all of this comes at a price, with WeVideo offering a variety of payment plans ranging from $4.99 to $36.99 a month.
Follow the steps to edit videos using WeVideo:
Step 1: Open WeVideo and import the video file.
Step 2: Click on create new video in the left-hand corner of the screen.
Step 3: Edit the video.
The video clip you imported will appear in the viewing window to the right once you click on it. By moving the arrows and either end, you can edit out the beginning or end of your footage.
- Drag the clip into your timeline from your media pool.
- Place the clip on your timeline by dragging and dropping it.
- Click the scissor symbol after moving the blue marker to the spot where you want to cut your clip.
- Once the material has been chopped, you can erase bits of it by selecting it with your mouse and then pressing delete on your keyboard or rearrange the clips in the timeline by dragging and dropping them to other positions.
Step 4: Add effects, transitions, and music to the video.
Step 5: Save and export the video by clicking on the Finish tab.
FAQs about editing FLV video
- How to open FLV files?
Any FLV player is required to view FLV files. Various players are available, including VLC, FLV Player, Sothink FLV Player for Mac, Tonec Free FLV Player, Any FLV Player, and others.
- Is Filmora compatible with Mac?
Filmora requires macOS Sierra (version 10.12) or later and the Big Sur (version 11) and Apple M1 chips. Touch Bar compatibility for MacBook Pro users and custom shortcuts to speed up editing.
- What is the best online FLV editor?
There are numerous free online editors to choose from. Fastreel, WeVideo, and FlexClip Video Maker are a few of the most popular.
- Is FLV better than MP4?
Because FLV and MP4 are the two most popular video file formats, it’s crucial to know which one is preferable. Adobe’s proprietary format is FLV. Both formats employ video and audio codecs and have equal performance levels. In their unprocessed state, MP4 files are more adaptable. You can, however, use an FLV file at the same time if you have the correct player.
- How do I choose a video editor?
When comparing video editing software, there are six crucial elements to consider.
- Budget and cost
- Ease of use/learning curve
- Multi-GPGPU acceleration and video format support
- Tools for advanced editing
- Music, special effects, and other goodies
- Customer service is second to none.
Also read:
- Updated Looking for a Way to Learn How to Merge Videos in HandBrake? Theres a Better Solution Waiting for You Inside
- Updated Best Cinematic LUTs For Premiere Pro You Can Come Across for 2024
- 2024 Approved Looking for Ways to Enhance Overall Look for Your Contents Professionally? Then Coming up with These Cool PowerPoint Templates Can Help You a Lot
- Updated In 2024, How to Create a Video Slideshow in iMovie
- Updated 10 Best Suggestions for AI Video Interviews
- 2024 Approved 2 Easy Methods | How To Zoom In On TikTok Videos?
- Updated 5 Tips for Aquasoft Slideshow for 2024
- New 2024 Approved Gimp Green Screen
- New In 2024, 7 Best MP4 Editors on Mac Edit MP4 in Mac
- In 2024, Are You Looking for Top AI Video Recognition Software to Choose From? Please Stay on This Article as We Look at the Current Top AI-Based Video Tools
- Updated How to Trim Video in Quicktime Player on Mac for 2024
- In 2024, Green Screen YouTube Videos
- New Introduction to The Best Cinematic LUTs in The Market for 2024
- In 2024, How to Use Adjustment Layer in Photoshop?
- New In 2024, How to Add Filter to Video Online
- Updated In 2024, How Can You Deny These Best 10 Free Speech to Text Software
- Updated In 2024, How to Create Discord Emoji GIF
- In 2024, A Guide To Motion Tracking Using The Best Video Editors
- New How to Add Text Behind Objects in Video
- Updated In 2024, Benefits of Live Streaming on YouTube
- Premiere Pro Text Effects Beginner Guide
- New 10+ Royalty-Free 5 Second Countdown Footage HD & 4K Clips Included
- 2024 Approved Step by Step to Crop Videos Using Lightworks
- Best Text Animations In After Effects
- Updated Final Cut Pro - How to Download and Install It, In 2024
- ReVisionFX ReelSmart Motion Blur Plugin For Premiere Pro
- In 2024, How to Download and Use Vegas Pro
- How to Make a Video Slideshow in iMovie
- New 2024 Approved Voice Changer for Discord | Use Voicemod on Discord
- New Find The Best LUTs for Lightroom
- 2024 Approved How To Unlink Audio and Video in DaVinci Resolve
- New Step by Step to Split a Clip in VLC
- Updated In 2024, How to Create a PowerPoint Looping Slideshow
- How To Mirror a Video Clip in Premiere Pro for 2024
- Adjust Background to Black for Your Product Review Video for 2024
- New The Art of Fashioning Slow Motions Has Remained Popular Ever Since. Read This Article to Learn How to Do Slow-Mo in CapCut and Other Powerful Tools
- Updated How Can You DIY VHS Overlay in After Effects for 2024
- New 2024 Approved Guide To Cropping and Combining Content in Wondershare Filmora Latest
- Updated In 2024, The Craziest 10 AI Editors Youve Ever Seen
- Fixes | What If YouTube Zoom to Fill Not Working for 2024
- Updated In 2024, Top 10 Old Film Overlays to Make Your Videos Look Vintage
- Updated 2024 Approved 2 Ways to Fade in Text in Premiere Pro
- New Keyframes Interval Everything You Need To Know
- New How to Make a Smooth Speed Ramping in Premiere Pro, In 2024
- Practical Way to Resize Video in Handbrake for 2024
- Updated 2024 Approved Best 9 Amv Makers for Computer
- Updated How to Add Custom Filters in VN App 2024 Quick Guide
- New Legend Intro Maker – Create Intro Video with Ease
- 3 Effective Methods to Fake GPS location on Android For your OnePlus Nord N30 5G | Dr.fone
- In 2024, Best Pokemons for PVP Matches in Pokemon Go For Oppo A2 | Dr.fone
- In 2024, Full Guide on Mirroring Your Motorola Razr 40 to Your PC/Mac | Dr.fone
- How to Turn Off Google Location to Stop Tracking You on Realme GT 5 | Dr.fone
- FRP Hijacker by Hagard Download and Bypass your Itel P40 FRP Locks
- For People Wanting to Mock GPS on Vivo X Fold 2 Devices | Dr.fone
- iSpoofer is not working On Apple iPhone 7 Plus? Fixed | Dr.fone
- Updated 2024 Approved Exploring the Finest Text-to-Speech Male Voice Tools for Natural Output
- iPhone 6® Data Recovery Software to Recover Lost iOS® Data | Stellar
- How to Mirror Apple iPhone 15 to Roku? | Dr.fone
- In 2024, How Can I Use a Fake GPS Without Mock Location On Motorola G24 Power? | Dr.fone
- Useful ways that can help to effectively recover deleted files from Asus ROG Phone 7
- In 2024, How to Mirror Samsung Galaxy S23 FE to Mac? | Dr.fone
- In 2024, Ultimate Guide on iPhone 12 Pro Max iCloud Activation Lock Bypass
- New 2024 Approved 10 Photoshop Cartoon Effects For Creatives
- How to recover deleted photos after deleting from Recently Deleted on iPhone 12 | Stellar
- In 2024, How to Use Pokémon Emerald Master Ball Cheat On Oppo Reno 11F 5G | Dr.fone
- In 2024, Everything You Need To Know About Unlocked iPhone 13 mini
- 7 Solutions to Fix Chrome Crashes or Wont Open on Xiaomi Redmi Note 12 5G | Dr.fone
- In 2024, 5 Ways to Move Contacts From Nubia Red Magic 8S Pro to iPhone (13/14/15) | Dr.fone
- Full Guide to Hard Reset Your Infinix Hot 40 | Dr.fone
- Full Tutorial to Bypass Your Infinix Hot 30 5G Face Lock?
- How to Remove an AirTag from Your Apple ID Account From iPhone 15 Plus?
- In 2024, 2 Ways to Monitor Apple iPhone XR Activity | Dr.fone
- How To Reset Your Apple iPhone 14 Plus Without iTunes? | Dr.fone
- How to Transfer Photos from Apple iPhone X to other iPhone without iCloud | Dr.fone
- Remove Device Supervision From your iPhone 6s
- How to Change your Apple iPhone 12 Pro Max Location on Twitter | Dr.fone
- In 2024, How to Screen Mirroring Itel A70 to PC? | Dr.fone
- How to Y36i Get Deleted Pictures Back with Ease and Safety?
- Top 10 Password Cracking Tools For Realme 12 Pro+ 5G
- In 2024, 10 Free Location Spoofers to Fake GPS Location on your Tecno Spark 10 4G | Dr.fone
- Why Does My OnePlus Ace 2 Pro Keep Turning Off By Itself? 6 Fixes Are Here | Dr.fone
- In 2024, Step-by-Step Tutorial How To Bypass Samsung Galaxy F04 FRP
- Easy steps to recover deleted videos from Oppo Find X7 Ultra
- In 2024, Will Pokémon Go Ban the Account if You Use PGSharp On Honor 100 Pro | Dr.fone
- In 2024, Forgotten The Voicemail Password Of Honor X9b? Try These Fixes
- In 2024, How To Open Your Apple iPhone 13 Pro Max Without a Home Button | Dr.fone
- In 2024, Top 7 iCloud Activation Bypass Tools For your iPhone SE (2022)
- In 2024, Forgot Locked iPhone 11 Pro Password? Learn the Best Methods To Unlock | Dr.fone
- In 2024, Full Guide to Bypass Motorola Moto G13 FRP
- In 2024, List of Pokémon Go Joysticks On Meizu 21 | Dr.fone
- Motorola Bypass Tools to Bypass Lock Screen(Motorola )
- A Guide Vivo Y27 5G Wireless and Wired Screen Mirroring | Dr.fone
- Title: 2024 Approved Splitting Audio From Video in Sony Vegas Step by Step
- Author: Chloe
- Created at : 2024-05-20 03:38:17
- Updated at : 2024-05-21 03:38:17
- Link: https://ai-editing-video.techidaily.com/2024-approved-splitting-audio-from-video-in-sony-vegas-step-by-step/
- License: This work is licensed under CC BY-NC-SA 4.0.
