

2024 Approved Step by Step to Crop a Video Using Lightworks
Step by Step to Crop a Video Using Lightworks
Video cropping refers to delete unwanted parts from your videos with software like Lightworks. It is also known as clipping which ultimately result in cutting off something, cropping or reducing an image. The very important question here is how to crop video in lightworks?
Video cropping can be done with the help of various methods, some are free while others are paid. Here we will discuss about both the methods which you can choose one to get rid of unwanted portions from your videos or photos.
About Lightworks
Today, there are so many video editing software available on the internet that can be used to crop videos. Most of them are free but have limited features only, some may contain ads which you do not want to see at all. One such best free video editor is Lightworks that does not have any watermark, ad or free trail period. It is completely free for life time and the best part is that you do not need to register or subscribe here.
Lightworks is a professional non-linear editing system (NLE) created by EditShare, a technology company based in London. The software allows both amateur and professional video editors to create and edit videos like movies, TV shows, music videos etc. Lightworks has been used in over 500 Hollywood feature films including “The Wolf of Wall Street”, “Jack Ryan: Shadow Recruit” and “Edge of Tomorrow”.
Step-by-step on how to crop video in Lightworks?
Step 1: Open any video or photo. You can easily add media files in the Project panel and it will start appearing in the preview/program monitor. Once you have added your videos to the timeline, you can view them in both waveform display and Vectorscope format. You also get an option to see a live filmstrip preview, to see what is happening in the video.

Step 2: After importing your videos into Lightworks, you can now proceed towards cropping them. For this purpose, click on the video editing tab and select the “DVE” (Dynamic Video Effect) tool.


Step 3: How to crop videos using the DVE tool? You can now go to the ‘Crop’ option under the DVE tab and move your cursor over any unwanted portion of the video and click-and-drag it down and in the right direction. This will distort and stretch the video to remove that particular portion from there while preserving its overall appearance and quality.

Step 4: You can now preview what your video looks like after cropping it by hitting the “Play” button. Hit play to view any changes you have made to your videos.
Step 5: Hit the “Close” button and save your project.
So, this is how you can edit or remove part of a video clip in Lightworks easily. You can also go for some other online tools which are available on the internet and offer great services at no cost for life time. Many of these tools are free to use, easy to handle and have amazing features that can be used by professionals to get their work done beautifully.
There are many video cropping tools available on the internet which can be used for free. Those who are looking for a free, easy to use video editor can download and use this tool without any hassle. That is why; Filmora is best alternative of Lightworks, which offers free version of simple editing tools with all the features you need for your home videos. The free version of this tool is available for Windows; Mac; and Linux operating systems.
An Easier Way to Crop Video Using Filmora
Filmora Video Editor is an easy to use free video editing software that can be used for cropping videos. It allows users to upload their videos online and create new ones or edit existing ones. The steps involved in cropping videos in Filmora are very easy and to the point so you can follow them without any hassle.
It also comes in two versions; free and paid. The free version has less editing tools than the paid one but offers a good enough range of options for beginners who are not looking to make pro-quality movies just yet.
Filmora (video editor) is a power software that allows you to make the most impressive video clips with few steps. This video editing tool gives users various tools to edit videos. It also offers the user-friendly interface that anyone can use to edit home videos on Windows PC, Mac, and Linux devices.
You can download Filmora free video editor from the official website easily. Just visit the behind the link and click on ‘Download’ to get the installer file. Once you have downloaded it, you need to install Filmora software on your computer to start using it. Or install it using the link below:
For Win 7 or later (64-bit)
For macOS 10.14 or later
Step-by-step on how to crop videos using Filmora?
Step 1: Open a video that you want to edit.

Step 2: Open the Filmora editing tool and select the “Crop and Zoom” icon.

Step 3: Drag the cursor from any corner of your video preview window so as to adjust the size of the crop frame.

Step 4: Once you have adjusted it as per your needs hit the green “OK” button. So, this is how you can add or remove any part of a video clip on Filmora easily.
This free video editing tool offers great features for users and helps them edit home videos without any hassle.
Those who are looking for an easy to use online tool with user-friendly interface and advanced features can go for Wondershare Filmora. It is one of the best video editing software for beginners which will help them edit videos quickly and efficiently.
Step 2: After importing your videos into Lightworks, you can now proceed towards cropping them. For this purpose, click on the video editing tab and select the “DVE” (Dynamic Video Effect) tool.
Step 3: How to crop videos using the DVE tool? You can now go to the ‘Crop’ option under the DVE tab and move your cursor over any unwanted portion of the video and click-and-drag it down and in the right direction. This will distort and stretch the video to remove that particular portion from there while preserving its overall appearance and quality.
Step 4: You can now preview what your video looks like after cropping it by hitting the “Play” button. Hit play to view any changes you have made to your videos.
Step 5: Hit the “Close” button and save your project.
So, this is how you can edit or remove part of a video clip in Lightworks easily. You can also go for some other online tools which are available on the internet and offer great services at no cost for life time. Many of these tools are free to use, easy to handle and have amazing features that can be used by professionals to get their work done beautifully.
There are many video cropping tools available on the internet which can be used for free. Those who are looking for a free, easy to use video editor can download and use this tool without any hassle. That is why; Filmora is best alternative of Lightworks, which offers free version of simple editing tools with all the features you need for your home videos. The free version of this tool is available for Windows; Mac; and Linux operating systems.
An Easier Way to Crop Video Using Filmora
Filmora Video Editor is an easy to use free video editing software that can be used for cropping videos. It allows users to upload their videos online and create new ones or edit existing ones. The steps involved in cropping videos in Filmora are very easy and to the point so you can follow them without any hassle.
It also comes in two versions; free and paid. The free version has less editing tools than the paid one but offers a good enough range of options for beginners who are not looking to make pro-quality movies just yet.
Filmora (video editor) is a power software that allows you to make the most impressive video clips with few steps. This video editing tool gives users various tools to edit videos. It also offers the user-friendly interface that anyone can use to edit home videos on Windows PC, Mac, and Linux devices.
You can download Filmora free video editor from the official website easily. Just visit the behind the link and click on ‘Download’ to get the installer file. Once you have downloaded it, you need to install Filmora software on your computer to start using it. Or install it using the link below:
For Win 7 or later (64-bit)
For macOS 10.14 or later
Step-by-step on how to crop videos using Filmora?
Step 1: Open a video that you want to edit.
Step 2: Open the Filmora editing tool and select the “Crop and Zoom” icon.
Step 3: Drag the cursor from any corner of your video preview window so as to adjust the size of the crop frame.
Step 4: Once you have adjusted it as per your needs hit the green “OK” button. So, this is how you can add or remove any part of a video clip on Filmora easily.
This free video editing tool offers great features for users and helps them edit home videos without any hassle.
Those who are looking for an easy to use online tool with user-friendly interface and advanced features can go for Wondershare Filmora. It is one of the best video editing software for beginners which will help them edit videos quickly and efficiently.
Would You Like to Know How to Change the Ratio of the Video or Which Is the Correct Aspect Ratio for Uploading to the Online Platform? Then, Go Through the Article to Get Complete Details About the Video Aspect Ratio
Versatile Video Editor - Wondershare Filmora
Videos are a great way to complete the whole story in one go. In social media, videography, entertainment, educational video sharing, or many more areas, viewers and their viewing experience matter a lot. For instance, if a person visited YouTube to see some educational content but finds it out that the overall view of the video content is not up to the mark. Then, what will happen? That person will switch to another channel, which is not good for your business area. Thus, knowing the correct aspect ratio for your video is very important. Here, the aspect ratio refers to the ratio of width to the height of the Video or image visible on the screen. So, here you will learn about ways to change the ratio of a video and how to change video dimensions on premiere pro or iOS devices.

In this article
01 [Change aspect Ratio with Softwares](#Part 1)
02 [Change Video aspect Ratio Online](#Part 2)
03 [Make sure which aspect Ratio You Want to Change](#Part 3)
Part 1 Change aspect Ratio with Softwares
1.1 For beginners & most people
This part is for beginners or people who are not aware of the technicalities related to video size, dimensions, or changing the ratio of Video. A quick and easy-to-use application is Wondershare Filmora, one of the widely used platforms for video editing and adopting it s per the video requirement.
Thus, let’s try to understand how you can change the Video’s aspect ratio using Filmora.
Step1 Download and open the Software
First, visit the official link of Wondershare Filmora and download, install and lunch the tool on your system.
Step2 Set the aspect ratio and upload your file
Right from the main interface, you will find the aspect ratio option. Using the drop-down menu, select the desired one to change the ratio of Video. After that, click on the new project to upload your video file.
Step3 Save and Export
Now, when you upload the video file, it will automatically modify the chosen aspect ratio for the video. Then export the file to save at the desired location on your system.

1.2 For Professional People
Now, here comes the guidance to those professional videographers, movie maker who needs an advanced version to change video size or aspect ratio.
Since you are already aware of technicalities to a certain extent, it becomes easy to use some advanced tools to change the aspect ratio of Video using adobe and OBS Software.
● Adobe PR
The first tool that we shall discuss is Adobe PR, and we will learn how to use Adobe Premiere Pro to change the Video’s aspect ratio. This tool is valuable for worldwide users explicitly working in the video editing field or dedicated professionals who need some technical knowledge to understand the interface. Here are the required steps to handle the adobe PR to change aspect Ratio iPhone Video devices.
Open the ‘File’ Menu> then Go to the ‘New’ Folder > after that, visit the ‘Sequence’ (dialog box) That will give the option of ‘Settings,’ select it> then visit the ‘Video’ section. Then, from the Video section, you need to adjust the Frame size for height and the Horizontal value for width.
Then opt for ‘OK.’
● OBS Studio
Those who know are pretty aware of the professional OBS studio full of features and technical detailing. In this part, you shall see how to use OBS software to change the iMovie aspect ratio following the mentioned steps.
Here, you need to open the ‘Settings .’ Under the ‘Video’ subsection, you will see ‘Output Resolution’ (click on drop-down), then from the given aspect ratios, change the ratio of your Video. Then, press the OK button to apply the changes at the end. That’s it.
Using this professional software will make you able to change the aspect ratio on iPhone Video and change the aspect ratio MP4, MKV, FLV, or other formats. The only need is to have a basic understanding of the technical knowledge related to the software. If you’re already a professional video maker, this software will be the most option.
Part 2 Change Video aspect Ratio Online
Till now, we have covered different software as per the user requirements. Suppose you are not comfortable with downloading any software on your devices. In that case, there are some alternatives for Online Video Editors to change video aspect ratio with ease. Let’s take a look over some of the easy-to-use online tools to change the ratio of the Video. Such tools are quick to use and accessible worldwide. Some of them are mentioned below:
1. veed.io
You can effortlessly change the aspect ratio of your video using ‘Veed.io’. Which supports multiple video formats such as .wmv, .mp4, .mkv, .flv, .3gp and many more. While uploading the video, you need to mention the required width and height of the video and then click on the ‘Resize’ button.
2. Kapwing (kapwing.com)
Another helpful tool while searching for some quick tools to change the ratio of Video through online mode is Kapwing Online Convertor. You can scale, resize your Video by simply uploading your file or pasting the URL there. The interface is quite simple to use and changes the aspect ratio of MP4 or other format videosThere is noNo doubt accessing some online tools to change the Video’s aspect ratio in quick and easy steps. Though there exist certain limitations such as internet connection speed should be good to upload or download the Video. In addition, there is a certain limitation in terms of the size of the Video or other factors. Otherwise, it comes out to be a practical option for small files.
Part 3 Make sure which aspect Ratio You Want to Change
Technical specifications needed by different online platforms are different, such as YouTube, Instagram, Facebook, or other social media platform that needed a video with different aspect ratios to make them suitable s per their criteria. Thus, accordingly, you need to modify or change the aspect ratio on MP4 as per these social media requirements. Here are some famous social media platforms, and their aspect ratio requirements are listed. Let’s check them out one by one:
Twitter: The aspect ratio range that works for Twitter is between 1.1 to 2.1
Instagram: For it, the standard ratios are: 1.91:1, 4:5
Tiktok: Required ratio is 9:16 (Smartphone screen)
YouTube: Standard aspect Ratio for YouTube is 16:9. If the video uploaded is not in this ratio, then YouTube will make an internal adjustment and show the video with an outer band of the black or white strip around the video screen.
Vimeo: Both the options are available with Vimeo that is 16:9, 4:3
Wondershare Filmora
Get started easily with Filmora’s powerful performance, intuitive interface, and countless effects Try It Free Try It Free Learn More >

Conclusion
Getting the correct information about the iMovie aspect ratio change and Adobe premiere pro-change aspect ratio is crucial to uplift the viewer base to your Video. Furthermore, to a great extent, it matters which platform your Video will launch on as different devices need different aspect ratios. Thus, this article focused on covering all the points covered under how to change the Aspect Ratio of MP4 videos. Thus, whether you are a novice in video making or a professional videographer, or a moviemaker, learn about changing the ratio of Video to open new vistas to your efforts with Wondershare Filmora, Adobe, and OBS web applications.
Videos are a great way to complete the whole story in one go. In social media, videography, entertainment, educational video sharing, or many more areas, viewers and their viewing experience matter a lot. For instance, if a person visited YouTube to see some educational content but finds it out that the overall view of the video content is not up to the mark. Then, what will happen? That person will switch to another channel, which is not good for your business area. Thus, knowing the correct aspect ratio for your video is very important. Here, the aspect ratio refers to the ratio of width to the height of the Video or image visible on the screen. So, here you will learn about ways to change the ratio of a video and how to change video dimensions on premiere pro or iOS devices.
In this article
01 [Change aspect Ratio with Softwares](#Part 1)
02 [Change Video aspect Ratio Online](#Part 2)
03 [Make sure which aspect Ratio You Want to Change](#Part 3)
Part 1 Change aspect Ratio with Softwares
1.1 For beginners & most people
This part is for beginners or people who are not aware of the technicalities related to video size, dimensions, or changing the ratio of Video. A quick and easy-to-use application is Wondershare Filmora, one of the widely used platforms for video editing and adopting it s per the video requirement.
Thus, let’s try to understand how you can change the Video’s aspect ratio using Filmora.
Step1 Download and open the Software
First, visit the official link of Wondershare Filmora and download, install and lunch the tool on your system.
Step2 Set the aspect ratio and upload your file
Right from the main interface, you will find the aspect ratio option. Using the drop-down menu, select the desired one to change the ratio of Video. After that, click on the new project to upload your video file.
Step3 Save and Export
Now, when you upload the video file, it will automatically modify the chosen aspect ratio for the video. Then export the file to save at the desired location on your system.
1.2 For Professional People
Now, here comes the guidance to those professional videographers, movie maker who needs an advanced version to change video size or aspect ratio.
Since you are already aware of technicalities to a certain extent, it becomes easy to use some advanced tools to change the aspect ratio of Video using adobe and OBS Software.
● Adobe PR
The first tool that we shall discuss is Adobe PR, and we will learn how to use Adobe Premiere Pro to change the Video’s aspect ratio. This tool is valuable for worldwide users explicitly working in the video editing field or dedicated professionals who need some technical knowledge to understand the interface. Here are the required steps to handle the adobe PR to change aspect Ratio iPhone Video devices.
Open the ‘File’ Menu> then Go to the ‘New’ Folder > after that, visit the ‘Sequence’ (dialog box) That will give the option of ‘Settings,’ select it> then visit the ‘Video’ section. Then, from the Video section, you need to adjust the Frame size for height and the Horizontal value for width.
Then opt for ‘OK.’
● OBS Studio
Those who know are pretty aware of the professional OBS studio full of features and technical detailing. In this part, you shall see how to use OBS software to change the iMovie aspect ratio following the mentioned steps.
Here, you need to open the ‘Settings .’ Under the ‘Video’ subsection, you will see ‘Output Resolution’ (click on drop-down), then from the given aspect ratios, change the ratio of your Video. Then, press the OK button to apply the changes at the end. That’s it.
Using this professional software will make you able to change the aspect ratio on iPhone Video and change the aspect ratio MP4, MKV, FLV, or other formats. The only need is to have a basic understanding of the technical knowledge related to the software. If you’re already a professional video maker, this software will be the most option.
Part 2 Change Video aspect Ratio Online
Till now, we have covered different software as per the user requirements. Suppose you are not comfortable with downloading any software on your devices. In that case, there are some alternatives for Online Video Editors to change video aspect ratio with ease. Let’s take a look over some of the easy-to-use online tools to change the ratio of the Video. Such tools are quick to use and accessible worldwide. Some of them are mentioned below:
1. veed.io
You can effortlessly change the aspect ratio of your video using ‘Veed.io’. Which supports multiple video formats such as .wmv, .mp4, .mkv, .flv, .3gp and many more. While uploading the video, you need to mention the required width and height of the video and then click on the ‘Resize’ button.
2. Kapwing (kapwing.com)
Another helpful tool while searching for some quick tools to change the ratio of Video through online mode is Kapwing Online Convertor. You can scale, resize your Video by simply uploading your file or pasting the URL there. The interface is quite simple to use and changes the aspect ratio of MP4 or other format videosThere is noNo doubt accessing some online tools to change the Video’s aspect ratio in quick and easy steps. Though there exist certain limitations such as internet connection speed should be good to upload or download the Video. In addition, there is a certain limitation in terms of the size of the Video or other factors. Otherwise, it comes out to be a practical option for small files.
Part 3 Make sure which aspect Ratio You Want to Change
Technical specifications needed by different online platforms are different, such as YouTube, Instagram, Facebook, or other social media platform that needed a video with different aspect ratios to make them suitable s per their criteria. Thus, accordingly, you need to modify or change the aspect ratio on MP4 as per these social media requirements. Here are some famous social media platforms, and their aspect ratio requirements are listed. Let’s check them out one by one:
Twitter: The aspect ratio range that works for Twitter is between 1.1 to 2.1
Instagram: For it, the standard ratios are: 1.91:1, 4:5
Tiktok: Required ratio is 9:16 (Smartphone screen)
YouTube: Standard aspect Ratio for YouTube is 16:9. If the video uploaded is not in this ratio, then YouTube will make an internal adjustment and show the video with an outer band of the black or white strip around the video screen.
Vimeo: Both the options are available with Vimeo that is 16:9, 4:3
Wondershare Filmora
Get started easily with Filmora’s powerful performance, intuitive interface, and countless effects Try It Free Try It Free Learn More >
Conclusion
Getting the correct information about the iMovie aspect ratio change and Adobe premiere pro-change aspect ratio is crucial to uplift the viewer base to your Video. Furthermore, to a great extent, it matters which platform your Video will launch on as different devices need different aspect ratios. Thus, this article focused on covering all the points covered under how to change the Aspect Ratio of MP4 videos. Thus, whether you are a novice in video making or a professional videographer, or a moviemaker, learn about changing the ratio of Video to open new vistas to your efforts with Wondershare Filmora, Adobe, and OBS web applications.
How To Fade Audio In Kinemaster
If you have been looking for video and audio editing tools then you have probably heard of Kinemaster. It is a great video editing app that allows users to edit all aspects of the video including any audio or music that may accompany the video. It has a lot of very useful features and the user interface is fairly easy to use.
One of the things that you can do with Kinemaster is to fade out audio, a useful feature that can help the ending of any video appear more authentic. In this article, we will be looking at how you can use Kinemaster to fade audio.
Kinemaster Fade Audio Steps
The following steps show you how you can easily fade audio in Kinemaster;
Step1If you don’t have Kinemaster already, start by downloading and installing the video editor on your computer.
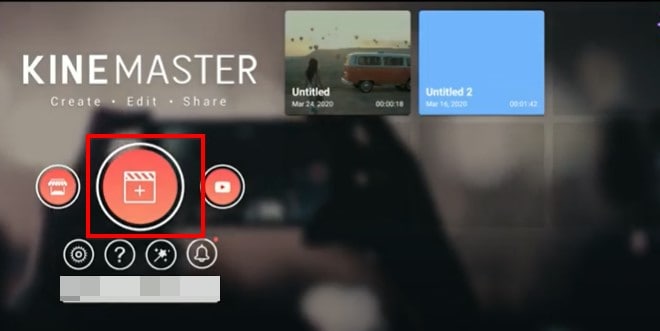
Step2Open Kinemaster on your computer and then click on the “New Project” icon to start. Select the aspect ratio that you would like to use. If you are not sure, we recommend choosing the “16:9” aspect ratio.
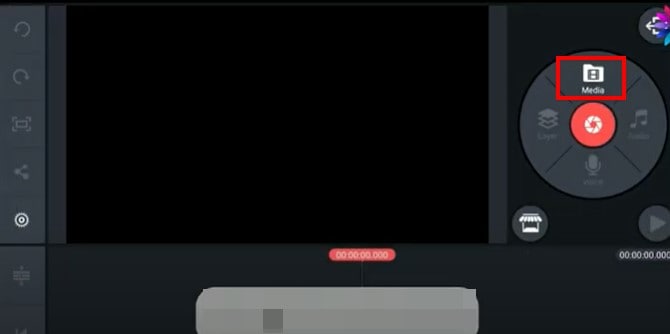
Step3In the next window, click on “Media” to select the clip you would like to add to the Kinemaster project that you have just created.
Step4To fade in and fade out the audio in the project, click on the gear icon from the options to the left of the screen.
![]()
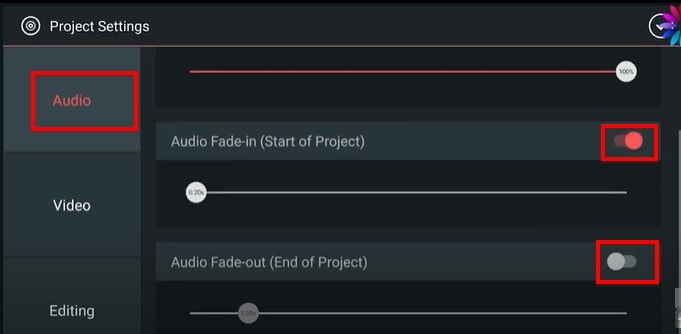
Step5Select the “Audio” tab on the next screen and then turn on the switch next to “Audio Fade-in (Start of Project)” and “Audio Fade-out (End of Project).” This will add a fade-in and fade-out effect at the beginning of the audio and at the end of it.
Step6You can then easily set the duration of the “Audio fade-in” and “Audio fade-out” by dragging the slider below each option. We recommend setting the duration to just a few seconds.
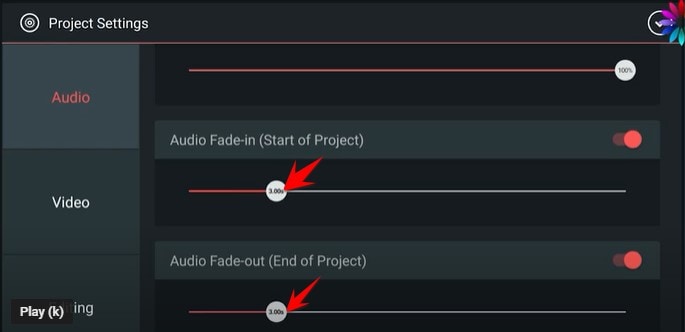
Don’t forget to save the project when you’re done.
Kinemaster Alternative to Edit Audio
Kinemaster is a good way to edit both audio and video on your computer, but the following options are just as good;
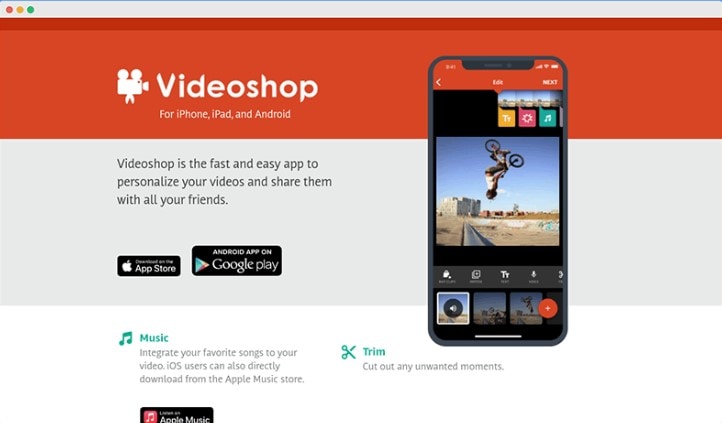
1. VideoShop
VideoShop is a simple to use and highly effective program that you can use to create and edit videos on your computer. The interface makes it easy to import any video project that you have into the program and the wealth of very useful features can help you edit the video in various ways.
For example, you can change the speed of the video, add transitions at various points in the video, add and remove text, add and remove music and so much more. Although there is a free trial version, you will only be able to access some of the more useful features when you purchase the premium version.
The Pro version of VideoShop goes for $3.99 a month, but you can get lifetime access to the program for only $39.99. One thing that VideoShop has over Kinemaster is that it is very easy to use, even beginner users find video editing a breeze with this tool.
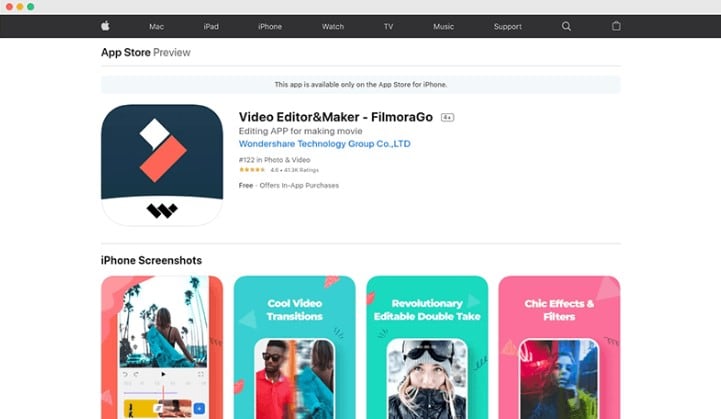
2. Filmora
If you are looking for a simple way to edit videos on Android or iOS devices, Filmora is one of the best options in the market. This mobile version of the very popular Filmora video editor is just as easy to use as its parent program. You can use it to create video projects from scratch or upload a video and make changes to it.
It offers you a lot of choices when it comes to editing features including trimming sections of the video, adding filters, adding music, adding or removing text, and even changing the canvas or the background of the video. Advanced options such as changing the speed of the video are also available.
One of the things that we love about Filmora is that you don’t even have to create an account to use it or remove the watermark added to the completed video project, watching a video ad can be enough. But this option is only available once every 24 hours, meaning that you can only remove a watermark on the free version once a day. Filmora is available for both iOS and Android and the yearly premium plan will cost you just $19.90.
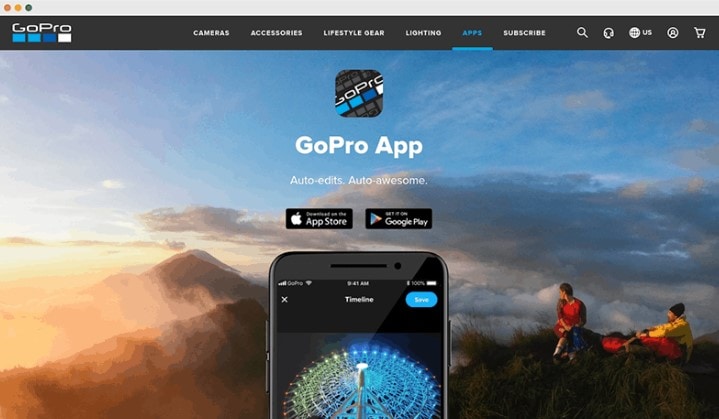
3. Quik
Quik is a video editing program created by GoPro for the purpose of editing GoPro videos, but that doesn’t mean that you will not be able to use it to edit other types of videos. You can use Quik to create a new project or edit an existing video and gives users a lot of different options when it comes to video editing.
One of the main benefits of using Quik is that you can easily add music, audio, and special effects to a video as well as change the length of the video, fade audio in and out and even change when the music starts. It is also one of the best ways to use images to create collages and slideshows very easily. There are a lot of slideshow and collage templates to choose from, and you can edit them easily by adding your music and images. Quik is completely free to use and you can upload your creation to the cloud ad share the link with others.
Conclusion
Kinemaster is one of the most popular video editing tools, especially since it simplifies the video editing process to make it very easy. All the alternative tools we have outlined here in this article are selected because they can make video editing quite simple.
Free Download For Win 7 or later(64-bit)
Free Download For macOS 10.14 or later
Create True 3D Text Effects Using After Effects
Every video creator wants to make their videos eye-catching and get the message delivered to the viewers properly. If you have regular graphic elements and texts, your video is not going to be as engaging as expected. That is why video creators always try to include trending and attention-grabbing effects and animations in the video. There is no doubt that 3D animations for texts and titles look really amazing.
Different video editors have different 3D text animations and effects that you can apply to the text on your video and get instantly noticed by your viewers. You can apply 3D text animation on premium video editors like After Effects as well as apply 3D text effect online. We will illustrate how to create stunning 3D text animations with different video editors in simple steps.
Part 1. Create True 3D Text Effects using After Effects
After Effects is a premium video editor where you can create true 3D text effect from scratch. First of all, you need to create a new composition and add your text to your video. You have to enable 3D option for the text and add depth and lighting texture to get 3D effect. Therefore, you should first create 3D text effect and thereafter, animate 3D text as per your preference. Here are the steps to create 3D text After Effects easily.
Step1Launch After Effects and click on New Composition from Project section. Set the different parameters on Composition Settings and click on Ok button.

Step2Click on Type Text icon located at the top bar and type a text on the video. After typing the text, go to the Character panel to the right and adjust the style of the text.

Step3You have to enable 3D option for the text from the 3D icon on text layer. Under text layer, click on Transform and use X-Y-Z rotation options to rotate the text from 3D perspectives.

Step4Similarly, click on Geometry Options and add depth to your text to get 3D effect on your text.

Step5You have to create a new Camera layer by right-clicking Timeline and go to New>Camera option. You will get Camera Settings window to adjust the parameters and click on Ok button.

Step6Use the Orbit Tool to rotate the text to get the true 3D effect visible on the screen.

Step7You need to get the lighting and shading for your 3D text. Right-click on Comp window and go to New> Light. Adjust the parameters from Light Settings window.

Step8You can adjust Transform and Light Options from Comp window under Light layer for better effect.

You have successfully created 3D text effect on After Effects. You will now illustrate how to animate the 3D text.
Part 2. Create 3D Camera Animation
You have prepared your text with 3D effect, and you can have multiple 3D texts on your video. It is time to animate those 3D texts so that the 3D effect becomes more prominent and the text instantly grabs attention. You do not have to create animation from scratch as there are 3D animation presets available. All you need to do is apply them to your 3D texts and they will start to animate automatically. Besides, you can create 3D camera animation to show the texts from different camera perspectives. Here are the steps to use 3d animated text generator on After Effects.
Step1Once you have created your 3D text effect, go to Effects & Presets panel.
Step2Go to Text> 3D Text and you will see all the different 3D animation presets that you can apply.

Step3Drag and drop your desired 3D animation directly to 3D text layer.
Step4If you want camera animation on your 3D text, select the Camera layer you already created. Press C to get the Orbit tool to get the starting position of the 3D text. You can also use Dolly tool and Pan & Zoom tool for adjustment.

Step5Now add a keyframe on Position option from Transform option to mark the starting point of the animation. Similarly, add another keyframe where you want the animation to end.

Step6Use the Orbit tool, Dolly tool and others to position 3D text as per how you want the animation to end.

Part 3. Make Stunning 3D Text Effects Online
Since adding 3D effects to text is a rather heavy task in video editing, there are many who think that you cannot add 3D text effects without a dedicated video editor application. But there are many renowned online video editors available where you can create amazing 3D text effects and animations with a few clicks.
In fact, you can use 3d animated text generator online to get any desired text in 3D mode. We recommend FlexClip full-featured video editor for 3D text animation online. You can select from available 3D text templates and apply different motion animations. Here are the steps to follow.
Step1Open your web browser and “flexclip.com/editor/app”. Go to Media tab and import your video and add it to the Timeline.

Step2Go to Text and click on See All for Text Styles. Scroll down and check out the 3D text templates available. Click on any desired template to apply to your video.

Step3Double-Click on 3D text present on Viewer and edit the style and text as per your preference.

Step4Click on three-dot icon at the top of Viewer and click on Motion option.

Step5Select any desired motion effect and you will see your 3D text animation on Viewer when you play the video.

Part 4. Alternative Way to Create 3D Text Animation
When you use an online video editor to create 3D text animation, there will have limited 3D text effects. We can use After Effects to create 3D text animations from scratch. But you may find the steps slightly complicated and we recommend Filmora as the best alternative way to create 3D text animation. Filmora is a premium video editor that is equally popular among amateurs and professionals. Here are the steps to create 3D text animations using Filmora in simple steps.
Step1Download and install Filmora on your computer. The video editor is available for Windows and Mac users. Click on New Project button on welcome screen or go to File> New Project option.

Step2Go to File> Import Media > Import Media Files to import the video file. Alternatively, drag and drop the video file directly into Project Media folder. Put the video file into Timeline to get started.

Step3Go to Titles tab and go to left panel, click on Titles option. Search “3D” in the search field and check out all 3d text effects and animations available.

Step4Drag and drop 3D text templates on Timeline. You should place the effect on the Timeline where you want it to appear on the video. You can also adjust the duration of the effect as per your requirements.

Step5Double-click on the text layer to customize the text and style. Play the video and click on Export button to save the edited 3D text video.

Conclusion
There is no doubt that if you include 3D text effects and animations in your video, your video will definitely stand out. The viewers will find the video engaging and understand the message that the video creator wants to get across. We have illustrated how to make stunning 3D text animations. You can also use 3d text generator online. But we recommend Filmora as the best and the easiest video editor to create 3D text animations instantly.
Free Download For Win 7 or later(64-bit)
Free Download For macOS 10.14 or later
Also read:
- In 2024, Add Green Screen Effects in Final Cut Pro
- New How to Make a Neon Dance Effect With Filmora for 2024
- 2 Methods to Cut Video in VLC on Windows for 2024
- New Are You Looking to Find Out How to Loop YouTube Videos on iPhone? Learn How to Loop Your Favorite YouTube Video on Your iPhone, so You Can Play that Part over and Over
- In 2024, Do You Want to Know How to Edit a Time Lapse Video on iPhone, Interesting Ideas, and some Tips and Pointers for Shooting a Professional Time Lapse Video? Find Out Everything in This Guide
- New How To Create A Green Screen Video In After Effects
- 2024 Approved Finding The Best Ways To Replace Sky in Lightroom
- New In 2024, Learn Top Best Free LUTs For Premiere Pro
- New Learn How to Blur Faces in Your Video on iPhone
- Easy Ways to Add Text Overlay to Video
- New YouTube Zoom to Fill Is a Great Feature for Viewing Things in Depth. This Article Answers All Questions About Fixing YouTube Zoom to Fill Not Working on Your Device
- Camtasia Vs. Final Cut Pro
- Updated 2024 Approved Best Slow Motion Camera Apps for Best Content Creation
- Updated 2024 Approved Tips That Show Anybody How To Make Youtube Slideshow – Guaranteed
- Updated 2024 Approved How to Add Filters on iMovie
- 2024 Approved Making Creative and Engaging Youtube Videos Is Now Easy with Several Tools. Now, YouTube Also Offers You Its Own Built-In Video Editor Through Which You Can Edit and Enhance the Video Quality
- Updated Make Transparent Background Video Today
- Adobe Premiere Pro Rec 709 LUTs Finding The Best Options for 2024
- This Article Presents a Guide to Using the Keyframe Feature for Creating Competent Films with Detailed Instructions and Filmoras Grow and Win Program Contest
- New Easily Cut Large Videos Faster on Mac 7 Solutions Included
- New How to Do Perfect Match Paint 100 the Easy Way for 2024
- Updated Making Slow Motion Videos in Premiere Pro A Review on The Best Methods
- Updated Do You Want to Be Aware of VHSs Meaning? There Is Nothing to Be Worried About because We Will Guide You in This Article
- 18 Best Tools and Services to Create Animated Videos for Business 2023
- 4 Methods to Turn off Life 360 On Oppo Reno 10 Pro+ 5G without Anyone Knowing | Dr.fone
- In 2024, How to Lock Apps on Samsung Galaxy A14 4G to Protect Your Individual Information
- Change Location on Yik Yak For your Apple iPhone 7 to Enjoy More Fun | Dr.fone
- How to recover lost data from Pova 5 Pro?
- In 2024, Ways to stop parent tracking your OnePlus 11R | Dr.fone
- In 2024, The Ultimate Guide to Bypassing iCloud Activation Lock on Apple iPhone XR
- Solved Photos Disappeared from iPhone SE (2020) Suddenly | Stellar
- Why does the pokemon go battle league not available On Poco C50 | Dr.fone
- Remove FRP Lock on Play 40C
- In 2024, How to Migrate Android Data From Lava Blaze 2 to New Android Phone? | Dr.fone
- New Guide How To Check iCloud Activation Lock Status From Your Apple iPhone 8
- Play Store Stuck on Downloading Of Xiaomi 13 Ultra? 7 Ways to Resolve | Dr.fone
- For People Wanting to Mock GPS on Vivo V29 Pro Devices | Dr.fone
- How To Recover Whatsapp Chat History From iPhone 13 mini | Stellar
- In 2024, How to Cast Infinix Hot 30i to Computer for iPhone and Android? | Dr.fone
- In 2024, How to Get and Use Pokemon Go Promo Codes On Honor Magic Vs 2 | Dr.fone
- In 2024, How To Use Special Features - Virtual Location On Tecno Pova 5? | Dr.fone
- Title: 2024 Approved Step by Step to Crop a Video Using Lightworks
- Author: Chloe
- Created at : 2024-06-18 14:31:08
- Updated at : 2024-06-19 14:31:08
- Link: https://ai-editing-video.techidaily.com/2024-approved-step-by-step-to-crop-a-video-using-lightworks/
- License: This work is licensed under CC BY-NC-SA 4.0.
