
:max_bytes(150000):strip_icc():format(webp)/GettyImages-1369568023-c596ac8d6b5a4f3682bda2fa0feb12bd.jpg)
2024 Approved The Best Way to Remove Audio From Your Videos
The Best Way to Remove Audio From Your Videos
Extracting audio from video lets you focus on the main video. Moreover, it also protects privacy and addresses copyright problems. Thus, controlling the audio is a crucial skill for video editors. One approach to making the video seem better is to remove the noise. Well, it isn’t just about reducing background noise. Instead, it’s a calculated move to make your editing more precise. So, how do you remove audio from a video? Don’t worry if you are a newcomer in the video editing field! This post is your go-to guide to effortlessly eliminating audio from your video content.
Extracting audio from video lets you focus on the main video. Moreover, it also protects privacy and addresses copyright problems. Thus, controlling the audio is a crucial skill for video editors. One approach to making the video seem better is to remove the noise. Well, it isn’t just about reducing background noise. Instead, it’s a calculated move to make your editing more precise. So, how do you remove audio from a video? Don’t worry if you are a newcomer in the video editing field! This post is your go-to guide to effortlessly eliminating audio from your video content.
In this article
- Part 1: Why Is It Necessary to Remove Audio from a Video?
- Part 2: How Can You Improve Storytelling With Silent Videos?
- Part 3: How to Use Filmora to Remove Audio from Your Video?
Remove Audio Now For Win 7 or later(64-bit)
Remove Audio Now For macOS 10.14 or later
Why Is It Necessary to Remove Audio from a Video?
You can make a video far more versatile and successful for many different things by removing the audio.
Your Video Becomes Multipurpose
Taking the audio out of a video makes it more versatile. Presentations, slide decks, and instructional videos may all benefit from this. The original audio or background noise might be too distracting in such videos.
No Language Issues
The muted or removed audio lets you reach viewers who speak a different language. By removing the original audio, the video becomes language-neutral. Thus, you save time adding subtitles or dubbing without disturbing the narration.
Place Emphasis on the Video Itself
Cutting off the sound may make the video’s visuals the main attraction. It may be beneficial when creating tutorials or instructional videos. That’s because viewers may prefer to see the demos without the sound.
Eliminating Excessive Background Noise
The video might get dull with background noises, echoes, or unwanted sounds. Deleting the audio stream helps to eliminate distractions. As a result, viewers get a cleaner viewing experience.
Keeping Copyright Concerns at Bay
Businesses can avoid copyright infringement problems by eliminating audio from videos. Removing someone’s audio work before using it in public venues is necessary. It supports copyright laws on audio material by limiting display to visual components.
Content Personalization
Creators can let viewers add their soundtracks or voiceovers by removing audio. Thus, it can make the watching experience more customized. It suits projects that need a high degree of personalization or user-generated content.
Confidential Data Security
Sometimes, a video might capture sensitive conversations or information. So, it’s essential to remove the audio to protect privacy. Remember, sharing the visual footage does not compromise confidentiality. It hides the crucial discussions or data from the original audio.
As you can see, removing audio from a video has several benefits. Many options are available when you mute the audio in a video. By eliminating background noise, you’re freeing your imagination.
So, how do silent videos improve your video production strategies? Let’s find out!
How Can You Improve Storytelling With Silent Videos?
There is a much unrealized narrative potential in silent videos. Most videos rely only on visual elements to convey narratives. Thus, mute clips have a unique ability to captivate audiences. It also offers many possibilities for storytelling, allowing for a more immersive experience.
Setting a Narrative
Videos without sound force viewers to rely more on their visual perception of the tale. It can draw your viewers closer to the visuals. Moreover, it also heightens their involvement with the story as it develops.
Improving Stories
Silence directs the viewer’s attention to certain visual aspects. When you remove all sound distractions, the audience can focus on the pictures. It helps you highlight essential story aspects.
For instance, rely on more than just dialogue to convey emotion. Instead, you can take a modest close-up of the character’s face.
Build Emotions With No Audio
One effective method of building intense emotions is the complete absence of sound. Remember, silent clips can keep viewers on the top of their seats. The audience may get more invested in the story’s raw essence when a scene unfolds in silence. In short, this technique aims to evoke a range of emotions in the audience.
Add Metaphor
The lack of audio permits the use of symbolic language only via visual representations. You can use each picture to convey information. It eliminates the need for dialogue or background music.
The audience can interact with the story on a deeper level via interpretation. Here, video scenes, objects, or actions work as symbols.
Simplify Complex Stories
Silent videos let storytellers elicit strong emotional reactions from audiences. They can co-create the story by deciphering visual cues. Besides, they can also add thoughts, emotions, and interpretations in silent videos. Without words, silent videos can help you convey stories that captivate audiences.
How to Use Filmora to Remove Audio from Your Video?
Two main approaches are available for using this software. You can start by downloading Wondershare Filmora for free to try it out. Here is how to remove audio in a video editor.
Remove Audio Now For Win 7 or later(64-bit)
Remove Audio Now For macOS 10.14 or later
Method 1: Use the “Mute” Button
The first method is using the “Mute” function available in Filmora. You can start by importing the local video file into this software.
Drop the file into Filmora’s video editing timeline. You can mute the file by right-clicking on it. Once you’ve finished, choose a format to save the file in.
As you can see, the mute option stands out as a fantastic one-click feature. It removes the necessity for specialized video editing skills. Anyone can effortlessly remove audio from their videos with ease.

Method 2: Use the Audio Detach feature
Now, let’s turn our focus to a different, efficient way. The Audio Detach function becomes a potent feature for separating audio from videos. Let’s check out its detailed instructions for precisely separating audio and video.
Step1Upload Your Video
First, select the video clip whose audio you want to extract. You can start by clicking “Import” and then navigating to the relevant folder on your hard drive.
While you pick more files, keep the “Ctrl” button down to select them all at once. The main editing dashboard will show thumbnails of all the currently loaded files. You can see a preview in the right-hand window when you double-click them.

Step2Cut Out the Music
Now, you should drag videos from the dashboard into the Video Timeline. After that, you can right-click the video to choose the “Audio Detach” option.
The Music Timeline will immediately display a new audio file. Here, you can see the original video’s soundtrack. Now, pressing the “Delete” button can remove the sounds.
You can also detach audio from multiple video files. Remember, all the files will mesh together perfectly on the Video Timeline.
Thus, you need to click the application icon on the left-hand side of the screen and choose “Save As…” to create new project files if you need to extract audio from more than one file. Then, export each output file individually after reloading the project file.

Step3Download the Video
To be sure this is what you need, double-tap the file in the Video Timeline. You can add suitable music files to the clip if needed. To save only the video track, click the “Create” option directly. A popup will open up, asking you to choose a format before you can save it to your PC.
The Music Timeline will immediately display a new audio file. Here, you can see the original video’s soundtrack. Now, pressing the “Delete” button can remove the sounds.
You can also detach audio from multiple video files. Remember, all the files will mesh together perfectly on the Video Timeline.
Thus, you need to click the application icon on the left-hand side of the screen and choose “Save As…” to create new project files if you need to extract audio from more than one file. Then, export each output file individually after reloading the project file.
Now you know how to remove audio from videos in Wondershare Filmora. As you can see, removing background noise from videos is a breeze using Filmora. You don’t need extensive experience or expensive software packages.
Follow the simple steps outlined above, even if this is your first time. You may remove distracting or unnecessary audio from your file in just a few minutes.
Conclusion
As you can see, your ability to control the audio in video editing defines the viewing experience. It is about not just transforming video material but also expanding possibilities. This silent space is where imagination soars.
It’s a technique to make your video clips more adaptable. Thus, they can transcend language obstacles, legal limitations, and distractions.
Think of a vacation video where the beautiful sights and sounds of the busy streets are in front. It will allow the audience to lose themselves in the lively atmosphere completely. If you remove the audio from this clip, it can become livelier.
In short, sound removal is crucial in creating a more engaging story. It changes the viewer’s experience by focusing on visuals and increasing engagement. You can use Filmora’s powerful audio removal features. The software streamlines the editing process without compromising the quality of the video. Learn to use silence as a tool to tell stories and make people feel things in your videos.
- Part 2: How Can You Improve Storytelling With Silent Videos?
- Part 3: How to Use Filmora to Remove Audio from Your Video?
Remove Audio Now For Win 7 or later(64-bit)
Remove Audio Now For macOS 10.14 or later
Why Is It Necessary to Remove Audio from a Video?
You can make a video far more versatile and successful for many different things by removing the audio.
Your Video Becomes Multipurpose
Taking the audio out of a video makes it more versatile. Presentations, slide decks, and instructional videos may all benefit from this. The original audio or background noise might be too distracting in such videos.
No Language Issues
The muted or removed audio lets you reach viewers who speak a different language. By removing the original audio, the video becomes language-neutral. Thus, you save time adding subtitles or dubbing without disturbing the narration.
Place Emphasis on the Video Itself
Cutting off the sound may make the video’s visuals the main attraction. It may be beneficial when creating tutorials or instructional videos. That’s because viewers may prefer to see the demos without the sound.
Eliminating Excessive Background Noise
The video might get dull with background noises, echoes, or unwanted sounds. Deleting the audio stream helps to eliminate distractions. As a result, viewers get a cleaner viewing experience.
Keeping Copyright Concerns at Bay
Businesses can avoid copyright infringement problems by eliminating audio from videos. Removing someone’s audio work before using it in public venues is necessary. It supports copyright laws on audio material by limiting display to visual components.
Content Personalization
Creators can let viewers add their soundtracks or voiceovers by removing audio. Thus, it can make the watching experience more customized. It suits projects that need a high degree of personalization or user-generated content.
Confidential Data Security
Sometimes, a video might capture sensitive conversations or information. So, it’s essential to remove the audio to protect privacy. Remember, sharing the visual footage does not compromise confidentiality. It hides the crucial discussions or data from the original audio.
As you can see, removing audio from a video has several benefits. Many options are available when you mute the audio in a video. By eliminating background noise, you’re freeing your imagination.
So, how do silent videos improve your video production strategies? Let’s find out!
How Can You Improve Storytelling With Silent Videos?
There is a much unrealized narrative potential in silent videos. Most videos rely only on visual elements to convey narratives. Thus, mute clips have a unique ability to captivate audiences. It also offers many possibilities for storytelling, allowing for a more immersive experience.
Setting a Narrative
Videos without sound force viewers to rely more on their visual perception of the tale. It can draw your viewers closer to the visuals. Moreover, it also heightens their involvement with the story as it develops.
Improving Stories
Silence directs the viewer’s attention to certain visual aspects. When you remove all sound distractions, the audience can focus on the pictures. It helps you highlight essential story aspects.
For instance, rely on more than just dialogue to convey emotion. Instead, you can take a modest close-up of the character’s face.
Build Emotions With No Audio
One effective method of building intense emotions is the complete absence of sound. Remember, silent clips can keep viewers on the top of their seats. The audience may get more invested in the story’s raw essence when a scene unfolds in silence. In short, this technique aims to evoke a range of emotions in the audience.
Add Metaphor
The lack of audio permits the use of symbolic language only via visual representations. You can use each picture to convey information. It eliminates the need for dialogue or background music.
The audience can interact with the story on a deeper level via interpretation. Here, video scenes, objects, or actions work as symbols.
Simplify Complex Stories
Silent videos let storytellers elicit strong emotional reactions from audiences. They can co-create the story by deciphering visual cues. Besides, they can also add thoughts, emotions, and interpretations in silent videos. Without words, silent videos can help you convey stories that captivate audiences.
How to Use Filmora to Remove Audio from Your Video?
Two main approaches are available for using this software. You can start by downloading Wondershare Filmora for free to try it out. Here is how to remove audio in a video editor.
Remove Audio Now For Win 7 or later(64-bit)
Remove Audio Now For macOS 10.14 or later
Method 1: Use the “Mute” Button
The first method is using the “Mute” function available in Filmora. You can start by importing the local video file into this software.
Drop the file into Filmora’s video editing timeline. You can mute the file by right-clicking on it. Once you’ve finished, choose a format to save the file in.
As you can see, the mute option stands out as a fantastic one-click feature. It removes the necessity for specialized video editing skills. Anyone can effortlessly remove audio from their videos with ease.
Method 2: Use the Audio Detach feature
Now, let’s turn our focus to a different, efficient way. The Audio Detach function becomes a potent feature for separating audio from videos. Let’s check out its detailed instructions for precisely separating audio and video.
Step1Upload Your Video
First, select the video clip whose audio you want to extract. You can start by clicking “Import” and then navigating to the relevant folder on your hard drive.
While you pick more files, keep the “Ctrl” button down to select them all at once. The main editing dashboard will show thumbnails of all the currently loaded files. You can see a preview in the right-hand window when you double-click them.
Step2Cut Out the Music
Now, you should drag videos from the dashboard into the Video Timeline. After that, you can right-click the video to choose the “Audio Detach” option.
The Music Timeline will immediately display a new audio file. Here, you can see the original video’s soundtrack. Now, pressing the “Delete” button can remove the sounds.
You can also detach audio from multiple video files. Remember, all the files will mesh together perfectly on the Video Timeline.
Thus, you need to click the application icon on the left-hand side of the screen and choose “Save As…” to create new project files if you need to extract audio from more than one file. Then, export each output file individually after reloading the project file.
Step3Download the Video
To be sure this is what you need, double-tap the file in the Video Timeline. You can add suitable music files to the clip if needed. To save only the video track, click the “Create” option directly. A popup will open up, asking you to choose a format before you can save it to your PC.
The Music Timeline will immediately display a new audio file. Here, you can see the original video’s soundtrack. Now, pressing the “Delete” button can remove the sounds.
You can also detach audio from multiple video files. Remember, all the files will mesh together perfectly on the Video Timeline.
Thus, you need to click the application icon on the left-hand side of the screen and choose “Save As…” to create new project files if you need to extract audio from more than one file. Then, export each output file individually after reloading the project file.
Now you know how to remove audio from videos in Wondershare Filmora. As you can see, removing background noise from videos is a breeze using Filmora. You don’t need extensive experience or expensive software packages.
Follow the simple steps outlined above, even if this is your first time. You may remove distracting or unnecessary audio from your file in just a few minutes.
Conclusion
As you can see, your ability to control the audio in video editing defines the viewing experience. It is about not just transforming video material but also expanding possibilities. This silent space is where imagination soars.
It’s a technique to make your video clips more adaptable. Thus, they can transcend language obstacles, legal limitations, and distractions.
Think of a vacation video where the beautiful sights and sounds of the busy streets are in front. It will allow the audience to lose themselves in the lively atmosphere completely. If you remove the audio from this clip, it can become livelier.
In short, sound removal is crucial in creating a more engaging story. It changes the viewer’s experience by focusing on visuals and increasing engagement. You can use Filmora’s powerful audio removal features. The software streamlines the editing process without compromising the quality of the video. Learn to use silence as a tool to tell stories and make people feel things in your videos.
10 Matching Color Combination That Works Together
10 Matching Color Combination That Works Together
An easy yet powerful editor
Numerous effects to choose from
Detailed tutorials provided by the official channel
Color is abundant in our life. Our moods, sensations, and perceptions, as well as our decision-making processes, are all influenced by color. Emotion evokes by color. It affects our perception, eliciting subconscious or conscious responses in the human brain. Color is perhaps the most robust tool at your disposal as a designer because of its influential and communicative nature.

Although not everyone is born with a keen sense of color or a natural aptitude for graphic design, there are methods and principles you can employ to select the best color that matches together to make a strong impression and achieve your desired effect. Fortunately, we’ve got you backed up. The ten best colors that match everything are listed below to help you create your next design.
In this article
01 [What is a color combination?](#Part 1)
02 [Types of color combinations](#Part 2)
03 [Two-color combination vs. Three-color logo combinations](#Part 3)
04 [How to apply color combinations to your designs?](#Part 4)
Part 1 What is Color Combination?
Color Theory is an art when it comes to playing with colors. It explains how people perceive color and the visual effects of colors mixing, pairing, and contrasting with one another. Designers use a color wheel and considerable collected knowledge about human psychology, society, and more to pick the perfect colors that match everything. Color is a crucial, if not the most important, feature of design since it may affect the meaning of the text, how people move across a layout, and how they feel. You may be more intentional in generating graphics that affect you if you understand color theory.
Part 2 Types of Color Combinations
Learning how different colors match together is essential for successful color combinations. Studying the color wheel and color harmonies (what works, what doesn’t, and how color communicates) will help you blend colors, establish a stronger brand, and share more effectively with your designers and printers.
The color wheel contains:?
● Three primary colors (red, yellow, and blue),?
● Three secondary colors (purple, green, and orange), and?
● Six tertiary colors (colors generated when you mix primary colors), plus (colors created from primary and secondary colors, such as blue-green or red-violet).

Draw a line over the core of the wheel to separate the warm colors (reds, oranges, and yellows) from the cool colors (blues, greens, and purples) (blues, greens, purples).
Warm colors are connected with activity, brightness, and vigor, whereas cold colors are associated with tranquility, peace, and serenity. So when you hold that color has a temperature, you can see how its use might influence your message.
On the color wheel, complementary hues are opposites. They may make artwork jump because of the great contrast between the two hues, but overusing them can get tiring.
Analogous hues are next to each other. Therefore, one color will dominate, one will support, and another will accent when developing a similar color scheme.
Triadic hues are energetic and vibrant, evenly dispersed throughout the color wheel. They provide visual contrast and harmony, allowing everything to shine as the overall image comes to life.
You can build a variety of grand color schemes by using the color wheel. Finding the perfect color combination for the right occasion is vital.
● 10 Matching Color Combination That Works Together
01Yellow and Blue

Yellow is the ultimate attention-getter, and it provides a young backdrop for the commanding navy. The equally electrifying Blue color that matches with Yellow dazzles the senses. It’s one of those color schemes mainly used for parties and casual gatherings. It helps instill a sense of purpose and energy in a design by contributing to enthusiasm.
02Black and Orange

The vibrant orange contrasts wonderfully with the dark black, providing a sense of mystery and suspense. Black is one of my favorite colors that match with orange.
03Lime Green and Purple

This high-octane color combination exudes a powerful presence, with purple being a beautiful choice to compliment light green. That?**color matches the lime green?**and presents a strong sense of design.?
04Dark Brown and Yellow

This fantastic color combination is ideal for creating a design that shouts spontaneity and dependability. The perfect tag-team, marigold yellow, catches the eye while dark brown keeps it. Yellow is yet another favorite pick of color that matches dark brown.
05Lavender and Indigo

Indigo, a dramatic color associated with the arts, is intuitive and forceful. It creates an exciting backdrop for the softer purple shade.
06Turquoise Blue and Purple

The imaginative purple and waterleaf turquoise combination create an overall sensation of limitless possibilities. These colors are ideal for communication-related businesses, such as teachers, trainers, and media communication. Purple is the choice of many designers, and this color matches turquoise blue perfectly.
07Light Pink, Hot Pink & Maroon

The pink color family is your best pick if you’re looking for a design that shouts “approachable.” These colors are distinct enough to provide visual interest to the design while remaining similar sufficient to maintain an innocent appearance. When you add maroon to the mix, you reduce the chance of appearing foolish while also exuding just the appropriate amount of professionalism. Hot Pink and Maroon are my top picks for a color that matches light pink.
08Light Gray and Desert Sand Beige

Although desert sand beige is one of the least-used design colors, it will make you stand out if you use it. For fashion or interior design brands, the tones of desert sand and emperor gray work nicely together.
09Dark Sea Green and Deep Forest Green

Forest green is a color that conjures up images of nature just by its name. This adaptable color connects with growth, and it looks cool and fresh when coupled with lighter seafoam green.
10Dark Blue, Turquoise, Beige

These colors go well together and reinforce the brand’s reliability. When you combine them with the beige backdrop, you feel secure exploring and pursuing. This color combination functions well for vacation, life consulting, and healthcare businesses.
Part 3 Two Color Combination vs. Three Color Combination
The choice is yours to decide. Colors have a significant role in your brand’s identification. After you’ve decided on the style of logo you want to employ, think about what each color will say about your business. Check for the feelings you want to evoke and how you want your customers to react to your brand. You can assist your brand leave a lasting impression and forming a stronger connection with your audience by selecting the proper color combination.
Part 4 How to Apply Color Combinations to Your Designs?
Specific color combinations have the power to catch our attention, generate emotion, and ultimately make a lasting statement.
In this section, we’ll look at some great colors that match together and can help your brand make a significant impact, along with a step guide on how you can easily color match during video editing.
0110 Beautiful Color Combinations for Your Next Design
● You can produce all kinds of grand color schemes with the color wheel. Find the right color pairing for the right occasion.
● Yellow, magenta, cyan, and black

Hex code: #e2d810, #d9138a, #12a4d9 and #322e2f
Almost each print project is dependent upon these four ink colors. They can create any color imaginable after they combine. Individually, they make a color scheme that’s bright, contemporary, and full of life.
● Shades of pink and brown

Hex code: #e75874, #be1558, #fbcbc9 and #322514
Pink is youthful, modern, and luxurious, and using different shades adds even more motion and depth to the design. Combining pink with dark brown adds a basic level of contrast and seriousness.
● Gold, charcoal, and grey

Hex code: #ef9d10f, #3b4d61 and #6b7b8c
It is a perfect merge of seriousness and sunshine. The gold represents nature and cheerfulness, which combines perfectly with two different shades of black and grey that add a layer of maturity.
● Tan, deep turquoise, and black

Hex code: #ecc19c, #1e847f, #000000
Over a natural, masculine tan base, this merge presents turquoise to the forefront to display its utility as a color that displays nature and rebirth.
● Raspberry and shades of blue

Hex code: #8a307f, #79a7d3, #6883bc
Like the palette above, trusted blue forms the foundation of this combination, while the pinkish-purple addition of raspberry adds luxurious femininity.
● Sea-foam, salmon, and navy

Hex code: #aed6dc, #ff9a8d, #4a536b
The ideal beachy palette. This unique pastel combination of salmon, sea-foam, and navy represents everyone’s favorite coastal colors and shows the warmth and peacefulness that comes from a day at the ocean.
● Yellow-green, olive, and forest green

Hex code: #e1dd72, #a8c66c, #1b6535
These three color combinations of green are the perfect palette for this lime and mint beverage. They both combine into a brilliant blend of excitement and youthfulness.
● Beige, slate, and khaki

Hex code: #f6ead4, #a2a595, #b4a284
Two complementary shades of lean brown masculine. An accent of khaki-grey represents a touch of elegance and maturity.
● Scarlet, light olive, and light teal

Hex code: #b85042, #e7e8d1, #a7beae
An extremely subdued take on the primary colors, this combination adds a lot of greys to keep the palette’s personality feeling severe and mysterious.
● Turquoise, mustard, and black

Hex code: #7fc3c0, #cfb845, #141414
This classic pairing of a calm and warm tone evokes calmness and cheerfulness. The black adds a bold, contemporary accent.
02How to Apply Color Combinations to Your Designs
The very famous video editor, Wondershare Filmora 11, is now launched. It is exclusively made with an intuitive interface now offering advanced editing features to even novice editors. The latest updates include audio ducking, motion graphics, keyframing, and color matches.
The color match feature in Wondershare Filmora Video Editor allows you to match one scene’s color in the video with all other different colors. The same video can have different results due to lighting concerns. For example, a car speeding up the road might display varied colors to the hype of the audience. The color match can correct the color combinations of all the clips with one click and introduce a beautiful consistency.
Color Match assists you to color correct clips as a batch instead of having to edit each individually. Here’s how.
For Win 7 or later (64-bit)
For macOS 10.12 or later
● Step 1: Import the media
Place the images and video clips you want to use into the timeline. If you wish to do any custom color correction, choose one clip or photo and proceed with making your changes.

● Step 2: Select Color Match
Then, place the playhead to a frame you wish to match your other clips. Choose the rest of the clips and photos and then either right-click and select ‘Color Match’ or hit the color icon on the toolbar and choose ‘Color Match.’

● Step 3: Start Color Matching
Then, choose a frame as a reference page and ‘Match.’

This is what you will watch after tapping the ‘Match’ option.

● Step 4: Preview your Color Match
Lastly, you need to modify the degree to which the color settings of the other clips are synced using the slider and preview the results in the Preview’s ‘comparison view.’

● Key Takeaways from This Episode →
● The connection of matching color combinations with emotion is unforgettable. Color brings that extra oomph to create stunning masterpieces. The lists of colors that match together are here to ensure we look through the perfect color to improve brand visibility or attract an audience.
● With these clues, you can get your hands on any and every color imaginable. You can use the matching color combinations by looking them through either the RGB or HEX color picker, whatever goes with your project at hand.
● Even Filmora is here to assist you in making beautiful videos by using the latest feature of color match. Now that you know how significant color is go on and find the perfect shade from our devised list of?colors that goes together.
Color is abundant in our life. Our moods, sensations, and perceptions, as well as our decision-making processes, are all influenced by color. Emotion evokes by color. It affects our perception, eliciting subconscious or conscious responses in the human brain. Color is perhaps the most robust tool at your disposal as a designer because of its influential and communicative nature.
Although not everyone is born with a keen sense of color or a natural aptitude for graphic design, there are methods and principles you can employ to select the best color that matches together to make a strong impression and achieve your desired effect. Fortunately, we’ve got you backed up. The ten best colors that match everything are listed below to help you create your next design.
In this article
01 [What is a color combination?](#Part 1)
02 [Types of color combinations](#Part 2)
03 [Two-color combination vs. Three-color logo combinations](#Part 3)
04 [How to apply color combinations to your designs?](#Part 4)
Part 1 What is Color Combination?
Color Theory is an art when it comes to playing with colors. It explains how people perceive color and the visual effects of colors mixing, pairing, and contrasting with one another. Designers use a color wheel and considerable collected knowledge about human psychology, society, and more to pick the perfect colors that match everything. Color is a crucial, if not the most important, feature of design since it may affect the meaning of the text, how people move across a layout, and how they feel. You may be more intentional in generating graphics that affect you if you understand color theory.
Part 2 Types of Color Combinations
Learning how different colors match together is essential for successful color combinations. Studying the color wheel and color harmonies (what works, what doesn’t, and how color communicates) will help you blend colors, establish a stronger brand, and share more effectively with your designers and printers.
The color wheel contains:?
● Three primary colors (red, yellow, and blue),?
● Three secondary colors (purple, green, and orange), and?
● Six tertiary colors (colors generated when you mix primary colors), plus (colors created from primary and secondary colors, such as blue-green or red-violet).
Draw a line over the core of the wheel to separate the warm colors (reds, oranges, and yellows) from the cool colors (blues, greens, and purples) (blues, greens, purples).
Warm colors are connected with activity, brightness, and vigor, whereas cold colors are associated with tranquility, peace, and serenity. So when you hold that color has a temperature, you can see how its use might influence your message.
On the color wheel, complementary hues are opposites. They may make artwork jump because of the great contrast between the two hues, but overusing them can get tiring.
Analogous hues are next to each other. Therefore, one color will dominate, one will support, and another will accent when developing a similar color scheme.
Triadic hues are energetic and vibrant, evenly dispersed throughout the color wheel. They provide visual contrast and harmony, allowing everything to shine as the overall image comes to life.
You can build a variety of grand color schemes by using the color wheel. Finding the perfect color combination for the right occasion is vital.
● 10 Matching Color Combination That Works Together
01Yellow and Blue
Yellow is the ultimate attention-getter, and it provides a young backdrop for the commanding navy. The equally electrifying Blue color that matches with Yellow dazzles the senses. It’s one of those color schemes mainly used for parties and casual gatherings. It helps instill a sense of purpose and energy in a design by contributing to enthusiasm.
02Black and Orange
The vibrant orange contrasts wonderfully with the dark black, providing a sense of mystery and suspense. Black is one of my favorite colors that match with orange.
03Lime Green and Purple
This high-octane color combination exudes a powerful presence, with purple being a beautiful choice to compliment light green. That?**color matches the lime green?**and presents a strong sense of design.?
04Dark Brown and Yellow
This fantastic color combination is ideal for creating a design that shouts spontaneity and dependability. The perfect tag-team, marigold yellow, catches the eye while dark brown keeps it. Yellow is yet another favorite pick of color that matches dark brown.
05Lavender and Indigo
Indigo, a dramatic color associated with the arts, is intuitive and forceful. It creates an exciting backdrop for the softer purple shade.
06Turquoise Blue and Purple
The imaginative purple and waterleaf turquoise combination create an overall sensation of limitless possibilities. These colors are ideal for communication-related businesses, such as teachers, trainers, and media communication. Purple is the choice of many designers, and this color matches turquoise blue perfectly.
07Light Pink, Hot Pink & Maroon
The pink color family is your best pick if you’re looking for a design that shouts “approachable.” These colors are distinct enough to provide visual interest to the design while remaining similar sufficient to maintain an innocent appearance. When you add maroon to the mix, you reduce the chance of appearing foolish while also exuding just the appropriate amount of professionalism. Hot Pink and Maroon are my top picks for a color that matches light pink.
08Light Gray and Desert Sand Beige
Although desert sand beige is one of the least-used design colors, it will make you stand out if you use it. For fashion or interior design brands, the tones of desert sand and emperor gray work nicely together.
09Dark Sea Green and Deep Forest Green
Forest green is a color that conjures up images of nature just by its name. This adaptable color connects with growth, and it looks cool and fresh when coupled with lighter seafoam green.
10Dark Blue, Turquoise, Beige
These colors go well together and reinforce the brand’s reliability. When you combine them with the beige backdrop, you feel secure exploring and pursuing. This color combination functions well for vacation, life consulting, and healthcare businesses.
Part 3 Two Color Combination vs. Three Color Combination
The choice is yours to decide. Colors have a significant role in your brand’s identification. After you’ve decided on the style of logo you want to employ, think about what each color will say about your business. Check for the feelings you want to evoke and how you want your customers to react to your brand. You can assist your brand leave a lasting impression and forming a stronger connection with your audience by selecting the proper color combination.
Part 4 How to Apply Color Combinations to Your Designs?
Specific color combinations have the power to catch our attention, generate emotion, and ultimately make a lasting statement.
In this section, we’ll look at some great colors that match together and can help your brand make a significant impact, along with a step guide on how you can easily color match during video editing.
0110 Beautiful Color Combinations for Your Next Design
● You can produce all kinds of grand color schemes with the color wheel. Find the right color pairing for the right occasion.
● Yellow, magenta, cyan, and black
Hex code: #e2d810, #d9138a, #12a4d9 and #322e2f
Almost each print project is dependent upon these four ink colors. They can create any color imaginable after they combine. Individually, they make a color scheme that’s bright, contemporary, and full of life.
● Shades of pink and brown
Hex code: #e75874, #be1558, #fbcbc9 and #322514
Pink is youthful, modern, and luxurious, and using different shades adds even more motion and depth to the design. Combining pink with dark brown adds a basic level of contrast and seriousness.
● Gold, charcoal, and grey
Hex code: #ef9d10f, #3b4d61 and #6b7b8c
It is a perfect merge of seriousness and sunshine. The gold represents nature and cheerfulness, which combines perfectly with two different shades of black and grey that add a layer of maturity.
● Tan, deep turquoise, and black
Hex code: #ecc19c, #1e847f, #000000
Over a natural, masculine tan base, this merge presents turquoise to the forefront to display its utility as a color that displays nature and rebirth.
● Raspberry and shades of blue
Hex code: #8a307f, #79a7d3, #6883bc
Like the palette above, trusted blue forms the foundation of this combination, while the pinkish-purple addition of raspberry adds luxurious femininity.
● Sea-foam, salmon, and navy
Hex code: #aed6dc, #ff9a8d, #4a536b
The ideal beachy palette. This unique pastel combination of salmon, sea-foam, and navy represents everyone’s favorite coastal colors and shows the warmth and peacefulness that comes from a day at the ocean.
● Yellow-green, olive, and forest green
Hex code: #e1dd72, #a8c66c, #1b6535
These three color combinations of green are the perfect palette for this lime and mint beverage. They both combine into a brilliant blend of excitement and youthfulness.
● Beige, slate, and khaki
Hex code: #f6ead4, #a2a595, #b4a284
Two complementary shades of lean brown masculine. An accent of khaki-grey represents a touch of elegance and maturity.
● Scarlet, light olive, and light teal
Hex code: #b85042, #e7e8d1, #a7beae
An extremely subdued take on the primary colors, this combination adds a lot of greys to keep the palette’s personality feeling severe and mysterious.
● Turquoise, mustard, and black
Hex code: #7fc3c0, #cfb845, #141414
This classic pairing of a calm and warm tone evokes calmness and cheerfulness. The black adds a bold, contemporary accent.
02How to Apply Color Combinations to Your Designs
The very famous video editor, Wondershare Filmora 11, is now launched. It is exclusively made with an intuitive interface now offering advanced editing features to even novice editors. The latest updates include audio ducking, motion graphics, keyframing, and color matches.
The color match feature in Wondershare Filmora Video Editor allows you to match one scene’s color in the video with all other different colors. The same video can have different results due to lighting concerns. For example, a car speeding up the road might display varied colors to the hype of the audience. The color match can correct the color combinations of all the clips with one click and introduce a beautiful consistency.
Color Match assists you to color correct clips as a batch instead of having to edit each individually. Here’s how.
For Win 7 or later (64-bit)
For macOS 10.12 or later
● Step 1: Import the media
Place the images and video clips you want to use into the timeline. If you wish to do any custom color correction, choose one clip or photo and proceed with making your changes.
● Step 2: Select Color Match
Then, place the playhead to a frame you wish to match your other clips. Choose the rest of the clips and photos and then either right-click and select ‘Color Match’ or hit the color icon on the toolbar and choose ‘Color Match.’
● Step 3: Start Color Matching
Then, choose a frame as a reference page and ‘Match.’
This is what you will watch after tapping the ‘Match’ option.
● Step 4: Preview your Color Match
Lastly, you need to modify the degree to which the color settings of the other clips are synced using the slider and preview the results in the Preview’s ‘comparison view.’
● Key Takeaways from This Episode →
● The connection of matching color combinations with emotion is unforgettable. Color brings that extra oomph to create stunning masterpieces. The lists of colors that match together are here to ensure we look through the perfect color to improve brand visibility or attract an audience.
● With these clues, you can get your hands on any and every color imaginable. You can use the matching color combinations by looking them through either the RGB or HEX color picker, whatever goes with your project at hand.
● Even Filmora is here to assist you in making beautiful videos by using the latest feature of color match. Now that you know how significant color is go on and find the perfect shade from our devised list of?colors that goes together.
Adobe After Effects Review
Make cinematic films, movies, intros, and transitions. Delete people from clips. Start fires or create a foggy weather. With Adobe After Effects, the industry-standard motion graphics and visual effects software, you are able to take any idea and make it come to life. Animate titles, credits, and lower thirds. Begin editing from scratch or with presets available. Combine photos and video footage to create anything you can think of.
Choose amazing effects from hundreds of options, remove unwanted parts from the frame, people or objects, and make VR videos to push your audience into the action. This software lets professionals configure keyframes, allow them to create compositing operations. Features of Adobe After Effects include a content library, digital asset management, video rendering, data import/export, and much more. In this article we will give you a brief overview of what After Effects is, what it’s used for and by who and the overall experience!
With that said, let’s get started!
1. Speed and Stability
When talking about speed and stability, After Effects has the latest release packed with improvements. All the developers have focused themselves on speed and also performance. The team at Adobe have worked very hard to make this application more responsive and when we go along in this article, that can be seen in many ways
The main improvement which is immediately clear to all users, is the renewed preview playback optimization. What we noticed is that After Effects is creating the ram preview for your projects a lot faster. However, while working with the software for this article, we did find the user interface to be more responsive, the playback is way smoother, so is it a lot more stable overall.
While using shape layers, there was a significant improvement. A few expressions are a lot faster. This alone is worth upgrading to the latest version of After Effects.

2. User Interface
The After Effects interface is constructed up of four main parts. The Timeline panel, the Project panel, the Composition panel and the Effects panel.
The Timeline Panel
In the Timeline panel, you edit all the footage and clips to create your rough cut. You can find the Timeline panel on the bottom of the workspace.
The Project Panel
It’s pretty straightforward that in the Project panel you import your footage and create your project. This is located on the top left of the standard After Effects workspace.
The Composition Panel
The Composition panel is where you will see the final product. This is located in the middle of your workspace.
The Effects Panel
In order to make creative changes to your video, use the preview, audio, effects, and Preset Panels. These panels are located on the upper right area of your workspace, each one also has its dropdown.
3. Learning Curve
The learning curve for After Effects depends on your background, the best way to find out if you like it is starting a free trial. Go through some tutorials online or paid courses. You’ll also want to spend time with the User Guide. The Search Help field in the top right corner provides you an easier search for answers to most questions that you have. Speaking of YouTube and online learning, most of the video tutorials you will find have been created by people that are experienced in After Effects and know their way around it.
4. VFX
There’s a time-period when video editors require strengthening their skills, calling it imperative software for improving editing skills is nowhere near an exaggeration. it really helps prospective professionals improve their learning experience through visual effects, camera tracking, text animation, motion tracking, color grading, etc. All of these methodologies do help in improving the VFX learning process in the long run.
Video editing happens to be a crucial part of film production. Making videos in a fantastic process can indulge in building professional videos via motion graphics animation. This is where Adobe After Effects become an excellent learning tool.
5. Motion Graphics
Motion graphics can sound quite scary. It’s a new term for a specific genre of animation. Motion graphics is the intersection between animation and graphic design. These are purpose-driven visual aspects with the goal of showing information to the viewer through the use of animated graphics or text. Sometimes they include voice-overs narrating what the text or graphics are showing. Where it gets a little complex is that the more popular the term motion graphics becomes, the more people are misaligning animations to it. They need to represent information and illustrate the idea to the viewer clearly, so they do that using animation and motion graphics.
6. Titles and Outros
Adobe released a new combination of features for you. For Adobe Stock: Graphics templates. Those pre-made templates give you a super smooth way to discover new motion graphics within Premiere Pro, without needing to spend time creating titles, overlays, or animations from scratch. The world has digitalized, and videos often need visual aspects such as titles, lower thirds, to present information. The templates not only assist video editors increase the quality of the content by showing certain information, but they also give a strong visual touch to keep the viewer engaged throughout the video. The audience nowadays is a lot more sophisticated, meaning that motion graphics are a necessity in a driven media world.
Motion Graphics templates are valuable for video editors of all levels. For the beginning content creators, the templates offer great quality, ready-made footage to help their creative goal. They can explore and work on their skills. Motion graphics that are pre-made are an excellent way to express the vision and express inspiration to new opportunities.
So now that you are aware of what After Effects templates are, we can move on to the actual workflow, why it is important, and how to use it as efficient as possible.
7. Workflow
Whether you are using Adobe After Effects to create motion graphics, or composite realistic visuals, you usually follow the same workflow, you may repeat the process of adjusting layer properties, editing, and compositing until everything looks good. You can change any property of any element, such as position, opacity and size. Make use of motion tracking to stabilize footage so that it follows the motion from another clip, and so much more!
8. Rendering Speed
When it comes to exporting your project in After Effects, you don’t need to buy an expensive workstation. You can speed up your rendering process from your own laptop without investing too much and by using the following tips we have for you below!
Tip #1: Enable Multiprocessing
What exactly is multiprocessing? That is when After Effects uses multiple cores from your CPU to export multiple frames at once. If your processor has one or more cores, you can enable this feature to reduce your rendering time. We want to mention that you need to check whether or not this option is turned on. Once enabled, you’ll see a great decrease in export time.
To enable Multiprocessing, navigate to Preferences > Memory & Multiprocessing. Then you click the check box next to ‘Render Multiple Frames Simultaneously’ and remember also to adjust the settings that you need.
Tip #2: Optimize Your RAM Usage
The RAM memory inside your workstation can be used to write and read data at a lot higher speeds than regular hard drives and portable drives. Configuring your RAM in a system is one of the easiest upgrades for better performance. Giving you affordable solutions for both desktop and laptop systems, the RAM memory upgrade does not require a lot of knowledge. The more RAM you allow applications to use, the higher the performance you will get out of it.
It also shows a noticeable increase in rendering speed. When the export time in your work is longer than needed, look at your RAM memory and see if you can make the necessary changes or upgrades.
Tip #3: Use the Media Encoder
Let’s talk about the Media Encoder. It’s the software that comes up with Adobe Creative Cloud products such as After Effects and Premiere Pro to simplify the export process. You can easily render your project from After Effects to Adobe Media Encoder and begin the project render process from that point on. The Media Encoder will increase your rendering performance and will significantly decrease rendering time.
Tip #4: Disable Ray-Traced 3D
The included After Effects Ray-Traced 3D feature enables you to produce 3D models within After Effects without any struggle. Calculating all the motions and visual graphics is such a heavy process for your workstation. When you disable raytracing, you will get a faster export time. By looking that ‘Classic 3D’ is checked instead of ‘Ray-Traced 3D’ from your composition preferences, you can speed your rendering speed up to 50%. Isn’t that incredible?
Tip #5: Activate GPU Exporting with Cuda Acceleration
Exporting your videos with GPU rather than CPU will increase the efficiency of your render process. The export length will decrease a whole lot when you activate Mercury GPU Acceleration, also known as ‘CUDA’ from the ‘Project Settings’.
After Effects doesn’t really require CUDA features from a special kind of Nvidia GPU. Only the GPU accelerated 3D renderer, that is based on the raytracing algorithm, requires that. The other GPU features are running on any GPU that meets the basic minimums, including Intel and AMD GPUs.
9. System Requirements for Windows
These are the minimum specifications needed to use After Effects on PC:
OS: Windows 10 (64-bit) versions 1909 and later, or Windows 11
CPU: Intel or AMD Quad-Core Processor (Intel i5 and i7 will do the job)
RAM: 16 GB
Monitor resolution: 1280 x 1080
An internet connection
Free storage: 15 GB
GPU: Minimum 2 GB of VRAM
10. System Requirements for macOS
OS: macOS 10.13 or later
RAM: 16 GB
CPU: Intel and Apple Silicon (Rosetta2 Supported) Quad-Core Processor
GPU: 2GB of VRAM
Monitor resolution: 1440×900
Free storage: 15 GB
An internet connection
11. Keyboard Shortcuts
You can work visually when you configure your keyboard shortcuts with the visual keyboard shortcut editor within After Effects. You can use the keyboard user interface to show the keys that have been assigned to shortcuts, the available keys for assignment, and edit assigned shortcuts to make your workflow even easier.
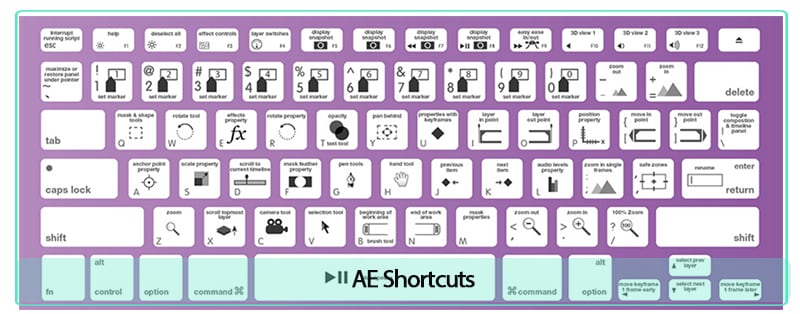
The keyboard layout:
This is a representation of your physical keyboard where you can see which keys have been assigned a shortcut, and which are available.
Command list:
The list displays all the commands that can be assigned shortcuts.
Key modifier list:
This list shows you all the modifier combinations and assigned shortcuts associated with the key you select on your physical keyboard.
After Effects does not allow you to reassign the following keys:
- A
- AA
- E
- EE
- F
- FF
- L
- LL
- M
- MM
- P
- PP
- R
- RR
- S
- SS
- T
- TT
- U
- UU
12. Should You Buy It?
Well first, you cannot buy After Effects, Premiere Pro or other software from Adobe. You have to rent them by paying monthly. After Effects is primarily a compositing and graphics software. Premiere is primarily a video editing program. In the case of After Effects and Premiere Pro, it’s not really an either/or. They’re both software with different purposes. After Effects is a lot more powerful and essentially showcases most of Premiere’s functionality, but according to our experience, the Premiere Pro interface and workflow is way more superior for video editing.
Premiere Pro is essentially built around its timeline, the region where you cut your video clips and drag and place them into your appropriate sequence. Hollywood filmmakers and professional YouTube content creators are using Premiere Pro to edit high-performing content and award-winning films. The software is very intuitive and easy for beginners to start with.
Are going to work with After Effects to create an income? Or are just going to use it for a hobby? It’s crucial to mention that question because Adobe After Effects is not something that is cheaply available. You will be investing much money on the program, and if you are working to use the software, paying a good amount, and earning nothing in return, then you might want to shift to another alternative which would cost you less. For instance, let’s assume you are using the application to earn an income, and have a few low-paying clients. In such a situation, you will have to rethink your options of software and analyze whether what you are paying in comparison to what you are getting is enough for you or not. We all are different individuals and have different preferences. Once we can see what is more important to us, or what is our need at this moment, then we will be able to judge the worth of purchasing Adobe After Effects better.
Are you going to use After Effects to earn an income? Or are just using it as a hobby? It is very important to address this question because Adobe After Effects is not something cheaply accessible. You will be investing a lot of money into this software, if you are using the software while paying a good amount and earning nothing in return yet, then you could shift to a different alternative which will cost you a lot less. Let’s say you are using After Effects to earn an income and have some low-paying work. In that case, you will have to reconsider your options of video editing software and look at whether what you are paying in comparison to what you are getting is possible for you. When we can see what is more important to us, we will be able to see the worth of buying After Effects.
Did you previously use After Effects or are you new to the program? The return that you will get using Adobe After Effects, depends on how good you know how to work with the options, functions and features in the software.
The Bottom Line
So summing it all together, Adobe After Effects takes care of all your assets and creates a final product, considering that After Effects is usually an asset-generation tool. Most video editors complete their projects in After Effects non-stop. It’s excellent for making visual videos come to life.
AE version 22.3 is very impressive. Giving you a wealth of new features created to make VFX editing a lot faster and easier. Offering new features on a regular basis, improving their subscription model making it more attractive. Especially if you’re a professional editor and designer.
Once you get comfortable with Adobe After Effects, you learn how to dynamically combine After Effects compositions to your Premiere projects. You are able to access both assets at the same time if needed!
Free Download For Win 7 or later(64-bit)
Free Download For macOS 10.14 or later
5 Ways to Denoise a Video
In today’s world, the quality of digital product such as photos and videos increase day by day, prompting us to create our content crystal clear and keep it that way. Of course, different kinds of effects and filters are great, and something called “noise” is one of them, but sometimes it is actually unwanted and makes our footage less likable. What is noise, or denoising, anyway? Well, instead of clear video, it’s something quite different – the footage looks grainy, sometimes excessively, and makes our eyes hurt, or simply, more difficult to see what’s going on on the screen. And if you didn’t decide to use a noise effect, then from where does it appear?..
Noise means a mix of different variations of brightness or color information in the shot. It is likely to show up when there is a low light, and/or when the video is taken with small sensors such as smartphones and action cameras. It works as follows: if someone tries to compensate for low-light settings with gain and ISO, more noise is produced.
But, as our readers already know, almost nothing is ever impossible to solve. There is a way to get rid of this annoying grain, and it is called, as pretty obvious, denoising. Hence, denoising in image and video production is used as a technique to take footage from grainy to crystal-clear. And, as you may already agree, it improves a viewer’s quality of experience. And how does this happen? - There are varied techniques, and each of them uses different mathematical and statistical models.
What is considered a good noise reduction? The technique is successful when it suppresses noise effectively in uniform regions; preserves edges and other characteristics, such as fine details and textures; and provides a visually natural experience.
and here you will learn 5 ways, as in 5 software to denoise a video. We’ll touch upon the following ones: Final Cut Pro, Adobe After Effects, Adobe Premiere Pro, DaVinci Resolve and Movavi Video Editor. But, we are not limited to these ones, so maybe there is one more you could use? You’ll find out in the article!
- Final Cut Pro
Noise that appears as unwanted grain or artifacts in the video image can be removed in Final Cut Pro pretty easily, you just have to follow the little steps for it. Keep in mind that Final Cut Pro is not eligible for PC, this editor is only available for Mac (but Windows users, tune in for the editors functioning on PC’s!)
So, you have your grained footage, which you already chose to denoise, and for which you will need a video reduction effect.
First, you will need to open Final Cut Pro and import abovementioned video. Select this clip in the timeline,

and position the play head in a way that the clip appears in the viewer, that is, on the big screen - for you to see well.

Click the Effects button in the top-right corner of the timeline, or, to use the shortcut, press Command & 5.

In the Effects browser, select the Basics category in the list of Video effects on the left, then select the Noise Reduction effect. For 360° clips, select the 360° category, then select the 360° Noise Reduction effect.
And you will need to do one of the following:
Drag the effect to the timeline clip you want to apply it to, or double-click the effect thumbnail to apply the effect to the selected clip.
When the effect is applied, Final Cut Pro analyzes the clip for noise, so you might need to wait for a little while the process is complete and only then see the result.
Interesting tip you can remember is that if you are using several effects to your video clip, then adding Noise Reduction as the first effect would guarantee the best results for you. So, Mac users, you can start denoising your videos in Final Cut Pro now!
- Adobe After Effects
Adobe After Effects is a digital visual effects, motion graphics, and compositing application… Pretty intense, right? This very software has endless powers, and one of them is, you guessed correctly – denoising the video! So, how are we going to do that in this monster of the industry?
Sometimes what’s annoying about this kind of programs is that you need plugins, so let’s try to find a way to achieve our desired result without using anything external.
So, first of all (as in all cases!) import your video into After Effects. Then, you will need to find Effect in the menu, and find: Noise and Grain. There, you will choose Remove Grain and click on it.

On the left side of the program layout, the Effects Control will be opened. Now, you see viewing mode, where you need to change Preview to Final Output.

So, this will be the video with Preview checked:

Which will look like this when Final Output is checked:

Somewhat different and looking better, right?..
By the way, you can watch the whole process video here !
- Adobe Premiere Pro
Adobe Premiere Pro is one of the most and sophisticated video editor. So, of course, there is a way to reduce noise in this software as well, and this can be reached using effect called Median.
First of all, you add your footage to the Timeline in Premiere Pro and then go find the Effects Panel, where Median can be found. You need to drag and drop the Median effect to your video clip.

The next step is to make sure that adding the effect to the grainiest parts of the clip, which can be done using masks. So, in the Effects Control panel, you’ll need to select the mask shape for your clip – you can either choose rectangle, circle, or pen tool. With the latter you can move the Mask around the screen and resize it to cover the area.

And if you Change the Feather setting to 100, the effect will not have a very visible edge and some smoothness will cover for it.

You will need to repeat the process with more than one mask, if you would like to have covered all of the grainy area of your shot.
Lastly, you’ll need to adjust the effect settings to reduce the noise.

The Median effect doesn’t actually take away the graininess, it just blurs it. You’ll need to experiment with the Radius settings until you are happy with the result.
- DaVinci Resolve
When it comes to DaVinci Resolve, the process is somewhat different in the free version of it. So, first of all, off course, you add your footage into the timeline. Then,you are going to find the fusion tab underneath the timeline panel.

You will see MediaIn1 and MediaOut1, you click on MediaIn1, which will ensure the scene appears in the first viewer – and MediaOut1 by default is appearing in the second. So, now you stay on MediaIn1, hit shift+spacebar, and find the option which says: Remove Noise (RN) and then click Add, which adds the Remove Noise1 node. On the top right corner you will find Inspector, and if you click on it, you will see all the properties you can modify.
After going only into the second viewer, and in the top bar we can find channel icons. We open it and click on red, which makes the footage black and white for a while. Then, we go back to the Inspector, increase Softness Red and Detail Red.

This removes much grain from the red channel. Then we repeat the same for green, as well as for blue channel. Once you finish, you go to the same channel button in the bar and change it to “back to color”. So, the footage will have its colors back and you will see that it has become clearer, compared to the first viewer.

You can play around with the Chroma and Luma channels in the Inspector, if that is something you have ever had experience with!
- Movavi Video Editor
In Movavi Video Editor, it is pretty straightforward – unlike DaVinci Resolve, of course! So, getting to the point: the first thing you need to do is Entering the Edit Mode. In order to achieve it, you’ll need to click the Edit button next to the file you want to adjust or select Adjustments in the Tools tab.

After this, you will be able to select the Noise removal option, and then, move the Noise level slider to reflect the amount of noise you can see in the preview. The more noise you need to remove, the higher the Noise level, and vice versa.

When you’re finished removing the noise, click Apply, but in case you need to remove noise from several files, select Apply to all files, which ensures the same noise level will be applied on all your files there.
Lastly, of course, Wondershare Filmora X offers the same option as well. The steps are ase follows: You need to go to the Effects panel and type: “Smart Denoise”. Then, right-click on the video and choose Edit Properties.

This will make sure you go inside the Smart Denoise, where you can change opacity of the clip, threshold and radius.

You should reduce Opacity until you are satisfied with the result. Then, you can use the box next to Smart Denoise in order to see the scene before and after noise and grain removal.
So, that’s it! – We learned how to remove/reduce noise and grain from the videos, using several video editors. So you might as well start making your video clips look better right away!
Noise that appears as unwanted grain or artifacts in the video image can be removed in Final Cut Pro pretty easily, you just have to follow the little steps for it. Keep in mind that Final Cut Pro is not eligible for PC, this editor is only available for Mac (but Windows users, tune in for the editors functioning on PC’s!)
So, you have your grained footage, which you already chose to denoise, and for which you will need a video reduction effect.
First, you will need to open Final Cut Pro and import abovementioned video. Select this clip in the timeline,
and position the play head in a way that the clip appears in the viewer, that is, on the big screen - for you to see well.
Click the Effects button in the top-right corner of the timeline, or, to use the shortcut, press Command & 5.
In the Effects browser, select the Basics category in the list of Video effects on the left, then select the Noise Reduction effect. For 360° clips, select the 360° category, then select the 360° Noise Reduction effect.
And you will need to do one of the following:
Drag the effect to the timeline clip you want to apply it to, or double-click the effect thumbnail to apply the effect to the selected clip.
When the effect is applied, Final Cut Pro analyzes the clip for noise, so you might need to wait for a little while the process is complete and only then see the result.
Interesting tip you can remember is that if you are using several effects to your video clip, then adding Noise Reduction as the first effect would guarantee the best results for you. So, Mac users, you can start denoising your videos in Final Cut Pro now!
- Adobe After Effects
Adobe After Effects is a digital visual effects, motion graphics, and compositing application… Pretty intense, right? This very software has endless powers, and one of them is, you guessed correctly – denoising the video! So, how are we going to do that in this monster of the industry?
Sometimes what’s annoying about this kind of programs is that you need plugins, so let’s try to find a way to achieve our desired result without using anything external.
So, first of all (as in all cases!) import your video into After Effects. Then, you will need to find Effect in the menu, and find: Noise and Grain. There, you will choose Remove Grain and click on it.
On the left side of the program layout, the Effects Control will be opened. Now, you see viewing mode, where you need to change Preview to Final Output.
So, this will be the video with Preview checked:
Which will look like this when Final Output is checked:
Somewhat different and looking better, right?..
By the way, you can watch the whole process video here !
- Adobe Premiere Pro
Adobe Premiere Pro is one of the most and sophisticated video editor. So, of course, there is a way to reduce noise in this software as well, and this can be reached using effect called Median.
First of all, you add your footage to the Timeline in Premiere Pro and then go find the Effects Panel, where Median can be found. You need to drag and drop the Median effect to your video clip.
The next step is to make sure that adding the effect to the grainiest parts of the clip, which can be done using masks. So, in the Effects Control panel, you’ll need to select the mask shape for your clip – you can either choose rectangle, circle, or pen tool. With the latter you can move the Mask around the screen and resize it to cover the area.
And if you Change the Feather setting to 100, the effect will not have a very visible edge and some smoothness will cover for it.
You will need to repeat the process with more than one mask, if you would like to have covered all of the grainy area of your shot.
Lastly, you’ll need to adjust the effect settings to reduce the noise.
The Median effect doesn’t actually take away the graininess, it just blurs it. You’ll need to experiment with the Radius settings until you are happy with the result.
- DaVinci Resolve
When it comes to DaVinci Resolve, the process is somewhat different in the free version of it. So, first of all, off course, you add your footage into the timeline. Then,you are going to find the fusion tab underneath the timeline panel.
You will see MediaIn1 and MediaOut1, you click on MediaIn1, which will ensure the scene appears in the first viewer – and MediaOut1 by default is appearing in the second. So, now you stay on MediaIn1, hit shift+spacebar, and find the option which says: Remove Noise (RN) and then click Add, which adds the Remove Noise1 node. On the top right corner you will find Inspector, and if you click on it, you will see all the properties you can modify.
After going only into the second viewer, and in the top bar we can find channel icons. We open it and click on red, which makes the footage black and white for a while. Then, we go back to the Inspector, increase Softness Red and Detail Red.
This removes much grain from the red channel. Then we repeat the same for green, as well as for blue channel. Once you finish, you go to the same channel button in the bar and change it to “back to color”. So, the footage will have its colors back and you will see that it has become clearer, compared to the first viewer.
You can play around with the Chroma and Luma channels in the Inspector, if that is something you have ever had experience with!
- Movavi Video Editor
In Movavi Video Editor, it is pretty straightforward – unlike DaVinci Resolve, of course! So, getting to the point: the first thing you need to do is Entering the Edit Mode. In order to achieve it, you’ll need to click the Edit button next to the file you want to adjust or select Adjustments in the Tools tab.
After this, you will be able to select the Noise removal option, and then, move the Noise level slider to reflect the amount of noise you can see in the preview. The more noise you need to remove, the higher the Noise level, and vice versa.
When you’re finished removing the noise, click Apply, but in case you need to remove noise from several files, select Apply to all files, which ensures the same noise level will be applied on all your files there.
Lastly, of course, Wondershare Filmora X offers the same option as well. The steps are ase follows: You need to go to the Effects panel and type: “Smart Denoise”. Then, right-click on the video and choose Edit Properties.
This will make sure you go inside the Smart Denoise, where you can change opacity of the clip, threshold and radius.
You should reduce Opacity until you are satisfied with the result. Then, you can use the box next to Smart Denoise in order to see the scene before and after noise and grain removal.
So, that’s it! – We learned how to remove/reduce noise and grain from the videos, using several video editors. So you might as well start making your video clips look better right away!
Also read:
- New 2024 Approved 6 Ways to Mimic Professional Filming Gears
- New In 2024, Unlock Your Video Editing Potential With Wondershare Filmora
- How to Add Motion Blur in After Effects for 2024
- New In 2024, Adobe Premiere Pro Download and Use Guide
- New 2024 Approved Top 5 Video Filter Software Improve Your Videos with Filters
- New In 2024, 10 Mind-Blowing Video Collage Maker for PC
- Best 5 Tools to Help You Know More Freeze-Frame Video Editing Skills for 2024
- 2024 Approved How to Animate Designs With Canva GIF
- New A Countdown Effect Is Widely Used in Gaming and Report Videos. So How to Create Your Own Countdown Video? This Article Will Tell You some Ideas About Contdown Video Editing for 2024
- 2024 Approved Keyframes Interval Everything You Need To Know
- New In 2024, How to Rotate a Video in Windows 10
- How to Correct Lens Distortion With Filmora
- New A Comprehensive Guide on Converting Slo-Mo Videos to Normal Speed Videos On iPhone
- Updated Updated 8 Ways to Merge SRT with MP4 for 2024
- New 2024 Approved Best Green Screen Software for Beginner on Mac
- In 2024, How To Add Fade In Windows Video Editor
- New In 2024, Best 10 iPad Slideshow Apps to Create a Slideshow
- 2024 Approved Want to Loop a Video to Extend Its Duration? You Can Use iMovie to Loop a Video on Your Mac and iPhone and We Will Illustrate How to Loop a Video in iMovie
- New 2024 Approved Vegas Pro - How to Download, Install and Use It?
- Got No Luck with MP4 Video Joining Software? Try These 6 Best MP4 Mergers to Combine Videos on Your MAC and Windows for 2024
- Updated Guide To Slowing Down Videos in Snapchat Discussing the Details for 2024
- 2024 Approved Recommended Video Background Online Changers
- Updated 2024 Approved What Is the Best MP4 Cutter for YouTuber on Mac?
- New Camtasia Vs Captivate - Which to Choose?
- Updated Top 5 AI Music Video Examples and Makers to Make Them
- Updated In 2024, Featuring The Use of Camera Shake in Creating the Best Videos
- New How to Change Aspect Ratio of Video, In 2024
- In 2024, How PGSharp Save You from Ban While Spoofing Pokemon Go On Honor X9a? | Dr.fone
- How to Change Lock Screen Wallpaper on Poco F5 Pro 5G
- 4 Feasible Ways to Fake Location on Facebook For your Xiaomi Redmi K70 Pro | Dr.fone
- Updated In 2024, Must-Read Top 10 AI Realistic Avatar Generators
- Complete Tutorial to Use VPNa to Fake GPS Location On Xiaomi Redmi Note 12 Pro+ 5G | Dr.fone
- 3 Methods to Mirror Poco M6 5G to Roku | Dr.fone
- Updated Best 7 Whiteboard Explainer Videos to Inspire You
- Overview of the Best Vivo Y77t Screen Mirroring App | Dr.fone
- In 2024, Does Life360 Notify When You Log Out On Realme 11X 5G? | Dr.fone
- In 2024, How To Change Vivo Lock Screen Clock in Seconds
- In 2024, How To Remove or Bypass Knox Enrollment Service On Itel A70
- A Detailed VPNa Fake GPS Location Free Review On Tecno Camon 20 | Dr.fone
- How To Fix Unresponsive Phone Touchscreen Of Honor 70 Lite 5G | Dr.fone
- Xiaomi Civi 3 Disney 100th Anniversary Edition Stuck on Screen – Finding Solutions For Stuck on Boot | Dr.fone
- What To Do When Asus ROG Phone 7 Ultimate Has Black Screen of Death? | Dr.fone
- All Things You Need to Know about Wipe Data/Factory Reset For Realme GT 5 (240W) | Dr.fone
- In 2024, How I Transferred Messages from Oppo A56s 5G to iPhone 12/XS (Max) in Seconds | Dr.fone
- How to Send and Fake Live Location on Facebook Messenger Of your Oppo A1 5G | Dr.fone
- Title: 2024 Approved The Best Way to Remove Audio From Your Videos
- Author: Chloe
- Created at : 2024-05-20 03:38:18
- Updated at : 2024-05-21 03:38:18
- Link: https://ai-editing-video.techidaily.com/2024-approved-the-best-way-to-remove-audio-from-your-videos/
- License: This work is licensed under CC BY-NC-SA 4.0.
