
:max_bytes(150000):strip_icc():format(webp)/001_the-best-disney-plus-movies-right-now-4846938-6783e356feb74fb7a09b84953620c5ed.jpg)
4 Solutions to Add White Borders on Mobile and Desktop
4 Solutions to Add White Borders on Mobile and Desktop
Would you like to add white borders to your videos?
Are you looking to put white backgrounds to your videos without cutting them?
You have seen many videos with attractive borders on different social media platforms (Instagram, YouTube, Facebook, LinkedIn, etc.) Adding borders allows you to create an evocative effect and also adjust the cropping issues. It plays a good role in redesigning a video. It should be noted that a border can change the entire style of the video.
There are hundreds of video editing software that allow adding borders to the videos for mobile and desktop. In this article, we shall discuss different ways to add white borders in movies used on different social media platforms.

4 Ways to Add White Borders to Video
The following 4 ways can be used to add white borders to the videos.
- Add a white border to the video on the computer (using Filmora)
- Add a white border to the video online
- Add a white border to the video on Android
- Add a white border to the video on iOS
Recommended way to add a white border to the video on the computer - using Filmora
Filmora Video Editor is one of the best video editing software. It allows editing the videos in a professional way. It has built-in editing features like splitting/cutting, trimming, cropping, adding watermark, changing speed, recording voice, and many more Along with this, you can rely on this application to add borders with different colors including white borders, black borders, colored border, and customized border. Add white borders on a computer, all this can be done in a few simple steps.
For Win 7 or later (64-bit)
For macOS 10.14 or later
Let’s download the free Wonder Share Filmora 11 software to proceed.
- Go to media, and import the video from your storage.
- Drag the video into the timeline.

- Select the video by clicking on the video.
- Hit the effects You can select the colorful effects from the panel.
- Now, write borders in the search engine. You will find various borders styles in the panel.
- Select the white border at the top of the panel.
- Simply drag and drop the border to the video/image.

- You will see the white border on the selected video.

- You can change the color of the border.
- Select the video by double-clicking on it.
- Hit the Effect tab from the Image and then click on Borders.
- Here you can change the color of your borders.
- Hit the OK

Add a white border to the video online
You can change white borders without launching software by editing online. Kapwing is an online video editing tool that is used to edit videos, images, and GIFs. It is very easy to use and the good thing about Kapwing is, it’s free and you don’t need to sign up or add watermarks to your edited videos/images.
However, it allows you to edit a video up to 250MB or you can only upload a video of almost 7 minutes in length. What you would need is to have a good internet connection and a Web.
Let’s start editing to add white borders step by step:
- Visit Kapwing collage maker and hit start collage maker
- You will see the below window.

- Click on Add media and select the desired video or image.
- Drag and drop the video into the timeline.

- Click on the video and drag the 4 corners to resize your video.
- It will eventually provide you with a white background and you can use it as a white border.

- Hit the Lock ratio tab once you got satisfied with your image borders.
- Double click the border to set the background color.

- You can change the background colors of your choice.

Add a white border to the video on Android
You can add white borders to your videos using android. BeeCut is a very simple and useful application for video editing. It presents a lot of stylish and beautiful frames and effects to make your video amazing. Along with this, it allows you to add text, filters, transitions, and many features to make your video stand out. It is very easy to use as takes a few steps to add frames to your video in android. To start the process follow these steps;
- Launch BeeCut on your mobile/android.
- Open the app and click on Media.
- Hit on Import file.

- Drag the video into the timeline or hit the +
- Hit the overlays
- Select your desired border.

- Drag the desired overlay border over the timeline. Here you can edit your design (change color, effect, etc.)
- Now, hit the export tab and choose the quality and format of your video.
- Save the file on your android.
Add a white border to the video on iOS
The PicsArt app is commonly used to edit videos on iPhone as well as on android. It is a very simple app, even a layman can use PicsArt and make professional white borders. This app is familiar among Instagram users. It changes the rectangular video or image into a square format. The aspect ratio of 1:1 is used for Instagram videos. It not only adds borders to the videos but also provides editing features like cut, resize, rotate, trims, text, etc. Let’s start with step-by-step instructions to add white borders to the video.
- Go to the app store and download the PicsArt app.
- Open the app and select the desired video.
- Hit the Fit tab from the bottom center.

- Select the color tool from the bottom.
- Choose the white color for white borders and you can also choose the desired color.
- Hit the ütab and the video will be saved to your phone gallery or you can directly share the video on Instagram.

Conclusion:
In the above content, we have introduced four methods to add white borders in your videos using windows, android, iPhone, and online. All the methods are free to use.
Wonder Share Filmora 11 is highly recommended to get the best and most professional results. It not only allows you to add borders but also provides you with an advanced editing panel. You can easily edit your videos and share with your social circle.
4 Ways to Add White Borders to Video
The following 4 ways can be used to add white borders to the videos.
- Add a white border to the video on the computer (using Filmora)
- Add a white border to the video online
- Add a white border to the video on Android
- Add a white border to the video on iOS
Recommended way to add a white border to the video on the computer - using Filmora
Filmora Video Editor is one of the best video editing software. It allows editing the videos in a professional way. It has built-in editing features like splitting/cutting, trimming, cropping, adding watermark, changing speed, recording voice, and many more Along with this, you can rely on this application to add borders with different colors including white borders, black borders, colored border, and customized border. Add white borders on a computer, all this can be done in a few simple steps.
For Win 7 or later (64-bit)
For macOS 10.14 or later
Let’s download the free Wonder Share Filmora 11 software to proceed.
- Go to media, and import the video from your storage.
- Drag the video into the timeline.
- Select the video by clicking on the video.
- Hit the effects You can select the colorful effects from the panel.
- Now, write borders in the search engine. You will find various borders styles in the panel.
- Select the white border at the top of the panel.
- Simply drag and drop the border to the video/image.
- You will see the white border on the selected video.
- You can change the color of the border.
- Select the video by double-clicking on it.
- Hit the Effect tab from the Image and then click on Borders.
- Here you can change the color of your borders.
- Hit the OK
Add a white border to the video online
You can change white borders without launching software by editing online. Kapwing is an online video editing tool that is used to edit videos, images, and GIFs. It is very easy to use and the good thing about Kapwing is, it’s free and you don’t need to sign up or add watermarks to your edited videos/images.
However, it allows you to edit a video up to 250MB or you can only upload a video of almost 7 minutes in length. What you would need is to have a good internet connection and a Web.
Let’s start editing to add white borders step by step:
- Visit Kapwing collage maker and hit start collage maker
- You will see the below window.
- Click on Add media and select the desired video or image.
- Drag and drop the video into the timeline.
- Click on the video and drag the 4 corners to resize your video.
- It will eventually provide you with a white background and you can use it as a white border.
- Hit the Lock ratio tab once you got satisfied with your image borders.
- Double click the border to set the background color.
- You can change the background colors of your choice.
Add a white border to the video on Android
You can add white borders to your videos using android. BeeCut is a very simple and useful application for video editing. It presents a lot of stylish and beautiful frames and effects to make your video amazing. Along with this, it allows you to add text, filters, transitions, and many features to make your video stand out. It is very easy to use as takes a few steps to add frames to your video in android. To start the process follow these steps;
- Launch BeeCut on your mobile/android.
- Open the app and click on Media.
- Hit on Import file.
- Drag the video into the timeline or hit the +
- Hit the overlays
- Select your desired border.
- Drag the desired overlay border over the timeline. Here you can edit your design (change color, effect, etc.)
- Now, hit the export tab and choose the quality and format of your video.
- Save the file on your android.
Add a white border to the video on iOS
The PicsArt app is commonly used to edit videos on iPhone as well as on android. It is a very simple app, even a layman can use PicsArt and make professional white borders. This app is familiar among Instagram users. It changes the rectangular video or image into a square format. The aspect ratio of 1:1 is used for Instagram videos. It not only adds borders to the videos but also provides editing features like cut, resize, rotate, trims, text, etc. Let’s start with step-by-step instructions to add white borders to the video.
- Go to the app store and download the PicsArt app.
- Open the app and select the desired video.
- Hit the Fit tab from the bottom center.
- Select the color tool from the bottom.
- Choose the white color for white borders and you can also choose the desired color.
- Hit the ütab and the video will be saved to your phone gallery or you can directly share the video on Instagram.
Conclusion:
In the above content, we have introduced four methods to add white borders in your videos using windows, android, iPhone, and online. All the methods are free to use.
Wonder Share Filmora 11 is highly recommended to get the best and most professional results. It not only allows you to add borders but also provides you with an advanced editing panel. You can easily edit your videos and share with your social circle.
How To Add Scrolling Text Effect
Almost every video has some titles and texts to show to the viewers. Instead of showing static texts on the video, everyone loves to add animated texts so that the video looks attractive and engaging. If you want to show credits and titles in intro and outro of the video, you will usually see texts scrolling vertically on the video.
If you want to show any text repeatedly, you can add horizontal scrolling text effect to your video so that the repeated text does not look weird. You will need a video editor to add scrolling rolling text effect to texts and titles in your video. We will illustrate in simple steps how to animate text on scroll using free as well as premium video editors.
Part 1. Add Scrolling Text to Video with Filmora
Wondershare Filmora is a professional video editor and if you are a Windows PC or Mac user, you can use Filmora to add scrolling text effect. In fact, Filmora is the most intuitive video editor where you can add scrolling text effect instantly without any prior experience in video editing.
Filmora has the best collection of text effects and you can add scrolling text anywhere and customize the effect as per your requirements. As a matter of fact, you can create a video with scrolling text effects only from scratch. Here are the steps to add scrolling text to video using Filmora.
Free Download For Win 7 or later(64-bit)
Free Download For macOS 10.14 or later
Step1 Download and install Filmora on your Windows PC or Mac. Launch the application and click on New Project on the welcome screen. You can also go to File> New option to get started.

Step2 Go to File> Import Media option to bring in your video file user Project Media folder. Thereafter, drag and drop the file into Timeline to get started.

Step3 Go to Titles option located at the top, and on the left panel, go to End Credits option. You will see various scrolling text effects. Place your mouse pointer on them to check their preview.

Step4 Once you are satisfied with any scrolling text effects, drag and drop it into Timeline above the video clip layer. Adjust the position of the text effect so that it appears on the video as expected. You can stretch the duration of the effect as per your preference.

Step5 Double-click on the text layer on Timeline and customize the text and style as you feel. Thereafter, you can click on Advanced button for more customization. Finally, click on OK button.

Part 2. Use After Effects to Create Scrolling Text
Adobe Affect Effects is an extremely popular video editor and there are so many different text effects available to apply to your video. After Effects scrolling text effects come with different variations so that your titles and texts look amazing on the screen. Apart from the available text effects, you can also download and get more text effects from external sources. Here are the steps to add text scroll after effects to your video.
Step1 Launch After Effects and type your text with the Text tool from the top bar.

Step2 Duplicate the written text by going to Edit> Duplicate.

Step3 Move the duplicate text out of the visible screen to the left by changing its position value.

Step4 Turn on Position option and change the duration and add a keyframe.

Step5 Right-click on Composition setting and go to New> Null Object. Change the duration and make it the same as the Duplicate layer and add a keyframe there. Besides, move the null object out of the visible screen to the right.

Step6 Select all layers and right-click and select Pre-compose.

Step7 Right-click on Pre-comp and go to Time> Enable Time Remapping. Play the video and you will see the scrolling effects that you see in end credits in videos.

The above-mentioned steps are for horizontal scrolling text effect. If you want vertical scrolling text After Effects, you have to position the duplicate text and null object vertically and the required text will scroll vertically.
Part 3. Add Scrolling Text Effect with VSDC Free Video Editor
So far, we have mentioned premium video editors to add scrolling effect to the text in your video. Now we are going to mention a free video editor where you can add scrolling effect instantly. If you are a Windows user, you can install VSDC free video editor. There are several scrolling text effects available on the video editor through which you can move the text horizontal and vertical. Here are the steps to animate text on scroll using VSDC free video editor.
Step1 Install VSDC free video editor and click on New Project option. Click on Finish button and select the video from your hard drive where you want to add text.

Step2 Select Type tool from the left panel and draw a box on the video where you can type your text. Make sure the text layer is on top of the video layer in Timeline.

Step3 Type your text and if you want to scroll it like horizontal scrolling text After Effects, place the text out of the viewer on the right side.

Step4 Double-click on text layer and go to Add Object and click on Movement.

Step5 You will find the mouse pointer change and you have to click on the spot to the left side where you want the text to go in scrolling effect.

Step6 Shorten the duration of the text layer and then copy the text layer from Timeline. Paste it again and again until you cover the video layer completely so that the scroll effect goes on as long as the video runs.

Takeaway
Adding scrolling text to your video should no more be an issue for you. If you are using After Effects, we have illustrated how you can create horizontal and vertical scrolling effect for text in your video perfectly. If you prefer a free video editor, you can use VSDC free video editor as well. But we recommend Wondershare Filmora where you can add scrolling effects to your text instantly, and there is a wide range of amazing scrolling effects available to apply to your video.
Free Download For macOS 10.14 or later
Step1 Download and install Filmora on your Windows PC or Mac. Launch the application and click on New Project on the welcome screen. You can also go to File> New option to get started.
Step2 Go to File> Import Media option to bring in your video file user Project Media folder. Thereafter, drag and drop the file into Timeline to get started.
Step3 Go to Titles option located at the top, and on the left panel, go to End Credits option. You will see various scrolling text effects. Place your mouse pointer on them to check their preview.
Step4 Once you are satisfied with any scrolling text effects, drag and drop it into Timeline above the video clip layer. Adjust the position of the text effect so that it appears on the video as expected. You can stretch the duration of the effect as per your preference.
Step5 Double-click on the text layer on Timeline and customize the text and style as you feel. Thereafter, you can click on Advanced button for more customization. Finally, click on OK button.
Part 2. Use After Effects to Create Scrolling Text
Adobe Affect Effects is an extremely popular video editor and there are so many different text effects available to apply to your video. After Effects scrolling text effects come with different variations so that your titles and texts look amazing on the screen. Apart from the available text effects, you can also download and get more text effects from external sources. Here are the steps to add text scroll after effects to your video.
Step1 Launch After Effects and type your text with the Text tool from the top bar.
Step2 Duplicate the written text by going to Edit> Duplicate.
Step3 Move the duplicate text out of the visible screen to the left by changing its position value.
Step4 Turn on Position option and change the duration and add a keyframe.
Step5 Right-click on Composition setting and go to New> Null Object. Change the duration and make it the same as the Duplicate layer and add a keyframe there. Besides, move the null object out of the visible screen to the right.
Step6 Select all layers and right-click and select Pre-compose.
Step7 Right-click on Pre-comp and go to Time> Enable Time Remapping. Play the video and you will see the scrolling effects that you see in end credits in videos.
The above-mentioned steps are for horizontal scrolling text effect. If you want vertical scrolling text After Effects, you have to position the duplicate text and null object vertically and the required text will scroll vertically.
Part 3. Add Scrolling Text Effect with VSDC Free Video Editor
So far, we have mentioned premium video editors to add scrolling effect to the text in your video. Now we are going to mention a free video editor where you can add scrolling effect instantly. If you are a Windows user, you can install VSDC free video editor. There are several scrolling text effects available on the video editor through which you can move the text horizontal and vertical. Here are the steps to animate text on scroll using VSDC free video editor.
Step1 Install VSDC free video editor and click on New Project option. Click on Finish button and select the video from your hard drive where you want to add text.
Step2 Select Type tool from the left panel and draw a box on the video where you can type your text. Make sure the text layer is on top of the video layer in Timeline.
Step3 Type your text and if you want to scroll it like horizontal scrolling text After Effects, place the text out of the viewer on the right side.
Step4 Double-click on text layer and go to Add Object and click on Movement.
Step5 You will find the mouse pointer change and you have to click on the spot to the left side where you want the text to go in scrolling effect.
Step6 Shorten the duration of the text layer and then copy the text layer from Timeline. Paste it again and again until you cover the video layer completely so that the scroll effect goes on as long as the video runs.
Takeaway
Adding scrolling text to your video should no more be an issue for you. If you are using After Effects, we have illustrated how you can create horizontal and vertical scrolling effect for text in your video perfectly. If you prefer a free video editor, you can use VSDC free video editor as well. But we recommend Wondershare Filmora where you can add scrolling effects to your text instantly, and there is a wide range of amazing scrolling effects available to apply to your video.
Kinetic Typography Text Effect 【EASY&FAST】
Preparation
What you need to prepare:
- A computer (Windows or macOS)
- Your video materials.
- Filmora video editor
Step 1
Go ahead and download the Filmora video editor before all else. The program will install and start automatically. Just hit “Download” and then “Install”.
Step 2
Once the program starts, open a New Project. Then, go to “Sample Color” and drag any color you want to the Timeline.

Step 3
Now, head over to the “Titles” tab and drag the Basic Title to the Timeline. Place it above the Sample Color clip.

Step 4
Right-click on the Title clip in the Timeline and select Edit Properties from the menu. From there, click on “ADVANCED” to open the advanced settings. Here, you can change the font, adjust the text size, and place your titles wherever you want on the screen.

Step 5
Now, start with the second text layer from the bottom and move it 5 frames forward. Move each text layer above 5 layers forward from the previous layer. This will display each word a few milliseconds after the previous one.
When you’re done, click OK.

Step 6
Export the Timeline to save your text animation as a new clip.

Step 7
Now, delete all the clips from the Timeline and import the text video you just exported. Drag it to the Timeline.

Step 8
Right-click on the clip in the Timeline and go to Edit Properties.
Step 9
Click on the Animation tab. Then, go to the Customize tab. Here, change the Scale setting to 120%.

Step 10
Next, move the Playhead to the end of the clip in the timeline. Then, reset the Scale and click OK.

Step 11
Watch the final preview. Then, Render and Export the video and you’re done. Congratulations.
Summary
What you’ve learned:
- How to create a kinetic movement effect on text in Filmora
- How to adjust the scale of a video in Filmora
- Adjust and manipulate text layers
What you need to prepare:
- A computer (Windows or macOS)
- Your video materials.
- Filmora video editor
Step 1
Go ahead and download the Filmora video editor before all else. The program will install and start automatically. Just hit “Download” and then “Install”.
Step 2
Once the program starts, open a New Project. Then, go to “Sample Color” and drag any color you want to the Timeline.
Step 3
Now, head over to the “Titles” tab and drag the Basic Title to the Timeline. Place it above the Sample Color clip.
Step 4
Right-click on the Title clip in the Timeline and select Edit Properties from the menu. From there, click on “ADVANCED” to open the advanced settings. Here, you can change the font, adjust the text size, and place your titles wherever you want on the screen.
Step 5
Now, start with the second text layer from the bottom and move it 5 frames forward. Move each text layer above 5 layers forward from the previous layer. This will display each word a few milliseconds after the previous one.
When you’re done, click OK.
Step 6
Export the Timeline to save your text animation as a new clip.
Step 7
Now, delete all the clips from the Timeline and import the text video you just exported. Drag it to the Timeline.
Step 8
Right-click on the clip in the Timeline and go to Edit Properties.
Step 9
Click on the Animation tab. Then, go to the Customize tab. Here, change the Scale setting to 120%.
Step 10
Next, move the Playhead to the end of the clip in the timeline. Then, reset the Scale and click OK.
Step 11
Watch the final preview. Then, Render and Export the video and you’re done. Congratulations.
Summary
What you’ve learned:
- How to create a kinetic movement effect on text in Filmora
- How to adjust the scale of a video in Filmora
- Adjust and manipulate text layers
How to Use LUTs in VN Editor – Complete Guide and Best LUTs Download
Hello and welcome to another article full of information and excitement. The topic of this article is LUT for the VN editor. So it will be exciting for those who want to use LUTs in their video to make them look nice and well. As we will discuss today that what is VN editor and how you can add LUTs to your videos using it on the devices it is compatible for. Moreover, where you can download some fantastic LUTs like moody LUTs, which help your videos to look nice, and which software you should use for this purpose if you are running a device on which the VN editor is not compatible. So let’s begin!
Part 1. What is VN editor?
VN editor is one of the best choices for video editing on mobiles and Mac. Fast editing, transitions, effects, filters, colors, subtitles, music, and many other features make the VN video editing app a great tool for producing and editing videos. It aims to make editing shorter and more feature-rich, empowering everyone to take control of their own lives. You cannot only produce great videos but good films as well. In the following, we will discuss how you can add LUTs to your videos using it.

Part 2. How to use LUTs in VN editor?
First, we must know that it is compatible with which platforms. So, it is now available for Android, iOS, and Mac OS only. However, you can also use it on Windows with some Android or iOS emulators, but it is not a very continent way in our suggestions. Even after doing this, it does not work well on your Windows. Maybe you will face some glitches or malfunctioning problems. So it is better to use it on only those platforms for which it is primarily available. Please read the instructions below since we will go through how to use LUTs in it later on.
On Mac:
First of all, we will learn how you can do it on Mac:
- Download the VN Editor for Mac and open it.
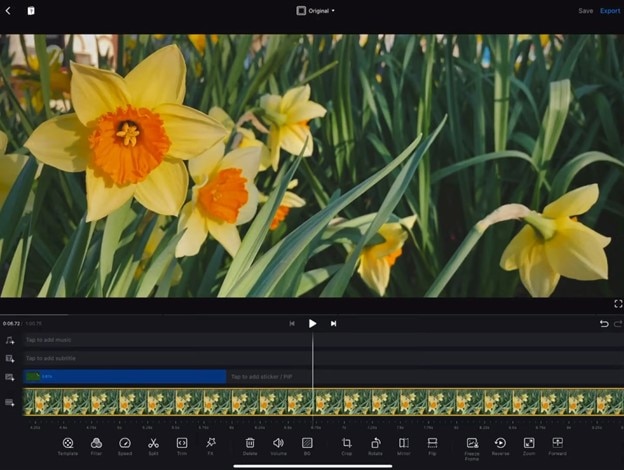
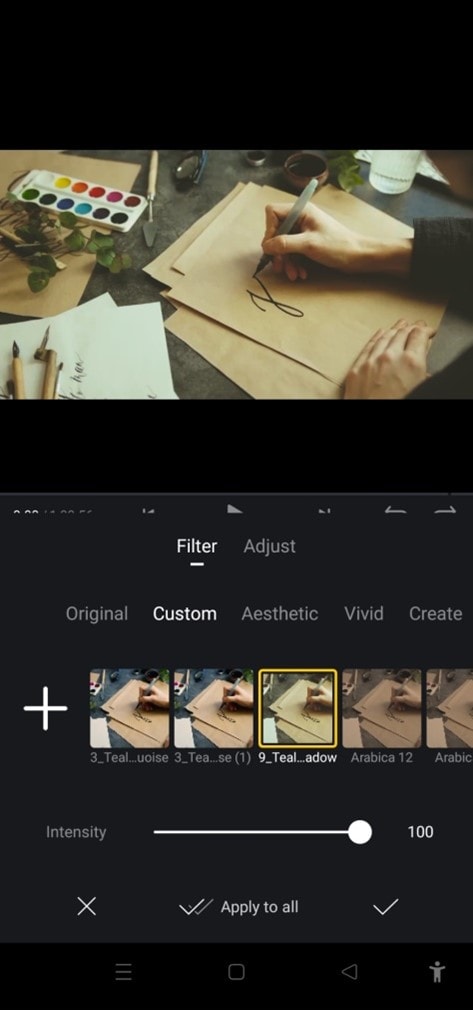
- Add your video and then tap the filters option.
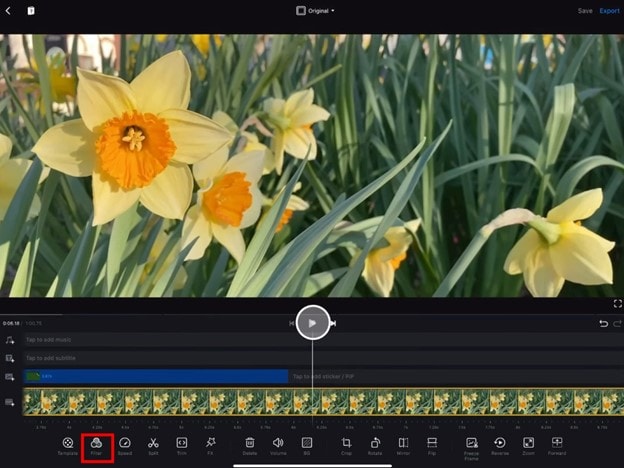
- Now choose custom filters and then select the LUTs pack.

- Select the desired LUT and apply.
On Mobile:
Secondly, we will discuss how we can do this on our mobiles (Android or iOS). The procedure on both devices (Android or iOS) is almost comparable. Therefore, we will discuss the steps from the perspective of both of these here:
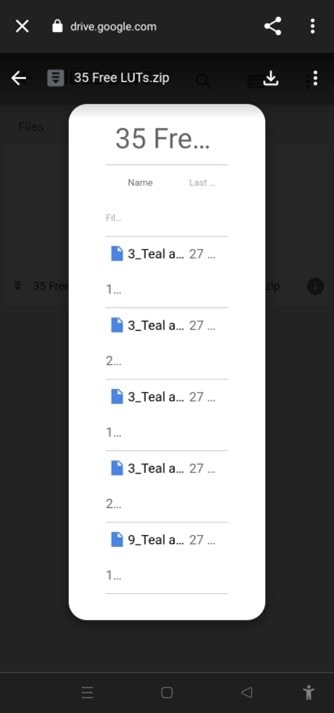
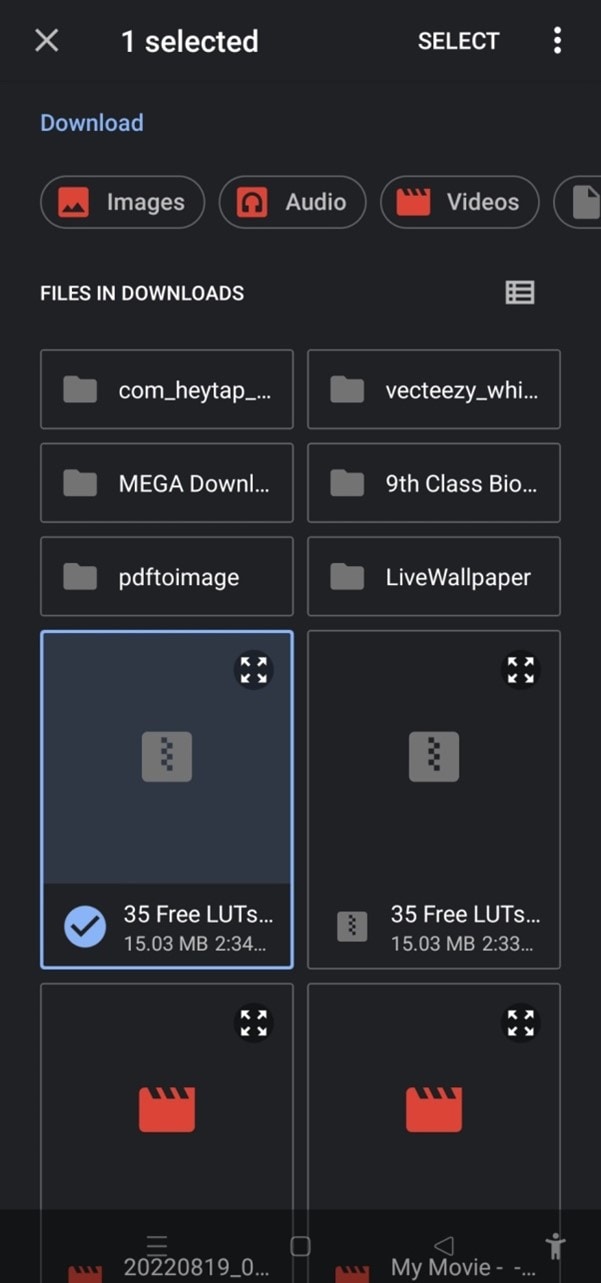
- First, download the VN editor from your mobile app store (Android or iOS) and the LUTs pack you want to use in your video.
- After downloading them on your mobile, open the VN editor application.
- Create a new project and add your video to it.

- Then click on the Filters option and select add external or custom filters option next to the existing filters.
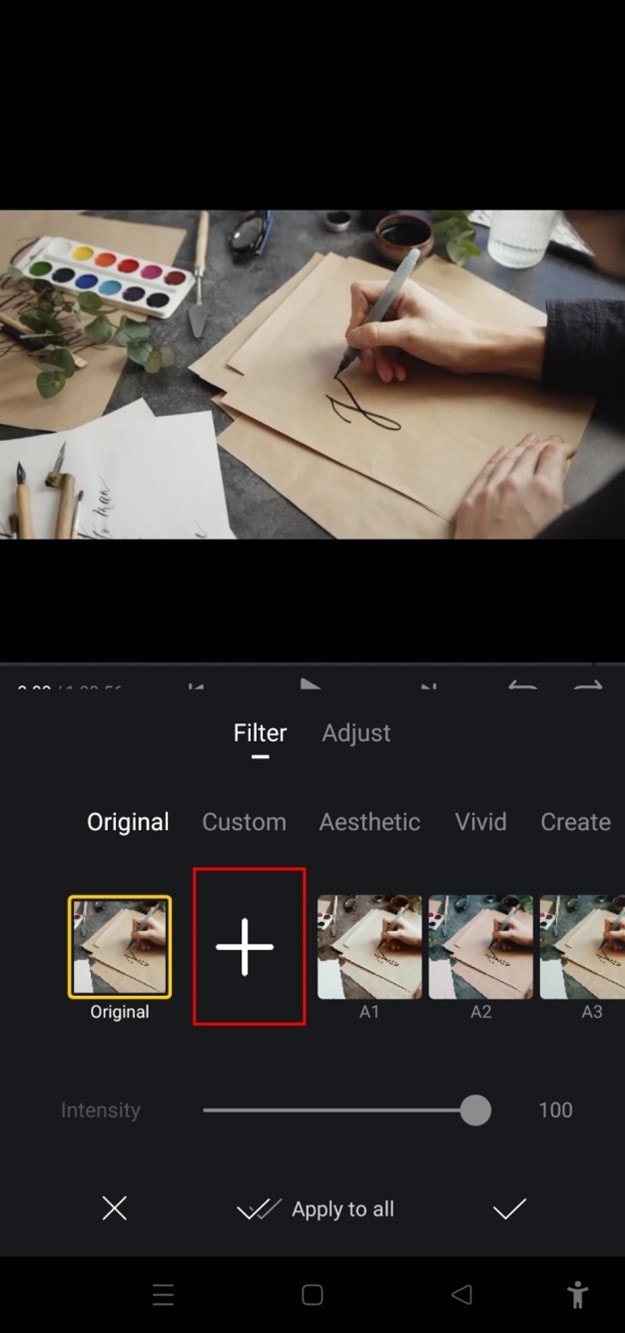
- It will take you to the File manager of your mobile, from which you have to find the folder in which you have stored your LUTs.
- After finding them, you can select those LUTs you want to use in your video and then click on the done or select button.
- Your downloaded LUTs start showing in the VN editor, and you can use them in your videos as you want.
Part 3. Best LUTs resource for VN video editor
1. Presets Store
Presets Store is an online platform that helps you with various Filters, LUTs, and other presets. So you can download LUTs for your videos for the VN editor using it. However, it’s not a free service. You have to pay for the LUTs you want to download from here. You can visit their YouTube channel to follow the latest LUTs, Filters and other presets on this platform.
2. Apna Editz
Apna Editz is another online platform you can use for this purpose. It also provides you with a fantastic variety of Presets like LUTs, Filters, and many other similar effects, which you can use in your video using the VN editor. The main Pros of this recommendation are that it’s a free website. So you can download LUTs for your videos from it for free. Keep an eye on their YouTube channel to be updated about the latest LUTs.
3. Lut Preset
Lut Preset is another alternative to all the above ones. You can get almost all your favorite LUTs for VN editor for free here and then use them in your videos as you want. They also share the latest LUTs on their YouTube Channel.
4. Pencil Hub
Pencil Hub is also a good option in this concern. However, it does not have too much variety of VN LUTs, but you can still use it to download some of the best LUTs for VN editors. To get informed of their every new effect and LUTs, their YouTube channel is the primary source.
5. YRP EDITZ
YRP ETIDZ is another good option if you are still looking for some fantastic VN LUTs. They, too not have a large variety of presets and LUTs. However, if you want some most commonly used LUTs for VN Editor, then they are a good option. You’ll notify of their most website updates by checking their YouTube channel.
Part 4. How to add LUTs to the best alternative to the VN editor?
VN Editor is undoubtedly an excellent choice to add LUTs to your videos. However, the VN editor is best suitable for mobile devices. To enhance your LUTs and effects, it would be great if you used some desktop software. Wondershare Filmora offers a great variety of built-in LUTs to choose from. Let’s look at how we can use Filmora to add LUTs:
- Add your video and tap the tools, then click the Color option.
- Now select the Color Correction option and then choose 3D LUT.
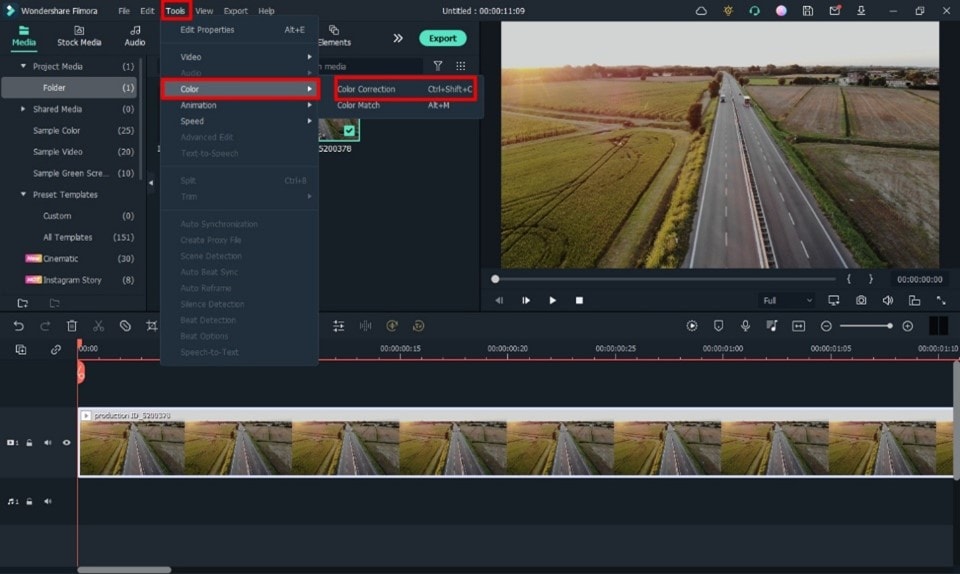
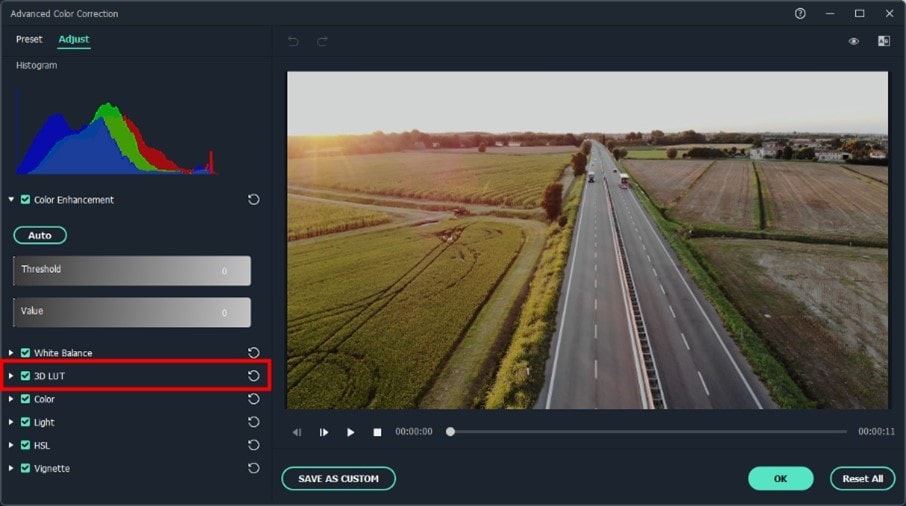
- Click the drop-down menu and select the Load new LUT option. Here you can import other downloaded preset LUTs to use
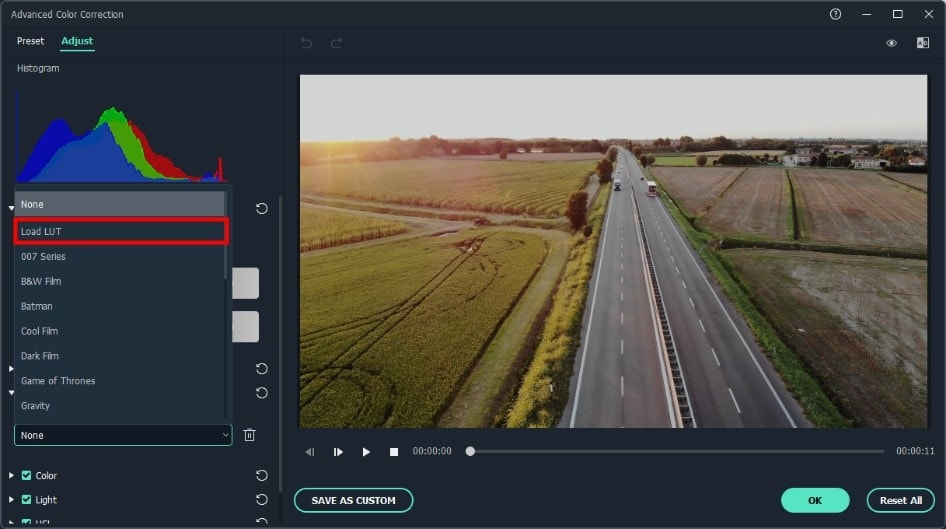
- Choose the LUT and click OK. Your new fantastic video is ready now.

Closing Thoughts
This post recommends several lut resources and demonstrates how to import them if you are a devoted user of VN editor and want to learn how to utilize it for video color grading. The more potent desktop editor Wondershare Filmora, which offers a range of built-in LUT sources and supports color grading settings, is of course recommended if you want to take your videos to the next level. Thanks for reading.
Free Download For Win 7 or later(64-bit)
Free Download For macOS 10.14 or later
2. Apna Editz
Apna Editz is another online platform you can use for this purpose. It also provides you with a fantastic variety of Presets like LUTs, Filters, and many other similar effects, which you can use in your video using the VN editor. The main Pros of this recommendation are that it’s a free website. So you can download LUTs for your videos from it for free. Keep an eye on their YouTube channel to be updated about the latest LUTs.
3. Lut Preset
Lut Preset is another alternative to all the above ones. You can get almost all your favorite LUTs for VN editor for free here and then use them in your videos as you want. They also share the latest LUTs on their YouTube Channel.
4. Pencil Hub
Pencil Hub is also a good option in this concern. However, it does not have too much variety of VN LUTs, but you can still use it to download some of the best LUTs for VN editors. To get informed of their every new effect and LUTs, their YouTube channel is the primary source.
5. YRP EDITZ
YRP ETIDZ is another good option if you are still looking for some fantastic VN LUTs. They, too not have a large variety of presets and LUTs. However, if you want some most commonly used LUTs for VN Editor, then they are a good option. You’ll notify of their most website updates by checking their YouTube channel.
Part 4. How to add LUTs to the best alternative to the VN editor?
VN Editor is undoubtedly an excellent choice to add LUTs to your videos. However, the VN editor is best suitable for mobile devices. To enhance your LUTs and effects, it would be great if you used some desktop software. Wondershare Filmora offers a great variety of built-in LUTs to choose from. Let’s look at how we can use Filmora to add LUTs:
- Add your video and tap the tools, then click the Color option.
- Now select the Color Correction option and then choose 3D LUT.
- Click the drop-down menu and select the Load new LUT option. Here you can import other downloaded preset LUTs to use
- Choose the LUT and click OK. Your new fantastic video is ready now.
Closing Thoughts
This post recommends several lut resources and demonstrates how to import them if you are a devoted user of VN editor and want to learn how to utilize it for video color grading. The more potent desktop editor Wondershare Filmora, which offers a range of built-in LUT sources and supports color grading settings, is of course recommended if you want to take your videos to the next level. Thanks for reading.
Free Download For Win 7 or later(64-bit)
Free Download For macOS 10.14 or later
Also read:
- In 2024, Top 6 Text to Speech Generators for YouTube Videos Windows, Mac, And
- In 2024, Want to Loop a Video to Extend Its Duration? You Can Use iMovie to Loop a Video on Your Mac and iPhone and We Will Illustrate How to Loop a Video in iMovie
- New Discover 8 Top-Rated Video and Photo Merger Tools for Desktop, Mobile, and Online Use. Elevate Your Media Game and Create Stunning Visuals with Ease
- New In 2024, Vegas Pro - How to Download, Install and Use It?
- How to Make Transparent Background in Canva for 2024
- In 2024, How To Make A Do-It-Yourself Video
- 2024 Approved 10 Best Audio Visualizers Windows, Mac, Android, iPhone & Online
- In 2024, Rotate Video in iMovie
- Updated 2024 Approved Detailed Steps to Rotate Videos Using OBS
- Updated Best iPhone LUTs App to Use for 2024
- Updated In 2024, Best Animated Text Generator
- New Best 10 Tools To Make Quiz Videos
- New 2024 Approved 7 Tips to Create Teaching Videos
- How to Add Text Effects in Adobe Premiere Pro, In 2024
- Updated 2024 Approved Getting Into The Details A Review of Kodak LUTs
- Updated Do You Want to Remove Unnecessary Sound From Your Video? We Are Providing You the List of the Best Software to Remove Audio From Video for Mac and Apple
- Updated In 2024, 15 Camera Shake Preset for Premiere Pro to Add Camera Shake with Simple Keyframes. Each Preset Is Editable with Easy Steps. Make Your Video Shocking and Impressive with These Camera Shake Effects
- New Create Glitch Text Effect for 2024
- New How to Make Double Exposure Effect in Filmora
- In 2024, Step-By-Step Guide To Creating Halftone Effects In Photoshop
- Updated How to Make a Slideshow with Icecream Slideshow Maker
- Updated In 2024, How To Create a Polaroid Collage?
- In 2024, A Guide to Effective Video Marketing
- New 2024 Approved 8 Free Title Makers to Use
- In 2024, How to Create an Adobe Slideshow the Easy Way
- 2024 Approved Progressive Solutions to Adding VHS Effects to Video with Ease
- New How to Create Vintage Film Effect 1920S
- New How to Blur Faces in Your Video on iPhone for 2024
- Updated In 2024, Top Things People Know About Wedding Slideshow
- Updated 2024 Approved Change Aspect Ratio of Video
- How to Make Simple Slideshow Word
- Updated Create Intro Video with Flixpress for 2024
- Make Transparent Background Video Today for 2024
- Updated 2024 Approved Best CapCut Templates for Slow Motion Video Trend
- Updated Making Slow Motion Videos in Premiere Pro A Review on The Best Methods
- Splitting the Clips in Adobe After Effects Step by Step
- All You Need to Know About Transparent Logos and How You Can Make Them. Top Transparent Logos You Can Take Inspiration From
- New How to Create and Use Adjustment Layers in After Effects
- Updated In 2024, Mastering OpenCV Object Tracking A Comprehensive Guide for Beginners and Experts
- Do You Wish to Learn About some Tools to Slow Down a Video? Discover How to Slow Down Time Lapse on iPhone Throughout This Article
- In 2024, In This Article, We Talk About How to Add Old Film Overlays and Other Effects to Turn the Videos or Photos More Vintage and with an Older Aspect. We Take a Look at Filmora in This Guide and Give Tips on How to Create Great Retro Videos
- New In 2024, Color Lut in Video - Color Grade Your Video
- In 2024, How to Screen Mirroring Realme V30T? | Dr.fone
- Complete Guide to Hard Reset Your Vivo V29 | Dr.fone
- New Best 15 Anime Shows That Are Great to Binge Watch
- In 2024, How to Transfer Contacts from Realme C67 4G to Other Android Devices Using Bluetooth? | Dr.fone
- In 2024, Process of Screen Sharing Samsung Galaxy Z Flip 5 to PC- Detailed Steps | Dr.fone
- In 2024, How to Bypass iCloud Lock on iPhone X
- In 2024, Does Life360 Notify When You Log Out On Tecno Spark 10 4G? | Dr.fone
- In 2024, Top-Notch Solutions for Disabled Apple ID From Apple iPhone SE Making It Possible
- How to Bypass Google FRP Lock on Oppo Reno 10 5G Devices
- 5 Ways to Restart Xiaomi Civi 3 Without Power Button | Dr.fone
- In 2024, The Top 5 Android Apps That Use Fingerprint Sensor to Lock Your Apps On Oppo A38
- Top 4 Android System Repair Software for Honor Magic 5 Bricked Devices | Dr.fone
- Tutorial to Change Vivo Y27 5G IMEI without Root A Comprehensive Guide
- How to Remove Forgotten PIN Of Your Vivo V27
- Title: 4 Solutions to Add White Borders on Mobile and Desktop
- Author: Chloe
- Created at : 2024-05-20 03:37:18
- Updated at : 2024-05-21 03:37:18
- Link: https://ai-editing-video.techidaily.com/4-solutions-to-add-white-borders-on-mobile-and-desktop/
- License: This work is licensed under CC BY-NC-SA 4.0.
