:max_bytes(150000):strip_icc():format(webp)/GettyImages-1305200685-e977d0ca4e9a47e2b006e5b32a9922fd.jpg)
6 Best Methods to Make a Video Longer for 2024

6 Best Methods to Make a Video Longer
These days when you head on to social media, you can easily find 4-5 seconds video clips on the internet. However, many social media platforms like YouTube, Instagram, and other videos sharing platforms require you to make your video longer to meet the site’s minimum length requirements. So, for example, although Instagram’s minimum length is 3 seconds, you might want to find ways to engage your audience longer.
This article will describe the best ways to make a video longer. We’ll also offer a bonus tip on how you can edit your video to make it look better and attract more audience. On that note, let’s take a look.
6 Best Methods to Make a Video Longer
There are many methods out there to make your video longer. This section will touch on the six best methods to make a video longer.
Loop the Video
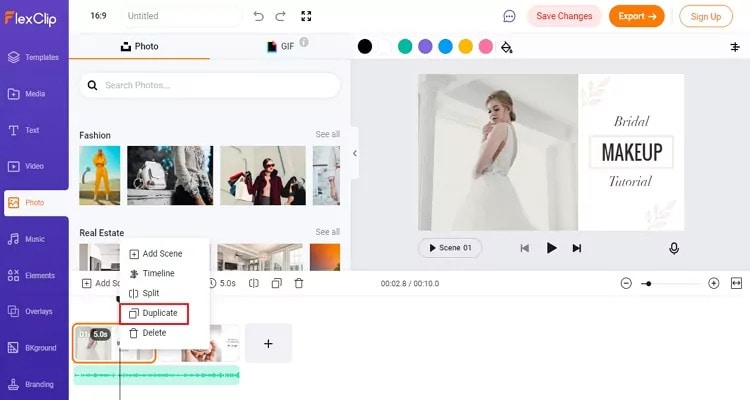
One of the best ways to make your video longer for most social media platforms is to loop the video. When you replay the video several times in a single row, it helps to multiply its length. An example is taking a 2-second video and looping it 4x. This automatically makes it into an 8-second video clip. With looping, you can simply replay the action of the clip rather than altering it in any way.
Many video editing software today allows you to loop your video for free. You have to upload the video and choose how many times you would like to loop it, and the software will get to work.
Slow Down the Video Speed

We would all agree that slow-motion makes everything seem longer automatically. You can utilize the same technique when you want to make a video longer. When you slow down a video clip, every second lasts longer. Using the slow-motion effect on a 3-second video will make the video 6 or even 9 seconds longer.
Add an Intro and Outro

Intro and outro are scenes you add before and after the video; these scenes are popular in YouTube videos. More generally, an intro is like a trailer. It shows the audience what the video is about, and the outro scene is usually used to show more information about the video maker. Adding an intro and outro to your video can add 2-4 seconds to your video clips.
It’s quite easy to add an intro and outro to any video. You can create them separately and then merge them with your video. The intro must be something relevant to the video clip; an example is adding a fast photo slideshow to the beginning of your video or a black frame. Relevant intro and outro scenes will make your video longer and maybe more engaging.
Add Images to the Video
This is another trick that most bloggers use to make their videos longer. It is an old trick in the book and makes your video significantly longer, depending on the number of videos you’re adding. A single picture can add a second or two to your video. You can simply use a video editor to merge the video clip and pictures into one seamless file.
Boomerang Your Video
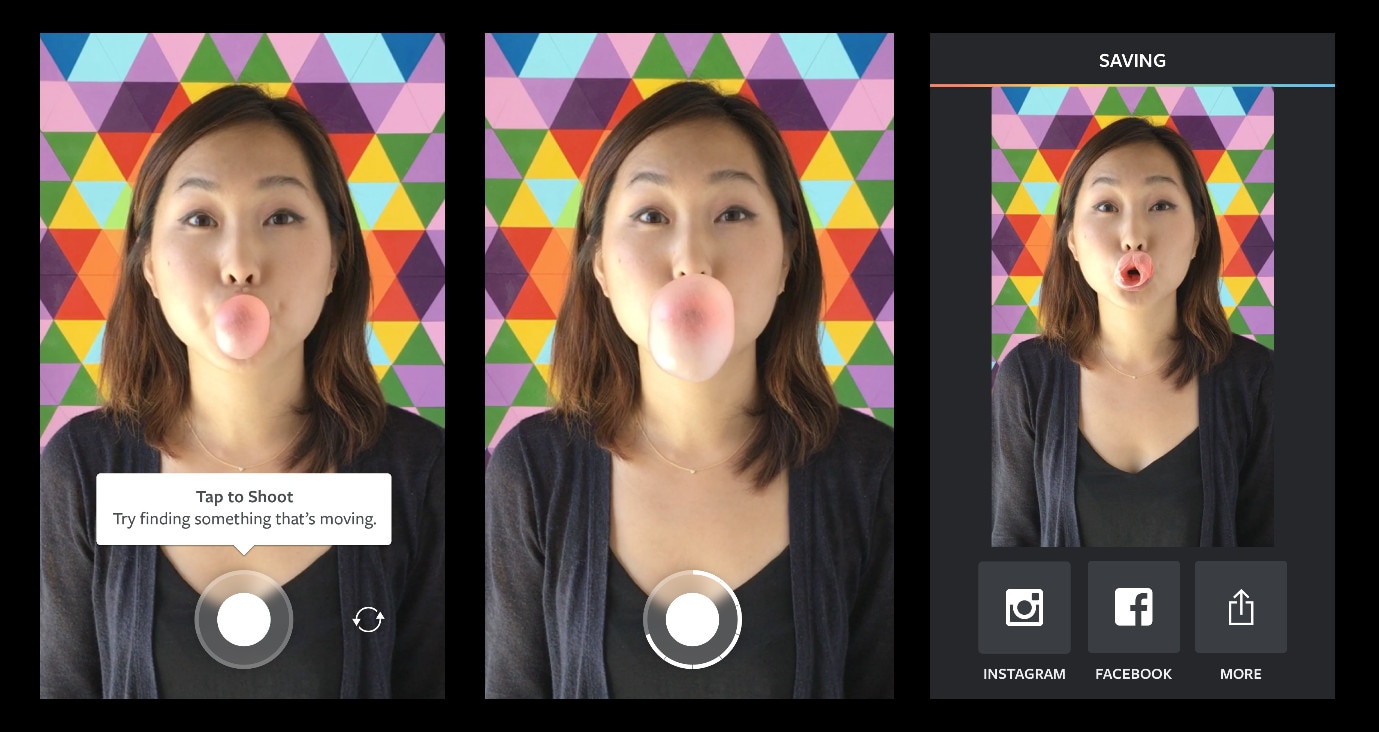
If you have plans to upload your media to Instagram, then a top feature you can use to make your video longer is the boomerang feature. Instagram introduced the Boomerang feature to play short video clips forward and then repeat their reverse. So by using the Boomerang feature, you don’t only add a memory effect to your video, but you also make your video longer.
Alternatively, you can manually append your video clip to a reversed version; this option allows you to make a boomerang from an existing clip. Apart from Instagram, you can utilize many other editing tools to create a boomerang from an existing video.
Add More Content to Your Video Clip
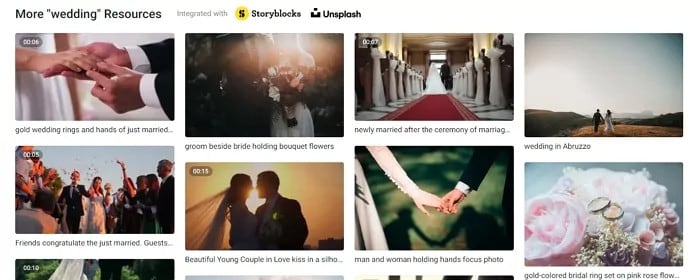
Another step you can take is to add more materials to your video. This doesn’t necessarily mean you have to get your camera out and start shooting more scenes to add to your video. Instead, you can simply access online media libraries and get amazing materials from there that are relevant to your video clip.
Today, most professional video editors offer you access to royalty-free photos and music material. You can simply browse through their collections and pick materials relevant to your video. For example, you could add a soundtrack and videos or GIFs that make your videos engaging. Adding extra content to your video clip can make it longer by 10 seconds.
Bonus Tips: How to Edit Video Easily on a Computer
Social media platforms offer you basic video editing features that you can use to optimize your video. However, these features are limited in what they can provide you with. If you want to have more control over the editing of your video clip and make it look even more professional, you should try Wondershare Filmora. This video editing tool is powerful and provides you with more editing features to ensure you get the result you want.
Filmora offers users over 300 effects like motion elements, overlays, titles, music sounds, and many more features to make your video more engaging and attractive. Using this app is relatively easy as well, and it offers users the option of changing the file format of their video if the social media platform does not support the original format.
If you would like to edit your video to give it a more engaging and professional look, follow the simple steps below.
Step 1: Import Video to Wondershare Filmora
First, you need to download the app on your device. After that, you can download it from the official website. Luckily, Wondershare Filmora supports Windows and Mac OS. Once you download the file, install and launch the app to get started.
On the menu, click on create a new project to begin. Next, click on the import button, and from the dropdown menu, choose ‘import media file.’ Alternatively, you can simply drag the video directly to the media library of this video editor. In addition, Filmora allows you to preview your video as you add different features to optimize the video.

If your video is shaky, you can use the stabilization feature to make it more stable. Simply right-click on the video in the preview window and select the option. Once you are sure, the video is ok, drag and drop it into the timeline to start editing your video.
Step 2: Cut, Slip, Rotate, or Color-Tune Your Video
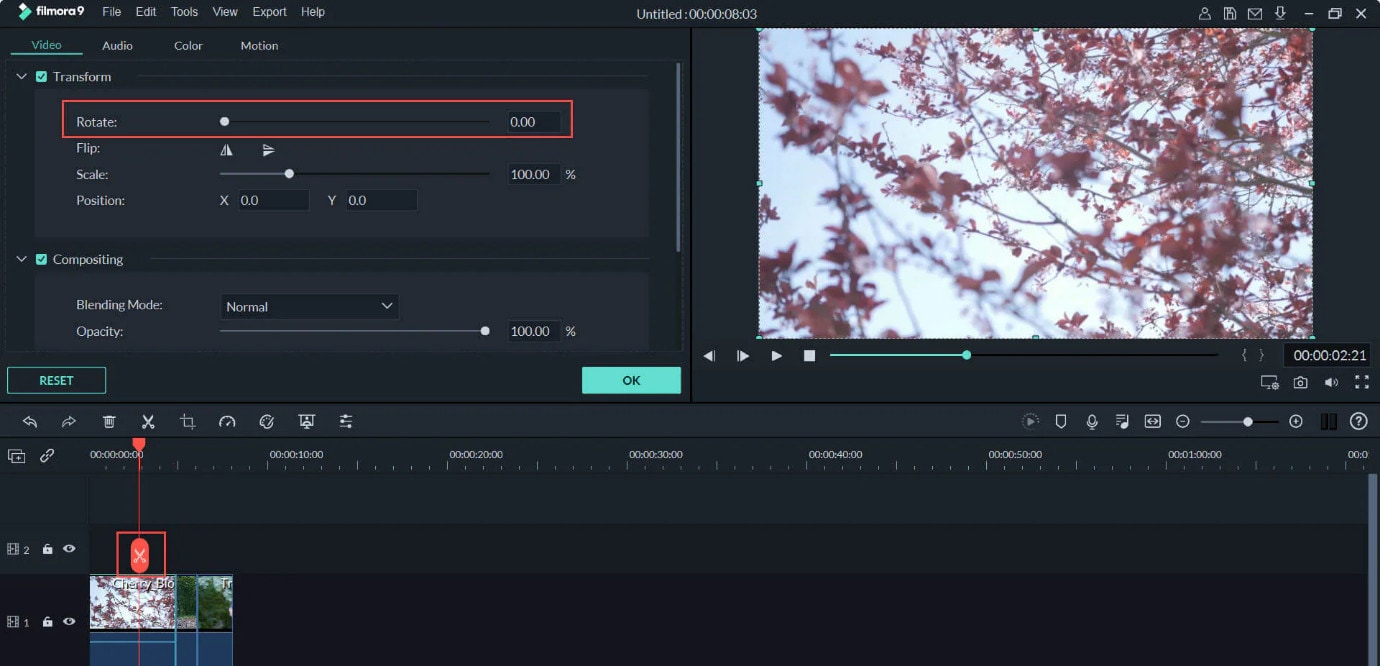
You can use many features to shape your video quickly on Wondershare Filmora. For example, you can use the scissors tool to cut or split your video. You can also use the transform tool to rotate and flip your video if you would prefer. In addition, Filmora allows you to add some advanced color tuning to your video with the color feature. This automatically makes your video even more beautiful.
Step 3: Add Filters and Effects to Your Video
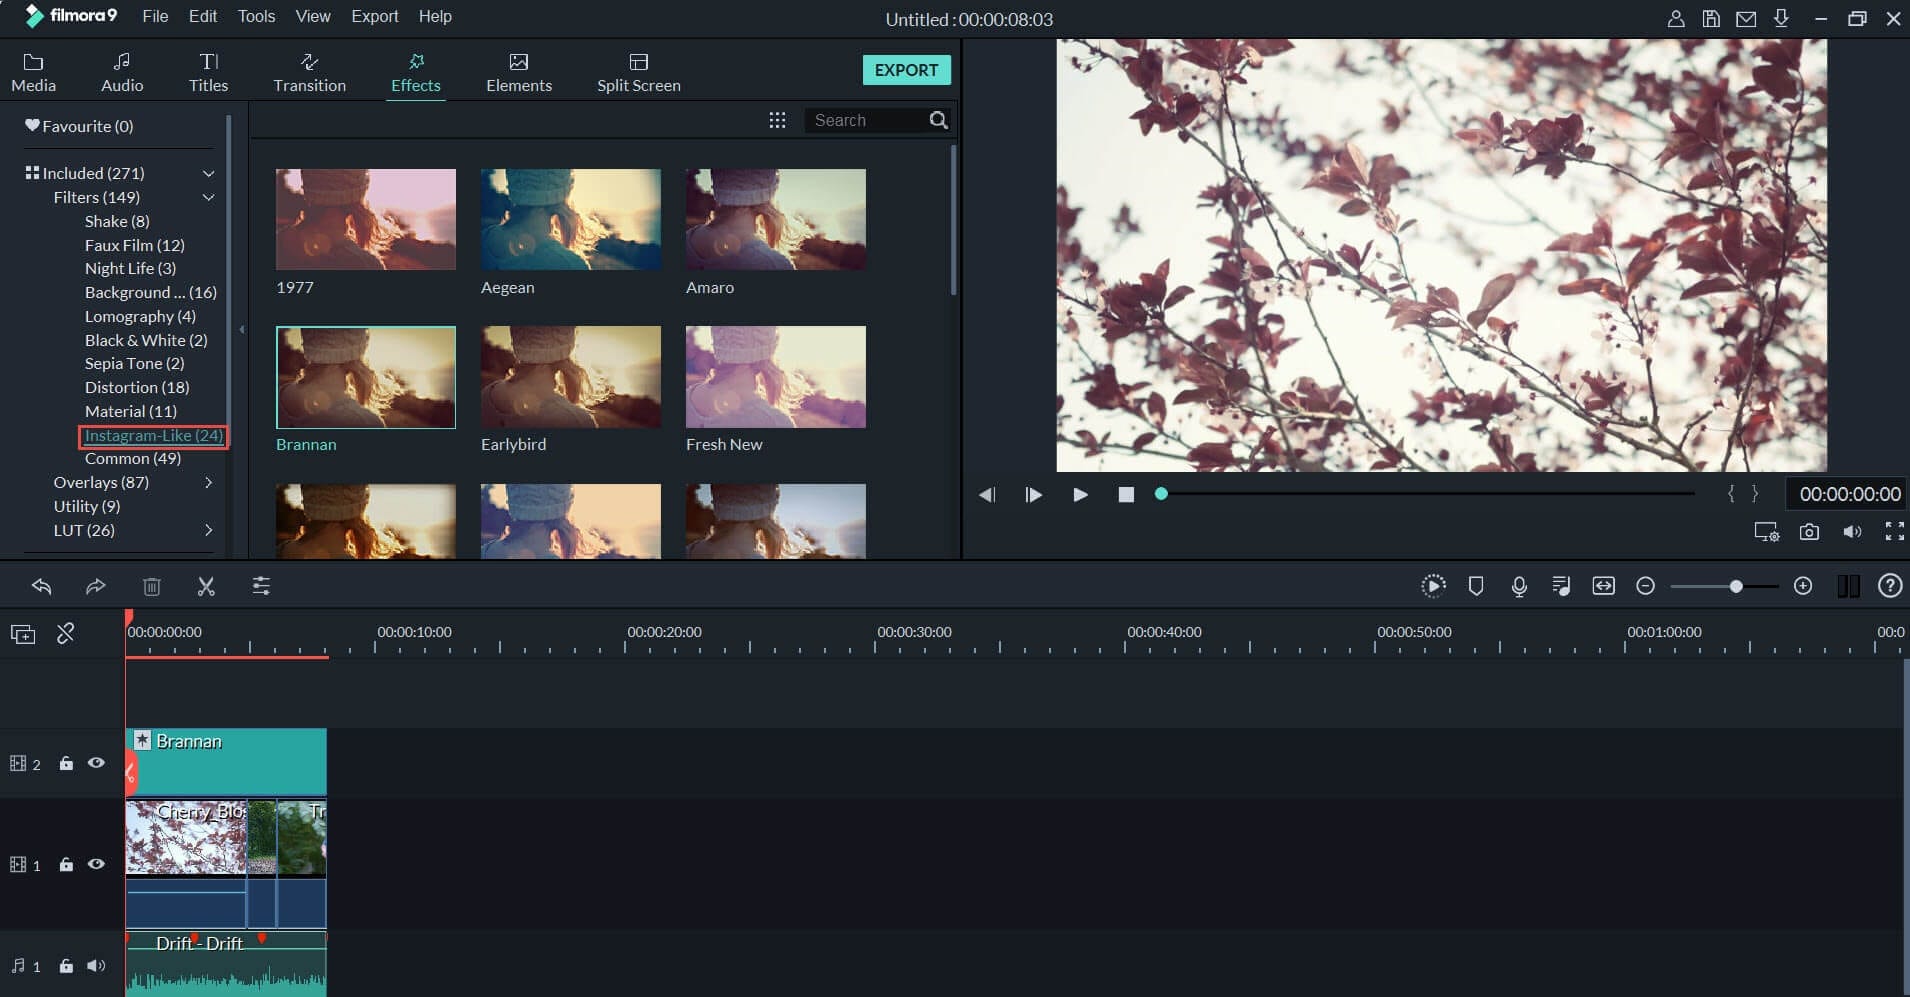
Additionally, Wondershare Filmora allows you to choose different transitions, graphics, tiles, texts, sound effects, titles, filters, overlays, and elements for your videos. With this video editing tool, you can get the exact look and sound you’re looking to achieve. In addition, there are different effect tabs above the timeline that directs you to the right feature you would like to include in your video.
You can just drag these effects and drop them on the timeline to apply to your video. Filmora has over 100 in-built filters and royalty-free music you can implement on your video. If you’re not sure which feature you’re looking for. Simply experiment and undo the effect till you find exactly what you’re looking for.
Step 4: Save and Share Edited Video

Once you’re satisfied with your video clip, you can now proceed to save it. You can choose to save the video to your local folder or a storage device you’d prefer. Wondershare Filmora allows you to save in the original format or change the format to your preferred option. Filmora also allows you to change your video’s resolution and bit rate to your preference. Alternatively, you can upload your video to video-sharing platforms like Instagram, Vimeo, YouTube, etc. You can also burn the video into a DVD collection if that’s what you’re looking for.
Final Thoughts
Social media platforms are great for gaining recognition and promoting your brand. However, there are times when you don’t meet the right video length, and you would like to make your video longer. With the six methods explained above, you can make your video as long as you want and also make your video more engaging. Additionally, you can use Wondershare Filmora to make your video more professional-looking. It offers you hundreds of effects and filters you can use to optimize your video.
Meta Description: If your video is short and you need to make it longer, this article gives you six methods to make a video longer and optimize them.
One of the best ways to make your video longer for most social media platforms is to loop the video. When you replay the video several times in a single row, it helps to multiply its length. An example is taking a 2-second video and looping it 4x. This automatically makes it into an 8-second video clip. With looping, you can simply replay the action of the clip rather than altering it in any way.
Many video editing software today allows you to loop your video for free. You have to upload the video and choose how many times you would like to loop it, and the software will get to work.
Slow Down the Video Speed

We would all agree that slow-motion makes everything seem longer automatically. You can utilize the same technique when you want to make a video longer. When you slow down a video clip, every second lasts longer. Using the slow-motion effect on a 3-second video will make the video 6 or even 9 seconds longer.
Add an Intro and Outro

Intro and outro are scenes you add before and after the video; these scenes are popular in YouTube videos. More generally, an intro is like a trailer. It shows the audience what the video is about, and the outro scene is usually used to show more information about the video maker. Adding an intro and outro to your video can add 2-4 seconds to your video clips.
It’s quite easy to add an intro and outro to any video. You can create them separately and then merge them with your video. The intro must be something relevant to the video clip; an example is adding a fast photo slideshow to the beginning of your video or a black frame. Relevant intro and outro scenes will make your video longer and maybe more engaging.
Add Images to the Video
This is another trick that most bloggers use to make their videos longer. It is an old trick in the book and makes your video significantly longer, depending on the number of videos you’re adding. A single picture can add a second or two to your video. You can simply use a video editor to merge the video clip and pictures into one seamless file.
Boomerang Your Video

If you have plans to upload your media to Instagram, then a top feature you can use to make your video longer is the boomerang feature. Instagram introduced the Boomerang feature to play short video clips forward and then repeat their reverse. So by using the Boomerang feature, you don’t only add a memory effect to your video, but you also make your video longer.
Alternatively, you can manually append your video clip to a reversed version; this option allows you to make a boomerang from an existing clip. Apart from Instagram, you can utilize many other editing tools to create a boomerang from an existing video.
Add More Content to Your Video Clip

Another step you can take is to add more materials to your video. This doesn’t necessarily mean you have to get your camera out and start shooting more scenes to add to your video. Instead, you can simply access online media libraries and get amazing materials from there that are relevant to your video clip.
Today, most professional video editors offer you access to royalty-free photos and music material. You can simply browse through their collections and pick materials relevant to your video. For example, you could add a soundtrack and videos or GIFs that make your videos engaging. Adding extra content to your video clip can make it longer by 10 seconds.
Bonus Tips: How to Edit Video Easily on a Computer
Social media platforms offer you basic video editing features that you can use to optimize your video. However, these features are limited in what they can provide you with. If you want to have more control over the editing of your video clip and make it look even more professional, you should try Wondershare Filmora. This video editing tool is powerful and provides you with more editing features to ensure you get the result you want.
Filmora offers users over 300 effects like motion elements, overlays, titles, music sounds, and many more features to make your video more engaging and attractive. Using this app is relatively easy as well, and it offers users the option of changing the file format of their video if the social media platform does not support the original format.
If you would like to edit your video to give it a more engaging and professional look, follow the simple steps below.
Step 1: Import Video to Wondershare Filmora
First, you need to download the app on your device. After that, you can download it from the official website. Luckily, Wondershare Filmora supports Windows and Mac OS. Once you download the file, install and launch the app to get started.
On the menu, click on create a new project to begin. Next, click on the import button, and from the dropdown menu, choose ‘import media file.’ Alternatively, you can simply drag the video directly to the media library of this video editor. In addition, Filmora allows you to preview your video as you add different features to optimize the video.

If your video is shaky, you can use the stabilization feature to make it more stable. Simply right-click on the video in the preview window and select the option. Once you are sure, the video is ok, drag and drop it into the timeline to start editing your video.
Step 2: Cut, Slip, Rotate, or Color-Tune Your Video

You can use many features to shape your video quickly on Wondershare Filmora. For example, you can use the scissors tool to cut or split your video. You can also use the transform tool to rotate and flip your video if you would prefer. In addition, Filmora allows you to add some advanced color tuning to your video with the color feature. This automatically makes your video even more beautiful.
Step 3: Add Filters and Effects to Your Video

Additionally, Wondershare Filmora allows you to choose different transitions, graphics, tiles, texts, sound effects, titles, filters, overlays, and elements for your videos. With this video editing tool, you can get the exact look and sound you’re looking to achieve. In addition, there are different effect tabs above the timeline that directs you to the right feature you would like to include in your video.
You can just drag these effects and drop them on the timeline to apply to your video. Filmora has over 100 in-built filters and royalty-free music you can implement on your video. If you’re not sure which feature you’re looking for. Simply experiment and undo the effect till you find exactly what you’re looking for.
Step 4: Save and Share Edited Video

Once you’re satisfied with your video clip, you can now proceed to save it. You can choose to save the video to your local folder or a storage device you’d prefer. Wondershare Filmora allows you to save in the original format or change the format to your preferred option. Filmora also allows you to change your video’s resolution and bit rate to your preference. Alternatively, you can upload your video to video-sharing platforms like Instagram, Vimeo, YouTube, etc. You can also burn the video into a DVD collection if that’s what you’re looking for.
Final Thoughts
Social media platforms are great for gaining recognition and promoting your brand. However, there are times when you don’t meet the right video length, and you would like to make your video longer. With the six methods explained above, you can make your video as long as you want and also make your video more engaging. Additionally, you can use Wondershare Filmora to make your video more professional-looking. It offers you hundreds of effects and filters you can use to optimize your video.
Meta Description: If your video is short and you need to make it longer, this article gives you six methods to make a video longer and optimize them.
One of the best ways to make your video longer for most social media platforms is to loop the video. When you replay the video several times in a single row, it helps to multiply its length. An example is taking a 2-second video and looping it 4x. This automatically makes it into an 8-second video clip. With looping, you can simply replay the action of the clip rather than altering it in any way.
Many video editing software today allows you to loop your video for free. You have to upload the video and choose how many times you would like to loop it, and the software will get to work.
Slow Down the Video Speed

We would all agree that slow-motion makes everything seem longer automatically. You can utilize the same technique when you want to make a video longer. When you slow down a video clip, every second lasts longer. Using the slow-motion effect on a 3-second video will make the video 6 or even 9 seconds longer.
Add an Intro and Outro

Intro and outro are scenes you add before and after the video; these scenes are popular in YouTube videos. More generally, an intro is like a trailer. It shows the audience what the video is about, and the outro scene is usually used to show more information about the video maker. Adding an intro and outro to your video can add 2-4 seconds to your video clips.
It’s quite easy to add an intro and outro to any video. You can create them separately and then merge them with your video. The intro must be something relevant to the video clip; an example is adding a fast photo slideshow to the beginning of your video or a black frame. Relevant intro and outro scenes will make your video longer and maybe more engaging.
Add Images to the Video
This is another trick that most bloggers use to make their videos longer. It is an old trick in the book and makes your video significantly longer, depending on the number of videos you’re adding. A single picture can add a second or two to your video. You can simply use a video editor to merge the video clip and pictures into one seamless file.
Boomerang Your Video

If you have plans to upload your media to Instagram, then a top feature you can use to make your video longer is the boomerang feature. Instagram introduced the Boomerang feature to play short video clips forward and then repeat their reverse. So by using the Boomerang feature, you don’t only add a memory effect to your video, but you also make your video longer.
Alternatively, you can manually append your video clip to a reversed version; this option allows you to make a boomerang from an existing clip. Apart from Instagram, you can utilize many other editing tools to create a boomerang from an existing video.
Add More Content to Your Video Clip

Another step you can take is to add more materials to your video. This doesn’t necessarily mean you have to get your camera out and start shooting more scenes to add to your video. Instead, you can simply access online media libraries and get amazing materials from there that are relevant to your video clip.
Today, most professional video editors offer you access to royalty-free photos and music material. You can simply browse through their collections and pick materials relevant to your video. For example, you could add a soundtrack and videos or GIFs that make your videos engaging. Adding extra content to your video clip can make it longer by 10 seconds.
Bonus Tips: How to Edit Video Easily on a Computer
Social media platforms offer you basic video editing features that you can use to optimize your video. However, these features are limited in what they can provide you with. If you want to have more control over the editing of your video clip and make it look even more professional, you should try Wondershare Filmora. This video editing tool is powerful and provides you with more editing features to ensure you get the result you want.
Filmora offers users over 300 effects like motion elements, overlays, titles, music sounds, and many more features to make your video more engaging and attractive. Using this app is relatively easy as well, and it offers users the option of changing the file format of their video if the social media platform does not support the original format.
If you would like to edit your video to give it a more engaging and professional look, follow the simple steps below.
Step 1: Import Video to Wondershare Filmora
First, you need to download the app on your device. After that, you can download it from the official website. Luckily, Wondershare Filmora supports Windows and Mac OS. Once you download the file, install and launch the app to get started.
On the menu, click on create a new project to begin. Next, click on the import button, and from the dropdown menu, choose ‘import media file.’ Alternatively, you can simply drag the video directly to the media library of this video editor. In addition, Filmora allows you to preview your video as you add different features to optimize the video.

If your video is shaky, you can use the stabilization feature to make it more stable. Simply right-click on the video in the preview window and select the option. Once you are sure, the video is ok, drag and drop it into the timeline to start editing your video.
Step 2: Cut, Slip, Rotate, or Color-Tune Your Video

You can use many features to shape your video quickly on Wondershare Filmora. For example, you can use the scissors tool to cut or split your video. You can also use the transform tool to rotate and flip your video if you would prefer. In addition, Filmora allows you to add some advanced color tuning to your video with the color feature. This automatically makes your video even more beautiful.
Step 3: Add Filters and Effects to Your Video

Additionally, Wondershare Filmora allows you to choose different transitions, graphics, tiles, texts, sound effects, titles, filters, overlays, and elements for your videos. With this video editing tool, you can get the exact look and sound you’re looking to achieve. In addition, there are different effect tabs above the timeline that directs you to the right feature you would like to include in your video.
You can just drag these effects and drop them on the timeline to apply to your video. Filmora has over 100 in-built filters and royalty-free music you can implement on your video. If you’re not sure which feature you’re looking for. Simply experiment and undo the effect till you find exactly what you’re looking for.
Step 4: Save and Share Edited Video

Once you’re satisfied with your video clip, you can now proceed to save it. You can choose to save the video to your local folder or a storage device you’d prefer. Wondershare Filmora allows you to save in the original format or change the format to your preferred option. Filmora also allows you to change your video’s resolution and bit rate to your preference. Alternatively, you can upload your video to video-sharing platforms like Instagram, Vimeo, YouTube, etc. You can also burn the video into a DVD collection if that’s what you’re looking for.
Final Thoughts
Social media platforms are great for gaining recognition and promoting your brand. However, there are times when you don’t meet the right video length, and you would like to make your video longer. With the six methods explained above, you can make your video as long as you want and also make your video more engaging. Additionally, you can use Wondershare Filmora to make your video more professional-looking. It offers you hundreds of effects and filters you can use to optimize your video.
Meta Description: If your video is short and you need to make it longer, this article gives you six methods to make a video longer and optimize them.
One of the best ways to make your video longer for most social media platforms is to loop the video. When you replay the video several times in a single row, it helps to multiply its length. An example is taking a 2-second video and looping it 4x. This automatically makes it into an 8-second video clip. With looping, you can simply replay the action of the clip rather than altering it in any way.
Many video editing software today allows you to loop your video for free. You have to upload the video and choose how many times you would like to loop it, and the software will get to work.
Slow Down the Video Speed

We would all agree that slow-motion makes everything seem longer automatically. You can utilize the same technique when you want to make a video longer. When you slow down a video clip, every second lasts longer. Using the slow-motion effect on a 3-second video will make the video 6 or even 9 seconds longer.
Add an Intro and Outro

Intro and outro are scenes you add before and after the video; these scenes are popular in YouTube videos. More generally, an intro is like a trailer. It shows the audience what the video is about, and the outro scene is usually used to show more information about the video maker. Adding an intro and outro to your video can add 2-4 seconds to your video clips.
It’s quite easy to add an intro and outro to any video. You can create them separately and then merge them with your video. The intro must be something relevant to the video clip; an example is adding a fast photo slideshow to the beginning of your video or a black frame. Relevant intro and outro scenes will make your video longer and maybe more engaging.
Add Images to the Video
This is another trick that most bloggers use to make their videos longer. It is an old trick in the book and makes your video significantly longer, depending on the number of videos you’re adding. A single picture can add a second or two to your video. You can simply use a video editor to merge the video clip and pictures into one seamless file.
Boomerang Your Video

If you have plans to upload your media to Instagram, then a top feature you can use to make your video longer is the boomerang feature. Instagram introduced the Boomerang feature to play short video clips forward and then repeat their reverse. So by using the Boomerang feature, you don’t only add a memory effect to your video, but you also make your video longer.
Alternatively, you can manually append your video clip to a reversed version; this option allows you to make a boomerang from an existing clip. Apart from Instagram, you can utilize many other editing tools to create a boomerang from an existing video.
Add More Content to Your Video Clip

Another step you can take is to add more materials to your video. This doesn’t necessarily mean you have to get your camera out and start shooting more scenes to add to your video. Instead, you can simply access online media libraries and get amazing materials from there that are relevant to your video clip.
Today, most professional video editors offer you access to royalty-free photos and music material. You can simply browse through their collections and pick materials relevant to your video. For example, you could add a soundtrack and videos or GIFs that make your videos engaging. Adding extra content to your video clip can make it longer by 10 seconds.
Bonus Tips: How to Edit Video Easily on a Computer
Social media platforms offer you basic video editing features that you can use to optimize your video. However, these features are limited in what they can provide you with. If you want to have more control over the editing of your video clip and make it look even more professional, you should try Wondershare Filmora. This video editing tool is powerful and provides you with more editing features to ensure you get the result you want.
Filmora offers users over 300 effects like motion elements, overlays, titles, music sounds, and many more features to make your video more engaging and attractive. Using this app is relatively easy as well, and it offers users the option of changing the file format of their video if the social media platform does not support the original format.
If you would like to edit your video to give it a more engaging and professional look, follow the simple steps below.
Step 1: Import Video to Wondershare Filmora
First, you need to download the app on your device. After that, you can download it from the official website. Luckily, Wondershare Filmora supports Windows and Mac OS. Once you download the file, install and launch the app to get started.
On the menu, click on create a new project to begin. Next, click on the import button, and from the dropdown menu, choose ‘import media file.’ Alternatively, you can simply drag the video directly to the media library of this video editor. In addition, Filmora allows you to preview your video as you add different features to optimize the video.

If your video is shaky, you can use the stabilization feature to make it more stable. Simply right-click on the video in the preview window and select the option. Once you are sure, the video is ok, drag and drop it into the timeline to start editing your video.
Step 2: Cut, Slip, Rotate, or Color-Tune Your Video

You can use many features to shape your video quickly on Wondershare Filmora. For example, you can use the scissors tool to cut or split your video. You can also use the transform tool to rotate and flip your video if you would prefer. In addition, Filmora allows you to add some advanced color tuning to your video with the color feature. This automatically makes your video even more beautiful.
Step 3: Add Filters and Effects to Your Video

Additionally, Wondershare Filmora allows you to choose different transitions, graphics, tiles, texts, sound effects, titles, filters, overlays, and elements for your videos. With this video editing tool, you can get the exact look and sound you’re looking to achieve. In addition, there are different effect tabs above the timeline that directs you to the right feature you would like to include in your video.
You can just drag these effects and drop them on the timeline to apply to your video. Filmora has over 100 in-built filters and royalty-free music you can implement on your video. If you’re not sure which feature you’re looking for. Simply experiment and undo the effect till you find exactly what you’re looking for.
Step 4: Save and Share Edited Video

Once you’re satisfied with your video clip, you can now proceed to save it. You can choose to save the video to your local folder or a storage device you’d prefer. Wondershare Filmora allows you to save in the original format or change the format to your preferred option. Filmora also allows you to change your video’s resolution and bit rate to your preference. Alternatively, you can upload your video to video-sharing platforms like Instagram, Vimeo, YouTube, etc. You can also burn the video into a DVD collection if that’s what you’re looking for.
Final Thoughts
Social media platforms are great for gaining recognition and promoting your brand. However, there are times when you don’t meet the right video length, and you would like to make your video longer. With the six methods explained above, you can make your video as long as you want and also make your video more engaging. Additionally, you can use Wondershare Filmora to make your video more professional-looking. It offers you hundreds of effects and filters you can use to optimize your video.
Meta Description: If your video is short and you need to make it longer, this article gives you six methods to make a video longer and optimize them.
Learn Color Correction in After Effects with These YouTube Videos
Create High-Quality Video - Wondershare Filmora
An easy and powerful YouTube video editor
Numerous video and audio effects to choose from
Detailed tutorials provided by the official channel
When it comes to understanding and mastery of information, videos are always the best. Research carried out by Wyzwol, a marketing research institute, states that 68% of people like to learn about services through videos.
Color correction in After Effects involves a wide range of tools, including Lumetri color, Hue saturation, and RGB curves. It involves extensive reading and interpretation of graphs and histograms – A thing not for the faint-hearted. To better your understanding of color correction in After Effects, you not only need to rely on blogs but also videos. Therefore from this article, you will learn about color correction in After Effects with videos.
Let’s dive in!
In this article
01 What is Color Correction in After Effects
02 Learn Color Correction in After Effects with These Videos
What is Color Correction in After Effects
Color correction is a functionality feature in Adobe After effects that fixes all the color complications in an image or a video. This functionality feature alters a clip of footage to match a constant appearance.
Most colorists and editors use After Effects to adjust color, saturation, and contrast in clips that look unreal and make them appear natural and unprocessed.
When you want to color correct your footage, you first need to establish your video clip and then determine the colors needs for your clip. With this, color grading will become an absolute breeze for you.
Learn Color Correction in After Effects with These Videos
1. Pro Tip - Cinematic Color Grade in After Effects - After Effects Tutorial by Dope Motions
One of the top-notch videos we will use to learn color correcting is one produced by Dope Motions. Dope Motions is a YouTube channel that is managed by Nick Pawar. Nick creates high-quality graphics and VFX tutorials where he shares insightful ideas on how to carry out various cinematic edits to videos – This includes color correction.
In this video, Nick gives his voice on color grid videos giving it that cinematic look with much ease. His method is relatively simpler since one need not use plugins to do color correction. Though it is much easier to carry out color correction with plugins, Nick emphasizes more on color correction without plugins since you will be able to extensively customize your video based on your preference.
In this video, Nick spotlights various topics, including how to use lumetri color, color correction, cinematic color grading, how to make presets, color effects, among many more. All in After Effects.
Besides, with these techniques, you cannot not only use color correction in After Effects but also in premiere pro. Beginners, as well as intermediate video editors, will significantly benefit from this exemplary video. Learn from Nick and create splendid videos that will leave your clients and viewers all rooted to the ground.
2. Create a Cinematic Look with After Effects Tricks! by Kriscoart
Another enlightening video that talks about color correction in After Effect are this one from Kriscoart. Kriscoart is a fast-growing YouTube channel developed by managed by Kris Truini. Some of the core values of this channel are to learn, create and share content. From his channel, Truini does not centralize his focus to only video editing; he goes to the extremes of edifying on VFX tutorials, lighting workshops, and short film breakdowns.
In this video, Truini shares some simple tricks with his subscribers as well as new visitors on how to carry out a color correction in After Effects. He elaborates on manipulating lights and adding dramatic atmospheres and cinematic looks to your video shots by using some simple masks, solids, and adjustment layers.
Truini uses the project he is working on to flesh out various color correction tools and how to put them into use authentically. He targets not only beginner video editors but also intermediate ones who are looking forward to increasing their skill set.
Through his YouTube channels, Truini aims at educating the masses so that they can be well conversant with most of the video editing tools. He wants the voice of every filmmaker and prospective to be heard by their prospective audiences.
3. Advanced Color Grading in After Effects - NO PLUGINS by the VFX Show
Color correcting and Color grading without plugins is something that is a back-breaking activity to beginner video editors. Here, Collin Black of @ The VFX Show tends to break that misconception. Collin Black, the manager of The VFX Show, teaches his subscribers and new visitors to his channel how to carry out color correction without necessarily using plugins.
Collin Black states that even though plugins are very easy to use in color correction, you cannot carry out a wide range of customizable activities. It makes color correction without plugins be something to use to create neck-breaking video clips.
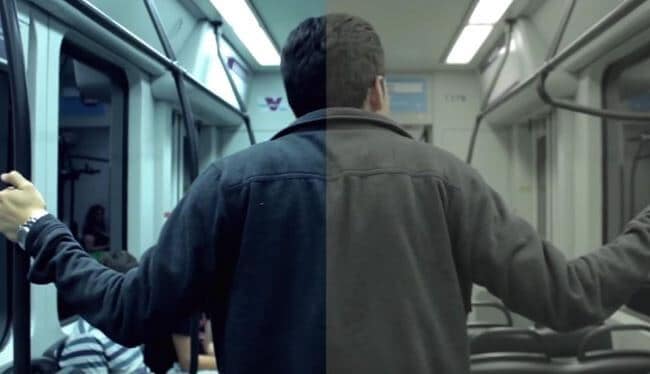
In this video, Collin uses a photo that he took while driving. The image appears to be faulty with lousy lighting. He uses a wide range of tools while elaborating every single step. When compared to the start, the final result of his work can be said to be “something out of this world.”
The target audience is beginner video editors with the zeal and zest of learning and wanting to get to know more about color correction without plugins.
4. Easy Colour Correction - After Effects Tutorial by DM Design
Are there scenarios where you come across a simple-looking video clip that is perfectly edited with ideal visual colors and has a sensational cinematic appearance? Debra Mayer, the founder, and owner of DM Designs, a renowned YouTube channel, simplify the processes required to get stunning videos.
Debra Mayer, in her YouTube channel, does all in her powers to teach all the Adobe techniques. She simplifies it and makes every single step to be somewhat relatable. In her channel, she does say much but expounds on tons of tools and activities.
Debra uses footage of a deserted land occupied by trees and grassland in this video. Everything in the picture looks dull and dusty. Debra expounds on how to create some cinematic appearance on clips with straightforward steps. Her after video appears to be something unreal due to extensive editing.
Her target audience for this video is beginner video editors. She can explain color correction in the easiest way possible from her immerse skillset. With that, beginner editors will significantly benefit from it.
5. Make Cinematic Looks with After Effects Color Correction Tricks! by Black Mixture
Paying for the After Effects subscription and again paying for color correction is something most people cannot wish to do. Even though you are not good at color correction, you need to stress yourself since Nate and Chriselle of Black Mixture will make things easy for you. Black Mixture is a YouTube account managed by Nate and Chriselle, a couple. In their channel, they expound on topics surrounding filmmaking, graphic design, motion design, and photography.
In this video, Nate elaborates on various steps on how to carry out a color correction in Adobe After Effects without plugins. He even goes to the extent of showing how to add music video effects as well as cinematic effects.
Nate uniquely uses only three color correction effects to carry out all the color correction needed to his footage – A super-fast driving car on a highway – And comes up with stunning results. He uses various customizable Adobe Effects settings such as hue, contrast, saturation.
Furthermore, Nate explains how to interpret and use histograms and graphs in adjusting various customizable settings. He also emphasizes the glow, a unique functionality feature that alters the lighting of clips to make his background appear super cool. Most editors do not commonly use glow, but it creates outstanding videos when used.
Nate does not only target beginner video editors but also intermediate ones. There is something new that intermediate editors will also learn.
6. Color Correction in After Effects - Tutorial by Kenneth Moore
This is the last YouTube video that we are going to learn about color correcting from. It is a video produced by Kenneth Moore, A prime owner of Kenneth Moore’s YouTube Channel. Even though his channel, Kenneth Moore channel, is still on the grow, he straightforwardly brought out every step to carry out when doing color correction in After Effects.
In this video, Moore uses a shot of a drown to elaborate color correction. The initial footage appears to be dull with indistinct features. With the color corrections tools, Moore is able to liven the footage giving it that outstanding look.
Moore unfolds on how to use various functionality tools in After Effects. In his video, he incorporates contrast, curves, RGB Parade, color balancing, color wheels, Vectorscope, and HSL Secondary functionalities. He used another footage, a car, to elaborate on HSL secondary.
In the video, Moore targets beginner and intermediate video editors to throw light on other color correction functionalities that video editors need to learn.
Conclusion
● Supplement your reading about color correction in After Effects with these videos. The above six videos evidently explain how to carry out a color correction in Adobe After Effects with ease. The videos are created with established producers and video editors; therefore they give professional insights and teachings.
● Color correction in After Effects should no longer stress you out. All you have to do is watch any of the above videos, or you can watch all of them and have a better grip of color correction. You will be able to create exceptional footage.
When it comes to understanding and mastery of information, videos are always the best. Research carried out by Wyzwol, a marketing research institute, states that 68% of people like to learn about services through videos.
Color correction in After Effects involves a wide range of tools, including Lumetri color, Hue saturation, and RGB curves. It involves extensive reading and interpretation of graphs and histograms – A thing not for the faint-hearted. To better your understanding of color correction in After Effects, you not only need to rely on blogs but also videos. Therefore from this article, you will learn about color correction in After Effects with videos.
Let’s dive in!

In this article
01 What is Color Correction in After Effects
02 Learn Color Correction in After Effects with These Videos
What is Color Correction in After Effects
Color correction is a functionality feature in Adobe After effects that fixes all the color complications in an image or a video. This functionality feature alters a clip of footage to match a constant appearance.
Most colorists and editors use After Effects to adjust color, saturation, and contrast in clips that look unreal and make them appear natural and unprocessed.
When you want to color correct your footage, you first need to establish your video clip and then determine the colors needs for your clip. With this, color grading will become an absolute breeze for you.
Learn Color Correction in After Effects with These Videos
1. Pro Tip - Cinematic Color Grade in After Effects - After Effects Tutorial by Dope Motions
One of the top-notch videos we will use to learn color correcting is one produced by Dope Motions. Dope Motions is a YouTube channel that is managed by Nick Pawar. Nick creates high-quality graphics and VFX tutorials where he shares insightful ideas on how to carry out various cinematic edits to videos – This includes color correction.
In this video, Nick gives his voice on color grid videos giving it that cinematic look with much ease. His method is relatively simpler since one need not use plugins to do color correction. Though it is much easier to carry out color correction with plugins, Nick emphasizes more on color correction without plugins since you will be able to extensively customize your video based on your preference.
In this video, Nick spotlights various topics, including how to use lumetri color, color correction, cinematic color grading, how to make presets, color effects, among many more. All in After Effects.
Besides, with these techniques, you cannot not only use color correction in After Effects but also in premiere pro. Beginners, as well as intermediate video editors, will significantly benefit from this exemplary video. Learn from Nick and create splendid videos that will leave your clients and viewers all rooted to the ground.
2. Create a Cinematic Look with After Effects Tricks! by Kriscoart
Another enlightening video that talks about color correction in After Effect are this one from Kriscoart. Kriscoart is a fast-growing YouTube channel developed by managed by Kris Truini. Some of the core values of this channel are to learn, create and share content. From his channel, Truini does not centralize his focus to only video editing; he goes to the extremes of edifying on VFX tutorials, lighting workshops, and short film breakdowns.
In this video, Truini shares some simple tricks with his subscribers as well as new visitors on how to carry out a color correction in After Effects. He elaborates on manipulating lights and adding dramatic atmospheres and cinematic looks to your video shots by using some simple masks, solids, and adjustment layers.
Truini uses the project he is working on to flesh out various color correction tools and how to put them into use authentically. He targets not only beginner video editors but also intermediate ones who are looking forward to increasing their skill set.
Through his YouTube channels, Truini aims at educating the masses so that they can be well conversant with most of the video editing tools. He wants the voice of every filmmaker and prospective to be heard by their prospective audiences.
3. Advanced Color Grading in After Effects - NO PLUGINS by the VFX Show
Color correcting and Color grading without plugins is something that is a back-breaking activity to beginner video editors. Here, Collin Black of @ The VFX Show tends to break that misconception. Collin Black, the manager of The VFX Show, teaches his subscribers and new visitors to his channel how to carry out color correction without necessarily using plugins.
Collin Black states that even though plugins are very easy to use in color correction, you cannot carry out a wide range of customizable activities. It makes color correction without plugins be something to use to create neck-breaking video clips.
In this video, Collin uses a photo that he took while driving. The image appears to be faulty with lousy lighting. He uses a wide range of tools while elaborating every single step. When compared to the start, the final result of his work can be said to be “something out of this world.”
The target audience is beginner video editors with the zeal and zest of learning and wanting to get to know more about color correction without plugins.
4. Easy Colour Correction - After Effects Tutorial by DM Design
Are there scenarios where you come across a simple-looking video clip that is perfectly edited with ideal visual colors and has a sensational cinematic appearance? Debra Mayer, the founder, and owner of DM Designs, a renowned YouTube channel, simplify the processes required to get stunning videos.
Debra Mayer, in her YouTube channel, does all in her powers to teach all the Adobe techniques. She simplifies it and makes every single step to be somewhat relatable. In her channel, she does say much but expounds on tons of tools and activities.
Debra uses footage of a deserted land occupied by trees and grassland in this video. Everything in the picture looks dull and dusty. Debra expounds on how to create some cinematic appearance on clips with straightforward steps. Her after video appears to be something unreal due to extensive editing.
Her target audience for this video is beginner video editors. She can explain color correction in the easiest way possible from her immerse skillset. With that, beginner editors will significantly benefit from it.
5. Make Cinematic Looks with After Effects Color Correction Tricks! by Black Mixture
Paying for the After Effects subscription and again paying for color correction is something most people cannot wish to do. Even though you are not good at color correction, you need to stress yourself since Nate and Chriselle of Black Mixture will make things easy for you. Black Mixture is a YouTube account managed by Nate and Chriselle, a couple. In their channel, they expound on topics surrounding filmmaking, graphic design, motion design, and photography.
In this video, Nate elaborates on various steps on how to carry out a color correction in Adobe After Effects without plugins. He even goes to the extent of showing how to add music video effects as well as cinematic effects.
Nate uniquely uses only three color correction effects to carry out all the color correction needed to his footage – A super-fast driving car on a highway – And comes up with stunning results. He uses various customizable Adobe Effects settings such as hue, contrast, saturation.
Furthermore, Nate explains how to interpret and use histograms and graphs in adjusting various customizable settings. He also emphasizes the glow, a unique functionality feature that alters the lighting of clips to make his background appear super cool. Most editors do not commonly use glow, but it creates outstanding videos when used.
Nate does not only target beginner video editors but also intermediate ones. There is something new that intermediate editors will also learn.
6. Color Correction in After Effects - Tutorial by Kenneth Moore
This is the last YouTube video that we are going to learn about color correcting from. It is a video produced by Kenneth Moore, A prime owner of Kenneth Moore’s YouTube Channel. Even though his channel, Kenneth Moore channel, is still on the grow, he straightforwardly brought out every step to carry out when doing color correction in After Effects.
In this video, Moore uses a shot of a drown to elaborate color correction. The initial footage appears to be dull with indistinct features. With the color corrections tools, Moore is able to liven the footage giving it that outstanding look.
Moore unfolds on how to use various functionality tools in After Effects. In his video, he incorporates contrast, curves, RGB Parade, color balancing, color wheels, Vectorscope, and HSL Secondary functionalities. He used another footage, a car, to elaborate on HSL secondary.
In the video, Moore targets beginner and intermediate video editors to throw light on other color correction functionalities that video editors need to learn.
Conclusion
● Supplement your reading about color correction in After Effects with these videos. The above six videos evidently explain how to carry out a color correction in Adobe After Effects with ease. The videos are created with established producers and video editors; therefore they give professional insights and teachings.
● Color correction in After Effects should no longer stress you out. All you have to do is watch any of the above videos, or you can watch all of them and have a better grip of color correction. You will be able to create exceptional footage.
When it comes to understanding and mastery of information, videos are always the best. Research carried out by Wyzwol, a marketing research institute, states that 68% of people like to learn about services through videos.
Color correction in After Effects involves a wide range of tools, including Lumetri color, Hue saturation, and RGB curves. It involves extensive reading and interpretation of graphs and histograms – A thing not for the faint-hearted. To better your understanding of color correction in After Effects, you not only need to rely on blogs but also videos. Therefore from this article, you will learn about color correction in After Effects with videos.
Let’s dive in!

In this article
01 What is Color Correction in After Effects
02 Learn Color Correction in After Effects with These Videos
What is Color Correction in After Effects
Color correction is a functionality feature in Adobe After effects that fixes all the color complications in an image or a video. This functionality feature alters a clip of footage to match a constant appearance.
Most colorists and editors use After Effects to adjust color, saturation, and contrast in clips that look unreal and make them appear natural and unprocessed.
When you want to color correct your footage, you first need to establish your video clip and then determine the colors needs for your clip. With this, color grading will become an absolute breeze for you.
Learn Color Correction in After Effects with These Videos
1. Pro Tip - Cinematic Color Grade in After Effects - After Effects Tutorial by Dope Motions
One of the top-notch videos we will use to learn color correcting is one produced by Dope Motions. Dope Motions is a YouTube channel that is managed by Nick Pawar. Nick creates high-quality graphics and VFX tutorials where he shares insightful ideas on how to carry out various cinematic edits to videos – This includes color correction.
In this video, Nick gives his voice on color grid videos giving it that cinematic look with much ease. His method is relatively simpler since one need not use plugins to do color correction. Though it is much easier to carry out color correction with plugins, Nick emphasizes more on color correction without plugins since you will be able to extensively customize your video based on your preference.
In this video, Nick spotlights various topics, including how to use lumetri color, color correction, cinematic color grading, how to make presets, color effects, among many more. All in After Effects.
Besides, with these techniques, you cannot not only use color correction in After Effects but also in premiere pro. Beginners, as well as intermediate video editors, will significantly benefit from this exemplary video. Learn from Nick and create splendid videos that will leave your clients and viewers all rooted to the ground.
2. Create a Cinematic Look with After Effects Tricks! by Kriscoart
Another enlightening video that talks about color correction in After Effect are this one from Kriscoart. Kriscoart is a fast-growing YouTube channel developed by managed by Kris Truini. Some of the core values of this channel are to learn, create and share content. From his channel, Truini does not centralize his focus to only video editing; he goes to the extremes of edifying on VFX tutorials, lighting workshops, and short film breakdowns.
In this video, Truini shares some simple tricks with his subscribers as well as new visitors on how to carry out a color correction in After Effects. He elaborates on manipulating lights and adding dramatic atmospheres and cinematic looks to your video shots by using some simple masks, solids, and adjustment layers.
Truini uses the project he is working on to flesh out various color correction tools and how to put them into use authentically. He targets not only beginner video editors but also intermediate ones who are looking forward to increasing their skill set.
Through his YouTube channels, Truini aims at educating the masses so that they can be well conversant with most of the video editing tools. He wants the voice of every filmmaker and prospective to be heard by their prospective audiences.
3. Advanced Color Grading in After Effects - NO PLUGINS by the VFX Show
Color correcting and Color grading without plugins is something that is a back-breaking activity to beginner video editors. Here, Collin Black of @ The VFX Show tends to break that misconception. Collin Black, the manager of The VFX Show, teaches his subscribers and new visitors to his channel how to carry out color correction without necessarily using plugins.
Collin Black states that even though plugins are very easy to use in color correction, you cannot carry out a wide range of customizable activities. It makes color correction without plugins be something to use to create neck-breaking video clips.
In this video, Collin uses a photo that he took while driving. The image appears to be faulty with lousy lighting. He uses a wide range of tools while elaborating every single step. When compared to the start, the final result of his work can be said to be “something out of this world.”
The target audience is beginner video editors with the zeal and zest of learning and wanting to get to know more about color correction without plugins.
4. Easy Colour Correction - After Effects Tutorial by DM Design
Are there scenarios where you come across a simple-looking video clip that is perfectly edited with ideal visual colors and has a sensational cinematic appearance? Debra Mayer, the founder, and owner of DM Designs, a renowned YouTube channel, simplify the processes required to get stunning videos.
Debra Mayer, in her YouTube channel, does all in her powers to teach all the Adobe techniques. She simplifies it and makes every single step to be somewhat relatable. In her channel, she does say much but expounds on tons of tools and activities.
Debra uses footage of a deserted land occupied by trees and grassland in this video. Everything in the picture looks dull and dusty. Debra expounds on how to create some cinematic appearance on clips with straightforward steps. Her after video appears to be something unreal due to extensive editing.
Her target audience for this video is beginner video editors. She can explain color correction in the easiest way possible from her immerse skillset. With that, beginner editors will significantly benefit from it.
5. Make Cinematic Looks with After Effects Color Correction Tricks! by Black Mixture
Paying for the After Effects subscription and again paying for color correction is something most people cannot wish to do. Even though you are not good at color correction, you need to stress yourself since Nate and Chriselle of Black Mixture will make things easy for you. Black Mixture is a YouTube account managed by Nate and Chriselle, a couple. In their channel, they expound on topics surrounding filmmaking, graphic design, motion design, and photography.
In this video, Nate elaborates on various steps on how to carry out a color correction in Adobe After Effects without plugins. He even goes to the extent of showing how to add music video effects as well as cinematic effects.
Nate uniquely uses only three color correction effects to carry out all the color correction needed to his footage – A super-fast driving car on a highway – And comes up with stunning results. He uses various customizable Adobe Effects settings such as hue, contrast, saturation.
Furthermore, Nate explains how to interpret and use histograms and graphs in adjusting various customizable settings. He also emphasizes the glow, a unique functionality feature that alters the lighting of clips to make his background appear super cool. Most editors do not commonly use glow, but it creates outstanding videos when used.
Nate does not only target beginner video editors but also intermediate ones. There is something new that intermediate editors will also learn.
6. Color Correction in After Effects - Tutorial by Kenneth Moore
This is the last YouTube video that we are going to learn about color correcting from. It is a video produced by Kenneth Moore, A prime owner of Kenneth Moore’s YouTube Channel. Even though his channel, Kenneth Moore channel, is still on the grow, he straightforwardly brought out every step to carry out when doing color correction in After Effects.
In this video, Moore uses a shot of a drown to elaborate color correction. The initial footage appears to be dull with indistinct features. With the color corrections tools, Moore is able to liven the footage giving it that outstanding look.
Moore unfolds on how to use various functionality tools in After Effects. In his video, he incorporates contrast, curves, RGB Parade, color balancing, color wheels, Vectorscope, and HSL Secondary functionalities. He used another footage, a car, to elaborate on HSL secondary.
In the video, Moore targets beginner and intermediate video editors to throw light on other color correction functionalities that video editors need to learn.
Conclusion
● Supplement your reading about color correction in After Effects with these videos. The above six videos evidently explain how to carry out a color correction in Adobe After Effects with ease. The videos are created with established producers and video editors; therefore they give professional insights and teachings.
● Color correction in After Effects should no longer stress you out. All you have to do is watch any of the above videos, or you can watch all of them and have a better grip of color correction. You will be able to create exceptional footage.
When it comes to understanding and mastery of information, videos are always the best. Research carried out by Wyzwol, a marketing research institute, states that 68% of people like to learn about services through videos.
Color correction in After Effects involves a wide range of tools, including Lumetri color, Hue saturation, and RGB curves. It involves extensive reading and interpretation of graphs and histograms – A thing not for the faint-hearted. To better your understanding of color correction in After Effects, you not only need to rely on blogs but also videos. Therefore from this article, you will learn about color correction in After Effects with videos.
Let’s dive in!

In this article
01 What is Color Correction in After Effects
02 Learn Color Correction in After Effects with These Videos
What is Color Correction in After Effects
Color correction is a functionality feature in Adobe After effects that fixes all the color complications in an image or a video. This functionality feature alters a clip of footage to match a constant appearance.
Most colorists and editors use After Effects to adjust color, saturation, and contrast in clips that look unreal and make them appear natural and unprocessed.
When you want to color correct your footage, you first need to establish your video clip and then determine the colors needs for your clip. With this, color grading will become an absolute breeze for you.
Learn Color Correction in After Effects with These Videos
1. Pro Tip - Cinematic Color Grade in After Effects - After Effects Tutorial by Dope Motions
One of the top-notch videos we will use to learn color correcting is one produced by Dope Motions. Dope Motions is a YouTube channel that is managed by Nick Pawar. Nick creates high-quality graphics and VFX tutorials where he shares insightful ideas on how to carry out various cinematic edits to videos – This includes color correction.
In this video, Nick gives his voice on color grid videos giving it that cinematic look with much ease. His method is relatively simpler since one need not use plugins to do color correction. Though it is much easier to carry out color correction with plugins, Nick emphasizes more on color correction without plugins since you will be able to extensively customize your video based on your preference.
In this video, Nick spotlights various topics, including how to use lumetri color, color correction, cinematic color grading, how to make presets, color effects, among many more. All in After Effects.
Besides, with these techniques, you cannot not only use color correction in After Effects but also in premiere pro. Beginners, as well as intermediate video editors, will significantly benefit from this exemplary video. Learn from Nick and create splendid videos that will leave your clients and viewers all rooted to the ground.
2. Create a Cinematic Look with After Effects Tricks! by Kriscoart
Another enlightening video that talks about color correction in After Effect are this one from Kriscoart. Kriscoart is a fast-growing YouTube channel developed by managed by Kris Truini. Some of the core values of this channel are to learn, create and share content. From his channel, Truini does not centralize his focus to only video editing; he goes to the extremes of edifying on VFX tutorials, lighting workshops, and short film breakdowns.
In this video, Truini shares some simple tricks with his subscribers as well as new visitors on how to carry out a color correction in After Effects. He elaborates on manipulating lights and adding dramatic atmospheres and cinematic looks to your video shots by using some simple masks, solids, and adjustment layers.
Truini uses the project he is working on to flesh out various color correction tools and how to put them into use authentically. He targets not only beginner video editors but also intermediate ones who are looking forward to increasing their skill set.
Through his YouTube channels, Truini aims at educating the masses so that they can be well conversant with most of the video editing tools. He wants the voice of every filmmaker and prospective to be heard by their prospective audiences.
3. Advanced Color Grading in After Effects - NO PLUGINS by the VFX Show
Color correcting and Color grading without plugins is something that is a back-breaking activity to beginner video editors. Here, Collin Black of @ The VFX Show tends to break that misconception. Collin Black, the manager of The VFX Show, teaches his subscribers and new visitors to his channel how to carry out color correction without necessarily using plugins.
Collin Black states that even though plugins are very easy to use in color correction, you cannot carry out a wide range of customizable activities. It makes color correction without plugins be something to use to create neck-breaking video clips.
In this video, Collin uses a photo that he took while driving. The image appears to be faulty with lousy lighting. He uses a wide range of tools while elaborating every single step. When compared to the start, the final result of his work can be said to be “something out of this world.”
The target audience is beginner video editors with the zeal and zest of learning and wanting to get to know more about color correction without plugins.
4. Easy Colour Correction - After Effects Tutorial by DM Design
Are there scenarios where you come across a simple-looking video clip that is perfectly edited with ideal visual colors and has a sensational cinematic appearance? Debra Mayer, the founder, and owner of DM Designs, a renowned YouTube channel, simplify the processes required to get stunning videos.
Debra Mayer, in her YouTube channel, does all in her powers to teach all the Adobe techniques. She simplifies it and makes every single step to be somewhat relatable. In her channel, she does say much but expounds on tons of tools and activities.
Debra uses footage of a deserted land occupied by trees and grassland in this video. Everything in the picture looks dull and dusty. Debra expounds on how to create some cinematic appearance on clips with straightforward steps. Her after video appears to be something unreal due to extensive editing.
Her target audience for this video is beginner video editors. She can explain color correction in the easiest way possible from her immerse skillset. With that, beginner editors will significantly benefit from it.
5. Make Cinematic Looks with After Effects Color Correction Tricks! by Black Mixture
Paying for the After Effects subscription and again paying for color correction is something most people cannot wish to do. Even though you are not good at color correction, you need to stress yourself since Nate and Chriselle of Black Mixture will make things easy for you. Black Mixture is a YouTube account managed by Nate and Chriselle, a couple. In their channel, they expound on topics surrounding filmmaking, graphic design, motion design, and photography.
In this video, Nate elaborates on various steps on how to carry out a color correction in Adobe After Effects without plugins. He even goes to the extent of showing how to add music video effects as well as cinematic effects.
Nate uniquely uses only three color correction effects to carry out all the color correction needed to his footage – A super-fast driving car on a highway – And comes up with stunning results. He uses various customizable Adobe Effects settings such as hue, contrast, saturation.
Furthermore, Nate explains how to interpret and use histograms and graphs in adjusting various customizable settings. He also emphasizes the glow, a unique functionality feature that alters the lighting of clips to make his background appear super cool. Most editors do not commonly use glow, but it creates outstanding videos when used.
Nate does not only target beginner video editors but also intermediate ones. There is something new that intermediate editors will also learn.
6. Color Correction in After Effects - Tutorial by Kenneth Moore
This is the last YouTube video that we are going to learn about color correcting from. It is a video produced by Kenneth Moore, A prime owner of Kenneth Moore’s YouTube Channel. Even though his channel, Kenneth Moore channel, is still on the grow, he straightforwardly brought out every step to carry out when doing color correction in After Effects.
In this video, Moore uses a shot of a drown to elaborate color correction. The initial footage appears to be dull with indistinct features. With the color corrections tools, Moore is able to liven the footage giving it that outstanding look.
Moore unfolds on how to use various functionality tools in After Effects. In his video, he incorporates contrast, curves, RGB Parade, color balancing, color wheels, Vectorscope, and HSL Secondary functionalities. He used another footage, a car, to elaborate on HSL secondary.
In the video, Moore targets beginner and intermediate video editors to throw light on other color correction functionalities that video editors need to learn.
Conclusion
● Supplement your reading about color correction in After Effects with these videos. The above six videos evidently explain how to carry out a color correction in Adobe After Effects with ease. The videos are created with established producers and video editors; therefore they give professional insights and teachings.
● Color correction in After Effects should no longer stress you out. All you have to do is watch any of the above videos, or you can watch all of them and have a better grip of color correction. You will be able to create exceptional footage.
Repeated Text Animation Tutorial in Filmora
Preparation
What you need to prepare:
- A computer (Windows or macOS)
- Your video materials.
- Filmora video editor
Step 1
Download Filmora . Let it install and wait for it to run. Then, click on “New Project”. Now, you’re ready to edit!
Step 2
First, go to Titles and drag the Default Title to the Timeline.

Step 3
Now, double-click on the Default Title clip. Here, change its font to any bold font. Increase the text size to 120. Type in your text in the box. Scroll a bit down and change the Text Spacing to 8. Click OK.

Step 4
Take a Snapshot of this Default Title.

Step 5
Double-click on the Default Title clip once again. This time, click on its Advanced settings. Here, turn OFF Text Fill → turn ON Outline → change the Outline color to White → reduce Thickness to 1. Click OK. Now, take another Snapshot.

Step 6
Delete the Default Title clip from the Timeline. Now, drag the Outline snapshot that we just created to the Timeline. Open the Crop tool → change the Ratio to Custom → replace “1080” with “540”. Lastly, move the highlighted crop section to the top. Click OK.

Step 7
Double-click on the Snapshot to open its settings panel. Go to the Animation tab. Here, change the value of the Y-axis to “275”**.** Click OK. Now, take a Snapshot.

Step 8
Next, click on the Crop tool again and simply move the highlighted crop section to the bottom part of the screen. Click OK. Then, double-click on the snapshot clip in the Timeline and change the value of the Y-axis from “275” to “-275”**.** Click OK. Take a Snapshot again.
Step 9
Import a background image to My Media. Drag the background image to the Timeline. Double-click on it and drag the Scale bar until the background image covers the whole screen. Click OK. You should cut the background clip to make it 3 seconds long as well.

Step 10
Lock this track in the Timeline by pressing the highlighted button on the left. Then, go to “Track Manager” and add 6 new Tracks to the Timeline. Click OK.

Step 11
Drag the first Snapshot we made before to Track 6. Cut it so it’s 3 seconds long. Then, Lock the Track.

Step 12
Set the Playhead at the 15th frame on the Timeline. Then, drag the Upward Outline snapshot to this point. Double-click on it and change the Y-axis value to “**-4%**”. Then, reduce the Opacity to 0%. Now, move the Playhead 5 frames further. Next, increase the Opacity to 100% and increase the Y-axis value to around “105”. Don’t click OK yet.
Step 13
Move the Playhead to 1 minute and 5 seconds on the Timeline. Add a keyframe by clicking on the “+Add” button. Then, move the Playhead 5 frames forward. Here, change the Zoom Level to 25%.

Step 14
Double-click on the clip in Track 5. Drag the text like in the image below. Then, delete the part of the clip on the right side after 1 minute and 15 seconds.

Step 15
Hide the clips on Track 6 and Track 1 by clicking the “eye” icons next to them. Then, take a Snapshot. Now, drag this Snapshot right next to the clip on Track 5.

Step 16
Move the Playhead 3 frames forward from the starting point of the clip you just added. Unhide Track 6. Double-click on the clip on the right side of Track 5 and click on “+Add”. Move the Playhead 5 seconds forward and adjust the Upward Outline to fit the text.

Step 17
Move the Playhead 5 frames forward again. Drag the Y-axis value to the left until the outline clip overlaps the main text. Then, reduce the Opacity to 0%. Move the Playhead to 2 minutes and 10 seconds. Cut the Track and delete the clip on the right side. Lastly, Lock Track 5.

Step 18
Drag the Downward Outline snapshot to Track 4. Then, repeat the same process as in Step 16 and Step 17.
Step 19
Drag the Upward Outline snapshot to Track 3 at the 17th frame. Double-click on it and change the Opacity to 0%.

Step 20
Now, move 5 frames forward and increase the Opacity back to 100%. Then, drag the Y-axis value to the right until the screen looks like this.

Step 21
Move the Playhead to 1 minute and 5 seconds. Click on “+Add” to add a keyframe. Then, move the Playhead 5 frames forward. Double-click on the clip and stretch it from side to side to match something like this.

Step 22
Move the Playhead to 1 minute and 16 seconds. Split the clip and delete the part on the right side. Hide Track 4, 5, and 6. Then, take a Snapshot. Drag this Snapshot next to the clip on Track 3. Place the Playhead on 1 minute and 18 seconds. Then, unhide Track 4, 5, and 6.
Step 23
Double-click on the clip on the right side of Track 3. Add a keyframe by pressing “+Add”. Move the Playhead to 1 minute and 23 seconds. Now, resize the clip back to its original size by moving the rectangle left and right. Right now, it should look like this.

Step 24
Move the Playhead 5 frames forward. Drag the Y-axis value to the left until the screen looks like this.

Step 25
Move the Playhead 5 frames forward again. Drag the value of the Y-axis to the left until the screen looks like this. Then, change the Opacity to 0%. Finally, split the clip at 2 minutes and 10 seconds. Delete the part on the right side. Lock Track 3.

Step 26
Next, drag the Downward Snapshot on Track 2 and follow the same process as in Steps 19 through 25.
Step 27
Unhide the Background clip at the bottom of the Timeline. Then, Unlock Track 6. Split the clip on Track 6 at the 15th frame.

Step 28
Move the Playhead at the beginning of the Timeline. Click on the first part of the clip on Track 6. Add a keyframe. Drag the X-axis value to the right until the word disappears out of the screen. Like this. 👇Then, move the Playhead to the 6th frame and Reset the X-axis value to 0.0.

Step 29
Take the Playhead to 2 minutes and 10 seconds. Split it. Now, move the Playhead to 2 minutes and 19 seconds and add a keyframe. Lastly, take the Playhead to the very end of the clip and drag the text to the right side until it’s out of the screen once again.

Step 30
Go to the Effects tab. Select Glitch from the panel on the left. Then, apply “Glitch Dispersion” and “Glitch Stripe 2” to the clips at the start and at the end.

Step 31
Finally, Render the video to watch the final preview. And, you’re done! Congratulations on creating a repeated text animation in Filmora.

Summary
What you’ve learned:
- How to create text animations in Filmora
- Applying animation effects
- Make advanced edits on Titles in Filmora
- Hide and lock Tracks and Clips in Filmora
What you need to prepare:
- A computer (Windows or macOS)
- Your video materials.
- Filmora video editor
Step 1
Download Filmora . Let it install and wait for it to run. Then, click on “New Project”. Now, you’re ready to edit!
Step 2
First, go to Titles and drag the Default Title to the Timeline.

Step 3
Now, double-click on the Default Title clip. Here, change its font to any bold font. Increase the text size to 120. Type in your text in the box. Scroll a bit down and change the Text Spacing to 8. Click OK.

Step 4
Take a Snapshot of this Default Title.

Step 5
Double-click on the Default Title clip once again. This time, click on its Advanced settings. Here, turn OFF Text Fill → turn ON Outline → change the Outline color to White → reduce Thickness to 1. Click OK. Now, take another Snapshot.

Step 6
Delete the Default Title clip from the Timeline. Now, drag the Outline snapshot that we just created to the Timeline. Open the Crop tool → change the Ratio to Custom → replace “1080” with “540”. Lastly, move the highlighted crop section to the top. Click OK.

Step 7
Double-click on the Snapshot to open its settings panel. Go to the Animation tab. Here, change the value of the Y-axis to “275”**.** Click OK. Now, take a Snapshot.

Step 8
Next, click on the Crop tool again and simply move the highlighted crop section to the bottom part of the screen. Click OK. Then, double-click on the snapshot clip in the Timeline and change the value of the Y-axis from “275” to “-275”**.** Click OK. Take a Snapshot again.
Step 9
Import a background image to My Media. Drag the background image to the Timeline. Double-click on it and drag the Scale bar until the background image covers the whole screen. Click OK. You should cut the background clip to make it 3 seconds long as well.

Step 10
Lock this track in the Timeline by pressing the highlighted button on the left. Then, go to “Track Manager” and add 6 new Tracks to the Timeline. Click OK.

Step 11
Drag the first Snapshot we made before to Track 6. Cut it so it’s 3 seconds long. Then, Lock the Track.

Step 12
Set the Playhead at the 15th frame on the Timeline. Then, drag the Upward Outline snapshot to this point. Double-click on it and change the Y-axis value to “**-4%**”. Then, reduce the Opacity to 0%. Now, move the Playhead 5 frames further. Next, increase the Opacity to 100% and increase the Y-axis value to around “105”. Don’t click OK yet.
Step 13
Move the Playhead to 1 minute and 5 seconds on the Timeline. Add a keyframe by clicking on the “+Add” button. Then, move the Playhead 5 frames forward. Here, change the Zoom Level to 25%.

Step 14
Double-click on the clip in Track 5. Drag the text like in the image below. Then, delete the part of the clip on the right side after 1 minute and 15 seconds.

Step 15
Hide the clips on Track 6 and Track 1 by clicking the “eye” icons next to them. Then, take a Snapshot. Now, drag this Snapshot right next to the clip on Track 5.

Step 16
Move the Playhead 3 frames forward from the starting point of the clip you just added. Unhide Track 6. Double-click on the clip on the right side of Track 5 and click on “+Add”. Move the Playhead 5 seconds forward and adjust the Upward Outline to fit the text.

Step 17
Move the Playhead 5 frames forward again. Drag the Y-axis value to the left until the outline clip overlaps the main text. Then, reduce the Opacity to 0%. Move the Playhead to 2 minutes and 10 seconds. Cut the Track and delete the clip on the right side. Lastly, Lock Track 5.

Step 18
Drag the Downward Outline snapshot to Track 4. Then, repeat the same process as in Step 16 and Step 17.
Step 19
Drag the Upward Outline snapshot to Track 3 at the 17th frame. Double-click on it and change the Opacity to 0%.

Step 20
Now, move 5 frames forward and increase the Opacity back to 100%. Then, drag the Y-axis value to the right until the screen looks like this.

Step 21
Move the Playhead to 1 minute and 5 seconds. Click on “+Add” to add a keyframe. Then, move the Playhead 5 frames forward. Double-click on the clip and stretch it from side to side to match something like this.

Step 22
Move the Playhead to 1 minute and 16 seconds. Split the clip and delete the part on the right side. Hide Track 4, 5, and 6. Then, take a Snapshot. Drag this Snapshot next to the clip on Track 3. Place the Playhead on 1 minute and 18 seconds. Then, unhide Track 4, 5, and 6.
Step 23
Double-click on the clip on the right side of Track 3. Add a keyframe by pressing “+Add”. Move the Playhead to 1 minute and 23 seconds. Now, resize the clip back to its original size by moving the rectangle left and right. Right now, it should look like this.

Step 24
Move the Playhead 5 frames forward. Drag the Y-axis value to the left until the screen looks like this.

Step 25
Move the Playhead 5 frames forward again. Drag the value of the Y-axis to the left until the screen looks like this. Then, change the Opacity to 0%. Finally, split the clip at 2 minutes and 10 seconds. Delete the part on the right side. Lock Track 3.

Step 26
Next, drag the Downward Snapshot on Track 2 and follow the same process as in Steps 19 through 25.
Step 27
Unhide the Background clip at the bottom of the Timeline. Then, Unlock Track 6. Split the clip on Track 6 at the 15th frame.

Step 28
Move the Playhead at the beginning of the Timeline. Click on the first part of the clip on Track 6. Add a keyframe. Drag the X-axis value to the right until the word disappears out of the screen. Like this. 👇Then, move the Playhead to the 6th frame and Reset the X-axis value to 0.0.

Step 29
Take the Playhead to 2 minutes and 10 seconds. Split it. Now, move the Playhead to 2 minutes and 19 seconds and add a keyframe. Lastly, take the Playhead to the very end of the clip and drag the text to the right side until it’s out of the screen once again.

Step 30
Go to the Effects tab. Select Glitch from the panel on the left. Then, apply “Glitch Dispersion” and “Glitch Stripe 2” to the clips at the start and at the end.

Step 31
Finally, Render the video to watch the final preview. And, you’re done! Congratulations on creating a repeated text animation in Filmora.

Summary
What you’ve learned:
- How to create text animations in Filmora
- Applying animation effects
- Make advanced edits on Titles in Filmora
- Hide and lock Tracks and Clips in Filmora
What you need to prepare:
- A computer (Windows or macOS)
- Your video materials.
- Filmora video editor
Step 1
Download Filmora . Let it install and wait for it to run. Then, click on “New Project”. Now, you’re ready to edit!
Step 2
First, go to Titles and drag the Default Title to the Timeline.

Step 3
Now, double-click on the Default Title clip. Here, change its font to any bold font. Increase the text size to 120. Type in your text in the box. Scroll a bit down and change the Text Spacing to 8. Click OK.

Step 4
Take a Snapshot of this Default Title.

Step 5
Double-click on the Default Title clip once again. This time, click on its Advanced settings. Here, turn OFF Text Fill → turn ON Outline → change the Outline color to White → reduce Thickness to 1. Click OK. Now, take another Snapshot.

Step 6
Delete the Default Title clip from the Timeline. Now, drag the Outline snapshot that we just created to the Timeline. Open the Crop tool → change the Ratio to Custom → replace “1080” with “540”. Lastly, move the highlighted crop section to the top. Click OK.

Step 7
Double-click on the Snapshot to open its settings panel. Go to the Animation tab. Here, change the value of the Y-axis to “275”**.** Click OK. Now, take a Snapshot.

Step 8
Next, click on the Crop tool again and simply move the highlighted crop section to the bottom part of the screen. Click OK. Then, double-click on the snapshot clip in the Timeline and change the value of the Y-axis from “275” to “-275”**.** Click OK. Take a Snapshot again.
Step 9
Import a background image to My Media. Drag the background image to the Timeline. Double-click on it and drag the Scale bar until the background image covers the whole screen. Click OK. You should cut the background clip to make it 3 seconds long as well.

Step 10
Lock this track in the Timeline by pressing the highlighted button on the left. Then, go to “Track Manager” and add 6 new Tracks to the Timeline. Click OK.

Step 11
Drag the first Snapshot we made before to Track 6. Cut it so it’s 3 seconds long. Then, Lock the Track.

Step 12
Set the Playhead at the 15th frame on the Timeline. Then, drag the Upward Outline snapshot to this point. Double-click on it and change the Y-axis value to “**-4%**”. Then, reduce the Opacity to 0%. Now, move the Playhead 5 frames further. Next, increase the Opacity to 100% and increase the Y-axis value to around “105”. Don’t click OK yet.
Step 13
Move the Playhead to 1 minute and 5 seconds on the Timeline. Add a keyframe by clicking on the “+Add” button. Then, move the Playhead 5 frames forward. Here, change the Zoom Level to 25%.

Step 14
Double-click on the clip in Track 5. Drag the text like in the image below. Then, delete the part of the clip on the right side after 1 minute and 15 seconds.

Step 15
Hide the clips on Track 6 and Track 1 by clicking the “eye” icons next to them. Then, take a Snapshot. Now, drag this Snapshot right next to the clip on Track 5.

Step 16
Move the Playhead 3 frames forward from the starting point of the clip you just added. Unhide Track 6. Double-click on the clip on the right side of Track 5 and click on “+Add”. Move the Playhead 5 seconds forward and adjust the Upward Outline to fit the text.

Step 17
Move the Playhead 5 frames forward again. Drag the Y-axis value to the left until the outline clip overlaps the main text. Then, reduce the Opacity to 0%. Move the Playhead to 2 minutes and 10 seconds. Cut the Track and delete the clip on the right side. Lastly, Lock Track 5.

Step 18
Drag the Downward Outline snapshot to Track 4. Then, repeat the same process as in Step 16 and Step 17.
Step 19
Drag the Upward Outline snapshot to Track 3 at the 17th frame. Double-click on it and change the Opacity to 0%.

Step 20
Now, move 5 frames forward and increase the Opacity back to 100%. Then, drag the Y-axis value to the right until the screen looks like this.

Step 21
Move the Playhead to 1 minute and 5 seconds. Click on “+Add” to add a keyframe. Then, move the Playhead 5 frames forward. Double-click on the clip and stretch it from side to side to match something like this.

Step 22
Move the Playhead to 1 minute and 16 seconds. Split the clip and delete the part on the right side. Hide Track 4, 5, and 6. Then, take a Snapshot. Drag this Snapshot next to the clip on Track 3. Place the Playhead on 1 minute and 18 seconds. Then, unhide Track 4, 5, and 6.
Step 23
Double-click on the clip on the right side of Track 3. Add a keyframe by pressing “+Add”. Move the Playhead to 1 minute and 23 seconds. Now, resize the clip back to its original size by moving the rectangle left and right. Right now, it should look like this.

Step 24
Move the Playhead 5 frames forward. Drag the Y-axis value to the left until the screen looks like this.

Step 25
Move the Playhead 5 frames forward again. Drag the value of the Y-axis to the left until the screen looks like this. Then, change the Opacity to 0%. Finally, split the clip at 2 minutes and 10 seconds. Delete the part on the right side. Lock Track 3.

Step 26
Next, drag the Downward Snapshot on Track 2 and follow the same process as in Steps 19 through 25.
Step 27
Unhide the Background clip at the bottom of the Timeline. Then, Unlock Track 6. Split the clip on Track 6 at the 15th frame.

Step 28
Move the Playhead at the beginning of the Timeline. Click on the first part of the clip on Track 6. Add a keyframe. Drag the X-axis value to the right until the word disappears out of the screen. Like this. 👇Then, move the Playhead to the 6th frame and Reset the X-axis value to 0.0.

Step 29
Take the Playhead to 2 minutes and 10 seconds. Split it. Now, move the Playhead to 2 minutes and 19 seconds and add a keyframe. Lastly, take the Playhead to the very end of the clip and drag the text to the right side until it’s out of the screen once again.

Step 30
Go to the Effects tab. Select Glitch from the panel on the left. Then, apply “Glitch Dispersion” and “Glitch Stripe 2” to the clips at the start and at the end.

Step 31
Finally, Render the video to watch the final preview. And, you’re done! Congratulations on creating a repeated text animation in Filmora.

Summary
What you’ve learned:
- How to create text animations in Filmora
- Applying animation effects
- Make advanced edits on Titles in Filmora
- Hide and lock Tracks and Clips in Filmora
What you need to prepare:
- A computer (Windows or macOS)
- Your video materials.
- Filmora video editor
Step 1
Download Filmora . Let it install and wait for it to run. Then, click on “New Project”. Now, you’re ready to edit!
Step 2
First, go to Titles and drag the Default Title to the Timeline.

Step 3
Now, double-click on the Default Title clip. Here, change its font to any bold font. Increase the text size to 120. Type in your text in the box. Scroll a bit down and change the Text Spacing to 8. Click OK.

Step 4
Take a Snapshot of this Default Title.

Step 5
Double-click on the Default Title clip once again. This time, click on its Advanced settings. Here, turn OFF Text Fill → turn ON Outline → change the Outline color to White → reduce Thickness to 1. Click OK. Now, take another Snapshot.

Step 6
Delete the Default Title clip from the Timeline. Now, drag the Outline snapshot that we just created to the Timeline. Open the Crop tool → change the Ratio to Custom → replace “1080” with “540”. Lastly, move the highlighted crop section to the top. Click OK.

Step 7
Double-click on the Snapshot to open its settings panel. Go to the Animation tab. Here, change the value of the Y-axis to “275”**.** Click OK. Now, take a Snapshot.

Step 8
Next, click on the Crop tool again and simply move the highlighted crop section to the bottom part of the screen. Click OK. Then, double-click on the snapshot clip in the Timeline and change the value of the Y-axis from “275” to “-275”**.** Click OK. Take a Snapshot again.
Step 9
Import a background image to My Media. Drag the background image to the Timeline. Double-click on it and drag the Scale bar until the background image covers the whole screen. Click OK. You should cut the background clip to make it 3 seconds long as well.

Step 10
Lock this track in the Timeline by pressing the highlighted button on the left. Then, go to “Track Manager” and add 6 new Tracks to the Timeline. Click OK.

Step 11
Drag the first Snapshot we made before to Track 6. Cut it so it’s 3 seconds long. Then, Lock the Track.

Step 12
Set the Playhead at the 15th frame on the Timeline. Then, drag the Upward Outline snapshot to this point. Double-click on it and change the Y-axis value to “**-4%**”. Then, reduce the Opacity to 0%. Now, move the Playhead 5 frames further. Next, increase the Opacity to 100% and increase the Y-axis value to around “105”. Don’t click OK yet.
Step 13
Move the Playhead to 1 minute and 5 seconds on the Timeline. Add a keyframe by clicking on the “+Add” button. Then, move the Playhead 5 frames forward. Here, change the Zoom Level to 25%.

Step 14
Double-click on the clip in Track 5. Drag the text like in the image below. Then, delete the part of the clip on the right side after 1 minute and 15 seconds.

Step 15
Hide the clips on Track 6 and Track 1 by clicking the “eye” icons next to them. Then, take a Snapshot. Now, drag this Snapshot right next to the clip on Track 5.

Step 16
Move the Playhead 3 frames forward from the starting point of the clip you just added. Unhide Track 6. Double-click on the clip on the right side of Track 5 and click on “+Add”. Move the Playhead 5 seconds forward and adjust the Upward Outline to fit the text.

Step 17
Move the Playhead 5 frames forward again. Drag the Y-axis value to the left until the outline clip overlaps the main text. Then, reduce the Opacity to 0%. Move the Playhead to 2 minutes and 10 seconds. Cut the Track and delete the clip on the right side. Lastly, Lock Track 5.

Step 18
Drag the Downward Outline snapshot to Track 4. Then, repeat the same process as in Step 16 and Step 17.
Step 19
Drag the Upward Outline snapshot to Track 3 at the 17th frame. Double-click on it and change the Opacity to 0%.

Step 20
Now, move 5 frames forward and increase the Opacity back to 100%. Then, drag the Y-axis value to the right until the screen looks like this.

Step 21
Move the Playhead to 1 minute and 5 seconds. Click on “+Add” to add a keyframe. Then, move the Playhead 5 frames forward. Double-click on the clip and stretch it from side to side to match something like this.

Step 22
Move the Playhead to 1 minute and 16 seconds. Split the clip and delete the part on the right side. Hide Track 4, 5, and 6. Then, take a Snapshot. Drag this Snapshot next to the clip on Track 3. Place the Playhead on 1 minute and 18 seconds. Then, unhide Track 4, 5, and 6.
Step 23
Double-click on the clip on the right side of Track 3. Add a keyframe by pressing “+Add”. Move the Playhead to 1 minute and 23 seconds. Now, resize the clip back to its original size by moving the rectangle left and right. Right now, it should look like this.

Step 24
Move the Playhead 5 frames forward. Drag the Y-axis value to the left until the screen looks like this.

Step 25
Move the Playhead 5 frames forward again. Drag the value of the Y-axis to the left until the screen looks like this. Then, change the Opacity to 0%. Finally, split the clip at 2 minutes and 10 seconds. Delete the part on the right side. Lock Track 3.

Step 26
Next, drag the Downward Snapshot on Track 2 and follow the same process as in Steps 19 through 25.
Step 27
Unhide the Background clip at the bottom of the Timeline. Then, Unlock Track 6. Split the clip on Track 6 at the 15th frame.

Step 28
Move the Playhead at the beginning of the Timeline. Click on the first part of the clip on Track 6. Add a keyframe. Drag the X-axis value to the right until the word disappears out of the screen. Like this. 👇Then, move the Playhead to the 6th frame and Reset the X-axis value to 0.0.

Step 29
Take the Playhead to 2 minutes and 10 seconds. Split it. Now, move the Playhead to 2 minutes and 19 seconds and add a keyframe. Lastly, take the Playhead to the very end of the clip and drag the text to the right side until it’s out of the screen once again.

Step 30
Go to the Effects tab. Select Glitch from the panel on the left. Then, apply “Glitch Dispersion” and “Glitch Stripe 2” to the clips at the start and at the end.

Step 31
Finally, Render the video to watch the final preview. And, you’re done! Congratulations on creating a repeated text animation in Filmora.

Summary
What you’ve learned:
- How to create text animations in Filmora
- Applying animation effects
- Make advanced edits on Titles in Filmora
- Hide and lock Tracks and Clips in Filmora
Ideas to Make A Perfect Café Vlog
Cafes are believed to be an inclusive part of a society that interconnects people with each other. As it is considered a spot for long sittings, café vlogs are considered relatively common among such individuals.
With some specialty in the menu for specials, a café vlog can be helpful in pointing out the greatness in this individual. This article will portray how to make a perfect café vlog without putting yourself in difficulty.
In this article
01 What Does an Attractive Café Vlog Look Like?
02 Inspiration for Creating a Café Vlog
04 5 Most Popular Café Vlog on YouTube
Part 1: What Does an Attractive Café Vlog Look Like?
A perfect café vlog needs to have the traits that would make it be accounted as one attractive piece of work. This, however, does not always depend on the elements used across developing a vlog. It can also vary in the form of any particular announcement of operation, which lets it become creative and attractive in the eyes of other users. To make your café vlogs look attractive like this, you need to:
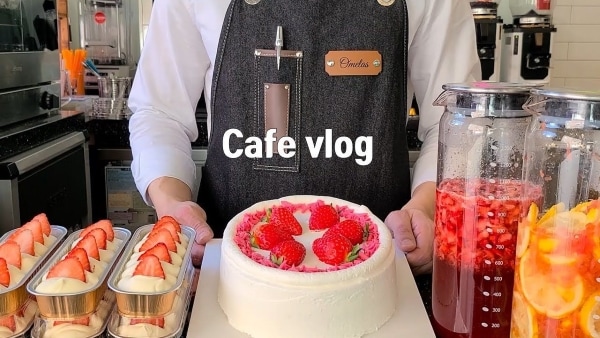
Follow the Theme of the Café
Your café vlog should be highly relevant to the theme of your café. Everything represented should be done under professional terms and would reflect a similar idea. This would bring up the attention of the fans of such themes, leading towards a better attractive viewership.
Highlights the Reality
People do believe that “Everything that glitters is not gold!” You should realize that the selection of content and the extent of highlighting it will present an attractive image of the café if presented perfectly.
Perfect Deals to Associate With
To make your vlogs exciting and interesting, it is considered to be perfect that the vlog should mainly give some special discount to enjoy from. These deals and discounts can bring and allure more viewers into the vlog.
Set up Competitions
Rewarding customers for being part of a greater cause is a perfect way of attracting viewers into watching your content. Café vlogs should be induced with such competitions that show the brighter side of the picture and show what brings greater loads of people into the abode.
Themed Campaigns
It is considered that the best thing to follow a professional way of interacting with such platforms is through themed campaigns. Any idea or belief backed with the platform set across the café will help the vlog target the region to the fullest.
Part 2: Inspiration for Creating a Café Vlog
How to make the perfect café vlog? This question can be covered coherently with an answer that would provoke you into making one yourself. This part shall provide some inspirations that need recognition for creating a café vlog to perfection.
Set Yourselves As a Brand
Before you put yourself in as an inspiration to the people, it is essential to develop a brand that would showcase its idea. An identity that helps people recognize the vlog; branding is believed to be the sole settlement of any particular motive that is started on different levels.
A Good Gear Is Equal to Good Video
Without a doubt, good gear would help a creator build a unique system for recording a café vlog. Rather than recording it from a primary mobile phone, a vlog is recorded with the best tools in mind, which initiate from the vlogging cameras. You need to be quite selective with your gear and select the best ones available in the market for the least possible price.
Always Look Out for Trends
If something new is being covered across cafes and is observed across other videos, you should realize the importance of adopting such trends on a bigger scale. Café vlogs should definitely follow a particular trend that would increase the presence of users within the premises of the café.
Using Good Elements
Once you are done recording the café vlog, the next step towards vlog excellency is how the user has edited it. If the elements used across the vlogs are catchy and attractive to watch, it will induce an increased number of views across the vlog too.
Part 3: How to Make a Café Vlog?
If you are making a café vlog for your channel, you need to figure out the editing tool that would assist your work to perfection. This editing environment is presented by Wondershare Filmora , a tool that combines uniqueness with ease of use. Along with presenting such an expressive environment, Filmora is quite effective in editing a vlog perfectly. To understand the process, look into the steps as shown below:
Step 1: Import Café Vlog Video
Launch Wondershare Filmora on your device and click on “New Project” to start a new project across the platform. Access the “Media Tab” and import the video you’ve recorded on your camera to start editing by clicking on the “Arrow Head” icon.
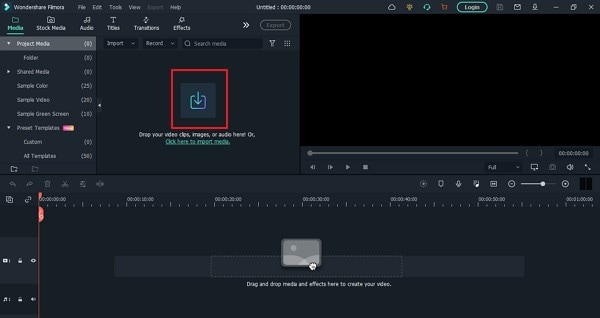
For Win 7 or later (64-bit)
For macOS 10.12 or later
Step 2: Make Changes in Videos
Once you’ve added the video, drag it across the timeline to start editing. You can find the tabs of “Effects,” “Transitions,” and “Elements” that you can add within the vlog to make it more entertaining and attractive. The use of effects, filters, and transitions is believed to be catchy for the viewer’s eye. Along with that, you can include different stickers and emojis to bring the video to life with exceptional elements.
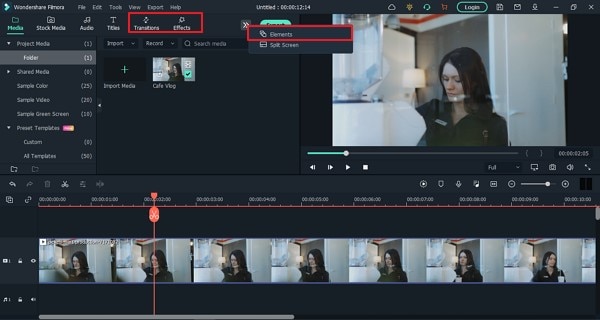
Step 3: Add & Edit Audio
You can also add catchy audio effects to your vlog by clicking on the “Audio” tab of the Filmora. In this tab, you can get the audio effect of all categories and can also access the premium audio effects of Filmstock. For editing the video’s audio, you have to double-click on the audio track present on the timeline.
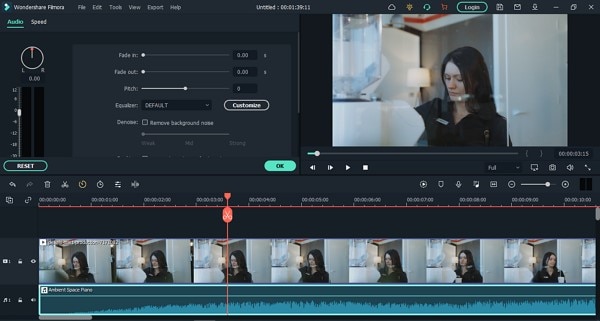
Step 4: Export File
As you complete the editing across the platform, click on “Export” to open a new window. You can set up effective settings for your video before finalizing it and successfully rendering it across your device.
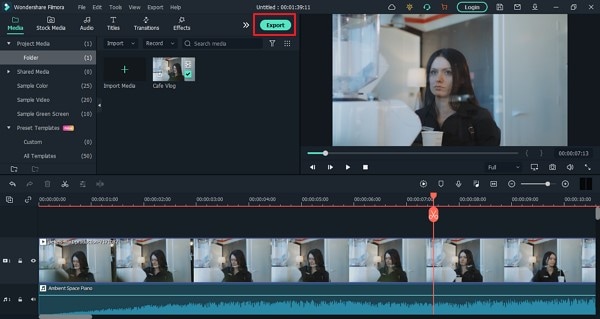
Part 4: 5 Most Popular Café Vlog on YouTube
If you are out there searching for the popular café vlogs that have gained a lot of traction in society, this part will offer you a list of some popular options that you can view and get inspiration from.
RealChrisBaca
Subscribers: 76K+
This individual has been around the corner for a while, where his love for coffee and barista has brought him into vlogging and sharing all ideas across social media. He has considered the use of different mediums for showcasing the idea of café and the elements that make up one.
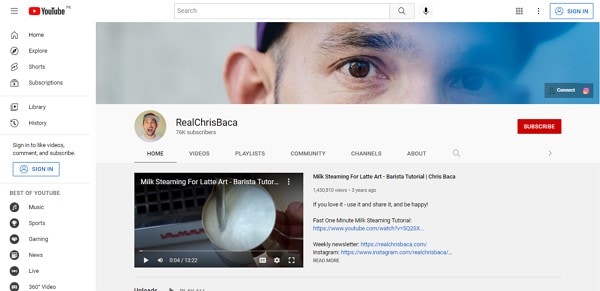
Coffictures
Subscribers: 307K+
A cafe vlog known for its recipes, Coffictures has presented an exceptional set of recipes to its viewers across the vlogs and other videos it has posted. Being one of the most popular channels for baristas, they have included many café vlog for the sake of the user to enjoy their environment.

Zoe’s
Subscribers: 2.4M+
This Korean YouTuber works across her mother’s café and sets up café vlogs that outline everything that happens behind in a café. As many users are curious about the technical considerations, Zoe helps them figure out multiple things.
European Coffee Trip
Subscribers: 212K+
As this presents a new narrative to café vlogs, The European Coffee Trip showcases different coffee used across different cafés. To provide users with cognitive information, this project aims to induce vlogs with subtle information.
Nebokgom
Subscribers: 549K+
This YouTuber has provided a quite different perspective of café vlogs to the viewers. With immersive recipes of different types that can be used across cafes, this channel presents a complete story to its users, combined with aesthetic stuff.
Closing Words
Are you sure on how to create a café vlog? We hope that the tips and directions provided in the article were significant in guiding the users towards an excellent future. If you are looking forward to starting your own venture, you should definitely look across this.
02 Inspiration for Creating a Café Vlog
04 5 Most Popular Café Vlog on YouTube
Part 1: What Does an Attractive Café Vlog Look Like?
A perfect café vlog needs to have the traits that would make it be accounted as one attractive piece of work. This, however, does not always depend on the elements used across developing a vlog. It can also vary in the form of any particular announcement of operation, which lets it become creative and attractive in the eyes of other users. To make your café vlogs look attractive like this, you need to:

Follow the Theme of the Café
Your café vlog should be highly relevant to the theme of your café. Everything represented should be done under professional terms and would reflect a similar idea. This would bring up the attention of the fans of such themes, leading towards a better attractive viewership.
Highlights the Reality
People do believe that “Everything that glitters is not gold!” You should realize that the selection of content and the extent of highlighting it will present an attractive image of the café if presented perfectly.
Perfect Deals to Associate With
To make your vlogs exciting and interesting, it is considered to be perfect that the vlog should mainly give some special discount to enjoy from. These deals and discounts can bring and allure more viewers into the vlog.
Set up Competitions
Rewarding customers for being part of a greater cause is a perfect way of attracting viewers into watching your content. Café vlogs should be induced with such competitions that show the brighter side of the picture and show what brings greater loads of people into the abode.
Themed Campaigns
It is considered that the best thing to follow a professional way of interacting with such platforms is through themed campaigns. Any idea or belief backed with the platform set across the café will help the vlog target the region to the fullest.
Part 2: Inspiration for Creating a Café Vlog
How to make the perfect café vlog? This question can be covered coherently with an answer that would provoke you into making one yourself. This part shall provide some inspirations that need recognition for creating a café vlog to perfection.
Set Yourselves As a Brand
Before you put yourself in as an inspiration to the people, it is essential to develop a brand that would showcase its idea. An identity that helps people recognize the vlog; branding is believed to be the sole settlement of any particular motive that is started on different levels.
A Good Gear Is Equal to Good Video
Without a doubt, good gear would help a creator build a unique system for recording a café vlog. Rather than recording it from a primary mobile phone, a vlog is recorded with the best tools in mind, which initiate from the vlogging cameras. You need to be quite selective with your gear and select the best ones available in the market for the least possible price.
Always Look Out for Trends
If something new is being covered across cafes and is observed across other videos, you should realize the importance of adopting such trends on a bigger scale. Café vlogs should definitely follow a particular trend that would increase the presence of users within the premises of the café.
Using Good Elements
Once you are done recording the café vlog, the next step towards vlog excellency is how the user has edited it. If the elements used across the vlogs are catchy and attractive to watch, it will induce an increased number of views across the vlog too.
Part 3: How to Make a Café Vlog?
If you are making a café vlog for your channel, you need to figure out the editing tool that would assist your work to perfection. This editing environment is presented by Wondershare Filmora , a tool that combines uniqueness with ease of use. Along with presenting such an expressive environment, Filmora is quite effective in editing a vlog perfectly. To understand the process, look into the steps as shown below:
Step 1: Import Café Vlog Video
Launch Wondershare Filmora on your device and click on “New Project” to start a new project across the platform. Access the “Media Tab” and import the video you’ve recorded on your camera to start editing by clicking on the “Arrow Head” icon.

For Win 7 or later (64-bit)
For macOS 10.12 or later
Step 2: Make Changes in Videos
Once you’ve added the video, drag it across the timeline to start editing. You can find the tabs of “Effects,” “Transitions,” and “Elements” that you can add within the vlog to make it more entertaining and attractive. The use of effects, filters, and transitions is believed to be catchy for the viewer’s eye. Along with that, you can include different stickers and emojis to bring the video to life with exceptional elements.

Step 3: Add & Edit Audio
You can also add catchy audio effects to your vlog by clicking on the “Audio” tab of the Filmora. In this tab, you can get the audio effect of all categories and can also access the premium audio effects of Filmstock. For editing the video’s audio, you have to double-click on the audio track present on the timeline.

Step 4: Export File
As you complete the editing across the platform, click on “Export” to open a new window. You can set up effective settings for your video before finalizing it and successfully rendering it across your device.

Part 4: 5 Most Popular Café Vlog on YouTube
If you are out there searching for the popular café vlogs that have gained a lot of traction in society, this part will offer you a list of some popular options that you can view and get inspiration from.
RealChrisBaca
Subscribers: 76K+
This individual has been around the corner for a while, where his love for coffee and barista has brought him into vlogging and sharing all ideas across social media. He has considered the use of different mediums for showcasing the idea of café and the elements that make up one.

Coffictures
Subscribers: 307K+
A cafe vlog known for its recipes, Coffictures has presented an exceptional set of recipes to its viewers across the vlogs and other videos it has posted. Being one of the most popular channels for baristas, they have included many café vlog for the sake of the user to enjoy their environment.

Zoe’s
Subscribers: 2.4M+
This Korean YouTuber works across her mother’s café and sets up café vlogs that outline everything that happens behind in a café. As many users are curious about the technical considerations, Zoe helps them figure out multiple things.

European Coffee Trip
Subscribers: 212K+
As this presents a new narrative to café vlogs, The European Coffee Trip showcases different coffee used across different cafés. To provide users with cognitive information, this project aims to induce vlogs with subtle information.

Nebokgom
Subscribers: 549K+
This YouTuber has provided a quite different perspective of café vlogs to the viewers. With immersive recipes of different types that can be used across cafes, this channel presents a complete story to its users, combined with aesthetic stuff.

Closing Words
Are you sure on how to create a café vlog? We hope that the tips and directions provided in the article were significant in guiding the users towards an excellent future. If you are looking forward to starting your own venture, you should definitely look across this.
02 Inspiration for Creating a Café Vlog
04 5 Most Popular Café Vlog on YouTube
Part 1: What Does an Attractive Café Vlog Look Like?
A perfect café vlog needs to have the traits that would make it be accounted as one attractive piece of work. This, however, does not always depend on the elements used across developing a vlog. It can also vary in the form of any particular announcement of operation, which lets it become creative and attractive in the eyes of other users. To make your café vlogs look attractive like this, you need to:

Follow the Theme of the Café
Your café vlog should be highly relevant to the theme of your café. Everything represented should be done under professional terms and would reflect a similar idea. This would bring up the attention of the fans of such themes, leading towards a better attractive viewership.
Highlights the Reality
People do believe that “Everything that glitters is not gold!” You should realize that the selection of content and the extent of highlighting it will present an attractive image of the café if presented perfectly.
Perfect Deals to Associate With
To make your vlogs exciting and interesting, it is considered to be perfect that the vlog should mainly give some special discount to enjoy from. These deals and discounts can bring and allure more viewers into the vlog.
Set up Competitions
Rewarding customers for being part of a greater cause is a perfect way of attracting viewers into watching your content. Café vlogs should be induced with such competitions that show the brighter side of the picture and show what brings greater loads of people into the abode.
Themed Campaigns
It is considered that the best thing to follow a professional way of interacting with such platforms is through themed campaigns. Any idea or belief backed with the platform set across the café will help the vlog target the region to the fullest.
Part 2: Inspiration for Creating a Café Vlog
How to make the perfect café vlog? This question can be covered coherently with an answer that would provoke you into making one yourself. This part shall provide some inspirations that need recognition for creating a café vlog to perfection.
Set Yourselves As a Brand
Before you put yourself in as an inspiration to the people, it is essential to develop a brand that would showcase its idea. An identity that helps people recognize the vlog; branding is believed to be the sole settlement of any particular motive that is started on different levels.
A Good Gear Is Equal to Good Video
Without a doubt, good gear would help a creator build a unique system for recording a café vlog. Rather than recording it from a primary mobile phone, a vlog is recorded with the best tools in mind, which initiate from the vlogging cameras. You need to be quite selective with your gear and select the best ones available in the market for the least possible price.
Always Look Out for Trends
If something new is being covered across cafes and is observed across other videos, you should realize the importance of adopting such trends on a bigger scale. Café vlogs should definitely follow a particular trend that would increase the presence of users within the premises of the café.
Using Good Elements
Once you are done recording the café vlog, the next step towards vlog excellency is how the user has edited it. If the elements used across the vlogs are catchy and attractive to watch, it will induce an increased number of views across the vlog too.
Part 3: How to Make a Café Vlog?
If you are making a café vlog for your channel, you need to figure out the editing tool that would assist your work to perfection. This editing environment is presented by Wondershare Filmora , a tool that combines uniqueness with ease of use. Along with presenting such an expressive environment, Filmora is quite effective in editing a vlog perfectly. To understand the process, look into the steps as shown below:
Step 1: Import Café Vlog Video
Launch Wondershare Filmora on your device and click on “New Project” to start a new project across the platform. Access the “Media Tab” and import the video you’ve recorded on your camera to start editing by clicking on the “Arrow Head” icon.

For Win 7 or later (64-bit)
For macOS 10.12 or later
Step 2: Make Changes in Videos
Once you’ve added the video, drag it across the timeline to start editing. You can find the tabs of “Effects,” “Transitions,” and “Elements” that you can add within the vlog to make it more entertaining and attractive. The use of effects, filters, and transitions is believed to be catchy for the viewer’s eye. Along with that, you can include different stickers and emojis to bring the video to life with exceptional elements.

Step 3: Add & Edit Audio
You can also add catchy audio effects to your vlog by clicking on the “Audio” tab of the Filmora. In this tab, you can get the audio effect of all categories and can also access the premium audio effects of Filmstock. For editing the video’s audio, you have to double-click on the audio track present on the timeline.

Step 4: Export File
As you complete the editing across the platform, click on “Export” to open a new window. You can set up effective settings for your video before finalizing it and successfully rendering it across your device.

Part 4: 5 Most Popular Café Vlog on YouTube
If you are out there searching for the popular café vlogs that have gained a lot of traction in society, this part will offer you a list of some popular options that you can view and get inspiration from.
RealChrisBaca
Subscribers: 76K+
This individual has been around the corner for a while, where his love for coffee and barista has brought him into vlogging and sharing all ideas across social media. He has considered the use of different mediums for showcasing the idea of café and the elements that make up one.

Coffictures
Subscribers: 307K+
A cafe vlog known for its recipes, Coffictures has presented an exceptional set of recipes to its viewers across the vlogs and other videos it has posted. Being one of the most popular channels for baristas, they have included many café vlog for the sake of the user to enjoy their environment.

Zoe’s
Subscribers: 2.4M+
This Korean YouTuber works across her mother’s café and sets up café vlogs that outline everything that happens behind in a café. As many users are curious about the technical considerations, Zoe helps them figure out multiple things.

European Coffee Trip
Subscribers: 212K+
As this presents a new narrative to café vlogs, The European Coffee Trip showcases different coffee used across different cafés. To provide users with cognitive information, this project aims to induce vlogs with subtle information.

Nebokgom
Subscribers: 549K+
This YouTuber has provided a quite different perspective of café vlogs to the viewers. With immersive recipes of different types that can be used across cafes, this channel presents a complete story to its users, combined with aesthetic stuff.

Closing Words
Are you sure on how to create a café vlog? We hope that the tips and directions provided in the article were significant in guiding the users towards an excellent future. If you are looking forward to starting your own venture, you should definitely look across this.
02 Inspiration for Creating a Café Vlog
04 5 Most Popular Café Vlog on YouTube
Part 1: What Does an Attractive Café Vlog Look Like?
A perfect café vlog needs to have the traits that would make it be accounted as one attractive piece of work. This, however, does not always depend on the elements used across developing a vlog. It can also vary in the form of any particular announcement of operation, which lets it become creative and attractive in the eyes of other users. To make your café vlogs look attractive like this, you need to:

Follow the Theme of the Café
Your café vlog should be highly relevant to the theme of your café. Everything represented should be done under professional terms and would reflect a similar idea. This would bring up the attention of the fans of such themes, leading towards a better attractive viewership.
Highlights the Reality
People do believe that “Everything that glitters is not gold!” You should realize that the selection of content and the extent of highlighting it will present an attractive image of the café if presented perfectly.
Perfect Deals to Associate With
To make your vlogs exciting and interesting, it is considered to be perfect that the vlog should mainly give some special discount to enjoy from. These deals and discounts can bring and allure more viewers into the vlog.
Set up Competitions
Rewarding customers for being part of a greater cause is a perfect way of attracting viewers into watching your content. Café vlogs should be induced with such competitions that show the brighter side of the picture and show what brings greater loads of people into the abode.
Themed Campaigns
It is considered that the best thing to follow a professional way of interacting with such platforms is through themed campaigns. Any idea or belief backed with the platform set across the café will help the vlog target the region to the fullest.
Part 2: Inspiration for Creating a Café Vlog
How to make the perfect café vlog? This question can be covered coherently with an answer that would provoke you into making one yourself. This part shall provide some inspirations that need recognition for creating a café vlog to perfection.
Set Yourselves As a Brand
Before you put yourself in as an inspiration to the people, it is essential to develop a brand that would showcase its idea. An identity that helps people recognize the vlog; branding is believed to be the sole settlement of any particular motive that is started on different levels.
A Good Gear Is Equal to Good Video
Without a doubt, good gear would help a creator build a unique system for recording a café vlog. Rather than recording it from a primary mobile phone, a vlog is recorded with the best tools in mind, which initiate from the vlogging cameras. You need to be quite selective with your gear and select the best ones available in the market for the least possible price.
Always Look Out for Trends
If something new is being covered across cafes and is observed across other videos, you should realize the importance of adopting such trends on a bigger scale. Café vlogs should definitely follow a particular trend that would increase the presence of users within the premises of the café.
Using Good Elements
Once you are done recording the café vlog, the next step towards vlog excellency is how the user has edited it. If the elements used across the vlogs are catchy and attractive to watch, it will induce an increased number of views across the vlog too.
Part 3: How to Make a Café Vlog?
If you are making a café vlog for your channel, you need to figure out the editing tool that would assist your work to perfection. This editing environment is presented by Wondershare Filmora , a tool that combines uniqueness with ease of use. Along with presenting such an expressive environment, Filmora is quite effective in editing a vlog perfectly. To understand the process, look into the steps as shown below:
Step 1: Import Café Vlog Video
Launch Wondershare Filmora on your device and click on “New Project” to start a new project across the platform. Access the “Media Tab” and import the video you’ve recorded on your camera to start editing by clicking on the “Arrow Head” icon.

For Win 7 or later (64-bit)
For macOS 10.12 or later
Step 2: Make Changes in Videos
Once you’ve added the video, drag it across the timeline to start editing. You can find the tabs of “Effects,” “Transitions,” and “Elements” that you can add within the vlog to make it more entertaining and attractive. The use of effects, filters, and transitions is believed to be catchy for the viewer’s eye. Along with that, you can include different stickers and emojis to bring the video to life with exceptional elements.

Step 3: Add & Edit Audio
You can also add catchy audio effects to your vlog by clicking on the “Audio” tab of the Filmora. In this tab, you can get the audio effect of all categories and can also access the premium audio effects of Filmstock. For editing the video’s audio, you have to double-click on the audio track present on the timeline.

Step 4: Export File
As you complete the editing across the platform, click on “Export” to open a new window. You can set up effective settings for your video before finalizing it and successfully rendering it across your device.

Part 4: 5 Most Popular Café Vlog on YouTube
If you are out there searching for the popular café vlogs that have gained a lot of traction in society, this part will offer you a list of some popular options that you can view and get inspiration from.
RealChrisBaca
Subscribers: 76K+
This individual has been around the corner for a while, where his love for coffee and barista has brought him into vlogging and sharing all ideas across social media. He has considered the use of different mediums for showcasing the idea of café and the elements that make up one.

Coffictures
Subscribers: 307K+
A cafe vlog known for its recipes, Coffictures has presented an exceptional set of recipes to its viewers across the vlogs and other videos it has posted. Being one of the most popular channels for baristas, they have included many café vlog for the sake of the user to enjoy their environment.

Zoe’s
Subscribers: 2.4M+
This Korean YouTuber works across her mother’s café and sets up café vlogs that outline everything that happens behind in a café. As many users are curious about the technical considerations, Zoe helps them figure out multiple things.

European Coffee Trip
Subscribers: 212K+
As this presents a new narrative to café vlogs, The European Coffee Trip showcases different coffee used across different cafés. To provide users with cognitive information, this project aims to induce vlogs with subtle information.

Nebokgom
Subscribers: 549K+
This YouTuber has provided a quite different perspective of café vlogs to the viewers. With immersive recipes of different types that can be used across cafes, this channel presents a complete story to its users, combined with aesthetic stuff.

Closing Words
Are you sure on how to create a café vlog? We hope that the tips and directions provided in the article were significant in guiding the users towards an excellent future. If you are looking forward to starting your own venture, you should definitely look across this.
Also read:
- 2024 Approved 4 Ways to Add White Borders on Mobile and Desktop
- Updated In 2024, Steps to Add Subtitles in Canva
- Updated FLV Editor for Windows 11/10/8.1/8/7 Easily Edit FLV Videos on PC for 2024
- Final Cut Pro for iPad- Is It Available for 2024
- Updated In 2024, 10 Catchy Pixel Art Wallpapers and How to Custom Your Own
- In 2024, REVIEW Whats Best 10 Software to Make AI Upscaling Video
- In 2024, How to Create Cinematic Style Videos?
- New 2024 Approved How to Find a High-Quality Video Marketing Agency?
- Mastering DaVinci Resolve Scopes A Comprehensive Guide for 2024
- 2024 Approved Fixing The Slow Playback Issues in DaVinci Resolve
- New How to Create an Aesthetic Slideshow Presentation
- In 2024, Are You Looking to Turn on the Motion Blur Effect in Minecraft? Learn How You Can Turn the Effect on or Off with the Help of the Best Methods
- New How to Make a Transparent Background in Paint. How 3D Paint Transparent Background Can Be Made. How to Save an Image with Transparent Background?
- New As a Designer, Color Is the Most Powerful and the Most Diverse Tool at Your Disposal. Here Are Ten Matching Color Combinations to Get You Started on Your Next Project
- Updated 3D Ray Traced Settings In After Effects
- Powerpoint Supported Video Format and Advanced User Tips for 2024
- New 2024 Approved Create Your Face Zoom TikTok Now
- New In 2024, Best 10 Options Slow Down Video Online with Perfection
- Updated The Complete Guide to Converting GIF to SVG With Ease for 2024
- New Step-by-Step Guide | How to Edit A Time Lapse Video on iPhone
- How to Record Super Slow Motion Videos on Your Phone for 2024
- Updated Do You Want Your Music Videos to Look Like Professional Music Videos? You Can Always Choose From Music Videos LUTs to Give Your Videos a Cinematic Touch
- Updated 2024 Approved How to Create After Effects Gifs
- In This Article, We Will Introduce You Our Top 5 Picks of Websites and Software Converter Online to Convert Powerpoint to Mp4 for 2024
- Powerpoint Supported Video Format and User Tips for 2024
- In 2024, Using The AI Auto Reframe Feature | Wondershare Filmora Tutorial
- New Best Animated Video Makers
- New 2024 Approved How to Add Video Effects with Movavi Slideshow Maker
- 2024 Approved A Guide to Create Your Own LOL Montage Video
- Updated 2024 Approved 2 Solutions to Crop a Video Using After Effects
- Updated In 2024, Easy Guide to Zoom Video in VLC
- Updated In 2024, Ultimate Guide to Making Cinematography for Music Video
- New In 2024, How to Add Text Behind Objects in Video
- Updated 2024 Approved How To Zoom In On TikTok Videos?
- New 2024 Approved Step by Step to Rotate Videos Using Handbrake
- Additional Tips About Sinnoh Stone For Tecno Spark 10 Pro | Dr.fone
- In 2024, 5 Easy Ways to Copy Contacts from Samsung Galaxy Z Flip 5 to iPhone 14 and 15 | Dr.fone
- Honor 90 Stuck on Screen – Finding Solutions For Stuck on Boot | Dr.fone
- How to Cast Vivo Y56 5G Screen to PC Using WiFi | Dr.fone
- In 2024, How PGSharp Save You from Ban While Spoofing Pokemon Go On Tecno Phantom V Flip? | Dr.fone
- In 2024, How and Where to Find a Shiny Stone Pokémon For Poco X6 Pro? | Dr.fone
- Full Tutorial to Bypass Your Itel P55T Face Lock?
- New How to Make GIF Stickers for WhatsApp 100 The Easy Way for 2024
- Recommended Best Applications for Mirroring Your Samsung Galaxy S23 Screen | Dr.fone
- Full Guide on Mirroring Your Vivo Y100t to Your PC/Mac | Dr.fone
- In 2024, Best 3 Nubia Red Magic 8S Pro+ Emulator for Mac to Run Your Wanted Android Apps | Dr.fone
- In 2024, Is pgsharp legal when you are playing pokemon On Oppo Find X7 Ultra? | Dr.fone
- In 2024, Pokemon Go Error 12 Failed to Detect Location On Samsung Galaxy F34 5G? | Dr.fone
- How to Unlock Apple iPhone 14 Pro Max?
- 5 Quick Methods to Bypass Lava Blaze Curve 5G FRP
- In 2024, How to Check Distance and Radius on Google Maps For your Realme Narzo N53 | Dr.fone
- 4 Feasible Ways to Fake Location on Facebook For your Vivo Y200 | Dr.fone
- Updated The Power of YouTube Live Selling Unlock Your Sales Potential for 2024
- In 2024, Top 10 Fingerprint Lock Apps to Lock Your Samsung Galaxy A25 5G Phone
- How To Fix OEM Unlock Missing on Realme C53?
- Title: 6 Best Methods to Make a Video Longer for 2024
- Author: Chloe
- Created at : 2024-05-20 03:37:43
- Updated at : 2024-05-21 03:37:43
- Link: https://ai-editing-video.techidaily.com/6-best-methods-to-make-a-video-longer-for-2024/
- License: This work is licensed under CC BY-NC-SA 4.0.

