:max_bytes(150000):strip_icc():format(webp)/handstypingonkeyboardCROPPED-6b13200ac0d24ef58817343cc4975ebd.jpg)
8 Ways To Live Stream Pre-Recorded Video

8 Ways To Live Stream Pre-Recorded Video
Many people tend to Livestream pre-recorded videos because of their exciting benefits. People often want to give their audience a near-perfect video in live sessions. They want to avoid the multiple errors and flaws that are usually known to plague live video sessions. Live streaming pre-recorded videos allow people to avoid all these errors effortlessly.
Uploading pre-recorded videos has a lot of excellent benefits attached to it. For example, it allows you to provide an error-free video. You can always re-record a video if you think it does not match your requirements or standards. Recording videos in advance also can help you to get the opportunity to determine the video quality. You may easily edit your videos if you decide it is not suited for the internet. Prerecorded videos allow you to switch between scenarios while watching them easily.
Part 1. 8 Best Tools To Live Stream Your Pre-recorded Video
If you also want to try live streaming a pre-recorded video, you can choose from the following 8 ways to do it easily.
1. Restream
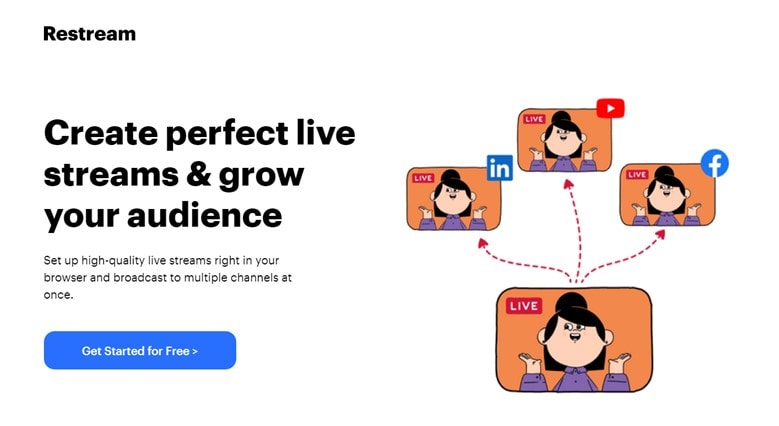
Restream is a website that allows users to interact actively with their audience through live streaming. This tool gives you access to live streams on 30+ media platforms.
Restream supports pre-recorded video live streaming, which helps content creators to come up with better content and scenes. Using Restream, you can go live on multiple media like Twitch and Facebook and get to engage with your audience more by live chat.
To make your live sessions more attractive, you can add texts and other effects to style up your live stream and make it more engaging. Restream boasts a cloud storage facility that helps users back up their recorded videos. This tool also provides an analysis of the audience.
Pros
- This website allows you to live stream pre-recorded videos with ease.
- io support multiple streaming.
- This sure is very easy to navigate through.
Cons
- Most of the key features of this website can only be accessed by subscriptions.
2. Prism Live Studio
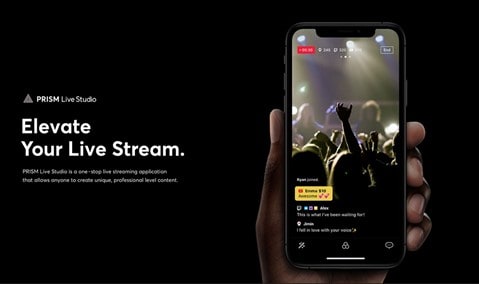
Prism Live Studio software supports live and pre-recorded live video streaming on major platforms. It is suitable for individuals and businesses. Prism live studio features three fascinating camera modes; photo, live stream, and video. And it also boosts your live sessions with its live effects and lives chat. Creators can also add texts, audio, GIFs, and animated texts.
Price & Download
Because Prism is a multi-platform product, you have the option of using a mobile app or an online product. Prism live studio is available for free download for both iOS and Android .
Pros
- This application supports prerecorded streaming videos.
- Prism allows users to add external content to their videos.
- Prism live studio features a desktop version as well as a mobile version.
Cons
- Some users have complained about the quality of its live streaming. Its resolution needs to be improved.
3. SplitCam
SplitCam is a live streaming software that can be used for many live sessions, like live gaming, online classes, etc. Using SplitCam, you can host up to 5 guests at once using a split screen. Users can also edit their videos while on live sessions. This software features an audio mixer that gives users complete control of the audio in their video. With SplitCam, you can stream your live sessions to Twitch, LinkedIn, Facebook, etc.
Price & Download
SplitCam is a free application. You can click its official website to download it.
Pros
- This software allows users to split their screen.
- SplitCam supports live streaming.
Cons
- This app is only available for desktop users.
4. vMix

Vmix is an online live streaming platform that supports NDI tools that give users access to several channels of audio and videos. It allows users to get access to several animations. With Vmix, you can also explore the fascinating slow-motion world of videos. This platform lets users customize their live sessions to their tastes. Vmix takes editing to a new level with its multiple editing options. You can also reach out to your audience by live streaming on several social media sites.
Price
vMix consists of five different versions. The basic version is free, and the Basic HD version goes for $60 per year, the HD version goes for $350 per year, the 4K version goes for $700 annually, the pro version goes for $1200 annually, while the MAX version goes for $50 per month.
Pros
- All version of vMix allows users to use the app for 60 days free.
- vMix can be used by professionals as it has proven to be efficient.
- vMix allows users to live stream on popular media platforms.
Cons
- vMix may appear difficult to use.
- vMix can only be used by Windows users.
5. OneStream
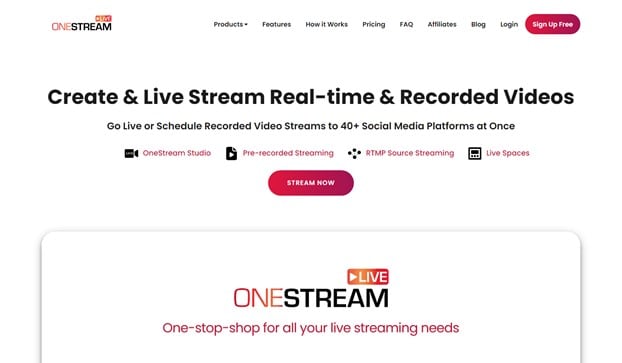
OneStream is a software that enables pre-recorded video live streaming. It is a platform that helps users get premium content to their audience around the globe. Using OneStream, you can schedule your live sessions up to 60 days in advance. Users can also add titles and subtitles to their videos. This software also boasts of the playlist streaming feature. With this tool, you can line up videos and schedule them to go live one after the other.
Price
OneStream is coming in 3 versions:
- Basic PLAN $10 monthly
- Standard PLAN $39 monthly
- Enterprise PLAN $89 monthly
Pros
- OneStream allows users to add extra content like captions and subtitles in their video.
- Users can schedule streaming.
- This tool does not need to be installed. You get access to its features easily.
Cons
- OneStream may be difficult to understand.
- The mobile version of this software needs improvement.
6. Be Live
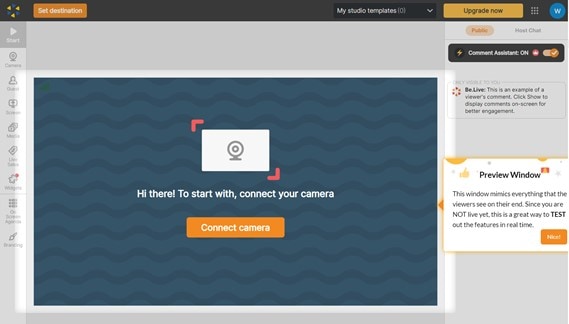
Be Live is a beginner-friendly live streaming tool that gives users an in-depth analysis of their audience. It makes your live session more interactive with its live chat. This software features a customization tool. With Be Live, users can live stream pre-recorded videos with ease. This tool allows users to host more than two guests simultaneously by sharing the screen. You can also go live on several platforms with this tool.
Price
Be Live is available in 2 versions:
- Standard PLAN $24.99 monthly
- Pro PLAN $37.50 monthly
Pros
- This software helps users to reach a maximum audience.
- Be Live is very easy to use.
- Users can design their videos to their taste.
Cons
- They need to improve on their video’s quality.
- This software can only work on some browsers.
- Most of their amazing features can only be accessed by subscription.
7. OBS Studio
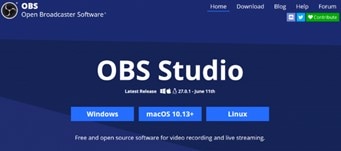
OBS Studio (Open Broadcaster Software Studio) is a live streaming and recording software compatible with Windows, Mac, and Linus. It features a powerful editing tool that would make your live sessions more engaging. This tool boasts an audio mixer that gives users complete control of the audio part of their videos. This software allows users to brand their videos the way they want. You can also use customized plugins to give your audience a more quality presentation.
Price
OBS Studio is a free software.
Pros
- This amazing tool is free.
- OBS allows you to customize your videos.
- OBS allows users to preview their videos.
Cons
- OBS may be difficult to navigate through.
- This software will need a large storage capacity.
8. Live Pigeon

Live Pigeon is a live streaming platform that boasts of one of the best premium editing tools. With live pigeon, you can schedule your live sessions. This tool provides users with audience engagement analysis.
Live pigeon makes your live sessions more enjoyable by allowing the audience to use the mic and interact with you. Users can also organize live pools for their audience.
Price
Live Pigeon is available in 3 versions:
- Basic PLAN $15
- Standard PLAN $37
- Enterprise PLAN $97
Pros
- Live Pigeon produces high-quality videos.
- This tool is easy to use.
- No limitations to Streaming.
Cons
- Live Pigeon only supports pre-recorded videos live streams.
Part 2. How To livestream pre-recorded Video with mobile app?
Suppose you are interested in the tools described above. In that case, we will provide you with a detailed tutorial to help you finish your pre-recorded live in advance on your phone.
Since the steps for the cell phone are similar, the following steps are based on OneStream Live as an example. You can operate the rest of the products similarly.
Step1 Connect your social platform
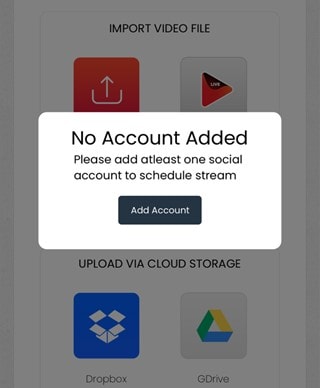
To avoid reminders for subsequent video uploads, you can associate the platform account you want to live stream with once you enter the app.
Step2 Upload your pre-recorded video
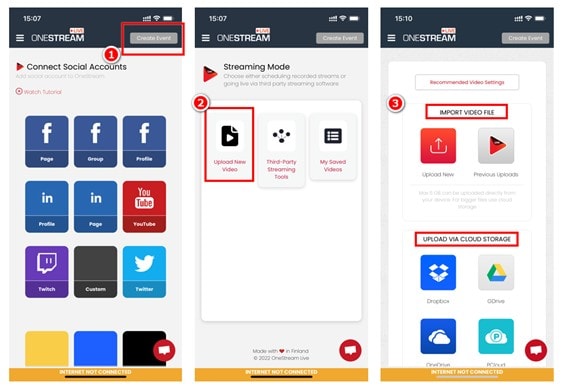
Click “Create Event” and choose the left button “Upload New Video”. Then, you can choose to import your pre-recorded video from your device or the cloud.
Step3 Edit your stream details
After analyzing the video, OneStream Live will let you edit some basic information about this video. You can change its thumbnail and add a title, tags and description. Also, you can do some light editing on this pre-recorded video. Adding some captions will be a good idea.
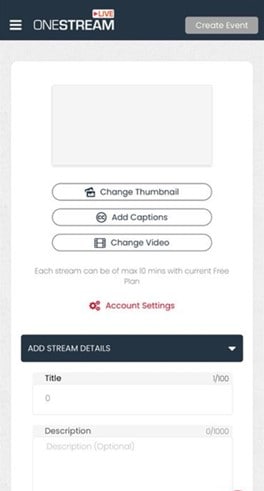
Step4 Choose the social accounts and schedule time
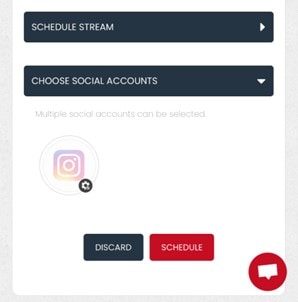
After finishing all your preparation, you can finally confirm the scheduled time of your pre-recorded stream. Then, choose the social account where you want to live stream. At last, don’t forget to click the SCHEDULE button to save your streams.
Bonus Tips: How to create pre-recorded Video?
To live stream quality pre-recorded videos, you would need an appropriate tool. Filmora, built by Wondershare, is one of the best you can find.
Filmora allows you to create and edit your videos efficiently. The newest version Filmora 11, boasts several effects, a simple interface, speakers, and mics amongst others. Here are some of Filmora’s wonderful features:
- **Instant mode:**This mode works with AI to help users do some editing and speed up video creation. You can make video creation fast and easy
- Speed control: Filmora 11 also allows users to have ultimate control of the speed of their videos. You can make your video faster or slower depending on what you want.
- Chroma key filming: Content creators often do not want their background to show while recording. With Filmora 11, you don’t have to worry about poor video backgrounds to another background with just one choice. In other words, Filmora 11 makes you appear anywhere you fancy.
How to record your video with Wondershare Filmora?
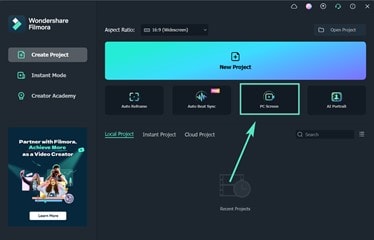
Step1 After downloading and installing Filmora Screen Recorder , click on the “PC Screen” to start the recording.
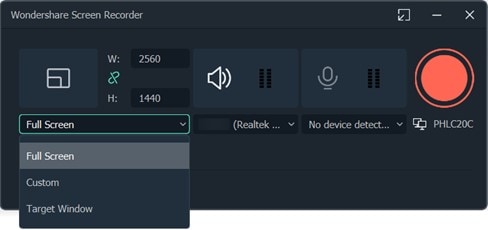
Step2 You can change the recording area, video quality and audio source in the following pop-up.
Step3 Press the F9 to stop your recording. Then, you can directly edit the recorded video with the advanced features of Filmora. When you’re through editing, export it to the video format you wish.
Conclusion
We can’t possibly overhype the importance of live streaming pre-recorded videos. Its benefits are just simply overwhelming and worthwhile. In this article, we have given you all the help that is necessary for you to start putting out excellent pre-recorded videos on the internet.
Free Download For Win 7 or later(64-bit)
Free Download For macOS 10.14 or later
Part 1. 8 Best Tools To Live Stream Your Pre-recorded Video
If you also want to try live streaming a pre-recorded video, you can choose from the following 8 ways to do it easily.
1. Restream

Restream is a website that allows users to interact actively with their audience through live streaming. This tool gives you access to live streams on 30+ media platforms.
Restream supports pre-recorded video live streaming, which helps content creators to come up with better content and scenes. Using Restream, you can go live on multiple media like Twitch and Facebook and get to engage with your audience more by live chat.
To make your live sessions more attractive, you can add texts and other effects to style up your live stream and make it more engaging. Restream boasts a cloud storage facility that helps users back up their recorded videos. This tool also provides an analysis of the audience.
Pros
- This website allows you to live stream pre-recorded videos with ease.
- io support multiple streaming.
- This sure is very easy to navigate through.
Cons
- Most of the key features of this website can only be accessed by subscriptions.
2. Prism Live Studio

Prism Live Studio software supports live and pre-recorded live video streaming on major platforms. It is suitable for individuals and businesses. Prism live studio features three fascinating camera modes; photo, live stream, and video. And it also boosts your live sessions with its live effects and lives chat. Creators can also add texts, audio, GIFs, and animated texts.
Price & Download
Because Prism is a multi-platform product, you have the option of using a mobile app or an online product. Prism live studio is available for free download for both iOS and Android .
Pros
- This application supports prerecorded streaming videos.
- Prism allows users to add external content to their videos.
- Prism live studio features a desktop version as well as a mobile version.
Cons
- Some users have complained about the quality of its live streaming. Its resolution needs to be improved.
3. SplitCam

SplitCam is a live streaming software that can be used for many live sessions, like live gaming, online classes, etc. Using SplitCam, you can host up to 5 guests at once using a split screen. Users can also edit their videos while on live sessions. This software features an audio mixer that gives users complete control of the audio in their video. With SplitCam, you can stream your live sessions to Twitch, LinkedIn, Facebook, etc.
Price & Download
SplitCam is a free application. You can click its official website to download it.
Pros
- This software allows users to split their screen.
- SplitCam supports live streaming.
Cons
- This app is only available for desktop users.
4. vMix

Vmix is an online live streaming platform that supports NDI tools that give users access to several channels of audio and videos. It allows users to get access to several animations. With Vmix, you can also explore the fascinating slow-motion world of videos. This platform lets users customize their live sessions to their tastes. Vmix takes editing to a new level with its multiple editing options. You can also reach out to your audience by live streaming on several social media sites.
Price
vMix consists of five different versions. The basic version is free, and the Basic HD version goes for $60 per year, the HD version goes for $350 per year, the 4K version goes for $700 annually, the pro version goes for $1200 annually, while the MAX version goes for $50 per month.
Pros
- All version of vMix allows users to use the app for 60 days free.
- vMix can be used by professionals as it has proven to be efficient.
- vMix allows users to live stream on popular media platforms.
Cons
- vMix may appear difficult to use.
- vMix can only be used by Windows users.
5. OneStream

OneStream is a software that enables pre-recorded video live streaming. It is a platform that helps users get premium content to their audience around the globe. Using OneStream, you can schedule your live sessions up to 60 days in advance. Users can also add titles and subtitles to their videos. This software also boasts of the playlist streaming feature. With this tool, you can line up videos and schedule them to go live one after the other.
Price
OneStream is coming in 3 versions:
- Basic PLAN $10 monthly
- Standard PLAN $39 monthly
- Enterprise PLAN $89 monthly
Pros
- OneStream allows users to add extra content like captions and subtitles in their video.
- Users can schedule streaming.
- This tool does not need to be installed. You get access to its features easily.
Cons
- OneStream may be difficult to understand.
- The mobile version of this software needs improvement.
6. Be Live

Be Live is a beginner-friendly live streaming tool that gives users an in-depth analysis of their audience. It makes your live session more interactive with its live chat. This software features a customization tool. With Be Live, users can live stream pre-recorded videos with ease. This tool allows users to host more than two guests simultaneously by sharing the screen. You can also go live on several platforms with this tool.
Price
Be Live is available in 2 versions:
- Standard PLAN $24.99 monthly
- Pro PLAN $37.50 monthly
Pros
- This software helps users to reach a maximum audience.
- Be Live is very easy to use.
- Users can design their videos to their taste.
Cons
- They need to improve on their video’s quality.
- This software can only work on some browsers.
- Most of their amazing features can only be accessed by subscription.
7. OBS Studio

OBS Studio (Open Broadcaster Software Studio) is a live streaming and recording software compatible with Windows, Mac, and Linus. It features a powerful editing tool that would make your live sessions more engaging. This tool boasts an audio mixer that gives users complete control of the audio part of their videos. This software allows users to brand their videos the way they want. You can also use customized plugins to give your audience a more quality presentation.
Price
OBS Studio is a free software.
Pros
- This amazing tool is free.
- OBS allows you to customize your videos.
- OBS allows users to preview their videos.
Cons
- OBS may be difficult to navigate through.
- This software will need a large storage capacity.
8. Live Pigeon

Live Pigeon is a live streaming platform that boasts of one of the best premium editing tools. With live pigeon, you can schedule your live sessions. This tool provides users with audience engagement analysis.
Live pigeon makes your live sessions more enjoyable by allowing the audience to use the mic and interact with you. Users can also organize live pools for their audience.
Price
Live Pigeon is available in 3 versions:
- Basic PLAN $15
- Standard PLAN $37
- Enterprise PLAN $97
Pros
- Live Pigeon produces high-quality videos.
- This tool is easy to use.
- No limitations to Streaming.
Cons
- Live Pigeon only supports pre-recorded videos live streams.
Part 2. How To livestream pre-recorded Video with mobile app?
Suppose you are interested in the tools described above. In that case, we will provide you with a detailed tutorial to help you finish your pre-recorded live in advance on your phone.
Since the steps for the cell phone are similar, the following steps are based on OneStream Live as an example. You can operate the rest of the products similarly.
Step1 Connect your social platform
To avoid reminders for subsequent video uploads, you can associate the platform account you want to live stream with once you enter the app.

Step2 Upload your pre-recorded video
Click “Create Event” and choose the left button “Upload New Video”. Then, you can choose to import your pre-recorded video from your device or the cloud.

Step3 Edit your stream details
After analyzing the video, OneStream Live will let you edit some basic information about this video. You can change its thumbnail and add a title, tags and description. Also, you can do some light editing on this pre-recorded video. Adding some captions will be a good idea.

Step4 Choose the social accounts and schedule time
After finishing all your preparation, you can finally confirm the scheduled time of your pre-recorded stream. Then, choose the social account where you want to live stream. At last, don’t forget to click the SCHEDULE button to save your streams.

Bonus Tips: How to create pre-recorded Video?
To live stream quality pre-recorded videos, you would need an appropriate tool. Filmora, built by Wondershare, is one of the best you can find.
Filmora allows you to create and edit your videos efficiently. The newest version Filmora 11, boasts several effects, a simple interface, speakers, and mics amongst others. Here are some of Filmora’s wonderful features:
- **Instant mode:**This mode works with AI to help users do some editing and speed up video creation. You can make video creation fast and easy
- Speed control: Filmora 11 also allows users to have ultimate control of the speed of their videos. You can make your video faster or slower depending on what you want.
- Chroma key filming: Content creators often do not want their background to show while recording. With Filmora 11, you don’t have to worry about poor video backgrounds to another background with just one choice. In other words, Filmora 11 makes you appear anywhere you fancy.
How to record your video with Wondershare Filmora?
Step1 After downloading and installing Filmora Screen Recorder , click on the “PC Screen” to start the recording.

Step2 You can change the recording area, video quality and audio source in the following pop-up.

Step3 Press the F9 to stop your recording. Then, you can directly edit the recorded video with the advanced features of Filmora. When you’re through editing, export it to the video format you wish.
Conclusion
We can’t possibly overhype the importance of live streaming pre-recorded videos. Its benefits are just simply overwhelming and worthwhile. In this article, we have given you all the help that is necessary for you to start putting out excellent pre-recorded videos on the internet.
Free Download For Win 7 or later(64-bit)
Free Download For macOS 10.14 or later
Easy Steps to Create Intro Video with After Effects

It’s difficult to make an intro in After Effects. To start, you must have a natural beginning that will catch the
viewer’s attention in the film you’ve made right away. Then, you can improve the caliber of your intros by using built-in filters, transition effects, overlays, animation, and more! Therefore, we’re confident that this article will be helpful to you if you’ve been trying to learn how to create After Effects intros of the highest level. Continue reading to learn more.
Let’s start off!
1. Create a new composition for your intro
You must build up your video’s composition based on the output. You can upload the previously recorded video after choosing the composition and the runtime. Right-click again and select “Pre-compose” from the menu that appears. To make it simpler to find later, you can also rename your movie here.
The composition can then include a solid layer. Follow *Layer > New > Solid* to get to this option. Additionally,
you can choose a hue based on the type of video you want to make. Additionally, you may use the Text option to build text layers, which will allow you to split the words at different points in the document. You can edit each word separately when you break it into layers. Finally, you can move the text around and change the color of the reader to make it more appropriate for your films.
After Effects makes it incredibly simple to edit the text composition and import it into the timeline of the film.
A panel appears on the right after importing a text composition. Here, you can alter the text’s color, position,
and size.
2. Add the first transition layer
By include the transition layer, you may use After Effects’ effects templates to apply a variety of effects to your
videos. You can experiment with a variety of transition layers in After Effects before selecting the ideal one (CC Light Wipe is a popular choice).
You can modify the transition after applying it to the layer. For instance, you may decide to apply the second
key transition at a later period in the timeline and configure the first key transition to occur immediately at the start of the timeline. Setting the completion value is crucial since it will influence how long the word will remain displayed in the video.
3. Add the second transition layer
The transition effect you introduced in the first stage can either be maintained here, or you can select an
entirely different one. According to how long you want the text to be displayed, add the layer and adjust
completion. The reader is invisible when the completion value is set to 100%, or the word is said when it is set
to 0%.
A memory sketch
If you want to make a black-and-white video that is more interesting, the memory sketch is a great template to use. You can make a visually beautiful video with its outstanding text captions, fluid transitions, and excellent animations.
Toolkit for Instagram
These days, Instagram is a very popular social media site. Instagram is a platform where reels and videos
flourish, therefore you must make every effort to differentiate your video from the millions of others available.
The Instagram Toolkit template meets the standards of the social media network by being brief, clear, and
appealing.
Lighting sweep
A final transition effect, which can be found in the *Effects > Generate *section, must be added to the video in order to complete the effect. The final flourish can be added in the same way as the other keyframes. In this step, you can use the edge intensity, sweep intensity, and direction. This allows you to seamlessly combine the transition of words with lighting effects.
These are some quick and easy techniques to adding some intros to your videos that look professional. Let’s
also take a look at some well-known templates you may utilize to make perfect video intros. Because the initial few seconds of any video are so important, After Effects has put together some incredible templates that have a variety of video clips, images, text, sound effects, and music tracks. To produce the video you want, you must obtain the ideal template.
The Bottom Line
Utilizing templates will hasten your workflow even though it takes some time to become familiar with After
Effects’ various tools. To gain a feel for how After Effects functions, we advise playing around by adding some
clips and titles. When you do that, you will be well on your way to creating a fantastic intro for your upcoming
video project.
Free Download For Win 7 or later(64-bit)
Free Download For macOS 10.14 or later
Free Download For macOS 10.14 or later
Ultimate Guide on How to Plan and Storyboard a Music Video
Do you want to bring your music to life on the big screen? Do you want to create something visually striking? Making a music video seems like a big task. Sometimes, the artist you’re working with might not have a clear idea for their music video. It’s your job to help guide the creative process.
But don’t worry! This guide is going to make it easy for you to plan and storyboard your music video step by step with the help of Filmora . So let’s get started and make an amazing music video together!
Plan and develop initial ideas
The first and essential step in creating a music video is planning. This is where you will lay the foundation of your music video. You need to figure out what your video is about and what you want to convey to the audience. It involves a concept or theme for the video, research, and reference material. You can also explore different ideas to make your video unique and engaging.

Step1Research and gather information
You can begin by researching and gathering information from other music videos. This will help you to know what has been done before and what is currently popular. You can also figure out how you can do it differently.
Step2Brainstorm and concept development
Once you understand the current trends and styles in the music video. It’s time to start brainstorming ideas. You can do it alone or with the help of your team. But remember that you have to think out of the box to make it creative.
Step3Consider the lyrics and message
In the planning stage, it is also important to consider the lyrics and message of the song. It would be best if you plan according to the feel and vibe of the song. It will help you to create a concept tied to the song and will help enhance its meaning.
Step4Experiment and find the right direction
Once you have a general concept, it’s time to develop it further. You can do it by creating rough sketches or storyboards. You can also film test footage to see how the concept will look on screen.
Step5Effort and attention to detail
Remember, this step is the foundation of your music video. So, take your time and don’t rush through it. By putting in effort and attention to detail, you’ll be able to create a visually stunning and closely tied to the song’s music video.
Choose a style for your music video
While creating ideas for the music video, it’s also important to consider the style of the music video. There are two main styles of music videos:

1.Performance-style music video
If you want to showcase energy and charisma in your music video, go for a performance-style music video. This video style focuses on you and your band performing live in front of an audience. You can shoot a video in a single take with minimal cuts or feature different angles and shots. The key is to capture the raw energy and emotion of the performance.
2.Narrative-style music video
A narrative-style music video tells a story or conveys a message along with the music. The story can be a visual representation of the lyrics or a multi-layered narrative. You can choose this style to convey a deeper message or story.
You can shoot this video in different locations and can include different scenes. The main motive is to create a video that emotionally connects with the audience.
Once you have an idea of what you want your music video to be about, you can put together a treatment to show the artist what your initial plan for the music video is.

If the artist approves the direction of the video, it’s time to move on to storyboarding!
Storyboard your music video
Once you are done with the style and concept of the video, the next step is storyboarding! It allows you to break down your music video visually and highlight key visual moments. It can save time and money and convey a clear idea to the team. You can do this on paper, a computer, or a tablet, whatever works best for you. Let’s see how to do it with the help of Filmora .
Free Download For Win 7 or later(64-bit)
Free Download For macOS 10.14 or later

Step1Draw your ideas
You are supposed to break your video idea into different scenes. For each scene, you should draw a picture of what the shot will look like and draw them within the rectangles.

Step2Take pictures
After doing your storyboarding on paper, take photos of each shot in a sequence and import them to your computer.

Before going to the next step, make sure to download Wondershare Filmora. It is powerful editing software that can help you easily make a storyboard. With its wide range of features, you can also customize your clips with special effects, transitions, and more.

Free Download For Win 7 or later(64-bit)
Free Download For macOS 10.14 or later
Step3Import pictures to Filmora
Now import all the scenes and music to Filmora. You can also create separate folders if you have multiple concepts for a single video.

Step4Drop your media onto the timeline
Drag and drop the song to the audio timeline. Then press shift, select all images, and drop them into the picture timeline. If you realize you are missing enough clips to complete the song, you can draw and add more shots.

Step5Adjust the frame
You can right-click on the picture’s timeline and select Crop to fit to adjust the image on the screen. You can also adjust the scenes according to the song.

Step6Add effects
You can also simulate transitions and effects in the clips. Let’s suppose you want to show a zoom-in shot. Then you would click on the picture frame and the keyframe option just above the timeline. Now keyframe the position and scale of the clip according to you.

Once you feel like your clips sync with the song, you are ready to start planning for the production of your music video.
Conclusion
We hope this blog has given you a better understanding of how planning and storyboarding can help make your music videos better. You can ensure that your vision is clearly communicated to the audience by planning and storyboarding your music videos properly. Now that you know what to do, it’s time to put that knowledge into action. Take a pencil and paper and start sketching the shots and scenes you want to create.
Free Download For macOS 10.14 or later

Step1Draw your ideas
You are supposed to break your video idea into different scenes. For each scene, you should draw a picture of what the shot will look like and draw them within the rectangles.

Step2Take pictures
After doing your storyboarding on paper, take photos of each shot in a sequence and import them to your computer.

Before going to the next step, make sure to download Wondershare Filmora. It is powerful editing software that can help you easily make a storyboard. With its wide range of features, you can also customize your clips with special effects, transitions, and more.

Free Download For Win 7 or later(64-bit)
Free Download For macOS 10.14 or later
Step3Import pictures to Filmora
Now import all the scenes and music to Filmora. You can also create separate folders if you have multiple concepts for a single video.

Step4Drop your media onto the timeline
Drag and drop the song to the audio timeline. Then press shift, select all images, and drop them into the picture timeline. If you realize you are missing enough clips to complete the song, you can draw and add more shots.

Step5Adjust the frame
You can right-click on the picture’s timeline and select Crop to fit to adjust the image on the screen. You can also adjust the scenes according to the song.

Step6Add effects
You can also simulate transitions and effects in the clips. Let’s suppose you want to show a zoom-in shot. Then you would click on the picture frame and the keyframe option just above the timeline. Now keyframe the position and scale of the clip according to you.

Once you feel like your clips sync with the song, you are ready to start planning for the production of your music video.
Conclusion
We hope this blog has given you a better understanding of how planning and storyboarding can help make your music videos better. You can ensure that your vision is clearly communicated to the audience by planning and storyboarding your music videos properly. Now that you know what to do, it’s time to put that knowledge into action. Take a pencil and paper and start sketching the shots and scenes you want to create.
Do You Wish to Know How FFmpeg Can Remove Audio From a Video? If Yes, Keep Scrolling This Guide to Remove Audio From Video with FFmpeg and Other Alternative Software
Unbelievably, the globe has been making headway in its endeavors. Considering how far the world has come in producing amazing things in recent times, it is impossible to fathom the progress made in the digital industry. There are now millions of video editing programs like FFmpeg that remove audio, each allowing you to accomplish anything. In addition to video editing, it is now possible to modify the music playing in the backdrop of a video. Doesn’t it seem impossible to you? However, it has an actual appearance and is simple to pull audio from a video. You will, however, need to choose a tool with great care and consideration.
In the following parts, we will discuss how to remove audio from video with FFmpeg successfully. In addition, we have also looked at other software that has the potential to be an alternative to FFmpeg that is far more effective.
Part 1: How to Use FFmpeg to Remove Audio from Videos?
FFMPEG is a highly flexible video editing program from the command line. You may use it for various purposes, including converting between different file formats. But in addition to that, you may use it to remove audio from your videos or clips. Here are two different ways to delete audio using FFMPEG, depending on what you want to do. But most crucially, speed and quality are not sacrificed with any of these choices. It’s about coding. When using other people’s code, also label the author. Using FFmpeg, you can separate the audio. The audio in video files may be removed, added, extracted, and added again with the help of this powerful utility.
You will only need to install FFmpeg on your computer after you have purchased it. Removing video is straightforward, so you won’t have to put in much effort to achieve this goal. Let’s look at the many methods available.
Use the Command Line
Step1 The command to extract audio from your video file is visible for your review.

Step2 It would be helpful if you updated the extension and the name of the file that was entered, but other than that, you won’t need to do anything else.
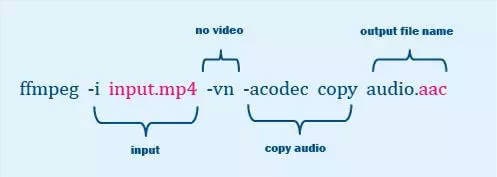
The preceding command is successful if the input file certifies. This is why you need to find the codec for the audio stream. If you obey this order, you will accomplish what you set out to do. A user might sometimes use an audio format returned by the previous command. However, this will only occasionally be successful.
The storage format that FFmpeg employs is determined by looking at the output file’s extension. It would help if you knew that a storage format, a container, and an audio format are distinct. You will encounter a scenario where the audio format does not have a container named after it. Two problematic formats are among the most common formats; they are PCM and Vorbis. OGG is compatible with Vorbis, whereas WAV is compatible with PCM.
Let’s investigate another approach to extract audio from a video using FFmpeg if the prior one was too difficult for you to grasp.
Use the Terminal
Step1 Verify that the format remains the same.
You will need to locate the video in its original format to be able to extract the audio from it. If you are unfamiliar with the primary format, you will be unable to determine the appropriate file extension. Because of this, you are going to need to make use of the ffprobe command.

Now, change “myvideo.mp4” to the name of the video file you want to use. This will verify that you are familiar with the video’s original file format.
After learning about the original audio’s format, you can reencode a video clip to remove the audio from it.
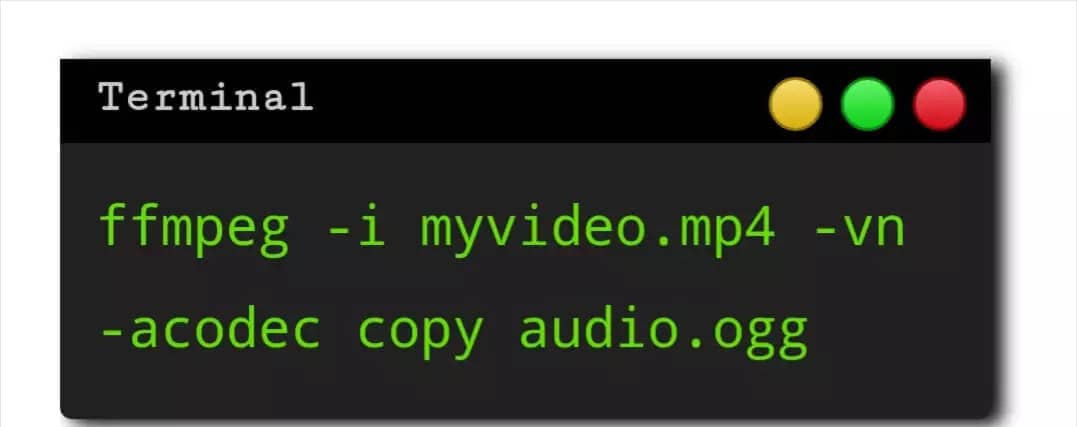
Step2 Modify the format, please.
You might try replacing myvideo.mp4 with the directory and filename to see if it helps. Additionally, it would be helpful if you updated the name of the audio.ogg file with the name you want to use.
Therefore, if you follow the two approaches discussed above, you can extract audio from your video files with little to no work. To completely comprehend the stages, you must examine them in great detail.
Part 2: The Most Straightforward Way to Mute Audio in Videos
If you seek an alternative method to FFmpeg removing audio, you can meet with an overwhelming number of possibilities, each claiming that it is superior to the others. However, in this instance, additional investigation is not required at all. Wondershare Filmora will turn out to be one of the better options. It is software designed for editing videos that will make it simple for you to work on any editing job. It is one of the choices held in the highest esteem among those offered in the industry nowadays.
Free Download For Win 7 or later(64-bit)
Free Download For macOS 10.14 or later
Some core audio editing features of Filmora are:
Audio Ducking: When VoiceOver is speaking, temporarily lower the loudness of the material played. Automatically Select the Caller as the Speaker: When you move your iPhone away from your ear during a call, the audio will automatically transfer over to the speaker system.
Silence Detection: Users of Filmora X have access to an add-on called Silence Detection, which is a paid add-on that helps users more quickly erase quiet pauses that occur throughout a film. To help you save time and make the editing process more comfortable, the add-on searches for the whole movie in search of any periods of silence automatically eliminates them all.
Auto Synchronization: When shooting with a camera or video camera and utilizing a microphone, this feature allows the user to easily replace the audio recorded with the audio in the movie. In addition, it can align the audio and video clips in the project automatically, eliminating the need for human alignment.
Speech to Text (STT): computational linguistics permits the recognition and translation of spoken language into written form. Other names for this technology are computer voice recognition and speech recognition.
Text to Speech (TTS): reads digital text aloud. This kind of technology is called “read-aloud” technology. TTS can take the text shown on a computer or any other digital device and turn it into sound by clicking a button or touching it with your finger.
Audio Visualizer: The Most Powerful Audio and Video Editor Available Today. With the help of Filmora Audio Visualizer, your music video may come to life. The effect will dynamically adapt the sound to the video while intelligently matching the sound.
Step1 Download, Install and Run the Filmora Video Editor.
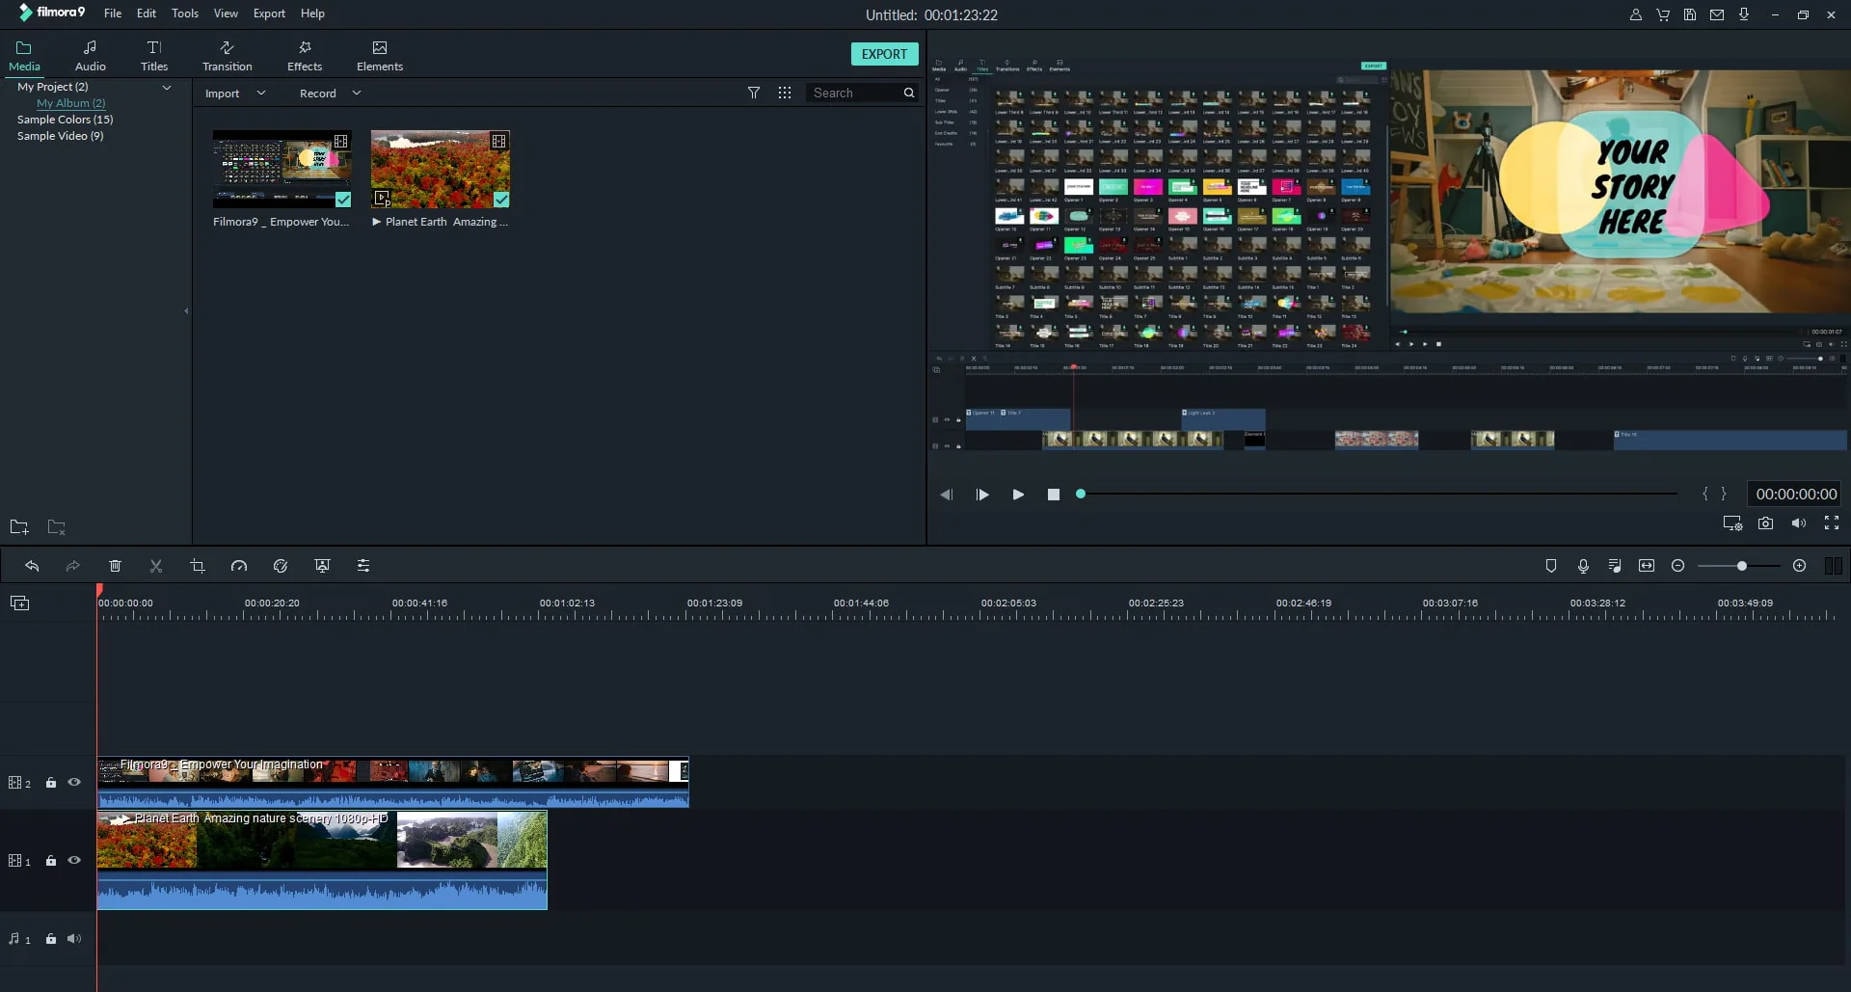
After opening Filmora, the following user interface will appear: You may upload the video file from which you wish to delete the audio tracks by clicking the “Import” button.
Step2 Detach Audio from Uploaded Files
Remove the audio tracks from the original MP4 file by a drag and drop into the timeline, then right-clicking on the file and selecting “Detach Audio” from the menu that appears. After that, the split audio track will show in the Audio Timeline. To delete audio from an MP4, right-click the audio file and choose “Delete” from the menu that appears.
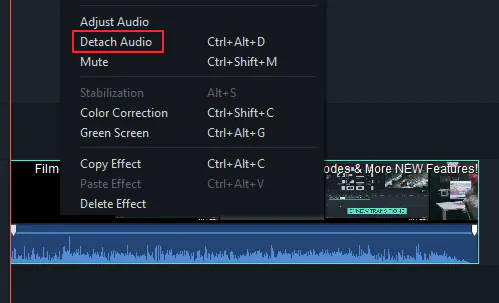
Step3 Export the Silenced Video
After that, pick the preferred export method by clicking the “Export” button. You can set the output video format to be the identical to the one used to record the video in the first place or select it as any other video format. After that, choose the video you want to export by clicking the “Export” option.
In addition, you can save the altered file to your iPhone, iPad, PSP, or other compatible device or instantly upload it to YouTube to share with your friends.
There you go! You successfully explored an excellent alternative software to remove audio from videos via FFmpeg.
Part 3: FAQs
1. How do I change audio in a video?
Changing audio in a video is easy if you use compatible high-end software like Filmora. This audio and video editing tool can modify or change the audio or soundtrack in a video. Much software of this kind is available for both Windows and Mac. Therefore, choose a reliable one, try it, and then begin using it.
2. How exactly does one go about switching the pre-installed audio track on a video?
When you’re viewing a video, you can get the impression that the music playing in the background doesn’t go very well with the content, and you might want to switch it. There are a variety of programs available that will assist you in replacing the audio with video. And now, I’m going to offer Filmora Video Editor as the ideal option since it is the program that is both the simplest and the quickest to do that task.
Conclusion
So, after reading this, you should be able to remove audio from video FFmpeg. Have you ever encountered an editing tool that exceeded your expectations in terms of performance? Although FFmpeg removes audio, the other editing tool we discussed is relatively good quality. Yes, Filmora is a video editing application that provides you with the most outstanding potential services you could have ever imagined having access to. Because it includes several exciting features and a high-quality user interface, it is one of the options people will find ideal.
Free Download For macOS 10.14 or later
Some core audio editing features of Filmora are:
Audio Ducking: When VoiceOver is speaking, temporarily lower the loudness of the material played. Automatically Select the Caller as the Speaker: When you move your iPhone away from your ear during a call, the audio will automatically transfer over to the speaker system.
Silence Detection: Users of Filmora X have access to an add-on called Silence Detection, which is a paid add-on that helps users more quickly erase quiet pauses that occur throughout a film. To help you save time and make the editing process more comfortable, the add-on searches for the whole movie in search of any periods of silence automatically eliminates them all.
Auto Synchronization: When shooting with a camera or video camera and utilizing a microphone, this feature allows the user to easily replace the audio recorded with the audio in the movie. In addition, it can align the audio and video clips in the project automatically, eliminating the need for human alignment.
Speech to Text (STT): computational linguistics permits the recognition and translation of spoken language into written form. Other names for this technology are computer voice recognition and speech recognition.
Text to Speech (TTS): reads digital text aloud. This kind of technology is called “read-aloud” technology. TTS can take the text shown on a computer or any other digital device and turn it into sound by clicking a button or touching it with your finger.
Audio Visualizer: The Most Powerful Audio and Video Editor Available Today. With the help of Filmora Audio Visualizer, your music video may come to life. The effect will dynamically adapt the sound to the video while intelligently matching the sound.
Step1 Download, Install and Run the Filmora Video Editor.
After opening Filmora, the following user interface will appear: You may upload the video file from which you wish to delete the audio tracks by clicking the “Import” button.

Step2 Detach Audio from Uploaded Files
Remove the audio tracks from the original MP4 file by a drag and drop into the timeline, then right-clicking on the file and selecting “Detach Audio” from the menu that appears. After that, the split audio track will show in the Audio Timeline. To delete audio from an MP4, right-click the audio file and choose “Delete” from the menu that appears.

Step3 Export the Silenced Video
After that, pick the preferred export method by clicking the “Export” button. You can set the output video format to be the identical to the one used to record the video in the first place or select it as any other video format. After that, choose the video you want to export by clicking the “Export” option.
In addition, you can save the altered file to your iPhone, iPad, PSP, or other compatible device or instantly upload it to YouTube to share with your friends.
There you go! You successfully explored an excellent alternative software to remove audio from videos via FFmpeg.
Part 3: FAQs
1. How do I change audio in a video?
Changing audio in a video is easy if you use compatible high-end software like Filmora. This audio and video editing tool can modify or change the audio or soundtrack in a video. Much software of this kind is available for both Windows and Mac. Therefore, choose a reliable one, try it, and then begin using it.
2. How exactly does one go about switching the pre-installed audio track on a video?
When you’re viewing a video, you can get the impression that the music playing in the background doesn’t go very well with the content, and you might want to switch it. There are a variety of programs available that will assist you in replacing the audio with video. And now, I’m going to offer Filmora Video Editor as the ideal option since it is the program that is both the simplest and the quickest to do that task.
Conclusion
So, after reading this, you should be able to remove audio from video FFmpeg. Have you ever encountered an editing tool that exceeded your expectations in terms of performance? Although FFmpeg removes audio, the other editing tool we discussed is relatively good quality. Yes, Filmora is a video editing application that provides you with the most outstanding potential services you could have ever imagined having access to. Because it includes several exciting features and a high-quality user interface, it is one of the options people will find ideal.
Also read:
- Updated Steps To Fade Audio In Premier Pro
- New Easy Guide to Overlay Videos in Premiere Pro for 2024
- Updated 6 Instant Ways to Make Windows 10 Slideshow for 2024
- New In 2024, Top 12 AI Video Generators to Pick
- How to Create Video Contents That Convert Sales
- New Are You Also Facing a Problem with the Snapchat Camera Zoomed In? Find Out the Easiest Methods to Fix This Error without Installing a Third-Party Tool
- Do You Need to Convert TXT to SRT to Add Subtitles to Your Videos? Here Are Three Effective Ways You Can Do It Effortlessly
- In 2024, What Is TS Format and How To Play TS Files?
- Updated Looking for Ways to Compress Your Videos for Instagram? Keep Reading to Know About some of the Best Video Compressors for Instagram
- Updated Best AR Video App - Top 10 Picks for 2024
- New In 2024, 7 Ways Add Subtitles to MKV Videos on All Platforms
- In 2024, Progressive Solutions to Adding VHS Effects to Video with Ease
- In 2024, How to Get the Most Out of KineMaster Video Templates
- 8 Free Photo Collage with Music Video Maker
- Updated How to Make A Fantastic Café Vlog
- How to Brighten a Video in Windows 10 Easily for 2024
- New Why You Should Master Slideshows In Lightroom, Fresh Insight, In 2024
- 2024 Approved Convert Time-Lapse to Normal Video
- Updated 2024 Approved How to Animate Your Designs With Canva GIF
- How to Make Canva Collages for 2024
- New In 2024, 3GP Video Format What Is 3GP Format And How To Play It?
- In 2024, How to Come up With the Best Pokemon Team On Vivo V27? | Dr.fone
- How to Upgrade iPhone 11 Pro Max to the Latest iOS/iPadOS Version? | Dr.fone
- How to Fix Videos Not Playing on Xiaomi Civi 3 Disney 100th Anniversary Edition?
- 3uTools Virtual Location Not Working On Honor 90 GT? Fix Now | Dr.fone
- Use Device Manager to identify some outdated your hardware drivers on Windows 11
- How to Unlock Realme 12 5G Phone without PIN
- How to Unlock Nubia Z50 Ultra PIN Code/Pattern Lock/Password
- How to Upgrade iPhone 6s Plus without Losing Data? | Dr.fone
- A Complete Guide To OEM Unlocking on Honor Magic 5
- How To Bypass Xiaomi Redmi Note 12 Pro 5G FRP In 3 Different Ways
- 3 Things You Must Know about Fake Snapchat Location On Tecno Spark 20 Pro+ | Dr.fone
- In 2024, How to Hide/Fake Snapchat Location on Your Motorola Razr 40 Ultra | Dr.fone
- Possible solutions to restore deleted music from Motorola Moto G34 5G
- How to Transfer Videos from Asus ROG Phone 7 Ultimate to iPad | Dr.fone
- How to Convert Animated GIF From Video
- Rootjunky APK To Bypass Google FRP Lock For Vivo
- The Top 5 Android Apps That Use Fingerprint Sensor to Lock Your Apps On Realme V30T
- Simple and Effective Ways to Change Your Country on YouTube App Of your Realme C33 2023 | Dr.fone
- In 2024, Easy Tutorial for Activating iCloud from iPhone 14 Safe and Legal
- Title: 8 Ways To Live Stream Pre-Recorded Video
- Author: Chloe
- Created at : 2024-05-20 03:37:18
- Updated at : 2024-05-21 03:37:18
- Link: https://ai-editing-video.techidaily.com/8-ways-to-live-stream-pre-recorded-video/
- License: This work is licensed under CC BY-NC-SA 4.0.

