:max_bytes(150000):strip_icc():format(webp)/should-you-buy-a-kindle-5270180-b1c49aad9c1142dc8722cfdb5d02072c.jpg)
A Guide to Use Distortion Effect in Premeiere Pro

A Guide to Use Distortion Effect in Premeiere Pro
Create High-Quality Video - Wondershare Filmora
An easy and powerful YouTube video editor
Numerous video and audio effects to choose from
Detailed tutorials are provided by the official channel
Premiere Pro is one of the most popular timeline-based video editing software, with over 9 million users. It’s the successor to Adobe Premiere, and it comes with cool distortion effects. We’ll look at Premiere Pro distortion effects and how to use them.
In this article
01 How to Use Distortion Effect in Premiere Pro?
02 Bonus! Free Distortion Effects for Premiere Pro
Adobe Premiere Pro offers a wide variety of beneficial editing tools and effects. Below are some of the impressive distortion effects you’ll find in Premiere Pro and how to use them in your project.
1. Corner Pin Effect
This effect distorts your image by simply changing the position of its corners. You can use the Corner pin effect to twist, skew, shrink, or stretch an image. Additionally, you can use it to simulate movement or perspective pivoting from the edge of your clip like a door opening.
You can directly manipulate the properties of the Corner Pin effect in the Program monitor by clicking the Transform right next to Corner Pin. To adjust the properties, drag one of the corner handles.
- To use this effect, open Premiere Pro and click File. Choose Import from the drop-down menu. The File Explorer window will open and allow you to find your footage. Select the video file you want to import, then click Open.
- Go to Effects Control and click Distortion. Choose Corner Pin Effect from the drop-down menu.

- You can now pin each corner from its original point to another specific point by adjusting the slider on the Upper Left, Upper Right, Lower Left, and Lower Right. You can also highlight your selection tool when working with the Corner Pin effect.

2. Lens Distortion Effect
This distortion effect Premiere Pro simulates the distorted lens through which people view the clip.
1. Go to Effects Control>Distortion>Lens Distortion Effect.
2. Choose the settings you want to use from the available options and adjust the slider.
- The Vertical and Horizontal Decentering control displaces the lens’ focal and makes the image bend and smear. The image will wrap in on itself at extreme settings.
- The Curvature setting alters the curvature of the lens. You can specify a positive value to make the image convex, while the negative value makes the image concave.
- The Vertical and Horizontal Prism FX setting created results similar to horizontal decentering and vertical, but the image does not wrap in on itself at extreme values.
- Use the Fill Color option to specify the background color, and Fill Alpha to make your background transparent.

3. Magnify Effect
This effect allows you to enlarge a selected area of your clip. The Magnify effect acts as a magnifying glass set over an area of an image. You can also use this effect to scale the whole image far beyond 100 percent and still maintain resolution.
1. To use this effect, go to Effect Control>Distortion>Magnify.
2. Next, go to the left side of the Effects Control panel and make the necessary adjustments to suit your preferences.
- Shape: This control specifies the magnified area shape.
- Center: The Center control allows you to specify the center of the magnified section.
- Magnification: This setting lets users specify the percentage of the magnification of the area they have selected, while the values represent the scale percentage.
- Link: The Link control allows you to specify how the effect will link the Size, Feather, and Magnification amount, to enable them to decrease or increase proportionally. You will disable the Resize Layer option if you set the Link control to any of the available settings except None. Setting the Link control to any setting except None disables Resize Layer. Size & Feather To Magnification allows you to specify that the edge feather and size of the magnified section decrease or increase proportionally regarding the magnification adjustment.
- Size: This control allows you to specify the magnified area size in pixels.
- Feather: With the Feather option, you can specify the amount of feather the effect applies to the magnified area edge. Lower values will sharpen the edge. Higher values will soften the edge while blending the edge with the layer that’s behind it.
- Opacity: This control allows you to specify the transparency of the magnified region.
- Scaling: Use this option to specify the kind of scaling the effect is using to magnify an image.
- Blending Mode: Use this control to specify the blend mode the effect will use to combine the original clip with the magnified area. The None option shows transparent pixels around the magnified section.
- Resize Layer: Selecting this option means the effect will only use the boundaries as the clip’s edge when the magnified region extends beyond the original boundaries of the clip. Deselecting the Resize Layer means that the boundaries of the clip will crop any area of your image outside the bounding box of the original clip.

4. Mirror Effect
This distortion Premiere Pro effect splits an image along a line while reflecting one side onto the other. Where the reflection appears and which side will be reflected is determined by the reflection angles.
1. Head over to Effect Control>Distortion>Mirror to use this effect.
2. Adjust the controls until you get the results you desire.
- Reflection Angle: With the Reflection Angle control, you can specify the angle of reflection and where it appears on the clip. A zero-degree angle reflects the left-hand side on the right.
- Reflection Center: This control allows you to specify the position of the line. You need to click the box, then drag the resulting crosshair up to the area in the image where you would like to place the line.

5. Offset Effect
This effect pans your image within a clip, and visual details pushed off one side of this image will appear on the opposite side. You have to perform the offset with subpixel precision at the best quality.
Also, you can use Offset with a combination of other effects. Head over to Effect Control>Distortion>Offset to use this effect.

6. Spherize Effect
The Spherize effect allows users to wrap a video clip around a spherical shape. You can use it to give texts and objects a three-dimensional effect. Go to Effect Control>Distortion>Spherize and adjust the radius and center of the sphere.

7. Transform Effect
This effect applies 2-dimensional geometric transformations to your clip. You can use this effect to skew clips along any axis.
1. Go to Effect Control>Distortion>Transform to apply this effect to your clip.
2. Use Transform settings to adjust Opacity, Skew, Rotation, Scale, Anchor Point, and more.

8. Turbulent Displace Effect
This fun effect utilizes fractal noise to create turbulent Premiere Pro distortion effects in your image. You can use the Turbulent Displace effect to add movement to your clip.
1. Head to Effect Control>Distortion>Turbulent Displace.
2. Adjust the following controls:
- Displacement
- Amount
- Size
- Offset (Turbulence)
- Complexity
- Evolution
- Pinning
- Resize Layer
- Antialiasing For Best Quality

9. Twirl Effect
The Twirl effect allows you to rotate your clip around its center. It rotates the image more sharply in the middle than at the edge. You can use it on faces to make a funny clip. Navigate to Effect Control>Distortion>Twirl to start using this effect. Next, use the settings to adjust how much angle it twirls and the radius.

10. Wave Warp Effect
This effect is one of the most popular Premiere Pro distortion effects. It generates the appearance of a wave as it’s traveling across an image. The Wave Warp effect allows you to produce various wave shapes, including sine, circular, and square waves.
It’s automatically animated at a steady speed across the time range, and that’s without frames. You need to set keyframes to vary speeds.
1. Head to Effect Control>Distortion>Wave Warp to apply this effect in your video clip.
2. Now, change the wave speed, direction, height, width, and type to suit your preference.

Bonus! Free Distortion Effects for Premiere Pro
1. Liquid Distortion Effect
This effect can distort the content in a clip and can be used to shift into the next clip. It could be utilized in editing or used as a transition.

2. Earthquake Effect
This effect adds a shaking motion to the video clip you add it to; it works as a transition but could also be a useful editing tool.

3. Glass Effect
This effect can add various blurs to the video clip and be used to transition from one clip to the next.

4. TV Effect
This effect imitates the view of a television being turned on or off. You can use it to introduce a new video clip. It would also be a great start or end to the entire video.

5. Glitch Effect
This effect adds a glitch to the video clip. You can use it in editing or as a transition from one clip to the next.

Conclusion
● You can add any of these Premiere Pro distortion effects to make your videos more catchy. In turn, they will get more attention and views. Premiere Pro comes with tons of distortion effects and a responsive interface.
Premiere Pro is one of the most popular timeline-based video editing software, with over 9 million users. It’s the successor to Adobe Premiere, and it comes with cool distortion effects. We’ll look at Premiere Pro distortion effects and how to use them.
In this article
01 How to Use Distortion Effect in Premiere Pro?
02 Bonus! Free Distortion Effects for Premiere Pro
Adobe Premiere Pro offers a wide variety of beneficial editing tools and effects. Below are some of the impressive distortion effects you’ll find in Premiere Pro and how to use them in your project.
1. Corner Pin Effect
This effect distorts your image by simply changing the position of its corners. You can use the Corner pin effect to twist, skew, shrink, or stretch an image. Additionally, you can use it to simulate movement or perspective pivoting from the edge of your clip like a door opening.
You can directly manipulate the properties of the Corner Pin effect in the Program monitor by clicking the Transform right next to Corner Pin. To adjust the properties, drag one of the corner handles.
- To use this effect, open Premiere Pro and click File. Choose Import from the drop-down menu. The File Explorer window will open and allow you to find your footage. Select the video file you want to import, then click Open.
- Go to Effects Control and click Distortion. Choose Corner Pin Effect from the drop-down menu.

- You can now pin each corner from its original point to another specific point by adjusting the slider on the Upper Left, Upper Right, Lower Left, and Lower Right. You can also highlight your selection tool when working with the Corner Pin effect.

2. Lens Distortion Effect
This distortion effect Premiere Pro simulates the distorted lens through which people view the clip.
1. Go to Effects Control>Distortion>Lens Distortion Effect.
2. Choose the settings you want to use from the available options and adjust the slider.
- The Vertical and Horizontal Decentering control displaces the lens’ focal and makes the image bend and smear. The image will wrap in on itself at extreme settings.
- The Curvature setting alters the curvature of the lens. You can specify a positive value to make the image convex, while the negative value makes the image concave.
- The Vertical and Horizontal Prism FX setting created results similar to horizontal decentering and vertical, but the image does not wrap in on itself at extreme values.
- Use the Fill Color option to specify the background color, and Fill Alpha to make your background transparent.

3. Magnify Effect
This effect allows you to enlarge a selected area of your clip. The Magnify effect acts as a magnifying glass set over an area of an image. You can also use this effect to scale the whole image far beyond 100 percent and still maintain resolution.
1. To use this effect, go to Effect Control>Distortion>Magnify.
2. Next, go to the left side of the Effects Control panel and make the necessary adjustments to suit your preferences.
- Shape: This control specifies the magnified area shape.
- Center: The Center control allows you to specify the center of the magnified section.
- Magnification: This setting lets users specify the percentage of the magnification of the area they have selected, while the values represent the scale percentage.
- Link: The Link control allows you to specify how the effect will link the Size, Feather, and Magnification amount, to enable them to decrease or increase proportionally. You will disable the Resize Layer option if you set the Link control to any of the available settings except None. Setting the Link control to any setting except None disables Resize Layer. Size & Feather To Magnification allows you to specify that the edge feather and size of the magnified section decrease or increase proportionally regarding the magnification adjustment.
- Size: This control allows you to specify the magnified area size in pixels.
- Feather: With the Feather option, you can specify the amount of feather the effect applies to the magnified area edge. Lower values will sharpen the edge. Higher values will soften the edge while blending the edge with the layer that’s behind it.
- Opacity: This control allows you to specify the transparency of the magnified region.
- Scaling: Use this option to specify the kind of scaling the effect is using to magnify an image.
- Blending Mode: Use this control to specify the blend mode the effect will use to combine the original clip with the magnified area. The None option shows transparent pixels around the magnified section.
- Resize Layer: Selecting this option means the effect will only use the boundaries as the clip’s edge when the magnified region extends beyond the original boundaries of the clip. Deselecting the Resize Layer means that the boundaries of the clip will crop any area of your image outside the bounding box of the original clip.

4. Mirror Effect
This distortion Premiere Pro effect splits an image along a line while reflecting one side onto the other. Where the reflection appears and which side will be reflected is determined by the reflection angles.
1. Head over to Effect Control>Distortion>Mirror to use this effect.
2. Adjust the controls until you get the results you desire.
- Reflection Angle: With the Reflection Angle control, you can specify the angle of reflection and where it appears on the clip. A zero-degree angle reflects the left-hand side on the right.
- Reflection Center: This control allows you to specify the position of the line. You need to click the box, then drag the resulting crosshair up to the area in the image where you would like to place the line.

5. Offset Effect
This effect pans your image within a clip, and visual details pushed off one side of this image will appear on the opposite side. You have to perform the offset with subpixel precision at the best quality.
Also, you can use Offset with a combination of other effects. Head over to Effect Control>Distortion>Offset to use this effect.

6. Spherize Effect
The Spherize effect allows users to wrap a video clip around a spherical shape. You can use it to give texts and objects a three-dimensional effect. Go to Effect Control>Distortion>Spherize and adjust the radius and center of the sphere.

7. Transform Effect
This effect applies 2-dimensional geometric transformations to your clip. You can use this effect to skew clips along any axis.
1. Go to Effect Control>Distortion>Transform to apply this effect to your clip.
2. Use Transform settings to adjust Opacity, Skew, Rotation, Scale, Anchor Point, and more.

8. Turbulent Displace Effect
This fun effect utilizes fractal noise to create turbulent Premiere Pro distortion effects in your image. You can use the Turbulent Displace effect to add movement to your clip.
1. Head to Effect Control>Distortion>Turbulent Displace.
2. Adjust the following controls:
- Displacement
- Amount
- Size
- Offset (Turbulence)
- Complexity
- Evolution
- Pinning
- Resize Layer
- Antialiasing For Best Quality

9. Twirl Effect
The Twirl effect allows you to rotate your clip around its center. It rotates the image more sharply in the middle than at the edge. You can use it on faces to make a funny clip. Navigate to Effect Control>Distortion>Twirl to start using this effect. Next, use the settings to adjust how much angle it twirls and the radius.

10. Wave Warp Effect
This effect is one of the most popular Premiere Pro distortion effects. It generates the appearance of a wave as it’s traveling across an image. The Wave Warp effect allows you to produce various wave shapes, including sine, circular, and square waves.
It’s automatically animated at a steady speed across the time range, and that’s without frames. You need to set keyframes to vary speeds.
1. Head to Effect Control>Distortion>Wave Warp to apply this effect in your video clip.
2. Now, change the wave speed, direction, height, width, and type to suit your preference.

Bonus! Free Distortion Effects for Premiere Pro
1. Liquid Distortion Effect
This effect can distort the content in a clip and can be used to shift into the next clip. It could be utilized in editing or used as a transition.

2. Earthquake Effect
This effect adds a shaking motion to the video clip you add it to; it works as a transition but could also be a useful editing tool.

3. Glass Effect
This effect can add various blurs to the video clip and be used to transition from one clip to the next.

4. TV Effect
This effect imitates the view of a television being turned on or off. You can use it to introduce a new video clip. It would also be a great start or end to the entire video.

5. Glitch Effect
This effect adds a glitch to the video clip. You can use it in editing or as a transition from one clip to the next.

Conclusion
● You can add any of these Premiere Pro distortion effects to make your videos more catchy. In turn, they will get more attention and views. Premiere Pro comes with tons of distortion effects and a responsive interface.
Premiere Pro is one of the most popular timeline-based video editing software, with over 9 million users. It’s the successor to Adobe Premiere, and it comes with cool distortion effects. We’ll look at Premiere Pro distortion effects and how to use them.
In this article
01 How to Use Distortion Effect in Premiere Pro?
02 Bonus! Free Distortion Effects for Premiere Pro
Adobe Premiere Pro offers a wide variety of beneficial editing tools and effects. Below are some of the impressive distortion effects you’ll find in Premiere Pro and how to use them in your project.
1. Corner Pin Effect
This effect distorts your image by simply changing the position of its corners. You can use the Corner pin effect to twist, skew, shrink, or stretch an image. Additionally, you can use it to simulate movement or perspective pivoting from the edge of your clip like a door opening.
You can directly manipulate the properties of the Corner Pin effect in the Program monitor by clicking the Transform right next to Corner Pin. To adjust the properties, drag one of the corner handles.
- To use this effect, open Premiere Pro and click File. Choose Import from the drop-down menu. The File Explorer window will open and allow you to find your footage. Select the video file you want to import, then click Open.
- Go to Effects Control and click Distortion. Choose Corner Pin Effect from the drop-down menu.

- You can now pin each corner from its original point to another specific point by adjusting the slider on the Upper Left, Upper Right, Lower Left, and Lower Right. You can also highlight your selection tool when working with the Corner Pin effect.

2. Lens Distortion Effect
This distortion effect Premiere Pro simulates the distorted lens through which people view the clip.
1. Go to Effects Control>Distortion>Lens Distortion Effect.
2. Choose the settings you want to use from the available options and adjust the slider.
- The Vertical and Horizontal Decentering control displaces the lens’ focal and makes the image bend and smear. The image will wrap in on itself at extreme settings.
- The Curvature setting alters the curvature of the lens. You can specify a positive value to make the image convex, while the negative value makes the image concave.
- The Vertical and Horizontal Prism FX setting created results similar to horizontal decentering and vertical, but the image does not wrap in on itself at extreme values.
- Use the Fill Color option to specify the background color, and Fill Alpha to make your background transparent.

3. Magnify Effect
This effect allows you to enlarge a selected area of your clip. The Magnify effect acts as a magnifying glass set over an area of an image. You can also use this effect to scale the whole image far beyond 100 percent and still maintain resolution.
1. To use this effect, go to Effect Control>Distortion>Magnify.
2. Next, go to the left side of the Effects Control panel and make the necessary adjustments to suit your preferences.
- Shape: This control specifies the magnified area shape.
- Center: The Center control allows you to specify the center of the magnified section.
- Magnification: This setting lets users specify the percentage of the magnification of the area they have selected, while the values represent the scale percentage.
- Link: The Link control allows you to specify how the effect will link the Size, Feather, and Magnification amount, to enable them to decrease or increase proportionally. You will disable the Resize Layer option if you set the Link control to any of the available settings except None. Setting the Link control to any setting except None disables Resize Layer. Size & Feather To Magnification allows you to specify that the edge feather and size of the magnified section decrease or increase proportionally regarding the magnification adjustment.
- Size: This control allows you to specify the magnified area size in pixels.
- Feather: With the Feather option, you can specify the amount of feather the effect applies to the magnified area edge. Lower values will sharpen the edge. Higher values will soften the edge while blending the edge with the layer that’s behind it.
- Opacity: This control allows you to specify the transparency of the magnified region.
- Scaling: Use this option to specify the kind of scaling the effect is using to magnify an image.
- Blending Mode: Use this control to specify the blend mode the effect will use to combine the original clip with the magnified area. The None option shows transparent pixels around the magnified section.
- Resize Layer: Selecting this option means the effect will only use the boundaries as the clip’s edge when the magnified region extends beyond the original boundaries of the clip. Deselecting the Resize Layer means that the boundaries of the clip will crop any area of your image outside the bounding box of the original clip.

4. Mirror Effect
This distortion Premiere Pro effect splits an image along a line while reflecting one side onto the other. Where the reflection appears and which side will be reflected is determined by the reflection angles.
1. Head over to Effect Control>Distortion>Mirror to use this effect.
2. Adjust the controls until you get the results you desire.
- Reflection Angle: With the Reflection Angle control, you can specify the angle of reflection and where it appears on the clip. A zero-degree angle reflects the left-hand side on the right.
- Reflection Center: This control allows you to specify the position of the line. You need to click the box, then drag the resulting crosshair up to the area in the image where you would like to place the line.

5. Offset Effect
This effect pans your image within a clip, and visual details pushed off one side of this image will appear on the opposite side. You have to perform the offset with subpixel precision at the best quality.
Also, you can use Offset with a combination of other effects. Head over to Effect Control>Distortion>Offset to use this effect.

6. Spherize Effect
The Spherize effect allows users to wrap a video clip around a spherical shape. You can use it to give texts and objects a three-dimensional effect. Go to Effect Control>Distortion>Spherize and adjust the radius and center of the sphere.

7. Transform Effect
This effect applies 2-dimensional geometric transformations to your clip. You can use this effect to skew clips along any axis.
1. Go to Effect Control>Distortion>Transform to apply this effect to your clip.
2. Use Transform settings to adjust Opacity, Skew, Rotation, Scale, Anchor Point, and more.

8. Turbulent Displace Effect
This fun effect utilizes fractal noise to create turbulent Premiere Pro distortion effects in your image. You can use the Turbulent Displace effect to add movement to your clip.
1. Head to Effect Control>Distortion>Turbulent Displace.
2. Adjust the following controls:
- Displacement
- Amount
- Size
- Offset (Turbulence)
- Complexity
- Evolution
- Pinning
- Resize Layer
- Antialiasing For Best Quality

9. Twirl Effect
The Twirl effect allows you to rotate your clip around its center. It rotates the image more sharply in the middle than at the edge. You can use it on faces to make a funny clip. Navigate to Effect Control>Distortion>Twirl to start using this effect. Next, use the settings to adjust how much angle it twirls and the radius.

10. Wave Warp Effect
This effect is one of the most popular Premiere Pro distortion effects. It generates the appearance of a wave as it’s traveling across an image. The Wave Warp effect allows you to produce various wave shapes, including sine, circular, and square waves.
It’s automatically animated at a steady speed across the time range, and that’s without frames. You need to set keyframes to vary speeds.
1. Head to Effect Control>Distortion>Wave Warp to apply this effect in your video clip.
2. Now, change the wave speed, direction, height, width, and type to suit your preference.

Bonus! Free Distortion Effects for Premiere Pro
1. Liquid Distortion Effect
This effect can distort the content in a clip and can be used to shift into the next clip. It could be utilized in editing or used as a transition.

2. Earthquake Effect
This effect adds a shaking motion to the video clip you add it to; it works as a transition but could also be a useful editing tool.

3. Glass Effect
This effect can add various blurs to the video clip and be used to transition from one clip to the next.

4. TV Effect
This effect imitates the view of a television being turned on or off. You can use it to introduce a new video clip. It would also be a great start or end to the entire video.

5. Glitch Effect
This effect adds a glitch to the video clip. You can use it in editing or as a transition from one clip to the next.

Conclusion
● You can add any of these Premiere Pro distortion effects to make your videos more catchy. In turn, they will get more attention and views. Premiere Pro comes with tons of distortion effects and a responsive interface.
Premiere Pro is one of the most popular timeline-based video editing software, with over 9 million users. It’s the successor to Adobe Premiere, and it comes with cool distortion effects. We’ll look at Premiere Pro distortion effects and how to use them.
In this article
01 How to Use Distortion Effect in Premiere Pro?
02 Bonus! Free Distortion Effects for Premiere Pro
Adobe Premiere Pro offers a wide variety of beneficial editing tools and effects. Below are some of the impressive distortion effects you’ll find in Premiere Pro and how to use them in your project.
1. Corner Pin Effect
This effect distorts your image by simply changing the position of its corners. You can use the Corner pin effect to twist, skew, shrink, or stretch an image. Additionally, you can use it to simulate movement or perspective pivoting from the edge of your clip like a door opening.
You can directly manipulate the properties of the Corner Pin effect in the Program monitor by clicking the Transform right next to Corner Pin. To adjust the properties, drag one of the corner handles.
- To use this effect, open Premiere Pro and click File. Choose Import from the drop-down menu. The File Explorer window will open and allow you to find your footage. Select the video file you want to import, then click Open.
- Go to Effects Control and click Distortion. Choose Corner Pin Effect from the drop-down menu.

- You can now pin each corner from its original point to another specific point by adjusting the slider on the Upper Left, Upper Right, Lower Left, and Lower Right. You can also highlight your selection tool when working with the Corner Pin effect.

2. Lens Distortion Effect
This distortion effect Premiere Pro simulates the distorted lens through which people view the clip.
1. Go to Effects Control>Distortion>Lens Distortion Effect.
2. Choose the settings you want to use from the available options and adjust the slider.
- The Vertical and Horizontal Decentering control displaces the lens’ focal and makes the image bend and smear. The image will wrap in on itself at extreme settings.
- The Curvature setting alters the curvature of the lens. You can specify a positive value to make the image convex, while the negative value makes the image concave.
- The Vertical and Horizontal Prism FX setting created results similar to horizontal decentering and vertical, but the image does not wrap in on itself at extreme values.
- Use the Fill Color option to specify the background color, and Fill Alpha to make your background transparent.

3. Magnify Effect
This effect allows you to enlarge a selected area of your clip. The Magnify effect acts as a magnifying glass set over an area of an image. You can also use this effect to scale the whole image far beyond 100 percent and still maintain resolution.
1. To use this effect, go to Effect Control>Distortion>Magnify.
2. Next, go to the left side of the Effects Control panel and make the necessary adjustments to suit your preferences.
- Shape: This control specifies the magnified area shape.
- Center: The Center control allows you to specify the center of the magnified section.
- Magnification: This setting lets users specify the percentage of the magnification of the area they have selected, while the values represent the scale percentage.
- Link: The Link control allows you to specify how the effect will link the Size, Feather, and Magnification amount, to enable them to decrease or increase proportionally. You will disable the Resize Layer option if you set the Link control to any of the available settings except None. Setting the Link control to any setting except None disables Resize Layer. Size & Feather To Magnification allows you to specify that the edge feather and size of the magnified section decrease or increase proportionally regarding the magnification adjustment.
- Size: This control allows you to specify the magnified area size in pixels.
- Feather: With the Feather option, you can specify the amount of feather the effect applies to the magnified area edge. Lower values will sharpen the edge. Higher values will soften the edge while blending the edge with the layer that’s behind it.
- Opacity: This control allows you to specify the transparency of the magnified region.
- Scaling: Use this option to specify the kind of scaling the effect is using to magnify an image.
- Blending Mode: Use this control to specify the blend mode the effect will use to combine the original clip with the magnified area. The None option shows transparent pixels around the magnified section.
- Resize Layer: Selecting this option means the effect will only use the boundaries as the clip’s edge when the magnified region extends beyond the original boundaries of the clip. Deselecting the Resize Layer means that the boundaries of the clip will crop any area of your image outside the bounding box of the original clip.

4. Mirror Effect
This distortion Premiere Pro effect splits an image along a line while reflecting one side onto the other. Where the reflection appears and which side will be reflected is determined by the reflection angles.
1. Head over to Effect Control>Distortion>Mirror to use this effect.
2. Adjust the controls until you get the results you desire.
- Reflection Angle: With the Reflection Angle control, you can specify the angle of reflection and where it appears on the clip. A zero-degree angle reflects the left-hand side on the right.
- Reflection Center: This control allows you to specify the position of the line. You need to click the box, then drag the resulting crosshair up to the area in the image where you would like to place the line.

5. Offset Effect
This effect pans your image within a clip, and visual details pushed off one side of this image will appear on the opposite side. You have to perform the offset with subpixel precision at the best quality.
Also, you can use Offset with a combination of other effects. Head over to Effect Control>Distortion>Offset to use this effect.

6. Spherize Effect
The Spherize effect allows users to wrap a video clip around a spherical shape. You can use it to give texts and objects a three-dimensional effect. Go to Effect Control>Distortion>Spherize and adjust the radius and center of the sphere.

7. Transform Effect
This effect applies 2-dimensional geometric transformations to your clip. You can use this effect to skew clips along any axis.
1. Go to Effect Control>Distortion>Transform to apply this effect to your clip.
2. Use Transform settings to adjust Opacity, Skew, Rotation, Scale, Anchor Point, and more.

8. Turbulent Displace Effect
This fun effect utilizes fractal noise to create turbulent Premiere Pro distortion effects in your image. You can use the Turbulent Displace effect to add movement to your clip.
1. Head to Effect Control>Distortion>Turbulent Displace.
2. Adjust the following controls:
- Displacement
- Amount
- Size
- Offset (Turbulence)
- Complexity
- Evolution
- Pinning
- Resize Layer
- Antialiasing For Best Quality

9. Twirl Effect
The Twirl effect allows you to rotate your clip around its center. It rotates the image more sharply in the middle than at the edge. You can use it on faces to make a funny clip. Navigate to Effect Control>Distortion>Twirl to start using this effect. Next, use the settings to adjust how much angle it twirls and the radius.

10. Wave Warp Effect
This effect is one of the most popular Premiere Pro distortion effects. It generates the appearance of a wave as it’s traveling across an image. The Wave Warp effect allows you to produce various wave shapes, including sine, circular, and square waves.
It’s automatically animated at a steady speed across the time range, and that’s without frames. You need to set keyframes to vary speeds.
1. Head to Effect Control>Distortion>Wave Warp to apply this effect in your video clip.
2. Now, change the wave speed, direction, height, width, and type to suit your preference.

Bonus! Free Distortion Effects for Premiere Pro
1. Liquid Distortion Effect
This effect can distort the content in a clip and can be used to shift into the next clip. It could be utilized in editing or used as a transition.

2. Earthquake Effect
This effect adds a shaking motion to the video clip you add it to; it works as a transition but could also be a useful editing tool.

3. Glass Effect
This effect can add various blurs to the video clip and be used to transition from one clip to the next.

4. TV Effect
This effect imitates the view of a television being turned on or off. You can use it to introduce a new video clip. It would also be a great start or end to the entire video.

5. Glitch Effect
This effect adds a glitch to the video clip. You can use it in editing or as a transition from one clip to the next.

Conclusion
● You can add any of these Premiere Pro distortion effects to make your videos more catchy. In turn, they will get more attention and views. Premiere Pro comes with tons of distortion effects and a responsive interface.
Whatever the Reason You Want to Convert an Mp4 to GIF Online, There Are a Number of Ways to Do It. Use This Guide to Learn the Best Methods. Read More Here
6 Instant mp4 to GIF Online Tools
An easy yet powerful editor
Numerous effects to choose from
Detailed tutorials provided by the official channel
Content creation has become easier than before with the popularity of mp4 to gif online. GIFs help to create compelling and engaging content in every industry. They can also be used in all sorts of ways, from adding animation to your designs to visually communicating information.
Moreover, if you don’t want to include videos and are interested in giving a good laugh dose to your audience, GIFs are the solution.
They are being used heavily today by content creators, marketing experts, and digital marketing agencies. However, they are not easily available in the way you want. So, you may have to convert mp4 to gif online. Fortunately, a number of tools are available for MP4 to GIF conversion that we are going to share here.
In this article
01 [6 Online Tools for Converting an MP4 to a GIF](#Part 1)
02 [6 Online Tools for Converting GIFs to MP4](#Part 2)
Part 1 6 Online Tools for Converting an MP4 to a GIF
01Any GIF Animator
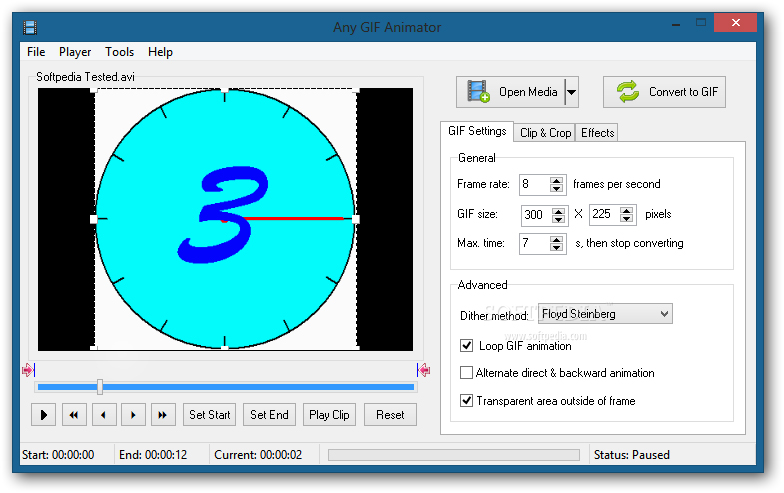
Any GIF Animator is a popular choice for content creators when making GIFs. Its simple interface helps in turning video files of any format into attractive GIFs. Even those who have no technical idea of video editing can use this software easily. You can even import media files from optical storage devices using this mp4 to gif online platform.
Key Features
● Best for those without a technical background
● Comes with an animation wizard and a built-in image editor
● Quickly add effects or customize your GIF the way you want
● Get access to some advanced features like text overlays, resolution effects, and more
● It is possible to make adjustments to frame rate, width, height, and more in a GIF
● Convert a Youtube video to a GIF as well
Supported Platforms: Windows
02Adobe Creative Cloud Express
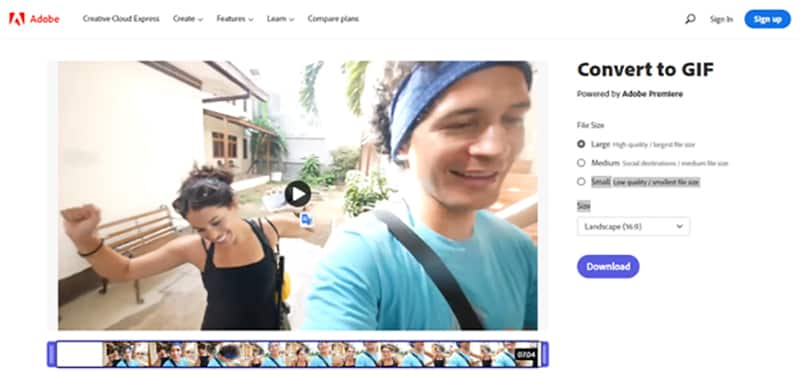
Adobe Creative Cloud Express is the simplest and quickest way to convert an MP4 to GIF. The users have to drag and drop the file and wait for the magic to happen. It has been powered by adobe premiere pro. The only requirement is there to sign up and then you get access to a plethora of creative tools.
Key Features
● Drag and Drop Feature Available
● Download the Converted file in your desired size and quality
● Simple and effective
Supported Platforms: All
03Instagriffer
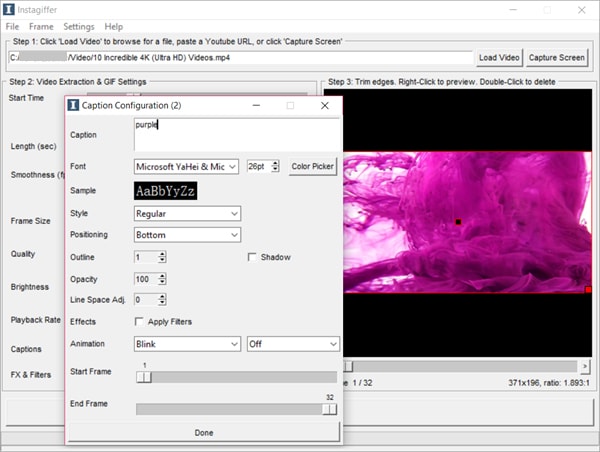
Instagriffer is widely used forextracting GIFs from YouTube videos, Netflix shows, and more. It assists you in capturing your favorite moments from the screen in GIF format for free. There is no need to worry about watermarks because it doesn’t add them to the output.
Key Features
● You can add text, filters, loops, and more
● A plethora of customizable text and logos
● Decide the starting and ending time of a GIF
Supported Platforms: Windows & Mac
04Cute GIF to Video Converter
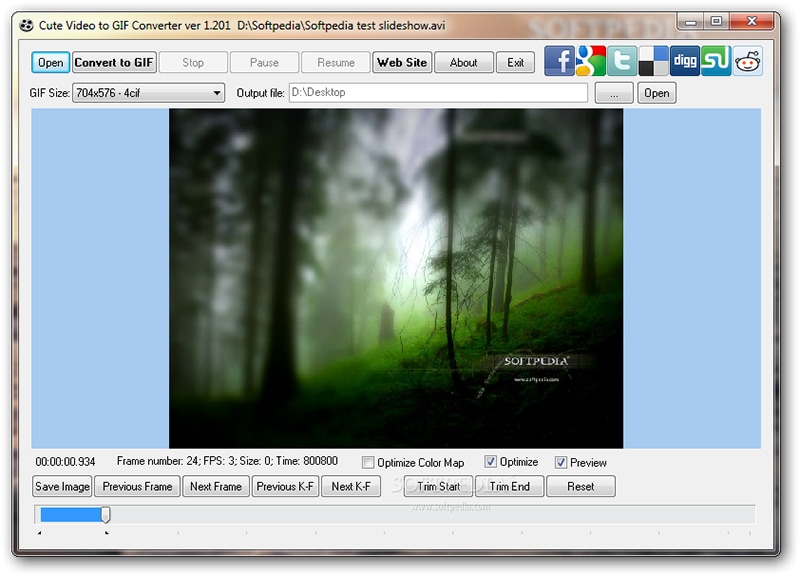
It allows you to add various animation effects during GIF processing. Apart from that, the users get the privilege of sharing GIFs on other networks. You can also extract a clip from a video and create a GIF out of it with this online tool. What makes this tool so demanding is the interface, where all the app segments are shown in one frame.
Key Features
● Navigating through the interface is easier than you can imagine
● Compatible with the batch conversion
● Supports numerous file types, including audio
● Supported Platforms: Windows
05Ezgif
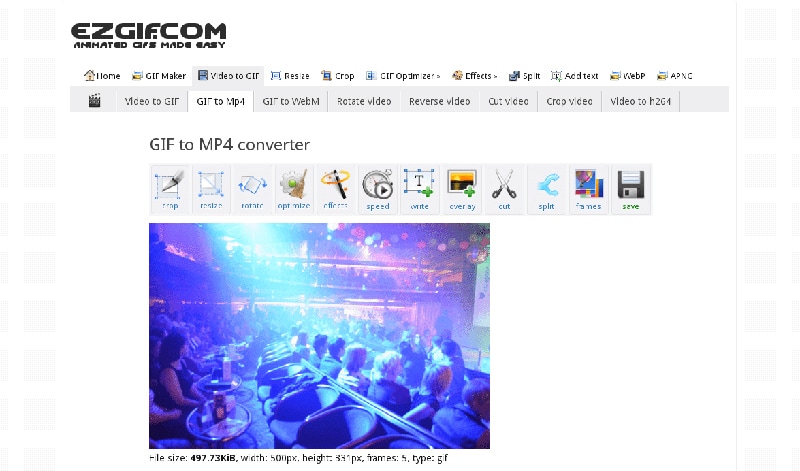
Ezgif offers flexible options to convert online mp4 to gif. Either you can upload a file from your computer or paste a video URL to make a GIF. But the maximum file size should not exceed 100 MB. You can preview the GIF before converting it too.
Key Features
● Can convert transparent videos into animated GIFs
● You can set the width, height, and other elements before saving your GIF.
● It lets you choose the frame rate at your convenience
Platforms Supported: All
06Zamzar
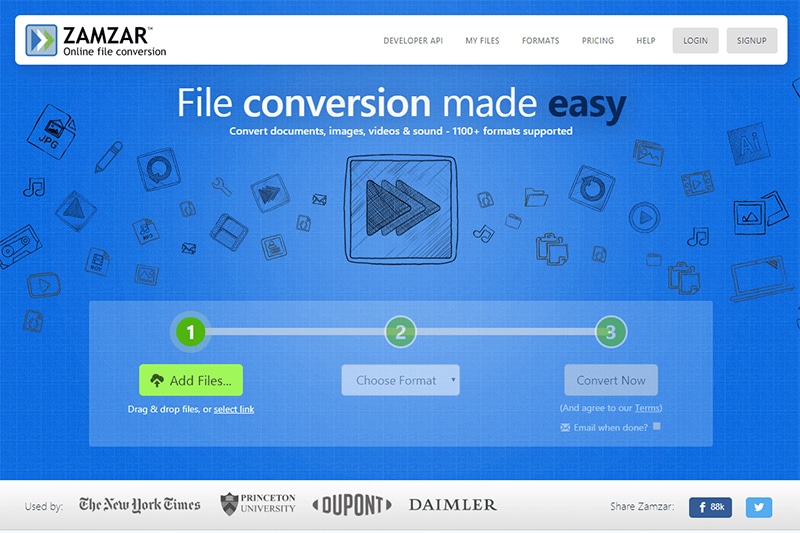
Do you want to convert an endless number of file formats? If so, go ahead to Zamzar. It is powerful enough to convert more than 1100 file formats on the go. Not only does it work as an online mp4 to gif converter, but it also lets you convert a document, image, video, or audio file.
Key Features
● Use the “drag and drop” feature to upload multiple files
● It gives a fast output of heavy media files within 10 minutes
● Simple to use
● Over 1200 file formats are supported
Supported Platforms: All Web Browsers
Part 2 6 Online Tools for Converting GIFs to MP4
01**Wondershare Filmora Video Editor ** by Wondershare

Wondershare Filmora - Best Video Editor for Mac/Windows
5,481,435 people have downloaded it.
Build unique custom animations without breaking a sweat.
Focus on creating epic stories and leave the details to Filmora’s auto features.
Start a creative adventure with drag & drop effects and endless possibilities.
Filmora simplifies advanced features to save you time and effort.
Filmora cuts out repetition so you can move on to your next creative breakthrough.
The Wondershare Filmora V11 is a one-stop platform for all of your online mp4 to GIF needs. This tool can deliver you a high-resolution GIF output from an mp4 video. It also allows you to do much more, like video trimming, editing, conversion to different file formats, etc. In addition, the advanced elements added in Filmora can help to create original GIFs.
Key Features
● There is no file size limitation during conversion
● It works with all the major video formats
● Interactive interface
● Fast in processing GIFs from HD videos
Platforms supported: Windows 8 and later, Mac 10.14 and later
02CloudConvert
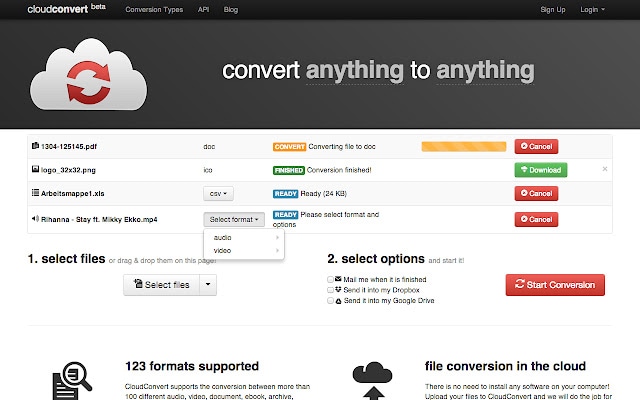
CloudConvert is a robust online file conversion platform. It can convert vectors, documents, ebooks, cad, archives, and more kinds of files. It enables you to adjust timing, dimensions, quality, and more. To convert a gif to an mp4 online, you have to upload the file and click on the export option. That’s it! Your file will start converting. However, you will only get the first 25 minutes free every day, and thereafter, you will have to pay a charge to convert large files.
Key Features
● Supports 200+ formats.
● Personalized conversion service based on your requirements
● It yields a high quality output at the end.
Platforms Supported: All
03Converterlite
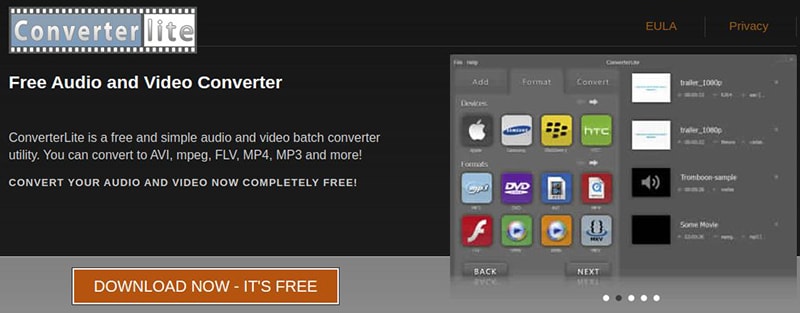
Converterlite supports batch conversion of audio and video file formats. It can convert GIF files into MP4 format efficiently. It supports all major video formats such as AVI, MPEG, WMV, MOV, FLV, etc. For someone involved in content creation at a broad level, this is a must-use platform.
Key Features
● Available in five different languages
● Based on the powerful FFmpeg project
● Produce high-quality output in a timely manner
● This is best for social media content creators, meme makers, and marketers
Platforms supported: Windows XP, Vista, and 7
04GIFtoMP4
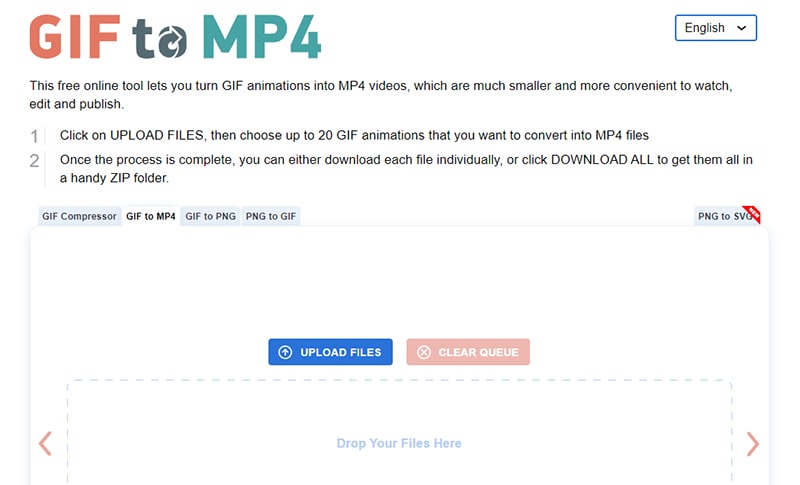
As the name implies, it simplifies gif to mp4 online conversion. The maximum number of GIFs it can convert to MP4 is 20. Once the conversion process ends, you can either download the files individually or get them all in zip format. It doesn’t keep any data on the site. All the stored data is deleted after anhour.
Key Features
● Use with confidence.
● Quickly convert GIF animations to MP4 videos
● No need to download software
● More than 16 languages to choose from
Platforms Supported: All
05Thundersoft GIF to Video Converter
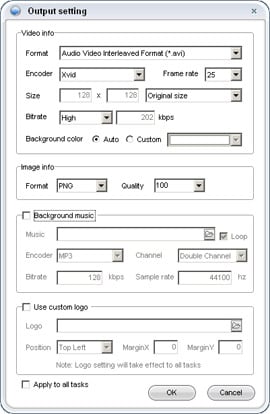
It may appear to be one of the most unusual tools for the online GIF to MP4 conversion. Prior to getting the MP4 file, you can add music and many other custom elements to the uploaded GIF. There are many other customization features, which you can only explore after trying out this tool.
Key Features
● A great tool for novice editors and video makers
● It permits batch conversion of GIFs at a single click
● Compatible with the majority of video formats
● Allows you to convert GIF files to image series
Platforms supported: Windows 2000, 2003, XP, Vista, 7, 8, and 10 are all supported platforms
06Aconvert

Although there are many alternatives for gif to mp4 online conversion, the simplicity of Aconvert attracts all. You have to choose the file that you can upload from your local disk, Google Drive, Dropbox, and more. After that, select the target format and whether you want to change anything or let it be as it is. You can also upload multiple files at once.
Key Features
● Converts audio, video, documents, ebooks, images, and a variety of other file types to audio, video, document, ebook, image, and a variety of other file types
● Batch conversion is supported
● Ensure final conversion without interruption by automatically trying a new server if one fails
Platforms Supported: All
● Key Takeaways from This Episode →
● Nowadays, there are so many tools for making GIFs that it’s hard to find the best one. But the six instant mp4 to gif online tools above will accelerate this process. You just have to upload the video and be patient while they work. From our findings, we can come to these conclusions:
● Converting mp4 to gif online and vice versa is easy with a tool.
● Get familiar with the tools for doing your things quickly.
● Wondershare Filmore is the best and most highly recommended one among them.
● Whatever the reason you want to convert an mp4 to GIF online, there are a number of ways to do it. Use this guide to learn the best methods. Read more here.
Content creation has become easier than before with the popularity of mp4 to gif online. GIFs help to create compelling and engaging content in every industry. They can also be used in all sorts of ways, from adding animation to your designs to visually communicating information.
Moreover, if you don’t want to include videos and are interested in giving a good laugh dose to your audience, GIFs are the solution.
They are being used heavily today by content creators, marketing experts, and digital marketing agencies. However, they are not easily available in the way you want. So, you may have to convert mp4 to gif online. Fortunately, a number of tools are available for MP4 to GIF conversion that we are going to share here.
In this article
01 [6 Online Tools for Converting an MP4 to a GIF](#Part 1)
02 [6 Online Tools for Converting GIFs to MP4](#Part 2)
Part 1 6 Online Tools for Converting an MP4 to a GIF
01Any GIF Animator

Any GIF Animator is a popular choice for content creators when making GIFs. Its simple interface helps in turning video files of any format into attractive GIFs. Even those who have no technical idea of video editing can use this software easily. You can even import media files from optical storage devices using this mp4 to gif online platform.
Key Features
● Best for those without a technical background
● Comes with an animation wizard and a built-in image editor
● Quickly add effects or customize your GIF the way you want
● Get access to some advanced features like text overlays, resolution effects, and more
● It is possible to make adjustments to frame rate, width, height, and more in a GIF
● Convert a Youtube video to a GIF as well
Supported Platforms: Windows
02Adobe Creative Cloud Express

Adobe Creative Cloud Express is the simplest and quickest way to convert an MP4 to GIF. The users have to drag and drop the file and wait for the magic to happen. It has been powered by adobe premiere pro. The only requirement is there to sign up and then you get access to a plethora of creative tools.
Key Features
● Drag and Drop Feature Available
● Download the Converted file in your desired size and quality
● Simple and effective
Supported Platforms: All
03Instagriffer

Instagriffer is widely used forextracting GIFs from YouTube videos, Netflix shows, and more. It assists you in capturing your favorite moments from the screen in GIF format for free. There is no need to worry about watermarks because it doesn’t add them to the output.
Key Features
● You can add text, filters, loops, and more
● A plethora of customizable text and logos
● Decide the starting and ending time of a GIF
Supported Platforms: Windows & Mac
04Cute GIF to Video Converter

It allows you to add various animation effects during GIF processing. Apart from that, the users get the privilege of sharing GIFs on other networks. You can also extract a clip from a video and create a GIF out of it with this online tool. What makes this tool so demanding is the interface, where all the app segments are shown in one frame.
Key Features
● Navigating through the interface is easier than you can imagine
● Compatible with the batch conversion
● Supports numerous file types, including audio
● Supported Platforms: Windows
05Ezgif

Ezgif offers flexible options to convert online mp4 to gif. Either you can upload a file from your computer or paste a video URL to make a GIF. But the maximum file size should not exceed 100 MB. You can preview the GIF before converting it too.
Key Features
● Can convert transparent videos into animated GIFs
● You can set the width, height, and other elements before saving your GIF.
● It lets you choose the frame rate at your convenience
Platforms Supported: All
06Zamzar

Do you want to convert an endless number of file formats? If so, go ahead to Zamzar. It is powerful enough to convert more than 1100 file formats on the go. Not only does it work as an online mp4 to gif converter, but it also lets you convert a document, image, video, or audio file.
Key Features
● Use the “drag and drop” feature to upload multiple files
● It gives a fast output of heavy media files within 10 minutes
● Simple to use
● Over 1200 file formats are supported
Supported Platforms: All Web Browsers
Part 2 6 Online Tools for Converting GIFs to MP4
01**Wondershare Filmora Video Editor ** by Wondershare

Wondershare Filmora - Best Video Editor for Mac/Windows
5,481,435 people have downloaded it.
Build unique custom animations without breaking a sweat.
Focus on creating epic stories and leave the details to Filmora’s auto features.
Start a creative adventure with drag & drop effects and endless possibilities.
Filmora simplifies advanced features to save you time and effort.
Filmora cuts out repetition so you can move on to your next creative breakthrough.
The Wondershare Filmora V11 is a one-stop platform for all of your online mp4 to GIF needs. This tool can deliver you a high-resolution GIF output from an mp4 video. It also allows you to do much more, like video trimming, editing, conversion to different file formats, etc. In addition, the advanced elements added in Filmora can help to create original GIFs.
Key Features
● There is no file size limitation during conversion
● It works with all the major video formats
● Interactive interface
● Fast in processing GIFs from HD videos
Platforms supported: Windows 8 and later, Mac 10.14 and later
02CloudConvert

CloudConvert is a robust online file conversion platform. It can convert vectors, documents, ebooks, cad, archives, and more kinds of files. It enables you to adjust timing, dimensions, quality, and more. To convert a gif to an mp4 online, you have to upload the file and click on the export option. That’s it! Your file will start converting. However, you will only get the first 25 minutes free every day, and thereafter, you will have to pay a charge to convert large files.
Key Features
● Supports 200+ formats.
● Personalized conversion service based on your requirements
● It yields a high quality output at the end.
Platforms Supported: All
03Converterlite

Converterlite supports batch conversion of audio and video file formats. It can convert GIF files into MP4 format efficiently. It supports all major video formats such as AVI, MPEG, WMV, MOV, FLV, etc. For someone involved in content creation at a broad level, this is a must-use platform.
Key Features
● Available in five different languages
● Based on the powerful FFmpeg project
● Produce high-quality output in a timely manner
● This is best for social media content creators, meme makers, and marketers
Platforms supported: Windows XP, Vista, and 7
04GIFtoMP4

As the name implies, it simplifies gif to mp4 online conversion. The maximum number of GIFs it can convert to MP4 is 20. Once the conversion process ends, you can either download the files individually or get them all in zip format. It doesn’t keep any data on the site. All the stored data is deleted after anhour.
Key Features
● Use with confidence.
● Quickly convert GIF animations to MP4 videos
● No need to download software
● More than 16 languages to choose from
Platforms Supported: All
05Thundersoft GIF to Video Converter

It may appear to be one of the most unusual tools for the online GIF to MP4 conversion. Prior to getting the MP4 file, you can add music and many other custom elements to the uploaded GIF. There are many other customization features, which you can only explore after trying out this tool.
Key Features
● A great tool for novice editors and video makers
● It permits batch conversion of GIFs at a single click
● Compatible with the majority of video formats
● Allows you to convert GIF files to image series
Platforms supported: Windows 2000, 2003, XP, Vista, 7, 8, and 10 are all supported platforms
06Aconvert

Although there are many alternatives for gif to mp4 online conversion, the simplicity of Aconvert attracts all. You have to choose the file that you can upload from your local disk, Google Drive, Dropbox, and more. After that, select the target format and whether you want to change anything or let it be as it is. You can also upload multiple files at once.
Key Features
● Converts audio, video, documents, ebooks, images, and a variety of other file types to audio, video, document, ebook, image, and a variety of other file types
● Batch conversion is supported
● Ensure final conversion without interruption by automatically trying a new server if one fails
Platforms Supported: All
● Key Takeaways from This Episode →
● Nowadays, there are so many tools for making GIFs that it’s hard to find the best one. But the six instant mp4 to gif online tools above will accelerate this process. You just have to upload the video and be patient while they work. From our findings, we can come to these conclusions:
● Converting mp4 to gif online and vice versa is easy with a tool.
● Get familiar with the tools for doing your things quickly.
● Wondershare Filmore is the best and most highly recommended one among them.
● Whatever the reason you want to convert an mp4 to GIF online, there are a number of ways to do it. Use this guide to learn the best methods. Read more here.
Content creation has become easier than before with the popularity of mp4 to gif online. GIFs help to create compelling and engaging content in every industry. They can also be used in all sorts of ways, from adding animation to your designs to visually communicating information.
Moreover, if you don’t want to include videos and are interested in giving a good laugh dose to your audience, GIFs are the solution.
They are being used heavily today by content creators, marketing experts, and digital marketing agencies. However, they are not easily available in the way you want. So, you may have to convert mp4 to gif online. Fortunately, a number of tools are available for MP4 to GIF conversion that we are going to share here.
In this article
01 [6 Online Tools for Converting an MP4 to a GIF](#Part 1)
02 [6 Online Tools for Converting GIFs to MP4](#Part 2)
Part 1 6 Online Tools for Converting an MP4 to a GIF
01Any GIF Animator

Any GIF Animator is a popular choice for content creators when making GIFs. Its simple interface helps in turning video files of any format into attractive GIFs. Even those who have no technical idea of video editing can use this software easily. You can even import media files from optical storage devices using this mp4 to gif online platform.
Key Features
● Best for those without a technical background
● Comes with an animation wizard and a built-in image editor
● Quickly add effects or customize your GIF the way you want
● Get access to some advanced features like text overlays, resolution effects, and more
● It is possible to make adjustments to frame rate, width, height, and more in a GIF
● Convert a Youtube video to a GIF as well
Supported Platforms: Windows
02Adobe Creative Cloud Express

Adobe Creative Cloud Express is the simplest and quickest way to convert an MP4 to GIF. The users have to drag and drop the file and wait for the magic to happen. It has been powered by adobe premiere pro. The only requirement is there to sign up and then you get access to a plethora of creative tools.
Key Features
● Drag and Drop Feature Available
● Download the Converted file in your desired size and quality
● Simple and effective
Supported Platforms: All
03Instagriffer

Instagriffer is widely used forextracting GIFs from YouTube videos, Netflix shows, and more. It assists you in capturing your favorite moments from the screen in GIF format for free. There is no need to worry about watermarks because it doesn’t add them to the output.
Key Features
● You can add text, filters, loops, and more
● A plethora of customizable text and logos
● Decide the starting and ending time of a GIF
Supported Platforms: Windows & Mac
04Cute GIF to Video Converter

It allows you to add various animation effects during GIF processing. Apart from that, the users get the privilege of sharing GIFs on other networks. You can also extract a clip from a video and create a GIF out of it with this online tool. What makes this tool so demanding is the interface, where all the app segments are shown in one frame.
Key Features
● Navigating through the interface is easier than you can imagine
● Compatible with the batch conversion
● Supports numerous file types, including audio
● Supported Platforms: Windows
05Ezgif

Ezgif offers flexible options to convert online mp4 to gif. Either you can upload a file from your computer or paste a video URL to make a GIF. But the maximum file size should not exceed 100 MB. You can preview the GIF before converting it too.
Key Features
● Can convert transparent videos into animated GIFs
● You can set the width, height, and other elements before saving your GIF.
● It lets you choose the frame rate at your convenience
Platforms Supported: All
06Zamzar

Do you want to convert an endless number of file formats? If so, go ahead to Zamzar. It is powerful enough to convert more than 1100 file formats on the go. Not only does it work as an online mp4 to gif converter, but it also lets you convert a document, image, video, or audio file.
Key Features
● Use the “drag and drop” feature to upload multiple files
● It gives a fast output of heavy media files within 10 minutes
● Simple to use
● Over 1200 file formats are supported
Supported Platforms: All Web Browsers
Part 2 6 Online Tools for Converting GIFs to MP4
01**Wondershare Filmora Video Editor ** by Wondershare

Wondershare Filmora - Best Video Editor for Mac/Windows
5,481,435 people have downloaded it.
Build unique custom animations without breaking a sweat.
Focus on creating epic stories and leave the details to Filmora’s auto features.
Start a creative adventure with drag & drop effects and endless possibilities.
Filmora simplifies advanced features to save you time and effort.
Filmora cuts out repetition so you can move on to your next creative breakthrough.
The Wondershare Filmora V11 is a one-stop platform for all of your online mp4 to GIF needs. This tool can deliver you a high-resolution GIF output from an mp4 video. It also allows you to do much more, like video trimming, editing, conversion to different file formats, etc. In addition, the advanced elements added in Filmora can help to create original GIFs.
Key Features
● There is no file size limitation during conversion
● It works with all the major video formats
● Interactive interface
● Fast in processing GIFs from HD videos
Platforms supported: Windows 8 and later, Mac 10.14 and later
02CloudConvert

CloudConvert is a robust online file conversion platform. It can convert vectors, documents, ebooks, cad, archives, and more kinds of files. It enables you to adjust timing, dimensions, quality, and more. To convert a gif to an mp4 online, you have to upload the file and click on the export option. That’s it! Your file will start converting. However, you will only get the first 25 minutes free every day, and thereafter, you will have to pay a charge to convert large files.
Key Features
● Supports 200+ formats.
● Personalized conversion service based on your requirements
● It yields a high quality output at the end.
Platforms Supported: All
03Converterlite

Converterlite supports batch conversion of audio and video file formats. It can convert GIF files into MP4 format efficiently. It supports all major video formats such as AVI, MPEG, WMV, MOV, FLV, etc. For someone involved in content creation at a broad level, this is a must-use platform.
Key Features
● Available in five different languages
● Based on the powerful FFmpeg project
● Produce high-quality output in a timely manner
● This is best for social media content creators, meme makers, and marketers
Platforms supported: Windows XP, Vista, and 7
04GIFtoMP4

As the name implies, it simplifies gif to mp4 online conversion. The maximum number of GIFs it can convert to MP4 is 20. Once the conversion process ends, you can either download the files individually or get them all in zip format. It doesn’t keep any data on the site. All the stored data is deleted after anhour.
Key Features
● Use with confidence.
● Quickly convert GIF animations to MP4 videos
● No need to download software
● More than 16 languages to choose from
Platforms Supported: All
05Thundersoft GIF to Video Converter

It may appear to be one of the most unusual tools for the online GIF to MP4 conversion. Prior to getting the MP4 file, you can add music and many other custom elements to the uploaded GIF. There are many other customization features, which you can only explore after trying out this tool.
Key Features
● A great tool for novice editors and video makers
● It permits batch conversion of GIFs at a single click
● Compatible with the majority of video formats
● Allows you to convert GIF files to image series
Platforms supported: Windows 2000, 2003, XP, Vista, 7, 8, and 10 are all supported platforms
06Aconvert

Although there are many alternatives for gif to mp4 online conversion, the simplicity of Aconvert attracts all. You have to choose the file that you can upload from your local disk, Google Drive, Dropbox, and more. After that, select the target format and whether you want to change anything or let it be as it is. You can also upload multiple files at once.
Key Features
● Converts audio, video, documents, ebooks, images, and a variety of other file types to audio, video, document, ebook, image, and a variety of other file types
● Batch conversion is supported
● Ensure final conversion without interruption by automatically trying a new server if one fails
Platforms Supported: All
● Key Takeaways from This Episode →
● Nowadays, there are so many tools for making GIFs that it’s hard to find the best one. But the six instant mp4 to gif online tools above will accelerate this process. You just have to upload the video and be patient while they work. From our findings, we can come to these conclusions:
● Converting mp4 to gif online and vice versa is easy with a tool.
● Get familiar with the tools for doing your things quickly.
● Wondershare Filmore is the best and most highly recommended one among them.
● Whatever the reason you want to convert an mp4 to GIF online, there are a number of ways to do it. Use this guide to learn the best methods. Read more here.
Content creation has become easier than before with the popularity of mp4 to gif online. GIFs help to create compelling and engaging content in every industry. They can also be used in all sorts of ways, from adding animation to your designs to visually communicating information.
Moreover, if you don’t want to include videos and are interested in giving a good laugh dose to your audience, GIFs are the solution.
They are being used heavily today by content creators, marketing experts, and digital marketing agencies. However, they are not easily available in the way you want. So, you may have to convert mp4 to gif online. Fortunately, a number of tools are available for MP4 to GIF conversion that we are going to share here.
In this article
01 [6 Online Tools for Converting an MP4 to a GIF](#Part 1)
02 [6 Online Tools for Converting GIFs to MP4](#Part 2)
Part 1 6 Online Tools for Converting an MP4 to a GIF
01Any GIF Animator

Any GIF Animator is a popular choice for content creators when making GIFs. Its simple interface helps in turning video files of any format into attractive GIFs. Even those who have no technical idea of video editing can use this software easily. You can even import media files from optical storage devices using this mp4 to gif online platform.
Key Features
● Best for those without a technical background
● Comes with an animation wizard and a built-in image editor
● Quickly add effects or customize your GIF the way you want
● Get access to some advanced features like text overlays, resolution effects, and more
● It is possible to make adjustments to frame rate, width, height, and more in a GIF
● Convert a Youtube video to a GIF as well
Supported Platforms: Windows
02Adobe Creative Cloud Express

Adobe Creative Cloud Express is the simplest and quickest way to convert an MP4 to GIF. The users have to drag and drop the file and wait for the magic to happen. It has been powered by adobe premiere pro. The only requirement is there to sign up and then you get access to a plethora of creative tools.
Key Features
● Drag and Drop Feature Available
● Download the Converted file in your desired size and quality
● Simple and effective
Supported Platforms: All
03Instagriffer

Instagriffer is widely used forextracting GIFs from YouTube videos, Netflix shows, and more. It assists you in capturing your favorite moments from the screen in GIF format for free. There is no need to worry about watermarks because it doesn’t add them to the output.
Key Features
● You can add text, filters, loops, and more
● A plethora of customizable text and logos
● Decide the starting and ending time of a GIF
Supported Platforms: Windows & Mac
04Cute GIF to Video Converter

It allows you to add various animation effects during GIF processing. Apart from that, the users get the privilege of sharing GIFs on other networks. You can also extract a clip from a video and create a GIF out of it with this online tool. What makes this tool so demanding is the interface, where all the app segments are shown in one frame.
Key Features
● Navigating through the interface is easier than you can imagine
● Compatible with the batch conversion
● Supports numerous file types, including audio
● Supported Platforms: Windows
05Ezgif

Ezgif offers flexible options to convert online mp4 to gif. Either you can upload a file from your computer or paste a video URL to make a GIF. But the maximum file size should not exceed 100 MB. You can preview the GIF before converting it too.
Key Features
● Can convert transparent videos into animated GIFs
● You can set the width, height, and other elements before saving your GIF.
● It lets you choose the frame rate at your convenience
Platforms Supported: All
06Zamzar

Do you want to convert an endless number of file formats? If so, go ahead to Zamzar. It is powerful enough to convert more than 1100 file formats on the go. Not only does it work as an online mp4 to gif converter, but it also lets you convert a document, image, video, or audio file.
Key Features
● Use the “drag and drop” feature to upload multiple files
● It gives a fast output of heavy media files within 10 minutes
● Simple to use
● Over 1200 file formats are supported
Supported Platforms: All Web Browsers
Part 2 6 Online Tools for Converting GIFs to MP4
01**Wondershare Filmora Video Editor ** by Wondershare

Wondershare Filmora - Best Video Editor for Mac/Windows
5,481,435 people have downloaded it.
Build unique custom animations without breaking a sweat.
Focus on creating epic stories and leave the details to Filmora’s auto features.
Start a creative adventure with drag & drop effects and endless possibilities.
Filmora simplifies advanced features to save you time and effort.
Filmora cuts out repetition so you can move on to your next creative breakthrough.
The Wondershare Filmora V11 is a one-stop platform for all of your online mp4 to GIF needs. This tool can deliver you a high-resolution GIF output from an mp4 video. It also allows you to do much more, like video trimming, editing, conversion to different file formats, etc. In addition, the advanced elements added in Filmora can help to create original GIFs.
Key Features
● There is no file size limitation during conversion
● It works with all the major video formats
● Interactive interface
● Fast in processing GIFs from HD videos
Platforms supported: Windows 8 and later, Mac 10.14 and later
02CloudConvert

CloudConvert is a robust online file conversion platform. It can convert vectors, documents, ebooks, cad, archives, and more kinds of files. It enables you to adjust timing, dimensions, quality, and more. To convert a gif to an mp4 online, you have to upload the file and click on the export option. That’s it! Your file will start converting. However, you will only get the first 25 minutes free every day, and thereafter, you will have to pay a charge to convert large files.
Key Features
● Supports 200+ formats.
● Personalized conversion service based on your requirements
● It yields a high quality output at the end.
Platforms Supported: All
03Converterlite

Converterlite supports batch conversion of audio and video file formats. It can convert GIF files into MP4 format efficiently. It supports all major video formats such as AVI, MPEG, WMV, MOV, FLV, etc. For someone involved in content creation at a broad level, this is a must-use platform.
Key Features
● Available in five different languages
● Based on the powerful FFmpeg project
● Produce high-quality output in a timely manner
● This is best for social media content creators, meme makers, and marketers
Platforms supported: Windows XP, Vista, and 7
04GIFtoMP4

As the name implies, it simplifies gif to mp4 online conversion. The maximum number of GIFs it can convert to MP4 is 20. Once the conversion process ends, you can either download the files individually or get them all in zip format. It doesn’t keep any data on the site. All the stored data is deleted after anhour.
Key Features
● Use with confidence.
● Quickly convert GIF animations to MP4 videos
● No need to download software
● More than 16 languages to choose from
Platforms Supported: All
05Thundersoft GIF to Video Converter

It may appear to be one of the most unusual tools for the online GIF to MP4 conversion. Prior to getting the MP4 file, you can add music and many other custom elements to the uploaded GIF. There are many other customization features, which you can only explore after trying out this tool.
Key Features
● A great tool for novice editors and video makers
● It permits batch conversion of GIFs at a single click
● Compatible with the majority of video formats
● Allows you to convert GIF files to image series
Platforms supported: Windows 2000, 2003, XP, Vista, 7, 8, and 10 are all supported platforms
06Aconvert

Although there are many alternatives for gif to mp4 online conversion, the simplicity of Aconvert attracts all. You have to choose the file that you can upload from your local disk, Google Drive, Dropbox, and more. After that, select the target format and whether you want to change anything or let it be as it is. You can also upload multiple files at once.
Key Features
● Converts audio, video, documents, ebooks, images, and a variety of other file types to audio, video, document, ebook, image, and a variety of other file types
● Batch conversion is supported
● Ensure final conversion without interruption by automatically trying a new server if one fails
Platforms Supported: All
● Key Takeaways from This Episode →
● Nowadays, there are so many tools for making GIFs that it’s hard to find the best one. But the six instant mp4 to gif online tools above will accelerate this process. You just have to upload the video and be patient while they work. From our findings, we can come to these conclusions:
● Converting mp4 to gif online and vice versa is easy with a tool.
● Get familiar with the tools for doing your things quickly.
● Wondershare Filmore is the best and most highly recommended one among them.
● Whatever the reason you want to convert an mp4 to GIF online, there are a number of ways to do it. Use this guide to learn the best methods. Read more here.
Voice Changer for Discord | Use Voicemod on Discord
Powerful Video Editor - Wondershare Filmora
Provide abundant video effects - A creative video editor
Powerful color correction and grading
Detailed tutorials are provided by the official channel
Introduction
In today’s world, these voice-changing tools are in use by a lot of online gamers for them to remain anonymous on popular game streaming platforms like Twitch. However, we are more focused on Discord in this article. With everything that’s happening in the world today, voice changers can be used for good or can be misused, depending on who is using them. However, we promote such tools for the immerse benefits they offer users as we do not condone the suggestive use of such devices.
Therefore, in a bid to rave about this phenomenal voice-changing tool, we will talk about the best voice changer for Discord which is Voicemod.
Voicemod is an excellent tool with an impressive list of voice filters at its disposal. With this tool, users can choose from a wide range of voice effects that can have both fun and practical uses. Also, if you are looking to use the tool like a robot, Voicemod can help you do that. The tool is spectacularly easy to use, free across all Windows platforms, and operates in real-time. Additionally, the software can work on Skype, Twitch, and other online chat or streaming platforms.
In this article
01 How to Use Voicemod Voice Changer for Discord on Desktop (Win+Mac)?
02 How to Use Voicemod Voice Changer for Discord on Mobile (Android+iPhone)?
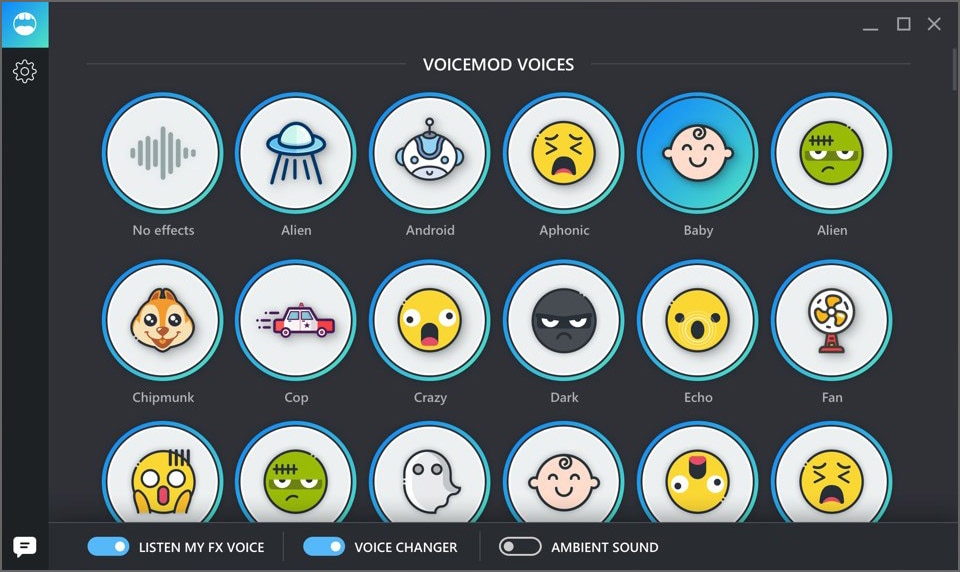
Part 1: How to Use Voicemod Voice Changer for Discord on Desktop (Win+Mac)?
Voicemod Discord works for Windows and Mac operating systems smoothly. Its new Mac OS version is on its way, and you can choose to get notified once it launches.
With a voice changer for Discord, you can add sound effects and change your voice in your communication. You can download this free application on your Windows 10/11 (64-bit) desktop. Its 90 different voices and effects integrate perfectly with Discord to give you strict and most efficient performance.
Now that you know about Voicemod, explore how to use Voicemod on Discord for Desktop.
Step 1: Install Voicemod
Before jumping straight to how we can use Discord for Desktop, we must first know how to install it on our Windows and Mac PC. Here is how to install Voicemod:
- First of all, visit the Voicemod website to start the download process.
- Next, you will see the “Get Voicemod Free” screen. Click it!
- After clicking, you will need to sign in to your account from Discord, Twitch, to Google. Make sure you use your Discord login details to sign in.
- After signing in, the “.exe” file will download to your Windows and Mac download folder. Open it.
- Then an install wizard opens. Navigate through it to install the program on your Windows and Mac computer.
- After complete installation, the installation wizard will ask you to restart your Windows’ or Mac computer.
- However, you can skip the restart process, but it’s best to restart it for smooth operations. Once your Mac or Windows computer restarts, you will see the Voicemod application icon on your desktop screen.
Step 2. Go to Settings>Voice and Video
To configure Voicemod with Discord, open your discord account and go to the settings option located in the screen’s bottom-left corner. Then tap on the “Voice and Video” option right under the app settings.
Step 3. In the “Input Device” section, Choose “Microphone Voicemod Virtual Audio.”
To make Voicemod usable, you are required to change the Voice settings. So, navigate within the “Input Device” option and select the option that says “Microphone Voicemod Virtual Audio.” Once the audio setting changes, it makes it easy for you to change the voice within the program. Also, other users can hear your audio alteration.
Step 4. Choose Your Favorite Voice
In the “basic version,” you have the authorization to change seven free voice choices each day. In addition, with the “pro-version,” you have access to more than 80 different voice options.
Therefore, if you are looking for a simple and easy Windows and Mac application, do not look further than Voicemod!
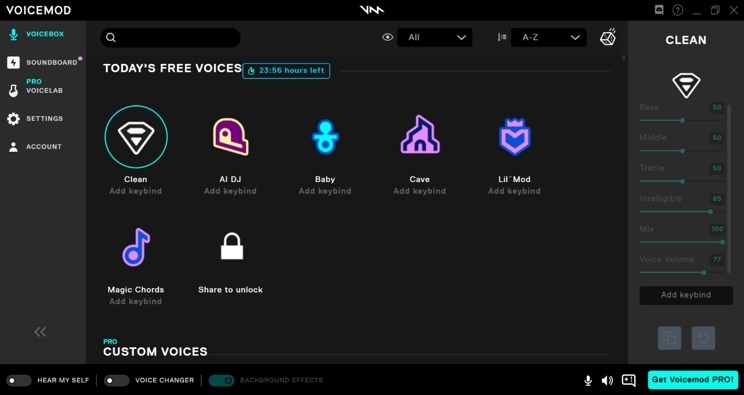
Part 2: How to Use Voicemod Voice Changer for Discord on Mobile (Android+iPhone)?
“Voicemod clips” is the version that is available for both Apple and Android devices. The application help users to make very high-quality content using its wide selection of one-of-a-kind effects that will change your voice so that you won’t even recognize yourself. Additionally, you can add filters connected to your cell phone’s camera to create hilarious, exciting videos. Also, you get the option to select from 10 different voices, and you can also make infinite videos and audio from the humorous to the terrifying.
Some of the Voicemod for Discord voices that are available on mobile devices include;
- Male-to-female
- Different robot effects
- Celebrities
- Scary voices, etc.
Also, the changes are on how you would like to modify your voice. It can also be cross-share to popular social networking platforms such as Facebook, Twitter, Instagram, TikTok, and Snapchat using your smartphone.
Here are step-by-step instructions:
Step 1: Download Voicemod for Mobile
Ensure you have downloaded the Voicemod application on your Android and iPhone and appropriately configured it. To configure, follow the step below;
- Open it to set your profile using Discord. Additionally, you can view all the different filters for videos and available voices.
- Also, you can decide the type of content you want to create, whether it is a video clip or audio.
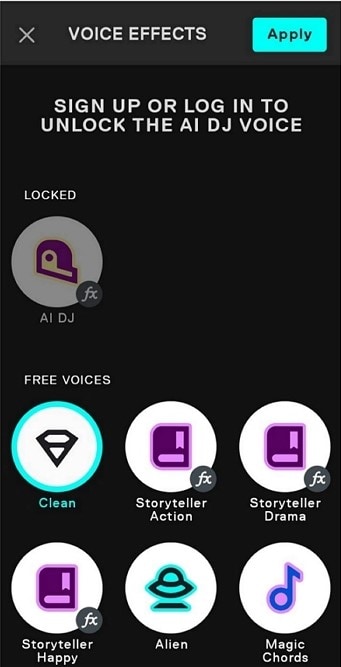
Step 2: Access Sound Effects
Open Discord and tap the “cogwheel icon” near your name and avatar. You will see a “settings” page located within it. Tap the “Voice & Video” option. Then under the “Input Device” option, select Voicemod and the headset under the “Output Device” option and tap escape. Then you will have access to numerous exciting sounds.
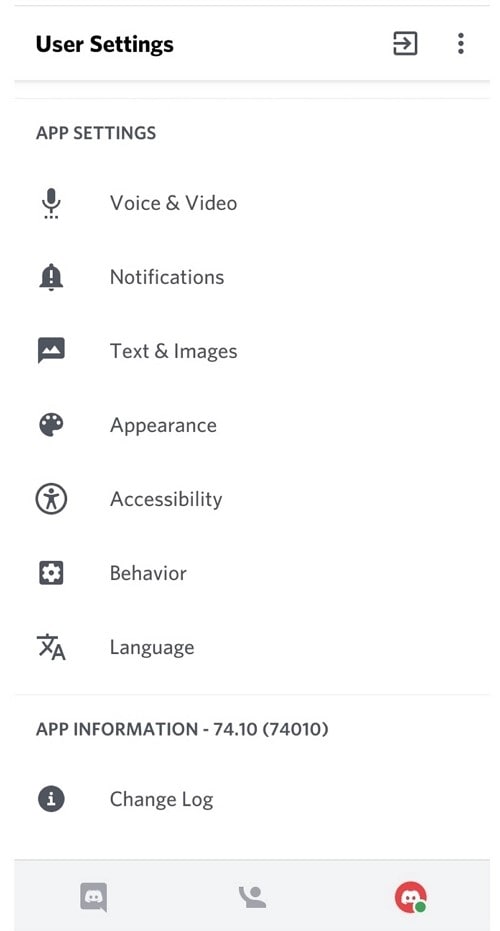
Finally, add your favorite effect, save and start using your new enhanced voice from Voicemod Discord.
Part 3: People Also Want to Know
This section will look at some basic questions about Voicemod Discord that appeared in Q&A forums.
Is Voicemod safe for Discord?
Yes, Voicemod is safe, but you must download it from its official website or the Google Playstore and Apple’s App Store, as there are many cracked versions of Voicemod online.
Is there a voice changer for Discord?
Yes, a voice changer for Discord and Voicemod is known to be the best. It is an advanced and easy-to-use voice changer that allows you to sound like a man, woman, robot, or anything else you can ever imagine.
Key Takeaways from This Episode
Thus, as you saw, in this report, we have summarised a few essential points that you should know regarding Voicemod Discord. You learned:
- The best voice changer for Discordis Voicemod
- How to use Voicemod for Windows and Mac computers
- How to use Voicemod for mobile (iPhone and Android)
- Finally, a few FAQs for users to better understand the discord voice changer (Voicemod).
So, use the new knowledge about how to use Voicemod on Discord you acquired above and spin some voice changes.
Introduction
In today’s world, these voice-changing tools are in use by a lot of online gamers for them to remain anonymous on popular game streaming platforms like Twitch. However, we are more focused on Discord in this article. With everything that’s happening in the world today, voice changers can be used for good or can be misused, depending on who is using them. However, we promote such tools for the immerse benefits they offer users as we do not condone the suggestive use of such devices.
Therefore, in a bid to rave about this phenomenal voice-changing tool, we will talk about the best voice changer for Discord which is Voicemod.
Voicemod is an excellent tool with an impressive list of voice filters at its disposal. With this tool, users can choose from a wide range of voice effects that can have both fun and practical uses. Also, if you are looking to use the tool like a robot, Voicemod can help you do that. The tool is spectacularly easy to use, free across all Windows platforms, and operates in real-time. Additionally, the software can work on Skype, Twitch, and other online chat or streaming platforms.
In this article
01 How to Use Voicemod Voice Changer for Discord on Desktop (Win+Mac)?
02 How to Use Voicemod Voice Changer for Discord on Mobile (Android+iPhone)?

Part 1: How to Use Voicemod Voice Changer for Discord on Desktop (Win+Mac)?
Voicemod Discord works for Windows and Mac operating systems smoothly. Its new Mac OS version is on its way, and you can choose to get notified once it launches.
With a voice changer for Discord, you can add sound effects and change your voice in your communication. You can download this free application on your Windows 10/11 (64-bit) desktop. Its 90 different voices and effects integrate perfectly with Discord to give you strict and most efficient performance.
Now that you know about Voicemod, explore how to use Voicemod on Discord for Desktop.
Step 1: Install Voicemod
Before jumping straight to how we can use Discord for Desktop, we must first know how to install it on our Windows and Mac PC. Here is how to install Voicemod:
- First of all, visit the Voicemod website to start the download process.
- Next, you will see the “Get Voicemod Free” screen. Click it!
- After clicking, you will need to sign in to your account from Discord, Twitch, to Google. Make sure you use your Discord login details to sign in.
- After signing in, the “.exe” file will download to your Windows and Mac download folder. Open it.
- Then an install wizard opens. Navigate through it to install the program on your Windows and Mac computer.
- After complete installation, the installation wizard will ask you to restart your Windows’ or Mac computer.
- However, you can skip the restart process, but it’s best to restart it for smooth operations. Once your Mac or Windows computer restarts, you will see the Voicemod application icon on your desktop screen.
Step 2. Go to Settings>Voice and Video
To configure Voicemod with Discord, open your discord account and go to the settings option located in the screen’s bottom-left corner. Then tap on the “Voice and Video” option right under the app settings.
Step 3. In the “Input Device” section, Choose “Microphone Voicemod Virtual Audio.”
To make Voicemod usable, you are required to change the Voice settings. So, navigate within the “Input Device” option and select the option that says “Microphone Voicemod Virtual Audio.” Once the audio setting changes, it makes it easy for you to change the voice within the program. Also, other users can hear your audio alteration.
Step 4. Choose Your Favorite Voice
In the “basic version,” you have the authorization to change seven free voice choices each day. In addition, with the “pro-version,” you have access to more than 80 different voice options.
Therefore, if you are looking for a simple and easy Windows and Mac application, do not look further than Voicemod!

Part 2: How to Use Voicemod Voice Changer for Discord on Mobile (Android+iPhone)?
“Voicemod clips” is the version that is available for both Apple and Android devices. The application help users to make very high-quality content using its wide selection of one-of-a-kind effects that will change your voice so that you won’t even recognize yourself. Additionally, you can add filters connected to your cell phone’s camera to create hilarious, exciting videos. Also, you get the option to select from 10 different voices, and you can also make infinite videos and audio from the humorous to the terrifying.
Some of the Voicemod for Discord voices that are available on mobile devices include;
- Male-to-female
- Different robot effects
- Celebrities
- Scary voices, etc.
Also, the changes are on how you would like to modify your voice. It can also be cross-share to popular social networking platforms such as Facebook, Twitter, Instagram, TikTok, and Snapchat using your smartphone.
Here are step-by-step instructions:
Step 1: Download Voicemod for Mobile
Ensure you have downloaded the Voicemod application on your Android and iPhone and appropriately configured it. To configure, follow the step below;
- Open it to set your profile using Discord. Additionally, you can view all the different filters for videos and available voices.
- Also, you can decide the type of content you want to create, whether it is a video clip or audio.

Step 2: Access Sound Effects
Open Discord and tap the “cogwheel icon” near your name and avatar. You will see a “settings” page located within it. Tap the “Voice & Video” option. Then under the “Input Device” option, select Voicemod and the headset under the “Output Device” option and tap escape. Then you will have access to numerous exciting sounds.

Finally, add your favorite effect, save and start using your new enhanced voice from Voicemod Discord.
Part 3: People Also Want to Know
This section will look at some basic questions about Voicemod Discord that appeared in Q&A forums.
Is Voicemod safe for Discord?
Yes, Voicemod is safe, but you must download it from its official website or the Google Playstore and Apple’s App Store, as there are many cracked versions of Voicemod online.
Is there a voice changer for Discord?
Yes, a voice changer for Discord and Voicemod is known to be the best. It is an advanced and easy-to-use voice changer that allows you to sound like a man, woman, robot, or anything else you can ever imagine.
Key Takeaways from This Episode
Thus, as you saw, in this report, we have summarised a few essential points that you should know regarding Voicemod Discord. You learned:
- The best voice changer for Discordis Voicemod
- How to use Voicemod for Windows and Mac computers
- How to use Voicemod for mobile (iPhone and Android)
- Finally, a few FAQs for users to better understand the discord voice changer (Voicemod).
So, use the new knowledge about how to use Voicemod on Discord you acquired above and spin some voice changes.
Introduction
In today’s world, these voice-changing tools are in use by a lot of online gamers for them to remain anonymous on popular game streaming platforms like Twitch. However, we are more focused on Discord in this article. With everything that’s happening in the world today, voice changers can be used for good or can be misused, depending on who is using them. However, we promote such tools for the immerse benefits they offer users as we do not condone the suggestive use of such devices.
Therefore, in a bid to rave about this phenomenal voice-changing tool, we will talk about the best voice changer for Discord which is Voicemod.
Voicemod is an excellent tool with an impressive list of voice filters at its disposal. With this tool, users can choose from a wide range of voice effects that can have both fun and practical uses. Also, if you are looking to use the tool like a robot, Voicemod can help you do that. The tool is spectacularly easy to use, free across all Windows platforms, and operates in real-time. Additionally, the software can work on Skype, Twitch, and other online chat or streaming platforms.
In this article
01 How to Use Voicemod Voice Changer for Discord on Desktop (Win+Mac)?
02 How to Use Voicemod Voice Changer for Discord on Mobile (Android+iPhone)?

Part 1: How to Use Voicemod Voice Changer for Discord on Desktop (Win+Mac)?
Voicemod Discord works for Windows and Mac operating systems smoothly. Its new Mac OS version is on its way, and you can choose to get notified once it launches.
With a voice changer for Discord, you can add sound effects and change your voice in your communication. You can download this free application on your Windows 10/11 (64-bit) desktop. Its 90 different voices and effects integrate perfectly with Discord to give you strict and most efficient performance.
Now that you know about Voicemod, explore how to use Voicemod on Discord for Desktop.
Step 1: Install Voicemod
Before jumping straight to how we can use Discord for Desktop, we must first know how to install it on our Windows and Mac PC. Here is how to install Voicemod:
- First of all, visit the Voicemod website to start the download process.
- Next, you will see the “Get Voicemod Free” screen. Click it!
- After clicking, you will need to sign in to your account from Discord, Twitch, to Google. Make sure you use your Discord login details to sign in.
- After signing in, the “.exe” file will download to your Windows and Mac download folder. Open it.
- Then an install wizard opens. Navigate through it to install the program on your Windows and Mac computer.
- After complete installation, the installation wizard will ask you to restart your Windows’ or Mac computer.
- However, you can skip the restart process, but it’s best to restart it for smooth operations. Once your Mac or Windows computer restarts, you will see the Voicemod application icon on your desktop screen.
Step 2. Go to Settings>Voice and Video
To configure Voicemod with Discord, open your discord account and go to the settings option located in the screen’s bottom-left corner. Then tap on the “Voice and Video” option right under the app settings.
Step 3. In the “Input Device” section, Choose “Microphone Voicemod Virtual Audio.”
To make Voicemod usable, you are required to change the Voice settings. So, navigate within the “Input Device” option and select the option that says “Microphone Voicemod Virtual Audio.” Once the audio setting changes, it makes it easy for you to change the voice within the program. Also, other users can hear your audio alteration.
Step 4. Choose Your Favorite Voice
In the “basic version,” you have the authorization to change seven free voice choices each day. In addition, with the “pro-version,” you have access to more than 80 different voice options.
Therefore, if you are looking for a simple and easy Windows and Mac application, do not look further than Voicemod!

Part 2: How to Use Voicemod Voice Changer for Discord on Mobile (Android+iPhone)?
“Voicemod clips” is the version that is available for both Apple and Android devices. The application help users to make very high-quality content using its wide selection of one-of-a-kind effects that will change your voice so that you won’t even recognize yourself. Additionally, you can add filters connected to your cell phone’s camera to create hilarious, exciting videos. Also, you get the option to select from 10 different voices, and you can also make infinite videos and audio from the humorous to the terrifying.
Some of the Voicemod for Discord voices that are available on mobile devices include;
- Male-to-female
- Different robot effects
- Celebrities
- Scary voices, etc.
Also, the changes are on how you would like to modify your voice. It can also be cross-share to popular social networking platforms such as Facebook, Twitter, Instagram, TikTok, and Snapchat using your smartphone.
Here are step-by-step instructions:
Step 1: Download Voicemod for Mobile
Ensure you have downloaded the Voicemod application on your Android and iPhone and appropriately configured it. To configure, follow the step below;
- Open it to set your profile using Discord. Additionally, you can view all the different filters for videos and available voices.
- Also, you can decide the type of content you want to create, whether it is a video clip or audio.

Step 2: Access Sound Effects
Open Discord and tap the “cogwheel icon” near your name and avatar. You will see a “settings” page located within it. Tap the “Voice & Video” option. Then under the “Input Device” option, select Voicemod and the headset under the “Output Device” option and tap escape. Then you will have access to numerous exciting sounds.

Finally, add your favorite effect, save and start using your new enhanced voice from Voicemod Discord.
Part 3: People Also Want to Know
This section will look at some basic questions about Voicemod Discord that appeared in Q&A forums.
Is Voicemod safe for Discord?
Yes, Voicemod is safe, but you must download it from its official website or the Google Playstore and Apple’s App Store, as there are many cracked versions of Voicemod online.
Is there a voice changer for Discord?
Yes, a voice changer for Discord and Voicemod is known to be the best. It is an advanced and easy-to-use voice changer that allows you to sound like a man, woman, robot, or anything else you can ever imagine.
Key Takeaways from This Episode
Thus, as you saw, in this report, we have summarised a few essential points that you should know regarding Voicemod Discord. You learned:
- The best voice changer for Discordis Voicemod
- How to use Voicemod for Windows and Mac computers
- How to use Voicemod for mobile (iPhone and Android)
- Finally, a few FAQs for users to better understand the discord voice changer (Voicemod).
So, use the new knowledge about how to use Voicemod on Discord you acquired above and spin some voice changes.
Introduction
In today’s world, these voice-changing tools are in use by a lot of online gamers for them to remain anonymous on popular game streaming platforms like Twitch. However, we are more focused on Discord in this article. With everything that’s happening in the world today, voice changers can be used for good or can be misused, depending on who is using them. However, we promote such tools for the immerse benefits they offer users as we do not condone the suggestive use of such devices.
Therefore, in a bid to rave about this phenomenal voice-changing tool, we will talk about the best voice changer for Discord which is Voicemod.
Voicemod is an excellent tool with an impressive list of voice filters at its disposal. With this tool, users can choose from a wide range of voice effects that can have both fun and practical uses. Also, if you are looking to use the tool like a robot, Voicemod can help you do that. The tool is spectacularly easy to use, free across all Windows platforms, and operates in real-time. Additionally, the software can work on Skype, Twitch, and other online chat or streaming platforms.
In this article
01 How to Use Voicemod Voice Changer for Discord on Desktop (Win+Mac)?
02 How to Use Voicemod Voice Changer for Discord on Mobile (Android+iPhone)?

Part 1: How to Use Voicemod Voice Changer for Discord on Desktop (Win+Mac)?
Voicemod Discord works for Windows and Mac operating systems smoothly. Its new Mac OS version is on its way, and you can choose to get notified once it launches.
With a voice changer for Discord, you can add sound effects and change your voice in your communication. You can download this free application on your Windows 10/11 (64-bit) desktop. Its 90 different voices and effects integrate perfectly with Discord to give you strict and most efficient performance.
Now that you know about Voicemod, explore how to use Voicemod on Discord for Desktop.
Step 1: Install Voicemod
Before jumping straight to how we can use Discord for Desktop, we must first know how to install it on our Windows and Mac PC. Here is how to install Voicemod:
- First of all, visit the Voicemod website to start the download process.
- Next, you will see the “Get Voicemod Free” screen. Click it!
- After clicking, you will need to sign in to your account from Discord, Twitch, to Google. Make sure you use your Discord login details to sign in.
- After signing in, the “.exe” file will download to your Windows and Mac download folder. Open it.
- Then an install wizard opens. Navigate through it to install the program on your Windows and Mac computer.
- After complete installation, the installation wizard will ask you to restart your Windows’ or Mac computer.
- However, you can skip the restart process, but it’s best to restart it for smooth operations. Once your Mac or Windows computer restarts, you will see the Voicemod application icon on your desktop screen.
Step 2. Go to Settings>Voice and Video
To configure Voicemod with Discord, open your discord account and go to the settings option located in the screen’s bottom-left corner. Then tap on the “Voice and Video” option right under the app settings.
Step 3. In the “Input Device” section, Choose “Microphone Voicemod Virtual Audio.”
To make Voicemod usable, you are required to change the Voice settings. So, navigate within the “Input Device” option and select the option that says “Microphone Voicemod Virtual Audio.” Once the audio setting changes, it makes it easy for you to change the voice within the program. Also, other users can hear your audio alteration.
Step 4. Choose Your Favorite Voice
In the “basic version,” you have the authorization to change seven free voice choices each day. In addition, with the “pro-version,” you have access to more than 80 different voice options.
Therefore, if you are looking for a simple and easy Windows and Mac application, do not look further than Voicemod!

Part 2: How to Use Voicemod Voice Changer for Discord on Mobile (Android+iPhone)?
“Voicemod clips” is the version that is available for both Apple and Android devices. The application help users to make very high-quality content using its wide selection of one-of-a-kind effects that will change your voice so that you won’t even recognize yourself. Additionally, you can add filters connected to your cell phone’s camera to create hilarious, exciting videos. Also, you get the option to select from 10 different voices, and you can also make infinite videos and audio from the humorous to the terrifying.
Some of the Voicemod for Discord voices that are available on mobile devices include;
- Male-to-female
- Different robot effects
- Celebrities
- Scary voices, etc.
Also, the changes are on how you would like to modify your voice. It can also be cross-share to popular social networking platforms such as Facebook, Twitter, Instagram, TikTok, and Snapchat using your smartphone.
Here are step-by-step instructions:
Step 1: Download Voicemod for Mobile
Ensure you have downloaded the Voicemod application on your Android and iPhone and appropriately configured it. To configure, follow the step below;
- Open it to set your profile using Discord. Additionally, you can view all the different filters for videos and available voices.
- Also, you can decide the type of content you want to create, whether it is a video clip or audio.

Step 2: Access Sound Effects
Open Discord and tap the “cogwheel icon” near your name and avatar. You will see a “settings” page located within it. Tap the “Voice & Video” option. Then under the “Input Device” option, select Voicemod and the headset under the “Output Device” option and tap escape. Then you will have access to numerous exciting sounds.

Finally, add your favorite effect, save and start using your new enhanced voice from Voicemod Discord.
Part 3: People Also Want to Know
This section will look at some basic questions about Voicemod Discord that appeared in Q&A forums.
Is Voicemod safe for Discord?
Yes, Voicemod is safe, but you must download it from its official website or the Google Playstore and Apple’s App Store, as there are many cracked versions of Voicemod online.
Is there a voice changer for Discord?
Yes, a voice changer for Discord and Voicemod is known to be the best. It is an advanced and easy-to-use voice changer that allows you to sound like a man, woman, robot, or anything else you can ever imagine.
Key Takeaways from This Episode
Thus, as you saw, in this report, we have summarised a few essential points that you should know regarding Voicemod Discord. You learned:
- The best voice changer for Discordis Voicemod
- How to use Voicemod for Windows and Mac computers
- How to use Voicemod for mobile (iPhone and Android)
- Finally, a few FAQs for users to better understand the discord voice changer (Voicemod).
So, use the new knowledge about how to use Voicemod on Discord you acquired above and spin some voice changes.
The Easiest Way to Make Time-Lapse Videos. Yes, You Can Make a Time-Lapse Video with Your Phone. It Powers a Very Simple and Easy Way to Make Time-Lapse Videos
If you’re looking for a way to create a time-lapse video online, you have come to the right place. There are different reasons why people use online time-lapse video makers. Let us take an example, if you want to make a time-lapse video of someone holding a phone in their hand then this would be pretty easy to do with the help of an online time-lapse maker.
Why do people use an online time-lapse maker because they want to get some good quality videos without spending much money on them? That’s something that many people who are just starting their business can do easily since it can be done by anyone who knows how to use online time-lapse makers properly! Let’s have a look at some online tools on which you can make time-lapse videos online.
1. Clideo Timelapse Video Tool
A video timelapse video is a type of video that shows the progression of time. It allows you to create an engaging experience for your viewers, and it can also be used to promote your business. Whether you’re a content creator, brand manager, or just a fan of videos, creating a time-lapse video is one of the most popular and effective ways to produce impressive content.
With Clideo Time-lapse Video Tool you can create incredible videos with ease. You can choose from dozens of beautiful templates, music tracks, transitions, and more. You can also add your photos or video clips and make your unique time-lapse video. By using this tool, you can:
- Capture your events in real-time and save them for later. Once captured, you can use the timeline function to move backward or forwards through the events of your day.
- Add filters and effects such as blur or freeze frame.
- Share your videos on social media with ease!
Steps to make a time-lapse video on Clideo:
Step1 Open Clideo and Create an account
You can use this online time-lapse maker from any browser e.g Google Chrome, Mozilla Firefox, Internet Explorer, etc. After that you don’t have an account on it then you have to create it first. You can Sign in by using different platforms like Google, Facebook, apple, etc.
Step2 Create a project and select a tool
When you create an account on Clideo, a page appears where you will get the option of creating a project. A list of several features will be provided by this online time-lapse video maker. You will get to add subtitles, compress videos, resize the video, and many more features in it.
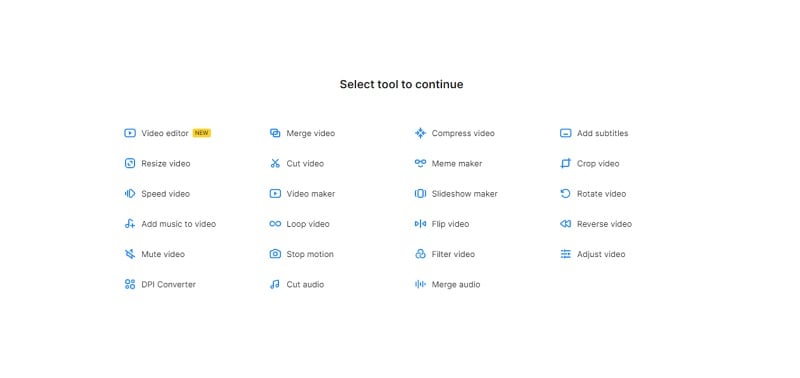
Step3 Create a video on Clideo
If you want to create a video then click on video maker and after that choose a file whether it is an image, video, gif, or music.
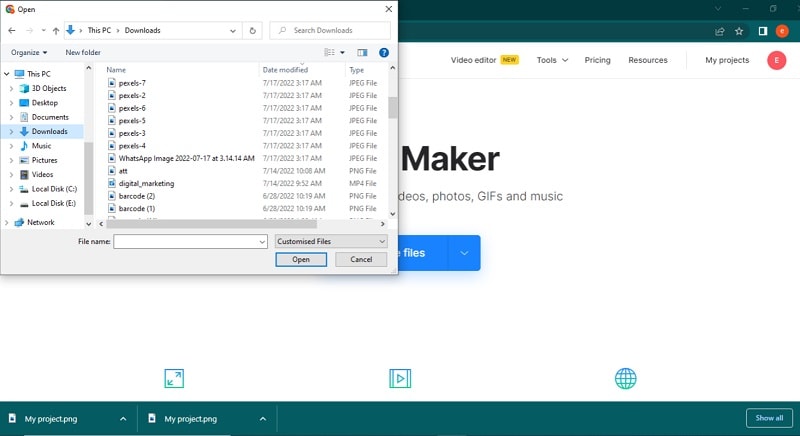
Step4 Edit the video and export
With Clideo, you can make amazing videos with just one click. You can choose the length of your video, as well as the format, and save it to your computer’s hard drive.
You can also adjust the duration of your video and add music to make it more interesting. This way you can make sure that your video is the right length for the content you’re putting in it.
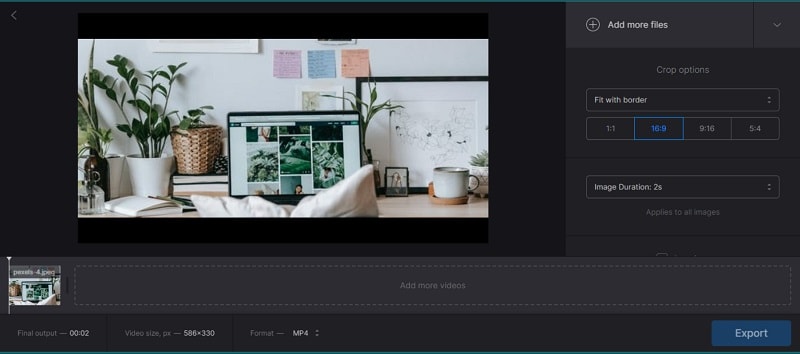
2. Flixier Timelapse Video Maker
Flixier Timelapse Video Maker is the easiest way to create beautiful timelapse videos. You can create beautiful, high-quality videos with ease. What’s more, you don’t have to know any programming languages! You’ll be able to export your videos in just one step.
The program’s intuitive user interface makes it easy for beginners to get started while still providing advanced features that professionals will love. The program supports drag-and-drop editing and has an intuitive layout designed for maximum efficiency.
Step1 Create a video without having an account
Flixier Timelapse Video Maker is a powerful video editing tool that allows you to create beautiful, high-quality timelapse videos. The best thing about Flixier is it does not require any account. You can easily click on Get Started and move on to the next step.
Step2 Drop and Browse any file
The Flixier Timelapse Video Maker is a new and exciting way to create HD videos from your favorite photos. It makes it easy for you to choose the photo you want to use, and then attach it to your video.
Flixier works with all of your favorite services: Google Drive, Google Photos, Dropbox, Flowplayer, and more! Flixier has a massive library of videos that you can use as inspiration for your project. There are thousands of them, some of which are free.
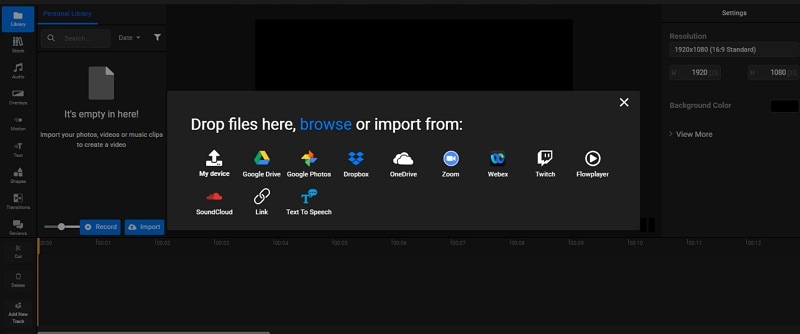
Step3 Edit the video and save it
This online time-lapse maker is easy to use, and it allows you to edit your videos in a few simple steps. You can add text, motion, position, and scale to your videos in just a few clicks. After that, you can export it to your hard drive.
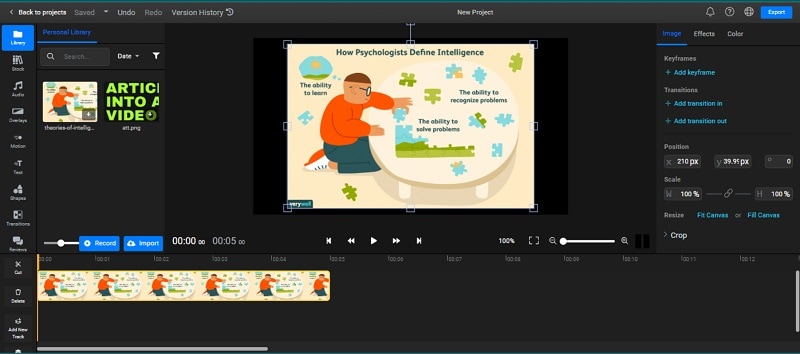
Flixier has tons of useful features for creating content for social media marketing. You can upload multiple clips at once and easily customize the length and format of each clip. You can also add music to your videos and adjust the volume levels for each clip individually so that they blend seamlessly when viewed as a whole.
3. Kapwing
Are you looking for a way to speed up and down your video without having to rewind and fast-forward? Kapwing is the tool that can help you do just that. With Kapwing, you can change the speed of your video from 1x to 10x faster. And because it’s easy to use and can be used on any device, you can take your videos anywhere!
There’s nothing worse than having your video slowdown in the middle of a high-speed chase. That’s why, this tool can speed up and down your videos as much as you want, whenever you want it. Now move to steps that how can we use it:
Step1 Sign in and export the file
If you’re looking for a way to speed up your video editing process, look no further. Kapwing Video Speed Changer is here to help!
With Kapwing, you have to create an account, add media like pictures and videos, and then easily tweak the speed of your video without ever having to create a new one.
Step2 Create video and change speed
Kapwing is a video editing software that lets you create videos as well as control the speed according to your needs. This feature makes it easy for you to create videos with different features. You can create videos with size, transitions, layers, and fonts. You can add text to your video as well as record audio from your computer’s microphone.
The software also includes other tools such as watermarking and adding subtitles to your video.
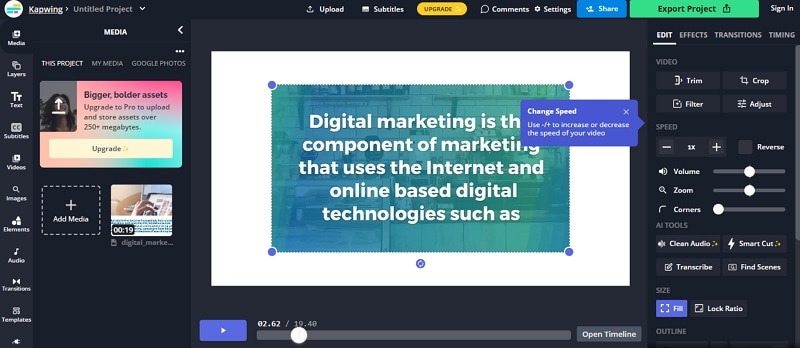
Step3 Export the video
This online tool provides you with different formats to export your video like mp4, mp3, GIF, and JPEG. You can download or export your video in full HD form. It provides you full resolution video.
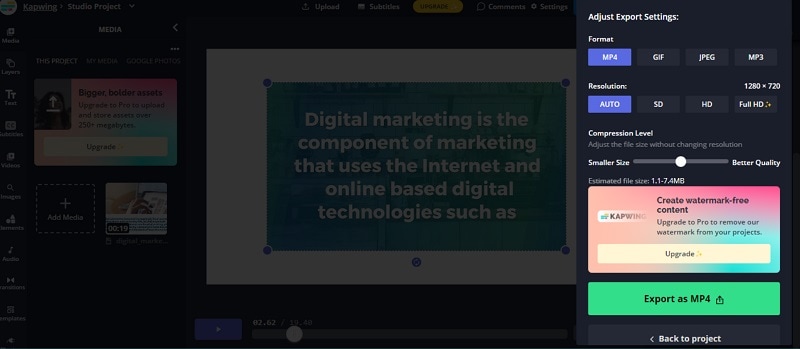
4. Veed.io Video Speed Controller
Are you looking to speed up or slow down your videos? We’ve got you covered. With Veed.io, you can easily adjust the speed of your video to your liking. You can also use a slider to control the speed of the video itself, which allows for more flexibility and control.
To use this tool, all you have to do is enter the URL of your video and select how fast you want it to be played back. And if you need even more flexibility, go ahead and add buttons so that you can easily change between faster and slower speeds without having to pause or rewind your video at all!
How can we control the speed on Veed.io let’s have a look at some steps:
Step1 Open the tool and create an account
Check out Veed.io Video Speed Controller, a new tool that allows you to control the speed of your videos. It’s super easy to use and can be accessed from any browser. Just create an account and you’ll be able to adjust the speed of your video on the go!
Step2 Create, edit the video and add subtitles
Veed.io is a video speed controller that allows you to create videos, edit your footage, and add voice-over in one simple app.
This is perfect for content creators who want to create more engaging videos and increase their profits by selling subscriptions or advertising within their content. With Veed.io, you can use the built-in editor to easily add text overlays, adjust the speed of your video, and add voice-over effects to create professional videos that people will love watching!
Step3 Add elements, and emojis in the video
Are you tired of your videos just being boring? Worried that they’re not engaging enough? Don’t worry, Veed.io has a solution for that.
With this editor, you can add elements to your videos to increase engagement and make them more interesting. You can also select the size and color of each element, so you can customize the look of your video to stand out from the crowd!
Step4 Export video without the watermark
After all the editing you can export or download the video without watermarks. The resolution of the video will be HD.
5. Typito Time Lapse Maker
Typito Time Lapse Maker is a tool that allows you to create videos with a timelapse effect. It is easy to use, and the interface is extremely simple. The first step is to select your video source and output format. You can choose from several different video formats, including MP4, MOV, and AVI.
Next, you’ll be prompted to select what you want your video to do. You have the option of creating a looping video or not it’s up to you! Once you’ve made your choices, you will be taken to the final step: entering text into the text editor for your video. This is where you can add captions or text overlays to spice up your video’s storyline.
Move to steps to create a lapse video online:
Step1 Create an account and make a video
Firstly, create an account on Typito and once you are done with the creation of the account click on the “Create Video” button in the middle of the screen. The video creation tool will begin loading, so please be patient!
Step2 Add media, title, elements, music
Time-lapse is a great way to create visual content. But how do you do it without spending a fortune? Typito Time Lapse Maker can help you make your time-lapse videos with the click of a button!
Just select media, add titles, elements, and anything else you want, and we’ll handle the rest—whether you’re using your music or not. You can add music according to your taste.
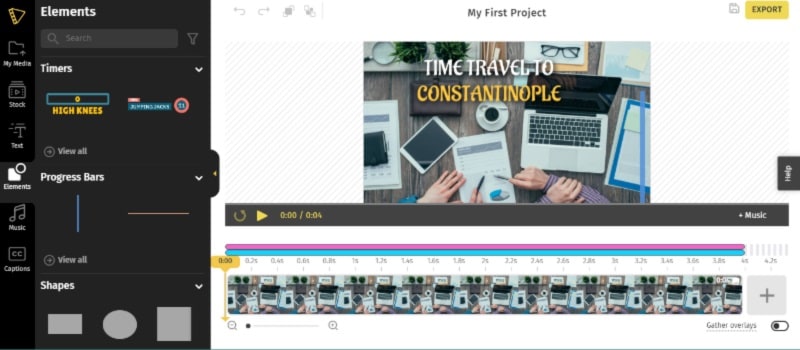
Step3 Export video and re-edit
When you are done with the video export it. And the great thing is video can be re-edited again and again. You can apply changes many times.

Conclusion
We hope that these ideas can motivate you to make timelapse videos. If you want to create a time-lapse video but don’t want to use a big and expensive camera just set up your online time-lapse. Moreover, there are lots of excellent platforms out there to share the finished product. Refer to the above recommendations to choose your favorite one.
Free Download For Win 7 or later(64-bit)
Free Download For macOS 10.14 or later
Free Download For macOS 10.14 or later
Also read:
- Updated In 2024, 5 Tried-And-True Ways to GIF Making
- Updated In 2024, How to Do Motion Graphics in Filmora
- Updated 4 Methods How To Make a Recap Video
- A Comprehensive Review of LUTs Finding LUTs Made by Danny Gevirtz for 2024
- New Guide To Slowing Down Videos in Snapchat Discussing the Details for 2024
- New If You Are Looking for an Open-Source, Cross-Platform Video Editor, Shotcut Is a Great Choice? But Is It Truly the Best Video Editor or Is There a Better Alternative Available?
- In 2024, How to Convert Videos to Slow Motion?
- Do You Know How to Create AI Thumbnails for Videos? This Article Will Mention some of the Best Tools to Generate Attractive Thumbnails for Videos with AI
- New Go Through This Guide on All Steps in Freezing Frame Sequences in Videos Using Filmora. Details Include Splitting the Clip, Reversing Speed, and More
- New How to Make OBS Slideshow
- In 2024, Easily Cut Large Video Faster on Mac
- New How to Make a Slideshow GIF, In 2024
- Updated Do You Know You Can Add LUTs for Cinematic Color Grading on Your Smartphones? With VN Editor You Can, You Can Add LUTs. Choose the Option VN LUTs Free Download
- New Want to Make a Slide Show Video? Heres How
- New 2024 Approved 3D Ray Traced Settings In After Effects
- New In 2024, How To Edit Youtube Videos In Simple Steps
- Updated 2024 Approved Turn Your Text Into a Podcast Made Possible
- New In 2024, A Complete Guideline To Better Use QuickTime Player
- New 2024 Approved How to Make Glitch Effect with Filmora
- Updated In 2024, Quick Answer What Is a GIF File?
- Updated In 2024, How to Convert Videos to Slow Motion? Complete Guide
- New In 2024, Live Stream on YouTube Using Zoom
- Updated In 2024, Best 5 Tools to Help You Know More Freeze-Frame Video Editing Skills
- Create Eye-Catching Slow-Motion Videos to Set Your Own Trend. For This Purpose, Read This Article to Find and Learn to Use CapCuts New Slow-Motion Templates for 2024
- Updated Top 4 Free 3D Intro Maker to Use
- If You Want to Color Grading Your Video, Final Cut Pro Can Be One of the Best Choices. However, Its Not Easy for Everyone to Use Color Grading Feature, and in This Guide Well Show You How to Do That
- Updated In 2024, 8 Unexpected Ways to Add Emoji to Photo Online
- Updated Color Match Game Top Tips for You for 2024
- New 2024 Approved Learn to Use Montage with These Movies
- Discover the Art of Masking in After Effects A Comprehensive Guide
- How To Split Screen On Tiktok
- Updated Leading Applications to Create Fast Motion in iPhone for 2024
- Preparation to Beat Giovani in Pokemon Go For Xiaomi Redmi Note 12 Pro 4G | Dr.fone
- In 2024, Set Your Preferred Job Location on LinkedIn App of your Motorola Edge 2023 | Dr.fone
- Top Apps and Online Tools To Track Poco C51 Phone With/Without IMEI Number
- Honor Magic V2 Screen Unresponsive? Heres How to Fix It | Dr.fone
- Fixing Foneazy MockGo Not Working On Nokia XR21 | Dr.fone
- How Can I Use a Fake GPS Without Mock Location On Infinix Smart 8 Plus? | Dr.fone
- In 2024, How to use iSpoofer on Nubia Z50 Ultra? | Dr.fone
- Why Your OnePlus Nord N30 5G Screen Might be Unresponsive and How to Fix It | Dr.fone
- Troubleshooting Guide How to Fix an Unresponsive Tecno Pop 7 Pro Screen | Dr.fone
- iSpoofer is not working On Poco X6? Fixed | Dr.fone
- 9 Best Free Android Monitoring Apps to Monitor Phone Remotely For your Vivo Y78+ | Dr.fone
- In 2024, The 6 Best SIM Unlock Services That Actually Work On Your Lava Yuva 3 Pro Device
- In 2024, Ultimate Guide to Catch the Regional-Located Pokemon For Realme GT 5 | Dr.fone
- Change Location on Yik Yak For your Oppo Reno 8T 5G to Enjoy More Fun | Dr.fone
- Title: A Guide to Use Distortion Effect in Premeiere Pro
- Author: Chloe
- Created at : 2024-05-20 03:37:18
- Updated at : 2024-05-21 03:37:18
- Link: https://ai-editing-video.techidaily.com/a-guide-to-use-distortion-effect-in-premeiere-pro/
- License: This work is licensed under CC BY-NC-SA 4.0.

