Adobe Premiere Pro Rec 709 LUTs Finding The Best Options

Adobe Premiere Pro Rec 709 LUTs: Finding The Best Options
Different styles of LUTs exist because each style serves a specific purpose in color correction and grading. LUTs are designed to replicate various cinematic styles and to change lighting conditions. By using different styles of LUTs, you can effortlessly achieve the desired color grading for your media. There are many types of LUTs to download, each with unique color composition.
However, Rec 709 LUT is a type of LUT commonly used in video editing software like Premiere Pro. Additionally, this LUT ensures that your video appears accurate and consistent on various HD screens. Moreover, it helps maintain the right balance of colors, contrast, and brightness. Furthermore, Rec 709 LUT Premiere Pro is suitable for broadcast, web streaming, or other HD content platforms.
Part 1: What are the Benefits of Using Premiere Pro Rec 709 LUTs in Video Editing?
Do you know the advantages of using Rec 709 Premiere Pro LUTs? Using Rec 709 LUTs in video editing with software like Adobe Premiere Pro can offer several benefits:
Color Accuracy
Rec 709 is the color space standard used for broadcast and video production. Furthermore, applying Rec 709 LUTs ensures accurate color representation of your media. Additionally, it maintains consistency and accuracy across different devices and platforms. It helps to achieve a standardized color look that conforms to industry standards.
Efficient Color Correction
Rec 709 LUTs streamline your color correction process. They provide a starting point for adjusting your videos’ color balance, contrast, and saturation. Moreover, if you apply this LUT at the start of your project, you can bring your video within the acceptable color range. Eventually, it will save you time and effort in the editing process.
Previewing Final Look
When you apply these LUTs, you can preview how your footage will look after color grading. Similarly, it helps you visualize your content to make changes for further adjustments. In addition, it also allows you to assess the tone and mood of the video in real-time.
Consistency and Compatibility
Such LUTs promote consistency across different cameras, lighting conditions, and sources. When working with multiple sources, you can apply this LUT for a consistent look. Furthermore, these LUTs also ensure compatibility with various display devices and platforms. It makes this tool compatible with different platforms and software.
Creative Control
Furthermore, these LUTs also serve as a starting point for further creative grading. You can layer additional adjustments on top of the LUT. In this way, you can achieve a specific artistic style to create a unique look for your project. Additionally, Rec 709 LUT creates a foundation for you to color-grade your content creatively.
Speeding Up Workflow
By using Rec 709 LUTs as a starting point, you can speed up your editing workflow. Using these LUTs, you don’t need to adjust each clip individually manually. In addition, you can apply a LUT to multiple clips simultaneously to color-correct your media files. Moreover, it saves you time when working on larger video projects.
Empower your videos with a new mood using different LUTs. Filmora now offers 100+ top-quality 3D LUTs cover a broad range of scenarios. Transform your videos with Filmora’s powerful 3D LUTs.
Apply LUT on Videos Apply LUT on Videos Learn More

Part 2: How to Use LUTs in Premiere Pro: A Guide
You can apply your Rec 709 LUT for Premiere Pro without needing any prior experience. All you have to do is to follow these simple steps to apply your favorite LUT.
Step 1: To apply a LUT using Adobe Premiere Pro, import your video by clicking the “File” button and selecting the “Import” option. You can also click on “Import media to start” in the Project Tab. Once your file is imported, drag the clip onto the timeline and move into the “Color” workspace.

Step 2: In continuation, click the “Adjustment Layer” button in the Project tab. Select your adjustment layer and drop it on top of your video clip in the timeline. Click on the layer and go to the “Video Effects” in the Effects option in the Project window. Then, navigate to “Color Correction” and select “Lumetri Color.”

Step 3: In the new window that appears, find the “Input LUT” option under the Basic Correction tab. Browse the LUT you want to apply to your video. Additionally, you can explore more creative LUTs by going to the “Creative” tab in the Lumetri Color window. In the “Look” section, browse for different creative LUTs for your video. You can adjust the intensity of the selected LUT using the slider.

Part 3: The Top Notch Premiere Pro LUTs Rec 709
There are many Premiere Pro Rec 709 LUTs available that you can download and purchase. In the list below are some of the best Rec 709 LUTs you can use.
1. LOOK Creative LUT Pack
The LOOK Creative LUT Pack is a collection of 10 creative LUTs. It includes a range of LUTs, including some popular ones like teal and orange and old noir. These LUTs provide a quick and easy way to add a specific color tone or mood to your footage. In addition to the basic LUTs, it also offers unique and creative options. For example, you’ll find LUTs like Subtle Sci-Fi, Grunge Green, and others.
2. Cinematic LUTs V2
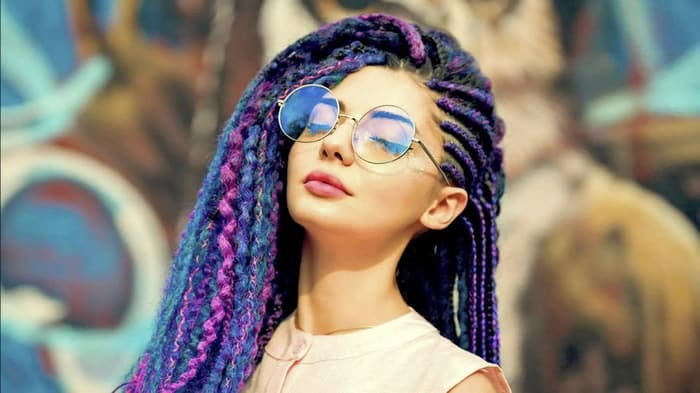
Cinematic LUTs V2 is a pack of modern cinematic-style LUTs. This incredible LUTs pack is designed to give your videos a cinematic touch. With this pack, you get access to 10 different cinematic LUTs to color grade your videos. Furthermore, you can use these LUTs for your LOG footage as well. Additionally, with these LUTs, you can add richness and depth to your videos.

3. NATURAL Rec709
The NATURAL Rec709 LUT pack offers 17 different styles of LUTs. It includes ones inspired by Tobacco, Crunchy Gold, and Black & White filters. These LUTs can enhance the colors and tones in your videos, providing a natural look. Furthermore, you can customize the intensity of the LUTs. Moreover, each LUT in this pack offers a unique color scheme for your videos.
4. 35 Free LUTs for Color Grading Videos
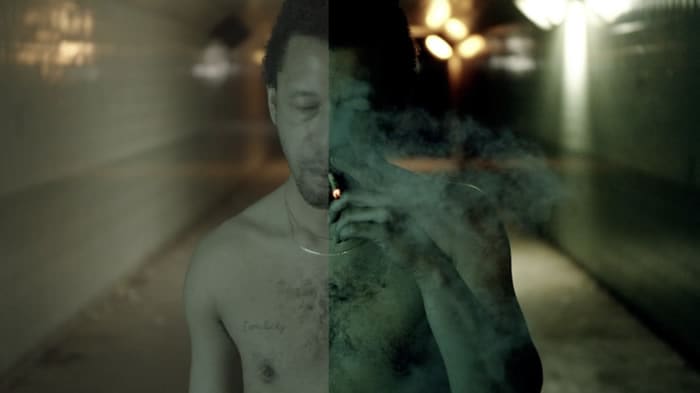
It is an amazing LUT pack that offers you a variety of 35 different styles of LUTs. With these LUTs, you can achieve a vintage look or a cinematic vibe for your videos. These LUTs can work perfectly with Rec 709 footage with accurate and vibrant colors. Furthermore, this pack is compatible with different software, including Premiere Pro.
5. S-Log 3 to Rec.709 LUT
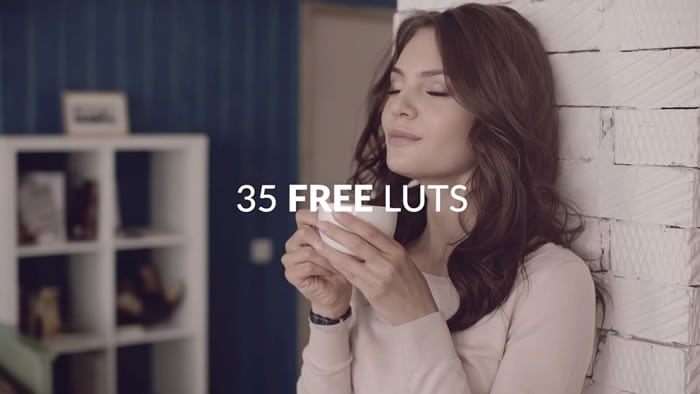
The S-Log3 to Rec.709 LUT pack is designed to enhance your footage by adding vibrance. Applying this LUT boosts saturation, giving your video a more natural and realistic look. Additionally, you can bring out the full potential of your videos captured in S-Log3 gamma. Moreover, this LUT amplifies the colors and is compatible with the Rec.709 color space.
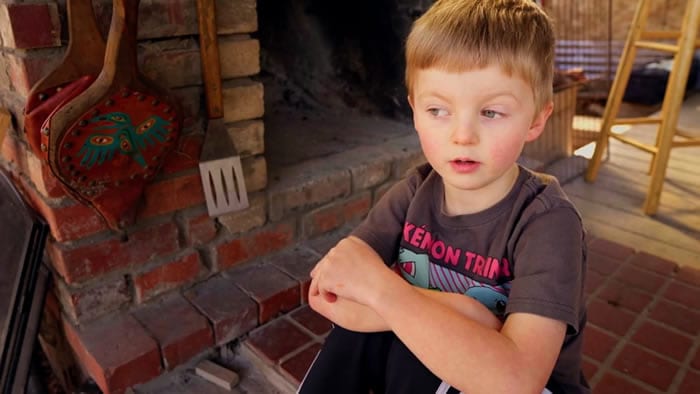
6. DJI OSMO POCKET Creative LUTs Pack
The DJI Osmo Pocket Creative LUTs Pack offers a collection of various creative LUTs. You can choose from different styles and color overlays for your media files. Moreover, you can use this LUT pack for both pictures and videos. In addition to this, it is also compatible with popular editing software. Furthermore, this tool pack supports both .3dl and .cube formats.
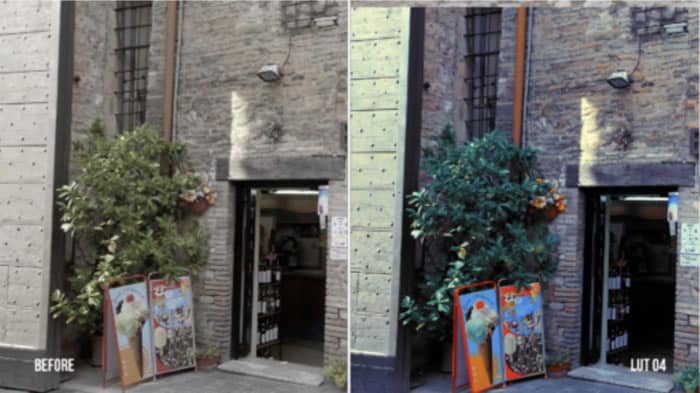
7. Blockbuster HLG And Standard LUTs
Another amazing pack of LUTs that you can use is Blockbuster HLG and Standard LUTs. This pack includes 21 Rec 709 LUTs with unique color toning and style. Furthermore, applying these LUTs will make your color grading more professional. Additionally, you can get rich and deep tones for your digital medial files. Similarly, you can change the feel of your content in a more professional style.
Conclusion
In conclusion, LUTs are perfect tools to enhance your media by altering its colors and tones. Different styles of LUTs cater to various creative needs. Furthermore, LUTs allow you to achieve specific looks and moods for your digital content. Moreover, the Rec 709 LUT Premiere Pro ensures your video appears accurate and consistent on HD displays. Additionally, you can achieve professional-grade results as well.
To add more LUTs on video, you can try Wondershare Filmora 
Add LUTs on Video For macOS 10.14 or later
Apply LUT on Videos Apply LUT on Videos Learn More

Part 2: How to Use LUTs in Premiere Pro: A Guide
You can apply your Rec 709 LUT for Premiere Pro without needing any prior experience. All you have to do is to follow these simple steps to apply your favorite LUT.
Step 1: To apply a LUT using Adobe Premiere Pro, import your video by clicking the “File” button and selecting the “Import” option. You can also click on “Import media to start” in the Project Tab. Once your file is imported, drag the clip onto the timeline and move into the “Color” workspace.

Step 2: In continuation, click the “Adjustment Layer” button in the Project tab. Select your adjustment layer and drop it on top of your video clip in the timeline. Click on the layer and go to the “Video Effects” in the Effects option in the Project window. Then, navigate to “Color Correction” and select “Lumetri Color.”

Step 3: In the new window that appears, find the “Input LUT” option under the Basic Correction tab. Browse the LUT you want to apply to your video. Additionally, you can explore more creative LUTs by going to the “Creative” tab in the Lumetri Color window. In the “Look” section, browse for different creative LUTs for your video. You can adjust the intensity of the selected LUT using the slider.

Part 3: The Top Notch Premiere Pro LUTs Rec 709
There are many Premiere Pro Rec 709 LUTs available that you can download and purchase. In the list below are some of the best Rec 709 LUTs you can use.
1. LOOK Creative LUT Pack
The LOOK Creative LUT Pack is a collection of 10 creative LUTs. It includes a range of LUTs, including some popular ones like teal and orange and old noir. These LUTs provide a quick and easy way to add a specific color tone or mood to your footage. In addition to the basic LUTs, it also offers unique and creative options. For example, you’ll find LUTs like Subtle Sci-Fi, Grunge Green, and others.

2. Cinematic LUTs V2
Cinematic LUTs V2 is a pack of modern cinematic-style LUTs. This incredible LUTs pack is designed to give your videos a cinematic touch. With this pack, you get access to 10 different cinematic LUTs to color grade your videos. Furthermore, you can use these LUTs for your LOG footage as well. Additionally, with these LUTs, you can add richness and depth to your videos.

3. NATURAL Rec709
The NATURAL Rec709 LUT pack offers 17 different styles of LUTs. It includes ones inspired by Tobacco, Crunchy Gold, and Black & White filters. These LUTs can enhance the colors and tones in your videos, providing a natural look. Furthermore, you can customize the intensity of the LUTs. Moreover, each LUT in this pack offers a unique color scheme for your videos.

4. 35 Free LUTs for Color Grading Videos
It is an amazing LUT pack that offers you a variety of 35 different styles of LUTs. With these LUTs, you can achieve a vintage look or a cinematic vibe for your videos. These LUTs can work perfectly with Rec 709 footage with accurate and vibrant colors. Furthermore, this pack is compatible with different software, including Premiere Pro.

5. S-Log 3 to Rec.709 LUT
The S-Log3 to Rec.709 LUT pack is designed to enhance your footage by adding vibrance. Applying this LUT boosts saturation, giving your video a more natural and realistic look. Additionally, you can bring out the full potential of your videos captured in S-Log3 gamma. Moreover, this LUT amplifies the colors and is compatible with the Rec.709 color space.

6. DJI OSMO POCKET Creative LUTs Pack
The DJI Osmo Pocket Creative LUTs Pack offers a collection of various creative LUTs. You can choose from different styles and color overlays for your media files. Moreover, you can use this LUT pack for both pictures and videos. In addition to this, it is also compatible with popular editing software. Furthermore, this tool pack supports both .3dl and .cube formats.

7. Blockbuster HLG And Standard LUTs
Another amazing pack of LUTs that you can use is Blockbuster HLG and Standard LUTs. This pack includes 21 Rec 709 LUTs with unique color toning and style. Furthermore, applying these LUTs will make your color grading more professional. Additionally, you can get rich and deep tones for your digital medial files. Similarly, you can change the feel of your content in a more professional style.

Conclusion
In conclusion, LUTs are perfect tools to enhance your media by altering its colors and tones. Different styles of LUTs cater to various creative needs. Furthermore, LUTs allow you to achieve specific looks and moods for your digital content. Moreover, the Rec 709 LUT Premiere Pro ensures your video appears accurate and consistent on HD displays. Additionally, you can achieve professional-grade results as well.
To add more LUTs on video, you can try Wondershare Filmora 
Add LUTs on Video For macOS 10.14 or later
How to to Mimic Professional Filming Gears
The professional and expensive gears are primarily out of budget for starters. But there is no need to stop filming because household things will give good output.
In this article, you will learn 6 pro tips to make professional filming gear using cardboard, container, and tape. It will turn out into POV and barrel roll shots. Scroll more to learn the top ways, and then enjoy the rest with your audience.
Part 1. Things to Remember Before Making Gears
Before using tools for professional videos, you should remember some side effects and cautions to make everything reliable and simple. Read the below outlines!
Not Professional Results
You should remember that homemade tools will give you different results than professional gear because they are expensive for a purpose. But you can experiment and get fun during filming with these products.
Safety Measures
If you use any heavy or temperature-sensitive equipment, you should take safety before operating them.
Handle Carefully
Before experimenting, make sure that you are holding everything tightly. Ensure that no accident occurs during filming!
After taking precautions and understanding the output, it’s time to make tools and film!
Part 2. Smooth Camera Movement with A Door
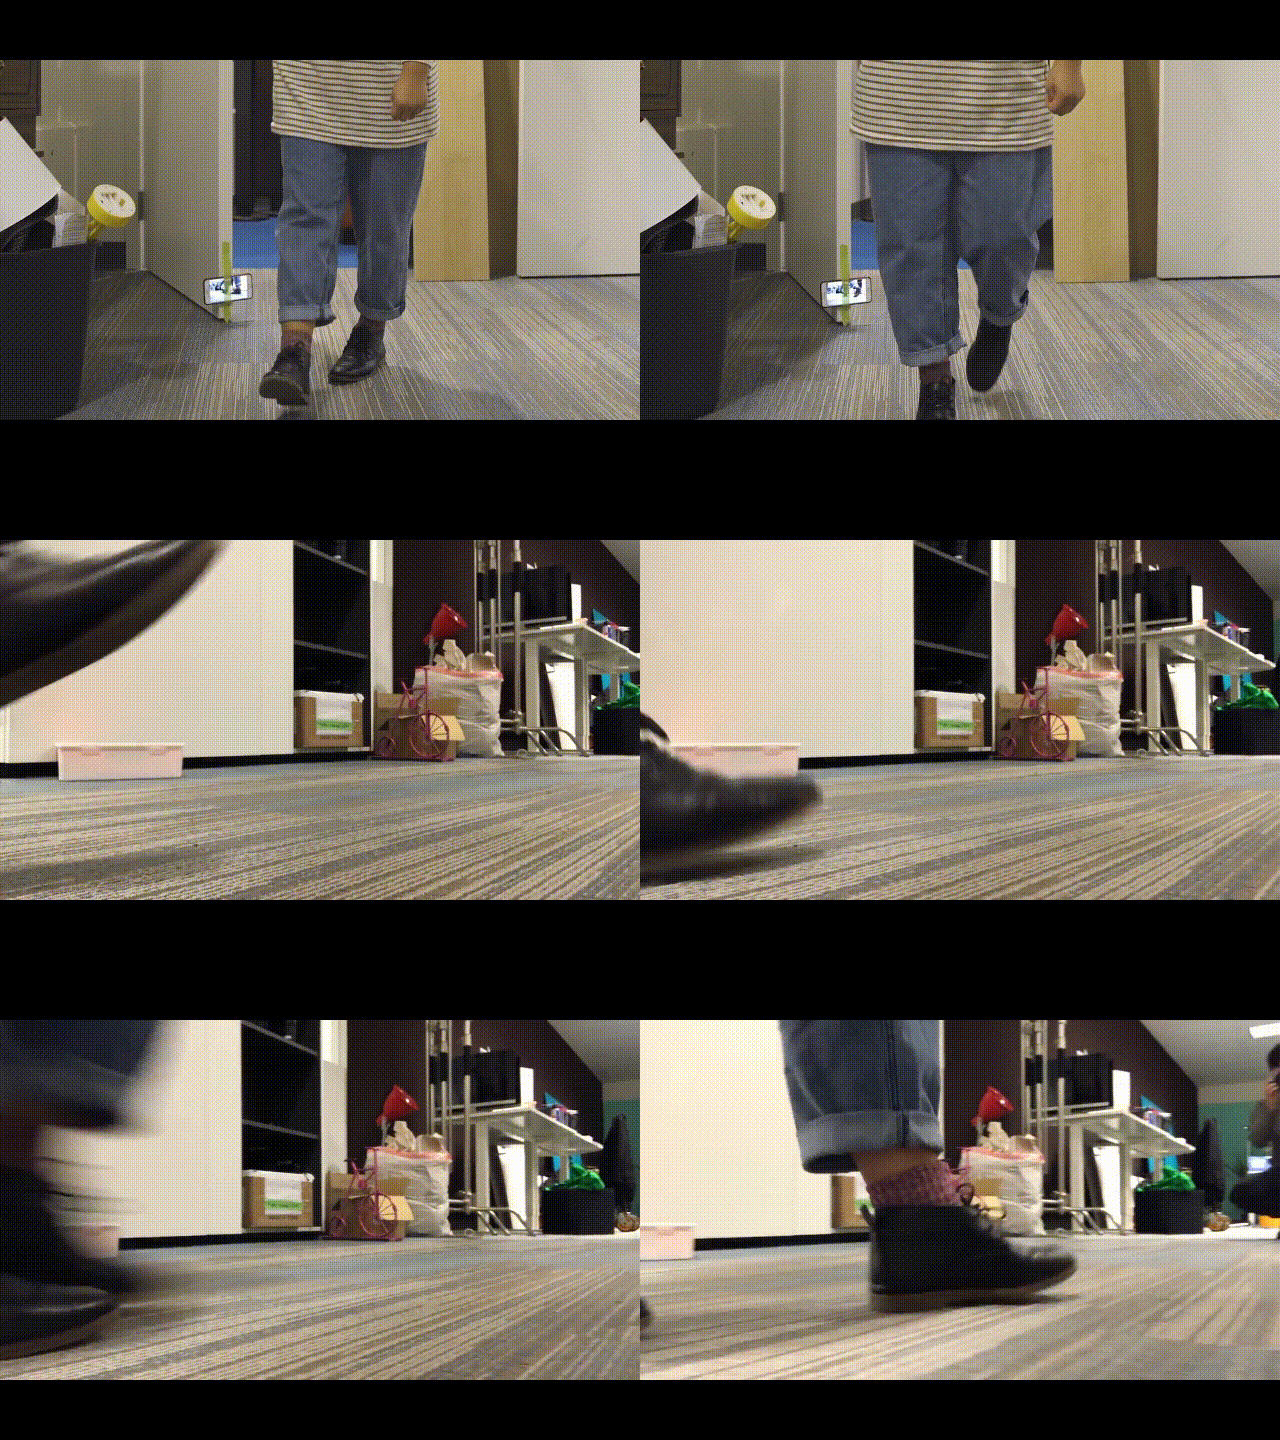
With a simple mobile camera, you can make smooth shots of any action, like walking, running, and playing. There is no need to get any professional gear.
It easy to achieve by attaching a camera to the door. You can use duct or any other tape which is easily available in the home. Fasten the mobile phone to the side of the door with tape, as shown below!
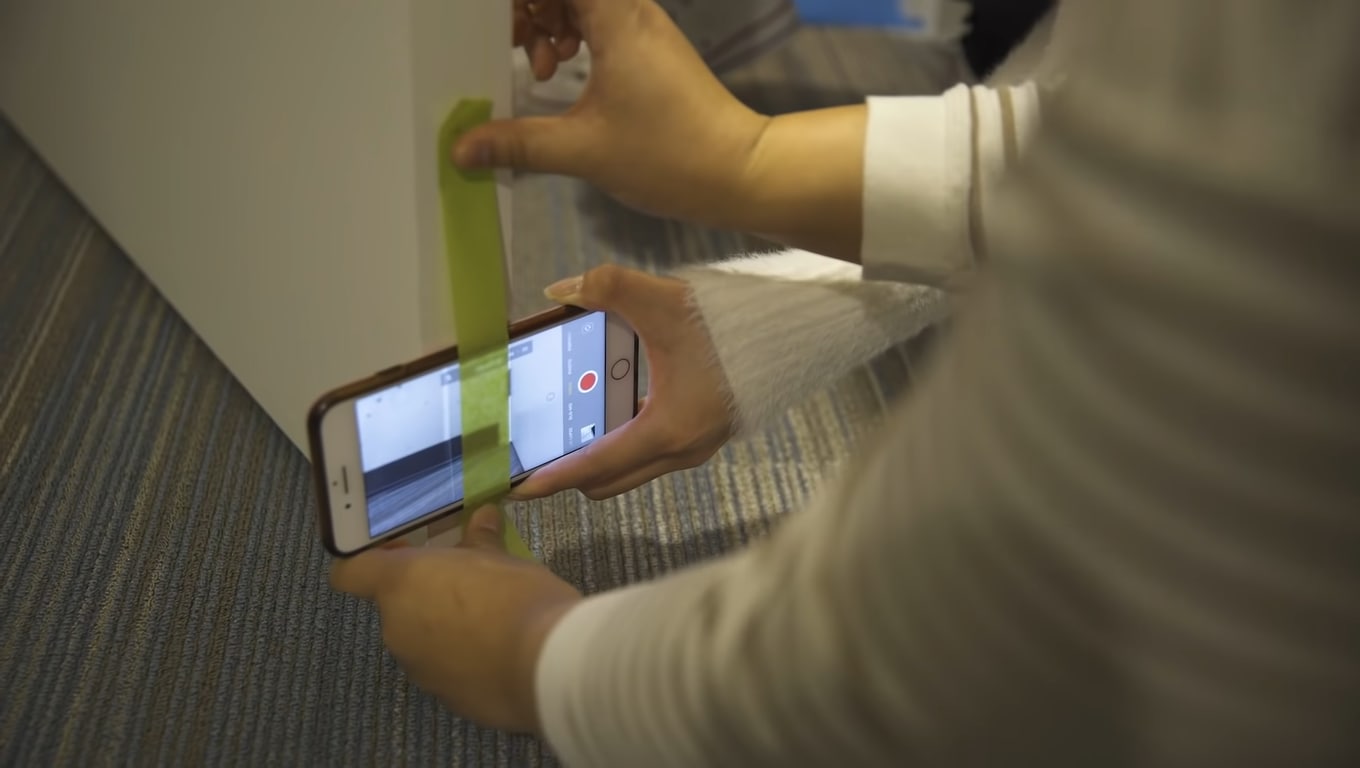
Moving the door while performing any action will result in smooth shots. Check out the final results below.
Part 3. Film Shots of Underwater
Filming underwater is always a dream of any videographer, but we were limited to get shots from the water’s surface. So now it’s time to add more creativity to your video.
First, you need to take a transparent container or any glass container. Pour water according to your need in it.
![]()
Note: Ensure the container is light enough to put on the phone.
Then, place the container on the lens of the phone to make a video. Then, take care of the phone from the water.
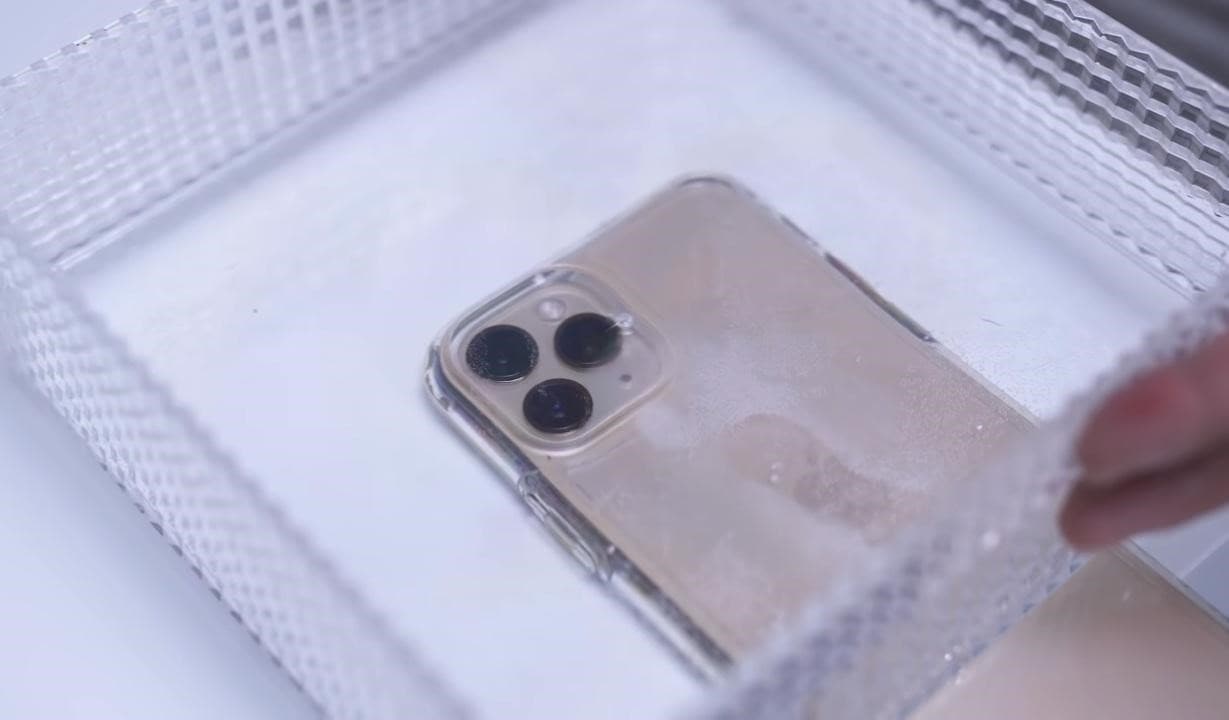
Pro Tip: You can also shine light source in water and add glitter or colors to get more astonishing shots.
Part 4. Make Colourful Shots Without Coloured Lights
All filmmakers love party lights and want to add colors like that in the video. Different colored lights in videos usually represent different mood swings and enhance the creativity of storytellers.
Professional videographers use expensive lights to give these effects. But you don’t need to purchase any expensive gear. Because you can make colorful shots easily with colored plastic binder dividers, or you can also use cellophane wraps.
First, wrap the colored divider around the LED light or any light you use to shoot video.
![]()
Note: Check the light temperature after short intervals because it melts or burns the dividers when the light source gets hot.
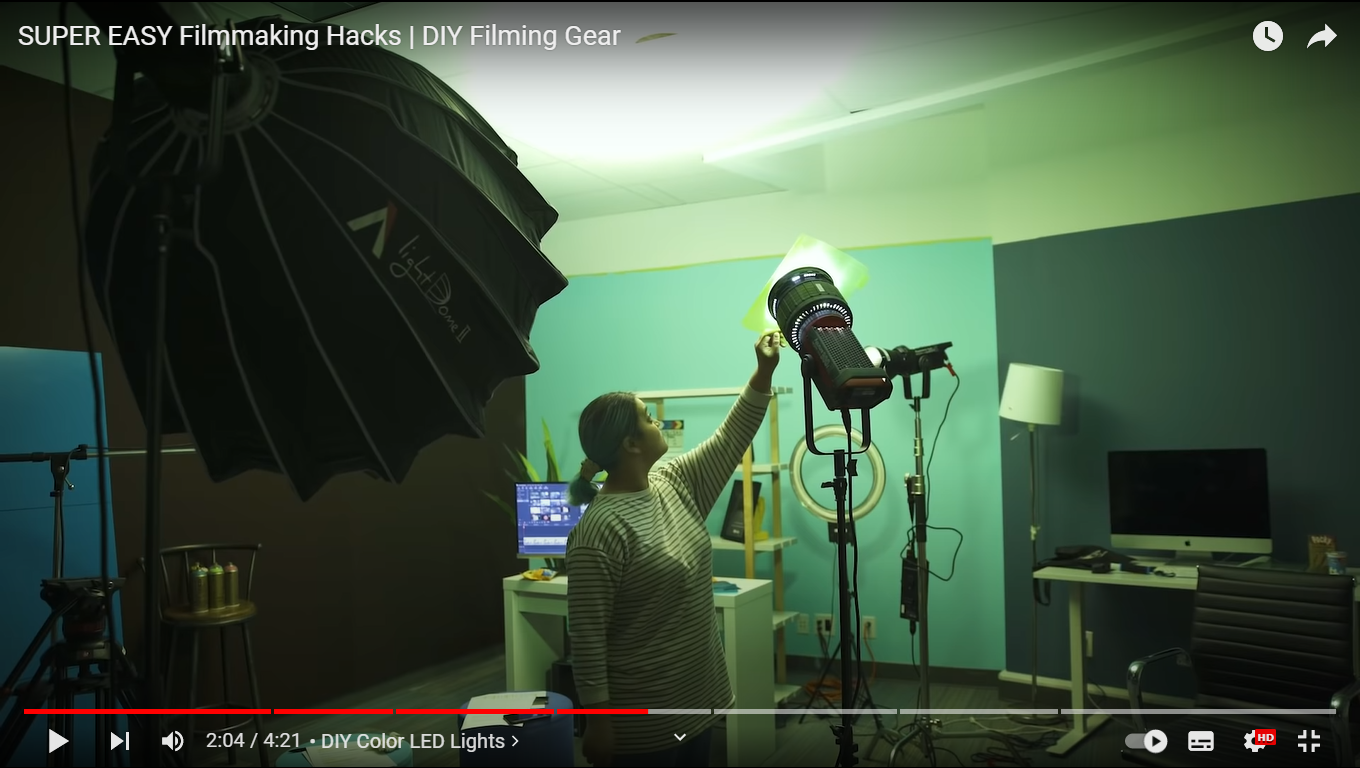
Now make the video and try with different colors to add suspense, horror, and happy effects to the video.
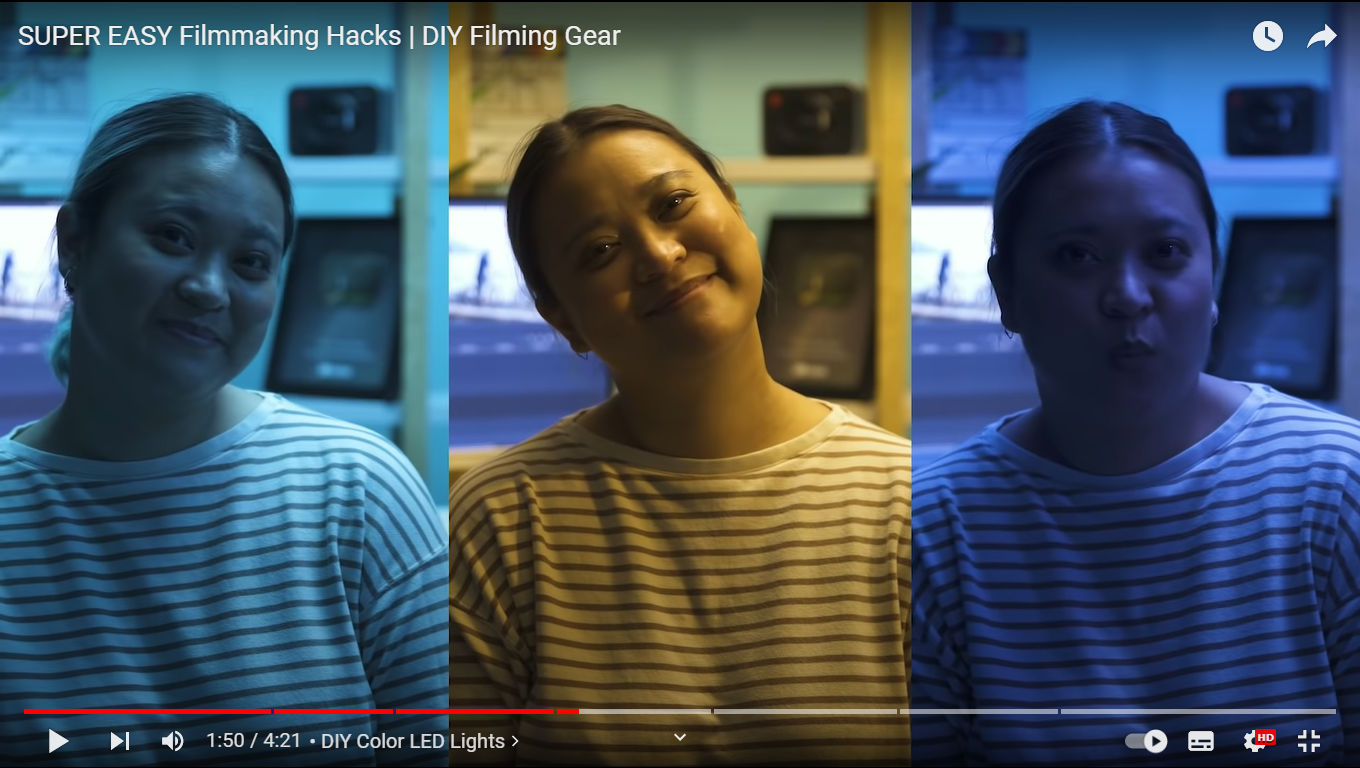
The video still needs more creative effects and designs; scroll more to read exciting tips.
Part 5. Different Shapes of Light with Cardboard
To add a fantasy location in the video and make light effects in the form of shapes, try out easily available cardboard. Most of the time, aesthetic videos are made by these hacks, giving viewers different vibes.
Only a professional photographer and videographer know how to attract the audience to the shots by doing these simple hacks.
The interesting thing is that if light has more shape, it will precisely describe more about the scene’s backstory, location, and context. Give it a try!
Step1 Cutting of cardboards
Cut the cardboard in any shape, whatever you want. We will experiment by cutting cardboard in window blinds shape.
![]()
Note: There is no specific recommendation for the cardboard, you can use any size or shape which suits you the best.
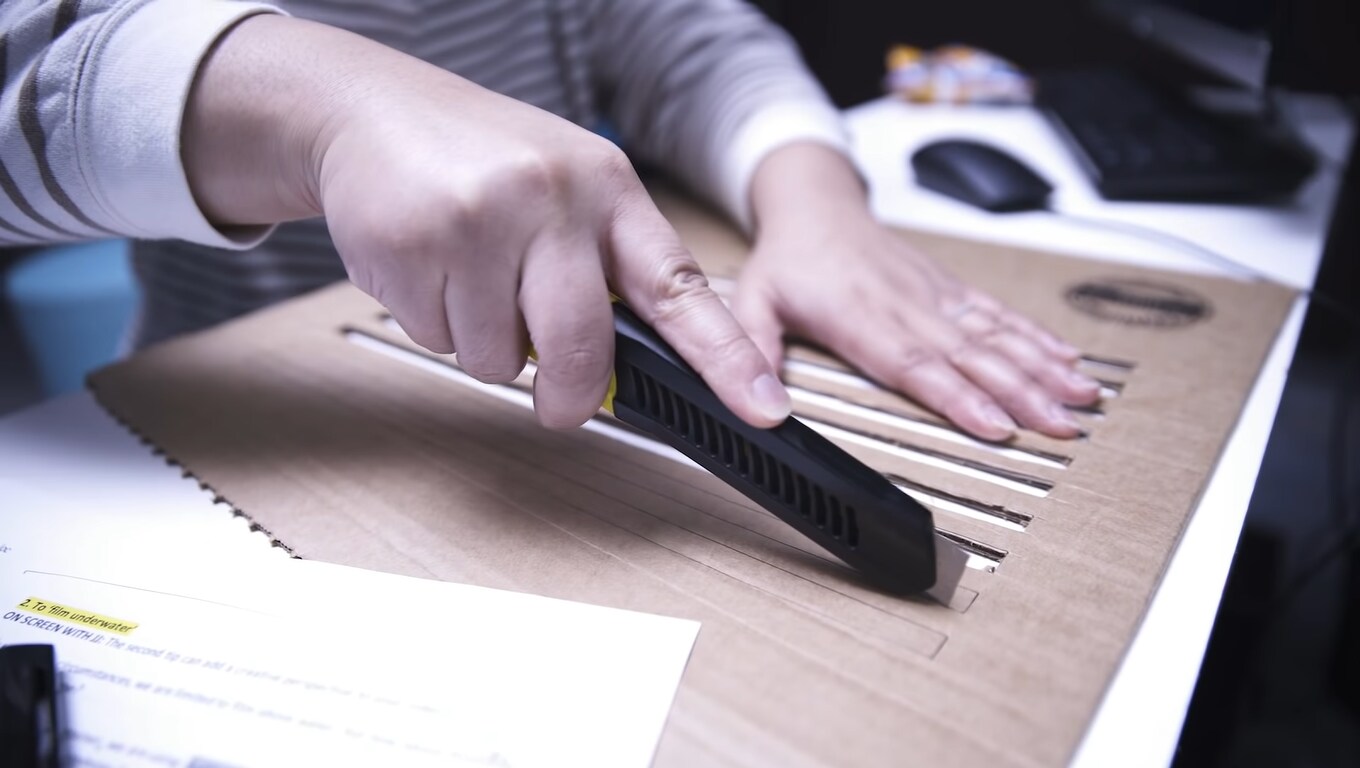
Step2 Make shots in different shapes of light
After giving shape, now move the cardboard around the light source and make a video. It seems like the subject is sitting near the window and has aesthetic vibes.
![]()
Note: The more precise the cutting of cardboard, the more professional it looks.

Become more creative and make more shapes with cardboard because the audience always prefers new content in the market.
Part 6. Create Point of View Shots
After adding colors and shapes, now it’s time to get some Point of View (POV) shots. Most of the time, viewers become bored by watching framing and filming coverages.
POV shots are mostly captured from a specific angle to show an object’s characters. They are mostly seen in food commercials, and videographers of snacks just love to make these shots.
To make POV shots, there is nothing specific required. You just have to make a suitable position for the lens. Follow the below guidelines and capture it!
Step1 Cut ends of packet
To create POV shots of your favorite snack, first of all, cut down both ends of the packets.
Step2 Attach packet on a camera
After cutting, attach the packet of snacks to the camera lens or phone with the help of old-fashioned tape.
Ensure the camera is turned on, and then make a POV shot. Now, it’s time to enjoy the rest part with the audience. Check out the final results, as shown below!
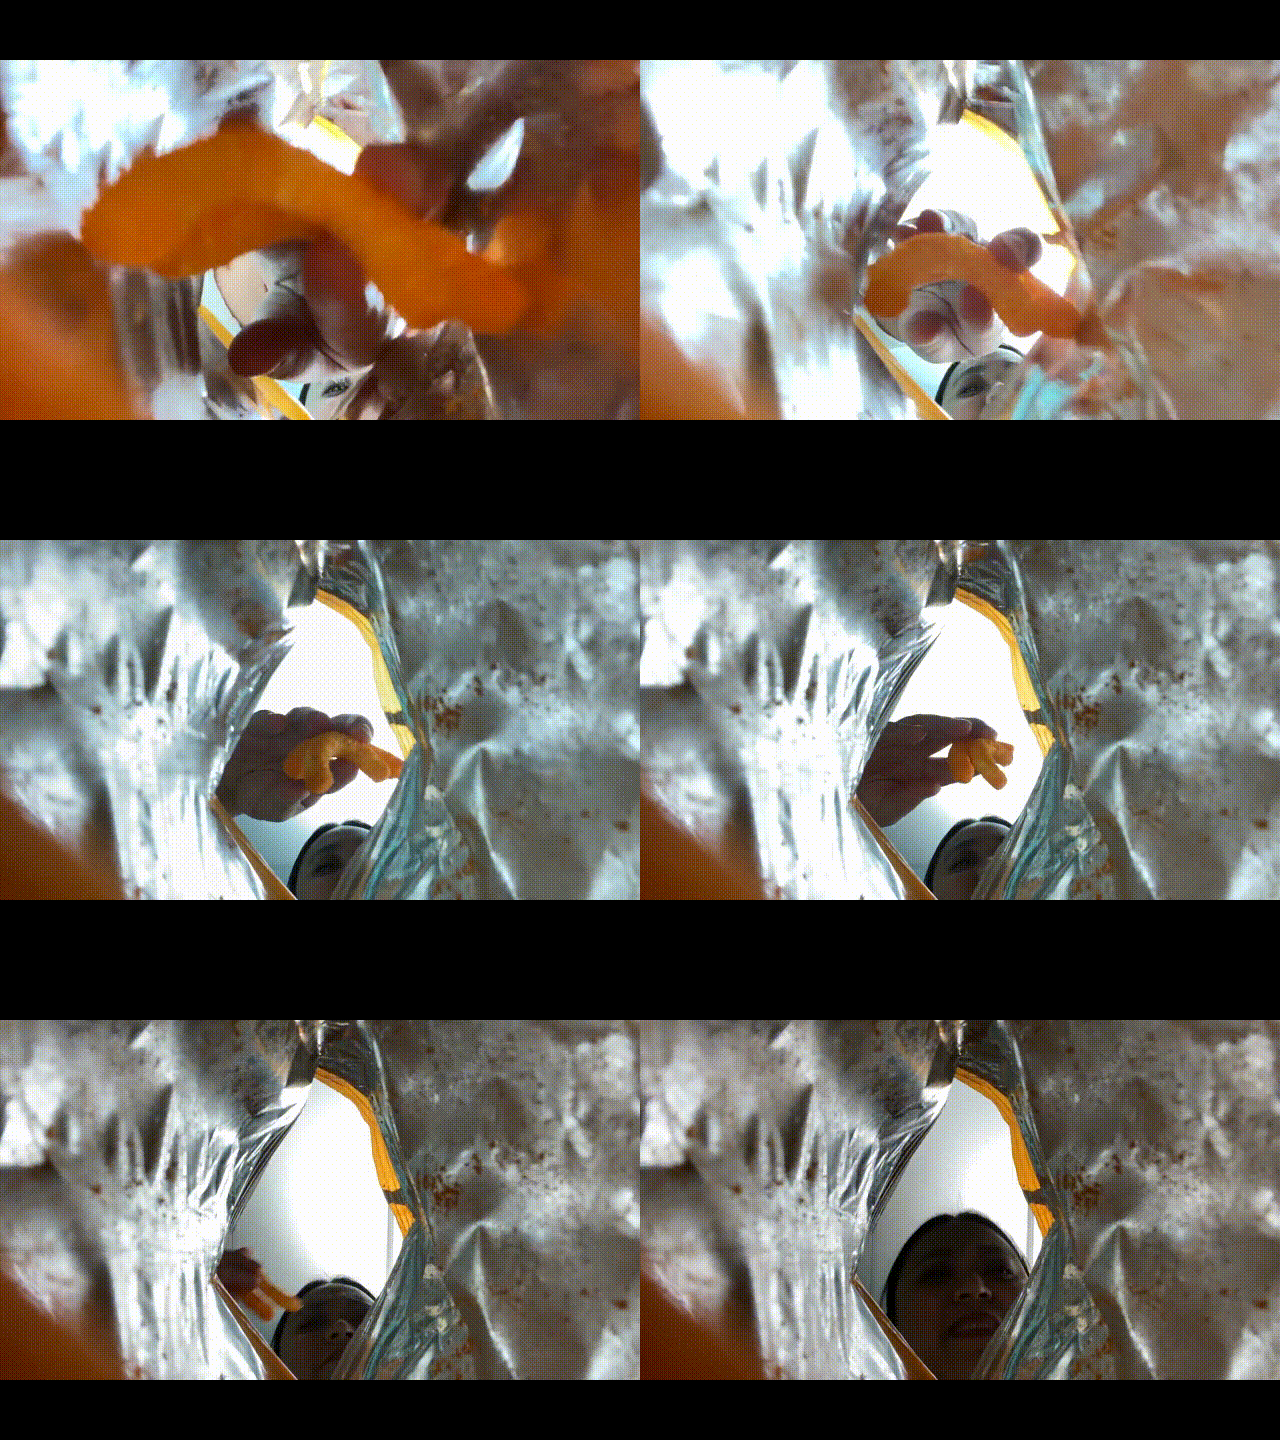
Due to this, the food seems good, and you can notice the number of spices too. This one actually looks amazing!
What if we add the rotatory shots, too, in the video? For this, check out the last tip and try that!
Part 7. Create a Barrel Roll Shot
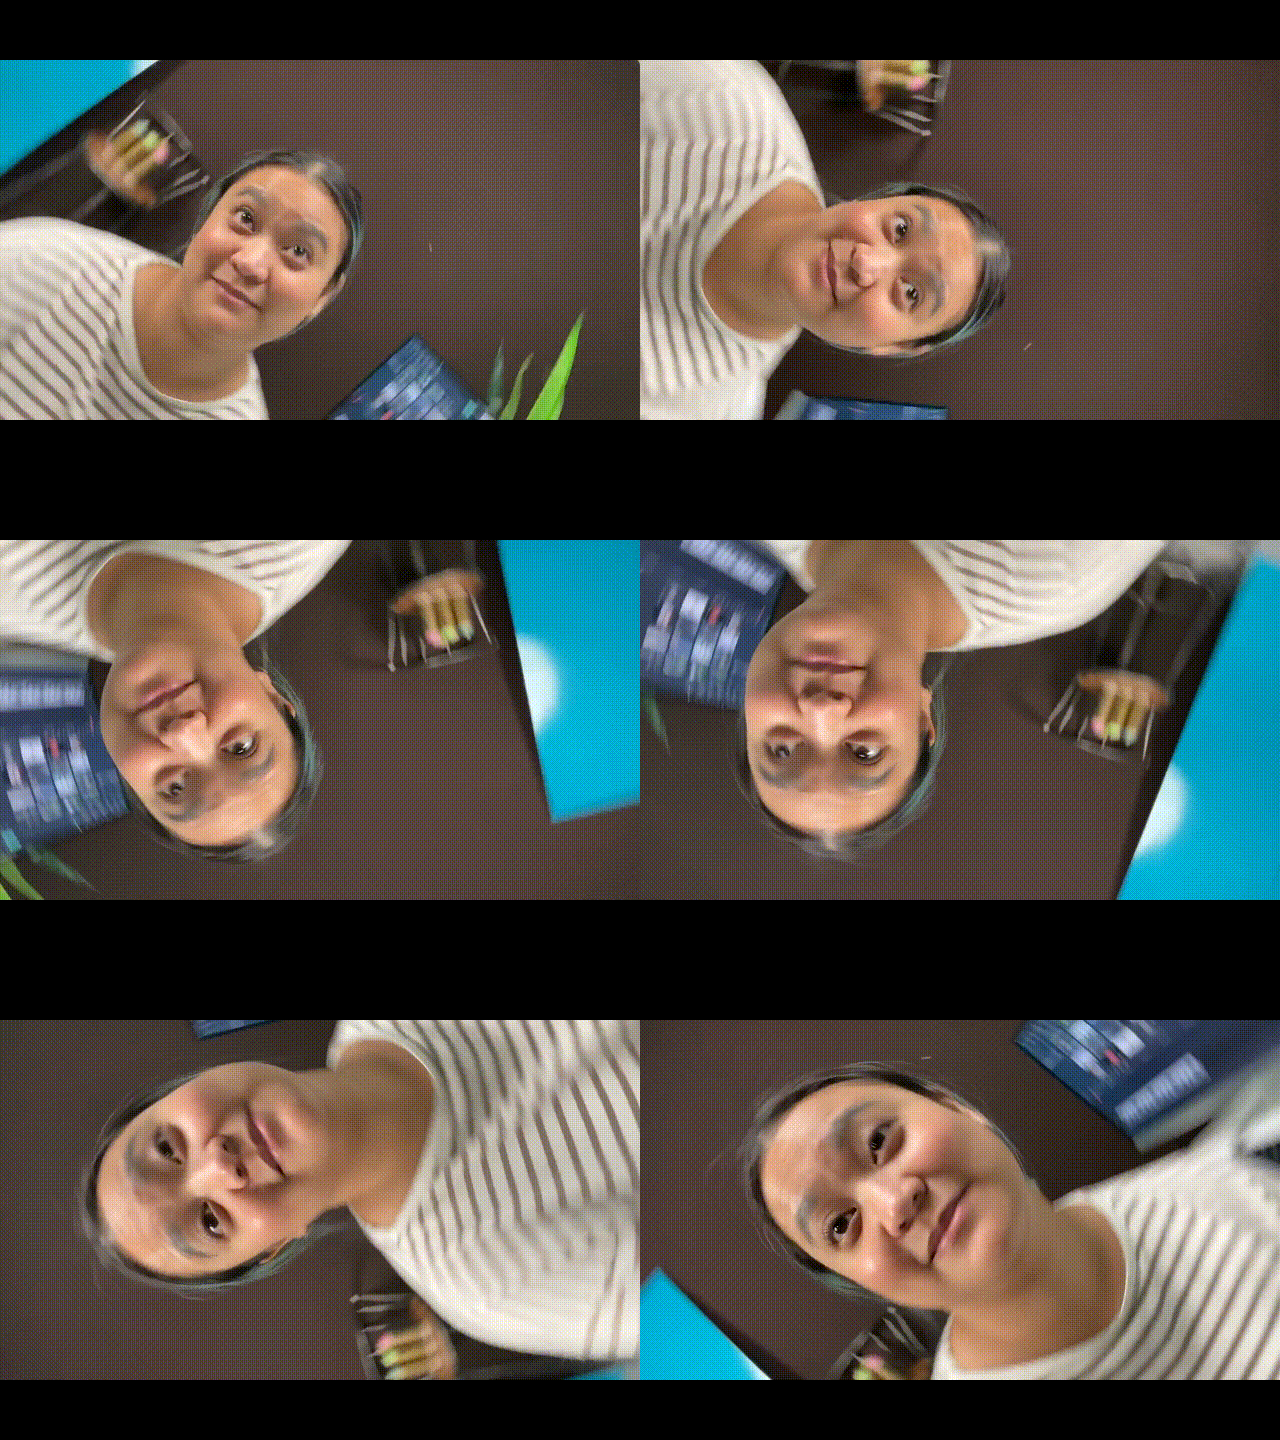
Barrel roll shots are the full axial shot by spinning the camera lens. Epic shots that formerly required costly gimbals and sophisticated techniques are now as simple as strolling.
It’s pretty easy to make a rotatory shot at 360° by using equipment easily available at home. Rolling may feel anxiety and disorientation. Filmmakers utilize it to confuse or unnerve audiences in movies.
There is no need to purchase expensive gambles to make barrel roll clips. Instead, try this hack by utilizing a power drill present at your home. Then, follow the below steps to give it a professional look!
Step1 Take equipment
First, take a camera lens or smartphone, whatever you are using to make a video, and a power drill as a gimbal.
Step2 Camera with drill
Attach the camera to the power drill with the help of old-fashioned tape.
![]()
Note: You should have a piece of square foam or soft block placed between the camera and drill to assist.
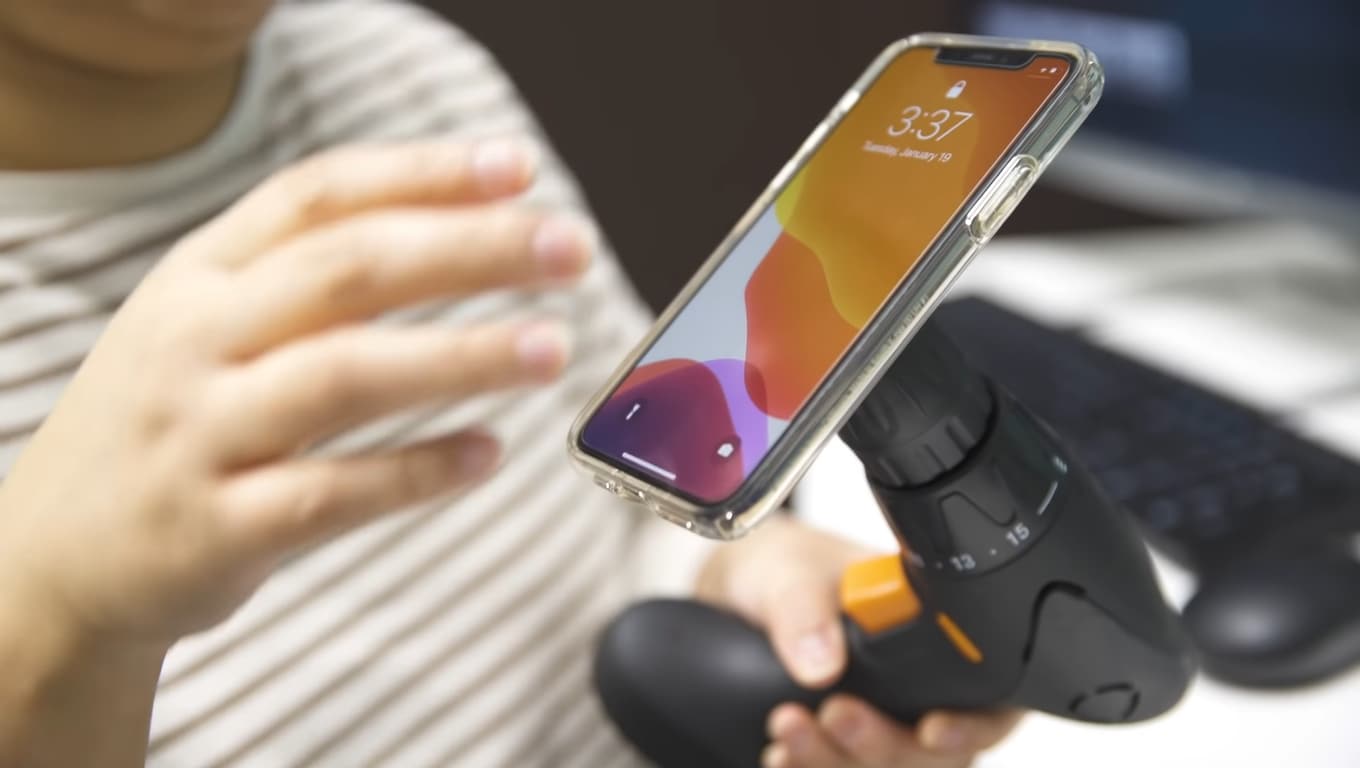
Now, it’s time to turn on the drill and ensure that the video option is “Turn On” in the camera. Then, enjoy the shots of 360° with your audience!
Conclusion
Finally, you get a filmy video after performing above mentioned 6 DIY hacks without expensive gear. More creativity in a video attracts more audience, which makes you more prior in the videography industry.
You can also try more tools at home and share your ideas with others to get reviews on them and make better changes. Make sure that you are taking all safety measures and precautions.
Then, place the container on the lens of the phone to make a video. Then, take care of the phone from the water.

Pro Tip: You can also shine light source in water and add glitter or colors to get more astonishing shots.
Part 4. Make Colourful Shots Without Coloured Lights
All filmmakers love party lights and want to add colors like that in the video. Different colored lights in videos usually represent different mood swings and enhance the creativity of storytellers.
Professional videographers use expensive lights to give these effects. But you don’t need to purchase any expensive gear. Because you can make colorful shots easily with colored plastic binder dividers, or you can also use cellophane wraps.
First, wrap the colored divider around the LED light or any light you use to shoot video.
![]()
Note: Check the light temperature after short intervals because it melts or burns the dividers when the light source gets hot.

Now make the video and try with different colors to add suspense, horror, and happy effects to the video.

The video still needs more creative effects and designs; scroll more to read exciting tips.
Part 5. Different Shapes of Light with Cardboard
To add a fantasy location in the video and make light effects in the form of shapes, try out easily available cardboard. Most of the time, aesthetic videos are made by these hacks, giving viewers different vibes.
Only a professional photographer and videographer know how to attract the audience to the shots by doing these simple hacks.
The interesting thing is that if light has more shape, it will precisely describe more about the scene’s backstory, location, and context. Give it a try!
Step1 Cutting of cardboards
Cut the cardboard in any shape, whatever you want. We will experiment by cutting cardboard in window blinds shape.
![]()
Note: There is no specific recommendation for the cardboard, you can use any size or shape which suits you the best.

Step2 Make shots in different shapes of light
After giving shape, now move the cardboard around the light source and make a video. It seems like the subject is sitting near the window and has aesthetic vibes.
![]()
Note: The more precise the cutting of cardboard, the more professional it looks.

Become more creative and make more shapes with cardboard because the audience always prefers new content in the market.
Part 6. Create Point of View Shots
After adding colors and shapes, now it’s time to get some Point of View (POV) shots. Most of the time, viewers become bored by watching framing and filming coverages.
POV shots are mostly captured from a specific angle to show an object’s characters. They are mostly seen in food commercials, and videographers of snacks just love to make these shots.
To make POV shots, there is nothing specific required. You just have to make a suitable position for the lens. Follow the below guidelines and capture it!
Step1 Cut ends of packet
To create POV shots of your favorite snack, first of all, cut down both ends of the packets.
Step2 Attach packet on a camera
After cutting, attach the packet of snacks to the camera lens or phone with the help of old-fashioned tape.
Ensure the camera is turned on, and then make a POV shot. Now, it’s time to enjoy the rest part with the audience. Check out the final results, as shown below!

Due to this, the food seems good, and you can notice the number of spices too. This one actually looks amazing!
What if we add the rotatory shots, too, in the video? For this, check out the last tip and try that!
Part 7. Create a Barrel Roll Shot
Barrel roll shots are the full axial shot by spinning the camera lens. Epic shots that formerly required costly gimbals and sophisticated techniques are now as simple as strolling.
It’s pretty easy to make a rotatory shot at 360° by using equipment easily available at home. Rolling may feel anxiety and disorientation. Filmmakers utilize it to confuse or unnerve audiences in movies.
There is no need to purchase expensive gambles to make barrel roll clips. Instead, try this hack by utilizing a power drill present at your home. Then, follow the below steps to give it a professional look!
Step1 Take equipment
First, take a camera lens or smartphone, whatever you are using to make a video, and a power drill as a gimbal.
Step2 Camera with drill
Attach the camera to the power drill with the help of old-fashioned tape.
![]()
Note: You should have a piece of square foam or soft block placed between the camera and drill to assist.

Now, it’s time to turn on the drill and ensure that the video option is “Turn On” in the camera. Then, enjoy the shots of 360° with your audience!

Conclusion
Finally, you get a filmy video after performing above mentioned 6 DIY hacks without expensive gear. More creativity in a video attracts more audience, which makes you more prior in the videography industry.
You can also try more tools at home and share your ideas with others to get reviews on them and make better changes. Make sure that you are taking all safety measures and precautions.
Do You Want to Apply Professional-Looking Color Grading on Your iPhone’s Photos and Videos? You Can Use Different iPhone LUTs for Your Pictures and Videos
LUTs are pre-made color settings that you can apply to your pictures and videos to change how they look. These are used by professionals like photographers, filmmakers, and video editors for their work. They can change an image or video’s colors, brightness, and contrast to create different moods. Nowadays, LUTs are even available on smartphones, including iPhones.
This article will explain how to use iPhone LUTs and suggest some excellent apps. You can apply LUTs to your work to give it a more creative and professional touch. Using these, you can take your photo and video editing skills to a whole other level.
- How to Apply LUTs to Edit Video on iPhone?
- What Should a Good LUT Video Editing App Have?
- Wondershare Filmora: A Computer Alternative for Applying LUTs
Part 1: The Top Best Apps for Applying LUTs on iPhone
Lookup Tables are a great way to improve your photos and videos. However, these LUTs are not only available for PCs or Macs but also for smartphones. There are many LUTs for iPhone available that you can apply using these apps.
1. VideoLUT
If you’re looking for an iPhone app to apply LUTs, the VideoLUT app for iPhone is a good choice. This iPhone application has over 2500 LUT presets available for color grading any photo or video. Furthermore, you can change your media files’ Hue, Saturation, and Lighting to make them look better. With so many color grading options available, make your content stand out from the rest.

pros
- This LUTs iPhone app lets you make your own preset of your liking.
- Furthermore, this application supports different formats, including .cube and .3dl.
pros
- Some of the users find the user interface difficult to navigate, slowing the editing process.
Compatibility
iOS: 13.2 and higher
2. Filmic Pro
Filmic Pro is an app that lets you apply LUTs to your media files. With this app, you can import up to 7 LUTs and use them to color-correct your digital content. Apart from this, its camera lets you capture high-quality videos and pictures with manual controls. With these controls, you can adjust the focus, exposure, and other settings to capture a professional-looking image.

pros
- It has a Quick Action Modals feature, which lets all the essential options within your reach.
- Moreover, you can change the speed of your video without compromising the quality.
pros
- Many users are complaining because of the switching from a one-time payment to a subscription model.
Compatibility
iOS: 14.1 and higher
3. VideoGrade
Use the VideoGrade app on your iPhone if you want to give your videos a professional look. This fantastic app lets you import and apply different LUTs to your video footage. Moreover, you can correct the color cast or even poor lighting to improve the color composition. VideoGrade app lets you easily color grade or enhance your videos by changing brightness, saturation, and contrast.

pros
- This iPhone application has in-built filters that you can apply to get a specific color tone.
- You can save your videos in HD, and additionally, you can capture frames from your videos as well.
pros
- On some iPhone versions, this app gets stuck and crashes by deleting the current edit.
Compatibility
iOS: 13.0 and higher
4. Darkroom
Darkroom is another iPhone LUTs free photo and video editing app with many features and options. One of its prominent features is the ability to apply LUTs and filters. LUTs and filters can change the look of your photo or video to create a different mood or style. Besides this, this app allows you to create your own color adjustment and correction presets.

pros
- With its AI technology, you can modify your background, subject, and foreground.
- You can even edit multiple photos simultaneously with its batch-processing feature.
pros
- In some photos, the app automatically changes the white balance even when it’s unnecessary.
Compatibility
iOS: 14.0 and higher
5. Prequel
Prequel is an excellent iOS option to set the tone of your video and image. This powerful app allows you to apply different LUTs, overlays, and filters to your media files. It has over 800 filters and effects available to change the mood and feel of your content. Furthermore, with its editing options, you can enhance your media as much as you want by adjusting its settings.

pros
- Other than the availability of LUTs for iPhone videos, you can also use different in-built templates.
- You can add music, stickers, and even text to your videos and photos.
pros
- The filters you apply are not high quality, and the editing process is a bit complex.
Compatibility
iOS: 13.0 and higher
Empower your videos with a new mood using different LUTs. Filmora now offers 800+ top-quality 3D LUTs cover a broad range of scenarios. Transform your videos with Filmora’s powerful 3D LUTs.
Apply LUT on Videos Apply LUT on Videos Learn More

Part 2: How to Apply LUTs to Edit Video on iPhone?
If you’re having trouble applying LUTs for iPhone videos and images, then don’t worry. Follow these easy and simple steps and apply the LUTs of your choice on your media files. For the guide, we use VideoLUT to help you understand how to apply LUTs on iOS devices.
Step1
Before applying LUT using an iOS device, you must install the application first. Go to the App Store and search for the application. Download the VideoLUT app to make further edits to your image or video footage.

Step2
Open the application and select the “Open” button on the right corner of the screen. After tapping the button, navigate to “LUT Image” and import the LUT of your choice.

Step3
Once you’ve imported your preferred LUT, select the image on which you want it to be applied. To do so, go to the “Open” button and select “Image/Video.” After selecting your desired option, choose the photo or video you want to edit.

Step4
Tap the “Imported” option from the drop-down menu right next to the Open button. Then choose the “IMG” option to access the imported LUT on the mobile application. On the bottom of your screen, select your LUT by tapping it. You can also change the intensity of your LUT for iPhone.

Step5
Once done with your editing, you can download your file by selecting the Save button on the right corner of the screen.

Part 3: What Should a Good LUT Video Editing App Have?
When looking for a good LUT to apply to your videos and photos, there are many things to look for. Some of the important options that a good LUT app should have been discussed here.
- Multiple LUT Formats: A good iPhone LUT app should support different LUT formats such as .cube, .3dl, .look, and more. It allows you to use LUTs from different sources and import them easily into your application.
- Easy LUT Import and Export: The app you are choosing should have an easy-to-use interface. The interface should allow you to import and export LUTs quickly. It saves you time and helps you do the editing quicker.
- Customizable LUTs: You should be able to create custom LUTs for your content. The app should allow you to adjust colors, contrasts, and saturation settings to make editing easy.
- Preview Options: A preview function also is a good option to have in your app. This option allows you to see the LUT effect in your digital media before applying it.
- Multiple Formats Compatibility: Furthermore, the app should be compatible with popular video formats like MP4, AVI, and MOV. With this option, you can edit and export your videos in the format you need.
- Non-Destructive Editing: Moreover, the app should allow you to edit your footage by keeping the original settings alongside. This feature will not affect the original, letting you revert to the original settings if needed.
- User-Friendly Interface: An easy-to-use interface lets you focus on your creativity. A good interface makes the editing process more fluid and easier.
Part 4: Wondershare Filmora: A Computer Alternative for Applying LUTs
Wondershare Filmora is a video editing tool that has been popular for recent years. This tool offers multiple color grading and adjustment options. With its newest update, you get access to over 200 LUTs to change the tone and look of your videos. Besides LUTs, you can also add effects and transitions to your videos to make them look more engaging.
Add LUTs on Video For Win 7 or later(64-bit)
Add LUTs on Video For macOS 10.14 or later
Additionally, this tool has built-in color grading tools that you can use to give your videos a more cinematic feel. Moreover, you can save your edits in up to 4k resolution, giving it a sharper and crispier quality. Its latest update offers many AI features to make your video editing easier. Lastly, users can access its library to choose different filters, overlays, and stock media.

Key Features of Wondershare Filmora
- Wondershare Filmora is a professional video editing tool that offers masking options. You can easily mask any subject in a video with its AI technology for your video edits.
- You can use the same font and text style in all your video clips with batch editing. With this feature, all your texts will be in a similar fashion across all your videos.
- With the integration of AI now, you can generate images using text prompts. This feature allows you to be creative with words to generate a unique image.
Conclusion
To sum up, there are many color correction and adjustment options to change the mood of your content. Similarly, LUTs are a great option to color grade your photos and videos. By integrating LUTs with smartphones, you can now apply LUTs using your iOS devices. There are many LUTs for iPhone footage and images, but more importantly, choosing a good app is important.
- What Should a Good LUT Video Editing App Have?
- Wondershare Filmora: A Computer Alternative for Applying LUTs
Part 1: The Top Best Apps for Applying LUTs on iPhone
Lookup Tables are a great way to improve your photos and videos. However, these LUTs are not only available for PCs or Macs but also for smartphones. There are many LUTs for iPhone available that you can apply using these apps.
1. VideoLUT
If you’re looking for an iPhone app to apply LUTs, the VideoLUT app for iPhone is a good choice. This iPhone application has over 2500 LUT presets available for color grading any photo or video. Furthermore, you can change your media files’ Hue, Saturation, and Lighting to make them look better. With so many color grading options available, make your content stand out from the rest.

pros
- This LUTs iPhone app lets you make your own preset of your liking.
- Furthermore, this application supports different formats, including .cube and .3dl.
pros
- Some of the users find the user interface difficult to navigate, slowing the editing process.
Compatibility
iOS: 13.2 and higher
2. Filmic Pro
Filmic Pro is an app that lets you apply LUTs to your media files. With this app, you can import up to 7 LUTs and use them to color-correct your digital content. Apart from this, its camera lets you capture high-quality videos and pictures with manual controls. With these controls, you can adjust the focus, exposure, and other settings to capture a professional-looking image.

pros
- It has a Quick Action Modals feature, which lets all the essential options within your reach.
- Moreover, you can change the speed of your video without compromising the quality.
pros
- Many users are complaining because of the switching from a one-time payment to a subscription model.
Compatibility
iOS: 14.1 and higher
3. VideoGrade
Use the VideoGrade app on your iPhone if you want to give your videos a professional look. This fantastic app lets you import and apply different LUTs to your video footage. Moreover, you can correct the color cast or even poor lighting to improve the color composition. VideoGrade app lets you easily color grade or enhance your videos by changing brightness, saturation, and contrast.

pros
- This iPhone application has in-built filters that you can apply to get a specific color tone.
- You can save your videos in HD, and additionally, you can capture frames from your videos as well.
pros
- On some iPhone versions, this app gets stuck and crashes by deleting the current edit.
Compatibility
iOS: 13.0 and higher
4. Darkroom
Darkroom is another iPhone LUTs free photo and video editing app with many features and options. One of its prominent features is the ability to apply LUTs and filters. LUTs and filters can change the look of your photo or video to create a different mood or style. Besides this, this app allows you to create your own color adjustment and correction presets.

pros
- With its AI technology, you can modify your background, subject, and foreground.
- You can even edit multiple photos simultaneously with its batch-processing feature.
pros
- In some photos, the app automatically changes the white balance even when it’s unnecessary.
Compatibility
iOS: 14.0 and higher
5. Prequel
Prequel is an excellent iOS option to set the tone of your video and image. This powerful app allows you to apply different LUTs, overlays, and filters to your media files. It has over 800 filters and effects available to change the mood and feel of your content. Furthermore, with its editing options, you can enhance your media as much as you want by adjusting its settings.

pros
- Other than the availability of LUTs for iPhone videos, you can also use different in-built templates.
- You can add music, stickers, and even text to your videos and photos.
pros
- The filters you apply are not high quality, and the editing process is a bit complex.
Compatibility
iOS: 13.0 and higher
Empower your videos with a new mood using different LUTs. Filmora now offers 800+ top-quality 3D LUTs cover a broad range of scenarios. Transform your videos with Filmora’s powerful 3D LUTs.
Apply LUT on Videos Apply LUT on Videos Learn More

Part 2: How to Apply LUTs to Edit Video on iPhone?
If you’re having trouble applying LUTs for iPhone videos and images, then don’t worry. Follow these easy and simple steps and apply the LUTs of your choice on your media files. For the guide, we use VideoLUT to help you understand how to apply LUTs on iOS devices.
Step1
Before applying LUT using an iOS device, you must install the application first. Go to the App Store and search for the application. Download the VideoLUT app to make further edits to your image or video footage.

Step2
Open the application and select the “Open” button on the right corner of the screen. After tapping the button, navigate to “LUT Image” and import the LUT of your choice.

Step3
Once you’ve imported your preferred LUT, select the image on which you want it to be applied. To do so, go to the “Open” button and select “Image/Video.” After selecting your desired option, choose the photo or video you want to edit.

Step4
Tap the “Imported” option from the drop-down menu right next to the Open button. Then choose the “IMG” option to access the imported LUT on the mobile application. On the bottom of your screen, select your LUT by tapping it. You can also change the intensity of your LUT for iPhone.

Step5
Once done with your editing, you can download your file by selecting the Save button on the right corner of the screen.

Part 3: What Should a Good LUT Video Editing App Have?
When looking for a good LUT to apply to your videos and photos, there are many things to look for. Some of the important options that a good LUT app should have been discussed here.
- Multiple LUT Formats: A good iPhone LUT app should support different LUT formats such as .cube, .3dl, .look, and more. It allows you to use LUTs from different sources and import them easily into your application.
- Easy LUT Import and Export: The app you are choosing should have an easy-to-use interface. The interface should allow you to import and export LUTs quickly. It saves you time and helps you do the editing quicker.
- Customizable LUTs: You should be able to create custom LUTs for your content. The app should allow you to adjust colors, contrasts, and saturation settings to make editing easy.
- Preview Options: A preview function also is a good option to have in your app. This option allows you to see the LUT effect in your digital media before applying it.
- Multiple Formats Compatibility: Furthermore, the app should be compatible with popular video formats like MP4, AVI, and MOV. With this option, you can edit and export your videos in the format you need.
- Non-Destructive Editing: Moreover, the app should allow you to edit your footage by keeping the original settings alongside. This feature will not affect the original, letting you revert to the original settings if needed.
- User-Friendly Interface: An easy-to-use interface lets you focus on your creativity. A good interface makes the editing process more fluid and easier.
Part 4: Wondershare Filmora: A Computer Alternative for Applying LUTs
Wondershare Filmora is a video editing tool that has been popular for recent years. This tool offers multiple color grading and adjustment options. With its newest update, you get access to over 200 LUTs to change the tone and look of your videos. Besides LUTs, you can also add effects and transitions to your videos to make them look more engaging.
Add LUTs on Video For Win 7 or later(64-bit)
Add LUTs on Video For macOS 10.14 or later
Additionally, this tool has built-in color grading tools that you can use to give your videos a more cinematic feel. Moreover, you can save your edits in up to 4k resolution, giving it a sharper and crispier quality. Its latest update offers many AI features to make your video editing easier. Lastly, users can access its library to choose different filters, overlays, and stock media.

Key Features of Wondershare Filmora
- Wondershare Filmora is a professional video editing tool that offers masking options. You can easily mask any subject in a video with its AI technology for your video edits.
- You can use the same font and text style in all your video clips with batch editing. With this feature, all your texts will be in a similar fashion across all your videos.
- With the integration of AI now, you can generate images using text prompts. This feature allows you to be creative with words to generate a unique image.
Conclusion
To sum up, there are many color correction and adjustment options to change the mood of your content. Similarly, LUTs are a great option to color grade your photos and videos. By integrating LUTs with smartphones, you can now apply LUTs using your iOS devices. There are many LUTs for iPhone footage and images, but more importantly, choosing a good app is important.
11 Ways To Radial Blur To Images (iPhone/Android/Mac/Windows)
Radial blur is an effect you can use to create a sense of movement, emphasize parts of an image, add visual interest to a scene, or make a subject stand out. There are multiple apps and software programs available to achieve this effect.
But if you don’t know where to start, we’ll show you 11 ways to create radial blur images on your iPhone, Android device, Mac, or Windows PC. With these tools, you can quickly recreate your pictures to make them unique by adding visual interest.
How To Make A Radial Blur Effect On iPhone And Android?
Below we’ve provided a list of 5 apps that can help you make a radial blur photo effect on your iPhone or Android devices.
1. Design Blur: Radial Blur
Design Blur: Radial Blur is a free app available on the Play Store for Android devices that lets you add a sense of motion and depth to your picture by applying the radial effect with just a few taps.
Download:Android
Key features:
- Mainly devoted to creating radial blur and motion blur effects.
- Includes a camera to help you instantly take pictures and apply radial effects.
- Option to revert to your original picture if you don’t like the effects.
- Easier to remove the radial blur effect from parts of your image.
- Supports changing the intensity of the effect.
Pros
- Includes a redo and undo option
- Free to use
- User-friendly UI
- Applies the effect instantly
Cons
- Includes ads
2. DSLR Camera Blur Effects
With the DSLR Camera Blur Effects app, you can instantly apply a more natural-looking radial motion blur effect to your images to give them a more professional appearance. The app offers multiple image-blurring tools and adds a DSLR-like finish to your photos.
Download: Android
Key Features
- Import photos from your phone’s gallery or take a new one using the app’s camera option.
- Options to crop your image before uploading.
- Multiple types of blur effects to choose from, such as motion blur, gaussian blur, line blur, box blur, and pixel blur.
- Can change the focus from auto to circular, linear, freestyle, point focus, or point blur.
Pros
- Simple and fast to use
- Available for free
- Draws around the subject
- A quick social sharing option is available
Cons
- Shows multiple ads
- Adds a watermark to your final image
3. Image Radial Blur
The Image Radial Blur is another user-friendly app designed to create radial blur effects for Android users and has a range of blur strengths, types, and focus options, so you can create the exact look you want.
Download:Android
Key Features
- Two Focus Move options and two blur types to choose from.
- Adjusts the strength of the radial blur on your image.
- Instantly applies the radial blur effect.
Pros
- Free and easy to use
- Applies the effect with one tap
- Comes with a quick social sharing option
- Excellent UI
Cons
- Displays ads
4. Picsart
Picsart is a powerful photo editing app that lets you create beautiful images by removing backgrounds, adding text and radial blur or other effects, and even creating collages.

Key Features
- All-in-one photo and video editor.
- Supports creating slideshows, and collages, adding subtitles to your video, and more.
- Labeled as “Editor’s Choice” on Google Play Store.
- Blur parts of an image, its background, the subject’s face, or a complete photo.
Pros
- Available for free
- AI select auto-detect blur feature
- Perfect for quick and easy edits
- Gives a professional touch to images
Cons
- The app lags sometimes
5. Affinity Photo
Affinity Photo is an award-winning photo editor available for iPads offering desktop-grade basic and advanced editing tools, including the Radial Blur effect.
Download: iOS
Key Features
- Available for a one-time purchase of $2476.20.
- Creates the radial effect in concentric circle lines, giving your images a sense of rotation.
- Brings the focus point in your pictures to life.
Pros
- Creates unique motion blur effects
- Offers other editing options
- Desktop-grade editing
Cons
- No image organization feature is available
6 Ways To Radial Blur Your Images On Windows And Mac
Here are our top 5 recommended tools to radial blur your images on Windows and Mac:
1. Wondershare Filmora
Free Download For Win 7 or later(64-bit)
Free Download For macOS 10.14 or later
Price: Starts at $7.99 per month
Support System: Windows 11 and below & macOS 10.14 - macOS 12
Wondershare Filmora is an editing software recommended by many content creators and is available for Windows and macOS. The software comes with various features such as speed ramping, screen recording, a library of royalty-free music, radial blur, keyframing, numerous filters, effects, & preset templates, motion tracking, title editing, and more.
To create a radial blur effect on your photos using the Wondershare Filmora software, do the following steps:
Step1 Visit the Filmora website and download the file, depending on your system. Install the software and launch it. Click the “Create New Project” option and drag & drop your file.

Step2 Head to the “Effects” tab, choose the Tilt-shift Circle for the radial blur effect and drop it in the timeline.

Step3 Double-click the effect in the timeline and configure the size, X-axis, Y-axis, and intensity. That’s about it. You can now export your file by clicking the “Export” option.
2. Final Cut Pro
Price: $299.99/perpetual license
Support System: macOS 11.5.1 or later
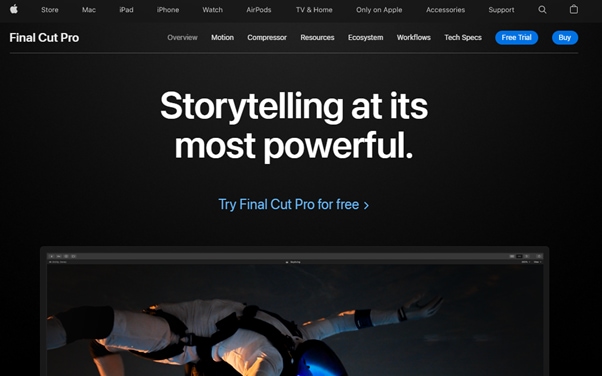
Final Cut Pro is an editing software designed for Mac systems and has everything you need to create high-finished videos. This software program offers a wide range of features, including a timeline, proxy editing, Multicam editing, and support for 4K and HDR footage.
With Final Cut Pro, you can instantly apply the radial blur effect to your images and adjust it using various parameters in the Filters Inspector section, such as Center, Angle, Crop, and Mix.
3. Adobe Photoshop
Price: US$20.99/month
Support System: macOS and Windows
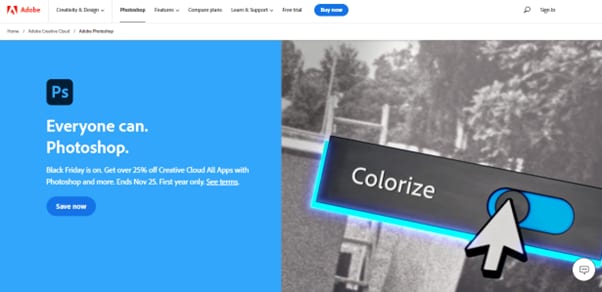
As one of the most popular and advanced photo editing software in the digital market, Adobe Photoshop is packed with high-end features and is used by many professionals as well as graphic designers to create stunning radial blur effects in their projects.
To add the radial blur effect on your images using Adobe Photoshop, start with converting your background image into a Smart Object and go to the “Filters” tab. Next, select “Blur” and click “Radial Blur.” Finally, you can set the parameter in the radial blur window to adjust the effect.
4. Paint.NET
Price: Free
Support System: Microsoft .NET 6, Windows XP, Vista, 7, & 8, and needs a 64-bit Windows processor
Paint.NET is an easy-to-use software developed on the .NET framework and is only compatible with Windows PCs. The software is free and has an innovative interface for novice users to create stunning image editing projects in no time.
Paint.NET also lets you quickly create the radial blur image effect using its blur effects. You can even configure the angle, center, and quality of the effect.
5. BCC FX Editor
Price: $175 per month
Support System: macOS Mojave 10.14
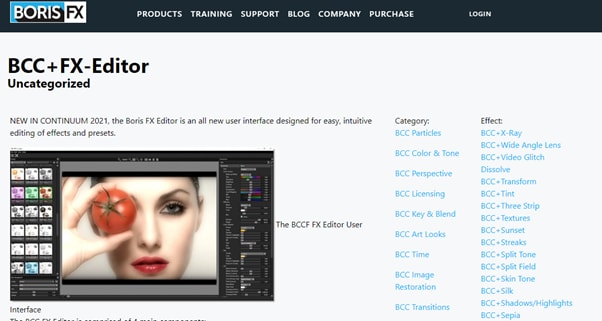
Yet another powerful software is the BCC FX Editor, designed with an intuitive interface where you can quickly apply the BCC+ Radial Blur effect around a specific point in your pictures.
The software also offers various parameters to help you adjust the effect on your image. These include GPU rendering, blur type, center, radial amount, rotation amount, falloff, smooth mode, edge mode, apply mode, and more.
6. VideoPad Video Editor
Price: Free, and the premium version starts at $23.16 quarterly
Support System: Windows 10, XP, Vista, 7, 8, and 8.1
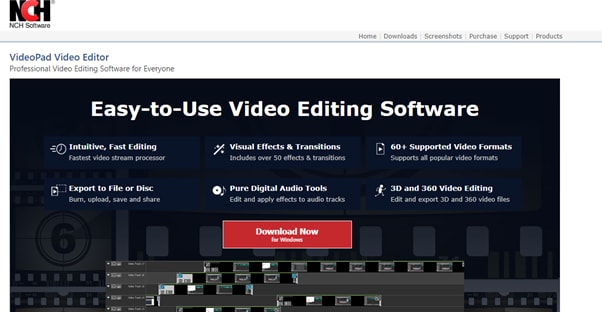
Designed for Windows systems, the VideoPad Editor is an intuitive and fast software program that can help you quickly add the radial blur effect to your file. Moreover, the software comes with numerous visual effects and transitions.
You can add custom logos, texts, & overlays and create & export your file in over 60 different video formats.
Last Words
In this article, we’ve provided a list of 5 iOS and Android apps and 6 Mac and Windows software for creating the radial blur image effect. From the above list, whichever tool you choose can help you create some stunning radial blur effects that will add depth and movement to your photos.
We’ve also provided step-by-step instructions on how you can use the Filmora 11 software to add impactful effects.
Hopefully, you’ve enjoyed reading this article and can now quickly add the radial blur effect to your images without any issues.
2. DSLR Camera Blur Effects
With the DSLR Camera Blur Effects app, you can instantly apply a more natural-looking radial motion blur effect to your images to give them a more professional appearance. The app offers multiple image-blurring tools and adds a DSLR-like finish to your photos.

Download: Android
Key Features
- Import photos from your phone’s gallery or take a new one using the app’s camera option.
- Options to crop your image before uploading.
- Multiple types of blur effects to choose from, such as motion blur, gaussian blur, line blur, box blur, and pixel blur.
- Can change the focus from auto to circular, linear, freestyle, point focus, or point blur.
Pros
- Simple and fast to use
- Available for free
- Draws around the subject
- A quick social sharing option is available
Cons
- Shows multiple ads
- Adds a watermark to your final image
3. Image Radial Blur
The Image Radial Blur is another user-friendly app designed to create radial blur effects for Android users and has a range of blur strengths, types, and focus options, so you can create the exact look you want.

Download:Android
Key Features
- Two Focus Move options and two blur types to choose from.
- Adjusts the strength of the radial blur on your image.
- Instantly applies the radial blur effect.
Pros
- Free and easy to use
- Applies the effect with one tap
- Comes with a quick social sharing option
- Excellent UI
Cons
- Displays ads
4. Picsart
Picsart is a powerful photo editing app that lets you create beautiful images by removing backgrounds, adding text and radial blur or other effects, and even creating collages.

Key Features
- All-in-one photo and video editor.
- Supports creating slideshows, and collages, adding subtitles to your video, and more.
- Labeled as “Editor’s Choice” on Google Play Store.
- Blur parts of an image, its background, the subject’s face, or a complete photo.
Pros
- Available for free
- AI select auto-detect blur feature
- Perfect for quick and easy edits
- Gives a professional touch to images
Cons
- The app lags sometimes
5. Affinity Photo
Affinity Photo is an award-winning photo editor available for iPads offering desktop-grade basic and advanced editing tools, including the Radial Blur effect.

Download: iOS
Key Features
- Available for a one-time purchase of $2476.20.
- Creates the radial effect in concentric circle lines, giving your images a sense of rotation.
- Brings the focus point in your pictures to life.
Pros
- Creates unique motion blur effects
- Offers other editing options
- Desktop-grade editing
Cons
- No image organization feature is available
6 Ways To Radial Blur Your Images On Windows And Mac
Here are our top 5 recommended tools to radial blur your images on Windows and Mac:
1. Wondershare Filmora
Free Download For Win 7 or later(64-bit)
Free Download For macOS 10.14 or later
Price: Starts at $7.99 per month
Support System: Windows 11 and below & macOS 10.14 - macOS 12
Wondershare Filmora is an editing software recommended by many content creators and is available for Windows and macOS. The software comes with various features such as speed ramping, screen recording, a library of royalty-free music, radial blur, keyframing, numerous filters, effects, & preset templates, motion tracking, title editing, and more.
To create a radial blur effect on your photos using the Wondershare Filmora software, do the following steps:
Step1 Visit the Filmora website and download the file, depending on your system. Install the software and launch it. Click the “Create New Project” option and drag & drop your file.

Step2 Head to the “Effects” tab, choose the Tilt-shift Circle for the radial blur effect and drop it in the timeline.

Step3 Double-click the effect in the timeline and configure the size, X-axis, Y-axis, and intensity. That’s about it. You can now export your file by clicking the “Export” option.
2. Final Cut Pro
Price: $299.99/perpetual license
Support System: macOS 11.5.1 or later

Final Cut Pro is an editing software designed for Mac systems and has everything you need to create high-finished videos. This software program offers a wide range of features, including a timeline, proxy editing, Multicam editing, and support for 4K and HDR footage.
With Final Cut Pro, you can instantly apply the radial blur effect to your images and adjust it using various parameters in the Filters Inspector section, such as Center, Angle, Crop, and Mix.
3. Adobe Photoshop
Price: US$20.99/month
Support System: macOS and Windows

As one of the most popular and advanced photo editing software in the digital market, Adobe Photoshop is packed with high-end features and is used by many professionals as well as graphic designers to create stunning radial blur effects in their projects.
To add the radial blur effect on your images using Adobe Photoshop, start with converting your background image into a Smart Object and go to the “Filters” tab. Next, select “Blur” and click “Radial Blur.” Finally, you can set the parameter in the radial blur window to adjust the effect.
4. Paint.NET
Price: Free
Support System: Microsoft .NET 6, Windows XP, Vista, 7, & 8, and needs a 64-bit Windows processor

Paint.NET is an easy-to-use software developed on the .NET framework and is only compatible with Windows PCs. The software is free and has an innovative interface for novice users to create stunning image editing projects in no time.
Paint.NET also lets you quickly create the radial blur image effect using its blur effects. You can even configure the angle, center, and quality of the effect.
5. BCC FX Editor
Price: $175 per month
Support System: macOS Mojave 10.14

Yet another powerful software is the BCC FX Editor, designed with an intuitive interface where you can quickly apply the BCC+ Radial Blur effect around a specific point in your pictures.
The software also offers various parameters to help you adjust the effect on your image. These include GPU rendering, blur type, center, radial amount, rotation amount, falloff, smooth mode, edge mode, apply mode, and more.
6. VideoPad Video Editor
Price: Free, and the premium version starts at $23.16 quarterly
Support System: Windows 10, XP, Vista, 7, 8, and 8.1

Designed for Windows systems, the VideoPad Editor is an intuitive and fast software program that can help you quickly add the radial blur effect to your file. Moreover, the software comes with numerous visual effects and transitions.
You can add custom logos, texts, & overlays and create & export your file in over 60 different video formats.
Last Words
In this article, we’ve provided a list of 5 iOS and Android apps and 6 Mac and Windows software for creating the radial blur image effect. From the above list, whichever tool you choose can help you create some stunning radial blur effects that will add depth and movement to your photos.
We’ve also provided step-by-step instructions on how you can use the Filmora 11 software to add impactful effects.
Hopefully, you’ve enjoyed reading this article and can now quickly add the radial blur effect to your images without any issues.
Also read:
- Updated In 2024, How to Splice Videos Together on iPhone
- How Did AI Video Games Act More Human Than Human for 2024
- New How to Create a Text Effect Video with Filmora
- 2024 Approved Why You Should Master Slideshows In Lightroom?
- 2024 Approved How to Make Fortnite Thumbnail with Motion Blur?
- Easy Ways to Make Procreate GIFs for 2024
- New How to Add Freeze Frame to Your Video From Any Device?
- New 15 Best Free Cinematic LUTs for Your Film for 2024
- Updated Are You Excited to Learn About a File Format that Helps in Easy Transfer? We Are Talking About the 3GP Format. Stay with Us and Get to Know More About It
- Updated What Is AI Composite Video App and AI Composite Video Tutorial
- Updated Best Ways to Slow Down Motion in CapCut for 2024
- In 2024, Use Your Social Media App and Make Slow-Motion Videos by Reading This Guide. Besides Learning Slow-Motion Snapchat, Get Useful Apps Serving the Same Purposes
- Updated In 2024, 10 Best Free Text to Speech Software Windows, Mac,Android, iPhone & Online
- New Step by Step Guide on Make Gimp Transparent Background PNG
- New Detailed Steps to Cut a Video in QuickTime
- 2024 Approved How to Animate Text in A Video
- New 2024 Approved Fast and Easy Method to Match Color in Photoshop
- Updated Top Online Video Background Changers Transform Your Videos with Ease
- New 11 Apps To Speed Up A Video On iPhone
- What is Fake GPS Location Pro and Is It Good On Samsung Galaxy XCover 7? | Dr.fone
- How Do You Get Sun Stone Evolutions in Pokémon For Nokia C12? | Dr.fone
- How to Use Pokémon Emerald Master Ball Cheat On Nokia C22 | Dr.fone
- In 2024, 2 Ways to Transfer Text Messages from Honor X9b to iPhone 15/14/13/12/11/X/8/ | Dr.fone
- In 2024, How to Unlock Your iPhone 7 Passcode 4 Easy Methods (With or Without iTunes) | Dr.fone
- The Complete Guide to Nokia FRP Bypass Everything You Need to Know
- How to Get and Use Pokemon Go Promo Codes On Oppo A1 5G | Dr.fone
- Thinking About Changing Your Netflix Region Without a VPN On OnePlus Nord 3 5G? | Dr.fone
- In 2024, 7 Ways to Lock Apps on iPhone 14 Plus and iPad Securely
- Here are Some Pro Tips for Pokemon Go PvP Battles On Honor X50 GT | Dr.fone
- How To Transfer WhatsApp From iPhone SE (2020) to other iPhone 15 devices? | Dr.fone
- Title: Adobe Premiere Pro Rec 709 LUTs Finding The Best Options
- Author: Chloe
- Created at : 2024-06-18 14:31:16
- Updated at : 2024-06-19 14:31:16
- Link: https://ai-editing-video.techidaily.com/adobe-premiere-pro-rec-709-luts-finding-the-best-options/
- License: This work is licensed under CC BY-NC-SA 4.0.


