
:max_bytes(150000):strip_icc():format(webp)/iPad-Pro_creative-sketch_10302018-5be0773ac9e77c0051d5d51c.jpg)
Are You a Teacher? Are You Looking for Educational Background Music? This Article Has Everything You Will Need to Know for Creating Outstanding Educational Teaching Videos
Are You a Teacher? Are You Looking for Educational Background Music? This Article Has Everything You Will Need to Know for Creating Outstanding Educational Teaching Videos
Pandemic bought the toughest time for everyone. Some unpredictable decisions were made. Among those decisions, one was online education. Teachers used to record lectures and share them. It was hard for the teachers to record lectures. It was equally hard for the students to study in this way. Teachers record boring lectures, which make it difficult to study and concentrate.
Teachers can add educational background music to their lectures to maintain students’ interest. School videos are not the only educational videos. There are various tutorials on the internet teaching you something. Explainer videos and instructional videos are also kinds of educational videos. This article will share tips to improve your educational teaching videos. Stay with us and learn to make better videos.
In this article
01 Ideas for Making an Outstanding Educational Teaching Video
02 How to Edit A Teacher Introduction Video?
03 3 Recommended Sites to Download Educational Background Music for Studying
Part 1. Ideas for Making an Outstanding Educational Teaching Video
Creating an educational video is not enough. There are a few elements that should be kept in mind. Your content should be good enough. Another thing that needs attention is your viewers’ interest. Your educational video is of no use if it cannot sustain the audience’s interest.
What could be done to improve your videos? How can someone create outstanding educational teaching videos? All your questions will be answered in this section of the article. We are going to share ideas for good educational videos.
· Digital Storytelling
How can digital storytelling help in educational videos? Well, it’s simple. You need to attract and motivate students to study. For this purpose, digital storytelling is the best choice. You can merge different images and videos.
Add cute images from your institute. Insert videos of students working together. All these will attract the student to study.
· Get Dressed
Do you think someone will listen to you with interest if you don’t have a personality? What we wear, how we present ourselves show our personality. If you want to create stunning educational videos, then work a little on yourself first.
Before you start recording, make sure you are well dressed. The more formally you present yourself, the more your students will be attracted.
· Plan Everything
A pro tip for creating outstanding educational videos is your planning. Before properly planning everything, you should never start making a video. You need to gather everything you might need during the video. You should properly compose yourself before you start speaking and teaching.
You should make a mind map of how you will explain things. A storyboard for the sequence of actions should be specified well before. It helps stay on top of things.
· Busy World
What if the video you want to watch is too long and you don’t have that much time? We are very busy in different aspects. For this purpose, it is essential to keep in mind that the educational video should be concise. The video must deliver the actual concept but in a short span of time.
· Audience Hunt
You should have clear knowledge regarding your audience. You must know what content they are looking for. What platform is the most suitable for sharing your content? If you are putting effort into creating amazing educational videos, then a proper audience hunt is also necessary.
Part 2. How to Edit A Teacher Introduction Video?
Have you been searching for the best video editing tool? Let us do the honors and introduce Wondershare Filmora to you. This is the perfect blend between an editing tool and a media library. Filmora has a massive media library. You can get a variety of transitions, effects, titles, etc., from there.
If we talk about the Filmora editing tool, this is amazing for all video creators. The tool is very useful for beginners, experts everyone. With Filmora, edit classy videos. You can edit without limits. Add effects like motion tracing, keyframing from Filmora. It can also be used to edit educational videos. Let us share a step-by-step guideline for making Teachers Introduction in Filmora, shall we?
For Win 7 or later (64-bit)
For macOS 10.12 or later
Step 1: To start making teachers intro in Filmora, firstly, import the background music for work that you want to add to your video. After that, simply drag and drop the music to the timeline.

Step 2: Next, it’s time to add a title to your intro. For that, you need to head over to the ‘Titles’ tab. There search for ‘Back to School’ titles. Select your favorite template from all the available templates and drag it to the timeline. You can edit and customize the template if you want to.

Step 3: Now comes the fun part. Add something to introduce yourself. This will build up the viewers’ interest. You can also add school clips to make an attractive video. Drag the desired media to timeline and trim them accordingly.

Step 4: After adding all the clips, it’s time to do some classy edits. With Filmora, you can easily add Lower Thirds. They can be located in the ‘Titles’ Tab. Lower Thirds can also be customized and edited.

Step 5: With the stunning Filmora editor, you can do wonders. You can perform color correction on your images and clips. With Filmora, add ‘Motion Tracking’ in your video and whatnot.

Step 6: You can conclude your introduction video in very cute ways. For that, head over to the ‘Titles’ tab and select another template. Edit and customize the template according to the video end and drag it on the timeline.

Part 3. 3 Recommended Sites to Download Educational Background Music for Studying
Some people study songs because it helps to concentrate. In the same way, music in educational videos also helps to retain the viewers’ interest. There is appropriate background music for studying available on the internet.
The question here is how can someone find the perfect educational background music? Let us answer your question. The following section of this article will share 3 sites to download work-appropriate background music.
1. Chosic
The first site to be discussed is Chosic. It allows you to download free background music for work. You can find royalty-free MP3 music here. With Chosic, find the perfect work music according to your mood. It offers various genres. The search process is also very convenient. You can search for music by using the tags.

2. Storyblocks
Another site that offers royalty-free music is Storyblocks. It has a lot to offer. You can download your favorite educational background music with Storyblocks. It also lets you create a folder and save your music there. The best thing about Storyblocks is that you can edit the music with its ‘Maker’ feature. Search the music according to your desired genre, instrument choice, moods, etc.

3. TakeTones
With TakeTones, you can find amazing instrumental background music for studying. If you don’t know, TakeTones has royalty-free music. You can not only listen to music but can also download it. The site displays complete details about the music—the music track, its duration, tags, etc. You can either download the music or else add it to your favorites to enjoy it later.

Bottom Line
After taking notes from this article, you will surely create interesting educational teaching videos. The article has shared every bit of information that is needed to create outstanding educational videos. We also introduced the best editor, Filmora. You can take help from Wondershare Filmora to edit mind-blowing videos. In addition to that, we also shed light on sites to download background music for work.
Wondershare Filmora
Get started easily with Filmora’s powerful performance, intuitive interface, and countless effects!
Try It Free Try It Free Try It Free Learn More >

02 How to Edit A Teacher Introduction Video?
03 3 Recommended Sites to Download Educational Background Music for Studying
Part 1. Ideas for Making an Outstanding Educational Teaching Video
Creating an educational video is not enough. There are a few elements that should be kept in mind. Your content should be good enough. Another thing that needs attention is your viewers’ interest. Your educational video is of no use if it cannot sustain the audience’s interest.
What could be done to improve your videos? How can someone create outstanding educational teaching videos? All your questions will be answered in this section of the article. We are going to share ideas for good educational videos.
· Digital Storytelling
How can digital storytelling help in educational videos? Well, it’s simple. You need to attract and motivate students to study. For this purpose, digital storytelling is the best choice. You can merge different images and videos.
Add cute images from your institute. Insert videos of students working together. All these will attract the student to study.
· Get Dressed
Do you think someone will listen to you with interest if you don’t have a personality? What we wear, how we present ourselves show our personality. If you want to create stunning educational videos, then work a little on yourself first.
Before you start recording, make sure you are well dressed. The more formally you present yourself, the more your students will be attracted.
· Plan Everything
A pro tip for creating outstanding educational videos is your planning. Before properly planning everything, you should never start making a video. You need to gather everything you might need during the video. You should properly compose yourself before you start speaking and teaching.
You should make a mind map of how you will explain things. A storyboard for the sequence of actions should be specified well before. It helps stay on top of things.
· Busy World
What if the video you want to watch is too long and you don’t have that much time? We are very busy in different aspects. For this purpose, it is essential to keep in mind that the educational video should be concise. The video must deliver the actual concept but in a short span of time.
· Audience Hunt
You should have clear knowledge regarding your audience. You must know what content they are looking for. What platform is the most suitable for sharing your content? If you are putting effort into creating amazing educational videos, then a proper audience hunt is also necessary.
Part 2. How to Edit A Teacher Introduction Video?
Have you been searching for the best video editing tool? Let us do the honors and introduce Wondershare Filmora to you. This is the perfect blend between an editing tool and a media library. Filmora has a massive media library. You can get a variety of transitions, effects, titles, etc., from there.
If we talk about the Filmora editing tool, this is amazing for all video creators. The tool is very useful for beginners, experts everyone. With Filmora, edit classy videos. You can edit without limits. Add effects like motion tracing, keyframing from Filmora. It can also be used to edit educational videos. Let us share a step-by-step guideline for making Teachers Introduction in Filmora, shall we?
For Win 7 or later (64-bit)
For macOS 10.12 or later
Step 1: To start making teachers intro in Filmora, firstly, import the background music for work that you want to add to your video. After that, simply drag and drop the music to the timeline.
Step 2: Next, it’s time to add a title to your intro. For that, you need to head over to the ‘Titles’ tab. There search for ‘Back to School’ titles. Select your favorite template from all the available templates and drag it to the timeline. You can edit and customize the template if you want to.
Step 3: Now comes the fun part. Add something to introduce yourself. This will build up the viewers’ interest. You can also add school clips to make an attractive video. Drag the desired media to timeline and trim them accordingly.
Step 4: After adding all the clips, it’s time to do some classy edits. With Filmora, you can easily add Lower Thirds. They can be located in the ‘Titles’ Tab. Lower Thirds can also be customized and edited.
Step 5: With the stunning Filmora editor, you can do wonders. You can perform color correction on your images and clips. With Filmora, add ‘Motion Tracking’ in your video and whatnot.
Step 6: You can conclude your introduction video in very cute ways. For that, head over to the ‘Titles’ tab and select another template. Edit and customize the template according to the video end and drag it on the timeline.
Part 3. 3 Recommended Sites to Download Educational Background Music for Studying
Some people study songs because it helps to concentrate. In the same way, music in educational videos also helps to retain the viewers’ interest. There is appropriate background music for studying available on the internet.
The question here is how can someone find the perfect educational background music? Let us answer your question. The following section of this article will share 3 sites to download work-appropriate background music.
1. Chosic
The first site to be discussed is Chosic. It allows you to download free background music for work. You can find royalty-free MP3 music here. With Chosic, find the perfect work music according to your mood. It offers various genres. The search process is also very convenient. You can search for music by using the tags.
2. Storyblocks
Another site that offers royalty-free music is Storyblocks. It has a lot to offer. You can download your favorite educational background music with Storyblocks. It also lets you create a folder and save your music there. The best thing about Storyblocks is that you can edit the music with its ‘Maker’ feature. Search the music according to your desired genre, instrument choice, moods, etc.
3. TakeTones
With TakeTones, you can find amazing instrumental background music for studying. If you don’t know, TakeTones has royalty-free music. You can not only listen to music but can also download it. The site displays complete details about the music—the music track, its duration, tags, etc. You can either download the music or else add it to your favorites to enjoy it later.
Bottom Line
After taking notes from this article, you will surely create interesting educational teaching videos. The article has shared every bit of information that is needed to create outstanding educational videos. We also introduced the best editor, Filmora. You can take help from Wondershare Filmora to edit mind-blowing videos. In addition to that, we also shed light on sites to download background music for work.
Wondershare Filmora
Get started easily with Filmora’s powerful performance, intuitive interface, and countless effects!
Try It Free Try It Free Try It Free Learn More >
How to Add Text Animation Online
Before you can publish your recorded video to your viewers, you need to polish the video so that you can get everyone’s appreciation. This is where the magic of video editing comes into the scene. Editing your video is not just about trimming unnecessary parts and adding transitions and effects. The titles and texts you display on your video play a major role in your video content. In fact, you can create a video based on texts and titles only.
Instead of showing static texts, you should create animated texts and place them in the video wherever appropriate. You do not need to download a video editor on your computer or smartphone to add animated text to your video. You can make text animation online using an online text animation maker. We will illustrate the steps to create animated text with three different online editors.
Part 1. Use Biteable Animated Text
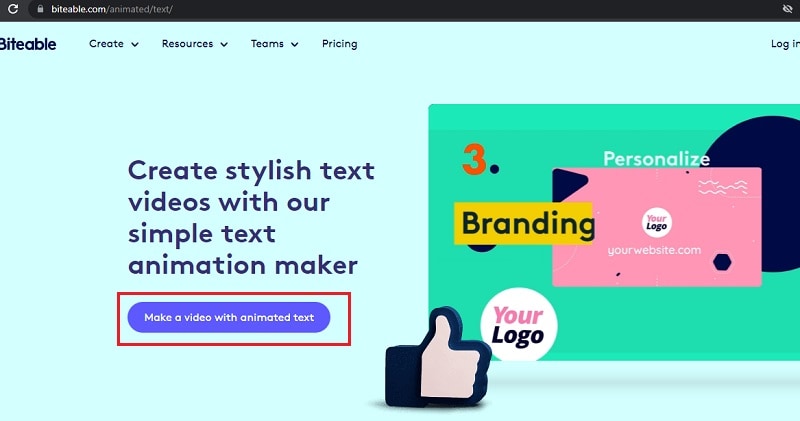
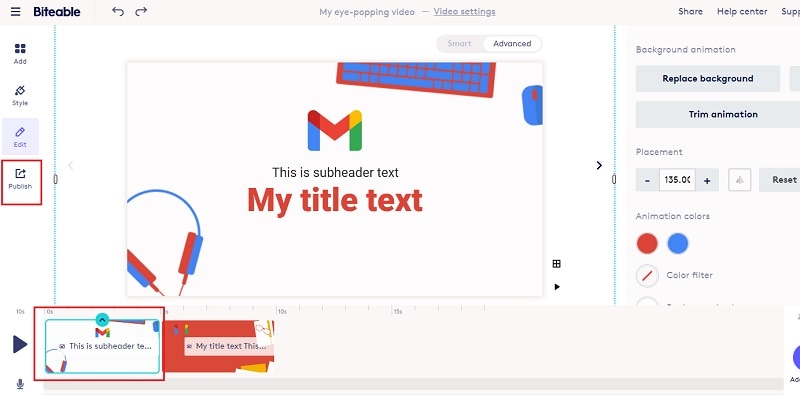
Biteable is a popular online platform where you can create amazing animated text video using Biteable text video maker. You can add animated text to your videos as well as photos. The user interface of Biteable is extremely easy for all users. You have to first create an account for free to get started. There are various templates available to create your animated text video from scratch. Here are the steps to use Biteable online text animation maker to create a video based on animated texts.
Step1Open your web browser and visit “biteable.com/animated/text”. Click on “Make a video with animated text” button.
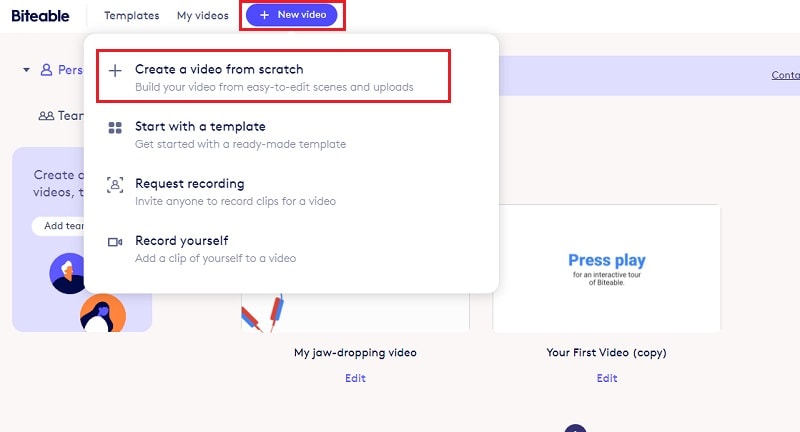
Step2Create an account by following the on-screen instructions. Click on New Video button and select “Create a video from scratch”.
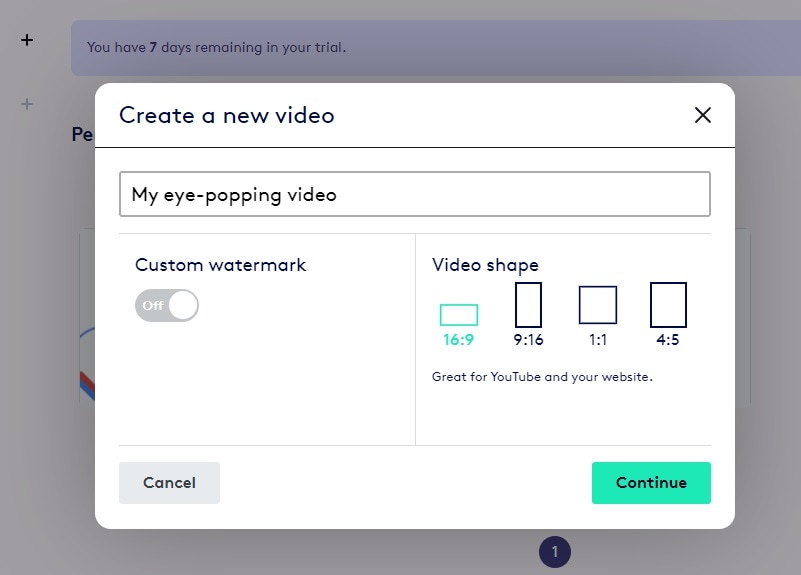
Step3Enter a name for the video and select a video shape as per your preference. Click on Continue button.
Step4Under Titles, select any template and it will be added to the Timeline. Similarly, you can add multiple titles templates, text templates, number templates and likewise. You will see them in the Timeline placed side by side. You can stretch their durations as per your requirements.
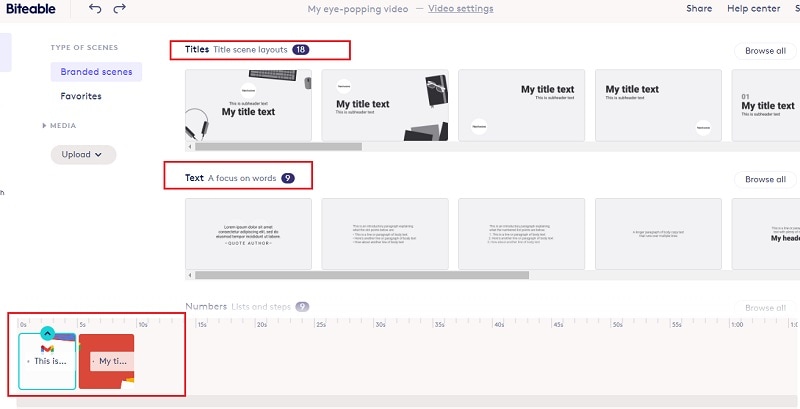
Step5Double-click on each template to edit the text in them and select the text animations as per your preference. Play the video and if you are satisfied, click on Publish button to save the video.
Part 2. Use Motionden Video Maker
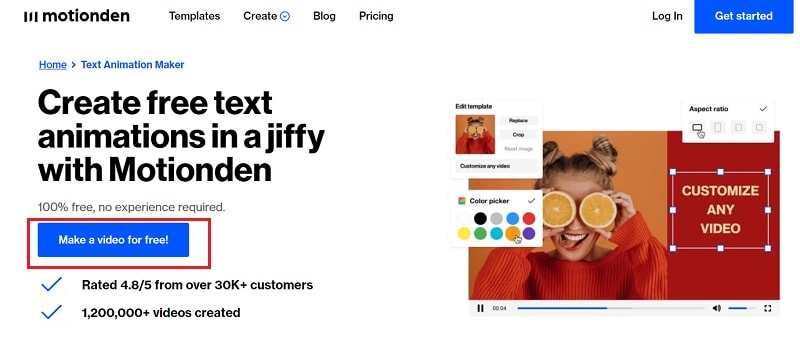
Motionden is yet another powerful text animation maker where you can create free text animations instantly. There are over 1500 templates available to choose from in order to create text videos from scratch. You can choose video templates from any category as per the video theme you want. Besides, you can upload your video or photo and add texts and music as per your preference. Here are the steps to create animated text online using Motionden Video Maker.
Step1Open your web browser and visit “motionden.com/video-maker/text-animation”. Click on “Make a video for free” button.
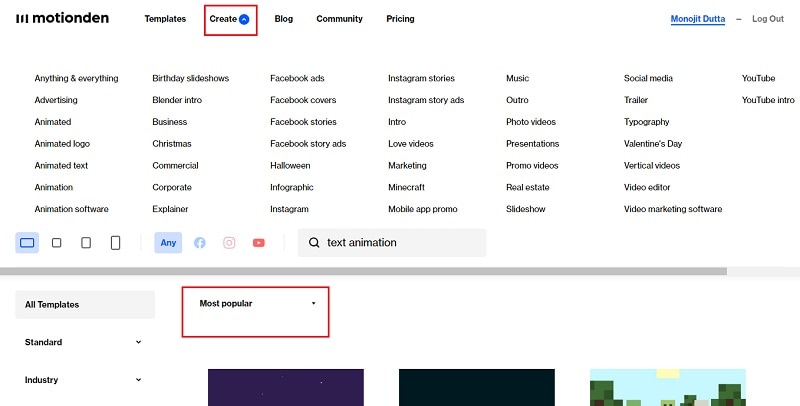
Step2Go to Create menu option and select any category of video templates. You can also check out the popular video templates and select anyone as per your preference.
Step3For the selected category, you need to select the desired video template. Click on Edit Video and you can make changes to the template on the video editor as per your requirements. You need to sign up for free in order to continue and edit the template.
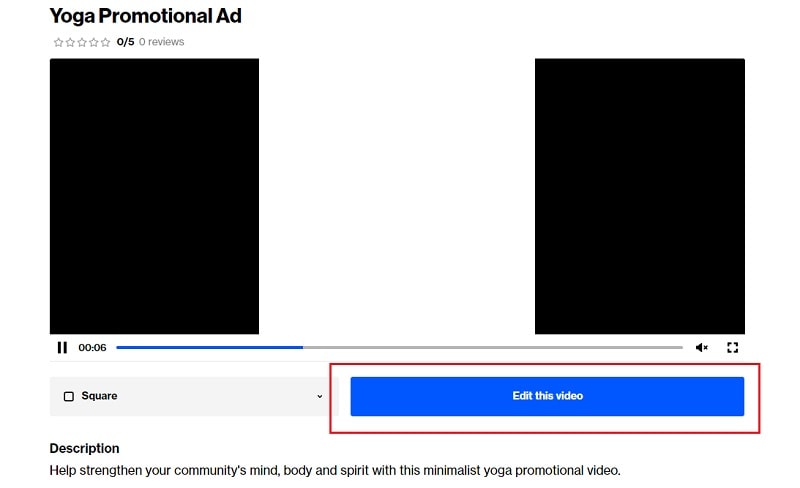
Step4Click on individual scenes and click on texts to customize them. Once the editing is done for each scene, click on Make Video button to build and save the text video.

Part 3. Use Flexclip Text Animation Tool
You can use Flexclip Text Animation Tool to create text video from scratch as well as add text to your recorded video. You should use Biteable and Motionden to create video with text effects only directly using video template while you should use Flexclip to edit your video and add text. You can add text effects to photos and videos and here are the steps to follow.
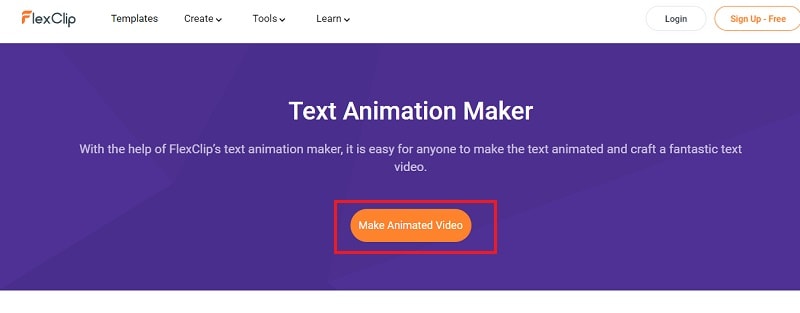
Step1Open web browser and visit “flexclip.com/features/text-animation.html”. Click on Make Animated Video button.
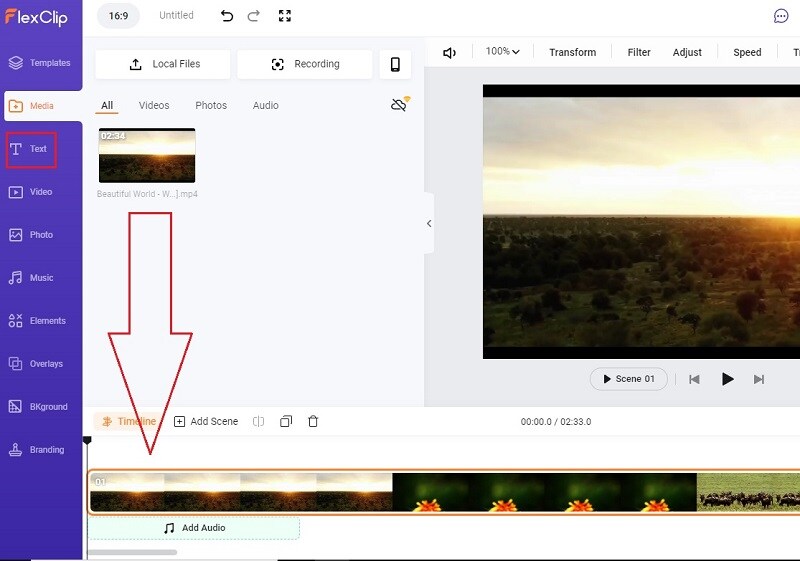
Step2You can choose from the available templates to create video with text from scratch. If you want to add text to your recorded video, go to Media tab. Click on Local Files button and upload your recorded video.

Step3Drag and drop the uploaded video into the Timeline. Thereafter, go to Text tab.
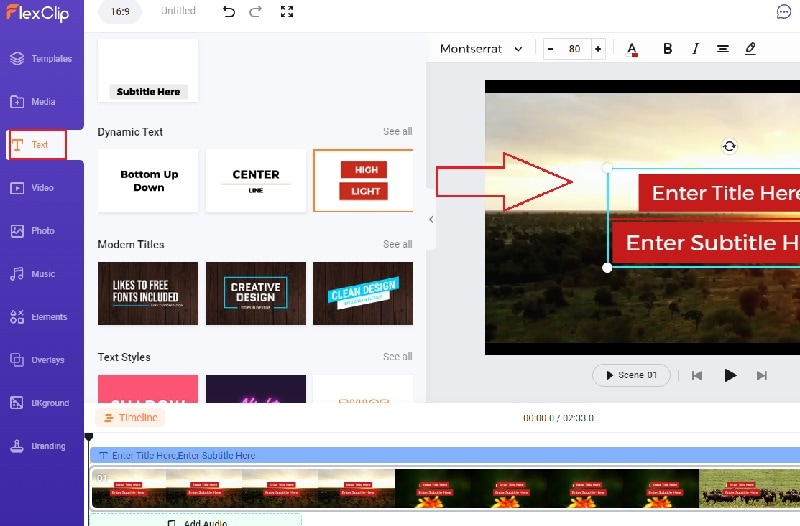
Step4You will see all the different text effects and animations. Place your mouse pointer to preview the animation. Drag and drop the select text template to the video on the Viewer. You can check the Timeline and stretch or compress the text layer as per your requirements.
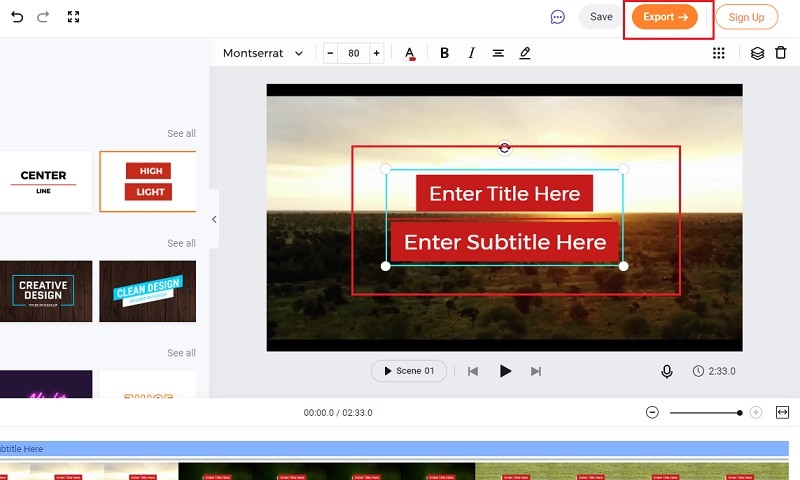
Step5Double-click on the text on Viewer window and customize the text as per your preference. Finally, click on Export button to save the edited video.
Conclusion
You can make video with animated text to make your presentation video eye-catching and attention-grabbing. We have mentioned three different online text animation makers that you can use to create animated text video from scratch by choosing different video templates. You can also edit your recorded video and add animated text wherever you want using Flexclip Text Animation Tool.
Free Download For Win 7 or later(64-bit)
Free Download For macOS 10.14 or later
100% Working Methods to Learn How to Rotate TikTok Video
The craze of TikTok has increased so much that literally, every person has the app on their smartphone. Many use TikTok for entertainment, while others operate to earn bread and butter. Additionally, you must follow the trend to keep your account up to date. For that, music, transitions, or effects should be used wisely.
Moreover, you need to ensure that the TikTok video your followers will view is in the proper orientation. Wrong or improperly oriented videos are hardly watched and mostly scrolled. Thus, to keep your video scroll-stopping, adjust every viewpoint of it properly. This article will teach you how to rotate TikTok videos on TikTok and with a third-party app.

Part 1. How to Rotate a Video on TikTok Directly
TikTok is not just a small social media platform with limited features. Here, you can create amazing videos apart from watching others’ clips. Anyone can use the in-built camera of this application and import pre-captured video to make amazing edits in it. Moreover, on this platform, you don’t have to worry about how to flip a video on TikTok because it has a built-in rotate feature.
You can easily make great edits to your video through its Edit feature. Here on TikTok, it is easy to split the videos, adjust the clips’ speed and sound, and add exceptional effects. You can also enter text in different colors, font styles, and sizes. To engage your followers more, use its sound feature to add trending soundtracks.
Step-by-Step Guide to Rotate TikTok Directly
Does your TikTok video need directional adjustments? You can follow the underneath simple steps of how to rotate TikTok video directly in different directions:
Step 1: Select the “Plus” icon in the center of the bottom toolbar of the TikTok app. Use the camera to capture video of 10m, 3m, 60s, or 15s. After making the video, click the “Tick” button and go to the “Edit” icon in the right panel.

Step 2: Now, tap on the “Rotate” icon to enable rotation in 0°, 90°, 180° or 270°. Press it again and again until you meet the required orientation. In the end, hit the “Save” option in the above right corner to save changes.

Part 2. How to Rotate a Video on TikTok with a Third-Party App
Undoubtedly, TikTok is a fantastic entertainment application, but the features it offers for making edits, especially for video rotation, are limited. If you want to increase your followers at lightning speed, it is highly suggested to use Wondershare Filmora mobile app.
Filmora is a video and movie editor that can make your dull video unforgettable and adjust your poorly oriented video. This app is loaded with more than 5000 stickers, effects, and 1000+ music for your use. Using its beautifully crafted transitions, filters, and backgrounds, you can create eye-catching TikToks, YouTube Shorts, or Instagram reels.
download filmora app for ios ](https://app.adjust.com/b0k9hf2%5F4bsu85t ) download filmora app for android ](https://app.adjust.com/b0k9hf2%5F4bsu85t )
Astonishing Features of Filmora
This video editor provides all the necessary features required to become a successful TikToker. To learn more about the features of Filmora, have a sight below:
Rotate Video
Through Filmora, it is possible to rotate video in any direction like 90°, 180°, 270°, and many others. You can rotate the complete video or rotate a few parts of it. Furthermore, you do not have to hassle about how to rotate TikTok videos because it provides the option of flip and mirror.
Adjust Soundtracks
This app offers a built-in music library for adding sound effects to video. You can also record your voice and add it to the video. Above all, it also supports beat detection, which automatically marks the beat and adjusts it according to your video clip.
Add Catchy Text
Use the Filmora text feature to add text layouts and subtitles in different colors and font styles. It also has the text movement trajectory feature, which can be customized according to video requirements.
Attach Stunning Effects
Multiple video transition effects are available for creating trending videos. Dynamic countdown, cinematic, and beauty video effects can change your video from uninteresting to spellbinding in seconds.
Steps to Rotate a Video with Filmora
Hope you have understood the greatness of Filmora and how it makes video editing easier. Now it is time to learn about how to rotate TikTok videos with a third-party app:
Step 1: Download and Open Filmora
Download Filmora mobile app from the Play Store if you are an Android user and from App Store if you are an iPhone user. After downloading, open the application on your smartphone.

Step 2: Import the Video
Go to the “New Project” tab to select the video you want to rotate. Once the video is selected, hit the “Import” button to successfully import the video into the Filmora app.

Step 3: Rotate the TikTok Video
Press the video in the timeline, and you will encounter multiple options in the bottom toolbar. Scroll to the right and tap on the “Rotate” feature. Different choices will appear, like right, left, mirror, and flip, for rotating the video. Select the option according to the theme of your video.

Step 4: Export the Rotated Video
Once rotated in the required direction, hit the “Export.” Now tap on the “TikTok” icon to directly share it on your TikTok account.

Conclusion
In this article, you have gone through the steps of rotating video via TikTok and Filmora. However, with the Filmora video editor, you can make TikTok rotate videos in a better way because it provides more options for video rotation and editing.
Different effects, transitions, and colors can be used to make delightful and trending videos. In short, without wasting any time, go download Filmora now to boost your TikTok followers.
Astonishing Features of Filmora
This video editor provides all the necessary features required to become a successful TikToker. To learn more about the features of Filmora, have a sight below:
Rotate Video
Through Filmora, it is possible to rotate video in any direction like 90°, 180°, 270°, and many others. You can rotate the complete video or rotate a few parts of it. Furthermore, you do not have to hassle about how to rotate TikTok videos because it provides the option of flip and mirror.
Adjust Soundtracks
This app offers a built-in music library for adding sound effects to video. You can also record your voice and add it to the video. Above all, it also supports beat detection, which automatically marks the beat and adjusts it according to your video clip.
Add Catchy Text
Use the Filmora text feature to add text layouts and subtitles in different colors and font styles. It also has the text movement trajectory feature, which can be customized according to video requirements.
Attach Stunning Effects
Multiple video transition effects are available for creating trending videos. Dynamic countdown, cinematic, and beauty video effects can change your video from uninteresting to spellbinding in seconds.
Steps to Rotate a Video with Filmora
Hope you have understood the greatness of Filmora and how it makes video editing easier. Now it is time to learn about how to rotate TikTok videos with a third-party app:
Step 1: Download and Open Filmora
Download Filmora mobile app from the Play Store if you are an Android user and from App Store if you are an iPhone user. After downloading, open the application on your smartphone.
Step 2: Import the Video
Go to the “New Project” tab to select the video you want to rotate. Once the video is selected, hit the “Import” button to successfully import the video into the Filmora app.
Step 3: Rotate the TikTok Video
Press the video in the timeline, and you will encounter multiple options in the bottom toolbar. Scroll to the right and tap on the “Rotate” feature. Different choices will appear, like right, left, mirror, and flip, for rotating the video. Select the option according to the theme of your video.
Step 4: Export the Rotated Video
Once rotated in the required direction, hit the “Export.” Now tap on the “TikTok” icon to directly share it on your TikTok account.
Conclusion
In this article, you have gone through the steps of rotating video via TikTok and Filmora. However, with the Filmora video editor, you can make TikTok rotate videos in a better way because it provides more options for video rotation and editing.
Different effects, transitions, and colors can be used to make delightful and trending videos. In short, without wasting any time, go download Filmora now to boost your TikTok followers.
Learn to Merge Clips in DaVinci Resolve [Simple Steps]
Combining two or more clips in a video doesn’t seem like a tough job. But to be fair, the video merger means a lot to professional video editors and videographers. Doing so could add that “special” element of continuity you mostly see in the long clips without noticing the cuts, breaks, and retakes between them.
And just like a few drops makes an entire ocean, the joining of multiple video clips can give life and meaning to your shots. So, how to merge clips in DaVinci Resolve to make your videos look perfect? Here’s the step-by-step guide.
In this article
02 How to Merge Clips in DaVinci Resolve?
03 How to Merge Clips in Wondershare Filmora?
Part 1: About DaVinci Resolve
DaVinci Resolve is a Blackmagic Design’s video editing software. It’s one of the favorite tools of professional video editors. And apart from video editing, the software works great when it comes to color coding, motion graphics, and even audio production.
Although DaVinci Resolve has several excellent video editing tools, it isn’t easy for beginners and intermediate users. Nevertheless, you can expect admirable outcomes if you spend a reasonable amount of time learning this software.
But on the other hand, if merging clips in DaVinci Resolve is what you want to do, you will be glad to know that it has an uncomplicated method. So let’s begin with the step-by-step process on how to merge clips in DaVinci Resolve.
Part 2: How to Merge Clips in DaVinci Resolve
Step 1: Download DaVinci Resolve
To download DaVinci Resolve , go to the official website and click on the “Free Download Now” button if you wish to use it for free.
Contrarily, if you desire to enjoy all the software features, feel free to purchase it by clicking on the “Buy Online Now” button.

Step 2: Import Clips on DaVinci Resolve Timeline
After installing the software on your PC or MAC operating systems, open DaVinci Resolve and import two or more clips on the timeline.
For example, you can see two different video clips on the timeline.

Step 3: Slide Clips and Select
In the next step, slide both clips together, so there’s no gap left between them. And then, using your mouse, select both clips, like this:

Make sure that all clips are on the same timeline.
Step 4: Merge Clips
Once you have selected all the clips, right-click anywhere on the selection. And choose the “New Compound” option from the list of options.

Now, rename the clip and hit the “Create” button.

DaVinci Resolve will merge the clips within a blink of an eye, as seen in this screenshot.

You can see that within a few steps, you can easily merge videos using DaVinci Resolve. However, you should know that this software requires a heavy system to work smoothly. And sometimes, the quality and result are not up to the mark.
That is why most video editors prefer Filmora by Wondershare when editing and merging videos. So, let’s see how you can use Filmora to do the same task in the next part.
Part 3: An Easier Way to Merge Clips in Wondershare Filmora
Filmora Video Editor is a powerful tool for video editing. With easy options and an extremely user-friendly interface, the software is nothing less than a boon for newbies, intermediated, and professional-level video editors.
For Win 7 or later (64-bit)
For macOS 10.14 or later
Compared to DaVinci Resolve, Filmora requires fewer tools to combine multiple videos in a single frame. So, without further waiting, let’s learn how to merge clips in Filmora.
Step 1: Download and Open Filmora
Go to Filmora’s official website and download the latest version for your MAC or Windows.

Run the setup and let the system complete the installation. Depending on the version, more or less, the software will look like this as you will open it on your system.

Step 2: Import Your Videos to Merge
Click on the “Import Media Files Here” button to choose the videos you want to merge.

For instance, here, you can see two different video clips on the timeline.

Step 3: Place Videos on the Same Timeline to Merge
First of all, you must plan the order of the clips because it will help you place the video clips correctly.
So, use your mouse and select the clip.
For example, you can see that there are two clips below. The first clip is named “Islands,” and the second clip is called “Beach.”

Then, move the selected clip (“second clip” is selected for demonstration) and place it right next to the first clip.

You must keep in mind that there shouldn’t be any gap between the clips.

Or else the final result will have a “black space” between the clips.

Step 4: Export Your File
When you are done merging clips on the timeline, click on the “Export” button to save the combined video in your system.

You can merge several clips in just four steps without wasting your time looking around for options and losing the video quality.
If you are aware of using the software, you can quickly learn how to merge clips in DaVinci Resolve. Undoubtedly, this video editing tool is helpful for professionals, and that is why new users may find it a bit difficult when using it for the first time. Contrarily, Filmora is a friendly video editor, allowing all kinds of users to merge clips quickly.
FAQs
Q1. Can I merge clips on different timelines in DaVinci Resolve?
To merge two or more clips in DaVinci Resolve, you must place the clips on the same timeline for better results.
Q2. How can I unmerge clips in DaVinci Resolve?
To unmerge clips in DaVinci, right-click on the merged clip and select the “Decompose in Place” option.
Q3. Can I use the same method to merge video clips in DaVinci Resolve 16 and 17?
Yes. You can use the same method to merge clips in any version of DaVinci Resolve.
02 How to Merge Clips in DaVinci Resolve?
03 How to Merge Clips in Wondershare Filmora?
Part 1: About DaVinci Resolve
DaVinci Resolve is a Blackmagic Design’s video editing software. It’s one of the favorite tools of professional video editors. And apart from video editing, the software works great when it comes to color coding, motion graphics, and even audio production.
Although DaVinci Resolve has several excellent video editing tools, it isn’t easy for beginners and intermediate users. Nevertheless, you can expect admirable outcomes if you spend a reasonable amount of time learning this software.
But on the other hand, if merging clips in DaVinci Resolve is what you want to do, you will be glad to know that it has an uncomplicated method. So let’s begin with the step-by-step process on how to merge clips in DaVinci Resolve.
Part 2: How to Merge Clips in DaVinci Resolve
Step 1: Download DaVinci Resolve
To download DaVinci Resolve , go to the official website and click on the “Free Download Now” button if you wish to use it for free.
Contrarily, if you desire to enjoy all the software features, feel free to purchase it by clicking on the “Buy Online Now” button.
Step 2: Import Clips on DaVinci Resolve Timeline
After installing the software on your PC or MAC operating systems, open DaVinci Resolve and import two or more clips on the timeline.
For example, you can see two different video clips on the timeline.
Step 3: Slide Clips and Select
In the next step, slide both clips together, so there’s no gap left between them. And then, using your mouse, select both clips, like this:
Make sure that all clips are on the same timeline.
Step 4: Merge Clips
Once you have selected all the clips, right-click anywhere on the selection. And choose the “New Compound” option from the list of options.
Now, rename the clip and hit the “Create” button.
DaVinci Resolve will merge the clips within a blink of an eye, as seen in this screenshot.
You can see that within a few steps, you can easily merge videos using DaVinci Resolve. However, you should know that this software requires a heavy system to work smoothly. And sometimes, the quality and result are not up to the mark.
That is why most video editors prefer Filmora by Wondershare when editing and merging videos. So, let’s see how you can use Filmora to do the same task in the next part.
Part 3: An Easier Way to Merge Clips in Wondershare Filmora
Filmora Video Editor is a powerful tool for video editing. With easy options and an extremely user-friendly interface, the software is nothing less than a boon for newbies, intermediated, and professional-level video editors.
For Win 7 or later (64-bit)
For macOS 10.14 or later
Compared to DaVinci Resolve, Filmora requires fewer tools to combine multiple videos in a single frame. So, without further waiting, let’s learn how to merge clips in Filmora.
Step 1: Download and Open Filmora
Go to Filmora’s official website and download the latest version for your MAC or Windows.
Run the setup and let the system complete the installation. Depending on the version, more or less, the software will look like this as you will open it on your system.
Step 2: Import Your Videos to Merge
Click on the “Import Media Files Here” button to choose the videos you want to merge.
For instance, here, you can see two different video clips on the timeline.
Step 3: Place Videos on the Same Timeline to Merge
First of all, you must plan the order of the clips because it will help you place the video clips correctly.
So, use your mouse and select the clip.
For example, you can see that there are two clips below. The first clip is named “Islands,” and the second clip is called “Beach.”
Then, move the selected clip (“second clip” is selected for demonstration) and place it right next to the first clip.
You must keep in mind that there shouldn’t be any gap between the clips.
Or else the final result will have a “black space” between the clips.
Step 4: Export Your File
When you are done merging clips on the timeline, click on the “Export” button to save the combined video in your system.
You can merge several clips in just four steps without wasting your time looking around for options and losing the video quality.
If you are aware of using the software, you can quickly learn how to merge clips in DaVinci Resolve. Undoubtedly, this video editing tool is helpful for professionals, and that is why new users may find it a bit difficult when using it for the first time. Contrarily, Filmora is a friendly video editor, allowing all kinds of users to merge clips quickly.
FAQs
Q1. Can I merge clips on different timelines in DaVinci Resolve?
To merge two or more clips in DaVinci Resolve, you must place the clips on the same timeline for better results.
Q2. How can I unmerge clips in DaVinci Resolve?
To unmerge clips in DaVinci, right-click on the merged clip and select the “Decompose in Place” option.
Q3. Can I use the same method to merge video clips in DaVinci Resolve 16 and 17?
Yes. You can use the same method to merge clips in any version of DaVinci Resolve.
Also read:
- In 2024, How to Make A Funny Vlog for TikTok?
- 2024 Approved Progressive Solutions to Add VHS Effects to Video with Ease
- New 10 Best Sony LUT for Different Purposes for 2024
- Updated How to Crop a Video in Davinci Resolve Step by Step
- New Are You Looking for Software to Convert Word to SRT Format? Here Is a Complete Guide About It
- New 2024 Approved How to Create and Add an Adjustment Layer in Final Cut Pro
- New 2024 Approved How to Become a Youtuber
- In 2024, Have You Ever Heard Hyperlapse and Tume Lapse Videos? Do You Know the Differences Between Them? This Article Will Introduce the Concepts, Features and Differnces of Them
- New 2024 Approved Detailed Tutorial to Crop Video in KineMaster
- In 2024, Hard to Remove Black Background in After Effects?
- In 2024, Slow Motion Videos Are Taking over Social Media and Becoming a New Trend. Read This Article if You Want to Learn How to Slow Down Video in After Effects
- MP3 CUTTER DOWNLOADMP3 Cutter Download Is One of the Most Reliable Tools for Editing of Music Files in a Fast and Friendly Way for 2024
- Updated Best Free Slow Motion Apps For Android and iPhone for 2024
- Updated If You Are a Marketer Who Want to Create Facebook Ads to Boost Your Business, You Are Coming to the Right Place. Well Share You some Useful Tips to Start Your First FB Ads Campaign
- Updated How to Create Photoshop GIF The 100 Easy Way for 2024
- Updated In 2024, How to Crop a Video in Davinci Resolve Step by Step
- Top 20 Slideshow Makers for Win/Mac/Online Review for 2024
- Updated Do You Want to Add Subtitles to Your Videos Efficiently? This Article Will Introduce an Online Subtitle Editor that Will Help You to Create Subtitles for Your Video
- Updated In 2024, Complete Guide to Make a Super Easy Rotating Video Effect
- New If You Want to Record Video Streams on Windows or Mac Using FFmpeg, Read Our Guide and Learn How to Do This with Easy Step-by-Step Instructions
- 2 Easy Methods | How To Zoom In On TikTok Videos for 2024
- Updated How to Create Cinematic Style Videos for 2024
- Guide to Create Intro Video with KineMaster
- Updated | How to Livestream Zoom on Facebook for 2024
- New How to Splice Videos Together on iPhone for 2024
- In 2024, How to Turn On/Off Motion Blur in Minecraft?
- 2024 Approved Do You Want to Learn About the iPhone LUT? Have You Used Them on Your iOS Device? Use This Article to Get Valuable Insights on the Same
- Top 10 Free Spanish Text To Speech Converter Software Windows, Mac for 2024
- New How to Change Video Thumbnail on Google Drive
- Updated 10 Best Text to Robot Voice Generators Windows, Mac, Android, iPhone & Online for 2024
- 2024 Approved If You Want to Add an Effect Like a VHS Overlay Free Effect to Enhance Your Videos, You Can Do It on After Effects. Read More to Learn How
- 2024 Approved 3 Best Effects to Appear on Camera Made with Filmora
- Updated In 2024, A Countdown Effect Is Widely Used in Gaming and Report Videos. So How to Create Your Own Countdown Video? This Article Will Tell You some Ideas About Contdown Video Editing
- Color Lut in Video -How to Color Grade Your Video
- New In 2024, Comprehensive Guide to Add LUTs in Premiere Pro with Ease
- 2024 Approved Do You Waste Time Making Transparent Background in Paint
- Videos Look Better when Edited Professionally. If Youre Looking to Edit Recorded Video with a Pro-Level Editing Then Weve Got You Covered. Learn About Editing Recorded Videos with the Best Toolkit Here for 2024
- 2024 Approved Quick Answer What Is a GIF File?
- How Can Infinix Note 30iMirror Share to PC? | Dr.fone
- 5 Easy Ways to Change Location on YouTube TV On Samsung Galaxy XCover 6 Pro Tactical Edition | Dr.fone
- How To Track IMEI Number Of Realme C55 Through Google Earth?
- What is Fake GPS Location Pro and Is It Good On Apple iPhone X? | Dr.fone
- In 2024, Process of Screen Sharing Motorola Moto G14 to PC- Detailed Steps | Dr.fone
- What are Location Permissions Life360 On Infinix Smart 7 HD? | Dr.fone
- Gmail Not Working on Tecno Camon 30 Pro 5G 7 Common Problems & Fixes | Dr.fone
- How to Bypass Google FRP Lock on Vivo Y100 5G Devices
- How and Where to Find a Shiny Stone Pokémon For Samsung Galaxy A05? | Dr.fone
- In 2024, How to Change GPS Location on Apple iPhone 12 Pro Easily & Safely | Dr.fone
- In 2024, How to Mirror PC Screen to Oppo Reno 8T Phones? | Dr.fone
- How to Track WhatsApp Messages on Realme Narzo 60 Pro 5G Without Them Knowing? | Dr.fone
- Which Pokémon can Evolve with a Moon Stone For Nokia C12 Pro? | Dr.fone
- Three Ways to Sim Unlock Nokia XR21
- How To Transfer WhatsApp From iPhone 13 Pro to other iPhone 11 devices? | Dr.fone
- In 2024, iPhone Is Disabled? Here Is The Way To Unlock Disabled iPhone 13 mini
- In 2024, How to Transfer Contacts from Itel A70 to iPhone XS/11 | Dr.fone
- Possible solutions to restore deleted contacts from Poco X6.
- How to Bypass iPhone 12 Passcode Easily Video Inside
- Forgot iPhone Passcode Again? Unlock iPhone 11 Pro Without Passcode Now
- Network Locked SIM Card Inserted On Your Motorola Moto G84 5G Phone? Unlock It Now
- How to Track Vivo S18e Location by Number | Dr.fone
- In 2024, How To Stream Anything From Honor 100 to Apple TV | Dr.fone
- 2024 Approved Best 10 Video to GIF Converters Top Picks
- Pokemon Go Error 12 Failed to Detect Location On Tecno Camon 20 Pro 5G? | Dr.fone
- Hassle-Free Ways to Remove FRP Lock on Itel P55T Phones with/without a PC
- How To Remove Screen Lock PIN On Xiaomi 14 Like A Pro 5 Easy Ways
- Top 4 Android System Repair Software for Nokia C32 Bricked Devices | Dr.fone
- How to Transfer Data from Vivo X100 to Other Android Devices? | Dr.fone
- 4 Ways to Sync Contacts from Apple iPhone 15 to iPad Easily | Dr.fone
- Title: Are You a Teacher? Are You Looking for Educational Background Music? This Article Has Everything You Will Need to Know for Creating Outstanding Educational Teaching Videos
- Author: Chloe
- Created at : 2024-05-20 03:37:31
- Updated at : 2024-05-21 03:37:31
- Link: https://ai-editing-video.techidaily.com/are-you-a-teacher-are-you-looking-for-educational-background-music-this-article-has-everything-you-will-need-to-know-for-creating-outstanding-educational-te/
- License: This work is licensed under CC BY-NC-SA 4.0.
