
:max_bytes(150000):strip_icc():format(webp)/tiktok-smart-tv-12dcac76114b4747b9b3db8bb3551ddc.jpg)
Best 10 Tools To Make Quiz Videos
Best 10 Tools To Make Quiz Videos
Nowadays, quiz videos are frequently used in different scenarios, such as business education, academic research, and social media, as they play an essential role in teaching, presenting, and covering many other aspects.
But how to make quiz videos for YouTube? To answer this, we’ve provided a list of the 10 best YouTube video quiz makers.
Let’s get started with our review without any further delay!
Part I. 4 Tips To Make A Quiz Video
Here are three tips to help you make a quiz video that will engage your audience and get them to participate.
1. The Order Of Quiz Questions
The first tip is to make sure you order your quiz questions correctly. You don’t want to start with the easy ones and then gradually get harder - this will make your quiz too easy and boring.
Instead, start with the most challenging questions and then work your way down to keep your audience engaged and challenged throughout the video.
2. Valid bases for questions
Make sure you have a valid basis for your questions. This means researching and ensuring that they are based on factual information.
3. Clear questions and answers
Keep your questions short, to the point, clear, and grammatically correct. Also, avoid jargon, slang, or “trick” questions in your quiz designed to trip up your viewers. This will help ensure that your audience understands them and can answer correctly.
4. Check out the final work
Always ensure that you check your final work before posting it on YouTube. Avoid misspelled characters or confusing sentences, and add an element of fun to make your quiz interesting.
Part II. Best 3 Quiz Video Makers On Desktops
Here are the 3 best YouTube video quiz makers available for desktops that can help you make exciting quizzes every time:
1.Camtasia
Price: US$299.99 per user.
Support System: Windows and macOS
Camtasia is an all-in-one video editor and screen recorder that can enable you to create fun and engaging quizzes on your Windows or Mac system. You can use this software to test viewer knowledge, gauge interest in a topic, or collect grades using unlimited surveys, true/false, or other types of content.

Pros
- Offers 30 answers per question
- Provides quiz scores through Camtasia Quiz Service
- Supports grading or upgrading the quiz
- Unlimited surveys, fill-in-the-blanks, and questions
- Easy to use
Cons
- Extremely expensive
2.Kaltura
Price: Free trial and quote-based pricing plan
Support System: Chrome, Safari, iOS, and Android
With Kaltura, founded by Ron Yekutiel, you can enhance your educational videos by adding a quiz to improve the learning experience. The platform also allows you to measure the participants’ understanding/interest and assess their comprehension through grade book integration.

Pros
- Easy-to-use creator interface
- Enable you to create quizzes in multiple formats, including true/false, MCQs, and reflection points
- Features mobile playback
- Can record from PowerPoint and webcam simultaneously
- Integrated with the Kaltura video player
- Supports unlimited questions
Cons
- Customer support is not up to the par
3.iSpring QuizMaker
Price: 14 days free trial and $370/year
Support System: Windows
iSpring QuizMaker is a powerful and easy-to-use desktop video quiz maker that lets you quickly design graded quizzes and surveys. With its intuitive interface, both professionals and newbies can create assessments with multiple question types, add multimedia, and randomize questions that can be published to LMS or the web.

Pros
- Lets you add media files to the quiz
- Excellent UI and easy-to-use
- Can publish to mobile-ready HTML5 content
- Compatible with most LMS systems
- Works with PowerPoint interface
Cons
- Only available for Windows
Part III. Best 7 Online Quiz Video Makers
Compared with desktop software programs, online quiz video makers are more convenient and can be accessed on multiple devices such as Windows PC, Mac System, iOS, and Android devices.
Therefore, we’ve compiled a list of the 7 best online video quiz makers to help you pick one that best suits your questioning requirements.
1. Drimify
Price: $119/per application and $179 per month
Priced at $119 per application, Drimify is an interactive HTML5 content-creation platform offering robust video quiz-making capabilities. The tool is super easy-to-use and helps you create, integrate, and share quizzes within minutes.

Pros
- Offers all forms of interactive formats to create quizzes, surveys, and personality tests
- Lets you analyze your quiz stats
- Supports data export
- Rated as 4.9 on Capterra
- Free demos are available
Cons
- Not much customizable
2.EducaPlay
Price: Free and 4.00 ERU per month
EducaPlay - a free educational games-generating web platform where you can quickly design quizzes with multiple choice, true/false, and fill-in-the-blank questions. You can also add images, videos, and audio to your assessments to make them more engaging.

Pros
- Free to use
- Can create educational games
- Supports map quizzes, video quizzes, and riddles
- Affordable pricing plan
- Easy integration with Google Classroom, Microsoft Team, and Canvas
Cons
- Some features are limited in their use
3.Flexclip
Price: Free
Flexclip is a robust online video editor that offers a free video quiz maker, having stylish fonts, text overlays, royalty-free stock images, backgrounds, and preset video quiz templates for you to use.
To create a quiz, you only need to follow three main steps: Add a media file, customize the content, and finally, export your file in various formats or share it online directly.

Pros
- Free to use
- Intuitive user interface
- Quick file export and sharing feature
- Extensive media library and preset templates
- Text animations and overlays
Cons
- Offers only basic editing tools
4.Edpuzzle
Price: 100% free for students and teachers
Making quizzes was never as simple and easy before as with the Edpuzzle platform. This free assessment-centered web tool lets you create interactive video quizzes that can be quickly integrated into the LMS or shared online.

Pros
- Free to use
- Quickly integrates with LMS
- Flexible and self-paced
- Data-driven and provides instant feedback on responses
Cons
- Experiences glitches while integrating with Canvas
5.Panopto
Price: Free and $14.99/month
Panopto is trusted by several universities and other educational institutes for designing educational content. This online tool offers video content management, visual classrooms, video accessibility, screen recording, video editing, and interactive online video quiz-making capabilities.

Pros
- Interactive and flexible quizzes
- Lets you create MCQs, true/false, and checkboxes
- Has an excellent online video editor
- Quick and simple configuration
- Instant assessment feedback
Cons
- Confusing interface for beginners
6.Canva
Price: Free
Creating quizzes with Canva is simple and easy because the platform offers a wide range of templates, simple customization tools, royalty-free images, and other media files, as well as various text styles and fonts. Furthermore, you can quickly export and share your quiz file in different formats.

Pros
- Free and easy-to-use
- Professionally designed templates
- Highly customizable
- Royalty-free media files, stickers, and graphics
- Available for desktop and smartphones
Cons
- Adds a watermark to some files
7.Flexiquiz
Price: Free, paid plans start from $180/year
FlexiQuiz is a cloud-based solution for creating, sharing, and grading quizzes in one app. The platform offers auto-grading, test scheduling, powerful reports, timed test, and many more robust features.

Pros
- Real-time powerful results and live analytics
- Automatically quiz assign completion certificate
- Access from anywhere
- Offers public and private tests
- Comes with advanced configuration options
Cons
- Some features are limited in the free version
Bonus Tips: How To Make A General Knowledge Quiz Video In Filmora?
Do you want to add a little extra excitement to your quiz videos with more effects and animations? We’ll recommend using Wondershare Filmora to enhance your content.
Free Download For Win 7 or later(64-bit)
Free Download For macOS 10.14 or later
Here’s a complete step-by-step guide to using Filmora to make a general knowledge quiz video:
Step1 Upload Your Materials
Gather your quiz questions and answers and launch the Filmora software on your PC/laptop. Click “Create New Project,” upload your video and drop it in the timeline.

Step2 Make An Intro
Now, to create an intro, select the template you want from the “Media” tab and drop it in the timeline. Go to the “Titles” tab, select and drop the text style in the timeline.
Click the titles track in the timeline, add the intro text telling the audience your quiz’s topic, and set the text color and font. Click “OK” to apply the changes.
Step3 Add A Quiz To The Timeline
Next, use the “Titles” tab to start adding questions and answers to the quiz background video, and make sure to adjust the display time.

Step4 Increase Interactivity In Your Quiz Video
Head to the “Transition” tab and add an effect to your video for a smooth transition. You can also add animations, effects, and countdown elements to make your quiz more engaging.
Step5 Repeat The Process And Export Your Final Video
Repeat the process until you complete creating your quiz and click the “Export” icon. You can save the file on your device or export it directly to your YouTube channel.
Conclusion
In this guide, we’ve provided a comprehensive review of the 3 best desktop video quiz makers and the 7 best online quiz tools. We’ve discussed what they are, their prices, pros, and cons to assist you in selecting the best one.
We’ve also recommended Filmora to enhance your quiz videos and add an extra flair to keep your audience interested until the end.
Hopefully, you’ve enjoyed reading this review and can now decide which software program or online tool to create interactive quiz videos.
- Drimify
- EducaPlay
- Flexclip
- Edpuzzle
- Panopto
- Canva
- Flexiquiz
- Bonus Tips: How To Make A General Knowledge Quiz Video In Filmora?
Part I. 4 Tips To Make A Quiz Video
Here are three tips to help you make a quiz video that will engage your audience and get them to participate.
1. The Order Of Quiz Questions
The first tip is to make sure you order your quiz questions correctly. You don’t want to start with the easy ones and then gradually get harder - this will make your quiz too easy and boring.
Instead, start with the most challenging questions and then work your way down to keep your audience engaged and challenged throughout the video.
2. Valid bases for questions
Make sure you have a valid basis for your questions. This means researching and ensuring that they are based on factual information.
3. Clear questions and answers
Keep your questions short, to the point, clear, and grammatically correct. Also, avoid jargon, slang, or “trick” questions in your quiz designed to trip up your viewers. This will help ensure that your audience understands them and can answer correctly.
4. Check out the final work
Always ensure that you check your final work before posting it on YouTube. Avoid misspelled characters or confusing sentences, and add an element of fun to make your quiz interesting.
Part II. Best 3 Quiz Video Makers On Desktops
Here are the 3 best YouTube video quiz makers available for desktops that can help you make exciting quizzes every time:
1.Camtasia
Price: US$299.99 per user.
Support System: Windows and macOS
Camtasia is an all-in-one video editor and screen recorder that can enable you to create fun and engaging quizzes on your Windows or Mac system. You can use this software to test viewer knowledge, gauge interest in a topic, or collect grades using unlimited surveys, true/false, or other types of content.
Pros
- Offers 30 answers per question
- Provides quiz scores through Camtasia Quiz Service
- Supports grading or upgrading the quiz
- Unlimited surveys, fill-in-the-blanks, and questions
- Easy to use
Cons
- Extremely expensive
2.Kaltura
Price: Free trial and quote-based pricing plan
Support System: Chrome, Safari, iOS, and Android
With Kaltura, founded by Ron Yekutiel, you can enhance your educational videos by adding a quiz to improve the learning experience. The platform also allows you to measure the participants’ understanding/interest and assess their comprehension through grade book integration.
Pros
- Easy-to-use creator interface
- Enable you to create quizzes in multiple formats, including true/false, MCQs, and reflection points
- Features mobile playback
- Can record from PowerPoint and webcam simultaneously
- Integrated with the Kaltura video player
- Supports unlimited questions
Cons
- Customer support is not up to the par
3.iSpring QuizMaker
Price: 14 days free trial and $370/year
Support System: Windows
iSpring QuizMaker is a powerful and easy-to-use desktop video quiz maker that lets you quickly design graded quizzes and surveys. With its intuitive interface, both professionals and newbies can create assessments with multiple question types, add multimedia, and randomize questions that can be published to LMS or the web.
Pros
- Lets you add media files to the quiz
- Excellent UI and easy-to-use
- Can publish to mobile-ready HTML5 content
- Compatible with most LMS systems
- Works with PowerPoint interface
Cons
- Only available for Windows
Part III. Best 7 Online Quiz Video Makers
Compared with desktop software programs, online quiz video makers are more convenient and can be accessed on multiple devices such as Windows PC, Mac System, iOS, and Android devices.
Therefore, we’ve compiled a list of the 7 best online video quiz makers to help you pick one that best suits your questioning requirements.
1. Drimify
Price: $119/per application and $179 per month
Priced at $119 per application, Drimify is an interactive HTML5 content-creation platform offering robust video quiz-making capabilities. The tool is super easy-to-use and helps you create, integrate, and share quizzes within minutes.
Pros
- Offers all forms of interactive formats to create quizzes, surveys, and personality tests
- Lets you analyze your quiz stats
- Supports data export
- Rated as 4.9 on Capterra
- Free demos are available
Cons
- Not much customizable
2.EducaPlay
Price: Free and 4.00 ERU per month
EducaPlay - a free educational games-generating web platform where you can quickly design quizzes with multiple choice, true/false, and fill-in-the-blank questions. You can also add images, videos, and audio to your assessments to make them more engaging.
Pros
- Free to use
- Can create educational games
- Supports map quizzes, video quizzes, and riddles
- Affordable pricing plan
- Easy integration with Google Classroom, Microsoft Team, and Canvas
Cons
- Some features are limited in their use
3.Flexclip
Price: Free
Flexclip is a robust online video editor that offers a free video quiz maker, having stylish fonts, text overlays, royalty-free stock images, backgrounds, and preset video quiz templates for you to use.
To create a quiz, you only need to follow three main steps: Add a media file, customize the content, and finally, export your file in various formats or share it online directly.
Pros
- Free to use
- Intuitive user interface
- Quick file export and sharing feature
- Extensive media library and preset templates
- Text animations and overlays
Cons
- Offers only basic editing tools
4.Edpuzzle
Price: 100% free for students and teachers
Making quizzes was never as simple and easy before as with the Edpuzzle platform. This free assessment-centered web tool lets you create interactive video quizzes that can be quickly integrated into the LMS or shared online.
Pros
- Free to use
- Quickly integrates with LMS
- Flexible and self-paced
- Data-driven and provides instant feedback on responses
Cons
- Experiences glitches while integrating with Canvas
5.Panopto
Price: Free and $14.99/month
Panopto is trusted by several universities and other educational institutes for designing educational content. This online tool offers video content management, visual classrooms, video accessibility, screen recording, video editing, and interactive online video quiz-making capabilities.
Pros
- Interactive and flexible quizzes
- Lets you create MCQs, true/false, and checkboxes
- Has an excellent online video editor
- Quick and simple configuration
- Instant assessment feedback
Cons
- Confusing interface for beginners
6.Canva
Price: Free
Creating quizzes with Canva is simple and easy because the platform offers a wide range of templates, simple customization tools, royalty-free images, and other media files, as well as various text styles and fonts. Furthermore, you can quickly export and share your quiz file in different formats.
Pros
- Free and easy-to-use
- Professionally designed templates
- Highly customizable
- Royalty-free media files, stickers, and graphics
- Available for desktop and smartphones
Cons
- Adds a watermark to some files
7.Flexiquiz
Price: Free, paid plans start from $180/year
FlexiQuiz is a cloud-based solution for creating, sharing, and grading quizzes in one app. The platform offers auto-grading, test scheduling, powerful reports, timed test, and many more robust features.
Pros
- Real-time powerful results and live analytics
- Automatically quiz assign completion certificate
- Access from anywhere
- Offers public and private tests
- Comes with advanced configuration options
Cons
- Some features are limited in the free version
Bonus Tips: How To Make A General Knowledge Quiz Video In Filmora?
Do you want to add a little extra excitement to your quiz videos with more effects and animations? We’ll recommend using Wondershare Filmora to enhance your content.
Free Download For Win 7 or later(64-bit)
Free Download For macOS 10.14 or later
Here’s a complete step-by-step guide to using Filmora to make a general knowledge quiz video:
Step1 Upload Your Materials
Gather your quiz questions and answers and launch the Filmora software on your PC/laptop. Click “Create New Project,” upload your video and drop it in the timeline.
Step2 Make An Intro
Now, to create an intro, select the template you want from the “Media” tab and drop it in the timeline. Go to the “Titles” tab, select and drop the text style in the timeline.
Click the titles track in the timeline, add the intro text telling the audience your quiz’s topic, and set the text color and font. Click “OK” to apply the changes.
Step3 Add A Quiz To The Timeline
Next, use the “Titles” tab to start adding questions and answers to the quiz background video, and make sure to adjust the display time.
Step4 Increase Interactivity In Your Quiz Video
Head to the “Transition” tab and add an effect to your video for a smooth transition. You can also add animations, effects, and countdown elements to make your quiz more engaging.
Step5 Repeat The Process And Export Your Final Video
Repeat the process until you complete creating your quiz and click the “Export” icon. You can save the file on your device or export it directly to your YouTube channel.
Conclusion
In this guide, we’ve provided a comprehensive review of the 3 best desktop video quiz makers and the 7 best online quiz tools. We’ve discussed what they are, their prices, pros, and cons to assist you in selecting the best one.
We’ve also recommended Filmora to enhance your quiz videos and add an extra flair to keep your audience interested until the end.
Hopefully, you’ve enjoyed reading this review and can now decide which software program or online tool to create interactive quiz videos.
6 Best Text to Speech Generators for YouTube Videos [Windows, Mac, Android, iPhone & Online]
Best Text To Speech Converter and Video Editor
Filmora’s Text to Speech (TTS) function allows you to convert your text files to voiceover and bring more elements to enrich your video.
Free Download Free Download Free Download Learn More >

Speech has a significant impact on the success rate of the entire YouTube adventure, whether storytelling or a standard sales pitch. It helps to have a decent voice and speaking abilities. However, not everyone gets both simultaneously; many individuals employ voice artists to provide voice-overs.
Some freelancers charge $5-$100 for a 5-minute voice-over. However, not everyone can afford an expensive voice artist, especially for longer films or just starting. Here are other options that I discovered as the most acceptable free text to voice generators for YouTube videos.
Let’s take a deeper look at the most excellent free text to speech software for YouTube videos.
Getting Started
Text to speech is a speech synthesis software that speaks aloud digital and textual content. The software offers a wide range of applications and is utilized by everyone from professionals and students to toddlers and adults.
Viewers are emotionally attached to documents such as PDFs, books, novels, and e-learning courses when they hear narration with a human voice. Text-to-speech systems are ideal for multitasking by busy professionals.
It’s no surprise that there are numerous text-to-speech options available. Audiobooks are also becoming more popular for the same reasons.
We’ll go over the best text-to-speech tools available in this guide. We’ve gathered a detailed list of the most exemplary free and commercial text-to-speech applications to help you choose the best option for your needs:
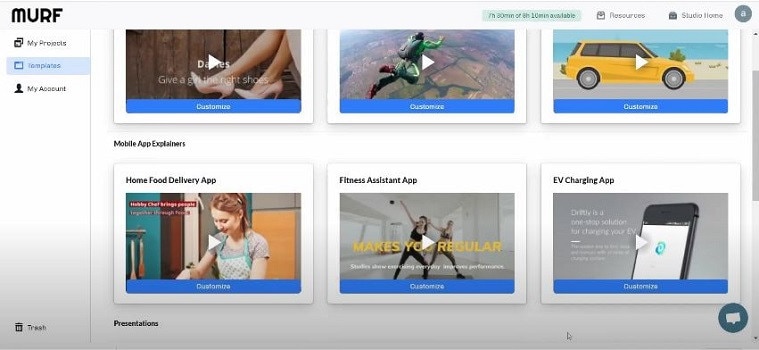
#1: Murf
It is available on Windows, Mac, Android, iPhone, and Online
Murf is a text-based voice-over maker. You can either compose your script or submit a voice clip to convert it into hyper-realistic AI voices. Murf delivers expert voice-over artists with experienced voices. You can check multiple parameters in the voices. You can use Murf to signify a brand, a product, a company, a presentation, and many more.
Features:
- Murf allows you to create voice-overs from the text. It also allows you to transform your speech into editable text, which you can subsequently edit or convert into AI voice.
- Murf Studio provides the ability to synchronize your speech with visuals.
- Murf provides over 100 authentic voices in 19 languages.
- It also gives options for inserting pauses, altering narration tempo, and emphasizing certain points.
- It also includes features such as script checking with grammar assistance, free background music, video and music cutting, and more.
- Murf offers comprehensive communication and collaboration tools, access control, a pronunciation library, and a service level agreement (SLA) for enterprises wishing to develop voice-overs in bulk.
Price
| Free | Basic | Pro | Enterprise |
|---|---|---|---|
| $0 / Month | $13 / Month | $26 / Month | $166 / Month |
| Try all 120+ voices 10 mins of voice generation 10 mins of transcription Share link for audio/video output No downloads Single User No credit card required | Unlimited Downloads 24 hours of voice generation/year Access to 60 voices (10 languages) Commercial Usage rights Chat and Email support Single User | Unlimited Downloads 96 hours of voice generation/year 48 hours of transcription/year Access 120+ voices (20 languages) Commercial Usage rights Recorded voice editing Voice changer Up to 3 users Priority Support | 5+ Users Unlimited Voice Generation Time Unlimited Transcription time Custom Voices Single-sign on (SSO) Collaboration and Access Control Dedicated Account Representative Centralized invoicing Service Agreement Deletion recovery Unlimited Storage |
Cons
- You may experience frequent technical glitches.
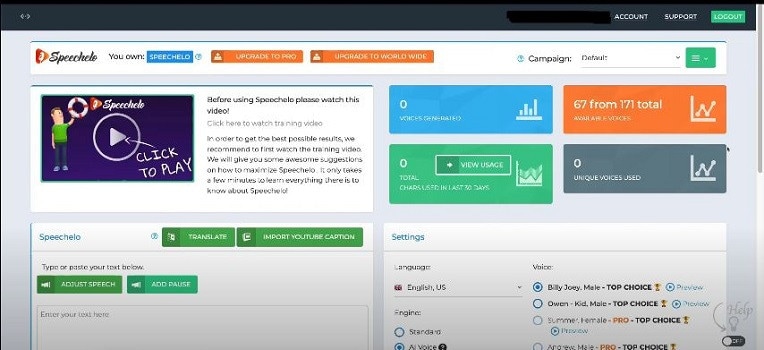
#2: Speechelo
It is available on Windows, Mac, Android, iPhone, and Online
Speechelo gives a realistic voice tone and expressions. This gets people more interested in voice-overs. You can use Speechelo to create sales videos, training films, and instructive videos, among other things. It includes attributes such as breathing and pauses, vocal tones, changing speed and pitch, and compatibility for 23 languages.
Features
- The text-to-speech engine in Speechelo can add intonation to the voice.
- It contains over 30 voices that sound natural.
- It has both male and female voices.
- It works with various video editing tools, including Camatasia, Adobe, Premier, and iMovie.
- Ordinary tone, cheerful tone, and serious tone are the three tones you may use to read your text.
Price
| Premium |
|---|
| $47 (Discount price) |
| One-time payment With 60-day money-back guarantee |
Cons
- The output of Speechelo will be 48kbps. If you’re familiar with sound production, you’ll see that this is a very low output.
- It might produce inaccurate output if you input long voice-overs.
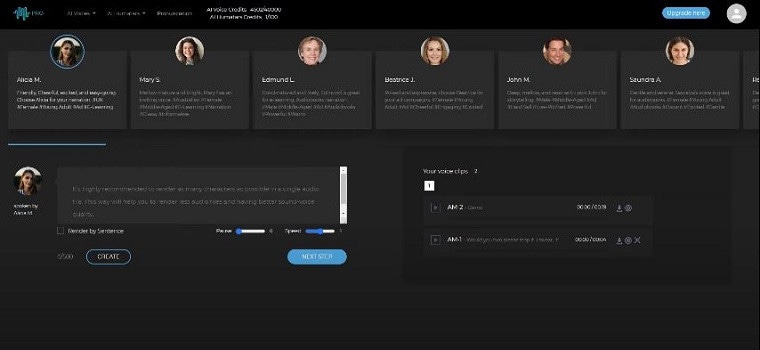
#3: Synthesys
It is available on Windows, Mac, Android, iPhone, and Online
Synthesys helps to convert text into a natural-sounding voice. With Synthesis, you can choose from various tones, accents, male and female voices, languages, and reading speeds. Moreover, It simply takes three steps to create a natural-sounding artificial speech that you may use for a variety of commercial applications.
- To begin, select the gender, style, accent, and tone you want the created voice to have.
- You can paste or type the content you want to turn into speech into Synthesys’ AI voice-producing platform.
- Lastly, click ‘create’ to start creating your artificial speech in minutes. You may adjust the reading speed and pause length from here.
Features
- Cloud-based software.
- Expert and natural-sounding voices are available in an extensive collection.
- There are over 35 female voices and 30 male voices.
- You can create and sell unlimited voices.
- Extremely user-friendly interface.
Price
| Audio Synthesys | Human Studio Synthesys | Audio and Human Studio Synthesys |
|---|---|---|
| $29 / Month | #39 / Month | $59 / Month |
| Unlimited voice-overs downloads Access to 30 Real Human Voices Access to 66 Languages & 254 General Voices Fully Web-Based | Unlimited Videos Access to 73 Humatars (Extra Outfits included) Access to 66 Languages & 254 General Voices Upload Your Own Voice Full Video Customization Fully Web-Based | Unlimited Videos & Voice Overs Access to both Software All features included 20% OFF |
Cons
- It has character limitations when making a voice-over.
- It does not have a free trial version.
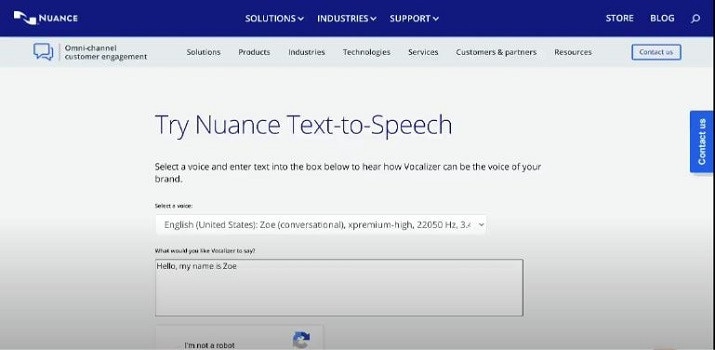
#4: Nuance Dragon
It is available in Windows only
Nuance Dragon is an artificial intelligence-powered voice recognition system. It offers both residential and commercial solutions. It spans across various data centers and delivers cloud services.
Its hosting platform is Microsoft Azure, which is HITRUST CSF-approved. All of their solutions follow industry-standard guidelines. Nuance Dragon protects data in transit and at rest with 256-bit encryption.
Features
- Nuance Dragon complies with HIPAA regulations, which are critical for public sector security and confidentiality.
- It applies to a wide range of professions.
- It offers complete protection.
Price
| Home | Professional |
|---|---|
| $200 | $500 |
| It has 99% recognition accuracy Immediate access to your dictation. One-time payment. | It has 99% recognition accuracy Share documents Sync custom words and commands Immediate access to your dictation. One-time payment. |
Cons
- It works only on Windows, and it is not available on Mac.
- It does not have a free trial version.
- It does not include Premium Consulting or Integration Services.
#5: Notevibes
It is available on Windows, Mac, Android, iPhone, and Online
Notevibes is a tremendous text-to-speech tool that comes in both a free and a commercial edition with many features. It offers customers over five hundred translation characters while also allowing them to modify the pronunciation.
As a result, users have access to all of their resources to learn a new language and significantly increase their reading skills. Furthermore, Notevibes features 177 distinct voices speaking in 18 different languages.
Users appreciate the natural-sounding voices that assist them in pronouncing words correctly. Users from many walks of life can profit from the tool because it has many functions.
Features
- Realistic voice generator
- Aloud Speaking
- Make an MP3 of your audio speech.
- 47 Individual Voices
- Characters: 200 – 1,000,000
Price
| Personal Pack | Commercial Pack | Corporate Pack |
|---|---|---|
| $9 / Month ($107 per year) | $90 / Month ($1080 per year) | $4,000 / Year |
| For personal use only: private listening, personal e-learning 1,200,000 characters pack per year 201 Premium Voices available 18 Languages (EN, ES, DE, FR, VT, RU, PT, IT, NL, TR, JP, KO, HI and etc) MP3 Download 1 Account License | For Commercial use: YouTube, broadcasts, TV, IVR voiceover and other businesses 12,000,000 characters pack per year Advanced voice editor new 201 Premium Voices available 18 Languages (EN, ES, DE, FR, VT, RU, PT, IT, NL, TR, JP, KO, HI and etc.) SSML tags support MP3, Wav Download Audio files history You 100% own intellectual property for all files | For Corporate Users All in Commercial and 50,000,000 characters pack per year Master account for management Team License (up to 10 users) Priority email support |
Cons
- It does not have a preview. You have to generate the voice-over to listen.
- You can’t combine a single audio file out of many audio files.
- The Voiceover & Editor Page is unique in that it has two sections: one for creating the voice-over and another for obtaining audio files. Switching between them will take some time. If you’re working on a large project, moving between bot sites will be a hassle.
- No project-based organization
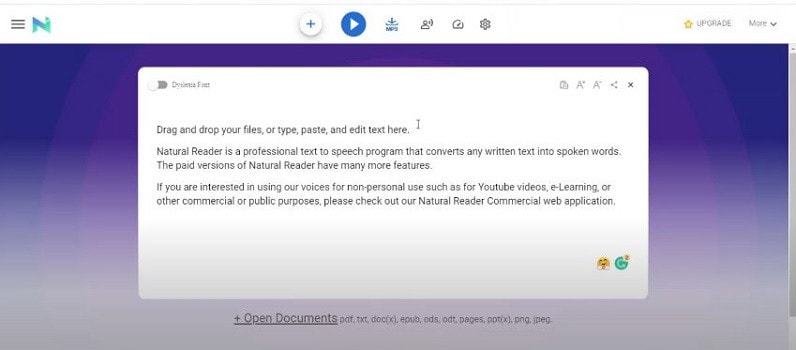
#6: Natural Reader
It is available on Windows, Mac, Android, iPhone, and Online
Natural Reader is among the few free text-to-speech programs with several exciting features. It’s pretty easy to use, and you can get started right away by loading texts into its library.
Furthermore, the tool allows users to manage several files in various formats. Lastly, the built-in OCR will enable you to submit images or text scans and have them read aloud.
Features
- Built-in OCR
- Choice of interfaces
- Built-in browser
- Dyslexic-friendly font
Price
| Free | Personal | Professional | Ultimate |
|---|---|---|---|
| $0 (Free to use) | $99.50 (One-time payment) | $129.50 (One-time payment) | $199.50 (One-time payment) |
| Unlimited use with Free Voices Miniboard to read text in other applications Pronunciation Editor Works with PDF, Docx, TXT and ePub | 2 natural voices included All features of Free Version included Convert to MP3 | 4 natural voices included All features of Personal Version included | 6 natural voices included All features of Professional Version included 5000 images/year for OCR to read from images & scanned PDFs |
Cons
- There is no way to skip or jump around any text on the page.
- You will need internet access in the free software to access the voices.
- The paid version is very expensive in comparison to others.
- Long-term use is complex.
Pro Tip:
If you just use text-to-speech software sometimes, it’s best to utilize one of the many free options available. On the other hand, paid versions are great if you want extensive functionality and don’t mind limitations on usage.
You should check for text-to-speech software with natural voices enabled in commercial applications. A top-rated system should include real-time speech capabilities and a user-friendly UI.
Text to Speech Services’ Advantages
TTS systems can help content owners such as corporations, YouTubers, institutions, media houses, mobile app developers, e-learning solution providers, and others in comparable fields in the following ways:
- Global Reach: TTS voices that sound human, are clear, and can be customized can let you communicate with people worldwide. You can even incorporate translations in multiple languages to read the text in their own language.
- Improve User Experience: Allowing speech in pre-sales and after-sales can reduce human agent burden, provide individualized services, lower operating expenses, and speed up productivity.
- Saves Money and Time: Companies can quickly and easily implement TTS systems with little maintenance.
- Improves Productivity: E-learning experts and HR departments can create learning modules for staff training using TTS. This will allow employees to learn the information while working anywhere and at any time.
Text to speech solutions can also help online students, researchers, teachers, device users, app users, website visitors, machine users, and others in the following ways:
- People with Reading Difficulties: A considerable portion of the global population suffers from learning or reading disabilities, including language-based learning disabilities. TTS solutions in your documents might assist them in better understanding the document. It can also aid persons with vision problems and literacy issues.
- Multitasking: Listening to something allows you to execute multiple physical duties at once, such as cooking, cleaning, exercising, etc. It’s a welcome break for busy professionals who can’t find time to read the stacks of books that have accumulated on their desks for years. They can just put on their headphones and listen to them while doing other things.
- Great for Kids: Instead of being glued to their computers or phones all day, your children can listen to audio files, including their books and other study materials. It will safeguard their priceless sight. It will also increase word recognition, cognitive skills, make finding and correcting problems in their writing easier.
- Journey Mate: People can listen to information while traveling by using speech to text. You may always listen to the noises and enjoy them while riding without having to strain your eyes, regardless of how rocky the road is.
Frequently Asked Questions
What is Text to Speech Software?
TTS (text-to-speech) is an assistive technology that reads text aloud. TTS systems provide computer-generated sound, and we may vary the reading speed by increasing the speed or slowing things down.
Is Text-To-Speech Technology Handy?
According to studies, text-to-speech technology helps viewers concentrate on the content rather than the process of reading, resulting in a greater understanding of the topic and more engagement.
While some argue that audiobooks, or scripts read by paid voice actors, are superior to computer-generated voices, there is compelling proof that text to speech can be a handy tool for YouTube content creators.
Is The Voice Quality Consistent Across All Text to Speech Programs?
Voice quality ultimately depends on the service. However, some use human voices, while premium solutions employ the voices of well-known narrators like David Attenborough and Morgan Freeman.
You can even mimic the sound of youngsters speaking. Many gadgets, particularly online web page scanners and even audiobooks emphasize the text they are scanning.
What Are the Benefits of Using Text to Speech Software?
You can use this type of technology in a variety of ways. Some programs read text from a digital document or an interactive online page for users. Some programs can even convert handwritten text into speech using modern technology such as Optical Character Recognition (OCR).
Text-to-speech software is compatible with various devices and applies to all kinds of individual digital devices, including laptops, PCs, tablets, and smartphones.
What Is the Process of Converting Speech in Text to Speech Software?
The majority of text-to-speech software works in the same way. Users can either upload or input the content to convert to audio. Then they choose from the different voices to evaluate which sound is best for the voice-over.
Many TTS solutions rely on OCR technology in some form. OCR allows us to obtain text from documents and photos by recognizing written and digital text. If you click an image of a street sign, the program will read the words printed on it.
Is it possible to use Text to Speech on YouTube?
Absolutely, you can get them in YouTube videos, but to prevent advertising strikes, make sure you post videos with authentic human voices somewhere between.
What Text-To-Speech Software Does YouTube Content Creators Use?
To incorporate voice-overs on their sales pitches and informative videos, most YouTubers pay for text-to-speech software like Synthesys and Speechelo.
Is It Possible to Monetize YouTube Videos Using Text to Speech?
It varies on the text to speech engine you’re using; some TTS engines support YouTube monetization while others don’t.
Speech has a significant impact on the success rate of the entire YouTube adventure, whether storytelling or a standard sales pitch. It helps to have a decent voice and speaking abilities. However, not everyone gets both simultaneously; many individuals employ voice artists to provide voice-overs.
Some freelancers charge $5-$100 for a 5-minute voice-over. However, not everyone can afford an expensive voice artist, especially for longer films or just starting. Here are other options that I discovered as the most acceptable free text to voice generators for YouTube videos.
Let’s take a deeper look at the most excellent free text to speech software for YouTube videos.
Getting Started
Text to speech is a speech synthesis software that speaks aloud digital and textual content. The software offers a wide range of applications and is utilized by everyone from professionals and students to toddlers and adults.
Viewers are emotionally attached to documents such as PDFs, books, novels, and e-learning courses when they hear narration with a human voice. Text-to-speech systems are ideal for multitasking by busy professionals.
It’s no surprise that there are numerous text-to-speech options available. Audiobooks are also becoming more popular for the same reasons.
We’ll go over the best text-to-speech tools available in this guide. We’ve gathered a detailed list of the most exemplary free and commercial text-to-speech applications to help you choose the best option for your needs:
#1: Murf
It is available on Windows, Mac, Android, iPhone, and Online
Murf is a text-based voice-over maker. You can either compose your script or submit a voice clip to convert it into hyper-realistic AI voices. Murf delivers expert voice-over artists with experienced voices. You can check multiple parameters in the voices. You can use Murf to signify a brand, a product, a company, a presentation, and many more.
Features:
- Murf allows you to create voice-overs from the text. It also allows you to transform your speech into editable text, which you can subsequently edit or convert into AI voice.
- Murf Studio provides the ability to synchronize your speech with visuals.
- Murf provides over 100 authentic voices in 19 languages.
- It also gives options for inserting pauses, altering narration tempo, and emphasizing certain points.
- It also includes features such as script checking with grammar assistance, free background music, video and music cutting, and more.
- Murf offers comprehensive communication and collaboration tools, access control, a pronunciation library, and a service level agreement (SLA) for enterprises wishing to develop voice-overs in bulk.
Price
| Free | Basic | Pro | Enterprise |
|---|---|---|---|
| $0 / Month | $13 / Month | $26 / Month | $166 / Month |
| Try all 120+ voices 10 mins of voice generation 10 mins of transcription Share link for audio/video output No downloads Single User No credit card required | Unlimited Downloads 24 hours of voice generation/year Access to 60 voices (10 languages) Commercial Usage rights Chat and Email support Single User | Unlimited Downloads 96 hours of voice generation/year 48 hours of transcription/year Access 120+ voices (20 languages) Commercial Usage rights Recorded voice editing Voice changer Up to 3 users Priority Support | 5+ Users Unlimited Voice Generation Time Unlimited Transcription time Custom Voices Single-sign on (SSO) Collaboration and Access Control Dedicated Account Representative Centralized invoicing Service Agreement Deletion recovery Unlimited Storage |
Cons
- You may experience frequent technical glitches.
#2: Speechelo
It is available on Windows, Mac, Android, iPhone, and Online
Speechelo gives a realistic voice tone and expressions. This gets people more interested in voice-overs. You can use Speechelo to create sales videos, training films, and instructive videos, among other things. It includes attributes such as breathing and pauses, vocal tones, changing speed and pitch, and compatibility for 23 languages.
Features
- The text-to-speech engine in Speechelo can add intonation to the voice.
- It contains over 30 voices that sound natural.
- It has both male and female voices.
- It works with various video editing tools, including Camatasia, Adobe, Premier, and iMovie.
- Ordinary tone, cheerful tone, and serious tone are the three tones you may use to read your text.
Price
| Premium |
|---|
| $47 (Discount price) |
| One-time payment With 60-day money-back guarantee |
Cons
- The output of Speechelo will be 48kbps. If you’re familiar with sound production, you’ll see that this is a very low output.
- It might produce inaccurate output if you input long voice-overs.
#3: Synthesys
It is available on Windows, Mac, Android, iPhone, and Online
Synthesys helps to convert text into a natural-sounding voice. With Synthesis, you can choose from various tones, accents, male and female voices, languages, and reading speeds. Moreover, It simply takes three steps to create a natural-sounding artificial speech that you may use for a variety of commercial applications.
- To begin, select the gender, style, accent, and tone you want the created voice to have.
- You can paste or type the content you want to turn into speech into Synthesys’ AI voice-producing platform.
- Lastly, click ‘create’ to start creating your artificial speech in minutes. You may adjust the reading speed and pause length from here.
Features
- Cloud-based software.
- Expert and natural-sounding voices are available in an extensive collection.
- There are over 35 female voices and 30 male voices.
- You can create and sell unlimited voices.
- Extremely user-friendly interface.
Price
| Audio Synthesys | Human Studio Synthesys | Audio and Human Studio Synthesys |
|---|---|---|
| $29 / Month | #39 / Month | $59 / Month |
| Unlimited voice-overs downloads Access to 30 Real Human Voices Access to 66 Languages & 254 General Voices Fully Web-Based | Unlimited Videos Access to 73 Humatars (Extra Outfits included) Access to 66 Languages & 254 General Voices Upload Your Own Voice Full Video Customization Fully Web-Based | Unlimited Videos & Voice Overs Access to both Software All features included 20% OFF |
Cons
- It has character limitations when making a voice-over.
- It does not have a free trial version.
#4: Nuance Dragon
It is available in Windows only
Nuance Dragon is an artificial intelligence-powered voice recognition system. It offers both residential and commercial solutions. It spans across various data centers and delivers cloud services.
Its hosting platform is Microsoft Azure, which is HITRUST CSF-approved. All of their solutions follow industry-standard guidelines. Nuance Dragon protects data in transit and at rest with 256-bit encryption.
Features
- Nuance Dragon complies with HIPAA regulations, which are critical for public sector security and confidentiality.
- It applies to a wide range of professions.
- It offers complete protection.
Price
| Home | Professional |
|---|---|
| $200 | $500 |
| It has 99% recognition accuracy Immediate access to your dictation. One-time payment. | It has 99% recognition accuracy Share documents Sync custom words and commands Immediate access to your dictation. One-time payment. |
Cons
- It works only on Windows, and it is not available on Mac.
- It does not have a free trial version.
- It does not include Premium Consulting or Integration Services.
#5: Notevibes
It is available on Windows, Mac, Android, iPhone, and Online
Notevibes is a tremendous text-to-speech tool that comes in both a free and a commercial edition with many features. It offers customers over five hundred translation characters while also allowing them to modify the pronunciation.
As a result, users have access to all of their resources to learn a new language and significantly increase their reading skills. Furthermore, Notevibes features 177 distinct voices speaking in 18 different languages.
Users appreciate the natural-sounding voices that assist them in pronouncing words correctly. Users from many walks of life can profit from the tool because it has many functions.
Features
- Realistic voice generator
- Aloud Speaking
- Make an MP3 of your audio speech.
- 47 Individual Voices
- Characters: 200 – 1,000,000
Price
| Personal Pack | Commercial Pack | Corporate Pack |
|---|---|---|
| $9 / Month ($107 per year) | $90 / Month ($1080 per year) | $4,000 / Year |
| For personal use only: private listening, personal e-learning 1,200,000 characters pack per year 201 Premium Voices available 18 Languages (EN, ES, DE, FR, VT, RU, PT, IT, NL, TR, JP, KO, HI and etc) MP3 Download 1 Account License | For Commercial use: YouTube, broadcasts, TV, IVR voiceover and other businesses 12,000,000 characters pack per year Advanced voice editor new 201 Premium Voices available 18 Languages (EN, ES, DE, FR, VT, RU, PT, IT, NL, TR, JP, KO, HI and etc.) SSML tags support MP3, Wav Download Audio files history You 100% own intellectual property for all files | For Corporate Users All in Commercial and 50,000,000 characters pack per year Master account for management Team License (up to 10 users) Priority email support |
Cons
- It does not have a preview. You have to generate the voice-over to listen.
- You can’t combine a single audio file out of many audio files.
- The Voiceover & Editor Page is unique in that it has two sections: one for creating the voice-over and another for obtaining audio files. Switching between them will take some time. If you’re working on a large project, moving between bot sites will be a hassle.
- No project-based organization
#6: Natural Reader
It is available on Windows, Mac, Android, iPhone, and Online
Natural Reader is among the few free text-to-speech programs with several exciting features. It’s pretty easy to use, and you can get started right away by loading texts into its library.
Furthermore, the tool allows users to manage several files in various formats. Lastly, the built-in OCR will enable you to submit images or text scans and have them read aloud.
Features
- Built-in OCR
- Choice of interfaces
- Built-in browser
- Dyslexic-friendly font
Price
| Free | Personal | Professional | Ultimate |
|---|---|---|---|
| $0 (Free to use) | $99.50 (One-time payment) | $129.50 (One-time payment) | $199.50 (One-time payment) |
| Unlimited use with Free Voices Miniboard to read text in other applications Pronunciation Editor Works with PDF, Docx, TXT and ePub | 2 natural voices included All features of Free Version included Convert to MP3 | 4 natural voices included All features of Personal Version included | 6 natural voices included All features of Professional Version included 5000 images/year for OCR to read from images & scanned PDFs |
Cons
- There is no way to skip or jump around any text on the page.
- You will need internet access in the free software to access the voices.
- The paid version is very expensive in comparison to others.
- Long-term use is complex.
Pro Tip:
If you just use text-to-speech software sometimes, it’s best to utilize one of the many free options available. On the other hand, paid versions are great if you want extensive functionality and don’t mind limitations on usage.
You should check for text-to-speech software with natural voices enabled in commercial applications. A top-rated system should include real-time speech capabilities and a user-friendly UI.
Text to Speech Services’ Advantages
TTS systems can help content owners such as corporations, YouTubers, institutions, media houses, mobile app developers, e-learning solution providers, and others in comparable fields in the following ways:
- Global Reach: TTS voices that sound human, are clear, and can be customized can let you communicate with people worldwide. You can even incorporate translations in multiple languages to read the text in their own language.
- Improve User Experience: Allowing speech in pre-sales and after-sales can reduce human agent burden, provide individualized services, lower operating expenses, and speed up productivity.
- Saves Money and Time: Companies can quickly and easily implement TTS systems with little maintenance.
- Improves Productivity: E-learning experts and HR departments can create learning modules for staff training using TTS. This will allow employees to learn the information while working anywhere and at any time.
Text to speech solutions can also help online students, researchers, teachers, device users, app users, website visitors, machine users, and others in the following ways:
- People with Reading Difficulties: A considerable portion of the global population suffers from learning or reading disabilities, including language-based learning disabilities. TTS solutions in your documents might assist them in better understanding the document. It can also aid persons with vision problems and literacy issues.
- Multitasking: Listening to something allows you to execute multiple physical duties at once, such as cooking, cleaning, exercising, etc. It’s a welcome break for busy professionals who can’t find time to read the stacks of books that have accumulated on their desks for years. They can just put on their headphones and listen to them while doing other things.
- Great for Kids: Instead of being glued to their computers or phones all day, your children can listen to audio files, including their books and other study materials. It will safeguard their priceless sight. It will also increase word recognition, cognitive skills, make finding and correcting problems in their writing easier.
- Journey Mate: People can listen to information while traveling by using speech to text. You may always listen to the noises and enjoy them while riding without having to strain your eyes, regardless of how rocky the road is.
Frequently Asked Questions
What is Text to Speech Software?
TTS (text-to-speech) is an assistive technology that reads text aloud. TTS systems provide computer-generated sound, and we may vary the reading speed by increasing the speed or slowing things down.
Is Text-To-Speech Technology Handy?
According to studies, text-to-speech technology helps viewers concentrate on the content rather than the process of reading, resulting in a greater understanding of the topic and more engagement.
While some argue that audiobooks, or scripts read by paid voice actors, are superior to computer-generated voices, there is compelling proof that text to speech can be a handy tool for YouTube content creators.
Is The Voice Quality Consistent Across All Text to Speech Programs?
Voice quality ultimately depends on the service. However, some use human voices, while premium solutions employ the voices of well-known narrators like David Attenborough and Morgan Freeman.
You can even mimic the sound of youngsters speaking. Many gadgets, particularly online web page scanners and even audiobooks emphasize the text they are scanning.
What Are the Benefits of Using Text to Speech Software?
You can use this type of technology in a variety of ways. Some programs read text from a digital document or an interactive online page for users. Some programs can even convert handwritten text into speech using modern technology such as Optical Character Recognition (OCR).
Text-to-speech software is compatible with various devices and applies to all kinds of individual digital devices, including laptops, PCs, tablets, and smartphones.
What Is the Process of Converting Speech in Text to Speech Software?
The majority of text-to-speech software works in the same way. Users can either upload or input the content to convert to audio. Then they choose from the different voices to evaluate which sound is best for the voice-over.
Many TTS solutions rely on OCR technology in some form. OCR allows us to obtain text from documents and photos by recognizing written and digital text. If you click an image of a street sign, the program will read the words printed on it.
Is it possible to use Text to Speech on YouTube?
Absolutely, you can get them in YouTube videos, but to prevent advertising strikes, make sure you post videos with authentic human voices somewhere between.
What Text-To-Speech Software Does YouTube Content Creators Use?
To incorporate voice-overs on their sales pitches and informative videos, most YouTubers pay for text-to-speech software like Synthesys and Speechelo.
Is It Possible to Monetize YouTube Videos Using Text to Speech?
It varies on the text to speech engine you’re using; some TTS engines support YouTube monetization while others don’t.
Cropping a Video in Final Cut Pro [Step by Step]
“Storytelling at its most powerful”, - words we read on the first page of the official web-site of Final Cut Pro, non-linear video editing software program which runs on Mac computers. The software lets us to log and transfer videos onto a hard drive, where it can be edited, processed, and output to a wide variety of formats. Final Cut Pro is so advanced that it is used by hobbyist filmmakers and industry professionals in TV, Film, and media. Anyone can get a free trial of the software for their Macs, but, to purchase directly from the Mac App Store it costs $299.99. It’s evident that Final Cut Pro can’t be downloaded, installed, and thus used on Windows, which is unfortunate, but for Mac users, it’s a very powerful video editing software.

What are the features this advanced computer program offers to Mac users? – itreads on the web-site of Final Cut Pro:
- Object Tracker and Cinematic mode;
- Blazing pro performance;
- Editing, audio, motion graphics, color grading, and delivery;
- The best plug-ins, effects, and tools from leading developers.
One of the most impressive things about Final Cut Pro is that through it, you can create 2D and 3D titles right in the program, apply and modify filters, and use the built-in chroma key for high-quality green- and blue-screen effects. But, one should not be alarmed when it comes to experience and knowledge in editing – even though Final Cut Pro seems so advanced with its powerful tools and the possibilities it contains, it is designed for easy use and can be used by amateurs as well as professionals.
The interface, which, when it comes to editing, is one of the most important aspects (if not the main one!), seems quite standard - an ordinary window configuration, sidebar with libraries, events, projects, collections… If you want to know more about the basics of Final Cut Pro, it would be helpful to watch a beginner tutorial , with the length of only 20 minutes, an introduction of the whole program.

Anyway, the main topic of this article is about cropping – how to crop a video in Final Cut Pro? If you are a Mac user and have this program installed on your computer, and you as well have a footage where you want to remove some portions of the video and adjust the size of the cropped clip within a certain area, this article is for you. Even though cropping is especially used when it comes to the images, it is extremely helpful in certain situations about the video clips, as well. So, let’s dive into each step of cropping in Final Cut Pro!
Steps to crop a video in Final Cut Pro
After getting Final Cut Pro ready to work in and opening it, you need to start as always, as in any other software: Of course, choose Import Media.

The software will ask your permission to access files in your computer, so, in order to import some, guess you have to click on OK.

Then, it will let you choose your file – but not by opening the new window (as in most cases), rather, you can choose file within the software.

Once you have your file(s) chosen, you need to find Import Selected button on the down and right.

This will lead you towards the editor again, but if you try to drag and drop your file into the sequence, the program will not follow this simple order…

This is because what the window below reads and looks like – it offers you create a New Project first. So, you need to hit it.

This will create the sequence where you can add the video you have already selected and imported from your media.

Now, it’s time to find where the cropping option is. It’s quite simple – look at the icon below and a little left of the screen where your video clip shows, click on it and you will see three options: Transform, Crop, and Distort. Needless to say, you will choose crop in this case, even if other options sound quite interesting, too!

Choosing Crop also gives you three options: Trim, Crop, and Ken Burns. Stick with the Crop again!

You will notice the kind of rulers on the angles of the video clip – they are there so you can crop your footage manually, by holding and moving them with your cursor to your liking.

Of course, if you direct your cursor in the middle of the cropped video, you can move the whole cropping window around it, so you can find the area where you intend to crop better.

And when the selected area is ready, you need to click on Done button on the right top side of the screen. If you are not satisfied with the result, you can take the step back, by clicking on Reset button right next to Done and modify the area again.

On the right side of the screen, you notice a window where Crop is also written. Alongside it, if you hover over the option with your mouse, you will see the word: Show. Clicking on it will let you crop the video from each side from there, too.

There, you can “play around” with Left, Right, Top, and Bottom sides.

In the process, if you are unsure or you want to compare the original video to the cropped version of it, keep in mind that you can uncheck the Crop button.

Finally, when you feel the result is what you have imagined, you can proceed to saving your work. For it to be done, you need to now find an Export button top right of the whole editor, and then, choose Export File (or else, if that’s what you are willing to do).


The next step would be Export Settings. You will see a new window which has three sections: Info, Settings, and Roles. The most important one here would be considered Settings, where you choose your preferred Format, Video Codec, Resolution, Color Space, Audio Format, and Action.


When you click on Next, you then choose the Name of your project and the location where you want to save it exactly.

Then you click on Save, and in a short amount of time, you have your new cropped video where you chose to save it! So, that’s it with cropping in the Final Cut Pro!


An easier way to crop a video in Wondershare Filmora
When it comes down to Mac, we can also discussed another program which is available on Mac as well as Windows operating system. This software is Filmora Video Editor , which is a simple yet sophisticated video editor that empowers the stories with everything a video editor program can offer to its users. On its official web-site, Filmora is declared as the best video editor, which allows you to edit videos with minimal effort (and isn’t that exactly what one wants when trying to just crop a video?..), enhance videos with 800+ stunning effects, unleash creativity with Hollywood effects, and, import and export in almost any format. One can say that the interface looks quite like that of Final Cut Pro…
For Win 7 or later (64-bit)
For macOS 10.14 or later

So, shall we imagine we use Wondershare Filmora X to crop our video, what would be the steps to do it?..
Needless to say, downloading and installing the software is the first step. To add files, you need to click on Import Media Files Here.

Choose your clip(s) you would like to crop and then drag and drop it in the sequence.

Above your video in the sequence, you will see little icons and find a Crop one.

Click on it and a new window will open – it’s for Crop and Zoom, where you can choose a needed ratio or do it manually (for it, you have to select Custom first).

After clicking OK, your video will be cropped as you like. Then, you can proceed with Exporting it – click on Export, choose your preferred settings, and save the video.

So, in this article, we got to know to software Final Cut Pro better and learned about how to crop our footage using this program; we also discussed how to do the same in Wondershare Filmora X, shall we need a different software.
And now, you can choose your preferred one and follow these step, or, why not try both?..
What are the features this advanced computer program offers to Mac users? – itreads on the web-site of Final Cut Pro:
- Object Tracker and Cinematic mode;
- Blazing pro performance;
- Editing, audio, motion graphics, color grading, and delivery;
- The best plug-ins, effects, and tools from leading developers.
One of the most impressive things about Final Cut Pro is that through it, you can create 2D and 3D titles right in the program, apply and modify filters, and use the built-in chroma key for high-quality green- and blue-screen effects. But, one should not be alarmed when it comes to experience and knowledge in editing – even though Final Cut Pro seems so advanced with its powerful tools and the possibilities it contains, it is designed for easy use and can be used by amateurs as well as professionals.
The interface, which, when it comes to editing, is one of the most important aspects (if not the main one!), seems quite standard - an ordinary window configuration, sidebar with libraries, events, projects, collections… If you want to know more about the basics of Final Cut Pro, it would be helpful to watch a beginner tutorial , with the length of only 20 minutes, an introduction of the whole program.
Anyway, the main topic of this article is about cropping – how to crop a video in Final Cut Pro? If you are a Mac user and have this program installed on your computer, and you as well have a footage where you want to remove some portions of the video and adjust the size of the cropped clip within a certain area, this article is for you. Even though cropping is especially used when it comes to the images, it is extremely helpful in certain situations about the video clips, as well. So, let’s dive into each step of cropping in Final Cut Pro!
Steps to crop a video in Final Cut Pro
After getting Final Cut Pro ready to work in and opening it, you need to start as always, as in any other software: Of course, choose Import Media.
The software will ask your permission to access files in your computer, so, in order to import some, guess you have to click on OK.
Then, it will let you choose your file – but not by opening the new window (as in most cases), rather, you can choose file within the software.
Once you have your file(s) chosen, you need to find Import Selected button on the down and right.
This will lead you towards the editor again, but if you try to drag and drop your file into the sequence, the program will not follow this simple order…
This is because what the window below reads and looks like – it offers you create a New Project first. So, you need to hit it.
This will create the sequence where you can add the video you have already selected and imported from your media.
Now, it’s time to find where the cropping option is. It’s quite simple – look at the icon below and a little left of the screen where your video clip shows, click on it and you will see three options: Transform, Crop, and Distort. Needless to say, you will choose crop in this case, even if other options sound quite interesting, too!
Choosing Crop also gives you three options: Trim, Crop, and Ken Burns. Stick with the Crop again!
You will notice the kind of rulers on the angles of the video clip – they are there so you can crop your footage manually, by holding and moving them with your cursor to your liking.
Of course, if you direct your cursor in the middle of the cropped video, you can move the whole cropping window around it, so you can find the area where you intend to crop better.
And when the selected area is ready, you need to click on Done button on the right top side of the screen. If you are not satisfied with the result, you can take the step back, by clicking on Reset button right next to Done and modify the area again.
On the right side of the screen, you notice a window where Crop is also written. Alongside it, if you hover over the option with your mouse, you will see the word: Show. Clicking on it will let you crop the video from each side from there, too.
There, you can “play around” with Left, Right, Top, and Bottom sides.
In the process, if you are unsure or you want to compare the original video to the cropped version of it, keep in mind that you can uncheck the Crop button.
Finally, when you feel the result is what you have imagined, you can proceed to saving your work. For it to be done, you need to now find an Export button top right of the whole editor, and then, choose Export File (or else, if that’s what you are willing to do).
The next step would be Export Settings. You will see a new window which has three sections: Info, Settings, and Roles. The most important one here would be considered Settings, where you choose your preferred Format, Video Codec, Resolution, Color Space, Audio Format, and Action.
When you click on Next, you then choose the Name of your project and the location where you want to save it exactly.
Then you click on Save, and in a short amount of time, you have your new cropped video where you chose to save it! So, that’s it with cropping in the Final Cut Pro!
An easier way to crop a video in Wondershare Filmora
When it comes down to Mac, we can also discussed another program which is available on Mac as well as Windows operating system. This software is Filmora Video Editor , which is a simple yet sophisticated video editor that empowers the stories with everything a video editor program can offer to its users. On its official web-site, Filmora is declared as the best video editor, which allows you to edit videos with minimal effort (and isn’t that exactly what one wants when trying to just crop a video?..), enhance videos with 800+ stunning effects, unleash creativity with Hollywood effects, and, import and export in almost any format. One can say that the interface looks quite like that of Final Cut Pro…
For Win 7 or later (64-bit)
For macOS 10.14 or later
So, shall we imagine we use Wondershare Filmora X to crop our video, what would be the steps to do it?..
Needless to say, downloading and installing the software is the first step. To add files, you need to click on Import Media Files Here.
Choose your clip(s) you would like to crop and then drag and drop it in the sequence.
Above your video in the sequence, you will see little icons and find a Crop one.
Click on it and a new window will open – it’s for Crop and Zoom, where you can choose a needed ratio or do it manually (for it, you have to select Custom first).
After clicking OK, your video will be cropped as you like. Then, you can proceed with Exporting it – click on Export, choose your preferred settings, and save the video.
So, in this article, we got to know to software Final Cut Pro better and learned about how to crop our footage using this program; we also discussed how to do the same in Wondershare Filmora X, shall we need a different software.
And now, you can choose your preferred one and follow these step, or, why not try both?..
How to Add Video Transitions in Videos
Editing a video is equally important as recording a video. A raw video footage is never appealing to the eyes because of sudden cuts, unnecessary parts, and lack of eye-catching effects. That is why video editing is crucial for turning an unappealing raw video into an attention-grabbing video. As a matter of fact, the way you edit your video makes your video stand out when you are posting on social media platforms.
One of the most important aspects of video editing is adding transitions to video clips. When you jump from one scene to another and make sudden cuts, you need to apply some video transitions so that the move from one scene to another becomes soothing to the eyes. Different video editors have different transition effects and Wondershare Filmora has the best collection of transitions. We will illustrate how to add transition in Filmora and how to improve your video with video transitions.
Part 1. What is a Video transition effect?
A video transition effect is the most commonly used graphical effect in video editing. A video transition effect is essential whereby you connect one shot to another, especially when you are making sudden cuts in the video. Therefore, a video transition effect sits in between two shots and connects them together smoothly so that it does not look odd to the eyes. Video editing with transitions is a common practice for short videos on social media, presentation videos, and even movies.
A video transition effect is effective when you are jumping from two moods and emotions in the video. It is equally useful while jumping between storylines, points of view, and timelines. Besides, you can spice up your narrative and make your video eye-catching as well as eye-soothing. There are different types of video transition effects such as fade in and out, zoom in and out, dissolve, wipe and pan.
Part 2. How to add transitions in video?
To add transitions to your video, you will need a video editor. You should choose a video editor that has a wide collection of transition effects so that you can apply them to your video as per your preference. If you are someone who regularly makes videos and edits them, a variety of transitions will make the videos look different. There are Movie Maker transitions for Windows users and iMovie transitions for Mac users. But we recommend Wondershare Filmora as the best video editor for adding transitions.
<pFilmora is a professional video editor with so many different categories of transitions including the trending ones. Their team continuously adds new transitions to their collection, and you can download them and use on your videos. Starting from basic, slideshow, and social media to 3D, light and smoke, there is no dearth of transitions to fulfill your requirements. Here are the steps how to add transition in Filmora. Free Download For Win 7 or later(64-bit)
Free Download For macOS 10.14 or later
Step1 Download and install Filmora on your computer. Filmora is available for Windows and Mac users. Launch Filmora and click on New Project.

Step2 Drag and drop your video clips under Project Media folder. Thereafter, drag and drop them on Timeline.
If you have one raw video file, you can split it up into multiple video clips to add transitions in between them.
Step3 Go to Transitions tab located at the top bar. You will see all the categories of transitions on the left panel.

Step4 Once you select your desired transition effect, drag and drop it in between the video clips. You can add multiple transition effects for different video clips.

Play the video after you are done editing and adding transitions. Thereafter, click on Export button to save the video on your hard drive. You should follow the same steps on how to add transition effects in reels, status videos, and YouTube videos.
Part 3. Video transitions tips and tricks
If you want to make your video stand out by simply using video transition effects, you have to follow the following tips and tricks.
Consistency – Amateur video editors tend to use several extravagant transitions in one video that distract and even annoy the audience. You are using video transition effects not to distract but to smoothen the video content. Therefore, you need to be consistent with the video transition effect you use. You should use one or maximum of two transition effects throughout the video so that the audience does not get distracted.
Experiment – While it is true that you should not be using too many video transitions in one video, but you should definitely apply different video transition effects in different videos initially. This will help you to understand which transition is getting better traction, and thereafter, you can stick to it for the rest of your videos. This is particularly useful when you are making similar type of content for social media and video streaming sites.
Out of the Box – The reason you recommended Wondershare Filmora is that there is a huge collection of different types of transition effects. If you use the regular transitions such as fade, zoom, wipe, and dissolve, you cannot create an impression among your viewers. You have to use out of the box transitions so that your video can look and feel different even when you content is not. There are 3D effects, social media effects, and different genres of effects that can go well with your video content.
Judicious – There is a difference between transition effects and video effects. Transition effects should last only for a fraction of a second so that there is no aftereffect in mind. On the contrary, a video effect can last as long as required in the video. Therefore, do not stretch the duration of a transition effect and keep it as short as possible. Similarly, you should not use transition effects here and there unnecessarily. It should be used only when there is a proper scope such as scene cuts, mood changes, and subject changes.
Meaningful – Even transition effect has a meaning behind it and you should understand it and use wherever appropriate. For example, fade out effect signifies the fading of a scene or changing of mood. Similarly, a dissolve effect is appropriate when the subject is dissolved in certain thoughts or a scene is getting dissolved. That way the effect will look natural and more meaningful as well as impactful.
The Bottom Line
Video transition effects are essential in almost all types of videos. They enhance the video content and make the transition between scenes smoother. You should choose your video editor wisely so that you can avail different types of video transition effects. We recommend Wondershare Filmora for its better collection of video transition effects for all types of videos.
Step1 Download and install Filmora on your computer. Filmora is available for Windows and Mac users. Launch Filmora and click on New Project.
Step2 Drag and drop your video clips under Project Media folder. Thereafter, drag and drop them on Timeline.
If you have one raw video file, you can split it up into multiple video clips to add transitions in between them.
Step3 Go to Transitions tab located at the top bar. You will see all the categories of transitions on the left panel.
Step4 Once you select your desired transition effect, drag and drop it in between the video clips. You can add multiple transition effects for different video clips.
Play the video after you are done editing and adding transitions. Thereafter, click on Export button to save the video on your hard drive. You should follow the same steps on how to add transition effects in reels, status videos, and YouTube videos.
Part 3. Video transitions tips and tricks
If you want to make your video stand out by simply using video transition effects, you have to follow the following tips and tricks.
Consistency – Amateur video editors tend to use several extravagant transitions in one video that distract and even annoy the audience. You are using video transition effects not to distract but to smoothen the video content. Therefore, you need to be consistent with the video transition effect you use. You should use one or maximum of two transition effects throughout the video so that the audience does not get distracted.
Experiment – While it is true that you should not be using too many video transitions in one video, but you should definitely apply different video transition effects in different videos initially. This will help you to understand which transition is getting better traction, and thereafter, you can stick to it for the rest of your videos. This is particularly useful when you are making similar type of content for social media and video streaming sites.
Out of the Box – The reason you recommended Wondershare Filmora is that there is a huge collection of different types of transition effects. If you use the regular transitions such as fade, zoom, wipe, and dissolve, you cannot create an impression among your viewers. You have to use out of the box transitions so that your video can look and feel different even when you content is not. There are 3D effects, social media effects, and different genres of effects that can go well with your video content.
Judicious – There is a difference between transition effects and video effects. Transition effects should last only for a fraction of a second so that there is no aftereffect in mind. On the contrary, a video effect can last as long as required in the video. Therefore, do not stretch the duration of a transition effect and keep it as short as possible. Similarly, you should not use transition effects here and there unnecessarily. It should be used only when there is a proper scope such as scene cuts, mood changes, and subject changes.
Meaningful – Even transition effect has a meaning behind it and you should understand it and use wherever appropriate. For example, fade out effect signifies the fading of a scene or changing of mood. Similarly, a dissolve effect is appropriate when the subject is dissolved in certain thoughts or a scene is getting dissolved. That way the effect will look natural and more meaningful as well as impactful.
The Bottom Line
Video transition effects are essential in almost all types of videos. They enhance the video content and make the transition between scenes smoother. You should choose your video editor wisely so that you can avail different types of video transition effects. We recommend Wondershare Filmora for its better collection of video transition effects for all types of videos.
Also read:
- New 8 Ways To Live Stream Pre-Recorded Video for 2024
- Guide to Create an Intro Video with Filmora
- New 2024 Approved 4 Ways to Merge MP4 and MP3
- Perfectly Use the Audio Mixer in Filmora for 2024
- New Take Your Video Editing to the Next Level with Video Scopes
- New 2024 Approved Looking Into The Top Free Slow Motion Apps (Android & iOS)
- General Knowledge About MP4 Format and Best MP4 Video Editor for 2024
- 2024 Approved Looking for Simple Steps to Apply Fade in Effect to Your Text in Premiere Pro? Here Are Two Different Methods Along with an Alternative Way to Fade Text in Videos
- New Here We Are, Now the Main Topic of Interest of This Article - How to Put Together Several Videos so that They Become One? This Case, Unlike Other Possibilities We Discussed Above, Is More Complicated, so We Will Study This Feature Step by Step
- The Best Jump Cut Editing Tricks Make Your Videos Snappy! For 2024
- Updated 2024 Approved Little Known Ways of Adding Emojis to Photos on iPhone & Android 2023
- Updated How Does the YouTube AI Algorithm Work - AI EXPLAINED for 2024
- Troubleshoot Snapchat Camera Zoomed in Issue
- New In 2024, Everything About Adding Effects In Kinemaster
- 2024 Approved Kdenlive Video Editor Review
- Leveraging the Vectorscope for Better Color Correction in Premiere Pro
- Premiere Pro Slow Playback Issues Finding The Best Solutions for 2024
- Add a Miniature Effect on Your Video for Filmy Looks. To Add This Effect, Read the Complete Guide and Make Your Video Cinematic by Wondershare Filmora for 2024
- How to Use LUTs in Lumafusion & Free LUTs Resource for 2024
- New How to Zoom Desktop Screen
- Guaranteed 10 Storyboard Creators To Make Animation Easier
- Updated 2024 Approved | Top GIF to MP4 Converters
- Want to Learn How to Add VHS Green Screen to Your Videos? This Guide Will Cover All the Details You Need to Know to Add This Effect to Your Videos and Make Them Stand Out
- Updated Keyframes Interval Everything You Need To Know | Filmora
- Updated WebM to GIF Converters (Online and Offline Solutions)
- New In 2024, Best Online GIF to Image (PNG/JPG) Converter
- New In 2024, Exploring the Best Slow-Motion App
- New Color Lut in Video - Color Grade Your Video for 2024
- New In 2024, | How to Change Quicktime Player Speed on Mac?
- In 2024, How to Use Rules of Thirds
- 2024 Approved 15 Best Free MP4 Video Rotators Windows,Mac, Android, iPhone & Online
- In 2024, How To Track IMEI Number Of Vivo V29 Through Google Earth?
- Gmail Not Working on Vivo Y100t 7 Common Problems & Fixes | Dr.fone
- Android Screen Stuck General Oppo F25 Pro 5G Partly Screen Unresponsive | Dr.fone
- 3 Effective Ways to Unlock iCloud Account Without Password On Apple iPhone X
- In 2024, Apple iPhone 14 Plus Mirror to PC? Top Apps You Must Know | Dr.fone
- Detailed Guide on Removing iPhone 15 Pro Activation Lock without Previous Owner?
- In 2024, How to Change Your Nokia G42 5G Location on life360 Without Anyone Knowing? | Dr.fone
- 8 Workable Fixes to the SIM not provisioned MM#2 Error on Infinix Hot 40 | Dr.fone
- How to Screen Mirroring OnePlus Ace 3? | Dr.fone
- New 10 Scary Anime Girls That Will Make You Creepy for 2024
- How to Fix Apple iPhone 14 Pro Max Passcode not Working?
- Bypassing Google Account With vnROM Bypass For Motorola Moto G Stylus 5G (2023)
- How to Detect and Stop mSpy from Spying on Your Vivo X90S | Dr.fone
- Unlocking iPhone 12 Pro Lock Screen 3 Foolproof Methods that Actually Work | Dr.fone
- How to Bypass Android Lock Screen Using Emergency Call On Poco M6 Pro 5G?
- How To Change Your Apple ID Password On your Apple iPhone X | Dr.fone
- What is Geo-Blocking and How to Bypass it On Apple iPhone 15 Pro Max? | Dr.fone
- Top 11 Free Apps to Check IMEI on Vivo T2 Pro 5G Phones
- Troubleshooting Guide How to Fix an Unresponsive Oppo Find N3 Screen | Dr.fone
- Is Your Apple iPhone X in Security Lockout? Proper Ways To Unlock
- New Reviewing the Live Streaming Shopping Industry in China
- In 2024, 11 Best Location Changers for Motorola Moto G04 | Dr.fone
- How to Transfer Data from Vivo Y56 5G to Other Android Devices? | Dr.fone
- updated 2024 Approved Step-by-step Guide How to Translate TikTok Videos
- A Quick Guide to Samsung Galaxy M14 4G FRP Bypass Instantly
- Tutorial to Change Lava Yuva 3 IMEI without Root A Comprehensive Guide
- Solved Warning Camera Failed on Samsung Galaxy S23 FE | Dr.fone
- In 2024, Translate Live Videos With The Best Video Translator
- In 2024, How to Track Apple iPhone 8 Location without Installing Software? | Dr.fone
- In 2024, 5 Ways To Teach You To Transfer Files from Vivo Y17s to Other Android Devices Easily | Dr.fone
- In 2024, What Legendaries Are In Pokemon Platinum On Oppo A38? | Dr.fone
- Title: Best 10 Tools To Make Quiz Videos
- Author: Chloe
- Created at : 2024-05-20 03:37:20
- Updated at : 2024-05-21 03:37:20
- Link: https://ai-editing-video.techidaily.com/best-10-tools-to-make-quiz-videos/
- License: This work is licensed under CC BY-NC-SA 4.0.
