
:max_bytes(150000):strip_icc():format(webp)/Childlearningonline_WillieBThomas_Getty-3e51600a64d742a0b5db4fadacead069.jpg)
Best GIF to Video Converters for 2024
Best GIF to Video Converters
Powerful Video Editor - Wondershare Filmora
Provide abundant video effects - A creative video editor
Powerful color correction and grading
Detailed tutorials are provided by the official channel
Since there are so many GIF to video converters available online, the question isn’t which is the best but instead what kind of experience you’re looking for.
Are you looking for a very simple solution where you can plug in your GIF and then immediately share it? Or are you looking for more refined control over your GIF before converting it to videos, such as being able to choose the resolution, frame rate, and aspect ratio? When trying to select from among these various options, think about the ways you will use your converted video clips and pick one that best suits your needs.
Here in this guide, we are going to share with you some amazing online and offline GIFs to video converters. You would love the specifications and possibilities they have created for all types of users to start with them right away!
Best 5 GIF to Video Converter Software
You don’t need to be a professional designer to convert your artwork into a video file. These converters are easy enough to use that anyone can take advantage of them, even you! Now all you have to do is decide which converter is the best for your needs, and get to it.
1. Wondershare Filmora

Wondershare Filmora is the most effective video converter for both PC and Mac users. This powerful and intuitive GIF to Video Converter is the best choice for all your video converting needs.
It offers all of these options, and it also scores high in terms of overall design and ease of use. It’s a clear winner if you’re looking to convert one or multiple GIFs into video. If you decide to download the app, we recommend purchasing the full version, which will give you a lot more customization options.
Pros
Highly adaptive to import and export files
Premium features make it the best tool among all
Faster conversion of files
Easy to use after installation
Cons
Works only on Windows and Mac
Expensive for monthly and yearly subscribers
2. Adobe Premiere Pro

The Adobe Premiere tool is easy to use. Just drag and drop your GIFs into the software, add music if you want, and hit the “Create” button. The software will create a video file that combines your GIF with the attached music in MP4 format so that you can share it across any social platform and enjoy it forever.
It is a subscription-based program that allows you to easily import and manipulate GIF files, and then export them as MP4 videos with the same features and steps that make the GIFs so appealing in the first place.
Pros
Support a plethora of formats for conversion
Quick in functionality
Very smooth experience
High-end customization of videos
Cons
Autosave doesn’t function sometimes
3. Movavi Video Editor Plus

Movavi Video Editor Plus 2020 is an affordable GIF to video converter you can use to shred your unfinished videos into GIFs, even if they’re just simple recordings.
It’s also good for mass-producing low-quality GIFs for your video blogs or YouTube channels. There are better options out there, but this software will suffice if you’re on a budget.
While it’s a bit on the pricey side for some, there aren’t many options that come close. It comes with everything you’d expect in a video editing package, with the added feature of being able to edit and export your videos in various GIF formats.
The program is pretty easy to use, and while it doesn’t have all of the advanced features that more expensive video editors do, it’s probably more than enough for most users.
Pros
Tons of cool transitions, filters, and preset titles
Easy by drag and drop actions
Offers Movavi’s effect store for more templates
Very clean and reflexive
Cons
Don’t have the histogram, vectorscope, or color wheel
Color grading is harder
4. VLC

The VLC media player is way better than most other GIF to video converters because not only can you download it for free but it’s also open-source, meaning that the code is public and developers worldwide can help improve its quality with their suggestions and thoughts. Plus, downloading VLC doesn’t cost a penny and it’s portable too!
In addition to these great features, the VLC player has many other interesting features which make it an essential piece of software for computer users. With its basic interface, it offers something that is very difficult to find in any other media player: the simplicity we talked about before…
Pros
User interface is straightforward
Fast forward pattern of features
Don’t require any codec installation
It is suitable for OS X.
Cons
Has no options for software upgradation
5. Cyberlink PowerDirector

CyberLink PowerDirector for Windows is a very useful tool for converting GIF to video. It is able to edit, process, and blend the video clips from various devices in a very simple and effective way. By adding insert video effects, users can turn their videos into spectacular works of art with ease.
Overall, CyberLink PowerDirector is a good option for users who want to enjoy an all-in-one video editing experience. It can be also used as an alternative to popular video editing software like Adobe Premiere Pro etc.
Pros
Over 100 stellar audio and video editing features
Videos can easily be imported, edited, and exported in 4k
Has advanced 360-degree video editing ability
24/7 fast customer service support
Cons
Create frustration due to ads on the page
Expensive tool
Online GIF to Video Converter
Whether you are looking to make the most out of an event that you have posted on your blog or just want a quick way of sharing a funny GIF on Facebook, like offline converting software, these tools offer a simple solution for quickly converting your GIF into a video.
1. EZGIF.COM

Ezgif.com is a fun and quick way to create memes and convert Gifs into videos quickly and easily. With fast conversion rates and a clear, simple interface, though, it’s possible that you might be disappointed with the amount of customization that this converter offers.
Other than that, however, it has everything you need to take your video from a few minutes to a few seconds.
Overall, while Ezgif’s free web-based service is easy to use, not all of its features are present in the free version. Users who want to customize their videos by adding text or effects may need to upgrade for better results.
Pros
Simple online gif maker
Toolkit for basic animated gif editing
Customize Gifs for better videos
High-end experience
Cons
The layout is not appealing
2. CloudConvert

The main selling point of CloudConvert is its large and varied list of file types, allowing you to convert any file to any other file. GIF to video conversion is just one of the many options offered by the site, and it does a surprisingly impressive job when it comes to this. There’s also an online tool for creating animated GIFs from standard video files, which can definitely come in handy for animators.
There’s no limit to how many files you can convert at once, so if you’re looking to optimize your workflow, CloudConvert will make your life easier.
Pros
High-quality video editing and conversion
Easy to understand interface
Fully-functional basic to intermediate features
Adaptable and free-to-use
Cons
Only 25 conversions/24 hours
3. Online Convert

This Online Convert is made for all your file conversion needs, from online image conversion to online GIF to video converting. With this online converter, if you will find a lot of useful information about all of these most popular online converters, do not hesitate to use them now!
The simple interface of this tool makes the conversion process easy to understand and utilize. If you are an individual looking to create videos of your gifs, then Online Gif Video Converter is the right fit for you.
Pros
Fast and progressive
Effective outcome
Simple step process of conversion
Wide range of formats to convert
Cons
There’s no specific drawback found!
How to Convert GIF to Video Using Wondershare Filmora?
Step 1: Import Media files
For the “Import” button to appear, you need to start by launching the Wondershare Filmora program. When you locate it on your desktop, double-click on it to open and select “Import” to browse and load GIF files from your Mac or PC.

Step 2: Drag to timeline
You can drag your imported media files to the timeline at the bottom of the screen. If you want to add text, you can simply drag and drop it to the timeline.
Step 3: Edit files
You can edit media files (image, audio, video) by using the built-in tools on Filmora. You can add titles, intro text, and watermarks to your video with filters and overlays. You can also add background music, transitions, and slow/fast-motion effects to make your GIF more interesting. If you want to remove the background of an image sequence or a video clip, you can use the green screen effect as well.
Step 4: Add text effects
Once you have imported the GIF file, you can add a text effect to it by double-clicking on the video track. Then go to Text/Credit and choose your desired one from the given options. You can adjust the size of text, font style, color, position, etc. as per your choice. You can also add some transition effects by clicking on Transitions. Once done, click OK to save changes or drag the text into the timeline for further editing.
Step 5: Save and Export
Once you are satisfied with your video, click “File” in the top left corner of the window. From the drop-down menu, select “Export” to get to the export window.

Conclusion
In conclusion, online tools can make your life a lot easier when it comes to converting media files. Sites like the ones reviewed above can also provide you with a host of other functions that make them valuable in your day-to-day work. If you’ve had the chance to try such websites, we hope that they’ve proven to be helpful and convenient.
Since there are so many GIF to video converters available online, the question isn’t which is the best but instead what kind of experience you’re looking for.
Are you looking for a very simple solution where you can plug in your GIF and then immediately share it? Or are you looking for more refined control over your GIF before converting it to videos, such as being able to choose the resolution, frame rate, and aspect ratio? When trying to select from among these various options, think about the ways you will use your converted video clips and pick one that best suits your needs.
Here in this guide, we are going to share with you some amazing online and offline GIFs to video converters. You would love the specifications and possibilities they have created for all types of users to start with them right away!
Best 5 GIF to Video Converter Software
You don’t need to be a professional designer to convert your artwork into a video file. These converters are easy enough to use that anyone can take advantage of them, even you! Now all you have to do is decide which converter is the best for your needs, and get to it.
1. Wondershare Filmora
Wondershare Filmora is the most effective video converter for both PC and Mac users. This powerful and intuitive GIF to Video Converter is the best choice for all your video converting needs.
It offers all of these options, and it also scores high in terms of overall design and ease of use. It’s a clear winner if you’re looking to convert one or multiple GIFs into video. If you decide to download the app, we recommend purchasing the full version, which will give you a lot more customization options.
Pros
Highly adaptive to import and export files
Premium features make it the best tool among all
Faster conversion of files
Easy to use after installation
Cons
Works only on Windows and Mac
Expensive for monthly and yearly subscribers
2. Adobe Premiere Pro
The Adobe Premiere tool is easy to use. Just drag and drop your GIFs into the software, add music if you want, and hit the “Create” button. The software will create a video file that combines your GIF with the attached music in MP4 format so that you can share it across any social platform and enjoy it forever.
It is a subscription-based program that allows you to easily import and manipulate GIF files, and then export them as MP4 videos with the same features and steps that make the GIFs so appealing in the first place.
Pros
Support a plethora of formats for conversion
Quick in functionality
Very smooth experience
High-end customization of videos
Cons
Autosave doesn’t function sometimes
3. Movavi Video Editor Plus
Movavi Video Editor Plus 2020 is an affordable GIF to video converter you can use to shred your unfinished videos into GIFs, even if they’re just simple recordings.
It’s also good for mass-producing low-quality GIFs for your video blogs or YouTube channels. There are better options out there, but this software will suffice if you’re on a budget.
While it’s a bit on the pricey side for some, there aren’t many options that come close. It comes with everything you’d expect in a video editing package, with the added feature of being able to edit and export your videos in various GIF formats.
The program is pretty easy to use, and while it doesn’t have all of the advanced features that more expensive video editors do, it’s probably more than enough for most users.
Pros
Tons of cool transitions, filters, and preset titles
Easy by drag and drop actions
Offers Movavi’s effect store for more templates
Very clean and reflexive
Cons
Don’t have the histogram, vectorscope, or color wheel
Color grading is harder
4. VLC
The VLC media player is way better than most other GIF to video converters because not only can you download it for free but it’s also open-source, meaning that the code is public and developers worldwide can help improve its quality with their suggestions and thoughts. Plus, downloading VLC doesn’t cost a penny and it’s portable too!
In addition to these great features, the VLC player has many other interesting features which make it an essential piece of software for computer users. With its basic interface, it offers something that is very difficult to find in any other media player: the simplicity we talked about before…
Pros
User interface is straightforward
Fast forward pattern of features
Don’t require any codec installation
It is suitable for OS X.
Cons
Has no options for software upgradation
5. Cyberlink PowerDirector
CyberLink PowerDirector for Windows is a very useful tool for converting GIF to video. It is able to edit, process, and blend the video clips from various devices in a very simple and effective way. By adding insert video effects, users can turn their videos into spectacular works of art with ease.
Overall, CyberLink PowerDirector is a good option for users who want to enjoy an all-in-one video editing experience. It can be also used as an alternative to popular video editing software like Adobe Premiere Pro etc.
Pros
Over 100 stellar audio and video editing features
Videos can easily be imported, edited, and exported in 4k
Has advanced 360-degree video editing ability
24/7 fast customer service support
Cons
Create frustration due to ads on the page
Expensive tool
Online GIF to Video Converter
Whether you are looking to make the most out of an event that you have posted on your blog or just want a quick way of sharing a funny GIF on Facebook, like offline converting software, these tools offer a simple solution for quickly converting your GIF into a video.
1. EZGIF.COM
Ezgif.com is a fun and quick way to create memes and convert Gifs into videos quickly and easily. With fast conversion rates and a clear, simple interface, though, it’s possible that you might be disappointed with the amount of customization that this converter offers.
Other than that, however, it has everything you need to take your video from a few minutes to a few seconds.
Overall, while Ezgif’s free web-based service is easy to use, not all of its features are present in the free version. Users who want to customize their videos by adding text or effects may need to upgrade for better results.
Pros
Simple online gif maker
Toolkit for basic animated gif editing
Customize Gifs for better videos
High-end experience
Cons
The layout is not appealing
2. CloudConvert
The main selling point of CloudConvert is its large and varied list of file types, allowing you to convert any file to any other file. GIF to video conversion is just one of the many options offered by the site, and it does a surprisingly impressive job when it comes to this. There’s also an online tool for creating animated GIFs from standard video files, which can definitely come in handy for animators.
There’s no limit to how many files you can convert at once, so if you’re looking to optimize your workflow, CloudConvert will make your life easier.
Pros
High-quality video editing and conversion
Easy to understand interface
Fully-functional basic to intermediate features
Adaptable and free-to-use
Cons
Only 25 conversions/24 hours
3. Online Convert
This Online Convert is made for all your file conversion needs, from online image conversion to online GIF to video converting. With this online converter, if you will find a lot of useful information about all of these most popular online converters, do not hesitate to use them now!
The simple interface of this tool makes the conversion process easy to understand and utilize. If you are an individual looking to create videos of your gifs, then Online Gif Video Converter is the right fit for you.
Pros
Fast and progressive
Effective outcome
Simple step process of conversion
Wide range of formats to convert
Cons
There’s no specific drawback found!
How to Convert GIF to Video Using Wondershare Filmora?
Step 1: Import Media files
For the “Import” button to appear, you need to start by launching the Wondershare Filmora program. When you locate it on your desktop, double-click on it to open and select “Import” to browse and load GIF files from your Mac or PC.
Step 2: Drag to timeline
You can drag your imported media files to the timeline at the bottom of the screen. If you want to add text, you can simply drag and drop it to the timeline.
Step 3: Edit files
You can edit media files (image, audio, video) by using the built-in tools on Filmora. You can add titles, intro text, and watermarks to your video with filters and overlays. You can also add background music, transitions, and slow/fast-motion effects to make your GIF more interesting. If you want to remove the background of an image sequence or a video clip, you can use the green screen effect as well.
Step 4: Add text effects
Once you have imported the GIF file, you can add a text effect to it by double-clicking on the video track. Then go to Text/Credit and choose your desired one from the given options. You can adjust the size of text, font style, color, position, etc. as per your choice. You can also add some transition effects by clicking on Transitions. Once done, click OK to save changes or drag the text into the timeline for further editing.
Step 5: Save and Export
Once you are satisfied with your video, click “File” in the top left corner of the window. From the drop-down menu, select “Export” to get to the export window.
Conclusion
In conclusion, online tools can make your life a lot easier when it comes to converting media files. Sites like the ones reviewed above can also provide you with a host of other functions that make them valuable in your day-to-day work. If you’ve had the chance to try such websites, we hope that they’ve proven to be helpful and convenient.
Using Montage In Movies | Learn to Use Montage With Movies
As with many new things in life, Montage isn’t your best friend right off the bat. So, if you want to learn to use montages with movies, they need to be the right ones. If you don’t know what Montage is, it is a way of compressing an action or series of actions into a short amount of time. We look at movies because they are a common type of entertainment everyone has seen before, which makes them easier to understand as a concept.
Using Montage is a great way to create engaging video content. There are many people interested in the topic of Montage, so if you get that video out there, you can easily find an audience. When used in conjunction with YouTube advertising, creating videos about Montage could be an excellent business idea for you.
Learning how to use Montage properly can be challenging. The process isn’t intuitive, and using it can feel like hiding random pieces around your page. But, when you watch the right movies, they can help you understand how to use this tool effectively. So, take some time, check out these movies, and learn how to get the most out of Montage!
What Is A Montage?
The definition of a montage is a “series of short scenes or episodes forming a unified whole.” That definition can lead to different interpretations of a montage and can be applied to any art medium. A “montage” isn’t just for movies. Music artists use montages to tell stories that often describe their emotions and experiences; writers create poetry and prose contained in such an artistic form, and painters often use this art form. However, many people are most familiar with the term associated with movies: a montage is essentially a collection of images or scenes that populate a movie with music.
If you’ve seen any blockbuster Hollywood films in the last ten years, you’ve probably seen some Montage. The Montage is a sequence that takes place over a set period and shows us how the lead character goes from being an ordinary person to an extraordinary one. The difference between these two states is dramatic, so we see so many montages in movies. They are meant to grab your attention and excitingly introduce a character.
Purpose of Montage
Montage movies are made up of a compilation of short yet powerful scenes put together to make one movie or project. Even though these types of movies have become a common genre, there’s a list of reasons why this is popular in movies today.
- Montage has several uses in movies. Of course, Montage can be used to show events such as battles or dancing. It can also describe emotions, including sadness, happiness, and sarcasm. These different uses of Montage do come with their styles, but they all share a few common traits.
- They’re often used to condense periods of storytime into much smaller but more entertaining segments. The word montage is French for “to construct from many parts .”Montages can now be seen everywhere in film and television, from silent films to blockbuster action movies.
- This is frequently used in narratives when the story needs to advance quickly. The characters are going somewhere or doing something else not within the context of the moment in time that represents them. A great example of a montage was used in Rocky when Rocky was training for his fight with Apollo Creed.
- A montage allows filmmakers to explore a theme using several sequential shots that can’t be covered in a single shot.
Learn To Use Montage With These Movies
1. Rocky (1976)
The training montage is popular in cinema. A montage like this helps us follow how the protagonist prepares himself for a life-threatening fight and claims honor in society. Sylvester Stallone plays Robert “Rocky” Balboa, going through the rigorous preparations for his fight. A song by Bill Conti called “Gonna Fly Now” is playing in the background, contributing to the scene’s energy.
Rocky (1976)
2. Scarface (1983)
A fictional Cuban Tony (Al Pacino) becomes a gangster in Brian De Palma’s 1983 film Scarface against the backdrop of the cocaine boom of the 1980s. He is portrayed as a criminal rising to the echelons of the underworld and slowly falling. In this montage sequence, Tony becomes the biggest drug lord in Miami and controls nearly all the cocaine that comes through the city.
Scarface (1983)
3. Goodfellas (1990)
Martin Scorsese’s Goodfellas is a gangster film set in 1950s New York City, one of the best. In it, Irish-Italian Henry Hill (Ray Liotta) is portrayed as he rises through the ranks of the crime branch of his Brooklyn neighborhood. As we watch this Montage, we see Henry and his gang members viciously murdering anyone who stands in their path. This edit is beautifully complemented by Eric Clapton’s “Layla.” voice-over.
Goodfellas (1990)
4. Trainspotting (1996)
Ewan McGregor stars in Danny Boyle’s black comedy, which tells the tale of drug addict Mark Renton (Danny Boyle). Mark tries to get clean and get back on his feet. Despite this, drug enticements and friend influence are major deterrents. Through this introductory Montage, we are introduced to the protagonist’s lifestyle. In addition, the film explores the themes of drug abuse, addiction, and nihilism.
Trainspotting (1996)
5. Run Lola Run (1998)
In his movie Run Lola Run (1998), Tom Tykwer tells the story of Lola (Franka Potente) and Mani (Moritz Bleibtreu) as they face the different possibilities that arise from a single event in their lives. This Montage shows Lola bumping into various people as she begins to sprint. Her encounter has a profound impact on their lives. Through Montage, the film is given a sense of exhilarating pace and multi-layered visual design.
Run Lola Run (1998)
6. Requiem for a Dream (2000)
Hubert Selby Jr.’s titular novel is the source material for Darren Aronofsky’s psychological drama. Four people trapped by their addictions are the focus of the narrative. By watching this Montage, a viewer can get a better sense of the world or the film’s characters. As a result of their drug addictions, four ambitious people will eventually have their dreams dashed. As a result, we gain insight into how addiction takes hold of the characters’ minds and bodies.
Requiem for a Dream (2000)
7. Swades (2004)
Songs have played an integral role in bringing the story of the film to life in the hands of some of India’s most thoughtful filmmakers. Among them is Ashutosh Gowariker. Montage techniques are used to create the title song sequence of his film Swades. The fictional Indian village of Charanpur, where the protagonist Mohan Bhargava (Shahrukh Khan) has lived, is a source of great trauma for the protagonist. As he ends up returning to India, the song signifies his development psychologically.
Swades (2004)
8. Whiplash (2014)
Miles Teller plays Andrew Neiman, a promising young drummer who enrolls in a tough music conservatory. Damien Chazelle directs the film. Terence Fletcher (J. K. Simmons) mentors him, and he is determined to see his students’ dreams come true. Neiman pushes himself to his limits in this Montage, suffering a breakdown as a result. Edited shots and tempo match the visual images to accentuate the protagonist’s mental state.
Whiplash (2014)
9. Gone Girl (2014)
Gillian Flynn’s eponymous novel is the basis for David Fincher’s psychological crime drama. On their fifth wedding anniversary, Amy Elliott Dunne (Rosamund Pike) disappears, and Nicholas Dunne (Ben Affleck) becomes the prime suspect. Amy carefully crafts her new identity in this Montage as we learn she is alive. The Montage ends as Amy sets up her cabin and begins purchasing supplies. After hitting herself with a hammer, the sequence ends.
Whiplash (2014)
10. Parasite (2019)
In Bong Joon-ho’s Oscar-winning dark comedy thriller, the Kim family lives on the edge of poverty. They are suddenly thrown into a world of affluence when a family member gets a job at an affluent family. Moon-Gwang (Lee Jung-Eun) is a long-time housekeeper for the Kim family. The family comes up with a cunning plan to exploit her allergy to peaches. In the closing montage, they convince Mrs. Park (Cho Yeo-Jeong) that Moon-Gwang has tuberculosis.
Whiplash (2014)
Wondershare Filmora11 Express Better
Achieve More
Grow Together
Free Download Free Download Learn More

![]()
Summarize:
If you’re thinking about using Montage, check out movies and trailers in the Action and Comedy genres. Keep in mind that finding material that works well with montages is no accident. They are filled with some of the best soundtracks, action scenes, and comedy routines that can help guide your project through its rough spots. Montage can do amazing things for any movie, so it’s important to learn when and where it should be used.
Rocky (1976)
2. Scarface (1983)
A fictional Cuban Tony (Al Pacino) becomes a gangster in Brian De Palma’s 1983 film Scarface against the backdrop of the cocaine boom of the 1980s. He is portrayed as a criminal rising to the echelons of the underworld and slowly falling. In this montage sequence, Tony becomes the biggest drug lord in Miami and controls nearly all the cocaine that comes through the city.
Scarface (1983)
3. Goodfellas (1990)
Martin Scorsese’s Goodfellas is a gangster film set in 1950s New York City, one of the best. In it, Irish-Italian Henry Hill (Ray Liotta) is portrayed as he rises through the ranks of the crime branch of his Brooklyn neighborhood. As we watch this Montage, we see Henry and his gang members viciously murdering anyone who stands in their path. This edit is beautifully complemented by Eric Clapton’s “Layla.” voice-over.
Goodfellas (1990)
4. Trainspotting (1996)
Ewan McGregor stars in Danny Boyle’s black comedy, which tells the tale of drug addict Mark Renton (Danny Boyle). Mark tries to get clean and get back on his feet. Despite this, drug enticements and friend influence are major deterrents. Through this introductory Montage, we are introduced to the protagonist’s lifestyle. In addition, the film explores the themes of drug abuse, addiction, and nihilism.
Trainspotting (1996)
5. Run Lola Run (1998)
In his movie Run Lola Run (1998), Tom Tykwer tells the story of Lola (Franka Potente) and Mani (Moritz Bleibtreu) as they face the different possibilities that arise from a single event in their lives. This Montage shows Lola bumping into various people as she begins to sprint. Her encounter has a profound impact on their lives. Through Montage, the film is given a sense of exhilarating pace and multi-layered visual design.
Run Lola Run (1998)
6. Requiem for a Dream (2000)
Hubert Selby Jr.’s titular novel is the source material for Darren Aronofsky’s psychological drama. Four people trapped by their addictions are the focus of the narrative. By watching this Montage, a viewer can get a better sense of the world or the film’s characters. As a result of their drug addictions, four ambitious people will eventually have their dreams dashed. As a result, we gain insight into how addiction takes hold of the characters’ minds and bodies.
Requiem for a Dream (2000)
7. Swades (2004)
Songs have played an integral role in bringing the story of the film to life in the hands of some of India’s most thoughtful filmmakers. Among them is Ashutosh Gowariker. Montage techniques are used to create the title song sequence of his film Swades. The fictional Indian village of Charanpur, where the protagonist Mohan Bhargava (Shahrukh Khan) has lived, is a source of great trauma for the protagonist. As he ends up returning to India, the song signifies his development psychologically.
Swades (2004)
8. Whiplash (2014)
Miles Teller plays Andrew Neiman, a promising young drummer who enrolls in a tough music conservatory. Damien Chazelle directs the film. Terence Fletcher (J. K. Simmons) mentors him, and he is determined to see his students’ dreams come true. Neiman pushes himself to his limits in this Montage, suffering a breakdown as a result. Edited shots and tempo match the visual images to accentuate the protagonist’s mental state.
Whiplash (2014)
9. Gone Girl (2014)
Gillian Flynn’s eponymous novel is the basis for David Fincher’s psychological crime drama. On their fifth wedding anniversary, Amy Elliott Dunne (Rosamund Pike) disappears, and Nicholas Dunne (Ben Affleck) becomes the prime suspect. Amy carefully crafts her new identity in this Montage as we learn she is alive. The Montage ends as Amy sets up her cabin and begins purchasing supplies. After hitting herself with a hammer, the sequence ends.
Whiplash (2014)
10. Parasite (2019)
In Bong Joon-ho’s Oscar-winning dark comedy thriller, the Kim family lives on the edge of poverty. They are suddenly thrown into a world of affluence when a family member gets a job at an affluent family. Moon-Gwang (Lee Jung-Eun) is a long-time housekeeper for the Kim family. The family comes up with a cunning plan to exploit her allergy to peaches. In the closing montage, they convince Mrs. Park (Cho Yeo-Jeong) that Moon-Gwang has tuberculosis.
Whiplash (2014)
Wondershare Filmora11 Express Better
Achieve More
Grow Together
Free Download Free Download Learn More
![]()
Summarize:
If you’re thinking about using Montage, check out movies and trailers in the Action and Comedy genres. Keep in mind that finding material that works well with montages is no accident. They are filled with some of the best soundtracks, action scenes, and comedy routines that can help guide your project through its rough spots. Montage can do amazing things for any movie, so it’s important to learn when and where it should be used.
A Complete Guideline About QuickTime Player
While designing the iOS and macOS for its dedicated devices, Apple created multiple supporting software that competes for the best in the market. An example is the QuickTime Player, a state-of-the-art, built-in video player available across Mac. This article shall introduce a detailed analysis and overview of QuickTime Player along with major QuickTime formats and features.
Come along as we explore more about QuickTime Player! You surely will get to know much about the tool before using it.
In this article
01 Key Features of QuickTime Player
02 List of QuickTime File Format
03 How to Play Videos with QuickTime
04 How to Do Screen Recording with QuickTime?
05 How to Convert Video File to MOV Format in QuickTime?
06 Top Recommended Video Editor in 2022 – Filmora Video Editor
Part 1: Key Features of QuickTime Player
Multiple highlighting features can be discovered across QuickTime Player. While a basic built-in video player, the tool outshines other video players for the following features, making it a special choice for users working across Mac. Let us look into these features to know more about QuickTime.
Record Across the Player
QuickTime Player offers users a variety of options in recording across the tool. With the basic screen recording where the user potentially sets up the area for recording and other settings, users can also record audio and movies across QuickTime. Doesn’t it sound awesome?
Editing with QuickTime
This video player is much more than a simple video player. Users can effectively use this tool for editing their videos in numerous ways. From trimming video or audio to splitting videos across the player, there are multiple options available that can be accessed easily. The user can also merge and rotate their clips according to their convenience. Sounds convenient, doesn’t it?
Change Resolution of Video
Want to change the resolution of a video? QuickTime Player allows you to potentially change the resolution of the video according to your requirement. If you have a 4K video of huge size, QuickTime Player can easily change its resolution to 1080p, 720p, or 480p, as per the requirement of the user.
Sharing Videos Directly
One of the most impressive options available across QuickTime Player is to share the video directly across different platforms. Users can share their video through Mail, Messages, AirDrop, Vimeo, Facebook, Flickr, YouTube, and several other options supported by QuickTime. Get it shared anywhere!
Part 2: List of QuickTime File Format
QuickTime offers a tangible list of file formats that can be operated across the video player. The following list shows all the QuickTime file format that can run across it:
Video File Formats
- QuickTime Movie (.mov)
- MPEG-4 (.mp4, .m4v)
- MPEG-1
- 3GPP
- 3GPP2
- AVI
- DV
Audio File Formats
- iTunes Audio (.m4a, .m4b, .m4p)
- MP3
- Core Audio (.caf)
- AIFF
- AU
- SD2
- WAV
- SND
- AMR
Part 3: How to Play Videos with QuickTime
Once you know how QuickTime Player makes it easy for Mac users to play their video, it is time to understand the steps associated with the procedure. Two basic techniques can be implemented to play videos with QuickTime. The first method to play videos with QuickTime are featured as follows:
Step 1: You need to open QuickTime Player across your Mac. For that, proceed across Launchpad to access the application.

Step 2: Once the player is launched, you can simply select any video across the window that opens up. Once selected, tap “Open” to play it across QuickTime.

Sounds easy, right? However, if you have multiple videos to open or have other video players installed in your Mac, you should consider following this second approach. If QuickTime Player is not your default video player, it is important to follow the steps below for opening any video across QuickTime.
Step 1: Open Finder on your device and proceed to locate the video that you wish to open across QuickTime. On finding the video, click on the video while holding the “Control” button on the keyboard. This opens a drop-down menu.

Step 2: In the “Open With” section across the menu, you will find the option of QuickTime Player. Tap on the option to open the video across QuickTime.

Part 4: How to Do Screen Recording with QuickTime?
Several functions can be performed across QuickTime. While the QuickTime video format allows you to play different videos across the platform, it also helps users record screens of their choice. To understand the step-by-step procedure, you need to follow the steps displayed below. Come along and learn more about it.
Step 1: Open QuickTime Player on your device and tap on the “File” tab on the top of the screen. Select the option of “New Screen Recording” from the available options to initiate screen recording.

Step 2: The next window opens up, which involves managing the screen recording settings. You need to set up the screen area recorded in the process initially.

Step 3: After setting the screen area, tap on “Options” to specify the microphone settings, the location where the recording will be saved, the timer, and other significant options that are important for screen recording. Click on the “Record” button to start.

Step 4: Once you have recorded the appropriate screen, click on the “Stop” sign appearing on the top of the window to conclude recording and save it across the decided location.

Part 5: How to Convert Video File to MOV Format in QuickTime?
QuickTime Player is not quite extensive when it comes to converting video files. Although there are several QuickTime format files that you may come across and play across the platform, it only converts any video file into MOV format, which is the dedicated file format potentially designed by Apple. To understand the method to convert any QuickTime video format to MOV format, follow the steps shown below:
Step 1: You need to open the appropriate video across QuickTime to convert it accordingly. Once opened, tap on the “File” tab, and select “Export as” across the available options.

Step 2: You need to select an appropriate resolution from the available options according to the video quality that you want the video to be saved in on the preceding menu. QuickTime player will show low-quality resolutions for the high-quality video but not vice versa.

Step 3: A new window opens that requires you to set up the name and location for the video. Add the file extension “.mov” at the end of the name of the video to convert it into MOV format.

Extra Tips: Top Recommended Video Editor in 2022 – Filmora Video Editor
Video players are important for running videos across your devices. However, the significance of a video editor is as primary as a video player in the market. When selecting the best video editor for making changes in your video before posting and viewing it across devices, there are multiple factors that a user looks into.
Wondershare Filmora offers unique and extensive features to its users at a price that is unmatched by the other players in the market. When it comes to basic video editing, the platform features the simplest set of tools that helps users enhance their video to perfection. Along with that, Filmora even allows you to add in music, effects, and transitions as desired. Isn’t it the dream?

For Win 7 or later (64-bit)
For macOS 10.12 or later
With such tools available, Filmora is recognized for its ability to make editing simple for users. There is no need for the user to be a professional in editing for making changes across Filmora. Any individual who is new to video editing can efficiently use the platform for their needs. Along with that, Filmora even allows users to make changes across the audios, both within the videos and separately. It surely is perfect!
Closing Words
Got to know much about QuickTime Player? This effective video player is the best available in the market for Mac users. While supporting different QuickTime file format, users can make significant changes across their videos with the tool. QuickTime allows them to make edits, convert, and record screens easily. This is what makes it a special choice in the market.
02 List of QuickTime File Format
03 How to Play Videos with QuickTime
04 How to Do Screen Recording with QuickTime?
05 How to Convert Video File to MOV Format in QuickTime?
06 Top Recommended Video Editor in 2022 – Filmora Video Editor
Part 1: Key Features of QuickTime Player
Multiple highlighting features can be discovered across QuickTime Player. While a basic built-in video player, the tool outshines other video players for the following features, making it a special choice for users working across Mac. Let us look into these features to know more about QuickTime.
Record Across the Player
QuickTime Player offers users a variety of options in recording across the tool. With the basic screen recording where the user potentially sets up the area for recording and other settings, users can also record audio and movies across QuickTime. Doesn’t it sound awesome?
Editing with QuickTime
This video player is much more than a simple video player. Users can effectively use this tool for editing their videos in numerous ways. From trimming video or audio to splitting videos across the player, there are multiple options available that can be accessed easily. The user can also merge and rotate their clips according to their convenience. Sounds convenient, doesn’t it?
Change Resolution of Video
Want to change the resolution of a video? QuickTime Player allows you to potentially change the resolution of the video according to your requirement. If you have a 4K video of huge size, QuickTime Player can easily change its resolution to 1080p, 720p, or 480p, as per the requirement of the user.
Sharing Videos Directly
One of the most impressive options available across QuickTime Player is to share the video directly across different platforms. Users can share their video through Mail, Messages, AirDrop, Vimeo, Facebook, Flickr, YouTube, and several other options supported by QuickTime. Get it shared anywhere!
Part 2: List of QuickTime File Format
QuickTime offers a tangible list of file formats that can be operated across the video player. The following list shows all the QuickTime file format that can run across it:
Video File Formats
- QuickTime Movie (.mov)
- MPEG-4 (.mp4, .m4v)
- MPEG-1
- 3GPP
- 3GPP2
- AVI
- DV
Audio File Formats
- iTunes Audio (.m4a, .m4b, .m4p)
- MP3
- Core Audio (.caf)
- AIFF
- AU
- SD2
- WAV
- SND
- AMR
Part 3: How to Play Videos with QuickTime
Once you know how QuickTime Player makes it easy for Mac users to play their video, it is time to understand the steps associated with the procedure. Two basic techniques can be implemented to play videos with QuickTime. The first method to play videos with QuickTime are featured as follows:
Step 1: You need to open QuickTime Player across your Mac. For that, proceed across Launchpad to access the application.
Step 2: Once the player is launched, you can simply select any video across the window that opens up. Once selected, tap “Open” to play it across QuickTime.
Sounds easy, right? However, if you have multiple videos to open or have other video players installed in your Mac, you should consider following this second approach. If QuickTime Player is not your default video player, it is important to follow the steps below for opening any video across QuickTime.
Step 1: Open Finder on your device and proceed to locate the video that you wish to open across QuickTime. On finding the video, click on the video while holding the “Control” button on the keyboard. This opens a drop-down menu.
Step 2: In the “Open With” section across the menu, you will find the option of QuickTime Player. Tap on the option to open the video across QuickTime.
Part 4: How to Do Screen Recording with QuickTime?
Several functions can be performed across QuickTime. While the QuickTime video format allows you to play different videos across the platform, it also helps users record screens of their choice. To understand the step-by-step procedure, you need to follow the steps displayed below. Come along and learn more about it.
Step 1: Open QuickTime Player on your device and tap on the “File” tab on the top of the screen. Select the option of “New Screen Recording” from the available options to initiate screen recording.
Step 2: The next window opens up, which involves managing the screen recording settings. You need to set up the screen area recorded in the process initially.
Step 3: After setting the screen area, tap on “Options” to specify the microphone settings, the location where the recording will be saved, the timer, and other significant options that are important for screen recording. Click on the “Record” button to start.
Step 4: Once you have recorded the appropriate screen, click on the “Stop” sign appearing on the top of the window to conclude recording and save it across the decided location.
Part 5: How to Convert Video File to MOV Format in QuickTime?
QuickTime Player is not quite extensive when it comes to converting video files. Although there are several QuickTime format files that you may come across and play across the platform, it only converts any video file into MOV format, which is the dedicated file format potentially designed by Apple. To understand the method to convert any QuickTime video format to MOV format, follow the steps shown below:
Step 1: You need to open the appropriate video across QuickTime to convert it accordingly. Once opened, tap on the “File” tab, and select “Export as” across the available options.
Step 2: You need to select an appropriate resolution from the available options according to the video quality that you want the video to be saved in on the preceding menu. QuickTime player will show low-quality resolutions for the high-quality video but not vice versa.
Step 3: A new window opens that requires you to set up the name and location for the video. Add the file extension “.mov” at the end of the name of the video to convert it into MOV format.
Extra Tips: Top Recommended Video Editor in 2022 – Filmora Video Editor
Video players are important for running videos across your devices. However, the significance of a video editor is as primary as a video player in the market. When selecting the best video editor for making changes in your video before posting and viewing it across devices, there are multiple factors that a user looks into.
Wondershare Filmora offers unique and extensive features to its users at a price that is unmatched by the other players in the market. When it comes to basic video editing, the platform features the simplest set of tools that helps users enhance their video to perfection. Along with that, Filmora even allows you to add in music, effects, and transitions as desired. Isn’t it the dream?
For Win 7 or later (64-bit)
For macOS 10.12 or later
With such tools available, Filmora is recognized for its ability to make editing simple for users. There is no need for the user to be a professional in editing for making changes across Filmora. Any individual who is new to video editing can efficiently use the platform for their needs. Along with that, Filmora even allows users to make changes across the audios, both within the videos and separately. It surely is perfect!
Closing Words
Got to know much about QuickTime Player? This effective video player is the best available in the market for Mac users. While supporting different QuickTime file format, users can make significant changes across their videos with the tool. QuickTime allows them to make edits, convert, and record screens easily. This is what makes it a special choice in the market.
If You Wish to Edit FLV Videos without Any Problems, You Should Utilize a Multipurpose Video Editor that Supports the FLV File Format
FLV is a common container format for transferring digital video and audio information over the Internet. A.flv file is a flash video that may be seen on your computer with Adobe Flash Player, Adobe Air, or some third-party Adobe Flash plugins.
FLV has become the standard video format for web-based streaming video service providers such as Hulu and VEVO due to its superior functionality and tiny size. It’s also the default format for Quicktime on Mac systems.
If you wish to edit FLV videos without any problems, you should utilize a multipurpose video editor that supports the FLV file format.
Best FLV Editor to Edit FlV Video on Windows and Mac - Filmroa Video Editor
Filmora Video Editor is a professional FLV video editing application. This software allows you to edit 4K video files, share completed films directly on social media platforms, and add subtitles and audio files.
You may mix multiple films and enhance your footage with numerous transitions and other effects using this FLV video editing software. Furthermore, the free Filmora application is ideal for adding audio files or video clips from the wide library and uploading your soundtrack.
For Win 7 or later (64-bit)
For macOS 10.14 or later
Therefore, you can use the following steps to edit FLV video on Windows and Mac:
Step 1: Import file:

Step 2: Edit the FLV file:
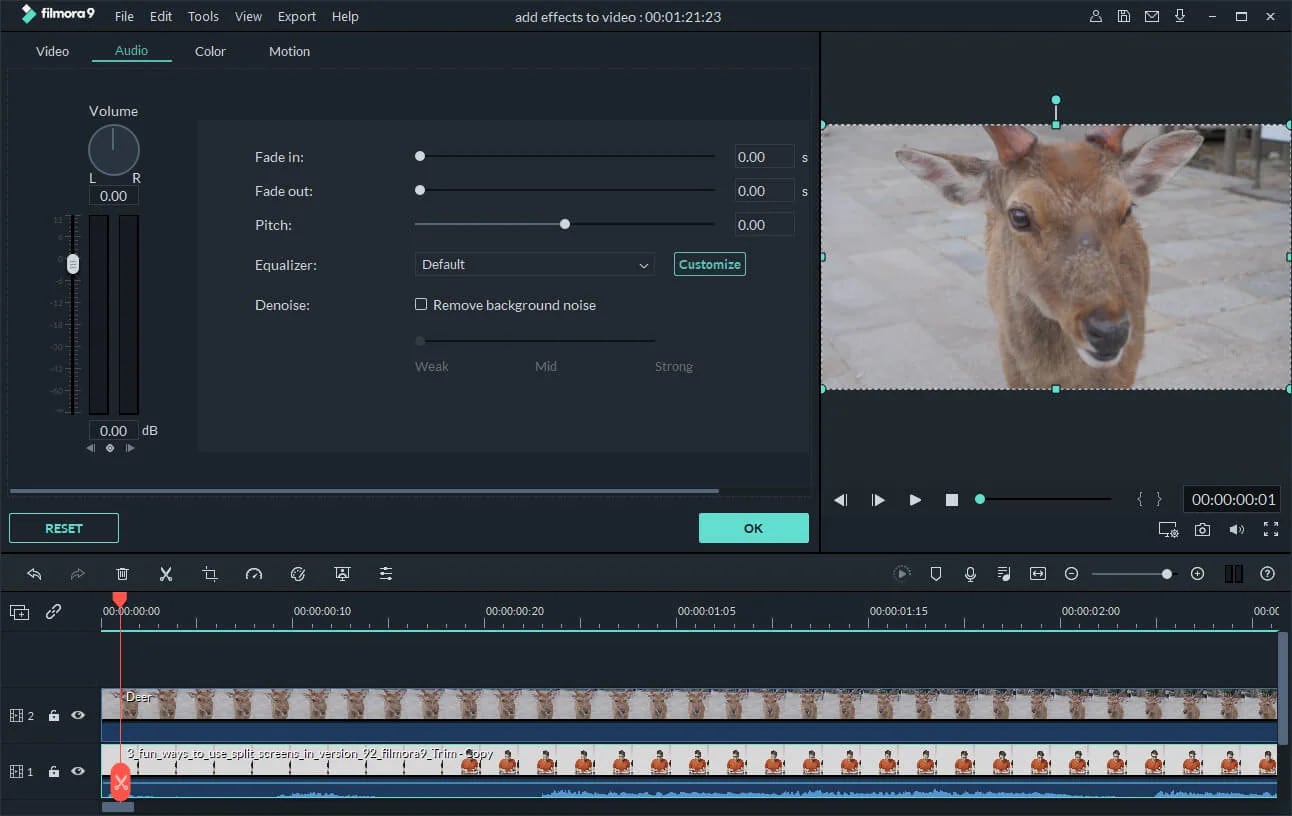
Acquire the perfect tool in your palm for anything you want to do, such as clipping, cropping, rotating, and more.
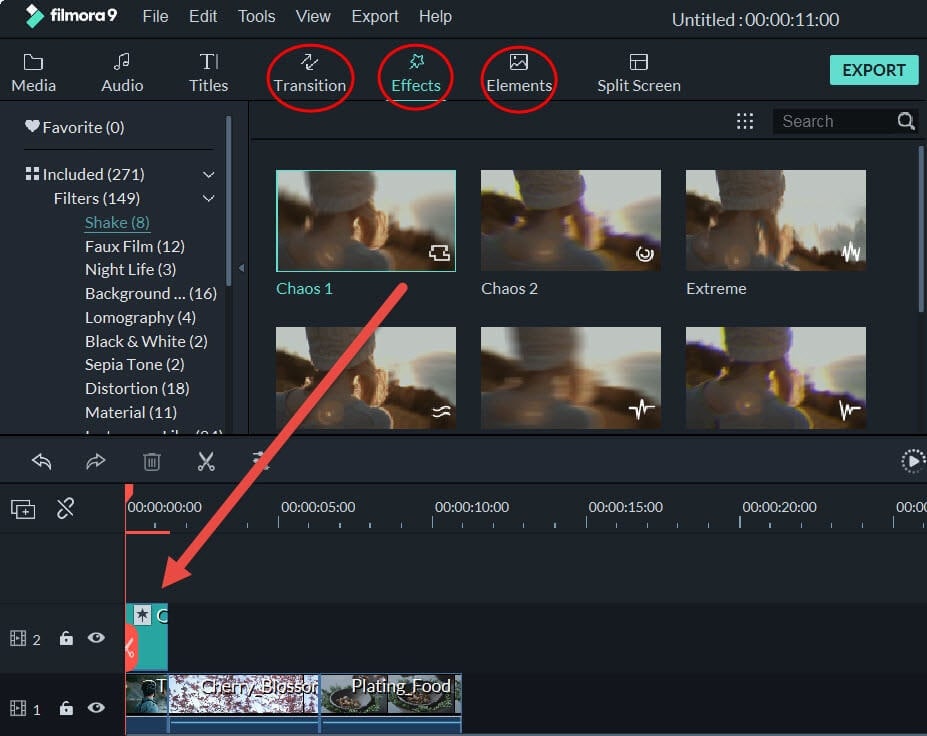
Furthermore, all editing capabilities in the toolbar allow drag-and-drop, making it even easier to touch up your films quickly. Consider the following scenario:
- Drag and drop a transition into the video/photo, or right-click it and select “Apply to All.”
- Please drag & drop a title template to the position where you want it to appear, then adjust it.
- To use the effects, select one from the 50+ available video effects, select it, and apply it to your photos/videos instantaneously.
Step 3: Save or Export the file:

When you’re done, export your modified MP4 files to Windows/Mac and quickly share them on YouTube, with the option of sending a message to Facebook and Twitter. When you click Create in the program window’s middle right corner, you’ll be taken to the Output window below.
Alternative Way to Edit FlV Video on Windows
1. VSDC
VSDC is a free video editor along with a lot of advanced features. Cut, combine, trim, crop, and other editing capabilities are available to help you polish your FLV films.
Although it may not look logical, learning the editing capabilities hidden within modular boxes is simple. One noteworthy aspect of VSDC is its ability to produce good visual effects using many trendy video effects, transitions, and filters.
Furthermore, strong chroma keys, color correction, object modification, and other editing tools can be utilized to edit FLV videos. It not only creates excellent FLV videos, but it also supports a wide range of media conversion, allowing you to convert FLV files to various formats and export them without a watermark.
Therefore, follow the below mentioned steps to edit FLV video using VSDC:
Step 1: Install the software on the Windows. Open the application and import the video.
Step 2: Use cutting and splitting tools to edit the video.
The first icon is a picture of a pair of scissors, which is a cutting tool. It’s very useful when you need to cut the beginning or end of a film. Place the cursor exactly where you want to cut, then select “Trim start” or “Trim finish” from the dropdown cutting menu (the small triangle next to the scissors icon).
Cropping is also simple. If you have too much additional space around the scene object recorded, just choose the file you want to trim and select the cropping icon from the “Cutting and Splitting” option. A new window will appear, allowing you to select the region of the scene that should stay.
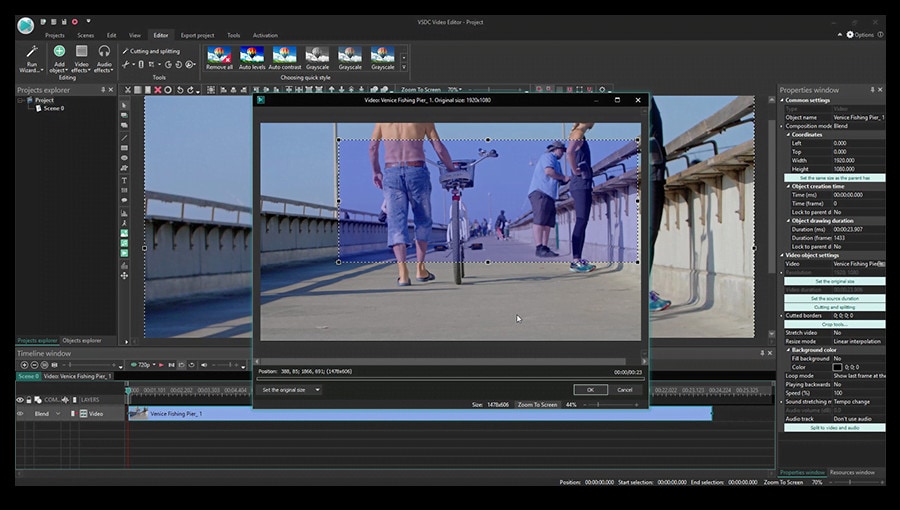
Step 3: Apply effects and transitions.
To use one, first select the video file you wish to edit, then go to the Video effects tab and select the effect you want to use. On the timeline, a new tab will appear, containing all of the effects done to the selected object. You can alter the effect’s duration and position in time by dragging it with the mouse there. The properties pane on the right-hand side can be used to change other parameters.
Transitions follow the same rule. Place your cursor where you want the transition to begin, then choose a transition from the Video effects dropdown menu and manually adjust the duration.
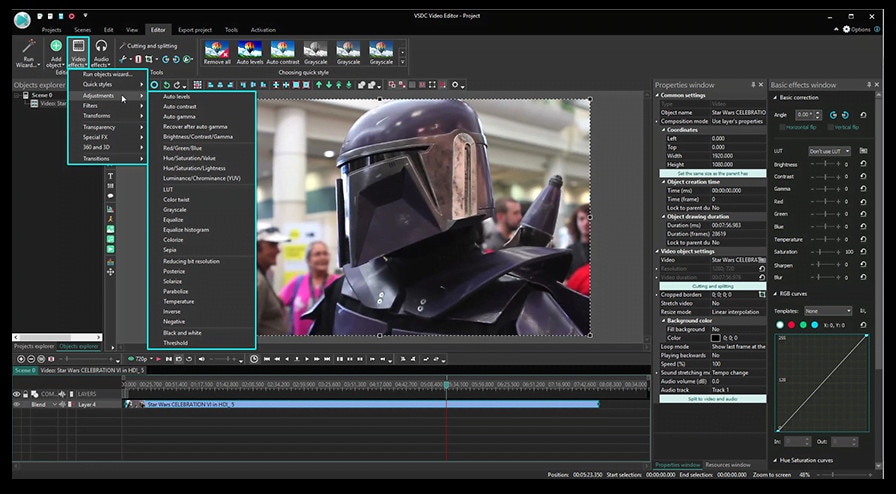
Step 4: Save changes and export video.
Make sure your movie appears exactly how you want it to before exporting it. If the video appears choppy, use the red preview button and lower the preview quality. When the PC’s resources are insufficient to process the video in real time, lagging can occur. Keep in mind that it has no bearing on the outcome. When you’re finished, navigate to the Export project tab and select an export format.
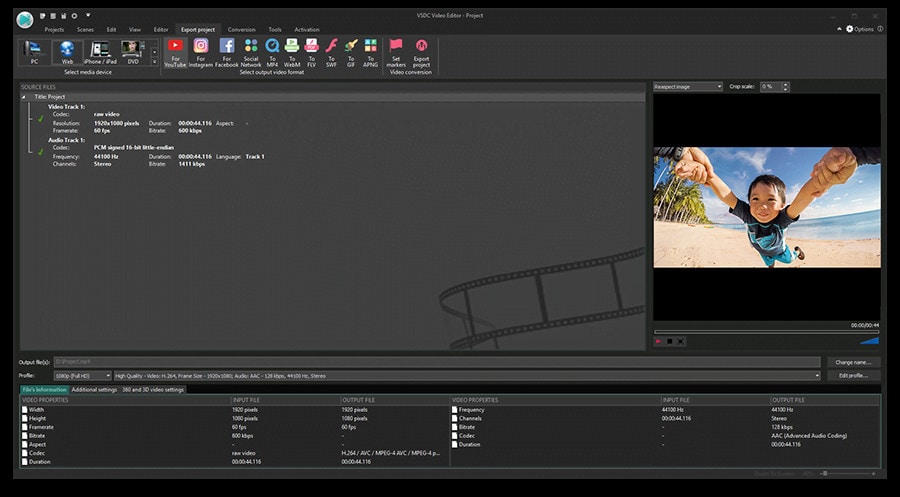
2. Adobe Premiere Pro:
Professional video editors use Premiere Pro to make everything from YouTube videos to Hollywood films like Mank, a 2021 Oscar candidate. It’s also widely utilized in the workflows of designers, animators, and VFX artists, and we can see why after lengthy testing.
We found the software’s UI to be simple to use, and it increased our productivity by separating things into various workspaces, such as editing, effects, and audio. When we tested it on both Mac and PC, we discovered that each workspace helps handle a specific activity while minimizing distraction.
Edit the FLV video with Adobe Premiere Pro using the following steps:
Step 1: Import the video and create initial sequence.
Step 2: In the Timeline, trim and rearrange clips, add audio, and transitions.
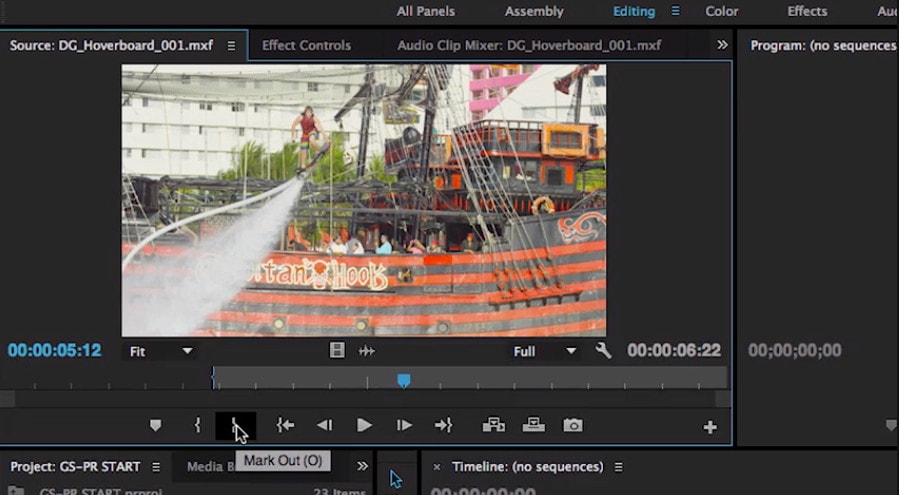
Step 3: Add title and graphics.
In Premiere Pro, you may make onscreen titles, as well as stylize and animate your images.
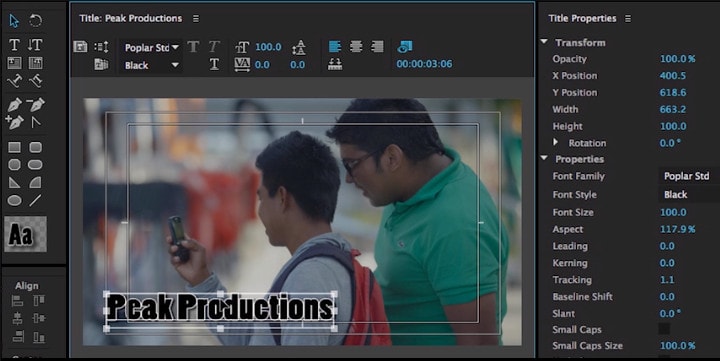
Step 4: Export your video.

Alternative Way to Edit FlV Video on Mac
1. Blender:
Under the GNU General Public License, Blender is a free, open-source 3D content production program that runs on all major operating systems. Blender is one of the greatest video editors for both Windows and Mac, with advanced features such as modifier-based modeling tools, powerful character animation capabilities, a node-based material, etc.
Because it is developed for professionals, it is tough to use as a beginner. However, it is unrestricted in its use and distribution. In addition, color options are changeable and versatile in the UI.
In contrast, this free video editor is perfect for semi-pros or those who want to enhance their video editing skills. However, you’ll need a lot of time and effort to learn it.
Step 1: Open the application.
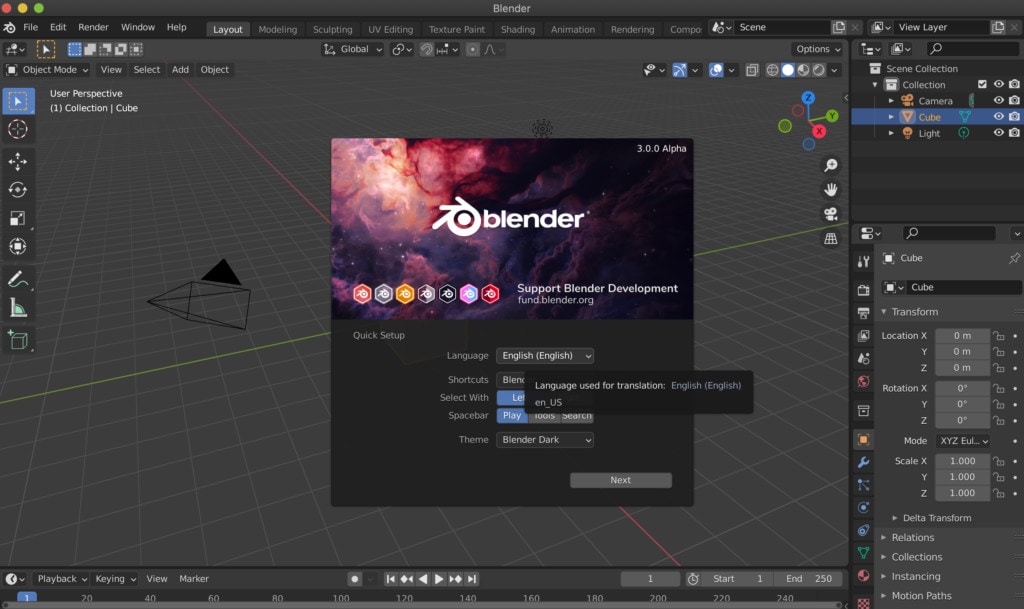
Step 2: Then, go into File->New->Video Editing to open the video editor.
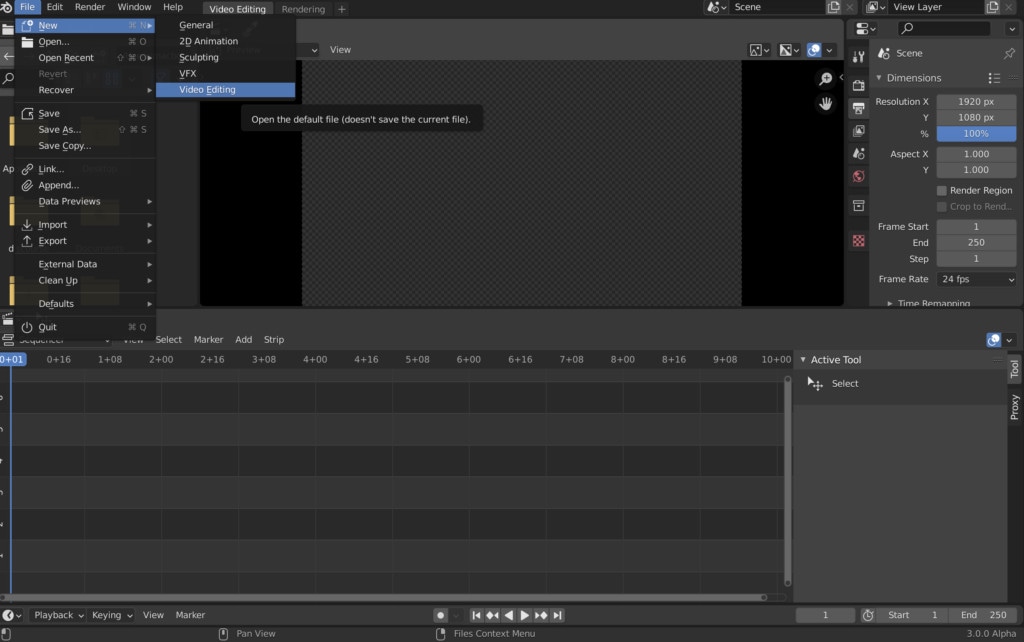
Step 3: Import the video and start editing using the editing tools.
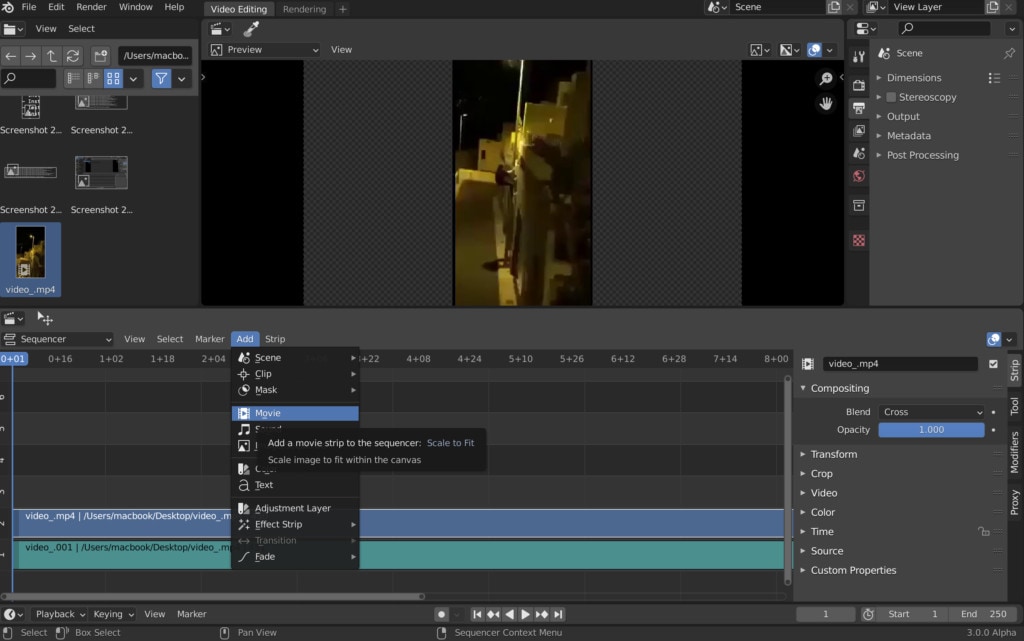
Step 4: Save and export the video.

2. Final Cut Pro:
When it comes to video editing software, Apple’s Final Cut Pro is one of the industry standards. As a result, it’s widely utilized in the television and film industries - at least among Mac users. However, one of the truly convincing reasons to choose it over Premiere Pro is because it is subscription-free: you only pay once.
The software’s Magnetic Timeline, grouping tools, a vast selection of effects, solid organizational capabilities, and simple ways to add and edit audio make it a favorite among professional video editors. 360° video, HDR, and powerful color correcting tools are among the other capabilities. It’s a strong software with a lot of features.
Follow the steps to edit FLV video using Final Cut Pro:
Step 1: Create Project.
To make a movie in Final Cut Pro, you must first establish a project, which keeps track of your editing selections and the media you utilize.
Step 2: Select and add clips to the timeline:
The second stage in making a movie with Final Cut Pro is to add and arrange clips in your project. In the timeline, you can move and reorder clips.
Step 3: Cut and trim video:
Final Cut Pro has a number of features for altering the start and stop points of clips in the timeline, as well as regulating the pacing of shots from one to the next.
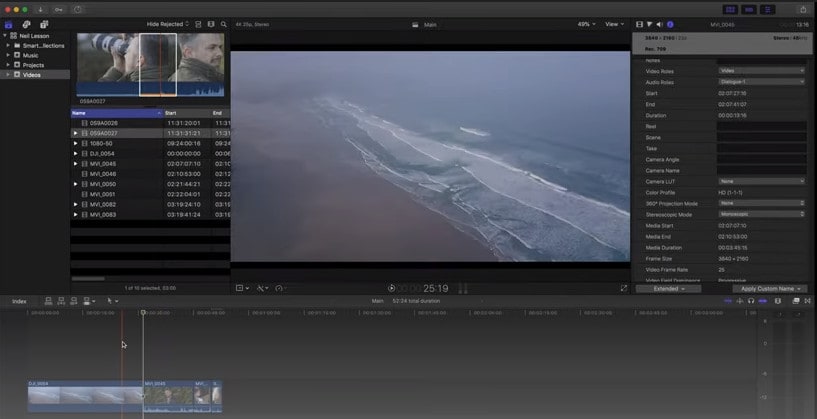
Step 4: Edit the video by adding effects and transitions:
Final Cut Pro includes a number of advanced editing features that make it simple to create a professional film. Visual enhancements and colour correction are among the finishing touches.

Step 5: Save and export video:
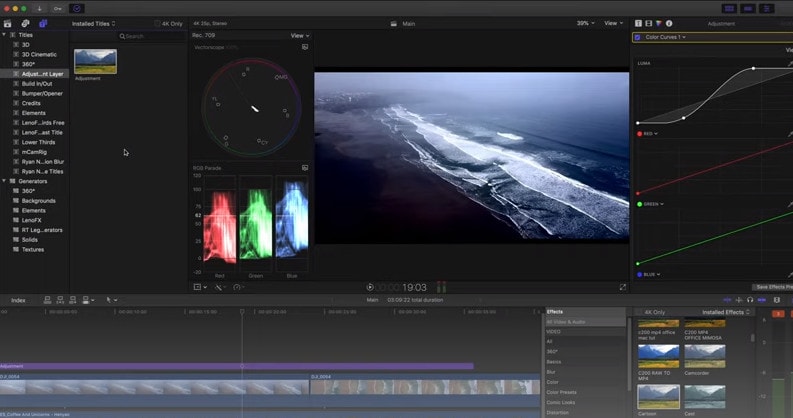
2 Ways to Edit FlV Video on Android:
1. Inshot:
For Android users, Inshot is a fantastic image and video editor. This Android video editor allows you to add popular stickers and emoticons to your films, making them more fashionable and unique.
The program supports HD video output, allowing you more control over your footage. Moreover, the additional sound and video can be synchronized with the available video chronology.
You can quickly blend more than two movies into one with rich effects and sound with this Android editor app. In addition, you can generate a watermark using unique text provided in the app, and subtitles support allow you to produce one with a variety of fonts.
Following are the steps that you can follow to edit FLV video using Inshot:
Step 1: Open the app and import the video.
Tap “Video” to open your phone’s gallery folder and begin editing a video in the InShot app. Select a video to work with. Adjust the canvass after your video has been loaded into the InShot App. For your other social media accounts, there are aspect ratios and sizes that work well with the video. It also has the option of being in portrait or landscape mode.
Step 2: Trim and split videos.
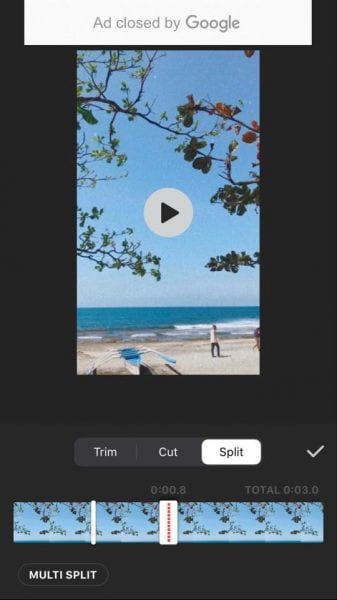
Step 3: Merge videos (optional):
By combining clips, you can combine them into a single film or project. Simply choose the videos you want to import from the drop-down menu. By tapping the “+” button on the lower left of the screen, you can insert and merge more videos. Your project will then be updated using the selected video.
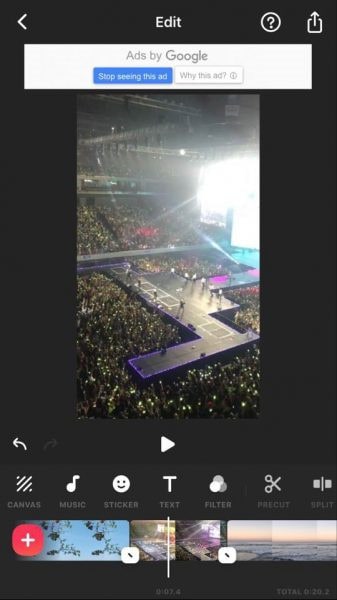
Step 4: Apply filters, add music, text and stickers.
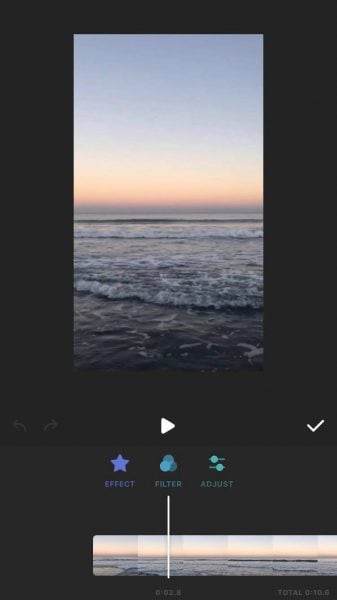
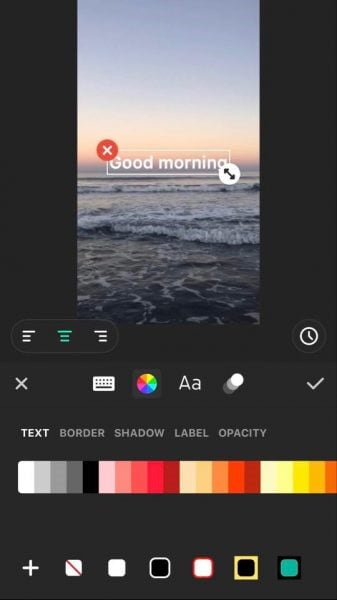
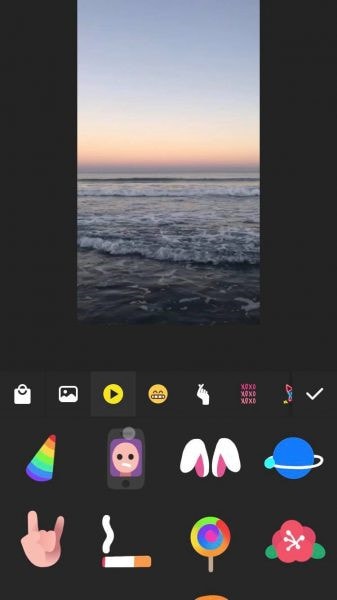
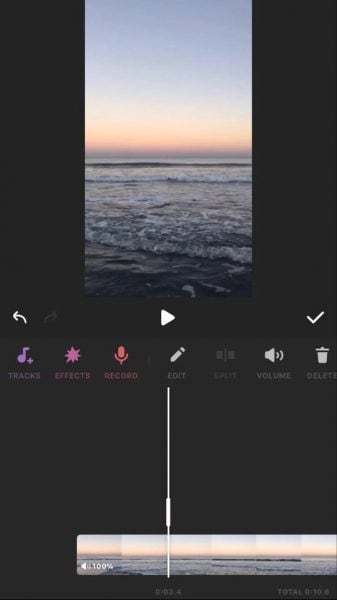
Step 5: Once you are done with the editing process, save the file.
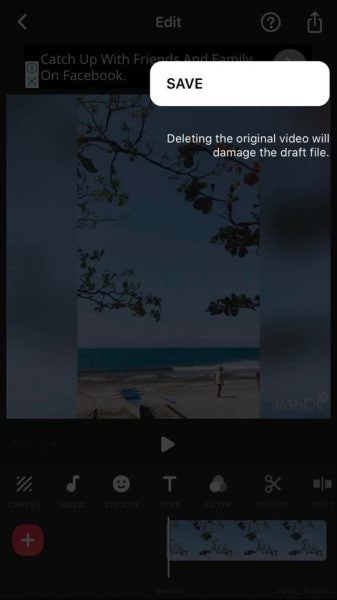
2. Videoshow:
VideoShow has a lot of video editing options. It is a simple and practical video editing program and movie scene maker for art directors and beginners. Using this video cutter, you may reverse, blur, duplicate, edit, merge and split collage clips or films.
You can also use VideoShow to adjust the audio or add subtitles to any video. It also allows you to use different filters on any video on your device. Over 50 intricate themes are included in the program, allowing you to create gorgeous music videos, slide shows, and vlogs in no time.
The annual subscription package is for $135.19, or you can also make a one-time purchase for $225.78.
However, to edit the video, you can use the following steps:
Step 1: Download and install the videoshow application and open it. Upload the video that you want to edit.
Step 2: Edit the video by applying filters or cutting and trimming the part of the video that you want to remove.
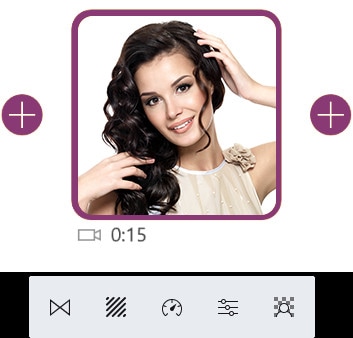
Step 3: Save changes and export the video to your preferred location.
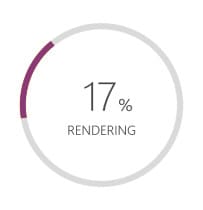
2 Ways to Edit FlV Video on iPhone:
1. LumaFusion:
No other software program on the iPhone comes close to the feature set that LumaFusion offers for video editing. It is the only premium app on this list, and it is well worth every penny.
But, of course, YouTubers aren’t the only ones who use the program; mobile journalists and professional video producers who don’t want to lug along their bulky camera equipment and editing apparatus also use it.
LumaFusion deals with up to six video and audio tracks for photographs, movies, audio, titles, and graphics, and six audio tracks for narration, music, and sound effects. You also receive a magnetic timeline; importing clips is a breeze once they’ve been imported.
There are many transitions and effects to choose from, all of which can be layered. Finally, it includes much royalty-free music, sound effects, and other assets. So if you need a professional video editing tool for your iPhone, LumaFusion ($29.99) is the way to go.
Follow these steps to edit FLV video using LumaFusion:
Step 1: To create your first project, press + at the bottom of the screen. You can create a new project by tapping that area or by tapping the Plus button.
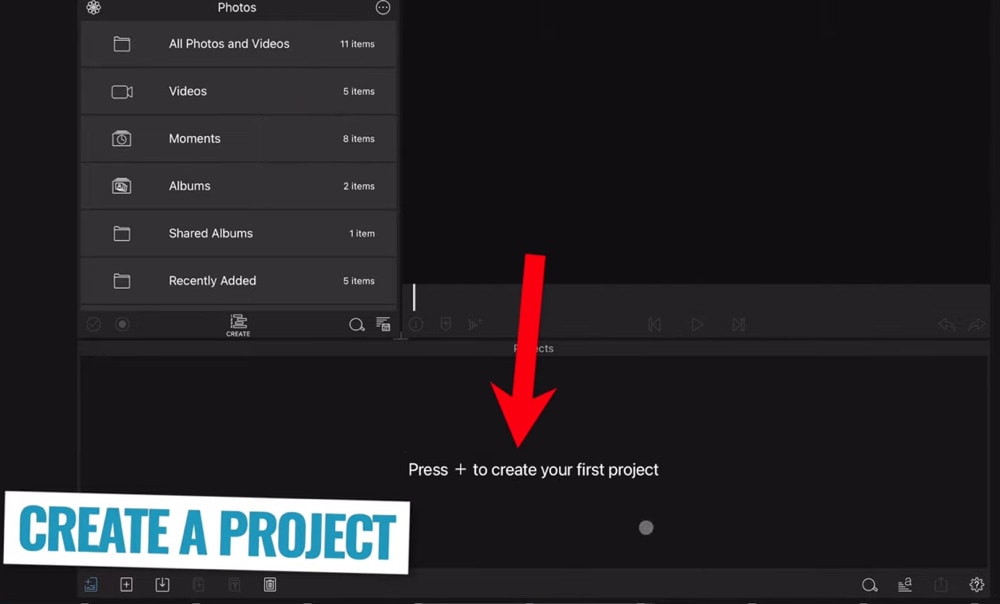
Step 2: Import video:
The Import section is located in the top left corner of the screen. This defaults to the Photos tab when you initially launch a new project. All of the photographs and videos can be seen here.
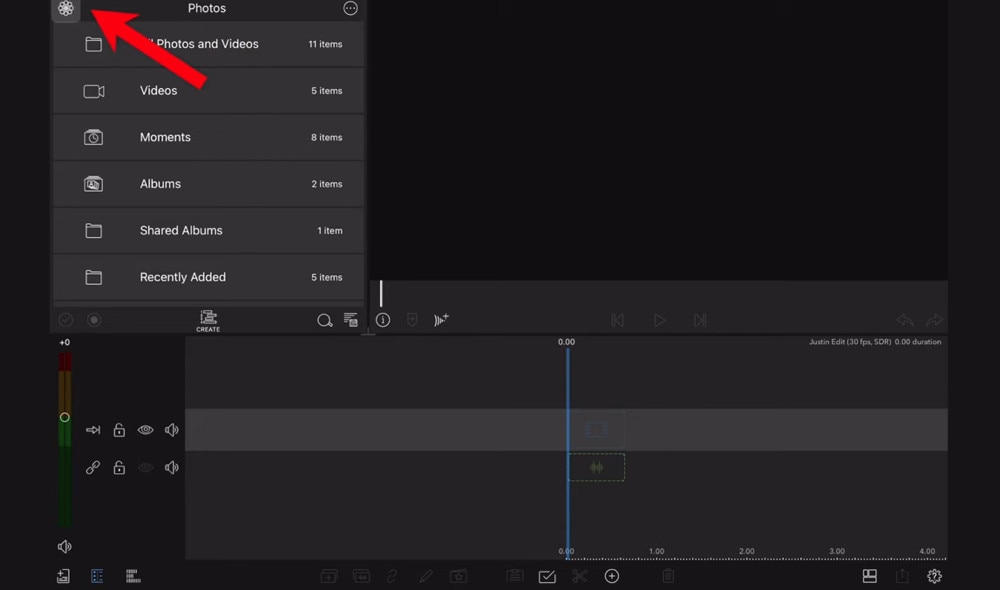
Step 3: Check layout and adjust volume levels
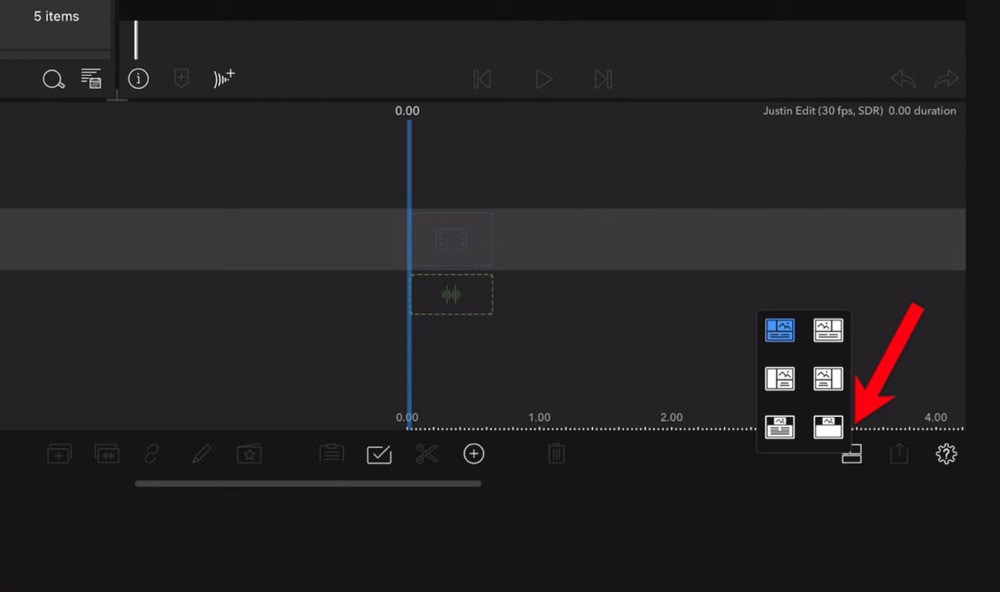
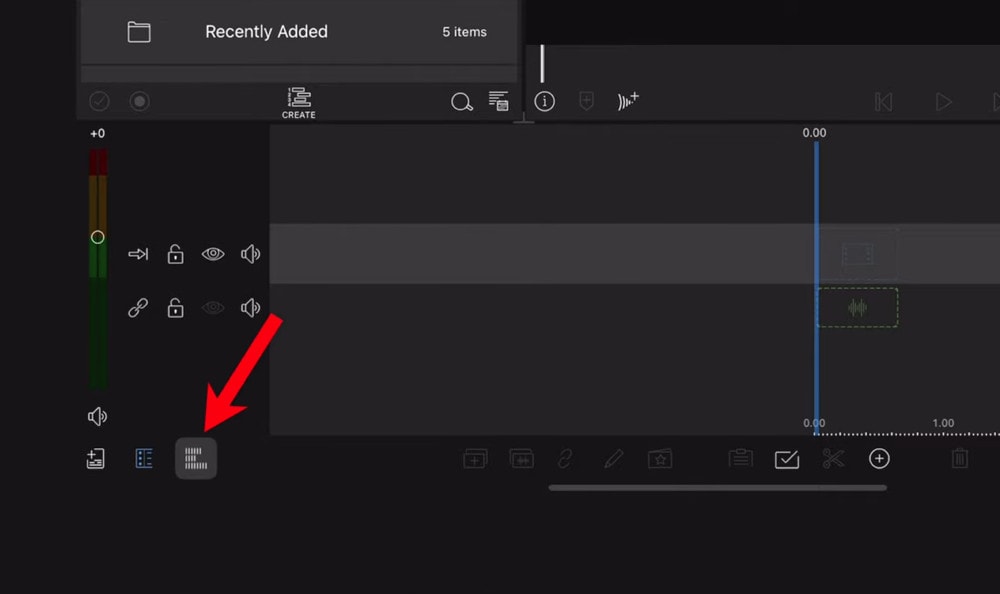
Step 4: Edit the video and add titles.
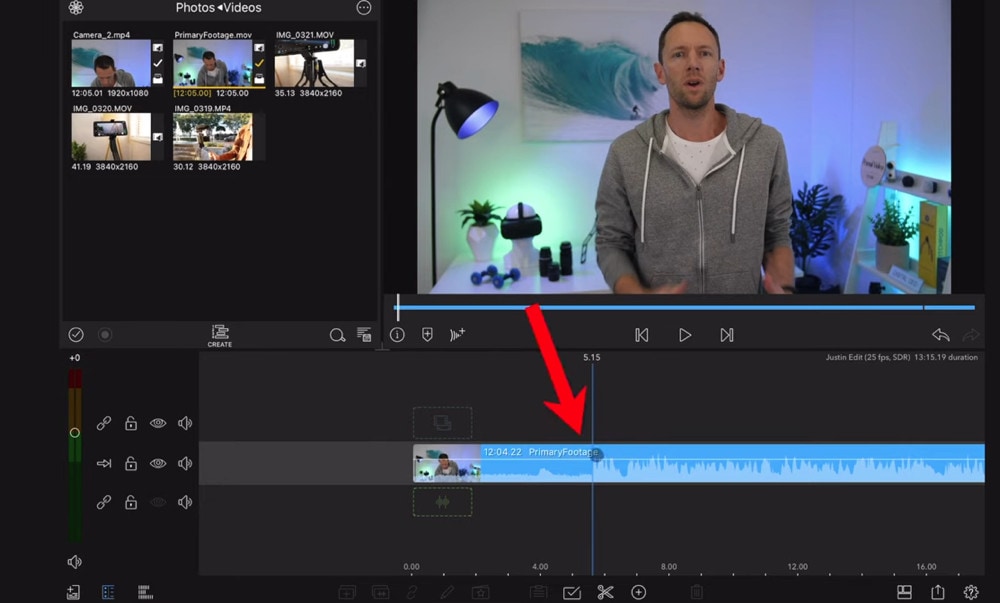
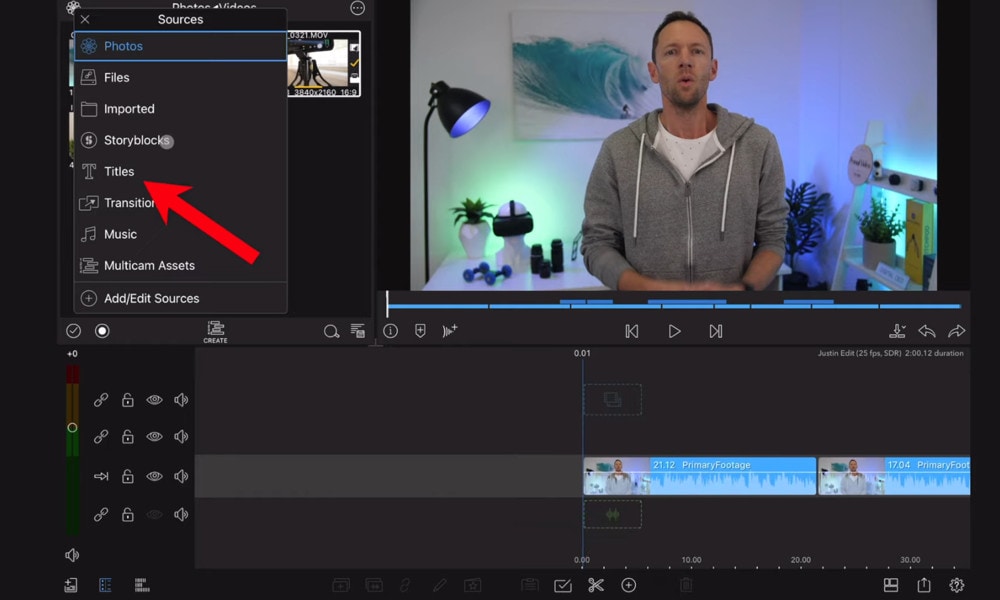
Step 5: Export the video.
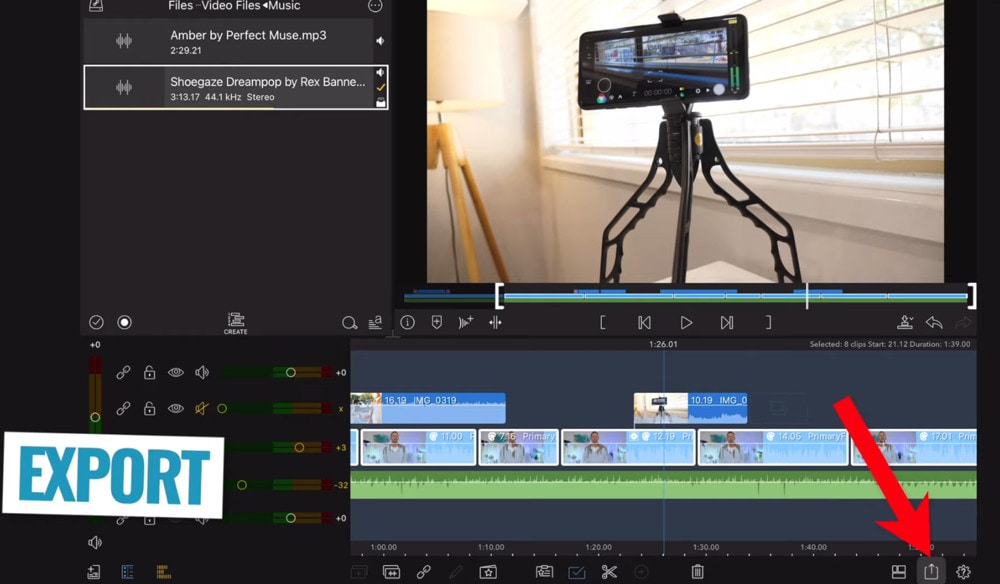
2. Filmora Go:
Without a doubt, Filmora is one of the greatest free video editors for iPhone that does not contain any watermarks. In addition, it’s compatible with both iPhones and Android devices and has a simple user interface.
Filmora is the greatest iPhone video editor for beginners, with themed filters and effects that add flair to your videos without any work.
Filmora has many unique features, including themes for your videos and ‘Materials,’ which are visual effects created by the program. Unfortunately, materials are only available with Filmora Pro, so keep that in mind.
Aside from that, you’ll find all of the typical features here. You can also add titles to videos, utilize stickers and effects, and add music to the background of your movie. You may also add another clip in picture-in-picture mode, which is beneficial.
Below are the following steps to edit FLV video:
Step 1: Open the application and select ‘Create new video’. Now, import the video by choosing the video icon.
Step 2: Edit the video. Within the edit tool, you can trim and split the video. You can also improve the video quality by adding titles, transitions, and music, and voiceovers.

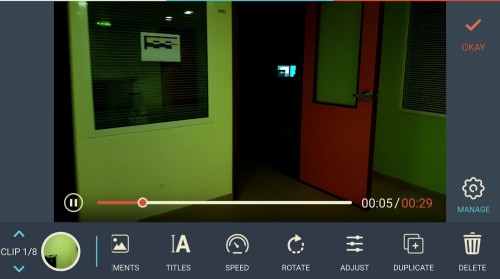

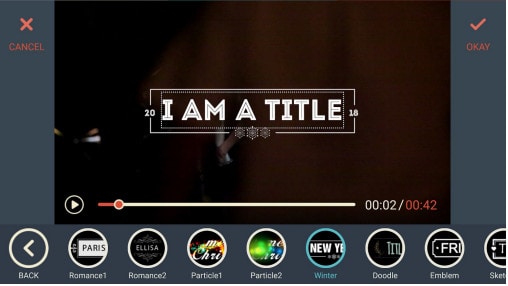
Step 3: After editing the video, select ‘SAVE’ and export the video or download it.
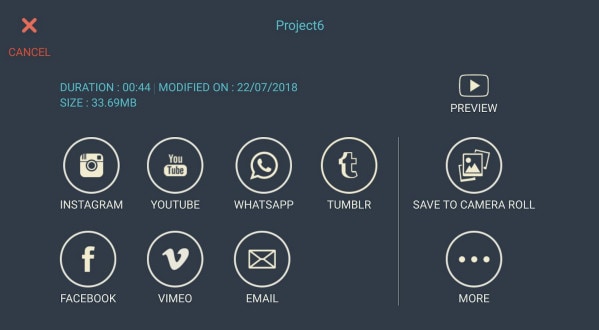
2 Ways to Edit FlV Video Online:
1. Fastreel:
If you’re seeking the finest free online video editor, Fastreel is a terrific tool to start with. This online video editing software provides a wide range of editing options. It can merge, edit, crop, and compress videos to make sharing easier.
It also includes many pre-made templates that you can change to create titles and transitions and other editing features like reverse, looping, and rotating. It’s also quite simple to use, and you can have polished videos in minutes.
There are also numerous pricing options to suit different customers, ranging from a completely free plan with watermarks to paid subscriptions with no limitations.
Use the following steps to edit FLV video:
Step 1: Open Fastreel web and import the video.
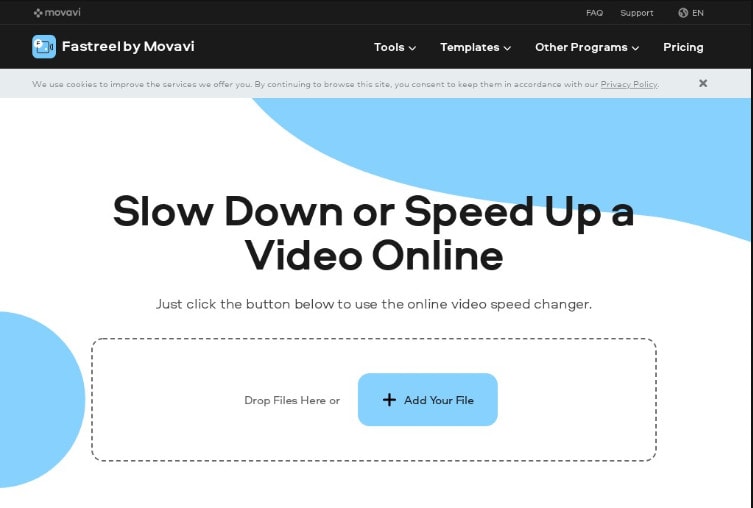
Step 2: Use templates to make it look attractive.
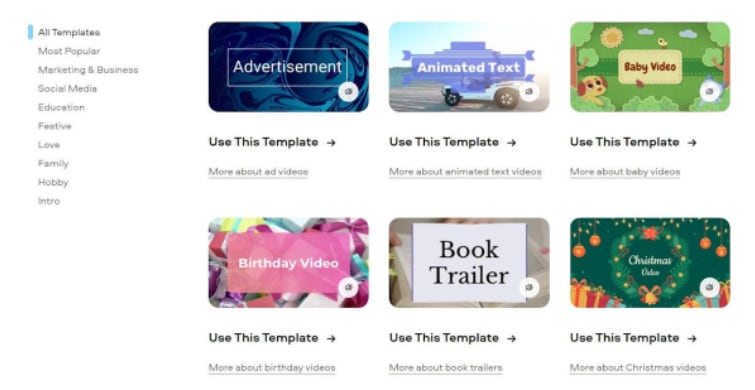
Step 3: Edit the video using the template.
Templates are unfinished videos with all of the effects already applied, such as backdrops, transitions, animated stickers, and titles. There are blank spots for your photos or videos, and you can arrange them in any sequence you like. You can also add music from the Fastreel library or upload your own track after entering your text.
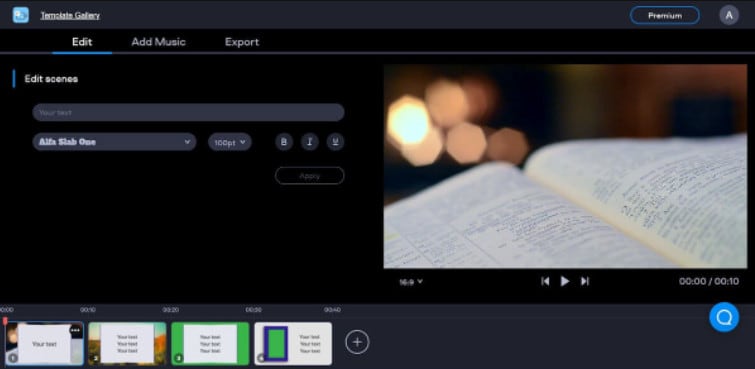
Step 4: Once you are done with edits, save the video and export it.
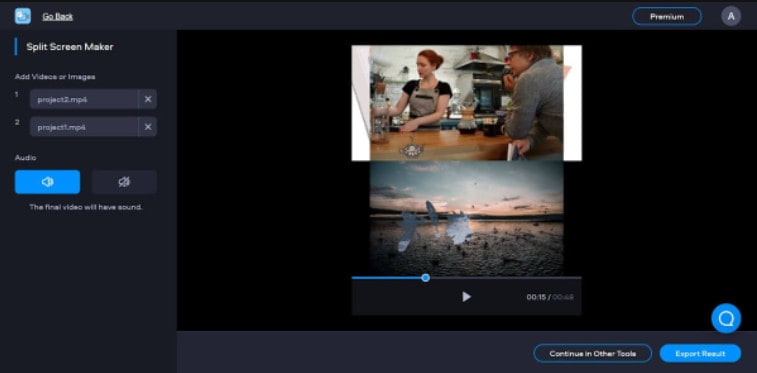
2. WeVideo:
When you’re seeking the greatest video producer online, another wonderful choice to explore is WeVideo.
Google, Dropbox, Rover, and Roche are just a few of the huge names that trust our online editor. Its fast, versatile editing engine and vast stock content collection for adding stock movies, photos, and audio tracks to your productions are ideal for business users.
WeVideo also stands out since it provides unlimited cloud storage for all of your videos, which you can download and watch on any device. The only drawback is that all of this comes at a price, with WeVideo offering a variety of payment plans ranging from $4.99 to $36.99 a month.
Follow the steps to edit videos using WeVideo:
Step 1: Open WeVideo and import the video file.
Step 2: Click on create new video in the left-hand corner of the screen.
Step 3: Edit the video.
The video clip you imported will appear in the viewing window to the right once you click on it. By moving the arrows and either end, you can edit out the beginning or end of your footage.
- Drag the clip into your timeline from your media pool.
- Place the clip on your timeline by dragging and dropping it.
- Click the scissor symbol after moving the blue marker to the spot where you want to cut your clip.
- Once the material has been chopped, you can erase bits of it by selecting it with your mouse and then pressing delete on your keyboard or rearrange the clips in the timeline by dragging and dropping them to other positions.
Step 4: Add effects, transitions, and music to the video.
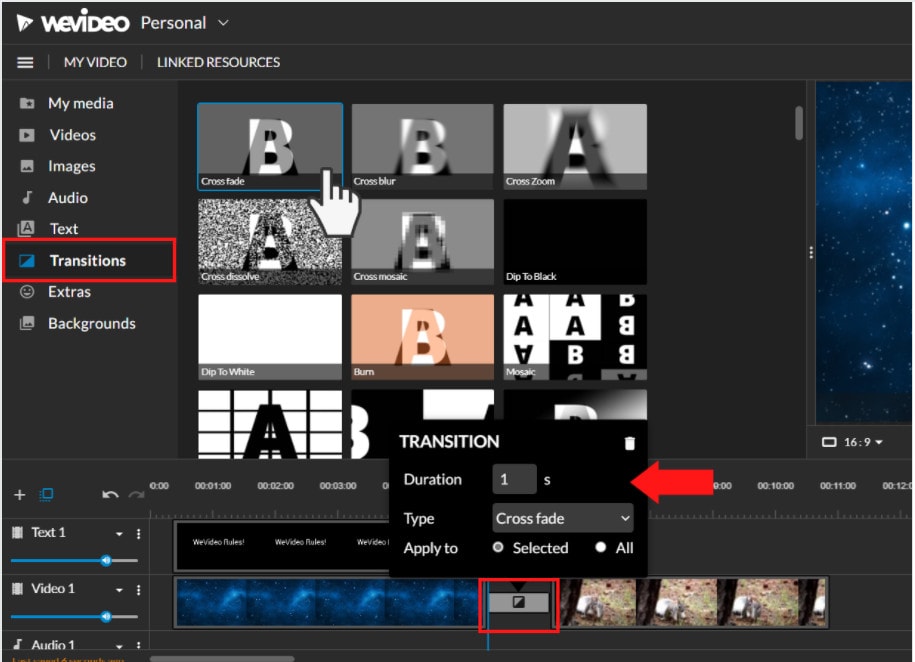
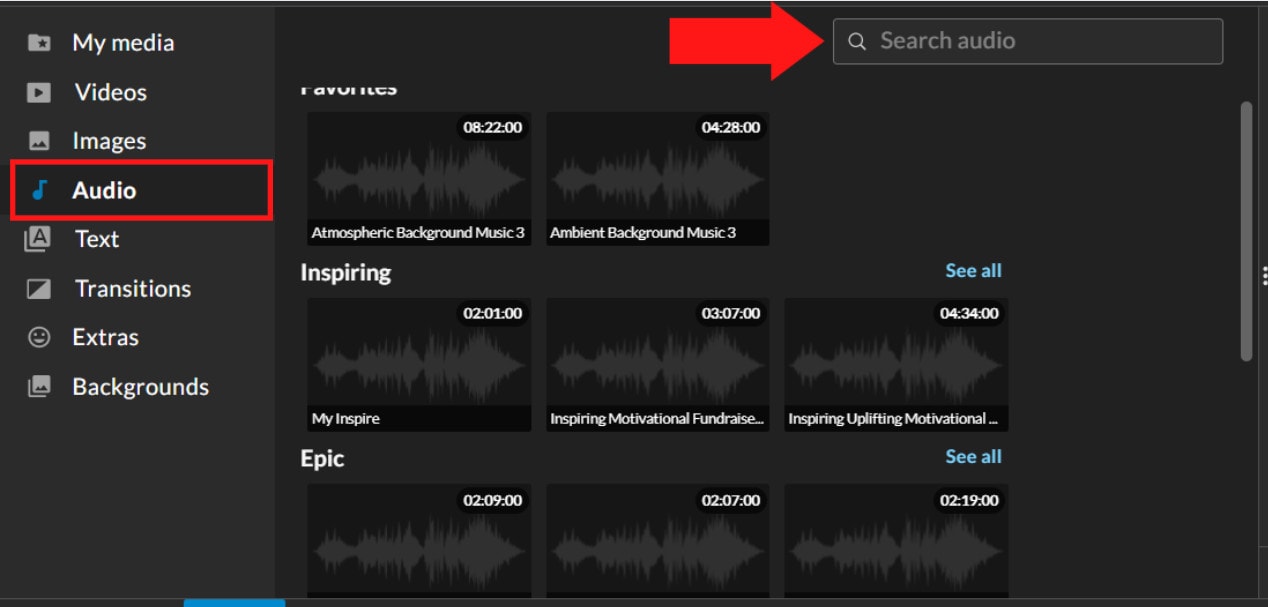
Step 5: Save and export the video by clicking on the Finish tab.
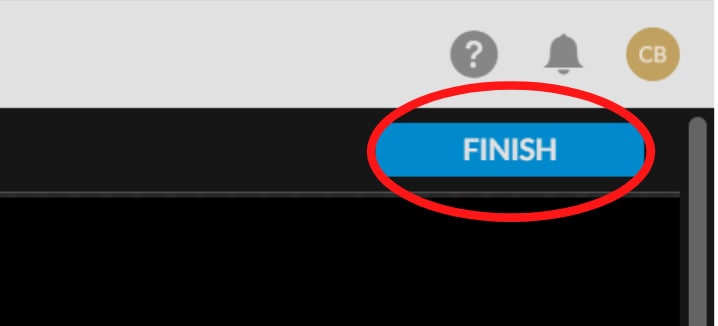
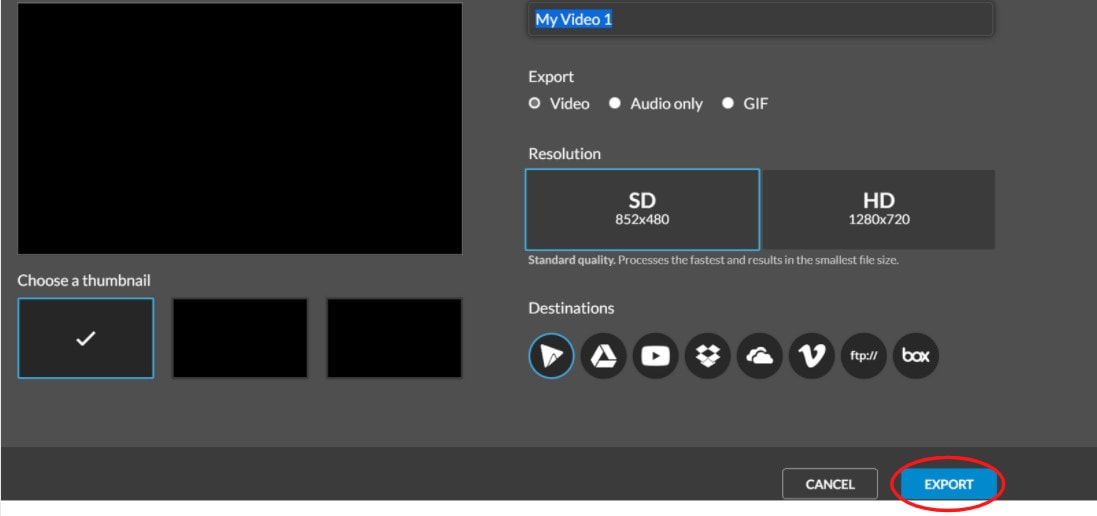
FAQs about editing FLV video
- How to open FLV files?
Any FLV player is required to view FLV files. Various players are available, including VLC, FLV Player, Sothink FLV Player for Mac, Tonec Free FLV Player, Any FLV Player, and others.
- Is Filmora compatible with Mac?
Filmora requires macOS Sierra (version 10.12) or later and the Big Sur (version 11) and Apple M1 chips. Touch Bar compatibility for MacBook Pro users and custom shortcuts to speed up editing.
- What is the best online FLV editor?
There are numerous free online editors to choose from. Fastreel, WeVideo, and FlexClip Video Maker are a few of the most popular.
- Is FLV better than MP4?
Because FLV and MP4 are the two most popular video file formats, it’s crucial to know which one is preferable. Adobe’s proprietary format is FLV. Both formats employ video and audio codecs and have equal performance levels. In their unprocessed state, MP4 files are more adaptable. You can, however, use an FLV file at the same time if you have the correct player.
- How do I choose a video editor?
When comparing video editing software, there are six crucial elements to consider.
- Budget and cost
- Ease of use/learning curve
- Multi-GPGPU acceleration and video format support
- Tools for advanced editing
- Music, special effects, and other goodies
- Customer service is second to none.
For macOS 10.14 or later
Therefore, you can use the following steps to edit FLV video on Windows and Mac:
Step 1: Import file:
Step 2: Edit the FLV file:
Acquire the perfect tool in your palm for anything you want to do, such as clipping, cropping, rotating, and more.
Furthermore, all editing capabilities in the toolbar allow drag-and-drop, making it even easier to touch up your films quickly. Consider the following scenario:
- Drag and drop a transition into the video/photo, or right-click it and select “Apply to All.”
- Please drag & drop a title template to the position where you want it to appear, then adjust it.
- To use the effects, select one from the 50+ available video effects, select it, and apply it to your photos/videos instantaneously.
Step 3: Save or Export the file:
When you’re done, export your modified MP4 files to Windows/Mac and quickly share them on YouTube, with the option of sending a message to Facebook and Twitter. When you click Create in the program window’s middle right corner, you’ll be taken to the Output window below.
Alternative Way to Edit FlV Video on Windows
1. VSDC
VSDC is a free video editor along with a lot of advanced features. Cut, combine, trim, crop, and other editing capabilities are available to help you polish your FLV films.
Although it may not look logical, learning the editing capabilities hidden within modular boxes is simple. One noteworthy aspect of VSDC is its ability to produce good visual effects using many trendy video effects, transitions, and filters.
Furthermore, strong chroma keys, color correction, object modification, and other editing tools can be utilized to edit FLV videos. It not only creates excellent FLV videos, but it also supports a wide range of media conversion, allowing you to convert FLV files to various formats and export them without a watermark.
Therefore, follow the below mentioned steps to edit FLV video using VSDC:
Step 1: Install the software on the Windows. Open the application and import the video.
Step 2: Use cutting and splitting tools to edit the video.
The first icon is a picture of a pair of scissors, which is a cutting tool. It’s very useful when you need to cut the beginning or end of a film. Place the cursor exactly where you want to cut, then select “Trim start” or “Trim finish” from the dropdown cutting menu (the small triangle next to the scissors icon).
Cropping is also simple. If you have too much additional space around the scene object recorded, just choose the file you want to trim and select the cropping icon from the “Cutting and Splitting” option. A new window will appear, allowing you to select the region of the scene that should stay.
Step 3: Apply effects and transitions.
To use one, first select the video file you wish to edit, then go to the Video effects tab and select the effect you want to use. On the timeline, a new tab will appear, containing all of the effects done to the selected object. You can alter the effect’s duration and position in time by dragging it with the mouse there. The properties pane on the right-hand side can be used to change other parameters.
Transitions follow the same rule. Place your cursor where you want the transition to begin, then choose a transition from the Video effects dropdown menu and manually adjust the duration.
Step 4: Save changes and export video.
Make sure your movie appears exactly how you want it to before exporting it. If the video appears choppy, use the red preview button and lower the preview quality. When the PC’s resources are insufficient to process the video in real time, lagging can occur. Keep in mind that it has no bearing on the outcome. When you’re finished, navigate to the Export project tab and select an export format.
2. Adobe Premiere Pro:
Professional video editors use Premiere Pro to make everything from YouTube videos to Hollywood films like Mank, a 2021 Oscar candidate. It’s also widely utilized in the workflows of designers, animators, and VFX artists, and we can see why after lengthy testing.
We found the software’s UI to be simple to use, and it increased our productivity by separating things into various workspaces, such as editing, effects, and audio. When we tested it on both Mac and PC, we discovered that each workspace helps handle a specific activity while minimizing distraction.
Edit the FLV video with Adobe Premiere Pro using the following steps:
Step 1: Import the video and create initial sequence.
Step 2: In the Timeline, trim and rearrange clips, add audio, and transitions.
Step 3: Add title and graphics.
In Premiere Pro, you may make onscreen titles, as well as stylize and animate your images.
Step 4: Export your video.
Alternative Way to Edit FlV Video on Mac
1. Blender:
Under the GNU General Public License, Blender is a free, open-source 3D content production program that runs on all major operating systems. Blender is one of the greatest video editors for both Windows and Mac, with advanced features such as modifier-based modeling tools, powerful character animation capabilities, a node-based material, etc.
Because it is developed for professionals, it is tough to use as a beginner. However, it is unrestricted in its use and distribution. In addition, color options are changeable and versatile in the UI.
In contrast, this free video editor is perfect for semi-pros or those who want to enhance their video editing skills. However, you’ll need a lot of time and effort to learn it.
Step 1: Open the application.
Step 2: Then, go into File->New->Video Editing to open the video editor.
Step 3: Import the video and start editing using the editing tools.
Step 4: Save and export the video.
2. Final Cut Pro:
When it comes to video editing software, Apple’s Final Cut Pro is one of the industry standards. As a result, it’s widely utilized in the television and film industries - at least among Mac users. However, one of the truly convincing reasons to choose it over Premiere Pro is because it is subscription-free: you only pay once.
The software’s Magnetic Timeline, grouping tools, a vast selection of effects, solid organizational capabilities, and simple ways to add and edit audio make it a favorite among professional video editors. 360° video, HDR, and powerful color correcting tools are among the other capabilities. It’s a strong software with a lot of features.
Follow the steps to edit FLV video using Final Cut Pro:
Step 1: Create Project.
To make a movie in Final Cut Pro, you must first establish a project, which keeps track of your editing selections and the media you utilize.
Step 2: Select and add clips to the timeline:
The second stage in making a movie with Final Cut Pro is to add and arrange clips in your project. In the timeline, you can move and reorder clips.
Step 3: Cut and trim video:
Final Cut Pro has a number of features for altering the start and stop points of clips in the timeline, as well as regulating the pacing of shots from one to the next.
Step 4: Edit the video by adding effects and transitions:
Final Cut Pro includes a number of advanced editing features that make it simple to create a professional film. Visual enhancements and colour correction are among the finishing touches.
Step 5: Save and export video:
2 Ways to Edit FlV Video on Android:
1. Inshot:
For Android users, Inshot is a fantastic image and video editor. This Android video editor allows you to add popular stickers and emoticons to your films, making them more fashionable and unique.
The program supports HD video output, allowing you more control over your footage. Moreover, the additional sound and video can be synchronized with the available video chronology.
You can quickly blend more than two movies into one with rich effects and sound with this Android editor app. In addition, you can generate a watermark using unique text provided in the app, and subtitles support allow you to produce one with a variety of fonts.
Following are the steps that you can follow to edit FLV video using Inshot:
Step 1: Open the app and import the video.
Tap “Video” to open your phone’s gallery folder and begin editing a video in the InShot app. Select a video to work with. Adjust the canvass after your video has been loaded into the InShot App. For your other social media accounts, there are aspect ratios and sizes that work well with the video. It also has the option of being in portrait or landscape mode.
Step 2: Trim and split videos.
Step 3: Merge videos (optional):
By combining clips, you can combine them into a single film or project. Simply choose the videos you want to import from the drop-down menu. By tapping the “+” button on the lower left of the screen, you can insert and merge more videos. Your project will then be updated using the selected video.
Step 4: Apply filters, add music, text and stickers.
Step 5: Once you are done with the editing process, save the file.
2. Videoshow:
VideoShow has a lot of video editing options. It is a simple and practical video editing program and movie scene maker for art directors and beginners. Using this video cutter, you may reverse, blur, duplicate, edit, merge and split collage clips or films.
You can also use VideoShow to adjust the audio or add subtitles to any video. It also allows you to use different filters on any video on your device. Over 50 intricate themes are included in the program, allowing you to create gorgeous music videos, slide shows, and vlogs in no time.
The annual subscription package is for $135.19, or you can also make a one-time purchase for $225.78.
However, to edit the video, you can use the following steps:
Step 1: Download and install the videoshow application and open it. Upload the video that you want to edit.
Step 2: Edit the video by applying filters or cutting and trimming the part of the video that you want to remove.
Step 3: Save changes and export the video to your preferred location.
2 Ways to Edit FlV Video on iPhone:
1. LumaFusion:
No other software program on the iPhone comes close to the feature set that LumaFusion offers for video editing. It is the only premium app on this list, and it is well worth every penny.
But, of course, YouTubers aren’t the only ones who use the program; mobile journalists and professional video producers who don’t want to lug along their bulky camera equipment and editing apparatus also use it.
LumaFusion deals with up to six video and audio tracks for photographs, movies, audio, titles, and graphics, and six audio tracks for narration, music, and sound effects. You also receive a magnetic timeline; importing clips is a breeze once they’ve been imported.
There are many transitions and effects to choose from, all of which can be layered. Finally, it includes much royalty-free music, sound effects, and other assets. So if you need a professional video editing tool for your iPhone, LumaFusion ($29.99) is the way to go.
Follow these steps to edit FLV video using LumaFusion:
Step 1: To create your first project, press + at the bottom of the screen. You can create a new project by tapping that area or by tapping the Plus button.
Step 2: Import video:
The Import section is located in the top left corner of the screen. This defaults to the Photos tab when you initially launch a new project. All of the photographs and videos can be seen here.
Step 3: Check layout and adjust volume levels
Step 4: Edit the video and add titles.
Step 5: Export the video.
2. Filmora Go:
Without a doubt, Filmora is one of the greatest free video editors for iPhone that does not contain any watermarks. In addition, it’s compatible with both iPhones and Android devices and has a simple user interface.
Filmora is the greatest iPhone video editor for beginners, with themed filters and effects that add flair to your videos without any work.
Filmora has many unique features, including themes for your videos and ‘Materials,’ which are visual effects created by the program. Unfortunately, materials are only available with Filmora Pro, so keep that in mind.
Aside from that, you’ll find all of the typical features here. You can also add titles to videos, utilize stickers and effects, and add music to the background of your movie. You may also add another clip in picture-in-picture mode, which is beneficial.
Below are the following steps to edit FLV video:
Step 1: Open the application and select ‘Create new video’. Now, import the video by choosing the video icon.
Step 2: Edit the video. Within the edit tool, you can trim and split the video. You can also improve the video quality by adding titles, transitions, and music, and voiceovers.
Step 3: After editing the video, select ‘SAVE’ and export the video or download it.
2 Ways to Edit FlV Video Online:
1. Fastreel:
If you’re seeking the finest free online video editor, Fastreel is a terrific tool to start with. This online video editing software provides a wide range of editing options. It can merge, edit, crop, and compress videos to make sharing easier.
It also includes many pre-made templates that you can change to create titles and transitions and other editing features like reverse, looping, and rotating. It’s also quite simple to use, and you can have polished videos in minutes.
There are also numerous pricing options to suit different customers, ranging from a completely free plan with watermarks to paid subscriptions with no limitations.
Use the following steps to edit FLV video:
Step 1: Open Fastreel web and import the video.
Step 2: Use templates to make it look attractive.
Step 3: Edit the video using the template.
Templates are unfinished videos with all of the effects already applied, such as backdrops, transitions, animated stickers, and titles. There are blank spots for your photos or videos, and you can arrange them in any sequence you like. You can also add music from the Fastreel library or upload your own track after entering your text.
Step 4: Once you are done with edits, save the video and export it.
2. WeVideo:
When you’re seeking the greatest video producer online, another wonderful choice to explore is WeVideo.
Google, Dropbox, Rover, and Roche are just a few of the huge names that trust our online editor. Its fast, versatile editing engine and vast stock content collection for adding stock movies, photos, and audio tracks to your productions are ideal for business users.
WeVideo also stands out since it provides unlimited cloud storage for all of your videos, which you can download and watch on any device. The only drawback is that all of this comes at a price, with WeVideo offering a variety of payment plans ranging from $4.99 to $36.99 a month.
Follow the steps to edit videos using WeVideo:
Step 1: Open WeVideo and import the video file.
Step 2: Click on create new video in the left-hand corner of the screen.
Step 3: Edit the video.
The video clip you imported will appear in the viewing window to the right once you click on it. By moving the arrows and either end, you can edit out the beginning or end of your footage.
- Drag the clip into your timeline from your media pool.
- Place the clip on your timeline by dragging and dropping it.
- Click the scissor symbol after moving the blue marker to the spot where you want to cut your clip.
- Once the material has been chopped, you can erase bits of it by selecting it with your mouse and then pressing delete on your keyboard or rearrange the clips in the timeline by dragging and dropping them to other positions.
Step 4: Add effects, transitions, and music to the video.
Step 5: Save and export the video by clicking on the Finish tab.
FAQs about editing FLV video
- How to open FLV files?
Any FLV player is required to view FLV files. Various players are available, including VLC, FLV Player, Sothink FLV Player for Mac, Tonec Free FLV Player, Any FLV Player, and others.
- Is Filmora compatible with Mac?
Filmora requires macOS Sierra (version 10.12) or later and the Big Sur (version 11) and Apple M1 chips. Touch Bar compatibility for MacBook Pro users and custom shortcuts to speed up editing.
- What is the best online FLV editor?
There are numerous free online editors to choose from. Fastreel, WeVideo, and FlexClip Video Maker are a few of the most popular.
- Is FLV better than MP4?
Because FLV and MP4 are the two most popular video file formats, it’s crucial to know which one is preferable. Adobe’s proprietary format is FLV. Both formats employ video and audio codecs and have equal performance levels. In their unprocessed state, MP4 files are more adaptable. You can, however, use an FLV file at the same time if you have the correct player.
- How do I choose a video editor?
When comparing video editing software, there are six crucial elements to consider.
- Budget and cost
- Ease of use/learning curve
- Multi-GPGPU acceleration and video format support
- Tools for advanced editing
- Music, special effects, and other goodies
- Customer service is second to none.
Also read:
- Are You the One Who Is Confused About What to Opt Between Camtasia vs Captivate? No More Confusion! Here We Are Going to Reveal the Answer to Camtasia vs Captivate Which Is Better? Learn More
- New The Most Efficient Ways to Manage Your Timeline for 2024
- Do You Need More Time to Explain a Particular Screen or Moment in Your Recording Using an Extended Freeze-Frame? Learn How to Use Camtasia Freeze-Frame to Extend Parts of a Video Effectively
- Updated Mask Tracking Is Believed to Be a Helpful Procedure for Marking Proper Areas in Videos. Learn How to Perform Premiere Pro Mask Tracking in This Guide
- Updated Wondering About How to Easily Create a Slideshow on Your iPhone? Well, Take Note of some of the Finest Apps to Turn Your Vision Into Reality
- New How To Make a Video by Mouse in Filmora for 2024
- 2024 Approved Ultimate Guide on Converting Word to SRT
- Updated 10 Best Slow-Motion Cameras to Try for 2024
- How to Create Educational Teaching Videos in An Outstanding Way for 2024
- Updated Progressive Solutions to Add VHS Effects to Video with Ease for 2024
- Updated How to Apply Gaussian Blur Effect to Videos In Premiere Pro?
- 2024 Approved 8 Unexpected Ways to Add Emoji to Photo Online
- How to Create an Adobe Slideshow the Easy Way for 2024
- Updated Have You Ever Watched YouTube Live Streams? In Fact, You Can Also Start a Live Streaming on YouTube if You Want. Here Well Share some Tips to Live Stream on YouTube
- Updated How to Make Dynamic Video Collages?
- Updated Want to Add Freeze Frame Effect to Your Video on Your Device? Here Are the Steps to Add Freeze Frame on PC, Mac, Smartphone as Well as Online From Any Device
- How to Do Velocity Edits on PC for 2024
- New 2024 Approved How to Make Flying Objects in Wondershare Filmora
- 2024 Approved Mask Tracking Is Believed to Be a Helpful Procedure for Marking Proper Areas in Videos. Learn How to Perform Premiere Pro Mask Tracking in This Guide
- 2024 Approved Do You Want to Crop a TikTok Video? In This Article, We Will Provide You with Detailed Steps Through Which You Can Discover How to Crop TikTok Videos Easily
- In 2024, Powerpoint Supported Video Format and User Tips
- 2024 Approved 5 Methods to Denoise a Video
- 2024 Approved How to Make A Fantastic Café Vlog
- Learn to Merge Clips in DaVinci Resolve with Simple Steps for 2024
- How to Make a Smooth Speed Ramping in Premiere Pro, In 2024
- In 2024, Top 10 Best Free Video Compressors
- Updated As a Designer, Color Is the Most Powerful and the Most Diverse Tool at Your Disposal. Here Are Ten Matching Color Combinations to Get You Started on Your Next Project
- How to Got Free After Effects Templates Slideshow with Simple Trick for 2024
- New 2024 Approved 10 Crazy-Cool Examples of AR Video
- Updated 2024 Approved TOP 10 Types of Video Framing From Novice to Master
- Updated Easy Way to Combine Several Xvid Files Into One Windows, Mac,Android
- Updated Do You Wish to Design the Perfect Slow-Motion Video on Your Smartphone? Learn some Top-Rated Free Slow-Mo Apps for Android and iOS Users in This Article
- Updated Best Image (JPG/PNG) to GIF Converters for 2024
- In 2024, Create the Night-to-Day Effect Videos
- New 2024 Approved How to Loop YouTube Videos on iPhone
- Updated 2024 Approved How to Create an Instant Slideshow on Mac
- Updated In 2024, How to Create An Eye-Catching Intro Videos with InVideo
- New In 2024, Quick Answer What Is a GIF File?
- Updated Understanding the Dynamics Underlying in AI Slow Motion Editing
- Updated 2024 Approved A Guide to Speed up a Video on Splice
- New Cropping Videos in VLC Step by Step
- New What Are the Best Video Background Changers Online, In 2024
- In 2024, How to Loop Videos with iMovie
- Updated In 2024, How to Speed Up Pictures on TikTok Slideshow
- 2024 Approved Lets Introduce the Top 5 Applications to Add a Song to a Video for Free with some Amazing Sound and Visual Effects
- Methods on How to Speed Up Video on Splice
- Updated Do You Want to Print Designs Onto Your Garments or Other Fashion Accessories? Find Out How to Create a Screen Print Effect in Photoshop to Give Your Text or Graphics a Vintage or Retro Look
- In 2024, How to Send and Fake Live Location on Facebook Messenger Of your Xiaomi Redmi Note 12 Pro+ 5G | Dr.fone
- In 2024, 15 Best Strongest Pokémon To Use in Pokémon GO PvP Leagues For Oppo Find X7 Ultra | Dr.fone
- How Can We Unlock Our Nokia Phone Screen?
- How To Repair System of Apple iPhone 7 Plus? | Dr.fone
- In 2024, How to Transfer Data from Honor Play 8T to Any iOS Devices | Dr.fone
- How to Repair a Damaged video file of Xiaomi Redmi Note 13 5G using Video Repair Utility on Mac?
- How To Transfer Data From iPhone 15 Plus To Other iPhone? | Dr.fone
- Mastering Android Device Manager The Ultimate Guide to Unlocking Your Samsung Galaxy S24 Ultra Device
- The Ultimate Guide to Bypassing iCloud Activation Lock from iPhone XS Max
- A Complete Guide To OEM Unlocking on Xiaomi 14 Ultra
- In 2024, Easy Steps on How To Create a New Apple ID Account On iPhone 6 Plus | Dr.fone
- In 2024, Top 10 Samsung Galaxy S23 Android SIM Unlock APK
- In 2024, 3 Things You Must Know about Fake Snapchat Location On Vivo Y02T | Dr.fone
- Why Is My Realme C53 Offline? Troubleshooting Guide | Dr.fone
- How to Unlock Realme GT 5 Phone without PIN
- In 2024, List of Pokémon Go Joysticks On Samsung Galaxy M14 4G | Dr.fone
- In 2024, Oppo Reno 11 5G ADB Format Tool for PC vs. Other Unlocking Tools Which One is the Best?
- The way to recover deleted contacts on Oppo A18 without backup.
- In 2024, Getting the Pokemon Go GPS Signal Not Found 11 Error in Nokia C12 | Dr.fone
- How to Check Distance and Radius on Google Maps For your Oppo A38 | Dr.fone
- How to Bypass Google FRP Lock on Samsung Galaxy M34 5G Devices
- 3 Solutions to Hard Reset Nokia 130 Music Phone Using PC | Dr.fone
- Complete guide for recovering video files on Poco M6 Pro 4G
- Full Guide to Unlock Your Vivo V30 Pro
- In 2024, Here Are Some Reliable Ways to Get Pokemon Go Friend Codes For Honor Play 7T | Dr.fone
- In 2024, Top 15 Augmented Reality Games Like Pokémon GO To Play On OnePlus Nord CE 3 5G | Dr.fone
- Will iSpoofer update On Vivo V29 | Dr.fone
- How to Check Distance and Radius on Google Maps For your Vivo X100 | Dr.fone
- In 2024, What is the best Pokemon for pokemon pvp ranking On Apple iPhone 7? | Dr.fone
- Unlock Apple ID without Phone Number From iPhone 11
- Will iSpoofer update On Samsung Galaxy S23 Tactical Edition | Dr.fone
- 10 Top Tools to Make Pic Collage for Windows
- Simple Solutions to Fix Android SystemUI Has Stopped Error For Poco F5 Pro 5G | Dr.fone
- How Can We Unlock Our Realme Narzo 60 Pro 5G Phone Screen?
- Bypassing Google Account With vnROM Bypass For Realme 12 Pro+ 5G
- Title: Best GIF to Video Converters for 2024
- Author: Chloe
- Created at : 2024-05-20 03:37:54
- Updated at : 2024-05-21 03:37:54
- Link: https://ai-editing-video.techidaily.com/best-gif-to-video-converters-for-2024/
- License: This work is licensed under CC BY-NC-SA 4.0.
