
:max_bytes(150000):strip_icc():format(webp)/best-free-movies-on-youtube-5114491-12-811d37329347405eab1a368e3018dc54.jpg)
Best MOV to GIF Converters for 2024
Best MOV to GIF Converters
Powerful Video Editor - Wondershare Filmora
Provide abundant video effects - A creative video editor
Powerful color correction and grading
Detailed tutorials are provided by the official channel
There are more than enough GIF makers available on the Internet. However, we’ve found it difficult to find quality MP4-to-GIF converters. Some of the tools that commonly pop up in your search results are either unreliable or simply bad at what they do. In some cases, you will also have to deal with intrusive ads and pop-ups.
Stop scrolling through a sea of options, and start converting your video files into animated GIFs in just a few steps. You no longer need to upload your files to some random website to get your desired results.
We’ve picked up the best online as well as offline MP4-to-GIF converters of 2022 and explained how to use them in a more easy way.
Best 5 MOV to GIF Converter Software
It’s no secret that converting video to GIFs is a good idea: they’re small, easy to share, and fun to look at. That’s why we decided to take the time to compare and review some of the best-animated GIF makers out there, from free online tools to offline software for PCs, Macs, and other devices.
1. Wondershare Filmora

Wondershare Filmora Video Editor is a professional and easy-to-use video editing software. This converter provides you with a lot of really cool filters and effects that let you make your videos even better. It is able to export videos in many different formats, including GIFs.
It is one of the best MOV to GIF Converters for Mac & Windows. It has all the important features that you need to convert, edit and create animated GIFs from any video format quickly and easily. With its simple and easy-to-use interface, you can choose your desired video clip or effect, edit it in different ways and then output it as a GIF.
Pros
Easy-to-use Tool for all device users
Able to export videos in multiple formats
Create animated GIFs from any video format
Best for professional work
Cons
Super effects cannot be added
Some effects can disturb tool’s functioning
2. Adobe Premiere Pro

To make the best GIFs, you need to use a program that can be versatile and powerful all at once. Adobe Premiere Pro is one of the best video editing softwares for professionals and amateurs. It is a great choice for people who have basic knowledge of film creation and want to produce video content at a professional level.
The reasons for its popularity are quite clear. The program has a non-linear video editing interface, an unrivaled system of working tools, and a powerful feature set.
Pros
Goes professionally with Windows OS, macOS
Provides non-linear video editing
Supports Flash Video, HD, and HDV
Featured for all professional tasks
Cons
Freemium for only a month
3. Movavi Video Editor Plus

The best way to create video highlights is to use an editing program and extract the best moments from your footage. Movavi’s new Video Editor Plus has all the tools you need to create compelling videos quickly and easily, with a user interface that even novice editors can master right away.
This affordable program gives you all the power (and simplicity) you need to create a high-quality GIF that represents your video perfectly. All without costing too much or putting up too many barriers to using this software.
Pros
Movement tracking and picture-in-picture features
Chroma keying
Sharp movie-creation software
Has multiple different features more
Cons
Resistive on slow slides
Doesn’t support high-end transitions
4. VLC

VLC Player is a highly portable multimedia player for various audio and video formats, including MPEG-4, DivX, MP3, and Ogg/Vorbis.
It is a free and open-source cross-platform multimedia player and framework that plays most multimedia files as well as DVDs, Audio CDs, VCDs, and various streaming protocols.
It can also be used to convert MOV format to GIF in many different ways.
To start with: you can use the tool to create animated avatars for Facebook and other social networks or even make an animated GIF for mobile phone wallpaper.
Pros
Most popular media players today
support DivX streaming and MPEG
Can be controlled using keyboard shortcuts
Support all formats, including BluRay, .mov, and .avi
Cons
No feature for upgradations
Some found it a hard tool as a converter
5. Cyberlink PowerDirector

Whether they’re an amateur or a seasoned pro, editing videos is easier than ever before with CyberLink PowerDirector . It comes with a host of advanced editing tools, including multi-cam editing, 3D title creation, and special effects. Avid editors can also upload their work to cloud services right from the app!
It is ideal for practically anyone who wants to create movies. It even comes with easy-to-use video editing and productive media sharing tools, so anyone can turn their videos into polished movies using this tool.
Pros
Featuring over 100 top-notch audio and video editing attributes
Enables you to easily edit and export videos in 4K
Features 360-degree video editing qualification
Quick customer support 24 hours a day
Cons
Adding ads to the page causes frustration
Costly
Online MOV to GIF Converter
If you have ever wanted to convert your MOV files into gifs, here are a few online tools that will help you do it with ease. Upload your .mov file to the service and enjoy the convenience of watching your favorite movies in animated gif format.
1. CloudConvert

The CloudConvert allows you to convert online documents, images, presentations, and much more into other formats. To use its API you need a free account on our servers (which allow you to do around 100 conversions per month).
Conversion is done on their servers, which means that: - The users of your app never have to install any software. - The API is fast and scalable. - It works across all popular platforms: Windows, macOS, Linux, iPhone, Android…
Pros
200+ File Formats Sustained
Absolute Data Protection
Persuasive API Integration
Rapid Online File Converter
Cons
Conversion minutes determine prepaid package plans
2. EZGIF.COM

Create GIFs from your video clips with this free online MOV to GIF converter.Ezgif.com is a simple to use toolset designed primarily for creating and editing animated GIFs but also can perform conversions.
With Ezgif you can capture videos, adjust the frames to suit your needs, save them as an animated GIF with text or sound, share them via email, Facebook, and more!
So, convert MOV, M4V, MP4, and various other video formats to animated GIFs with this free tool.
Pros
Design is comprehensive for all level users
Engaging work/functioning
Can stand with lots of devices
Easy to use
Cons
The structure of the tool is linear
3. Convertio

Convertio is easy to use, fast and available without signing up. The website offers a list of file converters that can be added directly to your Chrome browser.
The process uses Optimal media conversion settings that ensure the best quality possible with every conversion. It has worldwide popularity with millions of visitors each month.
It also has a large database of links to various online video web pages, so you can quickly access the video file you need and convert it into GIF format as well as other image formats like JPG, PNG, and BMP.
Pros
Permits you to check up to ten pages for free
Uses Optical Character Recognition technology
Save transformed files to Google Drive or Dropbox
Professional overall
Cons
There are certain security and safety risks
How to Convert MOV to GIF Using Wondershare Filmora?
Step 1: Import the MOV file
To get started, simply drag and drop your MOV file onto the interface of Filmora. Alternatively, click on the “Import” button in the upper left corner to browse and load the MOV file from your hard drive or external storage device. A third option is to right-click on the video in the media library and choose “Import Media Files” from the drop-down menu. This will open up a new window where you can select your desired video file.

Now that you have successfully imported your MOV file into Filmora, let’s look at how to proceed with making a GIF out of it.
Step 2: Trim to shorten the video
Next, you will need to trim the video. This is optional, but important if you want to make a GIF from a video. A longer video means a bigger file size and an increased loading time for your final GIF, so try to keep it as short as possible!

To trim your video, add another start and endpoint by clicking on the scissors icon below. You can also put them in manually by typing in the time (in seconds) into the box provided.
Step 3: Export as GIF
Click on the Export button to open up the Export dialog box. From here, you can choose how you want your file exported from a number of options including GIF under the Formats tab. Under the Video tab, select the video quality settings that best suit your requirements. You can also set the frame rate and resolution for your GIF image file at this point. Once you are done, click on Save to specify a location for your file as well as a name for it.

Step 4: Save the GIF file
Click “Convert” to start the MOV to GIF conversion.
When it’s done, click “Open Folder”, and you’ll see the generated GIF file there, which could be shared with others via social platforms such as Twitter, YouTube, and Facebook directly or used for other purposes.
Conclusion
We have not gathered several MOV to GIF converters for you to buy, but we have gone ahead and selected some and explained how to use them in easy steps. You no longer need to upload your files to some random website to get your desired results.
We’ve explored the market, and picked up the best MOV-to-GIF converters.
There are more than enough GIF makers available on the Internet. However, we’ve found it difficult to find quality MP4-to-GIF converters. Some of the tools that commonly pop up in your search results are either unreliable or simply bad at what they do. In some cases, you will also have to deal with intrusive ads and pop-ups.
Stop scrolling through a sea of options, and start converting your video files into animated GIFs in just a few steps. You no longer need to upload your files to some random website to get your desired results.
We’ve picked up the best online as well as offline MP4-to-GIF converters of 2022 and explained how to use them in a more easy way.
Best 5 MOV to GIF Converter Software
It’s no secret that converting video to GIFs is a good idea: they’re small, easy to share, and fun to look at. That’s why we decided to take the time to compare and review some of the best-animated GIF makers out there, from free online tools to offline software for PCs, Macs, and other devices.
1. Wondershare Filmora
Wondershare Filmora Video Editor is a professional and easy-to-use video editing software. This converter provides you with a lot of really cool filters and effects that let you make your videos even better. It is able to export videos in many different formats, including GIFs.
It is one of the best MOV to GIF Converters for Mac & Windows. It has all the important features that you need to convert, edit and create animated GIFs from any video format quickly and easily. With its simple and easy-to-use interface, you can choose your desired video clip or effect, edit it in different ways and then output it as a GIF.
Pros
Easy-to-use Tool for all device users
Able to export videos in multiple formats
Create animated GIFs from any video format
Best for professional work
Cons
Super effects cannot be added
Some effects can disturb tool’s functioning
2. Adobe Premiere Pro
To make the best GIFs, you need to use a program that can be versatile and powerful all at once. Adobe Premiere Pro is one of the best video editing softwares for professionals and amateurs. It is a great choice for people who have basic knowledge of film creation and want to produce video content at a professional level.
The reasons for its popularity are quite clear. The program has a non-linear video editing interface, an unrivaled system of working tools, and a powerful feature set.
Pros
Goes professionally with Windows OS, macOS
Provides non-linear video editing
Supports Flash Video, HD, and HDV
Featured for all professional tasks
Cons
Freemium for only a month
3. Movavi Video Editor Plus
The best way to create video highlights is to use an editing program and extract the best moments from your footage. Movavi’s new Video Editor Plus has all the tools you need to create compelling videos quickly and easily, with a user interface that even novice editors can master right away.
This affordable program gives you all the power (and simplicity) you need to create a high-quality GIF that represents your video perfectly. All without costing too much or putting up too many barriers to using this software.
Pros
Movement tracking and picture-in-picture features
Chroma keying
Sharp movie-creation software
Has multiple different features more
Cons
Resistive on slow slides
Doesn’t support high-end transitions
4. VLC
VLC Player is a highly portable multimedia player for various audio and video formats, including MPEG-4, DivX, MP3, and Ogg/Vorbis.
It is a free and open-source cross-platform multimedia player and framework that plays most multimedia files as well as DVDs, Audio CDs, VCDs, and various streaming protocols.
It can also be used to convert MOV format to GIF in many different ways.
To start with: you can use the tool to create animated avatars for Facebook and other social networks or even make an animated GIF for mobile phone wallpaper.
Pros
Most popular media players today
support DivX streaming and MPEG
Can be controlled using keyboard shortcuts
Support all formats, including BluRay, .mov, and .avi
Cons
No feature for upgradations
Some found it a hard tool as a converter
5. Cyberlink PowerDirector
Whether they’re an amateur or a seasoned pro, editing videos is easier than ever before with CyberLink PowerDirector . It comes with a host of advanced editing tools, including multi-cam editing, 3D title creation, and special effects. Avid editors can also upload their work to cloud services right from the app!
It is ideal for practically anyone who wants to create movies. It even comes with easy-to-use video editing and productive media sharing tools, so anyone can turn their videos into polished movies using this tool.
Pros
Featuring over 100 top-notch audio and video editing attributes
Enables you to easily edit and export videos in 4K
Features 360-degree video editing qualification
Quick customer support 24 hours a day
Cons
Adding ads to the page causes frustration
Costly
Online MOV to GIF Converter
If you have ever wanted to convert your MOV files into gifs, here are a few online tools that will help you do it with ease. Upload your .mov file to the service and enjoy the convenience of watching your favorite movies in animated gif format.
1. CloudConvert
The CloudConvert allows you to convert online documents, images, presentations, and much more into other formats. To use its API you need a free account on our servers (which allow you to do around 100 conversions per month).
Conversion is done on their servers, which means that: - The users of your app never have to install any software. - The API is fast and scalable. - It works across all popular platforms: Windows, macOS, Linux, iPhone, Android…
Pros
200+ File Formats Sustained
Absolute Data Protection
Persuasive API Integration
Rapid Online File Converter
Cons
Conversion minutes determine prepaid package plans
2. EZGIF.COM
Create GIFs from your video clips with this free online MOV to GIF converter.Ezgif.com is a simple to use toolset designed primarily for creating and editing animated GIFs but also can perform conversions.
With Ezgif you can capture videos, adjust the frames to suit your needs, save them as an animated GIF with text or sound, share them via email, Facebook, and more!
So, convert MOV, M4V, MP4, and various other video formats to animated GIFs with this free tool.
Pros
Design is comprehensive for all level users
Engaging work/functioning
Can stand with lots of devices
Easy to use
Cons
The structure of the tool is linear
3. Convertio
Convertio is easy to use, fast and available without signing up. The website offers a list of file converters that can be added directly to your Chrome browser.
The process uses Optimal media conversion settings that ensure the best quality possible with every conversion. It has worldwide popularity with millions of visitors each month.
It also has a large database of links to various online video web pages, so you can quickly access the video file you need and convert it into GIF format as well as other image formats like JPG, PNG, and BMP.
Pros
Permits you to check up to ten pages for free
Uses Optical Character Recognition technology
Save transformed files to Google Drive or Dropbox
Professional overall
Cons
There are certain security and safety risks
How to Convert MOV to GIF Using Wondershare Filmora?
Step 1: Import the MOV file
To get started, simply drag and drop your MOV file onto the interface of Filmora. Alternatively, click on the “Import” button in the upper left corner to browse and load the MOV file from your hard drive or external storage device. A third option is to right-click on the video in the media library and choose “Import Media Files” from the drop-down menu. This will open up a new window where you can select your desired video file.
Now that you have successfully imported your MOV file into Filmora, let’s look at how to proceed with making a GIF out of it.
Step 2: Trim to shorten the video
Next, you will need to trim the video. This is optional, but important if you want to make a GIF from a video. A longer video means a bigger file size and an increased loading time for your final GIF, so try to keep it as short as possible!
To trim your video, add another start and endpoint by clicking on the scissors icon below. You can also put them in manually by typing in the time (in seconds) into the box provided.
Step 3: Export as GIF
Click on the Export button to open up the Export dialog box. From here, you can choose how you want your file exported from a number of options including GIF under the Formats tab. Under the Video tab, select the video quality settings that best suit your requirements. You can also set the frame rate and resolution for your GIF image file at this point. Once you are done, click on Save to specify a location for your file as well as a name for it.
Step 4: Save the GIF file
Click “Convert” to start the MOV to GIF conversion.
When it’s done, click “Open Folder”, and you’ll see the generated GIF file there, which could be shared with others via social platforms such as Twitter, YouTube, and Facebook directly or used for other purposes.
Conclusion
We have not gathered several MOV to GIF converters for you to buy, but we have gone ahead and selected some and explained how to use them in easy steps. You no longer need to upload your files to some random website to get your desired results.
We’ve explored the market, and picked up the best MOV-to-GIF converters.
SBV to SRT: How to Convert YouTube SBV Subtitle to SRT Format
SBV to SRT: How to Convert YouTube SBV Subtitle to SRT Format
YouTube subtitles are becoming increasingly common, and business people mainly use subtitles for those who are hard to listen to. So everyone can understand the content.
Luckily, we’ve happened upon a relatively simple process by which SBV files can be converted to the commonly-used (and compatible with YouTube) SubRip (SRT) format, which we’ll discuss here.
In this article, we will discuss the converters that can convert SBV format to SRT files within just a few clicks. Sounds interesting? Keep reading the article to understand the context better. Let’s get started.
What is an SBV file?
It is an extension of a plain text file used for video subtitles. It is used to add subtitles and closed captions to the YouTube video.
It includes three sets of data:
- Start and end times for subtitle timings
- The actual content of the subtitle
- Its ID, which is just plain text that
- consists of additional information such as font size, etc.
Furthermore, SBV subtitles are saved in plain text format to be opened and edited efficiently. They also work on systems where notepad might be the only word processor available.
SBV files are similar to SRT files. YouTube recommends that caption creators create caption files using the SBV or SRT formats because those formats are pretty basic.
You’ll be thinking, can you convert the SBV files to SRT? Yes, you can. Now we know what an SBV file is, let’s find out why we need to convert SBV files to SRT.
Why do we need to convert SBV files to SRT?
Subtitles are necessary for accessibility and SEO. There are multiple file formats for subtitles. One of the most common is the SubRip (.srt) file format. But there are various cases when you have subtitles in SBV format, which your standard media player fails to identify.
That’s why the convenient thing to do is to convert SBV to SRT.
Let’s find out how to perform a such activity using online SBV to SRT converters.
Convert SBV to SRT with an Online Converter
Many users want to convert their SBV caption or subtitle into other formats for all devices.
Following, we have mentioned the top 4 SB- to-SRT converters capable of completing the file conversion in no time.
1. SBV to SRT converter for subtitles

This online converter takes the subtitles created by YouTube or other resources and then converts them into the SRT file format. This SRT file can be imported into any video editing software. It has a simple user interface. Its entire conversion process is instant.
Supported Platform: Browser-based
To convert the SBV format into SRT,
- It would help if you opened the online tool on your browser.
- Then click Select File to upload the SBV file.
- In the end, the service will automatically download the SRT file to your device.
2. Subtitles Converter

It is a tool that can be converted between subtitles. If the subtitle file is not reversed or truncated, change the subtitle extension in Explorer to any desired format.
Supported platforms: Browser-based.
Following the guides below, you can convert your SBV file into an SRT file.
- Go to Subtitles converters website .
- Upload your SBV file.
- Select the targeted format; SRT.
- Select sync control.
- Select a subtitle language.
- Then click on “Download after conversion.”
3. GoTranscript Subtitle Converter

GoTranscript is an online converter specializing in converting your subtitle files in SBV to your preferred format. Moreover, it is compatible with almost every subtitle file type, including SRT, SCC, VTT, RT, and more. Furthermore, the product has a high success rate for video transcription services.
GoTranscript is easy to use, offering a streamlined ordering process, affordable pricing, and customization options.
GoTranscript has a global team of 20,000 language experts ready to convert your content into text, including
- Medical files (reports, records)
- Legal documents (hearings, proceedings, interrogations)
- Academic materials (lectures, interviews)
- Enterprise recordings (focus groups, corporate meetings)
- Entertainment industry content (film, TV, news) and more!
Supported Platform: Browser-based
Services offers:
- Transcription, translation, subtitling, and caption
To convert the SBV format to SRT format by GoTrancscript, you need to follow the steps below.
Step1 Go to the Website
Click on Upload and add the SBV subtitle file after opening the online converter.

Step2 Select format
Then, head to the Select Format section and click on the SubRip(.srt) option.

Step3 Click on convert
Finally, click on convert to start the process and download the subtitles.

Convert SBV to SRT with desktop Software
As we’ve mentioned about the online converters, you can use them without wasting money and time. All you need is an internet connection, though it causes problems sometimes when you run out of the internet.
Many desktop converters have been introduced to help you with this problem. For this reason, We’ll tell you about top desktop software through which you can convert SBV format to SRT format.
We’ll also explain how to use one of the best file converters, FFmpeg, as an example to show you how to convert SBV to SRT. Let’s move on.
1. Jubler

It is another free open source SBV to SRT converter software. It allows you to edit subtitle files of SBV, SUB, TXT, SRT, etc. As soon as you upload a subtle file in it, you can view all the subtitle text and their times’ side by side. You can select and edit both subtitle text and time.
Platforms supported: Windows, Linux, and macOS.
After editing subtitles, start the conversion process. Now, follow the below steps to convert SBV to SRT using a jubler.
- Run this converter and upload an SBV file.
- Then, you can select and edit the subtitle text and its timings.
- After making the changes to the subtitle text and time, go to the file> Save As option.
- Ultimately, choose SubRip as the output format and press the Save button.
2. Subtitle Edit

If you are looking for desktop-based software that can carefully convert or edit subtitles files in SBV, we suggest using Subtitle Edit. This software allows you to edit timings/speed and change subtitle font type. Moreover, it supports a simple interface and runs smoothly on low-end PCs.
Supported Platform: Windows
Follow the steps to convert the SBV file to SRT
- Open Subtitle Edit on your Windows system.
- Then, open the subtitle file under the General tab.
- After adding the SBV file, select the SRT format as the new file type.
- Then, click on the “Save button” to export the converted subtitles.
3. FFmpeg

You might think that FFmpeg is only used for video file conversion. Although, it is not the case, as you can utilize this Platform to convert SBV subtitles to SRT using a single command line.
It is a free, open-source software project comprising a suite of libraries and programs which handles video, audio, streams, and other multimedia files.
There is an excellent library in your video processing and compression toolbox. It has endless capabilities, and being open-source, you are more than welcome to modify the source and extend its capabilities
Features of FFmpeg:
- It supports multiple formats conversion, not only subtitle conversion, like txt to srt, srt to sbv, word to srt, etc., but also aduio, video conversion.
- Basic video editing is also enabled by FFmpeg, post-production effects and scaling for video can be used at ease.
Supported Platform: macOS and Windows
YouTube supports the basic features of SBV (SuBView), and SRT (SubRipText) closed captions. You can download existing closed captions (including auto-generated subtitles) as SBV, convert them to SRT and edit the subtitles in a text editor such as vim or notepad. You can also upload the fixed version to YouTube and overwrite the old subtitles for the given language.
To convert SBV format to SRT through FFmpeg, you need to follow the steps given below.
The steps to convert SBV to SRT:
Step1 Visit the official website of FFmpeg. Download the software. After downloading, install it.
Step2 Run FFmpeg using Terminal or Command Prompt on your Mac or Windows computer.
Step3 Enter the following command to convert SBV to SRT instantly.
Pros
- FFmpeg is safe and easy to use
- You can convert any file in your desired format through command lines
Cons
- Interface is a little bit out of date. Except for this, everything seems good for now
How to Edit SRT Subtitles for Videos After Converting from SBV
Now that you know how to convert the SBV file to SRT format, the next step you may want to take is to learn how to hardcode them into your videos. We recommend the Wondershare Filmora Subtitle Editor feature to perform the task proficiently.
The software is available on Windows and macOS. It offers an intuitive user interface that will make beginners feel right at home.
Wondershare Filmora:
It is an easy free video editing software for a beginner that allows you to edit the created content. It also Supports 50 above formats, 4k editing, Filmstock effects store, and all basic and advanced editing tools in the most easily accessible and used manner.
However, the majority of video editors are limited to Windows 10. It works perfectly with Win 10, Win 8, Win 7, and Mac. After downloading this software, you will have plenty of features for free and produce videos with no watermarks.
Let’s have a look at its unique features.
Features:
SRT files Editing
You don’t need to waste your time creating a data backup. Auto synchronization ensures that data is backed up to another device.
Speech to Text (STT)
You can convert your speech into text.
Text to Speech (TTS)
It also allows you to convert your text into speech.
Also, it has various video editing functions, like green screen, split screen, motion tracking, etc., to help you make a video like a pro.
How to edit the SRT file with Filmora :
To edit the converted file, you’ll need to follow the steps
Free Download For Win 7 or later(64-bit)
Free Download For macOS 10.14 or later
Step1 Open Filmora. If you don’t have this software, go to its website and download it. Click on “New Project.”
Step2 Import the video and SRT file to the media library.
Step3 Drag the video and SRT file to the timeline. Then double-click on the SRT file, or you can right-click and choose “Advanced Edit” for the further subtitles editing.
Step4 From there, you can edit the subtitles the way you want.
Click on “PRESET” to select the font style. From custom, you can adjust the following settings
- Fade in/out
- Opacity
- Color gradient
- Effect
- Blur
Step5 You can delete the unwanted part and split and merge more clips. Once the editing is over, click on the “Export” option and save it.
Hot FAQs on converting SBV to SRT
1. How do I download SRT files from YouTube?
You can download the DRT files from YouTube by using the transcription option included below the video player: For this, press the small dot icon below the video, Then choose “open the transcription,” where you can copy and paste a complete transcript, in SRT format, of any video!
2. Can you download auto-generated subtitles from YouTube?
Yes, you can download auto-generated subtitles from YouTube. DownSub is a web-based application that can download automatically generated subtitles directly from YouTube, VIU, Viki, Vlive, and more. It supports downloading all subtitles/captions formats such as SRT, TXT, and VTT.
It doesn’t force our users to download or install any extensions or third-party software. It provides an online method to download subtitles by just entering the URL of the video and clicking Download.
3. What program opens an SBV file?
You can open the SBV file using any text editor, such as Notepad (Windows), TextEdit (Mac), or Atom. You can also see an SBV file’s contents by dragging the file into any web browser. Plus, it also allows you to edit.
Final words
By default, YouTube allows those files created in various formats such as SRT, SBV, MPSUB, etc. But the drawback is that the site automatically converts the SBV format once uploaded.
We’ve explained above the variety of online video converters and desktop software. You can convert the SBV files to SRT in no time.
After converting, editing, or merging the .srt file is necessary. For this, a variety of software is available, but Wondershare Filmora is one of the best video editing software.
Download Filmora and edit the content the way you want.
What is an SBV file?
It is an extension of a plain text file used for video subtitles. It is used to add subtitles and closed captions to the YouTube video.
It includes three sets of data:
- Start and end times for subtitle timings
- The actual content of the subtitle
- Its ID, which is just plain text that
- consists of additional information such as font size, etc.
Furthermore, SBV subtitles are saved in plain text format to be opened and edited efficiently. They also work on systems where notepad might be the only word processor available.
SBV files are similar to SRT files. YouTube recommends that caption creators create caption files using the SBV or SRT formats because those formats are pretty basic.
You’ll be thinking, can you convert the SBV files to SRT? Yes, you can. Now we know what an SBV file is, let’s find out why we need to convert SBV files to SRT.
Why do we need to convert SBV files to SRT?
Subtitles are necessary for accessibility and SEO. There are multiple file formats for subtitles. One of the most common is the SubRip (.srt) file format. But there are various cases when you have subtitles in SBV format, which your standard media player fails to identify.
That’s why the convenient thing to do is to convert SBV to SRT.
Let’s find out how to perform a such activity using online SBV to SRT converters.
Convert SBV to SRT with an Online Converter
Many users want to convert their SBV caption or subtitle into other formats for all devices.
Following, we have mentioned the top 4 SB- to-SRT converters capable of completing the file conversion in no time.
1. SBV to SRT converter for subtitles
This online converter takes the subtitles created by YouTube or other resources and then converts them into the SRT file format. This SRT file can be imported into any video editing software. It has a simple user interface. Its entire conversion process is instant.
Supported Platform: Browser-based
To convert the SBV format into SRT,
- It would help if you opened the online tool on your browser.
- Then click Select File to upload the SBV file.
- In the end, the service will automatically download the SRT file to your device.
2. Subtitles Converter
It is a tool that can be converted between subtitles. If the subtitle file is not reversed or truncated, change the subtitle extension in Explorer to any desired format.
Supported platforms: Browser-based.
Following the guides below, you can convert your SBV file into an SRT file.
- Go to Subtitles converters website .
- Upload your SBV file.
- Select the targeted format; SRT.
- Select sync control.
- Select a subtitle language.
- Then click on “Download after conversion.”
3. GoTranscript Subtitle Converter
GoTranscript is an online converter specializing in converting your subtitle files in SBV to your preferred format. Moreover, it is compatible with almost every subtitle file type, including SRT, SCC, VTT, RT, and more. Furthermore, the product has a high success rate for video transcription services.
GoTranscript is easy to use, offering a streamlined ordering process, affordable pricing, and customization options.
GoTranscript has a global team of 20,000 language experts ready to convert your content into text, including
- Medical files (reports, records)
- Legal documents (hearings, proceedings, interrogations)
- Academic materials (lectures, interviews)
- Enterprise recordings (focus groups, corporate meetings)
- Entertainment industry content (film, TV, news) and more!
Supported Platform: Browser-based
Services offers:
- Transcription, translation, subtitling, and caption
To convert the SBV format to SRT format by GoTrancscript, you need to follow the steps below.
Step1 Go to the Website
Click on Upload and add the SBV subtitle file after opening the online converter.
Step2 Select format
Then, head to the Select Format section and click on the SubRip(.srt) option.
Step3 Click on convert
Finally, click on convert to start the process and download the subtitles.
Convert SBV to SRT with desktop Software
As we’ve mentioned about the online converters, you can use them without wasting money and time. All you need is an internet connection, though it causes problems sometimes when you run out of the internet.
Many desktop converters have been introduced to help you with this problem. For this reason, We’ll tell you about top desktop software through which you can convert SBV format to SRT format.
We’ll also explain how to use one of the best file converters, FFmpeg, as an example to show you how to convert SBV to SRT. Let’s move on.
1. Jubler
It is another free open source SBV to SRT converter software. It allows you to edit subtitle files of SBV, SUB, TXT, SRT, etc. As soon as you upload a subtle file in it, you can view all the subtitle text and their times’ side by side. You can select and edit both subtitle text and time.
Platforms supported: Windows, Linux, and macOS.
After editing subtitles, start the conversion process. Now, follow the below steps to convert SBV to SRT using a jubler.
- Run this converter and upload an SBV file.
- Then, you can select and edit the subtitle text and its timings.
- After making the changes to the subtitle text and time, go to the file> Save As option.
- Ultimately, choose SubRip as the output format and press the Save button.
2. Subtitle Edit
If you are looking for desktop-based software that can carefully convert or edit subtitles files in SBV, we suggest using Subtitle Edit. This software allows you to edit timings/speed and change subtitle font type. Moreover, it supports a simple interface and runs smoothly on low-end PCs.
Supported Platform: Windows
Follow the steps to convert the SBV file to SRT
- Open Subtitle Edit on your Windows system.
- Then, open the subtitle file under the General tab.
- After adding the SBV file, select the SRT format as the new file type.
- Then, click on the “Save button” to export the converted subtitles.
3. FFmpeg
You might think that FFmpeg is only used for video file conversion. Although, it is not the case, as you can utilize this Platform to convert SBV subtitles to SRT using a single command line.
It is a free, open-source software project comprising a suite of libraries and programs which handles video, audio, streams, and other multimedia files.
There is an excellent library in your video processing and compression toolbox. It has endless capabilities, and being open-source, you are more than welcome to modify the source and extend its capabilities
Features of FFmpeg:
- It supports multiple formats conversion, not only subtitle conversion, like txt to srt, srt to sbv, word to srt, etc., but also aduio, video conversion.
- Basic video editing is also enabled by FFmpeg, post-production effects and scaling for video can be used at ease.
Supported Platform: macOS and Windows
YouTube supports the basic features of SBV (SuBView), and SRT (SubRipText) closed captions. You can download existing closed captions (including auto-generated subtitles) as SBV, convert them to SRT and edit the subtitles in a text editor such as vim or notepad. You can also upload the fixed version to YouTube and overwrite the old subtitles for the given language.
To convert SBV format to SRT through FFmpeg, you need to follow the steps given below.
The steps to convert SBV to SRT:
Step1 Visit the official website of FFmpeg. Download the software. After downloading, install it.
Step2 Run FFmpeg using Terminal or Command Prompt on your Mac or Windows computer.
Step3 Enter the following command to convert SBV to SRT instantly.
Pros
- FFmpeg is safe and easy to use
- You can convert any file in your desired format through command lines
Cons
- Interface is a little bit out of date. Except for this, everything seems good for now
How to Edit SRT Subtitles for Videos After Converting from SBV
Now that you know how to convert the SBV file to SRT format, the next step you may want to take is to learn how to hardcode them into your videos. We recommend the Wondershare Filmora Subtitle Editor feature to perform the task proficiently.
The software is available on Windows and macOS. It offers an intuitive user interface that will make beginners feel right at home.
Wondershare Filmora:
It is an easy free video editing software for a beginner that allows you to edit the created content. It also Supports 50 above formats, 4k editing, Filmstock effects store, and all basic and advanced editing tools in the most easily accessible and used manner.
However, the majority of video editors are limited to Windows 10. It works perfectly with Win 10, Win 8, Win 7, and Mac. After downloading this software, you will have plenty of features for free and produce videos with no watermarks.
Let’s have a look at its unique features.
Features:
SRT files Editing
You don’t need to waste your time creating a data backup. Auto synchronization ensures that data is backed up to another device.
Speech to Text (STT)
You can convert your speech into text.
Text to Speech (TTS)
It also allows you to convert your text into speech.
Also, it has various video editing functions, like green screen, split screen, motion tracking, etc., to help you make a video like a pro.
How to edit the SRT file with Filmora :
To edit the converted file, you’ll need to follow the steps
Free Download For Win 7 or later(64-bit)
Free Download For macOS 10.14 or later
Step1 Open Filmora. If you don’t have this software, go to its website and download it. Click on “New Project.”
Step2 Import the video and SRT file to the media library.
Step3 Drag the video and SRT file to the timeline. Then double-click on the SRT file, or you can right-click and choose “Advanced Edit” for the further subtitles editing.
Step4 From there, you can edit the subtitles the way you want.
Click on “PRESET” to select the font style. From custom, you can adjust the following settings
- Fade in/out
- Opacity
- Color gradient
- Effect
- Blur
Step5 You can delete the unwanted part and split and merge more clips. Once the editing is over, click on the “Export” option and save it.
Hot FAQs on converting SBV to SRT
1. How do I download SRT files from YouTube?
You can download the DRT files from YouTube by using the transcription option included below the video player: For this, press the small dot icon below the video, Then choose “open the transcription,” where you can copy and paste a complete transcript, in SRT format, of any video!
2. Can you download auto-generated subtitles from YouTube?
Yes, you can download auto-generated subtitles from YouTube. DownSub is a web-based application that can download automatically generated subtitles directly from YouTube, VIU, Viki, Vlive, and more. It supports downloading all subtitles/captions formats such as SRT, TXT, and VTT.
It doesn’t force our users to download or install any extensions or third-party software. It provides an online method to download subtitles by just entering the URL of the video and clicking Download.
3. What program opens an SBV file?
You can open the SBV file using any text editor, such as Notepad (Windows), TextEdit (Mac), or Atom. You can also see an SBV file’s contents by dragging the file into any web browser. Plus, it also allows you to edit.
Final words
By default, YouTube allows those files created in various formats such as SRT, SBV, MPSUB, etc. But the drawback is that the site automatically converts the SBV format once uploaded.
We’ve explained above the variety of online video converters and desktop software. You can convert the SBV files to SRT in no time.
After converting, editing, or merging the .srt file is necessary. For this, a variety of software is available, but Wondershare Filmora is one of the best video editing software.
Download Filmora and edit the content the way you want.
Discover the Top Slow Motion Camera App to Use
The latest technological advancements have made many things possible. Among such developments include slowing down the captured moments. On the professional level, slow-motion videos are crucial to express the details of complex tasks. The increase in creating and following trends on social media has also lifted the demand for slow-mo shots.
Many applications are being developed considering the amplified demand for slow-mo camera apps. This article will also assist you in finding the best slow-motion camera app to meet different needs. After reading it, you will be able to select the right one. Before delving into the slow-motion camera app, understand its practical implications for good.
Slow Motion Video Maker Slow your video’s speed with better control of your keyframes to create unique cinematic effects!
Make A Slow Motion Video Make A Slow Motion Video More Features

Part 1: What Are Different Practical Applications of Slow-Motion Videos?
Slow-motion videos are not only for posting on social media. It has other practical applications in different industries and for personal use. Slow-motion videos have vast use cases as they make digital content creative and emphasized. If you want to learn how? Let’s move on to the practical implications of slow-motion video in various settings.
- Sports Analysis: Slow-motion videos are widely used in the sports industry to make the play fair. The sports trainer can analyze the techniques and find the errors to improve his students’ performance. If a person gets injured during a sports session, then slow-motion video can be used to recognize the mechanism of injury. It will help in the rehabilitation and diagnosis of injured persons.
- Filmmaking and Entertainment: Artists and filmmakers can create stunning scenes in films through such video effects. These slow-motion videos can add emotion and depth to the storytelling. Action scenes become more dramatic and attractive by the slow-motion effect. Also, it enhances the movie’s fight and explosion scenes by giving a dynamic view.
- Wildlife and Nature Observation: The slow-motion camera app can make you admire wildlife and nature. The video of a lion running behind its target becomes more interesting because of the slow-motion effect. Slow videos enhancing details of plants and flowers give viewers an eye-catching view. Moreover, these videos give wildlife researchers an in-depth analysis.
- Occupational Safety and Security: Accidents in any occupation can be analyzed easily through slow-motion footage. The sequence of events that led to the accident is analyzed thoroughly in this slow-such video. Additionally, after finding the accident’s root cause, the security and safety systems can be updated.
Part 2: Recognizing the Top Slow Motion Camera Apps in 2024
These days, every other app is offering video speed-changing features. Do you know which is excellent and provides more freedom for this task? If not, keep reading until you recognize the top-notch slow-motion camera app download.
- Slow Motion Video Fast & Slow-Mo
- Slow Motion Video Camera
- SloPro
- Motion Camera - Slow Motion
- Efectum - Video Effect Editor
- Slow Motion Video Fx Editor
1. Slow Motion Video Fast & Slow-Mo
Turn your recorded speech into slow motion by trying this Android application. This slow mo camera app is designed to ease the post-production of films. Like professional programs, you can change the normal speed of videos on the graph. You can adjust normal videos with a speed slider. It will maintain a smooth transition when speed changes in videos.

Key Features
- This tool provides different filters and special effects to glorify scenes. You can use its famous Bleach, Polaroid, or Black and White effects.
- Apart from slowing your video, this tool aims to ensure its quality. Moreover, it offers a music library and allows you to add a sound of your choice.
- It can process your video faster with advanced editing. After conversion, users can share their projects directly on social media platforms.
2. Slow Motion Video Camera
For people who are looking for a simple slow-mo camera app, it’s the best one. They just need to upload a video from their gallery and get a slow-motion video. Without any technical operation, it can simply transform your projects. You can choose a specific video part to add a slow-motion effect using this tool.

Key Features
- Besides making videos slow, you can also use its trimming option. It will cut down the unnecessary parts of your footage.
- After getting a preview of your changes, you can share the media on any platform. In regard, you can share videos on WhatsApp, Facebook, Instagram, and Twitter.
- Despite slowing down clips, users can make them super-fast. To do so, they just have to move the speed slider to the right.
3. SloPro
It is the best slow-motion camera app that helps in making slow-motion videos. High-speed shoot video can be played in slow motion by this app. It offers optical flow elements to make a video high-quality. Also, the app helps to make any action of a person in slow motion to give a cool look.

Key Features
- The app provides the option to slow down the video by a percentage. You can apply the percentage and see which one is suitable for you.
- There is an option to fast-motion the video two times, three times, or four times. Depending on the user’s requirement, the fast-motion effect can be adjusted.
- Video can be made high quality by applying the optical frame option. The frame can also be adjusted from the frame blend option.
4. Motion Camera - Slow Motion
Motion Camera - Slow Motion camera app helps to record the video with motion effects. It allows you to record the video the way you want by offering different effects. You can try all these effects to make videos and impress friends on social media. So, it’s an in-one app that provides various effects for video on one platform.

Key Features
- This tool lets you record videos in slow motion. If you haven’t recorded it, use its slow button and turn the normal video into the slow one.
- It does not limit your creativity to making a slow-motion video. Thus, you can also create fast-motion videos to skip boring parts.
- If you want to blur certain sensitive parts of the video, use this app. It allows you to add a blur effect in video or capture shots in a blur.
5. Efectum - Video Effect Editor
This video editor is an amazing platform for making awesome videos. It has various features for video editing, like slow-motion and fast-motion effects. The app provides more features that make it flexible for all users. Moreover, you can insert relevant music in your content using this slow-motion camera app. There are many categories of music that you can choose from as per your mood.

Key Features
- The undesired clip or part of the video can be cut through this app. This editor can also trim extra or unnecessary shots recorded in the video.
- You can add the reverse effect in the video to rewind certain shots. Also, users can record videos in timelapse with complete customization.
- Despite that, it offers aesthetic filters to enhance your content’s appeal. Moreover, you can create a collage using this platform.
6. Slow Motion Video Fx Editor
If you are still browsing a perfect Slo-mo camera app, end your search on this app. It is an advanced video editor for slow and fast-motion video effects. You can apply the slo-mo and time-lapse quickly with this app. This video editor allows you to adjust speed flexibly according to requirements. With its interactive interface, your editing experience can be smooth and give you an aesthetic appeal.

Key Features
- Users can add different filters and effects to the video through this app. Such filters can make videos more captivating.
- You can add voiceovers and audio to your slow-down clips. This platform offers an extensive music library that caters to every kind of music.
- After editing footage, you can save it in your gallery with a single click. Besides, you can share on the social media platforms of your choice.
Bonus Part: Helping Create Professional-Grade Videos with Filmora
Slow-motion desktop tools are more powerful and versatile compared to apps. They provide flexibility to customize speed, playback, and other parameters. Professional editors rely on desktop tools instead of a slo-mo camera app for HD footage. In this regard, Wondershare Filmora proves to be a superior platform and the first choice for editors.
It is a video editor with AI integration to replace typical editing methods. You can bring innovation to old patterns of post-production tasks. The AI features of Filmora open the doors for unlimited creativity on one platform. From generating text to converting it into sound and image, Filmora can turn you speechless.
Free Download For Win 7 or later(64-bit)
Free Download For macOS 10.14 or later
Step 1Download Filmora and Explore it to Start a New Project
Go to the official site of Wondershare Filmora and tap to download it. After successful installation, launch it in your system to proceed. Hit the “New Project” from its main interface and enter the main editing window. Now, import your intended video in Filmora and drag it to the timeline.

Step 2Discover the Ways to Access Uniform Speed Option
Press your keyboard’s “Ctrl + R” keys and navigate to the right-side panel. Alternatively, you can right-click on the video and pick “Uniform Speed” from the list. Both ways will take you to that editing panel, where you can adjust speed.

Step 3Adjust Speed and Enhance the Playback
Hold the slider of “Speed” and drag towards the left to slow down the video. Optionally, you can move the slider on the right side for making fast-motion videos. Afterward, enable the “Ripple Edit” and “Maintain Pitch” options for playback enhancement. Then, move down and extend the “AI Frame Interpolation” menu to tap the “Optical Flow.”

Step 4Polish Videos or Export it from Different Ways
Optical flow will make the video slow while retaining its quality. Now, you can use “Audio” and “Transition” icons to polish your clips. When done editing, press the “Ctrl + E” keys to get the “Export” menu to save the video on your PC. In addition, you can use the “Export” button at the top right corner for exporting purposes.

Innovative Key Features of Filmora in Video Editing
If you want to identify exceptional functionalities of Filmora, read this part. Here, we have enlisted some fruitful and trending features to make you explore this platform further.
1. Motion Tracking
Visualize appealing media to inspire the audience with the help of Filmora. AI algorithms in this platform automatically detect moving objects in videos and add neon graphics. The AI motion tracker can also assist you in adding text, titles, smiley faces, and message bubbles. Besides, it can insert a mosaic effect and blur the moving faces to match your content needs.
2. AI Smart Masking
Recording videos in public places can sometimes ruin the best shots. You will not face it with Filmora, as it provides an advanced smart masking feature. It can intelligently recognize objects from video to change their background. With a multi-layer overlay, users can create three-dimensional scenes. Besides, it allows you to make color corrections in footage where required.
3. AI Music Generator
Have you heard that any slo-mo camera app can generate music for you? It is not in the above-highlighted applications, but Filmora can. It can generate music that aligns with your content needs. Users have to define the music length and number of tracks they want. Also, this feature requires you to prompt with music moods you wish to generate.
4. Screen Recorder
Record your screens for lectures, product demos, and gameplays with Filmora. It lets you record the entire screen or a specific window part. This is the most trending feature of Filmora, assisting video meetings. You can streamline recorded video on any popular platform with the recorded voices. Surprisingly, users can show four different mouse clicks along with sounds in recordings.
Conclusion
Ultimately, slow-motion videos can practically serve many benefits in various settings. The slow-motion camera app is helping individuals, but professionals are looking for better options. They should use Wondershare Filmora to use advanced features in making slow motion. Besides, Filmora is an AI platform that can uplift typical ways of video editing. So, try to explore its maximum functionalities after launching it.
Make A Slow Motion Video Make A Slow Motion Video More Features
Part 1: What Are Different Practical Applications of Slow-Motion Videos?
Slow-motion videos are not only for posting on social media. It has other practical applications in different industries and for personal use. Slow-motion videos have vast use cases as they make digital content creative and emphasized. If you want to learn how? Let’s move on to the practical implications of slow-motion video in various settings.
- Sports Analysis: Slow-motion videos are widely used in the sports industry to make the play fair. The sports trainer can analyze the techniques and find the errors to improve his students’ performance. If a person gets injured during a sports session, then slow-motion video can be used to recognize the mechanism of injury. It will help in the rehabilitation and diagnosis of injured persons.
- Filmmaking and Entertainment: Artists and filmmakers can create stunning scenes in films through such video effects. These slow-motion videos can add emotion and depth to the storytelling. Action scenes become more dramatic and attractive by the slow-motion effect. Also, it enhances the movie’s fight and explosion scenes by giving a dynamic view.
- Wildlife and Nature Observation: The slow-motion camera app can make you admire wildlife and nature. The video of a lion running behind its target becomes more interesting because of the slow-motion effect. Slow videos enhancing details of plants and flowers give viewers an eye-catching view. Moreover, these videos give wildlife researchers an in-depth analysis.
- Occupational Safety and Security: Accidents in any occupation can be analyzed easily through slow-motion footage. The sequence of events that led to the accident is analyzed thoroughly in this slow-such video. Additionally, after finding the accident’s root cause, the security and safety systems can be updated.
Part 2: Recognizing the Top Slow Motion Camera Apps in 2024
These days, every other app is offering video speed-changing features. Do you know which is excellent and provides more freedom for this task? If not, keep reading until you recognize the top-notch slow-motion camera app download.
- Slow Motion Video Fast & Slow-Mo
- Slow Motion Video Camera
- SloPro
- Motion Camera - Slow Motion
- Efectum - Video Effect Editor
- Slow Motion Video Fx Editor
1. Slow Motion Video Fast & Slow-Mo
Turn your recorded speech into slow motion by trying this Android application. This slow mo camera app is designed to ease the post-production of films. Like professional programs, you can change the normal speed of videos on the graph. You can adjust normal videos with a speed slider. It will maintain a smooth transition when speed changes in videos.
Key Features
- This tool provides different filters and special effects to glorify scenes. You can use its famous Bleach, Polaroid, or Black and White effects.
- Apart from slowing your video, this tool aims to ensure its quality. Moreover, it offers a music library and allows you to add a sound of your choice.
- It can process your video faster with advanced editing. After conversion, users can share their projects directly on social media platforms.
2. Slow Motion Video Camera
For people who are looking for a simple slow-mo camera app, it’s the best one. They just need to upload a video from their gallery and get a slow-motion video. Without any technical operation, it can simply transform your projects. You can choose a specific video part to add a slow-motion effect using this tool.
Key Features
- Besides making videos slow, you can also use its trimming option. It will cut down the unnecessary parts of your footage.
- After getting a preview of your changes, you can share the media on any platform. In regard, you can share videos on WhatsApp, Facebook, Instagram, and Twitter.
- Despite slowing down clips, users can make them super-fast. To do so, they just have to move the speed slider to the right.
3. SloPro
It is the best slow-motion camera app that helps in making slow-motion videos. High-speed shoot video can be played in slow motion by this app. It offers optical flow elements to make a video high-quality. Also, the app helps to make any action of a person in slow motion to give a cool look.
Key Features
- The app provides the option to slow down the video by a percentage. You can apply the percentage and see which one is suitable for you.
- There is an option to fast-motion the video two times, three times, or four times. Depending on the user’s requirement, the fast-motion effect can be adjusted.
- Video can be made high quality by applying the optical frame option. The frame can also be adjusted from the frame blend option.
4. Motion Camera - Slow Motion
Motion Camera - Slow Motion camera app helps to record the video with motion effects. It allows you to record the video the way you want by offering different effects. You can try all these effects to make videos and impress friends on social media. So, it’s an in-one app that provides various effects for video on one platform.
Key Features
- This tool lets you record videos in slow motion. If you haven’t recorded it, use its slow button and turn the normal video into the slow one.
- It does not limit your creativity to making a slow-motion video. Thus, you can also create fast-motion videos to skip boring parts.
- If you want to blur certain sensitive parts of the video, use this app. It allows you to add a blur effect in video or capture shots in a blur.
5. Efectum - Video Effect Editor
This video editor is an amazing platform for making awesome videos. It has various features for video editing, like slow-motion and fast-motion effects. The app provides more features that make it flexible for all users. Moreover, you can insert relevant music in your content using this slow-motion camera app. There are many categories of music that you can choose from as per your mood.
Key Features
- The undesired clip or part of the video can be cut through this app. This editor can also trim extra or unnecessary shots recorded in the video.
- You can add the reverse effect in the video to rewind certain shots. Also, users can record videos in timelapse with complete customization.
- Despite that, it offers aesthetic filters to enhance your content’s appeal. Moreover, you can create a collage using this platform.
6. Slow Motion Video Fx Editor
If you are still browsing a perfect Slo-mo camera app, end your search on this app. It is an advanced video editor for slow and fast-motion video effects. You can apply the slo-mo and time-lapse quickly with this app. This video editor allows you to adjust speed flexibly according to requirements. With its interactive interface, your editing experience can be smooth and give you an aesthetic appeal.
Key Features
- Users can add different filters and effects to the video through this app. Such filters can make videos more captivating.
- You can add voiceovers and audio to your slow-down clips. This platform offers an extensive music library that caters to every kind of music.
- After editing footage, you can save it in your gallery with a single click. Besides, you can share on the social media platforms of your choice.
Bonus Part: Helping Create Professional-Grade Videos with Filmora
Slow-motion desktop tools are more powerful and versatile compared to apps. They provide flexibility to customize speed, playback, and other parameters. Professional editors rely on desktop tools instead of a slo-mo camera app for HD footage. In this regard, Wondershare Filmora proves to be a superior platform and the first choice for editors.
It is a video editor with AI integration to replace typical editing methods. You can bring innovation to old patterns of post-production tasks. The AI features of Filmora open the doors for unlimited creativity on one platform. From generating text to converting it into sound and image, Filmora can turn you speechless.
Free Download For Win 7 or later(64-bit)
Free Download For macOS 10.14 or later
Step 1Download Filmora and Explore it to Start a New Project
Go to the official site of Wondershare Filmora and tap to download it. After successful installation, launch it in your system to proceed. Hit the “New Project” from its main interface and enter the main editing window. Now, import your intended video in Filmora and drag it to the timeline.
Step 2Discover the Ways to Access Uniform Speed Option
Press your keyboard’s “Ctrl + R” keys and navigate to the right-side panel. Alternatively, you can right-click on the video and pick “Uniform Speed” from the list. Both ways will take you to that editing panel, where you can adjust speed.
Step 3Adjust Speed and Enhance the Playback
Hold the slider of “Speed” and drag towards the left to slow down the video. Optionally, you can move the slider on the right side for making fast-motion videos. Afterward, enable the “Ripple Edit” and “Maintain Pitch” options for playback enhancement. Then, move down and extend the “AI Frame Interpolation” menu to tap the “Optical Flow.”
Step 4Polish Videos or Export it from Different Ways
Optical flow will make the video slow while retaining its quality. Now, you can use “Audio” and “Transition” icons to polish your clips. When done editing, press the “Ctrl + E” keys to get the “Export” menu to save the video on your PC. In addition, you can use the “Export” button at the top right corner for exporting purposes.
Innovative Key Features of Filmora in Video Editing
If you want to identify exceptional functionalities of Filmora, read this part. Here, we have enlisted some fruitful and trending features to make you explore this platform further.
1. Motion Tracking
Visualize appealing media to inspire the audience with the help of Filmora. AI algorithms in this platform automatically detect moving objects in videos and add neon graphics. The AI motion tracker can also assist you in adding text, titles, smiley faces, and message bubbles. Besides, it can insert a mosaic effect and blur the moving faces to match your content needs.
2. AI Smart Masking
Recording videos in public places can sometimes ruin the best shots. You will not face it with Filmora, as it provides an advanced smart masking feature. It can intelligently recognize objects from video to change their background. With a multi-layer overlay, users can create three-dimensional scenes. Besides, it allows you to make color corrections in footage where required.
3. AI Music Generator
Have you heard that any slo-mo camera app can generate music for you? It is not in the above-highlighted applications, but Filmora can. It can generate music that aligns with your content needs. Users have to define the music length and number of tracks they want. Also, this feature requires you to prompt with music moods you wish to generate.
4. Screen Recorder
Record your screens for lectures, product demos, and gameplays with Filmora. It lets you record the entire screen or a specific window part. This is the most trending feature of Filmora, assisting video meetings. You can streamline recorded video on any popular platform with the recorded voices. Surprisingly, users can show four different mouse clicks along with sounds in recordings.
Conclusion
Ultimately, slow-motion videos can practically serve many benefits in various settings. The slow-motion camera app is helping individuals, but professionals are looking for better options. They should use Wondershare Filmora to use advanced features in making slow motion. Besides, Filmora is an AI platform that can uplift typical ways of video editing. So, try to explore its maximum functionalities after launching it.
How to Get Zoom on TV [Easy Solutions]
The modern workforce needs adaptable alternatives to the conventional room-to-room conferencing. The latest integrated online collaboration platform is called Zoom. What’s more, now you can get Zoom on TV. Being one of the most well-known conferencing programs, it offers reliable and efficient hosting of online meetings. In a same vein, you may set up conference rooms, do video seminars, and use instant messaging to receive real-time communications. Moreover, can you get zoom on your tv? Then the answer is Yes! The ideal technique to expand a small conference is to mirror it on TV using Zoom meetings. Additionally, sharing across all platforms and devices is possible. Sharing HD video, audio, and material from your desktop and mobile devices to conference rooms and phone systems is simple, dependable, and safe with Zoom Meetings.
Zoom is one of the top videos calling applications available, however, in terms of functionality, dependability, and stability. Special features include screen sharing for multi-user annotation and local and cloud recording with transcription. With just a single click, you may share any file with supported and encrypted settings for increased security and communicate across all platforms. Zoom has now come to represent meetings for those who do their business remotely. For almost all platforms, including Android, iOS, macOS, Windows, Smart TVs, etc., the Zoom app is officially accessible. For the query how to get zoom on portal tv? you may activate Zoom screen casting whether you’re using a Windows 10 or a Mac laptop with the Chrome browser. This section will be useful to you if you want to benefit from Zoom on a TV. You may thus do so. Continue reading the article to learn more about how to get zoom on tv.
Part 1: Get Zoom on TV with HDMI Cable
Although Zoom provides companies and bigger organizations with a professional solution like Zoom Rooms, if you’re at home, you don’t need to put anything on your TV to use Zoom. You may start using Zoom right away by simply connecting your Zoom device to your TV. Connect your TV to your laptop’s HDMI port if it has one. Simple as that, however if the laptop doesn’t figure it out on its own you may need to explain what is going on with the second display. Although more reliable, connecting via cable means your source device is linked to the TV and you can’t go for a stroll. It also means you don’t have to worry about the wireless connection fading.
Steps to Get Zoom on TV with HDMI
Step1Connect the HDMI End to the TV and the Other End to Your Device
You may use this in its place if you don’t have an HDMI but do have a USB-C port. To connect to the HDMI cable coming into your TV, you’ll need a dongle, but you’ll need to make sure it’s compatible.
Step2Turn On your TV
Turn on your TV, then switch the video source to the HDMI port you just connected in your device to using the TV remote.
Step3Launch Zoom Meeting
Start or join a meeting by using the Zoom app on your smartphone (available for Android, iOS, Windows, and macOS).
Part 2: Use AirPlay to Connect Zoom to TV
Using AirPlay mirroring, MacOS or iOS devices may share content with Zoom rooms. On MacOS and iOS, Airplay is used to communicate between the Zoom client and the Zoom room. There may be a great potential for your own business requirements if you can figure out how to utilize Airplay to Zoom mirror your screen to your Apple TV. By default, AirPlay sends audio to the Apple TV. Depending on how loud your speakers are set to play and where your input device’s microphone is located, this may cause echoing and ever-louder feedback loops. Without further ado, let’s look at some of the important strategies you may use to maximize live screen streaming on your Apple TV device.
Steps to Use AirPlay to Connect Zoom to TV
Step1Navigate to the Airplay Display in the Apple menu’s top right corner. Choose your Apple TV from the list of AirPlay Display options in the Displays preference pane. The “Show mirroring option in the menu bar when available” checkbox makes it easier to reach the AirPlay menu.

Step2Select Room Management > Zoom Rooms after logging into the Zoom online interface to manage your current Zoom Rooms. Then, modify the account settings and turn on Apple screen mirroring using the location hierarchy system.
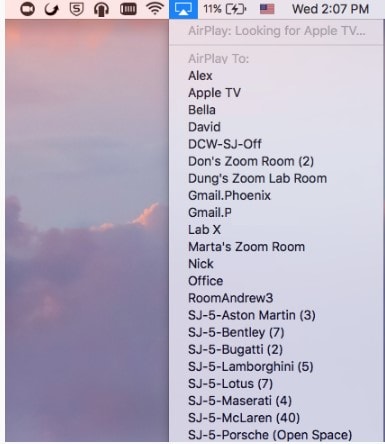
Step3Turn on Apple Screen Mirroring by going to the Meetings tab. If this happens, you may need to activate it from the verification dialog box; otherwise, screen mirroring ought to start immediately on your device and let you see Zoom on your Apple TV. A shared password will be required of you.
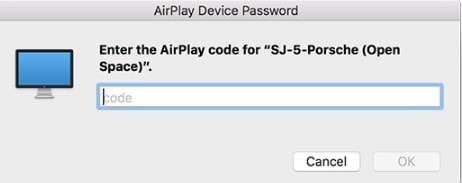
Step4Enter the passcode that is shown on the Zoom room’s screen. You may start using Airplay on your smartphone after enabling Apple screen mirroring.
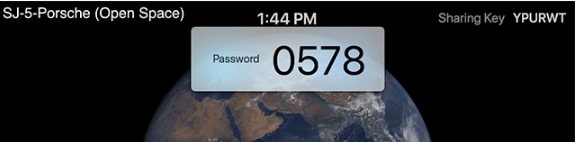
Step5After that, turn off AirPlay Display by using the option in the preference pane or the system menu bar. To stop sharing, click Disconnect Airplay.
Part 3: Mirror Screen with Chromecast
The Chromecast gadgets from Google are well constructed. They should be able to cast more than just standard streaming services to your TV, logically speaking. Using a Chromecast device is one of the simplest methods to cast a Zoom conference to your TV. They are affordable, and any Google browser and the Google Home app for your Android or iOS smartphone both contain the cast capability. Between a device, such as your phone or computer, and the television, Chromecast offers the perfect connection. Chromecast makes it easy to cast Zoom meetings, particularly conferences with many of participants, since it can virtually reflect everything on your phone, tablet, or computer screen to your TV. For meetings with bigger attendance, it is advantageous to be able to cast Zoom meetings to almost any device, even a smart TV, using Chromecast.
Steps to Mirror Screen with Chromecast
Step1Install the Chromecast
Connect your Google Chromecast to the same internet source as your casting device by plugging it in.
Step2Manage Cast Settings
Locate the casting option on your device and search for recipients. Get the Zoom Cloud Meetings app for iOS or Android. You’ll also need to download the third-party software if you use an iPad or iPhone. After that, sign up for a Zoom account and log in to get started.
Step3Start Mirroring Zoom
The screen of your phone will show up on your TV when you tap your Chromecast. The best view is obtained by turning your phone into landscape after opening Zoom as usual. Once you place a call from here, the video will cast to your TV. Go to the next screen and click Start Broadcasting. You may now start casting to your Chromecast device by opening the Zoom Cloud Meeting app.
You must download the third-party app if you use an iPhone or iPad. The Chromecast Streamer software will let you cast a Zoom meeting on your Chromecast device as Zoom doesn’t provide a casting option.
Conclusion
Zoom’s popularity has skyrocketed as a result of the Pandemic. Zoom has emerged as the preferred video conferencing solution as the bulk of the global workforce shifts to a “work from home” environment. Now that more individuals than ever before work from home, video conferencing has emerged as a vital tool for marketing and corporate communication. Mirroring Zoom meetings to TV has never been this simple. In light of this, we hope that this guide has helped you come up with some of the greatest ideas and approaches for your personal zoom sharing needs. We really hope that this information has been helpful to you if you’ve been interested in learning more about screen sharing your Zoom to TV. Thanks to these methods, you can now mirror any device platform on TV.
The modern workforce needs adaptable alternatives to the conventional room-to-room conferencing. The latest integrated online collaboration platform is called Zoom. What’s more, now you can get Zoom on TV. Being one of the most well-known conferencing programs, it offers reliable and efficient hosting of online meetings. In a same vein, you may set up conference rooms, do video seminars, and use instant messaging to receive real-time communications. Moreover, can you get zoom on your tv? Then the answer is Yes! The ideal technique to expand a small conference is to mirror it on TV using Zoom meetings. Additionally, sharing across all platforms and devices is possible. Sharing HD video, audio, and material from your desktop and mobile devices to conference rooms and phone systems is simple, dependable, and safe with Zoom Meetings.
Zoom is one of the top videos calling applications available, however, in terms of functionality, dependability, and stability. Special features include screen sharing for multi-user annotation and local and cloud recording with transcription. With just a single click, you may share any file with supported and encrypted settings for increased security and communicate across all platforms. Zoom has now come to represent meetings for those who do their business remotely. For almost all platforms, including Android, iOS, macOS, Windows, Smart TVs, etc., the Zoom app is officially accessible. For the query how to get zoom on portal tv? you may activate Zoom screen casting whether you’re using a Windows 10 or a Mac laptop with the Chrome browser. This section will be useful to you if you want to benefit from Zoom on a TV. You may thus do so. Continue reading the article to learn more about how to get zoom on tv.
Part 1: Get Zoom on TV with HDMI Cable
Although Zoom provides companies and bigger organizations with a professional solution like Zoom Rooms, if you’re at home, you don’t need to put anything on your TV to use Zoom. You may start using Zoom right away by simply connecting your Zoom device to your TV. Connect your TV to your laptop’s HDMI port if it has one. Simple as that, however if the laptop doesn’t figure it out on its own you may need to explain what is going on with the second display. Although more reliable, connecting via cable means your source device is linked to the TV and you can’t go for a stroll. It also means you don’t have to worry about the wireless connection fading.
Steps to Get Zoom on TV with HDMI
Step1Connect the HDMI End to the TV and the Other End to Your Device
You may use this in its place if you don’t have an HDMI but do have a USB-C port. To connect to the HDMI cable coming into your TV, you’ll need a dongle, but you’ll need to make sure it’s compatible.
Step2Turn On your TV
Turn on your TV, then switch the video source to the HDMI port you just connected in your device to using the TV remote.
Step3Launch Zoom Meeting
Start or join a meeting by using the Zoom app on your smartphone (available for Android, iOS, Windows, and macOS).
Part 2: Use AirPlay to Connect Zoom to TV
Using AirPlay mirroring, MacOS or iOS devices may share content with Zoom rooms. On MacOS and iOS, Airplay is used to communicate between the Zoom client and the Zoom room. There may be a great potential for your own business requirements if you can figure out how to utilize Airplay to Zoom mirror your screen to your Apple TV. By default, AirPlay sends audio to the Apple TV. Depending on how loud your speakers are set to play and where your input device’s microphone is located, this may cause echoing and ever-louder feedback loops. Without further ado, let’s look at some of the important strategies you may use to maximize live screen streaming on your Apple TV device.
Steps to Use AirPlay to Connect Zoom to TV
Step1Navigate to the Airplay Display in the Apple menu’s top right corner. Choose your Apple TV from the list of AirPlay Display options in the Displays preference pane. The “Show mirroring option in the menu bar when available” checkbox makes it easier to reach the AirPlay menu.
Step2Select Room Management > Zoom Rooms after logging into the Zoom online interface to manage your current Zoom Rooms. Then, modify the account settings and turn on Apple screen mirroring using the location hierarchy system.
Step3Turn on Apple Screen Mirroring by going to the Meetings tab. If this happens, you may need to activate it from the verification dialog box; otherwise, screen mirroring ought to start immediately on your device and let you see Zoom on your Apple TV. A shared password will be required of you.
Step4Enter the passcode that is shown on the Zoom room’s screen. You may start using Airplay on your smartphone after enabling Apple screen mirroring.
Step5After that, turn off AirPlay Display by using the option in the preference pane or the system menu bar. To stop sharing, click Disconnect Airplay.
Part 3: Mirror Screen with Chromecast
The Chromecast gadgets from Google are well constructed. They should be able to cast more than just standard streaming services to your TV, logically speaking. Using a Chromecast device is one of the simplest methods to cast a Zoom conference to your TV. They are affordable, and any Google browser and the Google Home app for your Android or iOS smartphone both contain the cast capability. Between a device, such as your phone or computer, and the television, Chromecast offers the perfect connection. Chromecast makes it easy to cast Zoom meetings, particularly conferences with many of participants, since it can virtually reflect everything on your phone, tablet, or computer screen to your TV. For meetings with bigger attendance, it is advantageous to be able to cast Zoom meetings to almost any device, even a smart TV, using Chromecast.
Steps to Mirror Screen with Chromecast
Step1Install the Chromecast
Connect your Google Chromecast to the same internet source as your casting device by plugging it in.
Step2Manage Cast Settings
Locate the casting option on your device and search for recipients. Get the Zoom Cloud Meetings app for iOS or Android. You’ll also need to download the third-party software if you use an iPad or iPhone. After that, sign up for a Zoom account and log in to get started.
Step3Start Mirroring Zoom
The screen of your phone will show up on your TV when you tap your Chromecast. The best view is obtained by turning your phone into landscape after opening Zoom as usual. Once you place a call from here, the video will cast to your TV. Go to the next screen and click Start Broadcasting. You may now start casting to your Chromecast device by opening the Zoom Cloud Meeting app.
You must download the third-party app if you use an iPhone or iPad. The Chromecast Streamer software will let you cast a Zoom meeting on your Chromecast device as Zoom doesn’t provide a casting option.
Conclusion
Zoom’s popularity has skyrocketed as a result of the Pandemic. Zoom has emerged as the preferred video conferencing solution as the bulk of the global workforce shifts to a “work from home” environment. Now that more individuals than ever before work from home, video conferencing has emerged as a vital tool for marketing and corporate communication. Mirroring Zoom meetings to TV has never been this simple. In light of this, we hope that this guide has helped you come up with some of the greatest ideas and approaches for your personal zoom sharing needs. We really hope that this information has been helpful to you if you’ve been interested in learning more about screen sharing your Zoom to TV. Thanks to these methods, you can now mirror any device platform on TV.
Also read:
- In 2024, Ideas to Make A Perfect Café Vlog
- In 2024, Adobe Premiere Pro Rec 709 LUTs Finding The Best Options
- In 2024, Best 9 Amv Makers for Computer
- In 2024, Do You Want to Learn About the iPhone LUT? Have You Used Them on Your iOS Device? Use This Article to Get Valuable Insights on the Same
- How to Use a Stabilization Tool in Filmora for 2024
- New In 2024, Some Facts About GIF Background You Didnt Know
- 2024 Approved 15 Free Cinematic LUTs for Your Film
- Steps to Create Green Screen Videos in After Effects
- 2024 Approved 10 Amazing Anime Character Designs to Inspire You
- 2024 Approved How To Create a Polaroid Collage?
- How Does the YouTube AI Algorithm Work - AI EXPLAINED
- In 2024, Change Speed of a Video on iPhone
- How to Use the Logo Intro Templates for Your Next Video for 2024
- New What You Should Know About Speech-to-Text Technology
- New In 2024, Top Things People Know About Wedding Slideshow
- Updated In This Article, We Talk About How to Add Old Film Overlays and Other Effects to Turn the Videos or Photos More Vintage and with an Older Aspect. We Take a Look at Filmora in This Guide and Give Tips on How to Create Great Retro Videos
- New Best Ideas on Using Filmora Green Screen for 2024
- Updated In 2024, Whatre the Best Alternatives to Pexels?
- How to Make a GIF With Transparent Background, In 2024
- New In 2024, How To Create Quiz Videos Detailed Guide
- New In 2024, 20 Best Video Background Templates
- List of Whatsapp Video Format That You May Need to Know for 2024
- Updated In This Article, We Will Discuss What Lens Distortion Is, How It May Be Fixed, and the Factors You Need to Pay Attention to Avoid Lens Distortion when Taking or Recording Videos
- Updated 2024 Approved How to Apply Video Filters
- 2024 Approved Do You Want to Slow Down Your TikTok Video and Zoom on a Specific Part? This Is No Longer a Difficult Task as This Video Comes up with the Right Set of Methods that Can Be Used to Implement the Slow Zoom Effect TikTok
- New Fixes | What If YouTube Zoom to Fill Not Working, In 2024
- Updated How to Blur a Still or Moving Part of Video
- In 2024, Do You Want to Know How to Edit a Time Lapse Video on iPhone, Interesting Ideas, and some Tips and Pointers for Shooting a Professional Time Lapse Video? Find Out Everything in This Guide
- New 10 Best Mp3 Visualizers Windows, Mac, Android, iPhone & Online
- Updated Ultimate Guide on Making A Slideshow Video for 2024
- New 2024 Approved Fun & Easy Masking Tricks in Filmora
- Updated This Article Will Show You How to Clone Yourslef in Videos with Filmora
- New Benefits of Live Streaming on YouTube
- Updated 2024 Approved How to Use a Stabilization Tool in Filmora
- New Are You Also a Fan of the Slow Mo Guys? Well! Who Isnt? Learn How You Can Create Compelling Slow-Mo Videos Like the Slow Mo Guys Here
- 2024 Approved Detailed Steps to Cut a Video in QuickTime
- In 2024, Want to Learn How to Make a Fortnite Montage? This Guide Will Give You the Low-Down on Creating Epic Montage Fortnite Videos that You Can Share with Other Players on Social Media Platforms
- In 2024, KineMaster Templates 101 How to Get the Most Out of Video Templates
- How to Zoom Webcam on PC for 2024
- Updated Using Adobe After Effects as a Pro-Level Editing Platforms Demands You to Add Expressions in After Effects. If Youre Looking for the Solutions on After Effects How to Add Expressions Then Weve Got You Covered. Learn More Here
- Updated How to Create One Click Video Reverse Effect in Filmora for 2024
- Updated Why Your Transparent GIF Is Hard to Remove
- 2024 Approved Splitting Audio From a Video in Sony Vegas Step by Step
- Updated 6 Instant Ways to Make Windows 10 Slideshow for 2024
- New 2024 Approved 10 Best Free Text to Speech Software Windows, Mac,Android, iPhone & Online
- New 2024 Approved Top 5 Free Online Video Filter Editors Improve Your Videos with Filters
- New In 2024, How to Add Adjustment Layer (Clip) in DaVinci Resolve?
- In 2024, Do You Want to Download Slow-Motion Apps that Can Edit Video Professionally? This Article Will Discuss some Slomo Makers for Both iOS and Android
- Here are Some of the Best Pokemon Discord Servers to Join On Vivo Y200e 5G | Dr.fone
- Google Play Services Wont Update? 12 Fixes are Here on Asus ROG Phone 8 | Dr.fone
- How To Unlock a Vivo S17t Easily?
- Catch or Beat Sleeping Snorlax on Pokemon Go For Poco C55 | Dr.fone
- In 2024, Tips and Tricks for Setting Up your Nokia G22 Phone Pattern Lock
- Easy Guide to Tecno Spark Go (2024) FRP Bypass With Best Methods
- Easy Ways to Manage Your Xiaomi Redmi 13C 5G Location Settings | Dr.fone
- Ultimate Guide from Xiaomi Redmi K70 FRP Bypass
- In 2024, 5 Quick Methods to Bypass Oppo Find X6 Pro FRP
- In 2024, Change Location on Yik Yak For your Realme Narzo N55 to Enjoy More Fun | Dr.fone
- 3 Easy Ways to Factory Reset a Locked iPhone XS Without iTunes
- In 2024, Is pgsharp legal when you are playing pokemon On Samsung Galaxy F04? | Dr.fone
- In 2024, Best 3 Asus ROG Phone 8 Emulator for Mac to Run Your Wanted Android Apps | Dr.fone
- In 2024, Top 15 Apps To Hack WiFi Password On Realme GT 5 Pro
- In 2024, 5 Techniques to Transfer Data from Motorola Razr 40 Ultra to iPhone 15/14/13/12 | Dr.fone
- How to Transfer Data from Oppo A1x 5G to Any iOS Devices | Dr.fone
- In 2024, Pattern Locks Are Unsafe Secure Your Vivo V30 Phone Now with These Tips
- Fixed Excel 2013 VBA Runtime Error 9 Subscript Out of Range
- How to Change/Add Location Filters on Snapchat For your Samsung Galaxy A15 4G | Dr.fone
- The Ultimate Guide to Bypassing iCloud Activation Lock from Apple iPhone 14
- How To Do Poco X6 Pro Screen Sharing | Dr.fone
- In 2024, Can I Bypass a Forgotten Phone Password Of Samsung Galaxy A15 5G?
- Title: Best MOV to GIF Converters for 2024
- Author: Chloe
- Created at : 2024-05-20 03:37:54
- Updated at : 2024-05-21 03:37:54
- Link: https://ai-editing-video.techidaily.com/best-mov-to-gif-converters-for-2024/
- License: This work is licensed under CC BY-NC-SA 4.0.
