
:max_bytes(150000):strip_icc():format(webp)/GettyImages-1134410016-75c4b547097941299e55dceeef4b764c.jpg)
Best Video Editors to Add Text to a Video for 2024
Best Video Editors to Add Text to a Video
While it can be very easy to add text to an image, the same cannot be said when it comes to adding even the simplest text to a video. You will need video editing software that is designed with the necessary features to help you add text to your video.
There are very many programs in the market that can technically be used to add text to a video. But the ones we will look at are video editors that make the process easy, but also give you a wide range of options to customize your text in numerous ways.
Filmora
Filmora by Wondershare is one of the best video editors in the market. Its user interface is so easy to use that adding text to the video is a simple 3-step process. Aside from adding text to the video, Filmora also allows you to edit other aspects of the video including adding transitions, overlays, and animations to any section of the video.

Key Features:
- You can use Filmora to add text to any section of the video
- It gives you the freedom to move the text to any section of the video
- Customizing the text, you add to the video can be done in numerous ways including changing the color, and font and adding animations to the text.
- It offers numerous templates to choose from and different font styles that you can use
- It has a simple user interface that makes the video editing process very easy
- It has numerous other video editing capabilities that allow you to create and edit videos in different ways including splitting videos, trimming videos, and even merging videos clips into one
- You can upload the videos directly to YouTube after editing.
After Effects
Adobe After Effects is a motion picture editing program that you can also use to add text and other animations to your video. While you can use it to add simple text to the video, it is an ideal solution when your goal is to add advanced text animations. It is however by no means a simple solution, especially for beginners who may find it hard to get going with After Effects.

Key Features:
- You can add simple lines of text to any section of the video
- Text is easily customizable by changing the color, font, and size of the text
- You can also choose to change the entire text layer and add advanced animations and effects
- There are a lot of text, animations, and effects templates to choose from
- You can easily copy text from other Adobe applications to use in After Effects
Movavi Editor
Movavi video editor is another great video editor that you can use to add and edit text on a video. Like most similar tools it is designed to simplify the process, allowing you to add text to any section of the document, move the text to any location on the video and even add text effects to customize the text. It has a very simple user interface that allows you to do that quickly and easily.

Key Features:
- You can add text to any section of the video
- Customizing the text by changing the font, color and size is also very easy
- The user interface is very easy to use, allowing you to add even blocks of text very quickly
- You also have additional options to edit the video including splitting and merging the video or adjusting the brightness, saturation, and color.
iMovie
This is a built-in video editor that you will find on macOS and iOS devices. Even though it is free, iMovie has a lot of features that come in handy when you want to add and edit text on a video. The fact that it can be used on iOS devices is an added advantage when you want to edit videos on the go.

Key Features:
- It allows users to add transitions and effects to the text you add to the video
- It comes with a lot of title templates to choose from
- Adding animated text is also very simple including Sideways Drift, Lens Flare, and more
- You can customize the text in very many ways including adding fonts, drop shadows, changing the color, and even resizing or repositioning the text.
Camtasia
TechSmith Camtasia is one of the most popular tools to create and edit videos. Of the numerous features that you get when you choose to use Camtasia is adding and editing text to the video. It has numerous templates that can be used to customize the text you add in various ways.

Key Features:
- It gives you numerous options to add text to the images including text boxes, templates, and effects
- It has a speech-to-text feature that is perfect for adding captions and subtitles to the video
- You can easily customize the text by adding transitions and effects or even by simply changing the font, color, and size of the text
- The text can be moved to any section of the video
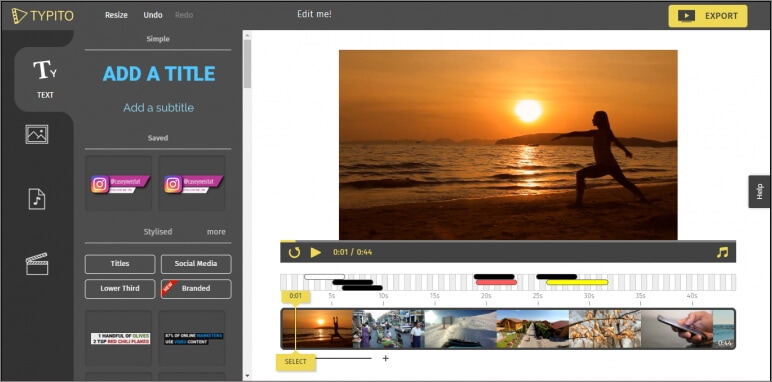
Typito
Typito is an online video editor with simple tools that can help you make changes to any video. designed to help YouTube content creators and video editors, Typito can be used to add all kinds of text and text effects to any video. It is accessible on all browsers and it is also very easy to use.
Key Features:
- It is very easy to use, allowing you to add text to any video in a few simple steps
- It has numerous templates to choose from
- Changing the font size, color, and style of the text is very easy
- You can publish videos directly to numerous video-sharing sites after editing
- It allows users to add animations, transitions, and effects to the text
Splice
Splice is an iOS app designed to help you add text to videos on iOS devices. Adding text to any video using Splice can be easily done using the overlay feature. It also has numerous other video editing features including allowing you to easily synchronize your videos and music, adding filters and transitions, and more.

Key Features:
- it has a simple user interface that makes adding text very easy
- You can customize the text in various ways including changing the font size, color and style or even adding various text effects
- Videos can be saved on the device or shared directly on social media apps like Facebook, Instagram, and YouTube
- It has numerous other video editing features including filters and animations
Clipomatic
If the text you want to add to the video is in the form of captions or subtitles, then Clipomatic is perhaps the best choice. It supports various languages including German, French, Portuguese, and even Chinese. You can also use it to add regular text to any video, reposition the text on any section of the video and customize the text in various ways.

Key Features:
- It is available for both Android and iOS
- Adding text to the video is very easy
- You can easily customize the text by changing the font color, and size and adding transitions and text effects
- It supports various languages, making it ideal for captions and subtitles
MySubtitle
MySubtitle is a simple but highly effective app that you can use to add text to your video. As the name suggests, this tool is ideal for adding subtitles and you can do that very easily by simply typing in the text and syncing the text to the video’s content.

Key Features:
- It is available for both iOS and Android devices
- You can type in your subtitles directly on the video
- Subtitles can then be paced to suit the video’s playback speed
- It is completely free to use
- You can share the videos you edit directly on various social media platforms
Free Download For Win 7 or later(64-bit)
Free Download For macOS 10.14 or later
Free Download For macOS 10.14 or later
Top Way to Freeze-Frame in Final Cut Pro
Best Way to Freeze Frame in Final Cut Pro
An easy yet powerful editor
Numerous effects to choose from
Detailed tutorials provided by the official channel
The primary purpose of freezing frames is to hold a particular frame in clips in one place, temporarily to stop the action onscreen. You can create the Freeze-Frame clip from any video clip in the browser or the timeline. If a Freeze-Frame clip is created from the browser, it gets affixed to the major storyline at the Playhead location as a connecting clip.

Now, Final Cut Pro is a fantastic video editor available for macOS. It is an entire video editing tool perfect for basic video editing. In addition, it can be valuable to Freeze-Frames in a video. This article will explain why to Freeze-Frame in FCP and its alternatives. We will also introduce how to add a Freeze-Frame Final Cut Pro video editor that can make your videos more appealing.
In this article
01 [Why Do You Need to Freeze-Frame](#Part 1)
02 [How to Freeze-Frames in Final Cut Pro?](#Part 2)
03 [3 Alternative to Freeze-Frames and Why](#Part 3)
Part 1 Why Do You Need to Freeze-Frame
Freeze-Frames is an effective and quick way to begin a drama session when you want to edit a movie. Besides, users of any age, ranging from children to adults, can easily handle it. Participants can use it to create an image using their bodies with no movement, and Freeze-Frames can also be made by individuals, a whole group, or a small group.
Another perfect way to describe a Freeze-Frame is a “still image.” It is a way of pressing the pause button on the remote control and making a statue or taking a photo. The image creation can be quick without discussion, planned, or rehearsed.
Here are some reasons you need a Freeze-Frame app:
● They are beneficial as a quick way of communicating ideas or telling a story.
● In addition, Freeze-Frame can represent objects or people and even abstract concepts like atmosphere or emotions.
● Freeze-Frames can help shyer performers to gain confidence, as there are no lines to learn.

Part 2 How to Freeze-Frames in Final Cut Pro?
FCPX Freeze-Frame clips can temporarily hold a particular frame in place and stop the action onscreen. The Freeze-Frame, as its phrase, freezes or contains the specific frame you want to feature or focus on in a video.
You have to pick or select the frame you want to freeze and follow the steps in the article to freeze the frame of your choice.
In addition, if you do not want to create a separate freeze-frame clip, make a hold segment to stop the action for part of a clip temporarily. This action offers more precise control, especially when a variable speed effect is created.
You can Freeze-Frame on the fly by navigating to a specific frame in a clip or during playback. Thus, A Freeze-Frame clip will preserve any attributes applied to the source clip, such as settings and effects.
Here is how to Freeze-Frame in Final Cut Pro effectively.
Step 1: In the browser or in the timeline in Final Cut Pro, do any one of the following:
● Begin playback of the clip and pause
● Move the Skimmer or Playhead to the portion you wish to freeze.

Step 2: Choose Edit > Add Freeze-Frame (or press Option-F).
Note: How Freeze-Frame gets added to the project depends on whether it got created from the browser or the timeline:
● If the Freeze-Frame was from a browser clip, a new freeze-frame clip gets attached as a connected clip at the Playhead site in the timeline.
● Alternatively, if the freeze-frame was from the timeline, a new freeze-frame clip gets inserted at the Playhead location or the Skimmer in the timeline.

Part 3 Alternative to Freeze-Frames and Why
There are a lot of alternatives to Freeze-Frame in Final-Cut Pro all over the Internet. However, you must be careful while choosing when you want to add customization to your videos.
Additionally, if you are looking for the best editor to add a Freeze-Frame effect to your video, we recommend trying Filmora. Wondershare Filmora Video Editor for Mac and Windows devices comes with tons of Freeze-Frame impacts that you can use to spice-up your video.
For Win 7 or later (64-bit)
For macOS 10.12 or later
Some of the alternatives to adding a Freeze-Frame on Final Cut Pro include:
01AZ Screen Recorder
This is a free android APK alternative to Freeze-Frames in FCP. It is a great application available for anyone who needs to have the ability to record what is happening on their Android device’s screen. One great benefit of using this application is that your Android device does need to be rooted to experience the best the app has to offer.
A blinking red dot will be noticed in the screen’s right bottom corner when users begin to record with this application. This is an indicator that the recording is in progress. In addition, users can pause the recording as per their requirements by just tapping the screen. If you are not comfortable with the location of the blinking red dot, hold and move it to anywhere on the screen that can better suit your needs. Thus, this is an excellent alternative to Final Cut Pro X Freeze-Frame with the exceptional video quality.
Features
● Simple, clean, and easy to use interface
● The application settings options allow users to adjust things like the video output quality and how the clip recording interacts with the screen while the application is running.
● The four icons located in the middle of the application’s home screen clearly outline their options when the application is first open. The four options include adjusting the application’s settings, accessing previously recorded video files, starting recording, and the option to exit.
Pros:
● It has options to increase video quality.
● No watermark
● No time limits
● No frame loss
Cons:
● No option to live stream.

02AndroVid
This Android application allows the creation of new videos by cutting and combining two or more video effects on your phone. Additionally, this application is typically different from the others that let you watch videos or share them with other sites. Bits and pieces can be cut from two or more videos and combined to make a new video. In addition, it is fun to use if you want to create a new music video that features the same song but different steps made when various people are being used.
Users can easily cut and paste with simple instructions, and the application also lets you work with any video stored on your phone.
Features
● Add subtitles to the videos that you create
● Create titles in any color or font that is available with the application
● making the videos from the clips a little more personal and customized before sharing.
Pros
● Allows multiple videos editing
● Allows the addition of a subtitle
● Users can reverse video content
Cons
● You cannot save a lot of work automatically
● It takes time to get the video adjusted

03Action Director
This Android editor also serves as an alternative to Final Cut Pro X Freeze-Frame. This video editing tool allows users to create quality compositions in no time at all. Additionally, you can change the image’s color, cut video clips, add a soundtrack, or insert text with this Video Editor using effortless control. With just a few finger taps on the screen, you can customize any video. This excellent video editing tool lets you create and share your videos quickly and easily.
Features
● Record videos with this Android app.
● Edit video and apply effects from its exclusive list.
● Get more than 12 transitions for your videos
● The useful movie editing guide helps you create videos with action effects and edits.
● Share your videos with your friends.
Pros
● It is fast and easy to use
● It is elementary to control
● Has video sharing option to share videos on another website
Cons
● Requires premium version to export video in high quality
● Ending Thoughts →
● About Final Cut Pro X Freeze-Frame and explained to the user how to use Freeze-Frame in FCP.
● Additionally, the article listed and presented three alternatives to Freeze-Frame and
● Recommended Filmora as the best editing software to use Freeze-Frame effects due to its many editing options.
The primary purpose of freezing frames is to hold a particular frame in clips in one place, temporarily to stop the action onscreen. You can create the Freeze-Frame clip from any video clip in the browser or the timeline. If a Freeze-Frame clip is created from the browser, it gets affixed to the major storyline at the Playhead location as a connecting clip.
Now, Final Cut Pro is a fantastic video editor available for macOS. It is an entire video editing tool perfect for basic video editing. In addition, it can be valuable to Freeze-Frames in a video. This article will explain why to Freeze-Frame in FCP and its alternatives. We will also introduce how to add a Freeze-Frame Final Cut Pro video editor that can make your videos more appealing.
In this article
01 [Why Do You Need to Freeze-Frame](#Part 1)
02 [How to Freeze-Frames in Final Cut Pro?](#Part 2)
03 [3 Alternative to Freeze-Frames and Why](#Part 3)
Part 1 Why Do You Need to Freeze-Frame
Freeze-Frames is an effective and quick way to begin a drama session when you want to edit a movie. Besides, users of any age, ranging from children to adults, can easily handle it. Participants can use it to create an image using their bodies with no movement, and Freeze-Frames can also be made by individuals, a whole group, or a small group.
Another perfect way to describe a Freeze-Frame is a “still image.” It is a way of pressing the pause button on the remote control and making a statue or taking a photo. The image creation can be quick without discussion, planned, or rehearsed.
Here are some reasons you need a Freeze-Frame app:
● They are beneficial as a quick way of communicating ideas or telling a story.
● In addition, Freeze-Frame can represent objects or people and even abstract concepts like atmosphere or emotions.
● Freeze-Frames can help shyer performers to gain confidence, as there are no lines to learn.
Part 2 How to Freeze-Frames in Final Cut Pro?
FCPX Freeze-Frame clips can temporarily hold a particular frame in place and stop the action onscreen. The Freeze-Frame, as its phrase, freezes or contains the specific frame you want to feature or focus on in a video.
You have to pick or select the frame you want to freeze and follow the steps in the article to freeze the frame of your choice.
In addition, if you do not want to create a separate freeze-frame clip, make a hold segment to stop the action for part of a clip temporarily. This action offers more precise control, especially when a variable speed effect is created.
You can Freeze-Frame on the fly by navigating to a specific frame in a clip or during playback. Thus, A Freeze-Frame clip will preserve any attributes applied to the source clip, such as settings and effects.
Here is how to Freeze-Frame in Final Cut Pro effectively.
Step 1: In the browser or in the timeline in Final Cut Pro, do any one of the following:
● Begin playback of the clip and pause
● Move the Skimmer or Playhead to the portion you wish to freeze.
Step 2: Choose Edit > Add Freeze-Frame (or press Option-F).
Note: How Freeze-Frame gets added to the project depends on whether it got created from the browser or the timeline:
● If the Freeze-Frame was from a browser clip, a new freeze-frame clip gets attached as a connected clip at the Playhead site in the timeline.
● Alternatively, if the freeze-frame was from the timeline, a new freeze-frame clip gets inserted at the Playhead location or the Skimmer in the timeline.
Part 3 Alternative to Freeze-Frames and Why
There are a lot of alternatives to Freeze-Frame in Final-Cut Pro all over the Internet. However, you must be careful while choosing when you want to add customization to your videos.
Additionally, if you are looking for the best editor to add a Freeze-Frame effect to your video, we recommend trying Filmora. Wondershare Filmora Video Editor for Mac and Windows devices comes with tons of Freeze-Frame impacts that you can use to spice-up your video.
For Win 7 or later (64-bit)
For macOS 10.12 or later
Some of the alternatives to adding a Freeze-Frame on Final Cut Pro include:
01AZ Screen Recorder
This is a free android APK alternative to Freeze-Frames in FCP. It is a great application available for anyone who needs to have the ability to record what is happening on their Android device’s screen. One great benefit of using this application is that your Android device does need to be rooted to experience the best the app has to offer.
A blinking red dot will be noticed in the screen’s right bottom corner when users begin to record with this application. This is an indicator that the recording is in progress. In addition, users can pause the recording as per their requirements by just tapping the screen. If you are not comfortable with the location of the blinking red dot, hold and move it to anywhere on the screen that can better suit your needs. Thus, this is an excellent alternative to Final Cut Pro X Freeze-Frame with the exceptional video quality.
Features
● Simple, clean, and easy to use interface
● The application settings options allow users to adjust things like the video output quality and how the clip recording interacts with the screen while the application is running.
● The four icons located in the middle of the application’s home screen clearly outline their options when the application is first open. The four options include adjusting the application’s settings, accessing previously recorded video files, starting recording, and the option to exit.
Pros:
● It has options to increase video quality.
● No watermark
● No time limits
● No frame loss
Cons:
● No option to live stream.
02AndroVid
This Android application allows the creation of new videos by cutting and combining two or more video effects on your phone. Additionally, this application is typically different from the others that let you watch videos or share them with other sites. Bits and pieces can be cut from two or more videos and combined to make a new video. In addition, it is fun to use if you want to create a new music video that features the same song but different steps made when various people are being used.
Users can easily cut and paste with simple instructions, and the application also lets you work with any video stored on your phone.
Features
● Add subtitles to the videos that you create
● Create titles in any color or font that is available with the application
● making the videos from the clips a little more personal and customized before sharing.
Pros
● Allows multiple videos editing
● Allows the addition of a subtitle
● Users can reverse video content
Cons
● You cannot save a lot of work automatically
● It takes time to get the video adjusted
03Action Director
This Android editor also serves as an alternative to Final Cut Pro X Freeze-Frame. This video editing tool allows users to create quality compositions in no time at all. Additionally, you can change the image’s color, cut video clips, add a soundtrack, or insert text with this Video Editor using effortless control. With just a few finger taps on the screen, you can customize any video. This excellent video editing tool lets you create and share your videos quickly and easily.
Features
● Record videos with this Android app.
● Edit video and apply effects from its exclusive list.
● Get more than 12 transitions for your videos
● The useful movie editing guide helps you create videos with action effects and edits.
● Share your videos with your friends.
Pros
● It is fast and easy to use
● It is elementary to control
● Has video sharing option to share videos on another website
Cons
● Requires premium version to export video in high quality
● Ending Thoughts →
● About Final Cut Pro X Freeze-Frame and explained to the user how to use Freeze-Frame in FCP.
● Additionally, the article listed and presented three alternatives to Freeze-Frame and
● Recommended Filmora as the best editing software to use Freeze-Frame effects due to its many editing options.
Minecraft Pixel Art: A Complete Guide for Die-Hard Fans
Versatile Video Editor - Wondershare Filmora
An easy yet powerful editor
Numerous effects to choose from
Detailed tutorials provided by the official channel
Minecraft pixel art is a trending subject, and they simply consist of in-game pixel artworks, besides the Minecraft houses, farms or cities.
In this article
01 What is Pixel Art Minecraft?
02 5 Most Popular Minecraft Pixel Art for Minecraft Die-Hard Fans
03 Best Tools to Make Minecraft Pixel Art
04 How to Make Pixel Art Minecraft In-game?
05 Tips for Creating a Wonderful Minecraft Pixel Art
Part 1: What is Pixel Art Minecraft?
This art can range from drawings to 3D models and even statues. Anything the players would like is just up to their imagination.
Like any Minecraft thing you do in-game, you just stack piles of blocks over blocks to do it, except what the player is doing is creating pixelated art, in general in large proportions. In terms of in-game, pixel art really doesn’t do much, but it is to be appreciated like any art.
Many players state that Minecraft pixel art is rewarding and realistic in terms of the game.
Part 2: 5 Most Popular Minecraft Pixel Art for Minecraft Die-Hard Fans
1. The Sandshrew
In this Minecraft pixel art, we see a mural of a Sandshrew; a pokemon depicted sitting down and with a palette color ranging from yellow to light brown and dark brown.
![]()
2. The Obama
In this Minecraft Pixel art, we can see the former president of the USA, Barack Obama portrait, in reference to a famous picture of him in real life. The color palette ranges from white to blue and red.
![]()
3. The Goomba
In this pixel art Minecraft, we have Goomba, a character from Super Mario. The colors are very simple and range from black to white and brown.
![]()
4. Spongebob
In this Minecraft pixel art, we have depicted SpongeBob Square pants in the game. Its color goes from yellow to green, blue, white and black to be faithful to the original cartoon.
![]()
5. The Joker
In this Minecraft pixel art, we have Joker from the Batman universe. A famous villain in that universe. Its color pattern ranges from several tones of green, red, purple, white, and blue.
![]()
Part 3: Best Tools to Make Minecraft Pixel Art
There are a few apps that you can use to create Minecraft pixel art, for example:
1. Scriptolab.com
In this small web application, you are able to transform your image or any photo of your choice into Minecraft pixel art and blocks.
It’s very easy to use. All you have to do is go to the website and pic your image. Resize the image or picture to the desired size to correspond to the number of blocks in the game.
It also has an easy-to-contact platform to communicate with the website owner that can guide you through the steps if you are ever in doubt.
2. Filmora
This is an application that you can download onto your PC or Mac for free. It is a powerful tool that does more than pixel art, but we will use it for such.
With Filmora, you can use a range of tools to create your Minecraft pixel art, like posterize effect to add a different gradient to the pixel art. The tool CC Black Load can help you perfect the square pixels to make it look more defined. You also have tools such as tint and grid to give a retro look to your art. Or even an animation effect for your wallpapers.
Also, in Filmora, you can add many effects to your pixel art like the 8-bit style or 16-bit style. You can also share your creations and export them and send them to your friends.
![]()
Wondershare Filmora
Get started easily with Filmora’s powerful performance, intuitive interface, and countless effects!
Try It Free Try It Free Try It Free Learn More >

3. Pixel Art Builder
In this mobile app, you can create Minecraft pixel art from the palm of your hand.
You can draw on grids rather than in real pixels to help you be more precise with your art. It has a very easy-to-use interface, and it is completely free.
Many of its key features are, for example, exporting images, dynamic size adjustment of the ability to save in several different formats. Its tools range from the regular pencil to eraser, paint bucket, line and circle drawer, move/zoom function, color wheel, and eyedropper.
Part 4: How to Make Pixel Art Minecraft In-game?
It is very easy to create pixel art Minecraft in-game. Of course, each artist’s ability differs, and so does art as well, but to start out, you do not need much. You need, though, careful planning and knowing the exact scale of your art.
You can break the creation of pixel art in Minecraft into four different steps:
1. Choose an image that you like
It is important that you reference the original work and can easily access it, as you might need to peek often while building your own art. The best thing to do is when you are starting to copy an image and work on it, rather than start it from scratch, as it takes an enormous amount of time and you need to be an expert to do it.
2. Break the image down into single-color sections
This is the part where “careful planning” comes in. You need to be looking at your original piece constantly to know if you are going in the right direction. Also, take all the colors and try to group them. Deconstructing the original image into colored shapes is a process that will help you outline the shape and color of the original design.
3. Obtain the necessary resources
You can start this step by opening Minecraft and start collecting blocks that you think will be useful for your pixel art. It does not matter if you play in Survival, Hardcore, or Adventure mode. The process is the same. It is ideal, though, that you work on creative mode when making pixel art, as the game gives you unlimited resources. You are also able to fly in this mode, making it easier to pick up blocks, and there is no risk of your art being destroyed.
4. Start building
Now you can start building your masterpiece. Start with the foundation and build from there; although you can virtually start anywhere, these blocks can float, unlike art or buildings outside the game. The time the process takes depends on the amount of work that needs to be done and the piece’s complexity.
Part 5: Tips for Creating a Wonderful Minecraft Pixel Art
There are many ways to draw Minecraft pixel art, but here are some tips to help you out.
- Have a clear idea of what kind of art you want to do. And start with something pre-made if you are only starting out. It is extremely hard to start something from scratch.
- Plan the pixel art you are going to do. Gather around all the block materials and colors that you’ll need to make your pixel art.
- Use creative mode. Because with the creative mode, you are not limited to the number of blocks you can find, and also, no one can come and destroy your art.
- If it is easier, you can first draft your pixel art on another app to help you map out your own project.
Conclusion
Minecraft pixel art is a growing trend in the video games world. It can range from easy and accessible to beginners to extremely complicated pieces of art. Players are becoming more engaged with this type of art in-game, and the future only predicts a bigger expansion. There are several tools that you can use to start out in your pixel art, as well as many tutorials.
Minecraft pixel art is a trending subject, and they simply consist of in-game pixel artworks, besides the Minecraft houses, farms or cities.
In this article
01 What is Pixel Art Minecraft?
02 5 Most Popular Minecraft Pixel Art for Minecraft Die-Hard Fans
03 Best Tools to Make Minecraft Pixel Art
04 How to Make Pixel Art Minecraft In-game?
05 Tips for Creating a Wonderful Minecraft Pixel Art
Part 1: What is Pixel Art Minecraft?
This art can range from drawings to 3D models and even statues. Anything the players would like is just up to their imagination.
Like any Minecraft thing you do in-game, you just stack piles of blocks over blocks to do it, except what the player is doing is creating pixelated art, in general in large proportions. In terms of in-game, pixel art really doesn’t do much, but it is to be appreciated like any art.
Many players state that Minecraft pixel art is rewarding and realistic in terms of the game.
Part 2: 5 Most Popular Minecraft Pixel Art for Minecraft Die-Hard Fans
1. The Sandshrew
In this Minecraft pixel art, we see a mural of a Sandshrew; a pokemon depicted sitting down and with a palette color ranging from yellow to light brown and dark brown.
![]()
2. The Obama
In this Minecraft Pixel art, we can see the former president of the USA, Barack Obama portrait, in reference to a famous picture of him in real life. The color palette ranges from white to blue and red.
![]()
3. The Goomba
In this pixel art Minecraft, we have Goomba, a character from Super Mario. The colors are very simple and range from black to white and brown.
![]()
4. Spongebob
In this Minecraft pixel art, we have depicted SpongeBob Square pants in the game. Its color goes from yellow to green, blue, white and black to be faithful to the original cartoon.
![]()
5. The Joker
In this Minecraft pixel art, we have Joker from the Batman universe. A famous villain in that universe. Its color pattern ranges from several tones of green, red, purple, white, and blue.
![]()
Part 3: Best Tools to Make Minecraft Pixel Art
There are a few apps that you can use to create Minecraft pixel art, for example:
1. Scriptolab.com
In this small web application, you are able to transform your image or any photo of your choice into Minecraft pixel art and blocks.
It’s very easy to use. All you have to do is go to the website and pic your image. Resize the image or picture to the desired size to correspond to the number of blocks in the game.
It also has an easy-to-contact platform to communicate with the website owner that can guide you through the steps if you are ever in doubt.
2. Filmora
This is an application that you can download onto your PC or Mac for free. It is a powerful tool that does more than pixel art, but we will use it for such.
With Filmora, you can use a range of tools to create your Minecraft pixel art, like posterize effect to add a different gradient to the pixel art. The tool CC Black Load can help you perfect the square pixels to make it look more defined. You also have tools such as tint and grid to give a retro look to your art. Or even an animation effect for your wallpapers.
Also, in Filmora, you can add many effects to your pixel art like the 8-bit style or 16-bit style. You can also share your creations and export them and send them to your friends.
![]()
Wondershare Filmora
Get started easily with Filmora’s powerful performance, intuitive interface, and countless effects!
Try It Free Try It Free Try It Free Learn More >
3. Pixel Art Builder
In this mobile app, you can create Minecraft pixel art from the palm of your hand.
You can draw on grids rather than in real pixels to help you be more precise with your art. It has a very easy-to-use interface, and it is completely free.
Many of its key features are, for example, exporting images, dynamic size adjustment of the ability to save in several different formats. Its tools range from the regular pencil to eraser, paint bucket, line and circle drawer, move/zoom function, color wheel, and eyedropper.
Part 4: How to Make Pixel Art Minecraft In-game?
It is very easy to create pixel art Minecraft in-game. Of course, each artist’s ability differs, and so does art as well, but to start out, you do not need much. You need, though, careful planning and knowing the exact scale of your art.
You can break the creation of pixel art in Minecraft into four different steps:
1. Choose an image that you like
It is important that you reference the original work and can easily access it, as you might need to peek often while building your own art. The best thing to do is when you are starting to copy an image and work on it, rather than start it from scratch, as it takes an enormous amount of time and you need to be an expert to do it.
2. Break the image down into single-color sections
This is the part where “careful planning” comes in. You need to be looking at your original piece constantly to know if you are going in the right direction. Also, take all the colors and try to group them. Deconstructing the original image into colored shapes is a process that will help you outline the shape and color of the original design.
3. Obtain the necessary resources
You can start this step by opening Minecraft and start collecting blocks that you think will be useful for your pixel art. It does not matter if you play in Survival, Hardcore, or Adventure mode. The process is the same. It is ideal, though, that you work on creative mode when making pixel art, as the game gives you unlimited resources. You are also able to fly in this mode, making it easier to pick up blocks, and there is no risk of your art being destroyed.
4. Start building
Now you can start building your masterpiece. Start with the foundation and build from there; although you can virtually start anywhere, these blocks can float, unlike art or buildings outside the game. The time the process takes depends on the amount of work that needs to be done and the piece’s complexity.
Part 5: Tips for Creating a Wonderful Minecraft Pixel Art
There are many ways to draw Minecraft pixel art, but here are some tips to help you out.
- Have a clear idea of what kind of art you want to do. And start with something pre-made if you are only starting out. It is extremely hard to start something from scratch.
- Plan the pixel art you are going to do. Gather around all the block materials and colors that you’ll need to make your pixel art.
- Use creative mode. Because with the creative mode, you are not limited to the number of blocks you can find, and also, no one can come and destroy your art.
- If it is easier, you can first draft your pixel art on another app to help you map out your own project.
Conclusion
Minecraft pixel art is a growing trend in the video games world. It can range from easy and accessible to beginners to extremely complicated pieces of art. Players are becoming more engaged with this type of art in-game, and the future only predicts a bigger expansion. There are several tools that you can use to start out in your pixel art, as well as many tutorials.
Unlink Audio and Video in DaVinci Resolve [Detailed Steps]
There are various reasons why someone might want to remove audio from a video. Some of the film shots will have a lot of background noise, which might be distracting while watching the video. Some people like to include alternative audio or a soundtrack to make their films more presentable and attract people. So, whether you want to watch a silent video or one with a separate audio file, you’ll have to erase the original audio.
How To Detach Audio and Video in Da Vinci Resolve
DaVinci Resolve is a sound and video editing program for all types of files. It has numerous applications. Let’s begin with audio extraction from a video clip below:
- Launch the DaVinci Resolve and open the file from File>Open>Select video clip.

- All you have to do with DaVinci Resolve is tap on the chain link in the toolbar above to delete audio from any clip. Alternatively, you may just press down the “ctrl + shift + I” keys to connect and unlink the audio from your clip. Inspect the equalizer after that, and you’re done.

- You can now export the footage on your computer once you’ve finished editing and are pleased with the progress.
Other Alternatives
Suppose you find Da Vinci Resolve very complicated, and you get confused a lot while using it. I prepared a list of a few alternatives that you may use to detach the audio to your videos.
Besides extracting sound from video, the software listed below also has functionality for editing the audio file. Here are some of the most excellent and most popular audio separation and replacement tools:
#1: Wondershare Filmora – Overall Best
It is available on Windows and Mac.
Wondershare Filmora is a popular video editing program used all over the world. Filmora includes all the capabilities that will give you the most outstanding results, whether you’re doing easy video editing, advanced video editing, or even making movies. It also has specific editing features for social media videos.
Follow these steps below, and let’s look at how to detach audio from a video file with Filmora:
- Launch Filmora, then click on File-Import Media and load the video clip to the Media Library, wherein the sound needs to be deleted.

- Drag and drop using the mouse the video clips from the Media Library to the Timeline when it has been imported.
- Click Detach Audio from the context menu of the video file on the timeline.

- The audio will now show on the audio track below in a different format.

- To completely remove the audio file, press on it and simply tap the Delete icon.

You may add a new sound to your video clip in the same manner, you did with the video (import, drag, and drop). Filmora also offers options that enable you to edit and add effects to an audio track.
#2: VSDC Video Editor
It is available on Windows and Mac.
VSDC is a popular video editing program that can handle high-resolution videos such as VR 360-degree, 4K UHD, and 3D films. It also allows users to capture speech and film from the screen and save the material in any format they want. Let’s look at how VSDC can be used to eliminate audio from video:
- Upload the clips you want to edit into VSDC.
- Pick the Properties option from the toolbar by right-clicking on the file with the cursor. A small window will drop down from the right side of the screen.

- You will find a Split to Audio and Video tab at the very bottom of the window; select it.

- On the timeline, the sound will now be divided from the video.

- Erase the audio file by clicking on it. Then, the video is now playable without audio.
VSDC also gives you the option of muting the audio rather than deleting it; however, deleting the audio is preferred.
#3: AudioRemover Tool
It is available on Windows, Mac, and Online.
The AudioRemover Tool is a program that allows you to eliminate audio from any video without having to re-encode it. It is an online service that can be accessed using a browser on Windows and Mac computers. The AudioRemover program can be used by those who do not want to download and install video editing software or just wish to remove audio from video files without additional editing. It can handle any video format, including MP4, MOV, and AVI.
Let’s look at how you can use this application to delete audio:
- Open the online AudioRemover.
- Choose the source video using the Browse tab, then press the Upload Video icon.

- You can save the media files (without audio) once the uploading is finished by clicking the Download File button next to the Completed indication.

This program requires an active connection to the internet, and you cannot upload files larger than 500 MB.
#4: Windows Movie Maker
It is available on Windows.
Because it used to be included in the Windows Essentials software set, Windows Movie Maker is among the most popular accessible editing programs. Let’s have a look at how Movie Maker handles audio extraction.
- Upload the video you want to modify into Windows Movie Maker.

- Create a timeline for the video. Remove audio by right-clicking it (You may also click Detach Audio, and then it will detach the sound from the audio track)

- It will immediately erase the sound, and it will not show any Audio input anymore.

Wrapping Things Up
People’s viewing experiences are greatly influenced by the audio accompanying a video. No matter how wonderful or perfect a video clip is, if the audio playing while watching it is terrible, it may be a very frustrating experience. So, we’ve gone over a few different software options for removing audio from a video file and replacing it with another audio in a couple of moments.
Frequently Asked Questions
How to Insert Audio to Video Clip in Da Vinci Resolve?
There may be times that your video may require the addition of music, background audio, or wooshing sounds.
To begin, open Resolve and import your audio clip:
- Navigate to the “Edit” page.
- Select the tab “Media Pool.”
- Right-click and choose “Import Media” or push “Ctrl + i.”
- Pick your audio clip and browse to your location.
- Select “Open.”
The audio clip is now imported into the “Media Pool.” After that, you’ll need to figure out which part of the audio track you’ll use.
Double-click the audio clip to play it. In the “Source Viewer,” it will appear.
Set the needed audio parts in (press I) and out (press O). Alternatively, if you need the entire soundtrack, there’s no need to set in and out.
Drag & drop the audio track (from the media pool) underneath the video you want to use. It will then add the sound file with the selected portion of the audio. You can now modify the audio to match the visual.
How to Link Your Audio and Video in DaVinci Resolve?
It’s best to link the soundtrack (music, sound effect, or background music) to the relevant video once you’ve adjusted the audio file.
Here’s how to connect audio and video in a timeline:
- Press “Ctrl” or “Cmd” to toggle both the video and audio.
- Right-click and choose “Link Clips.” You may also use the shortcuts “Ctrl + Alt + L” or “Option + Command + L.”
- The sound and visual are now both connected.
Thus, you can rest guaranteed that the audio will follow your movie wherever it goes. There will be no issues with out-of-sync!
How Do You Link Many Audio and Video Files Together in DaVinci Resolve?
Several video and audio segments can be linked together to form a single one. You can rearrange them anywhere in the timeline, and they will not be out of sync.
This is how you connect many clips:
- By holding down the “Ctrl” or “Cmd” key, you can choose all the video and audio clips you want.
- Right-click and choose “Link Clips.” You may also use the shortcut keys “Ctrl + Alt + L” or “Option + Command + L”.
- Now, all your video or audio files are linked together.
Is Any Music Available to Use for Editing?
Understanding copyright law can be complicated. It’s best to use free music for video editing if you don’t want to be accused of copyright violation.
Additionally, you can purchase two licenses to avoid copyright concerns. The producer controls the synchronization license, and the master license to use the song recording is managed by the publishing company.
If you don’t want to go into legal trouble, the only thing you need to remember is never to utilize any illegal video.
Is There Any Free Music in DaVinci Resolve?
DaVinci Resolve does not include any free music; however, it does include royalty-free sound effects noise. To get started, you can download and install the available sound package.
What Software Provides Free Music?
The Audio Collection in Wondershare Filmora has over 50 royalty-free audio tracks for videos, with more to come.
For video production, you can acquire free background music.
In addition, Filmora has 25 sound effects, including animal sounds, video game sounds, and beeps. With Filmora, you may use more advanced editing features like keyframing, background noise elimination, cut, trim, crop, PIP effects, green-screen effects, and more to add free-choice music to your film.
Filmora will enhance the appeal of your video by giving free background music. You may also tweak the background sound, such as speeding up and slowing down, fade-in and fade-out.
- All you have to do with DaVinci Resolve is tap on the chain link in the toolbar above to delete audio from any clip. Alternatively, you may just press down the “ctrl + shift + I” keys to connect and unlink the audio from your clip. Inspect the equalizer after that, and you’re done.
- You can now export the footage on your computer once you’ve finished editing and are pleased with the progress.
Other Alternatives
Suppose you find Da Vinci Resolve very complicated, and you get confused a lot while using it. I prepared a list of a few alternatives that you may use to detach the audio to your videos.
Besides extracting sound from video, the software listed below also has functionality for editing the audio file. Here are some of the most excellent and most popular audio separation and replacement tools:
#1: Wondershare Filmora – Overall Best
It is available on Windows and Mac.
Wondershare Filmora is a popular video editing program used all over the world. Filmora includes all the capabilities that will give you the most outstanding results, whether you’re doing easy video editing, advanced video editing, or even making movies. It also has specific editing features for social media videos.
Follow these steps below, and let’s look at how to detach audio from a video file with Filmora:
- Launch Filmora, then click on File-Import Media and load the video clip to the Media Library, wherein the sound needs to be deleted.
- Drag and drop using the mouse the video clips from the Media Library to the Timeline when it has been imported.
- Click Detach Audio from the context menu of the video file on the timeline.
- The audio will now show on the audio track below in a different format.
- To completely remove the audio file, press on it and simply tap the Delete icon.
You may add a new sound to your video clip in the same manner, you did with the video (import, drag, and drop). Filmora also offers options that enable you to edit and add effects to an audio track.
#2: VSDC Video Editor
It is available on Windows and Mac.
VSDC is a popular video editing program that can handle high-resolution videos such as VR 360-degree, 4K UHD, and 3D films. It also allows users to capture speech and film from the screen and save the material in any format they want. Let’s look at how VSDC can be used to eliminate audio from video:
- Upload the clips you want to edit into VSDC.
- Pick the Properties option from the toolbar by right-clicking on the file with the cursor. A small window will drop down from the right side of the screen.
- You will find a Split to Audio and Video tab at the very bottom of the window; select it.
- On the timeline, the sound will now be divided from the video.
- Erase the audio file by clicking on it. Then, the video is now playable without audio.
VSDC also gives you the option of muting the audio rather than deleting it; however, deleting the audio is preferred.
#3: AudioRemover Tool
It is available on Windows, Mac, and Online.
The AudioRemover Tool is a program that allows you to eliminate audio from any video without having to re-encode it. It is an online service that can be accessed using a browser on Windows and Mac computers. The AudioRemover program can be used by those who do not want to download and install video editing software or just wish to remove audio from video files without additional editing. It can handle any video format, including MP4, MOV, and AVI.
Let’s look at how you can use this application to delete audio:
- Open the online AudioRemover.
- Choose the source video using the Browse tab, then press the Upload Video icon.
- You can save the media files (without audio) once the uploading is finished by clicking the Download File button next to the Completed indication.
This program requires an active connection to the internet, and you cannot upload files larger than 500 MB.
#4: Windows Movie Maker
It is available on Windows.
Because it used to be included in the Windows Essentials software set, Windows Movie Maker is among the most popular accessible editing programs. Let’s have a look at how Movie Maker handles audio extraction.
- Upload the video you want to modify into Windows Movie Maker.
- Create a timeline for the video. Remove audio by right-clicking it (You may also click Detach Audio, and then it will detach the sound from the audio track)
- It will immediately erase the sound, and it will not show any Audio input anymore.
Wrapping Things Up
People’s viewing experiences are greatly influenced by the audio accompanying a video. No matter how wonderful or perfect a video clip is, if the audio playing while watching it is terrible, it may be a very frustrating experience. So, we’ve gone over a few different software options for removing audio from a video file and replacing it with another audio in a couple of moments.
Frequently Asked Questions
How to Insert Audio to Video Clip in Da Vinci Resolve?
There may be times that your video may require the addition of music, background audio, or wooshing sounds.
To begin, open Resolve and import your audio clip:
- Navigate to the “Edit” page.
- Select the tab “Media Pool.”
- Right-click and choose “Import Media” or push “Ctrl + i.”
- Pick your audio clip and browse to your location.
- Select “Open.”
The audio clip is now imported into the “Media Pool.” After that, you’ll need to figure out which part of the audio track you’ll use.
Double-click the audio clip to play it. In the “Source Viewer,” it will appear.
Set the needed audio parts in (press I) and out (press O). Alternatively, if you need the entire soundtrack, there’s no need to set in and out.
Drag & drop the audio track (from the media pool) underneath the video you want to use. It will then add the sound file with the selected portion of the audio. You can now modify the audio to match the visual.
How to Link Your Audio and Video in DaVinci Resolve?
It’s best to link the soundtrack (music, sound effect, or background music) to the relevant video once you’ve adjusted the audio file.
Here’s how to connect audio and video in a timeline:
- Press “Ctrl” or “Cmd” to toggle both the video and audio.
- Right-click and choose “Link Clips.” You may also use the shortcuts “Ctrl + Alt + L” or “Option + Command + L.”
- The sound and visual are now both connected.
Thus, you can rest guaranteed that the audio will follow your movie wherever it goes. There will be no issues with out-of-sync!
How Do You Link Many Audio and Video Files Together in DaVinci Resolve?
Several video and audio segments can be linked together to form a single one. You can rearrange them anywhere in the timeline, and they will not be out of sync.
This is how you connect many clips:
- By holding down the “Ctrl” or “Cmd” key, you can choose all the video and audio clips you want.
- Right-click and choose “Link Clips.” You may also use the shortcut keys “Ctrl + Alt + L” or “Option + Command + L”.
- Now, all your video or audio files are linked together.
Is Any Music Available to Use for Editing?
Understanding copyright law can be complicated. It’s best to use free music for video editing if you don’t want to be accused of copyright violation.
Additionally, you can purchase two licenses to avoid copyright concerns. The producer controls the synchronization license, and the master license to use the song recording is managed by the publishing company.
If you don’t want to go into legal trouble, the only thing you need to remember is never to utilize any illegal video.
Is There Any Free Music in DaVinci Resolve?
DaVinci Resolve does not include any free music; however, it does include royalty-free sound effects noise. To get started, you can download and install the available sound package.
What Software Provides Free Music?
The Audio Collection in Wondershare Filmora has over 50 royalty-free audio tracks for videos, with more to come.
For video production, you can acquire free background music.
In addition, Filmora has 25 sound effects, including animal sounds, video game sounds, and beeps. With Filmora, you may use more advanced editing features like keyframing, background noise elimination, cut, trim, crop, PIP effects, green-screen effects, and more to add free-choice music to your film.
Filmora will enhance the appeal of your video by giving free background music. You may also tweak the background sound, such as speeding up and slowing down, fade-in and fade-out.
Also read:
- Updated In 2024, Creating Video Testimonials
- Find Out What the Flexclip Trimmer Is, Its Key Features, and How to Use It to Trim Your Videos to Remove Unwanted Parts with Just a Few Clicks
- Updated Finding Best GIF Websites Is Easy as Pie
- Updated Do You Want to Know About the DaVinci Resolve Adjustment Layer? Read This Article to Learn How to Use an Adjustment Layer (Clip) in DaVinci Resolve to Edit Videos
- New 2024 Approved Complete Tutorial on After Effects Countdown Timer Adding
- New In 2024, How to Denoise in After Effects – Audio & Video Noise Removal
- New 2024 Approved Video Maker with Song
- New 2024 Approved Best Ideas on Using Green Screen with Filmora
- 2024 Approved How to Use a Stabilization Tool in Filmora
- New In 2024, Zoom In and Zoom Out on YouTube
- New In 2024, Best Text Animations In After Effects
- Updated Top 5 Free Online Video Filter Editors Improve Your Videos with Filters
- New 2024 Approved Step by Step to Resize Video in Davinci Resolve
- New How To Make Ninja Jump Effect for 2024
- New Do You Know How to Create Video Loops on PowerPoint? If Not Then Read This Article to Learn More Details
- New Top 10 Mp3 Visualizers Windows, Mac, Android, iPhone & Online
- New Are You Looking for the Best Way to Add Subtitles to Your Video? The Top SRT File Creators Can Help You Do That
- Updated Dubbing Videos With Voiceovers | Wondershare Filmora Tutorial for 2024
- Updated In 2024, How to Uue Adobe Lightroom Color Grading
- In 2024, Top 10 OnePlus Open Android SIM Unlock APK
- In 2024, How to Turn Off Find My Apple iPhone 7 when Phone is Broken? | Dr.fone
- A Guide Samsung Galaxy M34 Wireless and Wired Screen Mirroring | Dr.fone
- How PGSharp Save You from Ban While Spoofing Pokemon Go On Tecno Spark 20 Pro+? | Dr.fone
- How can I get more stardust in pokemon go On Realme C33 2023? | Dr.fone
- How To Transfer Data From Apple iPhone 13 Pro To Other iPhone 11 Pro devices? | Dr.fone
- How To Transfer Data From Apple iPhone 13 Pro To Other iPhone 13 devices? | Dr.fone
- In 2024, Where Is the Best Place to Catch Dratini On Vivo V27 Pro | Dr.fone
- In 2024, How To Pause Life360 Location Sharing For Realme C55 | Dr.fone
- Universal Unlock Pattern for Oppo Find N3 Flip
- In 2024, Tutorial to Change Vivo Y100 IMEI without Root A Comprehensive Guide
- Android Safe Mode - How to Turn off Safe Mode on Motorola Defy 2? | Dr.fone
- CatchEmAll Celebrate National Pokémon Day with Virtual Location On Lava Blaze Pro 5G | Dr.fone
- In 2024, Disabled iPhone 14 How to Unlock a Disabled iPhone 14? | Dr.fone
- Complete Tutorial Sending Photos From Apple iPhone 11 Pro to iPad | Dr.fone
- A Working Guide For Pachirisu Pokemon Go Map On Vivo G2 | Dr.fone
- In 2024, Bypass iCloud Activation Lock with IMEI Code From iPhone 6s Plus
- In 2024, How To Remove the Two Factor Authentication From iPhone XS
- Title: Best Video Editors to Add Text to a Video for 2024
- Author: Chloe
- Created at : 2024-05-20 03:38:26
- Updated at : 2024-05-21 03:38:26
- Link: https://ai-editing-video.techidaily.com/best-video-editors-to-add-text-to-a-video-for-2024/
- License: This work is licensed under CC BY-NC-SA 4.0.
