:max_bytes(150000):strip_icc():format(webp)/how-to-see-who-viewed-your-tiktok-5271090-e2cb663541b8484a8a2e80ffbdd98db3.jpg)
Create the Night-to-Day Effect Videos

Create the Night-to-Day Effect Videos
Do you wish you could control when it’s nighttime to daytime? It would make getting ready in the morning much faster! This tutorial will show you how to use the keyframe and mask feature in Filmora to make a remarkable night-to-day transition.
How-to Guide
1) Preparation
For this effect, you will need to shoot two footage shots with the same frame. The first is for the daytime clip, and the second is for nighttime.
But before that, you need to prepare some things, such as:
- Tripod to ensure your camera stays at the same point, so the frame doesn’t change.
- Mark the place where you want to shoot the scene. You can put a marker on the floor to ensure that you perform at the same spot in different shots.
Once done, let’s start shooting to get the footage.
2) Steps
Shooting footages
First, get the daytime shot. For this tutorial, we will pretend that you are walking and transitioning into nighttime at the spot you have marked.

Now, let’s film the nighttime clip. You will walk through the living room and do the same movement again at the same spot. You can dim the light and change the camera’s white balance settings to bluer to create a night feeling.

After you have both clips that you need, let’s go to Filmora and start editing.
Night-to-day transition
Step1 Launch Filmora and import the footage into the program. If you haven’t installed it, you can download Filmora on their website here: https://filmora.wondershare.com
Step2 Place the nighttime video clip on the first video track of the timeline and place the daytime clip on the top.

Step3 Find the spot where you want to create a transition between the day and nighttime. Then, you can delete the unwanted part.

Step4 Since the transition for this tutorial is where the subject started waving, make sure to place the daytime clip at the same time the subject started waving in the nighttime clip. Hence, the timing in both clips syncs.
Masking transition
For the next step, we will make a masking transition with the Filmora mask feature.
Step1 Double-click the daytime clip on the timeline. In the Filmora setting, find the Mask section > Circle. You can see the mask is applied in the preview screen.

Step2 Scroll down the setting and click add a keyframe at the beginning of the clip.

Step3 Change the scale of the mask to the smallest number and adjust the Width and Height down to 0. You can set the blur strength to 15 to make the transition edge smoother.

Step4 Move the play head to find the spot where you want the mask fully opens up, then add another keyframe. Change the scale of the mask to 2 and the Width and Height to 50. Make sure the mask occupies the whole frame.

Now, if you play back, you can see the nighttime becomes daytime through the mask.

If the movement in the two clips is a bit off, you can fix it by adding more keyframes on the mask.
3) Pro tips
You can add one more effect in Filmora to make it more magical. To do this, open the Effects window on the top left and find “Heartbeat” under the Basic section.

Drag and drop it onto the third video track and start the effect when the mask opens up. Then, trim the effect length to match the movement. Adjust the speed of this effect if needed.

The final result will look like this:

Summary
That is how to do this night-to-day transition night-to-day time shift effect in Filmora. By the end of this tutorial, you should be able to use the masking transition technique. You can apply and adjust it based on your needs.
Free Download For Win 7 or later(64-bit)
Free Download For macOS 10.14 or later
Free Download For macOS 10.14 or later
How to Make Blender Render Transparent Background
Blender Tips - How to Make Blender Render Transparent Background
An easy yet powerful editor
Numerous effects to choose from
Detailed tutorials provided by the official channel
Want to explore open source 2D/3D content creation through Blender? Stay here to embark your graphic creations with over the top dimensional detailing!
In this article
01 [What’s Blender and What’s Its Advantages?](#Part 1)
02 [How to Make a Material Transparent in Blender](#Part 2)
03 [How to Make a Background Transparent in Blender](#Part 3)
Part 1 What’s Blender and What’s Its Advantages?
When landing into the world of 3D graphic design, the Blender software suite is a one stop access to everything you would possibly think of exploring with. Right from modeling, animation, rendering and compositing to rigging, motion tracking and simulation; the software is a complete video editor and game developer kit.
Some high rated professional applications of the software include, API based Python and allied tool scripting to customize different applications, most of which are a part of the suite’s later releases. The software further supports a common graphic pipeline; compatible to studio based professional as well as individual usage and undergoes continuous upgrade to ascertain maximum graphic productivity.
Talking of the software’s platform compatibility, you are free to use Blender on any of your Windows, Mac and Linux supported devices with utmost ease. The suite works on the OpenGL platform for the most responsive user experience and quick output response.
You can further, conveniently regard the software as your personal 3D graphic designer, owing to the fact that the software’s General Public License grants the liberty of minor and major code alterations to its users, which often results in making the suite additively responsive, with the inclusion of improved features, receptive bug fixes and interactive usage.
Potential Advantages
Choosing the Blender 3D design suite for dimensional and motion graphic editing, you are entitled to benefit from the following advantages:
01A Free Graphic Suite
Almost every software user has the obvious habit of prioritizing financial equity before all other program credibility. However, you should be relieved to realize that the Blender 3D Suite is available to you without a price tag. Loyal users of the software claim the product to outshine its priced counterparts in terms of features and responsive flexibility.
If you are at the shore of graphic design and 3D modeling, there’s absolutely no better software to jump with, in the creation pool. Talking of the concerns of long term free usage and hidden feature blocking pay walls, there’s no cause to worry.
The software earns most of it financial credits through sales merchandise, donations and Cloud Service, which is a reasonably priced and optional graphic design assistant and application resource.
02Open Source Software
Essentially programmed and developed by an expert and skilled core team, the software is liberal enough to entertain open source modifications. Public users of the suite are permitted to make functionality alterations with Python coding. This flexibility of the Blender software is the underlying reason to a community driven increment to the existing top class suite functionalities.
While the public user creativity is responsible for adding a heap of free and paid software functionalities, the suite offers a sale of the specific feature scripts at marketplaces like, Blendermarket.com as a developer support initiative to promote the creation of highly productive graphic tools.
03Extensive Pipeline Support
As already stated, the software supports a plethora of creative utilities ranging from still and motion image graphics, movie developments, dimensional modeling, gaming, studio VFX and lots more. What’s best is, you are entitled to all this without having to spend a single penny from your pocket.
While most creators take up Blender graphic designing as a full time earning source, the bottom line is, if you are wondering, whether or not Blender supports a particular design task, most of the times it possibly can!
04Rendering Flexibility
You can work with two rendering options, viz., Eevee and Cycles within Blender. Using the Eevee render option, users can render their design models in physical, real time outputs in a quick time span. T5her biggest advantage of this rendering engine happens to be its working speed. While it does not require you wait for tedious rendering durations, you can additionally escape individual frame renders.
The Cycles is a physical, path tracing render engine, using light rays to interpret design looks. Compatible to GPU and CPU rendering, this one is a bit slow, but delivers a much precise image than Eevee.
Part 2 How to Make a Material Transparent in Blender
Blender is a top class graphic modulation tool; you can use to play with your editing creativity to your heart’s content, catering to a variety of design requirements, while adhering to a distinguished professional outlook. If you are pondering over the perfect task choice to start your editing journey with Blender, you can begin with making a material transparent in the software.
When beginning to create transparent artworks in Blender, you need to be familiar with the Transparent BSDF node. Here’s a quick explanation:
Transparent BSDF Node
When working with Blender, you get to access a variety of graphic nodes that cater to specific design purposes. Likewise, the transparent BSDF, as the name suggests, is an exclusive transparency creation graphic node that is essential to make materials transparent in Blender. Talking of the specific node function, it is there to facilitate the control of different transparency modes, in cohesion with specific user requirements.
Browse through the following section for a guided tutorial to make a material transparent using Blender:
Step 1:
Prepare a suitable BSDF material by selecting any image from your device and applying it to the object in the Blender’s viewport.
Step 2:
To start working with the Transparent BSDF node, you first need to insert the same into the node tree amongst the Principle BSDF and the Mix Shader nodes. To do this, you need to select ‘Add’ or press ‘Ctrl + A’, followed by locating the same in the ‘Shader’ submenu. Do not forget to add the ‘Mix Shader’ node, which is again, present in the ‘Shader’ submenu, to the node tree.
Step 3:
Plug in the Transparent BSDF output into the top Shader input of the Mix Shader, while dragging the latter into the connecting link between the Material Output and Principle BSDF nodes. This enables the Mix Shader node to pass through the two output generating nodes. The resultant ‘Transparency Effect’ can be seen on the viewpoint object within a few seconds.
Step 4:
Make an additional connection of two fresh nodes into the node tree as follows:
● Transparent BSDF output to the Mix Shader input
● Principal BSDF output to the Mix Shader input
● Mix Shader output to the Surface input
This will finally fetch a transparent material output for the selected image object.
Part 3 How to Make a Background Transparent in Blender
Having experimented with object material transparency in Blender, you can try hands at taking your creativity to the next level by creating Blender render transparent backgrounds in the software. Here’s what you need to do to take up the creation process:
Step 1:
Begin with choosing a suitable image to create a transparent background in either of the Eevee or Cycles render engines, followed by navigating to the ‘Render Properties’ tab in the software’s main interface. Click on the same to get a related drop down menu for activating selected image effects.
Step 2:
From the dropdown that appears, reach to the ‘Film’ option and click on the ‘Transparency’ checkbox to activate it.
You will now observe the image background in the Blender object viewport to disappear.
Step 3:
Press F12 to receive the render output. You can now save the transparent background image in your device. Take note use a transparency compatible image format, preferably PNG.
Blender is undoubtedly a viable graphic editing software to create transparent background images, but if you are in search of a different editor alternative, the Filmora Image Creator and Editor software to take up the aforesaid task with utmost ease.
Wondershare Filmora Video Editor
Essentially a Wondershare software utility, Filmora is conveniently regarded as one among the finest and top curated image editor software. Adhering to the particular interest of transparent background creation, Filmora’s exclusive ‘Green Screen’ attribute is a viable solution to create masterpieces of professional quality, transparent background images. The huge effects library of the software is there to infuse the additional tint of class to your creative excellence.
Making Transparent Background Images in Filmora
Follow the stepwise guided tutorial given below to create images with excellent quality transparent background in Filmora:
Step 1: Software Download and Installation
Log in to your favorite web browser in a Mac or Windows device to download Filmora from its official site and proceed with the software installation process.
For Win 7 or later (64-bit)
For macOS 10.12 or later
Step 2: Import Image File
When you are done with the installation, launch the software and navigate to the ’Import’ tab in its welcome interface. Click and tap ‘Import Media File’ from the dropdown that appears to import the desired image to Filmora’s media library.
Step 3: Drag to Timeline
The next step is to drag your image selection from the software’s media library to its editor timeline. Either right click the image and select ‘Insert’ option from the submenu that appears, or use the conventional ‘Drag and Drop’ method to accomplish this task.
Step 4: Transparency Adjustments
Once the image reaches the timeline, tap the same to see the ‘Settings’ tab get opened. Navigate through the tab options until you find ‘Chroma Key Settings’. Enable the ‘Chroma Key’ with a right side toggle to see your selected image get transparent with a ‘Green’ color in the background.
An alternative to the above method is to hit the ‘Color Picker’ option to the right of the ‘Select Color’ tab and navigate to a desired section of the image to make it transparent with a single click.
If you observe partial transparency in the resultant image background, consider making additional adjustments in ’Chroma Key’ setting parameters like, offset, edge thickness, tolerance, edge feather, etc., to ensure that the image background is totally transparent. When the final artwork makes you happy, tap ‘OK’.
**Step 4: Time to Export!**Your creation is now all set for a media export to your favorite social media handles. Just click on the ‘Export’ tab in the top right of the software timeline and that’s it!
● Ending Thoughts →
● Exploring your creative abilities with different graphic design tools and editing variations is an absolute fun. Among the various design alternatives, playing with dimensional graphic creativity is a remarkable craft that can be mastered with convenient market based software like Blender.
● However, if you are keen on trying other alternatives, you can prefer the Filmora Image Editor software for top class, professional quality image and video creation.
How to Make Eye Zoom Transition Effect with Filmora
What is an eye zoom transition effect? It’s a close-up video effect allowing viewers to transit to the next clip from the eye. This effect is commonly used by musicians and travel bloggers to give their videos a more cinematic feel. So, without wasting time, let’s learn how to create an eye zoom transition with Wondershare Filmora .
Free Download For Win 7 or later(64-bit)
Free Download For macOS 10.14 or later
Preparation:
First, you need to create a close-up eye video. Although you can do that with your digital camera, a standard smartphone should do it just fine. Just ask a friend or family member to use your phone’s rear camera to record your eye centered on the screen. Ensure that the eye is as close as possible and you don’t lose focus. The camera should be around 10cm away from your face. And lest I forget, the flash should be ON.

How to Create an Eye-zoom Transition
Step 1 Align the video clips on Filmora
After recording a close-up eye video, add it on Wondershare Filmora and duplicate it. Alternatively, you can add the video to the first and second tracks.

Step 2 Add a freeze frame to the video
Next, we want to add a freeze frame to the section where the eye opens fully. To do that, select the second video track and place the playhead where the eye is fully open. After that, right-click the video track, then choose the Add Freeze Frame option.

Now trim the first video track from where the freeze frame starts on the second video. Also, cut the second video track to leave only the freeze frame
Step 3 Add a masking effect to the eye
With the two video tracks ready, it’s time to apply a masking effect. Tap the Effect tab on the top menu bar and then find the Shape Mask under the utility section. Now drag and drop the effect to the freeze frame.

Double-click on the freeze frame clip to adjust the Shape Mask on the preview screen. Ensure the mask reveals the eye pupil only and check the Invert Mask box. Also, set the Feather number to 10.

Step 4 Add the transition video
Next, add the video you want to edit with an eye-zoom effect next to the first video track. Preview the video, and you’ll notice your new video playing inside the eye mask.
With that done, move the playhead to the start of the freeze frame video and double-click the video clip to launch the settings window. Click the Animation tab before clicking Customize to see the keyframe settings. Tap the Add button to add a keyframe. Then, add a few frames using the playhead before clicking Add. But because we’re zooming in, increase the scale to 160%. You can also add the rotation and position.

After setting the second keyframe, move the playhead to the right and add the third keyframe. This time, increase the scale number to 400%, as well as the rotation and position. Now preview the video, and you’ll notice the rotating eye-zoom effect.
Summary
There you go! That’s how to create an eye-zoom transition using Wondershare Filmora. Don’t forget to play around with this feature-rich video editor to unlock its full capabilities. Enjoy!
Free Download For macOS 10.14 or later
Preparation:
First, you need to create a close-up eye video. Although you can do that with your digital camera, a standard smartphone should do it just fine. Just ask a friend or family member to use your phone’s rear camera to record your eye centered on the screen. Ensure that the eye is as close as possible and you don’t lose focus. The camera should be around 10cm away from your face. And lest I forget, the flash should be ON.

How to Create an Eye-zoom Transition
Step 1 Align the video clips on Filmora
After recording a close-up eye video, add it on Wondershare Filmora and duplicate it. Alternatively, you can add the video to the first and second tracks.

Step 2 Add a freeze frame to the video
Next, we want to add a freeze frame to the section where the eye opens fully. To do that, select the second video track and place the playhead where the eye is fully open. After that, right-click the video track, then choose the Add Freeze Frame option.

Now trim the first video track from where the freeze frame starts on the second video. Also, cut the second video track to leave only the freeze frame
Step 3 Add a masking effect to the eye
With the two video tracks ready, it’s time to apply a masking effect. Tap the Effect tab on the top menu bar and then find the Shape Mask under the utility section. Now drag and drop the effect to the freeze frame.

Double-click on the freeze frame clip to adjust the Shape Mask on the preview screen. Ensure the mask reveals the eye pupil only and check the Invert Mask box. Also, set the Feather number to 10.

Step 4 Add the transition video
Next, add the video you want to edit with an eye-zoom effect next to the first video track. Preview the video, and you’ll notice your new video playing inside the eye mask.
With that done, move the playhead to the start of the freeze frame video and double-click the video clip to launch the settings window. Click the Animation tab before clicking Customize to see the keyframe settings. Tap the Add button to add a keyframe. Then, add a few frames using the playhead before clicking Add. But because we’re zooming in, increase the scale to 160%. You can also add the rotation and position.

After setting the second keyframe, move the playhead to the right and add the third keyframe. This time, increase the scale number to 400%, as well as the rotation and position. Now preview the video, and you’ll notice the rotating eye-zoom effect.
Summary
There you go! That’s how to create an eye-zoom transition using Wondershare Filmora. Don’t forget to play around with this feature-rich video editor to unlock its full capabilities. Enjoy!
Free Download For macOS 10.14 or later
Preparation:
First, you need to create a close-up eye video. Although you can do that with your digital camera, a standard smartphone should do it just fine. Just ask a friend or family member to use your phone’s rear camera to record your eye centered on the screen. Ensure that the eye is as close as possible and you don’t lose focus. The camera should be around 10cm away from your face. And lest I forget, the flash should be ON.

How to Create an Eye-zoom Transition
Step 1 Align the video clips on Filmora
After recording a close-up eye video, add it on Wondershare Filmora and duplicate it. Alternatively, you can add the video to the first and second tracks.

Step 2 Add a freeze frame to the video
Next, we want to add a freeze frame to the section where the eye opens fully. To do that, select the second video track and place the playhead where the eye is fully open. After that, right-click the video track, then choose the Add Freeze Frame option.

Now trim the first video track from where the freeze frame starts on the second video. Also, cut the second video track to leave only the freeze frame
Step 3 Add a masking effect to the eye
With the two video tracks ready, it’s time to apply a masking effect. Tap the Effect tab on the top menu bar and then find the Shape Mask under the utility section. Now drag and drop the effect to the freeze frame.

Double-click on the freeze frame clip to adjust the Shape Mask on the preview screen. Ensure the mask reveals the eye pupil only and check the Invert Mask box. Also, set the Feather number to 10.

Step 4 Add the transition video
Next, add the video you want to edit with an eye-zoom effect next to the first video track. Preview the video, and you’ll notice your new video playing inside the eye mask.
With that done, move the playhead to the start of the freeze frame video and double-click the video clip to launch the settings window. Click the Animation tab before clicking Customize to see the keyframe settings. Tap the Add button to add a keyframe. Then, add a few frames using the playhead before clicking Add. But because we’re zooming in, increase the scale to 160%. You can also add the rotation and position.

After setting the second keyframe, move the playhead to the right and add the third keyframe. This time, increase the scale number to 400%, as well as the rotation and position. Now preview the video, and you’ll notice the rotating eye-zoom effect.
Summary
There you go! That’s how to create an eye-zoom transition using Wondershare Filmora. Don’t forget to play around with this feature-rich video editor to unlock its full capabilities. Enjoy!
Free Download For macOS 10.14 or later
Preparation:
First, you need to create a close-up eye video. Although you can do that with your digital camera, a standard smartphone should do it just fine. Just ask a friend or family member to use your phone’s rear camera to record your eye centered on the screen. Ensure that the eye is as close as possible and you don’t lose focus. The camera should be around 10cm away from your face. And lest I forget, the flash should be ON.

How to Create an Eye-zoom Transition
Step 1 Align the video clips on Filmora
After recording a close-up eye video, add it on Wondershare Filmora and duplicate it. Alternatively, you can add the video to the first and second tracks.

Step 2 Add a freeze frame to the video
Next, we want to add a freeze frame to the section where the eye opens fully. To do that, select the second video track and place the playhead where the eye is fully open. After that, right-click the video track, then choose the Add Freeze Frame option.

Now trim the first video track from where the freeze frame starts on the second video. Also, cut the second video track to leave only the freeze frame
Step 3 Add a masking effect to the eye
With the two video tracks ready, it’s time to apply a masking effect. Tap the Effect tab on the top menu bar and then find the Shape Mask under the utility section. Now drag and drop the effect to the freeze frame.

Double-click on the freeze frame clip to adjust the Shape Mask on the preview screen. Ensure the mask reveals the eye pupil only and check the Invert Mask box. Also, set the Feather number to 10.

Step 4 Add the transition video
Next, add the video you want to edit with an eye-zoom effect next to the first video track. Preview the video, and you’ll notice your new video playing inside the eye mask.
With that done, move the playhead to the start of the freeze frame video and double-click the video clip to launch the settings window. Click the Animation tab before clicking Customize to see the keyframe settings. Tap the Add button to add a keyframe. Then, add a few frames using the playhead before clicking Add. But because we’re zooming in, increase the scale to 160%. You can also add the rotation and position.

After setting the second keyframe, move the playhead to the right and add the third keyframe. This time, increase the scale number to 400%, as well as the rotation and position. Now preview the video, and you’ll notice the rotating eye-zoom effect.
Summary
There you go! That’s how to create an eye-zoom transition using Wondershare Filmora. Don’t forget to play around with this feature-rich video editor to unlock its full capabilities. Enjoy!
Best GIF to AVI Converters (Online + Software Solutions)
Great Video Converter - Wondershare Filmora
Provide abundant video effects - A creative video editor
Powerful color correction and grading
Detailed tutorials provided by the official channel
Introduction
It will be much fun if you get to assort most of your GIF files and turn them into full-length streaming videos. However, many conversion websites and software on the internet offer you the facility to convert GIF to AVI file format with ease of use. With these online tools, you also get the opportunity to upload the converted file on various social media channels. Unlike real video, these files have less memory and are easy to save on your device or hard disk.
Although both AVI and GIF are two commonly used file formats, they are different. First of all, GIF stands for Graphical Interchange Format, and it is an image format that can store several consequent or dis-consequent pictures into an animated file. In contrast, AVI is a lossless video file format. This guide focuses on turning GIF animated images into AVI videos and gives a list of the best GIF to AVI converters you can choose from.
In this article
Part 1: Best 4 Online GIFs to AVI Converters
Part 2: Best 4 GIFs to AVI Software
Part 3: How to Convert GIF to AVI?
Part 1: Best 4 Online GIFs to AVI Converters
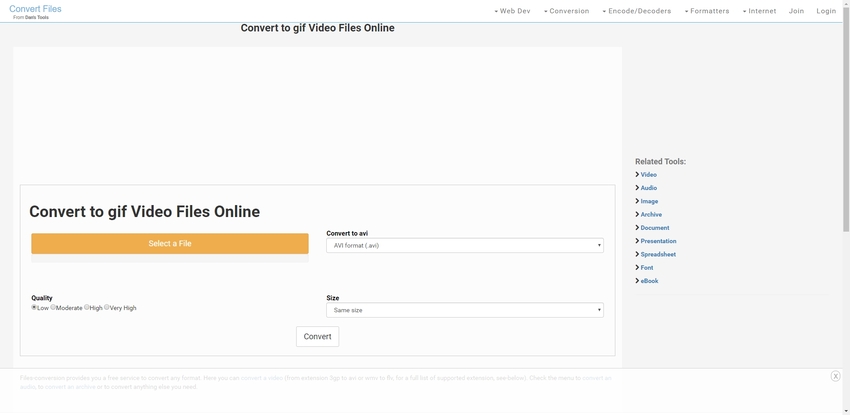
· Cloudconvert
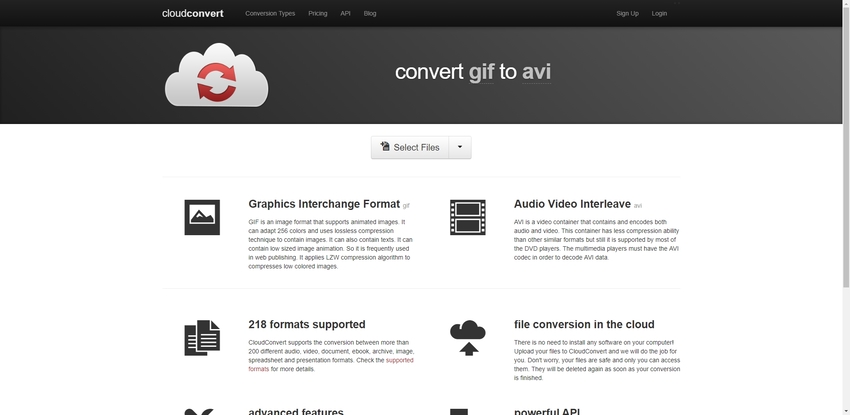
One prominent feature of this tool is the interface of this GIF to AVI converter is straightforward to follow. However, you don’t have to download any plug-ins or software during the file conversion process with this online tool. This online website is SSL protected; thus, you will not need to deal with worms or viruses when downloading your converted file. In addition, you can also choose from more than 200 different file formats. Moreso, you get a chance to contact webmasters through email channels.
Main Features:
- There is an API function that you can use the site on several of your laptops, mobile devices, etc.
- It offers users various platforms to upload files for conversion through URL, PC, DropBox, Google Drive, etc.
· Video.online-convert
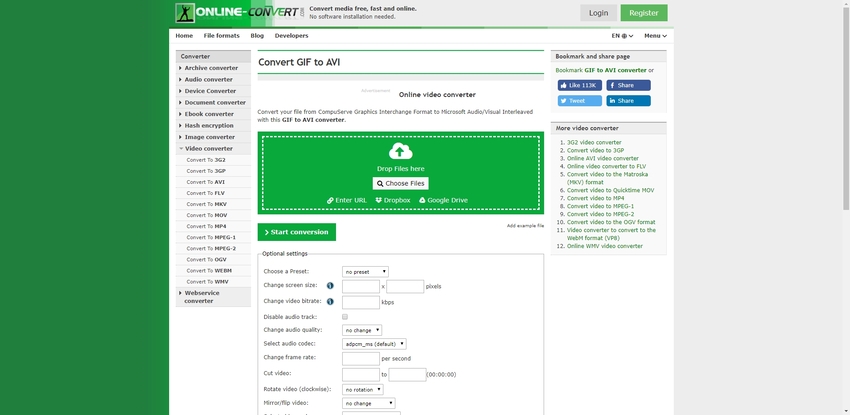
Using this GIF to AVI online converter, you do not have to deal with many advertisements; furthermore, the conversion speed is very high. Thus, with this converter, you can work on lengthy projects efficiently. In addition, the website also offers a lot of options that you can choose from while converting a file. This software also allows you to crop, change the bitrate of the video, change the rate of the frame, etc. The uploaded files will be secure and safe as the website follows strict confidentiality norms.
Main Features:
- This converter website offers a drag-drop feature that allows users to upload a file quickly.
- The facility to solve your queries is available through various frequently asked questions.
· Convertio
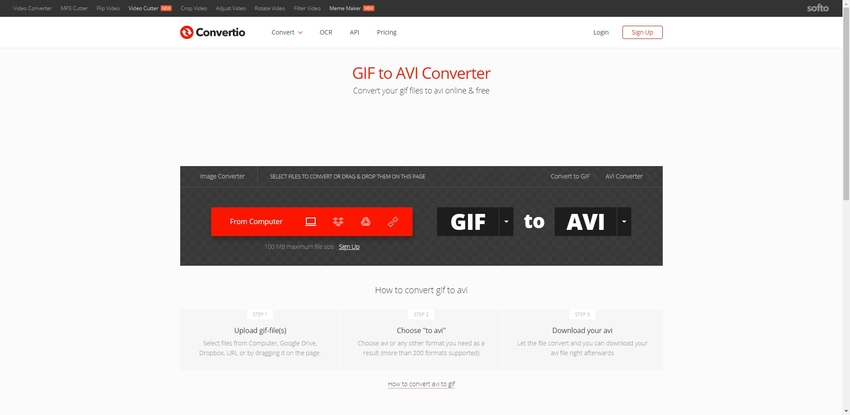
Using Convertio will have to follow a few initial steps to change GIF to AVI file extension. However, to convert GIF files to AVI online, you are not required to download any external software, saving your computer memory and time. It is effortless to download converted files on your system, as the website also provides API services. The website also gives an effective option to store and save data over cloud services through DropBox, Google Drive, etc.
Main Features:
- The site provides excellent options for video cutting, rotating, clipping, filtering, etc.
- Choose from different languages; thus, converting a file would be more comfortable and practical.
· File-conversion
The website has excellent UI and UX features. Allows users to convert GIF to AVI file format within a short time. Once you can convert GIF to AVI with this software, you will be able to download the file straight into your PC. The website also grants the opportunity to delete the data once it gets converted, and you can then download the file.
Main Features:
- This converter web portal gives you the chance to make several changes to the file you plan to convert.
- There are no unnecessary advertisements, which speeds up the conversion process.
Part 2: Best 4 GIFs to AVI Software
· Filmora.
Wondershare Filmora is editing and creating software specially designed for Windows and Mac PCs that is also an excellent GIF to AVI converter. In addition, it is highly compatible with a variety of media formats and gives you access to a variety of editing options. It also provides you with high-quality output files and uses various effects, transitions, overlays, graphics, and titles to create videos.
This software also supports numerous formats: MPEG, MP4, AVI, WebM, etc. It extracts the audio or converts them into MP3 format. In addition, it outputs high-quality videos, which include ones in 4K resolution.
Pros
It is compatible with various media formats
It comes with a built-in video editing tool
Receive high-quality output files
Grant users with access to multiple video editing options
Cons
Sometimes it takes extra time to generate the output files
Some of the sample files require a download
· ACDSee
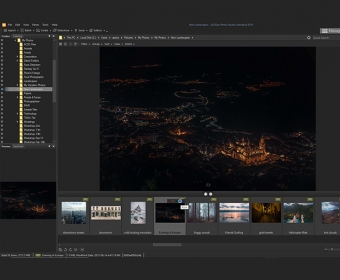
This GIF to AVI converter software can share, manage, and edit photographs. In addition, its interface is, however, similar to those of other similar products, so if you have previous experience in using any editing software, this is no different. This software is also highly improbable. Thus, you will not have any difficulty using ACDSee. Its working area is usually divided into three sections:
- a left panel where you can browse folders
- a right panel with the properties
- the prominent viewing area in the middle.
Pros
It is elementary to use
It has a very lovely user-interface
An extensive collection of tools
Quick browsing through photos is allowed
Uploading photographs to the cloud through photos is supported
Cons
There are not as many features as other video editing tools
Its corrections are not always effective
· Free Video Editor
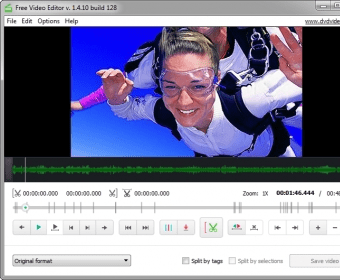
If you need a GIF to AVI converter that works free of charge, you need to try this software. This software program allows you to slice your video files and convert them into popular video formats. It also enables users to perform some basic edits and supports AVI, GIF, MKV, and MP4 for the output. It also gives users the possibility of extracting the audio stream of your video files and saving it as an MP3 file. In addition, users can load any MPG, MKV, AVI, WEBM, MP$, or WMV files split easily into as many clips as possible.
Pros
Has an accurate cutting point
It has useful features that can help to maximize the cutting process
Capabilities for rotation
Tag editor
Allows the conversion to some of the most well-known video formats
Cons
Some complex editing features are lacking
Unable to customize output profiles
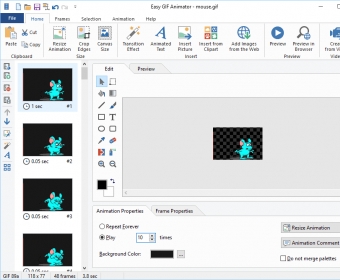
· Easy GIF Animator
The main intention of this software is to create animations for your web pages. In addition, this software has a modern interface, in the style of Microsoft Office’s latest versions. However, some wizards can help to guide users of this software.
Pros
Helpful in creating graphical banners for advertising
Perfect for animation frame by frame
Convert video to GIF animations
Ideal for converting GIF to AVI
Add effects to your animations
Cons
Key-framing animation unsupported
Layers are not supported
Part 3: How to Convert GIF to AVI?
Convert GIF to AVI Using Online Converters
Convertio is an online file format converting tool compatible with a wide range of input and output formats, including GIF to AVI.
Here is a step-by-step guide of this GIF to AVI converter:
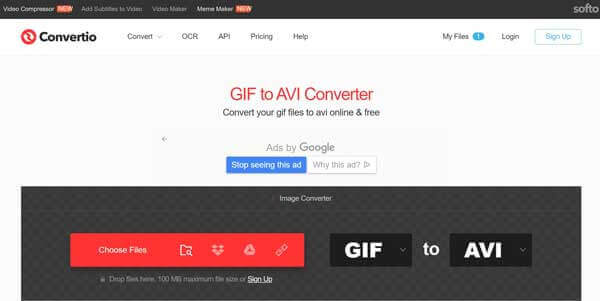
Step 1: Visit Convertio in your browser and select and upload a GIF file from your channel, like URL, computer, Dropbox, and Google Drive.
Step 2: Select AVI from the dropdown format option and click the Convert button to begin converting GIF to AVI.
Step 3: When completed, download the AVI files to your computer or send them to the cloud service
Save GIF as AVI through GIF to AVI Software
One of the primary reasons we recommend Wondershare Filmora is that online GIF converters can be unreliable. This implies that there must be a stable internet connection and power supply. In addition, Filmora software is safe and secure, which is a common concern with online tools.
Follow the steps below to turn GIF into AVI:
Step 1: Install Filmora on Mac or Windows
Download and Install Filmora software on your PC. Double click the .dmg file and follow all the instructions to install this software.
Step 2: Begin New Project
Click on the Filmora icon to start a new project and when it is open, click “New Project,” and make sure you select the “Project Settings” from the dropdown options (desired video aspect ratio, resolution and frame rate based on the sharing platform)

Step 3: Import Files to Convert
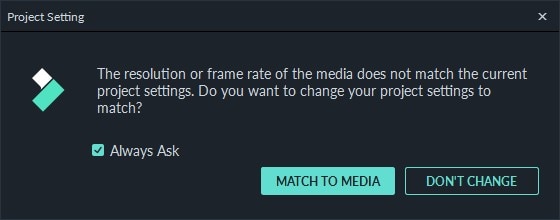
Start a new project by importing the GIF you want to convert to the timeline. A prompt project setting will pop up if the media aspect ratio and resolution do not match. Make sure you click on “DON’T CHANGE” to maintain your earlier setting
Step 4: Finish the Process and Export
Click on export to convert the video and select the AVI file format to save your file

Finally, save your GIF to AVI video on your preferred location
Conclusion
Thus, we learned:
- The process of converting GIF files to AVI using online tools
- How to use downloaded software to turn GIF to AVI
- It also provided a list of the top best software and online tool you can choose from to convert your GIF to AVIvery quickly.
- Lastly, it recommended Filmora as the top-most GIF to AVI converterdue to its reliability and safety commitment.
Introduction
It will be much fun if you get to assort most of your GIF files and turn them into full-length streaming videos. However, many conversion websites and software on the internet offer you the facility to convert GIF to AVI file format with ease of use. With these online tools, you also get the opportunity to upload the converted file on various social media channels. Unlike real video, these files have less memory and are easy to save on your device or hard disk.
Although both AVI and GIF are two commonly used file formats, they are different. First of all, GIF stands for Graphical Interchange Format, and it is an image format that can store several consequent or dis-consequent pictures into an animated file. In contrast, AVI is a lossless video file format. This guide focuses on turning GIF animated images into AVI videos and gives a list of the best GIF to AVI converters you can choose from.
In this article
Part 1: Best 4 Online GIFs to AVI Converters
Part 2: Best 4 GIFs to AVI Software
Part 3: How to Convert GIF to AVI?

Part 1: Best 4 Online GIFs to AVI Converters
· Cloudconvert
One prominent feature of this tool is the interface of this GIF to AVI converter is straightforward to follow. However, you don’t have to download any plug-ins or software during the file conversion process with this online tool. This online website is SSL protected; thus, you will not need to deal with worms or viruses when downloading your converted file. In addition, you can also choose from more than 200 different file formats. Moreso, you get a chance to contact webmasters through email channels.
Main Features:
- There is an API function that you can use the site on several of your laptops, mobile devices, etc.
- It offers users various platforms to upload files for conversion through URL, PC, DropBox, Google Drive, etc.

· Video.online-convert
Using this GIF to AVI online converter, you do not have to deal with many advertisements; furthermore, the conversion speed is very high. Thus, with this converter, you can work on lengthy projects efficiently. In addition, the website also offers a lot of options that you can choose from while converting a file. This software also allows you to crop, change the bitrate of the video, change the rate of the frame, etc. The uploaded files will be secure and safe as the website follows strict confidentiality norms.
Main Features:
- This converter website offers a drag-drop feature that allows users to upload a file quickly.
- The facility to solve your queries is available through various frequently asked questions.

· Convertio
Using Convertio will have to follow a few initial steps to change GIF to AVI file extension. However, to convert GIF files to AVI online, you are not required to download any external software, saving your computer memory and time. It is effortless to download converted files on your system, as the website also provides API services. The website also gives an effective option to store and save data over cloud services through DropBox, Google Drive, etc.
Main Features:
- The site provides excellent options for video cutting, rotating, clipping, filtering, etc.
- Choose from different languages; thus, converting a file would be more comfortable and practical.

· File-conversion
The website has excellent UI and UX features. Allows users to convert GIF to AVI file format within a short time. Once you can convert GIF to AVI with this software, you will be able to download the file straight into your PC. The website also grants the opportunity to delete the data once it gets converted, and you can then download the file.
Main Features:
- This converter web portal gives you the chance to make several changes to the file you plan to convert.
- There are no unnecessary advertisements, which speeds up the conversion process.

Part 2: Best 4 GIFs to AVI Software
· Filmora.
Wondershare Filmora is editing and creating software specially designed for Windows and Mac PCs that is also an excellent GIF to AVI converter. In addition, it is highly compatible with a variety of media formats and gives you access to a variety of editing options. It also provides you with high-quality output files and uses various effects, transitions, overlays, graphics, and titles to create videos.
This software also supports numerous formats: MPEG, MP4, AVI, WebM, etc. It extracts the audio or converts them into MP3 format. In addition, it outputs high-quality videos, which include ones in 4K resolution.
Pros
It is compatible with various media formats
It comes with a built-in video editing tool
Receive high-quality output files
Grant users with access to multiple video editing options
Cons
Sometimes it takes extra time to generate the output files
Some of the sample files require a download

· ACDSee
This GIF to AVI converter software can share, manage, and edit photographs. In addition, its interface is, however, similar to those of other similar products, so if you have previous experience in using any editing software, this is no different. This software is also highly improbable. Thus, you will not have any difficulty using ACDSee. Its working area is usually divided into three sections:
- a left panel where you can browse folders
- a right panel with the properties
- the prominent viewing area in the middle.
Pros
It is elementary to use
It has a very lovely user-interface
An extensive collection of tools
Quick browsing through photos is allowed
Uploading photographs to the cloud through photos is supported
Cons
There are not as many features as other video editing tools
Its corrections are not always effective

· Free Video Editor
If you need a GIF to AVI converter that works free of charge, you need to try this software. This software program allows you to slice your video files and convert them into popular video formats. It also enables users to perform some basic edits and supports AVI, GIF, MKV, and MP4 for the output. It also gives users the possibility of extracting the audio stream of your video files and saving it as an MP3 file. In addition, users can load any MPG, MKV, AVI, WEBM, MP$, or WMV files split easily into as many clips as possible.
Pros
Has an accurate cutting point
It has useful features that can help to maximize the cutting process
Capabilities for rotation
Tag editor
Allows the conversion to some of the most well-known video formats
Cons
Some complex editing features are lacking
Unable to customize output profiles

· Easy GIF Animator
The main intention of this software is to create animations for your web pages. In addition, this software has a modern interface, in the style of Microsoft Office’s latest versions. However, some wizards can help to guide users of this software.
Pros
Helpful in creating graphical banners for advertising
Perfect for animation frame by frame
Convert video to GIF animations
Ideal for converting GIF to AVI
Add effects to your animations
Cons
Key-framing animation unsupported
Layers are not supported

Part 3: How to Convert GIF to AVI?
Convert GIF to AVI Using Online Converters
Convertio is an online file format converting tool compatible with a wide range of input and output formats, including GIF to AVI.
Here is a step-by-step guide of this GIF to AVI converter:

Step 1: Visit Convertio in your browser and select and upload a GIF file from your channel, like URL, computer, Dropbox, and Google Drive.
Step 2: Select AVI from the dropdown format option and click the Convert button to begin converting GIF to AVI.
Step 3: When completed, download the AVI files to your computer or send them to the cloud service
Save GIF as AVI through GIF to AVI Software
One of the primary reasons we recommend Wondershare Filmora is that online GIF converters can be unreliable. This implies that there must be a stable internet connection and power supply. In addition, Filmora software is safe and secure, which is a common concern with online tools.
Follow the steps below to turn GIF into AVI:
Step 1: Install Filmora on Mac or Windows
Download and Install Filmora software on your PC. Double click the .dmg file and follow all the instructions to install this software.
Step 2: Begin New Project
Click on the Filmora icon to start a new project and when it is open, click “New Project,” and make sure you select the “Project Settings” from the dropdown options (desired video aspect ratio, resolution and frame rate based on the sharing platform)

Step 3: Import Files to Convert
Start a new project by importing the GIF you want to convert to the timeline. A prompt project setting will pop up if the media aspect ratio and resolution do not match. Make sure you click on “DON’T CHANGE” to maintain your earlier setting

Step 4: Finish the Process and Export
Click on export to convert the video and select the AVI file format to save your file

Finally, save your GIF to AVI video on your preferred location
Conclusion
Thus, we learned:
- The process of converting GIF files to AVI using online tools
- How to use downloaded software to turn GIF to AVI
- It also provided a list of the top best software and online tool you can choose from to convert your GIF to AVIvery quickly.
- Lastly, it recommended Filmora as the top-most GIF to AVI converterdue to its reliability and safety commitment.
Introduction
It will be much fun if you get to assort most of your GIF files and turn them into full-length streaming videos. However, many conversion websites and software on the internet offer you the facility to convert GIF to AVI file format with ease of use. With these online tools, you also get the opportunity to upload the converted file on various social media channels. Unlike real video, these files have less memory and are easy to save on your device or hard disk.
Although both AVI and GIF are two commonly used file formats, they are different. First of all, GIF stands for Graphical Interchange Format, and it is an image format that can store several consequent or dis-consequent pictures into an animated file. In contrast, AVI is a lossless video file format. This guide focuses on turning GIF animated images into AVI videos and gives a list of the best GIF to AVI converters you can choose from.
In this article
Part 1: Best 4 Online GIFs to AVI Converters
Part 2: Best 4 GIFs to AVI Software
Part 3: How to Convert GIF to AVI?

Part 1: Best 4 Online GIFs to AVI Converters
· Cloudconvert
One prominent feature of this tool is the interface of this GIF to AVI converter is straightforward to follow. However, you don’t have to download any plug-ins or software during the file conversion process with this online tool. This online website is SSL protected; thus, you will not need to deal with worms or viruses when downloading your converted file. In addition, you can also choose from more than 200 different file formats. Moreso, you get a chance to contact webmasters through email channels.
Main Features:
- There is an API function that you can use the site on several of your laptops, mobile devices, etc.
- It offers users various platforms to upload files for conversion through URL, PC, DropBox, Google Drive, etc.

· Video.online-convert
Using this GIF to AVI online converter, you do not have to deal with many advertisements; furthermore, the conversion speed is very high. Thus, with this converter, you can work on lengthy projects efficiently. In addition, the website also offers a lot of options that you can choose from while converting a file. This software also allows you to crop, change the bitrate of the video, change the rate of the frame, etc. The uploaded files will be secure and safe as the website follows strict confidentiality norms.
Main Features:
- This converter website offers a drag-drop feature that allows users to upload a file quickly.
- The facility to solve your queries is available through various frequently asked questions.

· Convertio
Using Convertio will have to follow a few initial steps to change GIF to AVI file extension. However, to convert GIF files to AVI online, you are not required to download any external software, saving your computer memory and time. It is effortless to download converted files on your system, as the website also provides API services. The website also gives an effective option to store and save data over cloud services through DropBox, Google Drive, etc.
Main Features:
- The site provides excellent options for video cutting, rotating, clipping, filtering, etc.
- Choose from different languages; thus, converting a file would be more comfortable and practical.

· File-conversion
The website has excellent UI and UX features. Allows users to convert GIF to AVI file format within a short time. Once you can convert GIF to AVI with this software, you will be able to download the file straight into your PC. The website also grants the opportunity to delete the data once it gets converted, and you can then download the file.
Main Features:
- This converter web portal gives you the chance to make several changes to the file you plan to convert.
- There are no unnecessary advertisements, which speeds up the conversion process.

Part 2: Best 4 GIFs to AVI Software
· Filmora.
Wondershare Filmora is editing and creating software specially designed for Windows and Mac PCs that is also an excellent GIF to AVI converter. In addition, it is highly compatible with a variety of media formats and gives you access to a variety of editing options. It also provides you with high-quality output files and uses various effects, transitions, overlays, graphics, and titles to create videos.
This software also supports numerous formats: MPEG, MP4, AVI, WebM, etc. It extracts the audio or converts them into MP3 format. In addition, it outputs high-quality videos, which include ones in 4K resolution.
Pros
It is compatible with various media formats
It comes with a built-in video editing tool
Receive high-quality output files
Grant users with access to multiple video editing options
Cons
Sometimes it takes extra time to generate the output files
Some of the sample files require a download

· ACDSee
This GIF to AVI converter software can share, manage, and edit photographs. In addition, its interface is, however, similar to those of other similar products, so if you have previous experience in using any editing software, this is no different. This software is also highly improbable. Thus, you will not have any difficulty using ACDSee. Its working area is usually divided into three sections:
- a left panel where you can browse folders
- a right panel with the properties
- the prominent viewing area in the middle.
Pros
It is elementary to use
It has a very lovely user-interface
An extensive collection of tools
Quick browsing through photos is allowed
Uploading photographs to the cloud through photos is supported
Cons
There are not as many features as other video editing tools
Its corrections are not always effective

· Free Video Editor
If you need a GIF to AVI converter that works free of charge, you need to try this software. This software program allows you to slice your video files and convert them into popular video formats. It also enables users to perform some basic edits and supports AVI, GIF, MKV, and MP4 for the output. It also gives users the possibility of extracting the audio stream of your video files and saving it as an MP3 file. In addition, users can load any MPG, MKV, AVI, WEBM, MP$, or WMV files split easily into as many clips as possible.
Pros
Has an accurate cutting point
It has useful features that can help to maximize the cutting process
Capabilities for rotation
Tag editor
Allows the conversion to some of the most well-known video formats
Cons
Some complex editing features are lacking
Unable to customize output profiles

· Easy GIF Animator
The main intention of this software is to create animations for your web pages. In addition, this software has a modern interface, in the style of Microsoft Office’s latest versions. However, some wizards can help to guide users of this software.
Pros
Helpful in creating graphical banners for advertising
Perfect for animation frame by frame
Convert video to GIF animations
Ideal for converting GIF to AVI
Add effects to your animations
Cons
Key-framing animation unsupported
Layers are not supported

Part 3: How to Convert GIF to AVI?
Convert GIF to AVI Using Online Converters
Convertio is an online file format converting tool compatible with a wide range of input and output formats, including GIF to AVI.
Here is a step-by-step guide of this GIF to AVI converter:

Step 1: Visit Convertio in your browser and select and upload a GIF file from your channel, like URL, computer, Dropbox, and Google Drive.
Step 2: Select AVI from the dropdown format option and click the Convert button to begin converting GIF to AVI.
Step 3: When completed, download the AVI files to your computer or send them to the cloud service
Save GIF as AVI through GIF to AVI Software
One of the primary reasons we recommend Wondershare Filmora is that online GIF converters can be unreliable. This implies that there must be a stable internet connection and power supply. In addition, Filmora software is safe and secure, which is a common concern with online tools.
Follow the steps below to turn GIF into AVI:
Step 1: Install Filmora on Mac or Windows
Download and Install Filmora software on your PC. Double click the .dmg file and follow all the instructions to install this software.
Step 2: Begin New Project
Click on the Filmora icon to start a new project and when it is open, click “New Project,” and make sure you select the “Project Settings” from the dropdown options (desired video aspect ratio, resolution and frame rate based on the sharing platform)

Step 3: Import Files to Convert
Start a new project by importing the GIF you want to convert to the timeline. A prompt project setting will pop up if the media aspect ratio and resolution do not match. Make sure you click on “DON’T CHANGE” to maintain your earlier setting

Step 4: Finish the Process and Export
Click on export to convert the video and select the AVI file format to save your file

Finally, save your GIF to AVI video on your preferred location
Conclusion
Thus, we learned:
- The process of converting GIF files to AVI using online tools
- How to use downloaded software to turn GIF to AVI
- It also provided a list of the top best software and online tool you can choose from to convert your GIF to AVIvery quickly.
- Lastly, it recommended Filmora as the top-most GIF to AVI converterdue to its reliability and safety commitment.
Introduction
It will be much fun if you get to assort most of your GIF files and turn them into full-length streaming videos. However, many conversion websites and software on the internet offer you the facility to convert GIF to AVI file format with ease of use. With these online tools, you also get the opportunity to upload the converted file on various social media channels. Unlike real video, these files have less memory and are easy to save on your device or hard disk.
Although both AVI and GIF are two commonly used file formats, they are different. First of all, GIF stands for Graphical Interchange Format, and it is an image format that can store several consequent or dis-consequent pictures into an animated file. In contrast, AVI is a lossless video file format. This guide focuses on turning GIF animated images into AVI videos and gives a list of the best GIF to AVI converters you can choose from.
In this article
Part 1: Best 4 Online GIFs to AVI Converters
Part 2: Best 4 GIFs to AVI Software
Part 3: How to Convert GIF to AVI?

Part 1: Best 4 Online GIFs to AVI Converters
· Cloudconvert
One prominent feature of this tool is the interface of this GIF to AVI converter is straightforward to follow. However, you don’t have to download any plug-ins or software during the file conversion process with this online tool. This online website is SSL protected; thus, you will not need to deal with worms or viruses when downloading your converted file. In addition, you can also choose from more than 200 different file formats. Moreso, you get a chance to contact webmasters through email channels.
Main Features:
- There is an API function that you can use the site on several of your laptops, mobile devices, etc.
- It offers users various platforms to upload files for conversion through URL, PC, DropBox, Google Drive, etc.

· Video.online-convert
Using this GIF to AVI online converter, you do not have to deal with many advertisements; furthermore, the conversion speed is very high. Thus, with this converter, you can work on lengthy projects efficiently. In addition, the website also offers a lot of options that you can choose from while converting a file. This software also allows you to crop, change the bitrate of the video, change the rate of the frame, etc. The uploaded files will be secure and safe as the website follows strict confidentiality norms.
Main Features:
- This converter website offers a drag-drop feature that allows users to upload a file quickly.
- The facility to solve your queries is available through various frequently asked questions.

· Convertio
Using Convertio will have to follow a few initial steps to change GIF to AVI file extension. However, to convert GIF files to AVI online, you are not required to download any external software, saving your computer memory and time. It is effortless to download converted files on your system, as the website also provides API services. The website also gives an effective option to store and save data over cloud services through DropBox, Google Drive, etc.
Main Features:
- The site provides excellent options for video cutting, rotating, clipping, filtering, etc.
- Choose from different languages; thus, converting a file would be more comfortable and practical.

· File-conversion
The website has excellent UI and UX features. Allows users to convert GIF to AVI file format within a short time. Once you can convert GIF to AVI with this software, you will be able to download the file straight into your PC. The website also grants the opportunity to delete the data once it gets converted, and you can then download the file.
Main Features:
- This converter web portal gives you the chance to make several changes to the file you plan to convert.
- There are no unnecessary advertisements, which speeds up the conversion process.

Part 2: Best 4 GIFs to AVI Software
· Filmora.
Wondershare Filmora is editing and creating software specially designed for Windows and Mac PCs that is also an excellent GIF to AVI converter. In addition, it is highly compatible with a variety of media formats and gives you access to a variety of editing options. It also provides you with high-quality output files and uses various effects, transitions, overlays, graphics, and titles to create videos.
This software also supports numerous formats: MPEG, MP4, AVI, WebM, etc. It extracts the audio or converts them into MP3 format. In addition, it outputs high-quality videos, which include ones in 4K resolution.
Pros
It is compatible with various media formats
It comes with a built-in video editing tool
Receive high-quality output files
Grant users with access to multiple video editing options
Cons
Sometimes it takes extra time to generate the output files
Some of the sample files require a download

· ACDSee
This GIF to AVI converter software can share, manage, and edit photographs. In addition, its interface is, however, similar to those of other similar products, so if you have previous experience in using any editing software, this is no different. This software is also highly improbable. Thus, you will not have any difficulty using ACDSee. Its working area is usually divided into three sections:
- a left panel where you can browse folders
- a right panel with the properties
- the prominent viewing area in the middle.
Pros
It is elementary to use
It has a very lovely user-interface
An extensive collection of tools
Quick browsing through photos is allowed
Uploading photographs to the cloud through photos is supported
Cons
There are not as many features as other video editing tools
Its corrections are not always effective

· Free Video Editor
If you need a GIF to AVI converter that works free of charge, you need to try this software. This software program allows you to slice your video files and convert them into popular video formats. It also enables users to perform some basic edits and supports AVI, GIF, MKV, and MP4 for the output. It also gives users the possibility of extracting the audio stream of your video files and saving it as an MP3 file. In addition, users can load any MPG, MKV, AVI, WEBM, MP$, or WMV files split easily into as many clips as possible.
Pros
Has an accurate cutting point
It has useful features that can help to maximize the cutting process
Capabilities for rotation
Tag editor
Allows the conversion to some of the most well-known video formats
Cons
Some complex editing features are lacking
Unable to customize output profiles

· Easy GIF Animator
The main intention of this software is to create animations for your web pages. In addition, this software has a modern interface, in the style of Microsoft Office’s latest versions. However, some wizards can help to guide users of this software.
Pros
Helpful in creating graphical banners for advertising
Perfect for animation frame by frame
Convert video to GIF animations
Ideal for converting GIF to AVI
Add effects to your animations
Cons
Key-framing animation unsupported
Layers are not supported

Part 3: How to Convert GIF to AVI?
Convert GIF to AVI Using Online Converters
Convertio is an online file format converting tool compatible with a wide range of input and output formats, including GIF to AVI.
Here is a step-by-step guide of this GIF to AVI converter:

Step 1: Visit Convertio in your browser and select and upload a GIF file from your channel, like URL, computer, Dropbox, and Google Drive.
Step 2: Select AVI from the dropdown format option and click the Convert button to begin converting GIF to AVI.
Step 3: When completed, download the AVI files to your computer or send them to the cloud service
Save GIF as AVI through GIF to AVI Software
One of the primary reasons we recommend Wondershare Filmora is that online GIF converters can be unreliable. This implies that there must be a stable internet connection and power supply. In addition, Filmora software is safe and secure, which is a common concern with online tools.
Follow the steps below to turn GIF into AVI:
Step 1: Install Filmora on Mac or Windows
Download and Install Filmora software on your PC. Double click the .dmg file and follow all the instructions to install this software.
Step 2: Begin New Project
Click on the Filmora icon to start a new project and when it is open, click “New Project,” and make sure you select the “Project Settings” from the dropdown options (desired video aspect ratio, resolution and frame rate based on the sharing platform)

Step 3: Import Files to Convert
Start a new project by importing the GIF you want to convert to the timeline. A prompt project setting will pop up if the media aspect ratio and resolution do not match. Make sure you click on “DON’T CHANGE” to maintain your earlier setting

Step 4: Finish the Process and Export
Click on export to convert the video and select the AVI file format to save your file

Finally, save your GIF to AVI video on your preferred location
Conclusion
Thus, we learned:
- The process of converting GIF files to AVI using online tools
- How to use downloaded software to turn GIF to AVI
- It also provided a list of the top best software and online tool you can choose from to convert your GIF to AVIvery quickly.
- Lastly, it recommended Filmora as the top-most GIF to AVI converterdue to its reliability and safety commitment.
Also read:
- 2024 Approved Guide Create The Perfect VHS Effect Look in Premiere Pro
- New A Full Guide to Funcall Voice Changer and Its Alternatives for 2024
- New Best Audio Plug-Ins For Video Editors for 2024
- Track Mattes The Ultimate Guide For After Effects for 2024
- New 2024 Approved General Information That You Need To Know About MKV Format
- New 2024 Approved What Are the Best Video Background Changers Online?
- Updated 2024 Approved 8 Top Premiere Pro Slideshow Templates
- Updated Best 6 WebM to GIF Converters for 2024
- How to to Mimic Professional Filming Gears for 2024
- Whether Youre a Professional Animator or a Beginner Into This. If You Want to Use the OBS Studio Chroma Key, Weve Presented some Efficient Ways to Proceed. Learn More Here for 2024
- New How To Use Virtual Green Screen to Shoot Video
- 2024 Approved Looking Forward to Complement Your Weekend Evenings with a Fantasy Tour to the Anime World? Stay Here to Pick the Most Appealing Alternative From the Best and Timeless Anime Creations
- In 2024, Want to Come up with Exciting Sony Vegas Slideshow Templates for Your Next Project on YouTube and Other Mediums Then There Is Something for You
- Updated 2024 Approved Elevate Your Designs with Feather Shapes in After Effects
- Updated How To Film a Slow Motion Video
- Updated How To Add Fade In Windows Video Editor
- In 2024, How to Loop a Video on Android
- Discover the Top Slow Motion Camera App to Use for 2024
- New 2 Easy Methods | How To Zoom In On TikTok Videos for 2024
- New Cropping a Video in Davinci Resolve Step by Step for 2024
- Updated In This Article We Will Be Covering the Most Important Topics You Have to Remember when Becoming a Successful YouTube-Star
- New Voice Changer for Discord | Use Voicemod on Discord
- In 2024, Stop Worrying if Your Adobe Premiere Playback Slows Down. This Guide Will Show You the Best Solutions to Resolve This Issue and a Perfect Alternative
- New When Struggling to Find a Suitable Game Recorder for Your PC, You Might Come Across Many Options. Explore the Best Game Recorders for Sharing Game Highlights
- How to Add Motion Blur in After Effects for 2024
- 2024 Approved What Is AI Composite Video App and AI Composite Video Tutorial
- Updated How to Zoom In and Out on Mac
- 2024 Approved Have You Ever Watched a Movie Where You Felt the Filmmakers Left You Hanging? Yea, Thats What Freeze Frame Does. Here We Will Enlighten You on What It Is, Freeze Frame Examples Where It Has Been Helpful to Drive Our Point Home
- Updated In 2024, Creating Video Testimonials
- New Best 10 Anime Movies for All Time
- New 2024 Approved Best Free LUTs To Use in Shotcut
- New In 2024, A Comprehensive Guide on Converting Slo-Mo Videos to Normal Speed Videos On iPhone
- In 2024, Best 15 Subtitle Apps
- Updated 2024 Approved Five Thoughts on Discord Create Accounts How-To Questions
- 2024 Approved How to Shoot Cinematic Footage From a Smartphone
- Updated In 2024, Detailed Review of Kodak LUTs
- In 2024, How to Use Lumetri Color in Adobe After Effects
- Updated How to Change Quicktime Player Speed on Mac for 2024
- Is Augmented Reality Conferencing the Future of Workplace Collaboratio
- Updated Deep Learning of AI Video Recognition - Guide for 2024
- Easy Ways to Change Aspect Ratio in iMovie for 2024
- Updated How to Create a Text Effect Video with Filmora
- New When the Talk Is About an Effective Slideshow Design, People Also Ask of Creating a Quick Windows 10 Slideshow. Keep Reading to Know About the Quickest Ways of Setting the Issue Straight
- Updated 2024 Approved How to Perfect Quick and Efficient Video Editing | Keyboard Shortcuts in Filmora
- New Are You a Vlogger Looking for Good Color Correction and Video Grading Presets? Here Youll Find Different Vlog LUTs that You Can Use for Your Videos
- In 2024, Creative Ways to Add Green Screen Effects In Photoshop
- Updated 2024 Approved 10 Matching Color Combination That Works Together Greatly
- Using the Best Templates to Create Slow Motion Videos on CapCut
- How to Unlock Realme C33 2023 Phone Pattern Lock without Factory Reset
- How To Leave a Life360 Group On Oppo A59 5G Without Anyone Knowing? | Dr.fone
- 3 Ways to Erase Apple iPhone SE (2022) When Its Locked Within Seconds
- In 2024, Is Fake GPS Location Spoofer a Good Choice On Xiaomi 14 Ultra? | Dr.fone
- In 2024, How to Turn Yourself Into a WhatsApp Cartoon
- 8 Free GIF Animators to Make Your Own GIF for 2024
- In 2024, Ways To Find Unlocking Codes For Samsung Galaxy F34 5G Phones
- Bypass Activation Lock On iPhone 13 - 4 Easy Ways
- How Can We Bypass Xiaomi 14 FRP?
- In 2024, 5 Easy Ways to Copy Contacts from Realme 12 Pro+ 5G to iPhone 14 and 15 | Dr.fone
- In 2024, Ultimate Guide to Catch the Regional-Located Pokemon For Samsung Galaxy A34 5G | Dr.fone
- Top 11 Free Apps to Check IMEI on iPhone SE
- Strategies for Apps That Wont Download From Play Store On Samsung Galaxy S23 Ultra | Dr.fone
- In 2024, Ways to trade pokemon go from far away On Vivo Y100t? | Dr.fone
- Edit and Send Fake Location on Telegram For your Nokia C110 in 3 Ways | Dr.fone
- In 2024, Easiest Guide How to Clone Lava Storm 5G Phone? | Dr.fone
- How to Show Wi-Fi Password on Xiaomi Civi 3 Disney 100th Anniversary Edition
- In 2024, Ways to stop parent tracking your Apple iPhone 11 Pro Max | Dr.fone
- In 2024, 10 Amazing Whiteboard Animation Video Examples You Need to Bookmark
- CatchEmAll Celebrate National Pokémon Day with Virtual Location On Vivo T2x 5G | Dr.fone
- In 2024, How To Fix iPhone 14 Pro Unavailable Issue With Ease
- In 2024, How To Do Poco X5 Screen Sharing | Dr.fone
- In 2024, Best Free Apple iPhone 6 Plus IMEI Checker
- Play Store Not Working On Nokia C12? 8 Solutions Inside | Dr.fone
- For People Wanting to Mock GPS on Realme GT Neo 5 Devices | Dr.fone
- iPogo will be the new iSpoofer On Tecno Pop 8? | Dr.fone
- Oppo Reno 8T 5G Not Connecting to Wi-Fi? 12 Quick Ways to Fix | Dr.fone
- FRP Hijacker by Hagard Download and Bypass your Samsung Galaxy A54 5G FRP Locks
- How to Transfer Data from Poco X6 Pro to Samsung Phone | Dr.fone
- The Best Android Unlock Software For Motorola Edge+ (2023) Device Top 5 Picks to Remove Android Locks
- new Best Tool to Translate YouTube Video to Arabic
- 5 Best Route Generator Apps You Should Try On Honor V Purse | Dr.fone
- Is GSM Flasher ADB Legit? Full Review To Bypass Your Samsung Galaxy A23 5GFRP Lock
- Useful ways that can help to effectively recover deleted files from Samsung Galaxy S21 FE 5G (2023)
- In 2024, How and Where to Find a Shiny Stone Pokémon For Itel P55T? | Dr.fone
- In 2024, Top 5 Asus ROG Phone 8 Pro Bypass FRP Tools for PC That Actually Work
- In 2024, Here are Some Pro Tips for Pokemon Go PvP Battles On Honor 90 Lite | Dr.fone
- In 2024, How to Transfer Data from Apple iPhone 11 Pro Max to ZTE Phones | Dr.fone
- Ways To Find Unlocking Codes For Vivo Y78+ Phones
- Full Guide to Fix iToolab AnyGO Not Working On Vivo Y100t | Dr.fone
- iSpoofer is not working On Xiaomi Redmi Note 12R? Fixed | Dr.fone
- Title: Create the Night-to-Day Effect Videos
- Author: Chloe
- Created at : 2024-05-20 03:37:20
- Updated at : 2024-05-21 03:37:20
- Link: https://ai-editing-video.techidaily.com/create-the-night-to-day-effect-videos/
- License: This work is licensed under CC BY-NC-SA 4.0.


