

Cropping Videos in Final Cut Pro Step by Step
Cropping Videos in Final Cut Pro [Step by Step]
“Storytelling at its most powerful”, - words we read on the first page of the official web-site of Final Cut Pro, non-linear video editing software program which runs on Mac computers. The software lets us to log and transfer videos onto a hard drive, where it can be edited, processed, and output to a wide variety of formats. Final Cut Pro is so advanced that it is used by hobbyist filmmakers and industry professionals in TV, Film, and media. Anyone can get a free trial of the software for their Macs, but, to purchase directly from the Mac App Store it costs $299.99. It’s evident that Final Cut Pro can’t be downloaded, installed, and thus used on Windows, which is unfortunate, but for Mac users, it’s a very powerful video editing software.

What are the features this advanced computer program offers to Mac users? – itreads on the web-site of Final Cut Pro:
- Object Tracker and Cinematic mode;
- Blazing pro performance;
- Editing, audio, motion graphics, color grading, and delivery;
- The best plug-ins, effects, and tools from leading developers.
One of the most impressive things about Final Cut Pro is that through it, you can create 2D and 3D titles right in the program, apply and modify filters, and use the built-in chroma key for high-quality green- and blue-screen effects. But, one should not be alarmed when it comes to experience and knowledge in editing – even though Final Cut Pro seems so advanced with its powerful tools and the possibilities it contains, it is designed for easy use and can be used by amateurs as well as professionals.
The interface, which, when it comes to editing, is one of the most important aspects (if not the main one!), seems quite standard - an ordinary window configuration, sidebar with libraries, events, projects, collections… If you want to know more about the basics of Final Cut Pro, it would be helpful to watch a beginner tutorial , with the length of only 20 minutes, an introduction of the whole program.

Anyway, the main topic of this article is about cropping – how to crop a video in Final Cut Pro? If you are a Mac user and have this program installed on your computer, and you as well have a footage where you want to remove some portions of the video and adjust the size of the cropped clip within a certain area, this article is for you. Even though cropping is especially used when it comes to the images, it is extremely helpful in certain situations about the video clips, as well. So, let’s dive into each step of cropping in Final Cut Pro!
Steps to crop a video in Final Cut Pro
After getting Final Cut Pro ready to work in and opening it, you need to start as always, as in any other software: Of course, choose Import Media.

The software will ask your permission to access files in your computer, so, in order to import some, guess you have to click on OK.

Then, it will let you choose your file – but not by opening the new window (as in most cases), rather, you can choose file within the software.

Once you have your file(s) chosen, you need to find Import Selected button on the down and right.

This will lead you towards the editor again, but if you try to drag and drop your file into the sequence, the program will not follow this simple order…

This is because what the window below reads and looks like – it offers you create a New Project first. So, you need to hit it.

This will create the sequence where you can add the video you have already selected and imported from your media.

Now, it’s time to find where the cropping option is. It’s quite simple – look at the icon below and a little left of the screen where your video clip shows, click on it and you will see three options: Transform, Crop, and Distort. Needless to say, you will choose crop in this case, even if other options sound quite interesting, too!

Choosing Crop also gives you three options: Trim, Crop, and Ken Burns. Stick with the Crop again!

You will notice the kind of rulers on the angles of the video clip – they are there so you can crop your footage manually, by holding and moving them with your cursor to your liking.

Of course, if you direct your cursor in the middle of the cropped video, you can move the whole cropping window around it, so you can find the area where you intend to crop better.

And when the selected area is ready, you need to click on Done button on the right top side of the screen. If you are not satisfied with the result, you can take the step back, by clicking on Reset button right next to Done and modify the area again.

On the right side of the screen, you notice a window where Crop is also written. Alongside it, if you hover over the option with your mouse, you will see the word: Show. Clicking on it will let you crop the video from each side from there, too.

There, you can “play around” with Left, Right, Top, and Bottom sides.

In the process, if you are unsure or you want to compare the original video to the cropped version of it, keep in mind that you can uncheck the Crop button.

Finally, when you feel the result is what you have imagined, you can proceed to saving your work. For it to be done, you need to now find an Export button top right of the whole editor, and then, choose Export File (or else, if that’s what you are willing to do).


The next step would be Export Settings. You will see a new window which has three sections: Info, Settings, and Roles. The most important one here would be considered Settings, where you choose your preferred Format, Video Codec, Resolution, Color Space, Audio Format, and Action.


When you click on Next, you then choose the Name of your project and the location where you want to save it exactly.

Then you click on Save, and in a short amount of time, you have your new cropped video where you chose to save it! So, that’s it with cropping in the Final Cut Pro!


An easier way to crop a video in Wondershare Filmora
When it comes down to Mac, we can also discussed another program which is available on Mac as well as Windows operating system. This software is Filmora Video Editor , which is a simple yet sophisticated video editor that empowers the stories with everything a video editor program can offer to its users. On its official web-site, Filmora is declared as the best video editor, which allows you to edit videos with minimal effort (and isn’t that exactly what one wants when trying to just crop a video?..), enhance videos with 800+ stunning effects, unleash creativity with Hollywood effects, and, import and export in almost any format. One can say that the interface looks quite like that of Final Cut Pro…
For Win 7 or later (64-bit)
For macOS 10.14 or later

So, shall we imagine we use Wondershare Filmora X to crop our video, what would be the steps to do it?..
Needless to say, downloading and installing the software is the first step. To add files, you need to click on Import Media Files Here.

Choose your clip(s) you would like to crop and then drag and drop it in the sequence.

Above your video in the sequence, you will see little icons and find a Crop one.

Click on it and a new window will open – it’s for Crop and Zoom, where you can choose a needed ratio or do it manually (for it, you have to select Custom first).

After clicking OK, your video will be cropped as you like. Then, you can proceed with Exporting it – click on Export, choose your preferred settings, and save the video.

So, in this article, we got to know to software Final Cut Pro better and learned about how to crop our footage using this program; we also discussed how to do the same in Wondershare Filmora X, shall we need a different software.
And now, you can choose your preferred one and follow these step, or, why not try both?..
What are the features this advanced computer program offers to Mac users? – itreads on the web-site of Final Cut Pro:
- Object Tracker and Cinematic mode;
- Blazing pro performance;
- Editing, audio, motion graphics, color grading, and delivery;
- The best plug-ins, effects, and tools from leading developers.
One of the most impressive things about Final Cut Pro is that through it, you can create 2D and 3D titles right in the program, apply and modify filters, and use the built-in chroma key for high-quality green- and blue-screen effects. But, one should not be alarmed when it comes to experience and knowledge in editing – even though Final Cut Pro seems so advanced with its powerful tools and the possibilities it contains, it is designed for easy use and can be used by amateurs as well as professionals.
The interface, which, when it comes to editing, is one of the most important aspects (if not the main one!), seems quite standard - an ordinary window configuration, sidebar with libraries, events, projects, collections… If you want to know more about the basics of Final Cut Pro, it would be helpful to watch a beginner tutorial , with the length of only 20 minutes, an introduction of the whole program.
Anyway, the main topic of this article is about cropping – how to crop a video in Final Cut Pro? If you are a Mac user and have this program installed on your computer, and you as well have a footage where you want to remove some portions of the video and adjust the size of the cropped clip within a certain area, this article is for you. Even though cropping is especially used when it comes to the images, it is extremely helpful in certain situations about the video clips, as well. So, let’s dive into each step of cropping in Final Cut Pro!
Steps to crop a video in Final Cut Pro
After getting Final Cut Pro ready to work in and opening it, you need to start as always, as in any other software: Of course, choose Import Media.
The software will ask your permission to access files in your computer, so, in order to import some, guess you have to click on OK.
Then, it will let you choose your file – but not by opening the new window (as in most cases), rather, you can choose file within the software.
Once you have your file(s) chosen, you need to find Import Selected button on the down and right.
This will lead you towards the editor again, but if you try to drag and drop your file into the sequence, the program will not follow this simple order…
This is because what the window below reads and looks like – it offers you create a New Project first. So, you need to hit it.
This will create the sequence where you can add the video you have already selected and imported from your media.
Now, it’s time to find where the cropping option is. It’s quite simple – look at the icon below and a little left of the screen where your video clip shows, click on it and you will see three options: Transform, Crop, and Distort. Needless to say, you will choose crop in this case, even if other options sound quite interesting, too!
Choosing Crop also gives you three options: Trim, Crop, and Ken Burns. Stick with the Crop again!
You will notice the kind of rulers on the angles of the video clip – they are there so you can crop your footage manually, by holding and moving them with your cursor to your liking.
Of course, if you direct your cursor in the middle of the cropped video, you can move the whole cropping window around it, so you can find the area where you intend to crop better.
And when the selected area is ready, you need to click on Done button on the right top side of the screen. If you are not satisfied with the result, you can take the step back, by clicking on Reset button right next to Done and modify the area again.
On the right side of the screen, you notice a window where Crop is also written. Alongside it, if you hover over the option with your mouse, you will see the word: Show. Clicking on it will let you crop the video from each side from there, too.
There, you can “play around” with Left, Right, Top, and Bottom sides.
In the process, if you are unsure or you want to compare the original video to the cropped version of it, keep in mind that you can uncheck the Crop button.
Finally, when you feel the result is what you have imagined, you can proceed to saving your work. For it to be done, you need to now find an Export button top right of the whole editor, and then, choose Export File (or else, if that’s what you are willing to do).
The next step would be Export Settings. You will see a new window which has three sections: Info, Settings, and Roles. The most important one here would be considered Settings, where you choose your preferred Format, Video Codec, Resolution, Color Space, Audio Format, and Action.
When you click on Next, you then choose the Name of your project and the location where you want to save it exactly.
Then you click on Save, and in a short amount of time, you have your new cropped video where you chose to save it! So, that’s it with cropping in the Final Cut Pro!
An easier way to crop a video in Wondershare Filmora
When it comes down to Mac, we can also discussed another program which is available on Mac as well as Windows operating system. This software is Filmora Video Editor , which is a simple yet sophisticated video editor that empowers the stories with everything a video editor program can offer to its users. On its official web-site, Filmora is declared as the best video editor, which allows you to edit videos with minimal effort (and isn’t that exactly what one wants when trying to just crop a video?..), enhance videos with 800+ stunning effects, unleash creativity with Hollywood effects, and, import and export in almost any format. One can say that the interface looks quite like that of Final Cut Pro…
For Win 7 or later (64-bit)
For macOS 10.14 or later
So, shall we imagine we use Wondershare Filmora X to crop our video, what would be the steps to do it?..
Needless to say, downloading and installing the software is the first step. To add files, you need to click on Import Media Files Here.
Choose your clip(s) you would like to crop and then drag and drop it in the sequence.
Above your video in the sequence, you will see little icons and find a Crop one.
Click on it and a new window will open – it’s for Crop and Zoom, where you can choose a needed ratio or do it manually (for it, you have to select Custom first).
After clicking OK, your video will be cropped as you like. Then, you can proceed with Exporting it – click on Export, choose your preferred settings, and save the video.
So, in this article, we got to know to software Final Cut Pro better and learned about how to crop our footage using this program; we also discussed how to do the same in Wondershare Filmora X, shall we need a different software.
And now, you can choose your preferred one and follow these step, or, why not try both?..
Complete How-To Tutorials of Kapwing Collage Maker
How-to Tutorials of Kapwing Collage Maker
An easy yet powerful editor
Numerous effects to choose from
Detailed tutorials provided by the official channel
It’s easy to make video collages with Kapwing’s collage maker and video editing software. In Kapwing’s collage maker, you can apply filters or memes to create a collage. Gifs can also be added when you are making collages. Creating attractive collages online in a matter of minutes is one of the most popular ways to preserve precious moments, and kapwing lets you do just that.
Out of all the tools that we have used and tested to make video collages, kapwing is the easiest to have. This guide will help you learn all you need to know about the software and how it works.
In this article
01 [Types of Video Collages](#Part 1)
02 [Review of 5 Best Video Collage Maker Apps](#Part 2)
03 [How to Create a Kapwing Video Collage?](#Part 3)
Part 1 Types of Video Collages
01Reaction clips
Video collages of this type include a gif that you want to respond to at the end of the video. These days, this is among the most prominent video formats. However, if you want to make it more personal, you can also include your reaction.
02Transformation videos
The video collages of this type of format grants users the option to draw a comparison between the current situation with the previous ones. These formats are often seen in short videos and platforms they are compatible with.
03Wear it, do it, say it better
The comparison collage is an effective way of comparing two events easily and is often used to compare significant events that can be compared or have some similarities.
044. Throwback
Utilizing old and current photographs allows you to recreate a historical scene. Many such can be utilized to recreate the old memories scene or combine them with the popular events in a modern way.
05Recipe and lyrics
Making video collages with text video music will make some cool videos. A prime example of such a video can be found on YouTube.
06Comparison videos
Video collages can be used to compare two products very quickly and demonstrate how they are different from each other and similar.
07Split screen videos
When conducting interviews and completing surveys, collages of this type are extremely helpful. They help to create an equal share of screen time for each participant.
08Multimedia collage
Using Kapwing Collage Maker, you can create cool video collages by combining images, gifs, and videos.
Part 2 Review of 5 Best Video Collage Maker Apps
This article will introduce you to some of the best apps and services available for editing or creating video collages. This short overview will give you an idea of what’s available.
01Best photo and collage maker- VCU
Video Collages and other functionality are all included in this video editing and converting tool. However, you must download and install it to use it because it’s not an online editor.
Pros:
● The program provides you with a massive variety of frequently used templates to use when editing your collages and videos, making it a perfect choice for beginners.
● The application also allows the user to use a split-screen mode and add multiple videos simultaneously, making it easy to see how the video will look.
● It also has a filter feature for quickly applying different effects to the screens you wish to use.
Cons:
● To use this software, you must have the required knowledge.
● This software also lacks many necessary features, such as side-by-side editing, which many users prefer today.
● It is not a free application, so you have to pay before using it.

02Kapwing
Kapwing collage maker lets you easily make video collages from gifs, memes, and other media types, allowing you to create a highly entertaining and valuable video college for various situations and urgent assignments. Since it is a full-featured tool, it includes every possible feature your profession may require. One advantage is that you do not need to worry about installing it – it is an online tool.
Pros:
● User-friendly.
● Every type of user can choose from hundreds of layout options.
Cons:
● It is online software, so it cannot be used for heavy editing or making long collages.

03Fastreel
An online video collage-making service helps you make video collages using multiple videos and images.
Pros:
● You can make videos using many free and pre-made templates.
● Since this editor is online, you can access it from anywhere.
Cons:
● As an online editor, it does not have the same features as Kapwing, and it has much less flexibility

04Photo Grid Video Collage Maker
This app can be downloaded to iPhones and iPads for use directly via the app store.
Pros:
● Creating video collages and sharing them with friends and family is accessible on any iPhone or iPad.
● You can create video collages easily by combining multiple frames and custom features.
● You can directly upload videos and photos from the device and edit them on your PC.
Cons:
● There are no template options as there were other options on the list because this is a phone application.
● The app is unable to handle heavy editing.

05Video collage maker
This Android app makes it easy to edit videos and make video collages on your phone using pre-made formats and templates. You can download this app from the play store and use it later to create or edit video collages.
Pros:
● Your Android device may come with template layouts that you can use to create a video collage.
● Additionally, you may add text or stickers to your video collage and apply other filters to enhance its visual appeal.
Cons:
● Android’s specific nature makes it lack many tools and features found in a full-featured program.

Part 3 How to Create a Kapwing Video Collage?
The various steps one has to follow to utilize Kapwing’s collage maker.
● Firstly, this is an online video editor and collage maker, so there is no need to download anything. Instead, using any browser that supports the app, you can access the software directly on your PC and begin using it immediately.
● When you choose a layout, you need to decide whether to edit vertically or horizontally. Once you’ve selected a layout, you can begin editing.
● You can select the elements you want to add to your video collage, for example, videos, images, gifs, etc., and then choose the cropping options from the available options.
● Now that the hard part is over, all you need to do is click on create, and the collage will be downloaded and available for sharing.
Wondershare Filmora Video Editor is currently one of the best alternatives in the market if you are uncertain about using Kapwing collage.
Wondershare Filmora
Get started easily with Filmora’s powerful performance, intuitive interface, and countless effects!
Try It Free Try It Free Try It Free Learn More >

It has all the excellent features necessary for editing videos and making beautiful video collages shared with friends and family. Video collages can be created with every minute, and all kinds of filters can be applied.
● Key Takeaways from This Episode →
●Kapwing is an easy-to-use software that can make almost any type of video collage.
●You get access to a vast library of features, and you can edit video collages like a pro.
●As it is an online tool, you don’t have to worry about compatibility issues, and you can launch it right from your browser.
●Kapwing makes it a popular choice for video editing with so many features. Compared to other options, Kapwing comes out on top of all its features to make video collages with things like adding gifs, memes, and different media types.
●If you are not tech-savvy but want to make beautiful video collages that one can share with their friends and family to surprise them or cherish some moments, Kapwing video collage can be a perfect choice for you, and you should check it out today.
It’s easy to make video collages with Kapwing’s collage maker and video editing software. In Kapwing’s collage maker, you can apply filters or memes to create a collage. Gifs can also be added when you are making collages. Creating attractive collages online in a matter of minutes is one of the most popular ways to preserve precious moments, and kapwing lets you do just that.
Out of all the tools that we have used and tested to make video collages, kapwing is the easiest to have. This guide will help you learn all you need to know about the software and how it works.
In this article
01 [Types of Video Collages](#Part 1)
02 [Review of 5 Best Video Collage Maker Apps](#Part 2)
03 [How to Create a Kapwing Video Collage?](#Part 3)
Part 1 Types of Video Collages
01Reaction clips
Video collages of this type include a gif that you want to respond to at the end of the video. These days, this is among the most prominent video formats. However, if you want to make it more personal, you can also include your reaction.
02Transformation videos
The video collages of this type of format grants users the option to draw a comparison between the current situation with the previous ones. These formats are often seen in short videos and platforms they are compatible with.
03Wear it, do it, say it better
The comparison collage is an effective way of comparing two events easily and is often used to compare significant events that can be compared or have some similarities.
044. Throwback
Utilizing old and current photographs allows you to recreate a historical scene. Many such can be utilized to recreate the old memories scene or combine them with the popular events in a modern way.
05Recipe and lyrics
Making video collages with text video music will make some cool videos. A prime example of such a video can be found on YouTube.
06Comparison videos
Video collages can be used to compare two products very quickly and demonstrate how they are different from each other and similar.
07Split screen videos
When conducting interviews and completing surveys, collages of this type are extremely helpful. They help to create an equal share of screen time for each participant.
08Multimedia collage
Using Kapwing Collage Maker, you can create cool video collages by combining images, gifs, and videos.
Part 2 Review of 5 Best Video Collage Maker Apps
This article will introduce you to some of the best apps and services available for editing or creating video collages. This short overview will give you an idea of what’s available.
01Best photo and collage maker- VCU
Video Collages and other functionality are all included in this video editing and converting tool. However, you must download and install it to use it because it’s not an online editor.
Pros:
● The program provides you with a massive variety of frequently used templates to use when editing your collages and videos, making it a perfect choice for beginners.
● The application also allows the user to use a split-screen mode and add multiple videos simultaneously, making it easy to see how the video will look.
● It also has a filter feature for quickly applying different effects to the screens you wish to use.
Cons:
● To use this software, you must have the required knowledge.
● This software also lacks many necessary features, such as side-by-side editing, which many users prefer today.
● It is not a free application, so you have to pay before using it.
02Kapwing
Kapwing collage maker lets you easily make video collages from gifs, memes, and other media types, allowing you to create a highly entertaining and valuable video college for various situations and urgent assignments. Since it is a full-featured tool, it includes every possible feature your profession may require. One advantage is that you do not need to worry about installing it – it is an online tool.
Pros:
● User-friendly.
● Every type of user can choose from hundreds of layout options.
Cons:
● It is online software, so it cannot be used for heavy editing or making long collages.
03Fastreel
An online video collage-making service helps you make video collages using multiple videos and images.
Pros:
● You can make videos using many free and pre-made templates.
● Since this editor is online, you can access it from anywhere.
Cons:
● As an online editor, it does not have the same features as Kapwing, and it has much less flexibility
04Photo Grid Video Collage Maker
This app can be downloaded to iPhones and iPads for use directly via the app store.
Pros:
● Creating video collages and sharing them with friends and family is accessible on any iPhone or iPad.
● You can create video collages easily by combining multiple frames and custom features.
● You can directly upload videos and photos from the device and edit them on your PC.
Cons:
● There are no template options as there were other options on the list because this is a phone application.
● The app is unable to handle heavy editing.
05Video collage maker
This Android app makes it easy to edit videos and make video collages on your phone using pre-made formats and templates. You can download this app from the play store and use it later to create or edit video collages.
Pros:
● Your Android device may come with template layouts that you can use to create a video collage.
● Additionally, you may add text or stickers to your video collage and apply other filters to enhance its visual appeal.
Cons:
● Android’s specific nature makes it lack many tools and features found in a full-featured program.
Part 3 How to Create a Kapwing Video Collage?
The various steps one has to follow to utilize Kapwing’s collage maker.
● Firstly, this is an online video editor and collage maker, so there is no need to download anything. Instead, using any browser that supports the app, you can access the software directly on your PC and begin using it immediately.
● When you choose a layout, you need to decide whether to edit vertically or horizontally. Once you’ve selected a layout, you can begin editing.
● You can select the elements you want to add to your video collage, for example, videos, images, gifs, etc., and then choose the cropping options from the available options.
● Now that the hard part is over, all you need to do is click on create, and the collage will be downloaded and available for sharing.
Wondershare Filmora Video Editor is currently one of the best alternatives in the market if you are uncertain about using Kapwing collage.
Wondershare Filmora
Get started easily with Filmora’s powerful performance, intuitive interface, and countless effects!
Try It Free Try It Free Try It Free Learn More >
It has all the excellent features necessary for editing videos and making beautiful video collages shared with friends and family. Video collages can be created with every minute, and all kinds of filters can be applied.
● Key Takeaways from This Episode →
●Kapwing is an easy-to-use software that can make almost any type of video collage.
●You get access to a vast library of features, and you can edit video collages like a pro.
●As it is an online tool, you don’t have to worry about compatibility issues, and you can launch it right from your browser.
●Kapwing makes it a popular choice for video editing with so many features. Compared to other options, Kapwing comes out on top of all its features to make video collages with things like adding gifs, memes, and different media types.
●If you are not tech-savvy but want to make beautiful video collages that one can share with their friends and family to surprise them or cherish some moments, Kapwing video collage can be a perfect choice for you, and you should check it out today.
How To Make a Video Podcast
Starting a video podcast can be quite intimidating, but the truth is; having the proper knowledge will help you do things more correctly.
As we all know, knowledge is the key to success. So, for you to navigate your way around the video podcasting industry easily, you need to consume enough information that will enable you to make fewer wrong decisions.
To help you out, we took our time to do more research on how to record video podcasts, and in this post, we will share all you need to know to record a video podcast that stands out.
Part 1. But first: why record with a video?
If you’ve done a little research, you’ll notice many podcasters switched to recording with videos instead of audio. Did they decide to start doing that so we could see their faces? Well, the answer is NO. But before we discuss more on that, you should know what a video podcast is and its types.
You guessed right. A video podcast is a podcast with video. The video element could be a static image or a video recording of the podcast host and the guest. A video podcast will help you do the following;
1. Enhance the visual content
Research shows that humans learn more from what they visualize than what is heard. Yes, this is because 30% of the human brain comprises neurons dedicated to visual processing, and just 3% is dedicated to hearing. Besides, videos are always more engaging compared to audio. So why not combine both to boost your podcast performance?
2. Level up the personality and relatability
Most people have more belief in what they see than what is heard. So, video podcasts allow audiences to easily see your expression and understand your passion for the subject you discuss. It also builds a deeper level of connections between you and them. Also, it helps to add to the originality of your podcast and your brand as a whole.
3. Make the content more accessible
Your podcast show becomes more accessible when it’s in the video. You won’t be limited to just uploading it on podcast platforms but also on social media as a short TikTok trailer, Instagram post, YouTube video, etc. Doing this will get your content in front of a wide range of audience, thus prompting more people to engage with your podcast.
Part 2. Get your gear set up
The first step to starting a video podcast is getting your gear set up. We recommend you start with the following podcast equipment:
- A camera (if recording a video podcast)
- Microphone(s)
- Headphone(s)
- Memory cards
- Tripods
- Computers
- Recording software or a digital audio workstation
Let’s dig deeper into each of these. We’ve compiled the best podcast equipment for beginners and pros alike based on our extensive research.
1. DSLRs Camera – Sony A6300 ($779)

If you’re looking to record remotely, just like most podcasters in 2022, we’d advise using a DSLR camera by connecting it to your computer using an Elgato Cam link. A $30 version of the device is available on Amazon.
DSLR cameras are perfect for video podcasts, and one of the most reliable options is the Sony A6300 camera. It’s one rugged camera that feels very good at hand, and it offers excellent 4K video recording quality that allows you to shoot amazing videos for podcasts. You can never go wrong with such a camera at your fingertips.
2. Microphones - Shure SM58 ($89)

There is also other equipment – a microphone you need to start a podcast. There are many quality microphones in the market, but one of the most popular options among podcasters is the Shure SM58. It’s an XLR microphone that usually requires an interface to record. However, if you prefer a USB microphone, you can purchase either Rode, NT-USB mini, or the Shure MV7.
3. Headphones - Monoprice Premium Hi-Fi DJ Style ($26.60)

Headphones are a must for any kind of podcast. Yes, this helps you hear how everyone on your podcast sounds. One of the best choices for podcasters is the Monoprice Premium hi-fi DJ style. The headphones produce the best sound quality and are equipped with thick and comfortable padding that keeps music inside and prevents external noise.
4. Memory Card - SanDisk 128GB Ultra MicroSDXC UHS-I Memory Card ($16.35)

A memory card is also crucial when you’re recording a video podcast. It allows you to store recorded footage safely. Plus, it facilitates moving recorded videos between your computer and camera, especially when you cannot use a USB cable.
5. Tripods - Aureday 74 Camera Tripod ($36.99)

It would help if you had a tripod to shoot stable podcast videos. A tripod is a support tool that will enable you to adjust your camera height, movement, and stability to record a perfect video from any required angle. It is essential if you don’t have anyone helping you behind the camera.
6. Computers - ASUS VivoBook 15 F515 ($358.99)

A computer is just like a mastermind of the whole podcasting process. Yes, it’s where every other device is connected to, and you need it to edit the recorded podcast according to your requirements. Of course, any primary computer is perfect for the process. But if you’re looking to acquire one, the ASUS VivoBook 15 F515 is affordable.
7. Video Podcast Software - Filmora

Free Download For Win 7 or later(64-bit)
Free Download For macOS 10.14 or later
Your podcast gear setup isn’t complete without video podcast software. Yes, this one is also essential, as it’s required for performing podcast recording editing to spice up your videos. Wondershare Filmora is an ideal choice for anyone to edit podcast content with high quality!
Part 3. Build your set
Besides having a good quality camera and other podcast gear mentioned above, it’s also crucial to make your set look gorgeous. It makes your video podcast look more professional. Below are ideas for some techniques you can employ.
1. Depth & lighting
To make a professional-looking video podcast, you need to add as much depth as possible. So yes, there should be enough distance between you and the background (don’t be too close or too far). However, if this is impossible because you have a small space, good lighting should spice things up. Godox SL -150 is one perfect choice that you can opt for.
2. Make your background interesting
Your background shouldn’t just be left alone. It would be best to put up some fascinating stuff that will blend with the podcast’s theme and make the video look more admirable. For example, if your podcast discusses relationships, you should have a background that suits the topic.
3. Declutter
It’s never a good idea to leave unnecessary items in the background because that makes it look messy. Also, it may compromise everything you’ve done to spice it up. So, after you finish putting up an exciting background, take a few minutes to inspect the lighting, the elements, and lots more. Then, ensure it’s clean and tidy.
Part 4. Create a collaborative doc
Creating a collaborative doc is also essential for making a podcast. You might ask: “what is a collaborative doc?” Well, it’s where you jot down information on the following;
- Niche or Topic
- Brand name
- Format for the Show and each of the Episodes
- Intro and Outro Music
- Create a Cover Art
- Ideas to record the first podcast
Part 5. Create your show
Now that you have a perfect plan and setup, the next thing is to start the show. But first, what format have you chosen for your first show? Is it the static image recording? The remote interview recording? The in-studio recording? or interview & b-roll recording? Not sure of which format to start with? Worry less. We’ll walk you through the steps of the process for each process. Just keep reading;
Method 1: Static Image Podcast Recording

It is the simplest way to record a video podcast. You don’t necessarily have to show your face. Instead, record an audio podcast, then convert its file into a video file and add a static image to the background to keep playing as the viewer is listening.
You need video editing software to create this kind of video podcast - Filmora is a perfect choice. However, keep in mind that this kind of video podcast is usually less engaging, only that you’ll be able to publish it on various video platforms.
Equipment Required:
- Video editor - Filmora
- Computer
Method 2: In-studio Podcast Recording

Unlike static image recording, this kind of video podcast requires you to show in the video. It involves capturing the conversation between you and a guest or your colleague from a perfectly set up studio.
Equipment required:
- Camera
- Microphone
- Tripod (if you have nobody to stay behind the camera)
- Computer
- Headphones
- Video editing software - Filmora
Method 3: Remote Interview Podcast Recording

It is just like a live-stream podcast. It involves recording multiple speakers who are not in the same room as you. This kind of video podcast is reliable when you intend to shoot online interviews with guests across the country.
Equipment Required:
- Software that supports capturing multiple webcams. An example is Riverside.
- Microphone
- Computer
- Video Editor - Filmora
Part 6. Edit your video podcast
After creating your show, the next thing is to edit your video podcast to make it look worthy when you publish it on any platform. But for this operation, you need powerful video editing software like Filmora.
Filmora is an efficient video editor with many excellent features, including audio recording, audio effects, speech-to-text, and many more. Also, it allows users with any level of experience to create nice-looking videos using these features. With Filmora, you can;
- Record high-quality podcasts with no quality loss.
- Edit podcast videos with over 1,000 stunning effects and elements.
- Add subtitles in different languages, fonts, and formats for your podcast.
- Publish podcast videos directly to platforms like YouTube and Vimeo.
- Edit audio efficiently with audio denoise, auto beat sync, silence detection, etc.
Here is how to use Filmora to edit a video podcast
Step1 Download and Install Filmora software on your computer
Step2 Create a New Project
You can launch the Filmora app and click Create New Project.

Step3 Upload footage
Click the import button to upload your podcast video, then drag-n-drop it to the timeline.

Step4 Edit Podcast
Right-click the podcast video clip from the timeline > choose Edit Properties. Then, in the pop-up window, tick the checkbox next to Ducking and use the appropriate buttons to adjust the Fade in, Fade out, and pitch.

Step5 Use Speech-to-text
To convert your podcast voiceover into readable text, right-click on the podcast clip from the timeline and select Speech-to-text from the pop-up list.
Select the Language you wish to convert the voiceover to click OK to proceed.

Step6 Add Video & Audio Effects
To add video and audio effects to your podcast, you just need to click Effects from the top side of the screen. Then, click an option from the left side of the screen and select the effect you’d like to use in your video. After that, drag-n-drop the effect to the timeline.

Step7 Preview and Save Video
Finally, play the clip to preview the edited podcast and use the Export button at the top of the screen to save it to your computer.

For more detailed video podcast recording steps with Filmora, we advise you to refer to this video Record Podcast on Filmora
Part 7. Upload your video podcast
Firstly, you need a video platform to upload your show. Some of the excellent options you can find in the industry include YouTube, RSS, Spotify, Vimeo, Riverside.fm, and many others. Also, you can upload the show to video platforms like YouTube, Vimeo, etc. To upload the podcast video to a platform like YouTube, you just have to do the following;
Step1 Open YouTube’s official website and create or login into your account.
Step2 On the new interface, click Create New from the top-right corner and choose Upload Video.

Step3 Next, click Select Files and upload the podcast video.

Step4 Once the upload is complete, adjust the editing/settings according to your requirements and publish your video to complete the operation.

Part 8. Share and promote your video podcast
Most people think the final phase of making a video podcast is uploading to a video platform, but you still have to share and promote your content on different platforms. Nevertheless, it will help get the podcast to a wide range of audiences.
Thankfully, a video podcast allows you to upload a short clip of your show to different social media platforms like Instagram, TikTok, Twitter, etc. With this, your show will become more accessible across various platforms, thus increasing your show’s engagement. Honestly, it’s a win-win!
The Bottom Line
There you have it! Just like that, you’re ready to be a part of the top-rated video podcasters you can ever think of. With all that’s discussed in the article, we believe you can now focus on creating valuable and engaging content for your audience.
However, as you start to record video podcasts, we advise you to invest in the right marketing tools to help you gain more attraction in the industry.
Free Download For macOS 10.14 or later
Your podcast gear setup isn’t complete without video podcast software. Yes, this one is also essential, as it’s required for performing podcast recording editing to spice up your videos. Wondershare Filmora is an ideal choice for anyone to edit podcast content with high quality!
Part 3. Build your set
Besides having a good quality camera and other podcast gear mentioned above, it’s also crucial to make your set look gorgeous. It makes your video podcast look more professional. Below are ideas for some techniques you can employ.
1. Depth & lighting
To make a professional-looking video podcast, you need to add as much depth as possible. So yes, there should be enough distance between you and the background (don’t be too close or too far). However, if this is impossible because you have a small space, good lighting should spice things up. Godox SL -150 is one perfect choice that you can opt for.
2. Make your background interesting
Your background shouldn’t just be left alone. It would be best to put up some fascinating stuff that will blend with the podcast’s theme and make the video look more admirable. For example, if your podcast discusses relationships, you should have a background that suits the topic.
3. Declutter
It’s never a good idea to leave unnecessary items in the background because that makes it look messy. Also, it may compromise everything you’ve done to spice it up. So, after you finish putting up an exciting background, take a few minutes to inspect the lighting, the elements, and lots more. Then, ensure it’s clean and tidy.
Part 4. Create a collaborative doc
Creating a collaborative doc is also essential for making a podcast. You might ask: “what is a collaborative doc?” Well, it’s where you jot down information on the following;
- Niche or Topic
- Brand name
- Format for the Show and each of the Episodes
- Intro and Outro Music
- Create a Cover Art
- Ideas to record the first podcast
Part 5. Create your show
Now that you have a perfect plan and setup, the next thing is to start the show. But first, what format have you chosen for your first show? Is it the static image recording? The remote interview recording? The in-studio recording? or interview & b-roll recording? Not sure of which format to start with? Worry less. We’ll walk you through the steps of the process for each process. Just keep reading;
Method 1: Static Image Podcast Recording
It is the simplest way to record a video podcast. You don’t necessarily have to show your face. Instead, record an audio podcast, then convert its file into a video file and add a static image to the background to keep playing as the viewer is listening.
You need video editing software to create this kind of video podcast - Filmora is a perfect choice. However, keep in mind that this kind of video podcast is usually less engaging, only that you’ll be able to publish it on various video platforms.
Equipment Required:
- Video editor - Filmora
- Computer
Method 2: In-studio Podcast Recording
Unlike static image recording, this kind of video podcast requires you to show in the video. It involves capturing the conversation between you and a guest or your colleague from a perfectly set up studio.
Equipment required:
- Camera
- Microphone
- Tripod (if you have nobody to stay behind the camera)
- Computer
- Headphones
- Video editing software - Filmora
Method 3: Remote Interview Podcast Recording
It is just like a live-stream podcast. It involves recording multiple speakers who are not in the same room as you. This kind of video podcast is reliable when you intend to shoot online interviews with guests across the country.
Equipment Required:
- Software that supports capturing multiple webcams. An example is Riverside.
- Microphone
- Computer
- Video Editor - Filmora
Part 6. Edit your video podcast
After creating your show, the next thing is to edit your video podcast to make it look worthy when you publish it on any platform. But for this operation, you need powerful video editing software like Filmora.
Filmora is an efficient video editor with many excellent features, including audio recording, audio effects, speech-to-text, and many more. Also, it allows users with any level of experience to create nice-looking videos using these features. With Filmora, you can;
- Record high-quality podcasts with no quality loss.
- Edit podcast videos with over 1,000 stunning effects and elements.
- Add subtitles in different languages, fonts, and formats for your podcast.
- Publish podcast videos directly to platforms like YouTube and Vimeo.
- Edit audio efficiently with audio denoise, auto beat sync, silence detection, etc.
Here is how to use Filmora to edit a video podcast
Step1 Download and Install Filmora software on your computer
Step2 Create a New Project
You can launch the Filmora app and click Create New Project.
Step3 Upload footage
Click the import button to upload your podcast video, then drag-n-drop it to the timeline.
Step4 Edit Podcast
Right-click the podcast video clip from the timeline > choose Edit Properties. Then, in the pop-up window, tick the checkbox next to Ducking and use the appropriate buttons to adjust the Fade in, Fade out, and pitch.
Step5 Use Speech-to-text
To convert your podcast voiceover into readable text, right-click on the podcast clip from the timeline and select Speech-to-text from the pop-up list.
Select the Language you wish to convert the voiceover to click OK to proceed.
Step6 Add Video & Audio Effects
To add video and audio effects to your podcast, you just need to click Effects from the top side of the screen. Then, click an option from the left side of the screen and select the effect you’d like to use in your video. After that, drag-n-drop the effect to the timeline.
Step7 Preview and Save Video
Finally, play the clip to preview the edited podcast and use the Export button at the top of the screen to save it to your computer.
For more detailed video podcast recording steps with Filmora, we advise you to refer to this video Record Podcast on Filmora
Part 7. Upload your video podcast
Firstly, you need a video platform to upload your show. Some of the excellent options you can find in the industry include YouTube, RSS, Spotify, Vimeo, Riverside.fm, and many others. Also, you can upload the show to video platforms like YouTube, Vimeo, etc. To upload the podcast video to a platform like YouTube, you just have to do the following;
Step1 Open YouTube’s official website and create or login into your account.
Step2 On the new interface, click Create New from the top-right corner and choose Upload Video.
Step3 Next, click Select Files and upload the podcast video.
Step4 Once the upload is complete, adjust the editing/settings according to your requirements and publish your video to complete the operation.
Part 8. Share and promote your video podcast
Most people think the final phase of making a video podcast is uploading to a video platform, but you still have to share and promote your content on different platforms. Nevertheless, it will help get the podcast to a wide range of audiences.
Thankfully, a video podcast allows you to upload a short clip of your show to different social media platforms like Instagram, TikTok, Twitter, etc. With this, your show will become more accessible across various platforms, thus increasing your show’s engagement. Honestly, it’s a win-win!
The Bottom Line
There you have it! Just like that, you’re ready to be a part of the top-rated video podcasters you can ever think of. With all that’s discussed in the article, we believe you can now focus on creating valuable and engaging content for your audience.
However, as you start to record video podcasts, we advise you to invest in the right marketing tools to help you gain more attraction in the industry.
How to Use Visual Effect for Zoom
Zoom, a video calling software, has been quite popular over the last several months and is still one of the most used videos calling applications by millions of people worldwide. The site is a favorite among working professionals, but it is also utilized by individuals to connect with their friends and loved ones. Additionally, despite the app’s abundance of practical built-in tools and functions, it lacks the fun filters and special effects that the majority of users are used to when using a camera. Zoom has ingrained itself in our vocabulary during the last year. It seemed almost inevitable given that everything, from meetings to parties, has moved online.
You don’t need to seek farther than Zoom visual effects to inject a little jazz into the routine Zoom meetings during these hard times. By making adjustments to your Video configuration either before or during a video call, you may add visual effects in Zoom. Zoom meetings may be tedious to conduct over extended periods of time. Additionally, it would be helpful if you recorded the condition of your room before any Zoom meetings. You wouldn’t want to reveal your disorganized space while in a meeting. In these situations, adding visual effects will keep your private area private while also making your Zoom meetings entertaining and exciting. It will also prevent others from seeing your filthy room. This tutorial will walk you through the process of adding visual effects to Zoom step-by-step. In addition, you will get acquainted with the numerous camera functions and visual effects that you may employ during a Zoom video conversation.
- 1. What apps can add visual effect on Zoom?
- 2. How do I add visual effects to Zoom in Mobile?
- 3. How do you download Zoom effects?
Part 1: Popular Visual Effects you can add to Zoom
You may apply one of four main graphic effects to your Zoom meetings. The visual effects that you may use in your next Zoom video chat are briefly summarized below.
1. Visual Backgrounds
Virtual backdrops may transform any plain wall into an artistic setting. Zoom provides you the choice to add photographs to your backdrop in addition to offering you a few pre-made backdrops. Zoom lets you add a movie to your backdrop in addition to simply photographs. With the help of this imaginative feature, gather your pals and enjoy your favorite meme or video. A presentation’s collection of photos, a video, or a single image may all serve as virtual backdrops. A green screen would often be used as your real backdrop and consistent lighting would be required.
To avoid having to reveal your real surroundings while in a conference, you may add any picture or video as a virtual backdrop in Zoom. You have the option of adding own photos and movies or selecting from the pre-existing backdrop films and images. The file type for video backgrounds should be MP4 or MOV, and the resolution should range from 360p to a maximum of 1080p. Ensure that the mirroring of your video is deselected in the Zoom’s Video settings if your backdrop picture has text that may be read. By using virtual backdrops, you may alter the background of your video as it appears to the audience member with whom you are speaking. During the video conference you’re in, the other participants will be able to view your face and body overlaid on the backdrop of your choice.
2. Filters
With these filters, you can have fun in all of your Zoom meetings! Filters are a fun way to spend time with loved ones who are far away, particularly at a period when maintaining social distance is crucial. Filters are the modifications you make to yourself during Zoom meetings (such as a mustache, beard, etc.). They enliven the proceedings and contribute to the fun and memorability of your Zoom meetings.
Your films’ colors may be changed, and video filters can also add new aspects. By selecting a filter appropriate for each event, like team meetings or game nights, you may create the right atmosphere. You may embellish your face in the video with flowers or animal traits by using Zoom’s various filters. Alternately, you might just convert your video’s color to black and white. The video filters from a different program, however, allow you to apply more vibrant filters and place a greater emphasis on special effects.
3. Lighting and Touch-ups
The Lighting function enhances lighting effects and makes adjustments for low light situations to make you seem more professional during a Zoom conference. Similar to this, Touch-up enhances your facial characteristics by making your skin shine, erasing wrinkles, and giving your face a radiant appearance.
On your Zoom videos, changing your lighting and applying touch-ups may improve how you seem. By adjusting your lighting, you can make even dim illumination look bright. By doing touch-ups, you may get a smoother skin texture and get rid of any obvious imperfections.
4. Studio Effects
Zoom has been developing on a new feature called Studio Effects that would give customers the option of using virtual cosmetics in their movies. They are still checking it out before formally releasing it since it is still in beta. However, it is still available to users under the Backgrounds & Filters area. You may adjust the opacity as you like. You have the option to choose a new color or one of the predefined colors. Additionally, you may decide to employ the face effects in all of your next meetings, albeit doing so might be problematic if you use Zoom for business. Don’t worry if you’re running late. Zoom can give your face a natural-looking cosmetic makeover in only one minute!
This function is intended for less formal settings, such as gatherings of friends or family. Anyone who wants to seem more professional during meetings has access to Studio Effects, which offers the choice of various eyebrow colors, beards, and lipsticks. These are a few recently added features. You may add mustaches, beards, and brows in a variety of designs, hues, and intensities. Additionally, you have the option of coloring your lips.
Part 2: How to Add Visual Effects to Zoom
Along with facilitating online meetings, the Zoom program also lets you play with its visual effects. You just need to make a few adjustments to the video settings or utilize another third-party program to be ready to go.
Step1Start a Zoom meeting
You can download Zoom, install it on your computer, and log into your account if you don’t already have it if you don’t already have it.
Step2Tap Background and Filters
After logging in to Zoom, use these settings. - Options > Camera > Video

Step3Faucet Filters
Here, you may play with a variety of visual effects and customize them to suit your tastes. Pick one of the numerous filters that are offered. To activate the filter, tap it.
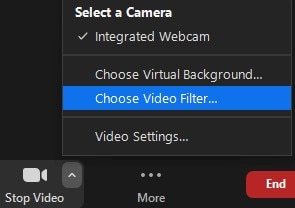
Step4Set Lighting Effects to on
Select “Adjust for low light” in the video options. For your lighting, you may choose between Auto and Manual effects. Zoom will automatically detect and adapt for the lighting in your room if you choose Auto.
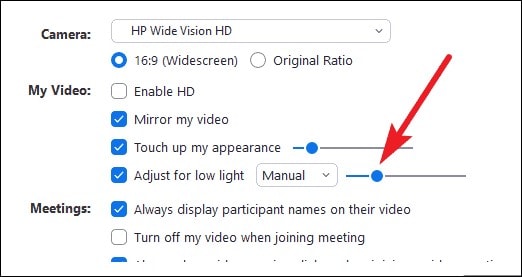
Use Zoom’s noise reduction option to keep your conversation focused during your video conference in addition to adding visual elements. To do this, go to “Audio Settings” and choose “High” under “Suppress background noise.” Once you start speaking during the video conference, this essentially cancels out any background noise.
Part 3: Related FAQs
1. What apps can add visual effect on Zoom?
Following is the list of top three apps that you can use to utilize visual effects Zoom application:
Snap Camera is regarded as the most user-friendly. It is a software that you can download for Windows or Mac that works with live broadcasts and video chats. Because it was created by the people who founded Snapchat, it shares a broad variety of filters with that platform.
Link: Snap Camera
The Mac is the only platform on which CamTwist may be used. You may also use it to give your movies additional filters and unique effects. This program lets you pick from a variety of pre-made effects while also allowing you to create your own.
Link: CamTwist
Another desktop application that lets you change and even blur your backdrop is ManyCam. It enables you to apply digital effects, filters, and 3-D masks to your face. Using this tool, you can also build layers and presets.
Link: ManyCam
2. How do I add visual effects to Zoom in Mobile?
Zoom includes a function that might be useful if you don’t want to tidy up or want to add some entertainment to your calls. You may utilize Zoom virtual backdrops to alter your surroundings and take you to a more pleasant location on both the desktop and mobile apps. After joining one on a mobile device, pick Virtual backdrop by tapping the More icon in the bottom right corner. Choose a photo from the list of choices, or click the plus sign (+) to add a photo or video from your gallery.
3. How do you download Zoom effects?
Pressing the Studio Effects button after installing Zoom for the first time will prompt a pop-up asking you to download the Studio Effects package. Several filters, suited for both business meetings and conversations with friends, let you customize the video and audio during your video calls. To start downloading the Effects bundle, click the Download button. The “Studio Effects” window will appear on the right-hand side of the Background & Filter page after the download is finished. All the face components and choices are available in this Studio Effects window.
Conclusion
The most popular video meeting tool worldwide is Zoom. Family, friends, coworkers, and any two people who want to video chat utilize it. Zoom visual effects are the ideal tool for injecting some humor into otherwise dull Zoom sessions and meetings. A few simple steps will get you a striking backdrop, a humorous filter, and some interesting effects. Since the majority of formal work is now completed from home, Zoom has taken over as the standard video conferencing program. Try out as many of the effects as you like, and use this page as a companion and a map to help you along the way.
- 1. What apps can add visual effect on Zoom?
- 2. How do I add visual effects to Zoom in Mobile?
- 3. How do you download Zoom effects?
Part 1: Popular Visual Effects you can add to Zoom
You may apply one of four main graphic effects to your Zoom meetings. The visual effects that you may use in your next Zoom video chat are briefly summarized below.
1. Visual Backgrounds
Virtual backdrops may transform any plain wall into an artistic setting. Zoom provides you the choice to add photographs to your backdrop in addition to offering you a few pre-made backdrops. Zoom lets you add a movie to your backdrop in addition to simply photographs. With the help of this imaginative feature, gather your pals and enjoy your favorite meme or video. A presentation’s collection of photos, a video, or a single image may all serve as virtual backdrops. A green screen would often be used as your real backdrop and consistent lighting would be required.
To avoid having to reveal your real surroundings while in a conference, you may add any picture or video as a virtual backdrop in Zoom. You have the option of adding own photos and movies or selecting from the pre-existing backdrop films and images. The file type for video backgrounds should be MP4 or MOV, and the resolution should range from 360p to a maximum of 1080p. Ensure that the mirroring of your video is deselected in the Zoom’s Video settings if your backdrop picture has text that may be read. By using virtual backdrops, you may alter the background of your video as it appears to the audience member with whom you are speaking. During the video conference you’re in, the other participants will be able to view your face and body overlaid on the backdrop of your choice.
2. Filters
With these filters, you can have fun in all of your Zoom meetings! Filters are a fun way to spend time with loved ones who are far away, particularly at a period when maintaining social distance is crucial. Filters are the modifications you make to yourself during Zoom meetings (such as a mustache, beard, etc.). They enliven the proceedings and contribute to the fun and memorability of your Zoom meetings.
Your films’ colors may be changed, and video filters can also add new aspects. By selecting a filter appropriate for each event, like team meetings or game nights, you may create the right atmosphere. You may embellish your face in the video with flowers or animal traits by using Zoom’s various filters. Alternately, you might just convert your video’s color to black and white. The video filters from a different program, however, allow you to apply more vibrant filters and place a greater emphasis on special effects.
3. Lighting and Touch-ups
The Lighting function enhances lighting effects and makes adjustments for low light situations to make you seem more professional during a Zoom conference. Similar to this, Touch-up enhances your facial characteristics by making your skin shine, erasing wrinkles, and giving your face a radiant appearance.
On your Zoom videos, changing your lighting and applying touch-ups may improve how you seem. By adjusting your lighting, you can make even dim illumination look bright. By doing touch-ups, you may get a smoother skin texture and get rid of any obvious imperfections.
4. Studio Effects
Zoom has been developing on a new feature called Studio Effects that would give customers the option of using virtual cosmetics in their movies. They are still checking it out before formally releasing it since it is still in beta. However, it is still available to users under the Backgrounds & Filters area. You may adjust the opacity as you like. You have the option to choose a new color or one of the predefined colors. Additionally, you may decide to employ the face effects in all of your next meetings, albeit doing so might be problematic if you use Zoom for business. Don’t worry if you’re running late. Zoom can give your face a natural-looking cosmetic makeover in only one minute!
This function is intended for less formal settings, such as gatherings of friends or family. Anyone who wants to seem more professional during meetings has access to Studio Effects, which offers the choice of various eyebrow colors, beards, and lipsticks. These are a few recently added features. You may add mustaches, beards, and brows in a variety of designs, hues, and intensities. Additionally, you have the option of coloring your lips.
Part 2: How to Add Visual Effects to Zoom
Along with facilitating online meetings, the Zoom program also lets you play with its visual effects. You just need to make a few adjustments to the video settings or utilize another third-party program to be ready to go.
Step1Start a Zoom meeting
You can download Zoom, install it on your computer, and log into your account if you don’t already have it if you don’t already have it.
Step2Tap Background and Filters
After logging in to Zoom, use these settings. - Options > Camera > Video
Step3Faucet Filters
Here, you may play with a variety of visual effects and customize them to suit your tastes. Pick one of the numerous filters that are offered. To activate the filter, tap it.
Step4Set Lighting Effects to on
Select “Adjust for low light” in the video options. For your lighting, you may choose between Auto and Manual effects. Zoom will automatically detect and adapt for the lighting in your room if you choose Auto.
Use Zoom’s noise reduction option to keep your conversation focused during your video conference in addition to adding visual elements. To do this, go to “Audio Settings” and choose “High” under “Suppress background noise.” Once you start speaking during the video conference, this essentially cancels out any background noise.
Part 3: Related FAQs
1. What apps can add visual effect on Zoom?
Following is the list of top three apps that you can use to utilize visual effects Zoom application:
Snap Camera is regarded as the most user-friendly. It is a software that you can download for Windows or Mac that works with live broadcasts and video chats. Because it was created by the people who founded Snapchat, it shares a broad variety of filters with that platform.
Link: Snap Camera
The Mac is the only platform on which CamTwist may be used. You may also use it to give your movies additional filters and unique effects. This program lets you pick from a variety of pre-made effects while also allowing you to create your own.
Link: CamTwist
Another desktop application that lets you change and even blur your backdrop is ManyCam. It enables you to apply digital effects, filters, and 3-D masks to your face. Using this tool, you can also build layers and presets.
Link: ManyCam
2. How do I add visual effects to Zoom in Mobile?
Zoom includes a function that might be useful if you don’t want to tidy up or want to add some entertainment to your calls. You may utilize Zoom virtual backdrops to alter your surroundings and take you to a more pleasant location on both the desktop and mobile apps. After joining one on a mobile device, pick Virtual backdrop by tapping the More icon in the bottom right corner. Choose a photo from the list of choices, or click the plus sign (+) to add a photo or video from your gallery.
3. How do you download Zoom effects?
Pressing the Studio Effects button after installing Zoom for the first time will prompt a pop-up asking you to download the Studio Effects package. Several filters, suited for both business meetings and conversations with friends, let you customize the video and audio during your video calls. To start downloading the Effects bundle, click the Download button. The “Studio Effects” window will appear on the right-hand side of the Background & Filter page after the download is finished. All the face components and choices are available in this Studio Effects window.
Conclusion
The most popular video meeting tool worldwide is Zoom. Family, friends, coworkers, and any two people who want to video chat utilize it. Zoom visual effects are the ideal tool for injecting some humor into otherwise dull Zoom sessions and meetings. A few simple steps will get you a striking backdrop, a humorous filter, and some interesting effects. Since the majority of formal work is now completed from home, Zoom has taken over as the standard video conferencing program. Try out as many of the effects as you like, and use this page as a companion and a map to help you along the way.
Also read:
- Video Editors Use Transitions to Tie Their Shots and Clips Together Into a Cohesive, Polished Program. Learn the Best Method to Create a Smooth Cut Transition Effect for 2024
- Updated In 2024, The Only Guide Youll Ever Need to Learn GIF Design That Get Shared Like Crazy
- New What Is TS Format and How To Play TS Files for 2024
- Updated Here We Are, Now the Main Topic of Interest of This Article - How to Put Together Several Videos so that They Become One? This Case, Unlike Other Possibilities We Discussed Above, Is More Complicated, so We Will Study This Feature Step by Step
- Updated 2024 Approved The Power of Music in Videos (+Filmora Editing Tricks)
- In 2024, Do You Have Any Idea About Changing the Video Speed Using the Editors? Had You Worked with the VLC Playback Speed? This Article Enlightens You with the Best Video Edits Using the Perfect Tool in the Digital Space
- 2024 Approved Videos Look Better when Edited Professionally. If Youre Looking to Edit Recorded Video with a Pro-Level Editing Then Weve Got You Covered. Learn About Editing Recorded Videos with the Best Toolkit Here
- 2024 Approved Recording Slow-Motion Videos Is Not More Difficult Using a Smartphone. Learn Everything From How to Record Slow-Motion Video and Edit a Video to Slow Down It
- Updated Do You Want to Get Green Screen Effects on Your Video without Green Screen Setup in Your Background? Learn How to Get Virtual Green Screen Background and Shoot Videos Like a Pro
- New 2024 Approved Best Youtube Video Meme Maker
- Best Tips for Better Event Videography
- Using AI to Replace Skies Finding the Right Methods
- How to Livestream Zoom on Facebook for 2024
- Updated In 2024, Beginners Guide About WMV Format and Best WMV Video Editor
- Updated 2024 Approved Change Speed of a Video on iPhone
- Updated In 2024, Change Video Speed with FFmpeg
- In 2024, Are You Looking for Dark LUTs Premiere Pro Free? This Article Discusses the Dark Moody LUTs with Top Recommendations for Beginning Visual Editing
- 2024 Approved How to Select and Use The Best BRAW LUTs
- New How to Shoot Cinematic Footage with Phone
- New In 2024, How to Make Text Reveal Effect Easily
- In 2024, 100 Working Methods to Learn How to Rotate TikTok Video
- In 2024, Do You Want to Add an Adjustment Layer to Your Video for Easier Editing? Read This Article to Find Out How to Efficiently Add an Adjustment Layer in After Effects
- 2024 Approved How to Create Motion Text Effects for Your Video?
- Updated How to Brighten a Video in Windows 10 | Step-By-Step Guide for 2024
- New 2024 Approved Create a Kickass COD Warzone Thumbnail for Free
- 2024 Approved Change Background Color in After Effects
- New Does the Customary Speed of Your TikTok Slideshow Appear to Be Slow Enough of Late? If Yes, Drop Your Worries Here with the Know-How of Increasing the TikTok Slideshow Speed
- New Guide To Using Luts Perfectly in Final Cut Pro for 2024
- In 2024, Gifs Can Convey Your Emotions in a Way that Words Cannot, so They Are Becoming a Popular Way to Express Yourself, and You Must Know How to Make a Gif and You Wont Believe that Its Not Difficult to Do
- In 2024, Best AR Video Apps
- Updated How Can You Deny These Best 10 Free Speech to Text Software for 2024
- Updated Denoise a Video in Adobe Premiere Pro – Audio and Video Noise Removal
- New In 2024, How To Trim Video In Premiere Pro in Different Ways
- New 2024 Approved Best Ways to Blur Zoom Background for Free
- Best Things People Know About Wedding Slideshow for 2024
- Step by Step to Crop a Video with CyberLink PowerDirector for 2024
- Updated Best 5 Tools to Help You Know More Freeze-Frame Video Editing Skills for 2024
- Updated In 2024, Best CapCut Templates for Slow Motion Video Trend
- In 2024, Split Audio From a Video in Adobe Premiere Pro Step by Step
- Updated Best AR Video App - Top 10 Picks
- Updated In 2024, The Craziest 10 AI Editors Youve Ever Seen
- In 2024, How To Use Allshare Cast To Turn On Screen Mirroring On Realme 11 Pro | Dr.fone
- Reasons for Samsung Galaxy M54 5G Stuck on Boot Screen and Ways To Fix Them | Dr.fone
- How To Simulate GPS Movement With Location Spoofer On Vivo Y27s? | Dr.fone
- How to Bypass Activation Lock on iPhone SE (2020) or iPad?
- Preparation to Beat Giovani in Pokemon Go For Oppo A38 | Dr.fone
- How to Unlock Xiaomi Civi 3 Disney 100th Anniversary Edition Phone Pattern Lock without Factory Reset
- How to Easily Hard reset my Vivo Y100A | Dr.fone
- How to recover old messages from your Samsung Galaxy A15 5G
- In 2024, How To Use Allshare Cast To Turn On Screen Mirroring On Oppo A56s 5G | Dr.fone
- Hassle-Free Ways to Remove FRP Lock on Infinix Smart 7 HD Phones with/without a PC
- In 2024, How to Track a Lost Oppo Reno 10 Pro+ 5G for Free? | Dr.fone
- Reasons why Pokémon GPS does not Work On Vivo Y56 5G? | Dr.fone
- In 2024, Motorola Edge 40 ADB Format Tool for PC vs. Other Unlocking Tools Which One is the Best?
- 8 Quick Fixes Unfortunately, Snapchat has Stopped on Vivo Y100 | Dr.fone
- In 2024, Will Pokémon Go Ban the Account if You Use PGSharp On Oppo Reno 11 5G | Dr.fone
- In 2024, Why Your WhatsApp Location is Not Updating and How to Fix On Apple iPhone 13 Pro | Dr.fone
- How to share/fake gps on Uber for Vivo Y27s | Dr.fone
- Simple Solutions to Fix Android SystemUI Has Stopped Error For Realme C33 2023 | Dr.fone
- In 2024, Does PokeGo++ still work on Apple iPhone 13 Pro/iPad? | Dr.fone
- In 2024, Guide on How To Remove Apple ID From iPhone 14 Pro
- In 2024, How to Make the Most of Your Apple iPhone 15 Pro Lock Screen with Notifications?
- Fake the Location to Get Around the MLB Blackouts on Honor Magic 5 Lite | Dr.fone
- In 2024, Mastering Android Device Manager The Ultimate Guide to Unlocking Your Vivo Y100 Device
- In 2024, Unlock Your Honor Magic 6 Phone with Ease The 3 Best Lock Screen Removal Tools
- In 2024, Full Guide on Mirroring Your Xiaomi Civi 3 to Your PC/Mac | Dr.fone
- In 2024, How to Bypass Android Lock Screen Using Emergency Call On Vivo Y100i Power 5G?
- Title: Cropping Videos in Final Cut Pro Step by Step
- Author: Chloe
- Created at : 2024-06-09 16:15:20
- Updated at : 2024-06-10 16:15:20
- Link: https://ai-editing-video.techidaily.com/cropping-videos-in-final-cut-pro-step-by-step/
- License: This work is licensed under CC BY-NC-SA 4.0.
