:max_bytes(150000):strip_icc():format(webp)/GettyImages-1164718779-aa87dac78cd44ad7b71e76c27adc7e9a.jpg)
Discover How You Can Use Vectorscope to Adjust Luminance, Color Grading, and More in Your Video Editing Projects

Discover How You Can Use Vectorscope to Adjust Luminance, Color Grading, and More in Your Video Editing Projects
Our eyes process colors differently. When two people look at the same picture, they may see different shades of colors. In post-production, Vectorscopes help to color grade and make sure you get your images exactly right. This means that you will process the exact color that you want across devices. Premiere Vectorscope is a great choice for anyone looking to correct and grade colors. Using Vectorscope Premiere allows you to get quantitative data about your image for a more accurate assessment of colors within the film. In this article, we explore what comprises Premiere Pro Vectorscope and how to use them in video editing.
Color Correction Editor An easy-to-use video editor helps you make color correction and color grading experience for videos!
Free Download Use Vectorscope in Filmora Try Color Correction

Part 1. Vectorscope: What is It and How to Read
Vectorscopes provide a great post-production way for color correction. It is video scope that provides greater data about the color properties of an image. Another way to look at it is that a Vectorscope is a circular graph, which monitors the following information of an image. By looking at it, you can measure saturation outward from the center while hue is measured in a circular pattern.
The Vectorscope contains markings indicating the degree of saturation and hue in an image. The distance of the markings from the center indicates how saturated the color is in your image. In simple terms, the further the markings, the more saturated the color. The two main options of Vectorscope are HLS and YUV. The HLS displays the hue, lightness, saturation, and signal information at a glance. On the other hand, the YUV mode contains several color boxes, giving accurate levels of hue and saturation.
Vectorscopes are useful to filmmakers and editors to ensure greater conformity in a film as they transition from one shot to the next. When the camera captures an image with too much saturation, using a Vectorscope helps to reduce the said saturation. This makes Vectorscope a useful feature for color correction and color grading. Color correction involves altering the colors of an image within a film to provide consistency and tone for the film. On the other hand, color grading is more like a supercharged version of color correction. It refers to altering a film so that it matches a tone or theme. Since the two, grading and correction are important, more video editing will use a combination of both.
How to Read a Vectorscope
Learning how to read a Vectorscope will make your video editing fun and easier. The best way is to view the Vectorscope in relation to the color wheel. When using Premiere Vectorscope, the colors are nicely labeled for anyone to understand. You only need to understand the primary colors of saturation and hue to accurately read a Vectorscope.
The hue color is the direction to which the marketer points. For instance, a marker pointing toward the boxes labeled “R” indicates that the hue is predominantly red. On the other hand, the saturation correlates to the length of the marker. The image is more saturated when the marker is furthest from the center of the wheel.
Keep note of the two boxes in each main color. The box that is close to the center indicates 75%, and you will normally avoid the marker extending beyond this first box. Any marketer that extends beyond this is known as non-broadcast safe or illegal colors. Although you may need to go beyond the first box in some projects for stylistic reasons, the general rule of thumb is to avoid that.
Without proper calibration, your images may end up looking too red or too blue. They will not look natural at all and will affect the overall quality of your video. Therefore, using the features within the vectorsope will help you color-grade your images to perfection.
Part 2. Vectorscope in Premiere Pro : A Brief Guide
Just like many other video editing software, Adobe Premiere Pro offers Vectorscope to help in post-production. The best way to look at Vectorscope in Premiere Pro is to use the Color Correction workspace. Once you have launched the software, Click Window, followed by Workspace, and then Color Correction. Access the reference monitor directly to deliver the program.
The reference monitor will first display composite video. Clicking on the setting icon allows you to access the panel and choose the video scope you want to use. Now, this is how you use the Vectorscope in Premiere Pro:
1. Reading a Vectorscope on Premiere Pro
A Vectorscope is similar to a color wheel. It displays colors in the same places as the wheel, with cyan to the bottom right and red to the top left. When you see a dot or line in the Vectorscope, you can tell it is giving you information about the color or chrominance of a shot. Essentially, this information is the hue (specific color) and the saturation (the strength of that hue).
As you examine the Vectorscope, you get to see how strong a particular color is by the length of the line from the center of the wheel. A longer line indicates that the color is more saturated. However, all Vectorscopes have small color targets. The Vectorscope points are lined with a drop-down used to read the scope. The default is set to 75%, which is a good limit for a typical broadcast system.
2. Adjusting Skin Tones
A commonly used feature of the Premier Pro Vectorscope is the Skin Tone Line. With this feature, you get the line on the scope between the Yellow and the Red sections at about 10.30 or 11 o’clock position.
The Vectorscope skin tone line represents the color of blood flowing through the skin. You can use this line to check the accuracy of skin tone color representation regardless of the ethnicity of the person you’re filming. In particular, video images are more accurate
The major problem is figuring out how to look at skin tones in a shot with many other colors. With the skin tons line in Premiere Pro, color correction becomes easy and quick. You only need to use a garbage matte, which is found under video effects then keying. Adjust the points so that they cover the skin of the person on the shot, then look at the Premiere Pro Vectorscope to see your end results.
Part 3. How to Use Vectorscope in Filmora : Step-by-Step Guide
The choice of video editing software can have an impact on how well you use your Vectorscopes. Wondershare Filmora is a great choice for anyone who wants to achieve great results with their videos. The versatile video editing software offers four types of video scopes, including the Vectorscope. This gives you more flexibility in video editing and achieving accurate results in color correction and grading. With the recent V13, you also get access to a range of AI features that make video editing quicker and easier.
Free Download For Win 7 or later(64-bit)
Free Download For macOS 10.14 or later
Access Vectorscope on Filmora
Accessing Vectorscope in Filmora is straightforward. As part of the four available video scopes, Filmora has made it easy to use Vectorscope during video editing. Here is a step-by-step guide to follow:
Step 1Create a New Project on Filmora
Once you have downloaded and installed the Filmora software on your desktop, launch it and click Create a New Project.
Step 2Access Video Scopes
After starting a new project, head to the top right corner of the main interface. Click on the Video Scope button to launch the video scope bar on the preview screen.
Step 3Customize Video Scopes Layout Bar
Customizing the layout of the video scope bar allows you to have more freedom in using the feature. You have the option to choose from four layouts or expand the button to display the video scope’s name. The purpose of this step is to modify the display option of the video scopes, allowing you to have a clear view of what you are editing.
Step 4Manage the Vectorscope as Desired
On the preview screen, choose the Vectorscope option. This video scope allows you to define the skin tone indication for better color grading and correction.
Step 5Change Other Video Scopes
To achieve more accurate and better results, explore the other video scopes in the same window. View the color changes in your image through parade, histogram, and waveform video scopes. You can also change the color channels to view specific color changes across the video.
Conclusion
Vectorscopes are great for post-production color correction. Although lesser-known features to many people, they are widely used in video production. They ensure that the colors in your video are consistent across all clips or shots of your film. Since filming will often involve different shots and settings, we recommend using Wondershare Filmora for your video editing. It comes with an easy-to-use Vectorscope and other video scopes that help you achieve great results with color correction and grading.
Free Download Use Vectorscope in Filmora Try Color Correction

Part 1. Vectorscope: What is It and How to Read
Vectorscopes provide a great post-production way for color correction. It is video scope that provides greater data about the color properties of an image. Another way to look at it is that a Vectorscope is a circular graph, which monitors the following information of an image. By looking at it, you can measure saturation outward from the center while hue is measured in a circular pattern.
The Vectorscope contains markings indicating the degree of saturation and hue in an image. The distance of the markings from the center indicates how saturated the color is in your image. In simple terms, the further the markings, the more saturated the color. The two main options of Vectorscope are HLS and YUV. The HLS displays the hue, lightness, saturation, and signal information at a glance. On the other hand, the YUV mode contains several color boxes, giving accurate levels of hue and saturation.
Vectorscopes are useful to filmmakers and editors to ensure greater conformity in a film as they transition from one shot to the next. When the camera captures an image with too much saturation, using a Vectorscope helps to reduce the said saturation. This makes Vectorscope a useful feature for color correction and color grading. Color correction involves altering the colors of an image within a film to provide consistency and tone for the film. On the other hand, color grading is more like a supercharged version of color correction. It refers to altering a film so that it matches a tone or theme. Since the two, grading and correction are important, more video editing will use a combination of both.
How to Read a Vectorscope
Learning how to read a Vectorscope will make your video editing fun and easier. The best way is to view the Vectorscope in relation to the color wheel. When using Premiere Vectorscope, the colors are nicely labeled for anyone to understand. You only need to understand the primary colors of saturation and hue to accurately read a Vectorscope.
The hue color is the direction to which the marketer points. For instance, a marker pointing toward the boxes labeled “R” indicates that the hue is predominantly red. On the other hand, the saturation correlates to the length of the marker. The image is more saturated when the marker is furthest from the center of the wheel.
Keep note of the two boxes in each main color. The box that is close to the center indicates 75%, and you will normally avoid the marker extending beyond this first box. Any marketer that extends beyond this is known as non-broadcast safe or illegal colors. Although you may need to go beyond the first box in some projects for stylistic reasons, the general rule of thumb is to avoid that.
Without proper calibration, your images may end up looking too red or too blue. They will not look natural at all and will affect the overall quality of your video. Therefore, using the features within the vectorsope will help you color-grade your images to perfection.
Part 2. Vectorscope in Premiere Pro : A Brief Guide
Just like many other video editing software, Adobe Premiere Pro offers Vectorscope to help in post-production. The best way to look at Vectorscope in Premiere Pro is to use the Color Correction workspace. Once you have launched the software, Click Window, followed by Workspace, and then Color Correction. Access the reference monitor directly to deliver the program.
The reference monitor will first display composite video. Clicking on the setting icon allows you to access the panel and choose the video scope you want to use. Now, this is how you use the Vectorscope in Premiere Pro:
1. Reading a Vectorscope on Premiere Pro
A Vectorscope is similar to a color wheel. It displays colors in the same places as the wheel, with cyan to the bottom right and red to the top left. When you see a dot or line in the Vectorscope, you can tell it is giving you information about the color or chrominance of a shot. Essentially, this information is the hue (specific color) and the saturation (the strength of that hue).
As you examine the Vectorscope, you get to see how strong a particular color is by the length of the line from the center of the wheel. A longer line indicates that the color is more saturated. However, all Vectorscopes have small color targets. The Vectorscope points are lined with a drop-down used to read the scope. The default is set to 75%, which is a good limit for a typical broadcast system.
2. Adjusting Skin Tones
A commonly used feature of the Premier Pro Vectorscope is the Skin Tone Line. With this feature, you get the line on the scope between the Yellow and the Red sections at about 10.30 or 11 o’clock position.
The Vectorscope skin tone line represents the color of blood flowing through the skin. You can use this line to check the accuracy of skin tone color representation regardless of the ethnicity of the person you’re filming. In particular, video images are more accurate
The major problem is figuring out how to look at skin tones in a shot with many other colors. With the skin tons line in Premiere Pro, color correction becomes easy and quick. You only need to use a garbage matte, which is found under video effects then keying. Adjust the points so that they cover the skin of the person on the shot, then look at the Premiere Pro Vectorscope to see your end results.
Part 3. How to Use Vectorscope in Filmora : Step-by-Step Guide
The choice of video editing software can have an impact on how well you use your Vectorscopes. Wondershare Filmora is a great choice for anyone who wants to achieve great results with their videos. The versatile video editing software offers four types of video scopes, including the Vectorscope. This gives you more flexibility in video editing and achieving accurate results in color correction and grading. With the recent V13, you also get access to a range of AI features that make video editing quicker and easier.
Free Download For Win 7 or later(64-bit)
Free Download For macOS 10.14 or later
Access Vectorscope on Filmora
Accessing Vectorscope in Filmora is straightforward. As part of the four available video scopes, Filmora has made it easy to use Vectorscope during video editing. Here is a step-by-step guide to follow:
Step 1Create a New Project on Filmora
Once you have downloaded and installed the Filmora software on your desktop, launch it and click Create a New Project.
Step 2Access Video Scopes
After starting a new project, head to the top right corner of the main interface. Click on the Video Scope button to launch the video scope bar on the preview screen.
Step 3Customize Video Scopes Layout Bar
Customizing the layout of the video scope bar allows you to have more freedom in using the feature. You have the option to choose from four layouts or expand the button to display the video scope’s name. The purpose of this step is to modify the display option of the video scopes, allowing you to have a clear view of what you are editing.
Step 4Manage the Vectorscope as Desired
On the preview screen, choose the Vectorscope option. This video scope allows you to define the skin tone indication for better color grading and correction.
Step 5Change Other Video Scopes
To achieve more accurate and better results, explore the other video scopes in the same window. View the color changes in your image through parade, histogram, and waveform video scopes. You can also change the color channels to view specific color changes across the video.
Conclusion
Vectorscopes are great for post-production color correction. Although lesser-known features to many people, they are widely used in video production. They ensure that the colors in your video are consistent across all clips or shots of your film. Since filming will often involve different shots and settings, we recommend using Wondershare Filmora for your video editing. It comes with an easy-to-use Vectorscope and other video scopes that help you achieve great results with color correction and grading.
How to Split a Clip in After Effects
You’ve probably heard of splitting clips in Adobe After Effects, and maybe you’ve even tried it out. But if you’re like many people, you’re not quite sure how to use it. This post will explain everything you need to know about trimming videos in After Effects. We’ll give you step-by-step instructions for splitting clips in the Windows and Mac versions of After Effects—and even show you some tricks that make it easier for beginners.
- What is Filmora
- How to split video clips in Filmora manually
- How to split video clips in Filmora automatically using a scene detector
- How to trim videos online with Filmora Online Video Trimmer
What is After Effects?
Adobe After Effects is an application that can be used to create videos and animation. It is a powerful tool that allows you to create custom animations, including motion graphics, visual effects, and titles. Many professionals in the industry today use it to create visual effects and animations. This program can be used to create professional videos or advertisements for your business.
After Effects allows users to quickly create animations that have been created in other programs like Photoshop or Illustrator. It also allows users to edit videos to look better than they initially did. The program has many features, such as prebuilt templates, text tools, support for different file formats, and more. This program also has a lot of customization options and will allow you to create stunning visuals quickly and easily.
How to split video clips in After Effects manually
Import your video into the After Effects timeline
To split your video clip using after effects, the first step is to get the clip into the program. To do this, open the file menu in the top left corner of the After Effects workspace. Select “ Import” from the options on the drop-down menu displayed. This will open up the file explorer for you to select the clip you would like to import into your project. Once you find your video file, click “OK” to add it to the project files. Alternatively, you can simply drag your clip from the file explorer and drop it into the Adobe After Effects workspace.
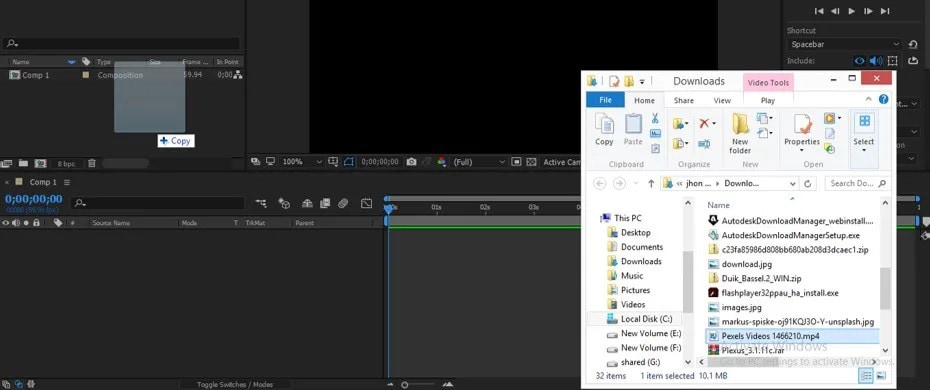
Create a new composition
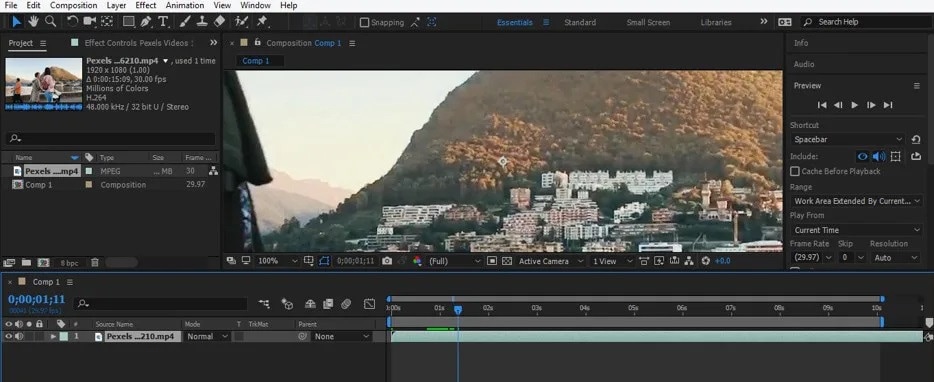
To go ahead with splitting your video clip, you will need to create a new composition. This can be done in two ways. The first is to drag the clip from the project browser to the new composition icon on the layer panel. This automatically creates a new composition. An alternate method is to right-click the video and select “New Comp” on the menu.


Split the clip
Once you have your clip loaded into your timeline, you can go ahead to split it. You just have to move the timeline indicator to the exact position where you would like to split the video. Press the keyboard combination [CTRL + SHIFT + D] to split the video on a windows computer. For macOS users, you will have to use the combination [CMD + SHIFT + D]. Once this is done, the video clip is split right where the timeline marker is placed.
Keyboard shortcuts for splitting videos in After Effects
| Shortcut | Windows | Mac |
|---|---|---|
| Split a layer | Control + Shift + D | CMD + Shift + D |
| New project | Control + Alt + N | Command + Option + N |
| New composition | Control + N | Command + N |
| Set beginning or end of work area to current time | B or N | B or N |
| Trim Composition to work area | Control + Shift + X | Command + Shift + X |
| Go to specific time | Alt + Shift + J | Option + Shift + J |
| Go to the beginning of a composition, layer, or footage item | Home or Ctrl + Alt + Left Arrow | Home or Command + Option + Left Arrow |
| Import one file or image sequence | Control + I | Command + I |
| Import multiple files or image sequences | Control + Alt + I | Command + Option + I |
How to split video clips in Filmora
What is Filmora?
Filmora video editor is a free and easy-to-use video editor for PC. The program boasts a wide range of features that allow users to easily create, edit and share their videos.
The interface is clean and straightforward, allowing you to focus on what you want to do without spending too much time figuring out how the program works. It also comes with an integrated video editor, which allows users to add text, images, and other elements.
Free Download For Win 7 or later(64-bit)
Free Download For macOS 10.14 or later
How to split video clips in Filmora manually
- Import your video clip into Filmora media using the “ Import” button or just drop your videos.
- Locate the video in your storage and then click “OK”.
- Once you have the video in, drag and drop it into the timeline to begin editing it.
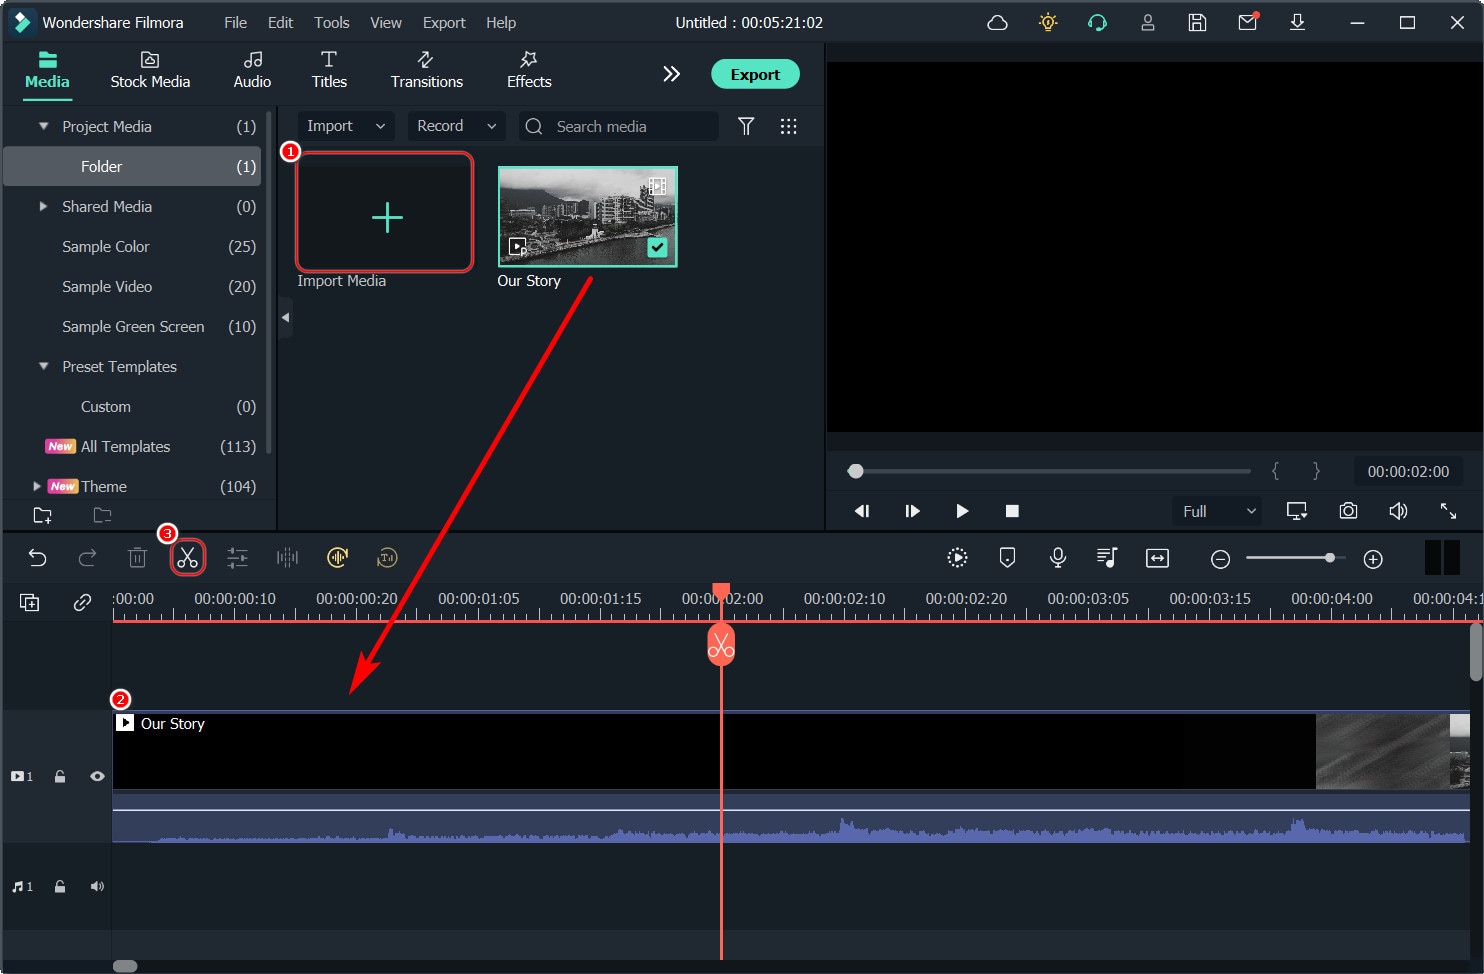
- Drag the playhead to the position where you would like to split the video and then click on the Split button (it is in the shape of scissors).
- To split the video into multiple parts, repeat the above processes as many times as you want.
- Once you have the video split up into multiple parts, you can go ahead to delete any unwanted parts. To do this, all you have to do is to select the section and then click on the Delete
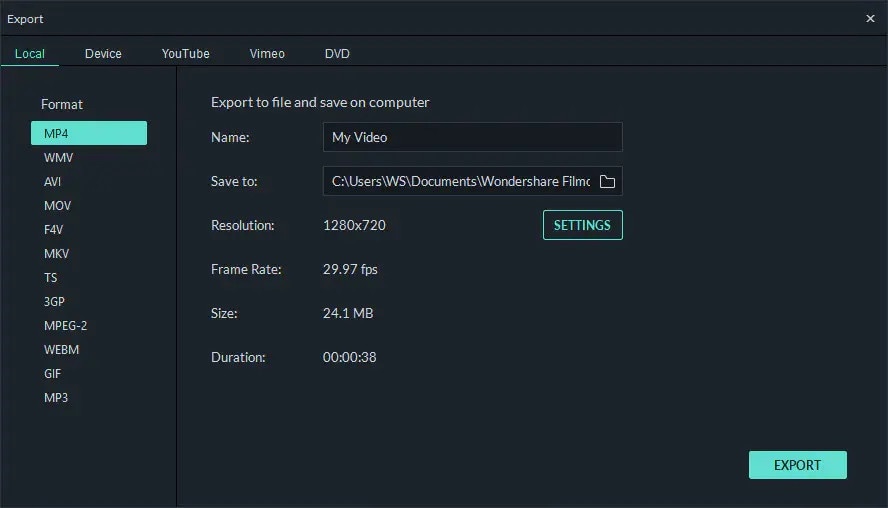
- Click on Export to save your video in any of the supported file formats. Filmora has support for 3GP, AVI, MP4, MKV, WMV, MOV, FLV, TS, GIF and so on.
How to split video clips in Filmora automatically using a scene detector
Wondershare Filmora has a nifty feature called scene detection that allows you to split a video automatically when a change in the scene is detected. The following are the steps you need to follow to use this feature.
- Import your video into the project media library using the same steps above.
- Once you have your video in the media library, right-click on it and select the Scene Detection This opens the scene detection interface.
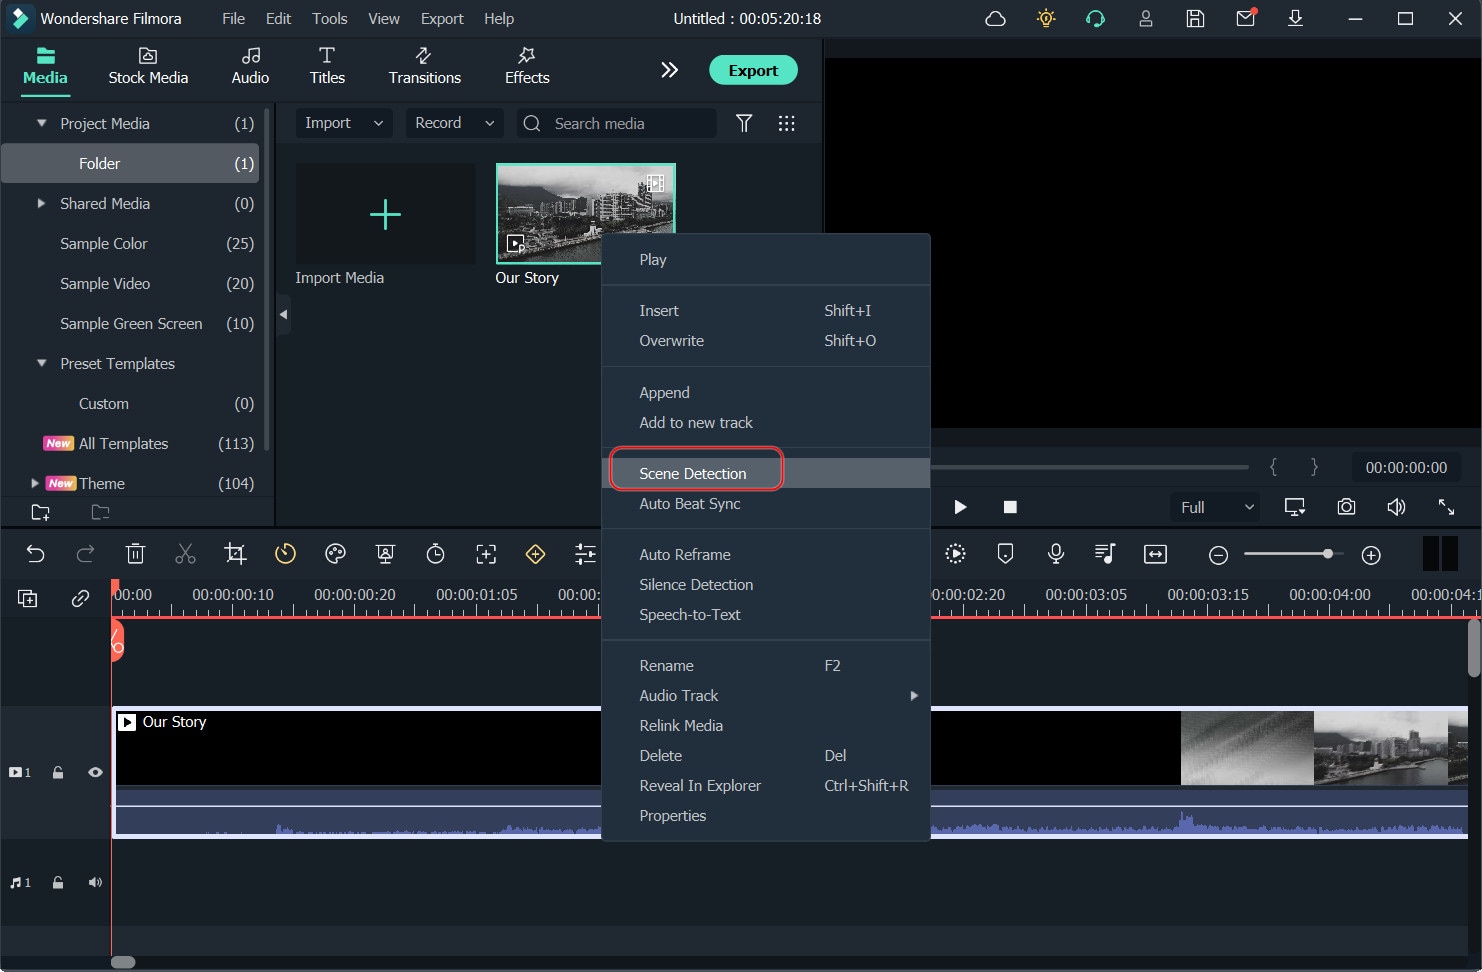
- Click on the Detect button to allow Filmora to automatically detect the scenes and split the video up. You have the option of previewing each of the individual clips before they are added to the timeline.
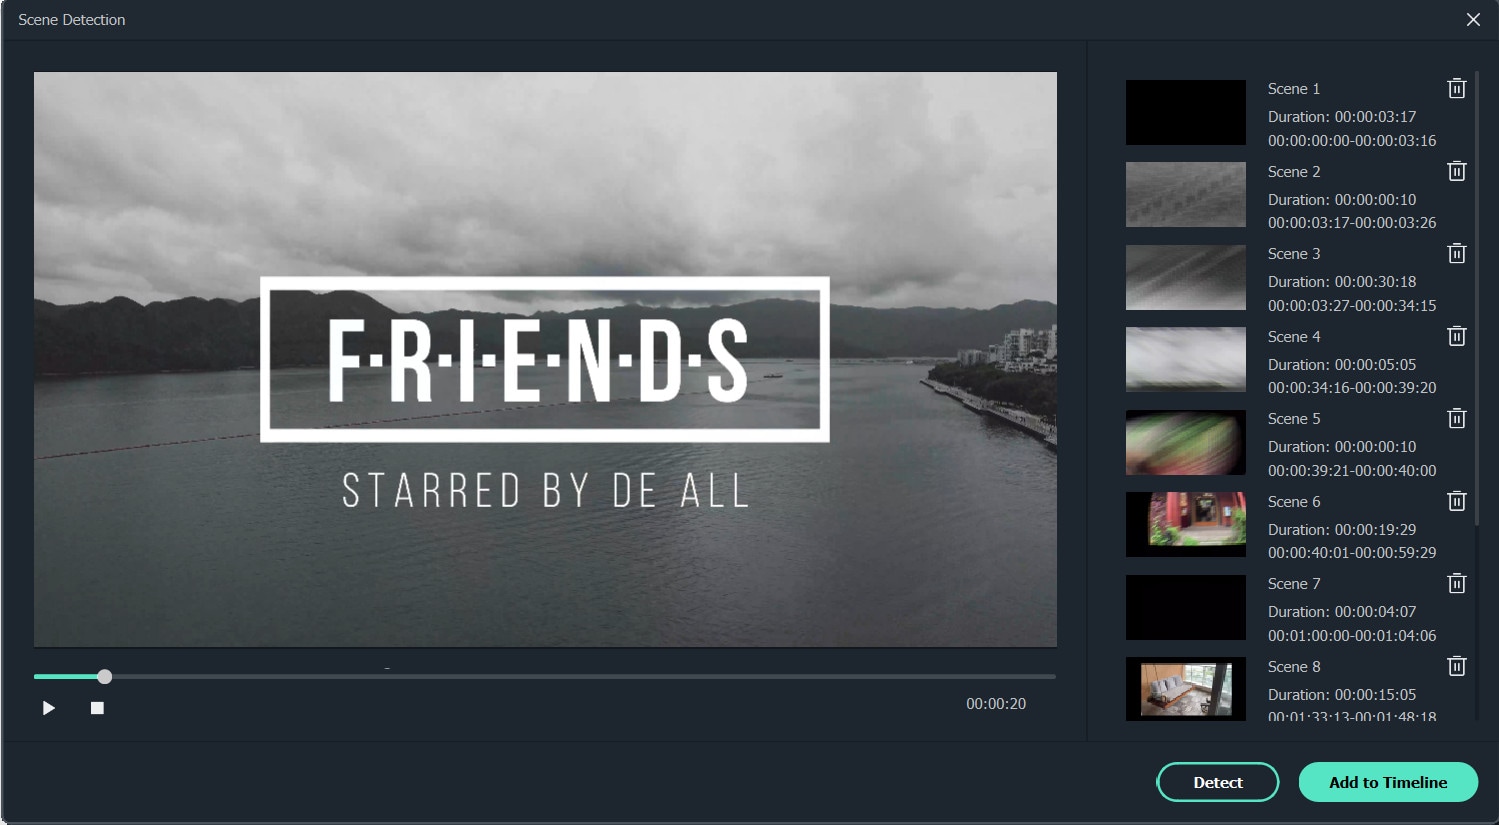
- You can also delete any section you will not need by clicking the Delete icon next to the clip. Alternatively, select Add to Timeline to add any clips you want to use to the timeline.
- Save your split video by using the Export button.
How to trim videos online with Filmora Online Video Trimmer
Filmora offers an online video trimmer for those that would like to trim videos without installing any additional software on their computers. Filmora’s online video editor is free to use and doesn’t leave a watermark on your videos. Read on to learn how to use this free tool.
- Click on this link to go to the video trimmer website.
- Upload your video from your computer. Note that you can only upload files less than 100MB.
- You can trim your video using either the slider or by inputting your desired start and stop time.
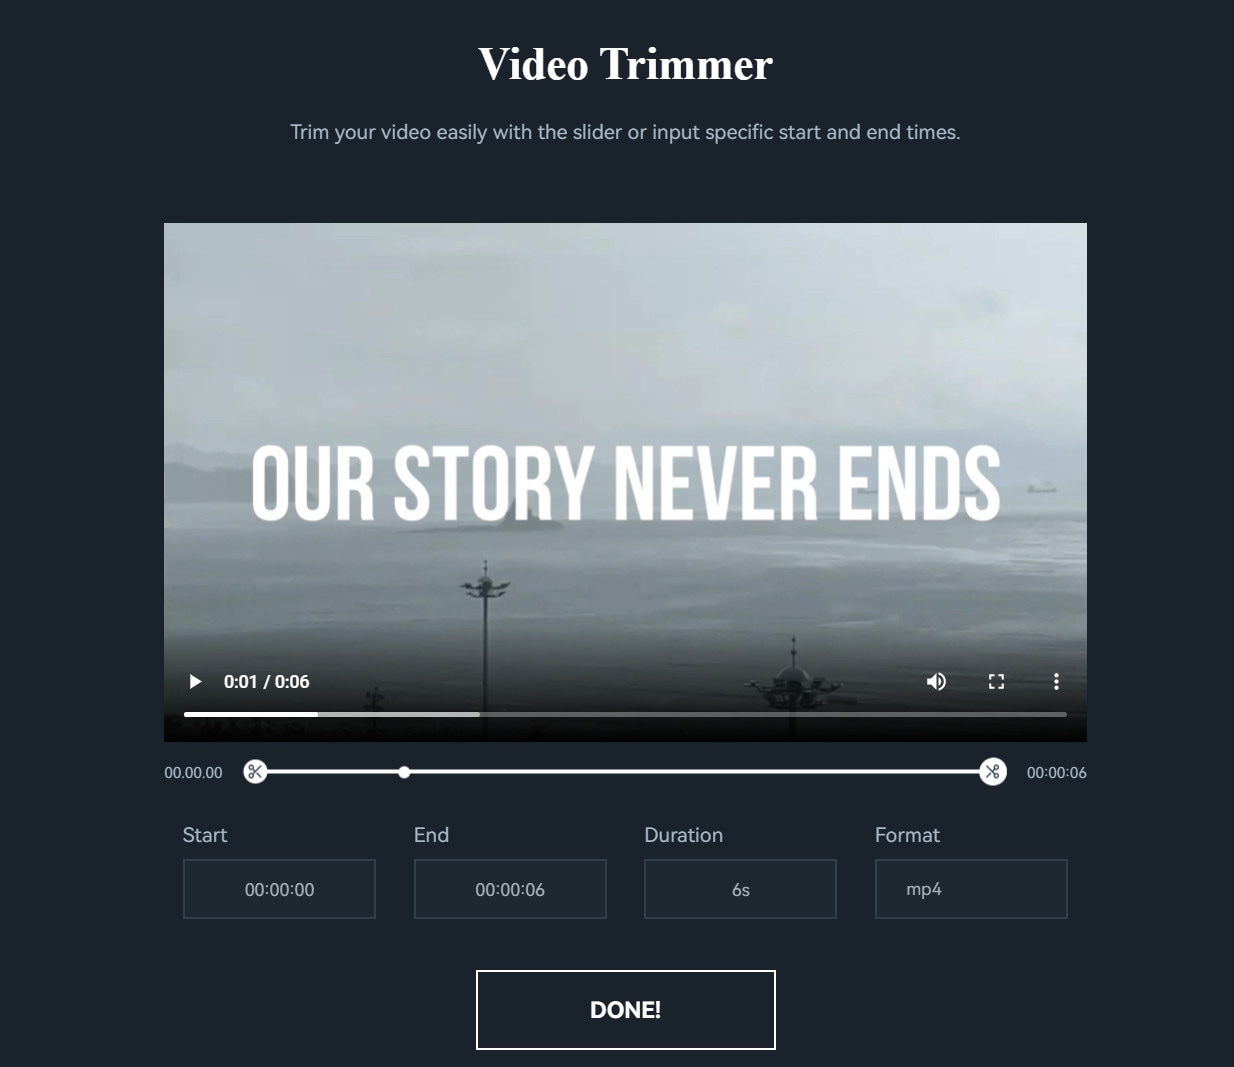
- Export and download your trimmed video.
Conclusion
It’s quite simple once you get the hang of it. Now that you know how to split a clip in After Effects, it will be much easier for you to adjust your frame, include a rapid cut, or simply steady a section of your movie.
- What is Filmora
- How to split video clips in Filmora manually
- How to split video clips in Filmora automatically using a scene detector
- How to trim videos online with Filmora Online Video Trimmer
What is After Effects?
Adobe After Effects is an application that can be used to create videos and animation. It is a powerful tool that allows you to create custom animations, including motion graphics, visual effects, and titles. Many professionals in the industry today use it to create visual effects and animations. This program can be used to create professional videos or advertisements for your business.
After Effects allows users to quickly create animations that have been created in other programs like Photoshop or Illustrator. It also allows users to edit videos to look better than they initially did. The program has many features, such as prebuilt templates, text tools, support for different file formats, and more. This program also has a lot of customization options and will allow you to create stunning visuals quickly and easily.
How to split video clips in After Effects manually
Import your video into the After Effects timeline
To split your video clip using after effects, the first step is to get the clip into the program. To do this, open the file menu in the top left corner of the After Effects workspace. Select “ Import” from the options on the drop-down menu displayed. This will open up the file explorer for you to select the clip you would like to import into your project. Once you find your video file, click “OK” to add it to the project files. Alternatively, you can simply drag your clip from the file explorer and drop it into the Adobe After Effects workspace.

Create a new composition
To go ahead with splitting your video clip, you will need to create a new composition. This can be done in two ways. The first is to drag the clip from the project browser to the new composition icon on the layer panel. This automatically creates a new composition. An alternate method is to right-click the video and select “New Comp” on the menu.


Split the clip
Once you have your clip loaded into your timeline, you can go ahead to split it. You just have to move the timeline indicator to the exact position where you would like to split the video. Press the keyboard combination [CTRL + SHIFT + D] to split the video on a windows computer. For macOS users, you will have to use the combination [CMD + SHIFT + D]. Once this is done, the video clip is split right where the timeline marker is placed.

Keyboard shortcuts for splitting videos in After Effects
| Shortcut | Windows | Mac |
|---|---|---|
| Split a layer | Control + Shift + D | CMD + Shift + D |
| New project | Control + Alt + N | Command + Option + N |
| New composition | Control + N | Command + N |
| Set beginning or end of work area to current time | B or N | B or N |
| Trim Composition to work area | Control + Shift + X | Command + Shift + X |
| Go to specific time | Alt + Shift + J | Option + Shift + J |
| Go to the beginning of a composition, layer, or footage item | Home or Ctrl + Alt + Left Arrow | Home or Command + Option + Left Arrow |
| Import one file or image sequence | Control + I | Command + I |
| Import multiple files or image sequences | Control + Alt + I | Command + Option + I |
How to split video clips in Filmora
What is Filmora?
Filmora video editor is a free and easy-to-use video editor for PC. The program boasts a wide range of features that allow users to easily create, edit and share their videos.
The interface is clean and straightforward, allowing you to focus on what you want to do without spending too much time figuring out how the program works. It also comes with an integrated video editor, which allows users to add text, images, and other elements.
Free Download For Win 7 or later(64-bit)
Free Download For macOS 10.14 or later
How to split video clips in Filmora manually
- Import your video clip into Filmora media using the “ Import” button or just drop your videos.
- Locate the video in your storage and then click “OK”.
- Once you have the video in, drag and drop it into the timeline to begin editing it.

- Drag the playhead to the position where you would like to split the video and then click on the Split button (it is in the shape of scissors).
- To split the video into multiple parts, repeat the above processes as many times as you want.
- Once you have the video split up into multiple parts, you can go ahead to delete any unwanted parts. To do this, all you have to do is to select the section and then click on the Delete
- Click on Export to save your video in any of the supported file formats. Filmora has support for 3GP, AVI, MP4, MKV, WMV, MOV, FLV, TS, GIF and so on.

How to split video clips in Filmora automatically using a scene detector
Wondershare Filmora has a nifty feature called scene detection that allows you to split a video automatically when a change in the scene is detected. The following are the steps you need to follow to use this feature.
- Import your video into the project media library using the same steps above.
- Once you have your video in the media library, right-click on it and select the Scene Detection This opens the scene detection interface.

- Click on the Detect button to allow Filmora to automatically detect the scenes and split the video up. You have the option of previewing each of the individual clips before they are added to the timeline.

- You can also delete any section you will not need by clicking the Delete icon next to the clip. Alternatively, select Add to Timeline to add any clips you want to use to the timeline.
- Save your split video by using the Export button.
How to trim videos online with Filmora Online Video Trimmer
Filmora offers an online video trimmer for those that would like to trim videos without installing any additional software on their computers. Filmora’s online video editor is free to use and doesn’t leave a watermark on your videos. Read on to learn how to use this free tool.
- Click on this link to go to the video trimmer website.
- Upload your video from your computer. Note that you can only upload files less than 100MB.
- You can trim your video using either the slider or by inputting your desired start and stop time.

- Export and download your trimmed video.
Conclusion
It’s quite simple once you get the hang of it. Now that you know how to split a clip in After Effects, it will be much easier for you to adjust your frame, include a rapid cut, or simply steady a section of your movie.
Do You Know There Are Websites to Download Free Glitch Transition Effects for Premiere Pro? You Can Easily Download Them and Make Awesome Videos
Glitch effects have made a comeback on the internet. You are free to use, download, and play with them. But the question that comes to everyone’s mind is which website is reliable for it? What are the best effects to download and use? We’ll go through 8 different websites where you can get free glitch transitions. Every website has its personality and Screen Glitchy Effects. So, let’s start looking at some of the top ones right away.
8 Best Sites to Download Glitch Transitions for Premiere Pro
1. Motion Array
You may create a variety of glitch effects with Motion Array. Adobe Premiere Pro and Adobe After Effects are among the best systems it supports. You may get some of the most excellent transitions and aesthetic effects with Adobe Premiere Pro, such as the vertical rhythmic glitchy start, geometric openers, and more.
You can make the most incredible shaky slideshow or even abstract promo slideshow. Download these fantastic effects like neon-colored glitch logos, quick glitch openers, and other bizarre effects.
2. Velosofy
Velosofy, is the next best place to download Glitch Effect for free. It features some of the most stylish effects like modern glitch intro templates, glitchy logo designs, and much more.
This site allows you to download an unlimited number of files. Other products supported by Velosofy include the well-known After Effects, Adobe Photoshop, and Premiere Pro.
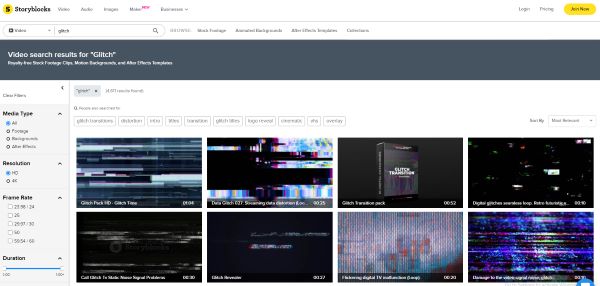
3. Storyblocks
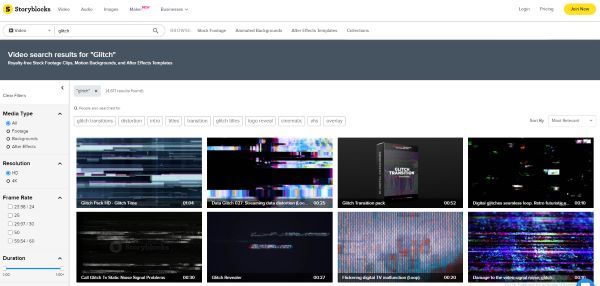
Storyblocks is the next in line. The site supports Adobe After Effects and Premiere Pro. Transitions, distortion, logo reveals, VHS, and more effects are available here. The Glitch Transition bundle includes greens and blues distortion.
Premiere Pro provides several packs containing various elements. Color Bars Data Glitches is Premiere Pro’s most impressive collection. It is a one-of-a-kind effect seen on Storyblocks, and there are plenty more like it. In addition, Storyblocks includes footage and background as well.
4. Placeit
Placeit is a website where anyone can download and use any glitch transition. Almost every application and piece of software is supported on the site. You have a long list of options on Placeit. Go ahead and select any of the numerous screen effects.
One can also make a slideshow with Placeit and its spectacular glitch effects. Add other astounding effects with a VHS feel to make the video look more impressive.

5. Adobe Stock
Adobe Stock is another excellent website that offers you free glitch transition. The site supports a variety of applications and has some incredible effects. You will like the effect that is “Simple & Bold”. As its name implies, the glitch effect is simple, yet it is highly bold because of the neon-bright colors.
Another astounding effect is 12 Glitchy Transition. The Anaglyph Glitch Effect is a photoshop effect that is perfect for video creators.
6. Motion Elements
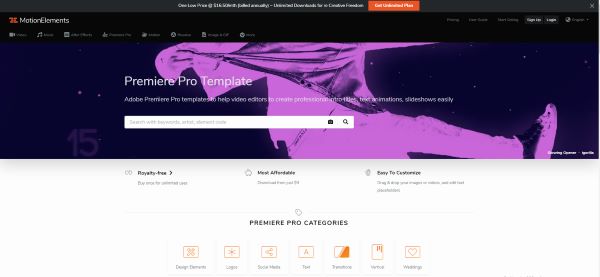
You should never limit yourself to the basics when you have sites like Motion Elements. You may create a professional film by downloading and applying the various glitch art effects.
The site works well with multiple programs, including After Effects and Premiere Pro. It features some bizarre but entertaining templates like neon glitchy transitions.
7. MixKit
With Mixkit, you can create unique and spectacular screen glitch effects.
Mixkit supports Premiere Pro and After Effects. You can easily employ its mind-blowing color effects to give your material a whole distinct feel. It includes digital static transitions, urban glitch openers, logo animation, and other elements.

8. Videohive
Videohive has over 7000 glitch templates. Each of the 7000 effects is unique and mind-blowing.
On the other hand, Premiere Pro has some jaw-dropping aesthetic effects. You can use elegant and trendy ones like the urban opener, glitch transition, and many more on Premiere Pro. Videohive’s Trailer effect is its most attractive feature.
5 Newest Glitch Transition Packs for Premiere Pro
Are you looking to add some extra colorful movement to your movie? There are many aesthetic effects and transitions available to add to the videos. You can create high-level YouTube videos, birthday clips, and holiday vlogs with Glitch art.
We’ll help explore these transition packs in Premiere Pro. Be sure to go to the website and check out the tutorials of these packs. You’ll find various effects within them.
1. FILM CRUX Glitch Transitions Vol. 1
This new pack by Film Crux has 15 free drag-and-drop free glitch transitions. These are designed specifically for Adobe Premiere Pro. You can just download the file and drag it into your Premiere Pro ‘Presets’ folder on your computer. Add the effects and enjoy the animated video!!
2. Glitch Templates for Premiere Pro by Mixxit
Mixxit has 30 Free Premiere Pro Templates for Glitch. All these templates are free to download for Premiere Pro. You can find every type of transition you need. Edit and add textures, make the videos enjoyable with zoom and outs and different sound effects.
3. 95+ Glitch Transitions - Premiere Pro by flatpackfx
You can try any of these glitch transitions and transform your videos. Simply drag and drop your videos to use with Adobe Premiere Pro. Moviemakers and video editors can save time and create unique-looking transitions all inside of Premiere Pro.
4. FREE 30 Glitch Transitions Preset for Premiere Pro by EnamAlamin
You can make your videos exciting with these 30 animated glitch transitions. The sound effects are also available to add to the videos. You’ll find detailed tutorials on the website. You don’t need any plugins. Just Drag & Drop the movie on Premiere Pro.
5. 10 Free Glitch transitions for Premiere Pro by 911templates
You can get 10 free digital distortion effects on 911templates. Import the video on Adobe Premiere Pro and turn them into art masterpieces. These effects can help you create a stunning opening of the video and the striking transitions between shots.
With these 5 newest transition packs, you can edit your video in many ways. The film industry has been using these transitions to impact the viewers. So, choose the styles that go well with your movie and catch your eyes. These are seen commonly in horror films to keep the viewers engaged. You can even add them on TikTok videos and other product description videos.
Conclusion
Glitch Transitions is a fun way to “transition” from one shot to the other. Drag and drop any of these transitions over two or more clips on your timeline. You can insert these free transitions nicely for educational videos, YouTube videos, event movies, or even documentaries. It adds fun, energetic energy to the project.
These transitions can make your work appear more professional and add to the final movie. We hope this article can help you find free assets for your next video project.
10 Best Free Video Player for Windows 11
Whether it’s work or entertainment, you come across videos of different file formats almost daily. It is so annoying that you play a video on your device, and it displays some errors. This is because not every video player is good and up to the mark.
Do you know what way to go in this scenario? Let us guide you. The article below will walk you through the 10 best and free all format video players for PC, which are a must to know in 2024. Let’s begin!
For Win 7 or later (64-bit)
For macOS 10.14 or later
download filmora app for ios ](https://app.adjust.com/b0k9hf2%5F4bsu85t ) download filmora app for android ](https://app.adjust.com/b0k9hf2%5F4bsu85t )
Click here to get Filmora for PC by email
List of 10 Best Free Video Players for Win 11
Not every Windows 11 video player supports all file formats, but certain amazing video players are free to use, and additionally, they support a wide range of formats. Let’s discuss them one by one.
| 1 - Windows 11 Media Player | 2 - VLC Media Player |
|---|---|
| 3 - PotPlayer | 4 - GOM Player |
| 5 - 5KPlayer | 6 - MPV Player |
| 7 - DivX Player | 8 - PowerDVD |
| 9 - MediaMonkey | 10 - Kodi Player |
1. Windows 11 Media Player
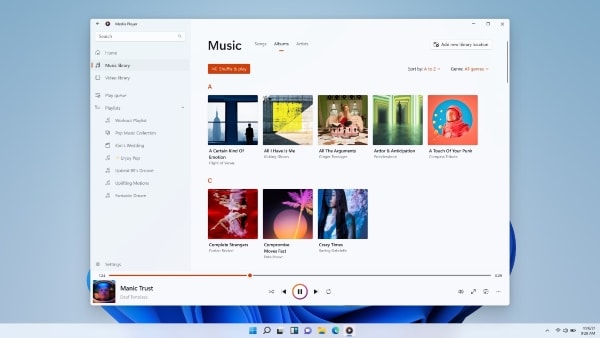
For all Windows 11 users, this video player is great news for you because Microsoft has finally released a media player app for Windows 11. With this, the struggle of using a third-party video player will now come to an end.
The user interface for this media player app is sleek, clean, and minimal. The video player for Windows 11 offers a dark mode, semi-transparent materials, accent colors, and other options. Windows 11 Media Player is great and made it to the top 10 because it is an all-format video player for PC, for instance, AVI , WAV, MPG, WMV , MP3, and others.
Find a Useful Video Editor to Make Video on Windows 11? Try This Out!
Filmora Video Editor is an expert in creating and editing videoson Windows 11. You can add cool visual effects and popular emojis to decorate your video. Plus, there is a vast media library to add audio and filter! You can edit video with high quality and play with the below video players at anytime!
Free Edit Videos on Windows 11 Free Edit Videos on Windows 11 Free Edit Videos on Windows 11 Learn More >
2. VLC Media Player
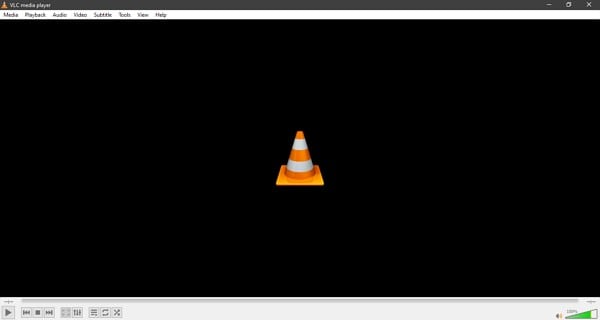
Do you know about any open-source media players? VLC Media Player is not only an open-source but also a cross-platform multimedia player. This Windows 11 video player supports video compression. Users can play any video files from webcams, discs, and even streams with this video player.
VLC Media Player is famous because it supports almost all file formats and supports codecs like , WMV, MPEG-2, MPEG-4, etc. The media player does not contain ads, user tracking, or spyware. Moreover, the software also offers a video filtration feature. VLC Media Player can also decode videos, and it is highly trusted and widely used.
3. PotPlayer
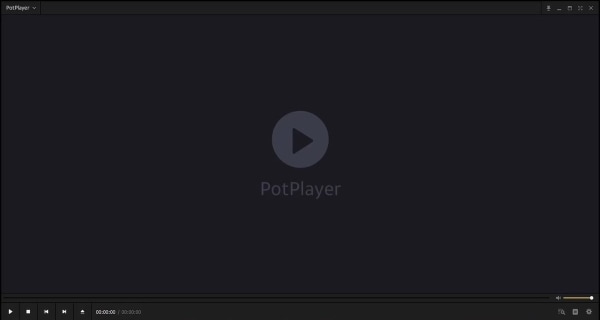
Are you ready to learn about a media player that can play 360-degree video and 3D videos? We are talking about PotPlayer, a media player developed by a South Korean Internet Company. As the media player supports 3D videos, it also supports various types of 3D glasses for a better experience.
Do you know what else it has? Overlay support and also Direct3D9 Ex Flip Mode. The video player for Windows 11 is compatible with various devices like TV, HDTV, DVD. Along with all this, PotPlayer also supports many subtitle formats like DVD, Blu-Ray, SRT & SMI.
4. GOM Player
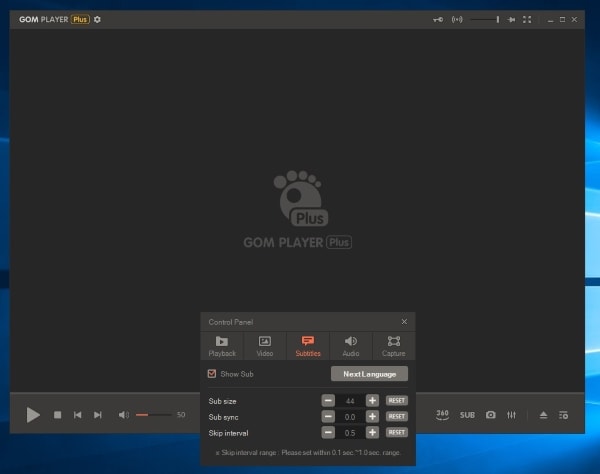
Let’s share another worth trying video player for Windows 11, GOM Player. The media player offers great features like speed control, screen capture, video/audio effects, A-B repeat, etc. Moreover, GOM Player supports a massive list of file formats like MP4 , AVI, MKV , MPG, MOV , and others.
The video player is a practical codec finder with a clean and simple interface. Additionally, the free-to-use video player also supports 360-degree video views. The design of the software is very minimal, with countless features.
Best Windows 11 Video Editor
Help you create and edit videos like a pro on Windows 11. Start your creation.
Edit Video Free Edit Video Free Edit Video Free Learn More >
5. 5KPlayer
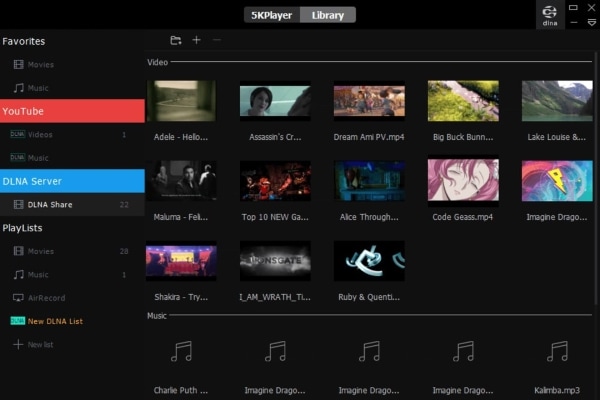
Do you know any media player that has a built-in video codec library? Well, 5KPlayer does have a codec library that supports different video formats, DVDs, etc. The media player is GPU accelerated and is very powerful. Moreover, it is an HD and 4K video player.
This Windows 11 video player supports a lot of video formats like WEBM, MPEG, WMV, FLV, MP4, and it is free to use. With 5KPlayer, you can easily stream media files as it supports DNLA wireless and AirPlay. The media player can even play ultra-high-definition clips easily.
6. MPV Player
MPV Player is a top-notch video player for Windows 11. It is free and open-source software. It is famous for its wide range of supported media formats, like DXVA2 and VAAPI too. MPV Player does not have a good interface but still provides basic video controls.
MPV Player is simple and effective at the same time. You won’t find a Windows 11 video player that does not consume a large number of system resources. MPV Player supports scripting like JavaScript and Lua Script, unlike normal media players.

7. DivX Player
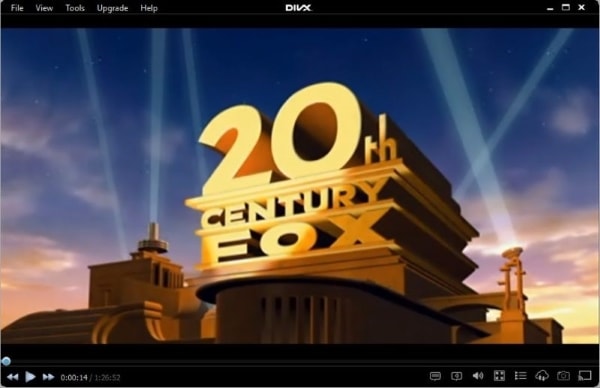
DivX Player is considered the best Windows 11 video player. This software allows playing advanced codecs like HECV, MKV, and AVI. You can play media up to 4K resolution. DivX Player is free software that allows you to stream on DLNA (Digital Living Network Alliance).
The interface for DivX Player might be simple, but they have not compromised on the features provided. DivX Player is the first media player that is offering free playback. It has a built-in media library from which you can keep track of your videos.
A cross-platform for making videos anywhere for all creators

Why your video editing isn’t good enough? How about some creative inspo?
- 100 Million+ Users
- 150+ Countries and Regions
- 4 Million+ Social Media Followers
- 5 Million+ Stock Media for Use
* Secure Download

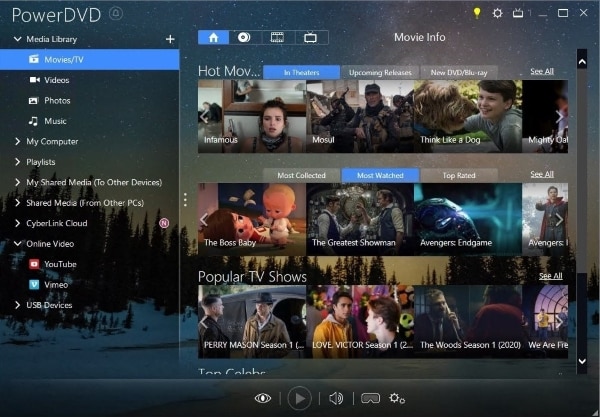
8. PowerDVD
PowerDVD is media-playing software that is compatible with Android, iOS, and Windows. It allows you to watch up to 8K resolution media content while providing an amazing cinema-style audio experience. It allows the downloading of videos for offline usage. PowerDVD is of its kind video player for Windows 11.
PowerDVD allows you to share media through the software. It also has cloud storage that is capable of saving 40 HD movies. You can use formats like and AVC along with XAVC-S. XAVC-S is high-definition video playback. You can manage your library, including photos, videos, music, and even DVD movies can be managed through the application.
9. MediaMonkey
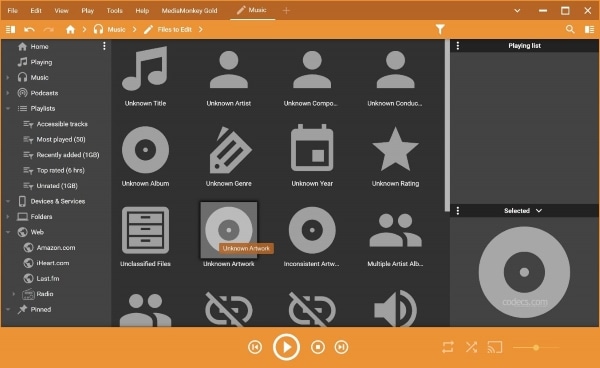
MediaMonkey is a digital video player for Windows 11; it allows the users to record and download movies and podcasts. MediaMonkey supports plug-ins for user advantage. Along with using MediaMonkey on Windows, also use it on Android and iOS devices. You can play high-quality audio on your TV, home stereo, or any other device.
Most collectors use MediaMonkey. It allows you to manage 100,000+ audio and media files. You can organize the media you have and keep it in a representable way. MediaMonkey will enable you to share media files between Windows, Android, and Apple devices. It can change audio and video formats as per consumer demand.
10. Kodi Player
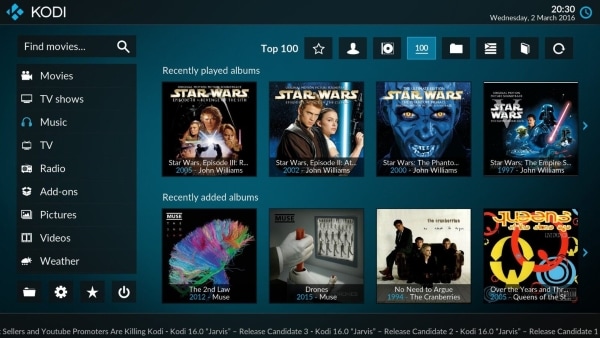
Kodi Player is a well-known video player for Windows 11. It is free software to use. Does free mean low quality? Not in Kodi Player’s case. Kodi player allows live sports streams. It is efficient and has a wide range of compatibility. Kodi Player is open-source software for home theatre.
Does Kodi support different file formats? Yes, the Kodi player allows multiple file formats. These formats include MIDI, and WavPack for audio and MP4 and real-time for videos. Kodi Player is not only used as a Window 11 video player; it can play games and record live TV too. You can also do browsing using the Kodi Player.
Conclusion
We discussed 10 top and free all format video players for PC as we committed. This article will provide great help whenever file-formats bother you. Moving on to a little surprise, let’s share a brilliant video editor, Wondershare Filmora .
The software offers chroma key background, green-screen effect, split-screen effect, and a lot more than this. Filmora is a full-fledged video editor with endless features and limitless editing opportunities. You can add cool and crazy effects, transitions, and titles to your video. Moreover, it has advanced AI portrait features, cut, trim, join, and many more facilities.
For Win 7 or later (64-bit)
For macOS 10.12 or later
For Win 7 or later (64-bit)
For macOS 10.14 or later
download filmora app for ios ](https://app.adjust.com/b0k9hf2%5F4bsu85t ) download filmora app for android ](https://app.adjust.com/b0k9hf2%5F4bsu85t )
Click here to get Filmora for PC by email
List of 10 Best Free Video Players for Win 11
Not every Windows 11 video player supports all file formats, but certain amazing video players are free to use, and additionally, they support a wide range of formats. Let’s discuss them one by one.
| 1 - Windows 11 Media Player | 2 - VLC Media Player |
|---|---|
| 3 - PotPlayer | 4 - GOM Player |
| 5 - 5KPlayer | 6 - MPV Player |
| 7 - DivX Player | 8 - PowerDVD |
| 9 - MediaMonkey | 10 - Kodi Player |
1. Windows 11 Media Player
For all Windows 11 users, this video player is great news for you because Microsoft has finally released a media player app for Windows 11. With this, the struggle of using a third-party video player will now come to an end.
The user interface for this media player app is sleek, clean, and minimal. The video player for Windows 11 offers a dark mode, semi-transparent materials, accent colors, and other options. Windows 11 Media Player is great and made it to the top 10 because it is an all-format video player for PC, for instance, AVI , WAV, MPG, WMV , MP3, and others.

Find a Useful Video Editor to Make Video on Windows 11? Try This Out!
Filmora Video Editor is an expert in creating and editing videoson Windows 11. You can add cool visual effects and popular emojis to decorate your video. Plus, there is a vast media library to add audio and filter! You can edit video with high quality and play with the below video players at anytime!
Free Edit Videos on Windows 11 Free Edit Videos on Windows 11 Free Edit Videos on Windows 11 Learn More >
2. VLC Media Player
Do you know about any open-source media players? VLC Media Player is not only an open-source but also a cross-platform multimedia player. This Windows 11 video player supports video compression. Users can play any video files from webcams, discs, and even streams with this video player.
VLC Media Player is famous because it supports almost all file formats and supports codecs like , WMV, MPEG-2, MPEG-4, etc. The media player does not contain ads, user tracking, or spyware. Moreover, the software also offers a video filtration feature. VLC Media Player can also decode videos, and it is highly trusted and widely used.

3. PotPlayer
Are you ready to learn about a media player that can play 360-degree video and 3D videos? We are talking about PotPlayer, a media player developed by a South Korean Internet Company. As the media player supports 3D videos, it also supports various types of 3D glasses for a better experience.
Do you know what else it has? Overlay support and also Direct3D9 Ex Flip Mode. The video player for Windows 11 is compatible with various devices like TV, HDTV, DVD. Along with all this, PotPlayer also supports many subtitle formats like DVD, Blu-Ray, SRT & SMI.

4. GOM Player
Let’s share another worth trying video player for Windows 11, GOM Player. The media player offers great features like speed control, screen capture, video/audio effects, A-B repeat, etc. Moreover, GOM Player supports a massive list of file formats like MP4 , AVI, MKV , MPG, MOV , and others.
The video player is a practical codec finder with a clean and simple interface. Additionally, the free-to-use video player also supports 360-degree video views. The design of the software is very minimal, with countless features.

Best Windows 11 Video Editor
Help you create and edit videos like a pro on Windows 11. Start your creation.
Edit Video Free Edit Video Free Edit Video Free Learn More >
5. 5KPlayer
Do you know any media player that has a built-in video codec library? Well, 5KPlayer does have a codec library that supports different video formats, DVDs, etc. The media player is GPU accelerated and is very powerful. Moreover, it is an HD and 4K video player.
This Windows 11 video player supports a lot of video formats like WEBM, MPEG, WMV, FLV, MP4, and it is free to use. With 5KPlayer, you can easily stream media files as it supports DNLA wireless and AirPlay. The media player can even play ultra-high-definition clips easily.

6. MPV Player
MPV Player is a top-notch video player for Windows 11. It is free and open-source software. It is famous for its wide range of supported media formats, like DXVA2 and VAAPI too. MPV Player does not have a good interface but still provides basic video controls.
MPV Player is simple and effective at the same time. You won’t find a Windows 11 video player that does not consume a large number of system resources. MPV Player supports scripting like JavaScript and Lua Script, unlike normal media players.

7. DivX Player
DivX Player is considered the best Windows 11 video player. This software allows playing advanced codecs like HECV, MKV, and AVI. You can play media up to 4K resolution. DivX Player is free software that allows you to stream on DLNA (Digital Living Network Alliance).
The interface for DivX Player might be simple, but they have not compromised on the features provided. DivX Player is the first media player that is offering free playback. It has a built-in media library from which you can keep track of your videos.
A cross-platform for making videos anywhere for all creators

Why your video editing isn’t good enough? How about some creative inspo?
- 100 Million+ Users
- 150+ Countries and Regions
- 4 Million+ Social Media Followers
- 5 Million+ Stock Media for Use
* Secure Download


8. PowerDVD
PowerDVD is media-playing software that is compatible with Android, iOS, and Windows. It allows you to watch up to 8K resolution media content while providing an amazing cinema-style audio experience. It allows the downloading of videos for offline usage. PowerDVD is of its kind video player for Windows 11.
PowerDVD allows you to share media through the software. It also has cloud storage that is capable of saving 40 HD movies. You can use formats like and AVC along with XAVC-S. XAVC-S is high-definition video playback. You can manage your library, including photos, videos, music, and even DVD movies can be managed through the application.

9. MediaMonkey
MediaMonkey is a digital video player for Windows 11; it allows the users to record and download movies and podcasts. MediaMonkey supports plug-ins for user advantage. Along with using MediaMonkey on Windows, also use it on Android and iOS devices. You can play high-quality audio on your TV, home stereo, or any other device.
Most collectors use MediaMonkey. It allows you to manage 100,000+ audio and media files. You can organize the media you have and keep it in a representable way. MediaMonkey will enable you to share media files between Windows, Android, and Apple devices. It can change audio and video formats as per consumer demand.

10. Kodi Player
Kodi Player is a well-known video player for Windows 11. It is free software to use. Does free mean low quality? Not in Kodi Player’s case. Kodi player allows live sports streams. It is efficient and has a wide range of compatibility. Kodi Player is open-source software for home theatre.
Does Kodi support different file formats? Yes, the Kodi player allows multiple file formats. These formats include MIDI, and WavPack for audio and MP4 and real-time for videos. Kodi Player is not only used as a Window 11 video player; it can play games and record live TV too. You can also do browsing using the Kodi Player.

Conclusion
We discussed 10 top and free all format video players for PC as we committed. This article will provide great help whenever file-formats bother you. Moving on to a little surprise, let’s share a brilliant video editor, Wondershare Filmora .
The software offers chroma key background, green-screen effect, split-screen effect, and a lot more than this. Filmora is a full-fledged video editor with endless features and limitless editing opportunities. You can add cool and crazy effects, transitions, and titles to your video. Moreover, it has advanced AI portrait features, cut, trim, join, and many more facilities.
For Win 7 or later (64-bit)
For macOS 10.12 or later
For Win 7 or later (64-bit)
For macOS 10.14 or later
download filmora app for ios ](https://app.adjust.com/b0k9hf2%5F4bsu85t ) download filmora app for android ](https://app.adjust.com/b0k9hf2%5F4bsu85t )
Click here to get Filmora for PC by email
List of 10 Best Free Video Players for Win 11
Not every Windows 11 video player supports all file formats, but certain amazing video players are free to use, and additionally, they support a wide range of formats. Let’s discuss them one by one.
| 1 - Windows 11 Media Player | 2 - VLC Media Player |
|---|---|
| 3 - PotPlayer | 4 - GOM Player |
| 5 - 5KPlayer | 6 - MPV Player |
| 7 - DivX Player | 8 - PowerDVD |
| 9 - MediaMonkey | 10 - Kodi Player |
1. Windows 11 Media Player
For all Windows 11 users, this video player is great news for you because Microsoft has finally released a media player app for Windows 11. With this, the struggle of using a third-party video player will now come to an end.
The user interface for this media player app is sleek, clean, and minimal. The video player for Windows 11 offers a dark mode, semi-transparent materials, accent colors, and other options. Windows 11 Media Player is great and made it to the top 10 because it is an all-format video player for PC, for instance, AVI , WAV, MPG, WMV , MP3, and others.

Find a Useful Video Editor to Make Video on Windows 11? Try This Out!
Filmora Video Editor is an expert in creating and editing videoson Windows 11. You can add cool visual effects and popular emojis to decorate your video. Plus, there is a vast media library to add audio and filter! You can edit video with high quality and play with the below video players at anytime!
Free Edit Videos on Windows 11 Free Edit Videos on Windows 11 Free Edit Videos on Windows 11 Learn More >
2. VLC Media Player
Do you know about any open-source media players? VLC Media Player is not only an open-source but also a cross-platform multimedia player. This Windows 11 video player supports video compression. Users can play any video files from webcams, discs, and even streams with this video player.
VLC Media Player is famous because it supports almost all file formats and supports codecs like , WMV, MPEG-2, MPEG-4, etc. The media player does not contain ads, user tracking, or spyware. Moreover, the software also offers a video filtration feature. VLC Media Player can also decode videos, and it is highly trusted and widely used.

3. PotPlayer
Are you ready to learn about a media player that can play 360-degree video and 3D videos? We are talking about PotPlayer, a media player developed by a South Korean Internet Company. As the media player supports 3D videos, it also supports various types of 3D glasses for a better experience.
Do you know what else it has? Overlay support and also Direct3D9 Ex Flip Mode. The video player for Windows 11 is compatible with various devices like TV, HDTV, DVD. Along with all this, PotPlayer also supports many subtitle formats like DVD, Blu-Ray, SRT & SMI.

4. GOM Player
Let’s share another worth trying video player for Windows 11, GOM Player. The media player offers great features like speed control, screen capture, video/audio effects, A-B repeat, etc. Moreover, GOM Player supports a massive list of file formats like MP4 , AVI, MKV , MPG, MOV , and others.
The video player is a practical codec finder with a clean and simple interface. Additionally, the free-to-use video player also supports 360-degree video views. The design of the software is very minimal, with countless features.

Best Windows 11 Video Editor
Help you create and edit videos like a pro on Windows 11. Start your creation.
Edit Video Free Edit Video Free Edit Video Free Learn More >
5. 5KPlayer
Do you know any media player that has a built-in video codec library? Well, 5KPlayer does have a codec library that supports different video formats, DVDs, etc. The media player is GPU accelerated and is very powerful. Moreover, it is an HD and 4K video player.
This Windows 11 video player supports a lot of video formats like WEBM, MPEG, WMV, FLV, MP4, and it is free to use. With 5KPlayer, you can easily stream media files as it supports DNLA wireless and AirPlay. The media player can even play ultra-high-definition clips easily.

6. MPV Player
MPV Player is a top-notch video player for Windows 11. It is free and open-source software. It is famous for its wide range of supported media formats, like DXVA2 and VAAPI too. MPV Player does not have a good interface but still provides basic video controls.
MPV Player is simple and effective at the same time. You won’t find a Windows 11 video player that does not consume a large number of system resources. MPV Player supports scripting like JavaScript and Lua Script, unlike normal media players.

7. DivX Player
DivX Player is considered the best Windows 11 video player. This software allows playing advanced codecs like HECV, MKV, and AVI. You can play media up to 4K resolution. DivX Player is free software that allows you to stream on DLNA (Digital Living Network Alliance).
The interface for DivX Player might be simple, but they have not compromised on the features provided. DivX Player is the first media player that is offering free playback. It has a built-in media library from which you can keep track of your videos.
A cross-platform for making videos anywhere for all creators

Why your video editing isn’t good enough? How about some creative inspo?
- 100 Million+ Users
- 150+ Countries and Regions
- 4 Million+ Social Media Followers
- 5 Million+ Stock Media for Use
* Secure Download


8. PowerDVD
PowerDVD is media-playing software that is compatible with Android, iOS, and Windows. It allows you to watch up to 8K resolution media content while providing an amazing cinema-style audio experience. It allows the downloading of videos for offline usage. PowerDVD is of its kind video player for Windows 11.
PowerDVD allows you to share media through the software. It also has cloud storage that is capable of saving 40 HD movies. You can use formats like and AVC along with XAVC-S. XAVC-S is high-definition video playback. You can manage your library, including photos, videos, music, and even DVD movies can be managed through the application.

9. MediaMonkey
MediaMonkey is a digital video player for Windows 11; it allows the users to record and download movies and podcasts. MediaMonkey supports plug-ins for user advantage. Along with using MediaMonkey on Windows, also use it on Android and iOS devices. You can play high-quality audio on your TV, home stereo, or any other device.
Most collectors use MediaMonkey. It allows you to manage 100,000+ audio and media files. You can organize the media you have and keep it in a representable way. MediaMonkey will enable you to share media files between Windows, Android, and Apple devices. It can change audio and video formats as per consumer demand.

10. Kodi Player
Kodi Player is a well-known video player for Windows 11. It is free software to use. Does free mean low quality? Not in Kodi Player’s case. Kodi player allows live sports streams. It is efficient and has a wide range of compatibility. Kodi Player is open-source software for home theatre.
Does Kodi support different file formats? Yes, the Kodi player allows multiple file formats. These formats include MIDI, and WavPack for audio and MP4 and real-time for videos. Kodi Player is not only used as a Window 11 video player; it can play games and record live TV too. You can also do browsing using the Kodi Player.

Conclusion
We discussed 10 top and free all format video players for PC as we committed. This article will provide great help whenever file-formats bother you. Moving on to a little surprise, let’s share a brilliant video editor, Wondershare Filmora .
The software offers chroma key background, green-screen effect, split-screen effect, and a lot more than this. Filmora is a full-fledged video editor with endless features and limitless editing opportunities. You can add cool and crazy effects, transitions, and titles to your video. Moreover, it has advanced AI portrait features, cut, trim, join, and many more facilities.
For Win 7 or later (64-bit)
For macOS 10.12 or later
For Win 7 or later (64-bit)
For macOS 10.14 or later
download filmora app for ios ](https://app.adjust.com/b0k9hf2%5F4bsu85t ) download filmora app for android ](https://app.adjust.com/b0k9hf2%5F4bsu85t )
Click here to get Filmora for PC by email
List of 10 Best Free Video Players for Win 11
Not every Windows 11 video player supports all file formats, but certain amazing video players are free to use, and additionally, they support a wide range of formats. Let’s discuss them one by one.
| 1 - Windows 11 Media Player | 2 - VLC Media Player |
|---|---|
| 3 - PotPlayer | 4 - GOM Player |
| 5 - 5KPlayer | 6 - MPV Player |
| 7 - DivX Player | 8 - PowerDVD |
| 9 - MediaMonkey | 10 - Kodi Player |
1. Windows 11 Media Player
For all Windows 11 users, this video player is great news for you because Microsoft has finally released a media player app for Windows 11. With this, the struggle of using a third-party video player will now come to an end.
The user interface for this media player app is sleek, clean, and minimal. The video player for Windows 11 offers a dark mode, semi-transparent materials, accent colors, and other options. Windows 11 Media Player is great and made it to the top 10 because it is an all-format video player for PC, for instance, AVI , WAV, MPG, WMV , MP3, and others.

Find a Useful Video Editor to Make Video on Windows 11? Try This Out!
Filmora Video Editor is an expert in creating and editing videoson Windows 11. You can add cool visual effects and popular emojis to decorate your video. Plus, there is a vast media library to add audio and filter! You can edit video with high quality and play with the below video players at anytime!
Free Edit Videos on Windows 11 Free Edit Videos on Windows 11 Free Edit Videos on Windows 11 Learn More >
2. VLC Media Player
Do you know about any open-source media players? VLC Media Player is not only an open-source but also a cross-platform multimedia player. This Windows 11 video player supports video compression. Users can play any video files from webcams, discs, and even streams with this video player.
VLC Media Player is famous because it supports almost all file formats and supports codecs like , WMV, MPEG-2, MPEG-4, etc. The media player does not contain ads, user tracking, or spyware. Moreover, the software also offers a video filtration feature. VLC Media Player can also decode videos, and it is highly trusted and widely used.

3. PotPlayer
Are you ready to learn about a media player that can play 360-degree video and 3D videos? We are talking about PotPlayer, a media player developed by a South Korean Internet Company. As the media player supports 3D videos, it also supports various types of 3D glasses for a better experience.
Do you know what else it has? Overlay support and also Direct3D9 Ex Flip Mode. The video player for Windows 11 is compatible with various devices like TV, HDTV, DVD. Along with all this, PotPlayer also supports many subtitle formats like DVD, Blu-Ray, SRT & SMI.

4. GOM Player
Let’s share another worth trying video player for Windows 11, GOM Player. The media player offers great features like speed control, screen capture, video/audio effects, A-B repeat, etc. Moreover, GOM Player supports a massive list of file formats like MP4 , AVI, MKV , MPG, MOV , and others.
The video player is a practical codec finder with a clean and simple interface. Additionally, the free-to-use video player also supports 360-degree video views. The design of the software is very minimal, with countless features.

Best Windows 11 Video Editor
Help you create and edit videos like a pro on Windows 11. Start your creation.
Edit Video Free Edit Video Free Edit Video Free Learn More >
5. 5KPlayer
Do you know any media player that has a built-in video codec library? Well, 5KPlayer does have a codec library that supports different video formats, DVDs, etc. The media player is GPU accelerated and is very powerful. Moreover, it is an HD and 4K video player.
This Windows 11 video player supports a lot of video formats like WEBM, MPEG, WMV, FLV, MP4, and it is free to use. With 5KPlayer, you can easily stream media files as it supports DNLA wireless and AirPlay. The media player can even play ultra-high-definition clips easily.

6. MPV Player
MPV Player is a top-notch video player for Windows 11. It is free and open-source software. It is famous for its wide range of supported media formats, like DXVA2 and VAAPI too. MPV Player does not have a good interface but still provides basic video controls.
MPV Player is simple and effective at the same time. You won’t find a Windows 11 video player that does not consume a large number of system resources. MPV Player supports scripting like JavaScript and Lua Script, unlike normal media players.

7. DivX Player
DivX Player is considered the best Windows 11 video player. This software allows playing advanced codecs like HECV, MKV, and AVI. You can play media up to 4K resolution. DivX Player is free software that allows you to stream on DLNA (Digital Living Network Alliance).
The interface for DivX Player might be simple, but they have not compromised on the features provided. DivX Player is the first media player that is offering free playback. It has a built-in media library from which you can keep track of your videos.
A cross-platform for making videos anywhere for all creators

Why your video editing isn’t good enough? How about some creative inspo?
- 100 Million+ Users
- 150+ Countries and Regions
- 4 Million+ Social Media Followers
- 5 Million+ Stock Media for Use
* Secure Download


8. PowerDVD
PowerDVD is media-playing software that is compatible with Android, iOS, and Windows. It allows you to watch up to 8K resolution media content while providing an amazing cinema-style audio experience. It allows the downloading of videos for offline usage. PowerDVD is of its kind video player for Windows 11.
PowerDVD allows you to share media through the software. It also has cloud storage that is capable of saving 40 HD movies. You can use formats like and AVC along with XAVC-S. XAVC-S is high-definition video playback. You can manage your library, including photos, videos, music, and even DVD movies can be managed through the application.

9. MediaMonkey
MediaMonkey is a digital video player for Windows 11; it allows the users to record and download movies and podcasts. MediaMonkey supports plug-ins for user advantage. Along with using MediaMonkey on Windows, also use it on Android and iOS devices. You can play high-quality audio on your TV, home stereo, or any other device.
Most collectors use MediaMonkey. It allows you to manage 100,000+ audio and media files. You can organize the media you have and keep it in a representable way. MediaMonkey will enable you to share media files between Windows, Android, and Apple devices. It can change audio and video formats as per consumer demand.

10. Kodi Player
Kodi Player is a well-known video player for Windows 11. It is free software to use. Does free mean low quality? Not in Kodi Player’s case. Kodi player allows live sports streams. It is efficient and has a wide range of compatibility. Kodi Player is open-source software for home theatre.
Does Kodi support different file formats? Yes, the Kodi player allows multiple file formats. These formats include MIDI, and WavPack for audio and MP4 and real-time for videos. Kodi Player is not only used as a Window 11 video player; it can play games and record live TV too. You can also do browsing using the Kodi Player.

Conclusion
We discussed 10 top and free all format video players for PC as we committed. This article will provide great help whenever file-formats bother you. Moving on to a little surprise, let’s share a brilliant video editor, Wondershare Filmora .
The software offers chroma key background, green-screen effect, split-screen effect, and a lot more than this. Filmora is a full-fledged video editor with endless features and limitless editing opportunities. You can add cool and crazy effects, transitions, and titles to your video. Moreover, it has advanced AI portrait features, cut, trim, join, and many more facilities.
For Win 7 or later (64-bit)
For macOS 10.12 or later
Also read:
- 2024 Approved How to Create Text Animation for Videos
- In 2024, The Ultimate Guide to Use LUTS to Color Grade on iPhone
- New How to Create and Use Adjustment Layers in After Effects
- 2024 Approved How to Make Video Fade to Black in Movie Maker Easily
- Updated Easy Guide to Apply Slow Zoom Effects to Videos
- 2024 Approved How to Remove Echo with Premiere Pro? Full Guide Here
- In 2024, Top 9 Sparkle Effects Photo and Video Editors You Should Know
- Updated Useful Guide to Speed Up/Down Videos in VLC
- New 2024 Approved How to Add Motion Blur in After Effects
- New The After-Effects Match Colour Feature Bestows Numerous Benefits. Thus, in the Following Discussion, We Will Discuss This Feature and an Equally Proficient Efficient Alternative Tool for Colour Matching
- How To Film a Slow Motion Video for 2024
- New If You Want to Replace or Delete the Sky Pictures or Background Media, Then Give a Quick Read to This Article for Effective Solutions
- In 2024, Are You Stuck with How to Use Discord GIF Ideally? Check that Out in This Article, as We Will Guide You on All You Need to Know About GIFs for Discord
- New In 2024, 2 Effective Ways to Make SRT File Translation Like a Pro
- Updated Learn About some of the Best Apps for Photo Collage for PC
- New 2024 Approved How to Create Educational Teaching Videos in An Outstanding Way?
- Updated Turn Your Text Into a Podcast Made Possible (+ EASY Editing Tips)
- Updated Are You Looking for an Ideal Halloween Countdown Video Clip for Your Video? This Article Will Walk You Through the Best Ones You Can Use to Get the Job Done Perfectly
- Here Is a Step-by-Step Guide to Color Correct and Color Grade a Video Professionally with Wondershare Filmora. Lets Get Going
- New In 2024, 7 Ways Add Subtitles to MKV Videos on All Platforms
- In 2024, In This Article, We Talk About How to Add Old Film Overlays and Other Effects to Turn the Videos or Photos More Vintage and with an Older Aspect. We Take a Look at Filmora in This Guide and Give Tips on How to Create Great Retro Videos
- Updated Color Lut in Video -How to Color Grade Your Video
- New How to Make a Movie with Windows Movie Maker for 2024
- New Looking for a Free and Open Source Video Editor with Cross-Platform Support? Kdenlive Video Editor Is Great but Is It the Best? Find Out From Our Complete Kdenlive Review
- In 2024, Are You Searching the Internet for Top Wedding LUTs Premiere Pro? This Article Provides Suggestions on the Best LUT Color Presets
- In 2024, Hard to Remove Black Background in After Effects? Heres the Best Way to Deal With It
- New In 2024, Video Maker with Song
- A Complete Guide to Use Distortion Effect in Premiere Pro for 2024
- Updated In 2024, How to Create Discord Emoji GIF
- In 2024, Editing Videos Was Never so Easy as It Is Now. With Video Enhancer Ai, This Task Is Very Simple to Do and No Trouble Will Be There in Getting the Things Done as Needed. Choose the Right AI Video Enhancer for Task Completion
- Explore the List of the Top Six Online Video Speed Controllers for Chrome, Safari, and Firefox
- In 2024, How to Do Datamoshing Effect in After Effects?
- 2024 Approved How to Resize FLV Videos EfficientlyWindows, Mac, Android, iPhone & Online
- Updated How to Make Stunning Glitch Effect in Photoshop? Ultimate Guide
- New How D AI Video Games Act More Human Than Human, In 2024
- New 7 Ways Add Subtitles to MKV Videos on All Platforms for 2024
- New In 2024, 30+ Amazing Templates for VN Video Editor
- Want to Save Your Edited Video File in MP4 Format in Windows Movie Maker? Here Are the Simple Steps Along with a Better Alternative for 2024
- 2024 Approved To Get Cinematographs of a Music Video, You Need to Understand the Basics of Camera Movement. As Well Framing and Lighting of the Setup Are Illustrated in This Article
- Updated Want to Explore the Exciting World of GIFs? Here Is Everything You Will Ever Want to Know and Learn About the Most Appealing GIF Libraries, All at Once Place
- Updated Best Ways to Merge FLV Files Windows, Mac,Android, iPhone & Online for 2024
- New 2024 Approved Top 10 Picks for Flawless Slow Motion Video Generation
- In 2024, You Can Easily Film Rotating Video Illusions From Your Smartphone and Edit Them on Wondershare Filmora in Just a Few Clicks
- New 2024 Approved Top 10 3D Slideshow Software Review
- DaVinci Resolve Scopes Have Undergone Significant Improvements. Find Out How to Use These Scopes and Improve Your Video Editing Skills for 2024
- New 2024 Approved Top 7 Video Language Converter Online Free
- Authentication Error Occurred on Realme C67 4G? Here Are 10 Proven Fixes | Dr.fone
- 4 Solutions to Fix Unfortunately Your App Has Stopped Error on Samsung Galaxy A25 5G | Dr.fone
- In 2024, Full Guide to Unlock iPhone 14 Pro with iTunes | Dr.fone
- How to get the dragon scale and evolution-enabled pokemon On Nubia Z50 Ultra? | Dr.fone
- The Best 8 VPN Hardware Devices Reviewed On Samsung Galaxy S24 | Dr.fone
- How to Rescue Lost Music from Nokia C12 Pro
- How to recover old call logs from your Xiaomi Redmi Note 12T Pro?
- How to Change/Fake Your Vivo S17 Location on Viber | Dr.fone
- Updated In 2024, Perfect Guide To Excel in TikTok Live Shopping
- Why Your WhatsApp Live Location is Not Updating and How to Fix on your Motorola Edge 40 Pro | Dr.fone
- In 2024, Detailed Review of doctorSIM Unlock Service For iPhone SE (2022) | Dr.fone
- How Can I Use a Fake GPS Without Mock Location On Tecno Camon 20 Pro 5G? | Dr.fone
- How to Exit Android Factory Mode On Samsung Galaxy M14 5G? | Dr.fone
- Best Video Repair tool to Fix and Repair Corrupted video files of Lava Blaze 2 5G
- A Perfect Guide To Remove or Disable Google Smart Lock On Lava Blaze 2 5G
- In 2024, 3 Solutions to Find Your Apple iPhone 15 Plus Current Location of a Mobile Number | Dr.fone
- Edit and Send Fake Location on Telegram For your Realme V30 in 3 Ways | Dr.fone
- The Ultimate Guide to Nubia Red Magic 8S Pro Pattern Lock Screen Everything You Need to Know
- How to identify malfunctioning your hardware drivers with Windows Device Manager in Windows 11 & 10 & 7
- Disabled iPhone SE (2022) How to Unlock a Disabled iPhone SE (2022)? | Dr.fone
- In 2024, How to Unlock iPhone 14 Online? Here are 6 Easy Ways
- In 2024, How to Change/Add Location Filters on Snapchat For your Vivo Y100A | Dr.fone
- Unlocking Made Easy The Best 10 Apps for Unlocking Your Realme 12 5G Device
- Top Apps and Online Tools To Track Samsung Galaxy A15 5G Phone With/Without IMEI Number
- How To Leave a Life360 Group On Vivo S17e Without Anyone Knowing? | Dr.fone
- Best Tecno Pova 5 Pattern Lock Removal Tools Remove Android Pattern Lock Without Losing Data
- In 2024, 4 solution to get rid of pokemon fail to detect location On Samsung Galaxy S24 | Dr.fone
- Android Unlock Code Sim Unlock Your Honor Play 40C Phone and Remove Locked Screen
- 4 Ways to Mirror Apple iPhone 11 to Laptop via USB or Wi-Fi | Dr.fone
- In 2024, Top 10 Oppo Find N3 Flip Android SIM Unlock APK
- How to Reset Honor X9b without Losing Data | Dr.fone
- Stuck at Android System Recovery Of Samsung Galaxy S23 Ultra ? Fix It Easily | Dr.fone
- How do I reset my OnePlus Ace 2 Pro Phone without technical knowledge? | Dr.fone
- What Legendaries Are In Pokemon Platinum On Poco C55? | Dr.fone
- Fix Vivo Y200e 5G Android System Webview Crash 2024 Issue | Dr.fone
- Free electronic signature - For .dotm file
- The Updated Method to Bypass Nokia G310 FRP
- Title: Discover How You Can Use Vectorscope to Adjust Luminance, Color Grading, and More in Your Video Editing Projects
- Author: Chloe
- Created at : 2024-05-20 03:37:32
- Updated at : 2024-05-21 03:37:32
- Link: https://ai-editing-video.techidaily.com/discover-how-you-can-use-vectorscope-to-adjust-luminance-color-grading-and-more-in-your-video-editing-projects/
- License: This work is licensed under CC BY-NC-SA 4.0.


