
:max_bytes(150000):strip_icc():format(webp)/Instagram_Login-5c004ff2c9e77c000104174d.png)
Discover the Best Video Filter Software . Elevate Your Video Editing with Top Contenders Like Filmora, DaVinci Resolve, HitFilm Express, and More for 2024
Discover the Best Video Filter Software . Elevate Your Video Editing with Top Contenders Like Filmora, DaVinci Resolve, HitFilm Express, and More
In today’s tech-savvy world, whether you’re a budding content creator or a seasoned pro, creating eye-catching videos is a must.
And what’s the secret sauce to make your videos stand out? You guessed it – video filters! These nifty tools can transform your raw footage into a visual masterpiece.
So, if you’re ready to take your video editing game up a notch, you’re in the right place.
In this article, we’ll dig into the top 5 video filter software of 2024 that are worth your attention.
Before we jump into the juicy details, let’s get down to basics.
Part 1: Introduction
What exactly are video filters, you ask?
Well, video filters are like Instagram filters for your videos but with much more finesse.
They allow you to tweak various aspects of your video’s appearance, such as color, contrast, saturation, and more, to achieve the desired visual style.
The beauty of video filter software lies in its ability to enhance your video’s overall look and feel. Let’s explore the top contenders in the video filter software arena.
Part 2: Top 5 Video Filter Software
01 Filmora

Our first contender in the world of video filter software is Filmora. Designed with a user-friendly interface, Filmora is the ideal choice for those who want to enhance their videos effortlessly. Let’s take a closer look at what makes it stand out.
Advantages:
- Filmora’s intuitive interface makes it a breeze for beginners to get started. You don’t need to be a tech whiz to dive into video editing; Filmora guides you through the process seamlessly.
- Filmora boasts an extensive library of video presets and color grading presets. This treasure trove of pre-made styles allows you to give your videos that extra flair without the need for in-depth editing skills.
- Time is precious, and Filmora respects that. It offers quick rendering speeds, so you can see the results of your editing efforts in no time.
- Filmora’s simplicity is its strength, but it doesn’t mean it lacks creative potential. You can still go into more advanced features when you’re ready to level up your video editing game. This software gracefully balances accessibility and functionality.
Disadvantages:
So, you might be wondering, what about the downsides? Well, Filmora is so user-friendly that it can make you addicted to editing!
You might find yourself spending hours perfecting your videos, which, to be honest, is more of an advantage disguised as a disadvantage. Who wouldn’t want to get lost in the world of video editing, creating stunning content effortlessly?
02 DaVinci Resolve

When it comes to professional video editing and color correction, DaVinci Resolve stands as a true powerhouse in the world of video filter software.
Renowned for its robust feature set and precision, it’s the go-to choice for filmmakers, colorists, and anyone who demands the highest level of control over their video projects.
Advantages:
- DaVinci Resolve is unrivaled in its color correction and grading capabilities. Whether you’re aiming for a cinematic look or a specific color scheme, the software provides an extensive suite of tools to fine-tune every detail. Its color wheels, curves, and advanced grading panels allow you to achieve the exact visual style you envision.
- It provides a lot of cool stuff for editing sound and video, like fancy tools for fixing audio, working with multiple cameras, and working together with others on the same project. This makes it an all-in-one solution for every aspect of video post-production.
- In a world where teamwork is essential, DaVinci Resolve shines with its collaboration features. Many people can work on a project together at the same time, making it easier for teams working on big video projects to edit smoothly.
Disadvantages:
DaVinci Resolve can be resource-intensive, demanding a powerful computer setup for smooth operation. This could be a great advantage for people with really good computers, but it might be a bit tough for folks with older or less powerful ones.
03 HitFilm Express

If you’re an aspiring filmmaker or content creator looking to dive into the world of video editing and visual effects, HitFilm Express is your ticket to boundless creativity.
This versatile software combines video editing and visual effects seamlessly, allowing you to create stunning, professional-quality videos without breaking the bank.
Advantages:
- HitFilm Express excels in merging video editing and visual effects into one unified platform. This means you can effortlessly incorporate jaw-dropping visual effects into your videos without the need for additional software. Whether you’re adding explosions, futuristic CGI, or enchanting motion graphics, HitFilm Express has you covered.
- It offers a free version that provides access to its fundamental video filter features and VFX capabilities. This is a fantastic opportunity for budding content creators to dip their toes into the world of video editing without any financial commitment.
- HitFilm Express comes with an extensive library of tutorials, making it incredibly user-friendly for those who are new to video editing or visual effects. These tutorials guide you through the software’s features and help you create eye-catching effects like a pro.
Disadvantages:
As for potential downsides, the free version of HitFilm Express may have some limitations compared to the paid version.
While it provides access to essential features, you may find certain advanced options restricted.
However, this can be seen as an advantage because it allows you to explore the software without any upfront costs.
04 Adobe Premiere Pro

Adobe Premiere Pro is a name that resonates deeply within the video editing community. It’s renowned for its versatility and rich feature set, making it a go-to choice for professional video editors and content creators alike.
Advantages:
- When it comes to customization, Adobe Premiere Pro truly shines. The software offers an extensive library of plugins and extensions, allowing you to tailor your video filter effects to your precise liking. Whether you’re into color grading, visual effects, or audio enhancement, you’ll find the tools you need within Adobe’s vast ecosystem.
- If you’re already a part of the Adobe Creative family, you’ll appreciate Premiere Pro’s seamless integration with other Adobe software. Easily import and export assets from Adobe Photoshop or Adobe After Effects, enhancing your workflow and saving you time.
- Adobe is committed to keeping Premiere Pro at the forefront of video editing technology. With regular updates, you can expect a constant influx of new features, improvements, and bug fixes. This ensures that your editing experience remains cutting-edge.
Disadvantages:
There are a few considerations to keep in mind. Adobe Premiere Pro operates on a subscription-based model, which means you’ll need to pay a monthly or annual fee to access the software. While this provides you with ongoing updates and support, it might not be the best fit for those on a strict budget.
Adobe Premiere Pro’s extensive feature set can be overwhelming for beginners. If you’re new to video editing, you may find the learning curve a bit steep. However, with dedication and a wealth of online tutorials available, mastering the software is within reach.
05 Final Cut Pro

If you’re a proud owner of a Mac, Final Cut Pro should be on your radar as the ultimate video filter software. This Apple-exclusive gem is tailored to take your video editing experience to the next level, offering seamless integration with the macOS ecosystem.
Advantages:
- A standout feature of Final Cut Pro is how well it works together with other Apple devices and software, making everything run smoothly. Whether you’re working on your Macbook, iPad, or iPhone, Final Cut Pro keeps your workflow smooth and consistent. This synergy allows you to transfer projects effortlessly between devices, making it a go-to choice for Apple enthusiasts.
- Final Cut Pro is a powerhouse when it comes to handling high-resolution videos. Whether you’re working with 4K or 8K footage, this software handles it with grace and precision. Expect smooth playback and rapid rendering, even with the most demanding video projects.
- Mac users will feel right at home with Final Cut Pro’s sleek and user-friendly interface. The software’s design prioritizes ease of use without compromising on functionality. You can focus on your creative vision rather than wrestling with a complex interface.
Disadvantages:
It’s important to mention that Final Cut Pro is quite expensive, which might not be affordable for people on a tight budget.
Final Cut Pro is exclusive to macOS, which means Windows users will have to explore alternative software options. If you’re committed to the Apple ecosystem and prioritize top-notch video editing, Final Cut Pro is a wise investment.
Part 3: Summary
In a world where visual content rules supreme, having the right video filter software can make all the difference.
Your choice depends on your skill level, preferences, and budget. Whether you’re a newbie or a seasoned pro, there’s a video filter software out there that’s perfect for you. Feel free to dive in, experiment, and let your creativity sparkle in your videos!
Part 1: Introduction
What exactly are video filters, you ask?
Well, video filters are like Instagram filters for your videos but with much more finesse.
They allow you to tweak various aspects of your video’s appearance, such as color, contrast, saturation, and more, to achieve the desired visual style.
The beauty of video filter software lies in its ability to enhance your video’s overall look and feel. Let’s explore the top contenders in the video filter software arena.
Part 2: Top 5 Video Filter Software
01 Filmora
Our first contender in the world of video filter software is Filmora. Designed with a user-friendly interface, Filmora is the ideal choice for those who want to enhance their videos effortlessly. Let’s take a closer look at what makes it stand out.
Advantages:
- Filmora’s intuitive interface makes it a breeze for beginners to get started. You don’t need to be a tech whiz to dive into video editing; Filmora guides you through the process seamlessly.
- Filmora boasts an extensive library of video presets and color grading presets. This treasure trove of pre-made styles allows you to give your videos that extra flair without the need for in-depth editing skills.
- Time is precious, and Filmora respects that. It offers quick rendering speeds, so you can see the results of your editing efforts in no time.
- Filmora’s simplicity is its strength, but it doesn’t mean it lacks creative potential. You can still go into more advanced features when you’re ready to level up your video editing game. This software gracefully balances accessibility and functionality.
Disadvantages:
So, you might be wondering, what about the downsides? Well, Filmora is so user-friendly that it can make you addicted to editing!
You might find yourself spending hours perfecting your videos, which, to be honest, is more of an advantage disguised as a disadvantage. Who wouldn’t want to get lost in the world of video editing, creating stunning content effortlessly?
02 DaVinci Resolve
When it comes to professional video editing and color correction, DaVinci Resolve stands as a true powerhouse in the world of video filter software.
Renowned for its robust feature set and precision, it’s the go-to choice for filmmakers, colorists, and anyone who demands the highest level of control over their video projects.
Advantages:
- DaVinci Resolve is unrivaled in its color correction and grading capabilities. Whether you’re aiming for a cinematic look or a specific color scheme, the software provides an extensive suite of tools to fine-tune every detail. Its color wheels, curves, and advanced grading panels allow you to achieve the exact visual style you envision.
- It provides a lot of cool stuff for editing sound and video, like fancy tools for fixing audio, working with multiple cameras, and working together with others on the same project. This makes it an all-in-one solution for every aspect of video post-production.
- In a world where teamwork is essential, DaVinci Resolve shines with its collaboration features. Many people can work on a project together at the same time, making it easier for teams working on big video projects to edit smoothly.
Disadvantages:
DaVinci Resolve can be resource-intensive, demanding a powerful computer setup for smooth operation. This could be a great advantage for people with really good computers, but it might be a bit tough for folks with older or less powerful ones.
03 HitFilm Express
If you’re an aspiring filmmaker or content creator looking to dive into the world of video editing and visual effects, HitFilm Express is your ticket to boundless creativity.
This versatile software combines video editing and visual effects seamlessly, allowing you to create stunning, professional-quality videos without breaking the bank.
Advantages:
- HitFilm Express excels in merging video editing and visual effects into one unified platform. This means you can effortlessly incorporate jaw-dropping visual effects into your videos without the need for additional software. Whether you’re adding explosions, futuristic CGI, or enchanting motion graphics, HitFilm Express has you covered.
- It offers a free version that provides access to its fundamental video filter features and VFX capabilities. This is a fantastic opportunity for budding content creators to dip their toes into the world of video editing without any financial commitment.
- HitFilm Express comes with an extensive library of tutorials, making it incredibly user-friendly for those who are new to video editing or visual effects. These tutorials guide you through the software’s features and help you create eye-catching effects like a pro.
Disadvantages:
As for potential downsides, the free version of HitFilm Express may have some limitations compared to the paid version.
While it provides access to essential features, you may find certain advanced options restricted.
However, this can be seen as an advantage because it allows you to explore the software without any upfront costs.
04 Adobe Premiere Pro
Adobe Premiere Pro is a name that resonates deeply within the video editing community. It’s renowned for its versatility and rich feature set, making it a go-to choice for professional video editors and content creators alike.
Advantages:
- When it comes to customization, Adobe Premiere Pro truly shines. The software offers an extensive library of plugins and extensions, allowing you to tailor your video filter effects to your precise liking. Whether you’re into color grading, visual effects, or audio enhancement, you’ll find the tools you need within Adobe’s vast ecosystem.
- If you’re already a part of the Adobe Creative family, you’ll appreciate Premiere Pro’s seamless integration with other Adobe software. Easily import and export assets from Adobe Photoshop or Adobe After Effects, enhancing your workflow and saving you time.
- Adobe is committed to keeping Premiere Pro at the forefront of video editing technology. With regular updates, you can expect a constant influx of new features, improvements, and bug fixes. This ensures that your editing experience remains cutting-edge.
Disadvantages:
There are a few considerations to keep in mind. Adobe Premiere Pro operates on a subscription-based model, which means you’ll need to pay a monthly or annual fee to access the software. While this provides you with ongoing updates and support, it might not be the best fit for those on a strict budget.
Adobe Premiere Pro’s extensive feature set can be overwhelming for beginners. If you’re new to video editing, you may find the learning curve a bit steep. However, with dedication and a wealth of online tutorials available, mastering the software is within reach.
05 Final Cut Pro
If you’re a proud owner of a Mac, Final Cut Pro should be on your radar as the ultimate video filter software. This Apple-exclusive gem is tailored to take your video editing experience to the next level, offering seamless integration with the macOS ecosystem.
Advantages:
- A standout feature of Final Cut Pro is how well it works together with other Apple devices and software, making everything run smoothly. Whether you’re working on your Macbook, iPad, or iPhone, Final Cut Pro keeps your workflow smooth and consistent. This synergy allows you to transfer projects effortlessly between devices, making it a go-to choice for Apple enthusiasts.
- Final Cut Pro is a powerhouse when it comes to handling high-resolution videos. Whether you’re working with 4K or 8K footage, this software handles it with grace and precision. Expect smooth playback and rapid rendering, even with the most demanding video projects.
- Mac users will feel right at home with Final Cut Pro’s sleek and user-friendly interface. The software’s design prioritizes ease of use without compromising on functionality. You can focus on your creative vision rather than wrestling with a complex interface.
Disadvantages:
It’s important to mention that Final Cut Pro is quite expensive, which might not be affordable for people on a tight budget.
Final Cut Pro is exclusive to macOS, which means Windows users will have to explore alternative software options. If you’re committed to the Apple ecosystem and prioritize top-notch video editing, Final Cut Pro is a wise investment.
Part 3: Summary
In a world where visual content rules supreme, having the right video filter software can make all the difference.
Your choice depends on your skill level, preferences, and budget. Whether you’re a newbie or a seasoned pro, there’s a video filter software out there that’s perfect for you. Feel free to dive in, experiment, and let your creativity sparkle in your videos!
Minecraft Pixel Art: A Complete Guide for Die-Hard Fans
Versatile Video Editor - Wondershare Filmora
An easy yet powerful editor
Numerous effects to choose from
Detailed tutorials provided by the official channel
Minecraft pixel art is a trending subject, and they simply consist of in-game pixel artworks, besides the Minecraft houses, farms or cities.
In this article
01 What is Pixel Art Minecraft?
02 5 Most Popular Minecraft Pixel Art for Minecraft Die-Hard Fans
03 Best Tools to Make Minecraft Pixel Art
04 How to Make Pixel Art Minecraft In-game?
05 Tips for Creating a Wonderful Minecraft Pixel Art
Part 1: What is Pixel Art Minecraft?
This art can range from drawings to 3D models and even statues. Anything the players would like is just up to their imagination.
Like any Minecraft thing you do in-game, you just stack piles of blocks over blocks to do it, except what the player is doing is creating pixelated art, in general in large proportions. In terms of in-game, pixel art really doesn’t do much, but it is to be appreciated like any art.
Many players state that Minecraft pixel art is rewarding and realistic in terms of the game.
Part 2: 5 Most Popular Minecraft Pixel Art for Minecraft Die-Hard Fans
1. The Sandshrew
In this Minecraft pixel art, we see a mural of a Sandshrew; a pokemon depicted sitting down and with a palette color ranging from yellow to light brown and dark brown.
![]()
2. The Obama
In this Minecraft Pixel art, we can see the former president of the USA, Barack Obama portrait, in reference to a famous picture of him in real life. The color palette ranges from white to blue and red.
![]()
3. The Goomba
In this pixel art Minecraft, we have Goomba, a character from Super Mario. The colors are very simple and range from black to white and brown.
![]()
4. Spongebob
In this Minecraft pixel art, we have depicted SpongeBob Square pants in the game. Its color goes from yellow to green, blue, white and black to be faithful to the original cartoon.
![]()
5. The Joker
In this Minecraft pixel art, we have Joker from the Batman universe. A famous villain in that universe. Its color pattern ranges from several tones of green, red, purple, white, and blue.
![]()
Part 3: Best Tools to Make Minecraft Pixel Art
There are a few apps that you can use to create Minecraft pixel art, for example:
1. Scriptolab.com
In this small web application, you are able to transform your image or any photo of your choice into Minecraft pixel art and blocks.
It’s very easy to use. All you have to do is go to the website and pic your image. Resize the image or picture to the desired size to correspond to the number of blocks in the game.
It also has an easy-to-contact platform to communicate with the website owner that can guide you through the steps if you are ever in doubt.
2. Filmora
This is an application that you can download onto your PC or Mac for free. It is a powerful tool that does more than pixel art, but we will use it for such.
With Filmora, you can use a range of tools to create your Minecraft pixel art, like posterize effect to add a different gradient to the pixel art. The tool CC Black Load can help you perfect the square pixels to make it look more defined. You also have tools such as tint and grid to give a retro look to your art. Or even an animation effect for your wallpapers.
Also, in Filmora, you can add many effects to your pixel art like the 8-bit style or 16-bit style. You can also share your creations and export them and send them to your friends.
![]()
Wondershare Filmora
Get started easily with Filmora’s powerful performance, intuitive interface, and countless effects!
Try It Free Try It Free Try It Free Learn More >

3. Pixel Art Builder
In this mobile app, you can create Minecraft pixel art from the palm of your hand.
You can draw on grids rather than in real pixels to help you be more precise with your art. It has a very easy-to-use interface, and it is completely free.
Many of its key features are, for example, exporting images, dynamic size adjustment of the ability to save in several different formats. Its tools range from the regular pencil to eraser, paint bucket, line and circle drawer, move/zoom function, color wheel, and eyedropper.
Part 4: How to Make Pixel Art Minecraft In-game?
It is very easy to create pixel art Minecraft in-game. Of course, each artist’s ability differs, and so does art as well, but to start out, you do not need much. You need, though, careful planning and knowing the exact scale of your art.
You can break the creation of pixel art in Minecraft into four different steps:
1. Choose an image that you like
It is important that you reference the original work and can easily access it, as you might need to peek often while building your own art. The best thing to do is when you are starting to copy an image and work on it, rather than start it from scratch, as it takes an enormous amount of time and you need to be an expert to do it.
2. Break the image down into single-color sections
This is the part where “careful planning” comes in. You need to be looking at your original piece constantly to know if you are going in the right direction. Also, take all the colors and try to group them. Deconstructing the original image into colored shapes is a process that will help you outline the shape and color of the original design.
3. Obtain the necessary resources
You can start this step by opening Minecraft and start collecting blocks that you think will be useful for your pixel art. It does not matter if you play in Survival, Hardcore, or Adventure mode. The process is the same. It is ideal, though, that you work on creative mode when making pixel art, as the game gives you unlimited resources. You are also able to fly in this mode, making it easier to pick up blocks, and there is no risk of your art being destroyed.
4. Start building
Now you can start building your masterpiece. Start with the foundation and build from there; although you can virtually start anywhere, these blocks can float, unlike art or buildings outside the game. The time the process takes depends on the amount of work that needs to be done and the piece’s complexity.
Part 5: Tips for Creating a Wonderful Minecraft Pixel Art
There are many ways to draw Minecraft pixel art, but here are some tips to help you out.
- Have a clear idea of what kind of art you want to do. And start with something pre-made if you are only starting out. It is extremely hard to start something from scratch.
- Plan the pixel art you are going to do. Gather around all the block materials and colors that you’ll need to make your pixel art.
- Use creative mode. Because with the creative mode, you are not limited to the number of blocks you can find, and also, no one can come and destroy your art.
- If it is easier, you can first draft your pixel art on another app to help you map out your own project.
Conclusion
Minecraft pixel art is a growing trend in the video games world. It can range from easy and accessible to beginners to extremely complicated pieces of art. Players are becoming more engaged with this type of art in-game, and the future only predicts a bigger expansion. There are several tools that you can use to start out in your pixel art, as well as many tutorials.
Minecraft pixel art is a trending subject, and they simply consist of in-game pixel artworks, besides the Minecraft houses, farms or cities.
In this article
01 What is Pixel Art Minecraft?
02 5 Most Popular Minecraft Pixel Art for Minecraft Die-Hard Fans
03 Best Tools to Make Minecraft Pixel Art
04 How to Make Pixel Art Minecraft In-game?
05 Tips for Creating a Wonderful Minecraft Pixel Art
Part 1: What is Pixel Art Minecraft?
This art can range from drawings to 3D models and even statues. Anything the players would like is just up to their imagination.
Like any Minecraft thing you do in-game, you just stack piles of blocks over blocks to do it, except what the player is doing is creating pixelated art, in general in large proportions. In terms of in-game, pixel art really doesn’t do much, but it is to be appreciated like any art.
Many players state that Minecraft pixel art is rewarding and realistic in terms of the game.
Part 2: 5 Most Popular Minecraft Pixel Art for Minecraft Die-Hard Fans
1. The Sandshrew
In this Minecraft pixel art, we see a mural of a Sandshrew; a pokemon depicted sitting down and with a palette color ranging from yellow to light brown and dark brown.
![]()
2. The Obama
In this Minecraft Pixel art, we can see the former president of the USA, Barack Obama portrait, in reference to a famous picture of him in real life. The color palette ranges from white to blue and red.
![]()
3. The Goomba
In this pixel art Minecraft, we have Goomba, a character from Super Mario. The colors are very simple and range from black to white and brown.
![]()
4. Spongebob
In this Minecraft pixel art, we have depicted SpongeBob Square pants in the game. Its color goes from yellow to green, blue, white and black to be faithful to the original cartoon.
![]()
5. The Joker
In this Minecraft pixel art, we have Joker from the Batman universe. A famous villain in that universe. Its color pattern ranges from several tones of green, red, purple, white, and blue.
![]()
Part 3: Best Tools to Make Minecraft Pixel Art
There are a few apps that you can use to create Minecraft pixel art, for example:
1. Scriptolab.com
In this small web application, you are able to transform your image or any photo of your choice into Minecraft pixel art and blocks.
It’s very easy to use. All you have to do is go to the website and pic your image. Resize the image or picture to the desired size to correspond to the number of blocks in the game.
It also has an easy-to-contact platform to communicate with the website owner that can guide you through the steps if you are ever in doubt.
2. Filmora
This is an application that you can download onto your PC or Mac for free. It is a powerful tool that does more than pixel art, but we will use it for such.
With Filmora, you can use a range of tools to create your Minecraft pixel art, like posterize effect to add a different gradient to the pixel art. The tool CC Black Load can help you perfect the square pixels to make it look more defined. You also have tools such as tint and grid to give a retro look to your art. Or even an animation effect for your wallpapers.
Also, in Filmora, you can add many effects to your pixel art like the 8-bit style or 16-bit style. You can also share your creations and export them and send them to your friends.
![]()
Wondershare Filmora
Get started easily with Filmora’s powerful performance, intuitive interface, and countless effects!
Try It Free Try It Free Try It Free Learn More >
3. Pixel Art Builder
In this mobile app, you can create Minecraft pixel art from the palm of your hand.
You can draw on grids rather than in real pixels to help you be more precise with your art. It has a very easy-to-use interface, and it is completely free.
Many of its key features are, for example, exporting images, dynamic size adjustment of the ability to save in several different formats. Its tools range from the regular pencil to eraser, paint bucket, line and circle drawer, move/zoom function, color wheel, and eyedropper.
Part 4: How to Make Pixel Art Minecraft In-game?
It is very easy to create pixel art Minecraft in-game. Of course, each artist’s ability differs, and so does art as well, but to start out, you do not need much. You need, though, careful planning and knowing the exact scale of your art.
You can break the creation of pixel art in Minecraft into four different steps:
1. Choose an image that you like
It is important that you reference the original work and can easily access it, as you might need to peek often while building your own art. The best thing to do is when you are starting to copy an image and work on it, rather than start it from scratch, as it takes an enormous amount of time and you need to be an expert to do it.
2. Break the image down into single-color sections
This is the part where “careful planning” comes in. You need to be looking at your original piece constantly to know if you are going in the right direction. Also, take all the colors and try to group them. Deconstructing the original image into colored shapes is a process that will help you outline the shape and color of the original design.
3. Obtain the necessary resources
You can start this step by opening Minecraft and start collecting blocks that you think will be useful for your pixel art. It does not matter if you play in Survival, Hardcore, or Adventure mode. The process is the same. It is ideal, though, that you work on creative mode when making pixel art, as the game gives you unlimited resources. You are also able to fly in this mode, making it easier to pick up blocks, and there is no risk of your art being destroyed.
4. Start building
Now you can start building your masterpiece. Start with the foundation and build from there; although you can virtually start anywhere, these blocks can float, unlike art or buildings outside the game. The time the process takes depends on the amount of work that needs to be done and the piece’s complexity.
Part 5: Tips for Creating a Wonderful Minecraft Pixel Art
There are many ways to draw Minecraft pixel art, but here are some tips to help you out.
- Have a clear idea of what kind of art you want to do. And start with something pre-made if you are only starting out. It is extremely hard to start something from scratch.
- Plan the pixel art you are going to do. Gather around all the block materials and colors that you’ll need to make your pixel art.
- Use creative mode. Because with the creative mode, you are not limited to the number of blocks you can find, and also, no one can come and destroy your art.
- If it is easier, you can first draft your pixel art on another app to help you map out your own project.
Conclusion
Minecraft pixel art is a growing trend in the video games world. It can range from easy and accessible to beginners to extremely complicated pieces of art. Players are becoming more engaged with this type of art in-game, and the future only predicts a bigger expansion. There are several tools that you can use to start out in your pixel art, as well as many tutorials.
10 Best Voice Over Generators [Windows, Mac, Android, iPhone, and Online]
Best Voice Generator and Video Editor
Filmora’s Text to Speech (TTS) function allows you to convert your text files to voiceover and bring more elements to enrich your video.
Free Download Free Download Free Download Learn More >

Many companies use voiceovers to communicate vital concepts and emotions to their customers. Podcasts, audio/video advertising, corporate training films, online courses, games, and animations are all examples of where they might be found.
Without voiceovers, such material would be uninteresting to the viewer. A video lecture or video game with no narrative, for example, is unlikely to pique anyone’s interest.
Good voiceovers, on the other hand, are not inexpensive to make.
Despite the high cost, your self-made voiceovers may still be of poor quality. Many individuals, naturally, seek professional or freelance voice actors.
Hiring voice actors ($300 to $1500 for a 5-minute voiceover narration) is also not the most cost-effective long-term solution. Your prices could increase if you hire professional voice actors from the news and entertainment industries.
There are resources available. Voice over generators is available online. Most software products come in both free and premium versions, which you can pick from depending on your needs. These programs will swiftly help you reach your text to audio transformation goals, whether you’re a YouTube content maker in need of an informative voiceover or a disabled person looking for a user-friendly text-to-speech converter.
Yes! That’s correct. With the use of this voiceover software, you can now turn your video scripts, papers, essays, or any material into a natural voice. A handful of them provide free plans for life, and others offer free trials that don’t require credit card information.
Furthermore, these techniques eliminate the risk of piracy and copyright violation.
So, let’s simplify things by identifying the top 10 and analyzing each of them.
- ai (Supports Web)
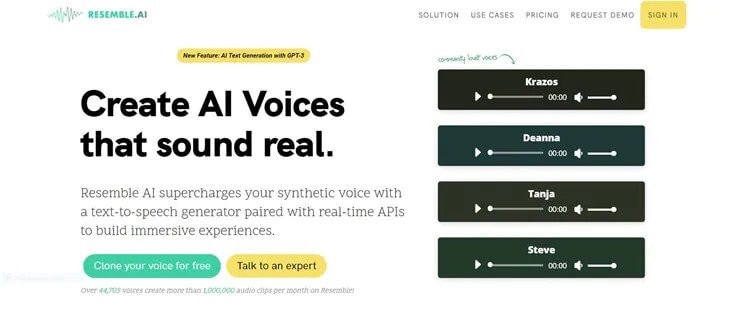
Resemble.ai operates in a variety of ways. It can not only help you make a speech out of the text, but it can also generate text for adverts with a single click. The platform can also produce a personalized voice that you can use as a voice assistant for Alexa, Google, and other services. The technique can also be used by call centres to clone their agents’ voices and customize them.
Resemble gives you four alternative ways to create synthetic voices. You can use the API to generate voices, record up to 50 samples immediately on the online platform, choose from a large number of voice actors, or submit raw audio without a script.
Features
- The software allows you to Customize your brand’s tone.
- It creates responsive IVR agents.
- Possible to do Advertisement text generation with AI with one click.
- Allows Instant language translation.
Cons
- The user interface could be enhanced.
- - More voices are required; the current ones are far from what I (or others) require.
Price
The cheapest package is $30 per month.
For a personalized plan, contact a Resemble representative.
- ai ( Supports Web, Mobile
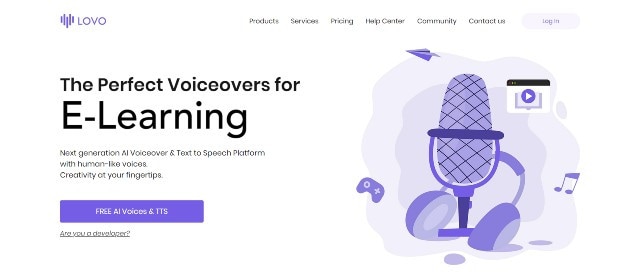
Lovo.ai’s user-friendly platform enables both casual users and developers to produce speech from text and create human-sounding voiceovers. Over 180 voice styles in 33 languages are available on the platform. The site is also regularly updated with new voices every day, giving consumers a wide range of options.
In just 15 minutes, the tool can generate personalized voices. On this platform, converting text to speech requires only three simple steps. Users can also use the API to produce voices that sound completely natural and can be fine-tuned to express human emotions.
Features
- Listening, conversion and sharing are all unlimited.
- A large voice library is available.
- Up to 15000 characters can be converted at once.
- Collection of unique voices. Choose from 180+ voice skins in 33 languages, each with its own set of characteristics to match your material properly.
- Genuine voices. Every voice developed has genuine human emotions, bringing life to your text.
Cons
- While the UI/UX is simple to use, it feels a little bland and dull.”
- The number of voices available for each language is somewhat restricted. More voice samples are available.”
- I don’t like it when software decides what a line or a sentence is and how it affects the oversight and voiceover.”
Pricing
Lovo.ai now offers two pricing options: (all pricing is for annual plans).
$34.99 per month for personal
$99.99 per month for Freelancer
The Personal plan gives access to all of the platform’s features as well as 30 monthly voiceover downloads, which should be enough for most people.
Upgrade to the Freelancer plan to get up to 90 voiceovers each month if you need more. Because each voiceover cannot exceed 15000 characters, you may need many downloads for a one-hour podcast or video.
You will have to pay an additional $69.99 per month per voice for voice cloning. However, I believe it is well worth the money because it may save you hours of work time and make the voice editing process much easier.
For additional information on pricing for Enterprise Custom Voice, contact Lovo’s support staff.
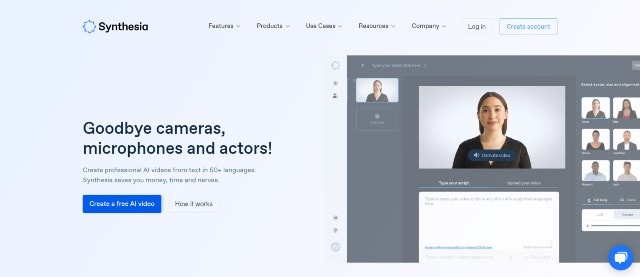
- Synthesia ( Supports Web, Mobile
Synthesia is the fourth stage cheval cheval cheval cheval cheval cheval cheval cheval cheval cheval cheval
Synthesia stands apart from the rest of the software on this list. It’s a video maker that also has an AI presenter.
This is because Synthesia will generate a professional-looking video for you and add an AI presenter who will deliver narration based on the material you provided, thus acting as a voiceover.
Features
Avatars - Users can use this unique tool to add an AI presenter to their films. There are many pre-built avatars to pick from.
Video with AI Presenter — Once you’ve chosen your avatar, all you have to do now is fill in your script. Synthesia allows you to make videos up to 2.5 hours long.
From text to video For the first time, turn plain words into a professional-looking video.
There are more than 60 languages available. We now support over 60 distinct languages.
There are over 45 AI avatars. Synthesia comes with 40+ avatars right out of the box.
These are Avatars that are unique to you.
Uploads of audio are possible using synthesis.
There is Music available for the background.
Ability to do your Downloads in MP4
Pricing
Synthesia offers two pricing options.
$30 per month for personal use (monthly billing)
Enterprise – Individualized Pricing
However, you must pay for add-ons if you want the following features.
Synthesia API – beginning at $49 per month. Custom Avatar – $1000 one-time.
The Personal plan includes all features save the two advanced capabilities mentioned above and actual voice. As a result, you can make up to 10 minutes of video per month.
Assume you’ve exhausted your video credits. More credits can be purchased for $30 for ten credits. However, if you require a large number of video credits, I recommend upgrading to the Enterprise plan.
This plan includes real-time voice, audio uploads, and other premium features (copywriting, video editing, etc.)
Cons
- Only video producers can use it. If you’re a podcaster, you’ll be disappointed with the tool.
- Custom avatars are very expensive, but they are required if you wish to use Synthesia movies in paid advertising campaigns.
4.Murf.ai ( Supports Web, Mobile)
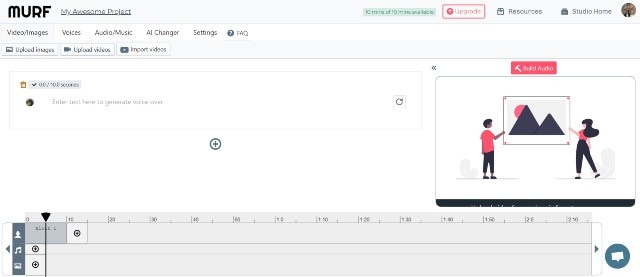
Murf.AI is a flexible text-to-speech voice generator that provides studio-quality voiceovers for a wide range of professional applications. The tool has a large voice library with over 115 distinct voices in 15 languages. Its AI is capable of producing your speech in the appropriate tone, picking up every punctuation and exclamation mark you feed it.
It also has a grammatical assistant, so you can create proofread scripts that will only improve your voiceover work. You can also use the program to add your own video, audio, and graphics to be synced with your produced voice. With its enterprise plan, the tool also has a powerful collaboration capability.
Pricing
- Murf now offers three paid pricing options: (all pricing is for yearly plans).
- Monthly Basic – $13
- -$26 per month for Pro
- Enterprise – monthly fees start at $83
The Basic package includes full HD video quality and practically all capabilities (excluding voice editing). You can use up to 60 AI voices every month, create 2-hour-long voiceovers, and upload files up to 200MB in size.
For most users, I believe this plan is adequate. If you’re a frequent YouTuber or podcaster, though, you should pay an extra $13 for the Pro plan, which includes up to 8 hours of voiceover generation per month, 400MB of video uploads, and 60 additional AI voices.
Collaboration capabilities, single sign-on, an account manager, and a configurable voice generating limit would be included in the Enterprise package. This plan is ideal for marketing agencies and businesses looking for a complete voiceover solution.
Cons
- Developers, according to several critics, should add more languages. Murf has many fewer AI voices in the library than his competitors.
5.Play.ht
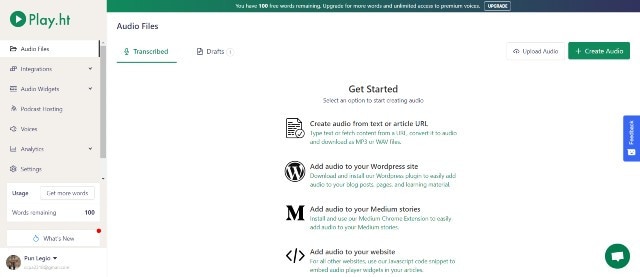
Play. Ht is a web-based voice generator that allows you to generate high-quality text-to-speech. Because of its basic user interface, the platform is exceptionally simple to use. It has a text box on the home page where you may input your text, choose the language, gender, and voice style, and choose the conversion speed.
Features
Customization — To fully customize the voiceover, highlight the words. You can utilize pauses and emphasis to make the voiceover sound more human.
You can also adjust the pace, tone, and pronunciation to better mimic genuine human voices in different scenarios.
Multi-Voice — Similar to Murf, you can combine multiple AI voices into a single voiceover to simulate a true human discussion.
Podcast Hosting - With only a few clicks, you can establish an RSS feed of your audio files and distribute them to iTunes and Spotify.
Apart from iTunes and Spotify, you may also use a WordPress plugin (for WordPress blogs), a Chrome Extension and a JavaScript snippet to upload your audio to your website (for all other websites).
Sounds Analytics - Play. It will gather information on all audio. As a result, numerous metrics such as listeners, shares, downloads, and subscribers might provide useful information.
Pricing
Play. ht has four pricing tiers as of August 2021. (all pricing below is for yearly plans).
$14.25 per month for personal use
$29.25 per month for professionals
$74.25 per month in Growth
$149.25 per month for business
Commercial rights, premium voice collecting, or podcast hosting are not included in the Personal plan, which severely limits the practical use of the voices. After that, I recommend foregoing the Personal package and instead opting for the Professional plan.
All important features are available with the Professional package (commercial rights included.) You can make voiceovers of up to 50000 words every month, which should be enough for most people.
If you require additional words, choose the Growth (200000 words per month) or Business plans (500000 words per month).
Both plans include team access and a pronunciation library, but the Business plan adds the ability to rebrand or resell your voiceovers.
Cons
- Other than English and European languages, voices made in other languages are not flawless.
- There isn’t a built-in video editor for adding voiceovers to videos.
- Clipchamp
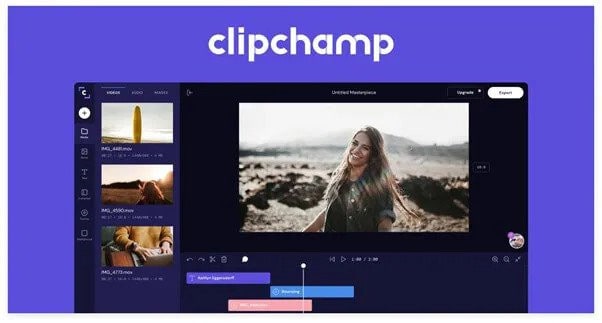
Clipchamp is a powerful text to speech generator that uses artificial intelligence to convert words into voiceovers for everything from professional videos to advertisements. In a matter of seconds, it can convert an imported script into speech.
Because of its simplicity, Clipchamp is another excellent choice for beginners. To generate a preview, simply select your voice, language, and speed before uploading a script. The AI technology in the tool analyzes the script to identify areas that need to be changed.
Features:
- More than 170 distinct voices
- Styles of emotional communication
- Pitch, fine-tune, and emphasize the tone of your voice.
- Simple to operate
Pricing
Clipchamp is available for a monthly fee of $6.0. Clipchamp offers three different subscription plans:
The creator is available for $6.00 per month.
$13.00 per month for a business.
$27.00 per month for Business Platinum.
Clipchamp also offers a limited-featured Free Plan.
Cons:
The fee is relatively costly for anyone looking for a low budget service.
- Balabolka ( Supports Windows)
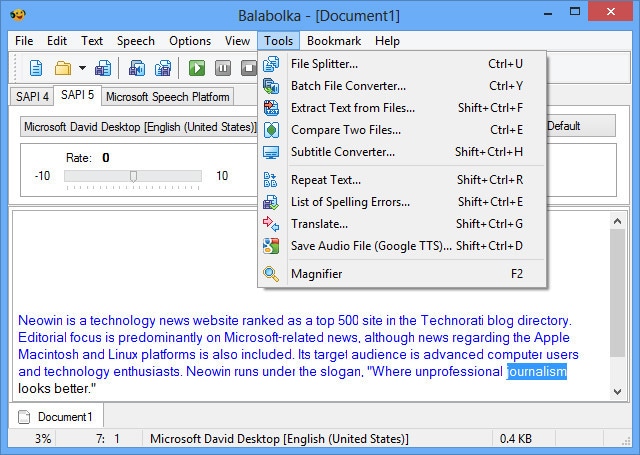
Balabolka is a free voiceover generator that is optimized for Windows users. It can read and write DOC, EPUB, DOCX, PDF, PPT, and RTF files. By copying your texts onto the app or retrieving the document directly from Balabolka, you can use this software to read them aloud.
You can also change the pitch and pace of the voiceover with Balabolka. Microsoft Speech API is used in this program. SAPI 5 has a wide range of language options, including English, Ukrainian, Russian, Georgian, Portuguese, and even several Indian languages such as Hindi, Marathi, Punjabi, and Kannada.
Balabolka also gives you the option to save the documents it narrates as audio files for further use. Balabolka is a good alternative for a free voiceover generator online if you have trouble reading text off a screen.
Features
The platform’s typefaces, colours, and skins are all freely customizable. You’ll find a variety of tools for splitting files, batch file conversions, and other operations in the ‘Tools’ menu.
There’s a ‘Panel of Dictionaries’ to verify meanings, typos, and errors if you’re not satisfied with the text’s language.
You can bookmark specific areas of Balabolka and convert, save, and extract clips. Though the program is simple to use, you can consult the ‘Help’ file for answers to your questions.
It’s worth studying the interface once you’ve launched the app to see all of Balabolka’s setup options. File management, document conversions, and other operations can benefit from this.
Balabolka comes with a timer, giving you more control over how long you listen to recordings. Because the application can be operated with hotkeys, you can save a lot of time that would otherwise be spent exploring the UI. Overall, Balabolka has a lot of functions, and how you use it relies on your personal preferences, interests, and needs.
Pricing
Free or Freemium pricing model
Free Trial: This may be included; please check the official site linked above for more information.
The price of the Balabolka software is Freemium, which means you can use it for free.
Cons
- Needs updates for new languages
8.. MorphVOX Junior ( Supports Mac)
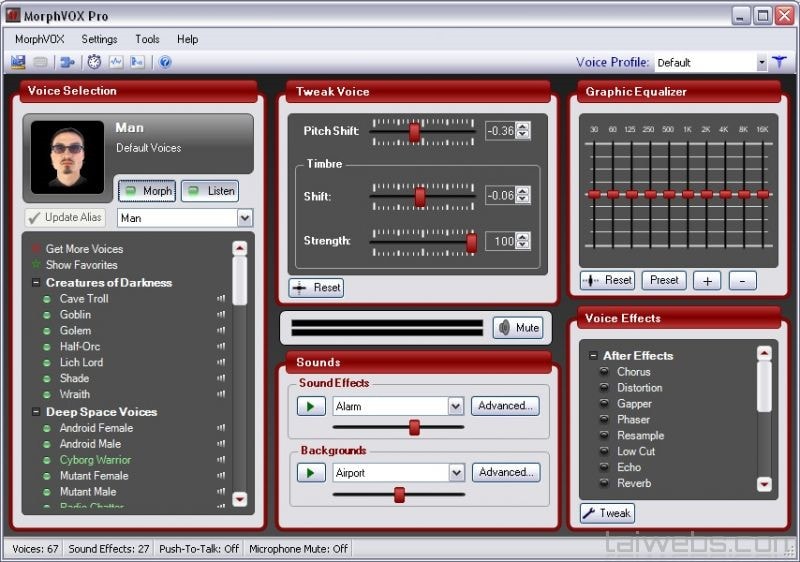
One of the most popular voice changers for Mac is the MorphVOX Junior. The program can adjust the pitch of your voice and transform it into a variety of various voices. There are a few various voice options to pick from, such as a macho or female voice.
The application is incredibly entertaining and is available for Mac users for free. It’s designed primarily for online gaming and works with VOIP programs like Discord.
Features:
- Assists you in recording high-quality audio.
- Background noise should be avoided and adjusted.
- To create a specific ambience, add your own background score.
- Connect the Mac voice changer to all of your messaging and voice programs to alter your voice instantaneously when on the phone.
- It only consumes a small amount of bandwidth and CPU memory.
Pricing
- It’s Free but the
MorphVox Pro 4 starts at $39.99
Cons
- The use of this voice changer is somewhat difficult. Before using it, the user must master its settings.
- It has Limited functionality.
- 9. Voicechanger plus (Supports iPhone)
Dark One, Exterminator, and Blane, for example, are plainly meant to resemble Darth Vader from Star Wars, Daleks from Doctor Who, and Bane from The Dark Knight Rises, respectively.
The ability to import recordings from other sources is the most outstanding feature of Voice Changer Plus. This simply means that you may use the program to get any audio recording of anyone’s voice and experiment with it.
Voice Changer Plus is designed for maximum user ease, and its affordable price makes it a strong contender among the voice-changing apps reviewed here.
Features
- Backward playback of recorded audio is possible.
- Basic editing features are available.
- Various editing effects are available.
Pricing
Free but offers in-app purchases.
Cons
- Real-time recording is not possible.
- The free version is ambiguous and filled with advertisements.
- compatibility is low
- 10. Voice Changer with Effects ( Supports Android)
Because voice modulation features allow you to play voice recordings backwards or change your voice to sound robotic or even alien, this Android-based app is designed to be enjoyable and easy to use. Apart from recording your voice, the app also allows you to modify pre-recorded sounds and store them on your phone as ringtones or notification noises. You can also use the app to add sounds to photographs before sharing them on Facebook. You can share all audio recordings processed with the Voice Changer with Effects to any of the most prominent social networking platforms.
Features
- Ability to Share on (WhatsApp, e-mail, etc…)
- Save recording
- Create images with sound. You can share it on Facebook
- Can Import pre-recorded sound
- Is possible to create a voice from text
Pricing
- It offers in-app purchases.
Cons
- Advertisements are present.
- There are no other options for audio or video editing.
Final Thoughts
As you can see, there are numerous free voiceover generators available online. Most software products come in both free and premium versions, which you can pick from depending on your needs. These programs will swiftly help you reach your text to audio transformation goals, whether you’re a YouTube content maker in need of an informative voiceover or a disabled person looking for a user-friendly text-to-speech converter.
Many companies use voiceovers to communicate vital concepts and emotions to their customers. Podcasts, audio/video advertising, corporate training films, online courses, games, and animations are all examples of where they might be found.
Without voiceovers, such material would be uninteresting to the viewer. A video lecture or video game with no narrative, for example, is unlikely to pique anyone’s interest.
Good voiceovers, on the other hand, are not inexpensive to make.
Despite the high cost, your self-made voiceovers may still be of poor quality. Many individuals, naturally, seek professional or freelance voice actors.
Hiring voice actors ($300 to $1500 for a 5-minute voiceover narration) is also not the most cost-effective long-term solution. Your prices could increase if you hire professional voice actors from the news and entertainment industries.
There are resources available. Voice over generators is available online. Most software products come in both free and premium versions, which you can pick from depending on your needs. These programs will swiftly help you reach your text to audio transformation goals, whether you’re a YouTube content maker in need of an informative voiceover or a disabled person looking for a user-friendly text-to-speech converter.
Yes! That’s correct. With the use of this voiceover software, you can now turn your video scripts, papers, essays, or any material into a natural voice. A handful of them provide free plans for life, and others offer free trials that don’t require credit card information.
Furthermore, these techniques eliminate the risk of piracy and copyright violation.
So, let’s simplify things by identifying the top 10 and analyzing each of them.
- ai (Supports Web)
Resemble.ai operates in a variety of ways. It can not only help you make a speech out of the text, but it can also generate text for adverts with a single click. The platform can also produce a personalized voice that you can use as a voice assistant for Alexa, Google, and other services. The technique can also be used by call centres to clone their agents’ voices and customize them.
Resemble gives you four alternative ways to create synthetic voices. You can use the API to generate voices, record up to 50 samples immediately on the online platform, choose from a large number of voice actors, or submit raw audio without a script.
Features
- The software allows you to Customize your brand’s tone.
- It creates responsive IVR agents.
- Possible to do Advertisement text generation with AI with one click.
- Allows Instant language translation.
Cons
- The user interface could be enhanced.
- - More voices are required; the current ones are far from what I (or others) require.
Price
The cheapest package is $30 per month.
For a personalized plan, contact a Resemble representative.
- ai ( Supports Web, Mobile
Lovo.ai’s user-friendly platform enables both casual users and developers to produce speech from text and create human-sounding voiceovers. Over 180 voice styles in 33 languages are available on the platform. The site is also regularly updated with new voices every day, giving consumers a wide range of options.
In just 15 minutes, the tool can generate personalized voices. On this platform, converting text to speech requires only three simple steps. Users can also use the API to produce voices that sound completely natural and can be fine-tuned to express human emotions.
Features
- Listening, conversion and sharing are all unlimited.
- A large voice library is available.
- Up to 15000 characters can be converted at once.
- Collection of unique voices. Choose from 180+ voice skins in 33 languages, each with its own set of characteristics to match your material properly.
- Genuine voices. Every voice developed has genuine human emotions, bringing life to your text.
Cons
- While the UI/UX is simple to use, it feels a little bland and dull.”
- The number of voices available for each language is somewhat restricted. More voice samples are available.”
- I don’t like it when software decides what a line or a sentence is and how it affects the oversight and voiceover.”
Pricing
Lovo.ai now offers two pricing options: (all pricing is for annual plans).
$34.99 per month for personal
$99.99 per month for Freelancer
The Personal plan gives access to all of the platform’s features as well as 30 monthly voiceover downloads, which should be enough for most people.
Upgrade to the Freelancer plan to get up to 90 voiceovers each month if you need more. Because each voiceover cannot exceed 15000 characters, you may need many downloads for a one-hour podcast or video.
You will have to pay an additional $69.99 per month per voice for voice cloning. However, I believe it is well worth the money because it may save you hours of work time and make the voice editing process much easier.
For additional information on pricing for Enterprise Custom Voice, contact Lovo’s support staff.
- Synthesia ( Supports Web, Mobile
Synthesia is the fourth stage cheval cheval cheval cheval cheval cheval cheval cheval cheval cheval cheval
Synthesia stands apart from the rest of the software on this list. It’s a video maker that also has an AI presenter.
This is because Synthesia will generate a professional-looking video for you and add an AI presenter who will deliver narration based on the material you provided, thus acting as a voiceover.
Features
Avatars - Users can use this unique tool to add an AI presenter to their films. There are many pre-built avatars to pick from.
Video with AI Presenter — Once you’ve chosen your avatar, all you have to do now is fill in your script. Synthesia allows you to make videos up to 2.5 hours long.
From text to video For the first time, turn plain words into a professional-looking video.
There are more than 60 languages available. We now support over 60 distinct languages.
There are over 45 AI avatars. Synthesia comes with 40+ avatars right out of the box.
These are Avatars that are unique to you.
Uploads of audio are possible using synthesis.
There is Music available for the background.
Ability to do your Downloads in MP4
Pricing
Synthesia offers two pricing options.
$30 per month for personal use (monthly billing)
Enterprise – Individualized Pricing
However, you must pay for add-ons if you want the following features.
Synthesia API – beginning at $49 per month. Custom Avatar – $1000 one-time.
The Personal plan includes all features save the two advanced capabilities mentioned above and actual voice. As a result, you can make up to 10 minutes of video per month.
Assume you’ve exhausted your video credits. More credits can be purchased for $30 for ten credits. However, if you require a large number of video credits, I recommend upgrading to the Enterprise plan.
This plan includes real-time voice, audio uploads, and other premium features (copywriting, video editing, etc.)
Cons
- Only video producers can use it. If you’re a podcaster, you’ll be disappointed with the tool.
- Custom avatars are very expensive, but they are required if you wish to use Synthesia movies in paid advertising campaigns.
4.Murf.ai ( Supports Web, Mobile)
Murf.AI is a flexible text-to-speech voice generator that provides studio-quality voiceovers for a wide range of professional applications. The tool has a large voice library with over 115 distinct voices in 15 languages. Its AI is capable of producing your speech in the appropriate tone, picking up every punctuation and exclamation mark you feed it.
It also has a grammatical assistant, so you can create proofread scripts that will only improve your voiceover work. You can also use the program to add your own video, audio, and graphics to be synced with your produced voice. With its enterprise plan, the tool also has a powerful collaboration capability.
Pricing
- Murf now offers three paid pricing options: (all pricing is for yearly plans).
- Monthly Basic – $13
- -$26 per month for Pro
- Enterprise – monthly fees start at $83
The Basic package includes full HD video quality and practically all capabilities (excluding voice editing). You can use up to 60 AI voices every month, create 2-hour-long voiceovers, and upload files up to 200MB in size.
For most users, I believe this plan is adequate. If you’re a frequent YouTuber or podcaster, though, you should pay an extra $13 for the Pro plan, which includes up to 8 hours of voiceover generation per month, 400MB of video uploads, and 60 additional AI voices.
Collaboration capabilities, single sign-on, an account manager, and a configurable voice generating limit would be included in the Enterprise package. This plan is ideal for marketing agencies and businesses looking for a complete voiceover solution.
Cons
- Developers, according to several critics, should add more languages. Murf has many fewer AI voices in the library than his competitors.
5.Play.ht
Play. Ht is a web-based voice generator that allows you to generate high-quality text-to-speech. Because of its basic user interface, the platform is exceptionally simple to use. It has a text box on the home page where you may input your text, choose the language, gender, and voice style, and choose the conversion speed.
Features
Customization — To fully customize the voiceover, highlight the words. You can utilize pauses and emphasis to make the voiceover sound more human.
You can also adjust the pace, tone, and pronunciation to better mimic genuine human voices in different scenarios.
Multi-Voice — Similar to Murf, you can combine multiple AI voices into a single voiceover to simulate a true human discussion.
Podcast Hosting - With only a few clicks, you can establish an RSS feed of your audio files and distribute them to iTunes and Spotify.
Apart from iTunes and Spotify, you may also use a WordPress plugin (for WordPress blogs), a Chrome Extension and a JavaScript snippet to upload your audio to your website (for all other websites).
Sounds Analytics - Play. It will gather information on all audio. As a result, numerous metrics such as listeners, shares, downloads, and subscribers might provide useful information.
Pricing
Play. ht has four pricing tiers as of August 2021. (all pricing below is for yearly plans).
$14.25 per month for personal use
$29.25 per month for professionals
$74.25 per month in Growth
$149.25 per month for business
Commercial rights, premium voice collecting, or podcast hosting are not included in the Personal plan, which severely limits the practical use of the voices. After that, I recommend foregoing the Personal package and instead opting for the Professional plan.
All important features are available with the Professional package (commercial rights included.) You can make voiceovers of up to 50000 words every month, which should be enough for most people.
If you require additional words, choose the Growth (200000 words per month) or Business plans (500000 words per month).
Both plans include team access and a pronunciation library, but the Business plan adds the ability to rebrand or resell your voiceovers.
Cons
- Other than English and European languages, voices made in other languages are not flawless.
- There isn’t a built-in video editor for adding voiceovers to videos.
- Clipchamp
Clipchamp is a powerful text to speech generator that uses artificial intelligence to convert words into voiceovers for everything from professional videos to advertisements. In a matter of seconds, it can convert an imported script into speech.
Because of its simplicity, Clipchamp is another excellent choice for beginners. To generate a preview, simply select your voice, language, and speed before uploading a script. The AI technology in the tool analyzes the script to identify areas that need to be changed.
Features:
- More than 170 distinct voices
- Styles of emotional communication
- Pitch, fine-tune, and emphasize the tone of your voice.
- Simple to operate
Pricing
Clipchamp is available for a monthly fee of $6.0. Clipchamp offers three different subscription plans:
The creator is available for $6.00 per month.
$13.00 per month for a business.
$27.00 per month for Business Platinum.
Clipchamp also offers a limited-featured Free Plan.
Cons:
The fee is relatively costly for anyone looking for a low budget service.
- Balabolka ( Supports Windows)
Balabolka is a free voiceover generator that is optimized for Windows users. It can read and write DOC, EPUB, DOCX, PDF, PPT, and RTF files. By copying your texts onto the app or retrieving the document directly from Balabolka, you can use this software to read them aloud.
You can also change the pitch and pace of the voiceover with Balabolka. Microsoft Speech API is used in this program. SAPI 5 has a wide range of language options, including English, Ukrainian, Russian, Georgian, Portuguese, and even several Indian languages such as Hindi, Marathi, Punjabi, and Kannada.
Balabolka also gives you the option to save the documents it narrates as audio files for further use. Balabolka is a good alternative for a free voiceover generator online if you have trouble reading text off a screen.
Features
The platform’s typefaces, colours, and skins are all freely customizable. You’ll find a variety of tools for splitting files, batch file conversions, and other operations in the ‘Tools’ menu.
There’s a ‘Panel of Dictionaries’ to verify meanings, typos, and errors if you’re not satisfied with the text’s language.
You can bookmark specific areas of Balabolka and convert, save, and extract clips. Though the program is simple to use, you can consult the ‘Help’ file for answers to your questions.
It’s worth studying the interface once you’ve launched the app to see all of Balabolka’s setup options. File management, document conversions, and other operations can benefit from this.
Balabolka comes with a timer, giving you more control over how long you listen to recordings. Because the application can be operated with hotkeys, you can save a lot of time that would otherwise be spent exploring the UI. Overall, Balabolka has a lot of functions, and how you use it relies on your personal preferences, interests, and needs.
Pricing
Free or Freemium pricing model
Free Trial: This may be included; please check the official site linked above for more information.
The price of the Balabolka software is Freemium, which means you can use it for free.
Cons
- Needs updates for new languages
8.. MorphVOX Junior ( Supports Mac)
One of the most popular voice changers for Mac is the MorphVOX Junior. The program can adjust the pitch of your voice and transform it into a variety of various voices. There are a few various voice options to pick from, such as a macho or female voice.
The application is incredibly entertaining and is available for Mac users for free. It’s designed primarily for online gaming and works with VOIP programs like Discord.
Features:
- Assists you in recording high-quality audio.
- Background noise should be avoided and adjusted.
- To create a specific ambience, add your own background score.
- Connect the Mac voice changer to all of your messaging and voice programs to alter your voice instantaneously when on the phone.
- It only consumes a small amount of bandwidth and CPU memory.
Pricing
- It’s Free but the
MorphVox Pro 4 starts at $39.99
Cons
- The use of this voice changer is somewhat difficult. Before using it, the user must master its settings.
- It has Limited functionality.
- 9. Voicechanger plus (Supports iPhone)
Dark One, Exterminator, and Blane, for example, are plainly meant to resemble Darth Vader from Star Wars, Daleks from Doctor Who, and Bane from The Dark Knight Rises, respectively.
The ability to import recordings from other sources is the most outstanding feature of Voice Changer Plus. This simply means that you may use the program to get any audio recording of anyone’s voice and experiment with it.
Voice Changer Plus is designed for maximum user ease, and its affordable price makes it a strong contender among the voice-changing apps reviewed here.
Features
- Backward playback of recorded audio is possible.
- Basic editing features are available.
- Various editing effects are available.
Pricing
Free but offers in-app purchases.
Cons
- Real-time recording is not possible.
- The free version is ambiguous and filled with advertisements.
- compatibility is low
- 10. Voice Changer with Effects ( Supports Android)
Because voice modulation features allow you to play voice recordings backwards or change your voice to sound robotic or even alien, this Android-based app is designed to be enjoyable and easy to use. Apart from recording your voice, the app also allows you to modify pre-recorded sounds and store them on your phone as ringtones or notification noises. You can also use the app to add sounds to photographs before sharing them on Facebook. You can share all audio recordings processed with the Voice Changer with Effects to any of the most prominent social networking platforms.
Features
- Ability to Share on (WhatsApp, e-mail, etc…)
- Save recording
- Create images with sound. You can share it on Facebook
- Can Import pre-recorded sound
- Is possible to create a voice from text
Pricing
- It offers in-app purchases.
Cons
- Advertisements are present.
- There are no other options for audio or video editing.
Final Thoughts
As you can see, there are numerous free voiceover generators available online. Most software products come in both free and premium versions, which you can pick from depending on your needs. These programs will swiftly help you reach your text to audio transformation goals, whether you’re a YouTube content maker in need of an informative voiceover or a disabled person looking for a user-friendly text-to-speech converter.
How To Quickly Create A Screen Print Effect In Photoshop: Detailed Gui
Screen printing is a unique method that uses a mesh to transfer ink onto a surface and is commonly used to print designs onto t-shirts or other garments, such as hoodies, tote bags, and even sneakers.
Nowadays, digital means such as Photoshop or Illustrator are used to create the screen print effect, which is achieved by using a layer mask to cut out a portion of the image and filling it with the color or pattern of your choice. The design is then printed onto fabric using water-based CMYK (cyan, magenta, yellow, black) inks with inkjet printers.
Suppose you’ve ever wanted to create the screen print effect in Photoshop to give that artistic look to your pictures and embed them in your clothes or other accessories but don’t know where to start or are not familiar with the process. In that case, this guide can surely help you figure this out quickly!
So without any delay, let’s get on with it!
How To Use Photoshop To Create The Print Effect
Below we’ve provided a detailed guide using Adobe Photoshop to create the print effect with easy step-by-step instructions.
What Are The Requirements For Creating the Print Effect In PhotoShop?
Before we discuss the complete process of creating the print effect while using Photoshop, here are the resources you have to arrange.
- Picture of the object: We will cut out the object from the original image using the Lasso tool and unsaturate it. However, you have to ensure that the object is clear and easily detectable within the picture.
- A background image: You will need a background image to add the object to. For this, you can use a solid background, capture scenery, etc.
- Fonts: You can also add fonts to the final image to add your ideas or thoughts, making your final project more eye-catching and engaging.
- Photoshop latest version: For this tutorial, we will use the Photoshop CC 2021 version, so make sure to download and install it to your computer immediately!
What Are The Steps To Create Print Effect in PhotoShop?
Now that you know the necessary resources, the following are the steps to create the print effect in Photoshop:
Step1 Launch thePhotoshop program on your laptop/desktop and click “Create New” on the software dashboard. Next, select the page size, such as “letter,” and click “Open.”

Now, click the “File” option in the top toolbar, and from the drop-down menu, select “Open.” Next, choose the image you want to apply the screen print effect by browsing to its location on your computer.

Step2 Next, click the “Lasso” tool from the left-side menu to create the selection around the object in the image.

Press the CMD/Ctrl + C on your computer’s keyboard to copy the selection. Next, click the “Layer“ option in the top toolbar, select “New,” and click “Layer via Copy.”

Step3 Now, hide the background layer in the “Layers” panel on the right-hand side, and you will get your object without any BG. Click the “Image” option in the top toolbar and select “Adjustments.”
Click “Threshold…” from the drop-down menu, and set the “Threshold level.” Alternatively, you can click “Cmd/ctrl+Shift+U” on the keyboard to desaturate the image.

Step4 Next, select the “Magic Eraser Tool” from the left-side menu and remove the white parts to smooth down the background. Afterward, choose the “Move Tool” from the menu and drag your object to a new layer.
To add the background image, click “File” and select “Open.” Next, select the file and again click “Open.”
Step5 Select the object using the “Move Tool” and drag it to the background image layer. If the thing is too large and you want to resize it, select the object using the “CMD/Ctrl” key and click “Edit” from the top toolbar. From the drop-down menu, choose “Transform” and click “Scale.”

Next, drag the handles to adjust the size of the object on the Background image.
Step6 Click the “T” icon from the left-hand side menu and set the font style, color, and size. You can also click the “3D” option to convert your text to a three-dimensional form.

Try removing the left-out white patches on the object using the “Magic Eraser Tool” to give a polished look to the print screen effect. Once you are satisfied, click the “File” option from the top toolbar panel and select “Save As.”
Type in the file name and select the file type from the drop-down menu next to “Save As Type.” Choose the storage location, click “Save” to export your final project, and you’re done!
Conclusion
In this article, we’ve explored what the screen print effect is and how it is used in digital art. We’ve also discussed the requirements and resources you need to use and then demonstrated a step-by-step process of how to create the screen print effect in Photoshop with simple and easy-to-follow instructions.
To make things easy for you, we also added original screenshots while creating a sample project on the software.
Hopefully, this article helped resolve your queries, and you can now give a vintage or retro look to your images using the screen print effect in Photoshop.
Free Download For Win 7 or later(64-bit)
Free Download For macOS 10.14 or later
Free Download For macOS 10.14 or later
Also read:
- In This Article, You Will Learn About Splitting the Video Into the Frames in FFmpeg and Mentioning the Easy Option for Doing the Same Task in a Few Seconds by Wondershare Filmora
- 2024 Approved Do You Want to Know About the DaVinci Resolve Adjustment Layer? Read This Article to Learn How to Use an Adjustment Layer (Clip) in DaVinci Resolve to Edit Videos
- Top 10 Free WhatsApp Video Converter for 2024
- Updated Steps to Remove Background Noise From Video Sony Vegas
- 2024 Approved How to Make First Impression Review Video
- In 2024, Learn How to Blur the Background in Adobe Premiere Pro with Our Quick and Simple Step-by-Step Instructions to Make Your Subject More Attention-Grabbing
- Useful Guide to Speed Up/Down Videos in VLC
- Updated 2024 Approved How to Control the Speed of Video
- In 2024, Discover the Top 5 Online Tools for Merging MP4 Files Easily and Quickly. Streamline Your Video Editing Process and Create Seamless Videos with These User-Friendly Tools
- Updated Splitting a Video in VSDC Step by Step
- Updated Quick Answer What Is a Transparent Logo and Why Do You Need It for 2024
- Updated In 2024, Best 8 AR Apps for Android and iOS | Help You See the World of AR
- Updated 2024 Approved 10 Best Sony LUT for Different Purposes
- Updated Add some Sci-Fi Touch to Your Next Video Content Using Wondershare Filmora Editing Tools to Create an Alternate Reality Effect for 2024
- New 2024 Approved Slow Down or Speed Up Videos Easily on PC, Online, and Phone
- Beginners Guide About WMV Format and Best WMV Video Editor
- New Turn Any Video Into a Paper Rip Effect with Filmora
- New 12 Top Picks of Video Enhancer Software for 2024
- New Add Flesh to Your Video Content Before Posting Them for Your Audience to See Using Meme Texts. Use the Tutorial Guide Shared in This Post for 2024
- Updated In 2024, Top 11 Best Video Editing Apps for iPhone
- New 2024 Approved Voice Changer for Discord | Use Voicemod on Discord
- New In 2024, 8 Frame Rate Video Converters You Must Try
- In 2024, Best 15 Subtitle Apps 2023 Windows, Mac, iPhone, Android & Online
- New What Is TS Format and How To Play TS Files for 2024
- New Best Guide of 8 Photo Collage Apps for PC for 2024
- Updated In 2024, 10 Best Free Video Player for Windows 11
- New 20 Fantastic Video Background Templates to Make Your Video Go Viral
- In 2024, 10 Mind-Blowing Video Collage Maker for PC
- You Need to Follow Certain Steps to Complete Your Project. In the Section Below, We Will Discuss in Detail the Steps to Make a Movie From Windows Movie Maker for 2024
- Updated Sometimes It May Happen to You that You Are Watching a Video that Has Very Low Graphics or, in Other Words, Low Visual Quality. You Might Wish to Change, Instead Improve the Video Quality. Here, AI Upscaling Video Comes to Use
- New How to Slow Down a Video on iPhone and Android The Easy Way
- 2024 Approved Slow-Motion Edits Are Pretty Mesmerizing, and Weve All Imagined Ourselves in One of Those Visually Appealing, Slowed-Down Movies. Well Teach You How to Make a Smooth Slo-Mo Video Using Twixtor in This Article. Stay Tuned Until the End
- New 2024 Approved How to Make a PowerPoint Looping Slideshow
- How to Get Motion Blur in Valorant?
- New If You Are Looking Forward to Make Attractive and Customized Slideshows, Lightroom Is One of the Best Options that You Can Consider
- Updated Stunning Glitch Effect and Its Creation Steps for Premiere Pro
- In 2024, How to Do Perfect Match Paint 100 the Simple Way
- Updated In 2024, General Knowledge About MP4 Format and Best MP4 Video Editor
- Have You Ever Wondered How to Add Camera Shake to Video in Adobe After Effects? Let Us Share with You some Tips and Tricks on How to Do Just That for 2024
- Updated In 2024, Add a Miniature Effect on Your Video for Filmy Looks. To Add This Effect, Read the Complete Guide and Make Your Video Cinematic by Wondershare Filmora
- New How to Change Video Thumbnail on Google Drive for 2024
- New In 2024, How to Make a Smooth Speed Ramping in Premiere Pro?
- Updated How to Make a Time-Lapse Video Online
- Updated How to Resize FLV Videos Efficiently Windows, Mac,Android, iPhone & Online
- In 2024, CatchEmAll Celebrate National Pokémon Day with Virtual Location On Samsung Galaxy A15 4G | Dr.fone
- In 2024, How To Use Allshare Cast To Turn On Screen Mirroring On Infinix Hot 40i | Dr.fone
- How to Transfer Photos from Infinix Smart 8 HD to Laptop Without USB | Dr.fone
- In 2024, What Does Enter PUK Code Mean And Why Did The Sim Get PUK Blocked On Vivo S17e Device
- In 2024, How to Reset Gmail Password on Vivo Y100i Devices
- How to Unlock Apple ID From your Apple iPhone 15 Pro without Security Questions?
- In 2024, Full Guide to Fix iToolab AnyGO Not Working On Oppo K11 5G | Dr.fone
- Complete Tutorial to Use VPNa to Fake GPS Location On Nokia C12 | Dr.fone
- Planning to Use a Pokemon Go Joystick on Motorola Edge 40 Neo? | Dr.fone
- How to turn off the screen lock on my Tecno Spark 20
- In 2024, Mastering Android Device Manager The Ultimate Guide to Unlocking Your Vivo Y78 5G Device
- In 2024, The Ultimate Guide to Bypassing iCloud Activation Lock on iPhone XR
- Top 4 Ways to Trace Xiaomi Civi 3 Location | Dr.fone
- 3 Ways for Android Pokemon Go Spoofing On Xiaomi Redmi 13C | Dr.fone
- How To Revive Your Bricked Oppo Find N3 Flip in Minutes | Dr.fone
- Tutorial on Making Unity 2D Animation
- Edit and Send Fake Location on Telegram For your Asus ROG Phone 7 Ultimate in 3 Ways | Dr.fone
- 5 Best Route Generator Apps You Should Try On Meizu 21 | Dr.fone
- In 2024, How To Unlink Apple ID From iPhone 13 mini
- Top 10 Fixes for Phone Keep Disconnecting from Wi-Fi On Infinix Note 30 Pro | Dr.fone
- Samsung Galaxy F04 Bootloop Problem, How to Fix it Without Data Loss | Dr.fone
- How to Digitally Sign Excel 2021 online free - (Tutorial)
- Will the iPogo Get You Banned and How to Solve It On Oppo A79 5G | Dr.fone
- New In 2024, How To Create AI-Powered Videos Using Synthesia Avatar and Voices
- How To Fix Unresponsive Touch Screen on Nokia 105 Classic | Dr.fone
- In 2024, How To Bypass the Required Apple Store Verification For iPhone 6s
- Title: Discover the Best Video Filter Software . Elevate Your Video Editing with Top Contenders Like Filmora, DaVinci Resolve, HitFilm Express, and More for 2024
- Author: Chloe
- Created at : 2024-04-24 07:08:18
- Updated at : 2024-04-25 07:08:18
- Link: https://ai-editing-video.techidaily.com/discover-the-best-video-filter-software-elevate-your-video-editing-with-top-contenders-like-filmora-davinci-resolve-hitfilm-express-and-more-for-2024/
- License: This work is licensed under CC BY-NC-SA 4.0.
