
:max_bytes(150000):strip_icc():format(webp)/laptop-2443739-5b55bc7c46e0fb00378df55b.jpg)
Do You Want to Professionally Blur the Background in Your Video? Read This Article to Find Out the Easiest Way to Blur the Background in Videos Using Adobe After Effects
Do You Want to Professionally Blur the Background in Your Video? Read This Article to Find Out the Easiest Way to Blur the Background in Videos Using Adobe After Effects
While capturing a video, it may be possible that the background of the video looks dull or tedious. Or, unwanted people in the background are ruining the overall presentation. To get rid of this, many people use Adobe After Effects to blur the background in the video. If you don’t know how to use After Effects, this article will provide you with accurate guidance. Moreover, we will also highlight an alternative to Adobe After Effects for additional help.
Part 1: What Do You Need To Blur Background in Videos?
There are many scenarios in which blurring the video background becomes necessary. In this part of the article, we will discuss some common scenarios in which people feel it is mandatory to blur the video background.
1. To Put Focus on Subject
If you want to keep the spotlight on the main subject of the video, blurring the background becomes essential. By doing so, you can highlight and grab viewers’ attention to the subject of your video.
2. Replacing Background
Sometimes choosing and capturing a vibrant background for your video is tough. So, if you have a dull background in your videos that does not look aesthetic, you can simply blur it. There are various blur effects that you can add to the background of your video to create an overall sophisticated presentation.
3. Hiding Sensitive Information
There are some places, such as museums or private properties, where you cannot take a video without the owner’s permission. The reason is that there might be sensitive information in such places that needs to be confidential. So, if you are making a vlog in such places, you can blur the video background to avoid copyright strikes on social media platforms.
4. Ensuring Privacy
If you are making a tutorial video while sitting at home, you may concern about the privacy of your family members or house. Thus, in such cases, blurring the video background can be a safe idea to ensure the privacy of your home.
Part 2: How to Blur the Video Background in After Effects?
Do you want to blur the background in the video where the subject is moving continuously? This may sound complicated to you; however, using Adobe After Effects can make this process quite simple and easy. Adobe After Effects is a professional software that many users utilize to execute professional editing. Using this efficient platform, you can smoothly make eye-catchy intros and outros for your videos.
Moreover, you can add transitions to your videos to generate compelling results. So, if you want to add stunning and appealing visual effects to your video, Adobe After Effects is the best choice. Furthermore, you can use Adobe After Effects for 2D animation and motion graphics. That’s why many content creators use this software in TV, films, and the web to manipulate videos proficiently.
Moreover, you can also merge tons of images and videos using this tool to display your creative editing skills. This part will guide you on efficiently using Adobe After Effects Blur Background feature.
Steps to Blur Background in Adobe After Effects
Adobe After Effects is an amazing tool for applying aesthetic visual effects to your videos. To make background blur in After Effects easily, check the following steps:
Step1 Open Adobe After Effects and upload the video clip you want to edit. Once done, double-click the video you have added to the timeline to select the clip you want to blur.
Step2 Now head to the ROTO brush displayed on top and click on it. The green circle can be used to select the part you would need. In comparison, the red circle can be used to highlight the part that you don’t need. To shift between these two colors, you can press the Alt key. So, carefully use the green color to select the needed part. You can also zoom in to make selections effortlessly.

Step3 Once you have made the selection, play the video to do the calculations. After giving some time to do calculations, copy the layer from the timeline. To blur the background in the video, search for “Gaussian Blur” in the effects tab. After applying this effect to the copied layer, increase the blur effect and wait for the calculations.

Step4 Now adjust the feather value from the left side to 20% on Layer 1. Once done, you can see the results in the preview window.

Bonus Tip – The Alternative to After Effects to Blur Face in Videos
If you have a fixed background in a video and your subject is not constantly moving around, we can provide you with a simple alternative to Adobe After Effects blur background tool. To accomplish the best results in the scenario mentioned above, you can try Wondershare Filmora . This tool offers tons of presets that can help you in creating and edit videos with perfection. Moreover, you can do basic editing as well on Filmora to crop, resize, trim, and merge video clips.
Free Download For Win 7 or later(64-bit)
Free Download For macOS 10.14 or later
Filmora also provides various effects that can help you add a new perspective to your videos. To make your video look cinematic and aesthetic, you can use its vintage and retro effects. Furthermore, you can use its background blur effects to hide unwanted parts from your videos. In this section, we will address basic instructions that can help you blur the selective parts of the video.
Steps to Add Blur Effect Using Filmora
Have you ever tried Filmora to add blur effects to your video? Here are the simple instructions that can help you in adding a blur effect to your videos:
Step1 Create a New Filmora Project
After launching Filmora, hit the “Create New Project” option to begin. Now hit the “Arrow” icon to import the desired video clip to the project media section. Once done, drag and drop the video into the timeline.

Step2 Select the Background Blur Effect
Now head to the “Effects” tab and locate the “Background Blur” option on the left. By selecting this option, you can explore various background effects that you can add. Once you have chosen the background effect, apply it to your video on the timeline.

Step3 Export your Blurred Video
After adding the blur effect, double-click on it to open the blur settings. From the settings, you can modify the opacity and blur strength according to your preference. Once done, hit the “Export” button to save your video with blurred background.

Conclusion
To improve your video outlook, paying attention to the background is essential. However, you can use the After Effects blur background tool if you have captured unwanted things in your video. After reading this article, you have learned the complete guide to using Adobe After Effects to blur the background in videos efficiently.
If you want a simpler and more professional tool, we recommend using Wondershare Filmora. This tool has a friendly interface that you can operate efficiently without any inconvenience.
Free Download For macOS 10.14 or later
Filmora also provides various effects that can help you add a new perspective to your videos. To make your video look cinematic and aesthetic, you can use its vintage and retro effects. Furthermore, you can use its background blur effects to hide unwanted parts from your videos. In this section, we will address basic instructions that can help you blur the selective parts of the video.
Steps to Add Blur Effect Using Filmora
Have you ever tried Filmora to add blur effects to your video? Here are the simple instructions that can help you in adding a blur effect to your videos:
Step1 Create a New Filmora Project
After launching Filmora, hit the “Create New Project” option to begin. Now hit the “Arrow” icon to import the desired video clip to the project media section. Once done, drag and drop the video into the timeline.
Step2 Select the Background Blur Effect
Now head to the “Effects” tab and locate the “Background Blur” option on the left. By selecting this option, you can explore various background effects that you can add. Once you have chosen the background effect, apply it to your video on the timeline.
Step3 Export your Blurred Video
After adding the blur effect, double-click on it to open the blur settings. From the settings, you can modify the opacity and blur strength according to your preference. Once done, hit the “Export” button to save your video with blurred background.
Conclusion
To improve your video outlook, paying attention to the background is essential. However, you can use the After Effects blur background tool if you have captured unwanted things in your video. After reading this article, you have learned the complete guide to using Adobe After Effects to blur the background in videos efficiently.
If you want a simpler and more professional tool, we recommend using Wondershare Filmora. This tool has a friendly interface that you can operate efficiently without any inconvenience.
Top 31 Video Trimmers That Will Save You Time in Ediitng
In the world of videography, editing a video is equally important as shooting a video. No matter how perfectly you shoot a video, there are some parts that you need to trim out so that the video could be presented perfectly to your target audience. If you are getting started in the videography world, this article is for you to learn how to trim videos with the best video trimmer.
First, we will touch upon different ways of making a video. Thereafter, you will move on to how to trim a video that you have either recorded with recording software or shot with your digital camera. We will begin by providing you the list of the best video trimmers for Windows, Mac and mobile users. The video trimmers are segregated for beginner and advanced users, and hence, you can choose as per your preference and requirements.
We will also touch on how to edit your video and share the edited video among your target audiences. Therefore, take your time to go through our list of the top 32 best video trimmers of 2022. Starting from free and premium video trimmers to video trimmers for beginners and advanced users, you will definitely find the best video trimmer that is tailor-made to satisfy your requirements.
Contents
01 [How to Make a Video before Trimming](#Part 1)
02 [Video Trimmer for PC and Mac](#Part 2)
03 [Video Trimmers for Mobile](#Part 3)
04 [Online Video Trimmers ](#Part 4)
05 [Editing Tips to Improve Your Videos](#Part 5)
06 [How to Share Your Videos](#Part 6)
07 [Related FAQs about Video Trimming](#Part 7)
Part 1 How to Make a Video before Trimming
Before coming to the trimming of a video section in detail, let us begin with how to make a video. You have two options when it comes to making a video. You can either record a video with recording software or you can shoot a video with your camera. Let us discuss both options in detail now.
-Record a video
You can record a video with recording software when you are capturing video from your webcam or from your computer screen. There are two options you have when it comes to choose a recording software.
- Premium Recorder - A premium recorder is a professional video recording software that you have to purchase to avail all the features and functionalities. Choose the best video recorder.
- Free Recorder - If you are not willing to spend any money on a recording software, there are plenty of free recording applications available. We recommend OBS Studio as the best free video recorder.
-Shoot a video
The second option is shooting a video with your external digital camera. You can also use your phone camera to shoot a video. For example, making vlogs, comedy skits, travel videos, or short films needs a digital camera. If you are using your phone camera, you can cut and crop the video after shooting using the video trimmer apps or online video trimmers. If you are shooting external with an external camera, you can transfer the video to your mobile or computer and use a preferred video trimmer for editing.
Part 2 Video Trimmer for PC and Mac
When it comes to editing and trimming a video, using a computer is the best option. This is because you have a wider screen to pay attention to the details of the video and trim out the unnecessary parts easily. Besides, editing a video requires CPU resources which are best served by a computer. We have divided the video trimmers for computers into two categories for user convenience. You can easily find video trimmers for Windows PC as well as for Mac.
# For Beginner Users
This category is perfect for those who do not have any experience in video editing and they are looking for a basic video trimmer to get the job done. Besides, if you need to trim videos once in a while, these are perfect for you. You can trim video free with the following video trimmers.
1. Windows Photos
Best for: Windows users with no editing skills
G2 rating: 4.0/5
Price: Free
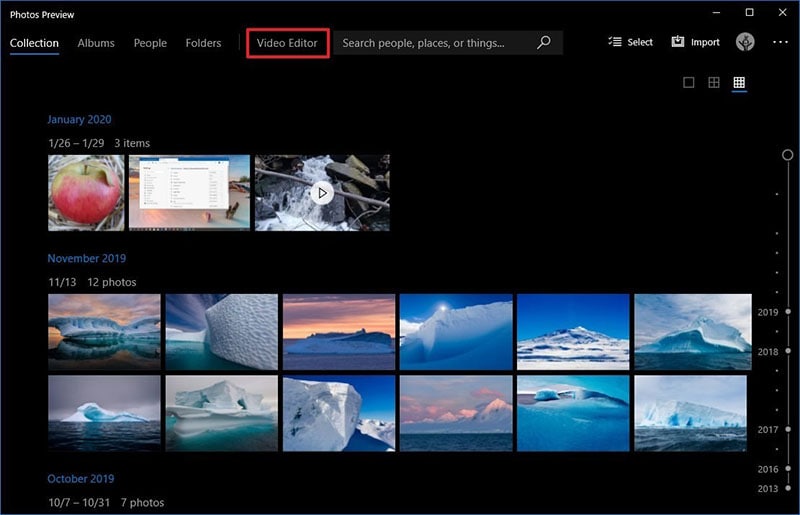
If you are a Windows PC user and you are looking for a basic video trimming application, Windows Photos is right there for you. The application comes pre-installed on Windows PC and hence, there is no need to install any external application. Even though Windows Photos is primarily used for viewing photos, there is a dedicated video editor available where you can trim your recorded video easily. Apart from trimming videos, you can do some basic editing like adding title cards and text, video effects, background music, and filters. Here are the pros and cons of Windows Photos.
Pros:-
- Comes pre-installed in Windows.
- Super easy user interface to operate.
- Quick trimming and cutting out videos.
- Different motion transitions and effects present.
- Add titles, texts, and audio to video.
- AVarious filters and 3D effects available.
Cons:-
- Not suitable for trimming large videos.
- Lack of different file formats for saving the videos.
2. QuickTime Player
Best for: Mac users with basic trimming needs
G2 rating: 4.2/5
Price: Free
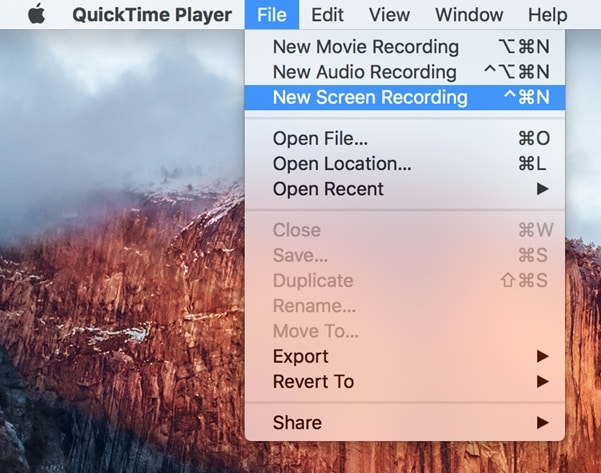
If you are a Mac user and you are looking for a free video editor for trimming your video, QuickTime Player is the best application for you. Just like Windows Photos for Windows users, QuickTime Player comes pre-installed for Mac users. In fact, it is the default media player for Mac users. Apart from playing media files, you can use QuickTime Player for video recording as well as editing the recorded video. This includes trimming videos and replaying on the application to reach the level of perfection easily. Here are the pros and cons of QuickTime Player you should be aware of.
Pros:-
- The user interface is super easy to operate.
- Trim, flip, split, and merge videos quickly.
- Option to record video with audio flawlessly.
- Instant preview of the edited video on QuickTime.
- QuickTime is compatible with iPhone and iPad.
- Advanced streaming options available in Pro version.
- Supports playing different video file formats.
Cons:-
- Some of the settings are complicated.
- It can crash while editing large video files.
3. iMovie
Best for: Playing and editing videos
G2 rating: 4.3/5
Price: Free

If you are a Mac user and you are looking for a dedicated video editor, iMovie is a great choice. iMovie also comes pre-install on Mac and it is compatible with iPhone and iPad as well. The application is available completely free for mac users and hence, many prefer it over QuickTime Player for editing videos. You can quickly trim your videos as well as rotate and crop your videos as per your requirements. You can enhance your video with effects and filters available. Here are the pros and cons of iMovie you should be aware of.
Pros:-
- Intuitive user interface for easy operation.
- Quick edits to make a raw video presentable.
- Supports 4K video editing without crashing.
- Add different graphical elements for engaging videos.
- Different types of effects and filters for video enhancement.
- Easy sharing options across devices and online platforms.
- Work on multiple video projects simultaneously.
Cons:-
- Editing MP4 video is complicated.
- Lacks advanced editing features.
4. Media Cope
Best for: Multiple video using needs
G2 rating: 4.0/5
Price: Free
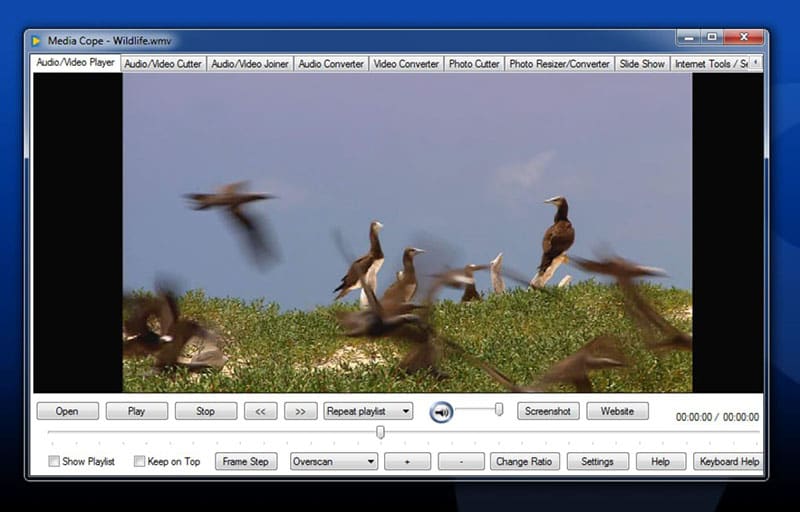
Media Cope is a freeware video trimmer for Windows users only. It is a basic video editor with standard editing options. The software is best suited for those who have older Windows versions such as Windows 7. The lightweight application can act as an audio and video player. You can easily trim your video and extract import parts as well. You can also join audio and video files and convert them into desired file formats. Here are the pros and cons of Media Cope.
Pros:-
- Can play audio and video files of different formats.
- Instantly trim and cut video and audio files.
- Can join audio and video clips and save in desired file format.
- Can convert audio and video files as per requirements.
- Transform photos into slideshow instantly.
- Resize photos and take screenshots from videos.
- Modify different video parameters and export the file.
Cons:-
- Lack of various standard video editing options.
- Looks outdated for modern Windows OS.
5. OpenShot
Best for: Open source software lovers
G2 rating: 4.4/5
Price: Free

If you are looking for a video editor that is compatible with all desktop operating system, OpenShot is the best choice for you. It is a completely free, open-source video editor for Windows, Mac and even Linux users. In this list of video editors for beginners, this is the best in terms of features and functionalities. You can trim and slice video, add animations, insert different layers and video effects to enhance the video content. The user interface is rather intuitive in spite of having all the different options you look for in a video editor. Here are the pros and cons of OpenShot video editor.
Pros:-
- Simple but powerful user interface.
- Trim video instantly without different options.
- Add 3D titles, 3D animations, and slow motion effects.
- Loads of video and audio effects present to apply.
- Add different layers of videos, audio tracks, and images.
- Advanced option for keyframing and time mapping.
- Multi-lingual support and frequent updates for new features.
Cons:-
- Unstable performance for large video files.
- The hardware acceleration is not very powerful.
# For Advanced Users
If you are a regular video creator and you want your videos to stand out, this category is for you. You can edit and trim your videos exactly the way you want. Besides, you can transform your raw videos into professional-quality videos with the following video editors.
1. Filmora
Best for: Rich videos effects and templates
G2 rating: 4.4/5
Price: $49.99

Wondershare Filmora is an outstanding video editor where you can trim your video and audio files like a professional. Since you are an advanced user, you will need more than just trimming to make your raw video look stunning. Filmora offers you all the tools and features you will ever need to take your video to the next level.
Compared to other popular premium video editors, Filmora does not need heavy CPU resource and it has an intuitive user interface. That is why video creators especially YouTubers and Vloggers prefer it for editing their videos regularly. The software is available for both Windows and Mac users. Here are the pros and cons of Filmora that you should be aware of.
For Win 7 or later (64-bit)
For macOS 10.12 or later
Pros:-
- Record screen and webcam video with audio sources.
- Basic tools for trimming, splitting, and joining video files.
- Customize different video settings and parameters.
- Add video and audio effects and graphical elements.
- Wide range of stock library of media files and animations.
- Add multiple layers and work with multiple channels while editing.
- Export the recorded or edited video file in different file formats.
Cons:-
- Saving the edited video takes time due to processing part.
2. Adobe Premiere Pro
Best for: Professional video trim, edit and after effects
G2 rating: 4.5/5
Price: $20.99/month

Adobe Premiere Pro is the most powerful video editor and that is why even professional video editors use it for editing movies. There is hardly any video file format that Premiere does not support. You can edit multiple videos at the same time and switch between scenes and clips. Trimming video and audio files is swift with intuitive controls. There is also option for non-linear video editing for advanced users.
Since it is extremely popular in the videography world, there are many organizational tools available for editing large video projects and integrated workflow. The software supports VR video, 3D video, and multicam video editing. The software is available for Windows as well as Mac users. Here are the pros and cons of Adobe Premiere Pro.
Pros:-
- Customizable layouts for reorganizing user interface.
- Quick trimming and playback option without rendering.
- Supports a wide range of file formats for import and export.
- All the different tools for professional video and audio editing.
- Can work on and render multiple video files easily.
- Cross-app functionality with amazing stabilization features.
Cons:-
- The learning curve is rather steep and takes a lot of time.
- The software is only suitable for high-end computers.
3. Final Cut Pro
Best for: Advanced organizing tools of any professional video editing
G2 rating: 4.4/5
Price: $299

Final Cut Pro is equally popular in the videography world as Adobe Premiere Pro. Final Cut Pro is primarily for Mac users as it is developed by Apple. This is the most powerful video editor for Mac users as it is packed with loads of features for professional video editing. Trimming videos is as easy as it gets, along with other standard editing options.
The software supports editing multicam videos, VR videos, 3D videos as well as 360 degree videos. There are endless presets and effects available that you can apply on your video while editing. You can easily edit 4K videos without performance lag. In fact, Final Cut Pro shines where other video editors fail to perform with high resolution and large video files. Here are the pros and cons of Final Cut Pro.
Pros:-
- Trimming, cutting, splitting and joining videos are easy.
- Seamless video editing with standard and advanced tools.
- Different motion graphics templates available.
- Supports external plug-ins and VR headset playback.
- Proper video files and assets organizing and audio editing options.
- Relatively quick rendering of large video files.
Cons:-
- May take time to get used to all the available options.
- Relatively expensive in comparison to peers.
4. Movavi Video Editor
Best for: People who love more brilliant effects in videos
G2 rating: 4.8/5
Price: $74.95

Movavi Video Editor is a premium software for trimming and editing videos. It is available for both Windows and Mac users. There is a free version available but it puts a watermark on the output video. Apart from trimming and splitting videos, you can add various video effects starting from adding titles and transitions to stickers and elements. Besides, you can opt for greenscreen effect and edit videos in vertical mode. Here are the pros and cons of Movavi Video Editor you should be aware of.
Pros:-
- Integrated video capturing options from different sources.
- Instant trimming, splitting, and joining of videos.
- Loads of titles, filters and transitions present.
- Add video PiP layers as well as voiceover.
- Vertical video editing mode present.
- Video stabilization mode and Chroma key.
- Keyframing, slow motion and motion tracking.
Cons:-
- The rendering is not very fast.
- Lack of color tuning options.
5. Bandicut
Best for: Trim, join and split video with fast speed
G2 rating: 4.0/5
Price: $44.96
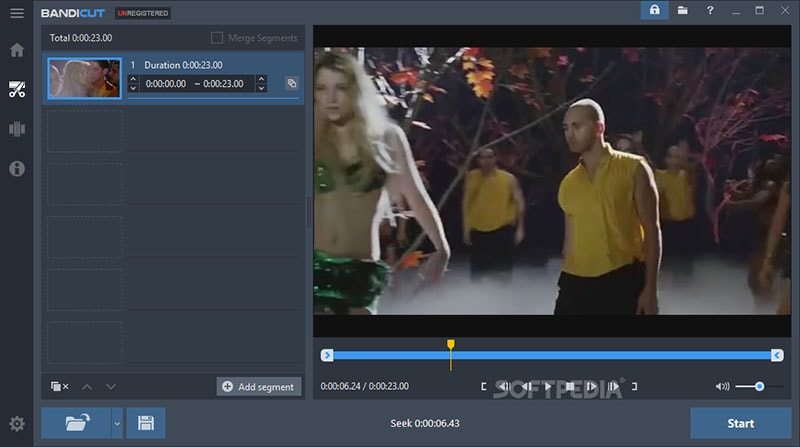
Bandicut from Bandicam is a dedicated video trimmer for Windows users. It is a premium application with a one-time purchase fee. The software ensures lossless video trimming, and you can trim video instantly thanks to its intuitive user interface. It is a versatile application that you can use to extract audio from a video as well as joining multiple video files. Splitting a large video file into multiple files is super easy. However, it is not a full-fledged video editor like Filmora or Premiere. Therefore, if your objective is specifically to trim, split, and join videos, this is the one for you. Here are the pros and cons of Bandicut.
Pros:-
- Trim and split videos instantly
- Super intuitive user interface.
- Cut segments from videos.
- Join multiple videos quickly.
- Supports different file formats.
- No loss of video quality during editing.
- Hardware acceleration for high performance.
Cons:-
- Very limited editing features.
6. VSDC
Best for: Movie level video cut with light professional skills
G2 rating: 4.0/5
Price: $19.99

VSDC is a free video editor with all the basic editing tools available. VSDC Pro is a premium video editor where advanced features are available. For trimming a video, VSDC free video editor can get the job done. Even though it is completely free, some features are comparable to many premium video editors. For example, you get access to a large set of filters, effects, and transitions that you can apply to your videos. Even when you have a low-end PC, you can do basic video editing works comfortably. Here are all the pros and cons of VSDC free video editor you should know.
Pros:-
- Instant trimming and basic editing of videos.
- Wide range of effects and filters as well as Chroma key.
- Color correction option and non-linear editing available.
- Supports editing 360 degree videos and split-screen videos.
- Supports different video and audio file formats.
- Lightweight and suitable for low-end computers.
Cons:-
- Lacks standard audio editing options.
- Lacks hotkeys and useful keyboard shortcuts.
7. Camtasia
Best for: Tutorial video recording and editing
G2 rating: 4.6/5
Price: $224.99

Camtasia by TechSmith is a premium video editor for Windows and Mac users. Even though it is more popular as a video editor, you can trim your videos easily on the software. You can record anything on your screen as well as external webcam. You can edit recorded video as well as import external video files for quick editing. The software offers easy share instant through which you can share on popular video streaming platforms. There are various templates and themes available to create and edit videos of different categories. Here are the pros and cons of Camtasia.
Pros:-
- Quick trimming, splitting, joining video options.
- Different templates and packages for versatile video creation.
- Various transitions, annotations, and presets present.
- PowerPoint integration, screen and web cam capture.
- Different cursor and audio effects with royalty-free assets.
- Import different media files and upload directly on video streaming platforms.
Cons:-
- Reports of crashes when working with large files.
- No keyframe and motion tracking.
- Very few customization options.
Part 3 Video Trimmers for Mobile
In today’s world, the cameras of smartphones are extremely powerful, and there are many who shoot videos with phone cameras instead of a dedicated digital camera. For example, there are many popular vloggers who shoot their videos with phone cameras, and video creators make short videos with phone cameras. When you shoot a video on your phone, you must be looking for a video trimmer app for your phone so that you can trim the recorded video instantly and share across social media and video streaming platforms. Here is the list of the best video trimmers for mobile.
# For Beginner Users
1. VidTrim Pro
Best for: Android video trimming, merging, frame grabbing
Rating: 4.1/5
Download Link: https://play.google.com/store/apps/details?id=com.goseet.VidTrimPro&hl=en\_US&gl=US
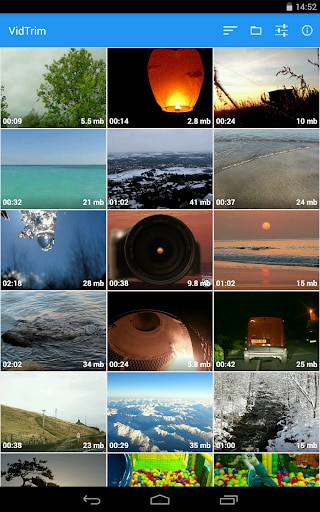
VidTrim is a dedicated video trimmer available for Android users. The free version adds a watermark to the output video, and hence, you have to opt for VidTrim Pro to avoid all limitations. Apart from trimming videos, you can merge videos and convert videos into audio files. You can also add effects and music tracks to your videos. The user interface is as simple as it gets. Here are the pros and cons of VidTrim Pro app.
Pros:-
- Trim videos as well as merge video clips.
- Convert supported video files into Mp3 audio files.
- Rotate videos as well as save screenshots from videos.
- Add cool video effects, sound effects, and soundtracks.
- Multi-lingual support and video file format converter.
Cons:-
- Limited video editing features for a paid video editor app.
- The user interface is simple but outdated.
2. KineMaster
Best for: Video content downloadable
Rating: 4.2/5
Download Link: https://play.google.com/store/apps/details?id=com.nexstreaming.app.kinemasterfree&hl=en\_US&gl=US

You must have seen many videos online with the watermark “Made with Kinemaster”. This is because KineMaster is very popular among amateur video creators. KineMaster is available for Android as well as iOS users. You can instantly trim and crop videos. Besides, you can add special effects, animations and stickers as well as tweak different video settings for enhancements. KineMaster is available free of cost but it attaches a watermark to the output video at one corner. You can subscribe to KineMaster Premium to remove watermark and unlock more features. Here are the pros and cons of KineMaster.
Pros:-
- Trim, cut, slice, and crop videos instantly.
- Add music, sound effects as well as voiceover.
- Provides amazing visual effects and animations.
- Adjust color filters, modes and video speed.
- Supports keyframing and motion tracking.
- Save 4K videos and share instantly online.
Cons:-
- KineMaster chroma key feature has bugs.
- Can crash or freeze handling large video files.
3. Quik
Best for: Producing cinematic auto-edits.
Rating: 4.3/5
Download Link: https://play.google.com/store/apps/details?id=com.gopro.smarty&hl=en\_US&gl=US
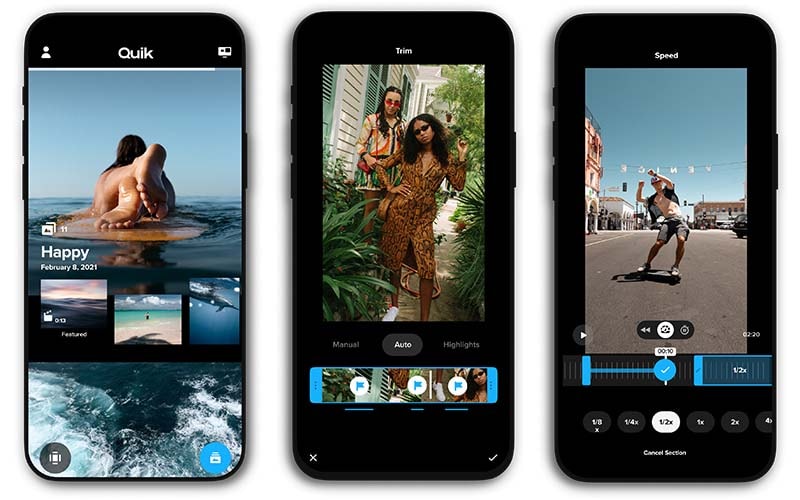
Quick from GoPro is fast becoming a popular video editor app. GoPro is the most popular action camera brand and naturally, its video editing app has garnered enough attention. The app is available for Android and iOS users. The app has a mixed bag of options for editing videos quickly. You can trim your videos, add filters and adjust video speed. Besides, its AI can locate the best shots in a video and enhance them with special effects. Here are the pros and cons of Quick app.
Pros:-
- Trim, crop, adjust speed, remove audio from videos.
- Different preset templates available with effects and filters.
- Add music, titles, effects, and transitions.
- Easy sharing of videos and photos.
- Powerful AI to highlight the best shots in a video.
- Adjust video orientation, save in 1080p resolution.
Cons:-
- Not suitable for large video files.
- No font adjustment options.
4. iMovie
Best for: Create Hollywood-style trailers and beautiful movies
Rating: 4.0/5
Download Link: https://apps.apple.com/us/app/imovie/id377298193
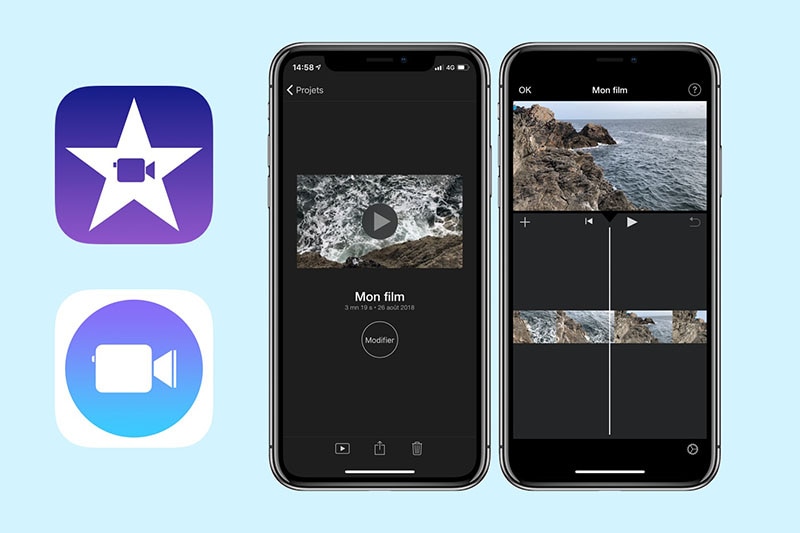
iMovie app by Apple is exclusively available for iOS users. iMovie is also available as a software which we have already discussed. In terms of features, iMovie app is very similar to iMovie software. You can instantly make basic editing works. Apart from editing, the app is ideal for creating different types of videos with ready-made templates. There are loads of graphical effects, animated titles, and video filters available to apply. Here are the pros and cons of iMovie app for you.
Pros:-
- Record, trim, split, join and crop videos on the go.
- Choose from different themes and templates to create videos.
- Animated titles, video filters, graphical effects available.
- Chroma key, PiP mode as well as split screen effect possible.
- Add sound effects, music, and depth of field effect.
- Optimized output for social media and video streaming platforms.
- Supports 4K video editing and easy share across Apple devices.
Cons:-
- Limited resources and customization options.
- The app size is large and uses high CPU resources.
# For Advanced Users
1. LumaFusion
Best for: Professional video trimming for iOS devices
Rating: 4.8/5
Download Link: https://apps.apple.com/us/app/lumafusion/id1062022008

LumaFusion is a top-rated video editor for iPad and iPhone. The app is as good as a premium video editor for desktop users. Therefore, professional video creators who use iPhone or iPad for video editing prefer LumaFusion all the time. You can trim, cut, crop, split, and merge videos intuitively from its timeline. Most importantly, you can edit multiple video and audio files together like a professional. Here are the pros and cons of LumaFusion.
Pros:-
- Trim and export video in different file formats.
- Work with multiple video and audio files.
- Preset transitions, instant preview, markers for timeline.
- Add Chroma and Luma key effects as well as stunning visual effects.
- Adjust speed, audio, use keyframes, correct colors.
- Work with titles, fonts, borders, and share conveniently.
- Wide range of media files available in the library.
Cons:-
- Does not support motion tracking.
- Can be difficult to edit large files.
2. Adobe Premiere Rush
Best for: Shoot, edit, and share online videos anywhere.
Rating: 3.0/5
Download Link: https://play.google.com/store/apps/details?id=com.adobe.premiererush.videoeditor&hl=en\_US&gl=US
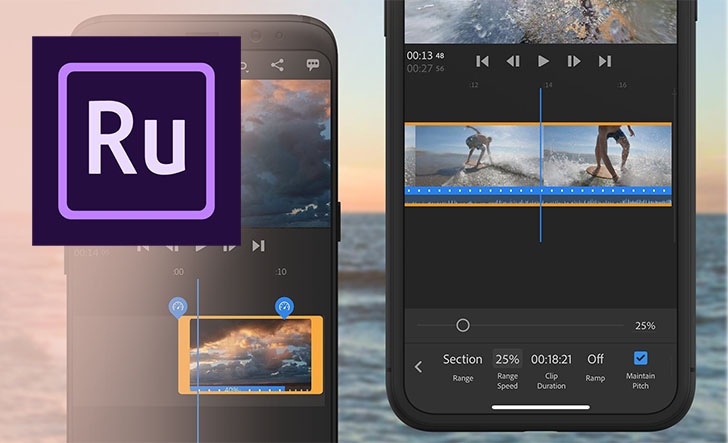
Even though Adobe Premium Rush app is available or Android and iOS users, it is more popular among iPhone and iPad users. The app is free though there are in-app purchases available. Rush Premium has more features and functionalities. Editing any video is quite convenient though Adobe has tried its level best to offer all the possible features of Adobe Premium Pro desktop software on the app. The app supports multitrack timeline for professional videos. Here are all the pros and cons of Adobe Premiere Rush you should be aware of.
Pros:-
- Record video in high-resolution with the app.
- Trim, crop, mirror, and flip videos.
- Add images, overlays, texts, and stickers.
- Pan and zoom effect, animation titles.
- Royalty-free audio tracks, color correction options.
- Easy exporting of files in different formats.
Cons:-
- Rendering projects can be slow.
- Comes with limited features.
3. Filmmaker Pro Video Editor
Best for: 4K quality video editing
Rating: 4.6/5
Download Link: https://apps.apple.com/us/app/filmmaker-pro-video-editor/id1082956994
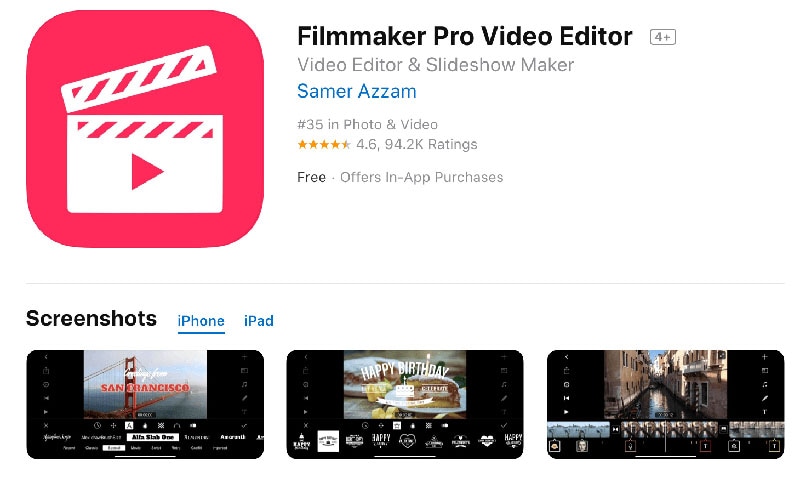
Filmmaker Pro is a highly rated video editor that you can use to trim your videos. Filmmaker Pro app is available for both Android and iOS. The app supports 4K video for editing works. The timeline has color codes for different assets and hence, editing becomes easy. You can edit different video parameters and settings and add different effects. The auto save option is extremely useful when it comes to editing a large file. Even though it is available for free, they have a subscription plan for unlocking all features. Here are the pros and cons of Filmmaker Pro Video Editor.
Pros:-
- Trim, split, crop and rotate videos.
- Adjust video speed, volume, video grading.
- Chroma key, voice to text caption, keyframe and motion tracking.
- Different Picture-in-Picture mode for videos, photos, and GIFs.
- Various transition effects, audio effects, and text overlays.
- Different drawing tools, stickers, and graphical elements present.
Cons:-
- The free version has limited features.
- The number of effects are relatively less.
4. Splice Video Editor and Maker
Best for: Vloggers and social platform video cutting
Rating: 4.7/5
Download Link: https://play.google.com/store/apps/details?id=com.splice.video.editor&hl=en\_US&gl=US
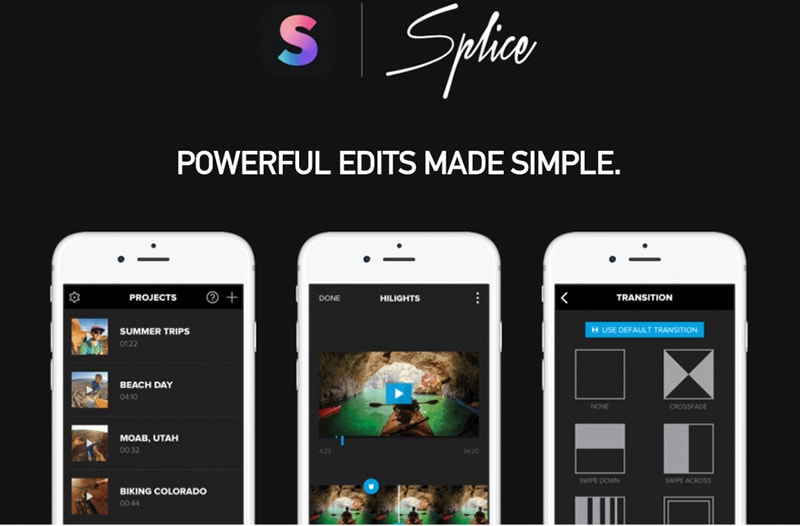
Splice Video Editor and Maker is a free but powerful app that enables you to do pro-level editing. You can trim your video clips, adjust speed, and add music on the go. In fact, you can create videos and slideshows instantly and you can add texts and overlays. The music library has different categories of tracks to apply to videos. You can also merge videos as well as change aspect ratio according. The app is available for Android and iOS users. Here are all the pros and cons of Splice Video Editor and Marker.
Pros:-
- Easy interface for smooth trimming and merging of videos.
- Adjust speed, aspect ratio, and video parameters.
- Organize clips and tracks in the timeline intuitively.
- Add custom texts, titles, tracks, transitions, and effects.
- Comes with a wide stock library of media files.
- Direct uploading video files on different social media platforms.
Cons:-
- Limited effects and filters available.
- Frequent crashes while handling large files.
5. Funimate
Best for: Mobile game video trim to show off gaming skills
Rating: 4.5/5
Download Link: https://play.google.com/store/apps/details?id=com.avcrbt.funimate&hl=en\_US&gl=US
Funimate video editor and maker app is quite highly rated on both Play Store and App Store. It is a very powerful and feature-rich app where you will get all the desired editing tools to publish a professional-quality video. Starting from element library to video masks and AI effects, the app takes your video to the next level. You can obviously perform the basic editing works like trimming, splitting and joining. Here are the pros and cons of Funimate app.
Pros:-
- Trimming, merging, and cutting videos.
- Text effects, video AI effects, and effect mixer.
- Comes with over 100 advanced video effects.
- Allows adding music to videos for engaging videos.
- Supports slow motion and looping videos.
- Advanced keyframing and element library.
- Allows creating a professional photo slideshow.
Cons:-
- No multilingual support and auto-save feature.
- Some lagging issues have been reported.
Part 4 Online Video Trimmers
If you are using a video editor on your computer, it takes considerable amount of space in your storage. The same is applicable to video editors for smartphones. If you do not want to install any app on your device yet trim videos conveniently, the online video trimmers are for you. You can open the video trimmer directly from your web browser and trim your video and save it without installing any application on your device. Here is the list of the best online video trimmers.
# For Beginner Users
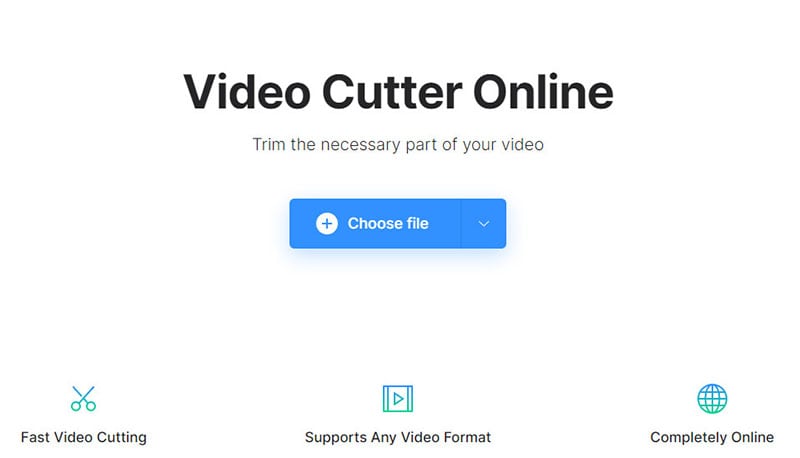
1. https://online-video-cutter.com/
Best for: Trimming large videos files.
Ratings: 4.2/5
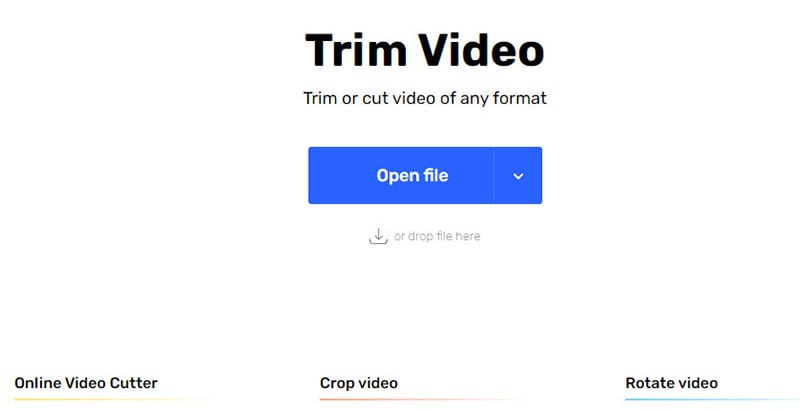
Online Video Cutter is a dedicated video trimmer where you need to drag and drop your video file and cut out the required portion. You can even crop and rotate your videos if there is any such requirement. You can access the online platform directly from your web browser. There is no need for installation of any web launcher. The platform is also secured and hence, your videos won’t get leaked. There is also a Chrome extension available that you can use if you are a Chrome user. Here are the pros and cons of Online Video Cutter.
Pros:-
- Easy video trimming by drag-and-drop files.
- Enables uploading different file formats.
- Rotate feature for saving in portrait and landscape mode.
- Automatically deletes files for better security.
- Crop feature for changing frame size.
- Can edit video file of 4GB capacity.
Cons:-
- May reduce the video quality for the editing video.
2. https://clideo.com/cut-video
Best for: Trimming short videos.
Ratings: 4.5/5
This is another online video trimmer that supports different video file formats. The user interface is sleek for quick video trimming. You can upload file from your device as well as from Cloud storage. In fact, you can use the platform to convert video files. The level of trust and security is high and there are additional settings available for better editing. Here are the pros and cons Clideo Video Cutter.
Pros:-
- Intuitive interface for quick trimming.
- Supports different file formats.
- Converts videos into different formats.
- Offers high-level online security.
- Add fade in and fade out effects.
- Upload video files from Google Drive and Dropbox.
Cons:-
- No drag and drop feature.
- File size is limited to 500 MB only.
3. https://www.kapwing.com/tools/trim-video
Best for: Editing video elaborately.
Ratings: 4.4/5
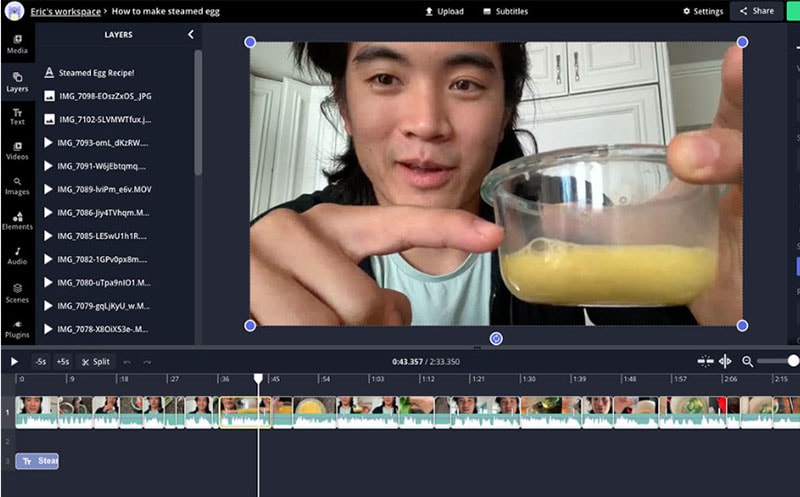
Kapwing is a dedicated online video editor that will give you the vibe of using a desktop video editor. Therefore, it is suitable for those who are looking for an online platform for trimming as well as various other editing works. You can add texts, images, elements, audio, transitions, as well as record videos. You can also export in different file formats. However, the free version attaches a watermark. Therefore, you have to upgrade to its premium version and use the platform is a full-fledged video editor. Here are the pros and cons of Kapwing.
Pros:-
- Trim, crop, zoom videos and adjust video parameters.
- Supports import and export of different file formats.
- Add effects, audio, and elements to the videos.
- You can work with multiple layers while editing.
- Different sound effects, templates, and scenes and emojis present.
- Stunning user interface that looks like a video editor software.
Cons:-
- Free version attaches watermark and lowers video quality.
4. https://www.freeconvert.com/video-trimmer
Best for: Basic video trimming
Ratings: 4.0/5
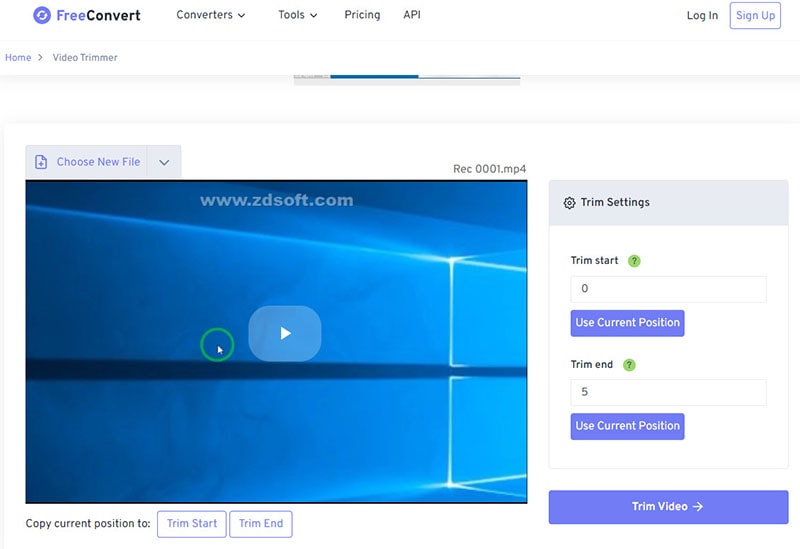
FreeConvert Video Trimmer is a free online tool through which you can trim videos of size up to 1GB easily. The platform supports as many as 40 different video file formats. Therefore, you can trim almost any video file easily. The security is tightened so that the uploaded videos do not get leaked. You can upload video files from your device, Google Drive, Dropbox as well as from URL. Therefore, if you want to trim videos that are available online, you can do it easily with this tool. Here are the pros and cons of FreeConvert Video Trimmer.
Pros:-
- Easy to use, intuitive interface.
- Does not require any registration.
- Supports over 40 file formats.
- Compatible with multiple browsers.
- 256-bit SSL encryption offers better security.
- Allows adjustment of parameters before conversion.
Cons:-
- There are too many annoying ads.
# For Advanced Users
5. https://www.veed.io/tools/video-cutter
Best for: Trimming videos for social media platforms.
Ratings: 4.3/5
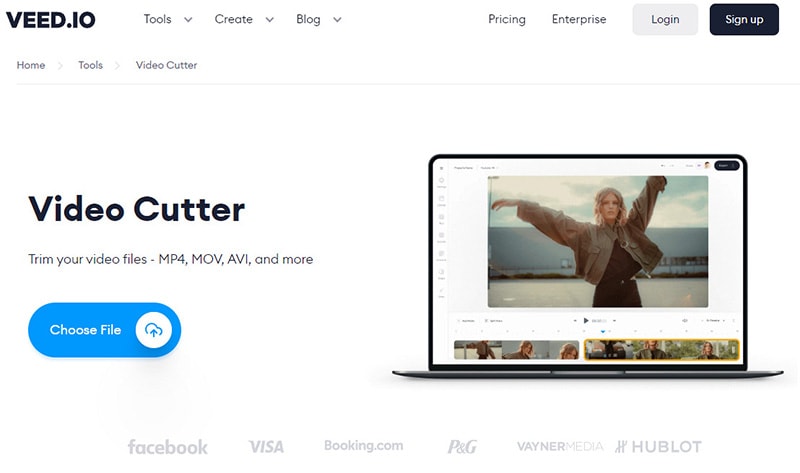
Veed.io has a wide collection of tools for video editing and the video cutter is a dedicated video trimmer. You can trim videos of popular file formats easily. Apart from video files, the platform supports trimming GIFs and audio files. You can upload videos as well as mention URL of videos that are present online for trimming. The online tool does not degrade the video quality and the output file is of high-quality as well. Here are the pros and cons of Veed.io video cutter.
Pros:-
- Allows saving the video in a high-quality format.
- Supports cutting a wide range of audio file formats.
- Ability to upload and cut animated GIFs.
- Allows cutting YouTube videos directly using URL.
- Easy drag and drop feature for saving time.
- “Split” option for removing the middle part of the video.
Cons:-
- Not suitable for trimming large video files.
6. https://www.fastreel.com/video-cutter.html
Best for: Trimming videos for personal use.
Ratings: 4.2/5
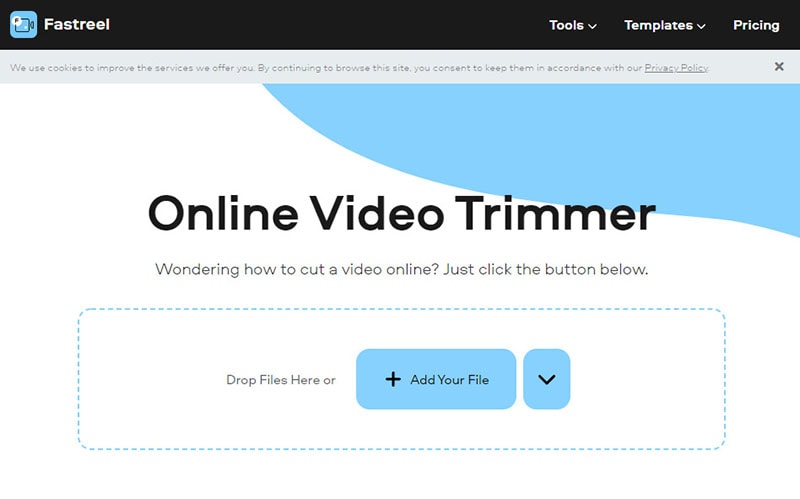
Fastreel online video trimmer lets you trim your videos with a few clicks. Drop your file and mark the points for trimming and there you go. That tool is also useful if you want to split your video. There are several video file formats that the platform supports. The user interface is intuitive and the trimming can be precise. The free version attaches a watermark and hence, the premium version is what you should have. Here are the pros and cons of Fastreel online video trimmer.
Pros:-
- Simple interface for hassle-free trimming.
- Supports different video file formats.
- Feature of data security offers better safety.
- Quick video trimming without using the editor.
- Different file formats while saving the video.
- Precision cutting for removing unwanted segments.
Cons:-
- The free version comes with watermark.
- Free version lowers the video quality.
7. https://flixier.com/tools/video-trimmer
Best for: editing videos as a teamwork
Ratings: 4.4/5

Flixier Video Trimmer is a premium tool to trim and crop videos instantly. The tool is available in a free version but there are many limitations. Therefore, you need to have a premium version of Flixier Video Trimmer. You can export videos in 1080p and 4K resolution. You can opt for transcribing your videos and store videos in the cloud. In the premium version, two team members can work together. Here are the pros and cons of Flixier Video Trimmer.
Pros:-
- Upload videos from YouTube, Twitch, and cloud platforms.
- No need to create account for instant trimming.
- Trim, crop, cut, and add images to videos.
- Supports multiple file formats.
- Comes with an easy collaborative platform.
- Additional translation and transcribe options.
Cons:-
- There are lots of limitations of premium plans as well.
- Only the highest premium plan supports 4K resolution.
8. https://www.wevideo.com/features/video-cutter
Best for: Best premium online video editor
Ratings: 4.5/5
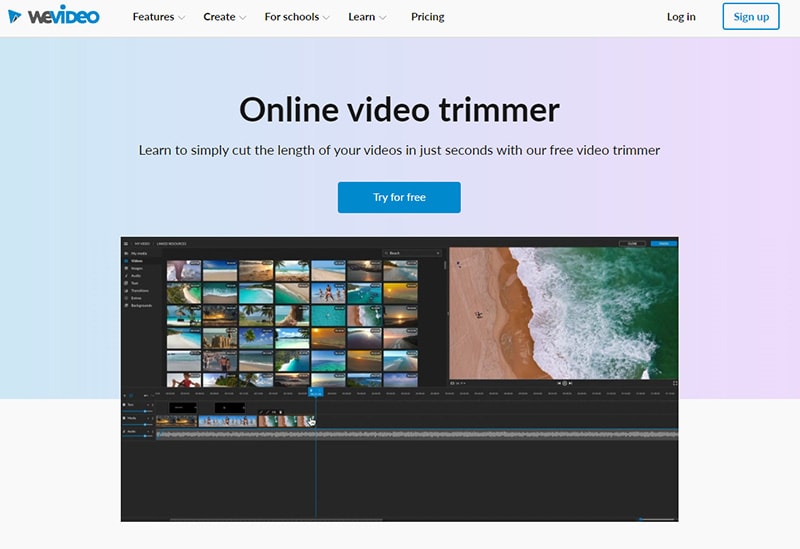
WeVideo Video Cutter is a paid video trimmer though you try out the platform for free. The platform supports a wide range of video files. You can drag and drop files and trim videos instantly. Trimming cannot get any easier and the processing speed of the editing video is fast. You can finish trimming your videos in a few seconds. There is a unique zoom feature to trim out videos accurately. You can also add texts and music to your video file before exporting. Here are the pros and cons of WeVideo Video Cutter.
Pros:-
- Drag and drop feature for quick editing.
- Smooth and accurate trimming with zoom function.
- Music and motion titles library.
- Compatible with different web browsers.
- Export edited files in different file formats.
- There is no capping on file size as such.
Cons:-
- The pricing is on the steeper side.
Part 5 Editing Tips to Improve Your Videos
Apart from trimming, you have to edit different other aspects so that you can make the video engaging and eye-catching. Here are some editing tips you should stick to improve your video content.
Get The Best Video Editor - Editing a video is equally important as shooting a video. Once you have the best video editor, you can rest assured that your editing work is half done. This is because you have all the tools to turn your raw video into stunning video. You can experiment and come up with the best editing work to your own surprise.
Get The Length Correct - In today’s world, viewers have very less time to watch videos. Therefore, a lengthy and elaborative video is a bummer. Hence, you should trim the video and keep only the portions that are relevant, engaging, and not boring.
Start with a Bang - The first impression is always the most important, and hence, the intro of your video is extremely crucial to keep the attention of the audiences intact. To make the intro interesting, you should not only focus on the content but also on video effects and animations that are attention-grabbing.
Smooth Cuts and Soothing Colours - When you are cutting from one scene or angle to another, the transition should be smooth so that it does not feel abrupt. Therefore, you should cut scenes when the subjects and objects seem to be static so that the transition is smooth naturally. Play attention to colour and the video editors allow you to enhance the quality by adjusting the colors and picture properties.
Graphical Objects - Use graphical objects and animated texts wherever possible for better explanations. Things can get boring visually when you do not add graphical elements, transitions, and animations appropriately in different places. Similarly, the use of texts and titles makes the video more engaging. Instead of static texts, there are animated texts and titles available with stickers and memes that you can edit your video with.
Play Attention to Sound - Sound is the most neglected part of a video by amateur video creators when one should pay attention to it. The sound effects can keep the audiences hooked to your video and make them not get bored. Certain sound effects refresh the attention of the audiences when it starts to fade, and hence, you should place the sound effects wisely.
Proper Flow - The editing work should be smooth so that the flow of the video is smooth and efficient. It takes time, and hence, you can practice and learn video editing so that your video can stand out instantly after your editing touches. Besides, the editing should be such that the video feels like a story that audiences can invest in and get engaged throughout.
Part 6 How to Share Your Videos
In order to share videos after trimming them, you need to save the video properly. There are different file formats available for video files. For example, MP4 is the most popular video file format among Windows users. On the contrary, MOV is the most popular video file format. Different file formats have different features such as compression and lossless. According to the file format, the file size varies for the same duration of video.
Therefore, the video trimmer you are using must have different file formats for saving and exporting the editing video files. Some video trimmers have in-built features to share videos on social media platforms and upload on video streaming platforms like YouTube. Depending on your target audiences, you need to adjust the parameters like aspect ratio, video resolution, as well as duration. Besides, you can upload videos on cloud storage and share with anyone as per your requirements.
Part 7 Related FAQs about Video Trimming
1. What is the best video trimmer?
Wondershare Filmora is the best video trimmer as all the features are well-balanced. Apart from trimming, it has all the tools for professional-quality video editing. Filmora can also be used for recording videos. Trimming videos is as easy as it gets and you can export the edited video in different file formats.
2. How can I trim a video?
To trim a video, you will need a video trimmer. If you are a desktop user and you need to regularly edit videos, there are video trimmers available for beginners as well as advanced users. Similarly, there are video editor apps available for mobile users. If you need to trim just one video, you should use an online video trimmer.
3. How can I trim a large video?
In order to trim a large video file, you will need a professional video editor like Filmora so that there is no loss in video quality and frequent crashes and screen freezing incidents while trimming. Drag and drop the video file on Filmora’s timeline and trim the unnecessary parts. You can view the changes and export the file in desired file format.
4. What does trim mean in video editing?
Trimming a video means you are cutting off different portions of a video and reducing its length. Trimming is mostly done to remove unnecessary parts from a video so that the video becomes more engaging without any unnecessary fillers.
5. Can I trim a video in VLC?
Here are the steps to trim a video in VLC Media Player.
- Open VLC Player. Go to View> Advanced Controls. This will make the recording buttons appear.
- Open the video that you want to trim. Mark the portion that you want to keep in your video.
- Play the video and go to the point from where you want to keep the video. Click on Record button.
- Go to the point where you want to end the video. Click on Record button again. All other portions are trimmed and the edited video will be saved.
6. How to trim YouTube videos?
In order to trim YouTube videos, you need to download the videos on your device. You can use an online video trimmer where you can upload the files and trim the videos as per your requirements.
02 [Video Trimmer for PC and Mac](#Part 2)
03 [Video Trimmers for Mobile](#Part 3)
04 [Online Video Trimmers ](#Part 4)
05 [Editing Tips to Improve Your Videos](#Part 5)
06 [How to Share Your Videos](#Part 6)
07 [Related FAQs about Video Trimming](#Part 7)
Part 1 How to Make a Video before Trimming
Before coming to the trimming of a video section in detail, let us begin with how to make a video. You have two options when it comes to making a video. You can either record a video with recording software or you can shoot a video with your camera. Let us discuss both options in detail now.
-Record a video
You can record a video with recording software when you are capturing video from your webcam or from your computer screen. There are two options you have when it comes to choose a recording software.
- Premium Recorder - A premium recorder is a professional video recording software that you have to purchase to avail all the features and functionalities. Choose the best video recorder.
- Free Recorder - If you are not willing to spend any money on a recording software, there are plenty of free recording applications available. We recommend OBS Studio as the best free video recorder.
-Shoot a video
The second option is shooting a video with your external digital camera. You can also use your phone camera to shoot a video. For example, making vlogs, comedy skits, travel videos, or short films needs a digital camera. If you are using your phone camera, you can cut and crop the video after shooting using the video trimmer apps or online video trimmers. If you are shooting external with an external camera, you can transfer the video to your mobile or computer and use a preferred video trimmer for editing.
Part 2 Video Trimmer for PC and Mac
When it comes to editing and trimming a video, using a computer is the best option. This is because you have a wider screen to pay attention to the details of the video and trim out the unnecessary parts easily. Besides, editing a video requires CPU resources which are best served by a computer. We have divided the video trimmers for computers into two categories for user convenience. You can easily find video trimmers for Windows PC as well as for Mac.
# For Beginner Users
This category is perfect for those who do not have any experience in video editing and they are looking for a basic video trimmer to get the job done. Besides, if you need to trim videos once in a while, these are perfect for you. You can trim video free with the following video trimmers.
1. Windows Photos
Best for: Windows users with no editing skills
G2 rating: 4.0/5
Price: Free
If you are a Windows PC user and you are looking for a basic video trimming application, Windows Photos is right there for you. The application comes pre-installed on Windows PC and hence, there is no need to install any external application. Even though Windows Photos is primarily used for viewing photos, there is a dedicated video editor available where you can trim your recorded video easily. Apart from trimming videos, you can do some basic editing like adding title cards and text, video effects, background music, and filters. Here are the pros and cons of Windows Photos.
Pros:-
- Comes pre-installed in Windows.
- Super easy user interface to operate.
- Quick trimming and cutting out videos.
- Different motion transitions and effects present.
- Add titles, texts, and audio to video.
- AVarious filters and 3D effects available.
Cons:-
- Not suitable for trimming large videos.
- Lack of different file formats for saving the videos.
2. QuickTime Player
Best for: Mac users with basic trimming needs
G2 rating: 4.2/5
Price: Free
If you are a Mac user and you are looking for a free video editor for trimming your video, QuickTime Player is the best application for you. Just like Windows Photos for Windows users, QuickTime Player comes pre-installed for Mac users. In fact, it is the default media player for Mac users. Apart from playing media files, you can use QuickTime Player for video recording as well as editing the recorded video. This includes trimming videos and replaying on the application to reach the level of perfection easily. Here are the pros and cons of QuickTime Player you should be aware of.
Pros:-
- The user interface is super easy to operate.
- Trim, flip, split, and merge videos quickly.
- Option to record video with audio flawlessly.
- Instant preview of the edited video on QuickTime.
- QuickTime is compatible with iPhone and iPad.
- Advanced streaming options available in Pro version.
- Supports playing different video file formats.
Cons:-
- Some of the settings are complicated.
- It can crash while editing large video files.
3. iMovie
Best for: Playing and editing videos
G2 rating: 4.3/5
Price: Free
If you are a Mac user and you are looking for a dedicated video editor, iMovie is a great choice. iMovie also comes pre-install on Mac and it is compatible with iPhone and iPad as well. The application is available completely free for mac users and hence, many prefer it over QuickTime Player for editing videos. You can quickly trim your videos as well as rotate and crop your videos as per your requirements. You can enhance your video with effects and filters available. Here are the pros and cons of iMovie you should be aware of.
Pros:-
- Intuitive user interface for easy operation.
- Quick edits to make a raw video presentable.
- Supports 4K video editing without crashing.
- Add different graphical elements for engaging videos.
- Different types of effects and filters for video enhancement.
- Easy sharing options across devices and online platforms.
- Work on multiple video projects simultaneously.
Cons:-
- Editing MP4 video is complicated.
- Lacks advanced editing features.
4. Media Cope
Best for: Multiple video using needs
G2 rating: 4.0/5
Price: Free
Media Cope is a freeware video trimmer for Windows users only. It is a basic video editor with standard editing options. The software is best suited for those who have older Windows versions such as Windows 7. The lightweight application can act as an audio and video player. You can easily trim your video and extract import parts as well. You can also join audio and video files and convert them into desired file formats. Here are the pros and cons of Media Cope.
Pros:-
- Can play audio and video files of different formats.
- Instantly trim and cut video and audio files.
- Can join audio and video clips and save in desired file format.
- Can convert audio and video files as per requirements.
- Transform photos into slideshow instantly.
- Resize photos and take screenshots from videos.
- Modify different video parameters and export the file.
Cons:-
- Lack of various standard video editing options.
- Looks outdated for modern Windows OS.
5. OpenShot
Best for: Open source software lovers
G2 rating: 4.4/5
Price: Free
If you are looking for a video editor that is compatible with all desktop operating system, OpenShot is the best choice for you. It is a completely free, open-source video editor for Windows, Mac and even Linux users. In this list of video editors for beginners, this is the best in terms of features and functionalities. You can trim and slice video, add animations, insert different layers and video effects to enhance the video content. The user interface is rather intuitive in spite of having all the different options you look for in a video editor. Here are the pros and cons of OpenShot video editor.
Pros:-
- Simple but powerful user interface.
- Trim video instantly without different options.
- Add 3D titles, 3D animations, and slow motion effects.
- Loads of video and audio effects present to apply.
- Add different layers of videos, audio tracks, and images.
- Advanced option for keyframing and time mapping.
- Multi-lingual support and frequent updates for new features.
Cons:-
- Unstable performance for large video files.
- The hardware acceleration is not very powerful.
# For Advanced Users
If you are a regular video creator and you want your videos to stand out, this category is for you. You can edit and trim your videos exactly the way you want. Besides, you can transform your raw videos into professional-quality videos with the following video editors.
1. Filmora
Best for: Rich videos effects and templates
G2 rating: 4.4/5
Price: $49.99
Wondershare Filmora is an outstanding video editor where you can trim your video and audio files like a professional. Since you are an advanced user, you will need more than just trimming to make your raw video look stunning. Filmora offers you all the tools and features you will ever need to take your video to the next level.
Compared to other popular premium video editors, Filmora does not need heavy CPU resource and it has an intuitive user interface. That is why video creators especially YouTubers and Vloggers prefer it for editing their videos regularly. The software is available for both Windows and Mac users. Here are the pros and cons of Filmora that you should be aware of.
For Win 7 or later (64-bit)
For macOS 10.12 or later
Pros:-
- Record screen and webcam video with audio sources.
- Basic tools for trimming, splitting, and joining video files.
- Customize different video settings and parameters.
- Add video and audio effects and graphical elements.
- Wide range of stock library of media files and animations.
- Add multiple layers and work with multiple channels while editing.
- Export the recorded or edited video file in different file formats.
Cons:-
- Saving the edited video takes time due to processing part.
2. Adobe Premiere Pro
Best for: Professional video trim, edit and after effects
G2 rating: 4.5/5
Price: $20.99/month
Adobe Premiere Pro is the most powerful video editor and that is why even professional video editors use it for editing movies. There is hardly any video file format that Premiere does not support. You can edit multiple videos at the same time and switch between scenes and clips. Trimming video and audio files is swift with intuitive controls. There is also option for non-linear video editing for advanced users.
Since it is extremely popular in the videography world, there are many organizational tools available for editing large video projects and integrated workflow. The software supports VR video, 3D video, and multicam video editing. The software is available for Windows as well as Mac users. Here are the pros and cons of Adobe Premiere Pro.
Pros:-
- Customizable layouts for reorganizing user interface.
- Quick trimming and playback option without rendering.
- Supports a wide range of file formats for import and export.
- All the different tools for professional video and audio editing.
- Can work on and render multiple video files easily.
- Cross-app functionality with amazing stabilization features.
Cons:-
- The learning curve is rather steep and takes a lot of time.
- The software is only suitable for high-end computers.
3. Final Cut Pro
Best for: Advanced organizing tools of any professional video editing
G2 rating: 4.4/5
Price: $299
Final Cut Pro is equally popular in the videography world as Adobe Premiere Pro. Final Cut Pro is primarily for Mac users as it is developed by Apple. This is the most powerful video editor for Mac users as it is packed with loads of features for professional video editing. Trimming videos is as easy as it gets, along with other standard editing options.
The software supports editing multicam videos, VR videos, 3D videos as well as 360 degree videos. There are endless presets and effects available that you can apply on your video while editing. You can easily edit 4K videos without performance lag. In fact, Final Cut Pro shines where other video editors fail to perform with high resolution and large video files. Here are the pros and cons of Final Cut Pro.
Pros:-
- Trimming, cutting, splitting and joining videos are easy.
- Seamless video editing with standard and advanced tools.
- Different motion graphics templates available.
- Supports external plug-ins and VR headset playback.
- Proper video files and assets organizing and audio editing options.
- Relatively quick rendering of large video files.
Cons:-
- May take time to get used to all the available options.
- Relatively expensive in comparison to peers.
4. Movavi Video Editor
Best for: People who love more brilliant effects in videos
G2 rating: 4.8/5
Price: $74.95
Movavi Video Editor is a premium software for trimming and editing videos. It is available for both Windows and Mac users. There is a free version available but it puts a watermark on the output video. Apart from trimming and splitting videos, you can add various video effects starting from adding titles and transitions to stickers and elements. Besides, you can opt for greenscreen effect and edit videos in vertical mode. Here are the pros and cons of Movavi Video Editor you should be aware of.
Pros:-
- Integrated video capturing options from different sources.
- Instant trimming, splitting, and joining of videos.
- Loads of titles, filters and transitions present.
- Add video PiP layers as well as voiceover.
- Vertical video editing mode present.
- Video stabilization mode and Chroma key.
- Keyframing, slow motion and motion tracking.
Cons:-
- The rendering is not very fast.
- Lack of color tuning options.
5. Bandicut
Best for: Trim, join and split video with fast speed
G2 rating: 4.0/5
Price: $44.96
Bandicut from Bandicam is a dedicated video trimmer for Windows users. It is a premium application with a one-time purchase fee. The software ensures lossless video trimming, and you can trim video instantly thanks to its intuitive user interface. It is a versatile application that you can use to extract audio from a video as well as joining multiple video files. Splitting a large video file into multiple files is super easy. However, it is not a full-fledged video editor like Filmora or Premiere. Therefore, if your objective is specifically to trim, split, and join videos, this is the one for you. Here are the pros and cons of Bandicut.
Pros:-
- Trim and split videos instantly
- Super intuitive user interface.
- Cut segments from videos.
- Join multiple videos quickly.
- Supports different file formats.
- No loss of video quality during editing.
- Hardware acceleration for high performance.
Cons:-
- Very limited editing features.
6. VSDC
Best for: Movie level video cut with light professional skills
G2 rating: 4.0/5
Price: $19.99
VSDC is a free video editor with all the basic editing tools available. VSDC Pro is a premium video editor where advanced features are available. For trimming a video, VSDC free video editor can get the job done. Even though it is completely free, some features are comparable to many premium video editors. For example, you get access to a large set of filters, effects, and transitions that you can apply to your videos. Even when you have a low-end PC, you can do basic video editing works comfortably. Here are all the pros and cons of VSDC free video editor you should know.
Pros:-
- Instant trimming and basic editing of videos.
- Wide range of effects and filters as well as Chroma key.
- Color correction option and non-linear editing available.
- Supports editing 360 degree videos and split-screen videos.
- Supports different video and audio file formats.
- Lightweight and suitable for low-end computers.
Cons:-
- Lacks standard audio editing options.
- Lacks hotkeys and useful keyboard shortcuts.
7. Camtasia
Best for: Tutorial video recording and editing
G2 rating: 4.6/5
Price: $224.99
Camtasia by TechSmith is a premium video editor for Windows and Mac users. Even though it is more popular as a video editor, you can trim your videos easily on the software. You can record anything on your screen as well as external webcam. You can edit recorded video as well as import external video files for quick editing. The software offers easy share instant through which you can share on popular video streaming platforms. There are various templates and themes available to create and edit videos of different categories. Here are the pros and cons of Camtasia.
Pros:-
- Quick trimming, splitting, joining video options.
- Different templates and packages for versatile video creation.
- Various transitions, annotations, and presets present.
- PowerPoint integration, screen and web cam capture.
- Different cursor and audio effects with royalty-free assets.
- Import different media files and upload directly on video streaming platforms.
Cons:-
- Reports of crashes when working with large files.
- No keyframe and motion tracking.
- Very few customization options.
Part 3 Video Trimmers for Mobile
In today’s world, the cameras of smartphones are extremely powerful, and there are many who shoot videos with phone cameras instead of a dedicated digital camera. For example, there are many popular vloggers who shoot their videos with phone cameras, and video creators make short videos with phone cameras. When you shoot a video on your phone, you must be looking for a video trimmer app for your phone so that you can trim the recorded video instantly and share across social media and video streaming platforms. Here is the list of the best video trimmers for mobile.
# For Beginner Users
1. VidTrim Pro
Best for: Android video trimming, merging, frame grabbing
Rating: 4.1/5
Download Link: https://play.google.com/store/apps/details?id=com.goseet.VidTrimPro&hl=en\_US&gl=US
VidTrim is a dedicated video trimmer available for Android users. The free version adds a watermark to the output video, and hence, you have to opt for VidTrim Pro to avoid all limitations. Apart from trimming videos, you can merge videos and convert videos into audio files. You can also add effects and music tracks to your videos. The user interface is as simple as it gets. Here are the pros and cons of VidTrim Pro app.
Pros:-
- Trim videos as well as merge video clips.
- Convert supported video files into Mp3 audio files.
- Rotate videos as well as save screenshots from videos.
- Add cool video effects, sound effects, and soundtracks.
- Multi-lingual support and video file format converter.
Cons:-
- Limited video editing features for a paid video editor app.
- The user interface is simple but outdated.
2. KineMaster
Best for: Video content downloadable
Rating: 4.2/5
Download Link: https://play.google.com/store/apps/details?id=com.nexstreaming.app.kinemasterfree&hl=en\_US&gl=US
You must have seen many videos online with the watermark “Made with Kinemaster”. This is because KineMaster is very popular among amateur video creators. KineMaster is available for Android as well as iOS users. You can instantly trim and crop videos. Besides, you can add special effects, animations and stickers as well as tweak different video settings for enhancements. KineMaster is available free of cost but it attaches a watermark to the output video at one corner. You can subscribe to KineMaster Premium to remove watermark and unlock more features. Here are the pros and cons of KineMaster.
Pros:-
- Trim, cut, slice, and crop videos instantly.
- Add music, sound effects as well as voiceover.
- Provides amazing visual effects and animations.
- Adjust color filters, modes and video speed.
- Supports keyframing and motion tracking.
- Save 4K videos and share instantly online.
Cons:-
- KineMaster chroma key feature has bugs.
- Can crash or freeze handling large video files.
3. Quik
Best for: Producing cinematic auto-edits.
Rating: 4.3/5
Download Link: https://play.google.com/store/apps/details?id=com.gopro.smarty&hl=en\_US&gl=US
Quick from GoPro is fast becoming a popular video editor app. GoPro is the most popular action camera brand and naturally, its video editing app has garnered enough attention. The app is available for Android and iOS users. The app has a mixed bag of options for editing videos quickly. You can trim your videos, add filters and adjust video speed. Besides, its AI can locate the best shots in a video and enhance them with special effects. Here are the pros and cons of Quick app.
Pros:-
- Trim, crop, adjust speed, remove audio from videos.
- Different preset templates available with effects and filters.
- Add music, titles, effects, and transitions.
- Easy sharing of videos and photos.
- Powerful AI to highlight the best shots in a video.
- Adjust video orientation, save in 1080p resolution.
Cons:-
- Not suitable for large video files.
- No font adjustment options.
4. iMovie
Best for: Create Hollywood-style trailers and beautiful movies
Rating: 4.0/5
Download Link: https://apps.apple.com/us/app/imovie/id377298193
iMovie app by Apple is exclusively available for iOS users. iMovie is also available as a software which we have already discussed. In terms of features, iMovie app is very similar to iMovie software. You can instantly make basic editing works. Apart from editing, the app is ideal for creating different types of videos with ready-made templates. There are loads of graphical effects, animated titles, and video filters available to apply. Here are the pros and cons of iMovie app for you.
Pros:-
- Record, trim, split, join and crop videos on the go.
- Choose from different themes and templates to create videos.
- Animated titles, video filters, graphical effects available.
- Chroma key, PiP mode as well as split screen effect possible.
- Add sound effects, music, and depth of field effect.
- Optimized output for social media and video streaming platforms.
- Supports 4K video editing and easy share across Apple devices.
Cons:-
- Limited resources and customization options.
- The app size is large and uses high CPU resources.
# For Advanced Users
1. LumaFusion
Best for: Professional video trimming for iOS devices
Rating: 4.8/5
Download Link: https://apps.apple.com/us/app/lumafusion/id1062022008
LumaFusion is a top-rated video editor for iPad and iPhone. The app is as good as a premium video editor for desktop users. Therefore, professional video creators who use iPhone or iPad for video editing prefer LumaFusion all the time. You can trim, cut, crop, split, and merge videos intuitively from its timeline. Most importantly, you can edit multiple video and audio files together like a professional. Here are the pros and cons of LumaFusion.
Pros:-
- Trim and export video in different file formats.
- Work with multiple video and audio files.
- Preset transitions, instant preview, markers for timeline.
- Add Chroma and Luma key effects as well as stunning visual effects.
- Adjust speed, audio, use keyframes, correct colors.
- Work with titles, fonts, borders, and share conveniently.
- Wide range of media files available in the library.
Cons:-
- Does not support motion tracking.
- Can be difficult to edit large files.
2. Adobe Premiere Rush
Best for: Shoot, edit, and share online videos anywhere.
Rating: 3.0/5
Download Link: https://play.google.com/store/apps/details?id=com.adobe.premiererush.videoeditor&hl=en\_US&gl=US
Even though Adobe Premium Rush app is available or Android and iOS users, it is more popular among iPhone and iPad users. The app is free though there are in-app purchases available. Rush Premium has more features and functionalities. Editing any video is quite convenient though Adobe has tried its level best to offer all the possible features of Adobe Premium Pro desktop software on the app. The app supports multitrack timeline for professional videos. Here are all the pros and cons of Adobe Premiere Rush you should be aware of.
Pros:-
- Record video in high-resolution with the app.
- Trim, crop, mirror, and flip videos.
- Add images, overlays, texts, and stickers.
- Pan and zoom effect, animation titles.
- Royalty-free audio tracks, color correction options.
- Easy exporting of files in different formats.
Cons:-
- Rendering projects can be slow.
- Comes with limited features.
3. Filmmaker Pro Video Editor
Best for: 4K quality video editing
Rating: 4.6/5
Download Link: https://apps.apple.com/us/app/filmmaker-pro-video-editor/id1082956994
Filmmaker Pro is a highly rated video editor that you can use to trim your videos. Filmmaker Pro app is available for both Android and iOS. The app supports 4K video for editing works. The timeline has color codes for different assets and hence, editing becomes easy. You can edit different video parameters and settings and add different effects. The auto save option is extremely useful when it comes to editing a large file. Even though it is available for free, they have a subscription plan for unlocking all features. Here are the pros and cons of Filmmaker Pro Video Editor.
Pros:-
- Trim, split, crop and rotate videos.
- Adjust video speed, volume, video grading.
- Chroma key, voice to text caption, keyframe and motion tracking.
- Different Picture-in-Picture mode for videos, photos, and GIFs.
- Various transition effects, audio effects, and text overlays.
- Different drawing tools, stickers, and graphical elements present.
Cons:-
- The free version has limited features.
- The number of effects are relatively less.
4. Splice Video Editor and Maker
Best for: Vloggers and social platform video cutting
Rating: 4.7/5
Download Link: https://play.google.com/store/apps/details?id=com.splice.video.editor&hl=en\_US&gl=US
Splice Video Editor and Maker is a free but powerful app that enables you to do pro-level editing. You can trim your video clips, adjust speed, and add music on the go. In fact, you can create videos and slideshows instantly and you can add texts and overlays. The music library has different categories of tracks to apply to videos. You can also merge videos as well as change aspect ratio according. The app is available for Android and iOS users. Here are all the pros and cons of Splice Video Editor and Marker.
Pros:-
- Easy interface for smooth trimming and merging of videos.
- Adjust speed, aspect ratio, and video parameters.
- Organize clips and tracks in the timeline intuitively.
- Add custom texts, titles, tracks, transitions, and effects.
- Comes with a wide stock library of media files.
- Direct uploading video files on different social media platforms.
Cons:-
- Limited effects and filters available.
- Frequent crashes while handling large files.
5. Funimate
Best for: Mobile game video trim to show off gaming skills
Rating: 4.5/5
Download Link: https://play.google.com/store/apps/details?id=com.avcrbt.funimate&hl=en\_US&gl=US
Funimate video editor and maker app is quite highly rated on both Play Store and App Store. It is a very powerful and feature-rich app where you will get all the desired editing tools to publish a professional-quality video. Starting from element library to video masks and AI effects, the app takes your video to the next level. You can obviously perform the basic editing works like trimming, splitting and joining. Here are the pros and cons of Funimate app.
Pros:-
- Trimming, merging, and cutting videos.
- Text effects, video AI effects, and effect mixer.
- Comes with over 100 advanced video effects.
- Allows adding music to videos for engaging videos.
- Supports slow motion and looping videos.
- Advanced keyframing and element library.
- Allows creating a professional photo slideshow.
Cons:-
- No multilingual support and auto-save feature.
- Some lagging issues have been reported.
Part 4 Online Video Trimmers
If you are using a video editor on your computer, it takes considerable amount of space in your storage. The same is applicable to video editors for smartphones. If you do not want to install any app on your device yet trim videos conveniently, the online video trimmers are for you. You can open the video trimmer directly from your web browser and trim your video and save it without installing any application on your device. Here is the list of the best online video trimmers.
# For Beginner Users
1. https://online-video-cutter.com/
Best for: Trimming large videos files.
Ratings: 4.2/5
Online Video Cutter is a dedicated video trimmer where you need to drag and drop your video file and cut out the required portion. You can even crop and rotate your videos if there is any such requirement. You can access the online platform directly from your web browser. There is no need for installation of any web launcher. The platform is also secured and hence, your videos won’t get leaked. There is also a Chrome extension available that you can use if you are a Chrome user. Here are the pros and cons of Online Video Cutter.
Pros:-
- Easy video trimming by drag-and-drop files.
- Enables uploading different file formats.
- Rotate feature for saving in portrait and landscape mode.
- Automatically deletes files for better security.
- Crop feature for changing frame size.
- Can edit video file of 4GB capacity.
Cons:-
- May reduce the video quality for the editing video.
2. https://clideo.com/cut-video
Best for: Trimming short videos.
Ratings: 4.5/5
This is another online video trimmer that supports different video file formats. The user interface is sleek for quick video trimming. You can upload file from your device as well as from Cloud storage. In fact, you can use the platform to convert video files. The level of trust and security is high and there are additional settings available for better editing. Here are the pros and cons Clideo Video Cutter.
Pros:-
- Intuitive interface for quick trimming.
- Supports different file formats.
- Converts videos into different formats.
- Offers high-level online security.
- Add fade in and fade out effects.
- Upload video files from Google Drive and Dropbox.
Cons:-
- No drag and drop feature.
- File size is limited to 500 MB only.
3. https://www.kapwing.com/tools/trim-video
Best for: Editing video elaborately.
Ratings: 4.4/5
Kapwing is a dedicated online video editor that will give you the vibe of using a desktop video editor. Therefore, it is suitable for those who are looking for an online platform for trimming as well as various other editing works. You can add texts, images, elements, audio, transitions, as well as record videos. You can also export in different file formats. However, the free version attaches a watermark. Therefore, you have to upgrade to its premium version and use the platform is a full-fledged video editor. Here are the pros and cons of Kapwing.
Pros:-
- Trim, crop, zoom videos and adjust video parameters.
- Supports import and export of different file formats.
- Add effects, audio, and elements to the videos.
- You can work with multiple layers while editing.
- Different sound effects, templates, and scenes and emojis present.
- Stunning user interface that looks like a video editor software.
Cons:-
- Free version attaches watermark and lowers video quality.
4. https://www.freeconvert.com/video-trimmer
Best for: Basic video trimming
Ratings: 4.0/5
FreeConvert Video Trimmer is a free online tool through which you can trim videos of size up to 1GB easily. The platform supports as many as 40 different video file formats. Therefore, you can trim almost any video file easily. The security is tightened so that the uploaded videos do not get leaked. You can upload video files from your device, Google Drive, Dropbox as well as from URL. Therefore, if you want to trim videos that are available online, you can do it easily with this tool. Here are the pros and cons of FreeConvert Video Trimmer.
Pros:-
- Easy to use, intuitive interface.
- Does not require any registration.
- Supports over 40 file formats.
- Compatible with multiple browsers.
- 256-bit SSL encryption offers better security.
- Allows adjustment of parameters before conversion.
Cons:-
- There are too many annoying ads.
# For Advanced Users
5. https://www.veed.io/tools/video-cutter
Best for: Trimming videos for social media platforms.
Ratings: 4.3/5
Veed.io has a wide collection of tools for video editing and the video cutter is a dedicated video trimmer. You can trim videos of popular file formats easily. Apart from video files, the platform supports trimming GIFs and audio files. You can upload videos as well as mention URL of videos that are present online for trimming. The online tool does not degrade the video quality and the output file is of high-quality as well. Here are the pros and cons of Veed.io video cutter.
Pros:-
- Allows saving the video in a high-quality format.
- Supports cutting a wide range of audio file formats.
- Ability to upload and cut animated GIFs.
- Allows cutting YouTube videos directly using URL.
- Easy drag and drop feature for saving time.
- “Split” option for removing the middle part of the video.
Cons:-
- Not suitable for trimming large video files.
6. https://www.fastreel.com/video-cutter.html
Best for: Trimming videos for personal use.
Ratings: 4.2/5
Fastreel online video trimmer lets you trim your videos with a few clicks. Drop your file and mark the points for trimming and there you go. That tool is also useful if you want to split your video. There are several video file formats that the platform supports. The user interface is intuitive and the trimming can be precise. The free version attaches a watermark and hence, the premium version is what you should have. Here are the pros and cons of Fastreel online video trimmer.
Pros:-
- Simple interface for hassle-free trimming.
- Supports different video file formats.
- Feature of data security offers better safety.
- Quick video trimming without using the editor.
- Different file formats while saving the video.
- Precision cutting for removing unwanted segments.
Cons:-
- The free version comes with watermark.
- Free version lowers the video quality.
7. https://flixier.com/tools/video-trimmer
Best for: editing videos as a teamwork
Ratings: 4.4/5
Flixier Video Trimmer is a premium tool to trim and crop videos instantly. The tool is available in a free version but there are many limitations. Therefore, you need to have a premium version of Flixier Video Trimmer. You can export videos in 1080p and 4K resolution. You can opt for transcribing your videos and store videos in the cloud. In the premium version, two team members can work together. Here are the pros and cons of Flixier Video Trimmer.
Pros:-
- Upload videos from YouTube, Twitch, and cloud platforms.
- No need to create account for instant trimming.
- Trim, crop, cut, and add images to videos.
- Supports multiple file formats.
- Comes with an easy collaborative platform.
- Additional translation and transcribe options.
Cons:-
- There are lots of limitations of premium plans as well.
- Only the highest premium plan supports 4K resolution.
8. https://www.wevideo.com/features/video-cutter
Best for: Best premium online video editor
Ratings: 4.5/5
WeVideo Video Cutter is a paid video trimmer though you try out the platform for free. The platform supports a wide range of video files. You can drag and drop files and trim videos instantly. Trimming cannot get any easier and the processing speed of the editing video is fast. You can finish trimming your videos in a few seconds. There is a unique zoom feature to trim out videos accurately. You can also add texts and music to your video file before exporting. Here are the pros and cons of WeVideo Video Cutter.
Pros:-
- Drag and drop feature for quick editing.
- Smooth and accurate trimming with zoom function.
- Music and motion titles library.
- Compatible with different web browsers.
- Export edited files in different file formats.
- There is no capping on file size as such.
Cons:-
- The pricing is on the steeper side.
Part 5 Editing Tips to Improve Your Videos
Apart from trimming, you have to edit different other aspects so that you can make the video engaging and eye-catching. Here are some editing tips you should stick to improve your video content.
Get The Best Video Editor - Editing a video is equally important as shooting a video. Once you have the best video editor, you can rest assured that your editing work is half done. This is because you have all the tools to turn your raw video into stunning video. You can experiment and come up with the best editing work to your own surprise.
Get The Length Correct - In today’s world, viewers have very less time to watch videos. Therefore, a lengthy and elaborative video is a bummer. Hence, you should trim the video and keep only the portions that are relevant, engaging, and not boring.
Start with a Bang - The first impression is always the most important, and hence, the intro of your video is extremely crucial to keep the attention of the audiences intact. To make the intro interesting, you should not only focus on the content but also on video effects and animations that are attention-grabbing.
Smooth Cuts and Soothing Colours - When you are cutting from one scene or angle to another, the transition should be smooth so that it does not feel abrupt. Therefore, you should cut scenes when the subjects and objects seem to be static so that the transition is smooth naturally. Play attention to colour and the video editors allow you to enhance the quality by adjusting the colors and picture properties.
Graphical Objects - Use graphical objects and animated texts wherever possible for better explanations. Things can get boring visually when you do not add graphical elements, transitions, and animations appropriately in different places. Similarly, the use of texts and titles makes the video more engaging. Instead of static texts, there are animated texts and titles available with stickers and memes that you can edit your video with.
Play Attention to Sound - Sound is the most neglected part of a video by amateur video creators when one should pay attention to it. The sound effects can keep the audiences hooked to your video and make them not get bored. Certain sound effects refresh the attention of the audiences when it starts to fade, and hence, you should place the sound effects wisely.
Proper Flow - The editing work should be smooth so that the flow of the video is smooth and efficient. It takes time, and hence, you can practice and learn video editing so that your video can stand out instantly after your editing touches. Besides, the editing should be such that the video feels like a story that audiences can invest in and get engaged throughout.
Part 6 How to Share Your Videos
In order to share videos after trimming them, you need to save the video properly. There are different file formats available for video files. For example, MP4 is the most popular video file format among Windows users. On the contrary, MOV is the most popular video file format. Different file formats have different features such as compression and lossless. According to the file format, the file size varies for the same duration of video.
Therefore, the video trimmer you are using must have different file formats for saving and exporting the editing video files. Some video trimmers have in-built features to share videos on social media platforms and upload on video streaming platforms like YouTube. Depending on your target audiences, you need to adjust the parameters like aspect ratio, video resolution, as well as duration. Besides, you can upload videos on cloud storage and share with anyone as per your requirements.
Part 7 Related FAQs about Video Trimming
1. What is the best video trimmer?
Wondershare Filmora is the best video trimmer as all the features are well-balanced. Apart from trimming, it has all the tools for professional-quality video editing. Filmora can also be used for recording videos. Trimming videos is as easy as it gets and you can export the edited video in different file formats.
2. How can I trim a video?
To trim a video, you will need a video trimmer. If you are a desktop user and you need to regularly edit videos, there are video trimmers available for beginners as well as advanced users. Similarly, there are video editor apps available for mobile users. If you need to trim just one video, you should use an online video trimmer.
3. How can I trim a large video?
In order to trim a large video file, you will need a professional video editor like Filmora so that there is no loss in video quality and frequent crashes and screen freezing incidents while trimming. Drag and drop the video file on Filmora’s timeline and trim the unnecessary parts. You can view the changes and export the file in desired file format.
4. What does trim mean in video editing?
Trimming a video means you are cutting off different portions of a video and reducing its length. Trimming is mostly done to remove unnecessary parts from a video so that the video becomes more engaging without any unnecessary fillers.
5. Can I trim a video in VLC?
Here are the steps to trim a video in VLC Media Player.
- Open VLC Player. Go to View> Advanced Controls. This will make the recording buttons appear.
- Open the video that you want to trim. Mark the portion that you want to keep in your video.
- Play the video and go to the point from where you want to keep the video. Click on Record button.
- Go to the point where you want to end the video. Click on Record button again. All other portions are trimmed and the edited video will be saved.
6. How to trim YouTube videos?
In order to trim YouTube videos, you need to download the videos on your device. You can use an online video trimmer where you can upload the files and trim the videos as per your requirements.
How Can You Create Outstanding Educational Teaching Videos?
Pandemic bought the toughest time for everyone. Some unpredictable decisions were made. Among those decisions, one was online education. Teachers used to record lectures and share them. It was hard for the teachers to record lectures. It was equally hard for the students to study in this way. Teachers record boring lectures, which make it difficult to study and concentrate.
Teachers can add educational background music to their lectures to maintain students’ interest. School videos are not the only educational videos. There are various tutorials on the internet teaching you something. Explainer videos and instructional videos are also kinds of educational videos. This article will share tips to improve your educational teaching videos. Stay with us and learn to make better videos.
In this article
01 Ideas for Making an Outstanding Educational Teaching Video
02 How to Edit A Teacher Introduction Video?
03 3 Recommended Sites to Download Educational Background Music for Studying
Part 1. Ideas for Making an Outstanding Educational Teaching Video
Creating an educational video is not enough. There are a few elements that should be kept in mind. Your content should be good enough. Another thing that needs attention is your viewers’ interest. Your educational video is of no use if it cannot sustain the audience’s interest.
What could be done to improve your videos? How can someone create outstanding educational teaching videos? All your questions will be answered in this section of the article. We are going to share ideas for good educational videos.
· Digital Storytelling
How can digital storytelling help in educational videos? Well, it’s simple. You need to attract and motivate students to study. For this purpose, digital storytelling is the best choice. You can merge different images and videos.
Add cute images from your institute. Insert videos of students working together. All these will attract the student to study.
· Get Dressed
Do you think someone will listen to you with interest if you don’t have a personality? What we wear, how we present ourselves show our personality. If you want to create stunning educational videos, then work a little on yourself first.
Before you start recording, make sure you are well dressed. The more formally you present yourself, the more your students will be attracted.
· Plan Everything
A pro tip for creating outstanding educational videos is your planning. Before properly planning everything, you should never start making a video. You need to gather everything you might need during the video. You should properly compose yourself before you start speaking and teaching.
You should make a mind map of how you will explain things. A storyboard for the sequence of actions should be specified well before. It helps stay on top of things.
· Busy World
What if the video you want to watch is too long and you don’t have that much time? We are very busy in different aspects. For this purpose, it is essential to keep in mind that the educational video should be concise. The video must deliver the actual concept but in a short span of time.
· Audience Hunt
You should have clear knowledge regarding your audience. You must know what content they are looking for. What platform is the most suitable for sharing your content? If you are putting effort into creating amazing educational videos, then a proper audience hunt is also necessary.
Part 2. How to Edit A Teacher Introduction Video?
Have you been searching for the best video editing tool? Let us do the honors and introduce Wondershare Filmora to you. This is the perfect blend between an editing tool and a media library. Filmora has a massive media library. You can get a variety of transitions, effects, titles, etc., from there.
If we talk about the Filmora editing tool, this is amazing for all video creators. The tool is very useful for beginners, experts everyone. With Filmora, edit classy videos. You can edit without limits. Add effects like motion tracing, keyframing from Filmora. It can also be used to edit educational videos. Let us share a step-by-step guideline for making Teachers Introduction in Filmora, shall we?
For Win 7 or later (64-bit)
For macOS 10.12 or later
Step 1: To start making teachers intro in Filmora, firstly, import the background music for work that you want to add to your video. After that, simply drag and drop the music to the timeline.

Step 2: Next, it’s time to add a title to your intro. For that, you need to head over to the ‘Titles’ tab. There search for ‘Back to School’ titles. Select your favorite template from all the available templates and drag it to the timeline. You can edit and customize the template if you want to.

Step 3: Now comes the fun part. Add something to introduce yourself. This will build up the viewers’ interest. You can also add school clips to make an attractive video. Drag the desired media to timeline and trim them accordingly.

Step 4: After adding all the clips, it’s time to do some classy edits. With Filmora, you can easily add Lower Thirds. They can be located in the ‘Titles’ Tab. Lower Thirds can also be customized and edited.

Step 5: With the stunning Filmora editor, you can do wonders. You can perform color correction on your images and clips. With Filmora, add ‘Motion Tracking’ in your video and whatnot.

Step 6: You can conclude your introduction video in very cute ways. For that, head over to the ‘Titles’ tab and select another template. Edit and customize the template according to the video end and drag it on the timeline.

Part 3. 3 Recommended Sites to Download Educational Background Music for Studying
Some people study songs because it helps to concentrate. In the same way, music in educational videos also helps to retain the viewers’ interest. There is appropriate background music for studying available on the internet.
The question here is how can someone find the perfect educational background music? Let us answer your question. The following section of this article will share 3 sites to download work-appropriate background music.
1. Chosic
The first site to be discussed is Chosic. It allows you to download free background music for work. You can find royalty-free MP3 music here. With Chosic, find the perfect work music according to your mood. It offers various genres. The search process is also very convenient. You can search for music by using the tags.

2. Storyblocks
Another site that offers royalty-free music is Storyblocks. It has a lot to offer. You can download your favorite educational background music with Storyblocks. It also lets you create a folder and save your music there. The best thing about Storyblocks is that you can edit the music with its ‘Maker’ feature. Search the music according to your desired genre, instrument choice, moods, etc.

3. TakeTones
With TakeTones, you can find amazing instrumental background music for studying. If you don’t know, TakeTones has royalty-free music. You can not only listen to music but can also download it. The site displays complete details about the music—the music track, its duration, tags, etc. You can either download the music or else add it to your favorites to enjoy it later.

Bottom Line
After taking notes from this article, you will surely create interesting educational teaching videos. The article has shared every bit of information that is needed to create outstanding educational videos. We also introduced the best editor, Filmora. You can take help from Wondershare Filmora to edit mind-blowing videos. In addition to that, we also shed light on sites to download background music for work.
Wondershare Filmora
Get started easily with Filmora’s powerful performance, intuitive interface, and countless effects!
Try It Free Try It Free Try It Free Learn More >

02 How to Edit A Teacher Introduction Video?
03 3 Recommended Sites to Download Educational Background Music for Studying
Part 1. Ideas for Making an Outstanding Educational Teaching Video
Creating an educational video is not enough. There are a few elements that should be kept in mind. Your content should be good enough. Another thing that needs attention is your viewers’ interest. Your educational video is of no use if it cannot sustain the audience’s interest.
What could be done to improve your videos? How can someone create outstanding educational teaching videos? All your questions will be answered in this section of the article. We are going to share ideas for good educational videos.
· Digital Storytelling
How can digital storytelling help in educational videos? Well, it’s simple. You need to attract and motivate students to study. For this purpose, digital storytelling is the best choice. You can merge different images and videos.
Add cute images from your institute. Insert videos of students working together. All these will attract the student to study.
· Get Dressed
Do you think someone will listen to you with interest if you don’t have a personality? What we wear, how we present ourselves show our personality. If you want to create stunning educational videos, then work a little on yourself first.
Before you start recording, make sure you are well dressed. The more formally you present yourself, the more your students will be attracted.
· Plan Everything
A pro tip for creating outstanding educational videos is your planning. Before properly planning everything, you should never start making a video. You need to gather everything you might need during the video. You should properly compose yourself before you start speaking and teaching.
You should make a mind map of how you will explain things. A storyboard for the sequence of actions should be specified well before. It helps stay on top of things.
· Busy World
What if the video you want to watch is too long and you don’t have that much time? We are very busy in different aspects. For this purpose, it is essential to keep in mind that the educational video should be concise. The video must deliver the actual concept but in a short span of time.
· Audience Hunt
You should have clear knowledge regarding your audience. You must know what content they are looking for. What platform is the most suitable for sharing your content? If you are putting effort into creating amazing educational videos, then a proper audience hunt is also necessary.
Part 2. How to Edit A Teacher Introduction Video?
Have you been searching for the best video editing tool? Let us do the honors and introduce Wondershare Filmora to you. This is the perfect blend between an editing tool and a media library. Filmora has a massive media library. You can get a variety of transitions, effects, titles, etc., from there.
If we talk about the Filmora editing tool, this is amazing for all video creators. The tool is very useful for beginners, experts everyone. With Filmora, edit classy videos. You can edit without limits. Add effects like motion tracing, keyframing from Filmora. It can also be used to edit educational videos. Let us share a step-by-step guideline for making Teachers Introduction in Filmora, shall we?
For Win 7 or later (64-bit)
For macOS 10.12 or later
Step 1: To start making teachers intro in Filmora, firstly, import the background music for work that you want to add to your video. After that, simply drag and drop the music to the timeline.
Step 2: Next, it’s time to add a title to your intro. For that, you need to head over to the ‘Titles’ tab. There search for ‘Back to School’ titles. Select your favorite template from all the available templates and drag it to the timeline. You can edit and customize the template if you want to.
Step 3: Now comes the fun part. Add something to introduce yourself. This will build up the viewers’ interest. You can also add school clips to make an attractive video. Drag the desired media to timeline and trim them accordingly.
Step 4: After adding all the clips, it’s time to do some classy edits. With Filmora, you can easily add Lower Thirds. They can be located in the ‘Titles’ Tab. Lower Thirds can also be customized and edited.
Step 5: With the stunning Filmora editor, you can do wonders. You can perform color correction on your images and clips. With Filmora, add ‘Motion Tracking’ in your video and whatnot.
Step 6: You can conclude your introduction video in very cute ways. For that, head over to the ‘Titles’ tab and select another template. Edit and customize the template according to the video end and drag it on the timeline.
Part 3. 3 Recommended Sites to Download Educational Background Music for Studying
Some people study songs because it helps to concentrate. In the same way, music in educational videos also helps to retain the viewers’ interest. There is appropriate background music for studying available on the internet.
The question here is how can someone find the perfect educational background music? Let us answer your question. The following section of this article will share 3 sites to download work-appropriate background music.
1. Chosic
The first site to be discussed is Chosic. It allows you to download free background music for work. You can find royalty-free MP3 music here. With Chosic, find the perfect work music according to your mood. It offers various genres. The search process is also very convenient. You can search for music by using the tags.
2. Storyblocks
Another site that offers royalty-free music is Storyblocks. It has a lot to offer. You can download your favorite educational background music with Storyblocks. It also lets you create a folder and save your music there. The best thing about Storyblocks is that you can edit the music with its ‘Maker’ feature. Search the music according to your desired genre, instrument choice, moods, etc.
3. TakeTones
With TakeTones, you can find amazing instrumental background music for studying. If you don’t know, TakeTones has royalty-free music. You can not only listen to music but can also download it. The site displays complete details about the music—the music track, its duration, tags, etc. You can either download the music or else add it to your favorites to enjoy it later.
Bottom Line
After taking notes from this article, you will surely create interesting educational teaching videos. The article has shared every bit of information that is needed to create outstanding educational videos. We also introduced the best editor, Filmora. You can take help from Wondershare Filmora to edit mind-blowing videos. In addition to that, we also shed light on sites to download background music for work.
Wondershare Filmora
Get started easily with Filmora’s powerful performance, intuitive interface, and countless effects!
Try It Free Try It Free Try It Free Learn More >
Best Video Editing Courses Online with Certificate
The best way to learn video editing is from people who are experts in the field. Plus, getting a certification is a nice bonus that can more easily land you a great job when you’re done. With that said, we’re offering a comprehensive list of the best video editing courses with certification — ones you’ll be glad to complete.
Read below to find out all about these courses. What they teach, who they are from, and how they will benefit you.
List of the Best Online Video Editing Courses With Certification
You’re about to see a list of video editing courses categorized into four groups. Each caters to specific needs that will help you make a better decision.
Courses With Certification for Popular Video Editor Platforms
| Course Name | Vendor |
|---|---|
| Premiere Pro CC for Beginners: Video Editing in Premiere | Udemy |
| Video Editing in DaVinci Resolve 18/17 | Udemy |
| DaVinci Resolve Fundamentals | LinkedIn Learning |
| PowerDirector 15 – Video Editing for PC Users | Udemy |
| Mastering Final Cut Pro | Coursera |
| Learning Final Cut Pro X – Video Editing Mastery | Udemy |
Video Editing Tutorials - Mastering The Basics
| Course Name | Vendor |
|---|---|
| Video Production Essentials | Fiverr Learn |
| Free Video Editing Courses and Tutorials | Udemy |
| Introduction to Video Editing | |
| Video editing fundamentals | |
| Online Video Editing Classes | Skillshare |
| The Complete Video Production Bootcamp | Udemy |
Video Editing Courses With Certification For Mobile Users
| Course Name | Vendor |
|---|---|
| Smartphone Video For Beginners – iPhone Video Editing Course | Udemy |
Cinematic Level Video Editing Courses
| Course Name | Vendor |
|---|---|
| VIDEO EDITING. Techniques loved by pro broadcast filmmakers | Udemy |
| The History of Film and Video Editing |
What You Will Learn From Each Course
Each video editing course online with certification offers something unique. Below, you can see a detailed comparison between all of them. As a result, you’ll know exactly which course to choose and which video editing tool to start with.
1. Courses With Certification for Popular Video Editor Platforms
First, let’s break down all the courses in this group. You’ll learn about its ratings, duration, contents, and more.
Premiere Pro CC for Beginners: Video Editing in Premiere

Initially, this course dives into the basics of video editing. Then, you get into more advanced topics that will help you distinguish yourself from the complete beginners.
- Vendor: Udemy
- Cost: $19.99
- Duration: 24.5 hours
- Rating: 4.7 / 5
- Level: Beginner-Advanced
Key topics inside this course:
- How to export your videos for High-Definition Playback and 4K
- Video color correction
- How to apply visual effects
- Design clean and modern titles for any video
- The editing process of a video from beginning to end
- Load the perfect settings at the start of each project
- Color grading
- Edit green screen footage
- How to add motion to titles, photos, and videos
At the end of the course, you’ll have the skills necessary to edit an entire video from start to finish. Additionally, you’ll know your way around Adobe Premiere Pro. Most of the topics taught inside will be enough to help you land a video editing job or edit your videos professionally.
Video Editing in DaVinci Resolve 18/17

With this video editing course, you will master editing in DaVinci Resolve. It includes beginner lessons, as well as a few advanced editing techniques. Over 30.000 students have currently completed it.
- Vendor: Udemy
- Cost: $84.99
- Duration: 11.5 hours
- Rating: 4.6 / 5
- Level: Beginner-Advanced
Key topics inside this course:
- How to add effects to videos in DaVinci Resolve
- Color Grading with multiple tools
- Master different types of Nodes
- Complete tests doing various projects
- Cut page quick and easy video editing
- Adding motion graphics
- Effective color-correcting methods
- Using Color Wheels, Power windows, Scopes, Curves, Qualifiers, and more
This course aims to teach you how to use DaVinci Resolve. After you’ve mastered the platform, the mentor shows you various tips and tricks to edit videos more professionally using this tool.
PowerDirector 15 - Video Editing for PC Users

Power Director 15 is a great app to learn video editing if you’re a Windows user. This course covers everything necessary for you to know your way around this program quickly.
- Vendor: Udemy
- Cost: $13.99
- Duration: 4h
- Rating: 4.5 / 5
- Level: Beginner
Key topics inside this course:
- How to export high-quality videos for any device or platform
- How to use every feature in Power Director, including the newest ones
- Add professional titles and animated graphics to any video
- Master using blend modes, masks, and the action camera center
The knowledge in this video editing course online with certification will allow you to edit videos the way you envision. You will have the ability to create anything you want, and deliver exceptional results.

Mastering Final Cut Pro is an online video editing course with certification that grants you the knowledge to use this tool. In addition, you and over 30.000 other students get to learn from Apple Certified trainers.
- Vendor: Coursera
- Cost: $49
- Duration: 40h
- Rating: 4.5 / 5
- Level: Beginner
Key topics inside this course:
- The best ways to import and export project files with Final Cut Pro
- How to apply effects and modern transitions
- Creating a project and editing a video from start to finish
- Change the timing of clips
This is the perfect course if you’ve never used Final Cut Pro. It’s beginner-friendly and takes you through every step of using the platform, from creating a project to editing it and finally exporting a high-quality video.
Learning Final Cut Pro X – Video Editing Mastery

This is a video editing course for anyone using Mavericks OS. It’s designed to take full advantage of this Operating System alongside the Final Cut Pro X platform.
- Vendor: Udemy
- Cost: $14.99
- Duration: 6h 30min
- Rating: 4.7 / 5
- Level: Beginner
Key topics inside this course:
- Mastering the user interface and choosing your preferences
- Learning helpful shortcuts to speed up your workflow
- Best and quickest methods to import media
- How to organize your clips
- Using the timeline
- Working with effects, keyframes, compounds clips, and audio clips
- How to use generators and white screens
- The best export settings and other tips
If you’ve ever wanted to master Final Cut Pro X, there’s no better place to go. This course is designed to start on a beginner-friendly level. But, it moves to more advanced lessons later down the line.
2. Video Editing Tutorials - Mastering The Basics
The following video editing courses include lessons mainly on the basics of video editing. They won’t focus on any specific platform or tool. Instead, you’ll be learning the most important principles of creating a high-quality and modern video.

A fairly simple course designed to teach you the process of creating and editing a video from scratch. This is one of the best video editing courses online, featuring several professional mentors.
- Vendor: Fiverr Learn
- Cost: $24
- Duration: 6h 38min
- Rating: 4.8 / 5
- Level: Beginner to Intermediate
Key topics inside this course:
- What equipment to use for professional video editing
- How to shoot high-quality video with your smartphone
- Professional video and audio recording techniques
- Exporting settings for high-quality online viewing
- Fundamentals of using a DSLR or Mirrorless camera
- Create high-converting CTAs for your videos
The course will help you understand crucial facts about many different types of videos that are in demand today. You’ll learn how to use and navigate video editing tools to create anything you can imagine. The mentors even offer a few tips for growing your own Youtube channel.
Free Video Editing Courses and Tutorials

This pick is slightly different. Here, you can see a list of a few of the best video editing courses that are completely free. They are still taught by experts and offer plenty of useful knowledge, especially for beginners.
- Vendor: Udemy
- Cost: Free
- Duration: Unknown
- Rating: Varies
- Level: Beginner to Intermediate
Key topics inside this course:
- Beginner lessons on editing all types of videos
- How to record professional video content
- Beginner lessons for many different video editing platforms
- 3D Video Composition
- Understand how to use Premiere Pro
- Video editing on your smartphone
- Camtasia 9 Mastery Course
- How to create social media marketing videos
This is a list of many different video editing courses that are free on Udemy. Millions of members have enrolled and are learning for free. Best of all, it’s a great way to dive into video editing for free. Then, you can choose some of the paid ones for more advanced lessons.

This course gives you a LinkedIn Learning Certificate and the knowledge to edit your first-ever video. There are 6 different lesson categories that you will enjoy going through. Each one focuses on another skill or principle.
- Vendor: LinkedIn Learning
- Cost: $34.99
- Duration: 2h 53min
- Rating: 4.7 / 5
- Level: Beginner
Key topics inside this course:
- The importance of storytelling in video editing
- Structures and transitions
- Timing and pacing
- Shot composition
- Comparing different editing applications
- Track-based editing vs. storyline-based editing
- Organizing your files
- How to edit a short documentary
- Audio editing lessons
- Post-production processes
This course offers a video editing certification that proves you’re well accustomed to the basic principles of this skill. You will know your way around different editing platforms. You will learn how to edit modern videos. And you will know exactly where to focus your efforts for improving yourself and your skills next.

This course features essential video editing foundations in one exciting program. It’s a short course designed to introduce you to video editing. To be more precise, you will mainly learn about the post-production process of video editing.
- Vendor: LinkedIn Learning
- Cost: LinkedIn Learning Membership Only ($39.99)
- Duration: 37min
- Rating: 4.7 / 5
- Level: Beginner
Key topics inside this course:
- Trimming or fine-tuning the product
- Audio editing process
- How to add images to your videos
- Video effects tutorials
- Color correction
- How to use text to your advantage
- Export and delivery settings
This certificate will prove that you know what it takes to edit a video professionally. It tells us that you are familiar with all the different parts that come together to create a video worth watching.

This is a list of video editing courses by some of the most popular video editors on the planet. You’ll learn from huge names such as Marques Brownies, Nathaniel Drew, Jordy Vandeput, and many more. So, pick your favorite, and start learning.
- Vendor: Skillshare
- Cost: Depends
- Duration: 37min
- Rating: Varies
- Level: From Beginner to Pro
Key topics inside this course:
- How to create mind-blowing Youtube videos
- Adobe Premiere Pro for Beginners
- How to document your life
- Final Cut Pro X - Beginner to Youtuber
- Introduction to Filmmaking
- Mastering TikTok videos
- iPhone Filmmaking
- Advanced training for all video editing apps
There are courses for all skill levels here. You can start as a complete beginner and finish as a master who knows how to create a worthwhile video. Or, you can choose one that improves your current skills.
The Complete Video Production Bootcamp

A nine-hour course on everything video editing related. To be more precise, you will dive into video production tutorials, cinematography, editing & distribution, and more. Companies like Nasdaq, Box, NetApp, and more offer this course to their employees.
- Vendor: Udemy
- Cost: $19.99
- Duration: 9h
- Rating: 4.5 / 5
- Level: Beginner
Key topics inside this course:
- Video storytelling
- How to record better audio
- Tips for posting videos online
- Discover the best equipment to use
- How to set up the perfect lighting
- How to get more engagement on your videos
- Create professional videos with any equipment
Over 160.000 students have benefited from the contents of this course. It dives into both beginner and advanced video editing lessons. So even if you don’t have any experience in this, you will still easily understand everything taught inside.
3. Video Editing Courses With Certification For Mobile Users
The courses you will see in this list are exclusively for mobile users. You can still make great videos on your mobile device if you don’t have a computer. All of the knowledge you need for this is below.
Smartphone Video For Beginners – iPhone Video Editing Course

Dive into five hours of content teaching you how to create unbelievable videos on your phone. You’ll be surprised by how it’s possible to create such professional videos on a smartphone.
- Vendor: Udemy
- Cost: $99.99
- Duration: 5h
- Rating: 4.3 / 5
- Level: Beginner
Key topics inside this course:
- Must-have gear for editing on a smartphone (Affordable options)
- How to set up your phone’s camera for optimal results
- Must-have free apps for professional smartphone video editing
- Using gimbals, action cams, and drones with your phone
- Video storytelling on a smartphone
- Phone resolutions, frame rates, ProRes, color space, and more
- How to make Cinematic shots, hit the right angles, and similar
This outstanding course will give you a certification proving you’re one of the rare video editors who can create wonders from their phones. From now on, you can’t use the excuse that you don’t have an excellent PC to create amazing videos.
4. Cinematic Level Video Editing Courses
The final category will introduce you to video editing courses online with certification for cinematic-level skills. Completing these courses will prove you are a master video editor who knows no bounds.
VIDEO EDITING. Techniques loved by pro broadcast filmmakers

Your teacher for this course will be Andrew St.Pierre White, an award-winning video editing veteran. He will teach you tips and tricks used by professionals to this day. Timeless advice that will take your career to the next level.
- Vendor: Udemy
- Cost: $84.99
- Duration: 3h 30min
- Rating: 4.5 / 5
- Level: Advanced to Pro
Key topics inside this course:
- How to entertain and inspire any audience
- Understand the balance between good editing and good content
- Amazing techniques used in TV production
- Turn great editing into great results
- Turn amateur videos into professional productions
- Most common mistakes filmmakers make
Once you know the basics of video editing, this course will take your skills to the next level. You will learn how the big players make professional videos that capture massive audiences. Plus, your mentor will show you how to work with big names in this industry.
The History of Film and Video Editing

Never underestimate how much history can teach you. Completing this course will teach you more about video editing than many pro filmmakers. Find out how video editing has progressed through the last century.
- Vendor: LinkedIn Learning
- Cost: $34.99
- Duration: 2h 10min
- Rating: 4.8 / 5
- Level: Everyone
Key topics inside this course:
- Early days of photography and film
- Continuity editing and montage theory
- When sound was born
- Establishing the standards for editing
- Evolution of editing techniques
- Technology
- The rise of the digital era
By learning the history of video editing, you will be more aware. You will realize what people love to see and detect patterns. These patterns will guide you toward becoming a professional video editor.
Make Your Video Editing Journey Easier
Now that we’re done with learning, it’s time to start doing. You already have enough fantastic courses to learn everything necessary to edit videos professionally. But now, how do you use your skills and achieve the easiest and quickest results?
Your best option is to use the Filmora video editor.
What Is Filmora and Filmora?
It’s as powerful as Adobe Premiere Pro but more straightforward to navigate. In addition, Filmora lets you command an arsenal of unique tools necessary for creating modern videos.
Free Download For Win 7 or later(64-bit)
Free Download For macOS 10.14 or later
Anyone on both Windows and Mac can use Filmora. In addition, if you’re a mobile user, you can download Filmora and enjoy the same benefits.
Aside from its easy-to-use interface, Filmora is packed with editing resources that will never leave you wondering how or what to do next. Of course, you can watch the free Youtube tutorials to master the platform entirely.
For example, we have prepared you with a video tutorial below to start your video editing journey with no delay!
Lastly, you can easily export in any format necessary for your project. It doesn’t get easier than this.
Conclusion
The video editing certification online courses you see here are more than enough to prepare you. You will learn everything it takes to edit any video. Use this information wisely and take advantage of this beautiful opportunity to become one of the best video editors.
Video Editing Tutorials - Mastering The Basics
| Course Name | Vendor |
|---|---|
| Video Production Essentials | Fiverr Learn |
| Free Video Editing Courses and Tutorials | Udemy |
| Introduction to Video Editing | |
| Video editing fundamentals | |
| Online Video Editing Classes | Skillshare |
| The Complete Video Production Bootcamp | Udemy |
Video Editing Courses With Certification For Mobile Users
| Course Name | Vendor |
|---|---|
| Smartphone Video For Beginners – iPhone Video Editing Course | Udemy |
Cinematic Level Video Editing Courses
| Course Name | Vendor |
|---|---|
| VIDEO EDITING. Techniques loved by pro broadcast filmmakers | Udemy |
| The History of Film and Video Editing |
What You Will Learn From Each Course
Each video editing course online with certification offers something unique. Below, you can see a detailed comparison between all of them. As a result, you’ll know exactly which course to choose and which video editing tool to start with.
1. Courses With Certification for Popular Video Editor Platforms
First, let’s break down all the courses in this group. You’ll learn about its ratings, duration, contents, and more.
Premiere Pro CC for Beginners: Video Editing in Premiere
Initially, this course dives into the basics of video editing. Then, you get into more advanced topics that will help you distinguish yourself from the complete beginners.
- Vendor: Udemy
- Cost: $19.99
- Duration: 24.5 hours
- Rating: 4.7 / 5
- Level: Beginner-Advanced
Key topics inside this course:
- How to export your videos for High-Definition Playback and 4K
- Video color correction
- How to apply visual effects
- Design clean and modern titles for any video
- The editing process of a video from beginning to end
- Load the perfect settings at the start of each project
- Color grading
- Edit green screen footage
- How to add motion to titles, photos, and videos
At the end of the course, you’ll have the skills necessary to edit an entire video from start to finish. Additionally, you’ll know your way around Adobe Premiere Pro. Most of the topics taught inside will be enough to help you land a video editing job or edit your videos professionally.
Video Editing in DaVinci Resolve 18/17
With this video editing course, you will master editing in DaVinci Resolve. It includes beginner lessons, as well as a few advanced editing techniques. Over 30.000 students have currently completed it.
- Vendor: Udemy
- Cost: $84.99
- Duration: 11.5 hours
- Rating: 4.6 / 5
- Level: Beginner-Advanced
Key topics inside this course:
- How to add effects to videos in DaVinci Resolve
- Color Grading with multiple tools
- Master different types of Nodes
- Complete tests doing various projects
- Cut page quick and easy video editing
- Adding motion graphics
- Effective color-correcting methods
- Using Color Wheels, Power windows, Scopes, Curves, Qualifiers, and more
This course aims to teach you how to use DaVinci Resolve. After you’ve mastered the platform, the mentor shows you various tips and tricks to edit videos more professionally using this tool.
PowerDirector 15 - Video Editing for PC Users
Power Director 15 is a great app to learn video editing if you’re a Windows user. This course covers everything necessary for you to know your way around this program quickly.
- Vendor: Udemy
- Cost: $13.99
- Duration: 4h
- Rating: 4.5 / 5
- Level: Beginner
Key topics inside this course:
- How to export high-quality videos for any device or platform
- How to use every feature in Power Director, including the newest ones
- Add professional titles and animated graphics to any video
- Master using blend modes, masks, and the action camera center
The knowledge in this video editing course online with certification will allow you to edit videos the way you envision. You will have the ability to create anything you want, and deliver exceptional results.
Mastering Final Cut Pro is an online video editing course with certification that grants you the knowledge to use this tool. In addition, you and over 30.000 other students get to learn from Apple Certified trainers.
- Vendor: Coursera
- Cost: $49
- Duration: 40h
- Rating: 4.5 / 5
- Level: Beginner
Key topics inside this course:
- The best ways to import and export project files with Final Cut Pro
- How to apply effects and modern transitions
- Creating a project and editing a video from start to finish
- Change the timing of clips
This is the perfect course if you’ve never used Final Cut Pro. It’s beginner-friendly and takes you through every step of using the platform, from creating a project to editing it and finally exporting a high-quality video.
Learning Final Cut Pro X – Video Editing Mastery
This is a video editing course for anyone using Mavericks OS. It’s designed to take full advantage of this Operating System alongside the Final Cut Pro X platform.
- Vendor: Udemy
- Cost: $14.99
- Duration: 6h 30min
- Rating: 4.7 / 5
- Level: Beginner
Key topics inside this course:
- Mastering the user interface and choosing your preferences
- Learning helpful shortcuts to speed up your workflow
- Best and quickest methods to import media
- How to organize your clips
- Using the timeline
- Working with effects, keyframes, compounds clips, and audio clips
- How to use generators and white screens
- The best export settings and other tips
If you’ve ever wanted to master Final Cut Pro X, there’s no better place to go. This course is designed to start on a beginner-friendly level. But, it moves to more advanced lessons later down the line.
2. Video Editing Tutorials - Mastering The Basics
The following video editing courses include lessons mainly on the basics of video editing. They won’t focus on any specific platform or tool. Instead, you’ll be learning the most important principles of creating a high-quality and modern video.
A fairly simple course designed to teach you the process of creating and editing a video from scratch. This is one of the best video editing courses online, featuring several professional mentors.
- Vendor: Fiverr Learn
- Cost: $24
- Duration: 6h 38min
- Rating: 4.8 / 5
- Level: Beginner to Intermediate
Key topics inside this course:
- What equipment to use for professional video editing
- How to shoot high-quality video with your smartphone
- Professional video and audio recording techniques
- Exporting settings for high-quality online viewing
- Fundamentals of using a DSLR or Mirrorless camera
- Create high-converting CTAs for your videos
The course will help you understand crucial facts about many different types of videos that are in demand today. You’ll learn how to use and navigate video editing tools to create anything you can imagine. The mentors even offer a few tips for growing your own Youtube channel.
Free Video Editing Courses and Tutorials
This pick is slightly different. Here, you can see a list of a few of the best video editing courses that are completely free. They are still taught by experts and offer plenty of useful knowledge, especially for beginners.
- Vendor: Udemy
- Cost: Free
- Duration: Unknown
- Rating: Varies
- Level: Beginner to Intermediate
Key topics inside this course:
- Beginner lessons on editing all types of videos
- How to record professional video content
- Beginner lessons for many different video editing platforms
- 3D Video Composition
- Understand how to use Premiere Pro
- Video editing on your smartphone
- Camtasia 9 Mastery Course
- How to create social media marketing videos
This is a list of many different video editing courses that are free on Udemy. Millions of members have enrolled and are learning for free. Best of all, it’s a great way to dive into video editing for free. Then, you can choose some of the paid ones for more advanced lessons.
This course gives you a LinkedIn Learning Certificate and the knowledge to edit your first-ever video. There are 6 different lesson categories that you will enjoy going through. Each one focuses on another skill or principle.
- Vendor: LinkedIn Learning
- Cost: $34.99
- Duration: 2h 53min
- Rating: 4.7 / 5
- Level: Beginner
Key topics inside this course:
- The importance of storytelling in video editing
- Structures and transitions
- Timing and pacing
- Shot composition
- Comparing different editing applications
- Track-based editing vs. storyline-based editing
- Organizing your files
- How to edit a short documentary
- Audio editing lessons
- Post-production processes
This course offers a video editing certification that proves you’re well accustomed to the basic principles of this skill. You will know your way around different editing platforms. You will learn how to edit modern videos. And you will know exactly where to focus your efforts for improving yourself and your skills next.
This course features essential video editing foundations in one exciting program. It’s a short course designed to introduce you to video editing. To be more precise, you will mainly learn about the post-production process of video editing.
- Vendor: LinkedIn Learning
- Cost: LinkedIn Learning Membership Only ($39.99)
- Duration: 37min
- Rating: 4.7 / 5
- Level: Beginner
Key topics inside this course:
- Trimming or fine-tuning the product
- Audio editing process
- How to add images to your videos
- Video effects tutorials
- Color correction
- How to use text to your advantage
- Export and delivery settings
This certificate will prove that you know what it takes to edit a video professionally. It tells us that you are familiar with all the different parts that come together to create a video worth watching.
This is a list of video editing courses by some of the most popular video editors on the planet. You’ll learn from huge names such as Marques Brownies, Nathaniel Drew, Jordy Vandeput, and many more. So, pick your favorite, and start learning.
- Vendor: Skillshare
- Cost: Depends
- Duration: 37min
- Rating: Varies
- Level: From Beginner to Pro
Key topics inside this course:
- How to create mind-blowing Youtube videos
- Adobe Premiere Pro for Beginners
- How to document your life
- Final Cut Pro X - Beginner to Youtuber
- Introduction to Filmmaking
- Mastering TikTok videos
- iPhone Filmmaking
- Advanced training for all video editing apps
There are courses for all skill levels here. You can start as a complete beginner and finish as a master who knows how to create a worthwhile video. Or, you can choose one that improves your current skills.
The Complete Video Production Bootcamp
A nine-hour course on everything video editing related. To be more precise, you will dive into video production tutorials, cinematography, editing & distribution, and more. Companies like Nasdaq, Box, NetApp, and more offer this course to their employees.
- Vendor: Udemy
- Cost: $19.99
- Duration: 9h
- Rating: 4.5 / 5
- Level: Beginner
Key topics inside this course:
- Video storytelling
- How to record better audio
- Tips for posting videos online
- Discover the best equipment to use
- How to set up the perfect lighting
- How to get more engagement on your videos
- Create professional videos with any equipment
Over 160.000 students have benefited from the contents of this course. It dives into both beginner and advanced video editing lessons. So even if you don’t have any experience in this, you will still easily understand everything taught inside.
3. Video Editing Courses With Certification For Mobile Users
The courses you will see in this list are exclusively for mobile users. You can still make great videos on your mobile device if you don’t have a computer. All of the knowledge you need for this is below.
Smartphone Video For Beginners – iPhone Video Editing Course
Dive into five hours of content teaching you how to create unbelievable videos on your phone. You’ll be surprised by how it’s possible to create such professional videos on a smartphone.
- Vendor: Udemy
- Cost: $99.99
- Duration: 5h
- Rating: 4.3 / 5
- Level: Beginner
Key topics inside this course:
- Must-have gear for editing on a smartphone (Affordable options)
- How to set up your phone’s camera for optimal results
- Must-have free apps for professional smartphone video editing
- Using gimbals, action cams, and drones with your phone
- Video storytelling on a smartphone
- Phone resolutions, frame rates, ProRes, color space, and more
- How to make Cinematic shots, hit the right angles, and similar
This outstanding course will give you a certification proving you’re one of the rare video editors who can create wonders from their phones. From now on, you can’t use the excuse that you don’t have an excellent PC to create amazing videos.
4. Cinematic Level Video Editing Courses
The final category will introduce you to video editing courses online with certification for cinematic-level skills. Completing these courses will prove you are a master video editor who knows no bounds.
VIDEO EDITING. Techniques loved by pro broadcast filmmakers
Your teacher for this course will be Andrew St.Pierre White, an award-winning video editing veteran. He will teach you tips and tricks used by professionals to this day. Timeless advice that will take your career to the next level.
- Vendor: Udemy
- Cost: $84.99
- Duration: 3h 30min
- Rating: 4.5 / 5
- Level: Advanced to Pro
Key topics inside this course:
- How to entertain and inspire any audience
- Understand the balance between good editing and good content
- Amazing techniques used in TV production
- Turn great editing into great results
- Turn amateur videos into professional productions
- Most common mistakes filmmakers make
Once you know the basics of video editing, this course will take your skills to the next level. You will learn how the big players make professional videos that capture massive audiences. Plus, your mentor will show you how to work with big names in this industry.
The History of Film and Video Editing
Never underestimate how much history can teach you. Completing this course will teach you more about video editing than many pro filmmakers. Find out how video editing has progressed through the last century.
- Vendor: LinkedIn Learning
- Cost: $34.99
- Duration: 2h 10min
- Rating: 4.8 / 5
- Level: Everyone
Key topics inside this course:
- Early days of photography and film
- Continuity editing and montage theory
- When sound was born
- Establishing the standards for editing
- Evolution of editing techniques
- Technology
- The rise of the digital era
By learning the history of video editing, you will be more aware. You will realize what people love to see and detect patterns. These patterns will guide you toward becoming a professional video editor.
Make Your Video Editing Journey Easier
Now that we’re done with learning, it’s time to start doing. You already have enough fantastic courses to learn everything necessary to edit videos professionally. But now, how do you use your skills and achieve the easiest and quickest results?
Your best option is to use the Filmora video editor.
What Is Filmora and Filmora?
It’s as powerful as Adobe Premiere Pro but more straightforward to navigate. In addition, Filmora lets you command an arsenal of unique tools necessary for creating modern videos.
Free Download For Win 7 or later(64-bit)
Free Download For macOS 10.14 or later
Anyone on both Windows and Mac can use Filmora. In addition, if you’re a mobile user, you can download Filmora and enjoy the same benefits.
Aside from its easy-to-use interface, Filmora is packed with editing resources that will never leave you wondering how or what to do next. Of course, you can watch the free Youtube tutorials to master the platform entirely.
For example, we have prepared you with a video tutorial below to start your video editing journey with no delay!
Lastly, you can easily export in any format necessary for your project. It doesn’t get easier than this.
Conclusion
The video editing certification online courses you see here are more than enough to prepare you. You will learn everything it takes to edit any video. Use this information wisely and take advantage of this beautiful opportunity to become one of the best video editors.
Also read:
- Updated How to Use Twixtor Effect to Create Super Slow-Motion Video?
- Updated 2024 Approved Guide To Make a YouTube Intro by Filmora
- In 2024, Looking for Final Cut Pro Alternative App for Your Android Smartphone or iPhone? Here Is the List of the Best FCP Alternative Apps for Android and iOS Users
- New 2024 Approved Practical Way to Resize Video in Handbrake
- Updated Complete Guide to Make an Intro Video for 2024
- New Convert Time-Lapse to Normal Video for 2024
- New 2024 Approved How to Make GIFs From Videos on Mac
- New Want to Play a Video in the Loop on Your Mac? Here Is How You Can Make a Video Loop in QuickTime in Simple Steps
- New 2024 Approved Top 8 Sites to Download Glitch Transition for Premiere Pro
- New In This Article, You Will Learn How to Create an Attractive and Engaging Slideshow Video Using Tools Available in the Wondershare Filmora
- New In 2024, The Best Peter McKinnon LUTs for Perfect Video Editing
- Updated Vintage Film Effect 1920S - How to Make for 2024
- The Glitch Effect Shows Errors and Flaws in the Image or a Video. The Write-Up Presents the Complete Procedure of Adding Premiere Pros Glitch Effect and Introduces Eight Free Glitch Effects for 2024
- Splice App for Android - How to Download & Use
- Top 7 MP4 Video Editors on Mac Edit MP4 Videos Easily for 2024
- AR Is a Trend These Days. Here, You Can Browse the List of Top 10 Picks for AR Video Editing Apps
- Updated Elevate Your Designs with Feather Shapes in After Effects
- How to Apply Gaussian Blur Effect to Videos In Premiere Pro, In 2024
- What is Fake GPS Location Pro and Is It Good On Motorola Moto G14? | Dr.fone
- How to Come up With the Best Pokemon Team On Oppo Reno 8T 5G? | Dr.fone
- How to Transfer Data from Realme V30T to Any iOS Devices | Dr.fone
- In 2024, How to Transfer Data from Nokia 105 Classic to BlackBerry | Dr.fone
- In 2024, Top 5 Tracking Apps to Track OnePlus 11 5G without Them Knowing | Dr.fone
- How to Check Distance and Radius on Google Maps For your Oppo Reno 8T 5G | Dr.fone
- Factory Reset Apple iPhone 12 Pro Max | Dr.fone
- In 2024, Complete Tutorial to Use VPNa to Fake GPS Location On Motorola Moto G73 5G | Dr.fone
- In 2024, How to Screen Mirroring Xiaomi Redmi K70 Pro to PC? | Dr.fone
- How PGSharp Save You from Ban While Spoofing Pokemon Go On Oppo F23 5G? | Dr.fone
- What To Do When Nokia G310 Has Black Screen of Death? | Dr.fone
- How to Screen Mirroring Motorola Moto E13 to PC? | Dr.fone
- Title: Do You Want to Professionally Blur the Background in Your Video? Read This Article to Find Out the Easiest Way to Blur the Background in Videos Using Adobe After Effects
- Author: Chloe
- Created at : 2024-05-20 03:37:33
- Updated at : 2024-05-21 03:37:33
- Link: https://ai-editing-video.techidaily.com/do-you-want-to-professionally-blur-the-background-in-your-video-read-this-article-to-find-out-the-easiest-way-to-blur-the-background-in-videos-using-adobe-a/
- License: This work is licensed under CC BY-NC-SA 4.0.
