
:max_bytes(150000):strip_icc():format(webp)/18-Hidden-Snapchat-Features-efa75dca521e4cf6bb321dc960276deb.jpg)
Do You Want to Use LUTs in Final Cut Pro? There Are Many Free LUTs for FCPX Available that You Can Use. Using LUTs, You Can Create Professional-Looking Content
Do You Want to Use LUTs in Final Cut Pro? There Are Many Free LUTs for FCPX Available that You Can Use. Using LUTs, You Can Create Professional-Looking Content
Final Cut Pro is a powerful video editing software available for Mac OS. You can create professional-looking videos using this tool. To give your videos a more professional touch, you can use LUTs as well. It is a quick way to color grade and improve the feel of your media content. They are essentially a set of instructions that apply a particular color grading to your video.
Moreover, with so many options available, you can choose from any color grading style you want. From cinematic to retro, LUTs offer you a variety of color adjustment tones and overlays. All you have to do is to choose from free LUTs for Final Cut Pro and download your preferred one.
- Part 2: How to Apply LUTs on Final Cut Pro
- Part 3: Discussing Wondershare Filmora LUTs - The Best Video Editing Platform
Part 1: Discovering The Top Best LUTs for FCPX
You are at the right place if you’re having trouble finding the best LUTs for FCPX. This section will provide you with one of the best LUTs you can choose for your videos.
1.Free Cinematic LUTs Pack for Video Editing
This free LUT pack is a perfect choice to give your videos a cinematic look. It features a soft blue color grading with high contrast that can make your footage look like it was shot on film. This LUT is especially effective for outdoor scenes and action shots. Moreover, its color grading enhances the drama and feel of your video footage.

2.10 Free Vintage Color Presets for Final Cut Pro
10 Free Vintage Color Presets for Final Cut Pro is a great pack if you’re looking for a vintage or retro feel. It has a warm, yellowish color grading that can give your videos a nostalgic look. This pack is ideal for footage shot in the 70s, 80s, or 90s. It highlights the muddiness and brown shades in your video to add a touch of authenticity to it.

3. Perfect Green Video LUT
Perfect Green Video LUT is a pack of 3 cinematic-style LUTs. This pack is ideal for travel or nature videos as it increases the green tone in your videos. It has a lush, green color grading that can make your videos look vibrant and lively. Additionally, this pack is effective for outdoor scenes as it improves your video’s natural colors and makes it look more dynamic.

4. Cyberpunk Color Grades
Cyberpunk Color Grades is a pack of modern cyberpunk-style LUTs. It is a fantastic LUT pack if you’re working on a music video or a creative project. It has a bold, colorful grading with high saturation that can make your video stand out. This LUT pack is perfect for scenes with many neon lights or bright backgrounds. Moreover, it adds an extra pop of color and makes your videos look more energetic.

5. Pro Retouching Essentials Pack by Prince Meyson
Prince Meyson offers this skin tone enhancer LUT pack. It has a neutral, balanced color grading that can make your videos look more polished and professional. This LUT is ideal for interviews, documentaries, or corporate videos. Moreover, this pack is perfect for portraits and close-up shots. It can enhance the natural colors of your footage and make it look more refined.

Part 2: How to Apply LUTs on Final Cut Pro
Now that you’ve discovered there are many Final Cut Pro LUTs free to download. The most important thing is to learn how to use these free LUTs on your video using FCPX. Here are some methods to learn to apply LUTs using Final Cut Pro in simple steps.
Method 1 Using Custom Layer
Step1
Open Final Cut Pro and import your video. Once the video is imported, click on the clip you want to apply the LUT.

Step2
Go to the “Effect Browser” and search for the LUT option from the search menu. After selecting it, you will get a “Custom LUT” layer. Select the custom LUT layer and drag and drop it onto your video clip. Then, click on the video clip and go to the “Inspector” window.

Step3
Select the “Custom LUT” option in the inspector window and choose your desired LUT from the LUT drop-down menu. Final Cut Pro will apply your desired LUT to your video clip.

Method 2 Using Adjustment Layer
Step1
Click the plugin button once you’ve imported your video clip and choose RT Adjustment Layer. Furthermore, if you don’t have this plugin, you can download it for free.

Step2
An icon will appear once you’ve selected RT Adjustment Layer. Drag and drop this icon on top of your video clip.

Step3
Drag and drop the “Custom LUT” layer onto your RT Adjustment Layer from the Effect Browser. Click on the RT Adjustment Layer and choose your desired LUT from the “Inspector” menu.

Method 3 Change Settings To Enable LUTs
Step1
Import your video into Final Cut Pro and click on your video in the library and open the inspector window.

Step2
In the section of the “Inspector” menu, click the drop-down menu and select the “General” option. It will open up new options in the menu where you have to choose the “Camera LUT” option and select your preferred LUT. After selecting your LUT, save your video by choosing the option.

Part 3: Discussing Wondershare Filmora LUTs - The Best Video Editing Platform
If you’re looking for a great video editing tool, Wondershare Filmora might be just what you need. With many features embedded in it, it makes it easy to create professional-looking videos. Moreover, you can apply LUTs to add a cinematic touch to your footage. With over 200+ LUTs available, you can improve the color grading of your videos. Additionally, this tool allows you to adjust its intensity as well.
Furthermore, Wondershare Filmora offers options for color adjustments and enhancements. You can add transitions, templates, effects, and filters to your videos. In addition to this, it offers over 10 billion free media assets that you can use to enhance your videos. With Wondershare Filmora, you can play around with different features and options to make your content look fantastic.

Empower your videos with a new mood using different LUTs. Filmora now offers 100+ top-quality 3D LUTs cover a broad range of scenarios. Transform your videos with Filmora’s powerful 3D LUTs.
Apply LUT on Videos Apply LUT on Videos Learn More


Conclusion
In conclusion, Final Cut Pro is a powerful tool for video editing. This tool allows you to make color corrections and color adjustments to your videos. Furthermore, Final Cut Pro offers the option to use LUTs for color grading. You can find many best LUTs for FCPX available online to use in this tool. However, Wondershare Filmora is another amazing tool that you use to color-grade your videos professionally.
Part 1: Discovering The Top Best LUTs for FCPX
You are at the right place if you’re having trouble finding the best LUTs for FCPX. This section will provide you with one of the best LUTs you can choose for your videos.
1.Free Cinematic LUTs Pack for Video Editing
This free LUT pack is a perfect choice to give your videos a cinematic look. It features a soft blue color grading with high contrast that can make your footage look like it was shot on film. This LUT is especially effective for outdoor scenes and action shots. Moreover, its color grading enhances the drama and feel of your video footage.
2.10 Free Vintage Color Presets for Final Cut Pro
10 Free Vintage Color Presets for Final Cut Pro is a great pack if you’re looking for a vintage or retro feel. It has a warm, yellowish color grading that can give your videos a nostalgic look. This pack is ideal for footage shot in the 70s, 80s, or 90s. It highlights the muddiness and brown shades in your video to add a touch of authenticity to it.
3. Perfect Green Video LUT
Perfect Green Video LUT is a pack of 3 cinematic-style LUTs. This pack is ideal for travel or nature videos as it increases the green tone in your videos. It has a lush, green color grading that can make your videos look vibrant and lively. Additionally, this pack is effective for outdoor scenes as it improves your video’s natural colors and makes it look more dynamic.
4. Cyberpunk Color Grades
Cyberpunk Color Grades is a pack of modern cyberpunk-style LUTs. It is a fantastic LUT pack if you’re working on a music video or a creative project. It has a bold, colorful grading with high saturation that can make your video stand out. This LUT pack is perfect for scenes with many neon lights or bright backgrounds. Moreover, it adds an extra pop of color and makes your videos look more energetic.
5. Pro Retouching Essentials Pack by Prince Meyson
Prince Meyson offers this skin tone enhancer LUT pack. It has a neutral, balanced color grading that can make your videos look more polished and professional. This LUT is ideal for interviews, documentaries, or corporate videos. Moreover, this pack is perfect for portraits and close-up shots. It can enhance the natural colors of your footage and make it look more refined.
Part 2: How to Apply LUTs on Final Cut Pro
Now that you’ve discovered there are many Final Cut Pro LUTs free to download. The most important thing is to learn how to use these free LUTs on your video using FCPX. Here are some methods to learn to apply LUTs using Final Cut Pro in simple steps.
Method 1 Using Custom Layer
Step1
Open Final Cut Pro and import your video. Once the video is imported, click on the clip you want to apply the LUT.
Step2
Go to the “Effect Browser” and search for the LUT option from the search menu. After selecting it, you will get a “Custom LUT” layer. Select the custom LUT layer and drag and drop it onto your video clip. Then, click on the video clip and go to the “Inspector” window.
Step3
Select the “Custom LUT” option in the inspector window and choose your desired LUT from the LUT drop-down menu. Final Cut Pro will apply your desired LUT to your video clip.
Method 2 Using Adjustment Layer
Step1
Click the plugin button once you’ve imported your video clip and choose RT Adjustment Layer. Furthermore, if you don’t have this plugin, you can download it for free.
Step2
An icon will appear once you’ve selected RT Adjustment Layer. Drag and drop this icon on top of your video clip.
Step3
Drag and drop the “Custom LUT” layer onto your RT Adjustment Layer from the Effect Browser. Click on the RT Adjustment Layer and choose your desired LUT from the “Inspector” menu.
Method 3 Change Settings To Enable LUTs
Step1
Import your video into Final Cut Pro and click on your video in the library and open the inspector window.
Step2
In the section of the “Inspector” menu, click the drop-down menu and select the “General” option. It will open up new options in the menu where you have to choose the “Camera LUT” option and select your preferred LUT. After selecting your LUT, save your video by choosing the option.
Part 3: Discussing Wondershare Filmora LUTs - The Best Video Editing Platform
If you’re looking for a great video editing tool, Wondershare Filmora might be just what you need. With many features embedded in it, it makes it easy to create professional-looking videos. Moreover, you can apply LUTs to add a cinematic touch to your footage. With over 200+ LUTs available, you can improve the color grading of your videos. Additionally, this tool allows you to adjust its intensity as well.
Furthermore, Wondershare Filmora offers options for color adjustments and enhancements. You can add transitions, templates, effects, and filters to your videos. In addition to this, it offers over 10 billion free media assets that you can use to enhance your videos. With Wondershare Filmora, you can play around with different features and options to make your content look fantastic.
Empower your videos with a new mood using different LUTs. Filmora now offers 100+ top-quality 3D LUTs cover a broad range of scenarios. Transform your videos with Filmora’s powerful 3D LUTs.
Apply LUT on Videos Apply LUT on Videos Learn More
Conclusion
In conclusion, Final Cut Pro is a powerful tool for video editing. This tool allows you to make color corrections and color adjustments to your videos. Furthermore, Final Cut Pro offers the option to use LUTs for color grading. You can find many best LUTs for FCPX available online to use in this tool. However, Wondershare Filmora is another amazing tool that you use to color-grade your videos professionally.
Being an After Effects Editor, You Often Find Yourself the Need to Add Motion Blur After Effects. This Guide Has Got You Covered. Follow to Find Out How to Add Motion Blur in After Effects
Everyone has seen those transition or animation video cuts when something doesn’t quite seem right; the movement appears forced or the playback is choppy. Typically, this occurs because a motion blur effect was not used while editing. Learning the ins, outs, rights, and wrongs of Motion Blur in After Effects is one of the most thrilling early steps in the motion graphics adventure. Learning how and when to utilize it successfully is a true “level up” moment for most designers.
Making everything you add to a motion graphic or animation project appear like it belongs there organically and hasn’t been “artificially” inserted is a crucial component. Adding motion blur After Effects Is a fantastic tool for making items mix more naturally in your compositions. Let’s quickly examine Motion Blur with all of this in mind. To help you better grasp motion blur and how to add motion blur to flawlessly merge objects in your video projects or even create styled effects, we’ve put up a detailed guide here.
Part 1. What is Motion Blur Effects
Let’s start with a little introduction before learning how to apply motion blur. The visual result of an item moving while being photographed in conjunction with the shutter speed of the camera is called motion blur. When we swiftly move our heads from side to side, this effect also naturally occurs with our eyes, but we aren’t aware of it since our brains “edit” it for us. It may be startling and awkward to watch when items are moving on the screen, particularly rapid motion, without any kind of blurring effect.
Motion blur was introduced into animation to aid in the blending of frames and replicate the blurring that was seen in earlier cameras as a result of fast-moving objects. When a moving item keeps moving while light is still reaching our eyes, motion blur results. The goal of Motion Blur in After Effects is to replicate this phenomenon. After Effects will duplicate your layer several times when it changes in size or location. Then, it will offset it in various ways. This is closely related to the direction and pace of your layer’s animation.
These days, we have cameras with fast shutter speeds, which allows us to almost completely remove motion blur. Without motion blurring, each frame of your animation is like a flawless still image, making the action seem a little disorienting. Each picture captures the exact moment in time, despite the fluid motion. However, the absence of motion blur is what viewers do notice. Because of this, visual effects creators often use artificial motion blur in their effects to replicate what the viewer would experience if the element were really there in the picture.
Part 2. How to Add Motion Blur in After Effects
In videos, slow-motion may be used in a variety of ways, such as to convey the emotional context of a story or make beautiful slideshow backdrops. It doesn’t matter why you want to make a slow-motion sequence; After Effects’ slow-motion effect will work well. Click the Motion Blur layer switch to turn Motion Blur on or off. Make sure you can render out Motion Blur by turning on the Enable Motion Blur composition option at the top of the Timeline panel.
Using the motion blur option in your layer settings is the first and easiest approach to apply motion blur in After Effects. You’ll see many choices on the left and right sides of the screen after choosing a certain video. There are several techniques to motion blur a video, which we wish to accomplish. But because this guide is for novices, we will choose the simpler option. Follow the steps below to learn how to add motion blur to a video in AE:
Steps to Add Motion Blur to After Effects:
So, it goes without saying that After Effects makes it simple to access Motion Blur’s magic. You should shoot the movie at a frame rate that is faster than the average if you want the greatest slow-motion effects. How many photos are being captured each second is indicated by the frame rate.
Step1 Download and install Adobe After Effects if it isn’t already on your PC. Since Adobe After Effects is a commercial program, it is not available for free. Open the program after installation. After installation, launch it and choose “New Project” to begin editing a brand-new file. Look through the video you wish to alter.

Step2 You have a variety of settings in Adobe After Effects on the right side. Then, choose “Effects & Presets.” A search bar will appear as a result. Enter “CC Force Motion Blur” in the search field if you wish to add motion blur to the video. You may apply this effect to whatever layer you choose since your movie is made up of layers.

Step3 Next, drag the “CC Force Motion Blur” to the layers that represent your imported video at the bottom left of the screen. On the left side of the screen, under “CC Force Motion Blur,” you will find settings for motion blur. Here, you may change the motion blur to suit your needs. You may type in the values and watch the video as appropriate. There are several choices available for you to modify.

![]()
Note: Before applying any speed effects, first trim your film to the proper length. Once the speed effects have been included, you need also make sure that your composition is lengthy enough for your clip. Once you’re satisfied with the footage you want to slow down, choose one of the ways—Time warp or Time Stretch.
Step4 Customize “Shutter Angle” and “Motion Blur Samples.” Always be careful to preview the video after any modifications. Adjust to your needs and specifications. Additionally, if you wish, you may add any additional effect to the video. When finished, save the video by selecting “File” in the upper left corner.

Step5 Finally, hit the OK button and afterwards, export the project with the Motion Blur embedded inside the main video. Adobe AE also gives you flexibility to export to the desired format with the preset project settings.
Part 3. Other Video Editor to Add Effects to Videos
Due to its cost and adaptability, Adobe After Effects is quite expensive; especially for the beginners. So, we’ve a handy option, Filmora by Wondershare, that is a fantastic option since most high-end video editors are, to put it mildly, expensive. It may seem natural to just add motion blur to everything before rendering while working on a conventional 2D project in After Effects, but there are occasions when having no motion blur at all is preferable. When used properly, After Effects’ slow-motion features are extensive and reliable.
Wondershare: A video-making and editing program has its flagship product called Filmora . You may use the tools to create a wide variety of styles and appearances. Less complicated and user-friendly for beginners, the program. With the help of this program, you may edit your video at home like an expert. With this user-friendly tool and stylish effects, making excellent films doesn’t have to be difficult. When you open the app and choose Editor mode as it will walk you through each stage of the procedure.
Free Download For Win 7 or later(64-bit)
Free Download For macOS 10.14 or later
Import Files
Media files may be easily added to the timeline in Filmora from the device’s library. .mpg,.mpeg, and many more file types are supported for this video file format’s input.

Utilize Filmstock
On Wondershare Filmora , there is a full-service shop called Filmstock that offers a ton of exciting media and after-effects for download. You may get free sound effects and short video clips to add to your videos on this website.
Edit Effect
Download films from the effect store or import them from your device and add them to your timeline in Filmora to modify your videos. Utilize the software’s drag-and-drop feature to modify the video.

Apply filters
Overlays and video filters are effects used to enhance the appeal of the video. Open the effects tab and select your desired filter to apply overlays and filters. To apply it, drag and drop it into the timeline’s video. Additionally, filters may be adjusted to change the time scale and transparency.
Export
Exporting a video to a variety of platforms comes after editing it. Filmora allows users to export video in a number of different file types, including mp4, Wmv, Mkv, ts, 3gp, f4v, Mkv, MOV, mpg, 3gp, GIF 4K, and mp3.
Conclusion
Motion blur is crucial when animating characters to move. Your videos require some blur to seem realistic when there is motion, particularly when there is quick movement. You have learnt how to include motion blur into your animation project from this guide. To add motion blur effects to your movie or animation, After Effects offers a wide variety of options. To inform you about this wonderful gesture, we utilized Filmora and Adobe After Effects and recommend Filmora for easiness and handy outputs.
Let’s start with a little introduction before learning how to apply motion blur. The visual result of an item moving while being photographed in conjunction with the shutter speed of the camera is called motion blur. When we swiftly move our heads from side to side, this effect also naturally occurs with our eyes, but we aren’t aware of it since our brains “edit” it for us. It may be startling and awkward to watch when items are moving on the screen, particularly rapid motion, without any kind of blurring effect.Motion blur was introduced into animation to aid in the blending of frames and replicate the blurring that was seen in earlier cameras as a result of fast-moving objects. When a moving item keeps moving while light is still reaching our eyes, motion blur results. The goal of Motion Blur in After Effects is to replicate this phenomenon. After Effects will duplicate your layer several times when it changes in size or location. Then, it will offset it in various ways. This is closely related to the direction and pace of your layer’s animation.
These days, we have cameras with fast shutter speeds, which allows us to almost completely remove motion blur. Without motion blurring, each frame of your animation is like a flawless still image, making the action seem a little disorienting. Each picture captures the exact moment in time, despite the fluid motion. However, the absence of motion blur is what viewers do notice. Because of this, visual effects creators often use artificial motion blur in their effects to replicate what the viewer would experience if the element were really there in the picture.
Part 2. How to Add Motion Blur in After Effects
In videos, slow-motion may be used in a variety of ways, such as to convey the emotional context of a story or make beautiful slideshow backdrops. It doesn’t matter why you want to make a slow-motion sequence; After Effects’ slow-motion effect will work well. Click the Motion Blur layer switch to turn Motion Blur on or off. Make sure you can render out Motion Blur by turning on the Enable Motion Blur composition option at the top of the Timeline panel.
Using the motion blur option in your layer settings is the first and easiest approach to apply motion blur in After Effects. You’ll see many choices on the left and right sides of the screen after choosing a certain video. There are several techniques to motion blur a video, which we wish to accomplish. But because this guide is for novices, we will choose the simpler option. Follow the steps below to learn how to add motion blur to a video in AE:
Steps to Add Motion Blur to After Effects:
So, it goes without saying that After Effects makes it simple to access Motion Blur’s magic. You should shoot the movie at a frame rate that is faster than the average if you want the greatest slow-motion effects. How many photos are being captured each second is indicated by the frame rate.
Step1 Download and install Adobe After Effects if it isn’t already on your PC. Since Adobe After Effects is a commercial program, it is not available for free. Open the program after installation. After installation, launch it and choose “New Project” to begin editing a brand-new file. Look through the video you wish to alter.
Step2 You have a variety of settings in Adobe After Effects on the right side. Then, choose “Effects & Presets.” A search bar will appear as a result. Enter “CC Force Motion Blur” in the search field if you wish to add motion blur to the video. You may apply this effect to whatever layer you choose since your movie is made up of layers.
Step3 Next, drag the “CC Force Motion Blur” to the layers that represent your imported video at the bottom left of the screen. On the left side of the screen, under “CC Force Motion Blur,” you will find settings for motion blur. Here, you may change the motion blur to suit your needs. You may type in the values and watch the video as appropriate. There are several choices available for you to modify.
![]()
Note: Before applying any speed effects, first trim your film to the proper length. Once the speed effects have been included, you need also make sure that your composition is lengthy enough for your clip. Once you’re satisfied with the footage you want to slow down, choose one of the ways—Time warp or Time Stretch.
Step4 Customize “Shutter Angle” and “Motion Blur Samples.” Always be careful to preview the video after any modifications. Adjust to your needs and specifications. Additionally, if you wish, you may add any additional effect to the video. When finished, save the video by selecting “File” in the upper left corner.
Step5 Finally, hit the OK button and afterwards, export the project with the Motion Blur embedded inside the main video. Adobe AE also gives you flexibility to export to the desired format with the preset project settings.
Part 3. Other Video Editor to Add Effects to Videos
Due to its cost and adaptability, Adobe After Effects is quite expensive; especially for the beginners. So, we’ve a handy option, Filmora by Wondershare, that is a fantastic option since most high-end video editors are, to put it mildly, expensive. It may seem natural to just add motion blur to everything before rendering while working on a conventional 2D project in After Effects, but there are occasions when having no motion blur at all is preferable. When used properly, After Effects’ slow-motion features are extensive and reliable.
Wondershare: A video-making and editing program has its flagship product called Filmora . You may use the tools to create a wide variety of styles and appearances. Less complicated and user-friendly for beginners, the program. With the help of this program, you may edit your video at home like an expert. With this user-friendly tool and stylish effects, making excellent films doesn’t have to be difficult. When you open the app and choose Editor mode as it will walk you through each stage of the procedure.
Free Download For Win 7 or later(64-bit)
Free Download For macOS 10.14 or later
Import Files
Media files may be easily added to the timeline in Filmora from the device’s library. .mpg,.mpeg, and many more file types are supported for this video file format’s input.
Utilize Filmstock
On Wondershare Filmora , there is a full-service shop called Filmstock that offers a ton of exciting media and after-effects for download. You may get free sound effects and short video clips to add to your videos on this website.
Edit Effect
Download films from the effect store or import them from your device and add them to your timeline in Filmora to modify your videos. Utilize the software’s drag-and-drop feature to modify the video.
Apply filters
Overlays and video filters are effects used to enhance the appeal of the video. Open the effects tab and select your desired filter to apply overlays and filters. To apply it, drag and drop it into the timeline’s video. Additionally, filters may be adjusted to change the time scale and transparency.
Export
Exporting a video to a variety of platforms comes after editing it. Filmora allows users to export video in a number of different file types, including mp4, Wmv, Mkv, ts, 3gp, f4v, Mkv, MOV, mpg, 3gp, GIF 4K, and mp3.
Conclusion
Motion blur is crucial when animating characters to move. Your videos require some blur to seem realistic when there is motion, particularly when there is quick movement. You have learnt how to include motion blur into your animation project from this guide. To add motion blur effects to your movie or animation, After Effects offers a wide variety of options. To inform you about this wonderful gesture, we utilized Filmora and Adobe After Effects and recommend Filmora for easiness and handy outputs.
Trailer Guide for Creators and Developers
Trailers are a popular means to showcase a product you are about to release to the market. Teasers and trailers are traditionally created for movies, but have eventually evolved to include book trailers, game trailers, and app trailers. In this article, we will explain the key details of a trailer, highlight some examples, and show you how to create an effective trailer.
Part 1. What is a Trailer?
A trailer is a type of video commercial advertisement made to advertise and inform audiences about a specific program or item. To persuade customers to view or use the product, it includes a brief series of previews of the entire material. It also serves as a means of creating anticipation for a show or product that is about to hit the market.
Trailers were originally made for cinema movies. Nowadays, trailers are created for different forms of media like shows, apps, programs, video games, and book videos. A typical traditional trailer lasts between 1 to 3 minutes.
Part 2. What Are the Similarities and Differences Between a Teaser and Trailer?
Teasers and trailers can often be confused with each other. After all, they pretty much have the same objective.
Both are created for the purpose of advertising an upcoming show, product, or service. Teasers and trailers are similarly shown to audiences prior to the release of the thing they are advertising. They are meant to show a small portion of the full experience to create curiosity and excitement towards a targeted market. Both videos are typically short in length - taking up only a maximum of 3 minutes in duration.
The differences between them lie in their content, timeline, and duration. A teaser is much shorter than a trailer - the former runs for only 20-30 seconds while the latter can go between 1-3 minutes in length. This is because teasers are typically made before or during the production process of a movie or feature, whilst trailers are commonly made at the end.
For films, movies, and shows, teasers generally capture only a single part of that media. It focuses on the most intense or impactful scene. Trailers are formed from a series of clips depicting striking scenes derived from the beginning, middle, and end of the show. These scenes are normally arranged in a nonlinear structure, allowing viewers to have a general understanding of the story without revealing the entirety of the plot.
Part 3. Examples of good trailers
An excellent trailer is one who can effectively attract and maintain the audience’s attention. It satisfies its objective of showcasing striking and captivating pieces of the main product and entices viewers to experience its entirety. Here are some examples of trailers who have well fulfilled the criteria of a good trailer.
1. The Suicide Squad
The Suicide Squad is a fresh take featuring DC’s anti-heroes assemble in a single chaotic and unconventional team. James Gunn’s iteration on these characters is brought to life in the trailer with a majestic cast including John Cena, Idris Elba, Margot Robbie, and David Dastmalchian. Several key scenes are shown, highlighting its standout characters in the process while portraying the movie’s setting.
2. Raya and the Last Dragon
The trailer starts out innocently and comes with an adorable and surprising twist. The brief 2-minute trailer is packed with relevant scenes that depict the character’s quest without revealing too much. Many action-packed scenes and emotional interactions are satisfactorily squeezed into the trailer. Excitement builds further with Tamara Bubble’s “I’m That Good” playing in the background on the last minute of the video.
3. Men (2022)
Ingenious combination of sound effects and background music play a distinct role in this 2022 trailer. The female lead’s voice echoing from a tunnel, the haunting piano keys gradually building up the suspense, and the common but cleverly used horror audio effects create a chilling ensemble of haunting scenes in the movie. The sounds gradually rise up as more aggressive and energized scenes flash on the screen, and eventually end back into the sombre intro that leaves the audience with questions.
4. The Farewell
Lulu Wang’s dramatic comedy The Farewell is all about a family hiding the truth of a family member’s terminal illness from the person herself. What makes the trailer special is that it steers away from the sad, melancholic direction and veers toward a feel-good movie vibe. The conflict, struggle, and the beliefs featured in the movie are depicted in the trailer. However, the clever placement of interactions and the uplifting music tug at the audience’s heartstrings and urge them to want to see more.
5. Pokémon Go
Pokémon has become a culture to several generations. Becoming a Pokémon trainer is a secret dream that almost all of us have, even as adults. Niantic’s collaboration with the Pokémon franchise brings people closer to that reality by introducing its AR and location-powered app Pokémon Go. The trailer shows people of all ages living out their trainer dreams in the real world and interacting with Pokémon. The different features of the game are dramatized in a real-life setting, inciting more excitement, and pulling out the nostalgia from its market. The trailer keeps the actual app showcase to a minimum, instead focusing on once again selling that dream to audiences and bringing out the inner child in everyone.
Part 4. How to bring your trailer to the next level?
While it may seem intimidating to create a trailer for your upcoming product, there is no need to worry. It is now easier than ever to create a well-crafted trailer by taking advantage of a program’s tools and templates.
- Stock media
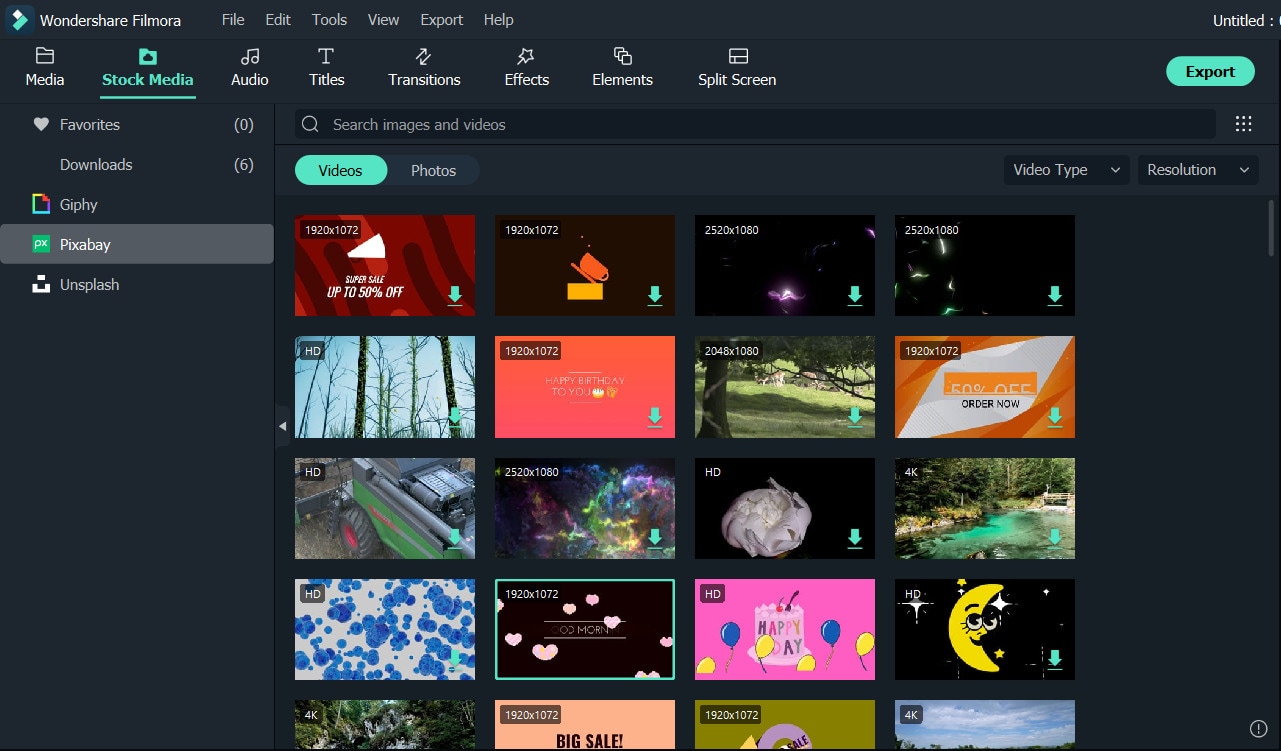
Filmora makes it easy to craft a trailer with only a few clicks. Make use of the program’s media library to gain access to a wealth of resources like stock photos, videos, music, and audio files.
- Keyframing
Keyframing lets you smoothly transition from one scene to another, making it an effective tool for trailers. It is particularly appealing for shows that highlight motion like sports, dancing, and action. Experiment with more than 80 preset templates and create smooth scene transitions with ease.
- Speed Ramping
Speed Ramping is a feature that works perfectly with keyframing. Increase the energy and dynamics in your trailer with 6 preset speed types. You can also customize these templates. There is also no need for concern about the audio - Filmora lets you maintain the audio pitch even when using these features.
- FX Effects
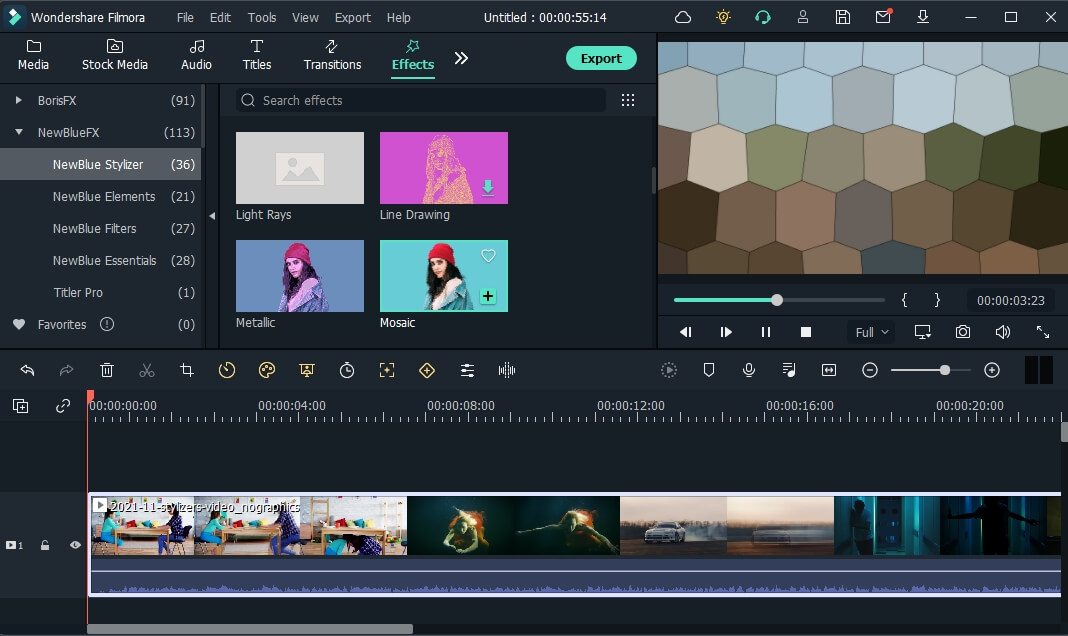
The program also offers many effects and filters for an extra element in your trailer. The Borix FX is an example of that. Designed in collaboration with the award-winning developer of the same name, Boris FX and its extension Continuum features a wide array of tasteful effects for your convenience. There are over 91 customizable and adjustable presets including types like blurs, stylization, and lights. NewBlue is another option that carries choices of filters, titlers, and stylizers.
Filmora offers different features, tools, and effects to explore that can help make your trailer editing objectives easier and more convenient. Save time and resources by taking advantage of its powerful yet easy-to-use tools.
Free Download For Win 7 or later(64-bit)
Free Download For macOS 10.14 or later
2. Raya and the Last Dragon
The trailer starts out innocently and comes with an adorable and surprising twist. The brief 2-minute trailer is packed with relevant scenes that depict the character’s quest without revealing too much. Many action-packed scenes and emotional interactions are satisfactorily squeezed into the trailer. Excitement builds further with Tamara Bubble’s “I’m That Good” playing in the background on the last minute of the video.
3. Men (2022)
Ingenious combination of sound effects and background music play a distinct role in this 2022 trailer. The female lead’s voice echoing from a tunnel, the haunting piano keys gradually building up the suspense, and the common but cleverly used horror audio effects create a chilling ensemble of haunting scenes in the movie. The sounds gradually rise up as more aggressive and energized scenes flash on the screen, and eventually end back into the sombre intro that leaves the audience with questions.
4. The Farewell
Lulu Wang’s dramatic comedy The Farewell is all about a family hiding the truth of a family member’s terminal illness from the person herself. What makes the trailer special is that it steers away from the sad, melancholic direction and veers toward a feel-good movie vibe. The conflict, struggle, and the beliefs featured in the movie are depicted in the trailer. However, the clever placement of interactions and the uplifting music tug at the audience’s heartstrings and urge them to want to see more.
5. Pokémon Go
Pokémon has become a culture to several generations. Becoming a Pokémon trainer is a secret dream that almost all of us have, even as adults. Niantic’s collaboration with the Pokémon franchise brings people closer to that reality by introducing its AR and location-powered app Pokémon Go. The trailer shows people of all ages living out their trainer dreams in the real world and interacting with Pokémon. The different features of the game are dramatized in a real-life setting, inciting more excitement, and pulling out the nostalgia from its market. The trailer keeps the actual app showcase to a minimum, instead focusing on once again selling that dream to audiences and bringing out the inner child in everyone.
Part 4. How to bring your trailer to the next level?
While it may seem intimidating to create a trailer for your upcoming product, there is no need to worry. It is now easier than ever to create a well-crafted trailer by taking advantage of a program’s tools and templates.
- Stock media
Filmora makes it easy to craft a trailer with only a few clicks. Make use of the program’s media library to gain access to a wealth of resources like stock photos, videos, music, and audio files.
- Keyframing
Keyframing lets you smoothly transition from one scene to another, making it an effective tool for trailers. It is particularly appealing for shows that highlight motion like sports, dancing, and action. Experiment with more than 80 preset templates and create smooth scene transitions with ease.
- Speed Ramping
Speed Ramping is a feature that works perfectly with keyframing. Increase the energy and dynamics in your trailer with 6 preset speed types. You can also customize these templates. There is also no need for concern about the audio - Filmora lets you maintain the audio pitch even when using these features.
- FX Effects
The program also offers many effects and filters for an extra element in your trailer. The Borix FX is an example of that. Designed in collaboration with the award-winning developer of the same name, Boris FX and its extension Continuum features a wide array of tasteful effects for your convenience. There are over 91 customizable and adjustable presets including types like blurs, stylization, and lights. NewBlue is another option that carries choices of filters, titlers, and stylizers.
Filmora offers different features, tools, and effects to explore that can help make your trailer editing objectives easier and more convenient. Save time and resources by taking advantage of its powerful yet easy-to-use tools.
Free Download For Win 7 or later(64-bit)
Free Download For macOS 10.14 or later
How to Create the Stranger Things Upside Down Effect
With stranger things season 4 ending, it seems like great timing to make a stranger things style transition to the Upside Down. In the Netflix series Stranger Things, there is an opposite version of our world called the Upside Down. The Upside Down is dark, creepy, and possibly filled with aliens, monsters, creatures, and other things.
Now, you can also apply the Stranger Things Upside Down Effect to your video! This effect combines camera tricks and video editing within Filmora to transition from the normal world into the Upside Down.
How-to Guide
1) Preparation
To make this effect, you will need two footage shots: one with the camera moving down and one with the camera coming back up.
When shooting for the footage, follow the steps below:
First shot
- Find any item close enough to the ground that we can block our frame with.

- Once you have your talent lined up, rotate your camera while lowering it below the foreground item at a constant speed and leaving the camera there. The key is making sure when you go behind the object, the frame is nothing but black.

For the next scene, have your actor change positions, or you can change the set around to look like the Upside Down. For instance, adding fake plants and flickering lights.
Second shot
Start bringing your camera back up at the same speed and rotate it again in the direction it was moving.

2) Steps
After you have all the footage, you can start editing it on Filmora. If you haven’t installed it yet, you can download Filmora at their official website at https://filmora.wondershare.com .
Free Download For Win 7 or later(64-bit)
Free Download For macOS 10.14 or later
Now, launch Filmora on your PC and follow the steps below:
Step1 Take your first clip in the “normal” world and drag it down to a video track on the timeline. Trim the edge of the clip, so it ends on pure black and in a downward motion.

Step2 Drag the second clip (in the Upside Down) onto the video track on the timeline after the first clip. Trim this video, so it begins in pure black and an upward motion.

Cut the clips to get the timing right since it should be a very fast transition. You can cut in the black frames so they won’t be too apparent.
If you don’t have a perfectly smooth transition, you can add a dissolve by going to Transitions > Basic > Dissolve.

Color Grading and Effects
After the transition, you can make the clip look a lot more like the Upside Down from the show with a color grade and Filmora effects. Follow the steps below:
Step1 Double-click on your second clip, then go to Color > Advanced. For a quick edit, you can try one of the presets available, such as “cool film.” It will give you the colder blue tones that Stranger Things used for the Upside Down.

Step2 You can further edit the color grading in the white balance menu. Drag the slider to the left to get a blue, cold vibe for the Upside Down.
The “cool” or “warm” color grading technically talks about color temperature. A “warmer” look will be more orange, and a “colder” look will be bluer. You can also use the tint slider to fine-tune the look.

Step3 Next, move down to the color, lower the brightness and increase contrast. It makes the scene darker and more sinister than the normal world.

Step4 Finally, go down to the vignette and drag the amount slider a tiny bit to give a Vinnette around your clip.

3) Pro Tips
You can still make your clip look even more like Upside Down with some Filmora elements.
Go to Elements > Smoke > Smokescreen 2. Drag this element on top of your Upside Down clip and trim it, so it starts at the same time the clip leaves the black frame.

You can adjust the opacity by double-clicking the smoke effect to open the setting.
Finally, go to the Transition > Basic > Dissolve to the start of the smoke and adjust it when the smoke gradually appears.

Resources from Filmostock
You can also use filmstock effects to bring our video to the next level. Go to Elements > Fire > Large Scale 12 and drag it down on top of your clip and the smoke.

Double-click the clip and change the scale of the effect to your needs. Then, go to compositing to change the blending mode to the screen to help the effect blend in more.

Now, go to color and open the white balance menu. Drag the two sliders to change the color of the particles to match your clip.

Summary
That is all you need to make a Stranger Things Upside Down effects to your video. Let us know if there are any other effects from tv shows you want to learn how to make.
Free Download For macOS 10.14 or later
Now, launch Filmora on your PC and follow the steps below:
Step1 Take your first clip in the “normal” world and drag it down to a video track on the timeline. Trim the edge of the clip, so it ends on pure black and in a downward motion.
Step2 Drag the second clip (in the Upside Down) onto the video track on the timeline after the first clip. Trim this video, so it begins in pure black and an upward motion.
Cut the clips to get the timing right since it should be a very fast transition. You can cut in the black frames so they won’t be too apparent.
If you don’t have a perfectly smooth transition, you can add a dissolve by going to Transitions > Basic > Dissolve.
Color Grading and Effects
After the transition, you can make the clip look a lot more like the Upside Down from the show with a color grade and Filmora effects. Follow the steps below:
Step1 Double-click on your second clip, then go to Color > Advanced. For a quick edit, you can try one of the presets available, such as “cool film.” It will give you the colder blue tones that Stranger Things used for the Upside Down.
Step2 You can further edit the color grading in the white balance menu. Drag the slider to the left to get a blue, cold vibe for the Upside Down.
The “cool” or “warm” color grading technically talks about color temperature. A “warmer” look will be more orange, and a “colder” look will be bluer. You can also use the tint slider to fine-tune the look.
Step3 Next, move down to the color, lower the brightness and increase contrast. It makes the scene darker and more sinister than the normal world.
Step4 Finally, go down to the vignette and drag the amount slider a tiny bit to give a Vinnette around your clip.
3) Pro Tips
You can still make your clip look even more like Upside Down with some Filmora elements.
Go to Elements > Smoke > Smokescreen 2. Drag this element on top of your Upside Down clip and trim it, so it starts at the same time the clip leaves the black frame.
You can adjust the opacity by double-clicking the smoke effect to open the setting.
Finally, go to the Transition > Basic > Dissolve to the start of the smoke and adjust it when the smoke gradually appears.
Resources from Filmostock
You can also use filmstock effects to bring our video to the next level. Go to Elements > Fire > Large Scale 12 and drag it down on top of your clip and the smoke.
Double-click the clip and change the scale of the effect to your needs. Then, go to compositing to change the blending mode to the screen to help the effect blend in more.
Now, go to color and open the white balance menu. Drag the two sliders to change the color of the particles to match your clip.
Summary
That is all you need to make a Stranger Things Upside Down effects to your video. Let us know if there are any other effects from tv shows you want to learn how to make.
Also read:
- You Need to Follow Certain Steps to Complete Your Project. In the Section Below, We Will Discuss in Detail the Steps to Make a Movie From Windows Movie Maker for 2024
- Updated 2024 Approved How to Achieve GoPro Slow Motion With Quality
- New Are You Looking to Enhance Your Video or Photo Colors Using Premiere LUTs? Get to Know About the Best Free LUT Effects to Get Started
- 2024 Approved 4 Ways to Add White Borders on Mobile and Desktop
- Steps to Create Green Screen Videos in After Effects
- Updated What Is the Best MP4 Cutters for YouTubers on Mac?
- 2024 Approved How to Add Filter to Video Online
- In 2024, What Is AI Composite Video App and AI Composite Video Guide
- Top 8 Video Grabbers for Chrome
- How to Loop Videos on Android Phones
- New In 2024, Best Tips on How to Design Travel Slideshow
- In 2024, Effective 10 Ways to Convert YouTube to MOV at Ease PC & Online
- Best Guide for Setting TikTok Countdown Timer
- Updated How to Make Video Slow Motion?
- Updated SRT File Translation Could Be a Tedious Task if You Dont Know the Right Steps. Lets Discuss Few Effective Ways to Do It Like a Pro
- Learn More About the Video Editing Interface of Wondershare Filmora for 2024
- Updated Want to Add an Exciting Countdown Timer to Your Wedding, Product Launch or Any Other Video Using After Effects or an Alternative Tool? This Article Will Help You Learn All About After Effects Countdown and the Procedure
- 2024 Approved How to Use OBS Chroma Key With/Without Green Screen Easy Solutions
- Updated 2024 Approved Spooky Halloween with the Best 15+ Halloween Countdown Video Clips
- In 2024, Do You Want to Know About Efficient Motion Blur Plugins for Adobe Effects? Read This Article to Find Out How to Use Motion Blur Plugins for Enhanced Results
- In 2024, Replace Sky Background in Video Figuring Out the Best Options
- In 2024, 10 Best Movie Trailer Voice Generators Windows, Mac, Android, iPhone & Online
- New Best Online YouTube Video Trimmer 2024
- Updated Do You Want to Know How to Convert YouTube SBV Subtitles to SRT Format? Here Is an Ultimate Guide About It
- 2024 Approved Level Up Videos By Applying Keyframe with Filmora
- What Is the Best Frame Rate for 4K Videos, In 2024
- Updated Are You Looking for the Best Premiere Pro Slideshow Template Online for Free? If Yes, You Can Find a Few Exciting Slideshow Templates Here. They Are Worth Using
- In 2024, Find Out How to Create Your Own Custom Motion Graphics in Filmora. Add Unique Objects, Manipulate Text, and Animate Anything You Want
- New Live Stream on YouTube Using Zoom
- Exploring Tools to Integrate Special Mask Effects Into Your Content. Read the Following Article to Master some Tools Experts in Mask Tracking
- Finding The Best Filmic Pro LUTs For Video Editing
- Updated Spooky Halloween with the Best 15+ Halloween Countdown Video Clips
- 2024 Approved Detailed Tutorial to Crop Videos Using Openshot?
- Updated How to Merge Audio and Video in VLC Media Player
- 2024 Approved Split Audio From Video in Adobe Premiere Pro Step by Step
- Updated Best Text Animations In After Effects for 2024
- New In This Article, You Will Learn How to Create an Attractive and Engaging Slideshow Video Using Tools Available in the Wondershare Filmora
- How to Make After Effects Gifs for 2024
- Top 12 Best Freeze Frame Video Editing Examples
- In 2024, A Full Guide to Funcall Voice Changer and Its Alternatives
- Updated Do You Know Everything Related to Wondershare Filmoras Video Editing Interface? If You Are Unaware of It, Read and Learn About Filmoras Interface
- Steps to Rotate Videos Using Handbrake for 2024
- Updated In 2024, How to Create The Best Video Collages ?
- New 2024 Approved Top 18 Video Editors for PC and Mac
- Updated 2024 Approved How to Combine Videos Into One on Instagram
- Updated 2024 Approved Cropping Videos in Final Cut Pro Step by Step
- Updated Guide to Synchronizing Your Audio And Videos Properly, In 2024
- Forgot your Camon 20 lock screen pattern, PIN or password? Here’s what to do
- Ultimate Guide to Free PPTP VPN For Beginners On Vivo S18 Pro | Dr.fone
- In 2024, Full Guide to Bypass Oppo Reno 11 Pro 5G FRP
- Troubleshooting Guide How to Fix an Unresponsive Vivo X Flip Screen | Dr.fone
- In 2024, How to Mirror Your Vivo V29 Pro Screen to PC with Chromecast | Dr.fone
- In 2024, How to Send and Fake Live Location on Facebook Messenger Of your Realme C33 2023 | Dr.fone
- Authentication Error Occurred on Oppo F25 Pro 5G? Here Are 10 Proven Fixes | Dr.fone
- How to Reset a Vivo Y27 5G Phone that is Locked?
- In 2024, How to Cast Vivo S17t to Computer for iPhone and Android? | Dr.fone
- In 2024, How To Use Special Features - Virtual Location On Xiaomi 13T Pro? | Dr.fone
- In 2024, How to Delete iCloud Account From iPhone XR without Password?
- How to Change Lava Agni 2 5G Location on Skout | Dr.fone
- All You Need To Know About Mega Greninja For Realme C51 | Dr.fone
- Simple and Effective Ways to Change Your Country on YouTube App Of your Samsung Galaxy S23+ | Dr.fone
- How to Unlock iPhone 7 Plus with a Mask On
- How to Reset a Oppo Find N3 Phone That Is Locked | Dr.fone
- How to Unlock Poco M6 Pro 5G Pattern Lock if Forgotten? 6 Ways
- In 2024, How to Transfer Contacts from Infinix GT 10 Pro to iPhone XS/11 | Dr.fone
- In 2024, How to Change Google Play Location On Samsung Galaxy A14 4G | Dr.fone
- Best Anti Tracker Software For Motorola Edge 40 Pro | Dr.fone
- How To Track IMEI Number Of Realme 12+ 5G Through Google Earth?
- Dose Life360 Notify Me When Someone Checks My Location On Apple iPhone 12 Pro? | Dr.fone
- The Ultimate Guide to Xiaomi Redmi Note 12R Pattern Lock Screen Everything You Need to Know
- Full Guide to Hard Reset Your Samsung Galaxy M14 5G | Dr.fone
- In 2024, How To Activate and Use Life360 Ghost Mode On Samsung Galaxy Z Flip 5 | Dr.fone
- AddROM Bypass An Android Tool to Unlock FRP Lock Screen For your Asus ROG Phone 8
- Want to Uninstall Google Play Service from Realme 11 Pro+? Here is How | Dr.fone
- In 2024, How to Migrate Android Data From HTC U23 Pro to New Android Phone? | Dr.fone
- In 2024, Complete Tutorial to Use VPNa to Fake GPS Location On Apple iPhone XR | Dr.fone
- 7 Solutions to Fix Error Code 963 on Google Play Of Honor X8b | Dr.fone
- In 2024, Can You Unlock iPhone 7 Plus After Forgetting the Passcode?
- Tutorials for Animating Picture Online Without Learning From Scratch
- How to Factory Reset Oppo Reno 10 Pro 5G in 5 Easy Ways | Dr.fone
- Is Your Apple iPhone 13 Pro in Security Lockout? Proper Ways To Unlock
- Title: Do You Want to Use LUTs in Final Cut Pro? There Are Many Free LUTs for FCPX Available that You Can Use. Using LUTs, You Can Create Professional-Looking Content
- Author: Chloe
- Created at : 2024-05-20 03:37:33
- Updated at : 2024-05-21 03:37:33
- Link: https://ai-editing-video.techidaily.com/do-you-want-to-use-luts-in-final-cut-pro-there-are-many-free-luts-for-fcpx-available-that-you-can-use-using-luts-you-can-create-professional-looking-content/
- License: This work is licensed under CC BY-NC-SA 4.0.
