:max_bytes(150000):strip_icc():format(webp)/GettyImages-678913139-58a4ece73df78c345bcd781b.jpg)
Easy Way to Create a DIY Green Screen Video Effect

Easy Way to Create a DIY Green Screen Video Effect
No matter how big the budget of a Hollywood movie is, at the end of the day, it has to rely on the humble green screens for special video effects. The stunning studios from where your favorite YouTubers and gamers stream their videos are graphical video effects created through green screens. Even the studios that you see on TV channels are a graphical creation of green screens. You must be wondering how they could achieve such awesome graphics with a simple green screen.
All you need is a good-quality green fabric, a professional video editing software, and a camera. You may not believe it, but that is all you need for creating DIY green screen video effect. You do not have to be a professional video editor to edit the green screen on your videos and add any special video effect. In this article, you will learn how to create your own DIY green backdrop.
What Is Green Screen Technique?
A green screen is nothing but a green fabric. In a video, a green screen is placed in the background behind the subject. In the editing phase of the video, the green screen is replaced with any background image or video effect that stays intact in the video as long as possible. In short, the green screen technique involves superimposing photos and videos on the green screen in a video.
Starting from the video game industry, movie industry to video streaming and TV channels, the green screen technique is used everywhere. The stunning graphical component of these industries is totally dependent on the green screen technique. In fact, DIY green screen for zoom meetings and video conferencing is widely used. Along with that, YouTubers and Twitch streamers use DIY green screen for streaming live.
Technically speaking, instead of a green screen, you can use any other color of screen. However, green screens are widely used, and it has become a norm. The main point to remember when using a green screen is that nothing else should have green color such as the dresses the subject is wearing. Therefore, in technical terms, the green screen is referred to as Chroma Key, and you will find Chroma Key option instead of green screen in most video editors.
Why Use Green Screen Technique?
The main reason why the green screen technique is used in movie and video making is that the video editor can replace the entire background at once instead of replacing the background frame by frame. Once you replace a green screen with an image or video effect, it stays the same throughout the video as long as required.
Therefore, the video editor can save a lot of time in editing and the editing stays uniform throughout which gives a realistic effect. If the green screen technique is not used and editing is done frame by frame of a video, there could be a manual error, inconsistent, and graphical glitches.
You can replace green screens with anything you want. It could be a still image of a beautiful studio with 3D effect like you see in case of YouTubers and gamers. It could be a moving, real-life landscape on any place in the world instead of a beautiful background picture. Similarly, it could be replaced by video effects such as explosions, stadiums full of people, battlefields, and likewise. At times, it could be live animations as you see on TV channels.
How To Create DIY Green Screen Stand Setup and Add Green Screen Effect?
If you want to have a green screen setup for your video, you need to have the following things ready.
- A green cloth that is large enough to cover the entire background.
- A video editing software to replace green screen in your video with anything.
- External light for more video clarity and a good camera with mic.
Step 1: Setup DIY Green Backdrop
Your green fabric should be soft and bright. If you are going to be the subject of the video, make sure you are not wearing anything green. Moreover, do not keep any object within the video frame that is green in color. If there are too many green objects, you can use a blue screen.
When it comes to hanging the green cloth in the background, people find it very difficult. If your video frame is going to be a close-up to the subject, you can use a green screen panel to hang green cloth. A green screen panel generally has a collapsible structure for easy storage and transportation.
Otherwise, you need to install hooks in the wall if you are planning to replace the green screen with a studio-like scene so that the entire background of the video frame stays covered with green screen. You should opt for multiple green screens and stitch them together to cover the background completely.
Step 2: Setup Camera and Light
Whether you are shooting with a DSLR camera or smartphone camera or webcam, make sure you are shooting at least HD video quality so that the editing could be great. Lights are important when you are using green screen though they are not a necessity. The video quality and brightness get enhanced with lights. Diffused lights work the best and the background should be well-lit.
Most importantly, you have to place the lights in such a way that your body arms should not be casting any shadow on the green screen. You can either stand very close to the green screen or away from the green screen so that your shadow does not go till the green screen. Instead of starting to shoot the video from the very beginning, you should capture for a few seconds and make sure everything is perfect including the camera angle.
Step 3: Get The Best Video Editor For Green Screen Effect
There are various video editors available, but not all of them are suitable for green screen effect. We recommend Wondershare Filmora as the best video editor to apply green screen effects on your video while editing. The reason behind the recommendation is that the steps to replace the green screen with any image or video are super simple and anyone can do it. There is no need to be a professional video editor.
Wondershare Filmora also lets you capture video through webcam and you can also capture your screen. It is perfect for recording gameplay as well as your reaction and commentary. Similarly, you can record demonstrations, tutorial videos, as well as video conferences. You can apply green screen effects to your recorded video instantly and publish on different platforms. In fact, you can adjust all the parameters such as color scheme, audio ducking, keyframing, motion tracking and much more to enhance the video output quality.
Conclusion
Making videos with DIY green screen stand is no more an esoteric concept. You can set it up anywhere and start shooting video. The magic begins in the post-production stage where you can use Wondershare Filmora to replace the green screen with video effects that will blow the mind of your viewers and followers. Filmora has intuitive options and controls through which you can apply green screen effect in simple steps.
Step by Step to Rotate Videos Using Handbrake
Handbrake is a video editing tool that allows you to rotate videos. It is a free and open source software that is available on Windows, Mac, and Linux. It is used to convert video files from one format to another. You can use it to compress videos, add subtitles, or create chapters. It also allows you to rotate videos in different directions. You can use it to fix videos that are not aligned properly or that have been filmed upside down. A handbrake is a popular tool because it is easy to use and it has a variety of features.
Step-by-step on how to rotate videos using Handbrake
When you import a video into the Handbrake software, it will by default be in a “landscape” orientation, with the long edge of the video oriented horizontally. If you want to rotate the video 90 degrees counterclockwise so that it appears “vertical,” or if you want to rotate it 180 degrees so that it is upside down, you can do so by following these two steps:
Step 1: Open the Handbrake software and import your video.
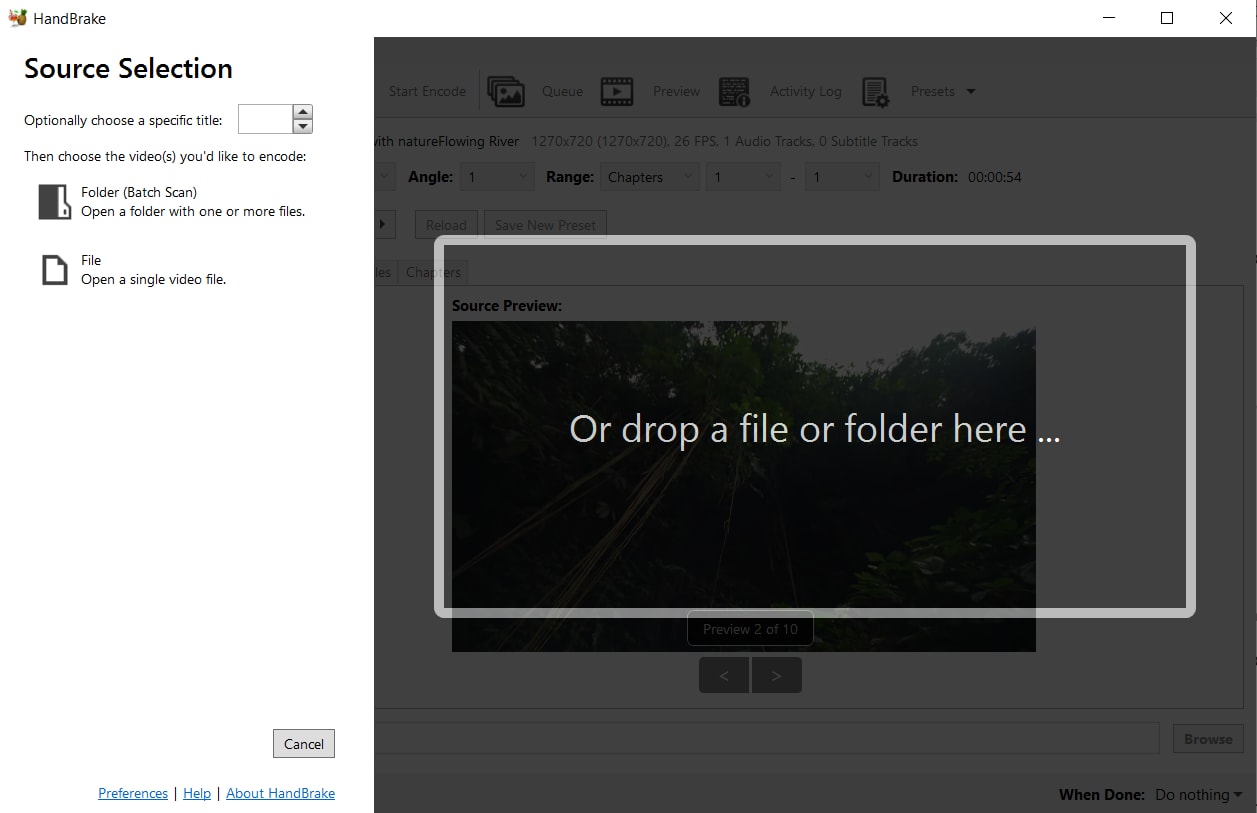
Step 2: Click on the “Dimensions” tab at the top of the Handbrake window.

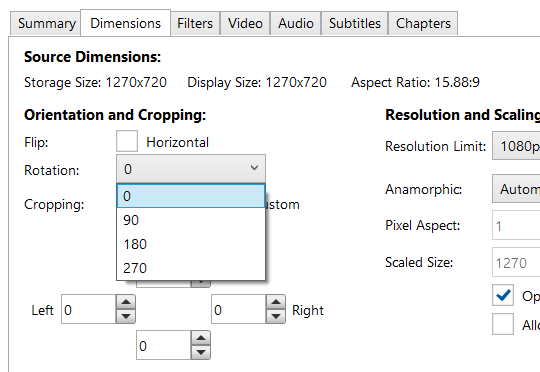
Step 3: Under the “Orientation and Cropping” section, click on one of the options in the “Rotate” menu.
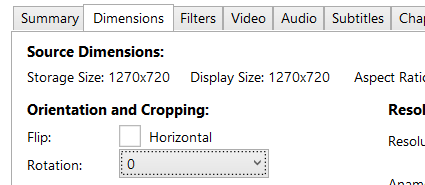
Step 4: If you want to rotate a video 90 degrees counterclockwise, select “90 Degrees CW (Counter-Clockwise).” If you want to rotate the video 180 degrees so that it is upside down, select “180 Degrees.”
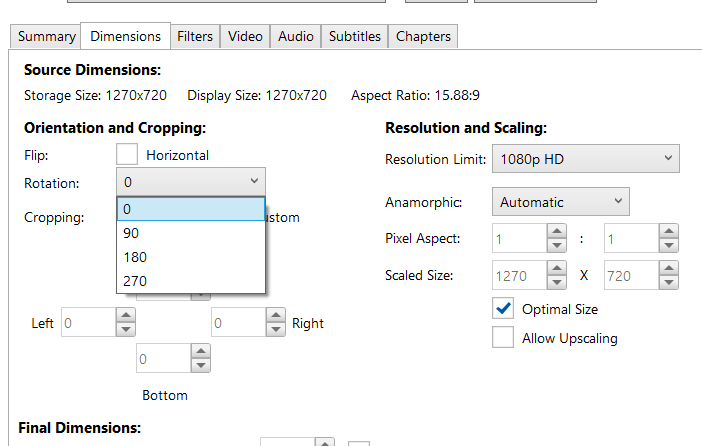
Step 5: Click on the “Preview” button at the bottom of the Handbrake window to see a preview of how your rotated video will look. When you are satisfied with the rotation, click on the “Start Encode” button to begin the encoding process.
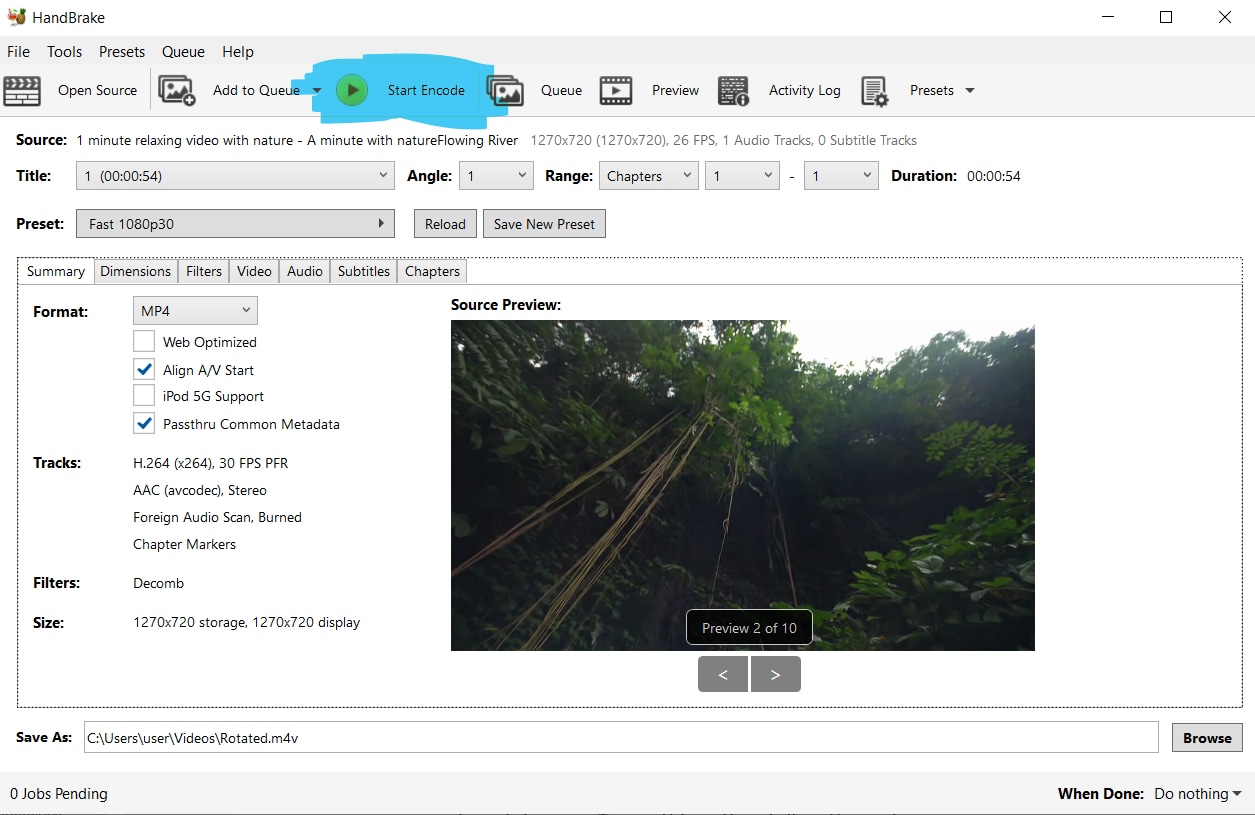
The Handbrake software also offers a “Flip” option which you can do after rotating it, which allows you to slip the video after rotating it. To use this option, follow these steps:
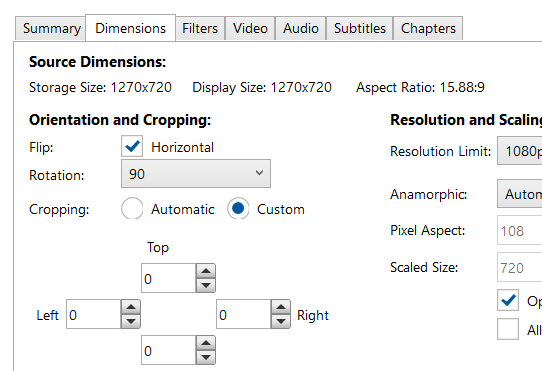
Under the “Orientation and Cropping” section, Go to Rotation and choose the degrees that best is best for your rotation requirements.
Click on “Flip” to flip your video horizontally.
Click on the “Preview” button at the bottom of the Handbrake window to see a preview of how your rotated video will look. When you are satisfied with the rotation, click on the “Start Encode” button to begin the encoding process.
Both of these methods for rotating videos are easy to use and produce good results. Experiment with them to see which method works best for you.
An Easy Way to Rotate Videos Using Filmora
Moreover, instead of using Handbrake, you can use Filmora Video Editor instead. Filmora is a video editor that is very easy to use. It has a variety of features, including the ability to rotate videos. You can download Filmora from the Filmora website. The website has links to the download page for each of the supported platforms.
For Win 7 or later (64-bit)
For macOS 10.14 or later
Step-by-Step on how to rotate videos in Filmora
In order for you to rotate videos in Filmora, follow these simple steps:
Step 1: Import the video that you want to rotate into Filmora.

Step 2: Click on the “Edit” tab at the top of the video timeline.
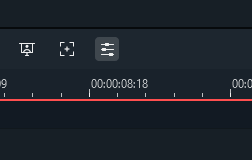
Step 3: Click on the “Rotate” button in the “Transform” section of the toolbar.

Step 4: Select the rotation angle that you want to rotate the video in the “Rotate” menu.

Step 5: Click on the “Preview” button at the bottom of the Filmora window to see a preview of how your rotated video will look. When you are satisfied with the rotation, click on the “OK” button to apply the rotation.

As you can see, rotating videos is a very easy process in both Handbrake and Filmora. Both Handbrake and Filmora offer simple methods for rotating videos. In Handbrake, you can rotate the video 90 degrees counterclockwise or 180 degrees.
In Filmora, you can rotate the video by any number of degrees in either direction. Experiment with these methods to see which one works best for you. Additionally, Filmora offers a number of other features, such as the ability to add text and transitions, that you may find useful.
Step 2: Click on the “Dimensions” tab at the top of the Handbrake window.

Step 3: Under the “Orientation and Cropping” section, click on one of the options in the “Rotate” menu.

Step 4: If you want to rotate a video 90 degrees counterclockwise, select “90 Degrees CW (Counter-Clockwise).” If you want to rotate the video 180 degrees so that it is upside down, select “180 Degrees.”

Step 5: Click on the “Preview” button at the bottom of the Handbrake window to see a preview of how your rotated video will look. When you are satisfied with the rotation, click on the “Start Encode” button to begin the encoding process.

The Handbrake software also offers a “Flip” option which you can do after rotating it, which allows you to slip the video after rotating it. To use this option, follow these steps:
Under the “Orientation and Cropping” section, Go to Rotation and choose the degrees that best is best for your rotation requirements.

Click on “Flip” to flip your video horizontally.

Click on the “Preview” button at the bottom of the Handbrake window to see a preview of how your rotated video will look. When you are satisfied with the rotation, click on the “Start Encode” button to begin the encoding process.
Both of these methods for rotating videos are easy to use and produce good results. Experiment with them to see which method works best for you.
An Easy Way to Rotate Videos Using Filmora
Moreover, instead of using Handbrake, you can use Filmora Video Editor instead. Filmora is a video editor that is very easy to use. It has a variety of features, including the ability to rotate videos. You can download Filmora from the Filmora website. The website has links to the download page for each of the supported platforms.
For Win 7 or later (64-bit)
For macOS 10.14 or later
Step-by-Step on how to rotate videos in Filmora
In order for you to rotate videos in Filmora, follow these simple steps:
Step 1: Import the video that you want to rotate into Filmora.

Step 2: Click on the “Edit” tab at the top of the video timeline.

Step 3: Click on the “Rotate” button in the “Transform” section of the toolbar.

Step 4: Select the rotation angle that you want to rotate the video in the “Rotate” menu.

Step 5: Click on the “Preview” button at the bottom of the Filmora window to see a preview of how your rotated video will look. When you are satisfied with the rotation, click on the “OK” button to apply the rotation.

As you can see, rotating videos is a very easy process in both Handbrake and Filmora. Both Handbrake and Filmora offer simple methods for rotating videos. In Handbrake, you can rotate the video 90 degrees counterclockwise or 180 degrees.
In Filmora, you can rotate the video by any number of degrees in either direction. Experiment with these methods to see which one works best for you. Additionally, Filmora offers a number of other features, such as the ability to add text and transitions, that you may find useful.
Step 2: Click on the “Dimensions” tab at the top of the Handbrake window.

Step 3: Under the “Orientation and Cropping” section, click on one of the options in the “Rotate” menu.

Step 4: If you want to rotate a video 90 degrees counterclockwise, select “90 Degrees CW (Counter-Clockwise).” If you want to rotate the video 180 degrees so that it is upside down, select “180 Degrees.”

Step 5: Click on the “Preview” button at the bottom of the Handbrake window to see a preview of how your rotated video will look. When you are satisfied with the rotation, click on the “Start Encode” button to begin the encoding process.

The Handbrake software also offers a “Flip” option which you can do after rotating it, which allows you to slip the video after rotating it. To use this option, follow these steps:
Under the “Orientation and Cropping” section, Go to Rotation and choose the degrees that best is best for your rotation requirements.

Click on “Flip” to flip your video horizontally.

Click on the “Preview” button at the bottom of the Handbrake window to see a preview of how your rotated video will look. When you are satisfied with the rotation, click on the “Start Encode” button to begin the encoding process.
Both of these methods for rotating videos are easy to use and produce good results. Experiment with them to see which method works best for you.
An Easy Way to Rotate Videos Using Filmora
Moreover, instead of using Handbrake, you can use Filmora Video Editor instead. Filmora is a video editor that is very easy to use. It has a variety of features, including the ability to rotate videos. You can download Filmora from the Filmora website. The website has links to the download page for each of the supported platforms.
For Win 7 or later (64-bit)
For macOS 10.14 or later
Step-by-Step on how to rotate videos in Filmora
In order for you to rotate videos in Filmora, follow these simple steps:
Step 1: Import the video that you want to rotate into Filmora.

Step 2: Click on the “Edit” tab at the top of the video timeline.

Step 3: Click on the “Rotate” button in the “Transform” section of the toolbar.

Step 4: Select the rotation angle that you want to rotate the video in the “Rotate” menu.

Step 5: Click on the “Preview” button at the bottom of the Filmora window to see a preview of how your rotated video will look. When you are satisfied with the rotation, click on the “OK” button to apply the rotation.

As you can see, rotating videos is a very easy process in both Handbrake and Filmora. Both Handbrake and Filmora offer simple methods for rotating videos. In Handbrake, you can rotate the video 90 degrees counterclockwise or 180 degrees.
In Filmora, you can rotate the video by any number of degrees in either direction. Experiment with these methods to see which one works best for you. Additionally, Filmora offers a number of other features, such as the ability to add text and transitions, that you may find useful.
Step 2: Click on the “Dimensions” tab at the top of the Handbrake window.

Step 3: Under the “Orientation and Cropping” section, click on one of the options in the “Rotate” menu.

Step 4: If you want to rotate a video 90 degrees counterclockwise, select “90 Degrees CW (Counter-Clockwise).” If you want to rotate the video 180 degrees so that it is upside down, select “180 Degrees.”

Step 5: Click on the “Preview” button at the bottom of the Handbrake window to see a preview of how your rotated video will look. When you are satisfied with the rotation, click on the “Start Encode” button to begin the encoding process.

The Handbrake software also offers a “Flip” option which you can do after rotating it, which allows you to slip the video after rotating it. To use this option, follow these steps:
Under the “Orientation and Cropping” section, Go to Rotation and choose the degrees that best is best for your rotation requirements.

Click on “Flip” to flip your video horizontally.

Click on the “Preview” button at the bottom of the Handbrake window to see a preview of how your rotated video will look. When you are satisfied with the rotation, click on the “Start Encode” button to begin the encoding process.
Both of these methods for rotating videos are easy to use and produce good results. Experiment with them to see which method works best for you.
An Easy Way to Rotate Videos Using Filmora
Moreover, instead of using Handbrake, you can use Filmora Video Editor instead. Filmora is a video editor that is very easy to use. It has a variety of features, including the ability to rotate videos. You can download Filmora from the Filmora website. The website has links to the download page for each of the supported platforms.
For Win 7 or later (64-bit)
For macOS 10.14 or later
Step-by-Step on how to rotate videos in Filmora
In order for you to rotate videos in Filmora, follow these simple steps:
Step 1: Import the video that you want to rotate into Filmora.

Step 2: Click on the “Edit” tab at the top of the video timeline.

Step 3: Click on the “Rotate” button in the “Transform” section of the toolbar.

Step 4: Select the rotation angle that you want to rotate the video in the “Rotate” menu.

Step 5: Click on the “Preview” button at the bottom of the Filmora window to see a preview of how your rotated video will look. When you are satisfied with the rotation, click on the “OK” button to apply the rotation.

As you can see, rotating videos is a very easy process in both Handbrake and Filmora. Both Handbrake and Filmora offer simple methods for rotating videos. In Handbrake, you can rotate the video 90 degrees counterclockwise or 180 degrees.
In Filmora, you can rotate the video by any number of degrees in either direction. Experiment with these methods to see which one works best for you. Additionally, Filmora offers a number of other features, such as the ability to add text and transitions, that you may find useful.
How To Remove Audio From Video
Extracting audio from video lets you focus on the main video. Moreover, it also protects privacy and addresses copyright problems. Thus, controlling the audio is a crucial skill for video editors. One approach to making the video seem better is to remove the noise. Well, it isn’t just about reducing background noise. Instead, it’s a calculated move to make your editing more precise. So, how do you remove audio from a video? Don’t worry if you are a newcomer in the video editing field! This post is your go-to guide to effortlessly eliminating audio from your video content.
Extracting audio from video lets you focus on the main video. Moreover, it also protects privacy and addresses copyright problems. Thus, controlling the audio is a crucial skill for video editors. One approach to making the video seem better is to remove the noise. Well, it isn’t just about reducing background noise. Instead, it’s a calculated move to make your editing more precise. So, how do you remove audio from a video? Don’t worry if you are a newcomer in the video editing field! This post is your go-to guide to effortlessly eliminating audio from your video content.
In this article
- Part 1: Why Is It Necessary to Remove Audio from a Video?
- Part 2: How Can You Improve Storytelling With Silent Videos?
- Part 3: How to Use Filmora to Remove Audio from Your Video?
Remove Audio Now For Win 7 or later(64-bit)
Remove Audio Now For macOS 10.14 or later
Why Is It Necessary to Remove Audio from a Video?
You can make a video far more versatile and successful for many different things by removing the audio.
Your Video Becomes Multipurpose
Taking the audio out of a video makes it more versatile. Presentations, slide decks, and instructional videos may all benefit from this. The original audio or background noise might be too distracting in such videos.
No Language Issues
The muted or removed audio lets you reach viewers who speak a different language. By removing the original audio, the video becomes language-neutral. Thus, you save time adding subtitles or dubbing without disturbing the narration.
Place Emphasis on the Video Itself
Cutting off the sound may make the video’s visuals the main attraction. It may be beneficial when creating tutorials or instructional videos. That’s because viewers may prefer to see the demos without the sound.
Eliminating Excessive Background Noise
The video might get dull with background noises, echoes, or unwanted sounds. Deleting the audio stream helps to eliminate distractions. As a result, viewers get a cleaner viewing experience.
Keeping Copyright Concerns at Bay
Businesses can avoid copyright infringement problems by eliminating audio from videos. Removing someone’s audio work before using it in public venues is necessary. It supports copyright laws on audio material by limiting display to visual components.
Content Personalization
Creators can let viewers add their soundtracks or voiceovers by removing audio. Thus, it can make the watching experience more customized. It suits projects that need a high degree of personalization or user-generated content.
Confidential Data Security
Sometimes, a video might capture sensitive conversations or information. So, it’s essential to remove the audio to protect privacy. Remember, sharing the visual footage does not compromise confidentiality. It hides the crucial discussions or data from the original audio.
As you can see, removing audio from a video has several benefits. Many options are available when you mute the audio in a video. By eliminating background noise, you’re freeing your imagination.
So, how do silent videos improve your video production strategies? Let’s find out!
How Can You Improve Storytelling With Silent Videos?
There is a much unrealized narrative potential in silent videos. Most videos rely only on visual elements to convey narratives. Thus, mute clips have a unique ability to captivate audiences. It also offers many possibilities for storytelling, allowing for a more immersive experience.
Setting a Narrative
Videos without sound force viewers to rely more on their visual perception of the tale. It can draw your viewers closer to the visuals. Moreover, it also heightens their involvement with the story as it develops.
Improving Stories
Silence directs the viewer’s attention to certain visual aspects. When you remove all sound distractions, the audience can focus on the pictures. It helps you highlight essential story aspects.
For instance, rely on more than just dialogue to convey emotion. Instead, you can take a modest close-up of the character’s face.
Build Emotions With No Audio
One effective method of building intense emotions is the complete absence of sound. Remember, silent clips can keep viewers on the top of their seats. The audience may get more invested in the story’s raw essence when a scene unfolds in silence. In short, this technique aims to evoke a range of emotions in the audience.
Add Metaphor
The lack of audio permits the use of symbolic language only via visual representations. You can use each picture to convey information. It eliminates the need for dialogue or background music.
The audience can interact with the story on a deeper level via interpretation. Here, video scenes, objects, or actions work as symbols.
Simplify Complex Stories
Silent videos let storytellers elicit strong emotional reactions from audiences. They can co-create the story by deciphering visual cues. Besides, they can also add thoughts, emotions, and interpretations in silent videos. Without words, silent videos can help you convey stories that captivate audiences.
How to Use Filmora to Remove Audio from Your Video?
Two main approaches are available for using this software. You can start by downloading Wondershare Filmora for free to try it out. Here is how to remove audio in a video editor.
Remove Audio Now For Win 7 or later(64-bit)
Remove Audio Now For macOS 10.14 or later
Method 1: Use the “Mute” Button
The first method is using the “Mute” function available in Filmora. You can start by importing the local video file into this software.
Drop the file into Filmora’s video editing timeline. You can mute the file by right-clicking on it. Once you’ve finished, choose a format to save the file in.
As you can see, the mute option stands out as a fantastic one-click feature. It removes the necessity for specialized video editing skills. Anyone can effortlessly remove audio from their videos with ease.

Method 2: Use the Audio Detach feature
Now, let’s turn our focus to a different, efficient way. The Audio Detach function becomes a potent feature for separating audio from videos. Let’s check out its detailed instructions for precisely separating audio and video.
Step1Upload Your Video
First, select the video clip whose audio you want to extract. You can start by clicking “Import” and then navigating to the relevant folder on your hard drive.
While you pick more files, keep the “Ctrl” button down to select them all at once. The main editing dashboard will show thumbnails of all the currently loaded files. You can see a preview in the right-hand window when you double-click them.

Step2Cut Out the Music
Now, you should drag videos from the dashboard into the Video Timeline. After that, you can right-click the video to choose the “Audio Detach” option.
The Music Timeline will immediately display a new audio file. Here, you can see the original video’s soundtrack. Now, pressing the “Delete” button can remove the sounds.
You can also detach audio from multiple video files. Remember, all the files will mesh together perfectly on the Video Timeline.
Thus, you need to click the application icon on the left-hand side of the screen and choose “Save As…” to create new project files if you need to extract audio from more than one file. Then, export each output file individually after reloading the project file.

Step3Download the Video
To be sure this is what you need, double-tap the file in the Video Timeline. You can add suitable music files to the clip if needed. To save only the video track, click the “Create” option directly. A popup will open up, asking you to choose a format before you can save it to your PC.

The Music Timeline will immediately display a new audio file. Here, you can see the original video’s soundtrack. Now, pressing the “Delete” button can remove the sounds.
You can also detach audio from multiple video files. Remember, all the files will mesh together perfectly on the Video Timeline.
Thus, you need to click the application icon on the left-hand side of the screen and choose “Save As…” to create new project files if you need to extract audio from more than one file. Then, export each output file individually after reloading the project file.
Now you know how to remove audio from videos in Wondershare Filmora. As you can see, removing background noise from videos is a breeze using Filmora. You don’t need extensive experience or expensive software packages.
Follow the simple steps outlined above, even if this is your first time. You may remove distracting or unnecessary audio from your file in just a few minutes.
Conclusion
As you can see, your ability to control the audio in video editing defines the viewing experience. It is about not just transforming video material but also expanding possibilities. This silent space is where imagination soars.
It’s a technique to make your video clips more adaptable. Thus, they can transcend language obstacles, legal limitations, and distractions.
Think of a vacation video where the beautiful sights and sounds of the busy streets are in front. It will allow the audience to lose themselves in the lively atmosphere completely. If you remove the audio from this clip, it can become livelier.
In short, sound removal is crucial in creating a more engaging story. It changes the viewer’s experience by focusing on visuals and increasing engagement. You can use Filmora’s powerful audio removal features. The software streamlines the editing process without compromising the quality of the video. Learn to use silence as a tool to tell stories and make people feel things in your videos.
- Part 2: How Can You Improve Storytelling With Silent Videos?
- Part 3: How to Use Filmora to Remove Audio from Your Video?
Remove Audio Now For Win 7 or later(64-bit)
Remove Audio Now For macOS 10.14 or later
Why Is It Necessary to Remove Audio from a Video?
You can make a video far more versatile and successful for many different things by removing the audio.
Your Video Becomes Multipurpose
Taking the audio out of a video makes it more versatile. Presentations, slide decks, and instructional videos may all benefit from this. The original audio or background noise might be too distracting in such videos.
No Language Issues
The muted or removed audio lets you reach viewers who speak a different language. By removing the original audio, the video becomes language-neutral. Thus, you save time adding subtitles or dubbing without disturbing the narration.
Place Emphasis on the Video Itself
Cutting off the sound may make the video’s visuals the main attraction. It may be beneficial when creating tutorials or instructional videos. That’s because viewers may prefer to see the demos without the sound.
Eliminating Excessive Background Noise
The video might get dull with background noises, echoes, or unwanted sounds. Deleting the audio stream helps to eliminate distractions. As a result, viewers get a cleaner viewing experience.
Keeping Copyright Concerns at Bay
Businesses can avoid copyright infringement problems by eliminating audio from videos. Removing someone’s audio work before using it in public venues is necessary. It supports copyright laws on audio material by limiting display to visual components.
Content Personalization
Creators can let viewers add their soundtracks or voiceovers by removing audio. Thus, it can make the watching experience more customized. It suits projects that need a high degree of personalization or user-generated content.
Confidential Data Security
Sometimes, a video might capture sensitive conversations or information. So, it’s essential to remove the audio to protect privacy. Remember, sharing the visual footage does not compromise confidentiality. It hides the crucial discussions or data from the original audio.
As you can see, removing audio from a video has several benefits. Many options are available when you mute the audio in a video. By eliminating background noise, you’re freeing your imagination.
So, how do silent videos improve your video production strategies? Let’s find out!
How Can You Improve Storytelling With Silent Videos?
There is a much unrealized narrative potential in silent videos. Most videos rely only on visual elements to convey narratives. Thus, mute clips have a unique ability to captivate audiences. It also offers many possibilities for storytelling, allowing for a more immersive experience.
Setting a Narrative
Videos without sound force viewers to rely more on their visual perception of the tale. It can draw your viewers closer to the visuals. Moreover, it also heightens their involvement with the story as it develops.
Improving Stories
Silence directs the viewer’s attention to certain visual aspects. When you remove all sound distractions, the audience can focus on the pictures. It helps you highlight essential story aspects.
For instance, rely on more than just dialogue to convey emotion. Instead, you can take a modest close-up of the character’s face.
Build Emotions With No Audio
One effective method of building intense emotions is the complete absence of sound. Remember, silent clips can keep viewers on the top of their seats. The audience may get more invested in the story’s raw essence when a scene unfolds in silence. In short, this technique aims to evoke a range of emotions in the audience.
Add Metaphor
The lack of audio permits the use of symbolic language only via visual representations. You can use each picture to convey information. It eliminates the need for dialogue or background music.
The audience can interact with the story on a deeper level via interpretation. Here, video scenes, objects, or actions work as symbols.
Simplify Complex Stories
Silent videos let storytellers elicit strong emotional reactions from audiences. They can co-create the story by deciphering visual cues. Besides, they can also add thoughts, emotions, and interpretations in silent videos. Without words, silent videos can help you convey stories that captivate audiences.
How to Use Filmora to Remove Audio from Your Video?
Two main approaches are available for using this software. You can start by downloading Wondershare Filmora for free to try it out. Here is how to remove audio in a video editor.
Remove Audio Now For Win 7 or later(64-bit)
Remove Audio Now For macOS 10.14 or later
Method 1: Use the “Mute” Button
The first method is using the “Mute” function available in Filmora. You can start by importing the local video file into this software.
Drop the file into Filmora’s video editing timeline. You can mute the file by right-clicking on it. Once you’ve finished, choose a format to save the file in.
As you can see, the mute option stands out as a fantastic one-click feature. It removes the necessity for specialized video editing skills. Anyone can effortlessly remove audio from their videos with ease.

Method 2: Use the Audio Detach feature
Now, let’s turn our focus to a different, efficient way. The Audio Detach function becomes a potent feature for separating audio from videos. Let’s check out its detailed instructions for precisely separating audio and video.
Step1Upload Your Video
First, select the video clip whose audio you want to extract. You can start by clicking “Import” and then navigating to the relevant folder on your hard drive.
While you pick more files, keep the “Ctrl” button down to select them all at once. The main editing dashboard will show thumbnails of all the currently loaded files. You can see a preview in the right-hand window when you double-click them.

Step2Cut Out the Music
Now, you should drag videos from the dashboard into the Video Timeline. After that, you can right-click the video to choose the “Audio Detach” option.
The Music Timeline will immediately display a new audio file. Here, you can see the original video’s soundtrack. Now, pressing the “Delete” button can remove the sounds.
You can also detach audio from multiple video files. Remember, all the files will mesh together perfectly on the Video Timeline.
Thus, you need to click the application icon on the left-hand side of the screen and choose “Save As…” to create new project files if you need to extract audio from more than one file. Then, export each output file individually after reloading the project file.

Step3Download the Video
To be sure this is what you need, double-tap the file in the Video Timeline. You can add suitable music files to the clip if needed. To save only the video track, click the “Create” option directly. A popup will open up, asking you to choose a format before you can save it to your PC.

The Music Timeline will immediately display a new audio file. Here, you can see the original video’s soundtrack. Now, pressing the “Delete” button can remove the sounds.
You can also detach audio from multiple video files. Remember, all the files will mesh together perfectly on the Video Timeline.
Thus, you need to click the application icon on the left-hand side of the screen and choose “Save As…” to create new project files if you need to extract audio from more than one file. Then, export each output file individually after reloading the project file.
Now you know how to remove audio from videos in Wondershare Filmora. As you can see, removing background noise from videos is a breeze using Filmora. You don’t need extensive experience or expensive software packages.
Follow the simple steps outlined above, even if this is your first time. You may remove distracting or unnecessary audio from your file in just a few minutes.
Conclusion
As you can see, your ability to control the audio in video editing defines the viewing experience. It is about not just transforming video material but also expanding possibilities. This silent space is where imagination soars.
It’s a technique to make your video clips more adaptable. Thus, they can transcend language obstacles, legal limitations, and distractions.
Think of a vacation video where the beautiful sights and sounds of the busy streets are in front. It will allow the audience to lose themselves in the lively atmosphere completely. If you remove the audio from this clip, it can become livelier.
In short, sound removal is crucial in creating a more engaging story. It changes the viewer’s experience by focusing on visuals and increasing engagement. You can use Filmora’s powerful audio removal features. The software streamlines the editing process without compromising the quality of the video. Learn to use silence as a tool to tell stories and make people feel things in your videos.
- Part 2: How Can You Improve Storytelling With Silent Videos?
- Part 3: How to Use Filmora to Remove Audio from Your Video?
Remove Audio Now For Win 7 or later(64-bit)
Remove Audio Now For macOS 10.14 or later
Why Is It Necessary to Remove Audio from a Video?
You can make a video far more versatile and successful for many different things by removing the audio.
Your Video Becomes Multipurpose
Taking the audio out of a video makes it more versatile. Presentations, slide decks, and instructional videos may all benefit from this. The original audio or background noise might be too distracting in such videos.
No Language Issues
The muted or removed audio lets you reach viewers who speak a different language. By removing the original audio, the video becomes language-neutral. Thus, you save time adding subtitles or dubbing without disturbing the narration.
Place Emphasis on the Video Itself
Cutting off the sound may make the video’s visuals the main attraction. It may be beneficial when creating tutorials or instructional videos. That’s because viewers may prefer to see the demos without the sound.
Eliminating Excessive Background Noise
The video might get dull with background noises, echoes, or unwanted sounds. Deleting the audio stream helps to eliminate distractions. As a result, viewers get a cleaner viewing experience.
Keeping Copyright Concerns at Bay
Businesses can avoid copyright infringement problems by eliminating audio from videos. Removing someone’s audio work before using it in public venues is necessary. It supports copyright laws on audio material by limiting display to visual components.
Content Personalization
Creators can let viewers add their soundtracks or voiceovers by removing audio. Thus, it can make the watching experience more customized. It suits projects that need a high degree of personalization or user-generated content.
Confidential Data Security
Sometimes, a video might capture sensitive conversations or information. So, it’s essential to remove the audio to protect privacy. Remember, sharing the visual footage does not compromise confidentiality. It hides the crucial discussions or data from the original audio.
As you can see, removing audio from a video has several benefits. Many options are available when you mute the audio in a video. By eliminating background noise, you’re freeing your imagination.
So, how do silent videos improve your video production strategies? Let’s find out!
How Can You Improve Storytelling With Silent Videos?
There is a much unrealized narrative potential in silent videos. Most videos rely only on visual elements to convey narratives. Thus, mute clips have a unique ability to captivate audiences. It also offers many possibilities for storytelling, allowing for a more immersive experience.
Setting a Narrative
Videos without sound force viewers to rely more on their visual perception of the tale. It can draw your viewers closer to the visuals. Moreover, it also heightens their involvement with the story as it develops.
Improving Stories
Silence directs the viewer’s attention to certain visual aspects. When you remove all sound distractions, the audience can focus on the pictures. It helps you highlight essential story aspects.
For instance, rely on more than just dialogue to convey emotion. Instead, you can take a modest close-up of the character’s face.
Build Emotions With No Audio
One effective method of building intense emotions is the complete absence of sound. Remember, silent clips can keep viewers on the top of their seats. The audience may get more invested in the story’s raw essence when a scene unfolds in silence. In short, this technique aims to evoke a range of emotions in the audience.
Add Metaphor
The lack of audio permits the use of symbolic language only via visual representations. You can use each picture to convey information. It eliminates the need for dialogue or background music.
The audience can interact with the story on a deeper level via interpretation. Here, video scenes, objects, or actions work as symbols.
Simplify Complex Stories
Silent videos let storytellers elicit strong emotional reactions from audiences. They can co-create the story by deciphering visual cues. Besides, they can also add thoughts, emotions, and interpretations in silent videos. Without words, silent videos can help you convey stories that captivate audiences.
How to Use Filmora to Remove Audio from Your Video?
Two main approaches are available for using this software. You can start by downloading Wondershare Filmora for free to try it out. Here is how to remove audio in a video editor.
Remove Audio Now For Win 7 or later(64-bit)
Remove Audio Now For macOS 10.14 or later
Method 1: Use the “Mute” Button
The first method is using the “Mute” function available in Filmora. You can start by importing the local video file into this software.
Drop the file into Filmora’s video editing timeline. You can mute the file by right-clicking on it. Once you’ve finished, choose a format to save the file in.
As you can see, the mute option stands out as a fantastic one-click feature. It removes the necessity for specialized video editing skills. Anyone can effortlessly remove audio from their videos with ease.

Method 2: Use the Audio Detach feature
Now, let’s turn our focus to a different, efficient way. The Audio Detach function becomes a potent feature for separating audio from videos. Let’s check out its detailed instructions for precisely separating audio and video.
Step1Upload Your Video
First, select the video clip whose audio you want to extract. You can start by clicking “Import” and then navigating to the relevant folder on your hard drive.
While you pick more files, keep the “Ctrl” button down to select them all at once. The main editing dashboard will show thumbnails of all the currently loaded files. You can see a preview in the right-hand window when you double-click them.

Step2Cut Out the Music
Now, you should drag videos from the dashboard into the Video Timeline. After that, you can right-click the video to choose the “Audio Detach” option.
The Music Timeline will immediately display a new audio file. Here, you can see the original video’s soundtrack. Now, pressing the “Delete” button can remove the sounds.
You can also detach audio from multiple video files. Remember, all the files will mesh together perfectly on the Video Timeline.
Thus, you need to click the application icon on the left-hand side of the screen and choose “Save As…” to create new project files if you need to extract audio from more than one file. Then, export each output file individually after reloading the project file.

Step3Download the Video
To be sure this is what you need, double-tap the file in the Video Timeline. You can add suitable music files to the clip if needed. To save only the video track, click the “Create” option directly. A popup will open up, asking you to choose a format before you can save it to your PC.

The Music Timeline will immediately display a new audio file. Here, you can see the original video’s soundtrack. Now, pressing the “Delete” button can remove the sounds.
You can also detach audio from multiple video files. Remember, all the files will mesh together perfectly on the Video Timeline.
Thus, you need to click the application icon on the left-hand side of the screen and choose “Save As…” to create new project files if you need to extract audio from more than one file. Then, export each output file individually after reloading the project file.
Now you know how to remove audio from videos in Wondershare Filmora. As you can see, removing background noise from videos is a breeze using Filmora. You don’t need extensive experience or expensive software packages.
Follow the simple steps outlined above, even if this is your first time. You may remove distracting or unnecessary audio from your file in just a few minutes.
Conclusion
As you can see, your ability to control the audio in video editing defines the viewing experience. It is about not just transforming video material but also expanding possibilities. This silent space is where imagination soars.
It’s a technique to make your video clips more adaptable. Thus, they can transcend language obstacles, legal limitations, and distractions.
Think of a vacation video where the beautiful sights and sounds of the busy streets are in front. It will allow the audience to lose themselves in the lively atmosphere completely. If you remove the audio from this clip, it can become livelier.
In short, sound removal is crucial in creating a more engaging story. It changes the viewer’s experience by focusing on visuals and increasing engagement. You can use Filmora’s powerful audio removal features. The software streamlines the editing process without compromising the quality of the video. Learn to use silence as a tool to tell stories and make people feel things in your videos.
- Part 2: How Can You Improve Storytelling With Silent Videos?
- Part 3: How to Use Filmora to Remove Audio from Your Video?
Remove Audio Now For Win 7 or later(64-bit)
Remove Audio Now For macOS 10.14 or later
Why Is It Necessary to Remove Audio from a Video?
You can make a video far more versatile and successful for many different things by removing the audio.
Your Video Becomes Multipurpose
Taking the audio out of a video makes it more versatile. Presentations, slide decks, and instructional videos may all benefit from this. The original audio or background noise might be too distracting in such videos.
No Language Issues
The muted or removed audio lets you reach viewers who speak a different language. By removing the original audio, the video becomes language-neutral. Thus, you save time adding subtitles or dubbing without disturbing the narration.
Place Emphasis on the Video Itself
Cutting off the sound may make the video’s visuals the main attraction. It may be beneficial when creating tutorials or instructional videos. That’s because viewers may prefer to see the demos without the sound.
Eliminating Excessive Background Noise
The video might get dull with background noises, echoes, or unwanted sounds. Deleting the audio stream helps to eliminate distractions. As a result, viewers get a cleaner viewing experience.
Keeping Copyright Concerns at Bay
Businesses can avoid copyright infringement problems by eliminating audio from videos. Removing someone’s audio work before using it in public venues is necessary. It supports copyright laws on audio material by limiting display to visual components.
Content Personalization
Creators can let viewers add their soundtracks or voiceovers by removing audio. Thus, it can make the watching experience more customized. It suits projects that need a high degree of personalization or user-generated content.
Confidential Data Security
Sometimes, a video might capture sensitive conversations or information. So, it’s essential to remove the audio to protect privacy. Remember, sharing the visual footage does not compromise confidentiality. It hides the crucial discussions or data from the original audio.
As you can see, removing audio from a video has several benefits. Many options are available when you mute the audio in a video. By eliminating background noise, you’re freeing your imagination.
So, how do silent videos improve your video production strategies? Let’s find out!
How Can You Improve Storytelling With Silent Videos?
There is a much unrealized narrative potential in silent videos. Most videos rely only on visual elements to convey narratives. Thus, mute clips have a unique ability to captivate audiences. It also offers many possibilities for storytelling, allowing for a more immersive experience.
Setting a Narrative
Videos without sound force viewers to rely more on their visual perception of the tale. It can draw your viewers closer to the visuals. Moreover, it also heightens their involvement with the story as it develops.
Improving Stories
Silence directs the viewer’s attention to certain visual aspects. When you remove all sound distractions, the audience can focus on the pictures. It helps you highlight essential story aspects.
For instance, rely on more than just dialogue to convey emotion. Instead, you can take a modest close-up of the character’s face.
Build Emotions With No Audio
One effective method of building intense emotions is the complete absence of sound. Remember, silent clips can keep viewers on the top of their seats. The audience may get more invested in the story’s raw essence when a scene unfolds in silence. In short, this technique aims to evoke a range of emotions in the audience.
Add Metaphor
The lack of audio permits the use of symbolic language only via visual representations. You can use each picture to convey information. It eliminates the need for dialogue or background music.
The audience can interact with the story on a deeper level via interpretation. Here, video scenes, objects, or actions work as symbols.
Simplify Complex Stories
Silent videos let storytellers elicit strong emotional reactions from audiences. They can co-create the story by deciphering visual cues. Besides, they can also add thoughts, emotions, and interpretations in silent videos. Without words, silent videos can help you convey stories that captivate audiences.
How to Use Filmora to Remove Audio from Your Video?
Two main approaches are available for using this software. You can start by downloading Wondershare Filmora for free to try it out. Here is how to remove audio in a video editor.
Remove Audio Now For Win 7 or later(64-bit)
Remove Audio Now For macOS 10.14 or later
Method 1: Use the “Mute” Button
The first method is using the “Mute” function available in Filmora. You can start by importing the local video file into this software.
Drop the file into Filmora’s video editing timeline. You can mute the file by right-clicking on it. Once you’ve finished, choose a format to save the file in.
As you can see, the mute option stands out as a fantastic one-click feature. It removes the necessity for specialized video editing skills. Anyone can effortlessly remove audio from their videos with ease.

Method 2: Use the Audio Detach feature
Now, let’s turn our focus to a different, efficient way. The Audio Detach function becomes a potent feature for separating audio from videos. Let’s check out its detailed instructions for precisely separating audio and video.
Step1Upload Your Video
First, select the video clip whose audio you want to extract. You can start by clicking “Import” and then navigating to the relevant folder on your hard drive.
While you pick more files, keep the “Ctrl” button down to select them all at once. The main editing dashboard will show thumbnails of all the currently loaded files. You can see a preview in the right-hand window when you double-click them.

Step2Cut Out the Music
Now, you should drag videos from the dashboard into the Video Timeline. After that, you can right-click the video to choose the “Audio Detach” option.
The Music Timeline will immediately display a new audio file. Here, you can see the original video’s soundtrack. Now, pressing the “Delete” button can remove the sounds.
You can also detach audio from multiple video files. Remember, all the files will mesh together perfectly on the Video Timeline.
Thus, you need to click the application icon on the left-hand side of the screen and choose “Save As…” to create new project files if you need to extract audio from more than one file. Then, export each output file individually after reloading the project file.

Step3Download the Video
To be sure this is what you need, double-tap the file in the Video Timeline. You can add suitable music files to the clip if needed. To save only the video track, click the “Create” option directly. A popup will open up, asking you to choose a format before you can save it to your PC.

The Music Timeline will immediately display a new audio file. Here, you can see the original video’s soundtrack. Now, pressing the “Delete” button can remove the sounds.
You can also detach audio from multiple video files. Remember, all the files will mesh together perfectly on the Video Timeline.
Thus, you need to click the application icon on the left-hand side of the screen and choose “Save As…” to create new project files if you need to extract audio from more than one file. Then, export each output file individually after reloading the project file.
Now you know how to remove audio from videos in Wondershare Filmora. As you can see, removing background noise from videos is a breeze using Filmora. You don’t need extensive experience or expensive software packages.
Follow the simple steps outlined above, even if this is your first time. You may remove distracting or unnecessary audio from your file in just a few minutes.
Conclusion
As you can see, your ability to control the audio in video editing defines the viewing experience. It is about not just transforming video material but also expanding possibilities. This silent space is where imagination soars.
It’s a technique to make your video clips more adaptable. Thus, they can transcend language obstacles, legal limitations, and distractions.
Think of a vacation video where the beautiful sights and sounds of the busy streets are in front. It will allow the audience to lose themselves in the lively atmosphere completely. If you remove the audio from this clip, it can become livelier.
In short, sound removal is crucial in creating a more engaging story. It changes the viewer’s experience by focusing on visuals and increasing engagement. You can use Filmora’s powerful audio removal features. The software streamlines the editing process without compromising the quality of the video. Learn to use silence as a tool to tell stories and make people feel things in your videos.
A Roster of 8 Best Color Match Generators
A Roster of 8 Best Color Match Generators
An easy yet powerful editor
Numerous effects to choose from
Detailed tutorials provided by the official channel
Did you face difficulty in putting a bunch of colors together and making them work well in a visual design? Yeah! It is not easy and complicated as throwing colors here and there. No doubt, for creating a graphic design, a story with imagery is delivered. To highlight things, the colors and the text are essential parts. This is where perfection is needed, so there are many color palette generators to make these tasks easier. A color match generator generates a random color palette or helps users create a selection of colors. This selection will define a specified shade. So, what makes an excellent color matching, and how can it be made? We’ve put some best color match generators together.
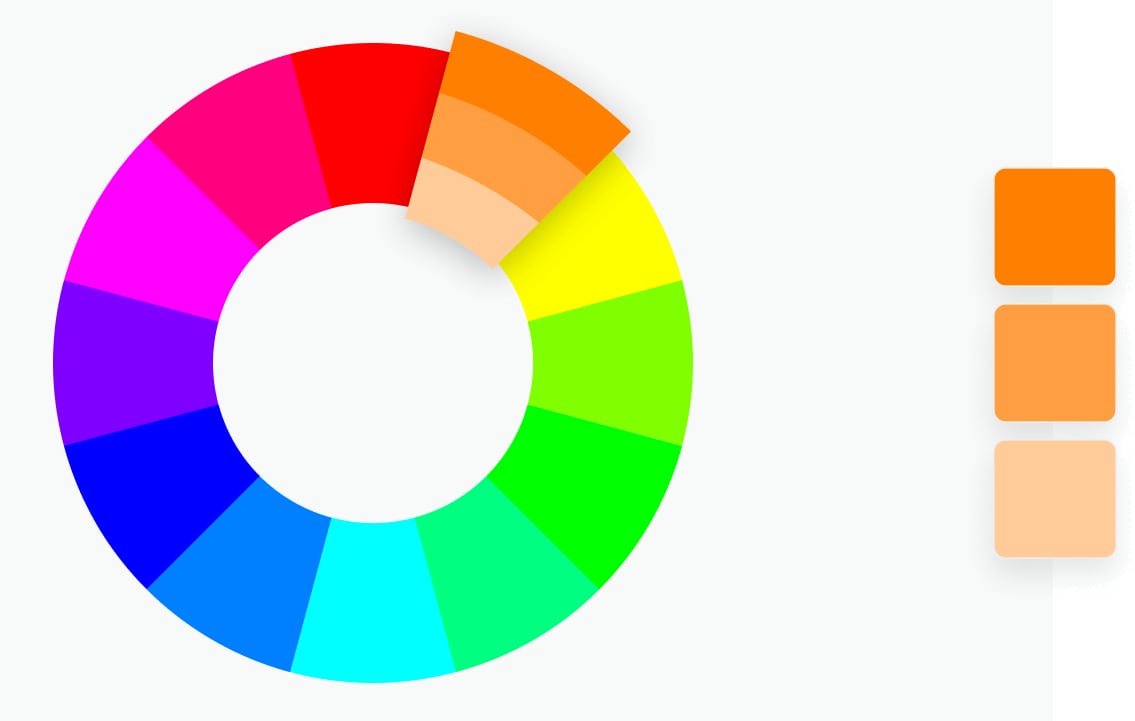
From today’s discussion, you’ll learn some must-know color match generates solutions. So, browse through mentioned eight-color match generators and create your color combinations and matching colors generator. Let’s get started!
In this article
01 [8 Color Match Generators](#Part 1)
02 [The Best Solution of Color Match Generators: Filmora 11 Video Editor](#Part 2)
Part 1 8 Color Match Generators
Let’s check out our well-researched findings on the 8 best color match generators for creating the perfect color combination and matching color with these matching colors generators.
01Coolors
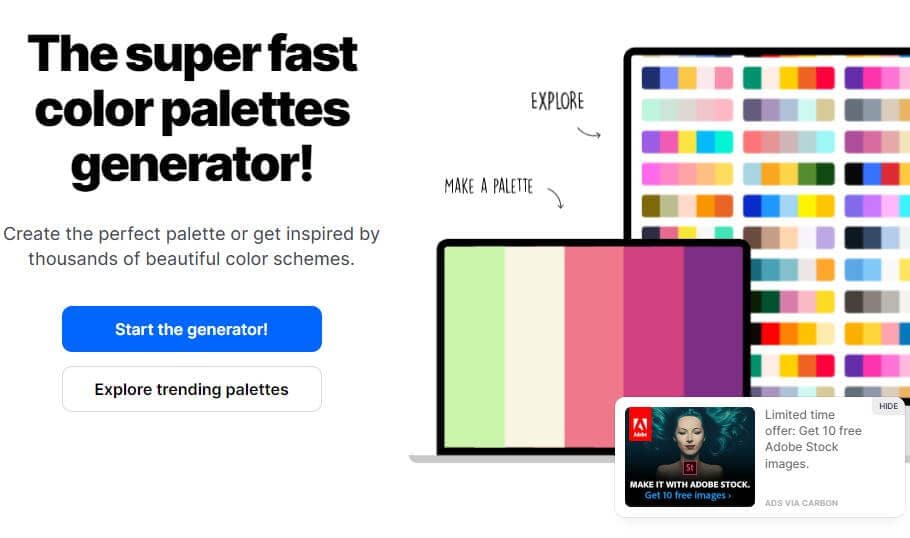
‘Coolors’ help users create the perfect palette. Along with an intuitive and robust color match generator, it offers thousands of beautiful color schemes. ‘Coolors’ tool is available as an iOS app, Instagram page, and Chrome extension. You can also find this accessible and ad-supported tool on the web. You can easily use this tool to explore palettes based on keywords and create your color palette from an uploaded image. Users will find the option to see the RGB, HEX codes, and CYMK color values. It will help them ensure that they have used the exact color shade while choosing and working with the available colors.
Features:
● Generate the palettes by exploring popular palettes.
● Easily pick up option for taking palette from photo.
● Create a collage.
● Explore gradients and create a gradient.
● Contrast checker.
02Adobe Color
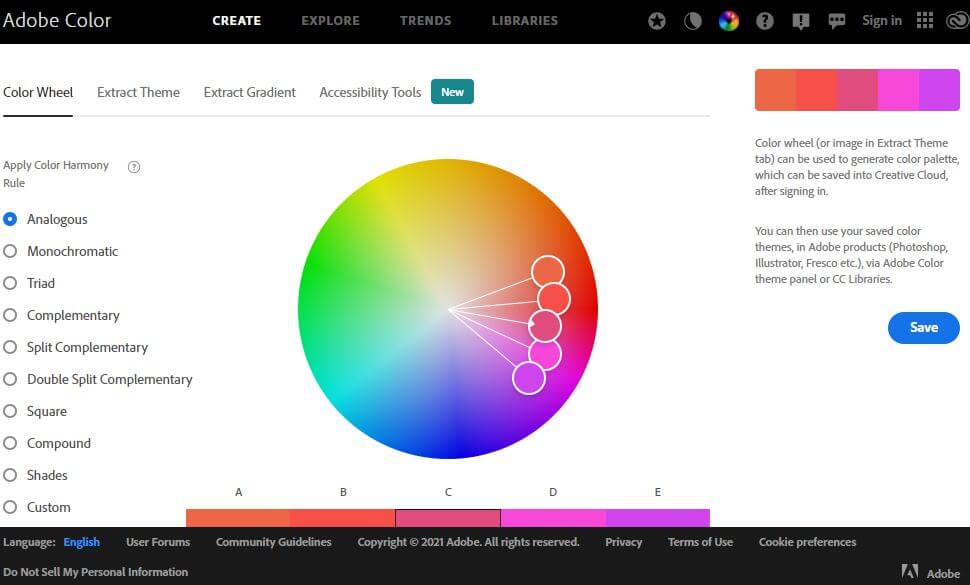
Adobe Color offers several free outstanding color shades that allow all users to show creativity. Adobe Color offers the color wheel to create color schemes as the wheel has different color harmony rules. Adobe Color helps extract themes from pictures, create gradients from uploaded ones, and create color palettes individually. Users can take subscriptions or not to Adobe products. Users can have color choices to ensure their shades for colorblind people as a background for text. Adobe Color extracts a color theme as well as a gradient from images. You can save the color themes if you have accessed Adobe’s Creative Cloud and use those themes directly in your projects.
Features:
● Create accessible themes by checking the background and text colors contrast ratio.
● Easily compare themes to Web Content Accessibility Guidelines (WCAG).
● Colorblind safe themes to ensure better experiences.
● A large number of Color Harmony Rules to apply.
● Accessible theme suggestions and color education availability.
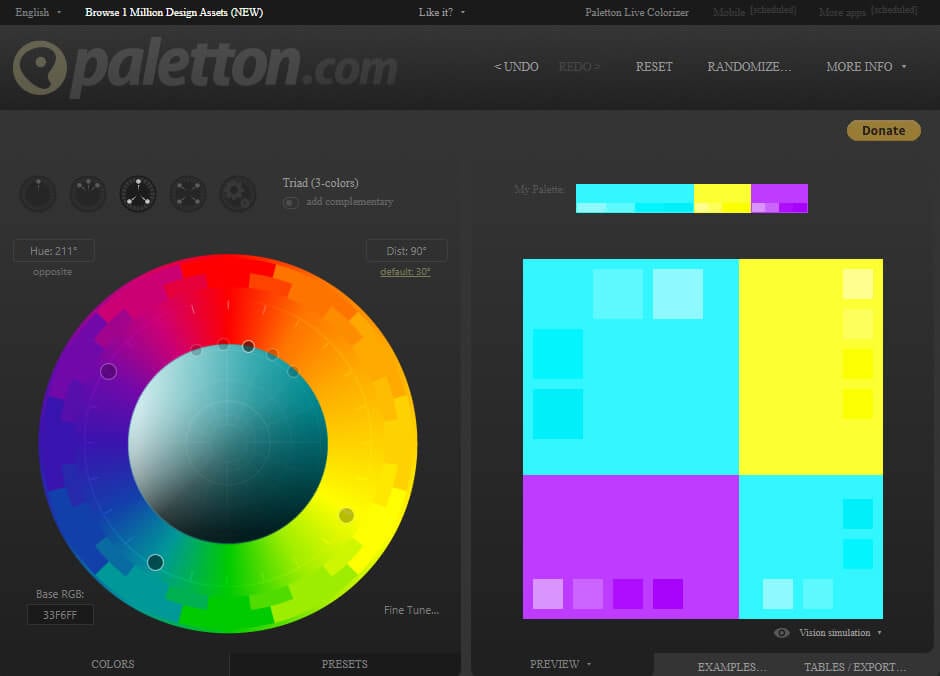
03 Palettton
Paletton offers a different approach compared to most color matching tools. This quite technical-looking and free color match generator is backed. Paletton can be seemed intimidating because of its interface. You will also get a few base colors set by brand guidelines in web design. This tool is excellent for adding a base color and tuning the gradients until a smooth color scheme. You can modify selections individually to know the shifts of shades. It can take the presets that create adjacent and monochromatic options. To choose the shades to match the primary color, you can adjust the color wheel distance.
Features:
● All color palettes have an offered base color.
● Eyedropper tool to extract a color or two from any of the selected images.
● Multiple color combinations.
● Using Paletton’s feature for vision simulation.
● Presets option available according to the base color.
04 ColorHunt
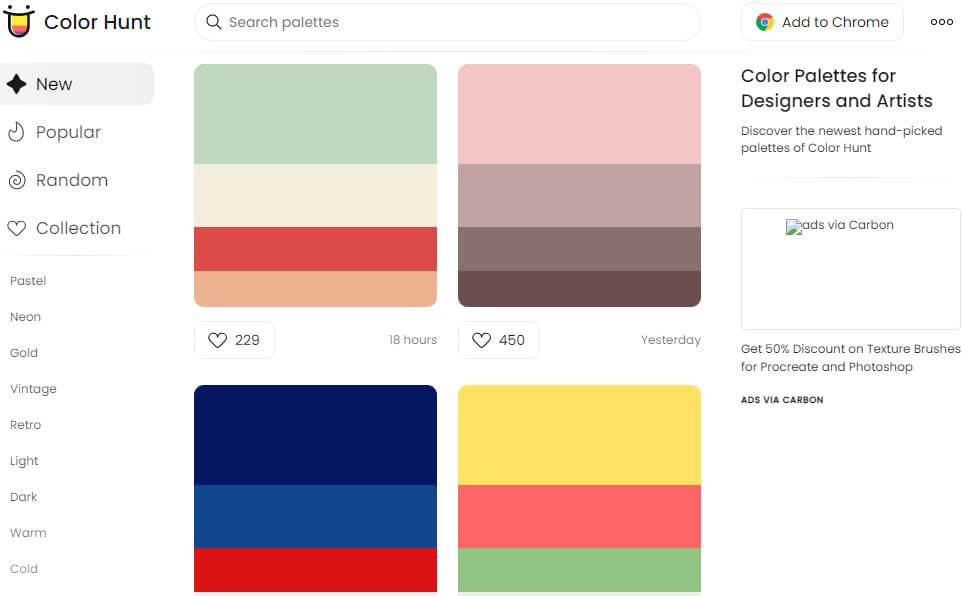
Color Hunt offers a vast collection of color palettes. This designer’s color palettes individually include a large number of colors shades. This tool contains different color palettes to explore according to popularity or trends. The tool has an option to let users create their color palettes. Other designers do craft these color palettes. The palettes are so visual to users to pick a palette easily and begin your design. Here, a little experience will assist you more in selecting the best color for the pallet. This artist-generated color palette library offers trendy, new, or random tools access.
Features:
● Allow discovering the newest hand-picked palettes.
● Create your four-color palette.
● A sheer number of created color palettes.
● Copy the HEX values for the colors or generate an image.
● Sharing options to get your colleagues.
05 BrandColors
BrandColors has the most extensive collection of several multiple brand color codes. This color-exploration tool offers much more than a good color palette generator. Serially there will be numerous color shades to choose from. This free tool shows the official brand color shades in purpose to use for hundreds of sports teams, companies, and other firms as well. For organizations, BrandColors has well-featured tools to develop their brand identity. You can scroll through the options to use color shades for applicable brands. You can easily select the color codes to quickly mimic or share a link.
Features:
● Offer a helpful reference for the brand color codes.
● More than 600 brands, including 1600 colors.
● Featured by CSS-Tricks, Smashing Magazine, Tuts+, Web Design Depot, and over 2 million page views.
● Offers color shades serially and views in letter form.
● Best to avoid conflict with a competitor while finding a color that will look different.
06Culrs
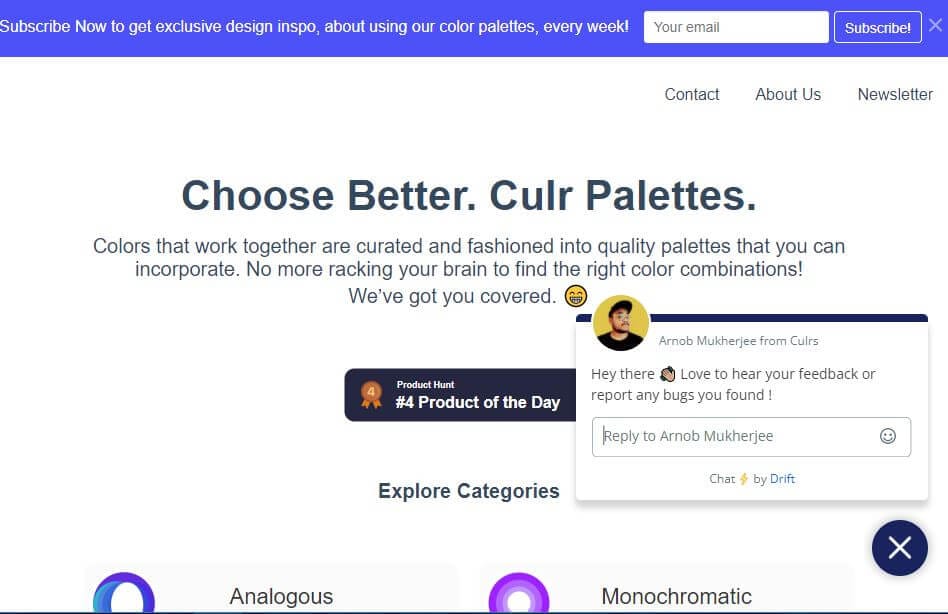
‘Culrs’ color match generator offers customized features so that you can be able to customize your color palette fully. ‘Culrs’ can generate color shades from a randomly selected image using Flickr. It offers free and simple-to-use color shades library along with different colors. It allows searching more than 17K color schemes and helps you to match words according to the color relativity. It serves methods including contrasting, monochromatic, or complementary. You will find the easiest way to explore color from the monochromatic palettes. There is not necessary to put pressure on your brain to find the right color combinations.
Features:
● Work can be curated and fashioned into quality palettes.
● Find must-have color by copying the HEX code.
● Mix colors up and warm shades and blend well.
● Explore categories from analogous, monochromatic, triad, and tetradic.
● Multiple hue options to see beautiful palettes.
07 ColourCode
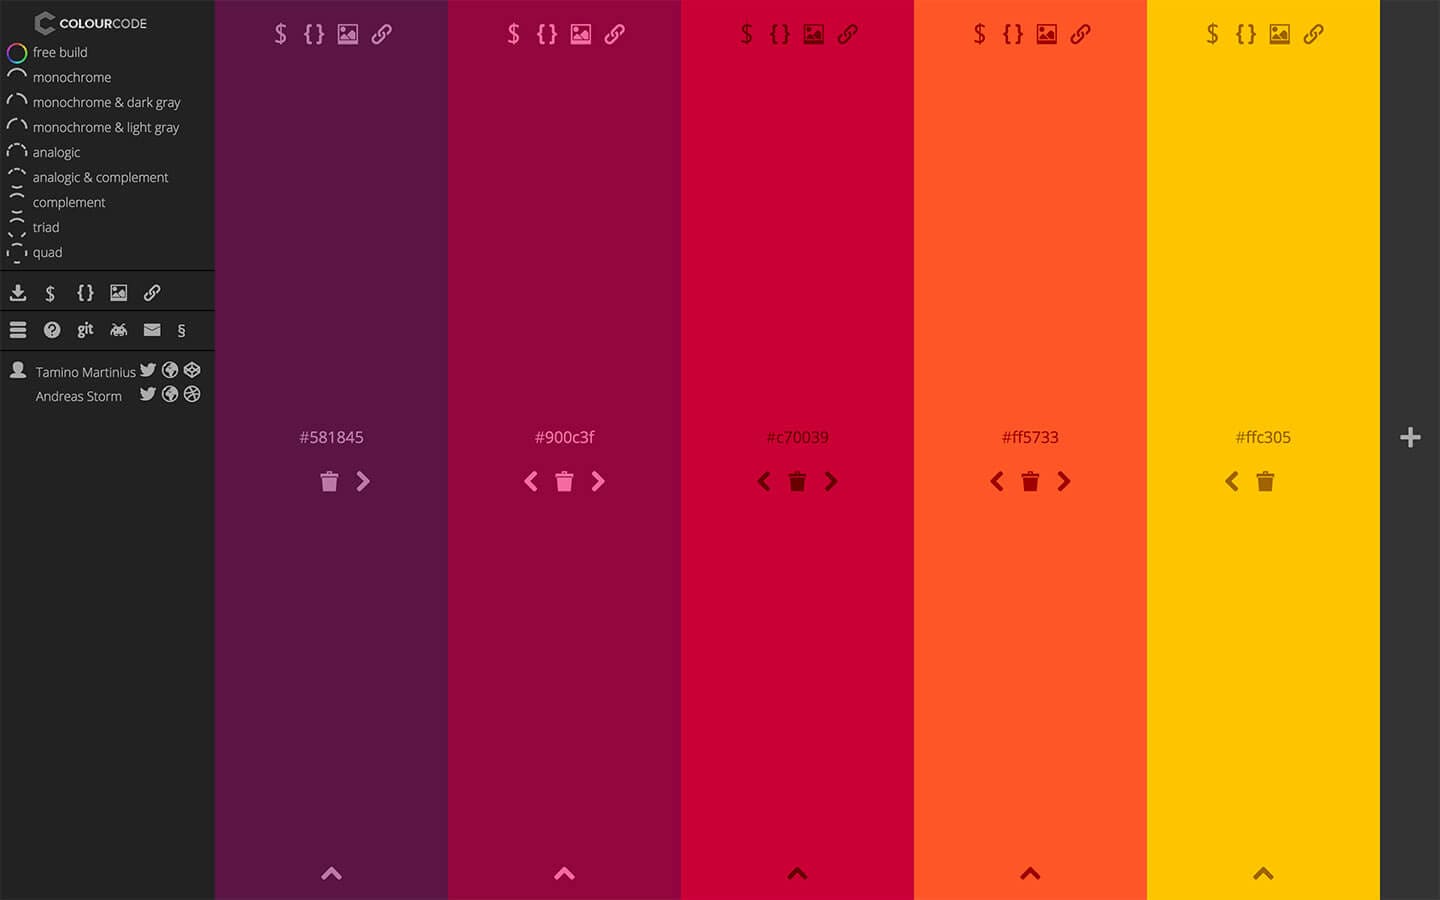
‘ColourCode’ will offer you multiple color shades to create palettes and harmonies. The color shading options remain side by side, and you can choose the brighter or lighter versions of your chosen colors with others. And there are options for creating palettes and exporting formats in several image formats. ‘ColourCode’ will offer several palettes so that you can generate harmonies. You can get several file formats to export and download with the most straightforward interface. All available options are easily accessible from its main interface.
Features:
● Click and add the color on the screen browser
● Create palettes on the same cursor according to the previous site’s interface.
● Generate color palettes in analog, triad, quad, monochrome, complement, monochromatic light, etc. categories.
● Export image files and save themes in LESS, SCSS, and PNG formats.
● The created color schemes are downloadable in multiple languages.
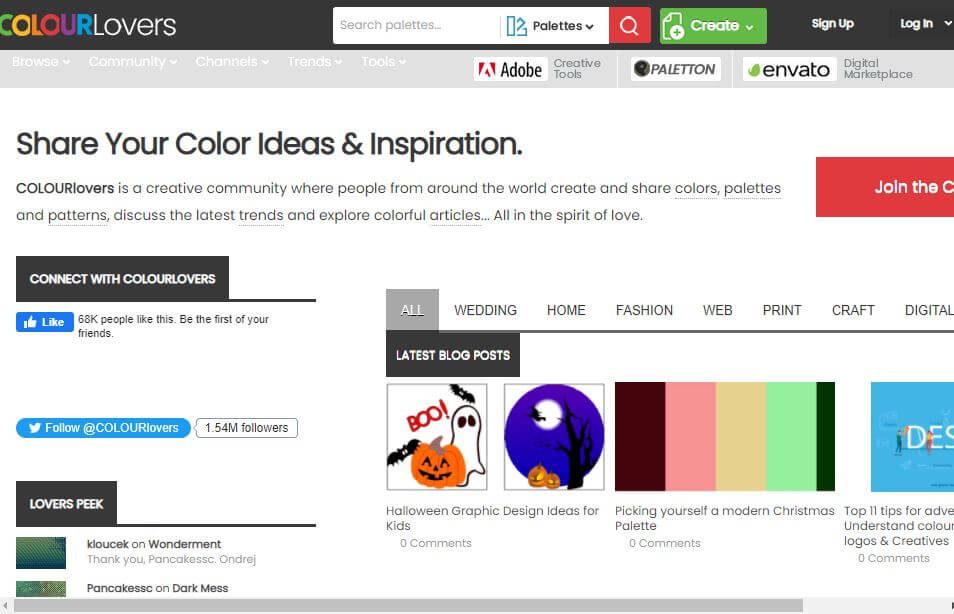
08Colour Lovers
Color Lovers helps create patterns and palettes for matching color generators with a vital social component, offering multiple numbers of color palettes and over a million colorful user bases to match. ColourLovers is a creative cornerstone of the online color community for artists to share their created palettes and patterns, including multiple design elements. You can generate extraordinary color editing tasks with palettes, patterns, shapes, and more. A basic generator version is more straightforward, and its free color palette is quite technical.
Features:
● Create and share colors, palettes, and patterns with offered color shades.
● Palettes like Fugitive Colour, Son of Ariel, etc., are available.
● Patterns include Southern Hemisphere, Wonderment, The Limbic System, and more.
● Multiple shapes, groups, trends, etc., are available.
● Guide through several blog posts on multiple topics like wedding, home, fashion, web, etc.
Part 2 The Best Solution of Color Match Generators: Filmora 11 Video Editor
While it is the topic of color match generators, how can we avoid the most well-known and used tool, Filmora, under matching color generators? Wondershare Filmora Video Editor is an all-in-one combination of many color shades generating tools and multiple other features.
Filmora 11 lets you transform your video into a piece of unique and most attractive art with a drag and drop interface, simple and powerful arts, colors, and editing tools. This color match generator has numerous functions to help you generate your own story with color perfection. You will find several effects to edit and other basic and advanced tools to beautify your videos. This powerful editor and color generator provide quality performance and ensure the appropriate color and editing match your expectations. You can use its color matching features and color palettes to match color accurately. Take a brief overview of features:
● 3D color grading pallets.
● Enhance videos’ beauty with more than 800 stunning effects
● Unleash creativity with offered Hollywood effects.
● Adjust the color tuning balance and dynamic range of the clips.
● Overlays and filters to transform a video into something spectacular.
● Clip adjustment with color tuning option.
For Win 7 or later (64-bit)
For macOS 10.12 or later
● Key Takeaways from This Episode →
● From our today’s discussion in this article, we have got overviews of the below things:
● We learned about 8 top Color Match Generators.
● Offered features of Color Match Generators
● The best solution for matching color generators isFilmora 11 and its proposed features.
Did you face difficulty in putting a bunch of colors together and making them work well in a visual design? Yeah! It is not easy and complicated as throwing colors here and there. No doubt, for creating a graphic design, a story with imagery is delivered. To highlight things, the colors and the text are essential parts. This is where perfection is needed, so there are many color palette generators to make these tasks easier. A color match generator generates a random color palette or helps users create a selection of colors. This selection will define a specified shade. So, what makes an excellent color matching, and how can it be made? We’ve put some best color match generators together.

From today’s discussion, you’ll learn some must-know color match generates solutions. So, browse through mentioned eight-color match generators and create your color combinations and matching colors generator. Let’s get started!
In this article
01 [8 Color Match Generators](#Part 1)
02 [The Best Solution of Color Match Generators: Filmora 11 Video Editor](#Part 2)
Part 1 8 Color Match Generators
Let’s check out our well-researched findings on the 8 best color match generators for creating the perfect color combination and matching color with these matching colors generators.
01Coolors
‘Coolors’ help users create the perfect palette. Along with an intuitive and robust color match generator, it offers thousands of beautiful color schemes. ‘Coolors’ tool is available as an iOS app, Instagram page, and Chrome extension. You can also find this accessible and ad-supported tool on the web. You can easily use this tool to explore palettes based on keywords and create your color palette from an uploaded image. Users will find the option to see the RGB, HEX codes, and CYMK color values. It will help them ensure that they have used the exact color shade while choosing and working with the available colors.
Features:
● Generate the palettes by exploring popular palettes.
● Easily pick up option for taking palette from photo.
● Create a collage.
● Explore gradients and create a gradient.
● Contrast checker.
02Adobe Color
Adobe Color offers several free outstanding color shades that allow all users to show creativity. Adobe Color offers the color wheel to create color schemes as the wheel has different color harmony rules. Adobe Color helps extract themes from pictures, create gradients from uploaded ones, and create color palettes individually. Users can take subscriptions or not to Adobe products. Users can have color choices to ensure their shades for colorblind people as a background for text. Adobe Color extracts a color theme as well as a gradient from images. You can save the color themes if you have accessed Adobe’s Creative Cloud and use those themes directly in your projects.
Features:
● Create accessible themes by checking the background and text colors contrast ratio.
● Easily compare themes to Web Content Accessibility Guidelines (WCAG).
● Colorblind safe themes to ensure better experiences.
● A large number of Color Harmony Rules to apply.
● Accessible theme suggestions and color education availability.
03 Palettton
Paletton offers a different approach compared to most color matching tools. This quite technical-looking and free color match generator is backed. Paletton can be seemed intimidating because of its interface. You will also get a few base colors set by brand guidelines in web design. This tool is excellent for adding a base color and tuning the gradients until a smooth color scheme. You can modify selections individually to know the shifts of shades. It can take the presets that create adjacent and monochromatic options. To choose the shades to match the primary color, you can adjust the color wheel distance.
Features:
● All color palettes have an offered base color.
● Eyedropper tool to extract a color or two from any of the selected images.
● Multiple color combinations.
● Using Paletton’s feature for vision simulation.
● Presets option available according to the base color.

04 ColorHunt
Color Hunt offers a vast collection of color palettes. This designer’s color palettes individually include a large number of colors shades. This tool contains different color palettes to explore according to popularity or trends. The tool has an option to let users create their color palettes. Other designers do craft these color palettes. The palettes are so visual to users to pick a palette easily and begin your design. Here, a little experience will assist you more in selecting the best color for the pallet. This artist-generated color palette library offers trendy, new, or random tools access.
Features:
● Allow discovering the newest hand-picked palettes.
● Create your four-color palette.
● A sheer number of created color palettes.
● Copy the HEX values for the colors or generate an image.
● Sharing options to get your colleagues.
05 BrandColors
BrandColors has the most extensive collection of several multiple brand color codes. This color-exploration tool offers much more than a good color palette generator. Serially there will be numerous color shades to choose from. This free tool shows the official brand color shades in purpose to use for hundreds of sports teams, companies, and other firms as well. For organizations, BrandColors has well-featured tools to develop their brand identity. You can scroll through the options to use color shades for applicable brands. You can easily select the color codes to quickly mimic or share a link.
Features:
● Offer a helpful reference for the brand color codes.
● More than 600 brands, including 1600 colors.
● Featured by CSS-Tricks, Smashing Magazine, Tuts+, Web Design Depot, and over 2 million page views.
● Offers color shades serially and views in letter form.
● Best to avoid conflict with a competitor while finding a color that will look different.
06Culrs
‘Culrs’ color match generator offers customized features so that you can be able to customize your color palette fully. ‘Culrs’ can generate color shades from a randomly selected image using Flickr. It offers free and simple-to-use color shades library along with different colors. It allows searching more than 17K color schemes and helps you to match words according to the color relativity. It serves methods including contrasting, monochromatic, or complementary. You will find the easiest way to explore color from the monochromatic palettes. There is not necessary to put pressure on your brain to find the right color combinations.
Features:
● Work can be curated and fashioned into quality palettes.
● Find must-have color by copying the HEX code.
● Mix colors up and warm shades and blend well.
● Explore categories from analogous, monochromatic, triad, and tetradic.
● Multiple hue options to see beautiful palettes.
07 ColourCode
‘ColourCode’ will offer you multiple color shades to create palettes and harmonies. The color shading options remain side by side, and you can choose the brighter or lighter versions of your chosen colors with others. And there are options for creating palettes and exporting formats in several image formats. ‘ColourCode’ will offer several palettes so that you can generate harmonies. You can get several file formats to export and download with the most straightforward interface. All available options are easily accessible from its main interface.
Features:
● Click and add the color on the screen browser
● Create palettes on the same cursor according to the previous site’s interface.
● Generate color palettes in analog, triad, quad, monochrome, complement, monochromatic light, etc. categories.
● Export image files and save themes in LESS, SCSS, and PNG formats.
● The created color schemes are downloadable in multiple languages.

08Colour Lovers
Color Lovers helps create patterns and palettes for matching color generators with a vital social component, offering multiple numbers of color palettes and over a million colorful user bases to match. ColourLovers is a creative cornerstone of the online color community for artists to share their created palettes and patterns, including multiple design elements. You can generate extraordinary color editing tasks with palettes, patterns, shapes, and more. A basic generator version is more straightforward, and its free color palette is quite technical.
Features:
● Create and share colors, palettes, and patterns with offered color shades.
● Palettes like Fugitive Colour, Son of Ariel, etc., are available.
● Patterns include Southern Hemisphere, Wonderment, The Limbic System, and more.
● Multiple shapes, groups, trends, etc., are available.
● Guide through several blog posts on multiple topics like wedding, home, fashion, web, etc.
Part 2 The Best Solution of Color Match Generators: Filmora 11 Video Editor
While it is the topic of color match generators, how can we avoid the most well-known and used tool, Filmora, under matching color generators? Wondershare Filmora Video Editor is an all-in-one combination of many color shades generating tools and multiple other features.
Filmora 11 lets you transform your video into a piece of unique and most attractive art with a drag and drop interface, simple and powerful arts, colors, and editing tools. This color match generator has numerous functions to help you generate your own story with color perfection. You will find several effects to edit and other basic and advanced tools to beautify your videos. This powerful editor and color generator provide quality performance and ensure the appropriate color and editing match your expectations. You can use its color matching features and color palettes to match color accurately. Take a brief overview of features:
● 3D color grading pallets.
● Enhance videos’ beauty with more than 800 stunning effects
● Unleash creativity with offered Hollywood effects.
● Adjust the color tuning balance and dynamic range of the clips.
● Overlays and filters to transform a video into something spectacular.
● Clip adjustment with color tuning option.
For Win 7 or later (64-bit)
For macOS 10.12 or later
● Key Takeaways from This Episode →
● From our today’s discussion in this article, we have got overviews of the below things:
● We learned about 8 top Color Match Generators.
● Offered features of Color Match Generators
● The best solution for matching color generators isFilmora 11 and its proposed features.
Did you face difficulty in putting a bunch of colors together and making them work well in a visual design? Yeah! It is not easy and complicated as throwing colors here and there. No doubt, for creating a graphic design, a story with imagery is delivered. To highlight things, the colors and the text are essential parts. This is where perfection is needed, so there are many color palette generators to make these tasks easier. A color match generator generates a random color palette or helps users create a selection of colors. This selection will define a specified shade. So, what makes an excellent color matching, and how can it be made? We’ve put some best color match generators together.

From today’s discussion, you’ll learn some must-know color match generates solutions. So, browse through mentioned eight-color match generators and create your color combinations and matching colors generator. Let’s get started!
In this article
01 [8 Color Match Generators](#Part 1)
02 [The Best Solution of Color Match Generators: Filmora 11 Video Editor](#Part 2)
Part 1 8 Color Match Generators
Let’s check out our well-researched findings on the 8 best color match generators for creating the perfect color combination and matching color with these matching colors generators.
01Coolors
‘Coolors’ help users create the perfect palette. Along with an intuitive and robust color match generator, it offers thousands of beautiful color schemes. ‘Coolors’ tool is available as an iOS app, Instagram page, and Chrome extension. You can also find this accessible and ad-supported tool on the web. You can easily use this tool to explore palettes based on keywords and create your color palette from an uploaded image. Users will find the option to see the RGB, HEX codes, and CYMK color values. It will help them ensure that they have used the exact color shade while choosing and working with the available colors.
Features:
● Generate the palettes by exploring popular palettes.
● Easily pick up option for taking palette from photo.
● Create a collage.
● Explore gradients and create a gradient.
● Contrast checker.
02Adobe Color
Adobe Color offers several free outstanding color shades that allow all users to show creativity. Adobe Color offers the color wheel to create color schemes as the wheel has different color harmony rules. Adobe Color helps extract themes from pictures, create gradients from uploaded ones, and create color palettes individually. Users can take subscriptions or not to Adobe products. Users can have color choices to ensure their shades for colorblind people as a background for text. Adobe Color extracts a color theme as well as a gradient from images. You can save the color themes if you have accessed Adobe’s Creative Cloud and use those themes directly in your projects.
Features:
● Create accessible themes by checking the background and text colors contrast ratio.
● Easily compare themes to Web Content Accessibility Guidelines (WCAG).
● Colorblind safe themes to ensure better experiences.
● A large number of Color Harmony Rules to apply.
● Accessible theme suggestions and color education availability.
03 Palettton
Paletton offers a different approach compared to most color matching tools. This quite technical-looking and free color match generator is backed. Paletton can be seemed intimidating because of its interface. You will also get a few base colors set by brand guidelines in web design. This tool is excellent for adding a base color and tuning the gradients until a smooth color scheme. You can modify selections individually to know the shifts of shades. It can take the presets that create adjacent and monochromatic options. To choose the shades to match the primary color, you can adjust the color wheel distance.
Features:
● All color palettes have an offered base color.
● Eyedropper tool to extract a color or two from any of the selected images.
● Multiple color combinations.
● Using Paletton’s feature for vision simulation.
● Presets option available according to the base color.

04 ColorHunt
Color Hunt offers a vast collection of color palettes. This designer’s color palettes individually include a large number of colors shades. This tool contains different color palettes to explore according to popularity or trends. The tool has an option to let users create their color palettes. Other designers do craft these color palettes. The palettes are so visual to users to pick a palette easily and begin your design. Here, a little experience will assist you more in selecting the best color for the pallet. This artist-generated color palette library offers trendy, new, or random tools access.
Features:
● Allow discovering the newest hand-picked palettes.
● Create your four-color palette.
● A sheer number of created color palettes.
● Copy the HEX values for the colors or generate an image.
● Sharing options to get your colleagues.
05 BrandColors
BrandColors has the most extensive collection of several multiple brand color codes. This color-exploration tool offers much more than a good color palette generator. Serially there will be numerous color shades to choose from. This free tool shows the official brand color shades in purpose to use for hundreds of sports teams, companies, and other firms as well. For organizations, BrandColors has well-featured tools to develop their brand identity. You can scroll through the options to use color shades for applicable brands. You can easily select the color codes to quickly mimic or share a link.
Features:
● Offer a helpful reference for the brand color codes.
● More than 600 brands, including 1600 colors.
● Featured by CSS-Tricks, Smashing Magazine, Tuts+, Web Design Depot, and over 2 million page views.
● Offers color shades serially and views in letter form.
● Best to avoid conflict with a competitor while finding a color that will look different.
06Culrs
‘Culrs’ color match generator offers customized features so that you can be able to customize your color palette fully. ‘Culrs’ can generate color shades from a randomly selected image using Flickr. It offers free and simple-to-use color shades library along with different colors. It allows searching more than 17K color schemes and helps you to match words according to the color relativity. It serves methods including contrasting, monochromatic, or complementary. You will find the easiest way to explore color from the monochromatic palettes. There is not necessary to put pressure on your brain to find the right color combinations.
Features:
● Work can be curated and fashioned into quality palettes.
● Find must-have color by copying the HEX code.
● Mix colors up and warm shades and blend well.
● Explore categories from analogous, monochromatic, triad, and tetradic.
● Multiple hue options to see beautiful palettes.
07 ColourCode
‘ColourCode’ will offer you multiple color shades to create palettes and harmonies. The color shading options remain side by side, and you can choose the brighter or lighter versions of your chosen colors with others. And there are options for creating palettes and exporting formats in several image formats. ‘ColourCode’ will offer several palettes so that you can generate harmonies. You can get several file formats to export and download with the most straightforward interface. All available options are easily accessible from its main interface.
Features:
● Click and add the color on the screen browser
● Create palettes on the same cursor according to the previous site’s interface.
● Generate color palettes in analog, triad, quad, monochrome, complement, monochromatic light, etc. categories.
● Export image files and save themes in LESS, SCSS, and PNG formats.
● The created color schemes are downloadable in multiple languages.

08Colour Lovers
Color Lovers helps create patterns and palettes for matching color generators with a vital social component, offering multiple numbers of color palettes and over a million colorful user bases to match. ColourLovers is a creative cornerstone of the online color community for artists to share their created palettes and patterns, including multiple design elements. You can generate extraordinary color editing tasks with palettes, patterns, shapes, and more. A basic generator version is more straightforward, and its free color palette is quite technical.
Features:
● Create and share colors, palettes, and patterns with offered color shades.
● Palettes like Fugitive Colour, Son of Ariel, etc., are available.
● Patterns include Southern Hemisphere, Wonderment, The Limbic System, and more.
● Multiple shapes, groups, trends, etc., are available.
● Guide through several blog posts on multiple topics like wedding, home, fashion, web, etc.
Part 2 The Best Solution of Color Match Generators: Filmora 11 Video Editor
While it is the topic of color match generators, how can we avoid the most well-known and used tool, Filmora, under matching color generators? Wondershare Filmora Video Editor is an all-in-one combination of many color shades generating tools and multiple other features.
Filmora 11 lets you transform your video into a piece of unique and most attractive art with a drag and drop interface, simple and powerful arts, colors, and editing tools. This color match generator has numerous functions to help you generate your own story with color perfection. You will find several effects to edit and other basic and advanced tools to beautify your videos. This powerful editor and color generator provide quality performance and ensure the appropriate color and editing match your expectations. You can use its color matching features and color palettes to match color accurately. Take a brief overview of features:
● 3D color grading pallets.
● Enhance videos’ beauty with more than 800 stunning effects
● Unleash creativity with offered Hollywood effects.
● Adjust the color tuning balance and dynamic range of the clips.
● Overlays and filters to transform a video into something spectacular.
● Clip adjustment with color tuning option.
For Win 7 or later (64-bit)
For macOS 10.12 or later
● Key Takeaways from This Episode →
● From our today’s discussion in this article, we have got overviews of the below things:
● We learned about 8 top Color Match Generators.
● Offered features of Color Match Generators
● The best solution for matching color generators isFilmora 11 and its proposed features.
Did you face difficulty in putting a bunch of colors together and making them work well in a visual design? Yeah! It is not easy and complicated as throwing colors here and there. No doubt, for creating a graphic design, a story with imagery is delivered. To highlight things, the colors and the text are essential parts. This is where perfection is needed, so there are many color palette generators to make these tasks easier. A color match generator generates a random color palette or helps users create a selection of colors. This selection will define a specified shade. So, what makes an excellent color matching, and how can it be made? We’ve put some best color match generators together.

From today’s discussion, you’ll learn some must-know color match generates solutions. So, browse through mentioned eight-color match generators and create your color combinations and matching colors generator. Let’s get started!
In this article
01 [8 Color Match Generators](#Part 1)
02 [The Best Solution of Color Match Generators: Filmora 11 Video Editor](#Part 2)
Part 1 8 Color Match Generators
Let’s check out our well-researched findings on the 8 best color match generators for creating the perfect color combination and matching color with these matching colors generators.
01Coolors
‘Coolors’ help users create the perfect palette. Along with an intuitive and robust color match generator, it offers thousands of beautiful color schemes. ‘Coolors’ tool is available as an iOS app, Instagram page, and Chrome extension. You can also find this accessible and ad-supported tool on the web. You can easily use this tool to explore palettes based on keywords and create your color palette from an uploaded image. Users will find the option to see the RGB, HEX codes, and CYMK color values. It will help them ensure that they have used the exact color shade while choosing and working with the available colors.
Features:
● Generate the palettes by exploring popular palettes.
● Easily pick up option for taking palette from photo.
● Create a collage.
● Explore gradients and create a gradient.
● Contrast checker.
02Adobe Color
Adobe Color offers several free outstanding color shades that allow all users to show creativity. Adobe Color offers the color wheel to create color schemes as the wheel has different color harmony rules. Adobe Color helps extract themes from pictures, create gradients from uploaded ones, and create color palettes individually. Users can take subscriptions or not to Adobe products. Users can have color choices to ensure their shades for colorblind people as a background for text. Adobe Color extracts a color theme as well as a gradient from images. You can save the color themes if you have accessed Adobe’s Creative Cloud and use those themes directly in your projects.
Features:
● Create accessible themes by checking the background and text colors contrast ratio.
● Easily compare themes to Web Content Accessibility Guidelines (WCAG).
● Colorblind safe themes to ensure better experiences.
● A large number of Color Harmony Rules to apply.
● Accessible theme suggestions and color education availability.
03 Palettton
Paletton offers a different approach compared to most color matching tools. This quite technical-looking and free color match generator is backed. Paletton can be seemed intimidating because of its interface. You will also get a few base colors set by brand guidelines in web design. This tool is excellent for adding a base color and tuning the gradients until a smooth color scheme. You can modify selections individually to know the shifts of shades. It can take the presets that create adjacent and monochromatic options. To choose the shades to match the primary color, you can adjust the color wheel distance.
Features:
● All color palettes have an offered base color.
● Eyedropper tool to extract a color or two from any of the selected images.
● Multiple color combinations.
● Using Paletton’s feature for vision simulation.
● Presets option available according to the base color.

04 ColorHunt
Color Hunt offers a vast collection of color palettes. This designer’s color palettes individually include a large number of colors shades. This tool contains different color palettes to explore according to popularity or trends. The tool has an option to let users create their color palettes. Other designers do craft these color palettes. The palettes are so visual to users to pick a palette easily and begin your design. Here, a little experience will assist you more in selecting the best color for the pallet. This artist-generated color palette library offers trendy, new, or random tools access.
Features:
● Allow discovering the newest hand-picked palettes.
● Create your four-color palette.
● A sheer number of created color palettes.
● Copy the HEX values for the colors or generate an image.
● Sharing options to get your colleagues.
05 BrandColors
BrandColors has the most extensive collection of several multiple brand color codes. This color-exploration tool offers much more than a good color palette generator. Serially there will be numerous color shades to choose from. This free tool shows the official brand color shades in purpose to use for hundreds of sports teams, companies, and other firms as well. For organizations, BrandColors has well-featured tools to develop their brand identity. You can scroll through the options to use color shades for applicable brands. You can easily select the color codes to quickly mimic or share a link.
Features:
● Offer a helpful reference for the brand color codes.
● More than 600 brands, including 1600 colors.
● Featured by CSS-Tricks, Smashing Magazine, Tuts+, Web Design Depot, and over 2 million page views.
● Offers color shades serially and views in letter form.
● Best to avoid conflict with a competitor while finding a color that will look different.
06Culrs
‘Culrs’ color match generator offers customized features so that you can be able to customize your color palette fully. ‘Culrs’ can generate color shades from a randomly selected image using Flickr. It offers free and simple-to-use color shades library along with different colors. It allows searching more than 17K color schemes and helps you to match words according to the color relativity. It serves methods including contrasting, monochromatic, or complementary. You will find the easiest way to explore color from the monochromatic palettes. There is not necessary to put pressure on your brain to find the right color combinations.
Features:
● Work can be curated and fashioned into quality palettes.
● Find must-have color by copying the HEX code.
● Mix colors up and warm shades and blend well.
● Explore categories from analogous, monochromatic, triad, and tetradic.
● Multiple hue options to see beautiful palettes.
07 ColourCode
‘ColourCode’ will offer you multiple color shades to create palettes and harmonies. The color shading options remain side by side, and you can choose the brighter or lighter versions of your chosen colors with others. And there are options for creating palettes and exporting formats in several image formats. ‘ColourCode’ will offer several palettes so that you can generate harmonies. You can get several file formats to export and download with the most straightforward interface. All available options are easily accessible from its main interface.
Features:
● Click and add the color on the screen browser
● Create palettes on the same cursor according to the previous site’s interface.
● Generate color palettes in analog, triad, quad, monochrome, complement, monochromatic light, etc. categories.
● Export image files and save themes in LESS, SCSS, and PNG formats.
● The created color schemes are downloadable in multiple languages.

08Colour Lovers
Color Lovers helps create patterns and palettes for matching color generators with a vital social component, offering multiple numbers of color palettes and over a million colorful user bases to match. ColourLovers is a creative cornerstone of the online color community for artists to share their created palettes and patterns, including multiple design elements. You can generate extraordinary color editing tasks with palettes, patterns, shapes, and more. A basic generator version is more straightforward, and its free color palette is quite technical.
Features:
● Create and share colors, palettes, and patterns with offered color shades.
● Palettes like Fugitive Colour, Son of Ariel, etc., are available.
● Patterns include Southern Hemisphere, Wonderment, The Limbic System, and more.
● Multiple shapes, groups, trends, etc., are available.
● Guide through several blog posts on multiple topics like wedding, home, fashion, web, etc.
Part 2 The Best Solution of Color Match Generators: Filmora 11 Video Editor
While it is the topic of color match generators, how can we avoid the most well-known and used tool, Filmora, under matching color generators? Wondershare Filmora Video Editor is an all-in-one combination of many color shades generating tools and multiple other features.
Filmora 11 lets you transform your video into a piece of unique and most attractive art with a drag and drop interface, simple and powerful arts, colors, and editing tools. This color match generator has numerous functions to help you generate your own story with color perfection. You will find several effects to edit and other basic and advanced tools to beautify your videos. This powerful editor and color generator provide quality performance and ensure the appropriate color and editing match your expectations. You can use its color matching features and color palettes to match color accurately. Take a brief overview of features:
● 3D color grading pallets.
● Enhance videos’ beauty with more than 800 stunning effects
● Unleash creativity with offered Hollywood effects.
● Adjust the color tuning balance and dynamic range of the clips.
● Overlays and filters to transform a video into something spectacular.
● Clip adjustment with color tuning option.
For Win 7 or later (64-bit)
For macOS 10.12 or later
● Key Takeaways from This Episode →
● From our today’s discussion in this article, we have got overviews of the below things:
● We learned about 8 top Color Match Generators.
● Offered features of Color Match Generators
● The best solution for matching color generators isFilmora 11 and its proposed features.
Also read:
- In 2024, Best Free Slow Motion Apps For Android and iPhone
- Top List of Best VHS Video Effect Makers
- The Craziest 10 AI Editors Youve Ever Seen
- New In 2024, 6 Instant Mp4 to GIF Online Tools
- 2024 Approved How to Find Free Online Slideshow Maker with No Watermark
- In 2024, Five Thoughts on Discord Create Accounts How-To Questions
- 2024 Approved Level Up Videos By Applying Keyframe with Filmora
- New 2024 Approved Easy Guide to Zoom Video in VLC
- 2024 Approved What Is MOV Format and How to Edit MOV Video Better?
- In 2024, How to Use Rule of Thirds in Video
- New Change Speed of a Video on iPhone
- 2024 Approved The Complete Guide to Making Fortnite Montage
- Adobe Lightroom Color Grading Tutorial
- How to Zoom Picture in Picture Easy Solution
- Updated Add a Miniature Effect on Your Video for Filmy Looks. To Add This Effect, Read the Complete Guide and Make Your Video Cinematic by Wondershare Filmora
- How to Add Subtitles in Canva?
- Updated In 2024, Best 10 Anime Movies for All Time
- New 2024 Approved Best Practical Tips to Improve Your Lighting in the Sun
- In 2024, Converting Files Is Easy with the Right Tools, and Likewise, GIF to JPG Conversion Is. Choose the Best Tool and Get the Expected Results Within the Blink of an Eye
- What Is the Best Frame Rate for 4K Videos, In 2024
- Updated In 2024, How to Combine Multiple Videos Into One on Instagram
- How To Mirror a Video Clip in Premiere Pro for 2024
- In 2024, How to Remove and Reset Face ID on iPhone 7 Plus | Dr.fone
- In 2024, Simple and Effective Ways to Change Your Country on YouTube App Of your Samsung Galaxy XCover 6 Pro Tactical Edition | Dr.fone
- How to Fix Pokemon Go Route Not Working On Vivo Y100A? | Dr.fone
- Updated Elevate Your Content with the Best Free Video Translator Apps
- In 2024, The Updated Method to Bypass Samsung Galaxy XCover 7 FRP
- Easy Methods How To Transfer Pictures From Apple iPhone 13 Pro to PC | Dr.fone
- In 2024, How to Track HTC U23 Pro Location by Number | Dr.fone
- In 2024, Delete Gmail Account With/Without Password On Samsung Galaxy S23+
- In 2024, Hacks to do pokemon go trainer battles For Vivo Y17s | Dr.fone
- Fixing Persistent Pandora Crashes on Google Pixel 8 Pro | Dr.fone
- Easy Guide How To Bypass Nokia C22 FRP Android 10/11/12/13
- Protecting Your Privacy How To Remove Apple ID From Apple iPhone 15 Pro Max
- In 2024, How to Transfer Data from Motorola Moto G13 to Samsung Phone | Dr.fone
- 3 Ways for Android Pokemon Go Spoofing On Honor X50 | Dr.fone
- In 2024, Hacks to do pokemon go trainer battles For Samsung Galaxy S23 Tactical Edition | Dr.fone
- Locked Out of iPhone 14 Pro? 5 Ways to get into a Locked iPhone 14 Pro
- List of Pokémon Go Joysticks On Gionee F3 Pro | Dr.fone
- In 2024, Apple ID Unlock From iPhone 12 mini? How to Fix it?
- Title: Easy Way to Create a DIY Green Screen Video Effect
- Author: Chloe
- Created at : 2024-05-20 03:37:26
- Updated at : 2024-05-21 03:37:26
- Link: https://ai-editing-video.techidaily.com/easy-way-to-create-a-diy-green-screen-video-effect/
- License: This work is licensed under CC BY-NC-SA 4.0.

