:max_bytes(150000):strip_icc():format(webp)/GettyImages-77744394-e5f79596e54a4ba6a914eed31be7efc4.jpg)
Enhance Your Film Production with These 5 Silence Detection Tools for 2024

Enhance Your Film Production with These 5 Silence Detection Tools
When it comes to making videos, audio quality is paramount. It can take an average video and turn it into a masterpiece. Yet, it may be challenging in specific cases, particularly undesired silences or pauses.
Modern silence detection tools are helpful in this situation. They can detect and remove any uncomfortable silences from audio files quickly. Besides, they save time and ensure the result is perfect by automating this procedure.
Today, we will review the top five silence detector tools. We will also discuss their positive and negative sides and the pricing factor. Let’s start!
- Part 2: How to Use Filmora’s Advanced Silence Detection Feature for Better Editing?
- Part 3: Conclusion
Silence Detection For Win 7 or later(64-bit)
Silence Detection For macOS 10.14 or later
Part 1: Top 5 Amazing Tools for Detecting Silence - A Thorough Review
Now, you know the importance of audio accuracy in video editing. So, we can reveal the five most innovative tools for detecting silence.
Anyone can improve video production skills with the help of these specialized tools. Remember, each tool is designed for a specific set of requirements.
01.Savvycut - Silence Detection Tool for Online Use
Savvycut is a fantastic audio silence remover online. As the name suggests, this tool is suitable for savvy video editors. No installation or downloads are required to use Savvycut. That’s because it is a web-based silence detection tool. Users need to upload video input for fast analysis and silence removal.
Pros
- It has a simple UI with easy video track uploading and processing.
- Savvycut offers quick and efficient silence detection to help editors save time.
- It provides entry-level functionality for free, making it available to everyone.
- This tool can work on many different video formats.
Cons
- You may need premium membership plans to access advanced functions.
- The limited functionality of the free version may be a turnoff for certain people.
02.Kapwing - Silence Detection Tool for Mobile
This tool offers an AI-driven audio silence detection and removal. Kapwing can also identify and erase silences from audio files in formats like MP3 and WAV. You don’t need to download this tool; it’s accessible online. You only need a web browser and a mobile phone with an internet connection.
Pros
- This tool edits video footage more quickly by automatically cutting any silences.
- It uses AI to improve the sound quality, including background music and more.
Cons
- There have been reports of compatibility concerns with previous versions.
- You may only have access to some of the basic features in the free edition.
03.Adobe Premiere Pro - Silence Detection Tool for Windows
Adobe Premiere Pro is the third most powerful software on our list. It is a helpful tool to detect and cut silences from video files. This tool works very well on Windows. Thanks to its batch-processing features, it lets you edit several audio files simultaneously.
Pros
- With its efficient batch audio silence remover feature, you may edit many audio files at once.
- It accommodates a wide range of editing requirements.
- Its silence detection parameters are fully customizable.
- The intuitive design makes it simple for users of all skill levels to get up and running.
- This tool allows users to export video clips in various formats, giving them more options.
Cons
- Newcomers to video editing software may find the learning curve to be steep.
- The use of more complex features may need expertise and training.
04.Audacity - Silence Detection Tool for Mac
Audacity is the best silence detection tool that works well with the macOS system. This tool makes it easier to identify and remove silences in video files. It can improve your video production speed on Mac.
Pros
- It works well with Mac devices and runs smoothly on macOS.
- It has an accessible and user-friendly interface developed with Mac users in mind.
- This tool facilitates quick and easy silence removal, which makes editing a breeze.
Cons
- The pricing is much greater than that of competing silence detection tools.
- It might not have all the bells and whistles we see in competitors.
05.Recut - General Silence Detection Tool
If you’re using Windows, Recut is an excellent silence detection tool. It can help you detect and delete silent spots from audio and videos. If you’re making a video, this tool can make editing the audio a breeze.
Pros
- Suitable for video editors of varying skill levels
- Its user-friendly interface makes silence detection and elimination simple.
- Besides audio silence detection, it provides a suite of tools for effective audio editing.
- It offers various editing features and supports several file types.
- It is available to people on a tight budget since it doesn’t cost much.
Cons
- There aren’t easy ways to get in touch with the Recut’s customer service.
- It might not have all the features that come with other affordable software.
How to Use Filmora’s Advanced Silence Detection Feature for Better Editing?
Filmora provides an easy way to detect and remove silences from your video files. To use the Silence Detection Filmora feature, do the following:
Step1Upload Your Video Clip
Launch Filmora and add the video clip that contains the track you want to modify for your project.
Step2Find the Silence Detection Feature
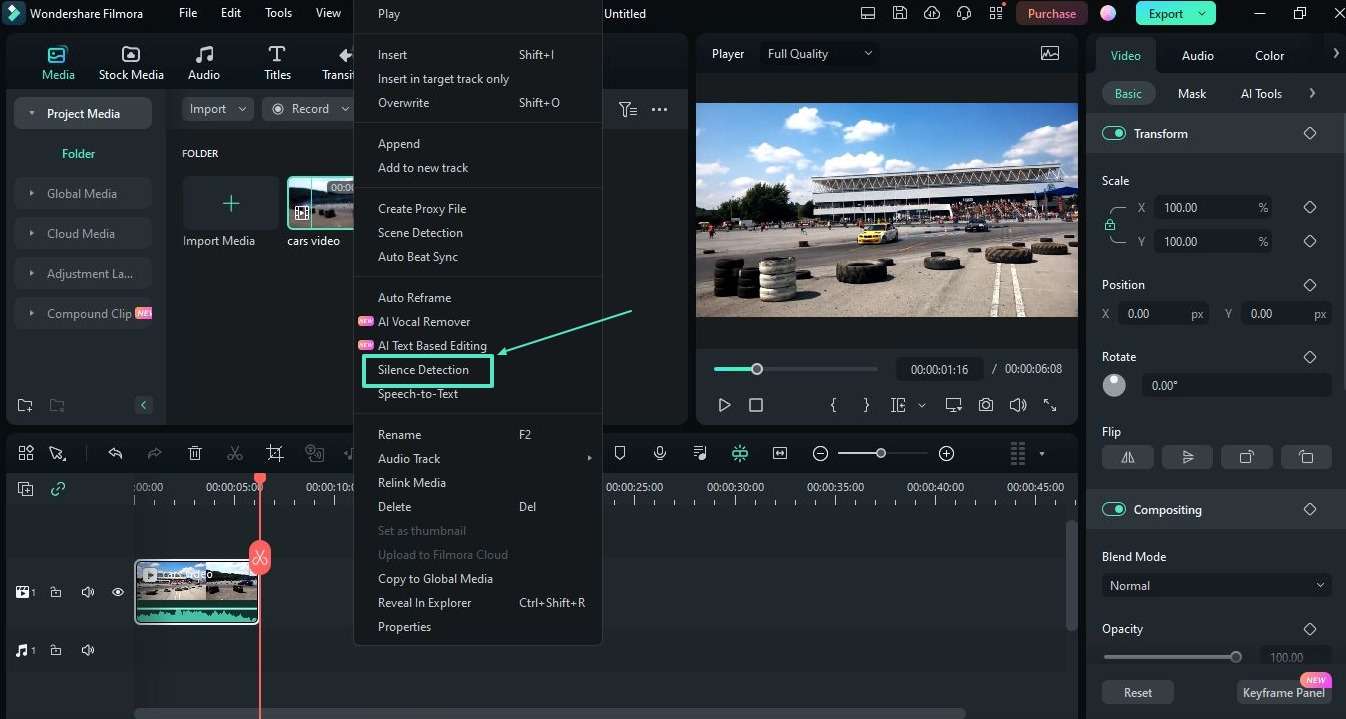
Remember, you will notice the Silence Detection feature in only audio-enabled video clips. Follow the below steps to detect and remove silent gaps from the clip.
- You need to choose the Silence Detection button from the toolbar.
- You will find the video in the Media window. Right-click your media file and choose Silence Detection.
- After selecting the audio or video clip, go to Tools, followed by Audio. You will find the Silence Detection option. The Silence Detection window will appear once you touch this option.
Step3Modify the Settings for the Silence Detection Feature
You may change the threshold or sensitivity to make it work for you. The sensitivity level determines the size of the pause. Thus, a lower sensitivity level records longer pauses. You can fine-tune three crucial Filmora Silence Detection settings in this step.
First, you should adjust the volume threshold to fix a specific value for silence. This parameter tells the algorithm how loud you want it to be before it becomes annoying. By default, 25% is the volume threshold. It implies that the software will consider segments silent if their volume threshold value is less than 25%.
Now, you should adjust the Minimum Duration option. It tells Filmora how long a period of quiet or low-volume sound should be. Just 0.5 seconds is the default minimum duration. In other words, for 0.5 seconds to be considered quiet, there must be no sound.
You can also set the Softening Buffer value. This setting allows you to add a little delay before and after audible parts begin and finish. With 0.1s set as the default, the softening buffer starts to work. It implies that the beginning and end of the audible parts may each have their own 0.1-second buffering time.
Step4Eliminate Any Found Silences
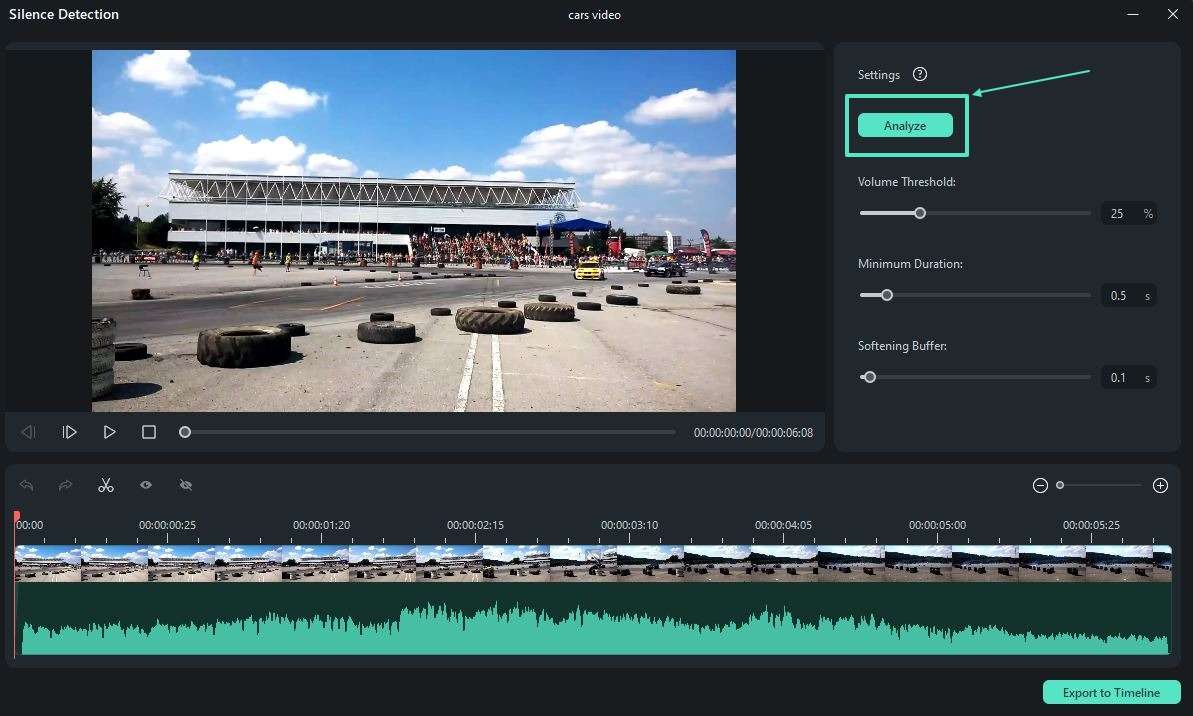
Hit the “Analyze” button after you’re happy with the settings. The Filmora will detect and remove the silent areas in your audio track.
The software also highlights segments in two different colors. Seen in black are the portions that do not contain any sound. The highlighted sections indicate the audible portions.
Step5Evaluate Your Work and Adjust
You can make sure the video segments move without a hitch. Thus, listen to the modified audio track again. You can adjust the clips in the timeline to customize the edit directly if necessary.
Of course, you also have the option to tweak the three audio settings listed in step 3. Next, choose Restart to remove the silent segments from your video.
Step6Export Your Video Clip
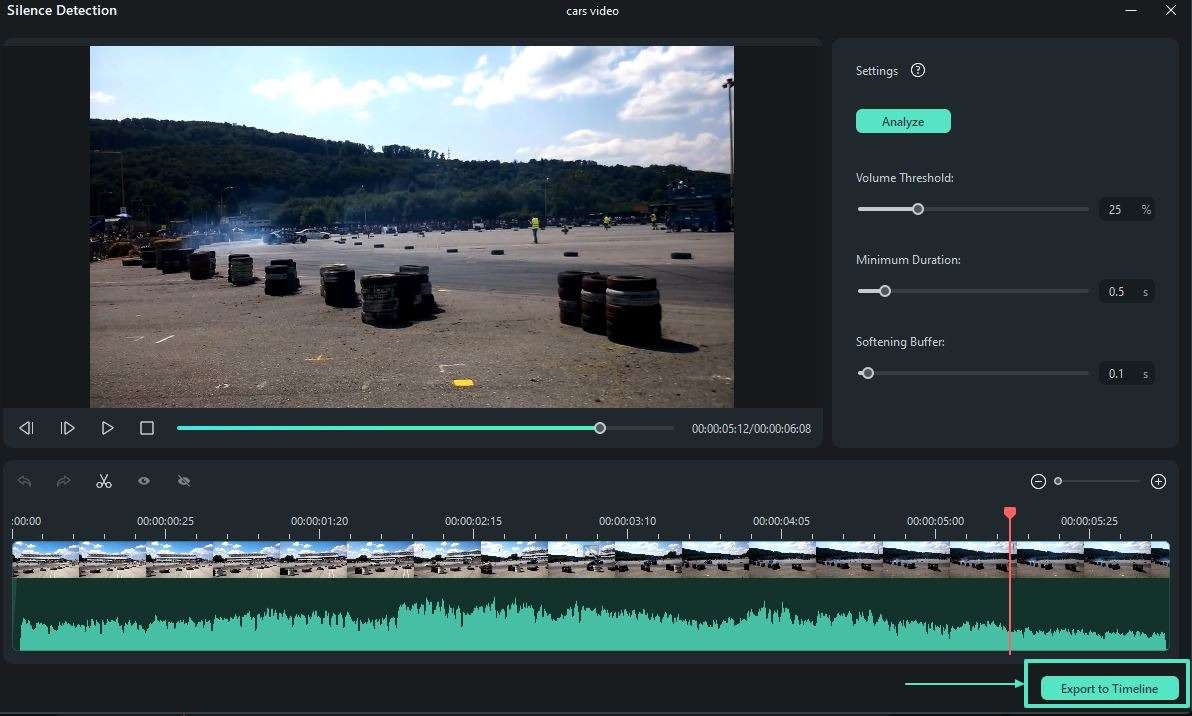
You’ve almost finished fine-tuning your movie using Filmora’s Silence Detection tool. Now, you may export the final video to the timeline. Enjoy a professionally upgraded audio component inside your video.
Conclusion
As you can see, video silence remover tools completely transform video production operations. They make editing processes easier by changing the audio quality. These tools provide efficiency, saving time and effort.
Anyone can detect and remove undesired silences with the help of specialized tools. Remember, the quality of your movies will increase after removing silences. It can offer your viewers a more pleasant audio-visual experience. So, take your films to the next level by mastering the art of precise editing.
Are you looking for an easy way to edit your video clips? Do you have videos that contain many undesired pauses and silences? Check out Filmora’s Silence Detection feature.
Silence Detection For Win 7 or later(64-bit)
Silence Detection For macOS 10.14 or later
Part 1: Top 5 Amazing Tools for Detecting Silence - A Thorough Review
Now, you know the importance of audio accuracy in video editing. So, we can reveal the five most innovative tools for detecting silence.
Anyone can improve video production skills with the help of these specialized tools. Remember, each tool is designed for a specific set of requirements.
01.Savvycut - Silence Detection Tool for Online Use
Savvycut is a fantastic audio silence remover online. As the name suggests, this tool is suitable for savvy video editors. No installation or downloads are required to use Savvycut. That’s because it is a web-based silence detection tool. Users need to upload video input for fast analysis and silence removal.
Pros
- It has a simple UI with easy video track uploading and processing.
- Savvycut offers quick and efficient silence detection to help editors save time.
- It provides entry-level functionality for free, making it available to everyone.
- This tool can work on many different video formats.
Cons
- You may need premium membership plans to access advanced functions.
- The limited functionality of the free version may be a turnoff for certain people.
02.Kapwing - Silence Detection Tool for Mobile
This tool offers an AI-driven audio silence detection and removal. Kapwing can also identify and erase silences from audio files in formats like MP3 and WAV. You don’t need to download this tool; it’s accessible online. You only need a web browser and a mobile phone with an internet connection.
Pros
- This tool edits video footage more quickly by automatically cutting any silences.
- It uses AI to improve the sound quality, including background music and more.
Cons
- There have been reports of compatibility concerns with previous versions.
- You may only have access to some of the basic features in the free edition.
03.Adobe Premiere Pro - Silence Detection Tool for Windows
Adobe Premiere Pro is the third most powerful software on our list. It is a helpful tool to detect and cut silences from video files. This tool works very well on Windows. Thanks to its batch-processing features, it lets you edit several audio files simultaneously.
Pros
- With its efficient batch audio silence remover feature, you may edit many audio files at once.
- It accommodates a wide range of editing requirements.
- Its silence detection parameters are fully customizable.
- The intuitive design makes it simple for users of all skill levels to get up and running.
- This tool allows users to export video clips in various formats, giving them more options.
Cons
- Newcomers to video editing software may find the learning curve to be steep.
- The use of more complex features may need expertise and training.
04.Audacity - Silence Detection Tool for Mac
Audacity is the best silence detection tool that works well with the macOS system. This tool makes it easier to identify and remove silences in video files. It can improve your video production speed on Mac.
Pros
- It works well with Mac devices and runs smoothly on macOS.
- It has an accessible and user-friendly interface developed with Mac users in mind.
- This tool facilitates quick and easy silence removal, which makes editing a breeze.
Cons
- The pricing is much greater than that of competing silence detection tools.
- It might not have all the bells and whistles we see in competitors.
05.Recut - General Silence Detection Tool
If you’re using Windows, Recut is an excellent silence detection tool. It can help you detect and delete silent spots from audio and videos. If you’re making a video, this tool can make editing the audio a breeze.
Pros
- Suitable for video editors of varying skill levels
- Its user-friendly interface makes silence detection and elimination simple.
- Besides audio silence detection, it provides a suite of tools for effective audio editing.
- It offers various editing features and supports several file types.
- It is available to people on a tight budget since it doesn’t cost much.
Cons
- There aren’t easy ways to get in touch with the Recut’s customer service.
- It might not have all the features that come with other affordable software.
How to Use Filmora’s Advanced Silence Detection Feature for Better Editing?
Filmora provides an easy way to detect and remove silences from your video files. To use the Silence Detection Filmora feature, do the following:
Step1Upload Your Video Clip
Launch Filmora and add the video clip that contains the track you want to modify for your project.
Step2Find the Silence Detection Feature

Remember, you will notice the Silence Detection feature in only audio-enabled video clips. Follow the below steps to detect and remove silent gaps from the clip.
- You need to choose the Silence Detection button from the toolbar.
- You will find the video in the Media window. Right-click your media file and choose Silence Detection.
- After selecting the audio or video clip, go to Tools, followed by Audio. You will find the Silence Detection option. The Silence Detection window will appear once you touch this option.
Step3Modify the Settings for the Silence Detection Feature
You may change the threshold or sensitivity to make it work for you. The sensitivity level determines the size of the pause. Thus, a lower sensitivity level records longer pauses. You can fine-tune three crucial Filmora Silence Detection settings in this step.
First, you should adjust the volume threshold to fix a specific value for silence. This parameter tells the algorithm how loud you want it to be before it becomes annoying. By default, 25% is the volume threshold. It implies that the software will consider segments silent if their volume threshold value is less than 25%.
Now, you should adjust the Minimum Duration option. It tells Filmora how long a period of quiet or low-volume sound should be. Just 0.5 seconds is the default minimum duration. In other words, for 0.5 seconds to be considered quiet, there must be no sound.
You can also set the Softening Buffer value. This setting allows you to add a little delay before and after audible parts begin and finish. With 0.1s set as the default, the softening buffer starts to work. It implies that the beginning and end of the audible parts may each have their own 0.1-second buffering time.
Step4Eliminate Any Found Silences

Hit the “Analyze” button after you’re happy with the settings. The Filmora will detect and remove the silent areas in your audio track.
The software also highlights segments in two different colors. Seen in black are the portions that do not contain any sound. The highlighted sections indicate the audible portions.
Step5Evaluate Your Work and Adjust
You can make sure the video segments move without a hitch. Thus, listen to the modified audio track again. You can adjust the clips in the timeline to customize the edit directly if necessary.
Of course, you also have the option to tweak the three audio settings listed in step 3. Next, choose Restart to remove the silent segments from your video.
Step6Export Your Video Clip

You’ve almost finished fine-tuning your movie using Filmora’s Silence Detection tool. Now, you may export the final video to the timeline. Enjoy a professionally upgraded audio component inside your video.
Conclusion
As you can see, video silence remover tools completely transform video production operations. They make editing processes easier by changing the audio quality. These tools provide efficiency, saving time and effort.
Anyone can detect and remove undesired silences with the help of specialized tools. Remember, the quality of your movies will increase after removing silences. It can offer your viewers a more pleasant audio-visual experience. So, take your films to the next level by mastering the art of precise editing.
Are you looking for an easy way to edit your video clips? Do you have videos that contain many undesired pauses and silences? Check out Filmora’s Silence Detection feature.
Everything That You Need to Know About Video Montages- Ideas, Techniques, and Software
Video montages are one of the best types of video formats people enjoy, and they are useful for different occasions. Whether you want to create a montage of your memories as an anniversary gift or create a montage of product photos for promotions, uses are multiple here. This prompts the need for users to learn how to make a montage, and that is what we will cover in this post.
These videos, with a series of shots and information edited together cohesively in sequence, are useful for showcasing storyline progress. Here, you will learn about use cases of the process, like a birthday video montage, more ideas, and the process of making them. Read on if any of that interests you.

Part 1. Classic Montage Ideas in Art and Film
Video montages play a major role in films, art productions, and gaming, like the call of duty montage.
In terms of the first example, when you watch movies, you might notice this technique used in many movies, utilized more prominently since the 1920s when Sergei Eisenstein coined the term first. These scenes appear as stitched-together shots of the characters showing time passage, enjoying activities or memories.
Different techniques are common, like rhythmic, metric, intellectual, or tonal. For example, the 2000 movie “Requiem for a Dream” showcased an intellectual/metric style of video montage to show the disorientating effect of the character under drug influence. A relatively recent example would be Benedict Cumberbatch’s 2016 movie “Doctor Strange”, where the montage shows the titular character’s interaction with the villain (no spoilers).
3 Top Montages in Film for All Times
If the above two examples did not fully express what is a montage video, seeing more examples should help. For this, here are three of the top montage examples available in Film History, each version representing a separate video montage style.
1. Rocky (1976)
One of the most notable montages is available in the 1976 action movie, the Sylvester Stallone-starrer “Rocky”. The type of video montage that is visible in this movie is rhythmic in nature, showcasing the training the character undergoes. This is edited with a musical background score, summarising some shots’ full training progression process.
To add an emotive tone to the video, music is added to the video clip that engages audiences to feel the character’s passion. A rhythmic style of video montage technique is used to cut the shorts as per the content. The lengths of each clip are not similar and differ as per the action going on in the scene.
2. Mulan (1998)
Video montages are also visible in animated movies, as seen in the 1998 version of Disney’s “Mulan”. The scene in question is where the song “I’ll Make a Man Out of You” plays while Mulan undergoes strict training for the military from the male lead. A sequence of shots showing her progress is shown.
Here, the video montage is shown with the background music that perfectly aligns with what is occurring in the video. The visuals and the audio in the background cohesively show the main character’s struggle, which creates an emotional response in the audience. Therefore, the style of video montage here falls under tonal or overtonal categories.
Watch this video to get an idea of how music and visuals can partner for tonal video montages.
3. Creed (2015)
Like in the Rocky movie, its 2015 sequel, “Creed”, also has a video montage. Here, the clips in the sequence are also used to depict the intense training progress. However, where it differs from the rhythmic formula is that the sequence highlights the emotional journey or determination of Adonis Creed to succeed.
Plus, this video montage is a homage to the original version; the tonal effect is further noticeable in the scene of Rocky’s health deterioration against Creed’s training. Thus, it juxtaposes the two scenes, creating an emotional impact on viewers to root for the main character.
Watch this video to understand what is a montage video of the tonal type.
Part 2. Creative Montage Ideas for Social Media
Of course, movies and TV shows are the only types of media where video montage techniques are useful. Many non-professionals use options like a fortnite montage editor to create and edit montage videos for other projects they can share across platforms. Some even create video montages to create videos for social media.
These include vlog-like videos that people record and then edit together into a montage which different techniques. Plus, some users create montages of different things that interest them, like gameplay. Then, they share those videos across social media for views, like on TikTok or YouTube.
· Gaming Montages
Different creators focus on developing gaming montages to create projects for the games they operate. These can include videos showcasing the skills or gameplays of the creation, all explaining a specific theme in some cases.
There are different games that the users focus on for showcasing their gaming prowess in action. Common examples include Fortnite, Call of Duty, CSGO, or PUBG montage videos.
Watch this video to get an idea.
· Wedding Montages
Many users turn to edit video montages for specific occasions, adding clips of different moments instead of one long-running documentary. They incorporate stylish effects like slow motion and transitions, incorporate a moving background score, and more.
Many top influencers and celebrities have used this technique for their wedding videos on social media. Additionally, regular people also adopt the style.
Watch this video as an example.
· Birthday Montages
Like wedding videos, users can try out the video montage technique to create videos for birthdays. These can include scenes of the main creator throughout their preparation phase for the party. Alternately, some users create video montages of their experience leading up to the video celebration, through a longer period or the same day.
Watch this video to understand how these videos may look.
Part 3. How Can I Create Easily a Montage Video?
After understanding the types of video montage techniques and ideas, the next point of concern is learning how to make a montage.
One of the best editing software to use for this process is Wondershare Filmora . With this editor, you can create different video montages as per the theme, customized or instantly. Filmora includes premium-quality effects and transitions, including free stock media that you can also add. Plus, the software allows the ability to record voiceover and adjust background scores in the video.
You can also choose the aspect ratio for the video, depending on the platform you post it on. For example, if you are creating a full professional-level scene montage, use the widescreen (16:9) aspect ratio, like in YouTube videos. Or, use the portrait (9:16) for mobile-based videos for TikTok videos or a 1:1 aspect ratio for Instagram videos.
Watch this video to know how it works.
Free Download For Win 7 or later(64-bit)
Free Download For macOS 10.14 or later
Features of Filmora for Video Montage Making
There are multiple top-quality features available in the Filmora software that is useful for creating and editing video montages. Use them and create dynamic videos.
1. Screen Recorder
The Screen Recorder feature is accessible through the home page of the Filmora software after launching. Since the first stage of making a montage involves getting the video clips for it, you can use this to record the video. For example, if you have a movie saved on your desktop, use the screen recorder and tap the Play button to record the screen.

You can adjust further settings, like which headphone or speaker to use for the audio recording.
2. Preset Templates
Next comes the editing process. After completing the recording process for the montage video, you can use preset templates on Filmora via Instant Mode. This is useful for users who do not have enough time to fully edit a long montage video or have the technical skills for it.
You can click on the Instant Mode tab on the home page. Then, choose the specific theme of the video montage you will create, like Birthday, Wedding, Business, etc. After selecting the theme, you can insert multiple video clips into the editor. Adjust the clips in sequence and press the “Auto-Create” button.

3. Abundant Video Effects and Music Resources
If you want to customize the video montage video manually, you can use the various effects and advanced features in the main editor timeline. For example, click on the Effects tab to find your options.

After importing the file(s) into the editor and dragging it to the timeline, you can use the Crop icon to cut clips. Then, rearrange them and merge them. Plus, further editing features are available for premium-level edits, like the Chroma Key. Click on it and add a green screen in the background.

The AI Portrait feature is also available, automatically detecting the main character and accurately removing the background.
You can adjust the speed of transitions in the video with the Speed Ramping function. Many high-quality effects are available under the Effects tab, and you can add audio to the video through the Media tab.

Conclusion
Video montages are one of the tried-and-tested methods used in film-making, gaming videos, and social media videos. You can use Filmora to create such video montages based on the type of video montage technique that fits it. Then, share it directly to YouTube or save it for transferring across different platforms.
Free Download For Win 7 or later(64-bit)
Free Download For macOS 10.14 or later
Part 1. Classic Montage Ideas in Art and Film
Video montages play a major role in films, art productions, and gaming, like the call of duty montage.
In terms of the first example, when you watch movies, you might notice this technique used in many movies, utilized more prominently since the 1920s when Sergei Eisenstein coined the term first. These scenes appear as stitched-together shots of the characters showing time passage, enjoying activities or memories.
Different techniques are common, like rhythmic, metric, intellectual, or tonal. For example, the 2000 movie “Requiem for a Dream” showcased an intellectual/metric style of video montage to show the disorientating effect of the character under drug influence. A relatively recent example would be Benedict Cumberbatch’s 2016 movie “Doctor Strange”, where the montage shows the titular character’s interaction with the villain (no spoilers).
3 Top Montages in Film for All Times
If the above two examples did not fully express what is a montage video, seeing more examples should help. For this, here are three of the top montage examples available in Film History, each version representing a separate video montage style.
1. Rocky (1976)
One of the most notable montages is available in the 1976 action movie, the Sylvester Stallone-starrer “Rocky”. The type of video montage that is visible in this movie is rhythmic in nature, showcasing the training the character undergoes. This is edited with a musical background score, summarising some shots’ full training progression process.
To add an emotive tone to the video, music is added to the video clip that engages audiences to feel the character’s passion. A rhythmic style of video montage technique is used to cut the shorts as per the content. The lengths of each clip are not similar and differ as per the action going on in the scene.
2. Mulan (1998)
Video montages are also visible in animated movies, as seen in the 1998 version of Disney’s “Mulan”. The scene in question is where the song “I’ll Make a Man Out of You” plays while Mulan undergoes strict training for the military from the male lead. A sequence of shots showing her progress is shown.
Here, the video montage is shown with the background music that perfectly aligns with what is occurring in the video. The visuals and the audio in the background cohesively show the main character’s struggle, which creates an emotional response in the audience. Therefore, the style of video montage here falls under tonal or overtonal categories.
Watch this video to get an idea of how music and visuals can partner for tonal video montages.
3. Creed (2015)
Like in the Rocky movie, its 2015 sequel, “Creed”, also has a video montage. Here, the clips in the sequence are also used to depict the intense training progress. However, where it differs from the rhythmic formula is that the sequence highlights the emotional journey or determination of Adonis Creed to succeed.
Plus, this video montage is a homage to the original version; the tonal effect is further noticeable in the scene of Rocky’s health deterioration against Creed’s training. Thus, it juxtaposes the two scenes, creating an emotional impact on viewers to root for the main character.
Watch this video to understand what is a montage video of the tonal type.
Part 2. Creative Montage Ideas for Social Media
Of course, movies and TV shows are the only types of media where video montage techniques are useful. Many non-professionals use options like a fortnite montage editor to create and edit montage videos for other projects they can share across platforms. Some even create video montages to create videos for social media.
These include vlog-like videos that people record and then edit together into a montage which different techniques. Plus, some users create montages of different things that interest them, like gameplay. Then, they share those videos across social media for views, like on TikTok or YouTube.
· Gaming Montages
Different creators focus on developing gaming montages to create projects for the games they operate. These can include videos showcasing the skills or gameplays of the creation, all explaining a specific theme in some cases.
There are different games that the users focus on for showcasing their gaming prowess in action. Common examples include Fortnite, Call of Duty, CSGO, or PUBG montage videos.
Watch this video to get an idea.
· Wedding Montages
Many users turn to edit video montages for specific occasions, adding clips of different moments instead of one long-running documentary. They incorporate stylish effects like slow motion and transitions, incorporate a moving background score, and more.
Many top influencers and celebrities have used this technique for their wedding videos on social media. Additionally, regular people also adopt the style.
Watch this video as an example.
· Birthday Montages
Like wedding videos, users can try out the video montage technique to create videos for birthdays. These can include scenes of the main creator throughout their preparation phase for the party. Alternately, some users create video montages of their experience leading up to the video celebration, through a longer period or the same day.
Watch this video to understand how these videos may look.
Part 3. How Can I Create Easily a Montage Video?
After understanding the types of video montage techniques and ideas, the next point of concern is learning how to make a montage.
One of the best editing software to use for this process is Wondershare Filmora . With this editor, you can create different video montages as per the theme, customized or instantly. Filmora includes premium-quality effects and transitions, including free stock media that you can also add. Plus, the software allows the ability to record voiceover and adjust background scores in the video.
You can also choose the aspect ratio for the video, depending on the platform you post it on. For example, if you are creating a full professional-level scene montage, use the widescreen (16:9) aspect ratio, like in YouTube videos. Or, use the portrait (9:16) for mobile-based videos for TikTok videos or a 1:1 aspect ratio for Instagram videos.
Watch this video to know how it works.
Free Download For Win 7 or later(64-bit)
Free Download For macOS 10.14 or later
Features of Filmora for Video Montage Making
There are multiple top-quality features available in the Filmora software that is useful for creating and editing video montages. Use them and create dynamic videos.
1. Screen Recorder
The Screen Recorder feature is accessible through the home page of the Filmora software after launching. Since the first stage of making a montage involves getting the video clips for it, you can use this to record the video. For example, if you have a movie saved on your desktop, use the screen recorder and tap the Play button to record the screen.

You can adjust further settings, like which headphone or speaker to use for the audio recording.
2. Preset Templates
Next comes the editing process. After completing the recording process for the montage video, you can use preset templates on Filmora via Instant Mode. This is useful for users who do not have enough time to fully edit a long montage video or have the technical skills for it.
You can click on the Instant Mode tab on the home page. Then, choose the specific theme of the video montage you will create, like Birthday, Wedding, Business, etc. After selecting the theme, you can insert multiple video clips into the editor. Adjust the clips in sequence and press the “Auto-Create” button.

3. Abundant Video Effects and Music Resources
If you want to customize the video montage video manually, you can use the various effects and advanced features in the main editor timeline. For example, click on the Effects tab to find your options.

After importing the file(s) into the editor and dragging it to the timeline, you can use the Crop icon to cut clips. Then, rearrange them and merge them. Plus, further editing features are available for premium-level edits, like the Chroma Key. Click on it and add a green screen in the background.

The AI Portrait feature is also available, automatically detecting the main character and accurately removing the background.
You can adjust the speed of transitions in the video with the Speed Ramping function. Many high-quality effects are available under the Effects tab, and you can add audio to the video through the Media tab.

Conclusion
Video montages are one of the tried-and-tested methods used in film-making, gaming videos, and social media videos. You can use Filmora to create such video montages based on the type of video montage technique that fits it. Then, share it directly to YouTube or save it for transferring across different platforms.
Free Download For Win 7 or later(64-bit)
Free Download For macOS 10.14 or later
Best 5 GIF to Video Converters You Can’t-Miss
Powerful Video Editor - Wondershare Filmora
Provide abundant video effects - A creative video editor
Powerful color correction and grading
Detailed tutorials are provided by the official channel
Since there are so many GIF to video converters available online, the question isn’t which is the best but instead what kind of experience you’re looking for.
Are you looking for a very simple solution where you can plug in your GIF and then immediately share it? Or are you looking for more refined control over your GIF before converting it to videos, such as being able to choose the resolution, frame rate, and aspect ratio? When trying to select from among these various options, think about the ways you will use your converted video clips and pick one that best suits your needs.
Here in this guide, we are going to share with you some amazing online and offline GIFs to video converters. You would love the specifications and possibilities they have created for all types of users to start with them right away!
Best 5 GIF to Video Converter Software
You don’t need to be a professional designer to convert your artwork into a video file. These converters are easy enough to use that anyone can take advantage of them, even you! Now all you have to do is decide which converter is the best for your needs, and get to it.
1. Wondershare Filmora

Wondershare Filmora is the most effective video converter for both PC and Mac users. This powerful and intuitive GIF to Video Converter is the best choice for all your video converting needs.
It offers all of these options, and it also scores high in terms of overall design and ease of use. It’s a clear winner if you’re looking to convert one or multiple GIFs into video. If you decide to download the app, we recommend purchasing the full version, which will give you a lot more customization options.
Pros
Highly adaptive to import and export files
Premium features make it the best tool among all
Faster conversion of files
Easy to use after installation
Cons
Works only on Windows and Mac
Expensive for monthly and yearly subscribers
2. Adobe Premiere Pro
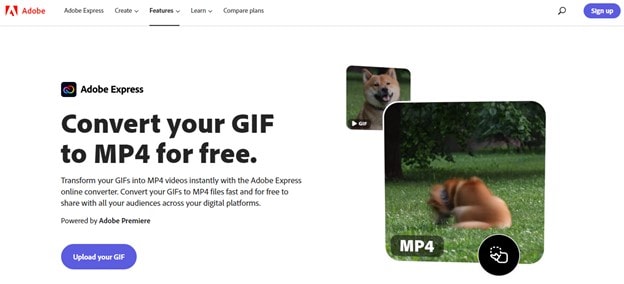
The Adobe Premiere tool is easy to use. Just drag and drop your GIFs into the software, add music if you want, and hit the “Create” button. The software will create a video file that combines your GIF with the attached music in MP4 format so that you can share it across any social platform and enjoy it forever.
It is a subscription-based program that allows you to easily import and manipulate GIF files, and then export them as MP4 videos with the same features and steps that make the GIFs so appealing in the first place.
Pros
Support a plethora of formats for conversion
Quick in functionality
Very smooth experience
High-end customization of videos
Cons
Autosave doesn’t function sometimes
3. Movavi Video Editor Plus
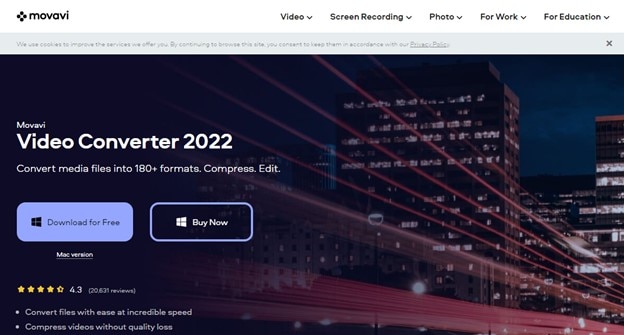
Movavi Video Editor Plus 2020 is an affordable GIF to video converter you can use to shred your unfinished videos into GIFs, even if they’re just simple recordings.
It’s also good for mass-producing low-quality GIFs for your video blogs or YouTube channels. There are better options out there, but this software will suffice if you’re on a budget.
While it’s a bit on the pricey side for some, there aren’t many options that come close. It comes with everything you’d expect in a video editing package, with the added feature of being able to edit and export your videos in various GIF formats.
The program is pretty easy to use, and while it doesn’t have all of the advanced features that more expensive video editors do, it’s probably more than enough for most users.
Pros
Tons of cool transitions, filters, and preset titles
Easy by drag and drop actions
Offers Movavi’s effect store for more templates
Very clean and reflexive
Cons
Don’t have the histogram, vectorscope, or color wheel
Color grading is harder
4. VLC

The VLC media player is way better than most other GIF to video converters because not only can you download it for free but it’s also open-source, meaning that the code is public and developers worldwide can help improve its quality with their suggestions and thoughts. Plus, downloading VLC doesn’t cost a penny and it’s portable too!
In addition to these great features, the VLC player has many other interesting features which make it an essential piece of software for computer users. With its basic interface, it offers something that is very difficult to find in any other media player: the simplicity we talked about before…
Pros
User interface is straightforward
Fast forward pattern of features
Don’t require any codec installation
It is suitable for OS X.
Cons
Has no options for software upgradation
5. Cyberlink PowerDirector

CyberLink PowerDirector for Windows is a very useful tool for converting GIF to video. It is able to edit, process, and blend the video clips from various devices in a very simple and effective way. By adding insert video effects, users can turn their videos into spectacular works of art with ease.
Overall, CyberLink PowerDirector is a good option for users who want to enjoy an all-in-one video editing experience. It can be also used as an alternative to popular video editing software like Adobe Premiere Pro etc.
Pros
Over 100 stellar audio and video editing features
Videos can easily be imported, edited, and exported in 4k
Has advanced 360-degree video editing ability
24/7 fast customer service support
Cons
Create frustration due to ads on the page
Expensive tool
Online GIF to Video Converter
Whether you are looking to make the most out of an event that you have posted on your blog or just want a quick way of sharing a funny GIF on Facebook, like offline converting software, these tools offer a simple solution for quickly converting your GIF into a video.
1. EZGIF.COM
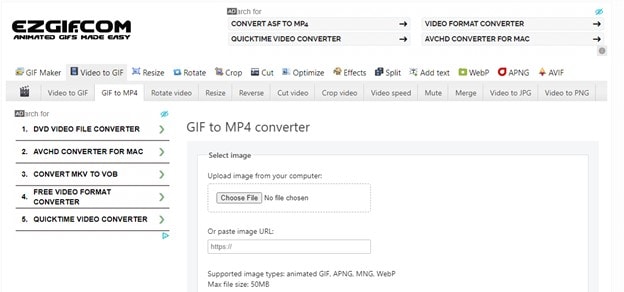
Ezgif.com is a fun and quick way to create memes and convert Gifs into videos quickly and easily. With fast conversion rates and a clear, simple interface, though, it’s possible that you might be disappointed with the amount of customization that this converter offers.
Other than that, however, it has everything you need to take your video from a few minutes to a few seconds.
Overall, while Ezgif’s free web-based service is easy to use, not all of its features are present in the free version. Users who want to customize their videos by adding text or effects may need to upgrade for better results.
Pros
Simple online gif maker
Toolkit for basic animated gif editing
Customize Gifs for better videos
High-end experience
Cons
The layout is not appealing
2. CloudConvert
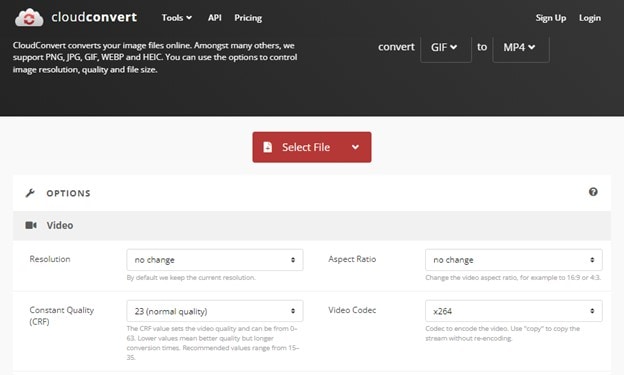
The main selling point of CloudConvert is its large and varied list of file types, allowing you to convert any file to any other file. GIF to video conversion is just one of the many options offered by the site, and it does a surprisingly impressive job when it comes to this. There’s also an online tool for creating animated GIFs from standard video files, which can definitely come in handy for animators.
There’s no limit to how many files you can convert at once, so if you’re looking to optimize your workflow, CloudConvert will make your life easier.
Pros
High-quality video editing and conversion
Easy to understand interface
Fully-functional basic to intermediate features
Adaptable and free-to-use
Cons
Only 25 conversions/24 hours
3. Online Convert

This Online Convert is made for all your file conversion needs, from online image conversion to online GIF to video converting. With this online converter, if you will find a lot of useful information about all of these most popular online converters, do not hesitate to use them now!
The simple interface of this tool makes the conversion process easy to understand and utilize. If you are an individual looking to create videos of your gifs, then Online Gif Video Converter is the right fit for you.
Pros
Fast and progressive
Effective outcome
Simple step process of conversion
Wide range of formats to convert
Cons
There’s no specific drawback found!
How to Convert GIF to Video Using Wondershare Filmora?
Step 1: Import Media files
For the “Import” button to appear, you need to start by launching the Wondershare Filmora program. When you locate it on your desktop, double-click on it to open and select “Import” to browse and load GIF files from your Mac or PC.
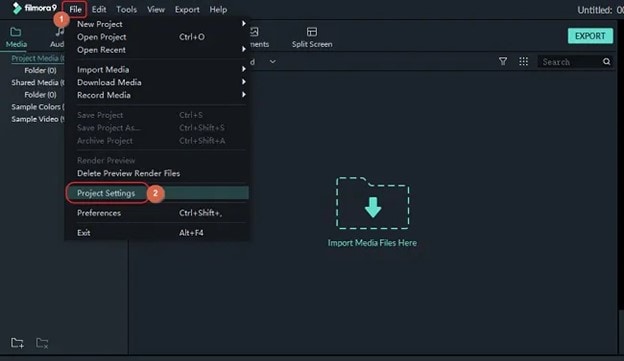
Step 2: Drag to timeline
You can drag your imported media files to the timeline at the bottom of the screen. If you want to add text, you can simply drag and drop it to the timeline.
Step 3: Edit files
You can edit media files (image, audio, video) by using the built-in tools on Filmora. You can add titles, intro text, and watermarks to your video with filters and overlays. You can also add background music, transitions, and slow/fast-motion effects to make your GIF more interesting. If you want to remove the background of an image sequence or a video clip, you can use the green screen effect as well.
Step 4: Add text effects
Once you have imported the GIF file, you can add a text effect to it by double-clicking on the video track. Then go to Text/Credit and choose your desired one from the given options. You can adjust the size of text, font style, color, position, etc. as per your choice. You can also add some transition effects by clicking on Transitions. Once done, click OK to save changes or drag the text into the timeline for further editing.
Step 5: Save and Export
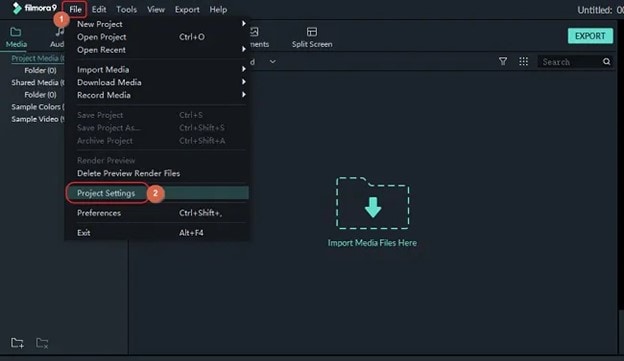
Once you are satisfied with your video, click “File” in the top left corner of the window. From the drop-down menu, select “Export” to get to the export window.
Conclusion
In conclusion, online tools can make your life a lot easier when it comes to converting media files. Sites like the ones reviewed above can also provide you with a host of other functions that make them valuable in your day-to-day work. If you’ve had the chance to try such websites, we hope that they’ve proven to be helpful and convenient.
Since there are so many GIF to video converters available online, the question isn’t which is the best but instead what kind of experience you’re looking for.
Are you looking for a very simple solution where you can plug in your GIF and then immediately share it? Or are you looking for more refined control over your GIF before converting it to videos, such as being able to choose the resolution, frame rate, and aspect ratio? When trying to select from among these various options, think about the ways you will use your converted video clips and pick one that best suits your needs.
Here in this guide, we are going to share with you some amazing online and offline GIFs to video converters. You would love the specifications and possibilities they have created for all types of users to start with them right away!
Best 5 GIF to Video Converter Software
You don’t need to be a professional designer to convert your artwork into a video file. These converters are easy enough to use that anyone can take advantage of them, even you! Now all you have to do is decide which converter is the best for your needs, and get to it.
1. Wondershare Filmora

Wondershare Filmora is the most effective video converter for both PC and Mac users. This powerful and intuitive GIF to Video Converter is the best choice for all your video converting needs.
It offers all of these options, and it also scores high in terms of overall design and ease of use. It’s a clear winner if you’re looking to convert one or multiple GIFs into video. If you decide to download the app, we recommend purchasing the full version, which will give you a lot more customization options.
Pros
Highly adaptive to import and export files
Premium features make it the best tool among all
Faster conversion of files
Easy to use after installation
Cons
Works only on Windows and Mac
Expensive for monthly and yearly subscribers
2. Adobe Premiere Pro

The Adobe Premiere tool is easy to use. Just drag and drop your GIFs into the software, add music if you want, and hit the “Create” button. The software will create a video file that combines your GIF with the attached music in MP4 format so that you can share it across any social platform and enjoy it forever.
It is a subscription-based program that allows you to easily import and manipulate GIF files, and then export them as MP4 videos with the same features and steps that make the GIFs so appealing in the first place.
Pros
Support a plethora of formats for conversion
Quick in functionality
Very smooth experience
High-end customization of videos
Cons
Autosave doesn’t function sometimes
3. Movavi Video Editor Plus

Movavi Video Editor Plus 2020 is an affordable GIF to video converter you can use to shred your unfinished videos into GIFs, even if they’re just simple recordings.
It’s also good for mass-producing low-quality GIFs for your video blogs or YouTube channels. There are better options out there, but this software will suffice if you’re on a budget.
While it’s a bit on the pricey side for some, there aren’t many options that come close. It comes with everything you’d expect in a video editing package, with the added feature of being able to edit and export your videos in various GIF formats.
The program is pretty easy to use, and while it doesn’t have all of the advanced features that more expensive video editors do, it’s probably more than enough for most users.
Pros
Tons of cool transitions, filters, and preset titles
Easy by drag and drop actions
Offers Movavi’s effect store for more templates
Very clean and reflexive
Cons
Don’t have the histogram, vectorscope, or color wheel
Color grading is harder
4. VLC

The VLC media player is way better than most other GIF to video converters because not only can you download it for free but it’s also open-source, meaning that the code is public and developers worldwide can help improve its quality with their suggestions and thoughts. Plus, downloading VLC doesn’t cost a penny and it’s portable too!
In addition to these great features, the VLC player has many other interesting features which make it an essential piece of software for computer users. With its basic interface, it offers something that is very difficult to find in any other media player: the simplicity we talked about before…
Pros
User interface is straightforward
Fast forward pattern of features
Don’t require any codec installation
It is suitable for OS X.
Cons
Has no options for software upgradation
5. Cyberlink PowerDirector

CyberLink PowerDirector for Windows is a very useful tool for converting GIF to video. It is able to edit, process, and blend the video clips from various devices in a very simple and effective way. By adding insert video effects, users can turn their videos into spectacular works of art with ease.
Overall, CyberLink PowerDirector is a good option for users who want to enjoy an all-in-one video editing experience. It can be also used as an alternative to popular video editing software like Adobe Premiere Pro etc.
Pros
Over 100 stellar audio and video editing features
Videos can easily be imported, edited, and exported in 4k
Has advanced 360-degree video editing ability
24/7 fast customer service support
Cons
Create frustration due to ads on the page
Expensive tool
Online GIF to Video Converter
Whether you are looking to make the most out of an event that you have posted on your blog or just want a quick way of sharing a funny GIF on Facebook, like offline converting software, these tools offer a simple solution for quickly converting your GIF into a video.
1. EZGIF.COM

Ezgif.com is a fun and quick way to create memes and convert Gifs into videos quickly and easily. With fast conversion rates and a clear, simple interface, though, it’s possible that you might be disappointed with the amount of customization that this converter offers.
Other than that, however, it has everything you need to take your video from a few minutes to a few seconds.
Overall, while Ezgif’s free web-based service is easy to use, not all of its features are present in the free version. Users who want to customize their videos by adding text or effects may need to upgrade for better results.
Pros
Simple online gif maker
Toolkit for basic animated gif editing
Customize Gifs for better videos
High-end experience
Cons
The layout is not appealing
2. CloudConvert

The main selling point of CloudConvert is its large and varied list of file types, allowing you to convert any file to any other file. GIF to video conversion is just one of the many options offered by the site, and it does a surprisingly impressive job when it comes to this. There’s also an online tool for creating animated GIFs from standard video files, which can definitely come in handy for animators.
There’s no limit to how many files you can convert at once, so if you’re looking to optimize your workflow, CloudConvert will make your life easier.
Pros
High-quality video editing and conversion
Easy to understand interface
Fully-functional basic to intermediate features
Adaptable and free-to-use
Cons
Only 25 conversions/24 hours
3. Online Convert

This Online Convert is made for all your file conversion needs, from online image conversion to online GIF to video converting. With this online converter, if you will find a lot of useful information about all of these most popular online converters, do not hesitate to use them now!
The simple interface of this tool makes the conversion process easy to understand and utilize. If you are an individual looking to create videos of your gifs, then Online Gif Video Converter is the right fit for you.
Pros
Fast and progressive
Effective outcome
Simple step process of conversion
Wide range of formats to convert
Cons
There’s no specific drawback found!
How to Convert GIF to Video Using Wondershare Filmora?
Step 1: Import Media files
For the “Import” button to appear, you need to start by launching the Wondershare Filmora program. When you locate it on your desktop, double-click on it to open and select “Import” to browse and load GIF files from your Mac or PC.

Step 2: Drag to timeline
You can drag your imported media files to the timeline at the bottom of the screen. If you want to add text, you can simply drag and drop it to the timeline.
Step 3: Edit files
You can edit media files (image, audio, video) by using the built-in tools on Filmora. You can add titles, intro text, and watermarks to your video with filters and overlays. You can also add background music, transitions, and slow/fast-motion effects to make your GIF more interesting. If you want to remove the background of an image sequence or a video clip, you can use the green screen effect as well.
Step 4: Add text effects
Once you have imported the GIF file, you can add a text effect to it by double-clicking on the video track. Then go to Text/Credit and choose your desired one from the given options. You can adjust the size of text, font style, color, position, etc. as per your choice. You can also add some transition effects by clicking on Transitions. Once done, click OK to save changes or drag the text into the timeline for further editing.
Step 5: Save and Export
Once you are satisfied with your video, click “File” in the top left corner of the window. From the drop-down menu, select “Export” to get to the export window.

Conclusion
In conclusion, online tools can make your life a lot easier when it comes to converting media files. Sites like the ones reviewed above can also provide you with a host of other functions that make them valuable in your day-to-day work. If you’ve had the chance to try such websites, we hope that they’ve proven to be helpful and convenient.
Since there are so many GIF to video converters available online, the question isn’t which is the best but instead what kind of experience you’re looking for.
Are you looking for a very simple solution where you can plug in your GIF and then immediately share it? Or are you looking for more refined control over your GIF before converting it to videos, such as being able to choose the resolution, frame rate, and aspect ratio? When trying to select from among these various options, think about the ways you will use your converted video clips and pick one that best suits your needs.
Here in this guide, we are going to share with you some amazing online and offline GIFs to video converters. You would love the specifications and possibilities they have created for all types of users to start with them right away!
Best 5 GIF to Video Converter Software
You don’t need to be a professional designer to convert your artwork into a video file. These converters are easy enough to use that anyone can take advantage of them, even you! Now all you have to do is decide which converter is the best for your needs, and get to it.
1. Wondershare Filmora

Wondershare Filmora is the most effective video converter for both PC and Mac users. This powerful and intuitive GIF to Video Converter is the best choice for all your video converting needs.
It offers all of these options, and it also scores high in terms of overall design and ease of use. It’s a clear winner if you’re looking to convert one or multiple GIFs into video. If you decide to download the app, we recommend purchasing the full version, which will give you a lot more customization options.
Pros
Highly adaptive to import and export files
Premium features make it the best tool among all
Faster conversion of files
Easy to use after installation
Cons
Works only on Windows and Mac
Expensive for monthly and yearly subscribers
2. Adobe Premiere Pro

The Adobe Premiere tool is easy to use. Just drag and drop your GIFs into the software, add music if you want, and hit the “Create” button. The software will create a video file that combines your GIF with the attached music in MP4 format so that you can share it across any social platform and enjoy it forever.
It is a subscription-based program that allows you to easily import and manipulate GIF files, and then export them as MP4 videos with the same features and steps that make the GIFs so appealing in the first place.
Pros
Support a plethora of formats for conversion
Quick in functionality
Very smooth experience
High-end customization of videos
Cons
Autosave doesn’t function sometimes
3. Movavi Video Editor Plus

Movavi Video Editor Plus 2020 is an affordable GIF to video converter you can use to shred your unfinished videos into GIFs, even if they’re just simple recordings.
It’s also good for mass-producing low-quality GIFs for your video blogs or YouTube channels. There are better options out there, but this software will suffice if you’re on a budget.
While it’s a bit on the pricey side for some, there aren’t many options that come close. It comes with everything you’d expect in a video editing package, with the added feature of being able to edit and export your videos in various GIF formats.
The program is pretty easy to use, and while it doesn’t have all of the advanced features that more expensive video editors do, it’s probably more than enough for most users.
Pros
Tons of cool transitions, filters, and preset titles
Easy by drag and drop actions
Offers Movavi’s effect store for more templates
Very clean and reflexive
Cons
Don’t have the histogram, vectorscope, or color wheel
Color grading is harder
4. VLC

The VLC media player is way better than most other GIF to video converters because not only can you download it for free but it’s also open-source, meaning that the code is public and developers worldwide can help improve its quality with their suggestions and thoughts. Plus, downloading VLC doesn’t cost a penny and it’s portable too!
In addition to these great features, the VLC player has many other interesting features which make it an essential piece of software for computer users. With its basic interface, it offers something that is very difficult to find in any other media player: the simplicity we talked about before…
Pros
User interface is straightforward
Fast forward pattern of features
Don’t require any codec installation
It is suitable for OS X.
Cons
Has no options for software upgradation
5. Cyberlink PowerDirector

CyberLink PowerDirector for Windows is a very useful tool for converting GIF to video. It is able to edit, process, and blend the video clips from various devices in a very simple and effective way. By adding insert video effects, users can turn their videos into spectacular works of art with ease.
Overall, CyberLink PowerDirector is a good option for users who want to enjoy an all-in-one video editing experience. It can be also used as an alternative to popular video editing software like Adobe Premiere Pro etc.
Pros
Over 100 stellar audio and video editing features
Videos can easily be imported, edited, and exported in 4k
Has advanced 360-degree video editing ability
24/7 fast customer service support
Cons
Create frustration due to ads on the page
Expensive tool
Online GIF to Video Converter
Whether you are looking to make the most out of an event that you have posted on your blog or just want a quick way of sharing a funny GIF on Facebook, like offline converting software, these tools offer a simple solution for quickly converting your GIF into a video.
1. EZGIF.COM

Ezgif.com is a fun and quick way to create memes and convert Gifs into videos quickly and easily. With fast conversion rates and a clear, simple interface, though, it’s possible that you might be disappointed with the amount of customization that this converter offers.
Other than that, however, it has everything you need to take your video from a few minutes to a few seconds.
Overall, while Ezgif’s free web-based service is easy to use, not all of its features are present in the free version. Users who want to customize their videos by adding text or effects may need to upgrade for better results.
Pros
Simple online gif maker
Toolkit for basic animated gif editing
Customize Gifs for better videos
High-end experience
Cons
The layout is not appealing
2. CloudConvert

The main selling point of CloudConvert is its large and varied list of file types, allowing you to convert any file to any other file. GIF to video conversion is just one of the many options offered by the site, and it does a surprisingly impressive job when it comes to this. There’s also an online tool for creating animated GIFs from standard video files, which can definitely come in handy for animators.
There’s no limit to how many files you can convert at once, so if you’re looking to optimize your workflow, CloudConvert will make your life easier.
Pros
High-quality video editing and conversion
Easy to understand interface
Fully-functional basic to intermediate features
Adaptable and free-to-use
Cons
Only 25 conversions/24 hours
3. Online Convert

This Online Convert is made for all your file conversion needs, from online image conversion to online GIF to video converting. With this online converter, if you will find a lot of useful information about all of these most popular online converters, do not hesitate to use them now!
The simple interface of this tool makes the conversion process easy to understand and utilize. If you are an individual looking to create videos of your gifs, then Online Gif Video Converter is the right fit for you.
Pros
Fast and progressive
Effective outcome
Simple step process of conversion
Wide range of formats to convert
Cons
There’s no specific drawback found!
How to Convert GIF to Video Using Wondershare Filmora?
Step 1: Import Media files
For the “Import” button to appear, you need to start by launching the Wondershare Filmora program. When you locate it on your desktop, double-click on it to open and select “Import” to browse and load GIF files from your Mac or PC.

Step 2: Drag to timeline
You can drag your imported media files to the timeline at the bottom of the screen. If you want to add text, you can simply drag and drop it to the timeline.
Step 3: Edit files
You can edit media files (image, audio, video) by using the built-in tools on Filmora. You can add titles, intro text, and watermarks to your video with filters and overlays. You can also add background music, transitions, and slow/fast-motion effects to make your GIF more interesting. If you want to remove the background of an image sequence or a video clip, you can use the green screen effect as well.
Step 4: Add text effects
Once you have imported the GIF file, you can add a text effect to it by double-clicking on the video track. Then go to Text/Credit and choose your desired one from the given options. You can adjust the size of text, font style, color, position, etc. as per your choice. You can also add some transition effects by clicking on Transitions. Once done, click OK to save changes or drag the text into the timeline for further editing.
Step 5: Save and Export
Once you are satisfied with your video, click “File” in the top left corner of the window. From the drop-down menu, select “Export” to get to the export window.

Conclusion
In conclusion, online tools can make your life a lot easier when it comes to converting media files. Sites like the ones reviewed above can also provide you with a host of other functions that make them valuable in your day-to-day work. If you’ve had the chance to try such websites, we hope that they’ve proven to be helpful and convenient.
Since there are so many GIF to video converters available online, the question isn’t which is the best but instead what kind of experience you’re looking for.
Are you looking for a very simple solution where you can plug in your GIF and then immediately share it? Or are you looking for more refined control over your GIF before converting it to videos, such as being able to choose the resolution, frame rate, and aspect ratio? When trying to select from among these various options, think about the ways you will use your converted video clips and pick one that best suits your needs.
Here in this guide, we are going to share with you some amazing online and offline GIFs to video converters. You would love the specifications and possibilities they have created for all types of users to start with them right away!
Best 5 GIF to Video Converter Software
You don’t need to be a professional designer to convert your artwork into a video file. These converters are easy enough to use that anyone can take advantage of them, even you! Now all you have to do is decide which converter is the best for your needs, and get to it.
1. Wondershare Filmora

Wondershare Filmora is the most effective video converter for both PC and Mac users. This powerful and intuitive GIF to Video Converter is the best choice for all your video converting needs.
It offers all of these options, and it also scores high in terms of overall design and ease of use. It’s a clear winner if you’re looking to convert one or multiple GIFs into video. If you decide to download the app, we recommend purchasing the full version, which will give you a lot more customization options.
Pros
Highly adaptive to import and export files
Premium features make it the best tool among all
Faster conversion of files
Easy to use after installation
Cons
Works only on Windows and Mac
Expensive for monthly and yearly subscribers
2. Adobe Premiere Pro

The Adobe Premiere tool is easy to use. Just drag and drop your GIFs into the software, add music if you want, and hit the “Create” button. The software will create a video file that combines your GIF with the attached music in MP4 format so that you can share it across any social platform and enjoy it forever.
It is a subscription-based program that allows you to easily import and manipulate GIF files, and then export them as MP4 videos with the same features and steps that make the GIFs so appealing in the first place.
Pros
Support a plethora of formats for conversion
Quick in functionality
Very smooth experience
High-end customization of videos
Cons
Autosave doesn’t function sometimes
3. Movavi Video Editor Plus

Movavi Video Editor Plus 2020 is an affordable GIF to video converter you can use to shred your unfinished videos into GIFs, even if they’re just simple recordings.
It’s also good for mass-producing low-quality GIFs for your video blogs or YouTube channels. There are better options out there, but this software will suffice if you’re on a budget.
While it’s a bit on the pricey side for some, there aren’t many options that come close. It comes with everything you’d expect in a video editing package, with the added feature of being able to edit and export your videos in various GIF formats.
The program is pretty easy to use, and while it doesn’t have all of the advanced features that more expensive video editors do, it’s probably more than enough for most users.
Pros
Tons of cool transitions, filters, and preset titles
Easy by drag and drop actions
Offers Movavi’s effect store for more templates
Very clean and reflexive
Cons
Don’t have the histogram, vectorscope, or color wheel
Color grading is harder
4. VLC

The VLC media player is way better than most other GIF to video converters because not only can you download it for free but it’s also open-source, meaning that the code is public and developers worldwide can help improve its quality with their suggestions and thoughts. Plus, downloading VLC doesn’t cost a penny and it’s portable too!
In addition to these great features, the VLC player has many other interesting features which make it an essential piece of software for computer users. With its basic interface, it offers something that is very difficult to find in any other media player: the simplicity we talked about before…
Pros
User interface is straightforward
Fast forward pattern of features
Don’t require any codec installation
It is suitable for OS X.
Cons
Has no options for software upgradation
5. Cyberlink PowerDirector

CyberLink PowerDirector for Windows is a very useful tool for converting GIF to video. It is able to edit, process, and blend the video clips from various devices in a very simple and effective way. By adding insert video effects, users can turn their videos into spectacular works of art with ease.
Overall, CyberLink PowerDirector is a good option for users who want to enjoy an all-in-one video editing experience. It can be also used as an alternative to popular video editing software like Adobe Premiere Pro etc.
Pros
Over 100 stellar audio and video editing features
Videos can easily be imported, edited, and exported in 4k
Has advanced 360-degree video editing ability
24/7 fast customer service support
Cons
Create frustration due to ads on the page
Expensive tool
Online GIF to Video Converter
Whether you are looking to make the most out of an event that you have posted on your blog or just want a quick way of sharing a funny GIF on Facebook, like offline converting software, these tools offer a simple solution for quickly converting your GIF into a video.
1. EZGIF.COM

Ezgif.com is a fun and quick way to create memes and convert Gifs into videos quickly and easily. With fast conversion rates and a clear, simple interface, though, it’s possible that you might be disappointed with the amount of customization that this converter offers.
Other than that, however, it has everything you need to take your video from a few minutes to a few seconds.
Overall, while Ezgif’s free web-based service is easy to use, not all of its features are present in the free version. Users who want to customize their videos by adding text or effects may need to upgrade for better results.
Pros
Simple online gif maker
Toolkit for basic animated gif editing
Customize Gifs for better videos
High-end experience
Cons
The layout is not appealing
2. CloudConvert

The main selling point of CloudConvert is its large and varied list of file types, allowing you to convert any file to any other file. GIF to video conversion is just one of the many options offered by the site, and it does a surprisingly impressive job when it comes to this. There’s also an online tool for creating animated GIFs from standard video files, which can definitely come in handy for animators.
There’s no limit to how many files you can convert at once, so if you’re looking to optimize your workflow, CloudConvert will make your life easier.
Pros
High-quality video editing and conversion
Easy to understand interface
Fully-functional basic to intermediate features
Adaptable and free-to-use
Cons
Only 25 conversions/24 hours
3. Online Convert

This Online Convert is made for all your file conversion needs, from online image conversion to online GIF to video converting. With this online converter, if you will find a lot of useful information about all of these most popular online converters, do not hesitate to use them now!
The simple interface of this tool makes the conversion process easy to understand and utilize. If you are an individual looking to create videos of your gifs, then Online Gif Video Converter is the right fit for you.
Pros
Fast and progressive
Effective outcome
Simple step process of conversion
Wide range of formats to convert
Cons
There’s no specific drawback found!
How to Convert GIF to Video Using Wondershare Filmora?
Step 1: Import Media files
For the “Import” button to appear, you need to start by launching the Wondershare Filmora program. When you locate it on your desktop, double-click on it to open and select “Import” to browse and load GIF files from your Mac or PC.

Step 2: Drag to timeline
You can drag your imported media files to the timeline at the bottom of the screen. If you want to add text, you can simply drag and drop it to the timeline.
Step 3: Edit files
You can edit media files (image, audio, video) by using the built-in tools on Filmora. You can add titles, intro text, and watermarks to your video with filters and overlays. You can also add background music, transitions, and slow/fast-motion effects to make your GIF more interesting. If you want to remove the background of an image sequence or a video clip, you can use the green screen effect as well.
Step 4: Add text effects
Once you have imported the GIF file, you can add a text effect to it by double-clicking on the video track. Then go to Text/Credit and choose your desired one from the given options. You can adjust the size of text, font style, color, position, etc. as per your choice. You can also add some transition effects by clicking on Transitions. Once done, click OK to save changes or drag the text into the timeline for further editing.
Step 5: Save and Export
Once you are satisfied with your video, click “File” in the top left corner of the window. From the drop-down menu, select “Export” to get to the export window.

Conclusion
In conclusion, online tools can make your life a lot easier when it comes to converting media files. Sites like the ones reviewed above can also provide you with a host of other functions that make them valuable in your day-to-day work. If you’ve had the chance to try such websites, we hope that they’ve proven to be helpful and convenient.
Easy Guide to Apply Slow Zoom Effects to Videos
A raw video without any effect will fall flat on its face when it comes to engagement and watch time. Nobody likes watching videos without effects as there is no entertainment value, and the video is not soothing and pleasing to the eyes. That is why effects in videos are extremely important especially when it is a video you are posting on social media to get everyone’s attention. You should definitely consider adding slow zoom effect in your video to make it stand out.
The slow zoom effect is one of the most common but widely loved video effects that work for any video. Human eyes love when there is slow motion effect of panning and zooming into the central or specific portion of a video. The slow zoom in effect is extremely popular among TikTok videos. We will illustrate how to apply slow zoom effect to your video on your smartphone as well as on your computer.
Part 1. How to create slow zoom-in effect in Filmora
If you want to add slow zoom to any recorded video on your computer, you will need a dedicated video editor. There are many popular video editors available where slow zoom effect is not available. We recommend Wondershare Filmora which is a professional video editor that is available for Windows and Mac users. You will need to combine slow motion and keyframe to achieve the desired slow zoom effect. Here are the steps on how to create slow zoom in effect for your videos.
Free Download For Win 7 or later(64-bit)
Free Download For macOS 10.14 or later
Step1 Download and install Wondershare Filmora . Launch the application and click on New Project option from the welcome screen.
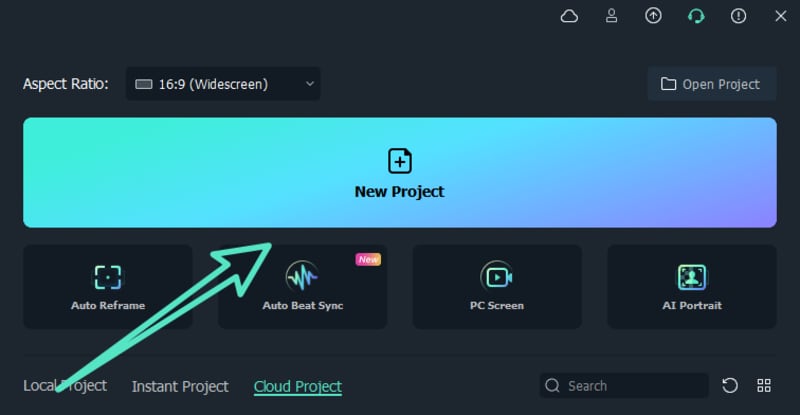
Step2 Drag and drop your video in Project Media folder. Thereafter, drag and drop the video into the Timeline.
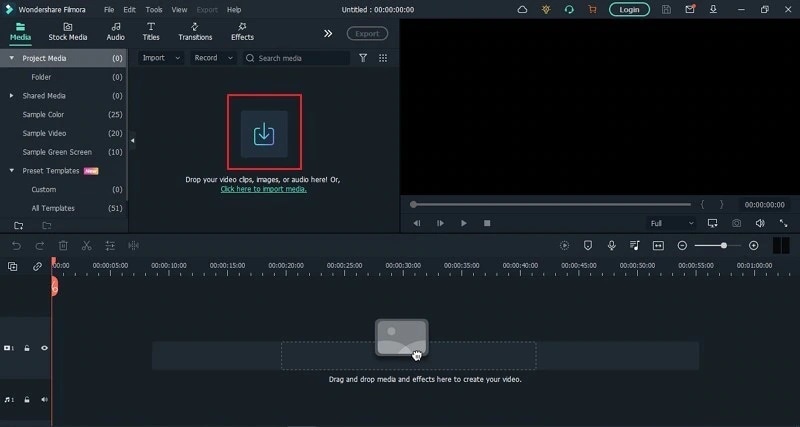
Step3 Put the red header on the beginning part of the clip that you want to cut off and click on Cut(Scissor) icon. Then put the red header on the end part of the clip and click on Cut icon again. You should now have the separated clip for applying slow zoom effect.
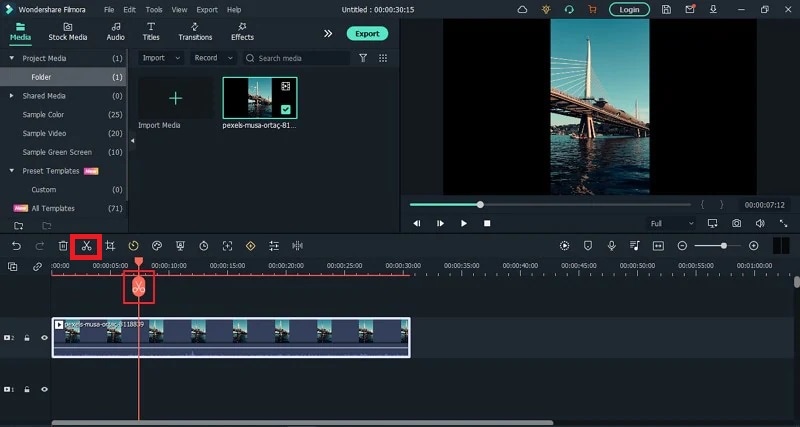
Step4 Select the separated clip and click on Speed icon. Go to Slow option and select the speed according to the slowness of zooming you want.
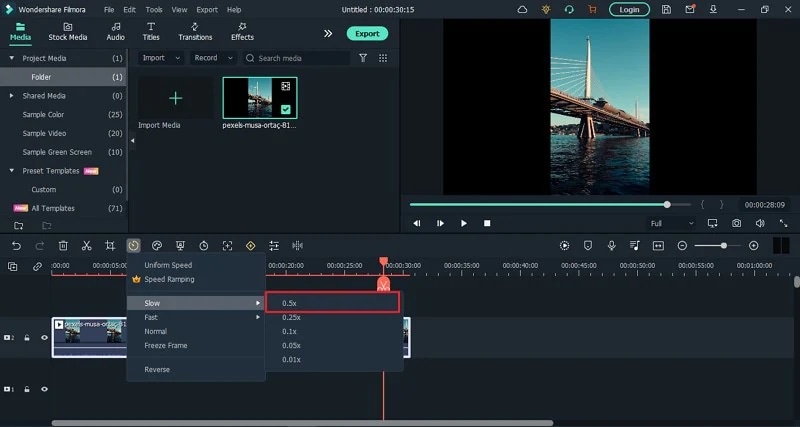
Step5 Now you have to add multiple keyframes so that the slow zoom effect is smooth and soothing. Right-click on the clip, go to Animation and click on Add Animation. Go to Animation tab and then to Customization section.
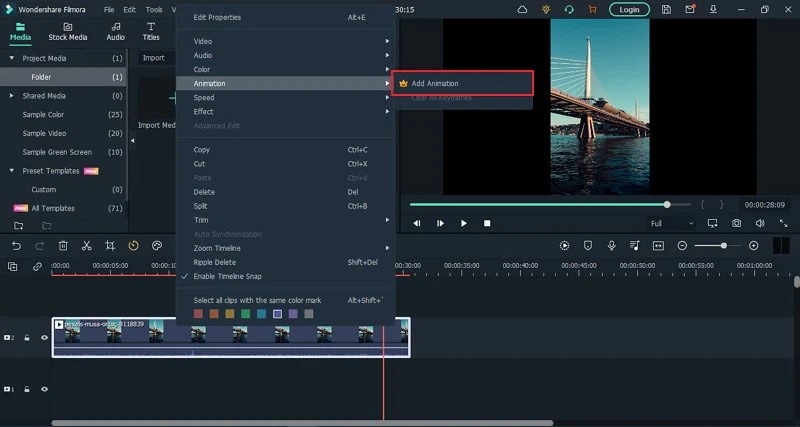
Move the red header to the point where you want a keyframe and click on Add option. Similarly, move the red header slightly farther and add another keyframe. Keep adding like that till you reach the end point.
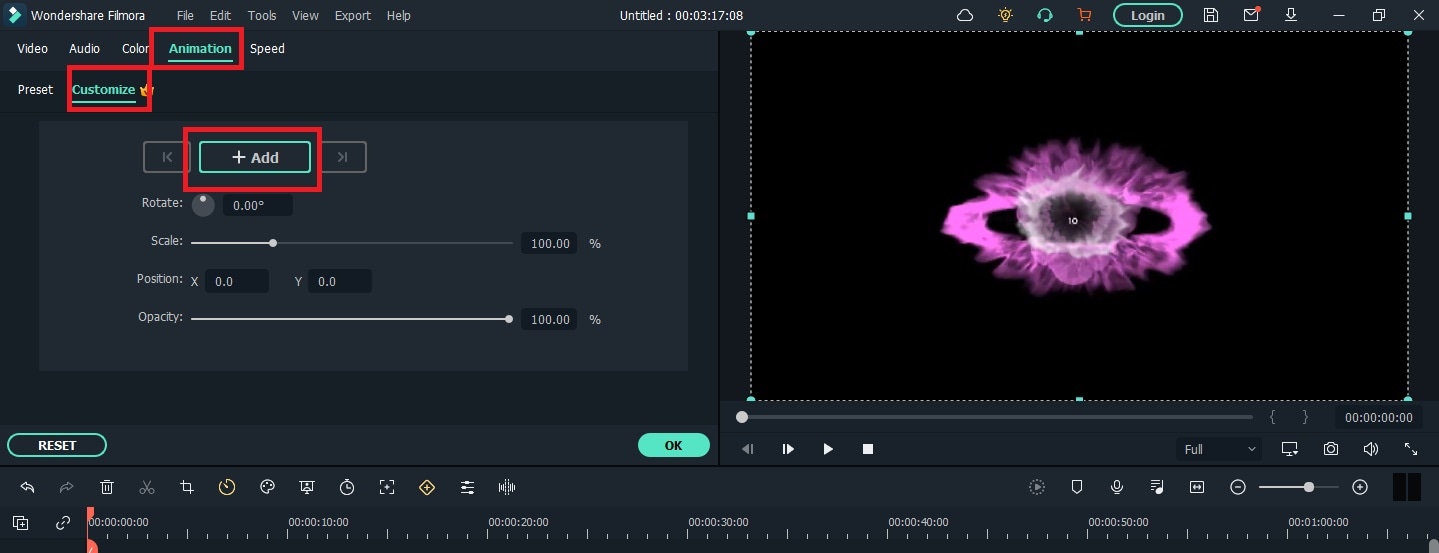
Step6 Double-click on the clip and go to Video> Basic> Transform. Select keyframes and slowly increase the scale slider for each keyframe to apply the zoom effect. Therefore, for every keyframe, zooming will increase gradually and you have already applied slow speed for complete slow zoom effect.
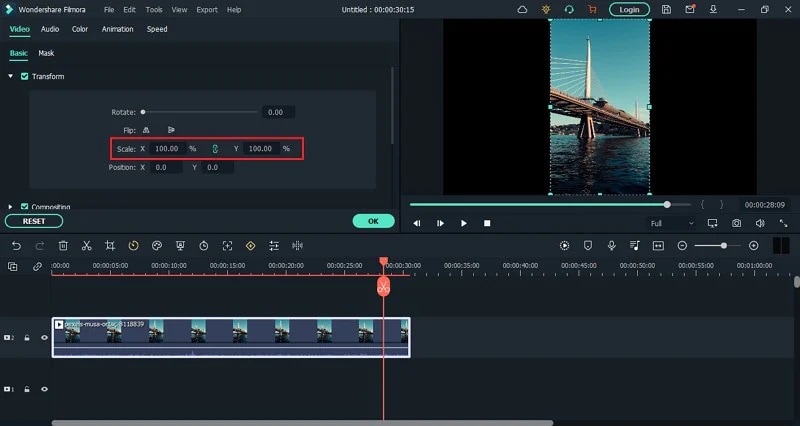
Part 2. How to do the slow zoom in effect on TikTok?
TikTok is one of the most popular short-video sharing platforms among teenagers and young adults. The slow zoom effect has been popularized by TikTokers as they use the effect quite regularly. Naturally, adding slow zoom in effect on your video on TikTok is the easiest. Here are the steps to follow one by one.
Step1 Launch TikTok app and you can shoot your video directly from TikTok. If you have already recorded the video, tap on “+” icon located at the bottom of the app screen and select the video.
Step2 After adding the video, go to Effects> Time. Under Time section, tap on “Slo-Mo” option to add slow-motion effect on your video.
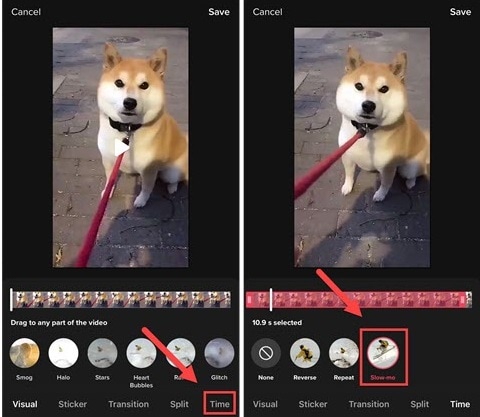
Step3 Go to Visuals and you will find Zoom option. Place the header on the part of the video where you want to place the slow zoom effect. Thereafter, tap and hold Zoom effect so that the effect applies on the video clip. Release the effect where the desired section is covered.
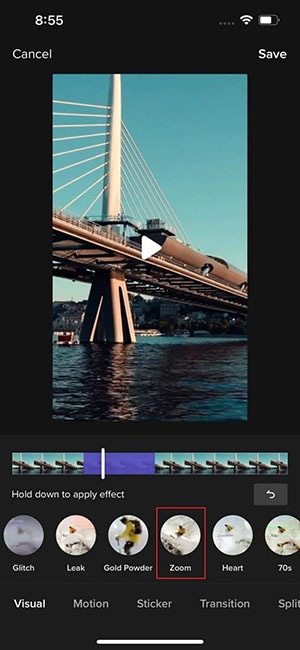
Step4 Tap on Save option and play the video to see slow zoom effect. Tap on Next button and you can share the video on social media platforms as well.

There is another way you can apply slow zoom effect on TikTok. Here are the steps to find and apply slow zoom effect.
Step1 Launch TikTok app and tap on Discover option located at the bottom.

Step2 On the next screen, type “Slow Zoom” on the search bar and tap on Search option.
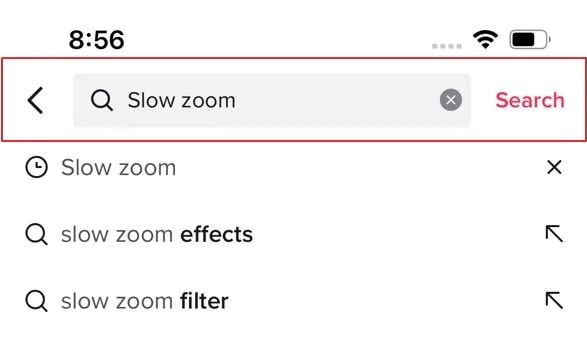
Step3 Now you will see the videos where different TikTok users have already applied slow zoom effect. Tap on Effects Slow Motion to apply the same effect to your video.

Step4 On the next screen, tap on Try This Effect button. You can select the duration of the zooming of the video you are about to shoot as well the zooming magnification.
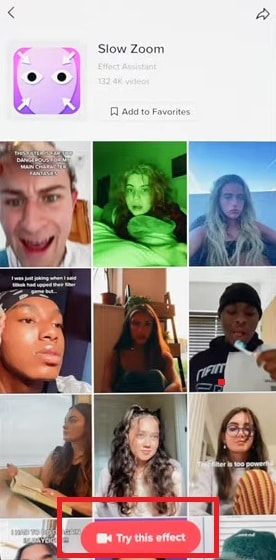
Step5 Finally, tap on Record button to capture your video and apply slow zoom effect on the video automatically.
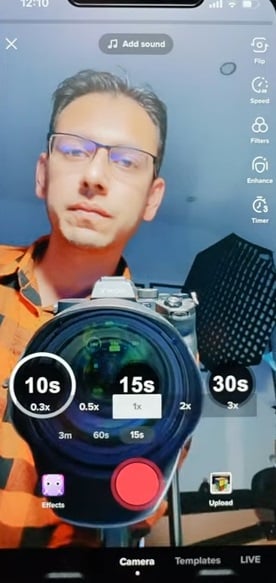
Conclusion
The slow zoom effect is one of the most viral and trending video effects on social media platforms. If you want to add slow zoom effect to your video for a certain portion, you can do the same from your smartphone as well as computer. For Windows and Mac users, we recommend you use Wondershare Filmora .
Free Download For macOS 10.14 or later
Step1 Download and install Wondershare Filmora . Launch the application and click on New Project option from the welcome screen.

Step2 Drag and drop your video in Project Media folder. Thereafter, drag and drop the video into the Timeline.

Step3 Put the red header on the beginning part of the clip that you want to cut off and click on Cut(Scissor) icon. Then put the red header on the end part of the clip and click on Cut icon again. You should now have the separated clip for applying slow zoom effect.

Step4 Select the separated clip and click on Speed icon. Go to Slow option and select the speed according to the slowness of zooming you want.

Step5 Now you have to add multiple keyframes so that the slow zoom effect is smooth and soothing. Right-click on the clip, go to Animation and click on Add Animation. Go to Animation tab and then to Customization section.

Move the red header to the point where you want a keyframe and click on Add option. Similarly, move the red header slightly farther and add another keyframe. Keep adding like that till you reach the end point.

Step6 Double-click on the clip and go to Video> Basic> Transform. Select keyframes and slowly increase the scale slider for each keyframe to apply the zoom effect. Therefore, for every keyframe, zooming will increase gradually and you have already applied slow speed for complete slow zoom effect.

Part 2. How to do the slow zoom in effect on TikTok?
TikTok is one of the most popular short-video sharing platforms among teenagers and young adults. The slow zoom effect has been popularized by TikTokers as they use the effect quite regularly. Naturally, adding slow zoom in effect on your video on TikTok is the easiest. Here are the steps to follow one by one.
Step1 Launch TikTok app and you can shoot your video directly from TikTok. If you have already recorded the video, tap on “+” icon located at the bottom of the app screen and select the video.
Step2 After adding the video, go to Effects> Time. Under Time section, tap on “Slo-Mo” option to add slow-motion effect on your video.

Step3 Go to Visuals and you will find Zoom option. Place the header on the part of the video where you want to place the slow zoom effect. Thereafter, tap and hold Zoom effect so that the effect applies on the video clip. Release the effect where the desired section is covered.

Step4 Tap on Save option and play the video to see slow zoom effect. Tap on Next button and you can share the video on social media platforms as well.

There is another way you can apply slow zoom effect on TikTok. Here are the steps to find and apply slow zoom effect.
Step1 Launch TikTok app and tap on Discover option located at the bottom.

Step2 On the next screen, type “Slow Zoom” on the search bar and tap on Search option.

Step3 Now you will see the videos where different TikTok users have already applied slow zoom effect. Tap on Effects Slow Motion to apply the same effect to your video.

Step4 On the next screen, tap on Try This Effect button. You can select the duration of the zooming of the video you are about to shoot as well the zooming magnification.

Step5 Finally, tap on Record button to capture your video and apply slow zoom effect on the video automatically.

Conclusion
The slow zoom effect is one of the most viral and trending video effects on social media platforms. If you want to add slow zoom effect to your video for a certain portion, you can do the same from your smartphone as well as computer. For Windows and Mac users, we recommend you use Wondershare Filmora .
Also read:
- Best 6 Online MP4 Croppers for 2024
- New Looking Into The Top Free Slow Motion Apps (Android & iOS) for 2024
- 2024 Approved What Is the Top Filmora Slideshow Templates? Experts Choice
- New In 2024, Top 9 Best Solutions To Go For When Creating an AI Thumbnail
- New How to Add Filters on iMovie for 2024
- New Applying the Effect of Camera Shake in Video Creation for 2024
- 2024 Approved Split Videos in the Lightworks Step by Step
- Updated In 2024, Guide to Create a Timelapse Video in After Effects
- In 2024, Learn How to Use and Download KineMaster Templates Like a Pro. Discover Alternative Video Templates to Elevate Your Video Creation
- New 2024 Approved A Countdown Effect Is Widely Used in Gaming and Report Videos. So How to Create Your Own Countdown Video? This Article Will Tell You some Ideas About Contdown Video Editing
- New A Complete Guide to Use Distortion Effect in Premiere Pro for 2024
- 2024 Approved This Article Will Reveal the Secrets of Choosing a Location to Shoot Your Viral Music Video. As Well as Tips to Make an Energetic Schedule for Shooting Days
- 2024 Approved Get Creative with These 10 Video Editing App With Templates
- New Best Method to Split Video Into Parts Online for 2024
- Updated Powerpoint Supported Video Format and User Tips for 2024
- Updated Best Ways to Merge FLV Files Windows, Mac,Android, iPhone & Online for 2024
- Want Make a Slide Show Video? Heres How
- How to Make Censor Effects with Filmora
- 2024 Approved Adding Slow Motion in DaVinci Resolve A Comprehensive Overview
- Use Mobile Phones to Shoot a Video Is Very Convenient Compare with Professional Cameras. In This Article, Well List You some Tips to Help Capture a High-Quality Video on Your Phone for 2024
- In 2024, Best 5 Apps To Add Song To Video
- New In 2024, How To Add Motion Blur On CapCut? (IPhone & Android)
- In 2024, How to Unlock Disabled Apple iPhone 12/iPad Without Computer
- Everything You Need to Know about Lock Screen Settings on your Honor Magic 6
- In 2024, iPhone 13 Pro Max iCloud Activation Lock Bypass
- How To Fix OEM Unlock Missing on Xiaomi Redmi A2?
- How Can I Catch the Regional Pokémon without Traveling On Honor Magic 5 Pro | Dr.fone
- How to Reset Motorola Edge 2023 Without the Home Button | Dr.fone
- Possible solutions to restore deleted videos from Xiaomi Redmi Note 13 Pro 5G
- In 2024, How to Unlock Vivo Y27 5G Phone with Broken Screen
- Why is iPogo not working On Nokia C210? Fixed | Dr.fone
- In 2024, How to Share/Fake Location on WhatsApp for Lava Blaze 2 | Dr.fone
- Title: Enhance Your Film Production with These 5 Silence Detection Tools for 2024
- Author: Chloe
- Created at : 2024-05-20 03:38:01
- Updated at : 2024-05-21 03:38:01
- Link: https://ai-editing-video.techidaily.com/enhance-your-film-production-with-these-5-silence-detection-tools-for-2024/
- License: This work is licensed under CC BY-NC-SA 4.0.


