
:max_bytes(150000):strip_icc():format(webp)/audio-books-56a324b93df78cf7727c00f5.jpg)
Finding Best GIF Websites Is Easy as Pie for 2024
Finding Best GIF Websites Is Easy as Pie
Finding Best GIF Websites Is Easy as Pie — Here’s What You Should Know
An easy yet powerful editor
Numerous effects to choose from
Detailed tutorials provided by the official channel
Want a heap of the most exiting GIFs? Here are the best websites to visit.
In this article
01 [10 Sites for Finding the Perfect GIF](#Part 1)
02 [How to Use Animated GIF Makers](#Part 2)
03 [5 Stunning Examples of Gifs in Web Design](#Part 3)
Part 1 Sites for Finding the Perfect GIF
Information was never so expressive until GIFs came up as delivery platform. Looking through the frame of content diversity and effective delivery, there’s possibly nothing that is left untouched by these short, precise and creative snippets. When the talk is about long term user credibility, creativity is one thing, while reach is the other.
No doubt about the creative aspect, but the convenient availability holds equal importance. However captivating a utility nay be, you would certainly not be interested to spend quality time searching the apt content. Let’s take a look at some of the most popular and convenient GIF website that will surely put a full stop on your search spree for a relatable GIF.
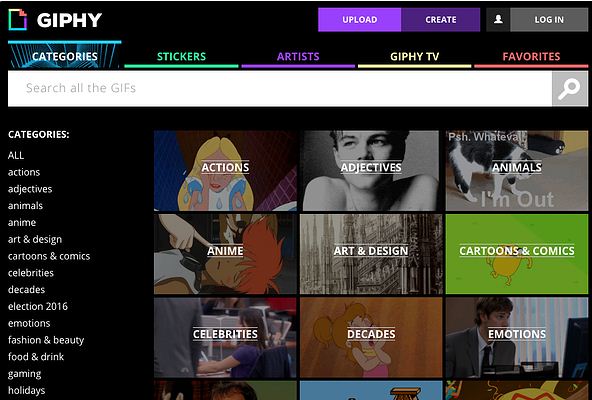
01GIPHY
Initially launched as a GIF search engine, thin is a complete storehouse on almost everything that you can possibly think of. The extensive content library of this site is all set to meet your most specific content requirements in less than a blink’s time. You get an access to quality content in music, science, nature and what not on this free GIF website.
Talking of search flexibility, GIPHY is known to have the most advanced and updated search bar that ensures that top quality and fresh content is always at the hand of its users. You can browse through the vast GIF categories of the site or look for your exact content using a specific search keyword.
02Reddit
You can regard this site as a GIF membership community, where you can find a variety of impressive sub-reddits in the GIF category. The best part is, you will never find recursive content on any two or more sub-reddits as each one is developed and updated keeping different content specifications in mind.

You are given access to even finer content libraries in some particular sub-reddits that follow a sequential guideline to filter their entries according to user preferences. Some popular sub-reddits are listed below:
03Tumblr
Originally a blogging site, Tumblr is simply heaven for creating and sharing GIFs across media platforms. What’s interesting about the site is its content categorization, where bloggers on the site group relatable content under specific categories, which facilitates an easy, quick and hassle free search. Most of the GIF content on the site is either created in Photoshop or taken from across the web.
While the site has exciting GIF content for almost every scenario, the comedy genre is the st5arb attraction of this GIF platform. The huge comic content library of the site has hilarious memes and GIFs that will certainly leave you rolling over the floor. To enjoy your favorite content daily, you just need to search a relatable hashtag and follow some blogs on your searched content.

04Gfycat
This one lands among the most preferred GIF sites and is packed with an enormous inventory of memes and GIFs. Not just this, this one is a free GIF maker website that allows you to convert videos from almost every media platform into GIFs, independent of the video file format via its ‘Video to GIF Converter’ tool.
You can set a daily dose of your favorite, exciting GIF content by using either the search bar or the ‘Selection Menu’ in the left of the site’s Home page. You can even browse through latest GIF categories by navigating to the ‘Trending’ and ‘Explore’ sections.

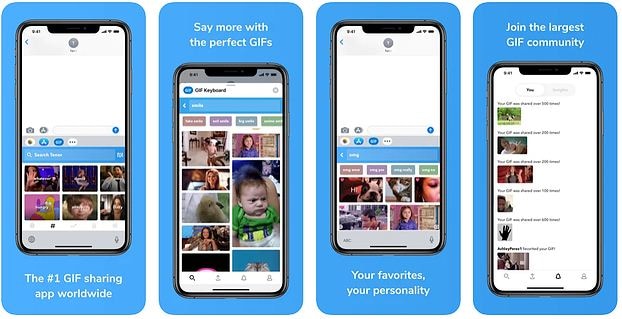
05Tenor
You can prefer this site to enjoy your favorite GIFs on your PC or iOS device. The site gives you the liberty to share GIFs and memes directly from its library into any of your Instant Messaging chats or community conversations on social media platforms.
All you need to do is navigate to the Tenor search bar, put in a suitable keyword and there you can see loads of GIF content on your screen in less than a second’s time. With periodic updates and a cohesive interface, this site is your storehouse of latest and trendy GIFs, anytime and anywhere.
06Reaction GIFs
This site is known for having an exact content database for almost every thought that crosses your mind. It serves you with a refined search mechanism, having a different pathway for every search, depending on the content you are looking for. This is a perfect aid to get exactly what you want, without having to fuss out with unwanted stuff.
Talking of search methods, you will find a drop-down menu at the right to search GIFs that express ‘Emotions’ or one word answers (preferably a ‘Yes’ or a ‘No’). If you want something related to a more specific category, you can browse through the ‘Galleries’ and ‘Tags’ of the site (categories, like, OMG, LOL, etc).

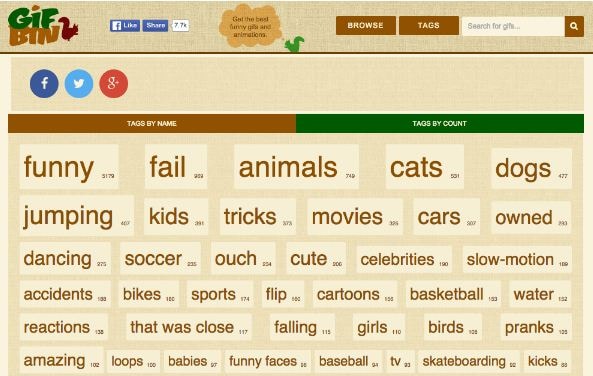
07GIFbin
This is again a trunk of latest, funny and entertaining GIFs tom watch and share. On this site, you get to add search filters, like, ‘Most Viewed’, ‘Latest’, ‘Top Rated’, etc., that refine your search to fetch exactly what you are looking for. You are also free to use ‘Search Tags’ grouped according to name and search count on the site.
The tag names are standard keywords (like, animals, sports, nature, etc.) and the count feature keeps a track of the most frequent searches, thus allowing you to find out your favorite GIFs in a more explicit manner. If you are clueless about anything specific, don’t worry. Hit the ‘Random GIFs’ button to explore a whole new world of fun and excitement.
08Imgur
This site is popular in the meme world as a GIF sub-reddit that has explicitly no text threads. You can take this one as a free, GIF hosting and sharing website. While you can find loads of quality content on the site convenient to almost any genre, it is a leader in comic and funny GIFs. You can use different search tags for hilarious movie snippets, or some other fun element of your liking. This site’s image library is a hub of latest and nostalgic content.

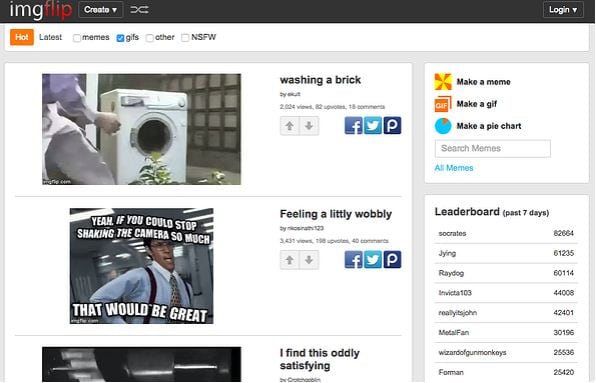
09Imgflip
This is one more hotspot for relatable GIFs and memes. The best thing about the site is that it has separate search pathways to refine your search in cohesion with your content preference. Some common pathways are explained below:
● Browse the site’s homepage for the latest and trending GIF content.
● Simplify your search on specific content pages using the ‘Random’, ‘Next’ or ‘Previous’ navigation options.
● Prefer using ‘Image Hotkeys’ on the content pages.
● Try on ‘Tagging’ specific content pages (sunrise, snowfall, cats, etc.).
If you like competing with fellow visitors on the site, you can experiment with creating GIFs of your own and get ranked on the creator scoreboard. Bag a high vote count to get your GIF trending on the site.
10Gyazo
Last on the list, this is a somewhat different site in terms of features and search constraints. The exclusively unique ’Screen Capture’ feature of this site allows you to take a video of your device screen and use it to create a GIF of your own, making itself a quick and effective ‘Video to GIF Converter’ tool.
You will require creating an account on the site to maintain a library of your searched contents, which you can either tag on the site or downloaded to your device. You can further, export and share your creations across media platforms through this site.

Part 2 How to Use Animated GIF Makers
Landing into the creative and exciting world of GIFs, you can easily get motivated to try hands on making your own GIFs. The online market is a pool of solutions that claim of adhering to this concern in the most effective ways. When looking for the best GIF maker tools and software, you can definitely count upon the following choices:
01**Wondershare Filmora Video Editor **
This one is undoubtedly the best GIF creator software in current times. Using the plethora of audio-visual features, effects and image filters that are offered by this tool, creating animated GIFs is a spic and span process. The software grants you the liberty to play with and explore your editing skills to generate professional quality GIFs within minutes.

Wondershare Filmora - Best Video Editor for Mac/Windows
5,481,435 people have downloaded it.
Build unique custom animations without breaking a sweat.
Focus on creating epic stories and leave the details to Filmora’s auto features.
Start a creative adventure with drag & drop effects and endless possibilities.
Filmora simplifies advanced features to save you time and effort.
Filmora cuts out repetition so you can move on to your next creative breakthrough.
Here’s how you can use this software to become a pro at creating GIFs:
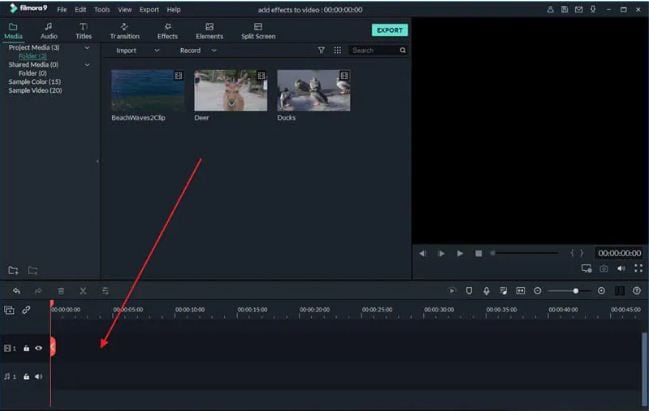
● Step 1: Import Required Media Files
To begin with, select any desired set of images or a particular video file to the Filmora timeline. You don’t need to be format specific; the software is compatible with over 150 different file formats.
● Step 2: Drag Files to Edit
Once you are done with selecting the files, you need to drag the same to the Filmora Editor Timeline, where you can transform the file contents with your editing skills.
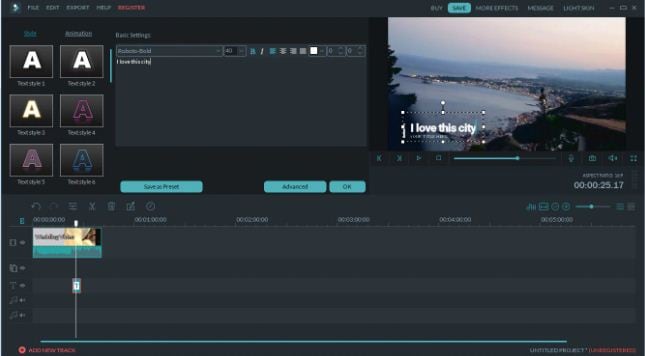
● Step 3: Let’s Get Editing.
In the editor window, you are free tom choose from a range of effects, tools and filters suitable to your GIF content to give your artwork a new and engaging look. You can experiment with the cutting, cropping and trimming tools or play with effects, like, overlays, rotation and speed adjustments and even add texts to deliver messages that intensify your GIF.
● Step 4: Time to Save and Share.
Now is the time to save your work locally to your device using the .gif extension with your created file, as well as share it among your peers on social communities.

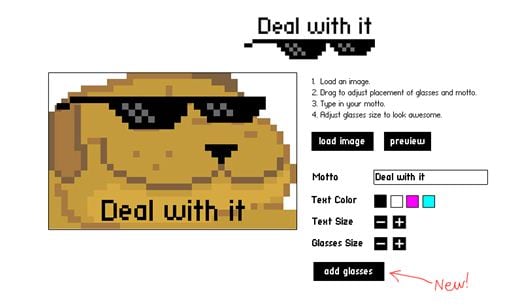
03Deal With It
This one is an online GIF maker tool that allows you to make top quality animated GIFs within a few seconds and you don’t even need to take up any third party software installation. Creating GIFs with this user friendly, clean interface and quick GIF generator utility is an absolute fun, to say the least.
Once you are done creating, the tools gives you the liberty to experiment with effects like, texts and glasses that would further intensify your GIF to the next level, and the best part is, all of this is available to you without having to spend a penny out of your pocket.
Explained below is the step wise user guide to use this tool for creating GIFs:
● Step 1:
Navigate to official website of the GIF creator tool.
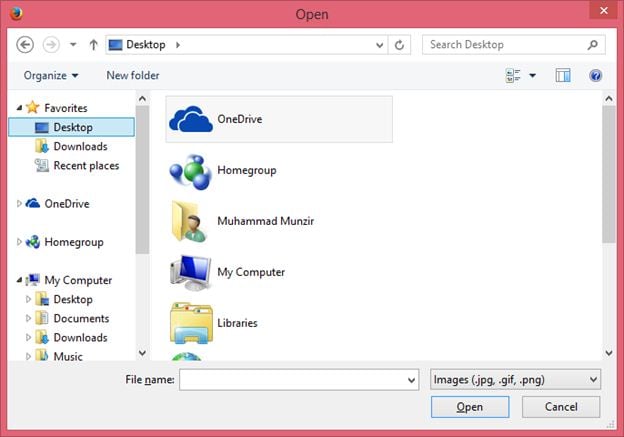
● Step 2:
Choose a desired locally saved image from your device and upload it in the tool’s editor window. To do this, click on the ‘Load Image’ button.
● Step 3:
You can now modify the uploaded image with text and glasses. This is it. Your GIF is ready to save and export.

03LunaPic
This one lands among the most preferred GIF maker tools available across the web. It comes with a clean interface, is free to use and does not require any third party software installation. You can create catchy and interesting GIF banners, or make captivating, animated GIF files with a series of still images using this tool. However, this GIF maker does not give you the liberty to take up editing and speed or accuracy modifications on your creation.
You need to follow the steps explained below to create your own GIF with LunaPic:
● Step 1:
Open the official site of LunaPic in your web browser.
● Step 2:
Upload a desired one or a set of images you wish to use for making your GIF on the site. To do this, select a group of images from your device and tap ‘Upload’
.

● Step 3:
Once uploaded, you can use your creativity to play with the effects library of the site and edit your images in its editing interface.
● Step 4:
When satisfied, choose the file type as GIF and hit the ‘Save’ option at the bottom. This will save your creation locally in your device, once the file conversion gets completed.
Image Name: Finding-best-gif-websites-is-easy-as-pie—here’s-what-you-should-know-22
04Wondershare TunesGo
This one is another efficient animated GIF creator utility on the internet. Available to you as free online software, this tool promises you an amazing and hassle free GIF making experience. You can either create stunning GIFs of your own, or convert video files and even live photos into the same using this software. It allows you to set time slots for file conversions and make speed and flow adjustments for GIF frames, along with offering a plethora of editing effects to play with.
Here’s the know-how of using this software to create top quality animated GIFs:
● Step 1: Download and Launch the Software
Pay a visit to the official TunesGo website to download the software. Begin with installing and launching the same on your preferred device. When you finish, click on the ‘Toolbox’ tab at the top in the welcome screen.
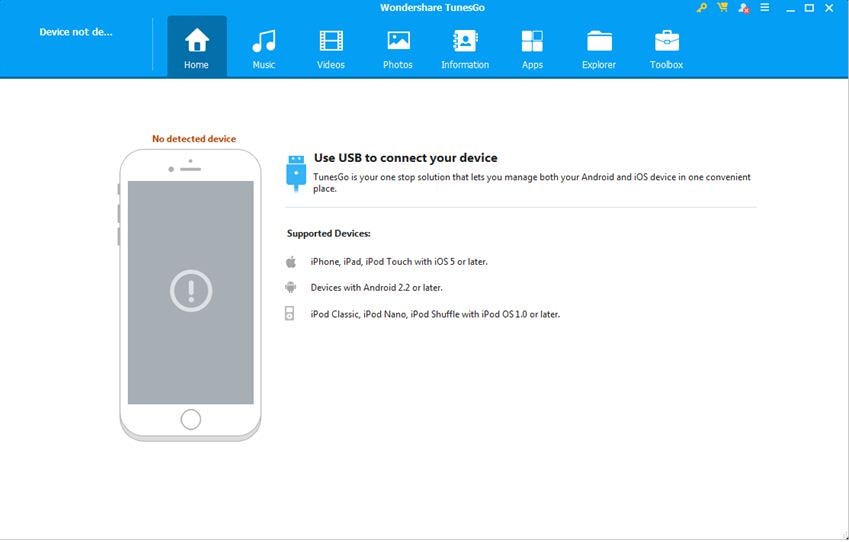
● Step 2: Upload Media Files
In the software’s opening interface, choose the GIF Maker tool. In the following window that pops-up, click on ‘Add’ to upload the desired media files saved in your device, you want to create a GIF with.
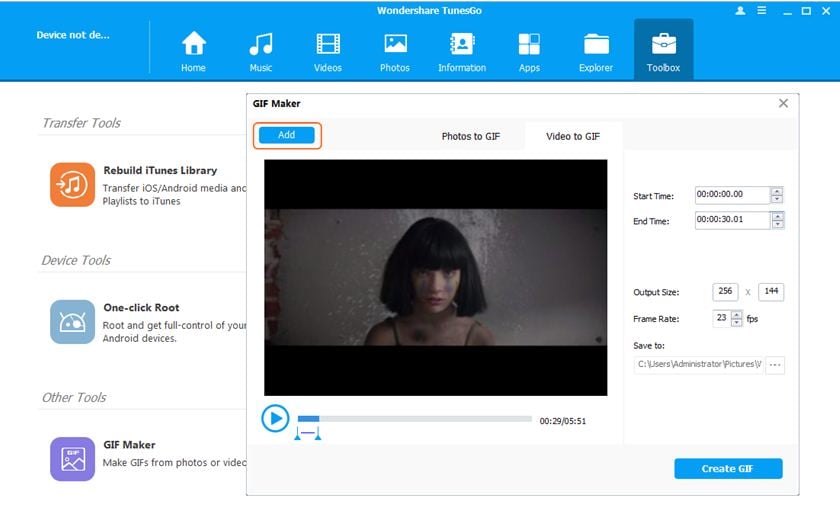
● Step 3: Convert to GIF
Set the media file to GIF conversion time and tap the ‘Create GIF’ button in the bottom-right to initiate the conversion process.

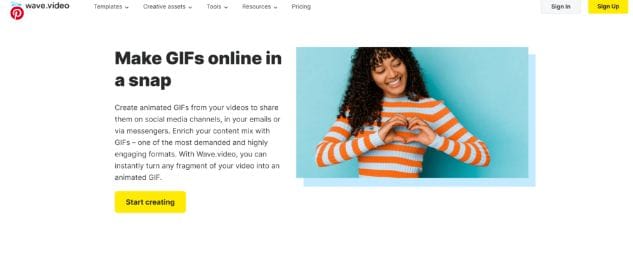
05Wave.video
This one is among the latest GIF maker tools that allow you to create animated GIFs from videos. What’s quite interesting about this Gif creation platform is, you can trim videos to the exact part depending on your content preference before beginning with the conversion process. You can also save your creation as a group of trimmed clips. It is a user friendly, free access online tool that does not ask you to install any third party software, and GIF creation with its mess-free interface is absolute fun.

Take the steps listed below to make GIFs with this online tool:
● Step 1: Choose a Project
To start working with this tool, you need to create an account on its official site. Having done that, just log into your account and upload a desired video you would like to use for creating a GIF. You have a choice to select a locally saved video, choose one from the templates available on the site or create something of your own.
● Step 2: Customization and Publishing
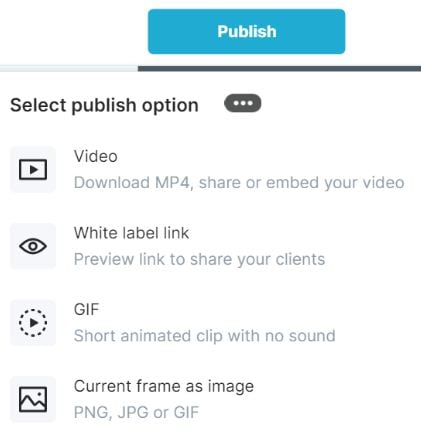
It is now time to try hands on editing your video with stunning effects like, overlays glasses, etc., or add impactful elements, such as, texts, stickers, etc., to make your artwork more impressive. When you are happy, navigate to the top-right and tap ‘Publish’. From the menu that drops down, select ‘GIF’.
● Step 3: Download Your Creation
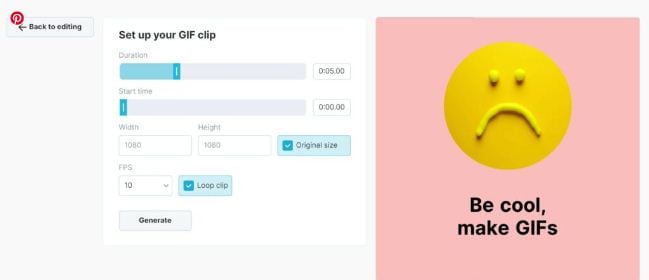
Select the section of your video you wish to convert into a GIF and proceed to fix the GIF start time and play duration. Check for any frame resize requirements, set an adequate frame rate and lastly, click on the ‘Loop Clip’ checkbox. This will produce an infinite loop GIF. When everything seems perfect, tap on ‘Generate’ followed by ‘Download’ to save your creation and share it on social media.
Part 3 5 Stunning Examples of Gifs in Web Design
The credibility of GIFs in market oriented content sharing and information publishing evidently does not require an introduction. These attractive snippets are expert means of business growth and customer appealing strategy planning to address attract a massive target audience within seconds.
Now that you are quite accustomed with the market reliability of GIFs, you may visibly feel motivated to use them to improvise your product websites for a next level market approach. However, before you plunge into using GIFs for your brand promotion, consider sparing a few minutes to browse through some top class product based GIFs to enhance your GIF creation and implementation aptitude.
Described below are some eye-catching examples of GIF for website background, you should certainly look forward to using in your business campaigns:
01Headscape
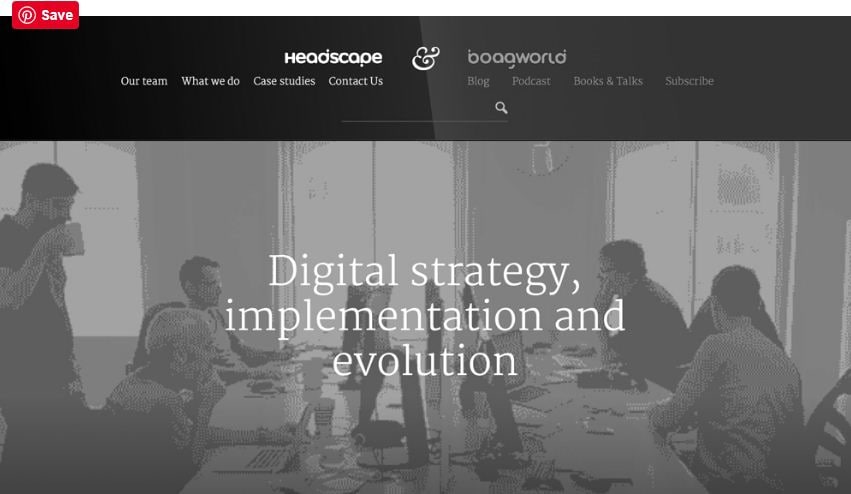
Having its roots in the United Kingdom, this is a top rated, digital media design corporation that excels in providing web design solutions to a diverse global clientele. Their unique idea of using GIFs in grayscale to depict conducive business settings is just perfect.
The monochromatic color balance with parallax scrolls makes this GIF all the more impactful. You can find impressive ways of using GIFs with a professional instinct on the company website and begin to add appeal to your market buildup strategies.
02Invision
This is another high ranked application marketing site that uses GIF for website background to improvise its product promotion. Equipped with a preset world class page makeover, the site’s look and appeal simply gets a boost with floating-text animated GIFs on an otherwise normal webpage.
As you move further on the Invision homepage, you will get to see a demonstration of the site’s prototype tool through GIFs that explain its working functionalities in the most interesting and convenient manner, thus putting forward and outrageously professional and effective marketing strategy.
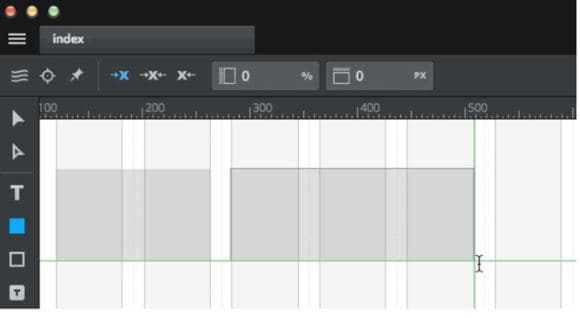
03Macaw
This one is an excellent design utility that is equally suited to both web designers as well as site developers. On visiting the tool’s homepage, you are welcomed with a streamlined text setting on a black and white theme. Move a bit downwards, and there you see a cluster of animated GIFs in action to get you familiar with the interface and usage pattern of the Macaw design utility with utmost ease. It is convenient enough to make you feel as if you are actually using the tool.

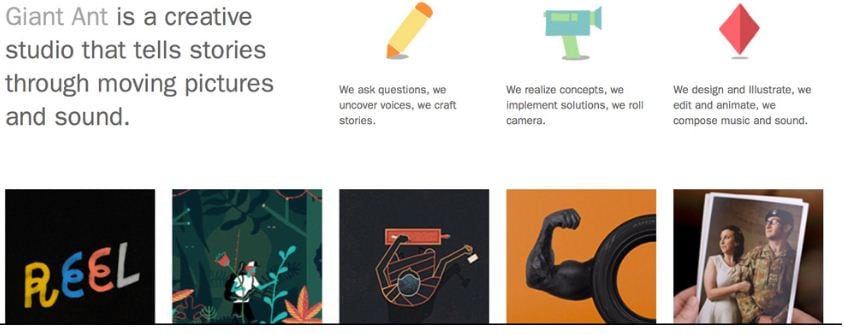
04Giant Ant
Established as a creative firm, this one is known for its appealing website design. As you navigate through the site, you will find a still image complemented by cohesive text overlays. Beneath that, there are caricature forms of everyday objects, but the real magic happens when you click on a particular object and woosh. It instantly turns into an animated GIF. This explicit style of infusing dynamism to your website is simply awesome, to say the least.
05Tinke
This is intuitively a fitness tracker that keeps a record of your system vitals in the most effective manner. But that’s not all. The tracker website is equally amazing, setting the perfect example of using GIFs to improve market buildup. The site majorly utilizes the parallax scroll effect with animated GIFs to facilitate a live demonstration of the tracker functionality, coupled with an iPhone user guide and ways of sharing relatable content with fellow users.
● Key Takeaways from This Episode →
● Surfing the internet, you will land across some of the best GIF creator and downloader sites that are flooded with brilliant GIF content suited for almost every purpose.
● You can create your own animated GIFs on any GIF maker website or enjoy pre-made stuff to your heart’s content, where using Filmora is certainly the best choice. To explore something more exciting, try hands on using GIFs for product marketing and brand promotions on your business sites.
Want a heap of the most exiting GIFs? Here are the best websites to visit.
In this article
01 [10 Sites for Finding the Perfect GIF](#Part 1)
02 [How to Use Animated GIF Makers](#Part 2)
03 [5 Stunning Examples of Gifs in Web Design](#Part 3)
Part 1 Sites for Finding the Perfect GIF
Information was never so expressive until GIFs came up as delivery platform. Looking through the frame of content diversity and effective delivery, there’s possibly nothing that is left untouched by these short, precise and creative snippets. When the talk is about long term user credibility, creativity is one thing, while reach is the other.
No doubt about the creative aspect, but the convenient availability holds equal importance. However captivating a utility nay be, you would certainly not be interested to spend quality time searching the apt content. Let’s take a look at some of the most popular and convenient GIF website that will surely put a full stop on your search spree for a relatable GIF.
01GIPHY
Initially launched as a GIF search engine, thin is a complete storehouse on almost everything that you can possibly think of. The extensive content library of this site is all set to meet your most specific content requirements in less than a blink’s time. You get an access to quality content in music, science, nature and what not on this free GIF website.
Talking of search flexibility, GIPHY is known to have the most advanced and updated search bar that ensures that top quality and fresh content is always at the hand of its users. You can browse through the vast GIF categories of the site or look for your exact content using a specific search keyword.
02Reddit
You can regard this site as a GIF membership community, where you can find a variety of impressive sub-reddits in the GIF category. The best part is, you will never find recursive content on any two or more sub-reddits as each one is developed and updated keeping different content specifications in mind.
You are given access to even finer content libraries in some particular sub-reddits that follow a sequential guideline to filter their entries according to user preferences. Some popular sub-reddits are listed below:
03Tumblr
Originally a blogging site, Tumblr is simply heaven for creating and sharing GIFs across media platforms. What’s interesting about the site is its content categorization, where bloggers on the site group relatable content under specific categories, which facilitates an easy, quick and hassle free search. Most of the GIF content on the site is either created in Photoshop or taken from across the web.
While the site has exciting GIF content for almost every scenario, the comedy genre is the st5arb attraction of this GIF platform. The huge comic content library of the site has hilarious memes and GIFs that will certainly leave you rolling over the floor. To enjoy your favorite content daily, you just need to search a relatable hashtag and follow some blogs on your searched content.
04Gfycat
This one lands among the most preferred GIF sites and is packed with an enormous inventory of memes and GIFs. Not just this, this one is a free GIF maker website that allows you to convert videos from almost every media platform into GIFs, independent of the video file format via its ‘Video to GIF Converter’ tool.
You can set a daily dose of your favorite, exciting GIF content by using either the search bar or the ‘Selection Menu’ in the left of the site’s Home page. You can even browse through latest GIF categories by navigating to the ‘Trending’ and ‘Explore’ sections.
05Tenor
You can prefer this site to enjoy your favorite GIFs on your PC or iOS device. The site gives you the liberty to share GIFs and memes directly from its library into any of your Instant Messaging chats or community conversations on social media platforms.
All you need to do is navigate to the Tenor search bar, put in a suitable keyword and there you can see loads of GIF content on your screen in less than a second’s time. With periodic updates and a cohesive interface, this site is your storehouse of latest and trendy GIFs, anytime and anywhere.
06Reaction GIFs
This site is known for having an exact content database for almost every thought that crosses your mind. It serves you with a refined search mechanism, having a different pathway for every search, depending on the content you are looking for. This is a perfect aid to get exactly what you want, without having to fuss out with unwanted stuff.
Talking of search methods, you will find a drop-down menu at the right to search GIFs that express ‘Emotions’ or one word answers (preferably a ‘Yes’ or a ‘No’). If you want something related to a more specific category, you can browse through the ‘Galleries’ and ‘Tags’ of the site (categories, like, OMG, LOL, etc).
07GIFbin
This is again a trunk of latest, funny and entertaining GIFs tom watch and share. On this site, you get to add search filters, like, ‘Most Viewed’, ‘Latest’, ‘Top Rated’, etc., that refine your search to fetch exactly what you are looking for. You are also free to use ‘Search Tags’ grouped according to name and search count on the site.
The tag names are standard keywords (like, animals, sports, nature, etc.) and the count feature keeps a track of the most frequent searches, thus allowing you to find out your favorite GIFs in a more explicit manner. If you are clueless about anything specific, don’t worry. Hit the ‘Random GIFs’ button to explore a whole new world of fun and excitement.
08Imgur
This site is popular in the meme world as a GIF sub-reddit that has explicitly no text threads. You can take this one as a free, GIF hosting and sharing website. While you can find loads of quality content on the site convenient to almost any genre, it is a leader in comic and funny GIFs. You can use different search tags for hilarious movie snippets, or some other fun element of your liking. This site’s image library is a hub of latest and nostalgic content.
09Imgflip
This is one more hotspot for relatable GIFs and memes. The best thing about the site is that it has separate search pathways to refine your search in cohesion with your content preference. Some common pathways are explained below:
● Browse the site’s homepage for the latest and trending GIF content.
● Simplify your search on specific content pages using the ‘Random’, ‘Next’ or ‘Previous’ navigation options.
● Prefer using ‘Image Hotkeys’ on the content pages.
● Try on ‘Tagging’ specific content pages (sunrise, snowfall, cats, etc.).
If you like competing with fellow visitors on the site, you can experiment with creating GIFs of your own and get ranked on the creator scoreboard. Bag a high vote count to get your GIF trending on the site.
10Gyazo
Last on the list, this is a somewhat different site in terms of features and search constraints. The exclusively unique ’Screen Capture’ feature of this site allows you to take a video of your device screen and use it to create a GIF of your own, making itself a quick and effective ‘Video to GIF Converter’ tool.
You will require creating an account on the site to maintain a library of your searched contents, which you can either tag on the site or downloaded to your device. You can further, export and share your creations across media platforms through this site.
Part 2 How to Use Animated GIF Makers
Landing into the creative and exciting world of GIFs, you can easily get motivated to try hands on making your own GIFs. The online market is a pool of solutions that claim of adhering to this concern in the most effective ways. When looking for the best GIF maker tools and software, you can definitely count upon the following choices:
01**Wondershare Filmora Video Editor **
This one is undoubtedly the best GIF creator software in current times. Using the plethora of audio-visual features, effects and image filters that are offered by this tool, creating animated GIFs is a spic and span process. The software grants you the liberty to play with and explore your editing skills to generate professional quality GIFs within minutes.
Wondershare Filmora - Best Video Editor for Mac/Windows
5,481,435 people have downloaded it.
Build unique custom animations without breaking a sweat.
Focus on creating epic stories and leave the details to Filmora’s auto features.
Start a creative adventure with drag & drop effects and endless possibilities.
Filmora simplifies advanced features to save you time and effort.
Filmora cuts out repetition so you can move on to your next creative breakthrough.
Here’s how you can use this software to become a pro at creating GIFs:
● Step 1: Import Required Media Files
To begin with, select any desired set of images or a particular video file to the Filmora timeline. You don’t need to be format specific; the software is compatible with over 150 different file formats.
● Step 2: Drag Files to Edit
Once you are done with selecting the files, you need to drag the same to the Filmora Editor Timeline, where you can transform the file contents with your editing skills.
● Step 3: Let’s Get Editing.
In the editor window, you are free tom choose from a range of effects, tools and filters suitable to your GIF content to give your artwork a new and engaging look. You can experiment with the cutting, cropping and trimming tools or play with effects, like, overlays, rotation and speed adjustments and even add texts to deliver messages that intensify your GIF.
● Step 4: Time to Save and Share.
Now is the time to save your work locally to your device using the .gif extension with your created file, as well as share it among your peers on social communities.
03Deal With It
This one is an online GIF maker tool that allows you to make top quality animated GIFs within a few seconds and you don’t even need to take up any third party software installation. Creating GIFs with this user friendly, clean interface and quick GIF generator utility is an absolute fun, to say the least.
Once you are done creating, the tools gives you the liberty to experiment with effects like, texts and glasses that would further intensify your GIF to the next level, and the best part is, all of this is available to you without having to spend a penny out of your pocket.
Explained below is the step wise user guide to use this tool for creating GIFs:
● Step 1:
Navigate to official website of the GIF creator tool.
● Step 2:
Choose a desired locally saved image from your device and upload it in the tool’s editor window. To do this, click on the ‘Load Image’ button.
● Step 3:
You can now modify the uploaded image with text and glasses. This is it. Your GIF is ready to save and export.
03LunaPic
This one lands among the most preferred GIF maker tools available across the web. It comes with a clean interface, is free to use and does not require any third party software installation. You can create catchy and interesting GIF banners, or make captivating, animated GIF files with a series of still images using this tool. However, this GIF maker does not give you the liberty to take up editing and speed or accuracy modifications on your creation.
You need to follow the steps explained below to create your own GIF with LunaPic:
● Step 1:
Open the official site of LunaPic in your web browser.
● Step 2:
Upload a desired one or a set of images you wish to use for making your GIF on the site. To do this, select a group of images from your device and tap ‘Upload’
.
● Step 3:
Once uploaded, you can use your creativity to play with the effects library of the site and edit your images in its editing interface.
● Step 4:
When satisfied, choose the file type as GIF and hit the ‘Save’ option at the bottom. This will save your creation locally in your device, once the file conversion gets completed.
Image Name: Finding-best-gif-websites-is-easy-as-pie—here’s-what-you-should-know-22
04Wondershare TunesGo
This one is another efficient animated GIF creator utility on the internet. Available to you as free online software, this tool promises you an amazing and hassle free GIF making experience. You can either create stunning GIFs of your own, or convert video files and even live photos into the same using this software. It allows you to set time slots for file conversions and make speed and flow adjustments for GIF frames, along with offering a plethora of editing effects to play with.
Here’s the know-how of using this software to create top quality animated GIFs:
● Step 1: Download and Launch the Software
Pay a visit to the official TunesGo website to download the software. Begin with installing and launching the same on your preferred device. When you finish, click on the ‘Toolbox’ tab at the top in the welcome screen.
● Step 2: Upload Media Files
In the software’s opening interface, choose the GIF Maker tool. In the following window that pops-up, click on ‘Add’ to upload the desired media files saved in your device, you want to create a GIF with.
● Step 3: Convert to GIF
Set the media file to GIF conversion time and tap the ‘Create GIF’ button in the bottom-right to initiate the conversion process.
05Wave.video
This one is among the latest GIF maker tools that allow you to create animated GIFs from videos. What’s quite interesting about this Gif creation platform is, you can trim videos to the exact part depending on your content preference before beginning with the conversion process. You can also save your creation as a group of trimmed clips. It is a user friendly, free access online tool that does not ask you to install any third party software, and GIF creation with its mess-free interface is absolute fun.
Take the steps listed below to make GIFs with this online tool:
● Step 1: Choose a Project
To start working with this tool, you need to create an account on its official site. Having done that, just log into your account and upload a desired video you would like to use for creating a GIF. You have a choice to select a locally saved video, choose one from the templates available on the site or create something of your own.
● Step 2: Customization and Publishing
It is now time to try hands on editing your video with stunning effects like, overlays glasses, etc., or add impactful elements, such as, texts, stickers, etc., to make your artwork more impressive. When you are happy, navigate to the top-right and tap ‘Publish’. From the menu that drops down, select ‘GIF’.
● Step 3: Download Your Creation
Select the section of your video you wish to convert into a GIF and proceed to fix the GIF start time and play duration. Check for any frame resize requirements, set an adequate frame rate and lastly, click on the ‘Loop Clip’ checkbox. This will produce an infinite loop GIF. When everything seems perfect, tap on ‘Generate’ followed by ‘Download’ to save your creation and share it on social media.
Part 3 5 Stunning Examples of Gifs in Web Design
The credibility of GIFs in market oriented content sharing and information publishing evidently does not require an introduction. These attractive snippets are expert means of business growth and customer appealing strategy planning to address attract a massive target audience within seconds.
Now that you are quite accustomed with the market reliability of GIFs, you may visibly feel motivated to use them to improvise your product websites for a next level market approach. However, before you plunge into using GIFs for your brand promotion, consider sparing a few minutes to browse through some top class product based GIFs to enhance your GIF creation and implementation aptitude.
Described below are some eye-catching examples of GIF for website background, you should certainly look forward to using in your business campaigns:
01Headscape
Having its roots in the United Kingdom, this is a top rated, digital media design corporation that excels in providing web design solutions to a diverse global clientele. Their unique idea of using GIFs in grayscale to depict conducive business settings is just perfect.
The monochromatic color balance with parallax scrolls makes this GIF all the more impactful. You can find impressive ways of using GIFs with a professional instinct on the company website and begin to add appeal to your market buildup strategies.
02Invision
This is another high ranked application marketing site that uses GIF for website background to improvise its product promotion. Equipped with a preset world class page makeover, the site’s look and appeal simply gets a boost with floating-text animated GIFs on an otherwise normal webpage.
As you move further on the Invision homepage, you will get to see a demonstration of the site’s prototype tool through GIFs that explain its working functionalities in the most interesting and convenient manner, thus putting forward and outrageously professional and effective marketing strategy.
03Macaw
This one is an excellent design utility that is equally suited to both web designers as well as site developers. On visiting the tool’s homepage, you are welcomed with a streamlined text setting on a black and white theme. Move a bit downwards, and there you see a cluster of animated GIFs in action to get you familiar with the interface and usage pattern of the Macaw design utility with utmost ease. It is convenient enough to make you feel as if you are actually using the tool.
04Giant Ant
Established as a creative firm, this one is known for its appealing website design. As you navigate through the site, you will find a still image complemented by cohesive text overlays. Beneath that, there are caricature forms of everyday objects, but the real magic happens when you click on a particular object and woosh. It instantly turns into an animated GIF. This explicit style of infusing dynamism to your website is simply awesome, to say the least.
05Tinke
This is intuitively a fitness tracker that keeps a record of your system vitals in the most effective manner. But that’s not all. The tracker website is equally amazing, setting the perfect example of using GIFs to improve market buildup. The site majorly utilizes the parallax scroll effect with animated GIFs to facilitate a live demonstration of the tracker functionality, coupled with an iPhone user guide and ways of sharing relatable content with fellow users.
● Key Takeaways from This Episode →
● Surfing the internet, you will land across some of the best GIF creator and downloader sites that are flooded with brilliant GIF content suited for almost every purpose.
● You can create your own animated GIFs on any GIF maker website or enjoy pre-made stuff to your heart’s content, where using Filmora is certainly the best choice. To explore something more exciting, try hands on using GIFs for product marketing and brand promotions on your business sites.
Want a heap of the most exiting GIFs? Here are the best websites to visit.
In this article
01 [10 Sites for Finding the Perfect GIF](#Part 1)
02 [How to Use Animated GIF Makers](#Part 2)
03 [5 Stunning Examples of Gifs in Web Design](#Part 3)
Part 1 Sites for Finding the Perfect GIF
Information was never so expressive until GIFs came up as delivery platform. Looking through the frame of content diversity and effective delivery, there’s possibly nothing that is left untouched by these short, precise and creative snippets. When the talk is about long term user credibility, creativity is one thing, while reach is the other.
No doubt about the creative aspect, but the convenient availability holds equal importance. However captivating a utility nay be, you would certainly not be interested to spend quality time searching the apt content. Let’s take a look at some of the most popular and convenient GIF website that will surely put a full stop on your search spree for a relatable GIF.
01GIPHY
Initially launched as a GIF search engine, thin is a complete storehouse on almost everything that you can possibly think of. The extensive content library of this site is all set to meet your most specific content requirements in less than a blink’s time. You get an access to quality content in music, science, nature and what not on this free GIF website.
Talking of search flexibility, GIPHY is known to have the most advanced and updated search bar that ensures that top quality and fresh content is always at the hand of its users. You can browse through the vast GIF categories of the site or look for your exact content using a specific search keyword.
02Reddit
You can regard this site as a GIF membership community, where you can find a variety of impressive sub-reddits in the GIF category. The best part is, you will never find recursive content on any two or more sub-reddits as each one is developed and updated keeping different content specifications in mind.
You are given access to even finer content libraries in some particular sub-reddits that follow a sequential guideline to filter their entries according to user preferences. Some popular sub-reddits are listed below:
03Tumblr
Originally a blogging site, Tumblr is simply heaven for creating and sharing GIFs across media platforms. What’s interesting about the site is its content categorization, where bloggers on the site group relatable content under specific categories, which facilitates an easy, quick and hassle free search. Most of the GIF content on the site is either created in Photoshop or taken from across the web.
While the site has exciting GIF content for almost every scenario, the comedy genre is the st5arb attraction of this GIF platform. The huge comic content library of the site has hilarious memes and GIFs that will certainly leave you rolling over the floor. To enjoy your favorite content daily, you just need to search a relatable hashtag and follow some blogs on your searched content.
04Gfycat
This one lands among the most preferred GIF sites and is packed with an enormous inventory of memes and GIFs. Not just this, this one is a free GIF maker website that allows you to convert videos from almost every media platform into GIFs, independent of the video file format via its ‘Video to GIF Converter’ tool.
You can set a daily dose of your favorite, exciting GIF content by using either the search bar or the ‘Selection Menu’ in the left of the site’s Home page. You can even browse through latest GIF categories by navigating to the ‘Trending’ and ‘Explore’ sections.
05Tenor
You can prefer this site to enjoy your favorite GIFs on your PC or iOS device. The site gives you the liberty to share GIFs and memes directly from its library into any of your Instant Messaging chats or community conversations on social media platforms.
All you need to do is navigate to the Tenor search bar, put in a suitable keyword and there you can see loads of GIF content on your screen in less than a second’s time. With periodic updates and a cohesive interface, this site is your storehouse of latest and trendy GIFs, anytime and anywhere.
06Reaction GIFs
This site is known for having an exact content database for almost every thought that crosses your mind. It serves you with a refined search mechanism, having a different pathway for every search, depending on the content you are looking for. This is a perfect aid to get exactly what you want, without having to fuss out with unwanted stuff.
Talking of search methods, you will find a drop-down menu at the right to search GIFs that express ‘Emotions’ or one word answers (preferably a ‘Yes’ or a ‘No’). If you want something related to a more specific category, you can browse through the ‘Galleries’ and ‘Tags’ of the site (categories, like, OMG, LOL, etc).
07GIFbin
This is again a trunk of latest, funny and entertaining GIFs tom watch and share. On this site, you get to add search filters, like, ‘Most Viewed’, ‘Latest’, ‘Top Rated’, etc., that refine your search to fetch exactly what you are looking for. You are also free to use ‘Search Tags’ grouped according to name and search count on the site.
The tag names are standard keywords (like, animals, sports, nature, etc.) and the count feature keeps a track of the most frequent searches, thus allowing you to find out your favorite GIFs in a more explicit manner. If you are clueless about anything specific, don’t worry. Hit the ‘Random GIFs’ button to explore a whole new world of fun and excitement.
08Imgur
This site is popular in the meme world as a GIF sub-reddit that has explicitly no text threads. You can take this one as a free, GIF hosting and sharing website. While you can find loads of quality content on the site convenient to almost any genre, it is a leader in comic and funny GIFs. You can use different search tags for hilarious movie snippets, or some other fun element of your liking. This site’s image library is a hub of latest and nostalgic content.
09Imgflip
This is one more hotspot for relatable GIFs and memes. The best thing about the site is that it has separate search pathways to refine your search in cohesion with your content preference. Some common pathways are explained below:
● Browse the site’s homepage for the latest and trending GIF content.
● Simplify your search on specific content pages using the ‘Random’, ‘Next’ or ‘Previous’ navigation options.
● Prefer using ‘Image Hotkeys’ on the content pages.
● Try on ‘Tagging’ specific content pages (sunrise, snowfall, cats, etc.).
If you like competing with fellow visitors on the site, you can experiment with creating GIFs of your own and get ranked on the creator scoreboard. Bag a high vote count to get your GIF trending on the site.
10Gyazo
Last on the list, this is a somewhat different site in terms of features and search constraints. The exclusively unique ’Screen Capture’ feature of this site allows you to take a video of your device screen and use it to create a GIF of your own, making itself a quick and effective ‘Video to GIF Converter’ tool.
You will require creating an account on the site to maintain a library of your searched contents, which you can either tag on the site or downloaded to your device. You can further, export and share your creations across media platforms through this site.
Part 2 How to Use Animated GIF Makers
Landing into the creative and exciting world of GIFs, you can easily get motivated to try hands on making your own GIFs. The online market is a pool of solutions that claim of adhering to this concern in the most effective ways. When looking for the best GIF maker tools and software, you can definitely count upon the following choices:
01**Wondershare Filmora Video Editor **
This one is undoubtedly the best GIF creator software in current times. Using the plethora of audio-visual features, effects and image filters that are offered by this tool, creating animated GIFs is a spic and span process. The software grants you the liberty to play with and explore your editing skills to generate professional quality GIFs within minutes.
Wondershare Filmora - Best Video Editor for Mac/Windows
5,481,435 people have downloaded it.
Build unique custom animations without breaking a sweat.
Focus on creating epic stories and leave the details to Filmora’s auto features.
Start a creative adventure with drag & drop effects and endless possibilities.
Filmora simplifies advanced features to save you time and effort.
Filmora cuts out repetition so you can move on to your next creative breakthrough.
Here’s how you can use this software to become a pro at creating GIFs:
● Step 1: Import Required Media Files
To begin with, select any desired set of images or a particular video file to the Filmora timeline. You don’t need to be format specific; the software is compatible with over 150 different file formats.
● Step 2: Drag Files to Edit
Once you are done with selecting the files, you need to drag the same to the Filmora Editor Timeline, where you can transform the file contents with your editing skills.
● Step 3: Let’s Get Editing.
In the editor window, you are free tom choose from a range of effects, tools and filters suitable to your GIF content to give your artwork a new and engaging look. You can experiment with the cutting, cropping and trimming tools or play with effects, like, overlays, rotation and speed adjustments and even add texts to deliver messages that intensify your GIF.
● Step 4: Time to Save and Share.
Now is the time to save your work locally to your device using the .gif extension with your created file, as well as share it among your peers on social communities.
03Deal With It
This one is an online GIF maker tool that allows you to make top quality animated GIFs within a few seconds and you don’t even need to take up any third party software installation. Creating GIFs with this user friendly, clean interface and quick GIF generator utility is an absolute fun, to say the least.
Once you are done creating, the tools gives you the liberty to experiment with effects like, texts and glasses that would further intensify your GIF to the next level, and the best part is, all of this is available to you without having to spend a penny out of your pocket.
Explained below is the step wise user guide to use this tool for creating GIFs:
● Step 1:
Navigate to official website of the GIF creator tool.
● Step 2:
Choose a desired locally saved image from your device and upload it in the tool’s editor window. To do this, click on the ‘Load Image’ button.
● Step 3:
You can now modify the uploaded image with text and glasses. This is it. Your GIF is ready to save and export.
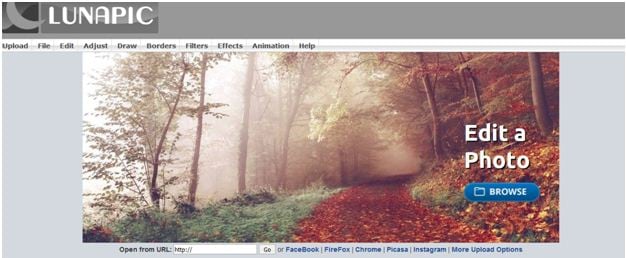
03LunaPic
This one lands among the most preferred GIF maker tools available across the web. It comes with a clean interface, is free to use and does not require any third party software installation. You can create catchy and interesting GIF banners, or make captivating, animated GIF files with a series of still images using this tool. However, this GIF maker does not give you the liberty to take up editing and speed or accuracy modifications on your creation.
You need to follow the steps explained below to create your own GIF with LunaPic:
● Step 1:
Open the official site of LunaPic in your web browser.
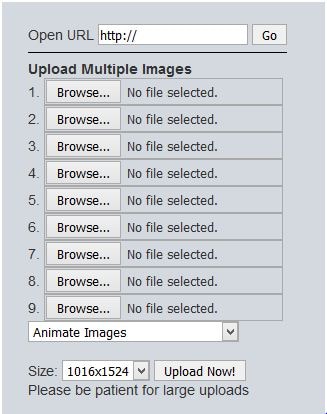
● Step 2:
Upload a desired one or a set of images you wish to use for making your GIF on the site. To do this, select a group of images from your device and tap ‘Upload’
.
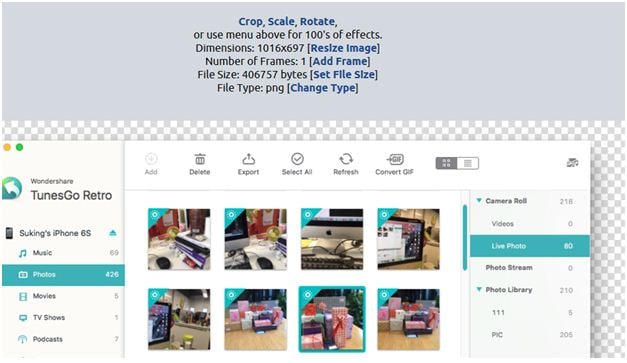
● Step 3:
Once uploaded, you can use your creativity to play with the effects library of the site and edit your images in its editing interface.
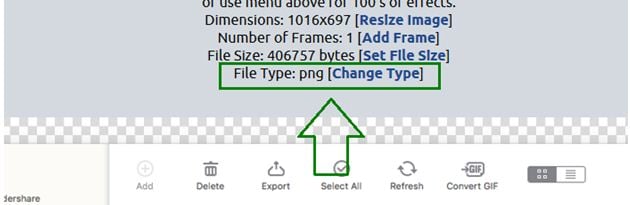
● Step 4:
When satisfied, choose the file type as GIF and hit the ‘Save’ option at the bottom. This will save your creation locally in your device, once the file conversion gets completed.
Image Name: Finding-best-gif-websites-is-easy-as-pie—here’s-what-you-should-know-22
04Wondershare TunesGo
This one is another efficient animated GIF creator utility on the internet. Available to you as free online software, this tool promises you an amazing and hassle free GIF making experience. You can either create stunning GIFs of your own, or convert video files and even live photos into the same using this software. It allows you to set time slots for file conversions and make speed and flow adjustments for GIF frames, along with offering a plethora of editing effects to play with.
Here’s the know-how of using this software to create top quality animated GIFs:
● Step 1: Download and Launch the Software
Pay a visit to the official TunesGo website to download the software. Begin with installing and launching the same on your preferred device. When you finish, click on the ‘Toolbox’ tab at the top in the welcome screen.
● Step 2: Upload Media Files
In the software’s opening interface, choose the GIF Maker tool. In the following window that pops-up, click on ‘Add’ to upload the desired media files saved in your device, you want to create a GIF with.
● Step 3: Convert to GIF
Set the media file to GIF conversion time and tap the ‘Create GIF’ button in the bottom-right to initiate the conversion process.
05Wave.video
This one is among the latest GIF maker tools that allow you to create animated GIFs from videos. What’s quite interesting about this Gif creation platform is, you can trim videos to the exact part depending on your content preference before beginning with the conversion process. You can also save your creation as a group of trimmed clips. It is a user friendly, free access online tool that does not ask you to install any third party software, and GIF creation with its mess-free interface is absolute fun.
Take the steps listed below to make GIFs with this online tool:
● Step 1: Choose a Project
To start working with this tool, you need to create an account on its official site. Having done that, just log into your account and upload a desired video you would like to use for creating a GIF. You have a choice to select a locally saved video, choose one from the templates available on the site or create something of your own.
● Step 2: Customization and Publishing
It is now time to try hands on editing your video with stunning effects like, overlays glasses, etc., or add impactful elements, such as, texts, stickers, etc., to make your artwork more impressive. When you are happy, navigate to the top-right and tap ‘Publish’. From the menu that drops down, select ‘GIF’.
● Step 3: Download Your Creation
Select the section of your video you wish to convert into a GIF and proceed to fix the GIF start time and play duration. Check for any frame resize requirements, set an adequate frame rate and lastly, click on the ‘Loop Clip’ checkbox. This will produce an infinite loop GIF. When everything seems perfect, tap on ‘Generate’ followed by ‘Download’ to save your creation and share it on social media.
Part 3 5 Stunning Examples of Gifs in Web Design
The credibility of GIFs in market oriented content sharing and information publishing evidently does not require an introduction. These attractive snippets are expert means of business growth and customer appealing strategy planning to address attract a massive target audience within seconds.
Now that you are quite accustomed with the market reliability of GIFs, you may visibly feel motivated to use them to improvise your product websites for a next level market approach. However, before you plunge into using GIFs for your brand promotion, consider sparing a few minutes to browse through some top class product based GIFs to enhance your GIF creation and implementation aptitude.
Described below are some eye-catching examples of GIF for website background, you should certainly look forward to using in your business campaigns:
01Headscape
Having its roots in the United Kingdom, this is a top rated, digital media design corporation that excels in providing web design solutions to a diverse global clientele. Their unique idea of using GIFs in grayscale to depict conducive business settings is just perfect.
The monochromatic color balance with parallax scrolls makes this GIF all the more impactful. You can find impressive ways of using GIFs with a professional instinct on the company website and begin to add appeal to your market buildup strategies.
02Invision
This is another high ranked application marketing site that uses GIF for website background to improvise its product promotion. Equipped with a preset world class page makeover, the site’s look and appeal simply gets a boost with floating-text animated GIFs on an otherwise normal webpage.
As you move further on the Invision homepage, you will get to see a demonstration of the site’s prototype tool through GIFs that explain its working functionalities in the most interesting and convenient manner, thus putting forward and outrageously professional and effective marketing strategy.
03Macaw
This one is an excellent design utility that is equally suited to both web designers as well as site developers. On visiting the tool’s homepage, you are welcomed with a streamlined text setting on a black and white theme. Move a bit downwards, and there you see a cluster of animated GIFs in action to get you familiar with the interface and usage pattern of the Macaw design utility with utmost ease. It is convenient enough to make you feel as if you are actually using the tool.
04Giant Ant
Established as a creative firm, this one is known for its appealing website design. As you navigate through the site, you will find a still image complemented by cohesive text overlays. Beneath that, there are caricature forms of everyday objects, but the real magic happens when you click on a particular object and woosh. It instantly turns into an animated GIF. This explicit style of infusing dynamism to your website is simply awesome, to say the least.
05Tinke
This is intuitively a fitness tracker that keeps a record of your system vitals in the most effective manner. But that’s not all. The tracker website is equally amazing, setting the perfect example of using GIFs to improve market buildup. The site majorly utilizes the parallax scroll effect with animated GIFs to facilitate a live demonstration of the tracker functionality, coupled with an iPhone user guide and ways of sharing relatable content with fellow users.
● Key Takeaways from This Episode →
● Surfing the internet, you will land across some of the best GIF creator and downloader sites that are flooded with brilliant GIF content suited for almost every purpose.
● You can create your own animated GIFs on any GIF maker website or enjoy pre-made stuff to your heart’s content, where using Filmora is certainly the best choice. To explore something more exciting, try hands on using GIFs for product marketing and brand promotions on your business sites.
Want a heap of the most exiting GIFs? Here are the best websites to visit.
In this article
01 [10 Sites for Finding the Perfect GIF](#Part 1)
02 [How to Use Animated GIF Makers](#Part 2)
03 [5 Stunning Examples of Gifs in Web Design](#Part 3)
Part 1 Sites for Finding the Perfect GIF
Information was never so expressive until GIFs came up as delivery platform. Looking through the frame of content diversity and effective delivery, there’s possibly nothing that is left untouched by these short, precise and creative snippets. When the talk is about long term user credibility, creativity is one thing, while reach is the other.
No doubt about the creative aspect, but the convenient availability holds equal importance. However captivating a utility nay be, you would certainly not be interested to spend quality time searching the apt content. Let’s take a look at some of the most popular and convenient GIF website that will surely put a full stop on your search spree for a relatable GIF.
01GIPHY
Initially launched as a GIF search engine, thin is a complete storehouse on almost everything that you can possibly think of. The extensive content library of this site is all set to meet your most specific content requirements in less than a blink’s time. You get an access to quality content in music, science, nature and what not on this free GIF website.
Talking of search flexibility, GIPHY is known to have the most advanced and updated search bar that ensures that top quality and fresh content is always at the hand of its users. You can browse through the vast GIF categories of the site or look for your exact content using a specific search keyword.
02Reddit
You can regard this site as a GIF membership community, where you can find a variety of impressive sub-reddits in the GIF category. The best part is, you will never find recursive content on any two or more sub-reddits as each one is developed and updated keeping different content specifications in mind.
You are given access to even finer content libraries in some particular sub-reddits that follow a sequential guideline to filter their entries according to user preferences. Some popular sub-reddits are listed below:
03Tumblr
Originally a blogging site, Tumblr is simply heaven for creating and sharing GIFs across media platforms. What’s interesting about the site is its content categorization, where bloggers on the site group relatable content under specific categories, which facilitates an easy, quick and hassle free search. Most of the GIF content on the site is either created in Photoshop or taken from across the web.
While the site has exciting GIF content for almost every scenario, the comedy genre is the st5arb attraction of this GIF platform. The huge comic content library of the site has hilarious memes and GIFs that will certainly leave you rolling over the floor. To enjoy your favorite content daily, you just need to search a relatable hashtag and follow some blogs on your searched content.
04Gfycat
This one lands among the most preferred GIF sites and is packed with an enormous inventory of memes and GIFs. Not just this, this one is a free GIF maker website that allows you to convert videos from almost every media platform into GIFs, independent of the video file format via its ‘Video to GIF Converter’ tool.
You can set a daily dose of your favorite, exciting GIF content by using either the search bar or the ‘Selection Menu’ in the left of the site’s Home page. You can even browse through latest GIF categories by navigating to the ‘Trending’ and ‘Explore’ sections.
05Tenor
You can prefer this site to enjoy your favorite GIFs on your PC or iOS device. The site gives you the liberty to share GIFs and memes directly from its library into any of your Instant Messaging chats or community conversations on social media platforms.
All you need to do is navigate to the Tenor search bar, put in a suitable keyword and there you can see loads of GIF content on your screen in less than a second’s time. With periodic updates and a cohesive interface, this site is your storehouse of latest and trendy GIFs, anytime and anywhere.
06Reaction GIFs
This site is known for having an exact content database for almost every thought that crosses your mind. It serves you with a refined search mechanism, having a different pathway for every search, depending on the content you are looking for. This is a perfect aid to get exactly what you want, without having to fuss out with unwanted stuff.
Talking of search methods, you will find a drop-down menu at the right to search GIFs that express ‘Emotions’ or one word answers (preferably a ‘Yes’ or a ‘No’). If you want something related to a more specific category, you can browse through the ‘Galleries’ and ‘Tags’ of the site (categories, like, OMG, LOL, etc).
07GIFbin
This is again a trunk of latest, funny and entertaining GIFs tom watch and share. On this site, you get to add search filters, like, ‘Most Viewed’, ‘Latest’, ‘Top Rated’, etc., that refine your search to fetch exactly what you are looking for. You are also free to use ‘Search Tags’ grouped according to name and search count on the site.
The tag names are standard keywords (like, animals, sports, nature, etc.) and the count feature keeps a track of the most frequent searches, thus allowing you to find out your favorite GIFs in a more explicit manner. If you are clueless about anything specific, don’t worry. Hit the ‘Random GIFs’ button to explore a whole new world of fun and excitement.
08Imgur
This site is popular in the meme world as a GIF sub-reddit that has explicitly no text threads. You can take this one as a free, GIF hosting and sharing website. While you can find loads of quality content on the site convenient to almost any genre, it is a leader in comic and funny GIFs. You can use different search tags for hilarious movie snippets, or some other fun element of your liking. This site’s image library is a hub of latest and nostalgic content.
09Imgflip
This is one more hotspot for relatable GIFs and memes. The best thing about the site is that it has separate search pathways to refine your search in cohesion with your content preference. Some common pathways are explained below:
● Browse the site’s homepage for the latest and trending GIF content.
● Simplify your search on specific content pages using the ‘Random’, ‘Next’ or ‘Previous’ navigation options.
● Prefer using ‘Image Hotkeys’ on the content pages.
● Try on ‘Tagging’ specific content pages (sunrise, snowfall, cats, etc.).
If you like competing with fellow visitors on the site, you can experiment with creating GIFs of your own and get ranked on the creator scoreboard. Bag a high vote count to get your GIF trending on the site.
10Gyazo
Last on the list, this is a somewhat different site in terms of features and search constraints. The exclusively unique ’Screen Capture’ feature of this site allows you to take a video of your device screen and use it to create a GIF of your own, making itself a quick and effective ‘Video to GIF Converter’ tool.
You will require creating an account on the site to maintain a library of your searched contents, which you can either tag on the site or downloaded to your device. You can further, export and share your creations across media platforms through this site.
Part 2 How to Use Animated GIF Makers
Landing into the creative and exciting world of GIFs, you can easily get motivated to try hands on making your own GIFs. The online market is a pool of solutions that claim of adhering to this concern in the most effective ways. When looking for the best GIF maker tools and software, you can definitely count upon the following choices:
01**Wondershare Filmora Video Editor **
This one is undoubtedly the best GIF creator software in current times. Using the plethora of audio-visual features, effects and image filters that are offered by this tool, creating animated GIFs is a spic and span process. The software grants you the liberty to play with and explore your editing skills to generate professional quality GIFs within minutes.
Wondershare Filmora - Best Video Editor for Mac/Windows
5,481,435 people have downloaded it.
Build unique custom animations without breaking a sweat.
Focus on creating epic stories and leave the details to Filmora’s auto features.
Start a creative adventure with drag & drop effects and endless possibilities.
Filmora simplifies advanced features to save you time and effort.
Filmora cuts out repetition so you can move on to your next creative breakthrough.
Here’s how you can use this software to become a pro at creating GIFs:
● Step 1: Import Required Media Files
To begin with, select any desired set of images or a particular video file to the Filmora timeline. You don’t need to be format specific; the software is compatible with over 150 different file formats.
● Step 2: Drag Files to Edit
Once you are done with selecting the files, you need to drag the same to the Filmora Editor Timeline, where you can transform the file contents with your editing skills.
● Step 3: Let’s Get Editing.
In the editor window, you are free tom choose from a range of effects, tools and filters suitable to your GIF content to give your artwork a new and engaging look. You can experiment with the cutting, cropping and trimming tools or play with effects, like, overlays, rotation and speed adjustments and even add texts to deliver messages that intensify your GIF.
● Step 4: Time to Save and Share.
Now is the time to save your work locally to your device using the .gif extension with your created file, as well as share it among your peers on social communities.
03Deal With It
This one is an online GIF maker tool that allows you to make top quality animated GIFs within a few seconds and you don’t even need to take up any third party software installation. Creating GIFs with this user friendly, clean interface and quick GIF generator utility is an absolute fun, to say the least.
Once you are done creating, the tools gives you the liberty to experiment with effects like, texts and glasses that would further intensify your GIF to the next level, and the best part is, all of this is available to you without having to spend a penny out of your pocket.
Explained below is the step wise user guide to use this tool for creating GIFs:
● Step 1:
Navigate to official website of the GIF creator tool.
● Step 2:
Choose a desired locally saved image from your device and upload it in the tool’s editor window. To do this, click on the ‘Load Image’ button.
● Step 3:
You can now modify the uploaded image with text and glasses. This is it. Your GIF is ready to save and export.
03LunaPic
This one lands among the most preferred GIF maker tools available across the web. It comes with a clean interface, is free to use and does not require any third party software installation. You can create catchy and interesting GIF banners, or make captivating, animated GIF files with a series of still images using this tool. However, this GIF maker does not give you the liberty to take up editing and speed or accuracy modifications on your creation.
You need to follow the steps explained below to create your own GIF with LunaPic:
● Step 1:
Open the official site of LunaPic in your web browser.
● Step 2:
Upload a desired one or a set of images you wish to use for making your GIF on the site. To do this, select a group of images from your device and tap ‘Upload’
.
● Step 3:
Once uploaded, you can use your creativity to play with the effects library of the site and edit your images in its editing interface.
● Step 4:
When satisfied, choose the file type as GIF and hit the ‘Save’ option at the bottom. This will save your creation locally in your device, once the file conversion gets completed.
Image Name: Finding-best-gif-websites-is-easy-as-pie—here’s-what-you-should-know-22
04Wondershare TunesGo
This one is another efficient animated GIF creator utility on the internet. Available to you as free online software, this tool promises you an amazing and hassle free GIF making experience. You can either create stunning GIFs of your own, or convert video files and even live photos into the same using this software. It allows you to set time slots for file conversions and make speed and flow adjustments for GIF frames, along with offering a plethora of editing effects to play with.
Here’s the know-how of using this software to create top quality animated GIFs:
● Step 1: Download and Launch the Software
Pay a visit to the official TunesGo website to download the software. Begin with installing and launching the same on your preferred device. When you finish, click on the ‘Toolbox’ tab at the top in the welcome screen.
● Step 2: Upload Media Files
In the software’s opening interface, choose the GIF Maker tool. In the following window that pops-up, click on ‘Add’ to upload the desired media files saved in your device, you want to create a GIF with.
● Step 3: Convert to GIF
Set the media file to GIF conversion time and tap the ‘Create GIF’ button in the bottom-right to initiate the conversion process.
05Wave.video
This one is among the latest GIF maker tools that allow you to create animated GIFs from videos. What’s quite interesting about this Gif creation platform is, you can trim videos to the exact part depending on your content preference before beginning with the conversion process. You can also save your creation as a group of trimmed clips. It is a user friendly, free access online tool that does not ask you to install any third party software, and GIF creation with its mess-free interface is absolute fun.
Take the steps listed below to make GIFs with this online tool:
● Step 1: Choose a Project
To start working with this tool, you need to create an account on its official site. Having done that, just log into your account and upload a desired video you would like to use for creating a GIF. You have a choice to select a locally saved video, choose one from the templates available on the site or create something of your own.
● Step 2: Customization and Publishing
It is now time to try hands on editing your video with stunning effects like, overlays glasses, etc., or add impactful elements, such as, texts, stickers, etc., to make your artwork more impressive. When you are happy, navigate to the top-right and tap ‘Publish’. From the menu that drops down, select ‘GIF’.
● Step 3: Download Your Creation
Select the section of your video you wish to convert into a GIF and proceed to fix the GIF start time and play duration. Check for any frame resize requirements, set an adequate frame rate and lastly, click on the ‘Loop Clip’ checkbox. This will produce an infinite loop GIF. When everything seems perfect, tap on ‘Generate’ followed by ‘Download’ to save your creation and share it on social media.
Part 3 5 Stunning Examples of Gifs in Web Design
The credibility of GIFs in market oriented content sharing and information publishing evidently does not require an introduction. These attractive snippets are expert means of business growth and customer appealing strategy planning to address attract a massive target audience within seconds.
Now that you are quite accustomed with the market reliability of GIFs, you may visibly feel motivated to use them to improvise your product websites for a next level market approach. However, before you plunge into using GIFs for your brand promotion, consider sparing a few minutes to browse through some top class product based GIFs to enhance your GIF creation and implementation aptitude.
Described below are some eye-catching examples of GIF for website background, you should certainly look forward to using in your business campaigns:
01Headscape
Having its roots in the United Kingdom, this is a top rated, digital media design corporation that excels in providing web design solutions to a diverse global clientele. Their unique idea of using GIFs in grayscale to depict conducive business settings is just perfect.
The monochromatic color balance with parallax scrolls makes this GIF all the more impactful. You can find impressive ways of using GIFs with a professional instinct on the company website and begin to add appeal to your market buildup strategies.
02Invision
This is another high ranked application marketing site that uses GIF for website background to improvise its product promotion. Equipped with a preset world class page makeover, the site’s look and appeal simply gets a boost with floating-text animated GIFs on an otherwise normal webpage.
As you move further on the Invision homepage, you will get to see a demonstration of the site’s prototype tool through GIFs that explain its working functionalities in the most interesting and convenient manner, thus putting forward and outrageously professional and effective marketing strategy.
03Macaw
This one is an excellent design utility that is equally suited to both web designers as well as site developers. On visiting the tool’s homepage, you are welcomed with a streamlined text setting on a black and white theme. Move a bit downwards, and there you see a cluster of animated GIFs in action to get you familiar with the interface and usage pattern of the Macaw design utility with utmost ease. It is convenient enough to make you feel as if you are actually using the tool.
04Giant Ant
Established as a creative firm, this one is known for its appealing website design. As you navigate through the site, you will find a still image complemented by cohesive text overlays. Beneath that, there are caricature forms of everyday objects, but the real magic happens when you click on a particular object and woosh. It instantly turns into an animated GIF. This explicit style of infusing dynamism to your website is simply awesome, to say the least.
05Tinke
This is intuitively a fitness tracker that keeps a record of your system vitals in the most effective manner. But that’s not all. The tracker website is equally amazing, setting the perfect example of using GIFs to improve market buildup. The site majorly utilizes the parallax scroll effect with animated GIFs to facilitate a live demonstration of the tracker functionality, coupled with an iPhone user guide and ways of sharing relatable content with fellow users.
● Key Takeaways from This Episode →
● Surfing the internet, you will land across some of the best GIF creator and downloader sites that are flooded with brilliant GIF content suited for almost every purpose.
● You can create your own animated GIFs on any GIF maker website or enjoy pre-made stuff to your heart’s content, where using Filmora is certainly the best choice. To explore something more exciting, try hands on using GIFs for product marketing and brand promotions on your business sites.
What Is MOV Format and How to Edit MOV Video Better?
We come across different media files every day, and surprisingly, every file has a unique format. Different devices and different programs support and entertain different file formats. It is hard to find the correct file format for your device.
The following article will shed light on MOV format. Not just this, apart from its introduction, pros and cons, if you plan to edit your MOV video format, we will also introduce a video editor. Let’s start!
In this article
02 What Are Pros and Coins about MOV Video Format?
03 Best MOV Video Editor- Filmora Video Editor
04 How to Edit MOV Video Files in An Creative Way?
05 Differences Between MP4 and MOV
Part 1. What Is MOV Format?
You might be using the MOV format without noticing and knowing what it is? MOV is a QuickTime file developed by Apple Inc. It is a multimedia container file. MOV file format is capable of keeping multiple types of data on different tracks, which may include audio, video, or even texts.

Does the MOV video format only work on Mac? MOV is developed by Apple, but it does not mean that it is not compatible with other devices. You can use it on Windows along with Sony and DVD. MOV file format is the same as MPEG-4 format file. It is sometimes considered as the basis for the MPEG-4 file format.
Part 2. What Are Pros and Coins about MOV Video Format
Do you know what benefits you get from the MOV video format? Or else, why not discuss its disadvantages? The following section of this article will shed light on both the advantages and also disadvantages of the MOV format.
Advantages of MOV Format
MOV file format is a famous format because of the simplicity it provides in editing and also because it embeds well in different programs. The format is very convenient as it holds various media content like videos, audio, everything in one compact place. MOV video files are easily edited as the primary elements are adjusted.
MOV format is widely used on the web, and because of this reason, the format is ideal for sharing files on the internet. The format is perfect for Mac and QuickTime Player. It is highly compatible with different platforms like Mac, Windows, iOS, and Android. Do you know about the storage space of MOV? The format acquires low storage space, making it a great file format.
Drawbacks of MOV Format
Moving on to its drawbacks, MOV has lossy compression of video tracks. The overall quality of the video might also be damaged while compressing the video. Every track of the MOV format file is encoded with a specific codec. Only those apps can smoothly play a MOV file that supports and recognize the encoded codec. In this case, you might need to convert the file format.
Part 3. Best MOV Video Editor- Filmora Video Editor
Are you looking for a great video editor to edit your MOV format videos? We might have something for you. Let’s introduce Wondershare Filmora to edit drastic videos. The software is very easy to understand and use. Its intuitive interface guides the user about every step.

For Win 7 or later (64-bit)
For macOS 10.12 or later
Filmora Video Editor has enormous features that could make a stunning video. You cannot find a better video editor than Filmora because of its features like cutting, trimming, joining, splitting, and so much more than this. Let’s share a few more features of Filmora:
Auto Reframe
Isn’t it easy if your video gets automatically focused? With Filmora, Auto Reframe feature, the AI technology automatically detects the focal point of the video and keeps it in the frame. With this feature, the main object of the video always remains in focus.
Stabilize Video
Do you know what wonders Stabilize Video feature can do? While filming a video, your hand might shake, and your video quality is disturbed, but with Filmora, you can fix the video. Use its Stabilize Video feature and smooth the shaky footage.
Silence Detection
You are not always speaking in a video; some parts of the video are silent. What to do with such parts? Well, take help from Filmora and remove the silent instances from your video. The Silence Detection feature spontaneously detects the silent parts of the MOV file format video and removes them, saving your precious time.
Split Screen
Are you creating a tutorial? Split Screen is the ideal feature to use for creating such videos. Filmora lets you display multiple videos on a single screen with this feature. You can simultaneously incorporate various clips by using the different provided templates.
Part 4. How to Edit MOV Video Files in An Creative Way?
Filmora is a stunning video editor with uncountable features. You can create mind-blowing videos with Wondershare Filmora. Apart from features like trim, cut, join, split, you also get some great advanced features like Motion Tracking, AI Portrait, Pan & Zoom, and a lot more.
The video editor is easy to use, and even novice users can understand the software and work with it. Filmora is a famous editor because of its functionalities. If you are looking for a video editor to edit your MOV file format, try Filmora, you will not be disappointed. Follow the steps below for assistance:
Step 1: Importing Media
After installing Filmora, launch it on your device. From the home screen, head to the ‘File’ tab and look for the ‘Import Media’ option. A sub-menu will appear as you hover on the option, click on the ‘Import Media Files’, and locate the MOV format file from the device to work with.

Step 2: Add Audio Effects
Do you want to make your video interesting? Try by adding some sound effects. For this, head to the ‘Audio’ section from the top menu and look for your preferred effect.

Step 3: Add Transitions
You might mix and join various videos but do they look good? For smooth transitions, move to the ‘Transition’ tab and select a cool effect.

Step 4: Elements and Titles
Have you tried adding any cool elements to your MOV video? From the ‘Elements’ section, add things like Laser Eye, fun emoji, and a lot more. Along with this, add titles to your video from the ‘Titles’ tab.

Step 5: Export MOV File
Are you satisfied with the final MOV video format file? If you are, export the video to your device. Hit the ‘Export’ button and select ‘MOV’ format as your output format to save the video.

Part 5. Differences Between MP4 and MOV
Both MP4 and MOV file format is almost the same thing. Some of the minor differences that exist are MOV format is recommended best for Mac devices. On the contrary, MP4 is universal that can be used on any device irrespective of the operating system or the software.

MP4 files are more compressed, thus taking less space than MOV video format, which takes slightly more space. The quality of payback that MP4 provides is less than what the MOV file format provides. MOV format, thus, for this reason, is used more by professionals.
Final Thoughts
The article has everything you need to know about the MOV format. From its introduction to the steps of editing a MOV video format, we shared everything in detail. It’s time to talk about a nice video creator and also a video editor. We are talking about Wondershare Filmora. The video editor will wow you with its features and editing capabilities.
The video editor offers regular options like split, cut, trim, join, etc. Whereas it also comes with advanced editing features like Color Match, Chroma Key Background, Auto Highlight, and whatnot. If you want to create a stunning and eye-catching video, take help from Filmora.
Wondershare Filmora
Get started easily with Filmora’s powerful performance, intuitive interface, and countless effects!
Try It Free Try It Free Try It Free Learn More >

02 What Are Pros and Coins about MOV Video Format?
03 Best MOV Video Editor- Filmora Video Editor
04 How to Edit MOV Video Files in An Creative Way?
05 Differences Between MP4 and MOV
Part 1. What Is MOV Format?
You might be using the MOV format without noticing and knowing what it is? MOV is a QuickTime file developed by Apple Inc. It is a multimedia container file. MOV file format is capable of keeping multiple types of data on different tracks, which may include audio, video, or even texts.
Does the MOV video format only work on Mac? MOV is developed by Apple, but it does not mean that it is not compatible with other devices. You can use it on Windows along with Sony and DVD. MOV file format is the same as MPEG-4 format file. It is sometimes considered as the basis for the MPEG-4 file format.
Part 2. What Are Pros and Coins about MOV Video Format
Do you know what benefits you get from the MOV video format? Or else, why not discuss its disadvantages? The following section of this article will shed light on both the advantages and also disadvantages of the MOV format.
Advantages of MOV Format
MOV file format is a famous format because of the simplicity it provides in editing and also because it embeds well in different programs. The format is very convenient as it holds various media content like videos, audio, everything in one compact place. MOV video files are easily edited as the primary elements are adjusted.
MOV format is widely used on the web, and because of this reason, the format is ideal for sharing files on the internet. The format is perfect for Mac and QuickTime Player. It is highly compatible with different platforms like Mac, Windows, iOS, and Android. Do you know about the storage space of MOV? The format acquires low storage space, making it a great file format.
Drawbacks of MOV Format
Moving on to its drawbacks, MOV has lossy compression of video tracks. The overall quality of the video might also be damaged while compressing the video. Every track of the MOV format file is encoded with a specific codec. Only those apps can smoothly play a MOV file that supports and recognize the encoded codec. In this case, you might need to convert the file format.
Part 3. Best MOV Video Editor- Filmora Video Editor
Are you looking for a great video editor to edit your MOV format videos? We might have something for you. Let’s introduce Wondershare Filmora to edit drastic videos. The software is very easy to understand and use. Its intuitive interface guides the user about every step.
For Win 7 or later (64-bit)
For macOS 10.12 or later
Filmora Video Editor has enormous features that could make a stunning video. You cannot find a better video editor than Filmora because of its features like cutting, trimming, joining, splitting, and so much more than this. Let’s share a few more features of Filmora:
Auto Reframe
Isn’t it easy if your video gets automatically focused? With Filmora, Auto Reframe feature, the AI technology automatically detects the focal point of the video and keeps it in the frame. With this feature, the main object of the video always remains in focus.
Stabilize Video
Do you know what wonders Stabilize Video feature can do? While filming a video, your hand might shake, and your video quality is disturbed, but with Filmora, you can fix the video. Use its Stabilize Video feature and smooth the shaky footage.
Silence Detection
You are not always speaking in a video; some parts of the video are silent. What to do with such parts? Well, take help from Filmora and remove the silent instances from your video. The Silence Detection feature spontaneously detects the silent parts of the MOV file format video and removes them, saving your precious time.
Split Screen
Are you creating a tutorial? Split Screen is the ideal feature to use for creating such videos. Filmora lets you display multiple videos on a single screen with this feature. You can simultaneously incorporate various clips by using the different provided templates.
Part 4. How to Edit MOV Video Files in An Creative Way?
Filmora is a stunning video editor with uncountable features. You can create mind-blowing videos with Wondershare Filmora. Apart from features like trim, cut, join, split, you also get some great advanced features like Motion Tracking, AI Portrait, Pan & Zoom, and a lot more.
The video editor is easy to use, and even novice users can understand the software and work with it. Filmora is a famous editor because of its functionalities. If you are looking for a video editor to edit your MOV file format, try Filmora, you will not be disappointed. Follow the steps below for assistance:
Step 1: Importing Media
After installing Filmora, launch it on your device. From the home screen, head to the ‘File’ tab and look for the ‘Import Media’ option. A sub-menu will appear as you hover on the option, click on the ‘Import Media Files’, and locate the MOV format file from the device to work with.
Step 2: Add Audio Effects
Do you want to make your video interesting? Try by adding some sound effects. For this, head to the ‘Audio’ section from the top menu and look for your preferred effect.
Step 3: Add Transitions
You might mix and join various videos but do they look good? For smooth transitions, move to the ‘Transition’ tab and select a cool effect.
Step 4: Elements and Titles
Have you tried adding any cool elements to your MOV video? From the ‘Elements’ section, add things like Laser Eye, fun emoji, and a lot more. Along with this, add titles to your video from the ‘Titles’ tab.
Step 5: Export MOV File
Are you satisfied with the final MOV video format file? If you are, export the video to your device. Hit the ‘Export’ button and select ‘MOV’ format as your output format to save the video.
Part 5. Differences Between MP4 and MOV
Both MP4 and MOV file format is almost the same thing. Some of the minor differences that exist are MOV format is recommended best for Mac devices. On the contrary, MP4 is universal that can be used on any device irrespective of the operating system or the software.
MP4 files are more compressed, thus taking less space than MOV video format, which takes slightly more space. The quality of payback that MP4 provides is less than what the MOV file format provides. MOV format, thus, for this reason, is used more by professionals.
Final Thoughts
The article has everything you need to know about the MOV format. From its introduction to the steps of editing a MOV video format, we shared everything in detail. It’s time to talk about a nice video creator and also a video editor. We are talking about Wondershare Filmora. The video editor will wow you with its features and editing capabilities.
The video editor offers regular options like split, cut, trim, join, etc. Whereas it also comes with advanced editing features like Color Match, Chroma Key Background, Auto Highlight, and whatnot. If you want to create a stunning and eye-catching video, take help from Filmora.
Wondershare Filmora
Get started easily with Filmora’s powerful performance, intuitive interface, and countless effects!
Try It Free Try It Free Try It Free Learn More >
Best Animated Video Makers
Animations can be a great way to get your work to stand out and the best animated video maker can help you get this effect very easily. Here, we will be helping you find the best way to create animated videos for your particular project.
It is important to point out that there are very many animation programs in the market and choosing the best one will depend on your needs, your style, the feature and tools you need, the cost of the program, and even the export options that each tool gives you.
Before we look at the best ways to create animated videos, let’s start by examining why you would need to use an animated video maker in the first place.
When to Use an Animated Video Maker
There are several reasons why you would want to create an animated video, rather than use traditional video solutions. The following are the most important from a digital marketing standpoint;
Improve Conversion and Sales
Animated videos are engaging enough to improve your conversion and sales. Studies have shown that an animated video can increase both conversion and sales by up to 80%. It may therefore be a good idea to use an animated explainer video to show your potential customers how to purchase a product or service on your website.
Increase Brand Awareness
Because they can be very entertaining and engaging, animated videos can also be a great way to increase brand awareness. And since they can be created very easily and cheaply, they can be a good way to reach potential customers.
Generate Online Leads
Because of the engaging nature of animated videos, you can use them to introduce yourself to potential customers and generate online leads. They have a very high conversion rate, as we have seen before, making them one of the best ways to reach people who would otherwise have never heard of you and your brand.
Explain Complex Processes
It can be very difficult to try to explain very complex ideas such as the mechanical aspect of a certain tool using words. But a well-crafted animated video gives you the chance to explain complex ideas in a fun and engaging way, making it easier for your customers to understand and engage with your brand.
Best Animated Video Makers
The following are the best animated video makers in the market to choose from;
1. Filmora
Created by Wondershare, one of the most popular software companies in the world, you can be certain that Filmora will deliver one of the best video creation and animation experiences you can find anywhere. It is a very easy-to-use, very effective way of creating animated videos that will intrigue your audiences and engage with them in ways traditional video cannot.

To accomplish this, Filmora has numerous features and effects that are not just meant to help you create the perfect video, but also make the process simple, allowing you to create stunning videos in just a few minutes.
For Win 7 or later (64-bit)
For macOS 10.12 or later
The following are some of the key features you can expect when using Filmora;
- Motion Tracking is a feature that you can use to attach an element to a moving object. The auto motion tracking feature ensures that the elements you attach move smoothly as the object moves.
- You can also use Filmora to customize an animation by adding keyframes to change various aspects including the positions, scale, rotations, and even the opacity of a clip.
- The color match feature allows you to match a selected clip’s color to a separate clip from another clip.
- The auto-ducking feature allows you to choose to fade away background music and make foreground narration or dialogue clearer.
- You can also add plain text to any section of the video
- The advanced title editing feature allows you to change the position, rotation, and scale of the video’s title while it is playing.
- You can also create and edit keyboard shortcut keys that you can then use to edit the video more easily.
2. Animaker
Price: Free with limited features. Paid plans from $10 a month
Best For: marketers, presenters, and freelancers
Link: https://www.animaker.com/
If you are looking for a simple way to create interactive presentations and videos, Animaker is a simple solution to choose. It is a particularly simple solution to use as it comes with numerous ways to create and edit the video, including a huge library of templates and elements that include illustrations, gestures, and characters.

The fact that you don’t have to create these animations from scratch makes it an ideal solution even if you have never used this kind of software before. It also comes with more than 200 music tracks and sound effects that you can add to the video.
Pros
- It can be used to create all kinds of animations for all kinds of use including business and personal uses
- It supports the creation of a variety of video styles
- It can be used to create whiteboard videos
- It has numerous animation options to choose from including illustrations, characters, and gestures
- It comes with a free plan
Cons
- You can only create 5 watermarked videos with the free plan
- It is only ideal for creating videos and not animated images
3. Visme
Price: Free plan with limited features. Paid plans start from $15 per month
Best For: Marketers, corporate teams, trainers, teachers, and personal use
Link: https://www.visme.co/
Visme is a cloud-based solution that can be used to create all sorts of animated media including animated videos, animated images, presentations, ads, banners, and more. It has numerous interactive features that are aimed at allowing you to create the perfect designs in a matter of minutes.

Since it is a cloud-based solution, you don’t need to download any software on your computer to use it. it also comes with thousands of premade templates and lots of stock-free images and videos that you can use to create your design.
Pros
- It is an all-in-one solution to create both animated images and videos
- It is a simple soliton even for beginner users
- You get thousands of different resources that can be used to create unique designs limited only by your imagination
- You don’t need to download any software to use it
Cons
- The numerous resources can make it a confusing solution for beginners
- The free plan is very limited
4. Adobe Animate
Price: Starts at $20.99 per month
Best For: Cartoon makers, YouTubers, and game designers
Link: https://www.adobe.com/africa/products/animate.html
Adobe Animate is an improvement on Adobe Flash Professional in every way. It is one of the best ways to create interactive graphics a 2D animations that can then be added to whatever project you are working on.

You can use the numerous tools in Adobe Animate to animate various aspects of your design including characters, shapes, avatars, and other assets. The animations can then be exported in various formats including Flash, HTML5, WebGL, SVG, and more.
Pros
- You have a lot of options when it comes to exporting and sharing the animations you create.
- It allows you to animate elements in numerous ways
- It has an extensive library of tools that can be used to create unique animations
Cons
- Like most Adobe tools, it can be very difficult to use, especially for beginner users
- There is no free trial version
5. Crello
Price: Free plan with limited features. Paid plan starts at $10 a month
Best For: Marketers, freelancers, and business owners
Link: https://create.vista.com/
Also known as VistaCreate, this is a simple solution for creating both animated videos and images. It makes this animation process quick and easy by providing you with a veritable library of templates and thousands of pre-animated characters and objects. It is therefore one of the best solutions to choose even if you don’t have the necessary technical skills to create a credible animated video.

One of the things VistaCreate can do so well is combining videos and animated GIFs with images to create short animated videos that you can share on social media.
Pros
- Create animated videos and export them in various formats, ideal for all devices
- It is one of the best ways to create animated social media posts
- It has a mobile app that allows you to create designs on your device
Cons
- The free version is very limited in creative assets and storage capacity
6. Biteable
Price: Free plan with limited features: Paid plans start from $49 a month
Best For: Marketers, Educators, and Trainers
Link: https://biteable.com/
Biteable is the best option when you want to create simple small animated videos that can be used as Ads or videos that you post to social media. It has numerous premade templates that make creating these simple videos a matter of simply editing one of the templates.

If you feel uninspired, it has thousands of stock footage clips and scenes that you can put together to create a complete. It also has collaborative features that can allow a team to work on the same project.
Pros
- It can be used to make all kinds of marketing videos
- It is an ideal choice for explainer and demo videos
- It provides a wealth of resources to create your videos including stock footage
- It has a free plan
Cons
- The free plan places a watermark on the video
- You can only export the videos in MP4 format.
- At $49 a month, it is a very expensive option.
7. PixTeller
Price: Basic free plan with no animation features. Paid plans start at $12 per month
Best For: Freelancers, marketers, and bloggers
Link: https://pixteller.com/
PixTeller is a great way to animate videos and images for both professional and personal use. if you don’t want the complications that come with a dedicated video editing software, PixTeller is a good option to consider as it is very simple to use.

You can use it to create simple animated short videos by setting frame-by-frame motions and then editing the attributes in each frame. Some of the attributes that you can use PixTeller to edit include colors, opacity, rotation, and more.
Pros
- Editing frame by frame on a timeline makes video creation very easy
- The free version has various editing features
- It can be used to create both animated videos and images
Cons
- It lacks the advanced editing features that you will find on some of the other options on this list
- You can only download the videos in MP4 format
- The free plan doesn’t have animation features
8. Blender
Price: Free
Best For: Scientists, Students, Engineers, Animators, and Artists
Link: https://www.blender.org/download/
If you want to create stunning animations for free, Blender is the open-source software to use. This free program allows users to use the command line to create, render and model 3D animations. It can be used on all platforms including Linux, Windows, and Mac.

Even though it is free, it comes with numerous features including the ability to draw and edit in 3D mode, advanced video editing in VFX, motion tracking, masking, and compositing. But because it uses command-line programming, it may not be an ideal solution for most users.
Pros
- It is a completely free solution
- It has pretty advanced animation and rendering features to create all kinds of videos
Cons
- It may not be the most ideal solution for beginner users even though there are hours of video tutorials to refer to.
Related FAQs
1. How Do I Turn my Video into Animation?
The best way to turn a video into animation is to use one of the animation software solutions that we have outlined above. Each tool has its features and you should choose one that has the necessary features to fit into your video project.
2. How Do I Make an Animated Video for Free?
The only way to make an animated video is to use animation software. And although most programs are not free, there are some open-source solutions like Blender that may be able to help you make an animated video for free.
3. How Do You Animate in PowerPoint?
PowerPoint allows you to add animation to objects and text. To do that, select the object or text that you want to animate and select “Animations.” From the options presented, select the animation that you would like to use and it will be added to the selected object or text. If you would like to add an effect, choose “Effect Options.”
For macOS 10.12 or later
The following are some of the key features you can expect when using Filmora;
- Motion Tracking is a feature that you can use to attach an element to a moving object. The auto motion tracking feature ensures that the elements you attach move smoothly as the object moves.
- You can also use Filmora to customize an animation by adding keyframes to change various aspects including the positions, scale, rotations, and even the opacity of a clip.
- The color match feature allows you to match a selected clip’s color to a separate clip from another clip.
- The auto-ducking feature allows you to choose to fade away background music and make foreground narration or dialogue clearer.
- You can also add plain text to any section of the video
- The advanced title editing feature allows you to change the position, rotation, and scale of the video’s title while it is playing.
- You can also create and edit keyboard shortcut keys that you can then use to edit the video more easily.
2. Animaker
Price: Free with limited features. Paid plans from $10 a month
Best For: marketers, presenters, and freelancers
Link: https://www.animaker.com/
If you are looking for a simple way to create interactive presentations and videos, Animaker is a simple solution to choose. It is a particularly simple solution to use as it comes with numerous ways to create and edit the video, including a huge library of templates and elements that include illustrations, gestures, and characters.
The fact that you don’t have to create these animations from scratch makes it an ideal solution even if you have never used this kind of software before. It also comes with more than 200 music tracks and sound effects that you can add to the video.
Pros
- It can be used to create all kinds of animations for all kinds of use including business and personal uses
- It supports the creation of a variety of video styles
- It can be used to create whiteboard videos
- It has numerous animation options to choose from including illustrations, characters, and gestures
- It comes with a free plan
Cons
- You can only create 5 watermarked videos with the free plan
- It is only ideal for creating videos and not animated images
3. Visme
Price: Free plan with limited features. Paid plans start from $15 per month
Best For: Marketers, corporate teams, trainers, teachers, and personal use
Link: https://www.visme.co/
Visme is a cloud-based solution that can be used to create all sorts of animated media including animated videos, animated images, presentations, ads, banners, and more. It has numerous interactive features that are aimed at allowing you to create the perfect designs in a matter of minutes.
Since it is a cloud-based solution, you don’t need to download any software on your computer to use it. it also comes with thousands of premade templates and lots of stock-free images and videos that you can use to create your design.
Pros
- It is an all-in-one solution to create both animated images and videos
- It is a simple soliton even for beginner users
- You get thousands of different resources that can be used to create unique designs limited only by your imagination
- You don’t need to download any software to use it
Cons
- The numerous resources can make it a confusing solution for beginners
- The free plan is very limited
4. Adobe Animate
Price: Starts at $20.99 per month
Best For: Cartoon makers, YouTubers, and game designers
Link: https://www.adobe.com/africa/products/animate.html
Adobe Animate is an improvement on Adobe Flash Professional in every way. It is one of the best ways to create interactive graphics a 2D animations that can then be added to whatever project you are working on.
You can use the numerous tools in Adobe Animate to animate various aspects of your design including characters, shapes, avatars, and other assets. The animations can then be exported in various formats including Flash, HTML5, WebGL, SVG, and more.
Pros
- You have a lot of options when it comes to exporting and sharing the animations you create.
- It allows you to animate elements in numerous ways
- It has an extensive library of tools that can be used to create unique animations
Cons
- Like most Adobe tools, it can be very difficult to use, especially for beginner users
- There is no free trial version
5. Crello
Price: Free plan with limited features. Paid plan starts at $10 a month
Best For: Marketers, freelancers, and business owners
Link: https://create.vista.com/
Also known as VistaCreate, this is a simple solution for creating both animated videos and images. It makes this animation process quick and easy by providing you with a veritable library of templates and thousands of pre-animated characters and objects. It is therefore one of the best solutions to choose even if you don’t have the necessary technical skills to create a credible animated video.
One of the things VistaCreate can do so well is combining videos and animated GIFs with images to create short animated videos that you can share on social media.
Pros
- Create animated videos and export them in various formats, ideal for all devices
- It is one of the best ways to create animated social media posts
- It has a mobile app that allows you to create designs on your device
Cons
- The free version is very limited in creative assets and storage capacity
6. Biteable
Price: Free plan with limited features: Paid plans start from $49 a month
Best For: Marketers, Educators, and Trainers
Link: https://biteable.com/
Biteable is the best option when you want to create simple small animated videos that can be used as Ads or videos that you post to social media. It has numerous premade templates that make creating these simple videos a matter of simply editing one of the templates.
If you feel uninspired, it has thousands of stock footage clips and scenes that you can put together to create a complete. It also has collaborative features that can allow a team to work on the same project.
Pros
- It can be used to make all kinds of marketing videos
- It is an ideal choice for explainer and demo videos
- It provides a wealth of resources to create your videos including stock footage
- It has a free plan
Cons
- The free plan places a watermark on the video
- You can only export the videos in MP4 format.
- At $49 a month, it is a very expensive option.
7. PixTeller
Price: Basic free plan with no animation features. Paid plans start at $12 per month
Best For: Freelancers, marketers, and bloggers
Link: https://pixteller.com/
PixTeller is a great way to animate videos and images for both professional and personal use. if you don’t want the complications that come with a dedicated video editing software, PixTeller is a good option to consider as it is very simple to use.
You can use it to create simple animated short videos by setting frame-by-frame motions and then editing the attributes in each frame. Some of the attributes that you can use PixTeller to edit include colors, opacity, rotation, and more.
Pros
- Editing frame by frame on a timeline makes video creation very easy
- The free version has various editing features
- It can be used to create both animated videos and images
Cons
- It lacks the advanced editing features that you will find on some of the other options on this list
- You can only download the videos in MP4 format
- The free plan doesn’t have animation features
8. Blender
Price: Free
Best For: Scientists, Students, Engineers, Animators, and Artists
Link: https://www.blender.org/download/
If you want to create stunning animations for free, Blender is the open-source software to use. This free program allows users to use the command line to create, render and model 3D animations. It can be used on all platforms including Linux, Windows, and Mac.
Even though it is free, it comes with numerous features including the ability to draw and edit in 3D mode, advanced video editing in VFX, motion tracking, masking, and compositing. But because it uses command-line programming, it may not be an ideal solution for most users.
Pros
- It is a completely free solution
- It has pretty advanced animation and rendering features to create all kinds of videos
Cons
- It may not be the most ideal solution for beginner users even though there are hours of video tutorials to refer to.
Related FAQs
1. How Do I Turn my Video into Animation?
The best way to turn a video into animation is to use one of the animation software solutions that we have outlined above. Each tool has its features and you should choose one that has the necessary features to fit into your video project.
2. How Do I Make an Animated Video for Free?
The only way to make an animated video is to use animation software. And although most programs are not free, there are some open-source solutions like Blender that may be able to help you make an animated video for free.
3. How Do You Animate in PowerPoint?
PowerPoint allows you to add animation to objects and text. To do that, select the object or text that you want to animate and select “Animations.” From the options presented, select the animation that you would like to use and it will be added to the selected object or text. If you would like to add an effect, choose “Effect Options.”
How to Make Random Letter Reveal Intro?
The introductions in the video can create a major feel for the rest of the video in the viewers’ minds. So, most film and video makers focus on developing different styles of appealing and visually vibrant intro title formats for their projects.
Currently, one of the unique types of title format that is popular today among Youtubers and filmmakers is the style of random letters appearing on screen until the main title forms.

Wondering how to have the same effect for your video? This process will work easily with certain software tools, the most user-friendly and simple being the Wondershare Filmora software. Let’s understand the steps that go into this process here.
1. Launch Filmora on your Device
On Filmora’s official website, you can get the latest software version when you click on the Download button at the top or in the description box. After you do so, the free software will download automatically into your device in an installer format.
Free Download For Win 7 or later(64-bit)
Free Download For macOS 10.14 or later
From the Downloads section of your browser, double-click on it and press the Install button when it appears. Give the necessary permissions that it prompts.

Then, the software will start the installation instantly, likely taking a few seconds to complete.
2. Add the Default Title and Edit its Font
After Filmora launches, click on the “Create New Project” button on the homepage of the editor. Then, click on the Title tab from the top toolbar and choose the default title available here. Drag it and drop it onto the editing timeline below on Track 1.
Double-click on the title on the timeline, which will open the text editing window. Under the Text’s Preset tab, you will find the parameters for changing the main fault. Adjust the font style to the Impact style (or any bold title style you prefer), and click on the text field to add your custom title.
Following that, click on the text size option and change it to 15. Scroll down the menu to the Text Spacing section. Change the value to 20 and tap on the OK button afterward.

3. Split the title
On the editing timeline, tap on the Track 1 clip and click on the Snapshot icon at the far right side of the toolbar just above the timeline. This will automatically save in the media library section.
Then, take hold of the playhead on the timeline at the 3rd frame mark. Then, tap on the Scissor icon on the play head, which will split the clip into two portions. Click on the part following the 3rd frame mark and delete it.

4. Copy the clipped section multiple times
Then, double-click on the amount still available on the timeline to open the title editor section again. Make changes to the title you added here, only keeping the first letter.
Click on this clipped section on the timeline and copy it. Next, keep copying this clip multiple times continuously until the length of the collection on Track 1 to the 5-second mark.
Following that, zoom in on the timeline for a better view of these clipped parts. Choose the last clip that you copied and drag it to expand its time duration to the 6:15 mark.

5. Change the character of each clip
After making the previous edits, use your cursor to move to the first part of the timeline instead of zooming outward. Tap on the first clip that you had edited and double-click on it. In the text editing window, change the character to another random alphabet.

Repeat the same for all the split parts following the first one, changing the character to any random alphabet. At this time, ensure that you do not make two consecutive letters have the same alphabet, as that will put off the effect. However, keep the last elongated clip the same character as you originally put it.
6. Export the first letter clip
Then, please tap on the Export button at the top of the screen and add a name, like the first letter of your title. Click on the Settings button on this page to adjust the resolution and quality of the clip to the highest resolution for the best results.
Press Export again to save it to your device.
7. Edit the second letter clip and so on
After exporting the first file that will ultimately become the first letter of your random letter reveal intro title, you have to make the second letter-related clip.
For this, tap on the last clip on the timeline and double-click on it. Change the text in this clip to the second letter of your title. After doing this, go back to the first clip of your collection and double-click on it after selling it. Tap on the text field and give it another random letter.

Like with the first clip, continue doing this step for all of the next clips, except for the final clip. Then, export it in the same manner as the first clip.
Now that you know how to edit the first and second letters in sequence, repeat this process for all of the letters of your title to create a full clip for all of the intro title letters. When you are done, please select these clips and press the Delete button to remove them from the timeline.

8. Add all clips back to Filmora
Now it’s time to add all of the clips to Filmora and merge them into one cohesive intro title.
For this, click on My Media and go to Project Media. Right-click on the library section and press the Import button. This will take you to your device storage. Find the location where you saved all cut clips, and select them all. Press the Open button, and all of them will import into Filmora.

9. Drag the Snapshot to Timeline
Tap on the Snapshot you saved earlier sitting on the media library and drag it onto the Track 1 of the editing timeline. Double-click on it to open the video editing window.
Click on the Opacity option in the Video editing section and change it to 20%. Press the OK button after that.

10. Drop the Clip into the Timeline
Select the first letter clip from the media library section and drag it onto the timeline. Drop it above the Snapshot in Track 2 part. Then, choose the first Snapshot clip and increase its duration to the 8-second mark.
Next, double-click on the first letter clip on the Track 2 section to open its editing window. Click on the Blending Mode option and choose Screen from the drop-down menu.

Then, right-click on the first letter clip in the timeline and choose the Copy Effects option from the next drop-down menu. Move the playhead to the ending position on the timeline and change the value on the relevant axis of Position until it matches its letter position on the original title.
See the preview playing on the side for a better reference while adjusting the position.
11. Drop the next clips
Following this, click on the second letter clip and drag and drop it onto Track 3 on the timeline. Make sure to move the playhead to mark the starting position of this letter at the 5th frame mark.
Tap on this clip and move your playhead to the end position. Then, right-click on it and choose the Paste Effects option. Double-click on this clip on the timeline and change the position axis value until the letter aligns with its original position per the snapshot. Again, look at the Preview to ensure you align them correctly.

Repeat this with all the other letters, making sure to change the starting position for each consecutive one-two frame forward.
12. Hide and elongate each clip with snapshots
Then, click on the Snapshot clip on Track 1 and delete it. Following that, click the Hide icon on Track 3, Track 4, and onwards till the last one. Then, move the playhead to the end of the Track 2 clip and click on the Snapshot icon.
Choose the saved snapshot in the library window and drag-and-drop it behind Track 2 clip so it continues into it. Double-click on this Snapshot and choose Screen under Blending Mode. Then, right-click on this Snapshot and select “Copy Effects” from the menu.

Then, hide the Track 2 clip, unhide the Track 3 and Track 4 clip, and take a snapshot of that. As you did with Track 1’s screenshot, take this snapshot and place it beside Track 3 clip. Right-click on it and tap on “Paste Effects”. Repeat this one by one for all the clips after unhiding them for their particular step.
13. Finishing touches to Opacity
Finally, unhide all the clips and move the playhead to the 8-second mark. Click on the Scissor icon to Split them all at this position and remove the excess. Then, place the playhead at the beginning of Track 3 and double-click on it. Tap the Animation tab this time and adjust the Opacity to 0. Then, move the playhead ten frames forward and increase the Opacity to 100. Repeat this for all of the steps.

14. Preview and Export
After everything, tap on the Render Preview icon. Make sure to move the second clip on Track 2 as the starting point of the video by moving it to the beginning position. Now, press the Play button under the Preview player.

Conclusion
Finally, you are ready to use the same tactics as explained to optimize the quality and style of your video introduction title. Besides this, you can utilize other preset title options on video projects via Filmora. Try out multiple options and practice this particular approach on different video projects. Then, prepare stunning, visually captivating movies, vlogs, and documentaries quickly.
Free Download For macOS 10.14 or later
From the Downloads section of your browser, double-click on it and press the Install button when it appears. Give the necessary permissions that it prompts.
Then, the software will start the installation instantly, likely taking a few seconds to complete.
2. Add the Default Title and Edit its Font
After Filmora launches, click on the “Create New Project” button on the homepage of the editor. Then, click on the Title tab from the top toolbar and choose the default title available here. Drag it and drop it onto the editing timeline below on Track 1.
Double-click on the title on the timeline, which will open the text editing window. Under the Text’s Preset tab, you will find the parameters for changing the main fault. Adjust the font style to the Impact style (or any bold title style you prefer), and click on the text field to add your custom title.
Following that, click on the text size option and change it to 15. Scroll down the menu to the Text Spacing section. Change the value to 20 and tap on the OK button afterward.
3. Split the title
On the editing timeline, tap on the Track 1 clip and click on the Snapshot icon at the far right side of the toolbar just above the timeline. This will automatically save in the media library section.
Then, take hold of the playhead on the timeline at the 3rd frame mark. Then, tap on the Scissor icon on the play head, which will split the clip into two portions. Click on the part following the 3rd frame mark and delete it.
4. Copy the clipped section multiple times
Then, double-click on the amount still available on the timeline to open the title editor section again. Make changes to the title you added here, only keeping the first letter.
Click on this clipped section on the timeline and copy it. Next, keep copying this clip multiple times continuously until the length of the collection on Track 1 to the 5-second mark.
Following that, zoom in on the timeline for a better view of these clipped parts. Choose the last clip that you copied and drag it to expand its time duration to the 6:15 mark.
5. Change the character of each clip
After making the previous edits, use your cursor to move to the first part of the timeline instead of zooming outward. Tap on the first clip that you had edited and double-click on it. In the text editing window, change the character to another random alphabet.
Repeat the same for all the split parts following the first one, changing the character to any random alphabet. At this time, ensure that you do not make two consecutive letters have the same alphabet, as that will put off the effect. However, keep the last elongated clip the same character as you originally put it.
6. Export the first letter clip
Then, please tap on the Export button at the top of the screen and add a name, like the first letter of your title. Click on the Settings button on this page to adjust the resolution and quality of the clip to the highest resolution for the best results.
Press Export again to save it to your device.
7. Edit the second letter clip and so on
After exporting the first file that will ultimately become the first letter of your random letter reveal intro title, you have to make the second letter-related clip.
For this, tap on the last clip on the timeline and double-click on it. Change the text in this clip to the second letter of your title. After doing this, go back to the first clip of your collection and double-click on it after selling it. Tap on the text field and give it another random letter.
Like with the first clip, continue doing this step for all of the next clips, except for the final clip. Then, export it in the same manner as the first clip.
Now that you know how to edit the first and second letters in sequence, repeat this process for all of the letters of your title to create a full clip for all of the intro title letters. When you are done, please select these clips and press the Delete button to remove them from the timeline.
8. Add all clips back to Filmora
Now it’s time to add all of the clips to Filmora and merge them into one cohesive intro title.
For this, click on My Media and go to Project Media. Right-click on the library section and press the Import button. This will take you to your device storage. Find the location where you saved all cut clips, and select them all. Press the Open button, and all of them will import into Filmora.
9. Drag the Snapshot to Timeline
Tap on the Snapshot you saved earlier sitting on the media library and drag it onto the Track 1 of the editing timeline. Double-click on it to open the video editing window.
Click on the Opacity option in the Video editing section and change it to 20%. Press the OK button after that.
10. Drop the Clip into the Timeline
Select the first letter clip from the media library section and drag it onto the timeline. Drop it above the Snapshot in Track 2 part. Then, choose the first Snapshot clip and increase its duration to the 8-second mark.
Next, double-click on the first letter clip on the Track 2 section to open its editing window. Click on the Blending Mode option and choose Screen from the drop-down menu.
Then, right-click on the first letter clip in the timeline and choose the Copy Effects option from the next drop-down menu. Move the playhead to the ending position on the timeline and change the value on the relevant axis of Position until it matches its letter position on the original title.
See the preview playing on the side for a better reference while adjusting the position.
11. Drop the next clips
Following this, click on the second letter clip and drag and drop it onto Track 3 on the timeline. Make sure to move the playhead to mark the starting position of this letter at the 5th frame mark.
Tap on this clip and move your playhead to the end position. Then, right-click on it and choose the Paste Effects option. Double-click on this clip on the timeline and change the position axis value until the letter aligns with its original position per the snapshot. Again, look at the Preview to ensure you align them correctly.
Repeat this with all the other letters, making sure to change the starting position for each consecutive one-two frame forward.
12. Hide and elongate each clip with snapshots
Then, click on the Snapshot clip on Track 1 and delete it. Following that, click the Hide icon on Track 3, Track 4, and onwards till the last one. Then, move the playhead to the end of the Track 2 clip and click on the Snapshot icon.
Choose the saved snapshot in the library window and drag-and-drop it behind Track 2 clip so it continues into it. Double-click on this Snapshot and choose Screen under Blending Mode. Then, right-click on this Snapshot and select “Copy Effects” from the menu.
Then, hide the Track 2 clip, unhide the Track 3 and Track 4 clip, and take a snapshot of that. As you did with Track 1’s screenshot, take this snapshot and place it beside Track 3 clip. Right-click on it and tap on “Paste Effects”. Repeat this one by one for all the clips after unhiding them for their particular step.
13. Finishing touches to Opacity
Finally, unhide all the clips and move the playhead to the 8-second mark. Click on the Scissor icon to Split them all at this position and remove the excess. Then, place the playhead at the beginning of Track 3 and double-click on it. Tap the Animation tab this time and adjust the Opacity to 0. Then, move the playhead ten frames forward and increase the Opacity to 100. Repeat this for all of the steps.
14. Preview and Export
After everything, tap on the Render Preview icon. Make sure to move the second clip on Track 2 as the starting point of the video by moving it to the beginning position. Now, press the Play button under the Preview player.
Conclusion
Finally, you are ready to use the same tactics as explained to optimize the quality and style of your video introduction title. Besides this, you can utilize other preset title options on video projects via Filmora. Try out multiple options and practice this particular approach on different video projects. Then, prepare stunning, visually captivating movies, vlogs, and documentaries quickly.
Also read:
- Updated How to Use Twixtor Effect to Create Super Slow-Motion Video, In 2024
- New This Article Will Show You How to Make a Tattoo Disappear on Your Body Magically
- Updated 2024 Approved Easy Steps to Add Miniature Effect to Videos
- Updated Blender - A Video Editor for Every Professional for 2024
- Premiere Pro Slow Playback Issues Finding The Best Solutions for 2024
- Updated In 2024, How to Denoise in After Effects – Audio and Video Noise Removal
- How to Create a DIY Green Screen Video Effect?
- Steps to Remove Background Noise From Video Sony Vegas
- Updated 10 Amazing Anime Character Designs to Inspire You
- Top 8 AR Apps for Android and iOS | Help You See the World of AR for 2024
- New Learn to Use Montage with These Movies for 2024
- New In 2024, 10 Mind-Blowing Video Collage Maker for PC
- Updated A Comprehensive Guide on Converting Slo-Mo Videos to Normal Speed Videos On iPhone
- 2024 Approved Troubleshoot Snapchat Camera Zoomed in Issue
- New Easy Step by Step Tutorial on Creating a Lightroom Collage
- Updated How to Add the Popular Video Text Effects to Your Video for 2024
- Want to Find a Good Camera for YouTube? This Article Brings You some of the Best Options of Different Varieties for Your Channel for 2024
- Want to Create an Impressive Video Collage but Clueless About the Best Tools? No Worries as We Are Here and Will Help You to Learn About the Best Video Collage Maker PC Tools
- 2024 Approved Blender Green Screen Effects
- Updated Edit FLV Video Files with FLV Editor Windows, Mac,Android, iPhone
- 2024 Approved How to Customize Your Loading Text Effect?
- Updated How to Add Text Effects in Adobe Premiere Pro, In 2024
- In 2024, Detailed Tutorial to Crop Video in KineMaster
- Updated This Article Aims to Show You How to Improve Your Lighting in the Sun
- How Can I Control Speed of a Video for 2024
- Updated In 2024, Best 12 Sony Vegas Slideshow Templates for Free Download
- New 20 Must-Have Graduation Songs for 2024
- Updated How to Split a Video Into Parts on All Platforms
- In 2024, Best Options to Replace Sky of Any Photo Online + Offline
- Updated In 2024, How to Make Discord Logo GIF
- New Being a Content Creator Means Creating a Slow-Mo at some Point. Study This Piece to Learn How to Play a Video in Slow Motion on iPhone
- New 2024 Approved How To Make Ninja Jump Effect
- New Things You Need to Know About Transparent PNG Remove and Convert
- Updated How to Speed Up Video with Canva Online Tool?
- New Looking for the Tools that Can Let You Blend Images Perfectly for Creating an Awesome Collage? Shortlisted for You Are the Best Bend Collage Program for an Effortless Task
- New Best GIF to AVI Converters for 2024
- New A Comprehensive Guide on Converting Slo-Mo Videos to Normal Speed Videos On iPhone
- 2024 Approved Want to Create an Impressive Video Collage but Clueless About the Best Tools? No Worries as We Are Here and Will Help You to Learn About the Best Video Collage Maker PC Tools
- In This Article I Will Share to You My Tips and Experiences on How to Become a YouTube Vlogger and Things You Need to Consider Being a Vlogger for 2024
- Updated In 2024, 30+ Amazing Templates for VN Video Editor
- Updated 2024 Approved How to Create a Bokeh Effect
- In 2024, The Ultimate Wedding Videography Checklist
- Updated How To Fix Slow Playback Issues in DaVinci Resolve Finding the Best Solutions for 2024
- Updated In 2024, How To Create a Polaroid Collage?
- 2024 Approved How to Add Video Transitions in Videos
- New Stunning Glitch Effect and Its Creation Steps for Premiere Pro
- In 2024, Latest way to get Shiny Meltan Box in Pokémon Go Mystery Box On HTC U23 Pro | Dr.fone
- Why are your photos lost from iPhone 15 Pro? | Stellar
- How to Remove a Previously Synced Google Account from Your Oppo Find X7
- How Can We Bypass Tecno Pova 5 FRP?
- Why does the pokemon go battle league not available On Tecno Spark 10 5G | Dr.fone
- In 2024, How To Change Realme 12+ 5G Lock Screen Password?
- Full Guide on Mirroring Your Motorola Moto G14 to Your PC/Mac | Dr.fone
- In 2024, How to Fix Pokemon Go Route Not Working On Honor 90? | Dr.fone
- In 2024, How Xiaomi Redmi Note 12 Pro 4G Mirror Screen to PC? | Dr.fone
- How To Activate and Use Life360 Ghost Mode On Honor Magic 5 Pro | Dr.fone
- 3 Easy Solutions to Hard Reset Infinix Smart 7 | Dr.fone
- Forgot Pattern Lock? Heres How You Can Unlock Tecno Pattern Lock Screen
- Updated 2024 Approved 4 Things You Should Know About Pinterest GIF
- In 2024, The Best Android Unlock Software For Samsung Galaxy F54 5G Device Top 5 Picks to Remove Android Locks
- Unlock android phone if you don't have Storm 5G fingerprint
- How to Track Vivo S18e Location without Installing Software? | Dr.fone
- How to Hard Reset Honor 90 Pro Without Password | Dr.fone
- Dose Life360 Notify Me When Someone Checks My Location On Samsung Galaxy S24+? | Dr.fone
- Updated How To Auto Translate YouTube Videos Into Different Languages for 2024
- How to Factory Reset Tecno Spark 20 without Losing Data | Dr.fone
- In 2024, How To Remove Screen Lock PIN On Realme 11X 5G Like A Pro 5 Easy Ways
- How to Restore Deleted Xiaomi Redmi 12 5G Contacts An Easy Method Explained.
- In 2024, The Best Android Unlock Software For OnePlus Nord CE 3 5G Device Top 5 Picks to Remove Android Locks
- In 2024, Top 10 AirPlay Apps in Infinix Smart 7 HD for Streaming | Dr.fone
- Undeleted lost videos from Samsung Galaxy XCover 6 Pro Tactical Edition
- How to Change Spotify Location After Moving to Another Country On Samsung Galaxy F04 | Dr.fone
- How To Check if Your Vivo S18 Is Unlocked
- In 2024, How to Share/Fake Location on WhatsApp for Poco C65 | Dr.fone
- Additional Tips About Sinnoh Stone For Vivo Y78+ (T1) Edition | Dr.fone
- How To Transfer Data From Apple iPhone 13 Pro To Android/iOS? | Dr.fone
- AVCHD MTS Converter for Xiaomi Redmi Note 12 Pro 4G
- In 2024, How to Fake Snapchat Location without Jailbreak On Realme C53 | Dr.fone
- How Do You Get Sun Stone Evolutions in Pokémon For Honor V Purse? | Dr.fone
- How to restore wiped music on Tecno Spark 10 4G
- In 2024, How to Track a Lost Oppo Reno 9A for Free? | Dr.fone
- App Wont Open on Your Poco F5 Pro 5G? Here Are All Fixes | Dr.fone
- Forgot Your Apple ID Password and Email On iPhone 14? Heres the Best Fixes
- Vivo V27e Stuck on Screen – Finding Solutions For Stuck on Boot | Dr.fone
- In 2024, How to Bypass Google FRP Lock on Huawei Nova Y91 Devices
- Additional Tips About Sinnoh Stone For Apple iPhone 12 Pro | Dr.fone
- 4 Things You Must Know About Apple iPhone X Activation Lock
- Fix Realme C67 5G Android System Webview Crash 2024 Issue | Dr.fone
- Title: Finding Best GIF Websites Is Easy as Pie for 2024
- Author: Chloe
- Created at : 2024-05-20 03:38:30
- Updated at : 2024-05-21 03:38:30
- Link: https://ai-editing-video.techidaily.com/finding-best-gif-websites-is-easy-as-pie-for-2024/
- License: This work is licensed under CC BY-NC-SA 4.0.
