:max_bytes(150000):strip_icc():format(webp)/nintendo-switch-vs-nintendo-switch-lite-01-61592395e9e44fc78403c7e99105de84.jpg)
Guide Adopting Lumetri Color Presets in Effective Color Grading

Guide: Adopting Lumetri Color Presets in Effective Color Grading
Color grading plays a crucial role in a video’s post-production. It can impact a video’s appearance and atmosphere. The Lumetri Color panel in Adobe Premiere Pro provides an efficient and powerful set of tools for color grading. However, knowing where to start or how to achieve the desired look can be challenging. One approach is to use Lumetri Color presets, which are pre-configured color grading settings.
You can apply these to your footage with a few clicks. This article will provide a guide on how to adopt Lumetri Color presets. We’ll cover the basics of color grading and their importance. We will also learn how to access and use Lumetri presets. By the end of this guide, you’ll have the knowledge and tools to take your color grading skills to the next level.
Part 1: What are Lumetri Color Presets?
Lumetri Color Presets are pre-made color grading settings that you can use for videos. These are used in Adobe’s Lumetri Color panel in Premiere Pro or After Effects. The Lumetri Color panel allows editors and colorists to adjust the colors and tones of a video clip. It improves your video’s visual appeal and storytelling impact.
The Lumetri Color panel is a powerful tool that provides a range of controls for color grading. It allows you to adjust these image attributes and see the changes in real time. Lumetri Looks provides a simple way to apply a pre-designed look or style to your footage. These presets can range from subtle adjustments to drastic color grading effects. Moreover, you can customize them further to fit your needs.
Empower your videos with a new mood using different LUTs. Filmora now offers 100+ top-quality 3D LUTs cover a broad range of scenarios. Transform your videos with Filmora’s powerful 3D LUTs.
Apply LUT on Videos Apply LUT on Videos Learn More

Part 2: Why Are Lumetri Color Presets Important?
There are many benefits attached to the use of a Lumetri preset. These benefits range from saving your time and effort to enhancing your video to new heights. Given below are some factors which emphasize the importance of Lumetri color presets:
Saves Time
Lumetri color can save a lot of time for video content creators. People adjust the colors and tones in a video to achieve a specific look. Instead, a Lumetri color preset can be applied in a few clicks. It is especially useful when working on larger projects or when deadlines are tight.
Enhanced Look
Color grading is an essential part of video production. Here, Lumetri color can help improve the look of a video. By applying a preset, you can achieve a specific mood or tone that would otherwise be hectic to create. It results in more visually appealing and professional-looking content.
Further Adjustments
You can use Lumetri color presets as a base for further color grading adjustments. After applying a preset, you can still make manual adjustments to fine-tune the colors. It helps achieve a more personalized look while still saving a lot of time and effort.
Maintains Consistency
Using Lumetri color can help maintain consistency across different video projects. It is especially important for branding purposes. Furthermore, it can help establish a recognizable visual style. Besides, using similar presets across different videos gives a cohesive look.
Part 3: How To Install Free Lumetri Color Presets on Device?
There is no doubt that Lumetri Color Presets are an essential tool for video editors. These presets help enhance the quality of their videos. Moreover, they also offer various color grading options. If you are looking for free Lumetri Color Presets, we have good news. Given below are the simple steps for free Lumetri Color download and installation:
Step 1Download Special Presets and Access Adobe Premiere Pro Folder
Start by downloading the “PremiumBeat Hollywood Lumetri Looks” folder from the official website. Now unzip the folder to view its contents. Next, you need to open the Adobe Premiere Pro folder.
To open the Premiere Pro folder, you need to open “Finder” and navigate to “Application.” Here open the “Adobe Premiere Pro CC” folder. Windows users can access the “Adobe Premiere Pro CC” through the “Program Files” of their “C:/” drive.

Step 2Lead Into Its Lumetri Folder
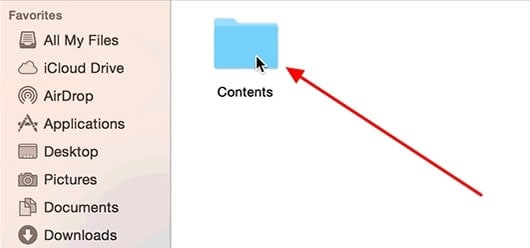
Here, you need to access the “Lumetri” folder. To do that, you need to hold “Command,” click “Adobe Premiere CC,” and choose “Show Package Contents.” Now go to the “Lumetri” folder in “Contents.” Windows users can access the “Lumetri” folder through the “Adobe Premiere Pro CC” folder.
Step 3Unzip The Presets To Lumetri Folder
Now, you need to access the “Cine” folder within the “Lumetri” folder. Afterward, move all “.look” files from the unzipped “PremiumBeat Hollywood Lumetri Looks” folder. Mac users can do that using the drag-and-drop method, while Windows users can do copy/paste.

Part 4: How To Use Lumetri LUT Presets in Premiere Pro?
Now that you have installed free Lumetri presets, the next part is how to use them. These presets can become a powerful feature in your Premiere Pro. It will allow you to apply a pre-defined color grading effect to your footage. In this guide, we will walk you through the steps to use Lumetri LUT presets in Adobe Premiere Pro:
Step 1Open the Color Workspace
After downloading free Lumetri presets, you need to restart your Adobe Premier Pro. Now open your project and access the “Lumetri Color” panel through “Color” from the top bar.

Step 2Lead Into Lumetri Color Section
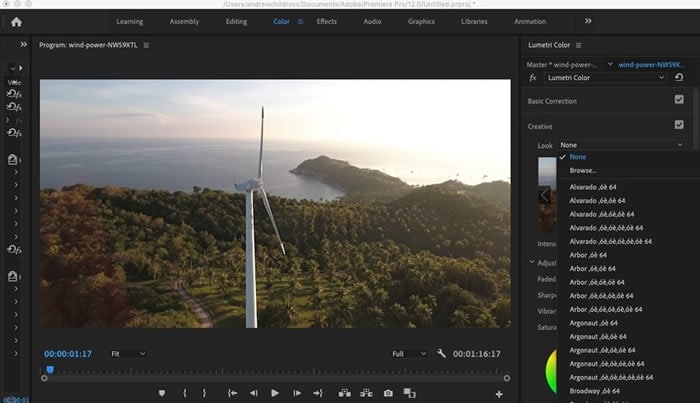
Scroll down in the “Lumetri Color” panel to find the “Creative” section. Here click the “Look” dropdown menu, and you will find all the installed presets here.
Step 3Apply the Required Presets
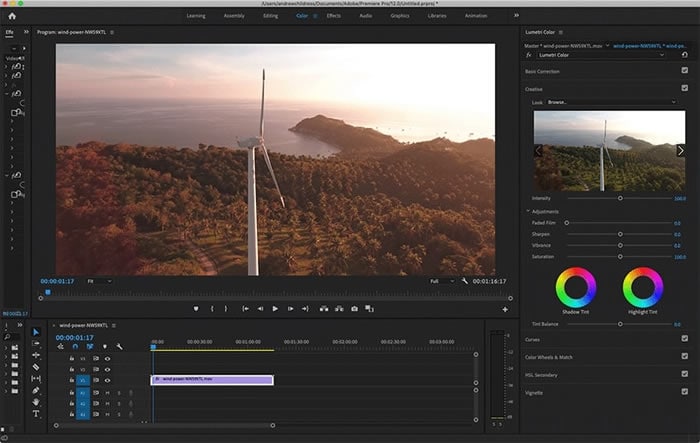
Choose a preset and apply it to your project. You can preview the file to see the effect of a preset on your footage.
Bonus Part: Using Lumetri Color Preset LUTs in Wondershare Filmora
Using Lumetri Color Presets or LUTs is essential during the post-production of your footage. However, using Adobe Premier Pro can be tough, especially for beginners. It has a steep learning curve and is also expensive. As a replacement, you can use Wondershare Filmora . It is a video editor known for its extensive features and affordable cost. This tool started its journey with more than 100 LUTs to use in your video.
Add LUTs on Video For Win 7 or later(64-bit)
Add LUTs on Video For macOS 10.14 or later
Furthermore, the video editing innovation has introduced 100+ new LUTs, taking the total number to well past 200. You can use this wide range of LUTs to enhance your video or footage to new heights. Moreover, it allows you to preview each LUT file as you hover over it. When using LUTs in Filmora, you can also set their intensity to your liking.

Main Features of Wondershare Filmora
- Filmora comes with various built-in effects, including transitions, filters, overlays, etc.
- Its Green Screen feature lets you replace the background of your videos with custom images or videos.
- The LUTs section of Filmora include scenarios like travel vlogger, event record, landscape film, and more.
- Using its motion-tracking feature, you can add text or graphics on a moving object or person in your video.
Conclusion
To sum it up, adopting Lumetri Presets is an effective way to enhance your video content. You can get professional-level color grading results by using the provided instructions. While Premiere Pro is a good choice for color grading, it has a steep learning curve. That’s why Wondershare Filmora stands out as the best choice due to its clean interface and affordable price.
Moreover, it offers an extensive library of built-in LUTs. You can take your video content to the next level using Filmora and the knowledge gained from this guide.
Apply LUT on Videos Apply LUT on Videos Learn More

Part 2: Why Are Lumetri Color Presets Important?
There are many benefits attached to the use of a Lumetri preset. These benefits range from saving your time and effort to enhancing your video to new heights. Given below are some factors which emphasize the importance of Lumetri color presets:
Saves Time
Lumetri color can save a lot of time for video content creators. People adjust the colors and tones in a video to achieve a specific look. Instead, a Lumetri color preset can be applied in a few clicks. It is especially useful when working on larger projects or when deadlines are tight.
Enhanced Look
Color grading is an essential part of video production. Here, Lumetri color can help improve the look of a video. By applying a preset, you can achieve a specific mood or tone that would otherwise be hectic to create. It results in more visually appealing and professional-looking content.
Further Adjustments
You can use Lumetri color presets as a base for further color grading adjustments. After applying a preset, you can still make manual adjustments to fine-tune the colors. It helps achieve a more personalized look while still saving a lot of time and effort.
Maintains Consistency
Using Lumetri color can help maintain consistency across different video projects. It is especially important for branding purposes. Furthermore, it can help establish a recognizable visual style. Besides, using similar presets across different videos gives a cohesive look.
Part 3: How To Install Free Lumetri Color Presets on Device?
There is no doubt that Lumetri Color Presets are an essential tool for video editors. These presets help enhance the quality of their videos. Moreover, they also offer various color grading options. If you are looking for free Lumetri Color Presets, we have good news. Given below are the simple steps for free Lumetri Color download and installation:
Step 1Download Special Presets and Access Adobe Premiere Pro Folder
Start by downloading the “PremiumBeat Hollywood Lumetri Looks” folder from the official website. Now unzip the folder to view its contents. Next, you need to open the Adobe Premiere Pro folder.
To open the Premiere Pro folder, you need to open “Finder” and navigate to “Application.” Here open the “Adobe Premiere Pro CC” folder. Windows users can access the “Adobe Premiere Pro CC” through the “Program Files” of their “C:/” drive.

Step 2Lead Into Its Lumetri Folder
Here, you need to access the “Lumetri” folder. To do that, you need to hold “Command,” click “Adobe Premiere CC,” and choose “Show Package Contents.” Now go to the “Lumetri” folder in “Contents.” Windows users can access the “Lumetri” folder through the “Adobe Premiere Pro CC” folder.

Step 3Unzip The Presets To Lumetri Folder
Now, you need to access the “Cine” folder within the “Lumetri” folder. Afterward, move all “.look” files from the unzipped “PremiumBeat Hollywood Lumetri Looks” folder. Mac users can do that using the drag-and-drop method, while Windows users can do copy/paste.

Part 4: How To Use Lumetri LUT Presets in Premiere Pro?
Now that you have installed free Lumetri presets, the next part is how to use them. These presets can become a powerful feature in your Premiere Pro. It will allow you to apply a pre-defined color grading effect to your footage. In this guide, we will walk you through the steps to use Lumetri LUT presets in Adobe Premiere Pro:
Step 1Open the Color Workspace
After downloading free Lumetri presets, you need to restart your Adobe Premier Pro. Now open your project and access the “Lumetri Color” panel through “Color” from the top bar.

Step 2Lead Into Lumetri Color Section
Scroll down in the “Lumetri Color” panel to find the “Creative” section. Here click the “Look” dropdown menu, and you will find all the installed presets here.

Step 3Apply the Required Presets
Choose a preset and apply it to your project. You can preview the file to see the effect of a preset on your footage.

Bonus Part: Using Lumetri Color Preset LUTs in Wondershare Filmora
Using Lumetri Color Presets or LUTs is essential during the post-production of your footage. However, using Adobe Premier Pro can be tough, especially for beginners. It has a steep learning curve and is also expensive. As a replacement, you can use Wondershare Filmora . It is a video editor known for its extensive features and affordable cost. This tool started its journey with more than 100 LUTs to use in your video.
Add LUTs on Video For Win 7 or later(64-bit)
Add LUTs on Video For macOS 10.14 or later
Furthermore, the video editing innovation has introduced 100+ new LUTs, taking the total number to well past 200. You can use this wide range of LUTs to enhance your video or footage to new heights. Moreover, it allows you to preview each LUT file as you hover over it. When using LUTs in Filmora, you can also set their intensity to your liking.

Main Features of Wondershare Filmora
- Filmora comes with various built-in effects, including transitions, filters, overlays, etc.
- Its Green Screen feature lets you replace the background of your videos with custom images or videos.
- The LUTs section of Filmora include scenarios like travel vlogger, event record, landscape film, and more.
- Using its motion-tracking feature, you can add text or graphics on a moving object or person in your video.
Conclusion
To sum it up, adopting Lumetri Presets is an effective way to enhance your video content. You can get professional-level color grading results by using the provided instructions. While Premiere Pro is a good choice for color grading, it has a steep learning curve. That’s why Wondershare Filmora stands out as the best choice due to its clean interface and affordable price.
Moreover, it offers an extensive library of built-in LUTs. You can take your video content to the next level using Filmora and the knowledge gained from this guide.
How to Use Lumetri Color in After Effects
Create High-Quality Video - Wondershare Filmora
An easy and powerful YouTube video editor
Numerous video and audio effects to choose from
Detailed tutorials provided by the official channel
When going forth with film post-production, video game creation, and television production, almost every video editor’s goal is to produce outstanding results. Usually, this cannot be achieved by using mediocre tools. One of the top-notch software video editors need to use is Adobe After Effect. Adobe After Effect is a motion graphics, digital visual effect, and compositing application developed by the Adobe system.
Adobe After Effects has tons of tools, and an exceptional one is a Lumetri color. With this functionality, you can easily carry out your color correction and color grading. Read this article and get to the bottom line on how to use Lumetri Color in Adobe After Effects.
Let’s dig in!
In this article
01 Does After Effects have Lumetri Color?
02 How to use Lumetri Color in Adobe After Effects
03 Is there a simple way to Unionise the Color of my Video?
Does After Effects have Lumetri Color?
Yes, there is lumetri color in After Effects. Lumetri Color allows you to adjust contrast, light, and color to your video based on your preference. With After Effects, you can carry out various color customizations in the Lumerti panel without exiting your current project.
Furthermore, the Lumetri color panel in Adobe After Effects allows you to export your settings to another different premiere pro project wholly. Usually, the file is exported as a .cube file – This relieves you from the wearisomeness of creating new grading features.
How to use Lumetri Color in Adobe After Effects
You don’t need to be a pro for you to use Lumetri Color in Adobe After Effects. The color workspace in Adobe After Effect is designed to be straightforward and user-friendly.
The Lumetri Color panel in Adobe contains the histogram, vectorscope, parade scope, and waveform monitor. The histogram, parade scope, and waveform monitor display image intensity, whereas the vectorscope display hue and color saturation.
Lumetri Color is considered an ultimate choice by most editors due to its wide range of functionalities. Some of the functionalities in the Lumetri panel include:
1. Vignettes
Vignette is an outstanding feature that effortlessly allows Lumetri users to adjust lightness and darkness using sliders.
Vignettes allow you to darken the borders and highlight certain parts. You will therefore create more emphasis on highlighted parts in your clip.
2. HSL Secondary
When you want to get exceptional footage controls, HSL Secondary (Hue, Saturation, and Luminance) is often the best functionality. HSL Secondary easily separates your footage and works on a selected piece.
With the functionality, you can easily manipulate the skin tones in your footage and refocus images.

3. Curves
The Lumetri panel in Adobe After Effects renders its users the curves functionality. There are two curves in the Lumetri Panel, i.e., Hue Saturation curves and luminesce curves.
The Hue/Saturation curve uses the red, green, and blue (RBG) flagship, whereas the luminance curve helps manage the frame curve’s tone.

4. Fx Bypass
Fx Bypass is a new functionality feature in the Lumetri panel. It allows you to bypass and reset effects without switching to the controls panel.
How to use Lumetri Color
With your Adobe After Effects, you can make quick and advanced color changes to your clips. Here are the simple steps on how to use Lumetri Color.
Step 1. Add your footage to the timeline
First, open your Adobe After Effect and add your video file to the software. Drag and drop to add it to the timeline.

Step 2. Open Lumetri Color
Here, you highlight your video in the timeline, then head over to the “Window” menu. From the drop-down menu, select “Effects & presets” > “Lumetri Color.”
Alternatively, you can go to the “Effects” menu, which is at the left-hand side of your interface, then select “Color Correction”> “Lumetri Color.”

Step 3. Carry out your Color Grading and Saturation
With the “Lumetri Color” functionality, you can carry out various adjustable settings such as tone, hue, saturation and color grading.
To carry out saturation:
Click on the “ Hue/Saturation “ from the drop-down menu in “Lumetri Color.” You can change the color of the entire footage by adjusting the “Master Hue” from the Effects Control Panel.
Alternatively, you can opt to fine-tune the freshly selected color by using the “Master Saturation” and Master Lightness.”
To carry out color grading:
- After opening the “Lumetri Color” panel as in step 2 above, click on the eyedropper to select the curve you want to use.
- Click the color in your footage that you wish to adjust. Usually, when you use the eyedropper, three points will be added to the graph. The two bottom points restrict color selection to a minimum range, whereas the first represents your selected color.
How to Use Lumetri Scope
Besides the Lumetric Color, Lumetric Scope is another essential tool for post-film production in Adobe After Effects. The color correcting tool, Lumetric scope guarantees its users’ accurate results when used correctly.
When carrying out color corrections in films, it is advisable to use quality monitor calibrators and paint your workspace walls neutral grey. Usually, it reduces lighting distraction and the external color effect, respectively.
However, not every editor can meet all the required basics, and that is where Lumetri scope comes in. Lumetri Scope allows one to get the best color results in their videos. Here are the steps on how to use Lumetri Scope:

Step 1. Open Lumetric Scope
First, open your Adobe After Effect application and add your footage to the timeline. Go to the “ Window “ menu at the top-left-hand side of your interface.
In the drop-down menu, select “Lumetri Scopes” or “Workspaces,” then click on the “Color” option.
The Lumetri Scope tab will be displayed adjacent to the timeline footage.
Step 2. Evaluate Hue and Saturation using Vectorscope
In the Lumetri Scope tab, click on the wrench icon, and a drop-down menu will be displayed. From the menu, select “Vectorscope YUV” and read the saturation. When reading saturation, begin from the center going outwards.
Hue, on the other hand, is read in a circular direction.

Step 3. Evaluate the tonal values and Brightness using Histogram
The histogram in Lumetri Scope displays an image’s tonal values and brightness levels.
To measure the brightness and tonal values, go back to the Lumetri Scope panel and click on the wrench icon. Click on “Presets” from the drop-down menu and select “Histogram.”
The scale in the histogram starts from 0 (pure black) to 225 (pure white). You, therefore, need to view the number of pixels for every color horizontally when reading.

Step 4. Evaluate Color and Brightness Intensities using Waveform Monitor
The color and brightness are read from the bottom to the top in the waveform monitor.
Click on the wrench icon to view the intensities, then pick the “Presets” option > “Waveform RBG.” A drop-down menu (RGB, YC, Luma, and YC no Chroma) will be displayed that allows you to do the readings.
Reading the IRE scale is usually done in ascension (0 to 100).

Step 5. Evaluate the Individual color channels using Parade Scope
Here, click on the wrench icon in the Lumetri Scopes panel, then select the “Presets”> “Parade RGB.” Select from the alternate Lumetri scope combinations of RGB, RGB-White, YUV, YUV white.
Is there a simple way to Unionise the Color of my Video?
Have you tried color grading and color correction in Lumetri using Adobe After Effects, but your efforts are bearing no fruits? It would be best not to worry since there is a simple way out. So, Yes! There is a simple way to unionize the color of your video – it is by using Wondershare Filmora .
Wondershare Filmora is a professional application to edit videos with a wide range of tools that allows its users to create stunning videos with ease. From its simple and intuitive design to its wide range of functionalities and affordability, Filmora users have every reason to stick to the software.
Some of the functionality features that make Wondershare Filmora easy to use include:
Curve Section
Filmora has way simpler curves than Adobe After Effects. Filmora has two presets, i.e., One that creates an S-curve over the graph, and the other resets graph to a straight linear line. Usually, the S-curve represents soft contrasts.
YUV color correction
The YUV color correction feature in Filmora functions straightforwardly when compared to Adobe After Effects. The Y and V channels in Filmora stores color data, whereas the U channel carries the brightness data. Editors find it effortlessly using the YUV color correction in Filmora.
Hue and Saturation
Hue, saturation, and lightness levels in Wondershare Filmora are undeniably very easy to understand unline other premiere software applications.
In Filmora, the Hue shift plays an essential role in shuffling the colors, whereas the Saturation defines the overall intensity of colors in an image.
For Win 7 or later (64-bit)
For macOS 10.12 or later
Conclusion
● With the above illustrations, you need not find it challenging to use Lumetri Color in Adobe After Effect. But if you are getting your head stuck when using Adobe After Effects, you need not stress out. There is an ultimate solution, and that is Wondershare Filmora. Incorporate this easy-to-use and pocket-friendly software in your edits. Besides, you will not have to go through the user guide to get started.
When going forth with film post-production, video game creation, and television production, almost every video editor’s goal is to produce outstanding results. Usually, this cannot be achieved by using mediocre tools. One of the top-notch software video editors need to use is Adobe After Effect. Adobe After Effect is a motion graphics, digital visual effect, and compositing application developed by the Adobe system.
Adobe After Effects has tons of tools, and an exceptional one is a Lumetri color. With this functionality, you can easily carry out your color correction and color grading. Read this article and get to the bottom line on how to use Lumetri Color in Adobe After Effects.
Let’s dig in!
In this article
01 Does After Effects have Lumetri Color?
02 How to use Lumetri Color in Adobe After Effects
03 Is there a simple way to Unionise the Color of my Video?
Does After Effects have Lumetri Color?
Yes, there is lumetri color in After Effects. Lumetri Color allows you to adjust contrast, light, and color to your video based on your preference. With After Effects, you can carry out various color customizations in the Lumerti panel without exiting your current project.
Furthermore, the Lumetri color panel in Adobe After Effects allows you to export your settings to another different premiere pro project wholly. Usually, the file is exported as a .cube file – This relieves you from the wearisomeness of creating new grading features.
How to use Lumetri Color in Adobe After Effects
You don’t need to be a pro for you to use Lumetri Color in Adobe After Effects. The color workspace in Adobe After Effect is designed to be straightforward and user-friendly.
The Lumetri Color panel in Adobe contains the histogram, vectorscope, parade scope, and waveform monitor. The histogram, parade scope, and waveform monitor display image intensity, whereas the vectorscope display hue and color saturation.
Lumetri Color is considered an ultimate choice by most editors due to its wide range of functionalities. Some of the functionalities in the Lumetri panel include:
1. Vignettes
Vignette is an outstanding feature that effortlessly allows Lumetri users to adjust lightness and darkness using sliders.
Vignettes allow you to darken the borders and highlight certain parts. You will therefore create more emphasis on highlighted parts in your clip.
2. HSL Secondary
When you want to get exceptional footage controls, HSL Secondary (Hue, Saturation, and Luminance) is often the best functionality. HSL Secondary easily separates your footage and works on a selected piece.
With the functionality, you can easily manipulate the skin tones in your footage and refocus images.

3. Curves
The Lumetri panel in Adobe After Effects renders its users the curves functionality. There are two curves in the Lumetri Panel, i.e., Hue Saturation curves and luminesce curves.
The Hue/Saturation curve uses the red, green, and blue (RBG) flagship, whereas the luminance curve helps manage the frame curve’s tone.

4. Fx Bypass
Fx Bypass is a new functionality feature in the Lumetri panel. It allows you to bypass and reset effects without switching to the controls panel.
How to use Lumetri Color
With your Adobe After Effects, you can make quick and advanced color changes to your clips. Here are the simple steps on how to use Lumetri Color.
Step 1. Add your footage to the timeline
First, open your Adobe After Effect and add your video file to the software. Drag and drop to add it to the timeline.

Step 2. Open Lumetri Color
Here, you highlight your video in the timeline, then head over to the “Window” menu. From the drop-down menu, select “Effects & presets” > “Lumetri Color.”
Alternatively, you can go to the “Effects” menu, which is at the left-hand side of your interface, then select “Color Correction”> “Lumetri Color.”

Step 3. Carry out your Color Grading and Saturation
With the “Lumetri Color” functionality, you can carry out various adjustable settings such as tone, hue, saturation and color grading.
To carry out saturation:
Click on the “ Hue/Saturation “ from the drop-down menu in “Lumetri Color.” You can change the color of the entire footage by adjusting the “Master Hue” from the Effects Control Panel.
Alternatively, you can opt to fine-tune the freshly selected color by using the “Master Saturation” and Master Lightness.”
To carry out color grading:
- After opening the “Lumetri Color” panel as in step 2 above, click on the eyedropper to select the curve you want to use.
- Click the color in your footage that you wish to adjust. Usually, when you use the eyedropper, three points will be added to the graph. The two bottom points restrict color selection to a minimum range, whereas the first represents your selected color.
How to Use Lumetri Scope
Besides the Lumetric Color, Lumetric Scope is another essential tool for post-film production in Adobe After Effects. The color correcting tool, Lumetric scope guarantees its users’ accurate results when used correctly.
When carrying out color corrections in films, it is advisable to use quality monitor calibrators and paint your workspace walls neutral grey. Usually, it reduces lighting distraction and the external color effect, respectively.
However, not every editor can meet all the required basics, and that is where Lumetri scope comes in. Lumetri Scope allows one to get the best color results in their videos. Here are the steps on how to use Lumetri Scope:

Step 1. Open Lumetric Scope
First, open your Adobe After Effect application and add your footage to the timeline. Go to the “ Window “ menu at the top-left-hand side of your interface.
In the drop-down menu, select “Lumetri Scopes” or “Workspaces,” then click on the “Color” option.
The Lumetri Scope tab will be displayed adjacent to the timeline footage.
Step 2. Evaluate Hue and Saturation using Vectorscope
In the Lumetri Scope tab, click on the wrench icon, and a drop-down menu will be displayed. From the menu, select “Vectorscope YUV” and read the saturation. When reading saturation, begin from the center going outwards.
Hue, on the other hand, is read in a circular direction.

Step 3. Evaluate the tonal values and Brightness using Histogram
The histogram in Lumetri Scope displays an image’s tonal values and brightness levels.
To measure the brightness and tonal values, go back to the Lumetri Scope panel and click on the wrench icon. Click on “Presets” from the drop-down menu and select “Histogram.”
The scale in the histogram starts from 0 (pure black) to 225 (pure white). You, therefore, need to view the number of pixels for every color horizontally when reading.

Step 4. Evaluate Color and Brightness Intensities using Waveform Monitor
The color and brightness are read from the bottom to the top in the waveform monitor.
Click on the wrench icon to view the intensities, then pick the “Presets” option > “Waveform RBG.” A drop-down menu (RGB, YC, Luma, and YC no Chroma) will be displayed that allows you to do the readings.
Reading the IRE scale is usually done in ascension (0 to 100).

Step 5. Evaluate the Individual color channels using Parade Scope
Here, click on the wrench icon in the Lumetri Scopes panel, then select the “Presets”> “Parade RGB.” Select from the alternate Lumetri scope combinations of RGB, RGB-White, YUV, YUV white.
Is there a simple way to Unionise the Color of my Video?
Have you tried color grading and color correction in Lumetri using Adobe After Effects, but your efforts are bearing no fruits? It would be best not to worry since there is a simple way out. So, Yes! There is a simple way to unionize the color of your video – it is by using Wondershare Filmora .
Wondershare Filmora is a professional application to edit videos with a wide range of tools that allows its users to create stunning videos with ease. From its simple and intuitive design to its wide range of functionalities and affordability, Filmora users have every reason to stick to the software.
Some of the functionality features that make Wondershare Filmora easy to use include:
Curve Section
Filmora has way simpler curves than Adobe After Effects. Filmora has two presets, i.e., One that creates an S-curve over the graph, and the other resets graph to a straight linear line. Usually, the S-curve represents soft contrasts.
YUV color correction
The YUV color correction feature in Filmora functions straightforwardly when compared to Adobe After Effects. The Y and V channels in Filmora stores color data, whereas the U channel carries the brightness data. Editors find it effortlessly using the YUV color correction in Filmora.
Hue and Saturation
Hue, saturation, and lightness levels in Wondershare Filmora are undeniably very easy to understand unline other premiere software applications.
In Filmora, the Hue shift plays an essential role in shuffling the colors, whereas the Saturation defines the overall intensity of colors in an image.
For Win 7 or later (64-bit)
For macOS 10.12 or later
Conclusion
● With the above illustrations, you need not find it challenging to use Lumetri Color in Adobe After Effect. But if you are getting your head stuck when using Adobe After Effects, you need not stress out. There is an ultimate solution, and that is Wondershare Filmora. Incorporate this easy-to-use and pocket-friendly software in your edits. Besides, you will not have to go through the user guide to get started.
When going forth with film post-production, video game creation, and television production, almost every video editor’s goal is to produce outstanding results. Usually, this cannot be achieved by using mediocre tools. One of the top-notch software video editors need to use is Adobe After Effect. Adobe After Effect is a motion graphics, digital visual effect, and compositing application developed by the Adobe system.
Adobe After Effects has tons of tools, and an exceptional one is a Lumetri color. With this functionality, you can easily carry out your color correction and color grading. Read this article and get to the bottom line on how to use Lumetri Color in Adobe After Effects.
Let’s dig in!
In this article
01 Does After Effects have Lumetri Color?
02 How to use Lumetri Color in Adobe After Effects
03 Is there a simple way to Unionise the Color of my Video?
Does After Effects have Lumetri Color?
Yes, there is lumetri color in After Effects. Lumetri Color allows you to adjust contrast, light, and color to your video based on your preference. With After Effects, you can carry out various color customizations in the Lumerti panel without exiting your current project.
Furthermore, the Lumetri color panel in Adobe After Effects allows you to export your settings to another different premiere pro project wholly. Usually, the file is exported as a .cube file – This relieves you from the wearisomeness of creating new grading features.
How to use Lumetri Color in Adobe After Effects
You don’t need to be a pro for you to use Lumetri Color in Adobe After Effects. The color workspace in Adobe After Effect is designed to be straightforward and user-friendly.
The Lumetri Color panel in Adobe contains the histogram, vectorscope, parade scope, and waveform monitor. The histogram, parade scope, and waveform monitor display image intensity, whereas the vectorscope display hue and color saturation.
Lumetri Color is considered an ultimate choice by most editors due to its wide range of functionalities. Some of the functionalities in the Lumetri panel include:
1. Vignettes
Vignette is an outstanding feature that effortlessly allows Lumetri users to adjust lightness and darkness using sliders.
Vignettes allow you to darken the borders and highlight certain parts. You will therefore create more emphasis on highlighted parts in your clip.
2. HSL Secondary
When you want to get exceptional footage controls, HSL Secondary (Hue, Saturation, and Luminance) is often the best functionality. HSL Secondary easily separates your footage and works on a selected piece.
With the functionality, you can easily manipulate the skin tones in your footage and refocus images.

3. Curves
The Lumetri panel in Adobe After Effects renders its users the curves functionality. There are two curves in the Lumetri Panel, i.e., Hue Saturation curves and luminesce curves.
The Hue/Saturation curve uses the red, green, and blue (RBG) flagship, whereas the luminance curve helps manage the frame curve’s tone.

4. Fx Bypass
Fx Bypass is a new functionality feature in the Lumetri panel. It allows you to bypass and reset effects without switching to the controls panel.
How to use Lumetri Color
With your Adobe After Effects, you can make quick and advanced color changes to your clips. Here are the simple steps on how to use Lumetri Color.
Step 1. Add your footage to the timeline
First, open your Adobe After Effect and add your video file to the software. Drag and drop to add it to the timeline.

Step 2. Open Lumetri Color
Here, you highlight your video in the timeline, then head over to the “Window” menu. From the drop-down menu, select “Effects & presets” > “Lumetri Color.”
Alternatively, you can go to the “Effects” menu, which is at the left-hand side of your interface, then select “Color Correction”> “Lumetri Color.”

Step 3. Carry out your Color Grading and Saturation
With the “Lumetri Color” functionality, you can carry out various adjustable settings such as tone, hue, saturation and color grading.
To carry out saturation:
Click on the “ Hue/Saturation “ from the drop-down menu in “Lumetri Color.” You can change the color of the entire footage by adjusting the “Master Hue” from the Effects Control Panel.
Alternatively, you can opt to fine-tune the freshly selected color by using the “Master Saturation” and Master Lightness.”
To carry out color grading:
- After opening the “Lumetri Color” panel as in step 2 above, click on the eyedropper to select the curve you want to use.
- Click the color in your footage that you wish to adjust. Usually, when you use the eyedropper, three points will be added to the graph. The two bottom points restrict color selection to a minimum range, whereas the first represents your selected color.
How to Use Lumetri Scope
Besides the Lumetric Color, Lumetric Scope is another essential tool for post-film production in Adobe After Effects. The color correcting tool, Lumetric scope guarantees its users’ accurate results when used correctly.
When carrying out color corrections in films, it is advisable to use quality monitor calibrators and paint your workspace walls neutral grey. Usually, it reduces lighting distraction and the external color effect, respectively.
However, not every editor can meet all the required basics, and that is where Lumetri scope comes in. Lumetri Scope allows one to get the best color results in their videos. Here are the steps on how to use Lumetri Scope:

Step 1. Open Lumetric Scope
First, open your Adobe After Effect application and add your footage to the timeline. Go to the “ Window “ menu at the top-left-hand side of your interface.
In the drop-down menu, select “Lumetri Scopes” or “Workspaces,” then click on the “Color” option.
The Lumetri Scope tab will be displayed adjacent to the timeline footage.
Step 2. Evaluate Hue and Saturation using Vectorscope
In the Lumetri Scope tab, click on the wrench icon, and a drop-down menu will be displayed. From the menu, select “Vectorscope YUV” and read the saturation. When reading saturation, begin from the center going outwards.
Hue, on the other hand, is read in a circular direction.

Step 3. Evaluate the tonal values and Brightness using Histogram
The histogram in Lumetri Scope displays an image’s tonal values and brightness levels.
To measure the brightness and tonal values, go back to the Lumetri Scope panel and click on the wrench icon. Click on “Presets” from the drop-down menu and select “Histogram.”
The scale in the histogram starts from 0 (pure black) to 225 (pure white). You, therefore, need to view the number of pixels for every color horizontally when reading.

Step 4. Evaluate Color and Brightness Intensities using Waveform Monitor
The color and brightness are read from the bottom to the top in the waveform monitor.
Click on the wrench icon to view the intensities, then pick the “Presets” option > “Waveform RBG.” A drop-down menu (RGB, YC, Luma, and YC no Chroma) will be displayed that allows you to do the readings.
Reading the IRE scale is usually done in ascension (0 to 100).

Step 5. Evaluate the Individual color channels using Parade Scope
Here, click on the wrench icon in the Lumetri Scopes panel, then select the “Presets”> “Parade RGB.” Select from the alternate Lumetri scope combinations of RGB, RGB-White, YUV, YUV white.
Is there a simple way to Unionise the Color of my Video?
Have you tried color grading and color correction in Lumetri using Adobe After Effects, but your efforts are bearing no fruits? It would be best not to worry since there is a simple way out. So, Yes! There is a simple way to unionize the color of your video – it is by using Wondershare Filmora .
Wondershare Filmora is a professional application to edit videos with a wide range of tools that allows its users to create stunning videos with ease. From its simple and intuitive design to its wide range of functionalities and affordability, Filmora users have every reason to stick to the software.
Some of the functionality features that make Wondershare Filmora easy to use include:
Curve Section
Filmora has way simpler curves than Adobe After Effects. Filmora has two presets, i.e., One that creates an S-curve over the graph, and the other resets graph to a straight linear line. Usually, the S-curve represents soft contrasts.
YUV color correction
The YUV color correction feature in Filmora functions straightforwardly when compared to Adobe After Effects. The Y and V channels in Filmora stores color data, whereas the U channel carries the brightness data. Editors find it effortlessly using the YUV color correction in Filmora.
Hue and Saturation
Hue, saturation, and lightness levels in Wondershare Filmora are undeniably very easy to understand unline other premiere software applications.
In Filmora, the Hue shift plays an essential role in shuffling the colors, whereas the Saturation defines the overall intensity of colors in an image.
For Win 7 or later (64-bit)
For macOS 10.12 or later
Conclusion
● With the above illustrations, you need not find it challenging to use Lumetri Color in Adobe After Effect. But if you are getting your head stuck when using Adobe After Effects, you need not stress out. There is an ultimate solution, and that is Wondershare Filmora. Incorporate this easy-to-use and pocket-friendly software in your edits. Besides, you will not have to go through the user guide to get started.
When going forth with film post-production, video game creation, and television production, almost every video editor’s goal is to produce outstanding results. Usually, this cannot be achieved by using mediocre tools. One of the top-notch software video editors need to use is Adobe After Effect. Adobe After Effect is a motion graphics, digital visual effect, and compositing application developed by the Adobe system.
Adobe After Effects has tons of tools, and an exceptional one is a Lumetri color. With this functionality, you can easily carry out your color correction and color grading. Read this article and get to the bottom line on how to use Lumetri Color in Adobe After Effects.
Let’s dig in!
In this article
01 Does After Effects have Lumetri Color?
02 How to use Lumetri Color in Adobe After Effects
03 Is there a simple way to Unionise the Color of my Video?
Does After Effects have Lumetri Color?
Yes, there is lumetri color in After Effects. Lumetri Color allows you to adjust contrast, light, and color to your video based on your preference. With After Effects, you can carry out various color customizations in the Lumerti panel without exiting your current project.
Furthermore, the Lumetri color panel in Adobe After Effects allows you to export your settings to another different premiere pro project wholly. Usually, the file is exported as a .cube file – This relieves you from the wearisomeness of creating new grading features.
How to use Lumetri Color in Adobe After Effects
You don’t need to be a pro for you to use Lumetri Color in Adobe After Effects. The color workspace in Adobe After Effect is designed to be straightforward and user-friendly.
The Lumetri Color panel in Adobe contains the histogram, vectorscope, parade scope, and waveform monitor. The histogram, parade scope, and waveform monitor display image intensity, whereas the vectorscope display hue and color saturation.
Lumetri Color is considered an ultimate choice by most editors due to its wide range of functionalities. Some of the functionalities in the Lumetri panel include:
1. Vignettes
Vignette is an outstanding feature that effortlessly allows Lumetri users to adjust lightness and darkness using sliders.
Vignettes allow you to darken the borders and highlight certain parts. You will therefore create more emphasis on highlighted parts in your clip.
2. HSL Secondary
When you want to get exceptional footage controls, HSL Secondary (Hue, Saturation, and Luminance) is often the best functionality. HSL Secondary easily separates your footage and works on a selected piece.
With the functionality, you can easily manipulate the skin tones in your footage and refocus images.

3. Curves
The Lumetri panel in Adobe After Effects renders its users the curves functionality. There are two curves in the Lumetri Panel, i.e., Hue Saturation curves and luminesce curves.
The Hue/Saturation curve uses the red, green, and blue (RBG) flagship, whereas the luminance curve helps manage the frame curve’s tone.

4. Fx Bypass
Fx Bypass is a new functionality feature in the Lumetri panel. It allows you to bypass and reset effects without switching to the controls panel.
How to use Lumetri Color
With your Adobe After Effects, you can make quick and advanced color changes to your clips. Here are the simple steps on how to use Lumetri Color.
Step 1. Add your footage to the timeline
First, open your Adobe After Effect and add your video file to the software. Drag and drop to add it to the timeline.

Step 2. Open Lumetri Color
Here, you highlight your video in the timeline, then head over to the “Window” menu. From the drop-down menu, select “Effects & presets” > “Lumetri Color.”
Alternatively, you can go to the “Effects” menu, which is at the left-hand side of your interface, then select “Color Correction”> “Lumetri Color.”

Step 3. Carry out your Color Grading and Saturation
With the “Lumetri Color” functionality, you can carry out various adjustable settings such as tone, hue, saturation and color grading.
To carry out saturation:
Click on the “ Hue/Saturation “ from the drop-down menu in “Lumetri Color.” You can change the color of the entire footage by adjusting the “Master Hue” from the Effects Control Panel.
Alternatively, you can opt to fine-tune the freshly selected color by using the “Master Saturation” and Master Lightness.”
To carry out color grading:
- After opening the “Lumetri Color” panel as in step 2 above, click on the eyedropper to select the curve you want to use.
- Click the color in your footage that you wish to adjust. Usually, when you use the eyedropper, three points will be added to the graph. The two bottom points restrict color selection to a minimum range, whereas the first represents your selected color.
How to Use Lumetri Scope
Besides the Lumetric Color, Lumetric Scope is another essential tool for post-film production in Adobe After Effects. The color correcting tool, Lumetric scope guarantees its users’ accurate results when used correctly.
When carrying out color corrections in films, it is advisable to use quality monitor calibrators and paint your workspace walls neutral grey. Usually, it reduces lighting distraction and the external color effect, respectively.
However, not every editor can meet all the required basics, and that is where Lumetri scope comes in. Lumetri Scope allows one to get the best color results in their videos. Here are the steps on how to use Lumetri Scope:

Step 1. Open Lumetric Scope
First, open your Adobe After Effect application and add your footage to the timeline. Go to the “ Window “ menu at the top-left-hand side of your interface.
In the drop-down menu, select “Lumetri Scopes” or “Workspaces,” then click on the “Color” option.
The Lumetri Scope tab will be displayed adjacent to the timeline footage.
Step 2. Evaluate Hue and Saturation using Vectorscope
In the Lumetri Scope tab, click on the wrench icon, and a drop-down menu will be displayed. From the menu, select “Vectorscope YUV” and read the saturation. When reading saturation, begin from the center going outwards.
Hue, on the other hand, is read in a circular direction.

Step 3. Evaluate the tonal values and Brightness using Histogram
The histogram in Lumetri Scope displays an image’s tonal values and brightness levels.
To measure the brightness and tonal values, go back to the Lumetri Scope panel and click on the wrench icon. Click on “Presets” from the drop-down menu and select “Histogram.”
The scale in the histogram starts from 0 (pure black) to 225 (pure white). You, therefore, need to view the number of pixels for every color horizontally when reading.

Step 4. Evaluate Color and Brightness Intensities using Waveform Monitor
The color and brightness are read from the bottom to the top in the waveform monitor.
Click on the wrench icon to view the intensities, then pick the “Presets” option > “Waveform RBG.” A drop-down menu (RGB, YC, Luma, and YC no Chroma) will be displayed that allows you to do the readings.
Reading the IRE scale is usually done in ascension (0 to 100).

Step 5. Evaluate the Individual color channels using Parade Scope
Here, click on the wrench icon in the Lumetri Scopes panel, then select the “Presets”> “Parade RGB.” Select from the alternate Lumetri scope combinations of RGB, RGB-White, YUV, YUV white.
Is there a simple way to Unionise the Color of my Video?
Have you tried color grading and color correction in Lumetri using Adobe After Effects, but your efforts are bearing no fruits? It would be best not to worry since there is a simple way out. So, Yes! There is a simple way to unionize the color of your video – it is by using Wondershare Filmora .
Wondershare Filmora is a professional application to edit videos with a wide range of tools that allows its users to create stunning videos with ease. From its simple and intuitive design to its wide range of functionalities and affordability, Filmora users have every reason to stick to the software.
Some of the functionality features that make Wondershare Filmora easy to use include:
Curve Section
Filmora has way simpler curves than Adobe After Effects. Filmora has two presets, i.e., One that creates an S-curve over the graph, and the other resets graph to a straight linear line. Usually, the S-curve represents soft contrasts.
YUV color correction
The YUV color correction feature in Filmora functions straightforwardly when compared to Adobe After Effects. The Y and V channels in Filmora stores color data, whereas the U channel carries the brightness data. Editors find it effortlessly using the YUV color correction in Filmora.
Hue and Saturation
Hue, saturation, and lightness levels in Wondershare Filmora are undeniably very easy to understand unline other premiere software applications.
In Filmora, the Hue shift plays an essential role in shuffling the colors, whereas the Saturation defines the overall intensity of colors in an image.
For Win 7 or later (64-bit)
For macOS 10.12 or later
Conclusion
● With the above illustrations, you need not find it challenging to use Lumetri Color in Adobe After Effect. But if you are getting your head stuck when using Adobe After Effects, you need not stress out. There is an ultimate solution, and that is Wondershare Filmora. Incorporate this easy-to-use and pocket-friendly software in your edits. Besides, you will not have to go through the user guide to get started.
How to Make Video Slow Motion? [Complete Guide]
Slow-motion videos are in trend now, especially when shooting for Instagram Reels , TikTok videos, or YouTube Shorts . While many users record the entire video in slow motion, there are others who need only a particular section of a clip to play at a reduced speed. Nevertheless, slowing down footage is no longer rocket science, thanks to the advancements in technology, and the availability and ease of access to relevant apps.
That said, here you will learn what is needed to record a video in slow motion, and how to get the job done in a simple way. In addition, you will also learn how to reduce the playback speed of an already existing video if it was recorded at a normal pace.
In this article
01 How to Make Slow Motion Videos via Recording?
02 How to Apply the Smooth Slow-Motion Effect in Post-Production?
Part 1: How to Make Slow Motion Videos via Recording?
The fact is, the playback speed of a video is inversely proportional to the frames per second (FPS) it has been recorded in. Usually, to have a video play at normal speed, it is recorded at 24 FPS or 30 FPS. On the other hand, if you increase the frame rate (FPS) to 120 or 240, the playback speed slows down. You can easily check this if you have access to a DSLR camera or an iPhone. These devices allow you to adjust the FPS so the videos can be recorded in slow motion.
For your convenience and learning, the step-by-step procedure on how to record a video in slow motion using an iPhone is explained below:
Step 1: Get to the SLO-MO Mode
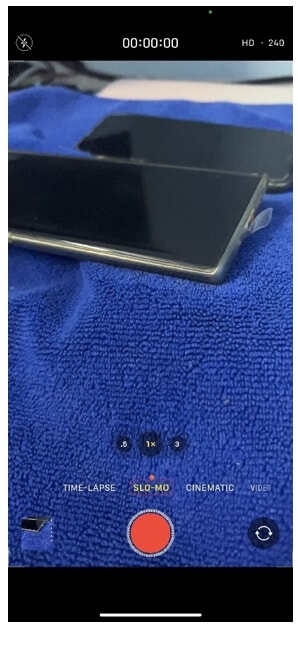
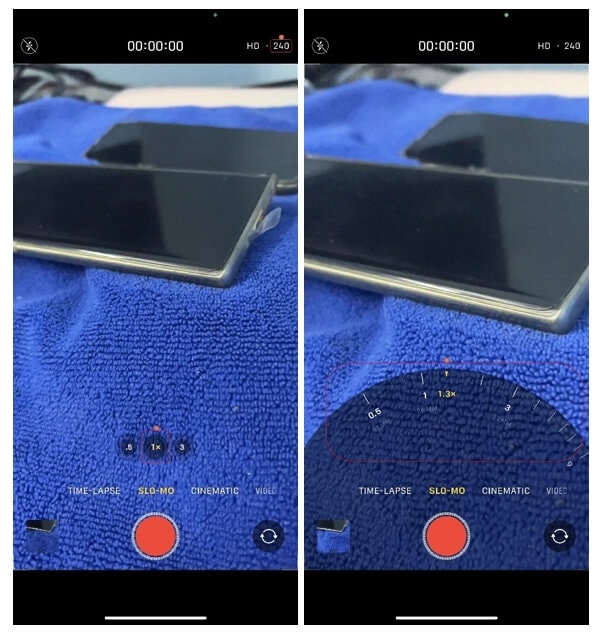
Launch the Camera app on your iPhone (iPhone 13 Pro Max is used here for illustrations), and swipe the screen to the left to get to the SLO-MO mode.
Step 2: Adjust Recording Preferences
Tap the number at the top-right corner to switch between 120 FPS and 240 FPS as needed. Tap 1x from the lower-middle section of the screen, and use the rotator to adjust your preferred zoom level.
Step 3: Start and Stop Recording
Tap the Record button from the bottom-center of the screen to begin recording the video in slow motion. Tap Stop when you are done. You can access the recorded video from the Videos container of the Photos app in your iPhone.
If you are using Android phone, you can check this article to find out more details about How to Record Super Slow Motion Videos on Your Phone.
You may also like: Best Slo-mo Camera Apps for Android And iPhone
Part 2: How to Apply the Smooth Slow-Motion Effect in Post-Production?
If you don’t have access to a camera that can record videos in slow motion, or in case you want to capture the footage at normal playback speed and then slow it down later, you need a dedicated tool to get the job done. Even though several post-production applications are available in the market, the one that is most versatile, has an intuitive interface, and is quite easy to use is Filmora video editor from Wondershare .
The latest version of the app, i.e., Wondershare Filmora 11 has a new feature called Speed Ramping that enables you to graphically manage the speed of the clips. While using the feature, you can either slow down the entire video or certain parts of it according to your requirements. For your learning, both the methods are explained below:
Method 1: Add Slow Motion Effect to the Whole Clip
For Win 7 or later (64-bit)
For macOS 10.12 or later
Step 1: Import the Source Video and Add to Timeline
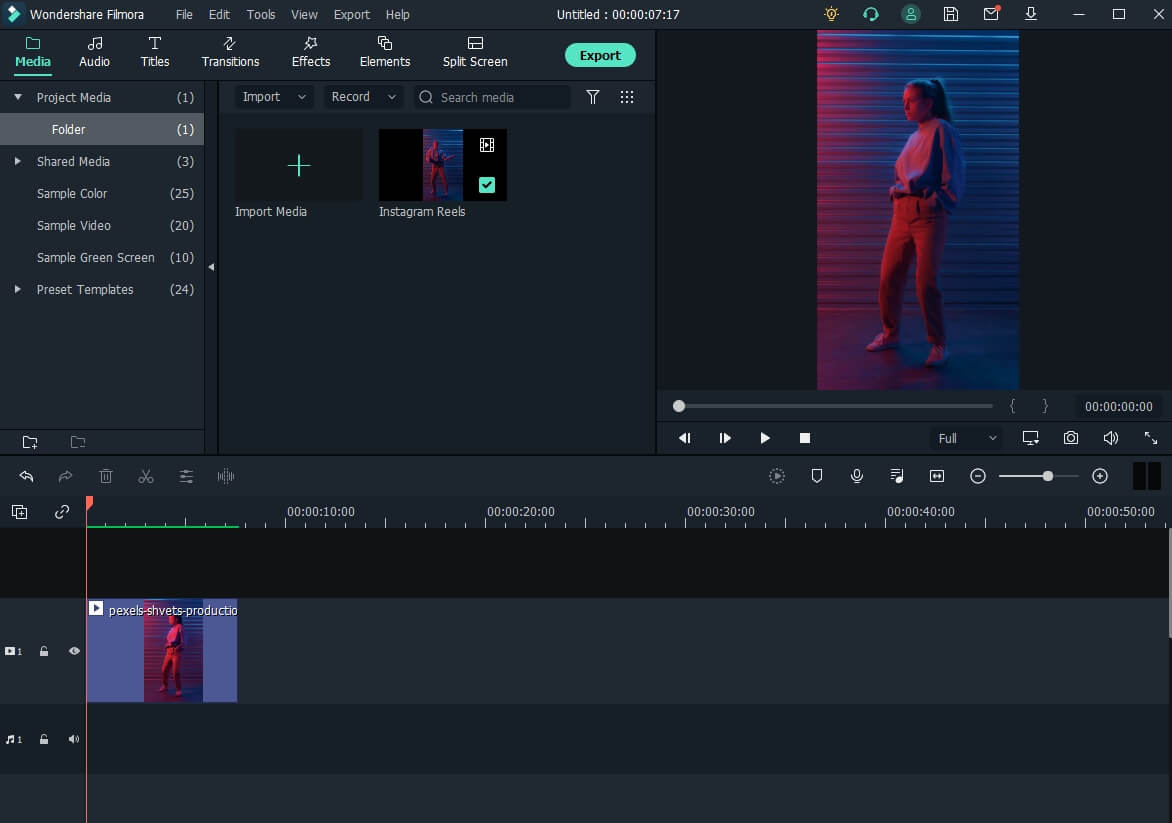
Launch Wondershare Filmora on your Windows or Mac computer (a Windows 11 PC is used here for illustrations), click New Project from the first screen that appears. Make sure that the Media tool is selected from the standard tool bar at the top, click anywhere inside the Media window, and select and import the source clip to the program.

Next, hover the mouse over the thumbnail of the imported video in the Media window, and click the + icon present at its bottom-right corner. When the confirmation box comes up, click the Match to Media or Keep Project Settings button to change the project settings to match the resolution of the video, or change the footage to meet the project settings respectively.
Step 2: Add Slow Motion Effect to the Whole Clip
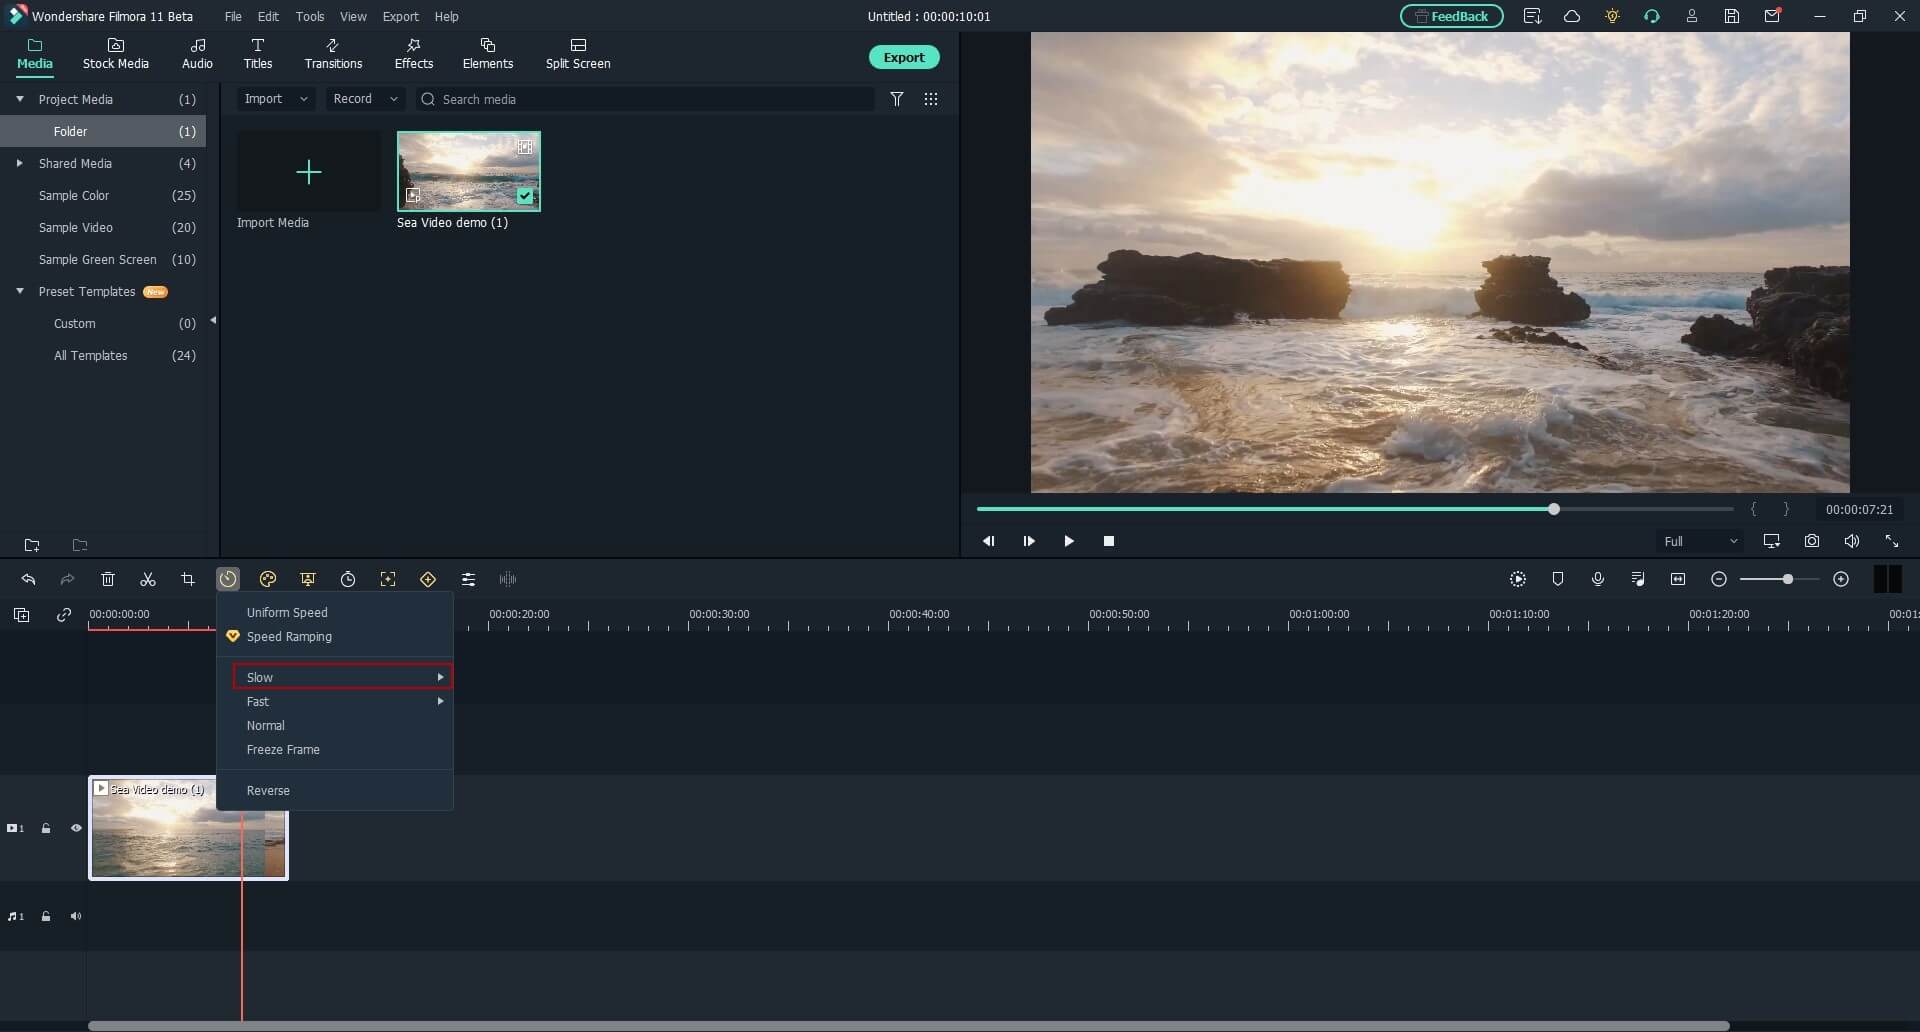
Once the media is added to the timeline, click on it and then click the Speed icon on the toolbar. Scroll down to the Slow menu and then you will see 0.5x, 0.25x, 0.1x, 0.05x and 0.01x presets. Select one to add slo-mo effects to the whole select clip. and click Speed Ramping from the menu that drops down.
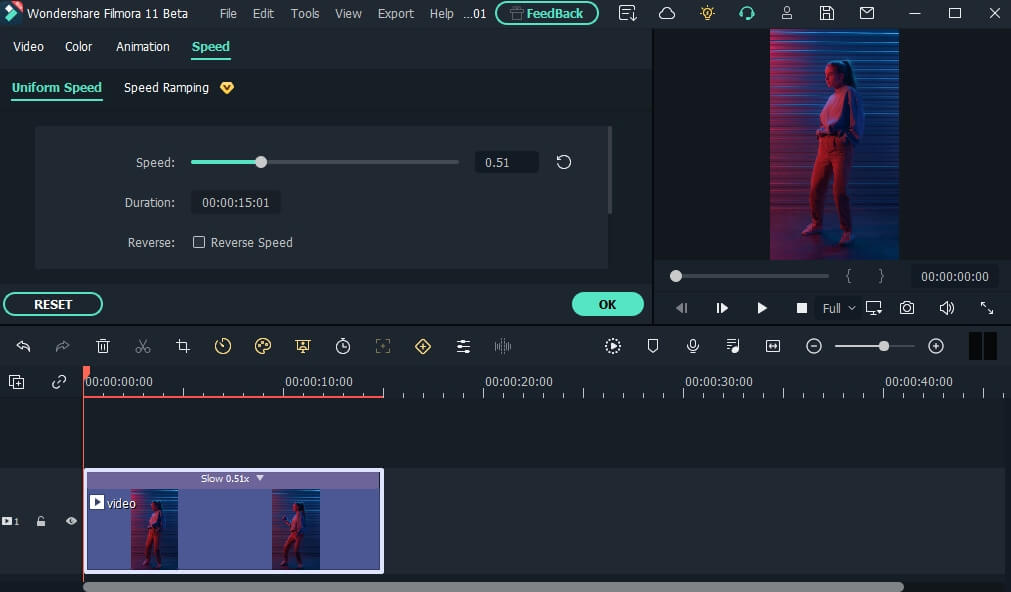
You can also right click the video in the timeline, and hover over to Speed option to select Uniform Speed to adjust the speed of the video to make a slo-mo effect video. Drag the speed slider to the left to slow down the video and you will see how many times it slowed down in the next field.
Method 2: Use Speed Ramping to Add Slow Motion Effect
For Win 7 or later (64-bit)
For macOS 10.12 or later
Speed Ramping enables you to add the slow-motion effect at different parts of a video and even freeze the screen for the duration that you specify. The processes to get these done are given below in detail:
Step 1: Add Source Video to Timeline and Get to the Speed Ramping Window
Use the process given in the previous method to import a source video to Wondershare Filmora 11 and add it to the Timeline. Then use the process given in the second step of the previous method to get to the Speed Ramping window.
Step 2: Add Slow Motion Effect to Different Parts of the Clip
Go to the Speed Ramping tab if it is not already selected, click Custom from the available options, and drag the adjustment points below the center line to reduce the playback speed for that particular section of the clip. Optionally, you can click any of the available presets to automatically add the slow-motion effect to the video.
Note: You can also drag the adjustment points above the line to increase the playback speed.
To add an adjustment point on the frame where it is not already present, place the playhead (skimmer) at the correct position, and click Add Adjust Point from the left of the Speed Ramping window itself. Once added, you can drag it downward to reduce the playback speed of that part of the clip.

Step 3: Freeze the Video
Place the skimmer on the frame where you want to freeze the video for a while, and click Add Freeze Frame from the left of the Speed Ramping window. When the time box appears, in the Freeze Time field, enter the duration in seconds you want to freeze the screen for, and click OK.
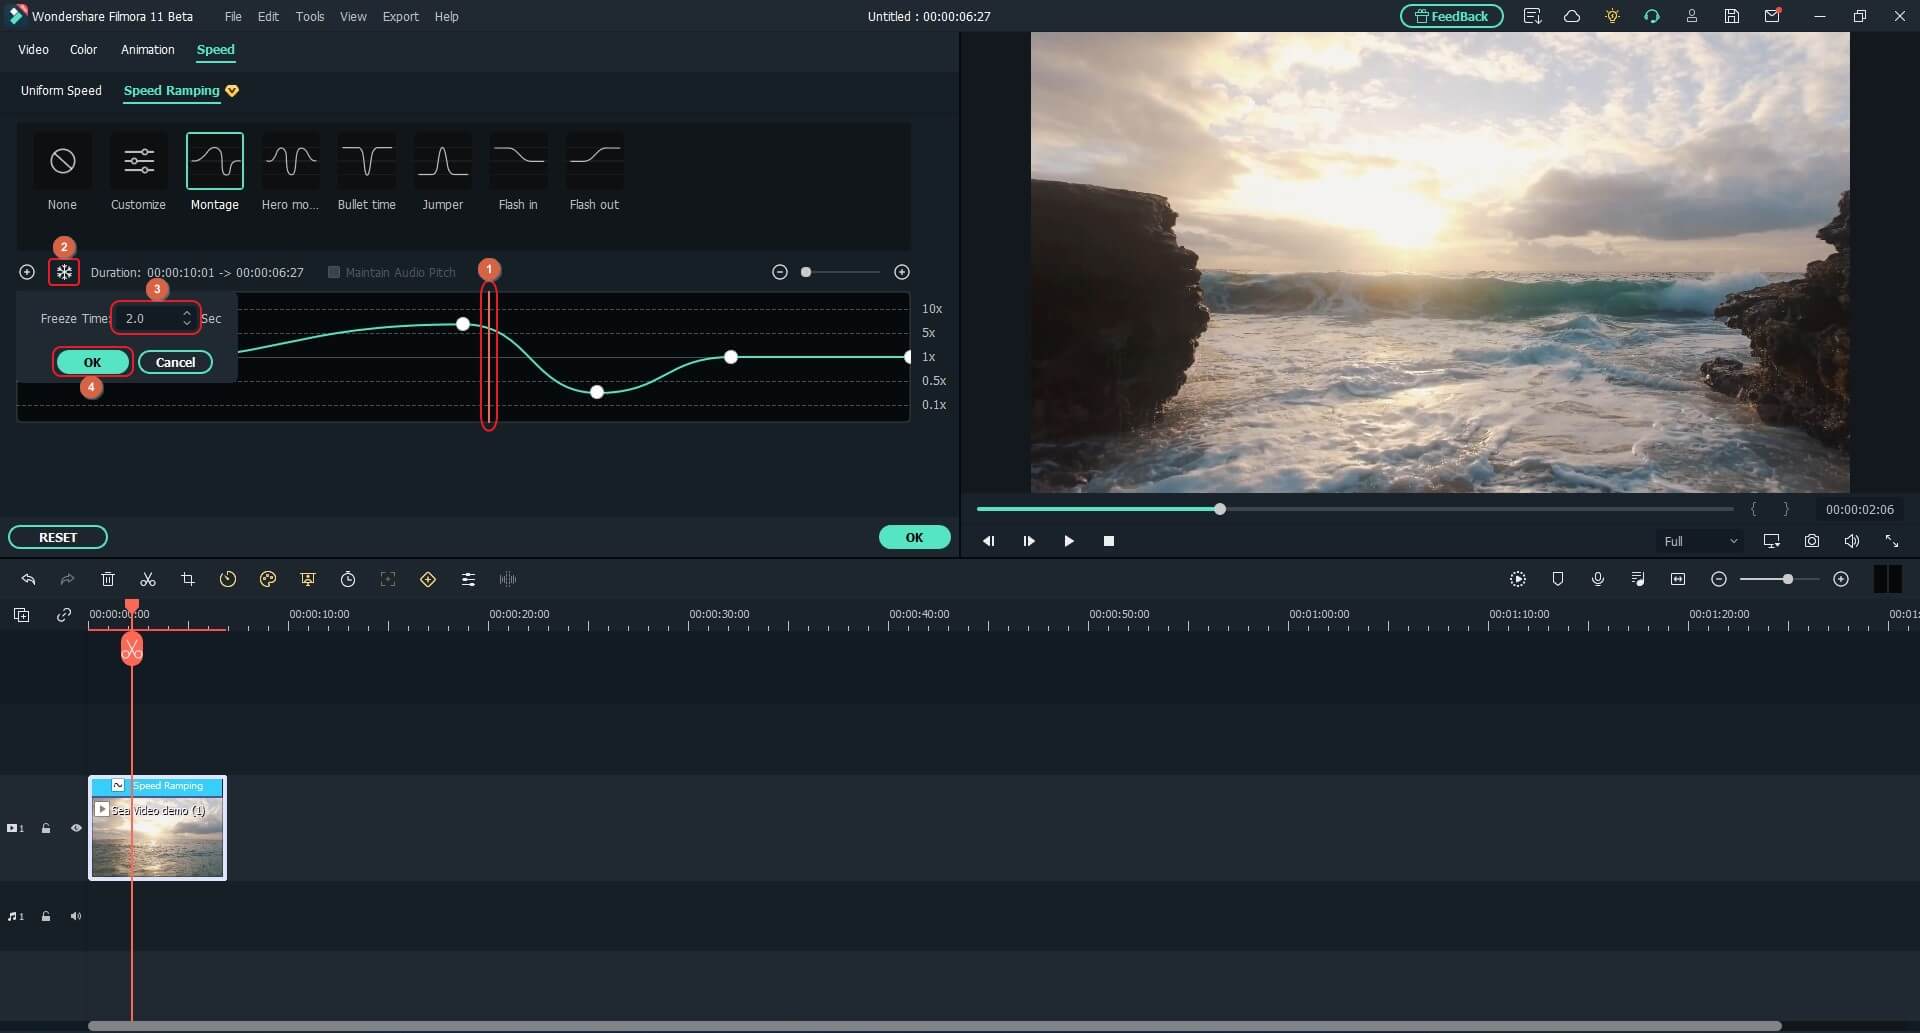
After adding a freeze point, optionally, you can drag and reposition it in the Speed Ramping timeline as needed. Finally, click OK from the bottom-right area to save the changes.
Part 3: When to Use Slow Motion?
There could be many instances when you want to add a slow-motion effect to your videos. Some of the most common ones include:
- Add Focus
If there is a particular scene in a clip that you want the audience to focus on, it would be a good idea to add the slow-motion effect right before that action appears on the screen, and bring the speed back to normal when the section is over.
- Skill or Style Demonstration
When a clip is playing at a normal speed, many times, the audience isn’t able to see the skills that you want to display. This is where you may want to add the slow-motion effect so that every detail can be noticed clearly and in detail.
- Replays
Mostly used for tournaments and matches where the actual action is to replayed so the audience, umpires, and other viewers can see the movements in detail before making the right decision.
- Observation
Some natural phenomena such as a deer running in the woods, a balloon full of water bursting, etc. occur quite quickly. If you want to witness such things clearly and in detail, it would be good to record them, and then reduce the playback speed for better viewing.
- Add Suspense
When you add the slow-motion effect to a scene, the impulse of the audience is automatically increased, and they take that particular section more seriously and with a thrill.
Conclusion
The slow-motion effect is inversely proportional to the framerate, i.e., frames per second or FPS. Almost all DSLR cameras that are available nowadays allow you to switch between different FPS values (typically 120 and 240) before recording. Also, if you have access to an iPhone, its Camera app has a built-in SLO-MO mode that can capture the footage in slow motion.
In addition, if you already have a video that has been recorded at a normal speed, you can use an efficient post-production software like Wondershare Filmora 11, and exploit its Speed Ramping feature to add the slow-motion effect at different scenes of a clip.
02 How to Apply the Smooth Slow-Motion Effect in Post-Production?
Part 1: How to Make Slow Motion Videos via Recording?
The fact is, the playback speed of a video is inversely proportional to the frames per second (FPS) it has been recorded in. Usually, to have a video play at normal speed, it is recorded at 24 FPS or 30 FPS. On the other hand, if you increase the frame rate (FPS) to 120 or 240, the playback speed slows down. You can easily check this if you have access to a DSLR camera or an iPhone. These devices allow you to adjust the FPS so the videos can be recorded in slow motion.
For your convenience and learning, the step-by-step procedure on how to record a video in slow motion using an iPhone is explained below:
Step 1: Get to the SLO-MO Mode
Launch the Camera app on your iPhone (iPhone 13 Pro Max is used here for illustrations), and swipe the screen to the left to get to the SLO-MO mode.

Step 2: Adjust Recording Preferences
Tap the number at the top-right corner to switch between 120 FPS and 240 FPS as needed. Tap 1x from the lower-middle section of the screen, and use the rotator to adjust your preferred zoom level.

Step 3: Start and Stop Recording
Tap the Record button from the bottom-center of the screen to begin recording the video in slow motion. Tap Stop when you are done. You can access the recorded video from the Videos container of the Photos app in your iPhone.
If you are using Android phone, you can check this article to find out more details about How to Record Super Slow Motion Videos on Your Phone.
You may also like: Best Slo-mo Camera Apps for Android And iPhone
Part 2: How to Apply the Smooth Slow-Motion Effect in Post-Production?
If you don’t have access to a camera that can record videos in slow motion, or in case you want to capture the footage at normal playback speed and then slow it down later, you need a dedicated tool to get the job done. Even though several post-production applications are available in the market, the one that is most versatile, has an intuitive interface, and is quite easy to use is Filmora video editor from Wondershare .
The latest version of the app, i.e., Wondershare Filmora 11 has a new feature called Speed Ramping that enables you to graphically manage the speed of the clips. While using the feature, you can either slow down the entire video or certain parts of it according to your requirements. For your learning, both the methods are explained below:
Method 1: Add Slow Motion Effect to the Whole Clip
For Win 7 or later (64-bit)
For macOS 10.12 or later
Step 1: Import the Source Video and Add to Timeline
Launch Wondershare Filmora on your Windows or Mac computer (a Windows 11 PC is used here for illustrations), click New Project from the first screen that appears. Make sure that the Media tool is selected from the standard tool bar at the top, click anywhere inside the Media window, and select and import the source clip to the program.

Next, hover the mouse over the thumbnail of the imported video in the Media window, and click the + icon present at its bottom-right corner. When the confirmation box comes up, click the Match to Media or Keep Project Settings button to change the project settings to match the resolution of the video, or change the footage to meet the project settings respectively.

Step 2: Add Slow Motion Effect to the Whole Clip
Once the media is added to the timeline, click on it and then click the Speed icon on the toolbar. Scroll down to the Slow menu and then you will see 0.5x, 0.25x, 0.1x, 0.05x and 0.01x presets. Select one to add slo-mo effects to the whole select clip. and click Speed Ramping from the menu that drops down.

You can also right click the video in the timeline, and hover over to Speed option to select Uniform Speed to adjust the speed of the video to make a slo-mo effect video. Drag the speed slider to the left to slow down the video and you will see how many times it slowed down in the next field.

Method 2: Use Speed Ramping to Add Slow Motion Effect
For Win 7 or later (64-bit)
For macOS 10.12 or later
Speed Ramping enables you to add the slow-motion effect at different parts of a video and even freeze the screen for the duration that you specify. The processes to get these done are given below in detail:
Step 1: Add Source Video to Timeline and Get to the Speed Ramping Window
Use the process given in the previous method to import a source video to Wondershare Filmora 11 and add it to the Timeline. Then use the process given in the second step of the previous method to get to the Speed Ramping window.
Step 2: Add Slow Motion Effect to Different Parts of the Clip
Go to the Speed Ramping tab if it is not already selected, click Custom from the available options, and drag the adjustment points below the center line to reduce the playback speed for that particular section of the clip. Optionally, you can click any of the available presets to automatically add the slow-motion effect to the video.
Note: You can also drag the adjustment points above the line to increase the playback speed.
To add an adjustment point on the frame where it is not already present, place the playhead (skimmer) at the correct position, and click Add Adjust Point from the left of the Speed Ramping window itself. Once added, you can drag it downward to reduce the playback speed of that part of the clip.

Step 3: Freeze the Video
Place the skimmer on the frame where you want to freeze the video for a while, and click Add Freeze Frame from the left of the Speed Ramping window. When the time box appears, in the Freeze Time field, enter the duration in seconds you want to freeze the screen for, and click OK.

After adding a freeze point, optionally, you can drag and reposition it in the Speed Ramping timeline as needed. Finally, click OK from the bottom-right area to save the changes.
Part 3: When to Use Slow Motion?
There could be many instances when you want to add a slow-motion effect to your videos. Some of the most common ones include:
- Add Focus
If there is a particular scene in a clip that you want the audience to focus on, it would be a good idea to add the slow-motion effect right before that action appears on the screen, and bring the speed back to normal when the section is over.
- Skill or Style Demonstration
When a clip is playing at a normal speed, many times, the audience isn’t able to see the skills that you want to display. This is where you may want to add the slow-motion effect so that every detail can be noticed clearly and in detail.
- Replays
Mostly used for tournaments and matches where the actual action is to replayed so the audience, umpires, and other viewers can see the movements in detail before making the right decision.
- Observation
Some natural phenomena such as a deer running in the woods, a balloon full of water bursting, etc. occur quite quickly. If you want to witness such things clearly and in detail, it would be good to record them, and then reduce the playback speed for better viewing.
- Add Suspense
When you add the slow-motion effect to a scene, the impulse of the audience is automatically increased, and they take that particular section more seriously and with a thrill.
Conclusion
The slow-motion effect is inversely proportional to the framerate, i.e., frames per second or FPS. Almost all DSLR cameras that are available nowadays allow you to switch between different FPS values (typically 120 and 240) before recording. Also, if you have access to an iPhone, its Camera app has a built-in SLO-MO mode that can capture the footage in slow motion.
In addition, if you already have a video that has been recorded at a normal speed, you can use an efficient post-production software like Wondershare Filmora 11, and exploit its Speed Ramping feature to add the slow-motion effect at different scenes of a clip.
02 How to Apply the Smooth Slow-Motion Effect in Post-Production?
Part 1: How to Make Slow Motion Videos via Recording?
The fact is, the playback speed of a video is inversely proportional to the frames per second (FPS) it has been recorded in. Usually, to have a video play at normal speed, it is recorded at 24 FPS or 30 FPS. On the other hand, if you increase the frame rate (FPS) to 120 or 240, the playback speed slows down. You can easily check this if you have access to a DSLR camera or an iPhone. These devices allow you to adjust the FPS so the videos can be recorded in slow motion.
For your convenience and learning, the step-by-step procedure on how to record a video in slow motion using an iPhone is explained below:
Step 1: Get to the SLO-MO Mode
Launch the Camera app on your iPhone (iPhone 13 Pro Max is used here for illustrations), and swipe the screen to the left to get to the SLO-MO mode.

Step 2: Adjust Recording Preferences
Tap the number at the top-right corner to switch between 120 FPS and 240 FPS as needed. Tap 1x from the lower-middle section of the screen, and use the rotator to adjust your preferred zoom level.

Step 3: Start and Stop Recording
Tap the Record button from the bottom-center of the screen to begin recording the video in slow motion. Tap Stop when you are done. You can access the recorded video from the Videos container of the Photos app in your iPhone.
If you are using Android phone, you can check this article to find out more details about How to Record Super Slow Motion Videos on Your Phone.
You may also like: Best Slo-mo Camera Apps for Android And iPhone
Part 2: How to Apply the Smooth Slow-Motion Effect in Post-Production?
If you don’t have access to a camera that can record videos in slow motion, or in case you want to capture the footage at normal playback speed and then slow it down later, you need a dedicated tool to get the job done. Even though several post-production applications are available in the market, the one that is most versatile, has an intuitive interface, and is quite easy to use is Filmora video editor from Wondershare .
The latest version of the app, i.e., Wondershare Filmora 11 has a new feature called Speed Ramping that enables you to graphically manage the speed of the clips. While using the feature, you can either slow down the entire video or certain parts of it according to your requirements. For your learning, both the methods are explained below:
Method 1: Add Slow Motion Effect to the Whole Clip
For Win 7 or later (64-bit)
For macOS 10.12 or later
Step 1: Import the Source Video and Add to Timeline
Launch Wondershare Filmora on your Windows or Mac computer (a Windows 11 PC is used here for illustrations), click New Project from the first screen that appears. Make sure that the Media tool is selected from the standard tool bar at the top, click anywhere inside the Media window, and select and import the source clip to the program.

Next, hover the mouse over the thumbnail of the imported video in the Media window, and click the + icon present at its bottom-right corner. When the confirmation box comes up, click the Match to Media or Keep Project Settings button to change the project settings to match the resolution of the video, or change the footage to meet the project settings respectively.

Step 2: Add Slow Motion Effect to the Whole Clip
Once the media is added to the timeline, click on it and then click the Speed icon on the toolbar. Scroll down to the Slow menu and then you will see 0.5x, 0.25x, 0.1x, 0.05x and 0.01x presets. Select one to add slo-mo effects to the whole select clip. and click Speed Ramping from the menu that drops down.

You can also right click the video in the timeline, and hover over to Speed option to select Uniform Speed to adjust the speed of the video to make a slo-mo effect video. Drag the speed slider to the left to slow down the video and you will see how many times it slowed down in the next field.

Method 2: Use Speed Ramping to Add Slow Motion Effect
For Win 7 or later (64-bit)
For macOS 10.12 or later
Speed Ramping enables you to add the slow-motion effect at different parts of a video and even freeze the screen for the duration that you specify. The processes to get these done are given below in detail:
Step 1: Add Source Video to Timeline and Get to the Speed Ramping Window
Use the process given in the previous method to import a source video to Wondershare Filmora 11 and add it to the Timeline. Then use the process given in the second step of the previous method to get to the Speed Ramping window.
Step 2: Add Slow Motion Effect to Different Parts of the Clip
Go to the Speed Ramping tab if it is not already selected, click Custom from the available options, and drag the adjustment points below the center line to reduce the playback speed for that particular section of the clip. Optionally, you can click any of the available presets to automatically add the slow-motion effect to the video.
Note: You can also drag the adjustment points above the line to increase the playback speed.
To add an adjustment point on the frame where it is not already present, place the playhead (skimmer) at the correct position, and click Add Adjust Point from the left of the Speed Ramping window itself. Once added, you can drag it downward to reduce the playback speed of that part of the clip.

Step 3: Freeze the Video
Place the skimmer on the frame where you want to freeze the video for a while, and click Add Freeze Frame from the left of the Speed Ramping window. When the time box appears, in the Freeze Time field, enter the duration in seconds you want to freeze the screen for, and click OK.

After adding a freeze point, optionally, you can drag and reposition it in the Speed Ramping timeline as needed. Finally, click OK from the bottom-right area to save the changes.
Part 3: When to Use Slow Motion?
There could be many instances when you want to add a slow-motion effect to your videos. Some of the most common ones include:
- Add Focus
If there is a particular scene in a clip that you want the audience to focus on, it would be a good idea to add the slow-motion effect right before that action appears on the screen, and bring the speed back to normal when the section is over.
- Skill or Style Demonstration
When a clip is playing at a normal speed, many times, the audience isn’t able to see the skills that you want to display. This is where you may want to add the slow-motion effect so that every detail can be noticed clearly and in detail.
- Replays
Mostly used for tournaments and matches where the actual action is to replayed so the audience, umpires, and other viewers can see the movements in detail before making the right decision.
- Observation
Some natural phenomena such as a deer running in the woods, a balloon full of water bursting, etc. occur quite quickly. If you want to witness such things clearly and in detail, it would be good to record them, and then reduce the playback speed for better viewing.
- Add Suspense
When you add the slow-motion effect to a scene, the impulse of the audience is automatically increased, and they take that particular section more seriously and with a thrill.
Conclusion
The slow-motion effect is inversely proportional to the framerate, i.e., frames per second or FPS. Almost all DSLR cameras that are available nowadays allow you to switch between different FPS values (typically 120 and 240) before recording. Also, if you have access to an iPhone, its Camera app has a built-in SLO-MO mode that can capture the footage in slow motion.
In addition, if you already have a video that has been recorded at a normal speed, you can use an efficient post-production software like Wondershare Filmora 11, and exploit its Speed Ramping feature to add the slow-motion effect at different scenes of a clip.
02 How to Apply the Smooth Slow-Motion Effect in Post-Production?
Part 1: How to Make Slow Motion Videos via Recording?
The fact is, the playback speed of a video is inversely proportional to the frames per second (FPS) it has been recorded in. Usually, to have a video play at normal speed, it is recorded at 24 FPS or 30 FPS. On the other hand, if you increase the frame rate (FPS) to 120 or 240, the playback speed slows down. You can easily check this if you have access to a DSLR camera or an iPhone. These devices allow you to adjust the FPS so the videos can be recorded in slow motion.
For your convenience and learning, the step-by-step procedure on how to record a video in slow motion using an iPhone is explained below:
Step 1: Get to the SLO-MO Mode
Launch the Camera app on your iPhone (iPhone 13 Pro Max is used here for illustrations), and swipe the screen to the left to get to the SLO-MO mode.

Step 2: Adjust Recording Preferences
Tap the number at the top-right corner to switch between 120 FPS and 240 FPS as needed. Tap 1x from the lower-middle section of the screen, and use the rotator to adjust your preferred zoom level.

Step 3: Start and Stop Recording
Tap the Record button from the bottom-center of the screen to begin recording the video in slow motion. Tap Stop when you are done. You can access the recorded video from the Videos container of the Photos app in your iPhone.
If you are using Android phone, you can check this article to find out more details about How to Record Super Slow Motion Videos on Your Phone.
You may also like: Best Slo-mo Camera Apps for Android And iPhone
Part 2: How to Apply the Smooth Slow-Motion Effect in Post-Production?
If you don’t have access to a camera that can record videos in slow motion, or in case you want to capture the footage at normal playback speed and then slow it down later, you need a dedicated tool to get the job done. Even though several post-production applications are available in the market, the one that is most versatile, has an intuitive interface, and is quite easy to use is Filmora video editor from Wondershare .
The latest version of the app, i.e., Wondershare Filmora 11 has a new feature called Speed Ramping that enables you to graphically manage the speed of the clips. While using the feature, you can either slow down the entire video or certain parts of it according to your requirements. For your learning, both the methods are explained below:
Method 1: Add Slow Motion Effect to the Whole Clip
For Win 7 or later (64-bit)
For macOS 10.12 or later
Step 1: Import the Source Video and Add to Timeline
Launch Wondershare Filmora on your Windows or Mac computer (a Windows 11 PC is used here for illustrations), click New Project from the first screen that appears. Make sure that the Media tool is selected from the standard tool bar at the top, click anywhere inside the Media window, and select and import the source clip to the program.

Next, hover the mouse over the thumbnail of the imported video in the Media window, and click the + icon present at its bottom-right corner. When the confirmation box comes up, click the Match to Media or Keep Project Settings button to change the project settings to match the resolution of the video, or change the footage to meet the project settings respectively.

Step 2: Add Slow Motion Effect to the Whole Clip
Once the media is added to the timeline, click on it and then click the Speed icon on the toolbar. Scroll down to the Slow menu and then you will see 0.5x, 0.25x, 0.1x, 0.05x and 0.01x presets. Select one to add slo-mo effects to the whole select clip. and click Speed Ramping from the menu that drops down.

You can also right click the video in the timeline, and hover over to Speed option to select Uniform Speed to adjust the speed of the video to make a slo-mo effect video. Drag the speed slider to the left to slow down the video and you will see how many times it slowed down in the next field.

Method 2: Use Speed Ramping to Add Slow Motion Effect
For Win 7 or later (64-bit)
For macOS 10.12 or later
Speed Ramping enables you to add the slow-motion effect at different parts of a video and even freeze the screen for the duration that you specify. The processes to get these done are given below in detail:
Step 1: Add Source Video to Timeline and Get to the Speed Ramping Window
Use the process given in the previous method to import a source video to Wondershare Filmora 11 and add it to the Timeline. Then use the process given in the second step of the previous method to get to the Speed Ramping window.
Step 2: Add Slow Motion Effect to Different Parts of the Clip
Go to the Speed Ramping tab if it is not already selected, click Custom from the available options, and drag the adjustment points below the center line to reduce the playback speed for that particular section of the clip. Optionally, you can click any of the available presets to automatically add the slow-motion effect to the video.
Note: You can also drag the adjustment points above the line to increase the playback speed.
To add an adjustment point on the frame where it is not already present, place the playhead (skimmer) at the correct position, and click Add Adjust Point from the left of the Speed Ramping window itself. Once added, you can drag it downward to reduce the playback speed of that part of the clip.

Step 3: Freeze the Video
Place the skimmer on the frame where you want to freeze the video for a while, and click Add Freeze Frame from the left of the Speed Ramping window. When the time box appears, in the Freeze Time field, enter the duration in seconds you want to freeze the screen for, and click OK.

After adding a freeze point, optionally, you can drag and reposition it in the Speed Ramping timeline as needed. Finally, click OK from the bottom-right area to save the changes.
Part 3: When to Use Slow Motion?
There could be many instances when you want to add a slow-motion effect to your videos. Some of the most common ones include:
- Add Focus
If there is a particular scene in a clip that you want the audience to focus on, it would be a good idea to add the slow-motion effect right before that action appears on the screen, and bring the speed back to normal when the section is over.
- Skill or Style Demonstration
When a clip is playing at a normal speed, many times, the audience isn’t able to see the skills that you want to display. This is where you may want to add the slow-motion effect so that every detail can be noticed clearly and in detail.
- Replays
Mostly used for tournaments and matches where the actual action is to replayed so the audience, umpires, and other viewers can see the movements in detail before making the right decision.
- Observation
Some natural phenomena such as a deer running in the woods, a balloon full of water bursting, etc. occur quite quickly. If you want to witness such things clearly and in detail, it would be good to record them, and then reduce the playback speed for better viewing.
- Add Suspense
When you add the slow-motion effect to a scene, the impulse of the audience is automatically increased, and they take that particular section more seriously and with a thrill.
Conclusion
The slow-motion effect is inversely proportional to the framerate, i.e., frames per second or FPS. Almost all DSLR cameras that are available nowadays allow you to switch between different FPS values (typically 120 and 240) before recording. Also, if you have access to an iPhone, its Camera app has a built-in SLO-MO mode that can capture the footage in slow motion.
In addition, if you already have a video that has been recorded at a normal speed, you can use an efficient post-production software like Wondershare Filmora 11, and exploit its Speed Ramping feature to add the slow-motion effect at different scenes of a clip.
How To Add Scrolling Text Effect
Almost every video has some titles and texts to show to the viewers. Instead of showing static texts on the video, everyone loves to add animated texts so that the video looks attractive and engaging. If you want to show credits and titles in intro and outro of the video, you will usually see texts scrolling vertically on the video.
If you want to show any text repeatedly, you can add horizontal scrolling text effect to your video so that the repeated text does not look weird. You will need a video editor to add scrolling rolling text effect to texts and titles in your video. We will illustrate in simple steps how to animate text on scroll using free as well as premium video editors.
Part 1. Add Scrolling Text to Video with Filmora
Wondershare Filmora is a professional video editor and if you are a Windows PC or Mac user, you can use Filmora to add scrolling text effect. In fact, Filmora is the most intuitive video editor where you can add scrolling text effect instantly without any prior experience in video editing.
Filmora has the best collection of text effects and you can add scrolling text anywhere and customize the effect as per your requirements. As a matter of fact, you can create a video with scrolling text effects only from scratch. Here are the steps to add scrolling text to video using Filmora.
Free Download For Win 7 or later(64-bit)
Free Download For macOS 10.14 or later
Step1 Download and install Filmora on your Windows PC or Mac. Launch the application and click on New Project on the welcome screen. You can also go to File> New option to get started.

Step2 Go to File> Import Media option to bring in your video file user Project Media folder. Thereafter, drag and drop the file into Timeline to get started.

Step3 Go to Titles option located at the top, and on the left panel, go to End Credits option. You will see various scrolling text effects. Place your mouse pointer on them to check their preview.

Step4 Once you are satisfied with any scrolling text effects, drag and drop it into Timeline above the video clip layer. Adjust the position of the text effect so that it appears on the video as expected. You can stretch the duration of the effect as per your preference.
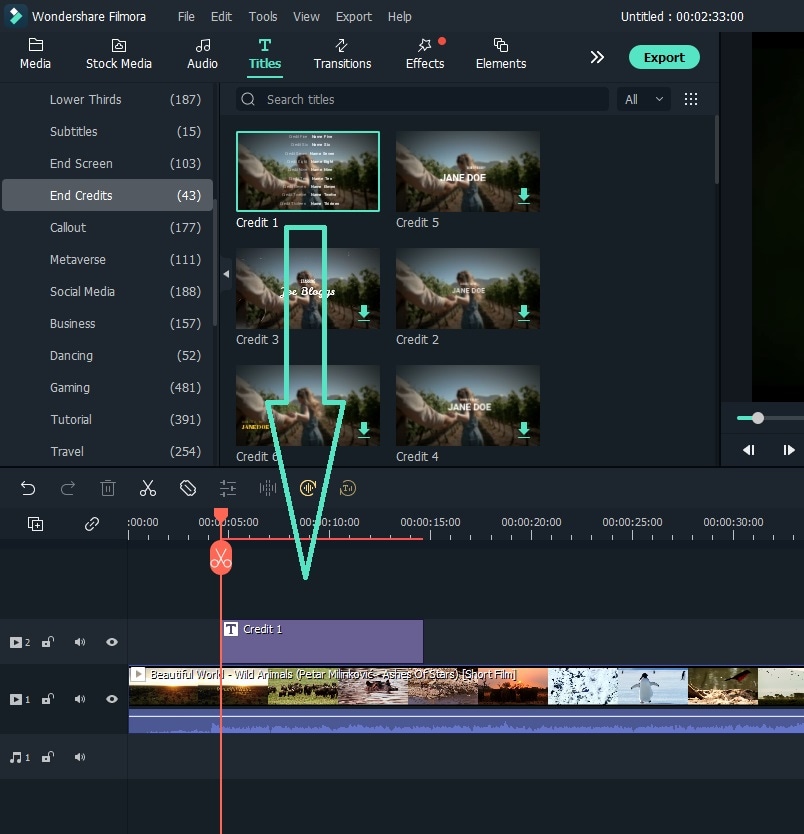
Step5 Double-click on the text layer on Timeline and customize the text and style as you feel. Thereafter, you can click on Advanced button for more customization. Finally, click on OK button.
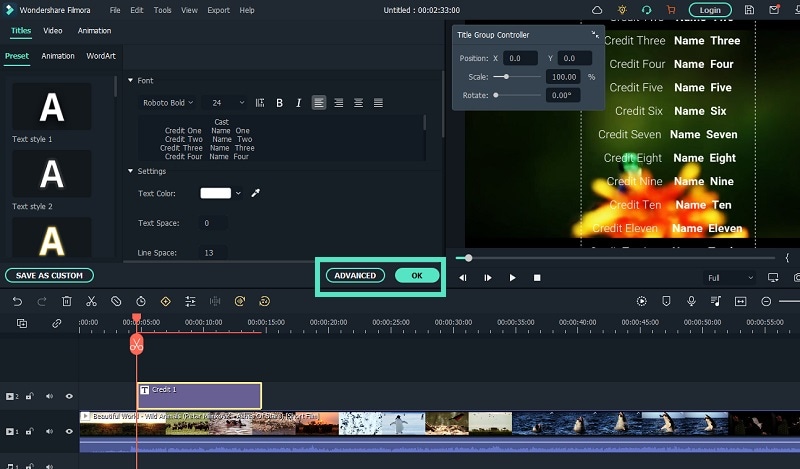
Part 2. Use After Effects to Create Scrolling Text
Adobe Affect Effects is an extremely popular video editor and there are so many different text effects available to apply to your video. After Effects scrolling text effects come with different variations so that your titles and texts look amazing on the screen. Apart from the available text effects, you can also download and get more text effects from external sources. Here are the steps to add text scroll after effects to your video.
Step1 Launch After Effects and type your text with the Text tool from the top bar.
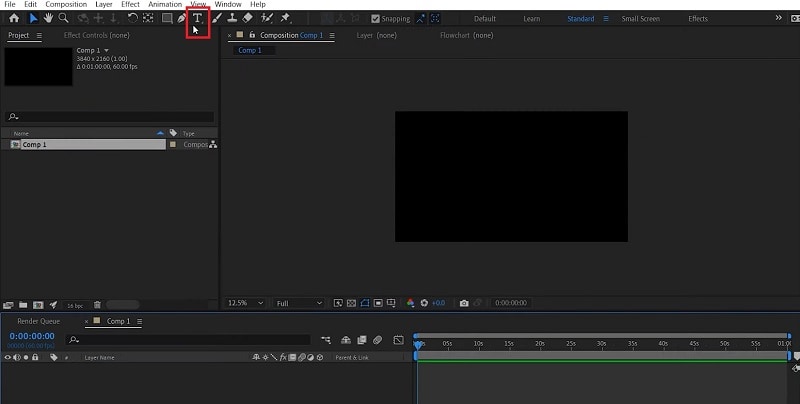
Step2 Duplicate the written text by going to Edit> Duplicate.
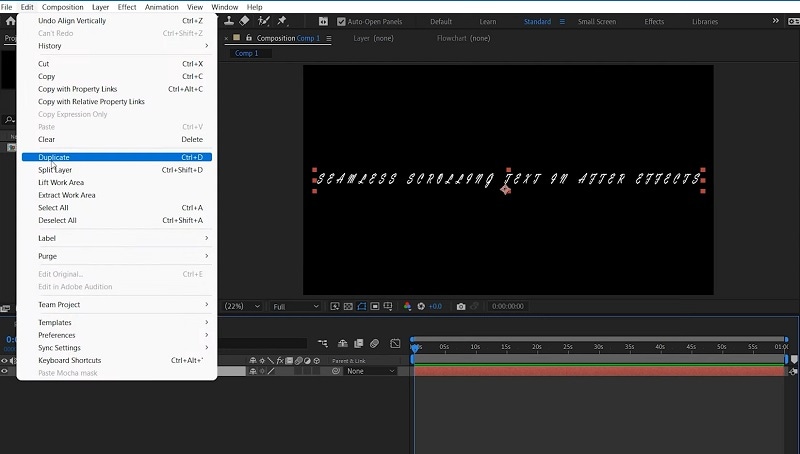
Step3 Move the duplicate text out of the visible screen to the left by changing its position value.
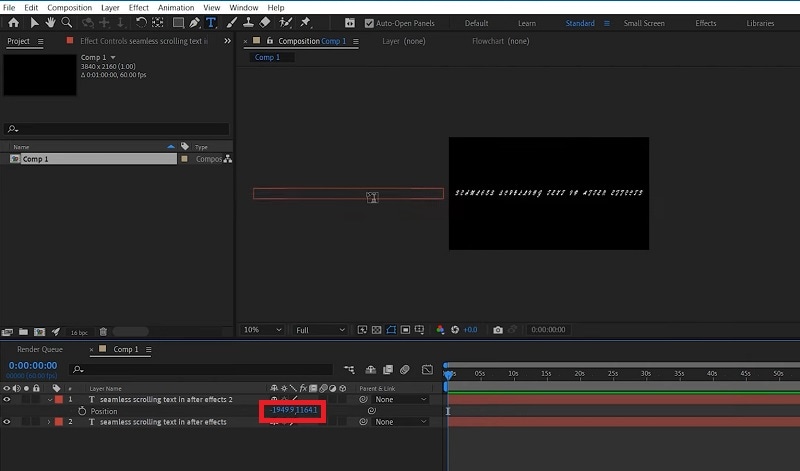
Step4 Turn on Position option and change the duration and add a keyframe.
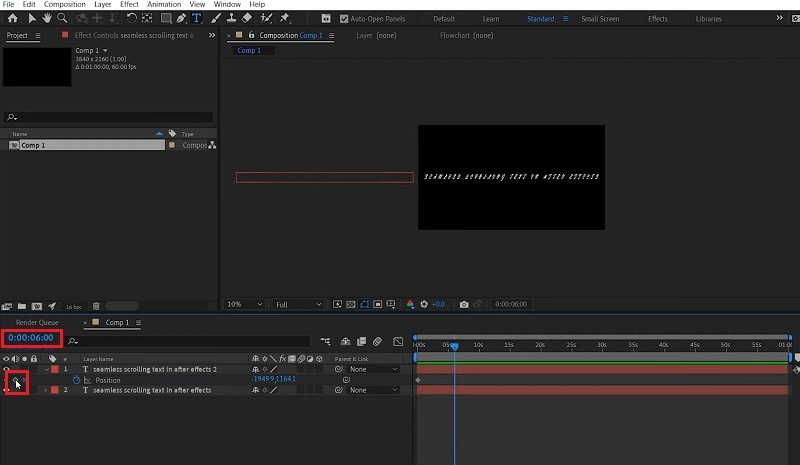
Step5 Right-click on Composition setting and go to New> Null Object. Change the duration and make it the same as the Duplicate layer and add a keyframe there. Besides, move the null object out of the visible screen to the right.
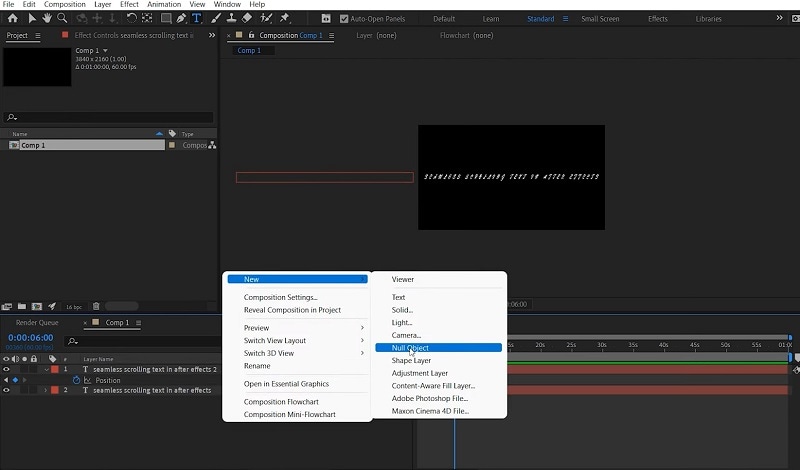
Step6 Select all layers and right-click and select Pre-compose.
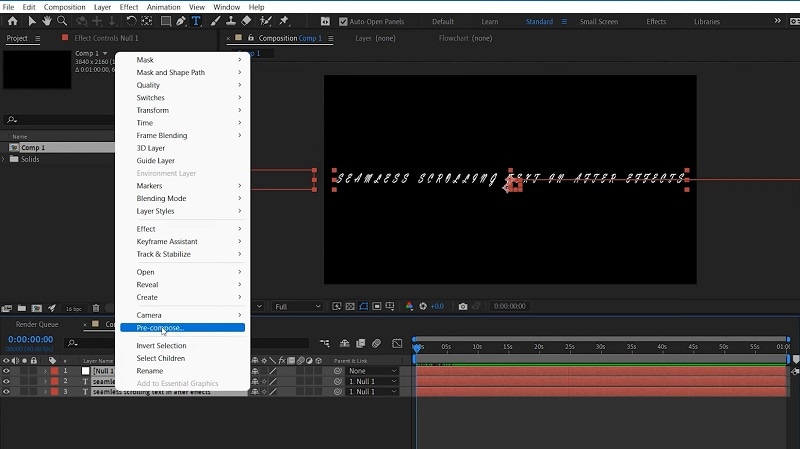
Step7 Right-click on Pre-comp and go to Time> Enable Time Remapping. Play the video and you will see the scrolling effects that you see in end credits in videos.
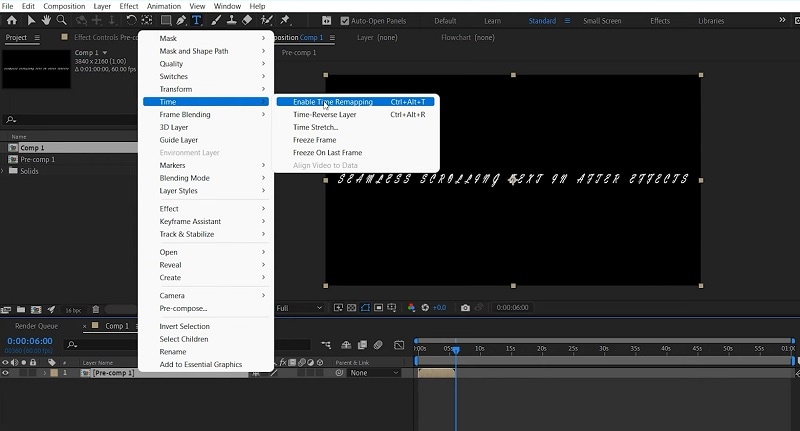
The above-mentioned steps are for horizontal scrolling text effect. If you want vertical scrolling text After Effects, you have to position the duplicate text and null object vertically and the required text will scroll vertically.
Part 3. Add Scrolling Text Effect with VSDC Free Video Editor
So far, we have mentioned premium video editors to add scrolling effect to the text in your video. Now we are going to mention a free video editor where you can add scrolling effect instantly. If you are a Windows user, you can install VSDC free video editor. There are several scrolling text effects available on the video editor through which you can move the text horizontal and vertical. Here are the steps to animate text on scroll using VSDC free video editor.
Step1 Install VSDC free video editor and click on New Project option. Click on Finish button and select the video from your hard drive where you want to add text.

Step2 Select Type tool from the left panel and draw a box on the video where you can type your text. Make sure the text layer is on top of the video layer in Timeline.

Step3 Type your text and if you want to scroll it like horizontal scrolling text After Effects, place the text out of the viewer on the right side.
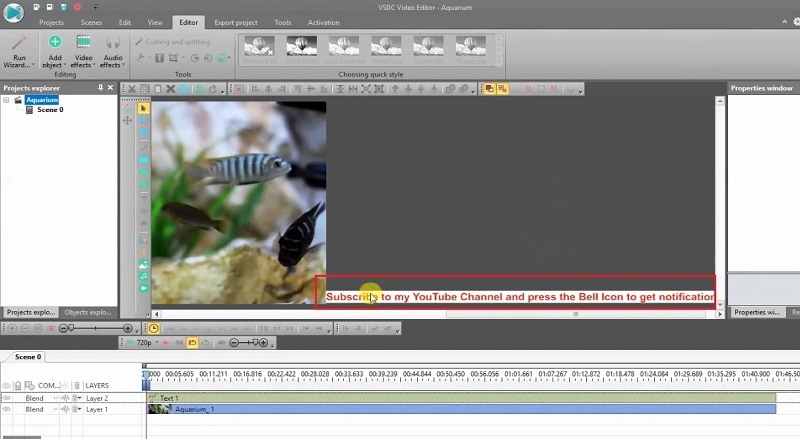
Step4 Double-click on text layer and go to Add Object and click on Movement.

Step5 You will find the mouse pointer change and you have to click on the spot to the left side where you want the text to go in scrolling effect.

Step6 Shorten the duration of the text layer and then copy the text layer from Timeline. Paste it again and again until you cover the video layer completely so that the scroll effect goes on as long as the video runs.

Takeaway
Adding scrolling text to your video should no more be an issue for you. If you are using After Effects, we have illustrated how you can create horizontal and vertical scrolling effect for text in your video perfectly. If you prefer a free video editor, you can use VSDC free video editor as well. But we recommend Wondershare Filmora where you can add scrolling effects to your text instantly, and there is a wide range of amazing scrolling effects available to apply to your video.
Free Download For macOS 10.14 or later
Step1 Download and install Filmora on your Windows PC or Mac. Launch the application and click on New Project on the welcome screen. You can also go to File> New option to get started.

Step2 Go to File> Import Media option to bring in your video file user Project Media folder. Thereafter, drag and drop the file into Timeline to get started.

Step3 Go to Titles option located at the top, and on the left panel, go to End Credits option. You will see various scrolling text effects. Place your mouse pointer on them to check their preview.

Step4 Once you are satisfied with any scrolling text effects, drag and drop it into Timeline above the video clip layer. Adjust the position of the text effect so that it appears on the video as expected. You can stretch the duration of the effect as per your preference.

Step5 Double-click on the text layer on Timeline and customize the text and style as you feel. Thereafter, you can click on Advanced button for more customization. Finally, click on OK button.

Part 2. Use After Effects to Create Scrolling Text
Adobe Affect Effects is an extremely popular video editor and there are so many different text effects available to apply to your video. After Effects scrolling text effects come with different variations so that your titles and texts look amazing on the screen. Apart from the available text effects, you can also download and get more text effects from external sources. Here are the steps to add text scroll after effects to your video.
Step1 Launch After Effects and type your text with the Text tool from the top bar.

Step2 Duplicate the written text by going to Edit> Duplicate.

Step3 Move the duplicate text out of the visible screen to the left by changing its position value.

Step4 Turn on Position option and change the duration and add a keyframe.

Step5 Right-click on Composition setting and go to New> Null Object. Change the duration and make it the same as the Duplicate layer and add a keyframe there. Besides, move the null object out of the visible screen to the right.

Step6 Select all layers and right-click and select Pre-compose.

Step7 Right-click on Pre-comp and go to Time> Enable Time Remapping. Play the video and you will see the scrolling effects that you see in end credits in videos.

The above-mentioned steps are for horizontal scrolling text effect. If you want vertical scrolling text After Effects, you have to position the duplicate text and null object vertically and the required text will scroll vertically.
Part 3. Add Scrolling Text Effect with VSDC Free Video Editor
So far, we have mentioned premium video editors to add scrolling effect to the text in your video. Now we are going to mention a free video editor where you can add scrolling effect instantly. If you are a Windows user, you can install VSDC free video editor. There are several scrolling text effects available on the video editor through which you can move the text horizontal and vertical. Here are the steps to animate text on scroll using VSDC free video editor.
Step1 Install VSDC free video editor and click on New Project option. Click on Finish button and select the video from your hard drive where you want to add text.

Step2 Select Type tool from the left panel and draw a box on the video where you can type your text. Make sure the text layer is on top of the video layer in Timeline.

Step3 Type your text and if you want to scroll it like horizontal scrolling text After Effects, place the text out of the viewer on the right side.

Step4 Double-click on text layer and go to Add Object and click on Movement.

Step5 You will find the mouse pointer change and you have to click on the spot to the left side where you want the text to go in scrolling effect.

Step6 Shorten the duration of the text layer and then copy the text layer from Timeline. Paste it again and again until you cover the video layer completely so that the scroll effect goes on as long as the video runs.

Takeaway
Adding scrolling text to your video should no more be an issue for you. If you are using After Effects, we have illustrated how you can create horizontal and vertical scrolling effect for text in your video perfectly. If you prefer a free video editor, you can use VSDC free video editor as well. But we recommend Wondershare Filmora where you can add scrolling effects to your text instantly, and there is a wide range of amazing scrolling effects available to apply to your video.
Also read:
- In 2024, Legend Intro Maker – Create Intro Video with Ease
- Updated Kdenlive Review – Is It The Best Video Editor, In 2024
- New How to Create Intro Video with KineMaster
- Updated How to Create a Light Sweep (Shine) Effect with Filmora
- Step by Step to Cut a Video in Lightworks for 2024
- In 2024, Know How to Create OBS Slideshow. Creating OBS Slideshow in Simple Steps; Application for Creating OBS Slideshow. Make OBS Slideshow Online
- Updated Guide To Creating The Perfect VHS Effect Look in Premiere Pro
- How to Make Discord GIF PFP? Solved for 2024
- Create a Brand Video to Make Your Business Shine
- Updated Top 15 LUTS to Buy
- Updated Clone Yourself in Videos with Filmora
- How to Create and Use Adjustment Layers in After Effects
- Why Did Filmora AI Portrait Attract People, In 2024
- Top 10 Voice Over Generators Windows, Mac, Android, iPhone, and Onli
- In 2024, Learn Eight Simple Steps that Will Allow You to Create a Stunning Text Reveal Animation in Filmora. Simple yet Very Professional
- New Detailed Steps to Rotate Videos in Lightworks
- 2024 Approved When It Comes to Video Editing, There Are Countless Software Options Available on the Market. However, Not All of Them Come with Useful Masking Tools. In This Article, We Will Be Discussing the Top 8 Video Editor with Useful Masking Tools
- In 2024, Here, the Main Discussion Is Regarding the Split of the Audio From the Video in the Sony Vegas Pro. There Are Also some Details About the Substitute, Which Is Wondershare Filmora
- New How to Make a Slideshow with Icecream Slideshow Maker for 2024
- Updated 2024 Approved How to Slow Down Time-Lapse Videos on iPhone
- New How to Create a Slideshow with Icecream Slideshow Maker for 2024
- 2024 Approved This Article Talks About Pixel Art Wallpapers. It Gives Examples of Different Pixel Art to Show You How to Customize Your Own Pixel Art Wallpapers, and How to Make a Pixel Art Gif on Filmora
- Updated Best Free LUTs To Use in Shotcut
- 2024 Approved 3 Ways to Combine 2 or 3 Videos Into 1
- Updated How to Create Cooking Video Intro and Outro for YouTube Channel, In 2024
- 2024 Approved How To Change Font In Premiere Pro
- New Finding the Best GIF Websites Was Never Easier
- In 2024, Top 10 Picks for Flawless Slow Motion Video Generation
- 2024 Approved With an SRT Editor Online, You Can Synchronize the Subtitles with the Video, Change the Font, and Make Them More Readable. Read on to Know Your Options
- Twitch Green Screen Guide
- 2024 Approved Back up and Organize Your Files to Protect Any Misfortune Befalling Them. The Article Will Guide You on How to Back up and Manage Your Footage
- In 2024, Steps to Create Makeup Videos
- How to Shoot Cinematic Footage with Phone
- New Find Out The Best Dark Moody LUTs During Editing for 2024
- New 2024 Approved Denoise a Video in Adobe Premiere Pro – Audio and Video Noise Removal
- Deleting White Background in Photoshop Is Hard?
- New How to Speed up a Video on Splice
- New List of Whatsapp Video Format That You May Need to Know
- New In 2024, Guide on How to Enable the Text to Speech Function on iPhone
- In 2024, How to Bypass Google FRP Lock on Samsung Galaxy XCover 7 Devices
- How to Mirror OnePlus Ace 2V to Mac? | Dr.fone
- How to share/fake gps on Uber for Lenovo ThinkPhone | Dr.fone
- Best Ways on How to Unlock/Bypass/Swipe/Remove Poco F5 Pro 5G Fingerprint Lock
- How to Bypass FRP from Itel P55T?
- How to Display Apple iPhone 15 Screen on PC Easily? | Dr.fone
- 6 Proven Ways to Unlock Oppo F23 5G Phone When You Forget the Password
- Updated Launching Your Live Room | Virbo AI Live Stream for 2024
- In 2024, How to Delete iCloud Account with or without Password from your iPhone 14 Plus/Windows/Mac
- How to Track Vivo X100 Location without Installing Software? | Dr.fone
- In 2024, Full Tutorial to Bypass Your Vivo Y200e 5G Face Lock?
- A How-To Guide on Bypassing iPhone 13 iCloud Activation Lock
- Title: Guide Adopting Lumetri Color Presets in Effective Color Grading
- Author: Chloe
- Created at : 2024-05-20 03:37:21
- Updated at : 2024-05-21 03:37:21
- Link: https://ai-editing-video.techidaily.com/guide-adopting-lumetri-color-presets-in-effective-color-grading/
- License: This work is licensed under CC BY-NC-SA 4.0.


