
:max_bytes(150000):strip_icc():format(webp)/trends_MontyRakusen_Getty-5a4aa079482c5200362b0987.jpg)
Guide to Create an Intro Video with Filmora
Guide to Create an Intro Video with Filmora
If you’re just starting out as a YouTuber, you should have an introductory video, especially when people don’t know you that well yet. When you want to start a YouTube career one of the things you need to think about is How to make a YouTube intro video.
Whether you’re a beginner or a pro, knowing how to create a video intro for YouTube can help you introduce your audience to your content, pique their interest and boost your brand. Stand out and engage your audience with quick and easy YouTube intro animations. Not sure how to make a YouTube intro? We’ve built this guide on how to make a video intro using Wondershare Filmora an editing software.
- Start by introducing yourself
- Get into details
- Add a call to action
- Add personalization to your video
- Video length
What is Intro Video
There are also different ways of using the intro video, it can be used in business, in YouTube channels and others.
Introductory videos are short videos which you personally introduce yourself, your business, your brands and your brand’s mission and show your personality to your audience.
Introductory videos can help you stand out from the competition and gain favorability because you’re talking to your users on a personal level. People love seeing faces behind a brand, having an introductory video will ensure that people remember you.
YouTube intro videos are short, introductory clips that play at the beginning of a YouTube channel. They usually include the tittle of the YouTube channel, brand features like logos and colors animation and an accompanying snippet of music.
As the word suggest, intro are visuals that mark the beginning of a video. Likewise, outro are the closing visuals that appear at the end of the video. The two are widely used in educational, entertaining, business videos, webcasts, podcast, corporate presentations and the like. There are several reasons why an intro are vital elements of any professional video.
It goes without saying that intros should not be too complicated or to confusing. Other wise they will fail in their purpose and will drive the audience away. Instead, they should be simply but thoughtfully designed.
YouTube intro Videos usually include:
- Memorable background music
- Text and titles
- Stickers and GIFs
- Emojis

Goal of a Video Introduction to Follow
Making intro video is not just only in doing a YouTube channel but you can also use this guide for any businesses like brand presentation, educational etc.
Step1 Start by introducing yourself.
Step2 Get into details.
Step3 Add a call to action.
Step4 Add personalization to your video.
Step5 Video Length.
1. Start by introducing yourself
You can always start your intro by introducing yourself but don’t just state your name and what
you do, tell them why you do it, what your core values are and what motivates and dives you to
do this kind of career. Because you all know doing vlog on YouTube is a job, work, and a career.
Share emotions with your audience, and help them relate to you. Doing so is going to help you stand out immediately from the crowd and get audiences interested enough to watch the remainder of your video’s content.
2. Get into details
Tip is always direct to the point, add a few facts about yourself, like your interest or previous experiences or who you are as a person. If you are a business owner and would want to talk about your business you can always share how it started.
If we are talking about the YouTube intro video. Every good YouTube intro video usually includes beneficial information for subscribers and viewers. Add any short important text that you feel is necessary from the video titles, your YouTube channel name, and social media handles. Keep your informative text in a consistent format and branding style.
3. Add a call to action
if you have successfully maintained the interest of your viewer until the very end of your video, use this opportunity to invite them to engage with your content more. It’s worth including a call to action in each video. Take a full advantage of YouTube to provide your audience with your social media channels and maybe a link or two to your other videos that might interest them,
4. Add personalization to your video
Even though an intro can be more than logo animation, the latter should still be a part of it. Otherwise, there’s a sense that something is messing. Include eye catchy visuals effects to your videos to stands out, so that people can easily remember your YouTube channel.

5. Video length
A long intro, even if it’s spectacular, can get boring once your audience has seen it a few times. An ideal length for intros is up to 8-10 seconds only. Just enough time to deliver your message and branding, and hook audiences in for the rest of the video. Any longer than that, and you might lose viewers who are waiting to see the video that they clicked on.
In the era of social media, tempting distractions and short attention spans, it’s critical to keep your content as short and sharp as you can.
How to Create Intro Video using Filmora
Wondershare Filmora is an editing software that is available to download in google. This software is easy to use and includes products for a range of users from beginner to intermediate. Common features of Filmora include a timeline, preview window and effects library that you can use to create a nice and creative introduction video for your YouTube channel.
Free Download For Win 7 or later(64-bit)
Free Download For macOS 10.14 or later
Free trails are available to demo the product before purchasing. Pricing options for the various programs are available on the official Filmora website.

Start your own design from scratch or you can search for a YouTube video template
Select the best video that you like to be your intro, either create a video introducing yourself or just a video with some creative effects.
First you can check the Stock Media and go click some GIFs find your best fit and start customizing. You can always download some free template online that you think much better to used.

Add ready made animated graphic stickers to your YouTube intro videos by dragging and dropping them into design. Just choose “Elements” and then “Stickers” to browse a library of options.

Change the image on your YouTube intro video by uploading your own or choosing from millions of free photos, graphics, and illustration in Filmora library.
Start editing your videos to make them look seamless and professional on any platforms. Whether it’s on a widescreen, tablet, or mobile device. Click some effects to add some creative design on your intro videos.
You can split, resize trim or cut your videos to tailor it to your needs.
Change the text and insert your own channel title and tagline. You can also change the font style, color, and size to better suit your brand look.
Finally, add music to your YouTube intro video by uploading a clip from a stock music of Filmora library. You can also make your own YouTube intro music using instrument or digital tools

Conclusion
Hope with these tips, you’ll be able to create quality video introductions that draw the audience in and help them get to know you better. Introduce your brand, explain your business, and connect with your prospective customers like never before. Whether your intro clips start off your YouTube videos or plays after the teaser clip, YouTube intro videos can be a valuable tool for any creator.
Remember your video doesn’t have to be a high-budget production or you don’t have to spend a lot of money on making a creative video. You could create a video that works with pretty much of any smartphone today. Have fun creating your introductions videos, set a positive mind and positive creation will come out.
What is Intro Video
There are also different ways of using the intro video, it can be used in business, in YouTube channels and others.
Introductory videos are short videos which you personally introduce yourself, your business, your brands and your brand’s mission and show your personality to your audience.
Introductory videos can help you stand out from the competition and gain favorability because you’re talking to your users on a personal level. People love seeing faces behind a brand, having an introductory video will ensure that people remember you.
YouTube intro videos are short, introductory clips that play at the beginning of a YouTube channel. They usually include the tittle of the YouTube channel, brand features like logos and colors animation and an accompanying snippet of music.
As the word suggest, intro are visuals that mark the beginning of a video. Likewise, outro are the closing visuals that appear at the end of the video. The two are widely used in educational, entertaining, business videos, webcasts, podcast, corporate presentations and the like. There are several reasons why an intro are vital elements of any professional video.
It goes without saying that intros should not be too complicated or to confusing. Other wise they will fail in their purpose and will drive the audience away. Instead, they should be simply but thoughtfully designed.
YouTube intro Videos usually include:
- Memorable background music
- Text and titles
- Stickers and GIFs
- Emojis
Goal of a Video Introduction to Follow
Making intro video is not just only in doing a YouTube channel but you can also use this guide for any businesses like brand presentation, educational etc.
Step1 Start by introducing yourself.
Step2 Get into details.
Step3 Add a call to action.
Step4 Add personalization to your video.
Step5 Video Length.
1. Start by introducing yourself
You can always start your intro by introducing yourself but don’t just state your name and what
you do, tell them why you do it, what your core values are and what motivates and dives you to
do this kind of career. Because you all know doing vlog on YouTube is a job, work, and a career.
Share emotions with your audience, and help them relate to you. Doing so is going to help you stand out immediately from the crowd and get audiences interested enough to watch the remainder of your video’s content.
2. Get into details
Tip is always direct to the point, add a few facts about yourself, like your interest or previous experiences or who you are as a person. If you are a business owner and would want to talk about your business you can always share how it started.
If we are talking about the YouTube intro video. Every good YouTube intro video usually includes beneficial information for subscribers and viewers. Add any short important text that you feel is necessary from the video titles, your YouTube channel name, and social media handles. Keep your informative text in a consistent format and branding style.
3. Add a call to action
if you have successfully maintained the interest of your viewer until the very end of your video, use this opportunity to invite them to engage with your content more. It’s worth including a call to action in each video. Take a full advantage of YouTube to provide your audience with your social media channels and maybe a link or two to your other videos that might interest them,
4. Add personalization to your video
Even though an intro can be more than logo animation, the latter should still be a part of it. Otherwise, there’s a sense that something is messing. Include eye catchy visuals effects to your videos to stands out, so that people can easily remember your YouTube channel.
5. Video length
A long intro, even if it’s spectacular, can get boring once your audience has seen it a few times. An ideal length for intros is up to 8-10 seconds only. Just enough time to deliver your message and branding, and hook audiences in for the rest of the video. Any longer than that, and you might lose viewers who are waiting to see the video that they clicked on.
In the era of social media, tempting distractions and short attention spans, it’s critical to keep your content as short and sharp as you can.
How to Create Intro Video using Filmora
Wondershare Filmora is an editing software that is available to download in google. This software is easy to use and includes products for a range of users from beginner to intermediate. Common features of Filmora include a timeline, preview window and effects library that you can use to create a nice and creative introduction video for your YouTube channel.
Free Download For Win 7 or later(64-bit)
Free Download For macOS 10.14 or later
Free trails are available to demo the product before purchasing. Pricing options for the various programs are available on the official Filmora website.
Start your own design from scratch or you can search for a YouTube video template
Select the best video that you like to be your intro, either create a video introducing yourself or just a video with some creative effects.
First you can check the Stock Media and go click some GIFs find your best fit and start customizing. You can always download some free template online that you think much better to used.
Add ready made animated graphic stickers to your YouTube intro videos by dragging and dropping them into design. Just choose “Elements” and then “Stickers” to browse a library of options.
Change the image on your YouTube intro video by uploading your own or choosing from millions of free photos, graphics, and illustration in Filmora library.
Start editing your videos to make them look seamless and professional on any platforms. Whether it’s on a widescreen, tablet, or mobile device. Click some effects to add some creative design on your intro videos.
You can split, resize trim or cut your videos to tailor it to your needs.
Change the text and insert your own channel title and tagline. You can also change the font style, color, and size to better suit your brand look.
Finally, add music to your YouTube intro video by uploading a clip from a stock music of Filmora library. You can also make your own YouTube intro music using instrument or digital tools
Conclusion
Hope with these tips, you’ll be able to create quality video introductions that draw the audience in and help them get to know you better. Introduce your brand, explain your business, and connect with your prospective customers like never before. Whether your intro clips start off your YouTube videos or plays after the teaser clip, YouTube intro videos can be a valuable tool for any creator.
Remember your video doesn’t have to be a high-budget production or you don’t have to spend a lot of money on making a creative video. You could create a video that works with pretty much of any smartphone today. Have fun creating your introductions videos, set a positive mind and positive creation will come out.
Little Known Ways of Adding Emojis to Photos on iPhone & Android
Little Known Ways of Adding Emojis to Photos on iPhone & Android
An easy yet powerful editor
Numerous effects to choose from
Detailed tutorials provided by the official channel
Emojis are catchy graphic elements that can add life to your photos, videos and allied artworks within a wink. Be here to know about the most exciting how-tos!
In this article
01 [Best 6 Tools to Put Emojis on Pictures on iPhone](#Part 1)
02 [Best 6 Tools to Put Emojis on Pictures on Android](#Part 2)
03 [Best 5 Tools to Put Emojis on Pictures on Computer](#Part 3)
Part 1 Best 6 Tools to Put Emojis on Pictures on iPhone
Emojis have managed to secure enough significance in our social and professional lives across social media platforms in the current time. Be it a fun-filled conversation with friends and family on a chat service program, or a high end and professionally sound business strategy, these mini caricature pieces of graphic art can add the much needed highlight to almost every aspect of your digital communication concerns.
Now that you are aware of the utility of working with emojis to make your digital contents, let us take a dive into some of the best ways and means to make your iPhone images come alive in the following section:
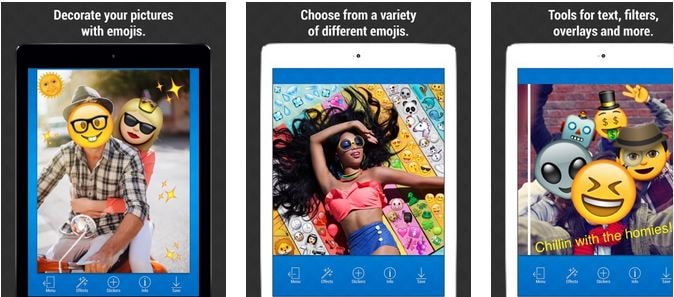
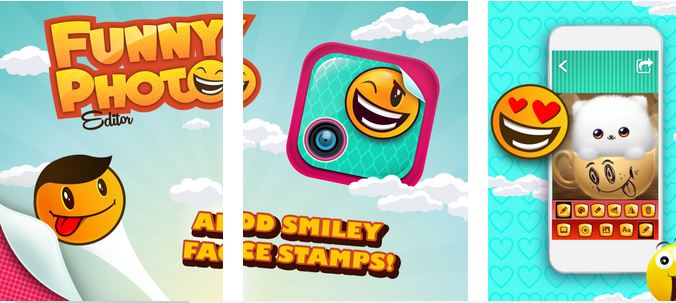
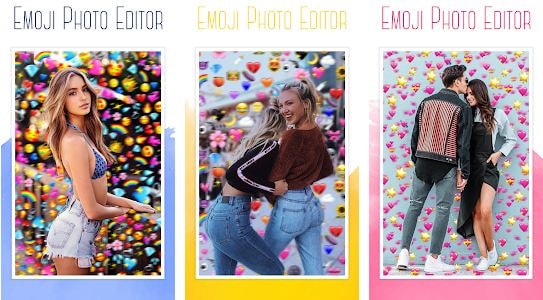
01Emoji Picture Editor- Add Emojis to Your Photos
If you like to imbibe the images on your iPhone media gallery with a hoard of funny and cool emojis, this one is a perfect app to address the concern. The tool’s library houses the latest collection of emoji categories to be in line with a diversity of photo styles, themes and backgrounds. You can take your pick from the huge inventory of over 1500 different emojis to level up your photos.
Talking about the app interface and usage controls, you are granted full liberty to add emojis to your emojis, while changing their positions through a finger drag, or scale and rotate them by expanding, pinching and twisting your fingers. The app additionally allows you to send bigger emoji stickers on chats and conversations.
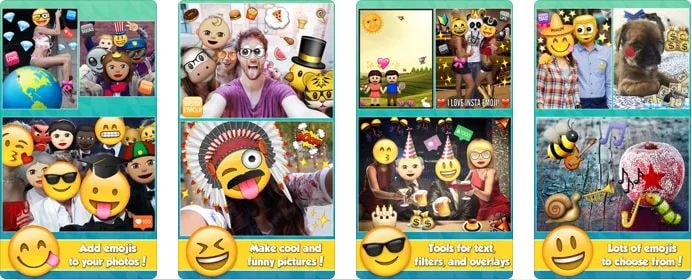
02Insta Emoji Photo Editor
When looking for an interesting and reliable application to set straight the concern of how to put emojis on pictures, the Insta Emoji Photo Editor is an affordable pick. Loaded with an enormous and updated emoji library, the app presents before you over 3200 fascinating emoji options to select from and add to your images.
The inclusion process is intuitively simple, with you just having to upload the desired images to the app’s working interface and choose from your most favorite emoji elements to make the stills come alive with added fun and spark. The app houses an interesting ’Emoji Paint’ feature for the extensively creative ones to let them create catchy drawings with the coolest emojis.
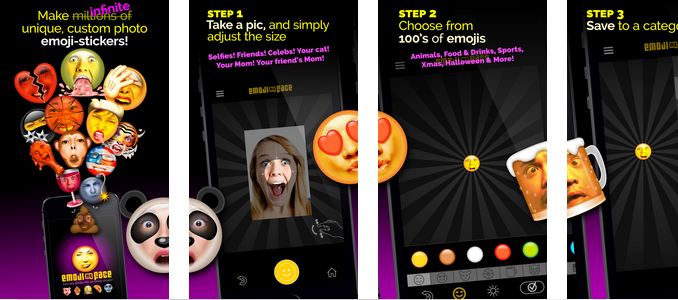
03Emoji My Face
Moving ahead in the list comes the aforesaid app, which you can conveniently rely on to get through the photo edit emoji task in less than a few seconds. What’s unique about the utility is its feature that lets you add emoji stickers on the faces of your image elements. Working with the app, you can transform the skinned appearances of your friends and family into hilarious emoji faces.
While the app permits you to pick any number of preferences from its latest and updated emoji collection, you can additionally, save and share your emoji centered image edits across a diversity of media sharing platforms and chat service programs.
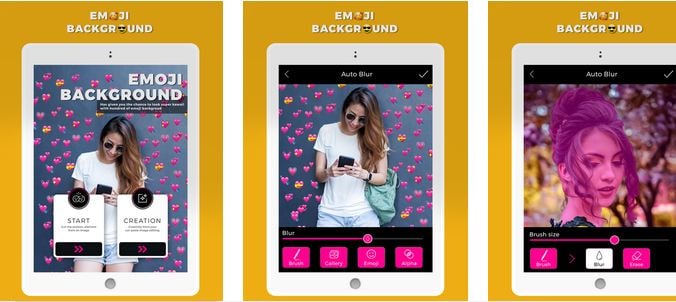
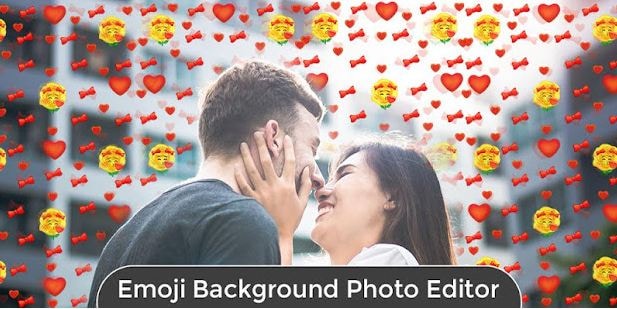
04Emoji Background Photo Maker
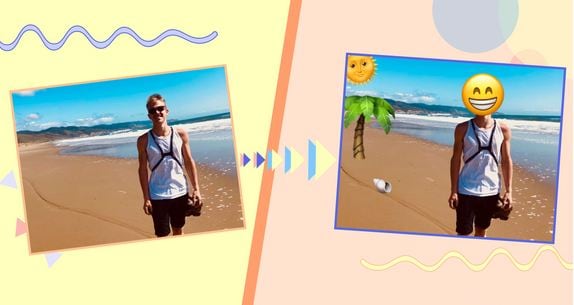
While there are hoards of IT alternatives to add emojis to pictures, the following utility caters to the concern in a slightly different style, ahead of just picking and pasting emojis to still captures. Working with the tool, you can experiment with changing the customary and fundamental image backgrounds into funny and appealing emoji centered themes. You are allowed to either work with a desired image from your iPhone’s media gallery, or take a fresh shot from your device’s camera, followed by uploading the same to the app’s editing interface.
Focusing on the tool’s expanse of usage features, you get tom work with a straightforward interface, and select from a wide variety of expressive and thematic emoji backgrounds. You can further, preview and save the edited images in HD quality, and share the same with friends and family across social media handles.
05Funny Photo Editor With Emoji Stickers Camera
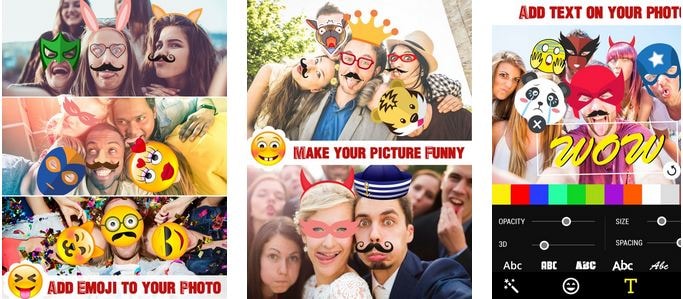
This one is an innovative image editing tool that lets you create funny image transformations with classic emoji stickers, while addressing the query of how to add emojis to pictures. If your peer group consists of crazy creators who are selfie freaks, try hands at uplifting your live camera shots with this application by adding the funkiest emojis and sharing them across the regular communication platforms.
The app’s default camera feature lets you capture a straight forward image and convert the same into a hilarious edit with the latest range of free emoji stickers, caricature smileys and lots more. You can additionally beautify the edits with choosing from a decent range of emoji skin tones to suit the image background.
06Instamoji- Emoji Photo Editor
If you have been searching for an affordable solution to walk through the concern of , how to add emoji to photo on your iPhone, try working with the Instamoji application to highlight your customary images with classic emoji stickers and elements within the blink of an eye. The app welcomes you with a clean and intuitive interface to work upon, and is completely free to use.
Talking about the utility’s emoji centered image editing features, you are permitted to select from a decent collection of vibrant, funny and cool emojis, assorted under a diversity of categories to complement your images with, while exporting them across your digital communication accounts with utmost ease. The app promises you of the finest quality edited image output.
Part 2 Best 6 Tools to Put Emojis on Pictures on Android
Emojis are best known to spark up graphic artworks with an element of fun and entertainment. While the introduction of social media and digital communication utilities have brought emojis to the fingertips of modern day smartphone users, the IT market never lags behind at putting the latest transformations regarding emoji usage at your disposal.
Discussing along the line, let us talk about some interesting applications that address the concern of how to add an emoji to a photo using an Android device in what follows next:
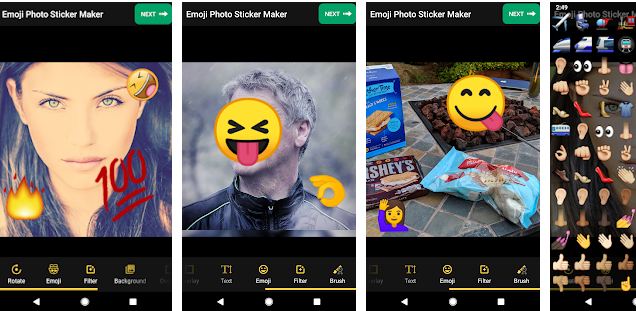
01Add Emoji Stickers- Pics Editor and Photo Maker
This one is a smart photo editing tool that you can choose to customize the otherwise ordinary images on the local media gallery of your Android smartphone. The app greets you with an extensive range of updated emoji alternatives to suit your most specific editing requirements for complementing your elementary photos with the perfect feel and emotion.
The emojis work to add the missing fun to your social media posts with image edits funny enough to make your peers roll over with laughter. Not just smiley faces, the app delivers to you a categorized set of emojis that are a perfect fit to any graphic theme. Some of the most preferred ones include Nature, Travel, Food & Drinks, and many more. So why wait? Just get the free utility and begin to edit and share!
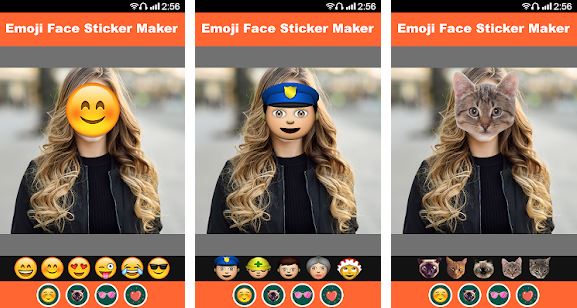
02Emoji Face Sticker
If you are creativity freak and love to experiment with your editing skills to put emoji on picture, try hands at working with this free image editor utility to add a fun element to your photos and give a laughter dose to your friends and family on social media. The app caters to transform your uploaded images faces to the cutest emoji look alike ever.
If that’s not enough, you can work with the app to change your smartphone’s regular camera into an emoji camera app that works to create the best caricature emoji montages from your snapped selfies. Navigating through the latte’s editing library, you will get to choose from among the craziest and coolest emoji stickers to create emoji photos out of normal stills. All in all, the app allows you to put forward your emotions in a relatively funnier way.
03Emoji Photo Editor
Are you bored of looking at those customary color backgrounds behind your images? Consider sparking them up with the cutest and most expressive emoji backgrounds. As you pick the app to edit your images, the latter grants you a complete access to its free emoji library that houses a decent collection of over 50 different emoji backgrounds to select from. A few of the most popular ones comprise of the flower and heart crown stickers, dog face camera among others.
Editing images within the app is seamless enough to last for a few seconds. You can use the created emoji background edits in a series of ways, like, preferring a local save or going for an image export to your favorite social media handle. Another cool way to show off your creativity can be making a device screen wallpaper of the emoji background image.
04Auto Face Stamp- Cover Face With Emoji
Looking forward to use an SNS services for media sharing purposes, but bothered about privacy concerns? While it is a common practice to share pictures via SNS and allied public platforms, most of us are often worried about keeping our faces hidden. Under normal circumstances, the face masking task is something you would ideally want to escape; the aforesaid app caters to the same in a funny and enjoyable manner.
Working with the utility, you can mask your image faces with over 100 different types of emoji stickers. The app aids you further in the task through its accurate face recognition ability that takes into consideration the smallest of faces with utmost precision. All you need to do is, select a desired emoji sticker and tap on the face you wish to mask with the same.
You can further, choose to directly export the masked images to media sharing handles right from the app’s editing workspace. The app is available to you absolutely free of cost and greets its users with a responsive working interface.

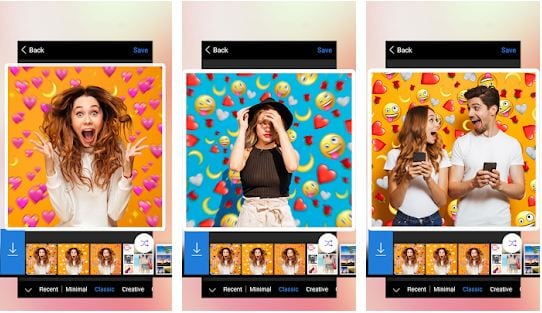
05Emoji Background Photo Editor
If the ordinary thematic backgrounds of your images do not suit you any longer, try working with this application to transmute the same into vibrant and expressive emoji alternatives. The aforesaid photo editing utility caters to make your images stand out of the crowd with beautiful emoji landscapes that render creative image edits of a matchless class, while maintaining a high-definition output image quality.
Extending the dimension of features to a longer stretch, the app grants you the liberty to adjust the position and transparency of the added emojis, set emoji frames and customize the emoji centered backgrounds with stunning effects and filters. As you finish with the editing process, the app lets you share your creations directly to a preferred social media platform, while also keeping them safe in your device’s local media gallery.
06Face Emoji Photo Effect
Reaching the end of the list, here comes the Face Emoji Photo Effect application that is all set to upgrade the level of your regular images with its classic and beautiful emoji backgrounds and stickers. The app’s editing library houses a diverse range of latest and elusive emojis to highlight your otherwise normal captures. The app additionally facilitates you with an expanded set of image editing features and effects to turn them into a graphic masterpiece.
The app welcomes you with a clean and responsive interface that makes the emoji inclusion process a quick and fun activity. All you need to do is, pick up an image from your locally saved alternatives and upload them to the app’s working interface, followed by browsing the latter’s emoji library to select a cohesive emoji background to complement the same.
You can further, download the premium emoji packs through a minimal payment to enhance the app’s library if the preset options do not match your requirements. The inbuilt emoji choices are however, free to work with.
Part 3 Best 5 Tools to Put Emojis on Pictures on Computer
All of us are familiar to and love using emojis everywhere, right from commenting on regular social media posts and chat service conversations, to creating professionally sound and strategic, business centered company presentations. While the most diverse use of these graphic utilities is reported on mobile devices, you may sometimes land across an instance that demands working with emojis on a computer.
Moving ahead with our discussion to address the aforesaid concern, let us talk about some of the prominent software and online solutions to set aside the issue of how to put emojis on photos while working on a computer in the upcoming section of this article:
01Kapwing
Entering into the domain of online image editing tools, the Kapwing website easily lands among the highly preferred choices. To address the concern of adding emojis to pictures on your PC or desktop systems, this one is an affordable tool to rely on. Talking of the underlying reasons behind the app’s high rated user preference, the latter allows you to access its huge inventory of emoji stickers, distributed across a heap of categories to choose from.
Next in the line is the tool’s spic and span editing process that lets you add and customize emojis on the uploaded images with a series of effects and filters in a matter of counted seconds. You can either pick and import images from your system, or work with the app’s in house emoji templates to edit the photos. As you are done with uploading images and adding emojis, proceed to place them at the desired position within the image.
The app allows you to add multiple emoji layers to the images by facilitating the creation of duplicate copies of your favorite emojis. Once you are done with the editing process, you are free to export your creation across media handles, or save them locally to your system.
02Editor.pho.to
If you are a newbie to the world of graphic editing and want to experiment with your creative skills to sort out the need of how to add an emoji to a picture, prefer landing on this free online website to work on your images. Considering the fact that not everyone around you is a tech savvy, the aforesaid online photo editing tool is designed to house the simplest of interfaces ever. The tool is available to you absolutely free of cost, without any unfair hidden purchases.
Ahead of the basic customization features, the tool grants you the freedom to expand your graphic skills on a wider canvas with presenting before you a plethora of emoji faces, stickers and backgrounds to complement the uploaded images with. Once you have added the emoji, the tool lets you work on the latter’s position and transparency adjustments, create emoji layers and overlays and save the edits to your system in a visibly high output quality.
03Add Emoji to Photo
When looking for dependable solutions to work towards the task of how to put an emoji on a photo, you can conveniently trust the aforementioned online tool to create classic emoji photo edits from the customary still alternatives son your computer. This one is a free to use image editor facility that allows you to decorate your otherwise unnoticed images with an extensive range of preset and custom emojis to make them expressive and speak out your emotions.
The tool caters to render a high definition edited image output within seconds through the simplest of customization processes. You just need to upload a desired image from your system to the tool’s working interface, followed by picking a suitable emoji from the tool’s editing library to add it to the image. If however, the available options don’t seem to address your specific requirements, you can proceed to create custom emojis of your own within the tool.
You can also create multiple emoji layers to add to the uploaded image and make adjustments to their transparency and position within the photo. As you finish the editing process, the tool grants you the liberty to download the customized image to your system in either of the PNG or JPG file formats.
04Image Online
Another entry into the list of solutions to answer the query of how to put emojis on a photo, the Image Online tool promises you of a quality constrained image editing process to complement the basic still captures in the local media gallery of your computer with the latest collection of emoji elements. Welcoming you with a decent interface, the tool caters to sort out your emoji centered picture editing requirements within a blink’s time.
To add emoji to image with this tool, you just need to upload the selected photo to the latter’s workspace, followed by selecting a preferred emoji from the editing library, or create a custom emoji of your own, to put on the image. You can customize the emoji settings in terms of position, size and transparency, and download the edits to your device in JPG and PNG image formats.
05Canva
Last in the list is the Canva graphic editing tool which you can conveniently work with to add an emoji to a picture. Having a slightly different image editing process in comparison to its online counterparts, the utility requires you to sign up to its working interface to begin editing your photos. To start with, you need to select a preset image template or pick customized dimensions to upload the desired image.
To add emojis to your picture, you will have to download the latter’s application by navigating to and tapping the ‘More’ icon, followed by choosing the ‘Emoji’ option from the drop down menu that appears next. Once the ‘Emoji’ tab shows up in the tool’s main interface, proceed to upload your image and pick a suitable emoji from the list to add to the uploaded image. You can further, add layers of emojis to the picture, while resizing and adjusting the skin tones of the same.
Part 4 Adding Emoji to Photo Q&A
● What is the total number of emoji characters till date?
As of September 2021, a total of 3,633 emojis are known to have been introduced so far. Talking of the latest emoji package, there comes the Emoji 14.0, adding 112 emoji variations to the existing count. The aforesaid is a cumulative figure, including the skin tone, gender and flag sequences.
● What are the different types of emoji categories?
During the current time, the emoji characterization is known to house 8 different categories, namely, Flags, Symbols, Objects, Travel, Activity, Food & Drink, Animals & Nature and Smileys & People.
● What is the difference between Emoji and Emoticons?
Emoticons are specifically, graphic interpretations of the various human emotions that come with a keyboard command combination. Emojis on the other hand, are a standard set of various characters, often having a different artwork, but a universal meaning.
● Is it possible to self-create custom emojis?
As of now, having self-created variants of emojis is not possible. If at all, you become successful in design a character that resembles an emoji, you can use it as an image at the most. In an attempt to share it as an emoji, you will end up sending text combinations.
● What is the best software alternative to add emojis to pictures?
When looking for an affordable software solution for catering to the concern of how to add emojis to a photo, you can go for picking the Wondershare Filmora Video Editor graphic editing program, whose editing library literally houses the largest and the latest collection of emoji categories and varieties for sparking up your images with the best possible customized appearance.
For Win 7 or later (64-bit)
For macOS 10.12 or later
● Ending Thoughts →
● Adding emojis to pictures has landed among the latest and most preferred graphic editing trends of current times.
● When beginning to address the concern of how do you add emojis to pictures, the IT market puts a diversity of software and online solutions before you.
● If you are confused about making the best choice, you can pick the Wondershare Filmora graphic editor program without having to think twice.
Emojis are catchy graphic elements that can add life to your photos, videos and allied artworks within a wink. Be here to know about the most exciting how-tos!
In this article
01 [Best 6 Tools to Put Emojis on Pictures on iPhone](#Part 1)
02 [Best 6 Tools to Put Emojis on Pictures on Android](#Part 2)
03 [Best 5 Tools to Put Emojis on Pictures on Computer](#Part 3)
Part 1 Best 6 Tools to Put Emojis on Pictures on iPhone
Emojis have managed to secure enough significance in our social and professional lives across social media platforms in the current time. Be it a fun-filled conversation with friends and family on a chat service program, or a high end and professionally sound business strategy, these mini caricature pieces of graphic art can add the much needed highlight to almost every aspect of your digital communication concerns.
Now that you are aware of the utility of working with emojis to make your digital contents, let us take a dive into some of the best ways and means to make your iPhone images come alive in the following section:
01Emoji Picture Editor- Add Emojis to Your Photos
If you like to imbibe the images on your iPhone media gallery with a hoard of funny and cool emojis, this one is a perfect app to address the concern. The tool’s library houses the latest collection of emoji categories to be in line with a diversity of photo styles, themes and backgrounds. You can take your pick from the huge inventory of over 1500 different emojis to level up your photos.
Talking about the app interface and usage controls, you are granted full liberty to add emojis to your emojis, while changing their positions through a finger drag, or scale and rotate them by expanding, pinching and twisting your fingers. The app additionally allows you to send bigger emoji stickers on chats and conversations.
02Insta Emoji Photo Editor
When looking for an interesting and reliable application to set straight the concern of how to put emojis on pictures, the Insta Emoji Photo Editor is an affordable pick. Loaded with an enormous and updated emoji library, the app presents before you over 3200 fascinating emoji options to select from and add to your images.
The inclusion process is intuitively simple, with you just having to upload the desired images to the app’s working interface and choose from your most favorite emoji elements to make the stills come alive with added fun and spark. The app houses an interesting ’Emoji Paint’ feature for the extensively creative ones to let them create catchy drawings with the coolest emojis.
03Emoji My Face
Moving ahead in the list comes the aforesaid app, which you can conveniently rely on to get through the photo edit emoji task in less than a few seconds. What’s unique about the utility is its feature that lets you add emoji stickers on the faces of your image elements. Working with the app, you can transform the skinned appearances of your friends and family into hilarious emoji faces.
While the app permits you to pick any number of preferences from its latest and updated emoji collection, you can additionally, save and share your emoji centered image edits across a diversity of media sharing platforms and chat service programs.
04Emoji Background Photo Maker
While there are hoards of IT alternatives to add emojis to pictures, the following utility caters to the concern in a slightly different style, ahead of just picking and pasting emojis to still captures. Working with the tool, you can experiment with changing the customary and fundamental image backgrounds into funny and appealing emoji centered themes. You are allowed to either work with a desired image from your iPhone’s media gallery, or take a fresh shot from your device’s camera, followed by uploading the same to the app’s editing interface.
Focusing on the tool’s expanse of usage features, you get tom work with a straightforward interface, and select from a wide variety of expressive and thematic emoji backgrounds. You can further, preview and save the edited images in HD quality, and share the same with friends and family across social media handles.
05Funny Photo Editor With Emoji Stickers Camera
This one is an innovative image editing tool that lets you create funny image transformations with classic emoji stickers, while addressing the query of how to add emojis to pictures. If your peer group consists of crazy creators who are selfie freaks, try hands at uplifting your live camera shots with this application by adding the funkiest emojis and sharing them across the regular communication platforms.
The app’s default camera feature lets you capture a straight forward image and convert the same into a hilarious edit with the latest range of free emoji stickers, caricature smileys and lots more. You can additionally beautify the edits with choosing from a decent range of emoji skin tones to suit the image background.
06Instamoji- Emoji Photo Editor
If you have been searching for an affordable solution to walk through the concern of , how to add emoji to photo on your iPhone, try working with the Instamoji application to highlight your customary images with classic emoji stickers and elements within the blink of an eye. The app welcomes you with a clean and intuitive interface to work upon, and is completely free to use.
Talking about the utility’s emoji centered image editing features, you are permitted to select from a decent collection of vibrant, funny and cool emojis, assorted under a diversity of categories to complement your images with, while exporting them across your digital communication accounts with utmost ease. The app promises you of the finest quality edited image output.
Part 2 Best 6 Tools to Put Emojis on Pictures on Android
Emojis are best known to spark up graphic artworks with an element of fun and entertainment. While the introduction of social media and digital communication utilities have brought emojis to the fingertips of modern day smartphone users, the IT market never lags behind at putting the latest transformations regarding emoji usage at your disposal.
Discussing along the line, let us talk about some interesting applications that address the concern of how to add an emoji to a photo using an Android device in what follows next:
01Add Emoji Stickers- Pics Editor and Photo Maker
This one is a smart photo editing tool that you can choose to customize the otherwise ordinary images on the local media gallery of your Android smartphone. The app greets you with an extensive range of updated emoji alternatives to suit your most specific editing requirements for complementing your elementary photos with the perfect feel and emotion.
The emojis work to add the missing fun to your social media posts with image edits funny enough to make your peers roll over with laughter. Not just smiley faces, the app delivers to you a categorized set of emojis that are a perfect fit to any graphic theme. Some of the most preferred ones include Nature, Travel, Food & Drinks, and many more. So why wait? Just get the free utility and begin to edit and share!
02Emoji Face Sticker
If you are creativity freak and love to experiment with your editing skills to put emoji on picture, try hands at working with this free image editor utility to add a fun element to your photos and give a laughter dose to your friends and family on social media. The app caters to transform your uploaded images faces to the cutest emoji look alike ever.
If that’s not enough, you can work with the app to change your smartphone’s regular camera into an emoji camera app that works to create the best caricature emoji montages from your snapped selfies. Navigating through the latte’s editing library, you will get to choose from among the craziest and coolest emoji stickers to create emoji photos out of normal stills. All in all, the app allows you to put forward your emotions in a relatively funnier way.
03Emoji Photo Editor
Are you bored of looking at those customary color backgrounds behind your images? Consider sparking them up with the cutest and most expressive emoji backgrounds. As you pick the app to edit your images, the latter grants you a complete access to its free emoji library that houses a decent collection of over 50 different emoji backgrounds to select from. A few of the most popular ones comprise of the flower and heart crown stickers, dog face camera among others.
Editing images within the app is seamless enough to last for a few seconds. You can use the created emoji background edits in a series of ways, like, preferring a local save or going for an image export to your favorite social media handle. Another cool way to show off your creativity can be making a device screen wallpaper of the emoji background image.
04Auto Face Stamp- Cover Face With Emoji
Looking forward to use an SNS services for media sharing purposes, but bothered about privacy concerns? While it is a common practice to share pictures via SNS and allied public platforms, most of us are often worried about keeping our faces hidden. Under normal circumstances, the face masking task is something you would ideally want to escape; the aforesaid app caters to the same in a funny and enjoyable manner.
Working with the utility, you can mask your image faces with over 100 different types of emoji stickers. The app aids you further in the task through its accurate face recognition ability that takes into consideration the smallest of faces with utmost precision. All you need to do is, select a desired emoji sticker and tap on the face you wish to mask with the same.
You can further, choose to directly export the masked images to media sharing handles right from the app’s editing workspace. The app is available to you absolutely free of cost and greets its users with a responsive working interface.
05Emoji Background Photo Editor
If the ordinary thematic backgrounds of your images do not suit you any longer, try working with this application to transmute the same into vibrant and expressive emoji alternatives. The aforesaid photo editing utility caters to make your images stand out of the crowd with beautiful emoji landscapes that render creative image edits of a matchless class, while maintaining a high-definition output image quality.
Extending the dimension of features to a longer stretch, the app grants you the liberty to adjust the position and transparency of the added emojis, set emoji frames and customize the emoji centered backgrounds with stunning effects and filters. As you finish with the editing process, the app lets you share your creations directly to a preferred social media platform, while also keeping them safe in your device’s local media gallery.
06Face Emoji Photo Effect
Reaching the end of the list, here comes the Face Emoji Photo Effect application that is all set to upgrade the level of your regular images with its classic and beautiful emoji backgrounds and stickers. The app’s editing library houses a diverse range of latest and elusive emojis to highlight your otherwise normal captures. The app additionally facilitates you with an expanded set of image editing features and effects to turn them into a graphic masterpiece.
The app welcomes you with a clean and responsive interface that makes the emoji inclusion process a quick and fun activity. All you need to do is, pick up an image from your locally saved alternatives and upload them to the app’s working interface, followed by browsing the latter’s emoji library to select a cohesive emoji background to complement the same.
You can further, download the premium emoji packs through a minimal payment to enhance the app’s library if the preset options do not match your requirements. The inbuilt emoji choices are however, free to work with.
Part 3 Best 5 Tools to Put Emojis on Pictures on Computer
All of us are familiar to and love using emojis everywhere, right from commenting on regular social media posts and chat service conversations, to creating professionally sound and strategic, business centered company presentations. While the most diverse use of these graphic utilities is reported on mobile devices, you may sometimes land across an instance that demands working with emojis on a computer.
Moving ahead with our discussion to address the aforesaid concern, let us talk about some of the prominent software and online solutions to set aside the issue of how to put emojis on photos while working on a computer in the upcoming section of this article:
01Kapwing
Entering into the domain of online image editing tools, the Kapwing website easily lands among the highly preferred choices. To address the concern of adding emojis to pictures on your PC or desktop systems, this one is an affordable tool to rely on. Talking of the underlying reasons behind the app’s high rated user preference, the latter allows you to access its huge inventory of emoji stickers, distributed across a heap of categories to choose from.
Next in the line is the tool’s spic and span editing process that lets you add and customize emojis on the uploaded images with a series of effects and filters in a matter of counted seconds. You can either pick and import images from your system, or work with the app’s in house emoji templates to edit the photos. As you are done with uploading images and adding emojis, proceed to place them at the desired position within the image.
The app allows you to add multiple emoji layers to the images by facilitating the creation of duplicate copies of your favorite emojis. Once you are done with the editing process, you are free to export your creation across media handles, or save them locally to your system.
02Editor.pho.to
If you are a newbie to the world of graphic editing and want to experiment with your creative skills to sort out the need of how to add an emoji to a picture, prefer landing on this free online website to work on your images. Considering the fact that not everyone around you is a tech savvy, the aforesaid online photo editing tool is designed to house the simplest of interfaces ever. The tool is available to you absolutely free of cost, without any unfair hidden purchases.
Ahead of the basic customization features, the tool grants you the freedom to expand your graphic skills on a wider canvas with presenting before you a plethora of emoji faces, stickers and backgrounds to complement the uploaded images with. Once you have added the emoji, the tool lets you work on the latter’s position and transparency adjustments, create emoji layers and overlays and save the edits to your system in a visibly high output quality.
03Add Emoji to Photo
When looking for dependable solutions to work towards the task of how to put an emoji on a photo, you can conveniently trust the aforementioned online tool to create classic emoji photo edits from the customary still alternatives son your computer. This one is a free to use image editor facility that allows you to decorate your otherwise unnoticed images with an extensive range of preset and custom emojis to make them expressive and speak out your emotions.
The tool caters to render a high definition edited image output within seconds through the simplest of customization processes. You just need to upload a desired image from your system to the tool’s working interface, followed by picking a suitable emoji from the tool’s editing library to add it to the image. If however, the available options don’t seem to address your specific requirements, you can proceed to create custom emojis of your own within the tool.
You can also create multiple emoji layers to add to the uploaded image and make adjustments to their transparency and position within the photo. As you finish the editing process, the tool grants you the liberty to download the customized image to your system in either of the PNG or JPG file formats.
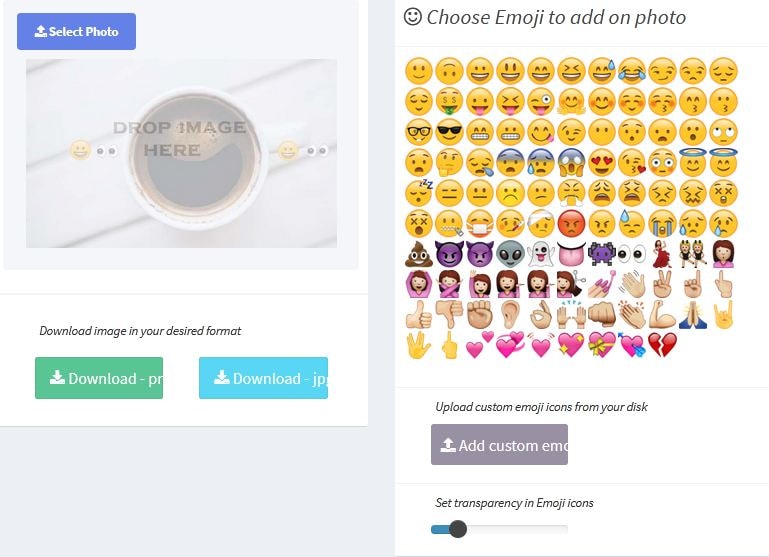
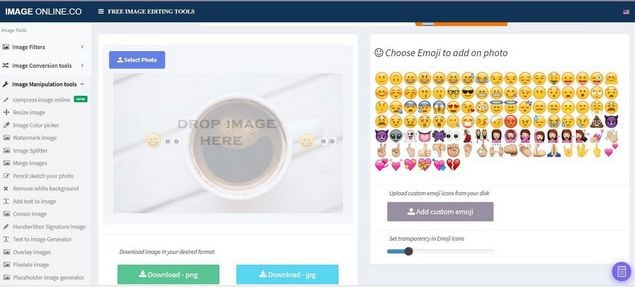
04Image Online
Another entry into the list of solutions to answer the query of how to put emojis on a photo, the Image Online tool promises you of a quality constrained image editing process to complement the basic still captures in the local media gallery of your computer with the latest collection of emoji elements. Welcoming you with a decent interface, the tool caters to sort out your emoji centered picture editing requirements within a blink’s time.
To add emoji to image with this tool, you just need to upload the selected photo to the latter’s workspace, followed by selecting a preferred emoji from the editing library, or create a custom emoji of your own, to put on the image. You can customize the emoji settings in terms of position, size and transparency, and download the edits to your device in JPG and PNG image formats.
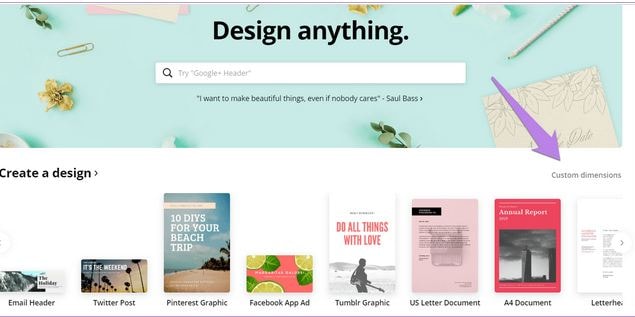
05Canva
Last in the list is the Canva graphic editing tool which you can conveniently work with to add an emoji to a picture. Having a slightly different image editing process in comparison to its online counterparts, the utility requires you to sign up to its working interface to begin editing your photos. To start with, you need to select a preset image template or pick customized dimensions to upload the desired image.
To add emojis to your picture, you will have to download the latter’s application by navigating to and tapping the ‘More’ icon, followed by choosing the ‘Emoji’ option from the drop down menu that appears next. Once the ‘Emoji’ tab shows up in the tool’s main interface, proceed to upload your image and pick a suitable emoji from the list to add to the uploaded image. You can further, add layers of emojis to the picture, while resizing and adjusting the skin tones of the same.
Part 4 Adding Emoji to Photo Q&A
● What is the total number of emoji characters till date?
As of September 2021, a total of 3,633 emojis are known to have been introduced so far. Talking of the latest emoji package, there comes the Emoji 14.0, adding 112 emoji variations to the existing count. The aforesaid is a cumulative figure, including the skin tone, gender and flag sequences.
● What are the different types of emoji categories?
During the current time, the emoji characterization is known to house 8 different categories, namely, Flags, Symbols, Objects, Travel, Activity, Food & Drink, Animals & Nature and Smileys & People.
● What is the difference between Emoji and Emoticons?
Emoticons are specifically, graphic interpretations of the various human emotions that come with a keyboard command combination. Emojis on the other hand, are a standard set of various characters, often having a different artwork, but a universal meaning.
● Is it possible to self-create custom emojis?
As of now, having self-created variants of emojis is not possible. If at all, you become successful in design a character that resembles an emoji, you can use it as an image at the most. In an attempt to share it as an emoji, you will end up sending text combinations.
● What is the best software alternative to add emojis to pictures?
When looking for an affordable software solution for catering to the concern of how to add emojis to a photo, you can go for picking the Wondershare Filmora Video Editor graphic editing program, whose editing library literally houses the largest and the latest collection of emoji categories and varieties for sparking up your images with the best possible customized appearance.
For Win 7 or later (64-bit)
For macOS 10.12 or later
● Ending Thoughts →
● Adding emojis to pictures has landed among the latest and most preferred graphic editing trends of current times.
● When beginning to address the concern of how do you add emojis to pictures, the IT market puts a diversity of software and online solutions before you.
● If you are confused about making the best choice, you can pick the Wondershare Filmora graphic editor program without having to think twice.
Emojis are catchy graphic elements that can add life to your photos, videos and allied artworks within a wink. Be here to know about the most exciting how-tos!
In this article
01 [Best 6 Tools to Put Emojis on Pictures on iPhone](#Part 1)
02 [Best 6 Tools to Put Emojis on Pictures on Android](#Part 2)
03 [Best 5 Tools to Put Emojis on Pictures on Computer](#Part 3)
Part 1 Best 6 Tools to Put Emojis on Pictures on iPhone
Emojis have managed to secure enough significance in our social and professional lives across social media platforms in the current time. Be it a fun-filled conversation with friends and family on a chat service program, or a high end and professionally sound business strategy, these mini caricature pieces of graphic art can add the much needed highlight to almost every aspect of your digital communication concerns.
Now that you are aware of the utility of working with emojis to make your digital contents, let us take a dive into some of the best ways and means to make your iPhone images come alive in the following section:
01Emoji Picture Editor- Add Emojis to Your Photos
If you like to imbibe the images on your iPhone media gallery with a hoard of funny and cool emojis, this one is a perfect app to address the concern. The tool’s library houses the latest collection of emoji categories to be in line with a diversity of photo styles, themes and backgrounds. You can take your pick from the huge inventory of over 1500 different emojis to level up your photos.
Talking about the app interface and usage controls, you are granted full liberty to add emojis to your emojis, while changing their positions through a finger drag, or scale and rotate them by expanding, pinching and twisting your fingers. The app additionally allows you to send bigger emoji stickers on chats and conversations.
02Insta Emoji Photo Editor
When looking for an interesting and reliable application to set straight the concern of how to put emojis on pictures, the Insta Emoji Photo Editor is an affordable pick. Loaded with an enormous and updated emoji library, the app presents before you over 3200 fascinating emoji options to select from and add to your images.
The inclusion process is intuitively simple, with you just having to upload the desired images to the app’s working interface and choose from your most favorite emoji elements to make the stills come alive with added fun and spark. The app houses an interesting ’Emoji Paint’ feature for the extensively creative ones to let them create catchy drawings with the coolest emojis.
03Emoji My Face
Moving ahead in the list comes the aforesaid app, which you can conveniently rely on to get through the photo edit emoji task in less than a few seconds. What’s unique about the utility is its feature that lets you add emoji stickers on the faces of your image elements. Working with the app, you can transform the skinned appearances of your friends and family into hilarious emoji faces.
While the app permits you to pick any number of preferences from its latest and updated emoji collection, you can additionally, save and share your emoji centered image edits across a diversity of media sharing platforms and chat service programs.
04Emoji Background Photo Maker
While there are hoards of IT alternatives to add emojis to pictures, the following utility caters to the concern in a slightly different style, ahead of just picking and pasting emojis to still captures. Working with the tool, you can experiment with changing the customary and fundamental image backgrounds into funny and appealing emoji centered themes. You are allowed to either work with a desired image from your iPhone’s media gallery, or take a fresh shot from your device’s camera, followed by uploading the same to the app’s editing interface.
Focusing on the tool’s expanse of usage features, you get tom work with a straightforward interface, and select from a wide variety of expressive and thematic emoji backgrounds. You can further, preview and save the edited images in HD quality, and share the same with friends and family across social media handles.
05Funny Photo Editor With Emoji Stickers Camera
This one is an innovative image editing tool that lets you create funny image transformations with classic emoji stickers, while addressing the query of how to add emojis to pictures. If your peer group consists of crazy creators who are selfie freaks, try hands at uplifting your live camera shots with this application by adding the funkiest emojis and sharing them across the regular communication platforms.
The app’s default camera feature lets you capture a straight forward image and convert the same into a hilarious edit with the latest range of free emoji stickers, caricature smileys and lots more. You can additionally beautify the edits with choosing from a decent range of emoji skin tones to suit the image background.
06Instamoji- Emoji Photo Editor
If you have been searching for an affordable solution to walk through the concern of , how to add emoji to photo on your iPhone, try working with the Instamoji application to highlight your customary images with classic emoji stickers and elements within the blink of an eye. The app welcomes you with a clean and intuitive interface to work upon, and is completely free to use.
Talking about the utility’s emoji centered image editing features, you are permitted to select from a decent collection of vibrant, funny and cool emojis, assorted under a diversity of categories to complement your images with, while exporting them across your digital communication accounts with utmost ease. The app promises you of the finest quality edited image output.
Part 2 Best 6 Tools to Put Emojis on Pictures on Android
Emojis are best known to spark up graphic artworks with an element of fun and entertainment. While the introduction of social media and digital communication utilities have brought emojis to the fingertips of modern day smartphone users, the IT market never lags behind at putting the latest transformations regarding emoji usage at your disposal.
Discussing along the line, let us talk about some interesting applications that address the concern of how to add an emoji to a photo using an Android device in what follows next:
01Add Emoji Stickers- Pics Editor and Photo Maker
This one is a smart photo editing tool that you can choose to customize the otherwise ordinary images on the local media gallery of your Android smartphone. The app greets you with an extensive range of updated emoji alternatives to suit your most specific editing requirements for complementing your elementary photos with the perfect feel and emotion.
The emojis work to add the missing fun to your social media posts with image edits funny enough to make your peers roll over with laughter. Not just smiley faces, the app delivers to you a categorized set of emojis that are a perfect fit to any graphic theme. Some of the most preferred ones include Nature, Travel, Food & Drinks, and many more. So why wait? Just get the free utility and begin to edit and share!
02Emoji Face Sticker
If you are creativity freak and love to experiment with your editing skills to put emoji on picture, try hands at working with this free image editor utility to add a fun element to your photos and give a laughter dose to your friends and family on social media. The app caters to transform your uploaded images faces to the cutest emoji look alike ever.
If that’s not enough, you can work with the app to change your smartphone’s regular camera into an emoji camera app that works to create the best caricature emoji montages from your snapped selfies. Navigating through the latte’s editing library, you will get to choose from among the craziest and coolest emoji stickers to create emoji photos out of normal stills. All in all, the app allows you to put forward your emotions in a relatively funnier way.
03Emoji Photo Editor
Are you bored of looking at those customary color backgrounds behind your images? Consider sparking them up with the cutest and most expressive emoji backgrounds. As you pick the app to edit your images, the latter grants you a complete access to its free emoji library that houses a decent collection of over 50 different emoji backgrounds to select from. A few of the most popular ones comprise of the flower and heart crown stickers, dog face camera among others.
Editing images within the app is seamless enough to last for a few seconds. You can use the created emoji background edits in a series of ways, like, preferring a local save or going for an image export to your favorite social media handle. Another cool way to show off your creativity can be making a device screen wallpaper of the emoji background image.
04Auto Face Stamp- Cover Face With Emoji
Looking forward to use an SNS services for media sharing purposes, but bothered about privacy concerns? While it is a common practice to share pictures via SNS and allied public platforms, most of us are often worried about keeping our faces hidden. Under normal circumstances, the face masking task is something you would ideally want to escape; the aforesaid app caters to the same in a funny and enjoyable manner.
Working with the utility, you can mask your image faces with over 100 different types of emoji stickers. The app aids you further in the task through its accurate face recognition ability that takes into consideration the smallest of faces with utmost precision. All you need to do is, select a desired emoji sticker and tap on the face you wish to mask with the same.
You can further, choose to directly export the masked images to media sharing handles right from the app’s editing workspace. The app is available to you absolutely free of cost and greets its users with a responsive working interface.
05Emoji Background Photo Editor
If the ordinary thematic backgrounds of your images do not suit you any longer, try working with this application to transmute the same into vibrant and expressive emoji alternatives. The aforesaid photo editing utility caters to make your images stand out of the crowd with beautiful emoji landscapes that render creative image edits of a matchless class, while maintaining a high-definition output image quality.
Extending the dimension of features to a longer stretch, the app grants you the liberty to adjust the position and transparency of the added emojis, set emoji frames and customize the emoji centered backgrounds with stunning effects and filters. As you finish with the editing process, the app lets you share your creations directly to a preferred social media platform, while also keeping them safe in your device’s local media gallery.
06Face Emoji Photo Effect
Reaching the end of the list, here comes the Face Emoji Photo Effect application that is all set to upgrade the level of your regular images with its classic and beautiful emoji backgrounds and stickers. The app’s editing library houses a diverse range of latest and elusive emojis to highlight your otherwise normal captures. The app additionally facilitates you with an expanded set of image editing features and effects to turn them into a graphic masterpiece.
The app welcomes you with a clean and responsive interface that makes the emoji inclusion process a quick and fun activity. All you need to do is, pick up an image from your locally saved alternatives and upload them to the app’s working interface, followed by browsing the latter’s emoji library to select a cohesive emoji background to complement the same.
You can further, download the premium emoji packs through a minimal payment to enhance the app’s library if the preset options do not match your requirements. The inbuilt emoji choices are however, free to work with.
Part 3 Best 5 Tools to Put Emojis on Pictures on Computer
All of us are familiar to and love using emojis everywhere, right from commenting on regular social media posts and chat service conversations, to creating professionally sound and strategic, business centered company presentations. While the most diverse use of these graphic utilities is reported on mobile devices, you may sometimes land across an instance that demands working with emojis on a computer.
Moving ahead with our discussion to address the aforesaid concern, let us talk about some of the prominent software and online solutions to set aside the issue of how to put emojis on photos while working on a computer in the upcoming section of this article:
01Kapwing
Entering into the domain of online image editing tools, the Kapwing website easily lands among the highly preferred choices. To address the concern of adding emojis to pictures on your PC or desktop systems, this one is an affordable tool to rely on. Talking of the underlying reasons behind the app’s high rated user preference, the latter allows you to access its huge inventory of emoji stickers, distributed across a heap of categories to choose from.
Next in the line is the tool’s spic and span editing process that lets you add and customize emojis on the uploaded images with a series of effects and filters in a matter of counted seconds. You can either pick and import images from your system, or work with the app’s in house emoji templates to edit the photos. As you are done with uploading images and adding emojis, proceed to place them at the desired position within the image.
The app allows you to add multiple emoji layers to the images by facilitating the creation of duplicate copies of your favorite emojis. Once you are done with the editing process, you are free to export your creation across media handles, or save them locally to your system.
02Editor.pho.to
If you are a newbie to the world of graphic editing and want to experiment with your creative skills to sort out the need of how to add an emoji to a picture, prefer landing on this free online website to work on your images. Considering the fact that not everyone around you is a tech savvy, the aforesaid online photo editing tool is designed to house the simplest of interfaces ever. The tool is available to you absolutely free of cost, without any unfair hidden purchases.
Ahead of the basic customization features, the tool grants you the freedom to expand your graphic skills on a wider canvas with presenting before you a plethora of emoji faces, stickers and backgrounds to complement the uploaded images with. Once you have added the emoji, the tool lets you work on the latter’s position and transparency adjustments, create emoji layers and overlays and save the edits to your system in a visibly high output quality.
03Add Emoji to Photo
When looking for dependable solutions to work towards the task of how to put an emoji on a photo, you can conveniently trust the aforementioned online tool to create classic emoji photo edits from the customary still alternatives son your computer. This one is a free to use image editor facility that allows you to decorate your otherwise unnoticed images with an extensive range of preset and custom emojis to make them expressive and speak out your emotions.
The tool caters to render a high definition edited image output within seconds through the simplest of customization processes. You just need to upload a desired image from your system to the tool’s working interface, followed by picking a suitable emoji from the tool’s editing library to add it to the image. If however, the available options don’t seem to address your specific requirements, you can proceed to create custom emojis of your own within the tool.
You can also create multiple emoji layers to add to the uploaded image and make adjustments to their transparency and position within the photo. As you finish the editing process, the tool grants you the liberty to download the customized image to your system in either of the PNG or JPG file formats.
04Image Online
Another entry into the list of solutions to answer the query of how to put emojis on a photo, the Image Online tool promises you of a quality constrained image editing process to complement the basic still captures in the local media gallery of your computer with the latest collection of emoji elements. Welcoming you with a decent interface, the tool caters to sort out your emoji centered picture editing requirements within a blink’s time.
To add emoji to image with this tool, you just need to upload the selected photo to the latter’s workspace, followed by selecting a preferred emoji from the editing library, or create a custom emoji of your own, to put on the image. You can customize the emoji settings in terms of position, size and transparency, and download the edits to your device in JPG and PNG image formats.
05Canva
Last in the list is the Canva graphic editing tool which you can conveniently work with to add an emoji to a picture. Having a slightly different image editing process in comparison to its online counterparts, the utility requires you to sign up to its working interface to begin editing your photos. To start with, you need to select a preset image template or pick customized dimensions to upload the desired image.
To add emojis to your picture, you will have to download the latter’s application by navigating to and tapping the ‘More’ icon, followed by choosing the ‘Emoji’ option from the drop down menu that appears next. Once the ‘Emoji’ tab shows up in the tool’s main interface, proceed to upload your image and pick a suitable emoji from the list to add to the uploaded image. You can further, add layers of emojis to the picture, while resizing and adjusting the skin tones of the same.
Part 4 Adding Emoji to Photo Q&A
● What is the total number of emoji characters till date?
As of September 2021, a total of 3,633 emojis are known to have been introduced so far. Talking of the latest emoji package, there comes the Emoji 14.0, adding 112 emoji variations to the existing count. The aforesaid is a cumulative figure, including the skin tone, gender and flag sequences.
● What are the different types of emoji categories?
During the current time, the emoji characterization is known to house 8 different categories, namely, Flags, Symbols, Objects, Travel, Activity, Food & Drink, Animals & Nature and Smileys & People.
● What is the difference between Emoji and Emoticons?
Emoticons are specifically, graphic interpretations of the various human emotions that come with a keyboard command combination. Emojis on the other hand, are a standard set of various characters, often having a different artwork, but a universal meaning.
● Is it possible to self-create custom emojis?
As of now, having self-created variants of emojis is not possible. If at all, you become successful in design a character that resembles an emoji, you can use it as an image at the most. In an attempt to share it as an emoji, you will end up sending text combinations.
● What is the best software alternative to add emojis to pictures?
When looking for an affordable software solution for catering to the concern of how to add emojis to a photo, you can go for picking the Wondershare Filmora Video Editor graphic editing program, whose editing library literally houses the largest and the latest collection of emoji categories and varieties for sparking up your images with the best possible customized appearance.
For Win 7 or later (64-bit)
For macOS 10.12 or later
● Ending Thoughts →
● Adding emojis to pictures has landed among the latest and most preferred graphic editing trends of current times.
● When beginning to address the concern of how do you add emojis to pictures, the IT market puts a diversity of software and online solutions before you.
● If you are confused about making the best choice, you can pick the Wondershare Filmora graphic editor program without having to think twice.
In This Article I Will Share to You My Tips and Experiences on How to Become a YouTube Vlogger and Things You Need to Consider Being a Vlogger
Being a vlogger is a lot of fun specially making videos but is not also very easy, there are times you feel giving up specially when no one in the family supports you, there are also times when you get tired because you think no one is interested in your videos, but very fulfilling at the same time being able to do what you love. As you all know making video on YouTube is making also money that is through google AdSense, but if you are into money without the passion of being a vlogger, you will definitely get tired immediately, because being a vlogger requires more effort, patience, love of work, creativity and most specially passion.
![]()
Note: You don’t need to study a career to become a vlogger, but it’s not easy as simply pressing the publishing button. You’ll need a purpose, a message, a platform, an audience and more.
In this article I will share to you my tips and experiences on How to become a YouTube Vlogger and things you need to consider being a Vlogger.
1. What is Vlog?
A Vlog is a piece of video that document a person’s life or expertise, with an average length of around five minutes. The word vlog is “video” and “blog”. Vlog are created to connect with an audience through shared ideas and experiences in the form of video.
2. Tips on How to Become a YouTube Vlogger
- Create a Channel
- Content
- Equipment
- Skills
- Collaborate
3. Create a YouTube Channel
Your channel name is the official name for your channel on YouTube. Your channel name is a big part of how people will define and understand what your channel is about. So, it’s important that your name accurately represents your brand. It’s important that your name stands out from another channel on YouTube or should be unique.
![]()
Note: So before deciding on a name, pop your potential name into YouTube and see what comes up, if you can’t find any similar sounding channels, you’re good to go.
For example, my channel name is Mayang Dyosa, Mayang is what my family and friend called me and Dyosa means Goddess. I find it unique and cute because that’s my dream to be a Goddess.
❶ Content
One of the challenging parts being a YouTuber is finding a right content for your channel.
You can use YouTube’s trending page this is the easiest way to find trending topic for you to have an idea of what topic or content you like. You can always use or share experiences to be your topic content whether it is beauty, make-up tutorial, DIY’s, Skin care ideas, etc. As long as you can share honestly and correctly.
Do whatever you love, do something that you like, expertise, make a relatable videos or timely videos and searchable videos. Create a content that people need or are often searched for online, content that can provide information to people. I suggest you go with “how to” videos, because people always searched for this kind of content.

Vlog Content
❷ Equipment
Gear is essential for making a YouTube video obviously a camera is the most important piece of equipment, you can use anything that can record at least 1080p resolution of video. You can use your mobile phone or a digital camera. Whatever your equipment you have now, you can start your first vlog as long as you can record a video at you have a clear audio you are good to go.
Many of the successful YouTube creators started with very simple equipment so don’t let equipment get in your way. Start your vlog now!

Vlog Equipment
❸ Skills

Vlog Editing Skills
Speaking with confident in the front of camera is always a skill of being a vlogger, you must be talkative in order for you to share more information to you viewers but make sure that your ideas are related to your chosen content.
You should be entertaining in front of the camera so that the viewers don’t get bored, because sometimes it’s not just the information that excite them to watch a vlogger, but also on how you entertain the viewers.

Entertain in Front of the Camera
❹ Editing Skils
In Editing skills, there are two ways you can edit your vlog, first on your phones, second on your pc or laptops.
You don’t have to be good at editing but this is one of the things you need to study to make your videos better.

Entertain in Front of the Camera2
Wondershare Filmora Video Editor is one of my personally used editing software, this is considered to be the best option for YouTubers because there is how-to video guide that allows anyone to quickly pick up the pace and start producing or creating an eye-catching video.
Wondershare Filmora 11 The Best video editor that makes your editing experience efficient and playful.
Try It Free Try It Free Learn More

I am using this software for almost 5 years and always satisfied by its performance. It is easy to use software with a lot of tools needed to edit a video in a fast way and it even has animation/affects you can add to your video to look more creative and catchier.
Filmora allows you to export your videos in multiple video formats with lot of customization settings.

Wondershare Filmora
It also allows you to export your videos directly to your social media platforms like YouTube, Facebook, Vimeo. The speed of exporting videos is also quite fast so not time consuming.
❺ Collaborate
It really helps your channel to grow if you collaborate with someone that is same passion as you, you can share ideas of content and help one another channel grow. Also, this will help others to know that you also have a YouTube channel and this is another way to promote your channel by the help of other content creator. In this way you can gain a friend and someone that you can seek for advice as you are starting for your career.

Wondershare Filmora
Wrap Up
- You must also remember when starting to be a vlogger you should be emotionally and mentally ready because this is not easy as you expected.
- You can earn money by doing a vlog but don’t make the money to be your motivation to be a Vlogger, ask yourself first if this is really you like or is this really your passion? because being a Vlogger comes with great responsibility and it comes with great effort.
- If you are ready to become a vlogger because of the tips I gave, you can start now but you should not expect more subscriber and views immediately because you still need a lot effort and a lot of work to get people get to know your channel. So just keep working and work hard on the content, one day you will be famous and recognized by many.
In this article I will share to you my tips and experiences on How to become a YouTube Vlogger and things you need to consider being a Vlogger.
1. What is Vlog?
A Vlog is a piece of video that document a person’s life or expertise, with an average length of around five minutes. The word vlog is “video” and “blog”. Vlog are created to connect with an audience through shared ideas and experiences in the form of video.
2. Tips on How to Become a YouTube Vlogger
- Create a Channel
- Content
- Equipment
- Skills
- Collaborate
3. Create a YouTube Channel
Your channel name is the official name for your channel on YouTube. Your channel name is a big part of how people will define and understand what your channel is about. So, it’s important that your name accurately represents your brand. It’s important that your name stands out from another channel on YouTube or should be unique.
![]()
Note: So before deciding on a name, pop your potential name into YouTube and see what comes up, if you can’t find any similar sounding channels, you’re good to go.
For example, my channel name is Mayang Dyosa, Mayang is what my family and friend called me and Dyosa means Goddess. I find it unique and cute because that’s my dream to be a Goddess.
❶ Content
One of the challenging parts being a YouTuber is finding a right content for your channel.
You can use YouTube’s trending page this is the easiest way to find trending topic for you to have an idea of what topic or content you like. You can always use or share experiences to be your topic content whether it is beauty, make-up tutorial, DIY’s, Skin care ideas, etc. As long as you can share honestly and correctly.
Do whatever you love, do something that you like, expertise, make a relatable videos or timely videos and searchable videos. Create a content that people need or are often searched for online, content that can provide information to people. I suggest you go with “how to” videos, because people always searched for this kind of content.
Vlog Content
❷ Equipment
Gear is essential for making a YouTube video obviously a camera is the most important piece of equipment, you can use anything that can record at least 1080p resolution of video. You can use your mobile phone or a digital camera. Whatever your equipment you have now, you can start your first vlog as long as you can record a video at you have a clear audio you are good to go.
Many of the successful YouTube creators started with very simple equipment so don’t let equipment get in your way. Start your vlog now!
Vlog Equipment
❸ Skills
Vlog Editing Skills
Speaking with confident in the front of camera is always a skill of being a vlogger, you must be talkative in order for you to share more information to you viewers but make sure that your ideas are related to your chosen content.
You should be entertaining in front of the camera so that the viewers don’t get bored, because sometimes it’s not just the information that excite them to watch a vlogger, but also on how you entertain the viewers.
Entertain in Front of the Camera
❹ Editing Skils
In Editing skills, there are two ways you can edit your vlog, first on your phones, second on your pc or laptops.
You don’t have to be good at editing but this is one of the things you need to study to make your videos better.
Entertain in Front of the Camera2
Wondershare Filmora Video Editor is one of my personally used editing software, this is considered to be the best option for YouTubers because there is how-to video guide that allows anyone to quickly pick up the pace and start producing or creating an eye-catching video.
Wondershare Filmora 11 The Best video editor that makes your editing experience efficient and playful.
Try It Free Try It Free Learn More
I am using this software for almost 5 years and always satisfied by its performance. It is easy to use software with a lot of tools needed to edit a video in a fast way and it even has animation/affects you can add to your video to look more creative and catchier.
Filmora allows you to export your videos in multiple video formats with lot of customization settings.
Wondershare Filmora
It also allows you to export your videos directly to your social media platforms like YouTube, Facebook, Vimeo. The speed of exporting videos is also quite fast so not time consuming.
❺ Collaborate
It really helps your channel to grow if you collaborate with someone that is same passion as you, you can share ideas of content and help one another channel grow. Also, this will help others to know that you also have a YouTube channel and this is another way to promote your channel by the help of other content creator. In this way you can gain a friend and someone that you can seek for advice as you are starting for your career.
Wondershare Filmora
Wrap Up
- You must also remember when starting to be a vlogger you should be emotionally and mentally ready because this is not easy as you expected.
- You can earn money by doing a vlog but don’t make the money to be your motivation to be a Vlogger, ask yourself first if this is really you like or is this really your passion? because being a Vlogger comes with great responsibility and it comes with great effort.
- If you are ready to become a vlogger because of the tips I gave, you can start now but you should not expect more subscriber and views immediately because you still need a lot effort and a lot of work to get people get to know your channel. So just keep working and work hard on the content, one day you will be famous and recognized by many.
2 Methods to Crop a Video Using After Effects
Cropping a video is part of the process of video edting. Not all video editing software can be obtained freely. There are some that you need to spend to get the professional output that you aim for. After Effects,a member of the Adobe tools that exist can enhance your videos to another level. This article can help you know how to crop video in After Effects and on the alternative by using Wondershare Filmora. I know that it may seem confusing to compare these two at first. But, I’ll provide an explanation to get the cropped video that you want.
Method 1: Cropping a Video using After Effects
After Effects is a professional motion graphics tool that can create outputs that are beyond the limits of reality. Like the other Adobe tools, this comes with a subscription fee to be able to maximize this product. But, is the price worth the risk? The “ Adobe” brand is known for its quality applications and customer’s satisfaction.
Let’s start with using this tool. The situation is that you want to crop your video using Adobe After Effects but you don’t know how to start. Search for the application on your computer. Launch it, then click the New Project. If you have files from your storage then select the New Composition Footage.

Check if the video is already in the interface. Find the Magnifying tab and zoom out the video into 50%. After that, click the Grid icon and Proportional Grid.

Click the Square icon, it is located beside the Pencil icon at the top section. The shape’s purpose is to crop the video section that you want to remain. If you’re done cutting then you should unclick the Proportional grid, and the video’s magnification should be 100%. Afterwards, you can check the pixel aspect ratio correction in the After Effects. You need to go through the video before saving your project. This is to avoid unnecessary errors that will make the process troublesome.

Already satisfied with the cropped video? Then, select File, Export and finally Add to Render Queue. Check on the Render Settings (located bottom of the interface) to ensure high quality output. Following that, hit the Output To part and decide the destination and folder where you want it to be.

Watch your cropped video and go ahead and repeat this with your other videos. After practicing this process many times, this will come to you as easy. If you get lost while following the instructions go back to this guide until it becomes a part of your memory.
Congratulations on making your first cropped video using After Effects! What was your experience while following through the guide? I hope that the information presented here is easy to understand and implement.
Even though it is not a free application, I hope you have experienced the advantages of using this compared to other tools. Did it come as a surprise for you that you can crop a video not just in Adobe Premiere but also in After Effects as well?
I hope that fear will not hinder you from trying this tool to crop your videos.
Method 2: Cropping a Video using Wondershare Filmora
If you didn’t know there is also an awesome video editing software called Wondershare Filmora Video Editor .
You can try it by searching the internet and downloading it on your computer. If simplicity is your priority then this may suit you perfectly. If you’re still hesitant then read the reviews and watch how others are using it.
There is no need to worry if you have a tight budget as downloading this would be free. You just need to go to the official site. Do not be scared of trying with something unfamiliar. I will guide you with using it and utilizing it to get the result that you dream of.
Wondershare Filmora just like the others that exist are video editors that will turn your raw videos into the vision that you like. Thanks to these applications, the gruesome process of manually cutting it by hand and permanently altering the footage are gone. You can make how many changes that you want without damaging the original video.
For Win 7 or later (64-bit)
For macOS 10.14 or later
Are you done installing the application? If you have any encountered issues with installing it, you can contact customer support.
Not only does it have a straightforward and simple interface but it is also packed with useful tools that can turn your video into another level. But, you should not be overwhelmed by the number of icons and features that exist. Take a deep breath and proceed to opening it in your computer.

Preparation is a must especially if you have multiple videos on your computer. A good tip would be renaming them by the sequence you plan to have. And, you could also place them in folders to avoid repetition and double copies. Once you’re done, you can drag and drop your video or
click the Import.

Go ahead and select the video clip that you want to crop. Then, click the Crop tool and choose if you want the Crop or Pan & Zoom. Yes, you have options on what kind of crop you want it to be.

An alternative way is by right clicking the video clip .Under the Video tab you can select the Crop and Zoom or Crop to Fit then adjust to your preferred ratio.

You can review the cropped video to think through if this is the portion that you want to be included. Unlike other applications, you can go back and adjust it to your liking.
If you’re finally satisfied then you can export it. Choose the output format and you can also rename the file. Clicking the settings button will offer you additional options of your video output.
After all that, you have the cropped video that you can either upload or repurpose in another content. Did you enjoy the process of cropping it in Wondershare Filmora?
Remember, that you have the option to batch crop multiple video clips on this so no need to manually crop and export it. You can see the big picture and monitor if the flow makes sense to you.
Don’t you think that the subscription is worth it? There is a trial that you could check out to test its capabilities and awesomeness.
The Bottom Line
You are once again done with the process of checking out these two applications. After Effects and Wondershare Filmora have a different process when it comes to cropping videos. I hope that you had a clearer understanding on which of these two would suit your video editing needs. The interface also could change your mind depending if you want simplicity or a challenge. Price is also a factor that can affect your willingness to use these applications. But, this guide clearly shows you that it is worth paying for.
What are your thoughts on both of these tools? Did you find this information to be helpful?
Check if the video is already in the interface. Find the Magnifying tab and zoom out the video into 50%. After that, click the Grid icon and Proportional Grid.
Click the Square icon, it is located beside the Pencil icon at the top section. The shape’s purpose is to crop the video section that you want to remain. If you’re done cutting then you should unclick the Proportional grid, and the video’s magnification should be 100%. Afterwards, you can check the pixel aspect ratio correction in the After Effects. You need to go through the video before saving your project. This is to avoid unnecessary errors that will make the process troublesome.
Already satisfied with the cropped video? Then, select File, Export and finally Add to Render Queue. Check on the Render Settings (located bottom of the interface) to ensure high quality output. Following that, hit the Output To part and decide the destination and folder where you want it to be.
Watch your cropped video and go ahead and repeat this with your other videos. After practicing this process many times, this will come to you as easy. If you get lost while following the instructions go back to this guide until it becomes a part of your memory.
Congratulations on making your first cropped video using After Effects! What was your experience while following through the guide? I hope that the information presented here is easy to understand and implement.
Even though it is not a free application, I hope you have experienced the advantages of using this compared to other tools. Did it come as a surprise for you that you can crop a video not just in Adobe Premiere but also in After Effects as well?
I hope that fear will not hinder you from trying this tool to crop your videos.
Method 2: Cropping a Video using Wondershare Filmora
If you didn’t know there is also an awesome video editing software called Wondershare Filmora Video Editor .
You can try it by searching the internet and downloading it on your computer. If simplicity is your priority then this may suit you perfectly. If you’re still hesitant then read the reviews and watch how others are using it.
There is no need to worry if you have a tight budget as downloading this would be free. You just need to go to the official site. Do not be scared of trying with something unfamiliar. I will guide you with using it and utilizing it to get the result that you dream of.
Wondershare Filmora just like the others that exist are video editors that will turn your raw videos into the vision that you like. Thanks to these applications, the gruesome process of manually cutting it by hand and permanently altering the footage are gone. You can make how many changes that you want without damaging the original video.
For Win 7 or later (64-bit)
For macOS 10.14 or later
Are you done installing the application? If you have any encountered issues with installing it, you can contact customer support.
Not only does it have a straightforward and simple interface but it is also packed with useful tools that can turn your video into another level. But, you should not be overwhelmed by the number of icons and features that exist. Take a deep breath and proceed to opening it in your computer.
Preparation is a must especially if you have multiple videos on your computer. A good tip would be renaming them by the sequence you plan to have. And, you could also place them in folders to avoid repetition and double copies. Once you’re done, you can drag and drop your video or
click the Import.
Go ahead and select the video clip that you want to crop. Then, click the Crop tool and choose if you want the Crop or Pan & Zoom. Yes, you have options on what kind of crop you want it to be.
An alternative way is by right clicking the video clip .Under the Video tab you can select the Crop and Zoom or Crop to Fit then adjust to your preferred ratio.
You can review the cropped video to think through if this is the portion that you want to be included. Unlike other applications, you can go back and adjust it to your liking.
If you’re finally satisfied then you can export it. Choose the output format and you can also rename the file. Clicking the settings button will offer you additional options of your video output.
After all that, you have the cropped video that you can either upload or repurpose in another content. Did you enjoy the process of cropping it in Wondershare Filmora?
Remember, that you have the option to batch crop multiple video clips on this so no need to manually crop and export it. You can see the big picture and monitor if the flow makes sense to you.
Don’t you think that the subscription is worth it? There is a trial that you could check out to test its capabilities and awesomeness.
The Bottom Line
You are once again done with the process of checking out these two applications. After Effects and Wondershare Filmora have a different process when it comes to cropping videos. I hope that you had a clearer understanding on which of these two would suit your video editing needs. The interface also could change your mind depending if you want simplicity or a challenge. Price is also a factor that can affect your willingness to use these applications. But, this guide clearly shows you that it is worth paying for.
What are your thoughts on both of these tools? Did you find this information to be helpful?
Also read:
- Updated Best 8 Free Video Editing Software Reddit
- Updated Best 12 Sony Vegas Slideshow Templates for Free Download
- New 2024 Approved Tips for Choosing Location and Scheduling Music Video
- Updated In 2024, A Guide to Create Your Own LOL Montage Video
- Best MOV to GIF Converters for 2024
- Updated Easy Step by Step Tutorial on Creating a Lightroom Collage for 2024
- New In 2024, Best Ideas on Using Filmora Green Screen
- Guide to Add Transition Effects in Premiere Pro
- Updated 2024 Approved Best Filmic Pro LUTs For Video Editing
- The Craziest 10 AI Editors Youve Seen
- Updated In 2024, Adding Slow Motion in DaVinci Resolve A Comprehensive Overview
- New The Best Laptops For Video Editing
- 2024 Approved Quickly Turn Any Video Into a Paper Rip Effect
- New In 2024, What Are AR Emoji Stickers & How to Add Them to Your Video
- Updated This Article Talks in Detail About How to Convert Time-Lapse to Normal Video Using Certain Methods on iPhone, Online Tools, and so On. It Further Discusses Converting Time-Lapse Video to Normal on the Computer. Check Out
- New How to Create a Custom Sequence Preset in Premiere Pro for 2024
- New In 2024, How to Add Slideshow in PowerPoint
- Updated Do You Want to Know How to Remove Audio From a Video without a Watermark? Keep Reading This Article Since We Have the Answers for You. Complete with the Guide on How to Do It
- 2024 Approved Detailed Steps to Add Border to Video Using Premiere Pro
- In 2024, How to Spruce Up Your Telegram Profile
- In 2024, MP3 Cutter Download
- In 2024, Do You Want Your Photos and Videos to Give an Old and Vintage Feel? Here Are some Vintage LUTs Premiere Pro Free and Paid Options Available to Download
- Updated 8 Tips to Apply Cinematic Color Grading to Your Videos for 2024
- In 2024, Ideas to Make A Perfect Café Vlog
- How to Recover iPhone X Data From iOS iTunes? | Dr.fone
- What To Do if Your Vivo V29 Auto Does Not Work | Dr.fone
- Transfer your Apple iPhone 12 mini Apps to New iPhone | Dr.fone
- In 2024, Vivo V30 ADB Format Tool for PC vs. Other Unlocking Tools Which One is the Best?
- Lock Your Samsung Galaxy S23 Ultra Phone in Style The Top 5 Gesture Lock Screen Apps
- 8 Safe and Effective Methods to Unlock Your iPhone 12 mini Without a Passcode
- In 2024, Trouble with Apple iPhone XS Max Swipe-Up? Try These 11 Solutions | Dr.fone
- In 2024, How to Use Life360 on Windows PC For Samsung Galaxy F14 5G? | Dr.fone
- How does the stardust trade cost In pokemon go On Oppo Find X7 Ultra? | Dr.fone
- Here Are Some Reliable Ways to Get Pokemon Go Friend Codes For Honor X9b | Dr.fone
- How to Come up With the Best Pokemon Team On Vivo Y28 5G? | Dr.fone
- Effective Ways To Fix Checkra1n Error 31 From iPhone 13
- Disabling Apple iPhone XR Parental Restrictions With/Without Password | Dr.fone
- How to share/fake gps on Uber for OnePlus Nord 3 5G | Dr.fone
- In 2024, How to Migrate Android Data From Lava Yuva 2 to New Android Phone? | Dr.fone
- Title: Guide to Create an Intro Video with Filmora
- Author: Chloe
- Created at : 2024-05-20 03:37:27
- Updated at : 2024-05-21 03:37:27
- Link: https://ai-editing-video.techidaily.com/guide-to-create-an-intro-video-with-filmora/
- License: This work is licensed under CC BY-NC-SA 4.0.
