
:max_bytes(150000):strip_icc():format(webp)/Twitter-and-X-4c4103f6bc3c42e0b7197b60a50317ca.jpg)
Here You Can Lean About the Different Ways for GIMP Transparent Background PNG Format Files
Here You Can Lean About the Different Ways for GIMP Transparent Background PNG Format Files
Step by Step Guide on Make Gimp Transparent Background PNG
An easy yet powerful editor
Numerous effects to choose from
Detailed tutorials provided by the official channel
Removing background of images and making them transparent is a really very tough task for the newbies. Sometimes you may need to learn lots of software to get the work done and most of the programs are paid over the internet. There are many reasons why you need to remove the background of images such as you don’t like the background and replace with the new one. Here, in this article we will share the information about the GIMP which is a free and open source programs and can help you to remove background from the images and make the transparent.
In this article
01 [What’s Gimp?](#Part 1)
02 [How to Create a Transparent Background in GIMP](#Part 2)
03 [How to Turn the Complex Image Background Transparent](#Part 3)
04 [How to Turn a One-Color Background Transparent](#Part 4)
Part 1 What’s Gimp?
GIMP is open source software which allows you to do image manipulations. The program is distributed over the internet for free of cost the beginners to learn the photography skills. GIMP software can be used for photo retouching, image authoring and image compositions. GIMP supports all features of photo editing even it can be used for GIMP remove background to transparent. You can also use it as a paint program, online batch processing system, image format converter and as an image renderer.
Part 2 How to Create a Transparent Background in GIMP
With the help of GIMP software you can easily remove background from image and make it transparent. Here, we are going to tell you that how you can remove background with the help of GIMP. Let’s learn it step by step.
Step 1:
Install and launch GIMP program on your system. Now click the “File > Open” or you can also use “File > Open as Layers” option.

Step 2:
Now, you have to use the Fuzzy tool. The Fuzzy tool is mainly designed to select the current layer area and the image on the basis of color. Using this tool you can easily select the background which you want to remove with just one click.

Step 3:
On your image, now you will see a channel dialog when you add a second layer on it. This layer will tell the transparency of the image you have added to remove background. So, click the “Layer > Transparency > Add Alpha Channel option.

Step 4:
On your keyboard now you need to hit the “Delete” button to remove background. You may need to repeat the steps 2 to 4 if the background is not completely removed else there is no problem. We have removed blue background here for example.

Step 5:
Finally, you can click the “File > Export As” and then select the PNG format and save it on your computer in the PNG format. This is the way about GIMP remove background to transparent.

Part 3 How to Turn the Complex Image Background Transparent
The above part was about removing the simple and easy background from the image. Here we will share about GIMP transparent background PNG when you have the complex background. For, GIMP create transparent background in the complex images you need to add a transparent layer on the image.
Step 1:
Open the image in GIMP and then right click on the layer of image. Now, click the “Add Alpha Chanel” option.

Step 2:
After making a layer for background now you have to select the foreground of the image which you want to keep using the select tool of GIMP. To start, first you need to make sure the in the settings you have selected “Draw foreground option” is selected.
After doing all adjustments of the settings you need to draw outline of the object and finally press the enter button on keyboard.

Step 3:
After doing all the settings you have to adjust the stroke width from settings panel of GIMP. Use your mouse now and start dragging and drawing the image just like you are painting with a brush. Once your drawing is finished and you leave your mouse the image will look like the below screenshot.

Step 4:
You can also fine tune your selection now with the help of draw background option in the GIMP. This will help you to adjust the rough outline you created previously. Once you are happy then simply press the enter button.

Step 5:
Still, if you want to refine your results more than you can refine your outlines by using the path nodes option. You can view the path nodes by following the below steps.
● Keep your mouse cursor at paths dialog.
● Now, hit selection.
● To view the path you can click the CTRL+Shift+A button.
● Now, select the paths tool.
● Finally click the “Path”.

Step 6:
Now, it’s a time to adjust the outlines according to the output of your foreground image. You can zoom the image and add or adjust the previous nodes. To adjust node you can click the CTRL button on keyboard and drag the node using your mouse. If you need to remove a node then you can use CTRL+Shift button and then click on the node.

Step 7:
Once the path is refined according to your need hit the “Selection from Path” option at the left side.

Step 8:
You will have to add the layer mask on the image now to which will reveal the transparency. Right click the Current layer > Add Layer Mask > Selection and finally click “Add” button.

Step 9:
Now, if you have followed all the previous steps perfectly then your background will be removed now and you can also add a new background to the image. This is way about GIMP delete background to transparent for the complex images.

Part 4 How to Turn a One-Color Background Transparent
While using the GIMP you can also run the one color images background in the transparent. This method helps you to make the transparent background in case if you have the single color in the background of your image. In this method you just need to select the background by the color and it will be removed in the seconds. For GIMP create transparent background image in the single color background image you can follow the below steps.
Steps to Follow:
● Open the image using “File > Open” in the GIMP program.
● Once image is opened you have to select the image layer at the right side corner of the screen. Now right click and select the Add Alpha Channel option.
● Now, you have to choose the select by color tool.

Step 2:
After selecting the color tool you can select the area of the background image which you need to make transparent by clicking on the image. You can also select it manually by clicking and dragging using your mouse pointer. To increase the selection press Shift button on keyboard and then select the different area which you want to select.

Step 3:
Finally, when you have selected the complete area which you want to make transparent then simply select the delete button. This is the way about GIMP set transparent background for one color background images.

Learn New Ways to Make Transparent Background
GIMP software is a free program for newbie users to expand their skills. With the help of GIMP software you can easily remove background from mostly any kind of images. If you like to go for pro software to make the video from the images you have created then you can try the Wondershare Filmora Video Editor which allows you to make the beautiful videos and edit them quickly.
For Win 7 or later (64-bit)
For macOS 10.12 or later
Wondershare Filmora program is video editor software which also offers you some of the photo editing options as well. It is compatible with the windows as well as the Mac operating system devices. The program comes with a very easy to use interface and allows you to edit the videos and design them from scratch. It comes with the premade templates in it so you can directly use them for your videos to make the process faster. You can do keyframing, speed ramping, splitting screen, motion tracking etc for editing your videos.
Filmora offers you an inbuilt screen recorder which is the best for recording the gaming videos. it also offers you the effects to apply on the videos, color correction, color matching and many more others features which can be used for making the best quality videos.

● Ending Thoughts →
● Well, this is all about making transparent background in the GIMP. GIMP is really a very helpful program that comes with most all features what you need to edit the images and change the background of your images.
● If you need to edit the videos as well or you want to make videos with the images edited using GIMP then you can simply use Wondershare Filmora which the best in the video editing Era.
Removing background of images and making them transparent is a really very tough task for the newbies. Sometimes you may need to learn lots of software to get the work done and most of the programs are paid over the internet. There are many reasons why you need to remove the background of images such as you don’t like the background and replace with the new one. Here, in this article we will share the information about the GIMP which is a free and open source programs and can help you to remove background from the images and make the transparent.
In this article
01 [What’s Gimp?](#Part 1)
02 [How to Create a Transparent Background in GIMP](#Part 2)
03 [How to Turn the Complex Image Background Transparent](#Part 3)
04 [How to Turn a One-Color Background Transparent](#Part 4)
Part 1 What’s Gimp?
GIMP is open source software which allows you to do image manipulations. The program is distributed over the internet for free of cost the beginners to learn the photography skills. GIMP software can be used for photo retouching, image authoring and image compositions. GIMP supports all features of photo editing even it can be used for GIMP remove background to transparent. You can also use it as a paint program, online batch processing system, image format converter and as an image renderer.
Part 2 How to Create a Transparent Background in GIMP
With the help of GIMP software you can easily remove background from image and make it transparent. Here, we are going to tell you that how you can remove background with the help of GIMP. Let’s learn it step by step.
Step 1:
Install and launch GIMP program on your system. Now click the “File > Open” or you can also use “File > Open as Layers” option.
Step 2:
Now, you have to use the Fuzzy tool. The Fuzzy tool is mainly designed to select the current layer area and the image on the basis of color. Using this tool you can easily select the background which you want to remove with just one click.
Step 3:
On your image, now you will see a channel dialog when you add a second layer on it. This layer will tell the transparency of the image you have added to remove background. So, click the “Layer > Transparency > Add Alpha Channel option.
Step 4:
On your keyboard now you need to hit the “Delete” button to remove background. You may need to repeat the steps 2 to 4 if the background is not completely removed else there is no problem. We have removed blue background here for example.
Step 5:
Finally, you can click the “File > Export As” and then select the PNG format and save it on your computer in the PNG format. This is the way about GIMP remove background to transparent.
Part 3 How to Turn the Complex Image Background Transparent
The above part was about removing the simple and easy background from the image. Here we will share about GIMP transparent background PNG when you have the complex background. For, GIMP create transparent background in the complex images you need to add a transparent layer on the image.
Step 1:
Open the image in GIMP and then right click on the layer of image. Now, click the “Add Alpha Chanel” option.
Step 2:
After making a layer for background now you have to select the foreground of the image which you want to keep using the select tool of GIMP. To start, first you need to make sure the in the settings you have selected “Draw foreground option” is selected.
After doing all adjustments of the settings you need to draw outline of the object and finally press the enter button on keyboard.
Step 3:
After doing all the settings you have to adjust the stroke width from settings panel of GIMP. Use your mouse now and start dragging and drawing the image just like you are painting with a brush. Once your drawing is finished and you leave your mouse the image will look like the below screenshot.
Step 4:
You can also fine tune your selection now with the help of draw background option in the GIMP. This will help you to adjust the rough outline you created previously. Once you are happy then simply press the enter button.
Step 5:
Still, if you want to refine your results more than you can refine your outlines by using the path nodes option. You can view the path nodes by following the below steps.
● Keep your mouse cursor at paths dialog.
● Now, hit selection.
● To view the path you can click the CTRL+Shift+A button.
● Now, select the paths tool.
● Finally click the “Path”.
Step 6:
Now, it’s a time to adjust the outlines according to the output of your foreground image. You can zoom the image and add or adjust the previous nodes. To adjust node you can click the CTRL button on keyboard and drag the node using your mouse. If you need to remove a node then you can use CTRL+Shift button and then click on the node.
Step 7:
Once the path is refined according to your need hit the “Selection from Path” option at the left side.
Step 8:
You will have to add the layer mask on the image now to which will reveal the transparency. Right click the Current layer > Add Layer Mask > Selection and finally click “Add” button.
Step 9:
Now, if you have followed all the previous steps perfectly then your background will be removed now and you can also add a new background to the image. This is way about GIMP delete background to transparent for the complex images.
Part 4 How to Turn a One-Color Background Transparent
While using the GIMP you can also run the one color images background in the transparent. This method helps you to make the transparent background in case if you have the single color in the background of your image. In this method you just need to select the background by the color and it will be removed in the seconds. For GIMP create transparent background image in the single color background image you can follow the below steps.
Steps to Follow:
● Open the image using “File > Open” in the GIMP program.
● Once image is opened you have to select the image layer at the right side corner of the screen. Now right click and select the Add Alpha Channel option.
● Now, you have to choose the select by color tool.
Step 2:
After selecting the color tool you can select the area of the background image which you need to make transparent by clicking on the image. You can also select it manually by clicking and dragging using your mouse pointer. To increase the selection press Shift button on keyboard and then select the different area which you want to select.
Step 3:
Finally, when you have selected the complete area which you want to make transparent then simply select the delete button. This is the way about GIMP set transparent background for one color background images.
Learn New Ways to Make Transparent Background
GIMP software is a free program for newbie users to expand their skills. With the help of GIMP software you can easily remove background from mostly any kind of images. If you like to go for pro software to make the video from the images you have created then you can try the Wondershare Filmora Video Editor which allows you to make the beautiful videos and edit them quickly.
For Win 7 or later (64-bit)
For macOS 10.12 or later
Wondershare Filmora program is video editor software which also offers you some of the photo editing options as well. It is compatible with the windows as well as the Mac operating system devices. The program comes with a very easy to use interface and allows you to edit the videos and design them from scratch. It comes with the premade templates in it so you can directly use them for your videos to make the process faster. You can do keyframing, speed ramping, splitting screen, motion tracking etc for editing your videos.
Filmora offers you an inbuilt screen recorder which is the best for recording the gaming videos. it also offers you the effects to apply on the videos, color correction, color matching and many more others features which can be used for making the best quality videos.
● Ending Thoughts →
● Well, this is all about making transparent background in the GIMP. GIMP is really a very helpful program that comes with most all features what you need to edit the images and change the background of your images.
● If you need to edit the videos as well or you want to make videos with the images edited using GIMP then you can simply use Wondershare Filmora which the best in the video editing Era.
This Review Post Introduces You to EasyHDR to Review and Customize Your HDR Photos. You’ll Also Learn the Best Desktop Application to Edit Your HDR Videos Effortlessly
Any professional photographer knows that “photography” is a broad niche. For example, HDR photography involves taking images in dark and bright areas. But because these images might not show much to the naked eyes, you’ll need an HDR program like EasyHDR. This software can recreate and design incredible HDR photos on Mac and Windows computers. So, this review post advises you whether Easy HDR is worth the money or not. We’ll also advise on the best way to edit and create HDR videos on PC.
Part 1: Summary Box on Easy HDR
| Description | EasyHDR is an HDR photography software for highlighting image details in HDR photos. It supports raw images and batch processing. |
|---|---|
| Pricing | $33 for a lifetime license |
| Operating System | Windows 7/8/10/11 and macOS 10.12 or newer |
| Layout | 4.5/5 |
| Easy to use | 4.8/5 |
| HDQ quality | 4.2/5 |
| Post-processing | 3.5/5 |
Before we dive deeper into this Easy HDRi review, let’s first discuss how this HDR software rates in some critical aspects:
1. Effectiveness - 4.8/5
The HDRi process on this software is very effective, although you shouldn’t have high expectations. It provides manual and automatic lens correction properties, although using the manual option might need a learning curve. Other extras include ghost removal and automatic alignment.
2. Price - 4.7/5
Easy HDR is not necessarily a free program. Although there’s a free demo version, it’s pretty limited in features. Therefore, purchase the premium plan for $33 or $55 for personal and lifetime licenses. As a seasoned HDR editor, you should know that other HDR programs like Aurora HDR cost way more than this.
3. Supported OS - 5/5
This HDR photography program is compatible with Windows and macOS systems, which is a big plus. You can install it on Windows 7 or newer and macOS 10.12 or newer. Sorry, Linux users!
4. Ease of use - 4.8
Easy HDR is one of the most beginner-friendly HDR processing tools despite the advanced management tools. It features automatic lens correction, ghost removal, and HDR merging capabilities.
5. Best for - Beginner HDRi editors
This program’s simple approach makes it perfect for HDRi photographers without prior editing skills. Also, if you’re a beginner on a tight budget, easyHDR is the best software for you.
Our Verdict
Up to this juncture, you might wonder if Easy HDR is worth the money or not. Well, that depends on what you want. If you have minimal HDR editing knowledge, then this is the best professional program for you.
The straightforward layout boasts automatic HDR editing tools to make your work effortless. In addition, it supports a wide array of image formats, including photos taken using your DSLR camera. And the $33/lifetime price should be manageable by many average Joes.
But on the flip side, Easy HDR lacks in-depth post-processing tools. Also, it lacks the all-important “undo” feature, which is vital in HDR image editing. Other than that, it’s the perfect program to make dramatic and realistic HDR photos.
Pros
- Simple layout.
- Make realistic HDR images with automatic tools.
- Easy HDRi Blender and Adobe Lightroom plugins.
- Standalone Easy HDR desktop program.
- Batch processing supported.
- Compatible with multiple image formats, including RAW.
Cons
- It doesn’t have advanced HDR post-processing tools.
- No HDR feature for editing.
Part 2. Detailed Review for Easy HDR
Before diving deeper into the detailed Easy HDR features, it’s important to note that the program has a demo version. You can use this version to practice and study the vital components of easyHDR. But be guided that the demo version exports images with a watermark. In addition, users can’t save HDRi in TIFF format. Let’s get in!
1. High-Quality Bracket Merging
A good quality HDRi software should easily merge different image exposures, making the photo look natural and spectacular. To start incorporating, drag the image brackets to easyHDR and press “Ok” on the pop-up screen. You can now try the different bracket merging effects until you find something that suits your preference.
2. Editing features
EasyHDR goes a step further to provide its users with a comprehensive list of editing features. For example, the “Clone Stamp” tool can remove unwanted objects like cables without blurring the photo. You can also use the “Tone Curve” feature to adjust the brightness of shadows and highlights.
3. Ghost removal
No, this is not the scary ghost that you know. Instead, these ghosting artefacts appear in misaligned photos due to moving objects like leaves, branches, cars, people, etc. With Easy HDR, you can eliminate the “ghosts” manually or automatically. Simply open the photo and turn on “Ghost Removal” to remove them automatically.
4. HDR batch processing
As expected, you can find it pretty tedious to import and merge each HDR bracket individually. For this reason, easyHDR comes with a “Batch Processing” feature that allows users to combine a whole folder of brackets automatically.
5. LDR enhancement
Although we’ve mainly focused on brackets and photos in this post, it’s important to note that easyHDR also works with single images. Instead of having three separate bracketed exposures, LDR (Low Dynamic Range) enhancement allows you to generate exposures from a single JPEG or RAW photo.
Bonus Tips: The Best Way to Edit HDR videos on your Desktop
Like HDR images, HDR videos offer more comprehensive displays in dark and bright surroundings. In short, these videos allow more colourful and detailed highlight representations. Unfortunately, not all HDR editing programs can merge bracketed exposures effortlessly to produce outstanding results. And those that do can cost you an arm and a leg.
With that in mind, we recommend Wondershare Filmora 11 for professional and semi-professional HDR editors. It’s a simple but detailed program that allows users to edit HDR materials quickly and easily. It houses thousands of free effects you’ll use with the Blending Mode to create nice HDR footage. Filmora 11 works with any video format, including RAW footage from your camcorder. And of course, there are many other editing features like color correction, color grading, image stabilization, chroma key/green screen, etc.
Steps to add an HDR effect to a standard video on Filmora 11:
Step1Open the video on Filmora 11

Run Wondershare Filmora 11 on your Mac/Win computer and start a new project. After creating a project, click Import Media to upload the video to edit and move it to the storyboard.
Step2Add a blending mode effect

Next, select the video and choose White as the color overlay. To do that, open the Sample color options and move the While color on the top timeline.

After that, it’s time to change the Blending Mode of the color overlay. To do that, right-click the color track and choose Edit Properties. Then tap Composition and then select Exclusion on the Blending Mode drop-down menu.
Step3Apply the B&W Film color effect

Now tap the Effect tab and search for the B&W Film effect. This film effect should be free to use whether using a paid or free account. After downloading it, add the effect overlay to the video track and export the video.
Step4Import the uploaded video

After creating the video, import it on Filmora 11 and delete the white color overlay and W&B Film effects. Now add the imported video on the first track, then search and apply a Square Blur effect. Also, change the Blending Mode of the footage to Overlay. Meanwhile, click the Effect tab and adjust the Size slider accordingly. For example, you can choose 10.

Don’t stop there. Open the Effects tab and add the Lomo effect to your video. Also, search and add the Luma Sharp effect. Remember that you can retouch these effects accordingly under the Effect tab. And lastly, export the new HDR video. That’s it!
Final Words
There you have it. Easy HDR is arguably the most-beginner friendly program to edit your photos on desktops. Although it doesn’t feature much, the available editing features should be enough to help you create incredible HDR images. And don’t forget to use Wondershare Filmora 11 to apply a cool HDR effect to your footage. Give it a try!
Free Download For Win 7 or later(64-bit)
Free Download For macOS 10.14 or later
Before we dive deeper into this Easy HDRi review, let’s first discuss how this HDR software rates in some critical aspects:
1. Effectiveness - 4.8/5
The HDRi process on this software is very effective, although you shouldn’t have high expectations. It provides manual and automatic lens correction properties, although using the manual option might need a learning curve. Other extras include ghost removal and automatic alignment.
2. Price - 4.7/5
Easy HDR is not necessarily a free program. Although there’s a free demo version, it’s pretty limited in features. Therefore, purchase the premium plan for $33 or $55 for personal and lifetime licenses. As a seasoned HDR editor, you should know that other HDR programs like Aurora HDR cost way more than this.
3. Supported OS - 5/5
This HDR photography program is compatible with Windows and macOS systems, which is a big plus. You can install it on Windows 7 or newer and macOS 10.12 or newer. Sorry, Linux users!
4. Ease of use - 4.8
Easy HDR is one of the most beginner-friendly HDR processing tools despite the advanced management tools. It features automatic lens correction, ghost removal, and HDR merging capabilities.
5. Best for - Beginner HDRi editors
This program’s simple approach makes it perfect for HDRi photographers without prior editing skills. Also, if you’re a beginner on a tight budget, easyHDR is the best software for you.
Our Verdict
Up to this juncture, you might wonder if Easy HDR is worth the money or not. Well, that depends on what you want. If you have minimal HDR editing knowledge, then this is the best professional program for you.
The straightforward layout boasts automatic HDR editing tools to make your work effortless. In addition, it supports a wide array of image formats, including photos taken using your DSLR camera. And the $33/lifetime price should be manageable by many average Joes.
But on the flip side, Easy HDR lacks in-depth post-processing tools. Also, it lacks the all-important “undo” feature, which is vital in HDR image editing. Other than that, it’s the perfect program to make dramatic and realistic HDR photos.
Pros
- Simple layout.
- Make realistic HDR images with automatic tools.
- Easy HDRi Blender and Adobe Lightroom plugins.
- Standalone Easy HDR desktop program.
- Batch processing supported.
- Compatible with multiple image formats, including RAW.
Cons
- It doesn’t have advanced HDR post-processing tools.
- No HDR feature for editing.
Part 2. Detailed Review for Easy HDR
Before diving deeper into the detailed Easy HDR features, it’s important to note that the program has a demo version. You can use this version to practice and study the vital components of easyHDR. But be guided that the demo version exports images with a watermark. In addition, users can’t save HDRi in TIFF format. Let’s get in!
1. High-Quality Bracket Merging
A good quality HDRi software should easily merge different image exposures, making the photo look natural and spectacular. To start incorporating, drag the image brackets to easyHDR and press “Ok” on the pop-up screen. You can now try the different bracket merging effects until you find something that suits your preference.
2. Editing features
EasyHDR goes a step further to provide its users with a comprehensive list of editing features. For example, the “Clone Stamp” tool can remove unwanted objects like cables without blurring the photo. You can also use the “Tone Curve” feature to adjust the brightness of shadows and highlights.
3. Ghost removal
No, this is not the scary ghost that you know. Instead, these ghosting artefacts appear in misaligned photos due to moving objects like leaves, branches, cars, people, etc. With Easy HDR, you can eliminate the “ghosts” manually or automatically. Simply open the photo and turn on “Ghost Removal” to remove them automatically.
4. HDR batch processing
As expected, you can find it pretty tedious to import and merge each HDR bracket individually. For this reason, easyHDR comes with a “Batch Processing” feature that allows users to combine a whole folder of brackets automatically.
5. LDR enhancement
Although we’ve mainly focused on brackets and photos in this post, it’s important to note that easyHDR also works with single images. Instead of having three separate bracketed exposures, LDR (Low Dynamic Range) enhancement allows you to generate exposures from a single JPEG or RAW photo.
Bonus Tips: The Best Way to Edit HDR videos on your Desktop
Like HDR images, HDR videos offer more comprehensive displays in dark and bright surroundings. In short, these videos allow more colourful and detailed highlight representations. Unfortunately, not all HDR editing programs can merge bracketed exposures effortlessly to produce outstanding results. And those that do can cost you an arm and a leg.
With that in mind, we recommend Wondershare Filmora 11 for professional and semi-professional HDR editors. It’s a simple but detailed program that allows users to edit HDR materials quickly and easily. It houses thousands of free effects you’ll use with the Blending Mode to create nice HDR footage. Filmora 11 works with any video format, including RAW footage from your camcorder. And of course, there are many other editing features like color correction, color grading, image stabilization, chroma key/green screen, etc.
Steps to add an HDR effect to a standard video on Filmora 11:
Step1Open the video on Filmora 11
Run Wondershare Filmora 11 on your Mac/Win computer and start a new project. After creating a project, click Import Media to upload the video to edit and move it to the storyboard.
Step2Add a blending mode effect
Next, select the video and choose White as the color overlay. To do that, open the Sample color options and move the While color on the top timeline.
After that, it’s time to change the Blending Mode of the color overlay. To do that, right-click the color track and choose Edit Properties. Then tap Composition and then select Exclusion on the Blending Mode drop-down menu.
Step3Apply the B&W Film color effect
Now tap the Effect tab and search for the B&W Film effect. This film effect should be free to use whether using a paid or free account. After downloading it, add the effect overlay to the video track and export the video.
Step4Import the uploaded video
After creating the video, import it on Filmora 11 and delete the white color overlay and W&B Film effects. Now add the imported video on the first track, then search and apply a Square Blur effect. Also, change the Blending Mode of the footage to Overlay. Meanwhile, click the Effect tab and adjust the Size slider accordingly. For example, you can choose 10.
Don’t stop there. Open the Effects tab and add the Lomo effect to your video. Also, search and add the Luma Sharp effect. Remember that you can retouch these effects accordingly under the Effect tab. And lastly, export the new HDR video. That’s it!
Final Words
There you have it. Easy HDR is arguably the most-beginner friendly program to edit your photos on desktops. Although it doesn’t feature much, the available editing features should be enough to help you create incredible HDR images. And don’t forget to use Wondershare Filmora 11 to apply a cool HDR effect to your footage. Give it a try!
Free Download For Win 7 or later(64-bit)
Free Download For macOS 10.14 or later
You Will Also Be Guided on How to Use This Software to Crop Your Videos. Don’t Worry and Just Take It One Step at a Time
Want to crop your videos but don’t know how to start?
A video editor needs to know how he can crop his videos. There is a way to do this using the VLC that is installed in your computer. This guide will teach you a simple way to get what you want. This might appear as complicated at first sight but it will be shown to you in a digestible way. An alternative way would be to use Wondershare Filmora. You will also be guided on how to use this software to crop your videos. Don’t worry and just take it one step at a time.
Method 1: Cropping a Video using VLC
Have you ever heard of the VLC media player? If not, you can browse through it online and install it on your computer. Aside from watching content, you can also crop videos with it. Cropping is a way to remove spaces that you would not want to be included on your video.
Find the software on your computer and don’t be overwhelmed by the interface.

Then click the Media and select Open File to choose the video that you want to crop. You should prepare the videos that you want to be cropped and rename them to avoid confusion.

Click the Tools on the menu and select the Effects and Filters.

After that, click on the Video Effects and under that select Crop. Doing this, will open the cropping editor.

You need to enter specific pixels on the left, right, top and bottom. This will depend on your preferences. If it is your first time and you don’t know the exact pixels then just input what you think would be enough.

After entering your preferred pixels, you can preview it. If you would like to adjust then just simply repeat entering the specific pixels.

You decided to save the cropped video. Find the Tools menu and select Preferences.

Find the Show settings and click All. In the search bar type Croppadd then save your previous preferred pixel settings. Lastly, click Save.

In the Media menu select the Convert/Save. You can drag and drop the cropped video to the File box.

You can select your file format and codecs by clicking Convert/Save.

Find the Edit Selected Profile and click the Video Codec. Then under the Filters tab, select the Video cropping filter. Finally, click Save.

In the Destination file select where you want it to be saved.

Then click Start.

Congratulations on getting here! You finally cropped your video using the VLC media player.
Although there are disadvantages to using this as your cropping tool. Like for example you want the real-time preview of what you’ve changed in your video. This would be a turn off for some that want their outputs to be shown to them immediately. Aside from this, there is a chance that you will forget one step to make and thus, the whole process would need to start over from scratch. Lastly, is the freedom to batch crop multiple videos. This is especially important for those that need to have many clips in one video. A user might lose the continuity of the story within his video.
While one of its strong suits is the affordability of the software. It is completely free and has no additional charges that may surprise you in the future. Finally, your output won’t have watermarks that could destroy the aesthetics of your video.
What are your experiences with using it as a cropping tool? What would you recommend to improve it? It is up to you the user if you want to continue using this as your partner in removing the excess in your videos.
Method 2: Cropping a Video using Wondershare Filmora
Have you heard of an editing tool called Wondershare Filmora Video Editor ? What are your first impressions of this software? You can download this for free by going to the official site.
For Win 7 or later (64-bit)
For macOS 10.14 or later
Wondershare Filmora is a useful editor that can help you produce the content that you want. It is packed with beneficial tools that you can learn to apply. If it is already installed on your computer then proceed to opening it.

Prepare your videos that you need to crop. You can drag and drop your video or click the Import.

Select the video clip that you want to crop. Then, click the Crop tool and choose if you want the Crop or Pan & Zoom.

You can also right click the video clip .Under the Video tab you can select the Crop and Zoom or Crop to Fit then adjust to your preferred ratio.

One of the advantages of Filmora is you can preview what you have cropped immediately. This will greatly help you if you’re not sure what kind of crop that you want. If you’ve thought that you made a mistake then a simple Undo button could fix it. In short, you’re not going through the gruesome process of starting all over again. You can also do the batch cropping of multiple videos helping you ensure the smoothness of flow in the final output.
Although the Filmora is not free, there is a trial that you can use to test it to check if this video editor would meet your needs. It has tools that a beginner to expert video editor could use to produce high quality videos that would make the audience think that it was life from the movies.
The Bottom Line
The journey of exploring different options would help you make the decision. Both VLC media player and Wondershare Filmora have their great features which would aid the user to crop his videos in an efficient way. What are your thoughts on each of them? As an individual you have varied needs that a video tool should meet.
After reading this, you’ve had a clearer view of what these video softwares offers. Did this guide help you decide which would fit your needs as a video editor? What are your suggestions for improvement?
You could share with us the tips and tricks you know on cropping videos using these applications.
Then click the Media and select Open File to choose the video that you want to crop. You should prepare the videos that you want to be cropped and rename them to avoid confusion.
Click the Tools on the menu and select the Effects and Filters.
After that, click on the Video Effects and under that select Crop. Doing this, will open the cropping editor.
You need to enter specific pixels on the left, right, top and bottom. This will depend on your preferences. If it is your first time and you don’t know the exact pixels then just input what you think would be enough.
After entering your preferred pixels, you can preview it. If you would like to adjust then just simply repeat entering the specific pixels.
You decided to save the cropped video. Find the Tools menu and select Preferences.
Find the Show settings and click All. In the search bar type Croppadd then save your previous preferred pixel settings. Lastly, click Save.
In the Media menu select the Convert/Save. You can drag and drop the cropped video to the File box.
You can select your file format and codecs by clicking Convert/Save.
Find the Edit Selected Profile and click the Video Codec. Then under the Filters tab, select the Video cropping filter. Finally, click Save.
In the Destination file select where you want it to be saved.
Then click Start.
Congratulations on getting here! You finally cropped your video using the VLC media player.
Although there are disadvantages to using this as your cropping tool. Like for example you want the real-time preview of what you’ve changed in your video. This would be a turn off for some that want their outputs to be shown to them immediately. Aside from this, there is a chance that you will forget one step to make and thus, the whole process would need to start over from scratch. Lastly, is the freedom to batch crop multiple videos. This is especially important for those that need to have many clips in one video. A user might lose the continuity of the story within his video.
While one of its strong suits is the affordability of the software. It is completely free and has no additional charges that may surprise you in the future. Finally, your output won’t have watermarks that could destroy the aesthetics of your video.
What are your experiences with using it as a cropping tool? What would you recommend to improve it? It is up to you the user if you want to continue using this as your partner in removing the excess in your videos.
Method 2: Cropping a Video using Wondershare Filmora
Have you heard of an editing tool called Wondershare Filmora Video Editor ? What are your first impressions of this software? You can download this for free by going to the official site.
For Win 7 or later (64-bit)
For macOS 10.14 or later
Wondershare Filmora is a useful editor that can help you produce the content that you want. It is packed with beneficial tools that you can learn to apply. If it is already installed on your computer then proceed to opening it.
Prepare your videos that you need to crop. You can drag and drop your video or click the Import.
Select the video clip that you want to crop. Then, click the Crop tool and choose if you want the Crop or Pan & Zoom.
You can also right click the video clip .Under the Video tab you can select the Crop and Zoom or Crop to Fit then adjust to your preferred ratio.
One of the advantages of Filmora is you can preview what you have cropped immediately. This will greatly help you if you’re not sure what kind of crop that you want. If you’ve thought that you made a mistake then a simple Undo button could fix it. In short, you’re not going through the gruesome process of starting all over again. You can also do the batch cropping of multiple videos helping you ensure the smoothness of flow in the final output.
Although the Filmora is not free, there is a trial that you can use to test it to check if this video editor would meet your needs. It has tools that a beginner to expert video editor could use to produce high quality videos that would make the audience think that it was life from the movies.
The Bottom Line
The journey of exploring different options would help you make the decision. Both VLC media player and Wondershare Filmora have their great features which would aid the user to crop his videos in an efficient way. What are your thoughts on each of them? As an individual you have varied needs that a video tool should meet.
After reading this, you’ve had a clearer view of what these video softwares offers. Did this guide help you decide which would fit your needs as a video editor? What are your suggestions for improvement?
You could share with us the tips and tricks you know on cropping videos using these applications.
Trailer Guide for Creators and Developers
Trailers are a popular means to showcase a product you are about to release to the market. Teasers and trailers are traditionally created for movies, but have eventually evolved to include book trailers, game trailers, and app trailers. In this article, we will explain the key details of a trailer, highlight some examples, and show you how to create an effective trailer.
Part 1. What is a Trailer?
A trailer is a type of video commercial advertisement made to advertise and inform audiences about a specific program or item. To persuade customers to view or use the product, it includes a brief series of previews of the entire material. It also serves as a means of creating anticipation for a show or product that is about to hit the market.

Trailers were originally made for cinema movies. Nowadays, trailers are created for different forms of media like shows, apps, programs, video games, and book videos. A typical traditional trailer lasts between 1 to 3 minutes.
Part 2. What Are the Similarities and Differences Between a Teaser and Trailer?
Teasers and trailers can often be confused with each other. After all, they pretty much have the same objective.
Both are created for the purpose of advertising an upcoming show, product, or service. Teasers and trailers are similarly shown to audiences prior to the release of the thing they are advertising. They are meant to show a small portion of the full experience to create curiosity and excitement towards a targeted market. Both videos are typically short in length - taking up only a maximum of 3 minutes in duration.

The differences between them lie in their content, timeline, and duration. A teaser is much shorter than a trailer - the former runs for only 20-30 seconds while the latter can go between 1-3 minutes in length. This is because teasers are typically made before or during the production process of a movie or feature, whilst trailers are commonly made at the end.
For films, movies, and shows, teasers generally capture only a single part of that media. It focuses on the most intense or impactful scene. Trailers are formed from a series of clips depicting striking scenes derived from the beginning, middle, and end of the show. These scenes are normally arranged in a nonlinear structure, allowing viewers to have a general understanding of the story without revealing the entirety of the plot.
Part 3. Examples of good trailers
An excellent trailer is one who can effectively attract and maintain the audience’s attention. It satisfies its objective of showcasing striking and captivating pieces of the main product and entices viewers to experience its entirety. Here are some examples of trailers who have well fulfilled the criteria of a good trailer.
1. The Suicide Squad
The Suicide Squad is a fresh take featuring DC’s anti-heroes assemble in a single chaotic and unconventional team. James Gunn’s iteration on these characters is brought to life in the trailer with a majestic cast including John Cena, Idris Elba, Margot Robbie, and David Dastmalchian. Several key scenes are shown, highlighting its standout characters in the process while portraying the movie’s setting.
2. Raya and the Last Dragon
The trailer starts out innocently and comes with an adorable and surprising twist. The brief 2-minute trailer is packed with relevant scenes that depict the character’s quest without revealing too much. Many action-packed scenes and emotional interactions are satisfactorily squeezed into the trailer. Excitement builds further with Tamara Bubble’s “I’m That Good” playing in the background on the last minute of the video.
3. Men (2022)
Ingenious combination of sound effects and background music play a distinct role in this 2022 trailer. The female lead’s voice echoing from a tunnel, the haunting piano keys gradually building up the suspense, and the common but cleverly used horror audio effects create a chilling ensemble of haunting scenes in the movie. The sounds gradually rise up as more aggressive and energized scenes flash on the screen, and eventually end back into the sombre intro that leaves the audience with questions.
4. The Farewell
Lulu Wang’s dramatic comedy The Farewell is all about a family hiding the truth of a family member’s terminal illness from the person herself. What makes the trailer special is that it steers away from the sad, melancholic direction and veers toward a feel-good movie vibe. The conflict, struggle, and the beliefs featured in the movie are depicted in the trailer. However, the clever placement of interactions and the uplifting music tug at the audience’s heartstrings and urge them to want to see more.
5. Pokémon Go
Pokémon has become a culture to several generations. Becoming a Pokémon trainer is a secret dream that almost all of us have, even as adults. Niantic’s collaboration with the Pokémon franchise brings people closer to that reality by introducing its AR and location-powered app Pokémon Go. The trailer shows people of all ages living out their trainer dreams in the real world and interacting with Pokémon. The different features of the game are dramatized in a real-life setting, inciting more excitement, and pulling out the nostalgia from its market. The trailer keeps the actual app showcase to a minimum, instead focusing on once again selling that dream to audiences and bringing out the inner child in everyone.
Part 4. How to bring your trailer to the next level?
While it may seem intimidating to create a trailer for your upcoming product, there is no need to worry. It is now easier than ever to create a well-crafted trailer by taking advantage of a program’s tools and templates.
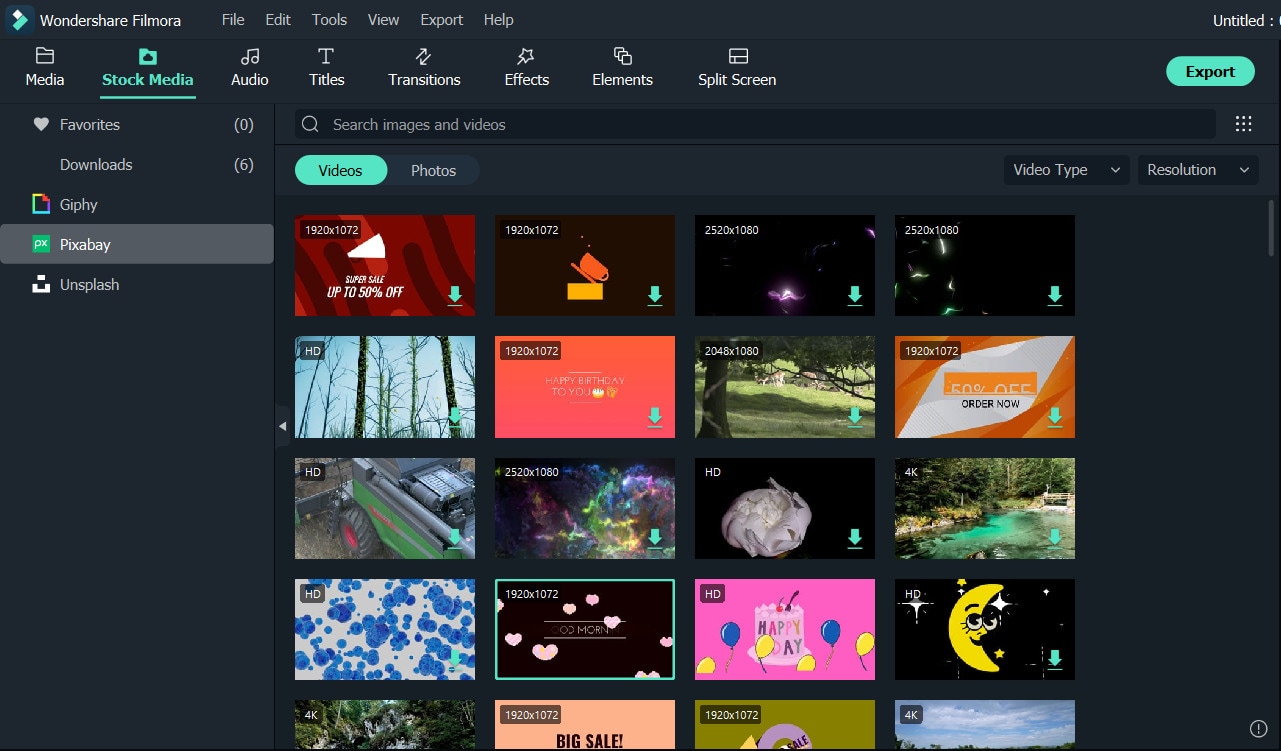
- Stock media
Filmora makes it easy to craft a trailer with only a few clicks. Make use of the program’s media library to gain access to a wealth of resources like stock photos, videos, music, and audio files.
- Keyframing
Keyframing lets you smoothly transition from one scene to another, making it an effective tool for trailers. It is particularly appealing for shows that highlight motion like sports, dancing, and action. Experiment with more than 80 preset templates and create smooth scene transitions with ease.
- Speed Ramping
Speed Ramping is a feature that works perfectly with keyframing. Increase the energy and dynamics in your trailer with 6 preset speed types. You can also customize these templates. There is also no need for concern about the audio - Filmora lets you maintain the audio pitch even when using these features.
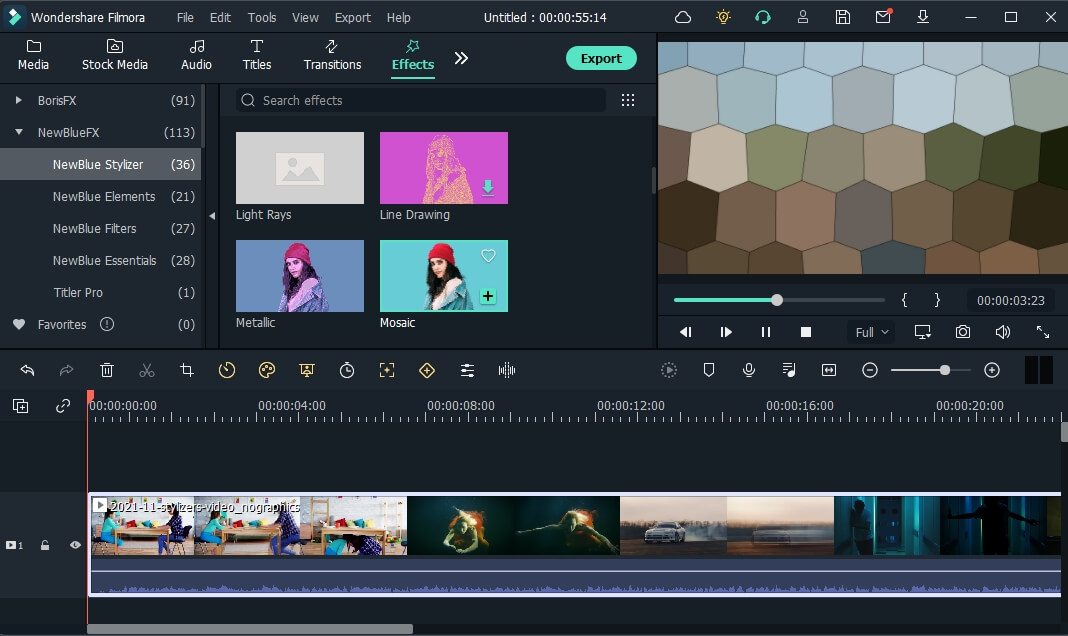
- FX Effects
The program also offers many effects and filters for an extra element in your trailer. The Borix FX is an example of that. Designed in collaboration with the award-winning developer of the same name, Boris FX and its extension Continuum features a wide array of tasteful effects for your convenience. There are over 91 customizable and adjustable presets including types like blurs, stylization, and lights. NewBlue is another option that carries choices of filters, titlers, and stylizers.
Filmora offers different features, tools, and effects to explore that can help make your trailer editing objectives easier and more convenient. Save time and resources by taking advantage of its powerful yet easy-to-use tools.
Free Download For Win 7 or later(64-bit)
Free Download For macOS 10.14 or later
2. Raya and the Last Dragon
The trailer starts out innocently and comes with an adorable and surprising twist. The brief 2-minute trailer is packed with relevant scenes that depict the character’s quest without revealing too much. Many action-packed scenes and emotional interactions are satisfactorily squeezed into the trailer. Excitement builds further with Tamara Bubble’s “I’m That Good” playing in the background on the last minute of the video.
3. Men (2022)
Ingenious combination of sound effects and background music play a distinct role in this 2022 trailer. The female lead’s voice echoing from a tunnel, the haunting piano keys gradually building up the suspense, and the common but cleverly used horror audio effects create a chilling ensemble of haunting scenes in the movie. The sounds gradually rise up as more aggressive and energized scenes flash on the screen, and eventually end back into the sombre intro that leaves the audience with questions.
4. The Farewell
Lulu Wang’s dramatic comedy The Farewell is all about a family hiding the truth of a family member’s terminal illness from the person herself. What makes the trailer special is that it steers away from the sad, melancholic direction and veers toward a feel-good movie vibe. The conflict, struggle, and the beliefs featured in the movie are depicted in the trailer. However, the clever placement of interactions and the uplifting music tug at the audience’s heartstrings and urge them to want to see more.
5. Pokémon Go
Pokémon has become a culture to several generations. Becoming a Pokémon trainer is a secret dream that almost all of us have, even as adults. Niantic’s collaboration with the Pokémon franchise brings people closer to that reality by introducing its AR and location-powered app Pokémon Go. The trailer shows people of all ages living out their trainer dreams in the real world and interacting with Pokémon. The different features of the game are dramatized in a real-life setting, inciting more excitement, and pulling out the nostalgia from its market. The trailer keeps the actual app showcase to a minimum, instead focusing on once again selling that dream to audiences and bringing out the inner child in everyone.
Part 4. How to bring your trailer to the next level?
While it may seem intimidating to create a trailer for your upcoming product, there is no need to worry. It is now easier than ever to create a well-crafted trailer by taking advantage of a program’s tools and templates.
- Stock media
Filmora makes it easy to craft a trailer with only a few clicks. Make use of the program’s media library to gain access to a wealth of resources like stock photos, videos, music, and audio files.
- Keyframing
Keyframing lets you smoothly transition from one scene to another, making it an effective tool for trailers. It is particularly appealing for shows that highlight motion like sports, dancing, and action. Experiment with more than 80 preset templates and create smooth scene transitions with ease.
- Speed Ramping
Speed Ramping is a feature that works perfectly with keyframing. Increase the energy and dynamics in your trailer with 6 preset speed types. You can also customize these templates. There is also no need for concern about the audio - Filmora lets you maintain the audio pitch even when using these features.
- FX Effects
The program also offers many effects and filters for an extra element in your trailer. The Borix FX is an example of that. Designed in collaboration with the award-winning developer of the same name, Boris FX and its extension Continuum features a wide array of tasteful effects for your convenience. There are over 91 customizable and adjustable presets including types like blurs, stylization, and lights. NewBlue is another option that carries choices of filters, titlers, and stylizers.
Filmora offers different features, tools, and effects to explore that can help make your trailer editing objectives easier and more convenient. Save time and resources by taking advantage of its powerful yet easy-to-use tools.
Free Download For Win 7 or later(64-bit)
Free Download For macOS 10.14 or later
Also read:
- Updated Simple Tricks Make 3D GIF Production of Inspiration Pop up Constantly for 2024
- Updated 4 Solutions to Add White Borders on Mobile and Desktop
- New 2024 Approved Easy Ways to Change Aspect Ratio in iMovie?
- New 2024 Approved Fun & Easy Masking Tricks in Filmora
- How to Use Speed Ramping to Create a Footage
- How to Change Quicktime Player Speed on Mac?
- Wondering How to Replace Sky in After Effects? Learn How for 2024
- Updated In This Article, We Will Review Movavi Video Editor and List Out Movavi Video Suites Features
- New Step by Step Guide on Make Gimp Transparent Background PNG
- Updated Learn How to Merge Audio and Video Like a Pro with This Step-by-Step Guide to Using FFmpeg. Create Seamless Videos and Improve Your Video Production Skills
- Updated 2024 Approved How to Crop Videos in Windows Media Player
- Edit FLV Video Files with FLV Editor Windows, Mac,Android, iPhone for 2024
- New 2024 Approved A Full Review of Leeming LUT Pro
- Updated How to Brighten a Video in Windows 10 | Step-By-Step Guide
- Updated How to Choose A Nice GoPro for Vlogging for 2024
- Top 10 Free WhatsApp Video Converter 2023
- Renderforest Is a Great Online Editing Platform to Use for Many Video Creators. If You Want to Make an Intro Video for Your Channel or Daily Vlogs, You Can Follow This Article to Know More Details
- New In 2024, How To Make Boring Videos Look Cool By B Rolls
- In 2024, How to Use the Logo Intro Templates for Your Next Video
- Updated 2024 Approved How to Make a Gaming Montage - Guide & Tips
- Updated In This Article Let Me Share with You How to Start a Vlog? Ideas and Any Tips for You to Start Your Own Vlogging Channel
- Have You Ever Used an Adjustment Layer in Photoshop? Read This Article to Find Out How to Add, Resize, Change, and Use an Adjustment Layer in Photoshop Efficiently
- In 2024, A Perfect Guide To Remove or Disable Google Smart Lock On Xiaomi 13T Pro
- In 2024, Full Guide to Bypass Vivo S18 FRP
- In 2024, The Complete Guide to Xiaomi Mix Fold 3 FRP Bypass Everything You Need to Know
- In 2024, Here are Some Pro Tips for Pokemon Go PvP Battles On Oppo Find X6 | Dr.fone
- 5 Quick Methods to Bypass Honor 100 Pro FRP
- Want to Uninstall Google Play Service from Nokia C02? Here is How | Dr.fone
- Fix the Error of Unfortunately the Process.com.android.phone Has Stopped on Vivo V30 Pro | Dr.fone
- In 2024, How To Remove or Bypass Knox Enrollment Service On Samsung Galaxy F04
- How to Track Vivo Y17s Location without Installing Software? | Dr.fone
- Updated Some Must-Know Useful Lego Animation Ideas for You
- How To Fix Unresponsive Touch Screen on Nubia Red Magic 9 Pro+ | Dr.fone
- Why Your WhatsApp Location is Not Updating and How to Fix On Motorola Moto G Stylus (2023) | Dr.fone
- In 2024, How to Migrate Android Data From Nokia G310 to New Android Phone? | Dr.fone
- Methods to Change GPS Location On Tecno Camon 20 Pro 5G | Dr.fone
- In 2024, How to Cast Nokia G310 Screen to PC Using WiFi | Dr.fone
- In 2024, 3 Solutions to Find Your Vivo Y100t Current Location of a Mobile Number | Dr.fone
- In 2024, How to Reset a Locked Vivo Y100A Phone
- Title: Here You Can Lean About the Different Ways for GIMP Transparent Background PNG Format Files
- Author: Chloe
- Created at : 2024-05-20 03:37:34
- Updated at : 2024-05-21 03:37:34
- Link: https://ai-editing-video.techidaily.com/here-you-can-lean-about-the-different-ways-for-gimp-transparent-background-png-format-files/
- License: This work is licensed under CC BY-NC-SA 4.0.
