:max_bytes(150000):strip_icc():format(webp)/Nightbooks-93aa15da6f37406fa34e8c155b1067b3.jpg)
How Can You Get VHS Filter and Glitch Filter to Your Images or Videos?

How Can You Get VHS Filter and Glitch Filter to Your Images or Videos?
A glitch in the video or an image gives the notion of an error in the video recording process, and it was not accepted in the media industry. However, presently, creative professionals are incorporating the VHS filters to give a vintage impression. The visual distortions are used by gamers and streaming creators extensively.
For this very reason, the article discusses the procedure to create a glitch filter in Photoshop, Instagram, TikTok, and in one of your impeccable travel videos. Time to start!
In this article
01 How to Make VHS Filter in Photoshop?
02 How to Get VHS Filter in Instagram?
03 How to Get VHS Filter in TikTok?
04 How to Add VHS Effects to your Travel Video?
Part 1: How to Make VHS Filter in Photoshop?
There are a lot of steps associated with VHS filter Photoshop. The procedure can be tricky for a beginner in the industry. Therefore, we have sketched out a guide to make a VHS image filter in Photoshop. Follow it carefully to have desirable results.
Step 1: Open Photoshop
Open Photoshop from your computer and click on “New.” Use the “Custom” option from the windows that appear. After that, click on “File” and launch the imagery. Drag and drop that picture to the customized workspace.

Step 2: Apply the Transformation
Head to the “Edit” from the top panel and press “Transform” from there. Click on “Scale” from the context menu. The user is recommended to set the scale as required using arrows from the mouse. After that, apply the transformation.

Step 3: Changing the Parameters
Now, right-click on your layer to click on “Brightness and Contrast.” Change it as you need. After that, move on to the “Curves” and play with the graphs of the picture. Change the “Solid Color” as well. Make the color white and change the opacity levels.

Step 4: Adding Noise
Moving on, click on the first layer and navigate to the “Filter” bar on the top of the interface. Hit “Noise” and then “Add Noise.” Make the necessary changes as you like and press “Enter.” Scroll up to the “File” and hit “Open Recent” to launch the VHS texture photo. Drag and drop the texture to the photo layer that we are working on.

Step 5: Inserting VHS Texture
Resize the VHS texture and then apply the transformation. By default, the blend mode is “Normal.” Change it to “Darken” from the right panel. The picture will get dark. Again, change the mode to “Screen.” Moving on, input another VHS Filter texture and drag and drop it to the layer we are working on. Resize it and apply the transformation.

Step 6: Altering the Blend Mode
Alter the blend mode to “Darker” and then to “Screen.” Apply another filter and then drag and drop the layer. Change the blend mode to “Screen.” Pick up the eraser from the left panel of tools and make necessary edits.

Step 7: Duplicating the Layer
Duplicate the photo layer and move it up. Again, click on “Filter” then “Noise” to add the noise as needed. Alter the blend mode to “Soft Light” and set the opacity value. After that, add any solid color and switch the blend mode back to Soft Light.

Step 8: Playing with the Layers
Duplicate the layer again to change the color. After that, double click the layer and deselect “R.” Move to left or right. Perform the same procedure for the rest of the layers. Use the erase tool to offer fine imprinting to the transition. Duplicate the final layer and deselect “R” and “C.” Move left and right.

Step 9: Final Process
Use the eraser tool one last time, and you are done with the VCR filter.
Part 2: How to Get VHS Filter in Instagram?
Now that you know how to add glitch filter Photoshop let us move on to Instagram. The sub-section of this write-up shall focus on VHS filter Instagram. If you are an Instagram user wishing to get a retro VHS filter, follow our lead.
Step 1: Finding the Filters
The first step revolves around clicking on the Instagram app to open it. Navigate to the “Story.” The user will find a number of filters in the top panel along a circle.

Step 2: Picking the Vintage Filter
Swipe right towards those filters until a “Search” option is seen. Type “Vintage DV” and press “Enter,” where several VHS video filters will be displayed. Pick one and save it to your camera roll.

Step 3: Using the VHS Filter
Head back to the “Story” and select the “Effects” option. Select the filter that you saved and initiate the recording process. You have got the VHS filter for videos.

Part 3: How to Get VHS Filter in TikTok?
The following section of the write-up shall highlight finding and getting the 90s VHS filter in TikTok. So, what are we waiting for? Let us start the procedure.
Find the VHS Filter in TikTok
Step 1: Navigate to the App
Use your computer to launch the TikTok application. As soon as the interface appears, click on “Trends” in the bottom left corner.
Step 2: Open the Effects
Type Retro VHS in the search bar and click on the second result that is displayed. Click on the “Effects” that says, “VHS Retro.”
Step 3: Add in Favorites
Add it to the favorites and then tap on the video icon located at the center of the screen.

Use the VHS Filter in TikTok
Step 1: Deactivating the Filter</p
With the camera open, click on “Effects” right next to the camera icon. The filter is activated, but we need to deactivate it by clicking on the stop icon with the effects. Click anywhere on the screen to exit the “Effects” panel.
Step 2: Recording Process
Now, click on the red video sign and begin recording for some seconds without the filter. It is important to record the video by pointing at the targeted person. After the first part of the video is recorded, head back to the “Effects” menu and navigate to the tab that says, “Add to Favorites.”

Step 3: Publishing the Video
Choose the Retro VHS Filter and point the camera at the person that needs the filter. Hit the “Register” button. Make the recording and press the red popcorn. Hit “Next” and “Publish” the video finally.

Part 4: How to Add VHS Effects to your Travel Video?
With vacation season on, bloggers are into adding VHS photo filters to their videos to be uploaded on YouTube channels. The section shall convey the detailed procedure of adding a glitch effect filter to the travel and vacation videos in Wondershare Filmora .
For Win 7 or later (64-bit)
For macOS 10.12 or later
Step 1: Initiating the Process
Begin the process by launching Wondershare Filmora. For starters, let us work on the perfect music for the video. The Audio tab shows an awful collection. Choose the “Young and Bright” category for the music.

Step 2: Picking the Music
Select any music and drag and drop it to the timeline. Now, trim the music into 15 seconds long. Now, input the travel videos to start their editing. Set the order for the video afterward.

Step 3: Choosing the Overlays
Navigate to the “Effects” panel and search for VHS. The software would offer multiple choices to pick from. Choose different overlays and place them onto the video tracks as you like.

Step 4: Adding the Transition
To add the transition, head to the “Transition” tab and find VHS. Drag and drop the transitions among the cuts between the video clips. Adjust their duration as needed. Preview the video, and the mission is accomplished.

Final Thoughts
Grabbing the attention of the audience is not as easy as it sounds. The creative industry uses a vast range of effects to compel the viewers to be on the edge of their seats. The article introduced the VHS filter while covering its procedure. If you are a TikTok, Instagram, or Photoshop user, we have got you. Wondershare Filmora helps perfectly to add the glitch filter to the vacation videos.
Versatile Video Editor - Wondershare Filmora
An easy yet powerful editor
Numerous effects to choose from
Detailed tutorials provided by the official channel
02 How to Get VHS Filter in Instagram?
03 How to Get VHS Filter in TikTok?
04 How to Add VHS Effects to your Travel Video?
Part 1: How to Make VHS Filter in Photoshop?
There are a lot of steps associated with VHS filter Photoshop. The procedure can be tricky for a beginner in the industry. Therefore, we have sketched out a guide to make a VHS image filter in Photoshop. Follow it carefully to have desirable results.
Step 1: Open Photoshop
Open Photoshop from your computer and click on “New.” Use the “Custom” option from the windows that appear. After that, click on “File” and launch the imagery. Drag and drop that picture to the customized workspace.

Step 2: Apply the Transformation
Head to the “Edit” from the top panel and press “Transform” from there. Click on “Scale” from the context menu. The user is recommended to set the scale as required using arrows from the mouse. After that, apply the transformation.

Step 3: Changing the Parameters
Now, right-click on your layer to click on “Brightness and Contrast.” Change it as you need. After that, move on to the “Curves” and play with the graphs of the picture. Change the “Solid Color” as well. Make the color white and change the opacity levels.

Step 4: Adding Noise
Moving on, click on the first layer and navigate to the “Filter” bar on the top of the interface. Hit “Noise” and then “Add Noise.” Make the necessary changes as you like and press “Enter.” Scroll up to the “File” and hit “Open Recent” to launch the VHS texture photo. Drag and drop the texture to the photo layer that we are working on.

Step 5: Inserting VHS Texture
Resize the VHS texture and then apply the transformation. By default, the blend mode is “Normal.” Change it to “Darken” from the right panel. The picture will get dark. Again, change the mode to “Screen.” Moving on, input another VHS Filter texture and drag and drop it to the layer we are working on. Resize it and apply the transformation.

Step 6: Altering the Blend Mode
Alter the blend mode to “Darker” and then to “Screen.” Apply another filter and then drag and drop the layer. Change the blend mode to “Screen.” Pick up the eraser from the left panel of tools and make necessary edits.

Step 7: Duplicating the Layer
Duplicate the photo layer and move it up. Again, click on “Filter” then “Noise” to add the noise as needed. Alter the blend mode to “Soft Light” and set the opacity value. After that, add any solid color and switch the blend mode back to Soft Light.

Step 8: Playing with the Layers
Duplicate the layer again to change the color. After that, double click the layer and deselect “R.” Move to left or right. Perform the same procedure for the rest of the layers. Use the erase tool to offer fine imprinting to the transition. Duplicate the final layer and deselect “R” and “C.” Move left and right.

Step 9: Final Process
Use the eraser tool one last time, and you are done with the VCR filter.
Part 2: How to Get VHS Filter in Instagram?
Now that you know how to add glitch filter Photoshop let us move on to Instagram. The sub-section of this write-up shall focus on VHS filter Instagram. If you are an Instagram user wishing to get a retro VHS filter, follow our lead.
Step 1: Finding the Filters
The first step revolves around clicking on the Instagram app to open it. Navigate to the “Story.” The user will find a number of filters in the top panel along a circle.

Step 2: Picking the Vintage Filter
Swipe right towards those filters until a “Search” option is seen. Type “Vintage DV” and press “Enter,” where several VHS video filters will be displayed. Pick one and save it to your camera roll.

Step 3: Using the VHS Filter
Head back to the “Story” and select the “Effects” option. Select the filter that you saved and initiate the recording process. You have got the VHS filter for videos.

Part 3: How to Get VHS Filter in TikTok?
The following section of the write-up shall highlight finding and getting the 90s VHS filter in TikTok. So, what are we waiting for? Let us start the procedure.
Find the VHS Filter in TikTok
Step 1: Navigate to the App
Use your computer to launch the TikTok application. As soon as the interface appears, click on “Trends” in the bottom left corner.
Step 2: Open the Effects
Type Retro VHS in the search bar and click on the second result that is displayed. Click on the “Effects” that says, “VHS Retro.”
Step 3: Add in Favorites
Add it to the favorites and then tap on the video icon located at the center of the screen.

Use the VHS Filter in TikTok
Step 1: Deactivating the Filter</p
With the camera open, click on “Effects” right next to the camera icon. The filter is activated, but we need to deactivate it by clicking on the stop icon with the effects. Click anywhere on the screen to exit the “Effects” panel.
Step 2: Recording Process
Now, click on the red video sign and begin recording for some seconds without the filter. It is important to record the video by pointing at the targeted person. After the first part of the video is recorded, head back to the “Effects” menu and navigate to the tab that says, “Add to Favorites.”

Step 3: Publishing the Video
Choose the Retro VHS Filter and point the camera at the person that needs the filter. Hit the “Register” button. Make the recording and press the red popcorn. Hit “Next” and “Publish” the video finally.

Part 4: How to Add VHS Effects to your Travel Video?
With vacation season on, bloggers are into adding VHS photo filters to their videos to be uploaded on YouTube channels. The section shall convey the detailed procedure of adding a glitch effect filter to the travel and vacation videos in Wondershare Filmora .
For Win 7 or later (64-bit)
For macOS 10.12 or later
Step 1: Initiating the Process
Begin the process by launching Wondershare Filmora. For starters, let us work on the perfect music for the video. The Audio tab shows an awful collection. Choose the “Young and Bright” category for the music.

Step 2: Picking the Music
Select any music and drag and drop it to the timeline. Now, trim the music into 15 seconds long. Now, input the travel videos to start their editing. Set the order for the video afterward.

Step 3: Choosing the Overlays
Navigate to the “Effects” panel and search for VHS. The software would offer multiple choices to pick from. Choose different overlays and place them onto the video tracks as you like.

Step 4: Adding the Transition
To add the transition, head to the “Transition” tab and find VHS. Drag and drop the transitions among the cuts between the video clips. Adjust their duration as needed. Preview the video, and the mission is accomplished.

Final Thoughts
Grabbing the attention of the audience is not as easy as it sounds. The creative industry uses a vast range of effects to compel the viewers to be on the edge of their seats. The article introduced the VHS filter while covering its procedure. If you are a TikTok, Instagram, or Photoshop user, we have got you. Wondershare Filmora helps perfectly to add the glitch filter to the vacation videos.
Versatile Video Editor - Wondershare Filmora
An easy yet powerful editor
Numerous effects to choose from
Detailed tutorials provided by the official channel
02 How to Get VHS Filter in Instagram?
03 How to Get VHS Filter in TikTok?
04 How to Add VHS Effects to your Travel Video?
Part 1: How to Make VHS Filter in Photoshop?
There are a lot of steps associated with VHS filter Photoshop. The procedure can be tricky for a beginner in the industry. Therefore, we have sketched out a guide to make a VHS image filter in Photoshop. Follow it carefully to have desirable results.
Step 1: Open Photoshop
Open Photoshop from your computer and click on “New.” Use the “Custom” option from the windows that appear. After that, click on “File” and launch the imagery. Drag and drop that picture to the customized workspace.

Step 2: Apply the Transformation
Head to the “Edit” from the top panel and press “Transform” from there. Click on “Scale” from the context menu. The user is recommended to set the scale as required using arrows from the mouse. After that, apply the transformation.

Step 3: Changing the Parameters
Now, right-click on your layer to click on “Brightness and Contrast.” Change it as you need. After that, move on to the “Curves” and play with the graphs of the picture. Change the “Solid Color” as well. Make the color white and change the opacity levels.

Step 4: Adding Noise
Moving on, click on the first layer and navigate to the “Filter” bar on the top of the interface. Hit “Noise” and then “Add Noise.” Make the necessary changes as you like and press “Enter.” Scroll up to the “File” and hit “Open Recent” to launch the VHS texture photo. Drag and drop the texture to the photo layer that we are working on.

Step 5: Inserting VHS Texture
Resize the VHS texture and then apply the transformation. By default, the blend mode is “Normal.” Change it to “Darken” from the right panel. The picture will get dark. Again, change the mode to “Screen.” Moving on, input another VHS Filter texture and drag and drop it to the layer we are working on. Resize it and apply the transformation.

Step 6: Altering the Blend Mode
Alter the blend mode to “Darker” and then to “Screen.” Apply another filter and then drag and drop the layer. Change the blend mode to “Screen.” Pick up the eraser from the left panel of tools and make necessary edits.

Step 7: Duplicating the Layer
Duplicate the photo layer and move it up. Again, click on “Filter” then “Noise” to add the noise as needed. Alter the blend mode to “Soft Light” and set the opacity value. After that, add any solid color and switch the blend mode back to Soft Light.

Step 8: Playing with the Layers
Duplicate the layer again to change the color. After that, double click the layer and deselect “R.” Move to left or right. Perform the same procedure for the rest of the layers. Use the erase tool to offer fine imprinting to the transition. Duplicate the final layer and deselect “R” and “C.” Move left and right.

Step 9: Final Process
Use the eraser tool one last time, and you are done with the VCR filter.
Part 2: How to Get VHS Filter in Instagram?
Now that you know how to add glitch filter Photoshop let us move on to Instagram. The sub-section of this write-up shall focus on VHS filter Instagram. If you are an Instagram user wishing to get a retro VHS filter, follow our lead.
Step 1: Finding the Filters
The first step revolves around clicking on the Instagram app to open it. Navigate to the “Story.” The user will find a number of filters in the top panel along a circle.

Step 2: Picking the Vintage Filter
Swipe right towards those filters until a “Search” option is seen. Type “Vintage DV” and press “Enter,” where several VHS video filters will be displayed. Pick one and save it to your camera roll.

Step 3: Using the VHS Filter
Head back to the “Story” and select the “Effects” option. Select the filter that you saved and initiate the recording process. You have got the VHS filter for videos.

Part 3: How to Get VHS Filter in TikTok?
The following section of the write-up shall highlight finding and getting the 90s VHS filter in TikTok. So, what are we waiting for? Let us start the procedure.
Find the VHS Filter in TikTok
Step 1: Navigate to the App
Use your computer to launch the TikTok application. As soon as the interface appears, click on “Trends” in the bottom left corner.
Step 2: Open the Effects
Type Retro VHS in the search bar and click on the second result that is displayed. Click on the “Effects” that says, “VHS Retro.”
Step 3: Add in Favorites
Add it to the favorites and then tap on the video icon located at the center of the screen.

Use the VHS Filter in TikTok
Step 1: Deactivating the Filter</p
With the camera open, click on “Effects” right next to the camera icon. The filter is activated, but we need to deactivate it by clicking on the stop icon with the effects. Click anywhere on the screen to exit the “Effects” panel.
Step 2: Recording Process
Now, click on the red video sign and begin recording for some seconds without the filter. It is important to record the video by pointing at the targeted person. After the first part of the video is recorded, head back to the “Effects” menu and navigate to the tab that says, “Add to Favorites.”

Step 3: Publishing the Video
Choose the Retro VHS Filter and point the camera at the person that needs the filter. Hit the “Register” button. Make the recording and press the red popcorn. Hit “Next” and “Publish” the video finally.

Part 4: How to Add VHS Effects to your Travel Video?
With vacation season on, bloggers are into adding VHS photo filters to their videos to be uploaded on YouTube channels. The section shall convey the detailed procedure of adding a glitch effect filter to the travel and vacation videos in Wondershare Filmora .
For Win 7 or later (64-bit)
For macOS 10.12 or later
Step 1: Initiating the Process
Begin the process by launching Wondershare Filmora. For starters, let us work on the perfect music for the video. The Audio tab shows an awful collection. Choose the “Young and Bright” category for the music.

Step 2: Picking the Music
Select any music and drag and drop it to the timeline. Now, trim the music into 15 seconds long. Now, input the travel videos to start their editing. Set the order for the video afterward.

Step 3: Choosing the Overlays
Navigate to the “Effects” panel and search for VHS. The software would offer multiple choices to pick from. Choose different overlays and place them onto the video tracks as you like.

Step 4: Adding the Transition
To add the transition, head to the “Transition” tab and find VHS. Drag and drop the transitions among the cuts between the video clips. Adjust their duration as needed. Preview the video, and the mission is accomplished.

Final Thoughts
Grabbing the attention of the audience is not as easy as it sounds. The creative industry uses a vast range of effects to compel the viewers to be on the edge of their seats. The article introduced the VHS filter while covering its procedure. If you are a TikTok, Instagram, or Photoshop user, we have got you. Wondershare Filmora helps perfectly to add the glitch filter to the vacation videos.
Versatile Video Editor - Wondershare Filmora
An easy yet powerful editor
Numerous effects to choose from
Detailed tutorials provided by the official channel
02 How to Get VHS Filter in Instagram?
03 How to Get VHS Filter in TikTok?
04 How to Add VHS Effects to your Travel Video?
Part 1: How to Make VHS Filter in Photoshop?
There are a lot of steps associated with VHS filter Photoshop. The procedure can be tricky for a beginner in the industry. Therefore, we have sketched out a guide to make a VHS image filter in Photoshop. Follow it carefully to have desirable results.
Step 1: Open Photoshop
Open Photoshop from your computer and click on “New.” Use the “Custom” option from the windows that appear. After that, click on “File” and launch the imagery. Drag and drop that picture to the customized workspace.

Step 2: Apply the Transformation
Head to the “Edit” from the top panel and press “Transform” from there. Click on “Scale” from the context menu. The user is recommended to set the scale as required using arrows from the mouse. After that, apply the transformation.

Step 3: Changing the Parameters
Now, right-click on your layer to click on “Brightness and Contrast.” Change it as you need. After that, move on to the “Curves” and play with the graphs of the picture. Change the “Solid Color” as well. Make the color white and change the opacity levels.

Step 4: Adding Noise
Moving on, click on the first layer and navigate to the “Filter” bar on the top of the interface. Hit “Noise” and then “Add Noise.” Make the necessary changes as you like and press “Enter.” Scroll up to the “File” and hit “Open Recent” to launch the VHS texture photo. Drag and drop the texture to the photo layer that we are working on.

Step 5: Inserting VHS Texture
Resize the VHS texture and then apply the transformation. By default, the blend mode is “Normal.” Change it to “Darken” from the right panel. The picture will get dark. Again, change the mode to “Screen.” Moving on, input another VHS Filter texture and drag and drop it to the layer we are working on. Resize it and apply the transformation.

Step 6: Altering the Blend Mode
Alter the blend mode to “Darker” and then to “Screen.” Apply another filter and then drag and drop the layer. Change the blend mode to “Screen.” Pick up the eraser from the left panel of tools and make necessary edits.

Step 7: Duplicating the Layer
Duplicate the photo layer and move it up. Again, click on “Filter” then “Noise” to add the noise as needed. Alter the blend mode to “Soft Light” and set the opacity value. After that, add any solid color and switch the blend mode back to Soft Light.

Step 8: Playing with the Layers
Duplicate the layer again to change the color. After that, double click the layer and deselect “R.” Move to left or right. Perform the same procedure for the rest of the layers. Use the erase tool to offer fine imprinting to the transition. Duplicate the final layer and deselect “R” and “C.” Move left and right.

Step 9: Final Process
Use the eraser tool one last time, and you are done with the VCR filter.
Part 2: How to Get VHS Filter in Instagram?
Now that you know how to add glitch filter Photoshop let us move on to Instagram. The sub-section of this write-up shall focus on VHS filter Instagram. If you are an Instagram user wishing to get a retro VHS filter, follow our lead.
Step 1: Finding the Filters
The first step revolves around clicking on the Instagram app to open it. Navigate to the “Story.” The user will find a number of filters in the top panel along a circle.

Step 2: Picking the Vintage Filter
Swipe right towards those filters until a “Search” option is seen. Type “Vintage DV” and press “Enter,” where several VHS video filters will be displayed. Pick one and save it to your camera roll.

Step 3: Using the VHS Filter
Head back to the “Story” and select the “Effects” option. Select the filter that you saved and initiate the recording process. You have got the VHS filter for videos.

Part 3: How to Get VHS Filter in TikTok?
The following section of the write-up shall highlight finding and getting the 90s VHS filter in TikTok. So, what are we waiting for? Let us start the procedure.
Find the VHS Filter in TikTok
Step 1: Navigate to the App
Use your computer to launch the TikTok application. As soon as the interface appears, click on “Trends” in the bottom left corner.
Step 2: Open the Effects
Type Retro VHS in the search bar and click on the second result that is displayed. Click on the “Effects” that says, “VHS Retro.”
Step 3: Add in Favorites
Add it to the favorites and then tap on the video icon located at the center of the screen.

Use the VHS Filter in TikTok
Step 1: Deactivating the Filter</p
With the camera open, click on “Effects” right next to the camera icon. The filter is activated, but we need to deactivate it by clicking on the stop icon with the effects. Click anywhere on the screen to exit the “Effects” panel.
Step 2: Recording Process
Now, click on the red video sign and begin recording for some seconds without the filter. It is important to record the video by pointing at the targeted person. After the first part of the video is recorded, head back to the “Effects” menu and navigate to the tab that says, “Add to Favorites.”

Step 3: Publishing the Video
Choose the Retro VHS Filter and point the camera at the person that needs the filter. Hit the “Register” button. Make the recording and press the red popcorn. Hit “Next” and “Publish” the video finally.

Part 4: How to Add VHS Effects to your Travel Video?
With vacation season on, bloggers are into adding VHS photo filters to their videos to be uploaded on YouTube channels. The section shall convey the detailed procedure of adding a glitch effect filter to the travel and vacation videos in Wondershare Filmora .
For Win 7 or later (64-bit)
For macOS 10.12 or later
Step 1: Initiating the Process
Begin the process by launching Wondershare Filmora. For starters, let us work on the perfect music for the video. The Audio tab shows an awful collection. Choose the “Young and Bright” category for the music.

Step 2: Picking the Music
Select any music and drag and drop it to the timeline. Now, trim the music into 15 seconds long. Now, input the travel videos to start their editing. Set the order for the video afterward.

Step 3: Choosing the Overlays
Navigate to the “Effects” panel and search for VHS. The software would offer multiple choices to pick from. Choose different overlays and place them onto the video tracks as you like.

Step 4: Adding the Transition
To add the transition, head to the “Transition” tab and find VHS. Drag and drop the transitions among the cuts between the video clips. Adjust their duration as needed. Preview the video, and the mission is accomplished.

Final Thoughts
Grabbing the attention of the audience is not as easy as it sounds. The creative industry uses a vast range of effects to compel the viewers to be on the edge of their seats. The article introduced the VHS filter while covering its procedure. If you are a TikTok, Instagram, or Photoshop user, we have got you. Wondershare Filmora helps perfectly to add the glitch filter to the vacation videos.
Versatile Video Editor - Wondershare Filmora
An easy yet powerful editor
Numerous effects to choose from
Detailed tutorials provided by the official channel
Multi Object Tracking: The Ultimate Guide
Multi Object Tracking (MOT) in a video is a challenging process with many applications in both the public and private sectors. Surveillance cameras in public places can track potential criminals, while retail stores can use object tracking to monitor customer behavior.
Developed in 1988 by Zenon Pylyshyn, MOT is a technique first designed to study the human visual system’s ability to track multiple moving objects. However, since then, various methods have been introduced for Object Tracking through computer vision.
In this article, we will explore Multi Object Tracking and provide a detailed guide on object tracking and the requirement to track multiple objects.
Part 1. What Is Object Tracking
Object Tracking is an application of computer vision that involves tracking the movement of objects in real-time. It is a useful tool for many different purposes, such as video surveillance, human-computer interaction, and automotive safety.
The Object Tracking algorithm is a deep-learning-based program that works by developing a model for each individual object and creating a set of trajectories to represent their movement. This is done through an indication, such as a square that follows the object and tells the users about its location on the screen in real-time.
Its algorithms are designed to work with various types of inputs, including everything from images and videos to real-time footage. The input you expect to use will impact the category, use cases, and object tracking applications.
![]()
Part 2. Types Of Object Tracking
There are two main types or levels of Object Tracking: SOT and MOT
SOT
Single Object Tracking or Visual Object Tracking is a process in which the bounding box of the target object is assigned to the tracker in the first frame. The tracker then detects the same object in all the other frames.
SOT only detects and tracks a single object and comes under the category of detection-free tracking, which implies that it is manually initialized with a fixed number of objects, even though other objects are present in the frames.
Let’s understand it with an example: A police department is resolving a murder case that involves a car on the highway. They received surveillance camera footage and wanted to track the vehicle to resolve the mystery. However, it might take time to do it manually. Therefore, they will use the Single Object Tracking process and will assign the tracker a bounding box for the target car to check what happens to it.
![]()
MOT
Multiple Object Tracking involves tracking multiple objects in a frame. Since its development in 1988 by Zenon Pylyshyn, several experiments have been conducted to see how human and computer vision systems can detect and track multiple objects in a frame.
As an output, multiple tracking creates several bounding boxes and are identified using certain parameters such as coordinates, width, height, etc. MOT program is not pre-trained regarding the appearance or amount of objects to be tracked.
Moreover, the algorithm assigns a detection ID to each box which helps the model in identifying the objects within a class. For instance, if multiple cars are in a frame, the MOT algorithm will identify each car as a separate object and assign them a unique ID.
![]()
Part 3. What Multi Object Tracking Needs?
Above is the explaination of MOT. In this part, we will focus on its mechanism. Following are some of the most important requirements of Multi Object Tracking:
1. Detection
The best approach to detect objects of your interest depends on what you’re trying to track and if the camera is stationary or moving.
MOT Using Stationary Camera
The vision.ForegroundDetector System object can be used to detect objects in motion against a stationary background by performing background subtraction. This approach is efficient but requires that the camera be stationary.
MOT Using Moving Camera
A sliding-window detection approach is often used with a moving camera to detect objects in motion. However, this approach is slower than the background subtraction method.
Use the following approaches for tracing the given categories of objects.
| Type of the Tracking Object | Camera Position | Approach |
|---|---|---|
| Custom object category | Stationary/Moving | custom sliding window detector using selectStrongestBbox and extractHOGFeatures or trainCascadeObjectDetector function |
| Pedestrians | Stationary/Moving | vision.PeopleDetector System object |
| Moving object | Stationary | vision.ForegroundDetector System object™ |
| Faces, upper body, mouth, nose, eyes, etc. | Stationary/Moving | vision.CascadeObjectDetector System object |
2. Prediction
The second requirement for Multi Object Tracking is “Prediction.” In this, you have to predict the position of the tracking object in the next frame. To do this, you can design the model to use the Kalman filter (vision.KalmanFilter ).
This will help predict the next location of the object in the frames. For this, it will take into account the object’s constant velocity, constant acceleration measurement noise, and process noise. Measurement noise is the detection of an error, while process noise is the variation in the object’s actual motion from that of the motion model.
3. Data Association
Data association is a critical step in Multiple Object Tracking and involves linking the data points together that represent the same thing across different frames.
A “track” is the temporal history of an object consisting of multiple detections and can include the entire history of past locations of the object or simply the object’s last known location and current velocity.
Part 4. Approaches Of Object Tracking
After understanding what MOT needs, let’s learn about the theory of how Object Tracking works.
The following are the most popular approaches for Object Tracking:
1. OpenCV-Based Object Tracking
There are many ways to approach object tracking, but one of the most popular is through the use of built-in algorithms in the OpenCV library.
The library has a tracking API containing Object Tracking algorithms and eight trackers: BOOSTING, MEDIANFLOW, MIL, KCF, CSRT, TLD, GOTURN, and MOSSE. Each tracker has its own advantages and disadvantages and has different goals. For instance, the MOSSE tracker is best for the fastest object tracking.
To have a deeper review of OpenCV Object Tracking and what is OpenCV, please read our article about: OpenCV Tracking: A complete Guide in 2022. (同期交付,可以插这个文章主题的内链)
2. MDNet
MDNet is a breakthrough in the field of tracking because it is the first network to use classification-based models instead of the more traditional approach. This makes MDNet much faster and more accurate than other tracking methods.
Inspired by the R-CNN object detection network, the MDNet algorithm can detect objects in real-time more efficiently and with high speed, making it a state-of-the-art visual tracker.
![]()
3. DeepSort
DeepSort is the most popular Object Tracking algorithm choice. The integration of appearance information or deep appearance distance metrics vastly improves DeepSORT performance.
The addition of the “Deep Appearance” distance metric enables DeepSort to avoid identifying switches by 45% and handle complex scenarios. On the MOT17 dataset, DeepSORT has received 77.2 IDF1 and 75.4 MOTA with 239 ID switches but a lower FPS of 13.
4. ROLO
ROLO - a combination of YOLO and LSTM is a Spatio-temporal convolutional neural network that uses the YOLO module and LTSM network for collecting visual features, location inference priors, and locating the target object’s trajectory.
The LSTM network uses an input feature vector of length 4096 for each frame to predict the target object’s location. This vector is obtained by combining the high-level visual features with the YOLO detection. By working together, the LSTM and YOLO can predict the target object’s location more accurately.
ALT TEXT: rolo for object tracking
![]()
Conclusion
In this ultimate guide, we’ve discussed Multi Object Tracking and its requirements. We also explored different approaches for object tracking to help you determine which one is best for your needs.
Hopefully, you found this guide helpful, and your queries related to Object Tracking and its types have been resolved.
Free Download For Win 7 or later(64-bit)
Free Download For macOS 10.14 or later
REVIEW: What’s Best 10 Software to Make AI Upscaling Video
REVIEW: What’s Best 10 Software to Make AI Upscaling Video
An easy yet powerful editor
Numerous effects to choose from
Detailed tutorials provided by the official channel
AI Upscaling is often used to improve the video quality. Here are some of the methods to do AI video upscaling. Follow these methods to successfully enhance your video quality.
In this article
01 [What Is AI Upscaling? And Why AI Upscaling Is Significant?](#Part 1)
02 [How to Easily AI Upscale Video to 1080p or 4K?](#Part 2)
03 [Best 10 Software to Make AI Upscaling Video](#Part 3)
Part 1 What Is AI Upscaling? And Why AI Upscaling Is Significant?
The process of generating or creating additional pixels of an image or frame in a video is AI Upscaling. This has many good results on the final video output.
This is mainly done to raise the bit rate of the video and, therefore, slightly improve the visual quality of the video. This is also used to improve the picture quality of DVDs and other low-quality videos. It is done to support lower quality videos or pictures on higher resolution screens like TV. This kind of upscaling is mostly done in TVs automatically.
Part 2 How to Easily AI Upscale Video to 1080p or 4K?
The interesting part is that this upscaling is done by the higher resolution device itself. If you display a lower resolution video on a high-resolution TV, the TV will upscale the video quality of the lower resolution video. This process mainly happens by the displaying device itself. But you can try to upscale videos by yourself using this software, which will help you achieve the best results.
Part 3 Best 10 Software to Make AI Upscaling Video
There are numerous AI upscale video software on the internet. The software listed below is the best among the numerous software because of its extraordinary features and interface. The 10 best AI video upscaling software are:
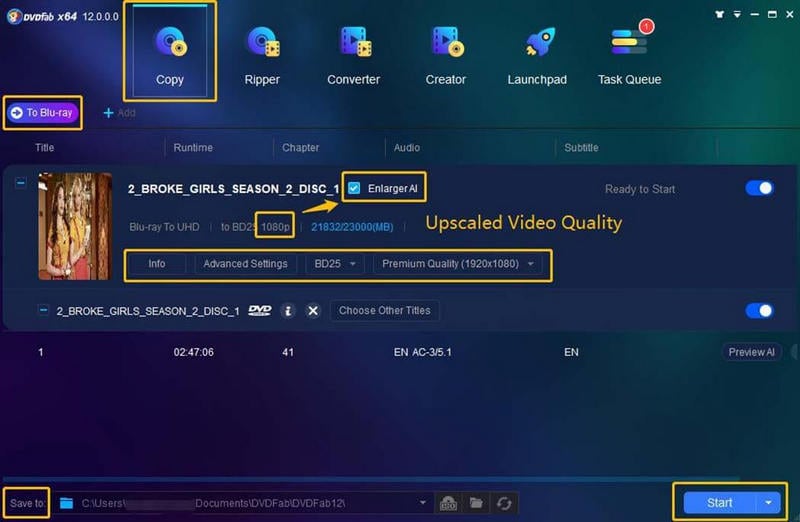
01DVDFab Enlarger AI
DVDFab Enlarger AI is an AI upscale video software published by Fengtao Software Limited. You can upscale any video you want to 4k. There are a few highlights of this software, and they are:
● This software is available onWindows.
● The price of the software ranges from $44.99 to $139.99
● You can use this software to rip videos from both DVDs and Blu-ray.
● You can save the output from the software in MP4 or MKV form.
● This software allows you to boost your fps up to 60.
Pros
Upscale your video to 4K resolution.
Boost your video to 60 fps.
Appropriate for beginners.
Cons
Available only on Windows.
Very Expensive.
No slow-motion is available.
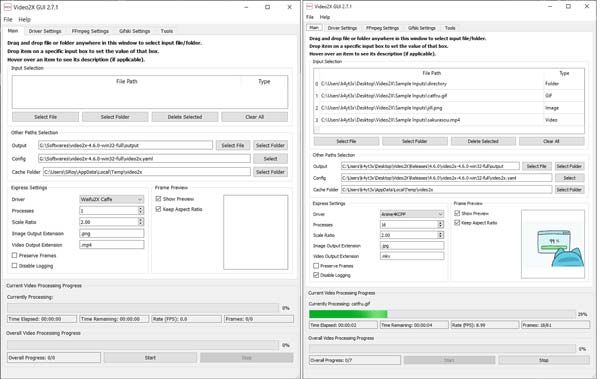
02Video2X
Video2X is popular ai video upscaling software that is developed by Open-source. It is quite popular among the professionals for various reasons like:
● Video2X is available exclusive to Windows.
● You can avail this software without paying any money.
● You can upscale old low-resolution videos.
● Upscale your videos to 4K.
● You can save the output from the software in MP4 or MKV form.
Pros
You can availthis software for free.
You can upscale GIFs.
You can decide your output format.
Cons
It is not beginner-friendly.
No slow-motion editing is available.
There is no fps boosting.
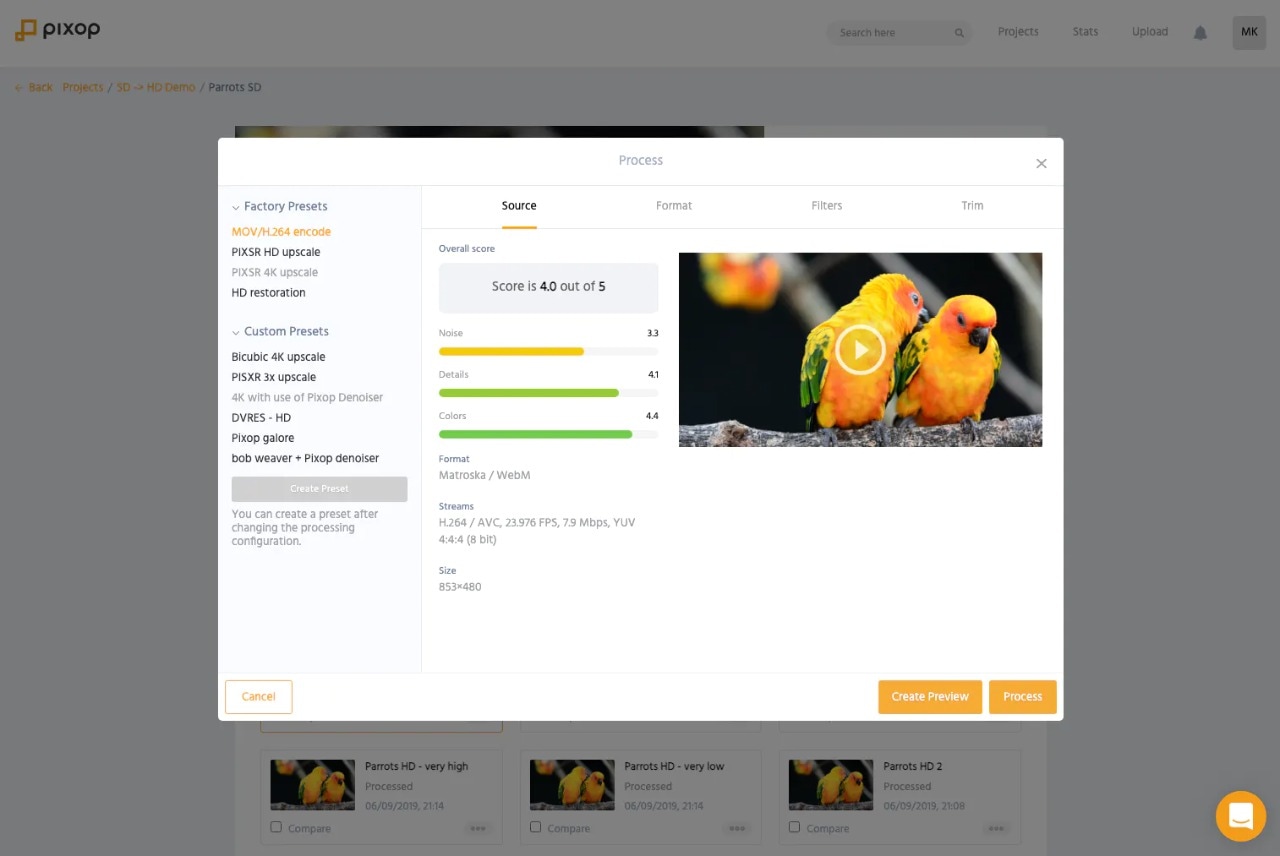
03Pixop
Pixop ai video upscaling online software is published or developed by Pixop ApS. The main features of this software are:
● It is available online.
● Available both for Windows and Mac.
● Allows to upscale videos up to 8K.
● Supports MP4, MXF, M2TS, and MOV formats of output.
● Allows custom fps boost in videos.
Pros
Available online for both Windows and Mac.
Allows video upscaling up to 8K.
Allows custom fps boost.
Cons
Expensive for longer videos.
Does not support slow-motion editing.
Only supports MP4, MXF, M2TS, and MOV formats of output.
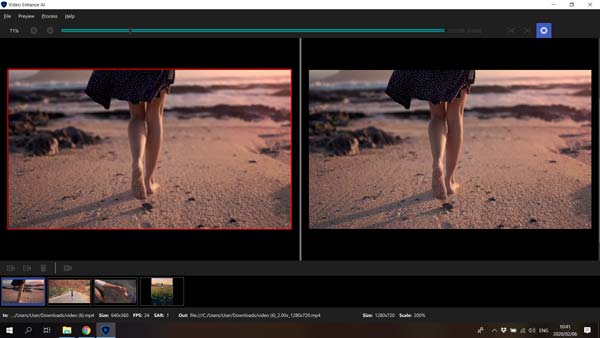
04Topaz Video Enhance AI
Topaz Video Enhance AI is an ai upscaling video enhancing app developed by the Topaz labs. The built-in AI system in topaz ai upscale software has been experimented on numerous videos, and it has been successful each time to edit every pixel in every frame of the video. The main features of this software are:
● The software is available for both os that is Mac and Windows.
● You can use this software to edit your video into slow motion, two thousand percent.
● This software can enhance any video up to 8K resolution.
● You can save the output from the software in any form, like MP4, PNG, TIFF, JPG, or MOV.
● This software allows fps boosting up to 120.
Pros
You can have a free trial.
You can upscale any video up to 8K resolution.
You can edit the video into slow motion to 2000%.
Cons
The app is expensive.
A watermark remains on the videos edited through these apps.
This software is not beginner-friendly software.
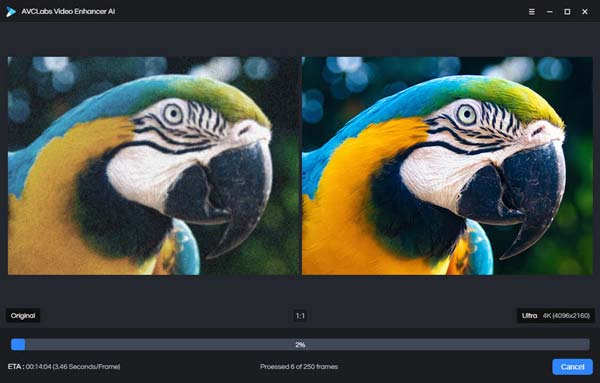
05AVCLabs Video Enhancer AI
AVCLabs Video Enhancer AI is ai video upscaling software developed by Anvsoft Inc. The most interesting features of this software are:
● Available for Windows only.
● It can be accessed through payment of $39.95/Month.
● Enhance video quality up to 4K.
● ‘Multi-frame feature’ helps to edit every frame of the video minutely.
● Manual settings for upscaling video or converting to low-quality video up to 480p.
Pros
Excellent video enhancing quality.
Allows enhancing video up to 4K.
This software can remove noise, overlay, and blurriness from the videos.
Cons
Expensive
Available only on Windows
Only for professional or expert users.
06GDFLab
GDFLab is an AI video enhancer online software. You can edit both images and videos with this software. This app is used in many fields, and it has been successful in all those fields due to its outstanding features like:
● This ai video upscaling online software gives a full free trial for its users.
● It is available online.
● It can be used both in Windows and Mac.
● You can upscale your videos up to 4K.
● The price of the software depends on the size of the video or photo you are enhancing.
Pros
This software is available both in Windows and Mac.
You can upscale your videos up to 4K.
You can use this app to restore your images to 4x.
Cons
Interruption in editing for internet problems.
You cannot use this app until you register.
This software is too complex for beginners to handle.

07iSize
iSize is an ai upscaler video online enhancer published by iSize technologies. It is said that this app excels in its field. This may happen for its extraordinary features like:
● This software is available both for Mac and Windows.
● A must-use software for professionals.
● High-end video codec capacity.
● You can use this app to upscale videos and also images.
Pros
You can use this software to upscale both videos and photos.
The video conversion process is fast.
This software supports batch conversion of videos.
Cons
Hardware is not upgraded regularly.
Expensive to avail.
Not for beginners.
● You can upscale your videos up to 8K.

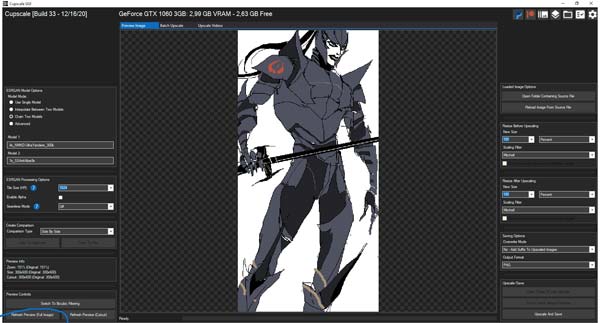
08Cupscale
Cupscale is another such ai upscaling video software. The main features of this software are:
● This software uses the very popular ESRGAN algorithm.
● This software is available both for PC and Mac.
● This software is available for free.
● This software can be used to upscale videos up to 8K.
● This software does not change the actual video format while editing the video.
Pros
Available for both Windows and Mac.
Available free.
Allows you to upscale videos up to 8K.
Cons
Supports only MP4, PNG, and JPG output formats.
Complex interface.
The AI used by this software is not stable.
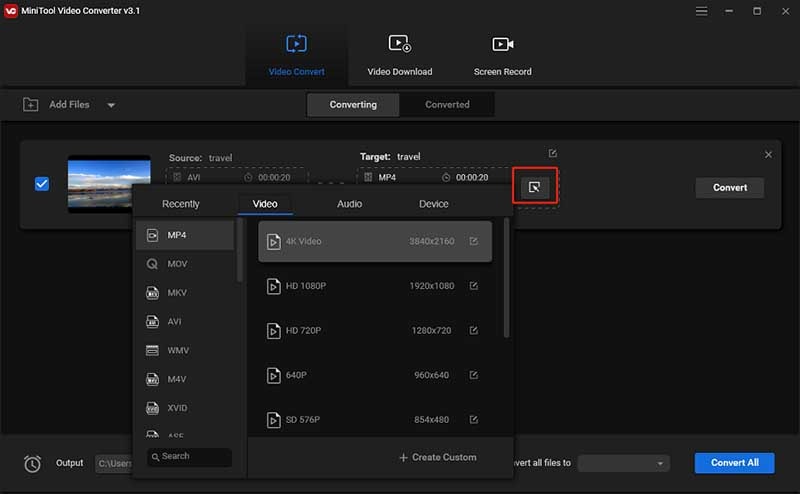
09MiniTool Video Converter
MiniTool Video Converter is another AI-driven video upscaling software. This app can also be used to upscale videos. It has some exciting features which can make your editing experience outstanding. The features are:
● This software is available for free.
● It is available only for Windows.
● This software supports more than 1000 output formats.
● You can use this video to enhance videos as well as audio.
● You can record your computer screen without a watermark.
Pros
Available free.
Supports more than 1000 different output formats.
Allows to the record computer screen without watermark.
Cons
Available only on Windows.
To run this software, high-end PC specifications are required.
This software is not for beginner use.
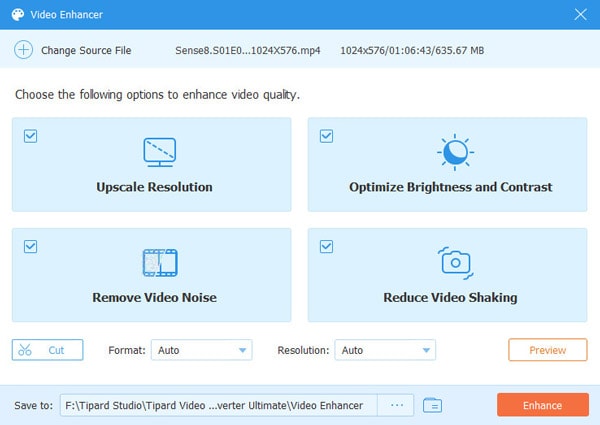
10Tipard Video Converter Ultimate
Tipard Video Converter Ultimate has some mind-boggling features, making this software one of the bestai upscale video software**.** This software is an all-in-one solution for the editors. The main features of this app are:
● Available in both Windows and Mac.
● Supports almost all different video formats.
● Upscale videos from DVDs to UHD videos.
● You can upscale your videos up to 8K.
● This app allows you to edit or retouch your videos on the timeline.
Pros
Available both for Windows and Mac.
You can rip videos from DVDs.
Allows you to upscale your videos up to 8K resolution.
Cons
It has a time-consuming editing process.
Does not support any usual PC.
Not beginner-friendly software.
Tip:Comparison between different AI Video Upscaling software
| Software | Windows/Mac/Both | 8K/4K Upscaling | Expensive | Beginner Friendly |
|---|---|---|---|---|
| DVDFab Enlarger AI | Windows | 4k | Yes | Yes |
| Video2x | Windows | 4k | No | No |
| Pixop | Both | 8k | Yes | No |
| Topaz Video Enhance AI | Both | 8k | Yes | No |
| AVCLabs Video Enhancer AI | Both | 8k | Yes | No |
| Windows | Both | 4k | Yes | No |
| GDFLab | Both | 4k | No | No |
| iSize | Both | 8k | Yes | No |
| Cupscale | Both | 8k | No | No |
| MiniTool Video Converter | Windows | 8k | No | No |
| Tipard Video Converter | Both | 8k | No | No |
There is another video editing app, which is Wondershare Filmora Video Editor . It is not an AI-driven video upscaling app. You can use this app to upscale videos of any format and create outputs of any format. This app allows you to upscale videos to 4K. You can use this app also for other video editing purposes to add new meaning and engagement to your video.
For Win 7 or later (64-bit)
For macOS 10.12 or later
● Ending Thoughts →
● I hope by now you know different software to upscale your low-quality video.
● Though this is an automatic process, you can use any software mentioned above to make your work smooth and hustle-free.
● You can access most software from any device and get output in any format with high-quality editing. This software will help you achieve the best results in your editing experience.
AI Upscaling is often used to improve the video quality. Here are some of the methods to do AI video upscaling. Follow these methods to successfully enhance your video quality.
In this article
01 [What Is AI Upscaling? And Why AI Upscaling Is Significant?](#Part 1)
02 [How to Easily AI Upscale Video to 1080p or 4K?](#Part 2)
03 [Best 10 Software to Make AI Upscaling Video](#Part 3)
Part 1 What Is AI Upscaling? And Why AI Upscaling Is Significant?
The process of generating or creating additional pixels of an image or frame in a video is AI Upscaling. This has many good results on the final video output.
This is mainly done to raise the bit rate of the video and, therefore, slightly improve the visual quality of the video. This is also used to improve the picture quality of DVDs and other low-quality videos. It is done to support lower quality videos or pictures on higher resolution screens like TV. This kind of upscaling is mostly done in TVs automatically.
Part 2 How to Easily AI Upscale Video to 1080p or 4K?
The interesting part is that this upscaling is done by the higher resolution device itself. If you display a lower resolution video on a high-resolution TV, the TV will upscale the video quality of the lower resolution video. This process mainly happens by the displaying device itself. But you can try to upscale videos by yourself using this software, which will help you achieve the best results.
Part 3 Best 10 Software to Make AI Upscaling Video
There are numerous AI upscale video software on the internet. The software listed below is the best among the numerous software because of its extraordinary features and interface. The 10 best AI video upscaling software are:
01DVDFab Enlarger AI
DVDFab Enlarger AI is an AI upscale video software published by Fengtao Software Limited. You can upscale any video you want to 4k. There are a few highlights of this software, and they are:
● This software is available onWindows.
● The price of the software ranges from $44.99 to $139.99
● You can use this software to rip videos from both DVDs and Blu-ray.
● You can save the output from the software in MP4 or MKV form.
● This software allows you to boost your fps up to 60.
Pros
Upscale your video to 4K resolution.
Boost your video to 60 fps.
Appropriate for beginners.
Cons
Available only on Windows.
Very Expensive.
No slow-motion is available.

02Video2X
Video2X is popular ai video upscaling software that is developed by Open-source. It is quite popular among the professionals for various reasons like:
● Video2X is available exclusive to Windows.
● You can avail this software without paying any money.
● You can upscale old low-resolution videos.
● Upscale your videos to 4K.
● You can save the output from the software in MP4 or MKV form.
Pros
You can availthis software for free.
You can upscale GIFs.
You can decide your output format.
Cons
It is not beginner-friendly.
No slow-motion editing is available.
There is no fps boosting.

03Pixop
Pixop ai video upscaling online software is published or developed by Pixop ApS. The main features of this software are:
● It is available online.
● Available both for Windows and Mac.
● Allows to upscale videos up to 8K.
● Supports MP4, MXF, M2TS, and MOV formats of output.
● Allows custom fps boost in videos.
Pros
Available online for both Windows and Mac.
Allows video upscaling up to 8K.
Allows custom fps boost.
Cons
Expensive for longer videos.
Does not support slow-motion editing.
Only supports MP4, MXF, M2TS, and MOV formats of output.

04Topaz Video Enhance AI
Topaz Video Enhance AI is an ai upscaling video enhancing app developed by the Topaz labs. The built-in AI system in topaz ai upscale software has been experimented on numerous videos, and it has been successful each time to edit every pixel in every frame of the video. The main features of this software are:
● The software is available for both os that is Mac and Windows.
● You can use this software to edit your video into slow motion, two thousand percent.
● This software can enhance any video up to 8K resolution.
● You can save the output from the software in any form, like MP4, PNG, TIFF, JPG, or MOV.
● This software allows fps boosting up to 120.
Pros
You can have a free trial.
You can upscale any video up to 8K resolution.
You can edit the video into slow motion to 2000%.
Cons
The app is expensive.
A watermark remains on the videos edited through these apps.
This software is not beginner-friendly software.

05AVCLabs Video Enhancer AI
AVCLabs Video Enhancer AI is ai video upscaling software developed by Anvsoft Inc. The most interesting features of this software are:
● Available for Windows only.
● It can be accessed through payment of $39.95/Month.
● Enhance video quality up to 4K.
● ‘Multi-frame feature’ helps to edit every frame of the video minutely.
● Manual settings for upscaling video or converting to low-quality video up to 480p.
Pros
Excellent video enhancing quality.
Allows enhancing video up to 4K.
This software can remove noise, overlay, and blurriness from the videos.
Cons
Expensive
Available only on Windows
Only for professional or expert users.

06GDFLab
GDFLab is an AI video enhancer online software. You can edit both images and videos with this software. This app is used in many fields, and it has been successful in all those fields due to its outstanding features like:
● This ai video upscaling online software gives a full free trial for its users.
● It is available online.
● It can be used both in Windows and Mac.
● You can upscale your videos up to 4K.
● The price of the software depends on the size of the video or photo you are enhancing.
Pros
This software is available both in Windows and Mac.
You can upscale your videos up to 4K.
You can use this app to restore your images to 4x.
Cons
Interruption in editing for internet problems.
You cannot use this app until you register.
This software is too complex for beginners to handle.

07iSize
iSize is an ai upscaler video online enhancer published by iSize technologies. It is said that this app excels in its field. This may happen for its extraordinary features like:
● This software is available both for Mac and Windows.
● A must-use software for professionals.
● High-end video codec capacity.
● You can use this app to upscale videos and also images.
Pros
You can use this software to upscale both videos and photos.
The video conversion process is fast.
This software supports batch conversion of videos.
Cons
Hardware is not upgraded regularly.
Expensive to avail.
Not for beginners.
● You can upscale your videos up to 8K.

08Cupscale
Cupscale is another such ai upscaling video software. The main features of this software are:
● This software uses the very popular ESRGAN algorithm.
● This software is available both for PC and Mac.
● This software is available for free.
● This software can be used to upscale videos up to 8K.
● This software does not change the actual video format while editing the video.
Pros
Available for both Windows and Mac.
Available free.
Allows you to upscale videos up to 8K.
Cons
Supports only MP4, PNG, and JPG output formats.
Complex interface.
The AI used by this software is not stable.

09MiniTool Video Converter
MiniTool Video Converter is another AI-driven video upscaling software. This app can also be used to upscale videos. It has some exciting features which can make your editing experience outstanding. The features are:
● This software is available for free.
● It is available only for Windows.
● This software supports more than 1000 output formats.
● You can use this video to enhance videos as well as audio.
● You can record your computer screen without a watermark.
Pros
Available free.
Supports more than 1000 different output formats.
Allows to the record computer screen without watermark.
Cons
Available only on Windows.
To run this software, high-end PC specifications are required.
This software is not for beginner use.

10Tipard Video Converter Ultimate
Tipard Video Converter Ultimate has some mind-boggling features, making this software one of the bestai upscale video software**.** This software is an all-in-one solution for the editors. The main features of this app are:
● Available in both Windows and Mac.
● Supports almost all different video formats.
● Upscale videos from DVDs to UHD videos.
● You can upscale your videos up to 8K.
● This app allows you to edit or retouch your videos on the timeline.
Pros
Available both for Windows and Mac.
You can rip videos from DVDs.
Allows you to upscale your videos up to 8K resolution.
Cons
It has a time-consuming editing process.
Does not support any usual PC.
Not beginner-friendly software.

Tip:Comparison between different AI Video Upscaling software
| Software | Windows/Mac/Both | 8K/4K Upscaling | Expensive | Beginner Friendly |
|---|---|---|---|---|
| DVDFab Enlarger AI | Windows | 4k | Yes | Yes |
| Video2x | Windows | 4k | No | No |
| Pixop | Both | 8k | Yes | No |
| Topaz Video Enhance AI | Both | 8k | Yes | No |
| AVCLabs Video Enhancer AI | Both | 8k | Yes | No |
| Windows | Both | 4k | Yes | No |
| GDFLab | Both | 4k | No | No |
| iSize | Both | 8k | Yes | No |
| Cupscale | Both | 8k | No | No |
| MiniTool Video Converter | Windows | 8k | No | No |
| Tipard Video Converter | Both | 8k | No | No |
There is another video editing app, which is Wondershare Filmora Video Editor . It is not an AI-driven video upscaling app. You can use this app to upscale videos of any format and create outputs of any format. This app allows you to upscale videos to 4K. You can use this app also for other video editing purposes to add new meaning and engagement to your video.
For Win 7 or later (64-bit)
For macOS 10.12 or later
● Ending Thoughts →
● I hope by now you know different software to upscale your low-quality video.
● Though this is an automatic process, you can use any software mentioned above to make your work smooth and hustle-free.
● You can access most software from any device and get output in any format with high-quality editing. This software will help you achieve the best results in your editing experience.
AI Upscaling is often used to improve the video quality. Here are some of the methods to do AI video upscaling. Follow these methods to successfully enhance your video quality.
In this article
01 [What Is AI Upscaling? And Why AI Upscaling Is Significant?](#Part 1)
02 [How to Easily AI Upscale Video to 1080p or 4K?](#Part 2)
03 [Best 10 Software to Make AI Upscaling Video](#Part 3)
Part 1 What Is AI Upscaling? And Why AI Upscaling Is Significant?
The process of generating or creating additional pixels of an image or frame in a video is AI Upscaling. This has many good results on the final video output.
This is mainly done to raise the bit rate of the video and, therefore, slightly improve the visual quality of the video. This is also used to improve the picture quality of DVDs and other low-quality videos. It is done to support lower quality videos or pictures on higher resolution screens like TV. This kind of upscaling is mostly done in TVs automatically.
Part 2 How to Easily AI Upscale Video to 1080p or 4K?
The interesting part is that this upscaling is done by the higher resolution device itself. If you display a lower resolution video on a high-resolution TV, the TV will upscale the video quality of the lower resolution video. This process mainly happens by the displaying device itself. But you can try to upscale videos by yourself using this software, which will help you achieve the best results.
Part 3 Best 10 Software to Make AI Upscaling Video
There are numerous AI upscale video software on the internet. The software listed below is the best among the numerous software because of its extraordinary features and interface. The 10 best AI video upscaling software are:
01DVDFab Enlarger AI
DVDFab Enlarger AI is an AI upscale video software published by Fengtao Software Limited. You can upscale any video you want to 4k. There are a few highlights of this software, and they are:
● This software is available onWindows.
● The price of the software ranges from $44.99 to $139.99
● You can use this software to rip videos from both DVDs and Blu-ray.
● You can save the output from the software in MP4 or MKV form.
● This software allows you to boost your fps up to 60.
Pros
Upscale your video to 4K resolution.
Boost your video to 60 fps.
Appropriate for beginners.
Cons
Available only on Windows.
Very Expensive.
No slow-motion is available.

02Video2X
Video2X is popular ai video upscaling software that is developed by Open-source. It is quite popular among the professionals for various reasons like:
● Video2X is available exclusive to Windows.
● You can avail this software without paying any money.
● You can upscale old low-resolution videos.
● Upscale your videos to 4K.
● You can save the output from the software in MP4 or MKV form.
Pros
You can availthis software for free.
You can upscale GIFs.
You can decide your output format.
Cons
It is not beginner-friendly.
No slow-motion editing is available.
There is no fps boosting.

03Pixop
Pixop ai video upscaling online software is published or developed by Pixop ApS. The main features of this software are:
● It is available online.
● Available both for Windows and Mac.
● Allows to upscale videos up to 8K.
● Supports MP4, MXF, M2TS, and MOV formats of output.
● Allows custom fps boost in videos.
Pros
Available online for both Windows and Mac.
Allows video upscaling up to 8K.
Allows custom fps boost.
Cons
Expensive for longer videos.
Does not support slow-motion editing.
Only supports MP4, MXF, M2TS, and MOV formats of output.

04Topaz Video Enhance AI
Topaz Video Enhance AI is an ai upscaling video enhancing app developed by the Topaz labs. The built-in AI system in topaz ai upscale software has been experimented on numerous videos, and it has been successful each time to edit every pixel in every frame of the video. The main features of this software are:
● The software is available for both os that is Mac and Windows.
● You can use this software to edit your video into slow motion, two thousand percent.
● This software can enhance any video up to 8K resolution.
● You can save the output from the software in any form, like MP4, PNG, TIFF, JPG, or MOV.
● This software allows fps boosting up to 120.
Pros
You can have a free trial.
You can upscale any video up to 8K resolution.
You can edit the video into slow motion to 2000%.
Cons
The app is expensive.
A watermark remains on the videos edited through these apps.
This software is not beginner-friendly software.

05AVCLabs Video Enhancer AI
AVCLabs Video Enhancer AI is ai video upscaling software developed by Anvsoft Inc. The most interesting features of this software are:
● Available for Windows only.
● It can be accessed through payment of $39.95/Month.
● Enhance video quality up to 4K.
● ‘Multi-frame feature’ helps to edit every frame of the video minutely.
● Manual settings for upscaling video or converting to low-quality video up to 480p.
Pros
Excellent video enhancing quality.
Allows enhancing video up to 4K.
This software can remove noise, overlay, and blurriness from the videos.
Cons
Expensive
Available only on Windows
Only for professional or expert users.

06GDFLab
GDFLab is an AI video enhancer online software. You can edit both images and videos with this software. This app is used in many fields, and it has been successful in all those fields due to its outstanding features like:
● This ai video upscaling online software gives a full free trial for its users.
● It is available online.
● It can be used both in Windows and Mac.
● You can upscale your videos up to 4K.
● The price of the software depends on the size of the video or photo you are enhancing.
Pros
This software is available both in Windows and Mac.
You can upscale your videos up to 4K.
You can use this app to restore your images to 4x.
Cons
Interruption in editing for internet problems.
You cannot use this app until you register.
This software is too complex for beginners to handle.

07iSize
iSize is an ai upscaler video online enhancer published by iSize technologies. It is said that this app excels in its field. This may happen for its extraordinary features like:
● This software is available both for Mac and Windows.
● A must-use software for professionals.
● High-end video codec capacity.
● You can use this app to upscale videos and also images.
Pros
You can use this software to upscale both videos and photos.
The video conversion process is fast.
This software supports batch conversion of videos.
Cons
Hardware is not upgraded regularly.
Expensive to avail.
Not for beginners.
● You can upscale your videos up to 8K.

08Cupscale
Cupscale is another such ai upscaling video software. The main features of this software are:
● This software uses the very popular ESRGAN algorithm.
● This software is available both for PC and Mac.
● This software is available for free.
● This software can be used to upscale videos up to 8K.
● This software does not change the actual video format while editing the video.
Pros
Available for both Windows and Mac.
Available free.
Allows you to upscale videos up to 8K.
Cons
Supports only MP4, PNG, and JPG output formats.
Complex interface.
The AI used by this software is not stable.

09MiniTool Video Converter
MiniTool Video Converter is another AI-driven video upscaling software. This app can also be used to upscale videos. It has some exciting features which can make your editing experience outstanding. The features are:
● This software is available for free.
● It is available only for Windows.
● This software supports more than 1000 output formats.
● You can use this video to enhance videos as well as audio.
● You can record your computer screen without a watermark.
Pros
Available free.
Supports more than 1000 different output formats.
Allows to the record computer screen without watermark.
Cons
Available only on Windows.
To run this software, high-end PC specifications are required.
This software is not for beginner use.

10Tipard Video Converter Ultimate
Tipard Video Converter Ultimate has some mind-boggling features, making this software one of the bestai upscale video software**.** This software is an all-in-one solution for the editors. The main features of this app are:
● Available in both Windows and Mac.
● Supports almost all different video formats.
● Upscale videos from DVDs to UHD videos.
● You can upscale your videos up to 8K.
● This app allows you to edit or retouch your videos on the timeline.
Pros
Available both for Windows and Mac.
You can rip videos from DVDs.
Allows you to upscale your videos up to 8K resolution.
Cons
It has a time-consuming editing process.
Does not support any usual PC.
Not beginner-friendly software.

Tip:Comparison between different AI Video Upscaling software
| Software | Windows/Mac/Both | 8K/4K Upscaling | Expensive | Beginner Friendly |
|---|---|---|---|---|
| DVDFab Enlarger AI | Windows | 4k | Yes | Yes |
| Video2x | Windows | 4k | No | No |
| Pixop | Both | 8k | Yes | No |
| Topaz Video Enhance AI | Both | 8k | Yes | No |
| AVCLabs Video Enhancer AI | Both | 8k | Yes | No |
| Windows | Both | 4k | Yes | No |
| GDFLab | Both | 4k | No | No |
| iSize | Both | 8k | Yes | No |
| Cupscale | Both | 8k | No | No |
| MiniTool Video Converter | Windows | 8k | No | No |
| Tipard Video Converter | Both | 8k | No | No |
There is another video editing app, which is Wondershare Filmora Video Editor . It is not an AI-driven video upscaling app. You can use this app to upscale videos of any format and create outputs of any format. This app allows you to upscale videos to 4K. You can use this app also for other video editing purposes to add new meaning and engagement to your video.
For Win 7 or later (64-bit)
For macOS 10.12 or later
● Ending Thoughts →
● I hope by now you know different software to upscale your low-quality video.
● Though this is an automatic process, you can use any software mentioned above to make your work smooth and hustle-free.
● You can access most software from any device and get output in any format with high-quality editing. This software will help you achieve the best results in your editing experience.
AI Upscaling is often used to improve the video quality. Here are some of the methods to do AI video upscaling. Follow these methods to successfully enhance your video quality.
In this article
01 [What Is AI Upscaling? And Why AI Upscaling Is Significant?](#Part 1)
02 [How to Easily AI Upscale Video to 1080p or 4K?](#Part 2)
03 [Best 10 Software to Make AI Upscaling Video](#Part 3)
Part 1 What Is AI Upscaling? And Why AI Upscaling Is Significant?
The process of generating or creating additional pixels of an image or frame in a video is AI Upscaling. This has many good results on the final video output.
This is mainly done to raise the bit rate of the video and, therefore, slightly improve the visual quality of the video. This is also used to improve the picture quality of DVDs and other low-quality videos. It is done to support lower quality videos or pictures on higher resolution screens like TV. This kind of upscaling is mostly done in TVs automatically.
Part 2 How to Easily AI Upscale Video to 1080p or 4K?
The interesting part is that this upscaling is done by the higher resolution device itself. If you display a lower resolution video on a high-resolution TV, the TV will upscale the video quality of the lower resolution video. This process mainly happens by the displaying device itself. But you can try to upscale videos by yourself using this software, which will help you achieve the best results.
Part 3 Best 10 Software to Make AI Upscaling Video
There are numerous AI upscale video software on the internet. The software listed below is the best among the numerous software because of its extraordinary features and interface. The 10 best AI video upscaling software are:
01DVDFab Enlarger AI
DVDFab Enlarger AI is an AI upscale video software published by Fengtao Software Limited. You can upscale any video you want to 4k. There are a few highlights of this software, and they are:
● This software is available onWindows.
● The price of the software ranges from $44.99 to $139.99
● You can use this software to rip videos from both DVDs and Blu-ray.
● You can save the output from the software in MP4 or MKV form.
● This software allows you to boost your fps up to 60.
Pros
Upscale your video to 4K resolution.
Boost your video to 60 fps.
Appropriate for beginners.
Cons
Available only on Windows.
Very Expensive.
No slow-motion is available.

02Video2X
Video2X is popular ai video upscaling software that is developed by Open-source. It is quite popular among the professionals for various reasons like:
● Video2X is available exclusive to Windows.
● You can avail this software without paying any money.
● You can upscale old low-resolution videos.
● Upscale your videos to 4K.
● You can save the output from the software in MP4 or MKV form.
Pros
You can availthis software for free.
You can upscale GIFs.
You can decide your output format.
Cons
It is not beginner-friendly.
No slow-motion editing is available.
There is no fps boosting.

03Pixop
Pixop ai video upscaling online software is published or developed by Pixop ApS. The main features of this software are:
● It is available online.
● Available both for Windows and Mac.
● Allows to upscale videos up to 8K.
● Supports MP4, MXF, M2TS, and MOV formats of output.
● Allows custom fps boost in videos.
Pros
Available online for both Windows and Mac.
Allows video upscaling up to 8K.
Allows custom fps boost.
Cons
Expensive for longer videos.
Does not support slow-motion editing.
Only supports MP4, MXF, M2TS, and MOV formats of output.

04Topaz Video Enhance AI
Topaz Video Enhance AI is an ai upscaling video enhancing app developed by the Topaz labs. The built-in AI system in topaz ai upscale software has been experimented on numerous videos, and it has been successful each time to edit every pixel in every frame of the video. The main features of this software are:
● The software is available for both os that is Mac and Windows.
● You can use this software to edit your video into slow motion, two thousand percent.
● This software can enhance any video up to 8K resolution.
● You can save the output from the software in any form, like MP4, PNG, TIFF, JPG, or MOV.
● This software allows fps boosting up to 120.
Pros
You can have a free trial.
You can upscale any video up to 8K resolution.
You can edit the video into slow motion to 2000%.
Cons
The app is expensive.
A watermark remains on the videos edited through these apps.
This software is not beginner-friendly software.

05AVCLabs Video Enhancer AI
AVCLabs Video Enhancer AI is ai video upscaling software developed by Anvsoft Inc. The most interesting features of this software are:
● Available for Windows only.
● It can be accessed through payment of $39.95/Month.
● Enhance video quality up to 4K.
● ‘Multi-frame feature’ helps to edit every frame of the video minutely.
● Manual settings for upscaling video or converting to low-quality video up to 480p.
Pros
Excellent video enhancing quality.
Allows enhancing video up to 4K.
This software can remove noise, overlay, and blurriness from the videos.
Cons
Expensive
Available only on Windows
Only for professional or expert users.

06GDFLab
GDFLab is an AI video enhancer online software. You can edit both images and videos with this software. This app is used in many fields, and it has been successful in all those fields due to its outstanding features like:
● This ai video upscaling online software gives a full free trial for its users.
● It is available online.
● It can be used both in Windows and Mac.
● You can upscale your videos up to 4K.
● The price of the software depends on the size of the video or photo you are enhancing.
Pros
This software is available both in Windows and Mac.
You can upscale your videos up to 4K.
You can use this app to restore your images to 4x.
Cons
Interruption in editing for internet problems.
You cannot use this app until you register.
This software is too complex for beginners to handle.

07iSize
iSize is an ai upscaler video online enhancer published by iSize technologies. It is said that this app excels in its field. This may happen for its extraordinary features like:
● This software is available both for Mac and Windows.
● A must-use software for professionals.
● High-end video codec capacity.
● You can use this app to upscale videos and also images.
Pros
You can use this software to upscale both videos and photos.
The video conversion process is fast.
This software supports batch conversion of videos.
Cons
Hardware is not upgraded regularly.
Expensive to avail.
Not for beginners.
● You can upscale your videos up to 8K.

08Cupscale
Cupscale is another such ai upscaling video software. The main features of this software are:
● This software uses the very popular ESRGAN algorithm.
● This software is available both for PC and Mac.
● This software is available for free.
● This software can be used to upscale videos up to 8K.
● This software does not change the actual video format while editing the video.
Pros
Available for both Windows and Mac.
Available free.
Allows you to upscale videos up to 8K.
Cons
Supports only MP4, PNG, and JPG output formats.
Complex interface.
The AI used by this software is not stable.

09MiniTool Video Converter
MiniTool Video Converter is another AI-driven video upscaling software. This app can also be used to upscale videos. It has some exciting features which can make your editing experience outstanding. The features are:
● This software is available for free.
● It is available only for Windows.
● This software supports more than 1000 output formats.
● You can use this video to enhance videos as well as audio.
● You can record your computer screen without a watermark.
Pros
Available free.
Supports more than 1000 different output formats.
Allows to the record computer screen without watermark.
Cons
Available only on Windows.
To run this software, high-end PC specifications are required.
This software is not for beginner use.

10Tipard Video Converter Ultimate
Tipard Video Converter Ultimate has some mind-boggling features, making this software one of the bestai upscale video software**.** This software is an all-in-one solution for the editors. The main features of this app are:
● Available in both Windows and Mac.
● Supports almost all different video formats.
● Upscale videos from DVDs to UHD videos.
● You can upscale your videos up to 8K.
● This app allows you to edit or retouch your videos on the timeline.
Pros
Available both for Windows and Mac.
You can rip videos from DVDs.
Allows you to upscale your videos up to 8K resolution.
Cons
It has a time-consuming editing process.
Does not support any usual PC.
Not beginner-friendly software.

Tip:Comparison between different AI Video Upscaling software
| Software | Windows/Mac/Both | 8K/4K Upscaling | Expensive | Beginner Friendly |
|---|---|---|---|---|
| DVDFab Enlarger AI | Windows | 4k | Yes | Yes |
| Video2x | Windows | 4k | No | No |
| Pixop | Both | 8k | Yes | No |
| Topaz Video Enhance AI | Both | 8k | Yes | No |
| AVCLabs Video Enhancer AI | Both | 8k | Yes | No |
| Windows | Both | 4k | Yes | No |
| GDFLab | Both | 4k | No | No |
| iSize | Both | 8k | Yes | No |
| Cupscale | Both | 8k | No | No |
| MiniTool Video Converter | Windows | 8k | No | No |
| Tipard Video Converter | Both | 8k | No | No |
There is another video editing app, which is Wondershare Filmora Video Editor . It is not an AI-driven video upscaling app. You can use this app to upscale videos of any format and create outputs of any format. This app allows you to upscale videos to 4K. You can use this app also for other video editing purposes to add new meaning and engagement to your video.
For Win 7 or later (64-bit)
For macOS 10.12 or later
● Ending Thoughts →
● I hope by now you know different software to upscale your low-quality video.
● Though this is an automatic process, you can use any software mentioned above to make your work smooth and hustle-free.
● You can access most software from any device and get output in any format with high-quality editing. This software will help you achieve the best results in your editing experience.
6 Websites to Free Download Motivational Video Footage
The rise in social media’s popularity has brought about a fresh era of creating and enjoying content. Among this plethora of content, one category has managed to stand out prominently - motivational videos. These snippets of inspiration, often not more than a few minutes long, have become a staple of many users’ daily feeds. But what makes them so universally loved?
To begin with, let’s consider the times we live in. The modern world is fast-paced and filled with challenges and hurdles. This is where “motivational video status” or “motivation status video” comes into play. They serve as a brief pause, a moment of reflection, and a powerful jolt of motivation for many. They remind people of their worth, potential, and the strength they possess to overcome adversities. Plus, given their short length, they’re easily digestible, making them perfect for quick breaks.
Moreover, these videos are often shared during specific times of the year, such as the Republic Day. “Republic Day status videos,” for instance, fuse motivation with patriotism, making them a hit among the masses.
For content creators and marketers, the appeal lies in the sheer virality of these videos. A compelling “motivational status video download” can quickly gain traction, garnering thousands, if not millions, of views in a short span. With the right mix of powerful imagery, stirring words, and evocative music, these videos can resonate with a vast audience, driving engagement and shares.
Part 1: 6 Websites to Free Download Motivational Video Footage
Finding the right footage for crafting that perfect motivational video is crucial. The imagery must align with the message, ensuring it’s impactful. For those on the lookout, here are six renowned platforms where one can source high-quality footage for free or at a cost:
Adobe Stock
Adobe Stock is a treasure trove of high-quality videos. While it’s primarily a paid platform, the range and quality of clips available make it a top choice for professionals.
iStock
Another premium platform, iStock by Getty Images, offers a diverse collection of video clips. From breathtaking landscapes to poignant human moments, you’ll find a plethora of options here.
Shutterstock
Shutterstock is a household name in the world of digital media. With an extensive library, this platform provides clips that can cater to virtually any theme or mood you’re aiming for.
Videezy
For those on a budget, Videezy offers a mix of free and premium video clips. It’s a community-driven platform, so you’ll find a unique array of footage not available elsewhere.
Pixabay
Pixabay is an entirely free platform, making it perfect for beginners or those not looking to invest heavily. The site hosts a variety of footage, from nature scenes to urban landscapes.
Pexels
Similar to Pixabay, Pexels offers a rich collection of free video clips. With its user-friendly interface and diverse catalog, it’s a favorite among many content creators.
In essence, whether you’re crafting a “motivation status video download” for a broad audience or a personalized “motivational status video” for a niche group, these platforms have got you covered. Dive in, explore, and let your creativity flow!
Part 2: Using Filmora to Edit Motivational Video Footage
Filmora has steadily risen in popularity, becoming a go-to choice for many when it comes to video editing. Whether you have tons of experience or you’re just starting out in the world of video creation, Filmora provides a user-friendly interface along with a wide range of useful tools. Let’s delve into how you can use Filmora to craft that perfect “motivation status video.”
Step1 Importing Your Footage
Start by importing your selected motivational video footage from platforms like Pixabay, Pexels, or any of the previously mentioned sites. Exactly! Just click on the ‘Import’ button and choose the clips you’d like.
Step2 Trimming and Merging
Once imported, you may want to trim the videos or merge multiple clips to make your motivational status video coherent. Use Filmora’s easy drag-and-drop timeline for this purpose.
Step3 Adding Music
**”motivational video status”**without inspiring music is like a cake without frosting. Filmora boasts an extensive library of music tracks. Alternatively, import your own to perfectly match the tone of your video.
Step4 Text and Titles
If you’re aiming for a “Republic Day status videos”theme or any other, adding text or titles can amplify your message. Filmora offers a range of customizable text options, from sleek and professional to fun and quirky.
Create AI Captions For Win 7 or later(64-bit)
Create AI Captions For macOS 10.14 or later
Step5 Transitions and Effects
Give your**”motivation status video download”**a polished feel with smooth transitions between clips. Add effects like slow motion or color grading to enhance the visual appeal further.
Step6 Export and Share
Once satisfied, export your video in the desired format. With Filmora, you can also directly share your **”motivational status video download”**to various social media platforms, amplifying its reach.
Filmora’s versatility ensures that you not only create a compelling “motivation status video” but also enjoy the process. Its user-friendly tools are perfect for crafting videos that resonate and inspire.
Part 3: Summary
In the age of social media, where content is consumed voraciously, motivational videos have carved a unique niche. They inspire, uplift, and connect with audiences, offering solace in trying times or propelling one towards their goals. Platforms like Adobe Stock, iStock, and Shutterstock, among others, offer a goldmine of footage for crafting these videos. But the magic truly comes alive in the editing room.
Filmora, with its rich array of tools and features, stands out as an excellent choice for editing. Whether you’re crafting a poignant “Republic Day status video” or a general “motivation status video,” Filmora’s capabilities can help bring your vision to fruition.
While sourcing the right footage lays the foundation, it’s the editing that breathes life into a “motivational status video.” So, dive in, explore the world of video creation, and let your stories inspire the world.
Also read:
- New Wondershare Filmora Tutorial | Using The AI Auto Reframe Feature for 2024
- Add Motion Blur in After Effects for 2024
- New Mastering OpenCV Object Tracking A Comprehensive Guide for Beginners and Experts
- 2024 Approved How to Select and Use The Best BRAW LUTs
- In 2024, Motion Blur Photo With GIMP Step-By-Step Guide
- Updated Best Video Grabbers for Chrome
- Updated This Article Is a Guide on How to Download and Install Final Cut Pro, Its Key Features, and More. It Also Discusses an Alternative Option to It so the Creators or Editors Can Opt for Editing Videos Accordingly
- New Do You Know How to Create AI Thumbnails for Videos? This Article Will Mention some of the Best Tools to Generate Attractive Thumbnails for Videos with AI
- 2024 Approved Are You Looking for Ways to Add Background to Green Screen Video Online? Worry Not, as in This Article; We Shall Discuss Using a Green Screen Background Adder in Filmora
- New In 2024, Best 10 Tools to Convert a GIF Into a PDF
- New Easily Sync Audio With Video With Filmora
- Updated Guaranteed 10 Storyboard Creators To Make Animation Easier
- Updated Complete Tutorial on After Effects Countdown Timer Adding for 2024
- Updated Do You Know How Boring a Video Can Be with Silent Moments? Some Tools with Silent Detection Features Help You Delete Those Moments
- 6 Best Methods to Make a Video Longer for 2024
- Updated In 2024, Best 5 Tips to Freeze-Frame in After Effects
- Updated Full Guide to Discord Boost for 2024
- Updated In 2024, 4 Ways to Add White Border to Video on Mobile and Desktop
- Updated How to Add Transitions in Adobe Premiere Pro for 2024
- New Are You Also a Fan of the Slow Mo Guys? Well! Who Isnt? Learn How You Can Create Compelling Slow-Mo Videos Like the Slow Mo Guys Here
- New 2024 Approved How To Change Sky Background With Adobe Photoshop Best Ways
- Updated In 2024, How to Create a Clideo Slideshow Simply
- Updated 2024 Approved FLV Editors for Windows 11/10/8.1/8/7 Easily Edit FLV Videos on PC
- Updated Do You Want to Blur Faces in Your Videos? Read This Article to Find Out the Easiest Way to Blur the Faces in Videos Using Adobe Premiere Pro
- Updated How to Brighten a Video in Windows 10 | Step-By-Step Guide
- In 2024, Top 10 Free Spanish Text To Speech Converter Software Windows, Mac
- In 2024, How to Add Font Effect
- 2024 Approved This Article Talks in Detail About How to Edit Videos with Windows Movie Maker 10, How to Download or Install It, and so On. It Further Involves the Use of an Alternative to This Tool. Check Out Now
- New Looking for the Tools that Can Let You Blend Images Perfectly for Creating an Awesome Collage? Shortlisted for You Are the Best Bend Collage Program for an Effortless Task
- New Top 9 AMV Makers for Computer
- Little Known Ways of Adding Emojis to Photos on iPhone & Android for 2024
- Updated 2024 Approved A Guide to Find a High-Quality Video Marketing Agency
- New 2024 Approved 10 Best Free Text to Speech Software Windows, Mac,Android, iPhone & Online
- New 2024 Approved Best GIF to AVI Converters (Online + Software Solutions)
- Updated In 2024, Easily Combine Videos and Audios with 5 Simple Online Tools
- New 2024 Approved Where To Find The Best Free Canon LUTs? Learn More
- 2024 Approved A Wedding Is One of the Exciting Parts that Will Happen in Your Life. Its Not that Easy to Plan a Wedding, Theres a Lot to Be Consider Like Wedding Dress, Food, Venue, Videographer Etc
- Updated 2024 Approved The Right Ways to Slow Down a Video on iPhone
- Learning How to Create LUTs with LUTs Generator for 2024
- 7 Solutions to Cut Video on Mac without Using FFmpeg for 2024
- 2024 Approved How to Add a Slideshow in PowerPoint
- 2024 Approved Are You Also a Fan of the Slow Mo Guys? Well! Who Isnt? Learn How You Can Create Compelling Slow-Mo Videos Like the Slow Mo Guys Here
- Recover your contacts after Vivo V30 has been deleted.
- In 2024, How to Watch Hulu Outside US On Poco M6 5G | Dr.fone
- App Wont Open on Your Honor Magic 5 Pro? Here Are All Fixes | Dr.fone
- 4 Ways to Fix Android Blue Screen of Death On Vivo S18 Pro | Dr.fone
- How To Install the Latest iOS Beta Version on Apple iPhone 8? | Dr.fone
- How to Restore Deleted Xiaomi Contacts An Easy Method Explained.
- 2024 Approved Top 6 Mickey Mouse Voice Generators Providing Efficient Results
- How to Use Life360 on Windows PC For Vivo V27e? | Dr.fone
- Can I play MKV movies on Xiaomi Redmi 12 5G?
- Full Guide on Mirroring Your Infinix Note 30i to Your PC/Mac | Dr.fone
- How to Fake Snapchat Location without Jailbreak On Vivo X Fold 2 | Dr.fone
- 3 Ways for Android Pokemon Go Spoofing On Vivo V29e | Dr.fone
- How Do You Get Sun Stone Evolutions in Pokémon For Poco C51? | Dr.fone
- Play Store Stuck on Downloading Of Xiaomi 13 Ultra? 7 Ways to Resolve | Dr.fone
- How does the stardust trade cost In pokemon go On Sony Xperia 10 V? | Dr.fone
- Honor Magic 6 Lite Messages Recovery - Recover Deleted Messages from Honor Magic 6 Lite
- How to Check Distance and Radius on Google Maps For your Xiaomi Redmi Note 12T Pro | Dr.fone
- 3 Ways for Android Pokemon Go Spoofing On Honor X8b | Dr.fone
- Unlocking Apple iPhone SE (2020) Passcode without a Computer | Dr.fone
- How to Unlock SIM Card on iPhone 12 Pro online without jailbreak
- How To Transfer Data From Apple iPhone 15 Plus To Other iPhone 12 Pro Max devices? | Dr.fone
- How to retrieve erased call logs from M6 Pro 5G?
- In 2024, For People Wanting to Mock GPS on Realme 11 Pro Devices | Dr.fone
- In 2024, 9 Best Free Android Monitoring Apps to Monitor Phone Remotely For your Honor X8b | Dr.fone
- Title: How Can You Get VHS Filter and Glitch Filter to Your Images or Videos?
- Author: Chloe
- Created at : 2024-05-20 03:37:27
- Updated at : 2024-05-21 03:37:27
- Link: https://ai-editing-video.techidaily.com/how-can-you-get-vhs-filter-and-glitch-filter-to-your-images-or-videos/
- License: This work is licensed under CC BY-NC-SA 4.0.

