
:max_bytes(150000):strip_icc():format(webp)/GettyImages-98471373-56a9ff935f9b58b7d0006b1a.jpg)
How To Add Text In After Effects
How To Add Text In After Effects
In almost every video you come across, you will see text added to the video in different parts. There are various reasons why adding text to videos becomes a necessity. First of all, you can highlight the underlying message or key points in your video. Along with audio and video, the viewers will have another cue point in the form of text that they can retain in their memory for longer. You add animated texts to video to make the video interesting to watch and break the monotony of visual cues only.
Besides, you may have to want credits and add intro as well as outro to your video where adding text is almost a necessity. Text can help your viewer get the context of your video and make sense of the content. After Effects is a popular video editor thanks to its visual effects, text animation animations, and instant video enhancement tools. We will illustrate the different ways of adding text in After Effects in simple steps.
Part 1. Add Text in After Effects with Horizontal Type Tool
Once you have imported your video clip into the Timeline, there are several ways you can add text to your video. First of all, you can right-click on the Timeline and select New> Text to create an empty text layer and add any text you want. Similarly, you can go to Layer> New> Text option to do the same. But the easiest way of adding text in After Effects is by using Horizontal Type Tool. Here are the steps on how you can add text in AE with the type tool.
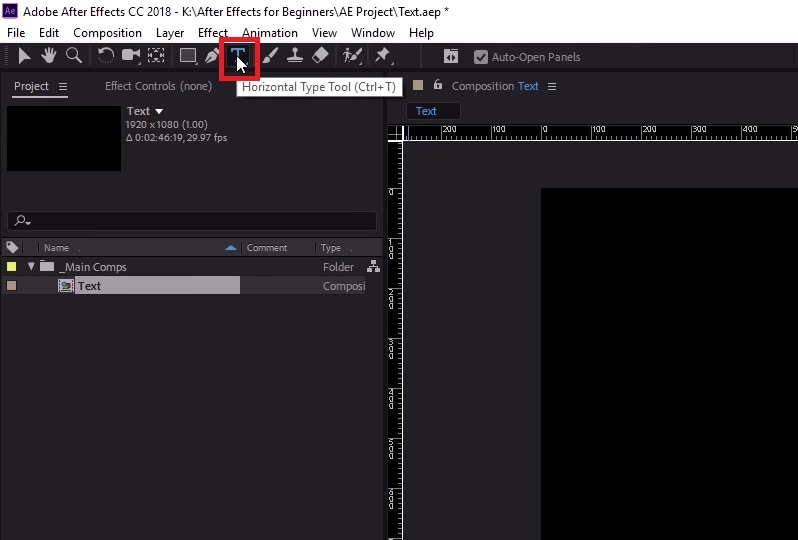
Step1Once you have imported your video into the Timeline, click on Horizontal Type Tool located in the top bar to add any text. You can press Ctrl+T(Windows) or Command+H(Mac) to get it instantly.
Step2Click on the video where you want to place the text and type your desired text there. After you are done adding your text, press Enter key in Num pad to exit out of the text field in the video.
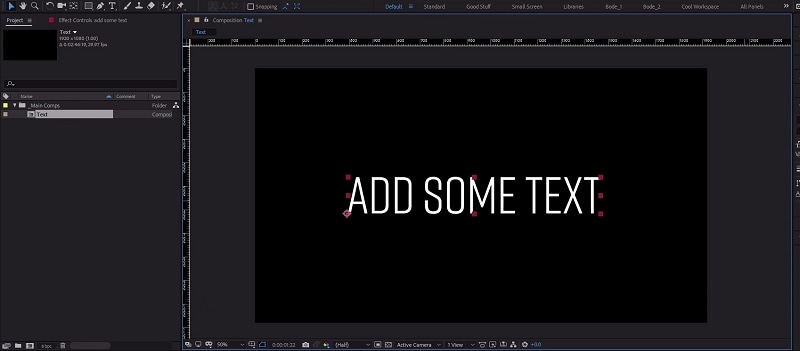
Step3This will automatically create a text layer on Timeline. You can now move the text and place it anywhere you want. You can also modify the text style and add animation which we will illustrate in the next section.
Part 2. Use the Character Panel to Edit Text in AE
When you select Type tool and add your desired text, you get a default style for the text. It is most likely that you have to modify the text style such as changing color, font, and size to fit in your video seamlessly. That is when you have to visit the Character Panel. Character Panel is where you get to edit the font of the text you have typed, increase or decrease the font size, change the font color, and much more. Apart from that, you can increase the spacing between lines when your text is a paragraph instead of a few words. Here are the steps to use Character Panel to edit text in AE.
Step1Once you have typed your text using Horizontal Type tool on the video, click on the text.
Step2Go to Character panel located in the right side of the screen. If it is minimized, click on the panel to expand it.
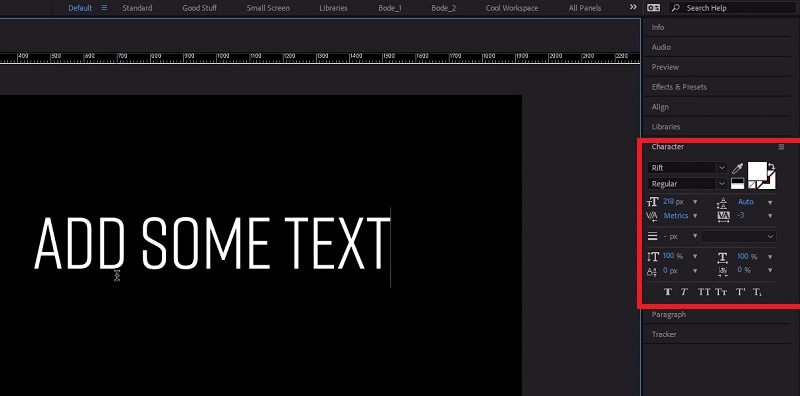
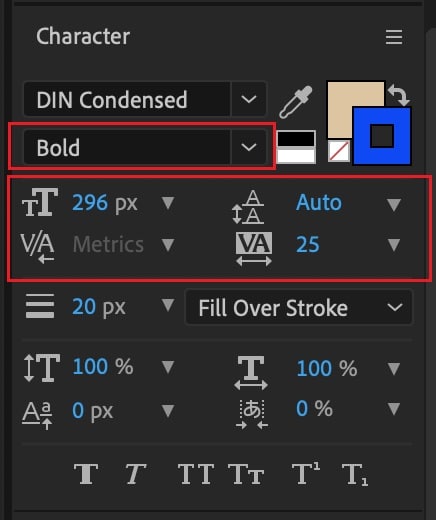
Step3The first option in the panel is the font of the text. By the side of the font is the text color. You can use the color picker tool to choose any color as per your preference.
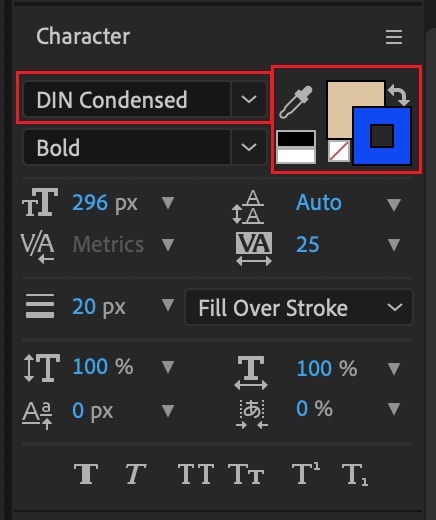
Step4Below the font, you can select the font style such as regular, bold, italics, and likewise. The subsequent part is to change the font size and adjust vertical spacing between lines and horizontal spacing between characters.
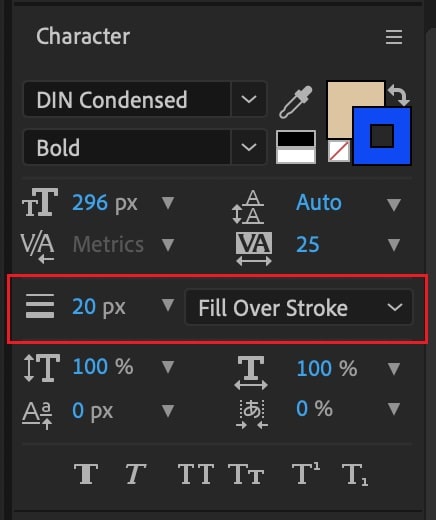
Step5The next section deals with Stroke option as well as fill the text option. You can fill the background of the text with any desired color.
Part 3. Add Animated Text to Video with Animation Presets
Now that you have added a static text and set the text format as per your preference, it is time to animate the text. A static text in a video does not look appealing, and animated texts make the video eye-catching instantly. You can use text animation presets in After Effects to add animated text to video. Here are the steps to add animated text to video with animation presets and effects.
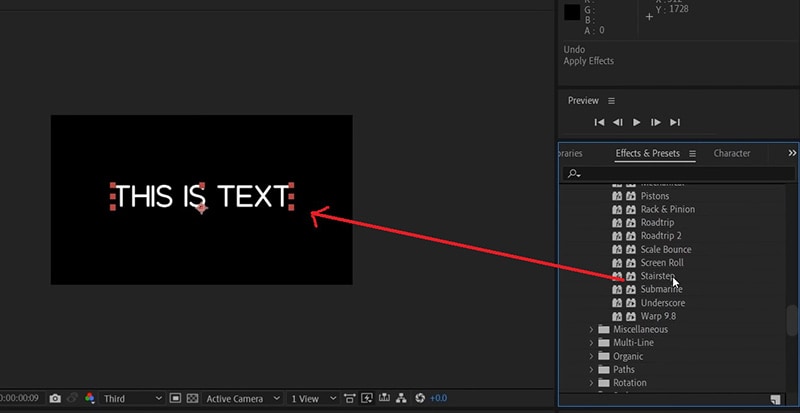
Step1Click on the text on your video that you want to animate. Go to Effects and Presets panel located on the right side.
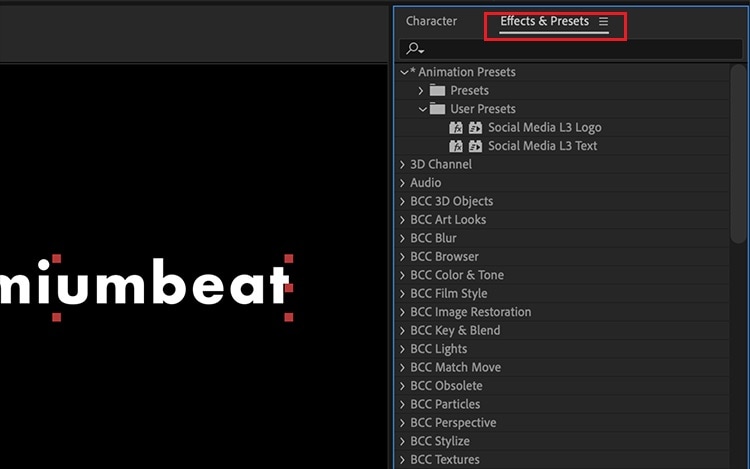
Step2Under Effects and Presets panel, Click on Text option. This will open all the different categories of animation presets available that you can apply to the text on your video.
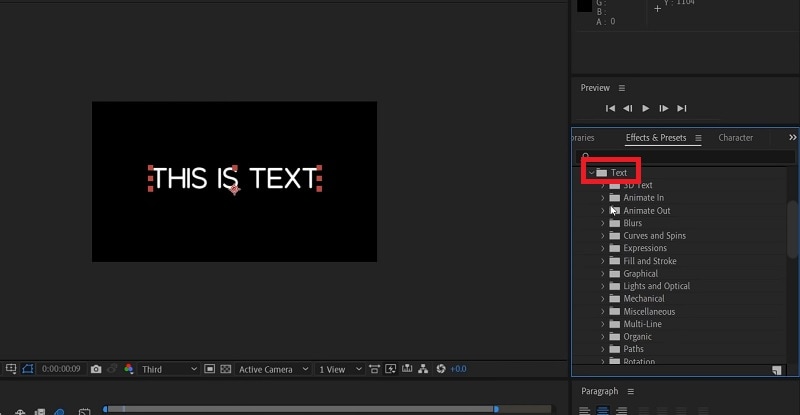
Step3Select any desired animation that you want to apply to the text and drag and drop the animation on the text in the composition window. Play the video and watch the applied animation on the text.
Part 4. Alternative Way to Add Text to Videos
If you are not comfortable with After Effects as a video editor, we recommend Wondershare as the best AE alternative. This is because the user interface of Filmora is super simple and there are loads of text effects and animations available to enhance your video content. Filmora is a professional video editor that is extremely popular among amateur and professional video editors. The application is available for both Windows and Mac users. Here are the steps for adding animated text to video using Filmora.
Step1Install Wondershare Filmora on your computer and launch the application. Click on New Project option on the welcome screen. Otherwise, you can go to File> New Project option.

Step2Go to File> Import Media> Import Media Files to import your video file. You can also drop the video file directly into Project Media folder.

Step3Drag and drop the video file from Project Media folder into the Timeline. If you have multiple video clips, you need to arrange them sequentially on the Timeline.
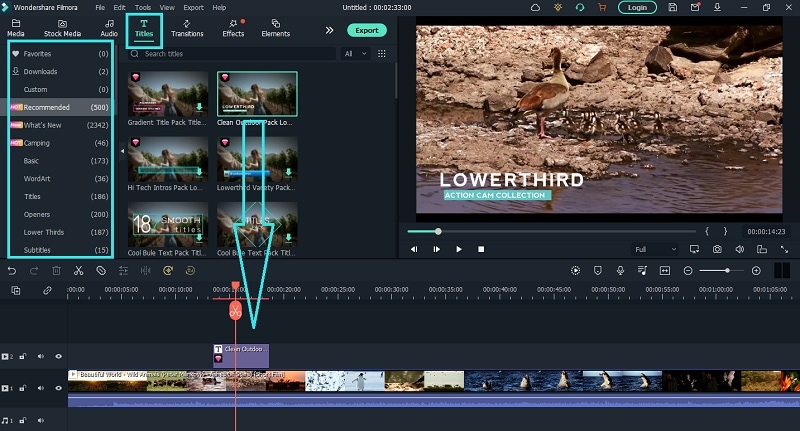
Step4To add text to your video, go to Titles located at the top bar. Check the left panel where you can see different categories of text effects. Select any desired text effect and drop into the Timeline. Make sure that the text layer is above the video layer on Timeline. You can shift the text layer on Timeline to place it where you want it to appear. You can also stretch the duration of the text effect as per your requirements.
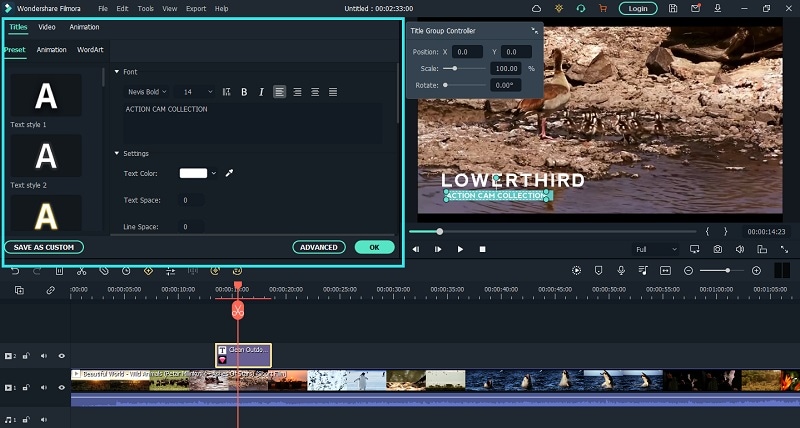
Step5You can edit the text effect by double clicking on the text layer on Timeline. Under Preset tab, you can change the text, font type and size, text color and much more. For further customization, you can click on Advanced button. At last, click on OK button to save the edits done.
The Bottom Line
If you want to add animated text to photo and video, After Effects is a great editor you can use. We have illustrated how you can add text and customize the text and finally, animate it as per your preference. However, if you are looking for AE alternative, we recommend Wondershare Filmora where you can add text to video instantly and choose from a wide range of text effects and animations.
Free Download For Win 7 or later(64-bit)
Free Download For macOS 10.14 or later
How to Split a Clip in After Effects
You’ve probably heard of splitting clips in Adobe After Effects, and maybe you’ve even tried it out. But if you’re like many people, you’re not quite sure how to use it. This post will explain everything you need to know about trimming videos in After Effects. We’ll give you step-by-step instructions for splitting clips in the Windows and Mac versions of After Effects—and even show you some tricks that make it easier for beginners.
- What is Filmora
- How to split video clips in Filmora manually
- How to split video clips in Filmora automatically using a scene detector
- How to trim videos online with Filmora Online Video Trimmer
What is After Effects?
Adobe After Effects is an application that can be used to create videos and animation. It is a powerful tool that allows you to create custom animations, including motion graphics, visual effects, and titles. Many professionals in the industry today use it to create visual effects and animations. This program can be used to create professional videos or advertisements for your business.
After Effects allows users to quickly create animations that have been created in other programs like Photoshop or Illustrator. It also allows users to edit videos to look better than they initially did. The program has many features, such as prebuilt templates, text tools, support for different file formats, and more. This program also has a lot of customization options and will allow you to create stunning visuals quickly and easily.
How to split video clips in After Effects manually
Import your video into the After Effects timeline
To split your video clip using after effects, the first step is to get the clip into the program. To do this, open the file menu in the top left corner of the After Effects workspace. Select “ Import” from the options on the drop-down menu displayed. This will open up the file explorer for you to select the clip you would like to import into your project. Once you find your video file, click “OK” to add it to the project files. Alternatively, you can simply drag your clip from the file explorer and drop it into the Adobe After Effects workspace.

Create a new composition
To go ahead with splitting your video clip, you will need to create a new composition. This can be done in two ways. The first is to drag the clip from the project browser to the new composition icon on the layer panel. This automatically creates a new composition. An alternate method is to right-click the video and select “New Comp” on the menu.


Split the clip
Once you have your clip loaded into your timeline, you can go ahead to split it. You just have to move the timeline indicator to the exact position where you would like to split the video. Press the keyboard combination [CTRL + SHIFT + D] to split the video on a windows computer. For macOS users, you will have to use the combination [CMD + SHIFT + D]. Once this is done, the video clip is split right where the timeline marker is placed.

Keyboard shortcuts for splitting videos in After Effects
| Shortcut | Windows | Mac |
|---|---|---|
| Split a layer | Control + Shift + D | CMD + Shift + D |
| New project | Control + Alt + N | Command + Option + N |
| New composition | Control + N | Command + N |
| Set beginning or end of work area to current time | B or N | B or N |
| Trim Composition to work area | Control + Shift + X | Command + Shift + X |
| Go to specific time | Alt + Shift + J | Option + Shift + J |
| Go to the beginning of a composition, layer, or footage item | Home or Ctrl + Alt + Left Arrow | Home or Command + Option + Left Arrow |
| Import one file or image sequence | Control + I | Command + I |
| Import multiple files or image sequences | Control + Alt + I | Command + Option + I |
How to split video clips in Filmora
What is Filmora?
Filmora video editor is a free and easy-to-use video editor for PC. The program boasts a wide range of features that allow users to easily create, edit and share their videos.
The interface is clean and straightforward, allowing you to focus on what you want to do without spending too much time figuring out how the program works. It also comes with an integrated video editor, which allows users to add text, images, and other elements.
Free Download For Win 7 or later(64-bit)
Free Download For macOS 10.14 or later
How to split video clips in Filmora manually
- Import your video clip into Filmora media using the “ Import” button or just drop your videos.
- Locate the video in your storage and then click “OK”.
- Once you have the video in, drag and drop it into the timeline to begin editing it.

- Drag the playhead to the position where you would like to split the video and then click on the Split button (it is in the shape of scissors).
- To split the video into multiple parts, repeat the above processes as many times as you want.
- Once you have the video split up into multiple parts, you can go ahead to delete any unwanted parts. To do this, all you have to do is to select the section and then click on the Delete
- Click on Export to save your video in any of the supported file formats. Filmora has support for 3GP, AVI, MP4, MKV, WMV, MOV, FLV, TS, GIF and so on.

How to split video clips in Filmora automatically using a scene detector
Wondershare Filmora has a nifty feature called scene detection that allows you to split a video automatically when a change in the scene is detected. The following are the steps you need to follow to use this feature.
- Import your video into the project media library using the same steps above.
- Once you have your video in the media library, right-click on it and select the Scene Detection This opens the scene detection interface.

- Click on the Detect button to allow Filmora to automatically detect the scenes and split the video up. You have the option of previewing each of the individual clips before they are added to the timeline.

- You can also delete any section you will not need by clicking the Delete icon next to the clip. Alternatively, select Add to Timeline to add any clips you want to use to the timeline.
- Save your split video by using the Export button.
How to trim videos online with Filmora Online Video Trimmer
Filmora offers an online video trimmer for those that would like to trim videos without installing any additional software on their computers. Filmora’s online video editor is free to use and doesn’t leave a watermark on your videos. Read on to learn how to use this free tool.
- Click on this link to go to the video trimmer website.
- Upload your video from your computer. Note that you can only upload files less than 100MB.
- You can trim your video using either the slider or by inputting your desired start and stop time.

- Export and download your trimmed video.
Conclusion
It’s quite simple once you get the hang of it. Now that you know how to split a clip in After Effects, it will be much easier for you to adjust your frame, include a rapid cut, or simply steady a section of your movie.
- What is Filmora
- How to split video clips in Filmora manually
- How to split video clips in Filmora automatically using a scene detector
- How to trim videos online with Filmora Online Video Trimmer
What is After Effects?
Adobe After Effects is an application that can be used to create videos and animation. It is a powerful tool that allows you to create custom animations, including motion graphics, visual effects, and titles. Many professionals in the industry today use it to create visual effects and animations. This program can be used to create professional videos or advertisements for your business.
After Effects allows users to quickly create animations that have been created in other programs like Photoshop or Illustrator. It also allows users to edit videos to look better than they initially did. The program has many features, such as prebuilt templates, text tools, support for different file formats, and more. This program also has a lot of customization options and will allow you to create stunning visuals quickly and easily.
How to split video clips in After Effects manually
Import your video into the After Effects timeline
To split your video clip using after effects, the first step is to get the clip into the program. To do this, open the file menu in the top left corner of the After Effects workspace. Select “ Import” from the options on the drop-down menu displayed. This will open up the file explorer for you to select the clip you would like to import into your project. Once you find your video file, click “OK” to add it to the project files. Alternatively, you can simply drag your clip from the file explorer and drop it into the Adobe After Effects workspace.
Create a new composition
To go ahead with splitting your video clip, you will need to create a new composition. This can be done in two ways. The first is to drag the clip from the project browser to the new composition icon on the layer panel. This automatically creates a new composition. An alternate method is to right-click the video and select “New Comp” on the menu.
Split the clip
Once you have your clip loaded into your timeline, you can go ahead to split it. You just have to move the timeline indicator to the exact position where you would like to split the video. Press the keyboard combination [CTRL + SHIFT + D] to split the video on a windows computer. For macOS users, you will have to use the combination [CMD + SHIFT + D]. Once this is done, the video clip is split right where the timeline marker is placed.
Keyboard shortcuts for splitting videos in After Effects
| Shortcut | Windows | Mac |
|---|---|---|
| Split a layer | Control + Shift + D | CMD + Shift + D |
| New project | Control + Alt + N | Command + Option + N |
| New composition | Control + N | Command + N |
| Set beginning or end of work area to current time | B or N | B or N |
| Trim Composition to work area | Control + Shift + X | Command + Shift + X |
| Go to specific time | Alt + Shift + J | Option + Shift + J |
| Go to the beginning of a composition, layer, or footage item | Home or Ctrl + Alt + Left Arrow | Home or Command + Option + Left Arrow |
| Import one file or image sequence | Control + I | Command + I |
| Import multiple files or image sequences | Control + Alt + I | Command + Option + I |
How to split video clips in Filmora
What is Filmora?
Filmora video editor is a free and easy-to-use video editor for PC. The program boasts a wide range of features that allow users to easily create, edit and share their videos.
The interface is clean and straightforward, allowing you to focus on what you want to do without spending too much time figuring out how the program works. It also comes with an integrated video editor, which allows users to add text, images, and other elements.
Free Download For Win 7 or later(64-bit)
Free Download For macOS 10.14 or later
How to split video clips in Filmora manually
- Import your video clip into Filmora media using the “ Import” button or just drop your videos.
- Locate the video in your storage and then click “OK”.
- Once you have the video in, drag and drop it into the timeline to begin editing it.
- Drag the playhead to the position where you would like to split the video and then click on the Split button (it is in the shape of scissors).
- To split the video into multiple parts, repeat the above processes as many times as you want.
- Once you have the video split up into multiple parts, you can go ahead to delete any unwanted parts. To do this, all you have to do is to select the section and then click on the Delete
- Click on Export to save your video in any of the supported file formats. Filmora has support for 3GP, AVI, MP4, MKV, WMV, MOV, FLV, TS, GIF and so on.
How to split video clips in Filmora automatically using a scene detector
Wondershare Filmora has a nifty feature called scene detection that allows you to split a video automatically when a change in the scene is detected. The following are the steps you need to follow to use this feature.
- Import your video into the project media library using the same steps above.
- Once you have your video in the media library, right-click on it and select the Scene Detection This opens the scene detection interface.
- Click on the Detect button to allow Filmora to automatically detect the scenes and split the video up. You have the option of previewing each of the individual clips before they are added to the timeline.
- You can also delete any section you will not need by clicking the Delete icon next to the clip. Alternatively, select Add to Timeline to add any clips you want to use to the timeline.
- Save your split video by using the Export button.
How to trim videos online with Filmora Online Video Trimmer
Filmora offers an online video trimmer for those that would like to trim videos without installing any additional software on their computers. Filmora’s online video editor is free to use and doesn’t leave a watermark on your videos. Read on to learn how to use this free tool.
- Click on this link to go to the video trimmer website.
- Upload your video from your computer. Note that you can only upload files less than 100MB.
- You can trim your video using either the slider or by inputting your desired start and stop time.
- Export and download your trimmed video.
Conclusion
It’s quite simple once you get the hang of it. Now that you know how to split a clip in After Effects, it will be much easier for you to adjust your frame, include a rapid cut, or simply steady a section of your movie.
How to Make Transparent Background in Canva
Some Facts That Few People Know on How to Make Transparent Background in Canva
An easy yet powerful editor
Numerous effects to choose from
Detailed tutorials provided by the official channel
Canva is a very well-known website that enables you to do your entire image editing work online. If you are regularly working with the editing of images then you may know about the Canva. If you still don’t know about it then we are going to share the information about it in this article with you. You can also learn about how Canva makes a background transparent in this article.
In this article
01 [Why Would You Need a Graphic to Have a Transparent Background](#Part 1)
02 [How to Remove the Background of Images in Canva](#Part 2)
03 [How to Change the Transparency of an Object in Canva](#Part 3)
04 [Get a Transparent Background for Free](#Part 4)
Part 2 How to Remove the Background of Images in Canva
Canva website allows users to turn their imagination into reality for free of cost. It offers you a free version that helps you to design mostly anything you want and there are many templates offered to make designs for free of cost. But, if you are looking for transparent background on Canva then you have to spend for it because this feature is not offered for free. If you already have paid versions then let’s see the steps for Canva background transparent.
● Step 1:
Firstly, sign in to your Canva account and select the image which you want to make a transparent background in Canva.

● Step 2:
After adding the image first of all you have to color the background layer of the image you have added. Click the “Effect” available at the top corner of the Canva interfaces toolbar. From here select the “Background remover”. Now, the background of the image will be removed and you are ready to make it transparent.

● Step 3:
Once the image background is removed click the “Download” icon available at the top of the interface.

● Step 4:
When you click the download button you will see a dialog box where you have to select the “PNG” format to download the image. Make sure to keep it PNG otherwise background will be not transparent.

● Step 5:
Now, under the options in the pop-up box you have to select check the “Transparent Background” option then click the “Download” button. Now the Canva background transparent is finished and the image will be saved on your system with a transparent background.

Part 3 How to Change the Transparency of an Object in Canva
While adding a text box on the images or if you want to merge several images in the one then you have to make at least one image transparent which will help you to get a better effect. Please follow the below steps to know about how you can do this.
● Step 1:
Firstly, select the text box or the image that you need to make transparent. After selecting the image the Canva interface will show you a pop-up box on the top side and then click the 4 dots on the right side of the popup. After clicking on it you will several other options. From this menu click the “Transparency”.

● Step 2:
On the screen you will see a slider. Use this slider to adjust the transparency of the text. This is the way to change the object transparency in the Canva. You can now download your image or continue working on it.

Part 4 Get a Transparent Background for Free
If you want your Canva design to make a transparent background without spending or paying anything to the Canva then you have several options to do that. Here we are going to tell you 2 options. The first option is that you can simply use the free 30 days trial version of the Canva to do that or you can also use the other website which is Kapwing. This website offers you options to remove the background of the image for free of cost without spending anything. Let’s see how you can do it with the help of Kapwing.
● Step 1:
Firstly, you have to download your Canva design in PNG format. After downloading the image you can browse the below URL of kapwing background remover.

● Step 2:
Now click the “Upload” button and select the PNG file from your computer. Now you have to hit the “Magic Wand” option and then hit the image background. Now, press the “Remove Pixels” option which is available at the right side menu.

● Step 3:
By following the previous step the image background will be removed but still if you see any part of the background on image then you may have to repeat the step again until the all parts of the background are not removed. Once you are satisfied with the final results then simply click the “Done” button.

● Step 4:
After clicking the “Done” button you will be redirected to the page where you can download your image on your computer with a transparent background. This is the process to for Canva no background for free of cost.

Editing the Videos While making Photos:
Sometimes while editing the photos for your projects if you need to make a video then you may also need to a video editor to make the best videos. You can use the photos you have created directly in the video you are going to make. In this case there is a product Wondershare Filmora Video Editor is available which really helps you a lot in making the best videos or edits the videos according to your project requirement. Wondershare Filmora is offered by the developers for the windows as well as the Mac operating system computers. This software offers you best options for making or editing the videos. Some of the features of the software are available below.
For Win 7 or later (64-bit)
For macOS 10.12 or later
Key Features:
● The program offers you cool video editing features such as split screen, motion tracking, keyframing, speed ramping, instant mode, auto beat sync etc.
● You can apply several effects such as green screen, AI Portrait, green screen and video effects.
● In the audio features it helps you to detect silence, audio synchronization and audio ducking.
● Wondershare Filmora offers you feature of correcting the colors of videos and match the color as well.

● Ending Thoughts →
● We hope now you know about how to make transparent background in Canva with the help of Canva website without doing much effort. Well, if you like to make a video with the help of images created using Canva then you can also try the Wondershare Filmora. It’s really perfect video editor software that enables you to create the best videos.
Canva is a very well-known website that enables you to do your entire image editing work online. If you are regularly working with the editing of images then you may know about the Canva. If you still don’t know about it then we are going to share the information about it in this article with you. You can also learn about how Canva makes a background transparent in this article.
In this article
01 [Why Would You Need a Graphic to Have a Transparent Background](#Part 1)
02 [How to Remove the Background of Images in Canva](#Part 2)
03 [How to Change the Transparency of an Object in Canva](#Part 3)
04 [Get a Transparent Background for Free](#Part 4)
Part 2 How to Remove the Background of Images in Canva
Canva website allows users to turn their imagination into reality for free of cost. It offers you a free version that helps you to design mostly anything you want and there are many templates offered to make designs for free of cost. But, if you are looking for transparent background on Canva then you have to spend for it because this feature is not offered for free. If you already have paid versions then let’s see the steps for Canva background transparent.
● Step 1:
Firstly, sign in to your Canva account and select the image which you want to make a transparent background in Canva.
● Step 2:
After adding the image first of all you have to color the background layer of the image you have added. Click the “Effect” available at the top corner of the Canva interfaces toolbar. From here select the “Background remover”. Now, the background of the image will be removed and you are ready to make it transparent.
● Step 3:
Once the image background is removed click the “Download” icon available at the top of the interface.
● Step 4:
When you click the download button you will see a dialog box where you have to select the “PNG” format to download the image. Make sure to keep it PNG otherwise background will be not transparent.
● Step 5:
Now, under the options in the pop-up box you have to select check the “Transparent Background” option then click the “Download” button. Now the Canva background transparent is finished and the image will be saved on your system with a transparent background.
Part 3 How to Change the Transparency of an Object in Canva
While adding a text box on the images or if you want to merge several images in the one then you have to make at least one image transparent which will help you to get a better effect. Please follow the below steps to know about how you can do this.
● Step 1:
Firstly, select the text box or the image that you need to make transparent. After selecting the image the Canva interface will show you a pop-up box on the top side and then click the 4 dots on the right side of the popup. After clicking on it you will several other options. From this menu click the “Transparency”.
● Step 2:
On the screen you will see a slider. Use this slider to adjust the transparency of the text. This is the way to change the object transparency in the Canva. You can now download your image or continue working on it.
Part 4 Get a Transparent Background for Free
If you want your Canva design to make a transparent background without spending or paying anything to the Canva then you have several options to do that. Here we are going to tell you 2 options. The first option is that you can simply use the free 30 days trial version of the Canva to do that or you can also use the other website which is Kapwing. This website offers you options to remove the background of the image for free of cost without spending anything. Let’s see how you can do it with the help of Kapwing.
● Step 1:
Firstly, you have to download your Canva design in PNG format. After downloading the image you can browse the below URL of kapwing background remover.
● Step 2:
Now click the “Upload” button and select the PNG file from your computer. Now you have to hit the “Magic Wand” option and then hit the image background. Now, press the “Remove Pixels” option which is available at the right side menu.
● Step 3:
By following the previous step the image background will be removed but still if you see any part of the background on image then you may have to repeat the step again until the all parts of the background are not removed. Once you are satisfied with the final results then simply click the “Done” button.
● Step 4:
After clicking the “Done” button you will be redirected to the page where you can download your image on your computer with a transparent background. This is the process to for Canva no background for free of cost.
Editing the Videos While making Photos:
Sometimes while editing the photos for your projects if you need to make a video then you may also need to a video editor to make the best videos. You can use the photos you have created directly in the video you are going to make. In this case there is a product Wondershare Filmora Video Editor is available which really helps you a lot in making the best videos or edits the videos according to your project requirement. Wondershare Filmora is offered by the developers for the windows as well as the Mac operating system computers. This software offers you best options for making or editing the videos. Some of the features of the software are available below.
For Win 7 or later (64-bit)
For macOS 10.12 or later
Key Features:
● The program offers you cool video editing features such as split screen, motion tracking, keyframing, speed ramping, instant mode, auto beat sync etc.
● You can apply several effects such as green screen, AI Portrait, green screen and video effects.
● In the audio features it helps you to detect silence, audio synchronization and audio ducking.
● Wondershare Filmora offers you feature of correcting the colors of videos and match the color as well.
● Ending Thoughts →
● We hope now you know about how to make transparent background in Canva with the help of Canva website without doing much effort. Well, if you like to make a video with the help of images created using Canva then you can also try the Wondershare Filmora. It’s really perfect video editor software that enables you to create the best videos.
In This Article, You Will Learn About the Top 5 Editors for Windows, Top 5 Editors for iPhone/Android, and Top 5 Editors for Animated GIF Editing
15 Must-Use Gifs Editors in 2024
An easy yet powerful editor
Numerous effects to choose from
Detailed tutorials provided by the official channel
Several websites and companies use the graphics interchange format that is the GIF. It can be seen to be used by a wide number of people on the internet and its format is supported by all platforms. The common goal of all the users can be satisfied.
Are you looking to create and edit gifs online or on your laptop but cannot find a suitable way out?
Finding the best and most user friendly GIF maker is not very hard, especially considering that free gif editor software is offered by so many providers. But if you’re only starting your journey with apps to make GIFs, it can be a difficult choice.
In this article
01 [How to Make GIF Interesting?](#Part 1)
02 [Top 5 Editors for Windows](#Part 2)
03 [Top 5 Editors for iPhone/Android](#Part 3)
04 [Top 5 Editors for Animated GIF Editing](#Part 4)
Part 1 How to Make GIF Interesting?
There are several ways by which a GIF can be made interesting. You can use colorful graphics and drop duplicate frames. Using fewer colors lets you make longer and more involved gifs.
Part 2 Top 5 Editors for Windows
Below are the top 5 editors which will help you to form GIFs for Windows: -
01Adobe Photoshop
Adobe Photoshop could be a useful device for making videos, image redaction, and GIF editing. This GIF code for Windows can allow you to import a GIF file so begin with the modification process.
Therefore, GIF editing is a breeze as you’ll alter the effects, modification the frame animation within the Timeline section, and do plenty a lot with this tool. You’ll simply utilize the free trial version to urge accustomed to the tool initial and then opt for the premium version to try to a lot more.
02EaseUS Video Editor
In the context of GIF makers, EaseUS Video Editor can also be said as one of the best. Free templates of texts, filters, elements, overlays, transitions, and music are available here which its users create GIF images with easily. You can also create lively and fully animated images, convert MP4 to GIFs and share it on YouTube, or other social media platforms.
The capabilities of this animated GIF maker for Windows are not restrained to this alone, as it can be used to edit all kinds of images, audio, and videos.
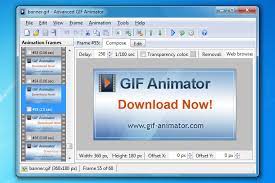
03GIF Animator
GIF animator editor is one of the first-rate GIF makers and is an awesome device for you if you desire to create GIF images, banners, buttons, and GIF videos. The device is very convenient to use and is a favorite of animators and designers.
The measurement of the photo can be modified and alongside that, it is feasible to control the frames, hastily cross texts, and enhance. Corrections to the movies can be brought and the built-in photograph editor can be used to rectify photographs and pictures, you can draw on them and you can convert movies to GIFs by the usage of the fragmented section of the video files.
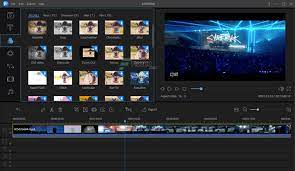
04**Wondershare Filmora Video Editor **
If you are searching for nice animated GIF makers for Windows computers, then Wondershare Filmora’s animated movies and GIF editor device may want to be a brilliant choice. That’s due to the fact with this GIF maker Windows device lets you add a video, convert it to the GIF structure and then edit it later with its super features.
The interactive UI helps customers manner greater than one hundred fifty file codecs easily. With this device, you can crop, pace up a video, alter the body size, and caption it. Additionally, you add texts, add animation consequences to the images, and alter the pictures and movies in a few steps.

Wondershare Filmora - Best Video Editor for Mac/Windows
5,481,435 people have downloaded it.
Build unique custom animations without breaking a sweat.
Focus on creating epic stories and leave the details to Filmora’s auto features.
Start a creative adventure with drag & drop effects and endless possibilities.
Filmora simplifies advanced features to save you time and effort.
Filmora cuts out repetition so you can move on to your next creative breakthrough.
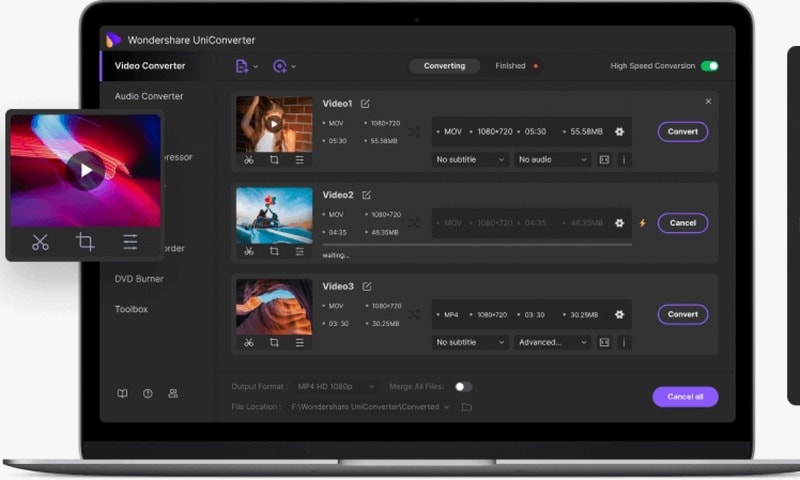
05Wondershare UniConverter
Wondershare UniConverter is one of the fine image, audio, and video editor and converter out there, and ranked the excellent GIF maker here. This GIF editor app is easy for customers and will furnish a pleasant platform for novices to operate their tasks. And when performed to create and edit GIF files, a person can export the GIF archives to both Android or iPhone barring having to use iTunes.
Part 3 Top 5 Editors for iPhone/Android
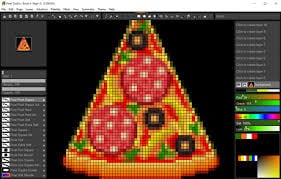
01PixelStudio
Pixel Studio is an animation app for pixel artwork fans. You can draw your little creations with pixel art. It additionally comes with a textual content tool, aid for matters like Samsung S-Pen, and it auto-saves so you don’t lose work. You can export your creations to GIF as nicely and that makes Pixel Studio one of the quality apps for customized GIFs. It’s normally an artwork app so meme lords may additionally want to put in a little greater effort than usual, however, the consequences are normally well worth it.
02Giphy Cam
Giphy Cam is one of the more recent gif editing apps. The digicam data is a brief phase of video. You can alter that video with lots of filters, different effects, stickers, text, and more. It additionally has a five-shot burst mode alongside its video mode. This is likely the excellent GIF/camera app hybrid. It doesn’t have any digital camera features; however, it does GIFs higher than the others by way of a large margin. It’s free with no in-app purchases.
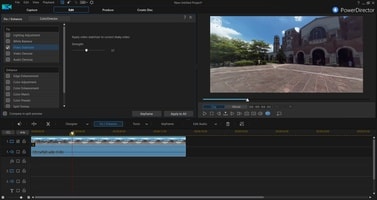
03PowerDirector
PowerDirector is one of many videos modifying apps with GIF support. This one simply takes place to be higher than most of the different ones. It’s a video editor app. Thus, it’ll have comparable features. However, two of the export codecs encompass GIF nonetheless pix and animated GIFs. This will work first-class for turning a video into a shorter GIF. The app is free to download and play with. You may additionally want to buy extra aspects by using in-app purchases.
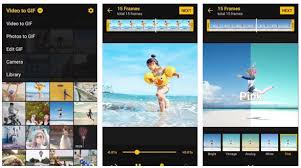
04ImgPlay – GIF Maker
ImgPlay is a popular GIF editing app that is available for Android and iOS. You have the option of using an existing video or shooting one using your phone’s camera. In GIFs, you can apply 30 effects, crop a portion of your choice, and modify the frame rate.
05Motion Stills
Motion Stills is a Google app that allows you to record short films and turn them into looping GIFs. You can use the app to take a short 3s clip with a single tap or utilize the Fast Forward feature to condense an existing video into a short one. To make yips GIFs even better, you may add motion text and emoticons. After that, save it as a GIF and send it to your friends.
Part 4 Top 5 Editors for Animated GIF Editing
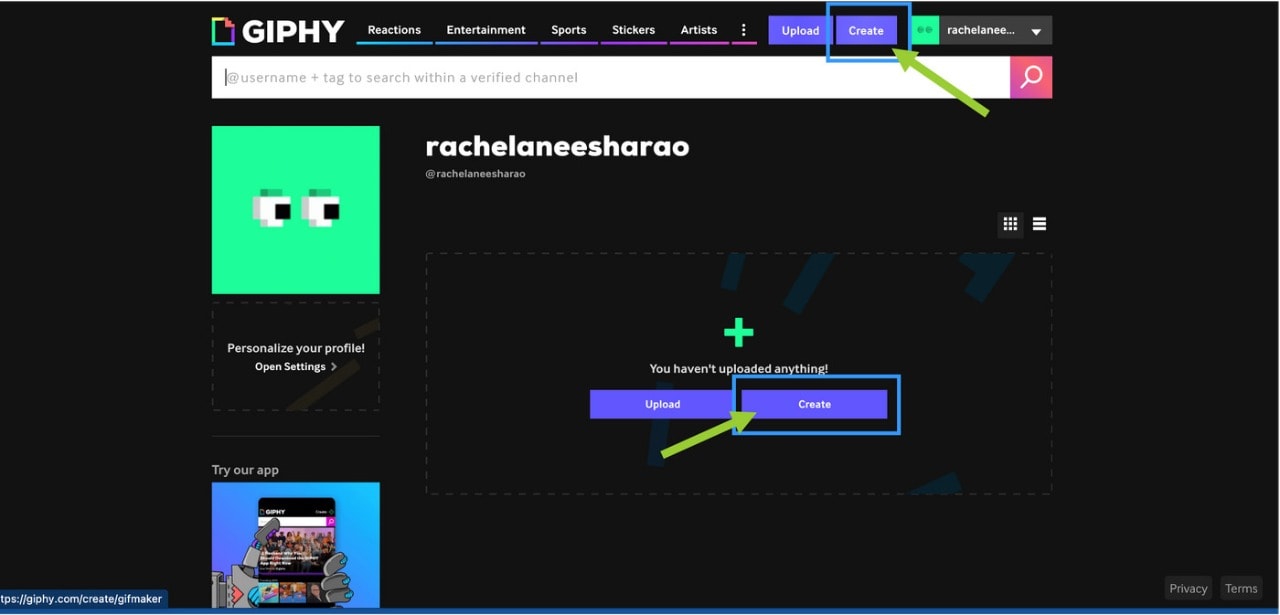
01Giphy
GIPHY is a designing tool that helps customers to create extraordinary GIFs, stickers, and backdrops. You can edit your plan with filters, captions, stickers, and different plan elements. The popular codecs for GIF uploads are JPG, PNG, GIF, MP4, or MOV, whilst the conventional file codecs to convert to stickers are JPG or PNG.
GIPHY permits you to paste URLs from specific sources such as Vimeo, YouTube, GIPHY, and others. The animated GIF maker software program makes it convenient for customers to edit and organize the uploaded archives in the favored order.
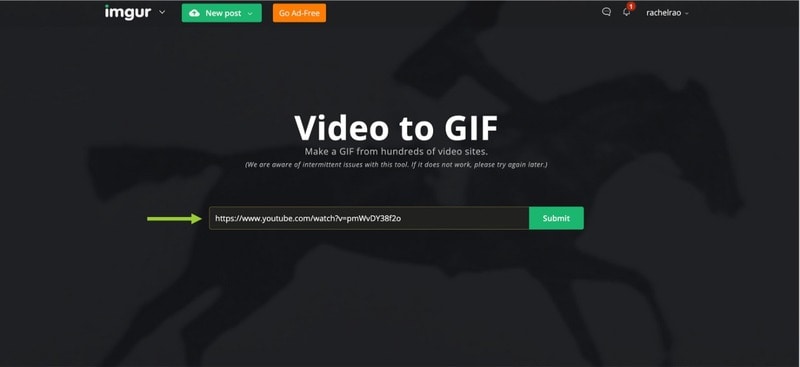
02Imgur
It’s a website that makes it simple to make GIFs. Simply paste the video URL into the web app and wait for it to process. After that, all you must do now is set the start time and duration of your GIF.
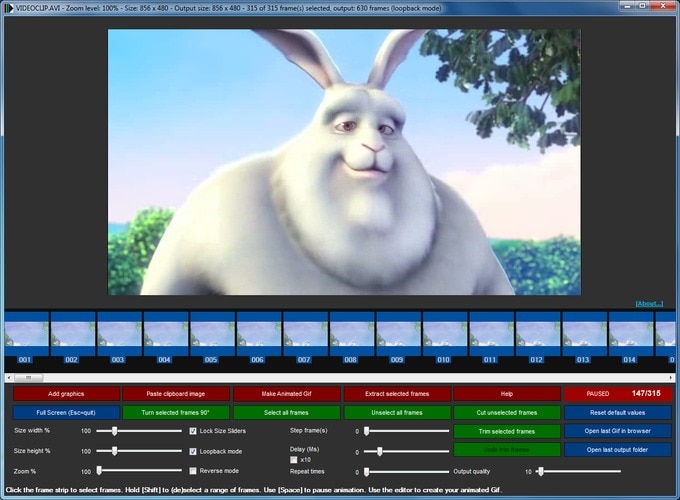
03KickMyGraphics
The utility comes with a humble person interface and it approves you to create animated GIFs from neighborhood images. In addition, you can additionally paste snapshots from your clipboard at once to the application. The utility additionally helps video files; however, you want to convert the video earlier than you can edit it. The utility affords a stay preview so you can see how your animation appears at any time. You can additionally see all handy frames and dispose of useless frames with ease.
As for editing, you can’t add your textual content or alter the brightness of your frames, however, you can trade their width, peak, and zoom level. You can additionally allow Loopback or Reverse mode and set delay, step frames, and a variety of repeats. You can additionally configure output first-class right from the application.
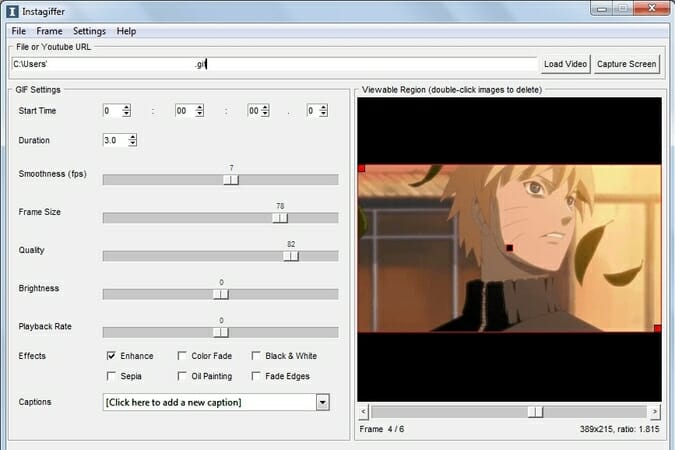
04Instagiffer
Instagiffer is some other easy software that lets you create animated GIFs on your PC. This utility affords a humble consumer interface; however, it makes up for it with an extensive variety of features. The software approves you to convert nearby movies to GIFs, however, you can additionally paste a YouTube URL and convert an online video to GIF with ease. According to the developer, the software additionally works with different video web hosting websites.
05GIMP
The software is free, so you can download and use it except for any restrictions. GIMP is best for picture designers and it comes with all preferences that an image editor needs. You can without problems edit your images, exchange their color, hue, saturation, or brightness, and add exceptional outcomes to them.
In addition, you can create special creations thanks to the built-in layer system. It’s worth citing that the software additionally helps programming algorithms so you can effortlessly edit your photos with the use of scripts.

● Key Takeaways from This Episode →
● If you are typically worried about how you can be able to come up with fascinating GIFs, you ought to hold in thought that you don’t have to create them from scratch.
● You can be capable to advance inspiring GIFs from current movies and photos eight after GIF editor software program free download.
● Hopefully, you are now capable to pick out a perfect GIF creator to use for your modifying tasks.
Several websites and companies use the graphics interchange format that is the GIF. It can be seen to be used by a wide number of people on the internet and its format is supported by all platforms. The common goal of all the users can be satisfied.
Are you looking to create and edit gifs online or on your laptop but cannot find a suitable way out?
Finding the best and most user friendly GIF maker is not very hard, especially considering that free gif editor software is offered by so many providers. But if you’re only starting your journey with apps to make GIFs, it can be a difficult choice.
In this article
01 [How to Make GIF Interesting?](#Part 1)
02 [Top 5 Editors for Windows](#Part 2)
03 [Top 5 Editors for iPhone/Android](#Part 3)
04 [Top 5 Editors for Animated GIF Editing](#Part 4)
Part 1 How to Make GIF Interesting?
There are several ways by which a GIF can be made interesting. You can use colorful graphics and drop duplicate frames. Using fewer colors lets you make longer and more involved gifs.
Part 2 Top 5 Editors for Windows
Below are the top 5 editors which will help you to form GIFs for Windows: -
01Adobe Photoshop
Adobe Photoshop could be a useful device for making videos, image redaction, and GIF editing. This GIF code for Windows can allow you to import a GIF file so begin with the modification process.
Therefore, GIF editing is a breeze as you’ll alter the effects, modification the frame animation within the Timeline section, and do plenty a lot with this tool. You’ll simply utilize the free trial version to urge accustomed to the tool initial and then opt for the premium version to try to a lot more.
02EaseUS Video Editor
In the context of GIF makers, EaseUS Video Editor can also be said as one of the best. Free templates of texts, filters, elements, overlays, transitions, and music are available here which its users create GIF images with easily. You can also create lively and fully animated images, convert MP4 to GIFs and share it on YouTube, or other social media platforms.
The capabilities of this animated GIF maker for Windows are not restrained to this alone, as it can be used to edit all kinds of images, audio, and videos.
03GIF Animator
GIF animator editor is one of the first-rate GIF makers and is an awesome device for you if you desire to create GIF images, banners, buttons, and GIF videos. The device is very convenient to use and is a favorite of animators and designers.
The measurement of the photo can be modified and alongside that, it is feasible to control the frames, hastily cross texts, and enhance. Corrections to the movies can be brought and the built-in photograph editor can be used to rectify photographs and pictures, you can draw on them and you can convert movies to GIFs by the usage of the fragmented section of the video files.
04**Wondershare Filmora Video Editor **
If you are searching for nice animated GIF makers for Windows computers, then Wondershare Filmora’s animated movies and GIF editor device may want to be a brilliant choice. That’s due to the fact with this GIF maker Windows device lets you add a video, convert it to the GIF structure and then edit it later with its super features.
The interactive UI helps customers manner greater than one hundred fifty file codecs easily. With this device, you can crop, pace up a video, alter the body size, and caption it. Additionally, you add texts, add animation consequences to the images, and alter the pictures and movies in a few steps.
Wondershare Filmora - Best Video Editor for Mac/Windows
5,481,435 people have downloaded it.
Build unique custom animations without breaking a sweat.
Focus on creating epic stories and leave the details to Filmora’s auto features.
Start a creative adventure with drag & drop effects and endless possibilities.
Filmora simplifies advanced features to save you time and effort.
Filmora cuts out repetition so you can move on to your next creative breakthrough.
05Wondershare UniConverter
Wondershare UniConverter is one of the fine image, audio, and video editor and converter out there, and ranked the excellent GIF maker here. This GIF editor app is easy for customers and will furnish a pleasant platform for novices to operate their tasks. And when performed to create and edit GIF files, a person can export the GIF archives to both Android or iPhone barring having to use iTunes.
Part 3 Top 5 Editors for iPhone/Android
01PixelStudio
Pixel Studio is an animation app for pixel artwork fans. You can draw your little creations with pixel art. It additionally comes with a textual content tool, aid for matters like Samsung S-Pen, and it auto-saves so you don’t lose work. You can export your creations to GIF as nicely and that makes Pixel Studio one of the quality apps for customized GIFs. It’s normally an artwork app so meme lords may additionally want to put in a little greater effort than usual, however, the consequences are normally well worth it.
02Giphy Cam
Giphy Cam is one of the more recent gif editing apps. The digicam data is a brief phase of video. You can alter that video with lots of filters, different effects, stickers, text, and more. It additionally has a five-shot burst mode alongside its video mode. This is likely the excellent GIF/camera app hybrid. It doesn’t have any digital camera features; however, it does GIFs higher than the others by way of a large margin. It’s free with no in-app purchases.
03PowerDirector
PowerDirector is one of many videos modifying apps with GIF support. This one simply takes place to be higher than most of the different ones. It’s a video editor app. Thus, it’ll have comparable features. However, two of the export codecs encompass GIF nonetheless pix and animated GIFs. This will work first-class for turning a video into a shorter GIF. The app is free to download and play with. You may additionally want to buy extra aspects by using in-app purchases.
04ImgPlay – GIF Maker
ImgPlay is a popular GIF editing app that is available for Android and iOS. You have the option of using an existing video or shooting one using your phone’s camera. In GIFs, you can apply 30 effects, crop a portion of your choice, and modify the frame rate.
05Motion Stills
Motion Stills is a Google app that allows you to record short films and turn them into looping GIFs. You can use the app to take a short 3s clip with a single tap or utilize the Fast Forward feature to condense an existing video into a short one. To make yips GIFs even better, you may add motion text and emoticons. After that, save it as a GIF and send it to your friends.
Part 4 Top 5 Editors for Animated GIF Editing
01Giphy
GIPHY is a designing tool that helps customers to create extraordinary GIFs, stickers, and backdrops. You can edit your plan with filters, captions, stickers, and different plan elements. The popular codecs for GIF uploads are JPG, PNG, GIF, MP4, or MOV, whilst the conventional file codecs to convert to stickers are JPG or PNG.
GIPHY permits you to paste URLs from specific sources such as Vimeo, YouTube, GIPHY, and others. The animated GIF maker software program makes it convenient for customers to edit and organize the uploaded archives in the favored order.
02Imgur
It’s a website that makes it simple to make GIFs. Simply paste the video URL into the web app and wait for it to process. After that, all you must do now is set the start time and duration of your GIF.
03KickMyGraphics
The utility comes with a humble person interface and it approves you to create animated GIFs from neighborhood images. In addition, you can additionally paste snapshots from your clipboard at once to the application. The utility additionally helps video files; however, you want to convert the video earlier than you can edit it. The utility affords a stay preview so you can see how your animation appears at any time. You can additionally see all handy frames and dispose of useless frames with ease.
As for editing, you can’t add your textual content or alter the brightness of your frames, however, you can trade their width, peak, and zoom level. You can additionally allow Loopback or Reverse mode and set delay, step frames, and a variety of repeats. You can additionally configure output first-class right from the application.
04Instagiffer
Instagiffer is some other easy software that lets you create animated GIFs on your PC. This utility affords a humble consumer interface; however, it makes up for it with an extensive variety of features. The software approves you to convert nearby movies to GIFs, however, you can additionally paste a YouTube URL and convert an online video to GIF with ease. According to the developer, the software additionally works with different video web hosting websites.
05GIMP
The software is free, so you can download and use it except for any restrictions. GIMP is best for picture designers and it comes with all preferences that an image editor needs. You can without problems edit your images, exchange their color, hue, saturation, or brightness, and add exceptional outcomes to them.
In addition, you can create special creations thanks to the built-in layer system. It’s worth citing that the software additionally helps programming algorithms so you can effortlessly edit your photos with the use of scripts.
● Key Takeaways from This Episode →
● If you are typically worried about how you can be able to come up with fascinating GIFs, you ought to hold in thought that you don’t have to create them from scratch.
● You can be capable to advance inspiring GIFs from current movies and photos eight after GIF editor software program free download.
● Hopefully, you are now capable to pick out a perfect GIF creator to use for your modifying tasks.
Also read:
- 2024 Approved Some Facts That Few People Know on How to Make Transparent Background in Canva
- Best 15 Subtitle Apps 2023 Windows, Mac, iPhone, Android & Online
- In 2024, How to Make a Countdown Video
- Updated The Power of Music in Videos for 2024
- New Perfect Moody LUTs for VN Editor An Overview for 2024
- 2024 Approved Best Ai Generated Memes
- New Do You Want to Show Your Mood in Your Digital Media Content but Dont Know How To? There Are Many Moody LUTs Available that Highlight Your Mood in Your Content
- Updated 2024 Approved How to Make Eye Zoom Transition Effect with Filmora
- Updated How to Use Kahoot! On Zoom
- Updated In 2024, Achieving GoPro Slow Motion with Quality An In-Depth Overview
- Slowing Down GIF With The Best Available Methods for 2024
- Updated How to Create The Best Video Collages ?
- Updated How to Create One Click Video Reverse Effect in Filmora
- Updated All You Need to Know About Transparent Logos and How You Can Make Them. Top Transparent Logos You Can Take Inspiration From
- In 2024, How to Vlog? A Beginners Guide to Start Vlogging
- In 2024, Ways To Find Unlocking Codes For Samsung Galaxy F14 5G Phones
- CatchEmAll Celebrate National Pokémon Day with Virtual Location On Tecno Pova 5 | Dr.fone
- Wondering the Best Alternative to Hola On Motorola Razr 40? Here Is the Answer | Dr.fone
- 3 Ways for Android Pokemon Go Spoofing On OnePlus Ace 2V | Dr.fone
- New 2024 Approved Breaking Language Barriers Elevate Your Content with the Best Free Video Translator Apps
- In 2024, What Legendaries Are In Pokemon Platinum On Poco X6? | Dr.fone
- 4 Feasible Ways to Fake Location on Facebook For your Motorola Moto G14 | Dr.fone
- 3 Solutions to Find Your Samsung Galaxy XCover 7 Current Location of a Mobile Number | Dr.fone
- Hacks to do pokemon go trainer battles For OnePlus Open | Dr.fone
- In 2024, Complete Guide For iPhone 13 Pro Max Lock Screen | Dr.fone
- In 2024, Can I use iTools gpx file to catch the rare Pokemon On Vivo X100 Pro | Dr.fone
- Updated In 2024, Tips for GIF to Animated PNG
- In 2024, Does Airplane Mode Turn off GPS Location On Xiaomi Redmi Note 12T Pro? | Dr.fone
- Three methods to recover lost data on Infinix
- Title: How To Add Text In After Effects
- Author: Chloe
- Created at : 2024-05-20 03:37:19
- Updated at : 2024-05-21 03:37:19
- Link: https://ai-editing-video.techidaily.com/how-to-add-text-in-after-effects/
- License: This work is licensed under CC BY-NC-SA 4.0.
