
:max_bytes(150000):strip_icc():format(webp)/Childlearningonline_WillieBThomas_Getty-3e51600a64d742a0b5db4fadacead069.jpg)
How to Change Video Resolution in Filmora for 2024
How to Change Video Resolution in Filmora
With the vast number of devices available in the market today, storing data and video files has become difficult. Frequently in cases where the devices share different forms of resolution, it makes sharing videos a hassle.
In those situations, changing the resolution of your video can be a great idea. It will also allow you to save storage. In this article, you’ll adjust the resolution in just a few clicks by Wondershare Filmora. But before we learn how to change a video’s resolution, let’s look into what a video resolution is!
Part 1. What Is a Video Resolution?
A video resolution, in short, is the quality of the video visible. A video is rendered at a specific rate whenever you watch a movie or go to a cinema. A screen is made up of tiny pixels and arranged in an order that determines the resolution of a screen.
Video resolution is rendered in a vertical and horizontal orientation. Therefore, whenever you play a video on YouTube, the resolution scale is available for you to choose from, i.e., 480p, 720p, 1080p, etc.
In most cases, a resolution is dictated by the full abbreviation. So, for example, a 720p video is 1280 x 720, and a 1080p video is a 1920 x 1080 resolution.

![]()
Note: The number written before is the number of horizontal pixels in a video. And the number written after is the vertical pixels in a video.
Before we adjust the resolution of a video, let’s look at a comparison between different types of video resolution.
Part 2. 7 Different Types of Video Resolution
It has been established that a video resolution is not a constant number and changes according to the screen. Scroll below to look at the different forms of video resolutions available!
360p
The full resolution is 480 x 360. This resolution is a minimal video resolution. On a big screen, 360p will look blurry. That is why a 360p resolution is the best for smaller devices such as Mobile phones.
480p
The full resolution is 853 x 480. Although an upgrade from the latter, this resolution is available on many devices. It’s mainly used in devices such as smaller TVs, laptops, and Desktop computers. It is also available for Burn-in DVDs.
720p
The full version of the resolution is 1280 x 720. This resolution is called HD, short for High Definition. 720p quality looks good almost on every device and is also reasonably available.
Most modern devices, such as Mobile phones, Touch Tablets, Laptops, and PCs, are calibrated in 720p Resolution.

1080p
The resolution in its complete form is 1920 x 1080. This resolution is also known as FHD, short for Full High Definition. 1080p resolution is the quality in which many high-quality devices are constructed. As a result, the screens of these devices have a clear and clean display.

![]()
Note: It is usually recommended to share videos on social media in 1080p resolution.
1440p
This resolution is also called QHD (Quad HD). The length and width of this resolution are 2560 x 1440. As the name suggests, its quality is quad (four times) than that of a standard 720p resolution.
The screens of devices constructed in this resolution usually have a high-end purpose. For example, this resolution is commonly used in Gaming monitors and High-end smartphones.

2160p
The screens constructed in this resolution are considered among the best available in the market. 2160p (3840 x 2160) is also known as UHD, which is short for Ultra High Definition. It is also known as 4K because it offers four times the power of 1080p or FHD (Full High Definition.)
These screens are usually available for high-end competitive gaming monitors or big screen LCD and LED Television. In addition, some of the flagship smartphones are also built with 4K resolution.

4320p
This resolution is also known as 8K. The length and width of the pixel arrangement are 7680 x 4320. The pixels are arranged in these screens to offer sixteen times the average power of a 1080p (FHD) monitor.
This resolution is only available on several devices, such as commercial TVs and monitors. However, this is the most significant resolution available in the modern market. Therefore, even if your monitor cannot support a larger resolution, you can test whether your PC can render an 8K resolution.

Part 3. Why Do You Need to Change a Video Resolution?
There are numerous cases where you will want to change the resolution of a video. Some of them are described below.
Decreasing a Video Resolution
Sometimes, you are trying to upload a video from a smartphone. Or, in general, you want to transfer videos to a smartphone. The resolution of your video can play a significant role in the transfer process.
If your video file has a higher resolution, it will take up more space on your phone. As well as, if your PC has a higher resolution, say a 4K resolution, and your phone is of 1080p resolution. You might not be able to play it.
To counter situations like these, you need to change the resolution of your video.
Increasing a Video Resolution
Similarly, there are instances where you would need to change the resolution of your video to increase it.
A good example would be to burn a low-quality DVD. To maintain good quality on a DVD, you need to increase its resolution before transfer.
Changing the exact resolution of a video is only possible in some cases because you cannot change the precise pixel of the video it is recorded in. But software like Wondershare Filmora allows you to change the resolution of your video easily.
Now let’s move to understanding the steps involved in changing the resolution of a video!
Part 4. Steps to Change Video Resolution in Filmora
To change the resolution of a video, you would need a basic video editor. This video editor needs to support the features that enable you to adjust a video resolution. In this case, Filmora is the best option.
Wondershare Filmora
Free Download For Win 7 or later(64-bit)
Free Download For macOS 10.14 or later
It has an attractive system UI that allows inexperienced users to learn how to use it quickly. It also has a diverse stock media collection. Not only that, but It gives you access to dependable features for changing the speed of a video.

Scroll below to learn how to download the latest version!
Step1 Download Filmora
Begin by installing the latest version of Wondershare Filmora if you don’t do already. Then, run the installer of this app on your PC or Mac.
Now that you have downloaded the app let’s change the resolution!
Step2 Import Video Clips
Your next step after launching Filmora is to import video clips you want to resize. To accomplish this, follow the steps outlined below:
- Locate and select the Import icon on the top left side of the Filmora Home Interface.
- It will take you to your computer’s library.
- Select the videos to be edited and then click OK.

If you need clarification about the resolution of the video that you imported, you can also check them before adding it to the timeline.
- Right-Click on the video in the import window.
- In the pop-up column, go to Properties.
It opens a window that will tell you the basic info about your video clips. Here you can also preview the resolution.

Now that we have our clips imported, it is time to add them to the timeline below!
Step3 Add The Video Clips to Timeline
To add Video clips to the timeline, go through the steps as guided:
- Hold Right click to drag and select the video clips in the import window.
- Release Right-click when in the timeline.

Doing so would have added the video clips to the timeline. Instead, it has created a workplace to edit our videos.
You can trim, add effects, and join multiple clips in this process. After finishing the editing process, it’s time to select an export format.
Step4 Export Your Video
You can export into video formats in two ways with Filmora. It can be either selecting a format for your video. Or you can also choose to export your video to a particular device.
Video Format Resolution
Wondershare Filmora is a fantastic software that allows you to access a variety of formats for your videos. These export formats include MP4, WMV, F4V, MOV, TS, 3GP, and more. To select a format for your video, follow the steps as guided:
- Click on Export.
- In the left column, click on the video format you need.
- Click Export on the bottom right corner of the window.

Exporting a video in a specific format not only allows you to change the format of a video but also allows you to change the resolution simultaneously.
Default Resolution Settings
Some formats have a built-in resolution. Whenever you choose a specific format for a video, the resolution of the video will be shifted to the resolution of that format, i.e., TS has a default 1080p resolution.
![]()
Note: Another thing to remember is that most video formats have defaulted to 1080p. But there are some formats whose resolutions vary according to their style. A good example is a 3GP format, which is set to 352 x 488 by default.
Customize the Resolution
But if you don’t find the resolution stable for your device, you can also change this default resolution in simple steps. In the export window, follow the steps mentioned ahead:
- In the preset tab, go to > settings.
- In the video tab, click on the resolution.
- In the drop-down menu, select the resolution that you desire.
You can also select a custom resolution by these steps:
- In the drop-down menu, click on Custom.
- Here, you can change the height and width according to your wish.

Exporting a Video to a Specific Device
Selecting a format for your video can help if you want to change the resolution. But in cases where you want to export a video to a particular mobile device. Such as an iPhone or an iPad, you can select the device export option.
In the device export option, you can select a custom device. Filmora allows you to choose from a wide variety of machines available when you choose a custom device; the resolution will be set to optimal for that particular device.
Select a Folder to Export Your Video
After you are done calibrating the resolution settings, you can move on to select the export location for your video. You can do so by the steps mentioned:
- In the main Export window, navigate to the Save
- Click on the Folder
- It will direct you to your PC library.
- Select the directory you want to export your video to.
- Click Select Folder.

Final Step
The last step to export your video is clicking on the Export icon in the bottom right corner of the window. It opens up a render window. Wait for a few minutes until the video finishes exporting.
When the export is finished, a window will pop up as a reminder. You can also find the target folder by clicking on Find Target.

Congratulations! You have successfully learned how to change the resolution of a video using Wondershare Filmora.
Conclusion
Rapid video technology advancement is leading to the development of higher-resolution devices. The greatest resolution in the modern day is the 8K; soon, everyone will be using 8K devices. So, it is beneficial to learn how to change a video’s resolution.
By following the steps mentioned in this article, you can now change the resolution of your video using Filmora.
Before we adjust the resolution of a video, let’s look at a comparison between different types of video resolution.
Part 2. 7 Different Types of Video Resolution
It has been established that a video resolution is not a constant number and changes according to the screen. Scroll below to look at the different forms of video resolutions available!
360p
The full resolution is 480 x 360. This resolution is a minimal video resolution. On a big screen, 360p will look blurry. That is why a 360p resolution is the best for smaller devices such as Mobile phones.
480p
The full resolution is 853 x 480. Although an upgrade from the latter, this resolution is available on many devices. It’s mainly used in devices such as smaller TVs, laptops, and Desktop computers. It is also available for Burn-in DVDs.
720p
The full version of the resolution is 1280 x 720. This resolution is called HD, short for High Definition. 720p quality looks good almost on every device and is also reasonably available.
Most modern devices, such as Mobile phones, Touch Tablets, Laptops, and PCs, are calibrated in 720p Resolution.
1080p
The resolution in its complete form is 1920 x 1080. This resolution is also known as FHD, short for Full High Definition. 1080p resolution is the quality in which many high-quality devices are constructed. As a result, the screens of these devices have a clear and clean display.
![]()
Note: It is usually recommended to share videos on social media in 1080p resolution.
1440p
This resolution is also called QHD (Quad HD). The length and width of this resolution are 2560 x 1440. As the name suggests, its quality is quad (four times) than that of a standard 720p resolution.
The screens of devices constructed in this resolution usually have a high-end purpose. For example, this resolution is commonly used in Gaming monitors and High-end smartphones.
2160p
The screens constructed in this resolution are considered among the best available in the market. 2160p (3840 x 2160) is also known as UHD, which is short for Ultra High Definition. It is also known as 4K because it offers four times the power of 1080p or FHD (Full High Definition.)
These screens are usually available for high-end competitive gaming monitors or big screen LCD and LED Television. In addition, some of the flagship smartphones are also built with 4K resolution.
4320p
This resolution is also known as 8K. The length and width of the pixel arrangement are 7680 x 4320. The pixels are arranged in these screens to offer sixteen times the average power of a 1080p (FHD) monitor.
This resolution is only available on several devices, such as commercial TVs and monitors. However, this is the most significant resolution available in the modern market. Therefore, even if your monitor cannot support a larger resolution, you can test whether your PC can render an 8K resolution.
Part 3. Why Do You Need to Change a Video Resolution?
There are numerous cases where you will want to change the resolution of a video. Some of them are described below.
Decreasing a Video Resolution
Sometimes, you are trying to upload a video from a smartphone. Or, in general, you want to transfer videos to a smartphone. The resolution of your video can play a significant role in the transfer process.
If your video file has a higher resolution, it will take up more space on your phone. As well as, if your PC has a higher resolution, say a 4K resolution, and your phone is of 1080p resolution. You might not be able to play it.
To counter situations like these, you need to change the resolution of your video.
Increasing a Video Resolution
Similarly, there are instances where you would need to change the resolution of your video to increase it.
A good example would be to burn a low-quality DVD. To maintain good quality on a DVD, you need to increase its resolution before transfer.
Changing the exact resolution of a video is only possible in some cases because you cannot change the precise pixel of the video it is recorded in. But software like Wondershare Filmora allows you to change the resolution of your video easily.
Now let’s move to understanding the steps involved in changing the resolution of a video!
Part 4. Steps to Change Video Resolution in Filmora
To change the resolution of a video, you would need a basic video editor. This video editor needs to support the features that enable you to adjust a video resolution. In this case, Filmora is the best option.
Wondershare Filmora
Free Download For Win 7 or later(64-bit)
Free Download For macOS 10.14 or later
It has an attractive system UI that allows inexperienced users to learn how to use it quickly. It also has a diverse stock media collection. Not only that, but It gives you access to dependable features for changing the speed of a video.
Scroll below to learn how to download the latest version!
Step1 Download Filmora
Begin by installing the latest version of Wondershare Filmora if you don’t do already. Then, run the installer of this app on your PC or Mac.
Now that you have downloaded the app let’s change the resolution!
Step2 Import Video Clips
Your next step after launching Filmora is to import video clips you want to resize. To accomplish this, follow the steps outlined below:
- Locate and select the Import icon on the top left side of the Filmora Home Interface.
- It will take you to your computer’s library.
- Select the videos to be edited and then click OK.
If you need clarification about the resolution of the video that you imported, you can also check them before adding it to the timeline.
- Right-Click on the video in the import window.
- In the pop-up column, go to Properties.
It opens a window that will tell you the basic info about your video clips. Here you can also preview the resolution.
Now that we have our clips imported, it is time to add them to the timeline below!
Step3 Add The Video Clips to Timeline
To add Video clips to the timeline, go through the steps as guided:
- Hold Right click to drag and select the video clips in the import window.
- Release Right-click when in the timeline.
Doing so would have added the video clips to the timeline. Instead, it has created a workplace to edit our videos.
You can trim, add effects, and join multiple clips in this process. After finishing the editing process, it’s time to select an export format.
Step4 Export Your Video
You can export into video formats in two ways with Filmora. It can be either selecting a format for your video. Or you can also choose to export your video to a particular device.
Video Format Resolution
Wondershare Filmora is a fantastic software that allows you to access a variety of formats for your videos. These export formats include MP4, WMV, F4V, MOV, TS, 3GP, and more. To select a format for your video, follow the steps as guided:
- Click on Export.
- In the left column, click on the video format you need.
- Click Export on the bottom right corner of the window.
Exporting a video in a specific format not only allows you to change the format of a video but also allows you to change the resolution simultaneously.
Default Resolution Settings
Some formats have a built-in resolution. Whenever you choose a specific format for a video, the resolution of the video will be shifted to the resolution of that format, i.e., TS has a default 1080p resolution.
![]()
Note: Another thing to remember is that most video formats have defaulted to 1080p. But there are some formats whose resolutions vary according to their style. A good example is a 3GP format, which is set to 352 x 488 by default.
Customize the Resolution
But if you don’t find the resolution stable for your device, you can also change this default resolution in simple steps. In the export window, follow the steps mentioned ahead:
- In the preset tab, go to > settings.
- In the video tab, click on the resolution.
- In the drop-down menu, select the resolution that you desire.
You can also select a custom resolution by these steps:
- In the drop-down menu, click on Custom.
- Here, you can change the height and width according to your wish.
Exporting a Video to a Specific Device
Selecting a format for your video can help if you want to change the resolution. But in cases where you want to export a video to a particular mobile device. Such as an iPhone or an iPad, you can select the device export option.
In the device export option, you can select a custom device. Filmora allows you to choose from a wide variety of machines available when you choose a custom device; the resolution will be set to optimal for that particular device.
Select a Folder to Export Your Video
After you are done calibrating the resolution settings, you can move on to select the export location for your video. You can do so by the steps mentioned:
- In the main Export window, navigate to the Save
- Click on the Folder
- It will direct you to your PC library.
- Select the directory you want to export your video to.
- Click Select Folder.
Final Step
The last step to export your video is clicking on the Export icon in the bottom right corner of the window. It opens up a render window. Wait for a few minutes until the video finishes exporting.
When the export is finished, a window will pop up as a reminder. You can also find the target folder by clicking on Find Target.
Congratulations! You have successfully learned how to change the resolution of a video using Wondershare Filmora.
Conclusion
Rapid video technology advancement is leading to the development of higher-resolution devices. The greatest resolution in the modern day is the 8K; soon, everyone will be using 8K devices. So, it is beneficial to learn how to change a video’s resolution.
By following the steps mentioned in this article, you can now change the resolution of your video using Filmora.
15 Camera Shake Preset for Premiere Pro
Create High-Quality Video - Wondershare Filmora
An easy and powerful video editor
Numerous video and audio effects to choose from
Detailed tutorials are provided by the official channel
Do you know how professional video footage is made? Most of the time, it’s through small movements on a camera, called Camera Shake. It is used to create realistic and dramatic shots in movies. In contrast, you can accidentally capture some shake on film; most of the time, it has to be created by a team of people. Camera operators will perform different movements with the camera in order to create this effect that we see in many movies, TV shows, and documentaries all around the world.
Putting a shake on footage can add visual interest to your scene. It adds kinetic energy to the shot and can be useful for transitions as well. Are you looking for realistic camera shake effects for your footage? Do you think these effects will help your video stand out from the rest on video sharing sites such as Youtube, Vimeo, or other sites? Look no more. In this article, we will look at 15 camera shake presets for unlimited possibilities! Mix and match to get your favorite camera shake effect. Save your time and costs!
15 Camera Shake Preset for Adobe Premiere Pro
1. Camera Shake Presets By Jorkiy
This preset collection contains 15 camera shake presets for Premiere Pro. The presets produce a live camera effect. Three groups of presets are available. A smooth preset, a quick preset, and a jerky preset. Choose one and apply it to your footage. Surprise your audience with dynamic videos courtesy of this pack.

2. Shake The Camera Or Text By 27
Create a dynamic and realistic camera shake with this awesome preset collection. The length of the presets is 1 minute, and the version for long videos is also included - 10 minutes. The project is perfect for shaking other objects, such as text or particles. Easy to use. Create dynamics in your video using this preset.

3. Real Action Ca1mera Shakes By PlaygroundStudio
12 Action Shakes effects are included in “Real Action Camera Shakes.”. You can use these effects directly in your clips or on adjustment layers. The visuals can be used in presentations, slideshows, TV shows, commercials, promotions, events, and on Facebook and YouTube. This professionally designed and energetically animated Premiere Preset will impress your audience.

4. Camera Shake By Insine
You can add a camera shake to your footage to give it a realistic look. You can also use it to shake other objects like text or particles. Animate your projects with realistic camera movements!
5. Shaking Presets Transitions By Jorkiy
This set of dynamic transitions for Premiere Pro is called Shaking Presets Transitions. There are different kinds of shakes in these transitions. This video pack works with any resolution (4k, full HD, vertical videos, etc.). Impress your audience with breathtaking videos by using this pack.

6. 35 Hit Presets By Animark
Your video will be shaken with these presets. There are 35 presets divided into seven categories. These presets would be ideal for any action, dynamic presentation, trailer, etc. You can choose from FullHD, 4K, Square, Instagram, etc.
7. 30 Shake Transitions By Animark
A stylish shake transition will be added to your video with these presets. Approximately 30 transitions are included in the project. You can create a multitude of different transitions by combining presets. You can use these presets for any action, dynamic social media presentation, trailer, etc.
8. 3D Spin Transitions By PlaygroundStudio
3D With Spin Transitions for Premiere Pro, you get 24 stylish and creative transitioning effects. This feature will look and feel better when presenting slideshows, films, movies, trailers, teasers, promotions, and events videos. PP presets that are action-packed and energetically crafted to impress your audience.
9. Stretched Bounce Transitions By LeftHand
This collection of 12 dynamic transitions presets is called Stretched Bounce Transitions. With these transitions, your videos will look more modern, clean, and cinematic. This transition works with videos and photos with resolutions up to 4K. With presets, you can combine seamless camera movement with an elastic shake. Each of the four directions is included, and there is also a category perfect for music videos with a liquid, psychedelic overlay. You can modify the speed of each preset easily.
10. Shake Transitions By JuliaDesign
Are you capable of creating dynamic videos? Check out these shake transitions to improve them. The pack is small but has a lot of cool effects. Six presets are included, so you can easily pick your favorite. You can customize each transition by adjusting the layer length.

11. Shake Transitions Presets By Jorkiy
The Shake Transitions Presets for Premiere Pro is available for free. Create sharp shaky camera effects by using this set of presets. You can apply a preset to an adjustment layer placed over your frames. The pack is compatible with any resolution (4K, full HD, vertical video, etc.). Surprise your viewers with dynamic videos created with this pack.
12. Camera Shake Flicker Effects By Vesna
14 shake presets are included in this pack, including shake effects and blinking effects. An instructional video is included. Presets last approximately 30 seconds each. It can be used as a camera shake effect, a text shake effect, or a transition effect. The possibilities are endless when you combine them.
13. Smooth Camera Shake By Enduro
Ten smooth camera shake effects are included in this project. Easily applied to the clip or layer above your edit, these are easy to use. You can use presets for effects such as camera shake, text shake, and even transitions. You can combine them to get any unique result you desire.
14. Real Camera Shakes By PlaygroundStudio
You can apply them to a clip or an adjustment layer, and they’re so easy to use. Presentations, slide shows, TV shows, commercials, promotions, events, Facebook, and YouTube videos can all benefit from using them. This energetic and beautifully designed Premiere Preset will impress your audience.
15. Spin Shake Transitions By VSDream
You’re sure to love the 24 dynamic, impactful directional spin shake transitions in the Spin Shake Transitions Premiere Pro template. Sport, travel, action movies, special events, TV shows, sports films, commercials, and trailers are perfect for this project. Anything that requires an extra dose of excitement.
How to import & use Camera Shake Preset in Premiere Pro
The following steps will show you how to use these presets in Premiere Pro.
Firstly, these aren’t just drag-and-drop effects. You must install Adobe Premiere Pro on your computer.
Step1: The first step is to install the presets in your After Effects presets folder. After downloading and unzipping the free presets, copy and paste them.
Step2: As soon as you have copied the presets to the AE presets folder, you can open a PP project and replace the effects in your videos by choosing: Replace with After Effects Composition.
Step3: Verify the composition settings in Premiere Pro, and see if 4K or FHD are selected.
Step4: If you want to start adding presets to NULL objects, you can do so by creating them. To add Motion Blur, you will need footage and the overall composition. Next, you can adjust keyframes and use Motion Tiles.
Conclusion
●If you are tired of the linear style and want to change your videos into cool videos, you can use these 15 Presets for Adobe Premiere Pro. You can even tweak the effects to suit your preferences. These presets have a wide range of uses and can be used easily. It is a completely customizable filter that you can use on any video or audio footage in Adobe Premiere Pro, no matter its format (avi, MPEG, mp4, etc.). You can also control the intensity of these effects, making it suitable for footage.
Do you know how professional video footage is made? Most of the time, it’s through small movements on a camera, called Camera Shake. It is used to create realistic and dramatic shots in movies. In contrast, you can accidentally capture some shake on film; most of the time, it has to be created by a team of people. Camera operators will perform different movements with the camera in order to create this effect that we see in many movies, TV shows, and documentaries all around the world.
Putting a shake on footage can add visual interest to your scene. It adds kinetic energy to the shot and can be useful for transitions as well. Are you looking for realistic camera shake effects for your footage? Do you think these effects will help your video stand out from the rest on video sharing sites such as Youtube, Vimeo, or other sites? Look no more. In this article, we will look at 15 camera shake presets for unlimited possibilities! Mix and match to get your favorite camera shake effect. Save your time and costs!
15 Camera Shake Preset for Adobe Premiere Pro
1. Camera Shake Presets By Jorkiy
This preset collection contains 15 camera shake presets for Premiere Pro. The presets produce a live camera effect. Three groups of presets are available. A smooth preset, a quick preset, and a jerky preset. Choose one and apply it to your footage. Surprise your audience with dynamic videos courtesy of this pack.
2. Shake The Camera Or Text By 27
Create a dynamic and realistic camera shake with this awesome preset collection. The length of the presets is 1 minute, and the version for long videos is also included - 10 minutes. The project is perfect for shaking other objects, such as text or particles. Easy to use. Create dynamics in your video using this preset.
3. Real Action Ca1mera Shakes By PlaygroundStudio
12 Action Shakes effects are included in “Real Action Camera Shakes.”. You can use these effects directly in your clips or on adjustment layers. The visuals can be used in presentations, slideshows, TV shows, commercials, promotions, events, and on Facebook and YouTube. This professionally designed and energetically animated Premiere Preset will impress your audience.
4. Camera Shake By Insine
You can add a camera shake to your footage to give it a realistic look. You can also use it to shake other objects like text or particles. Animate your projects with realistic camera movements!
5. Shaking Presets Transitions By Jorkiy
This set of dynamic transitions for Premiere Pro is called Shaking Presets Transitions. There are different kinds of shakes in these transitions. This video pack works with any resolution (4k, full HD, vertical videos, etc.). Impress your audience with breathtaking videos by using this pack.
6. 35 Hit Presets By Animark
Your video will be shaken with these presets. There are 35 presets divided into seven categories. These presets would be ideal for any action, dynamic presentation, trailer, etc. You can choose from FullHD, 4K, Square, Instagram, etc.
7. 30 Shake Transitions By Animark
A stylish shake transition will be added to your video with these presets. Approximately 30 transitions are included in the project. You can create a multitude of different transitions by combining presets. You can use these presets for any action, dynamic social media presentation, trailer, etc.
8. 3D Spin Transitions By PlaygroundStudio
3D With Spin Transitions for Premiere Pro, you get 24 stylish and creative transitioning effects. This feature will look and feel better when presenting slideshows, films, movies, trailers, teasers, promotions, and events videos. PP presets that are action-packed and energetically crafted to impress your audience.
9. Stretched Bounce Transitions By LeftHand
This collection of 12 dynamic transitions presets is called Stretched Bounce Transitions. With these transitions, your videos will look more modern, clean, and cinematic. This transition works with videos and photos with resolutions up to 4K. With presets, you can combine seamless camera movement with an elastic shake. Each of the four directions is included, and there is also a category perfect for music videos with a liquid, psychedelic overlay. You can modify the speed of each preset easily.
10. Shake Transitions By JuliaDesign
Are you capable of creating dynamic videos? Check out these shake transitions to improve them. The pack is small but has a lot of cool effects. Six presets are included, so you can easily pick your favorite. You can customize each transition by adjusting the layer length.
11. Shake Transitions Presets By Jorkiy
The Shake Transitions Presets for Premiere Pro is available for free. Create sharp shaky camera effects by using this set of presets. You can apply a preset to an adjustment layer placed over your frames. The pack is compatible with any resolution (4K, full HD, vertical video, etc.). Surprise your viewers with dynamic videos created with this pack.
12. Camera Shake Flicker Effects By Vesna
14 shake presets are included in this pack, including shake effects and blinking effects. An instructional video is included. Presets last approximately 30 seconds each. It can be used as a camera shake effect, a text shake effect, or a transition effect. The possibilities are endless when you combine them.
13. Smooth Camera Shake By Enduro
Ten smooth camera shake effects are included in this project. Easily applied to the clip or layer above your edit, these are easy to use. You can use presets for effects such as camera shake, text shake, and even transitions. You can combine them to get any unique result you desire.
14. Real Camera Shakes By PlaygroundStudio
You can apply them to a clip or an adjustment layer, and they’re so easy to use. Presentations, slide shows, TV shows, commercials, promotions, events, Facebook, and YouTube videos can all benefit from using them. This energetic and beautifully designed Premiere Preset will impress your audience.
15. Spin Shake Transitions By VSDream
You’re sure to love the 24 dynamic, impactful directional spin shake transitions in the Spin Shake Transitions Premiere Pro template. Sport, travel, action movies, special events, TV shows, sports films, commercials, and trailers are perfect for this project. Anything that requires an extra dose of excitement.
How to import & use Camera Shake Preset in Premiere Pro
The following steps will show you how to use these presets in Premiere Pro.
Firstly, these aren’t just drag-and-drop effects. You must install Adobe Premiere Pro on your computer.
Step1: The first step is to install the presets in your After Effects presets folder. After downloading and unzipping the free presets, copy and paste them.
Step2: As soon as you have copied the presets to the AE presets folder, you can open a PP project and replace the effects in your videos by choosing: Replace with After Effects Composition.
Step3: Verify the composition settings in Premiere Pro, and see if 4K or FHD are selected.
Step4: If you want to start adding presets to NULL objects, you can do so by creating them. To add Motion Blur, you will need footage and the overall composition. Next, you can adjust keyframes and use Motion Tiles.
Conclusion
●If you are tired of the linear style and want to change your videos into cool videos, you can use these 15 Presets for Adobe Premiere Pro. You can even tweak the effects to suit your preferences. These presets have a wide range of uses and can be used easily. It is a completely customizable filter that you can use on any video or audio footage in Adobe Premiere Pro, no matter its format (avi, MPEG, mp4, etc.). You can also control the intensity of these effects, making it suitable for footage.
How To Fade Audio In Kinemaster
If you have been looking for video and audio editing tools then you have probably heard of Kinemaster. It is a great video editing app that allows users to edit all aspects of the video including any audio or music that may accompany the video. It has a lot of very useful features and the user interface is fairly easy to use.
One of the things that you can do with Kinemaster is to fade out audio, a useful feature that can help the ending of any video appear more authentic. In this article, we will be looking at how you can use Kinemaster to fade audio.
Kinemaster Fade Audio Steps
The following steps show you how you can easily fade audio in Kinemaster;
Step1If you don’t have Kinemaster already, start by downloading and installing the video editor on your computer.
Step2Open Kinemaster on your computer and then click on the “New Project” icon to start. Select the aspect ratio that you would like to use. If you are not sure, we recommend choosing the “16:9” aspect ratio.
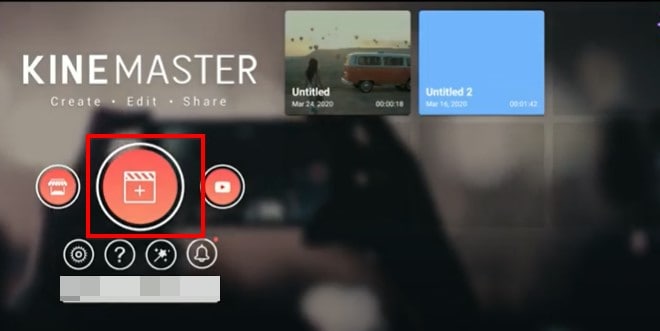
Step3In the next window, click on “Media” to select the clip you would like to add to the Kinemaster project that you have just created.
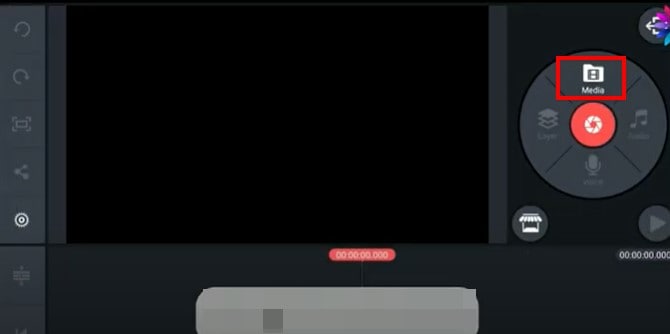
Step4To fade in and fade out the audio in the project, click on the gear icon from the options to the left of the screen.
![]()
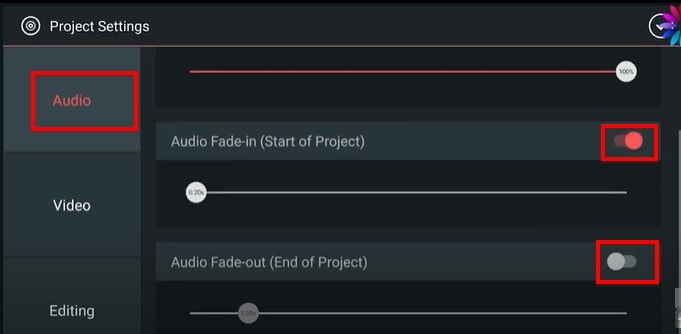
Step5Select the “Audio” tab on the next screen and then turn on the switch next to “Audio Fade-in (Start of Project)” and “Audio Fade-out (End of Project).” This will add a fade-in and fade-out effect at the beginning of the audio and at the end of it.
Step6You can then easily set the duration of the “Audio fade-in” and “Audio fade-out” by dragging the slider below each option. We recommend setting the duration to just a few seconds.
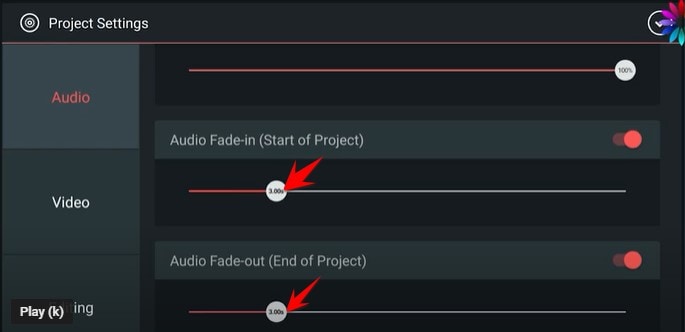
Don’t forget to save the project when you’re done.
Kinemaster Alternative to Edit Audio
Kinemaster is a good way to edit both audio and video on your computer, but the following options are just as good;
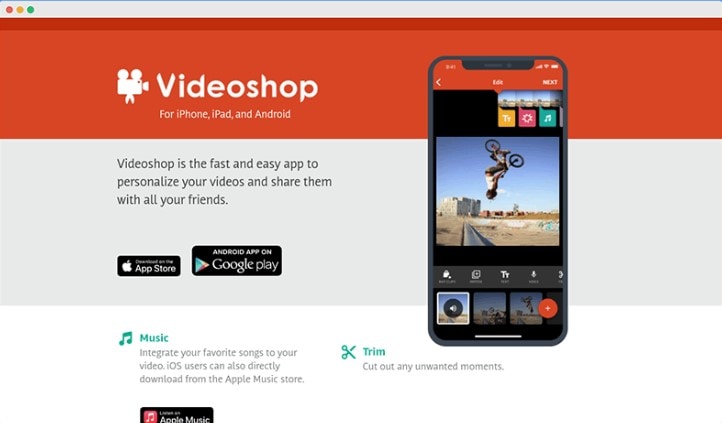
1. VideoShop
VideoShop is a simple to use and highly effective program that you can use to create and edit videos on your computer. The interface makes it easy to import any video project that you have into the program and the wealth of very useful features can help you edit the video in various ways.
For example, you can change the speed of the video, add transitions at various points in the video, add and remove text, add and remove music and so much more. Although there is a free trial version, you will only be able to access some of the more useful features when you purchase the premium version.
The Pro version of VideoShop goes for $3.99 a month, but you can get lifetime access to the program for only $39.99. One thing that VideoShop has over Kinemaster is that it is very easy to use, even beginner users find video editing a breeze with this tool.
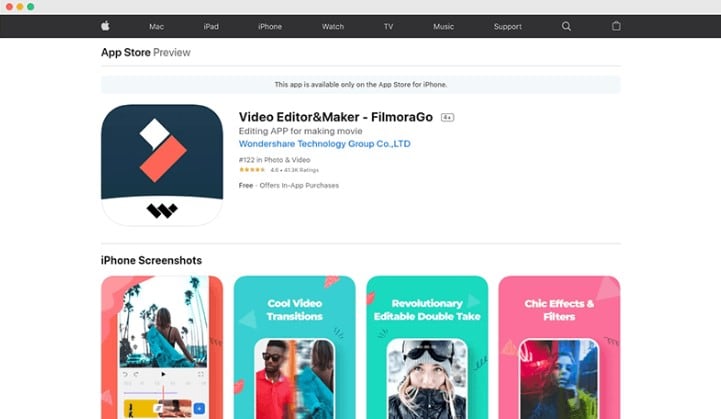
2. Filmora
If you are looking for a simple way to edit videos on Android or iOS devices, Filmora is one of the best options in the market. This mobile version of the very popular Filmora video editor is just as easy to use as its parent program. You can use it to create video projects from scratch or upload a video and make changes to it.
It offers you a lot of choices when it comes to editing features including trimming sections of the video, adding filters, adding music, adding or removing text, and even changing the canvas or the background of the video. Advanced options such as changing the speed of the video are also available.
One of the things that we love about Filmora is that you don’t even have to create an account to use it or remove the watermark added to the completed video project, watching a video ad can be enough. But this option is only available once every 24 hours, meaning that you can only remove a watermark on the free version once a day. Filmora is available for both iOS and Android and the yearly premium plan will cost you just $19.90.
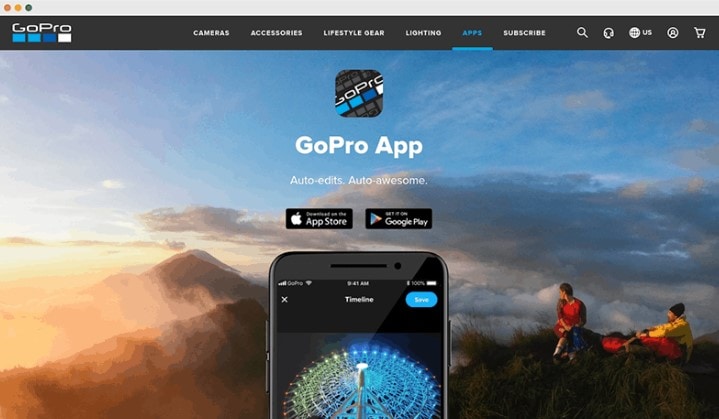
3. Quik
Quik is a video editing program created by GoPro for the purpose of editing GoPro videos, but that doesn’t mean that you will not be able to use it to edit other types of videos. You can use Quik to create a new project or edit an existing video and gives users a lot of different options when it comes to video editing.
One of the main benefits of using Quik is that you can easily add music, audio, and special effects to a video as well as change the length of the video, fade audio in and out and even change when the music starts. It is also one of the best ways to use images to create collages and slideshows very easily. There are a lot of slideshow and collage templates to choose from, and you can edit them easily by adding your music and images. Quik is completely free to use and you can upload your creation to the cloud ad share the link with others.
Conclusion
Kinemaster is one of the most popular video editing tools, especially since it simplifies the video editing process to make it very easy. All the alternative tools we have outlined here in this article are selected because they can make video editing quite simple.
Free Download For Win 7 or later(64-bit)
Free Download For macOS 10.14 or later
An Ultimate Guide to Flexclip Online Trimmer
Flexclip video trimmer is a robust and easy-to-use online tool that lets you cut the unwanted section of any of your videos to get the desired result.
Pros
- Online trimming - no need for software.
- No ads during the editing process.
- Real-time preview of what is happening.
- Additional robust video editing features.
- Simple and intuitive UI.
Cons
- The free version lacks advanced features.
- Video export duration is limited to 1 minute in the free version.
- Signup is required for exporting videos.
Part 1. What is Flexclip Video Trimmer?
Do you want to trim your videos quickly without downloading and installing any complicated software? Well, Flexclip Trimmer might be your answer.
Flexclip is a free-to-use online video editing tool that makes it effortless for you to trim, crop, and edit your videos. The editor has an intuitive and user-friendly interface, making it easy to use even for beginners.
Besides video trimming, Flexclip has numerous other features video trimming, including support for a wide range of video formats, slideshow making, screen and voice recording, royalty-free music, pictures and video libraries, and other advanced tools.
Price: You can use the Flexclip trimmer for free. However, export duration is limited to 1 minute, and a watermark will be added to it.
Besides the free version, Flexclip comes with three pricing tiers:
- Basic: $5.99/month or $71.88/year.
- Plus: $ 9.99 /month or $119.88/ year.
- Business: $ 19.99 /month or $239.88/year.
Part 2. Key Features Of Flexclip Video Trimmer
As a powerful and easy-to-use online video trimmer, Flexclip has helped numerous users make great videos without too much hassle.
Therefore, if you’re looking for a video trimmer with all the bells and whistles, this editor must be at the top of your list. Here are some of the key features that make Flexclip Free Video Trimmer stand out from the rest:
Online Video Cutter: Flexclip Video Trimmer eliminates the need to download complex software to cut videos. Head to the website, upload your video, and let the trimmer do its magic.
Safe and Secure to Use: Flexclip editor provides guaranteed security from any malware or data breach.
Easy to Use: Flexclip trimmer is designed with simplicity in mind. Even if you’ve never edited/trimmed a video before, you’ll be able to figure out how to use this tool in no time. Upload your footage, and with a few clicks/adjustments, you will get it trimmed.
Completely Free: Flexclip offers the trimming tool completely free, and no annoying ads will be displayed during the editing process.
Real-Time Preview: Not only is the Flexclip video trimmer convenient to use, but it also provides a real-time preview of the project, so you can see exactly how your edits will look before you save them.
Multiple Video Formats Support: Flexclip Video Trimmer is a versatile and powerful tool that supports a vast range of video formats, including MOV, WEBM, M4V, and MP4.
Part 3. How To Use Flexclip Trimmer To Trim Videos?
Videos are an excellent way to share memories, tell stories, or just have some fun. But sometimes, you might want to trim a clip to make it shorter, edit out certain parts, or just give it a different look. Flexclip’s video trimmer is a splendid way to do this in just a few steps:
Step1 First, ensure you have a stable internet connection. Now, launch a browser of your choice on your PC and visit theFlexclip Video Trimmer website.
Step2 Now, drag and drop your video clip or click the “Browse Video” option to find and upload the video from your computer in the supported MP4, M4V, MOV, or WEBM video formats.

Step3 Next, wait for a few seconds to complete the video uploading process. You will be taken to the editing interface, and the trimming window will pop up. If not, click the Scissor icon below the video.
Step4 Use the handles on either side of the video timeline to select the part of the video you want to keep. Next, click the “Trim Video” button to apply your changes.

Step5 You can also use the trimming tool to split the video into multiple clips. Once you’re done, click “Export” to save your project.
You’ll be asked to sign in to export the video. Create a new account or use the existing one and click “Export” again.
Step6 Finally, select the video resolution but bear in mind that the free version only allows 480p resolution for exporting a clip. Click the Export option and wait for the process to complete. You can also share your video to Youtube, Dropbox, or Google Drive.

Bonus Tips: Best Flexclip Video Trimmer Alternative On Desktop
A desktop video editor has a number of advantages over an online editor, such as:
- More control over the editing process.
- Can Fine tune your edits with more precision.
- Support for a wider range of video and audio formats.
- More flexibility.
- A more comprehensive set of features than online editors.
Filmora is an excellent desktop alternative to the Flexclip video trimmer and includes more advanced features with a user-friendly interface. The software also supports a bit more video formats and higher video output resolution.
Here’s how you can use Filmora to trim your video:
Step1 Download and install the Filmora software from the official website. Click the “New Project” option and select your video to upload. Next, drag and drop the clip to the timeline.

Step2 Hover your mouse near the starting or ending edges and drag the trim icon to cut your video into the desired length. You can also use the Split option to remove the unwanted part in the middle of your clip.

Step3 Once you are done with your video trimming, click the Export option. Select the format from the left-hand side menu and click Export again.
You can also export your videos with YouTube, Vimeo, DVD, or your device.
Conclusion
In this article, we’ve explored the Flexclip video trimmer online tool, its key features, and how to use it to trim videos with simple instructions. We also discussed the best Flexclip video trimmer alternative on desktop - Filmora and provided a step-by-step guide to help you cut an unwanted section from your clip.
Hopefully, you found this comprehensive guide useful and that you now know everything you need to know about trimming videos with Flexclip.
Free Download For Win 7 or later(64-bit)
Free Download For macOS 10.14 or later
Part 1. What is Flexclip Video Trimmer?
Do you want to trim your videos quickly without downloading and installing any complicated software? Well, Flexclip Trimmer might be your answer.
Flexclip is a free-to-use online video editing tool that makes it effortless for you to trim, crop, and edit your videos. The editor has an intuitive and user-friendly interface, making it easy to use even for beginners.
Besides video trimming, Flexclip has numerous other features video trimming, including support for a wide range of video formats, slideshow making, screen and voice recording, royalty-free music, pictures and video libraries, and other advanced tools.
Price: You can use the Flexclip trimmer for free. However, export duration is limited to 1 minute, and a watermark will be added to it.
Besides the free version, Flexclip comes with three pricing tiers:
- Basic: $5.99/month or $71.88/year.
- Plus: $ 9.99 /month or $119.88/ year.
- Business: $ 19.99 /month or $239.88/year.
Part 2. Key Features Of Flexclip Video Trimmer
As a powerful and easy-to-use online video trimmer, Flexclip has helped numerous users make great videos without too much hassle.
Therefore, if you’re looking for a video trimmer with all the bells and whistles, this editor must be at the top of your list. Here are some of the key features that make Flexclip Free Video Trimmer stand out from the rest:
Online Video Cutter: Flexclip Video Trimmer eliminates the need to download complex software to cut videos. Head to the website, upload your video, and let the trimmer do its magic.
Safe and Secure to Use: Flexclip editor provides guaranteed security from any malware or data breach.
Easy to Use: Flexclip trimmer is designed with simplicity in mind. Even if you’ve never edited/trimmed a video before, you’ll be able to figure out how to use this tool in no time. Upload your footage, and with a few clicks/adjustments, you will get it trimmed.
Completely Free: Flexclip offers the trimming tool completely free, and no annoying ads will be displayed during the editing process.
Real-Time Preview: Not only is the Flexclip video trimmer convenient to use, but it also provides a real-time preview of the project, so you can see exactly how your edits will look before you save them.
Multiple Video Formats Support: Flexclip Video Trimmer is a versatile and powerful tool that supports a vast range of video formats, including MOV, WEBM, M4V, and MP4.
Part 3. How To Use Flexclip Trimmer To Trim Videos?
Videos are an excellent way to share memories, tell stories, or just have some fun. But sometimes, you might want to trim a clip to make it shorter, edit out certain parts, or just give it a different look. Flexclip’s video trimmer is a splendid way to do this in just a few steps:
Step1 First, ensure you have a stable internet connection. Now, launch a browser of your choice on your PC and visit theFlexclip Video Trimmer website.
Step2 Now, drag and drop your video clip or click the “Browse Video” option to find and upload the video from your computer in the supported MP4, M4V, MOV, or WEBM video formats.
Step3 Next, wait for a few seconds to complete the video uploading process. You will be taken to the editing interface, and the trimming window will pop up. If not, click the Scissor icon below the video.
Step4 Use the handles on either side of the video timeline to select the part of the video you want to keep. Next, click the “Trim Video” button to apply your changes.
Step5 You can also use the trimming tool to split the video into multiple clips. Once you’re done, click “Export” to save your project.
You’ll be asked to sign in to export the video. Create a new account or use the existing one and click “Export” again.
Step6 Finally, select the video resolution but bear in mind that the free version only allows 480p resolution for exporting a clip. Click the Export option and wait for the process to complete. You can also share your video to Youtube, Dropbox, or Google Drive.
Bonus Tips: Best Flexclip Video Trimmer Alternative On Desktop
A desktop video editor has a number of advantages over an online editor, such as:
- More control over the editing process.
- Can Fine tune your edits with more precision.
- Support for a wider range of video and audio formats.
- More flexibility.
- A more comprehensive set of features than online editors.
Filmora is an excellent desktop alternative to the Flexclip video trimmer and includes more advanced features with a user-friendly interface. The software also supports a bit more video formats and higher video output resolution.
Here’s how you can use Filmora to trim your video:
Step1 Download and install the Filmora software from the official website. Click the “New Project” option and select your video to upload. Next, drag and drop the clip to the timeline.
Step2 Hover your mouse near the starting or ending edges and drag the trim icon to cut your video into the desired length. You can also use the Split option to remove the unwanted part in the middle of your clip.
Step3 Once you are done with your video trimming, click the Export option. Select the format from the left-hand side menu and click Export again.
You can also export your videos with YouTube, Vimeo, DVD, or your device.
Conclusion
In this article, we’ve explored the Flexclip video trimmer online tool, its key features, and how to use it to trim videos with simple instructions. We also discussed the best Flexclip video trimmer alternative on desktop - Filmora and provided a step-by-step guide to help you cut an unwanted section from your clip.
Hopefully, you found this comprehensive guide useful and that you now know everything you need to know about trimming videos with Flexclip.
Free Download For Win 7 or later(64-bit)
Free Download For macOS 10.14 or later
Also read:
- New 2024 Approved Best 10 iPad Slideshow Apps to Create a Slideshow
- Updated Best Dark Moody LUTs During Editing for 2024
- Updated Overview About Supported iPhone Video Formats and Best iPhone Video Editor & Converter for 2024
- Updated In 2024, How to Edit A Time Lapse Video on iPhone?
- 2024 Approved Track Mattes The Ultimate Guide For After Effects
- 2024 Approved Gif to Svg, Svg to Gif, Convert Gif to Svg, Animated Svg to Gif, Convert Svg to Gif, Svg to Gif Converter, Svg to Gif Animation, Svg Animation to Gif, Gif to Svg Converter
- In 2024, How to Use Kahoot! On Zoom
- Updated 2024 Approved How To Zoom In On TikTok Videos?
- 2024 Approved Learn How to Blur a Still or Moving Part of Video
- New Best Tips for Better Event Videography
- Best 10 Options Slow Down Video Online with Perfection
- New Ways to Learn Discord Game Bots – Even if Youre Just Starting Out for 2024
- New 2024 Approved 2 Ways to Fade in Text in Premiere Pro
- How to Use LUTs Perfectly in Final Cut Pro for 2024
- Updated Here Is a Guide on How You Can Resize Videos via Handbrake and Wondershare Filmora. The Former Is a Lightweight Tool Perfect for Batch Resizing Videos, While the Latter Is a Powerful Free Video Editing Software
- How to Make Simple Slideshow Word
- 2024 Approved You Can Easily Film Rotating Video Illusions From Your Smartphone and Edit Them on Wondershare Filmora in Just a Few Clicks
- New Want to Add a Motion Blur Effect to Your Photos? This Step-by-Step Tutorial Will Show You How to Use GIMP Software to Get the Effect You Want
- In 2024, This Easy Hack Using Wondershare Filmora New Masking Feature Will Be a Great Addition to Your Next Horror Video Content
- Top Animated Title Makers for 2024
- New 11 Best Video Editing Apps for iPhone
- Updated Learn About some of the Best Photo Collage with Music Tools
- 2024 Approved In This Article, You Will Learn Easy Ways to Edit Videos Using a Mouse in Wondershare Filmora. You Can Do Video Editing without a Keyboard After Reading This Article
- In 2024, AVI Editor for Windows 11/10/8.1/8/7 Easily Edit AVI Files on PC
- New 2024 Approved As a Designer, Color Is the Most Powerful and the Most Diverse Tool at Your Disposal. Here Are Ten Matching Color Combinations to Get You Started on Your Next Project
- Spooky Halloween Best 15+ Halloween Countdown Video Clips
- Step by Step to Rotate Videos in Davinci Resolve
- 2024 Approved How to Make Text Reveal Effect for Your Video
- New How to Make After Effects Gifs for 2024
- In 2024, A Complete Guideline To Better Use QuickTime Player
- 2024 Approved In This Article We Will Be Covering the Most Important Topics You Have to Remember when Becoming a Successful YouTube-Star
- In 2024, How to Create Photoshop GIF The 100 Easy Way
- Top List of Best VHS Video Effect Makers
- Updated 15 Stunning GIF Splitter Examples You Need to Bookmark
- In 2024, How to Fix Locked Apple ID from Apple iPhone 12 Pro
- Unlocking iPhone SE Lock Screen 3 Foolproof Methods that Actually Work
- Complete Tutorial to Use VPNa to Fake GPS Location On Tecno Camon 20 | Dr.fone
- 4 Ways to Fix Android Blue Screen of Death On Tecno Pova 5 Pro | Dr.fone
- Learn About Lip-Syncing in Animation
- 2024 Approved How to Make Your GIF on WhatsApp in Simple Ways
- In 2024, Everything You Want To Know About Kapwing Video Translation
- How to Vivo V29 Get Deleted photos Back with Ease and Safety?
- How to restore wiped messages on Tecno Pova 5
- How To Free Up iPhone 11 Pro Max Space | Dr.fone
- How to Reset Honor X50 Without the Home Button | Dr.fone
- The Ultimate Guide to Samsung Galaxy A25 5G Pattern Lock Screen Everything You Need to Know
- In 2024, Ways to trade pokemon go from far away On Oppo A56s 5G? | Dr.fone
- 8 Ultimate Fixes for Google Play Your Xiaomi Redmi A2 Isnt Compatible | Dr.fone
- In 2024, Android to Apple How To Transfer Photos From Motorola Moto G23 to iPad Easily | Dr.fone
- Full Guide to Fix iToolab AnyGO Not Working On Vivo Y27 5G | Dr.fone
- How to recover deleted photos from Android Gallery after format on Xiaomi
- 6 Fixes to Unfortunately WhatsApp has stopped Error Popups On Samsung Galaxy S24 | Dr.fone
- 10 Best Fake GPS Location Spoofers for Tecno Pova 6 Pro 5G | Dr.fone
- In 2024, How to Check Distance and Radius on Google Maps For your Lava Yuva 3 Pro | Dr.fone
- Title: How to Change Video Resolution in Filmora for 2024
- Author: Chloe
- Created at : 2024-05-20 03:38:33
- Updated at : 2024-05-21 03:38:33
- Link: https://ai-editing-video.techidaily.com/how-to-change-video-resolution-in-filmora-for-2024/
- License: This work is licensed under CC BY-NC-SA 4.0.
