
:max_bytes(150000):strip_icc():format(webp)/001_the-best-kids-movies-on-disney-plus-june-2023-5112564-37245acf2e6840ba8319f0e13985e04a.jpg)
How to Convert Videos to Slow Motion?
How to Convert Videos to Slow Motion?
Slow Motion films are unique, don’t you think? Occasionally, individuals use their phones to shoot slow-motion films if they have an in-built function, and if their phone does not have an in-built feature, they may use slow-motion video creator applications to assist them.
But what happens if you have previously filmed a video at regular speed and now want the movie to be converted to slow motion?
Maybe a video of you from the pool when you’re flipping your hair, but no one remembers to take it in slow motion? Don’t be concerned! Today, we will show you how to turn any video into a slow-motion video on different operating systems.
In this article
01 How to Turn Videos Into Slow Motion on Windows for Free?
02 How to Convert Normal Video to Slow Motion for Free on Mac?
03 How to turn Normal Video to Slow Motion With VLC On Linux Computer?
04 How to Use Wondershare Filmora Video Editor to Turn Normal Videos to Slow Motion?
05 Best Slow Motion Converters to Convert Video to Slow Motion Online Free?
06 How to Convert Normal Video to Smooth Slow Motion In iPhone And Android Phones
Part 1: How to Turn Videos Into Slow Motion on Windows for Free?
If you need to conduct some simple editing and effects on your films, there is no need to invest hundreds of dollars in a video editing software application. For example, you may use the Photos App pre-installed on Windows 10 machines to apply the slow-motion effect to your photographs.
Step 1: Right click the video and choose Open with Photos. If it has been recorded by an iPhone or Android device and stored up to OneDrive, it should appear in the Microsoft Photos app without any further effort. Just click it to preview the video.
Step 2: Go to the Edit & Create option on the right corner on the top, and then select Add slo-mo option.

Step 3: Using the slider, you can determine how slowly you want it to go. Microsoft has built-in support for “Slow“ and “Super-Slow“ performance levels. Drag the slide to the right end will trigger the super slow mode.

Step 4: Specifiy the part that you want to apply slow motion in the playback bar at the bottom, and then save the video that you have just created with slow motion effects on Windows 10 .
The possibility exists that you are using an older version of Windows 10 on your computer if you do not see the option anywhere in the Photos app. You can also follow the steps above to create a slow motion video on Windows 11.
Browse Windows Update from the system menu and click on the appropriate button. When all of the updates have been installed, you will have the most recent version of the Photos app, which includes this functionality.
Part 2: How to Convert Normal Video to Slow Motion for Free on Mac?
Slow-motion videos are among the most enjoyable parts of utilizing your iPhone for videography. Video may be recorded with a frame rate of 120 or 240 fps and then played back at a considerably slower rate than usual.
However, if you don’t record video on your iPhone, making slow motion out of videos shot on other cameras or devices is more challenging. The good news is that iMovie for Mac can do this for you. We’ll show you how in this guide.
Slow-motion films are easy to make using iMovie on your Mac . Just follow the steps listed below.
Step 1: Click on the Import Media option in iMovie once launched on your Mac.
Step 2: Click on the blue Import Selected button once you’ve selected the video file in the file browser to slow it down.
Step 3: You may now open the movie in iMovie. Creating a Project is required at this stage. To do so, click on the Projects option.
Step 4: Once you’ve entered a name for your project, click the blue OK button.
Step 5: By dragging the movie onto your timeline, you may modify the video. Select the video by clicking on it and clicking on the Speed option to change its speed.
Step 6: The speed-editing interface will be shown here. Change Normal to Slow in the Speed drop-down menu.
Step 7: The duration of your movie will be increased by halves the pace at which it was initially recorded. The video may be slowed down even further by moving the speed slider.
Step 8: Go to the Menu Bar and choose File > Share. Select the file you want to share.
Step 9: Click the blue Next button once you’ve selected the properties you want for the file.
Step 10: Select a name for the file, store it, and then click the blue Save button to save it to your computer.
Part 3: How to turn Normal Video to Slow Motion With VLC On Linux Computer?
The video speed may be controlled in two ways using VLC. Using shortcut keys or hotkeys is one method, while menus and buttons are another. Both methods are OK, but the shortcut option is the quickest and most efficient.
Speed up and speed down buttons appear on the upper right of the movie when you press them. Depending on how much you tweak it, the speed is represented as 1.50x or 0.80x. This option is available for those who like to use other shortcut keys.
Step 1: From the VLC menu bar, head over to the Playback for Speed and choose a speed option: slower, slower (fine), normal, faster (fine), and faster.
Step 2: Right-clicking is also possible to access these parameters from the Playback > Speed menu.
Step 3: The video’s speed may be altered by selecting one of those options and then clicking the appropriate button.
If you are running VLC on Windows and Mac, you can check this article to find out the detailed information about how to playback video in slow motion in VLC .
Related: Best Free Video Editor for Linux .
Part 4: How to Use Wondershare Filmora Video Editor to Turn Normal Videos to Slow Motion?
For Win 7 or later (64-bit)
For macOS 10.12 or later
Wondershare Filmora is a video editor we’d like to show to you. Whether using a Windows or a Mac computer, you can rapidly speed up and slow down films with this easy video editor . With a user-friendly interface, Filmora video editor has many professional-grade editing features to help refine videos with ease. From motion tracking to keyframe animations, Filmora video editor offers a plethora of options.
Step 1: Launch Filmora video editor on your Windows or Mac computer (I’m running Windows 10 here). Click the New Project in the Startup window to create a new project in 16:9 aspect ratio by default.

Step 2: Import the video you want to add slow motion effect to the media library, and then drag and drop it to the timeline.

Step 3: To add slow motion effect to part of the video, you need to split the video first and then right click it to choose Speed and Duration. There will be a pop-up window. The motion effects will be sped up or slowed down based on the speed values.

Step 4: When you increase or decrease the video playing speed, the video audio speed changes. If you wish to retain the video audio’s actual playing speed, you may first Detach Audio from the video and then edit the video to achieve a perfect pitch.

Step 5: Select Export after you’ve completed setting the video speed. By selecting Format, you may save the video in any significant format.
Part 5: Best Slow Motion Converters to Convert Video to Slow Motion Online Free?
1. Online Converter
This Online Converter is one of the best on the internet. It is simple to use and supports various video formats such as MP4, AVI, FLV, MOV, 3GP, MKV, WMV, M4V, and others. This tool can also change the video speed by increasing (speeding up) or decreasing (slowing down). The audio in the video file will also become faster or slower due to using this tool.
Step 1: click on the Choose File option from the website to upload the video (max. 200MB).
Step 2: Now select the Speed of the video from the given options. Since we are going to make a video with slow motion effect, choose 0.5x or 0.8x will work perfectly.

Step 3: click on Confirm to convert the video to your preferred slo-mo video.
Part 6: How to Convert Normal Video to Smooth Slow Motion In iPhone And Android Phones
In addition to the essential editing tools of the famous social media platform, TikTok, CapCut is mobile video editing software for both Android and iOS smartphones that were mainly built to complement them. Here is how you can use CapCut to transform a regular video into a slow-mo one:
Step 1: Create A New Project on the CapCut app’s home screen. Browse and add the video you want to search for in slow-motion to the project.
Step 2: When you’re ready to turn off the sound, go ahead and hit the Mute clip audio button first, so there will be no creep sound after applying the slow-motion effect.

Step 3: In case you just want to add a slo-mo effect to part of the video, you need to split the video accordingly. Split the portion of the video that will be slowed down by clicking on the Split button in the menu. And use the Split tool again to end the slow-motion effect to get a segment of the video.
Step 4: Tap the cut section of the video and then you will see the Speed option. Open the Speed menu by selecting it from the drop-down menu.

Step 5: In CapCut, there are two methods to slow down a video, Normal and Curve, respectively. You may just choose the “Normal“ option to make things easy. It is possible to reduce the video’s frame rate by moving the speed slider to the left. You may, for example, make the pace 0.3 times slower. Apply a slow-motion effect by tapping the Check box.

Make a slow motion video at this stage to spice things up. CapCut allows you to add text, create transition effects, and more.
For more information, you can check: How to slo-mo in Capcut .
Conclusion
In this complete guide on “How to Convert Videos to Slow Motion?”, we hope you have learned all the basics. We have covered different apps that can help you do so. As the steps are straigthforward, make sure you abide by all the basics and transform your videos into catchy ones!
02 How to Convert Normal Video to Slow Motion for Free on Mac?
03 How to turn Normal Video to Slow Motion With VLC On Linux Computer?
04 How to Use Wondershare Filmora Video Editor to Turn Normal Videos to Slow Motion?
05 Best Slow Motion Converters to Convert Video to Slow Motion Online Free?
06 How to Convert Normal Video to Smooth Slow Motion In iPhone And Android Phones
Part 1: How to Turn Videos Into Slow Motion on Windows for Free?
If you need to conduct some simple editing and effects on your films, there is no need to invest hundreds of dollars in a video editing software application. For example, you may use the Photos App pre-installed on Windows 10 machines to apply the slow-motion effect to your photographs.
Step 1: Right click the video and choose Open with Photos. If it has been recorded by an iPhone or Android device and stored up to OneDrive, it should appear in the Microsoft Photos app without any further effort. Just click it to preview the video.
Step 2: Go to the Edit & Create option on the right corner on the top, and then select Add slo-mo option.
Step 3: Using the slider, you can determine how slowly you want it to go. Microsoft has built-in support for “Slow“ and “Super-Slow“ performance levels. Drag the slide to the right end will trigger the super slow mode.
Step 4: Specifiy the part that you want to apply slow motion in the playback bar at the bottom, and then save the video that you have just created with slow motion effects on Windows 10 .
The possibility exists that you are using an older version of Windows 10 on your computer if you do not see the option anywhere in the Photos app. You can also follow the steps above to create a slow motion video on Windows 11.
Browse Windows Update from the system menu and click on the appropriate button. When all of the updates have been installed, you will have the most recent version of the Photos app, which includes this functionality.
Part 2: How to Convert Normal Video to Slow Motion for Free on Mac?
Slow-motion videos are among the most enjoyable parts of utilizing your iPhone for videography. Video may be recorded with a frame rate of 120 or 240 fps and then played back at a considerably slower rate than usual.
However, if you don’t record video on your iPhone, making slow motion out of videos shot on other cameras or devices is more challenging. The good news is that iMovie for Mac can do this for you. We’ll show you how in this guide.
Slow-motion films are easy to make using iMovie on your Mac . Just follow the steps listed below.
Step 1: Click on the Import Media option in iMovie once launched on your Mac.
Step 2: Click on the blue Import Selected button once you’ve selected the video file in the file browser to slow it down.
Step 3: You may now open the movie in iMovie. Creating a Project is required at this stage. To do so, click on the Projects option.
Step 4: Once you’ve entered a name for your project, click the blue OK button.
Step 5: By dragging the movie onto your timeline, you may modify the video. Select the video by clicking on it and clicking on the Speed option to change its speed.
Step 6: The speed-editing interface will be shown here. Change Normal to Slow in the Speed drop-down menu.
Step 7: The duration of your movie will be increased by halves the pace at which it was initially recorded. The video may be slowed down even further by moving the speed slider.
Step 8: Go to the Menu Bar and choose File > Share. Select the file you want to share.
Step 9: Click the blue Next button once you’ve selected the properties you want for the file.
Step 10: Select a name for the file, store it, and then click the blue Save button to save it to your computer.
Part 3: How to turn Normal Video to Slow Motion With VLC On Linux Computer?
The video speed may be controlled in two ways using VLC. Using shortcut keys or hotkeys is one method, while menus and buttons are another. Both methods are OK, but the shortcut option is the quickest and most efficient.
Speed up and speed down buttons appear on the upper right of the movie when you press them. Depending on how much you tweak it, the speed is represented as 1.50x or 0.80x. This option is available for those who like to use other shortcut keys.
Step 1: From the VLC menu bar, head over to the Playback for Speed and choose a speed option: slower, slower (fine), normal, faster (fine), and faster.
Step 2: Right-clicking is also possible to access these parameters from the Playback > Speed menu.
Step 3: The video’s speed may be altered by selecting one of those options and then clicking the appropriate button.
If you are running VLC on Windows and Mac, you can check this article to find out the detailed information about how to playback video in slow motion in VLC .
Related: Best Free Video Editor for Linux .
Part 4: How to Use Wondershare Filmora Video Editor to Turn Normal Videos to Slow Motion?
For Win 7 or later (64-bit)
For macOS 10.12 or later
Wondershare Filmora is a video editor we’d like to show to you. Whether using a Windows or a Mac computer, you can rapidly speed up and slow down films with this easy video editor . With a user-friendly interface, Filmora video editor has many professional-grade editing features to help refine videos with ease. From motion tracking to keyframe animations, Filmora video editor offers a plethora of options.
Step 1: Launch Filmora video editor on your Windows or Mac computer (I’m running Windows 10 here). Click the New Project in the Startup window to create a new project in 16:9 aspect ratio by default.
Step 2: Import the video you want to add slow motion effect to the media library, and then drag and drop it to the timeline.
Step 3: To add slow motion effect to part of the video, you need to split the video first and then right click it to choose Speed and Duration. There will be a pop-up window. The motion effects will be sped up or slowed down based on the speed values.
Step 4: When you increase or decrease the video playing speed, the video audio speed changes. If you wish to retain the video audio’s actual playing speed, you may first Detach Audio from the video and then edit the video to achieve a perfect pitch.
Step 5: Select Export after you’ve completed setting the video speed. By selecting Format, you may save the video in any significant format.
Part 5: Best Slow Motion Converters to Convert Video to Slow Motion Online Free?
1. Online Converter
This Online Converter is one of the best on the internet. It is simple to use and supports various video formats such as MP4, AVI, FLV, MOV, 3GP, MKV, WMV, M4V, and others. This tool can also change the video speed by increasing (speeding up) or decreasing (slowing down). The audio in the video file will also become faster or slower due to using this tool.
Step 1: click on the Choose File option from the website to upload the video (max. 200MB).
Step 2: Now select the Speed of the video from the given options. Since we are going to make a video with slow motion effect, choose 0.5x or 0.8x will work perfectly.
Step 3: click on Confirm to convert the video to your preferred slo-mo video.
Part 6: How to Convert Normal Video to Smooth Slow Motion In iPhone And Android Phones
In addition to the essential editing tools of the famous social media platform, TikTok, CapCut is mobile video editing software for both Android and iOS smartphones that were mainly built to complement them. Here is how you can use CapCut to transform a regular video into a slow-mo one:
Step 1: Create A New Project on the CapCut app’s home screen. Browse and add the video you want to search for in slow-motion to the project.
Step 2: When you’re ready to turn off the sound, go ahead and hit the Mute clip audio button first, so there will be no creep sound after applying the slow-motion effect.
Step 3: In case you just want to add a slo-mo effect to part of the video, you need to split the video accordingly. Split the portion of the video that will be slowed down by clicking on the Split button in the menu. And use the Split tool again to end the slow-motion effect to get a segment of the video.
Step 4: Tap the cut section of the video and then you will see the Speed option. Open the Speed menu by selecting it from the drop-down menu.
Step 5: In CapCut, there are two methods to slow down a video, Normal and Curve, respectively. You may just choose the “Normal“ option to make things easy. It is possible to reduce the video’s frame rate by moving the speed slider to the left. You may, for example, make the pace 0.3 times slower. Apply a slow-motion effect by tapping the Check box.
Make a slow motion video at this stage to spice things up. CapCut allows you to add text, create transition effects, and more.
For more information, you can check: How to slo-mo in Capcut .
Conclusion
In this complete guide on “How to Convert Videos to Slow Motion?”, we hope you have learned all the basics. We have covered different apps that can help you do so. As the steps are straigthforward, make sure you abide by all the basics and transform your videos into catchy ones!
Every Compositor Should Know The Tips of Color Match in After Effects
Every Compositor Should Know The Trick of Color Match in After Effects
An easy yet powerful editor
Numerous effects to choose from
Detailed tutorials provided by the official channel
After Effects is one of the most exciting applications put forward by Adobe. You can readily use this application for film-making; that is, you can edit videos with After Effects. The features of this application are highly proficient, effective and intuitive. And one of the most exciting and incredible features of After Effects is the “Colour Match” feature.
The “Color Match” of After Effects has numerous advantages, and there are some steps that you need to follow to use this feature. So, in the following discussion, we have discussed how you can match colours in After Effects its advantages. Lastly, we have introduced a video editing tool that can ideally be an alternative to the “Color Match” of After Effects.
In this article
01 [What Are the Obvious Advantages of the Color Match of After Effects?](#Part 1)
02 [Quick Tip - Matching Colors in After Effects](#Part 2)
03 [Alternative to After Effects Color Match](#Part 3)
Part 1 What Are the Obvious Advantages of the Color Match of After Effects?
As we have mentioned earlier, the colour matcher plugin of After Effects has numerous advantages, we will now be discussing what they are. So, the following list states the different benefits of using the “Color Match” of After Effects.
● You can add shadows and highlights.
Sometimes, our photos are underexposed, while sometimes, they are overexposed. Either way, they do not look quite pleasing. But you efficiently use “Colour Match” of After Effects to correct the exposure. And it will be possible when you adjust the highlights and shadows of the picture or the video through this feature. You can access this advantage in the “Shadows and Highlights” option of After Effects.

● Adjuting Vibrance
Another benefit you get from this feature of After Effects is that you can quickly fix the appropriate saturation of the picture or the video you want to edit. You can adjust the saturation, thus, making the picture or the video more vibrant and natural-looking. The option to adjust the saturation or the vibrance of any image or video is present in the “Vibrance” option. Click on the option and set the saturation of the colours of the images perfectly.

● Access to incredible filters
After Effects’ “Colour Match” feature filters make your photos and videos look all-natural. You can readily adjust the settings of the filters and set them according to the essence you want to have in your picture. The filters make your picture and videos look like they have been shot naturally on high-quality camera lenses. So, your videos and pictures look more natural and of the highest quality.
● Choose and match any colour for your images and videos
You might want to change or alter the colours of a particular video clip or an image with the colour of some other image. The “Colour Match” feature of Adobe After Effect makes it readily possible for you to carry this function.
● Intuitive but proficient feature
The “Colour Match” feature of Adobe After Effect helps you edit your videos and images most profoundly. But at the same time, apart from being a professional feature, it is not difficult to use. You can easily understand how to use the feature and make your videos and images match the colours you want.
Part 2 Quick Tip - Matching Colors in After Effects
Here are the steps by which you can avail of the incredible “Colour Match” feature of after-effects to match the colour between clips.
Step 1The first step requires you to access the “Composition Settings” and make the required changes accordingly. You can find the options in the “Composition Settings” and readily make the needed changes.

Step 2Choose the background color according to your choice.

Step 3Now, import the image you want to edit. First, right-click and then you will find an “Import” option. Click on it to import the image you want.

Step 4As you select the “Import” option, you will see a dialogue box. Select the folder in which the image has been saved and then select the image from the folder.

Step 5After importing the image, you need to select After Effects’ “Effects & Presets” option. And there, you will find the “Colour Correction” option. Click on that option.

Step 6You will see an “Auto-colour” option. Double-click on that option. It will automatically make your image look more realistic ad natural. Adobe After Effects will choose the most suitable colour correction shade for your photo and apply it. As a result, you will see a vibrant change in the image.

Many other features under this tool will help you make your images look as vibrant and incredible as possible. And now, we will be discussing the various features and tips that you can use in “After Effects” to make your images look more fabulous than ever.
● Change the contrast of the image to make it look more vibrant
You can change the settings of the image if you want. Also, you can use the “Blend” feature of After Effects to bring out better changes and edits in your picture. Another feature that can help you edit the colours of your image in After Effects is the “Auto Contrast” feature of After Effects.
In this feature, the tool automatically adjusts the exposure of the image’s colours, lights, and shadows, thereby making it look more realistic and natural. The image quality is also enhanced through this feature. It is because the colour contrast gets automatically adjusted to the perfect settings by the feature.
You will get the “Auto Contrast” feature exactly below the “Auto Colour” option, in the “Colour Contrast” drop-down panel.
● Change the level of your image to make it look more natural
You can readily make your images look more natural and realistic than ever. And that is possible through the “Colour Correction” feature of After Effects. Opt for the “Auto Levels” option present in the “Colour Correction” drop-down box.
Then right below the “Auto Contrast” option, you will find the “Auto-Levels” option. After you click on the option, your image will automatically get its colour adjusted by the tool, correctly adjusting all its required settings to make your image look as realistic and natural as possible.
● Bring a black-and-white effect on your image through the option in After effects
The Black-and-White effect on the images has been one of the most popular trends and styles one chooses to edit. And in order to make your efforts minimal and the quality of with the finest, the After Effects has a “Black & white” option as well.
So, if you want to edit your pictures in the black and white filter, you can readily do so in the highest quality and with the least effort. Open the “Colour Contrast” feature in After Effects and click on its drop-down box. The fourth option is the one that is below the “Auto Levels” option, and you will find the “Black & White” option present.
Click on that option, and you will find your image edited in the black-white hues, in the most impeccable shade, light, shadow and effect.
● Change the tint and the brightness or contrast
Under the “Black & White” option in the “Colour Correction” option of After effects, you can avail of the further edit option that is available under the “Black & White” option. There, the last option will be “Tint”. When you opt for the option of “Tint”. You can select the colour you want to be entirely dominant in your image.
And below the “Black & White” option, you will find the “Brightness & Contrast” option. Click on it to adjust and set the brightness and contrast of the image. It will make the image’s colour and shades look more vibrant because you can change its contrast according to your wish.
Part 3 Alternative to After Effects Color Match
And now, we will be introducing you to another video and image editing tool that will help you match the colours of your videos and images as proficiently as the colour matcher after effects plugin. And the tool is Wondershare Filmora Video Editor . Its incredible feature of “Colour Match” allows you to match the colours of your videos and images, making them more vibrancy, sometimes even monochromatic.
You can choose a particular theme or shade for the entire image or video and the “Colour Match” will help you bring your imagination into reality. If you want to edit or match colours in a particular clip or option of the video, you are all set to do so with Filmora 11.
For Win 7 or later (64-bit)
For macOS 10.12 or later
● Key Takeaways from This Episode →
● The advantages that you receive from “Colour Match” of After effects
● The quick steps of how to use “Colour Match” of “After Effects”
● The “Colour Match” feature of Filmora can readily make your videos alter colors and become more vibrant and incredible.
After Effects is one of the most exciting applications put forward by Adobe. You can readily use this application for film-making; that is, you can edit videos with After Effects. The features of this application are highly proficient, effective and intuitive. And one of the most exciting and incredible features of After Effects is the “Colour Match” feature.
The “Color Match” of After Effects has numerous advantages, and there are some steps that you need to follow to use this feature. So, in the following discussion, we have discussed how you can match colours in After Effects its advantages. Lastly, we have introduced a video editing tool that can ideally be an alternative to the “Color Match” of After Effects.
In this article
01 [What Are the Obvious Advantages of the Color Match of After Effects?](#Part 1)
02 [Quick Tip - Matching Colors in After Effects](#Part 2)
03 [Alternative to After Effects Color Match](#Part 3)
Part 1 What Are the Obvious Advantages of the Color Match of After Effects?
As we have mentioned earlier, the colour matcher plugin of After Effects has numerous advantages, we will now be discussing what they are. So, the following list states the different benefits of using the “Color Match” of After Effects.
● You can add shadows and highlights.
Sometimes, our photos are underexposed, while sometimes, they are overexposed. Either way, they do not look quite pleasing. But you efficiently use “Colour Match” of After Effects to correct the exposure. And it will be possible when you adjust the highlights and shadows of the picture or the video through this feature. You can access this advantage in the “Shadows and Highlights” option of After Effects.
● Adjuting Vibrance
Another benefit you get from this feature of After Effects is that you can quickly fix the appropriate saturation of the picture or the video you want to edit. You can adjust the saturation, thus, making the picture or the video more vibrant and natural-looking. The option to adjust the saturation or the vibrance of any image or video is present in the “Vibrance” option. Click on the option and set the saturation of the colours of the images perfectly.
● Access to incredible filters
After Effects’ “Colour Match” feature filters make your photos and videos look all-natural. You can readily adjust the settings of the filters and set them according to the essence you want to have in your picture. The filters make your picture and videos look like they have been shot naturally on high-quality camera lenses. So, your videos and pictures look more natural and of the highest quality.
● Choose and match any colour for your images and videos
You might want to change or alter the colours of a particular video clip or an image with the colour of some other image. The “Colour Match” feature of Adobe After Effect makes it readily possible for you to carry this function.
● Intuitive but proficient feature
The “Colour Match” feature of Adobe After Effect helps you edit your videos and images most profoundly. But at the same time, apart from being a professional feature, it is not difficult to use. You can easily understand how to use the feature and make your videos and images match the colours you want.
Part 2 Quick Tip - Matching Colors in After Effects
Here are the steps by which you can avail of the incredible “Colour Match” feature of after-effects to match the colour between clips.
Step 1The first step requires you to access the “Composition Settings” and make the required changes accordingly. You can find the options in the “Composition Settings” and readily make the needed changes.
Step 2Choose the background color according to your choice.
Step 3Now, import the image you want to edit. First, right-click and then you will find an “Import” option. Click on it to import the image you want.
Step 4As you select the “Import” option, you will see a dialogue box. Select the folder in which the image has been saved and then select the image from the folder.
Step 5After importing the image, you need to select After Effects’ “Effects & Presets” option. And there, you will find the “Colour Correction” option. Click on that option.
Step 6You will see an “Auto-colour” option. Double-click on that option. It will automatically make your image look more realistic ad natural. Adobe After Effects will choose the most suitable colour correction shade for your photo and apply it. As a result, you will see a vibrant change in the image.
Many other features under this tool will help you make your images look as vibrant and incredible as possible. And now, we will be discussing the various features and tips that you can use in “After Effects” to make your images look more fabulous than ever.
● Change the contrast of the image to make it look more vibrant
You can change the settings of the image if you want. Also, you can use the “Blend” feature of After Effects to bring out better changes and edits in your picture. Another feature that can help you edit the colours of your image in After Effects is the “Auto Contrast” feature of After Effects.
In this feature, the tool automatically adjusts the exposure of the image’s colours, lights, and shadows, thereby making it look more realistic and natural. The image quality is also enhanced through this feature. It is because the colour contrast gets automatically adjusted to the perfect settings by the feature.
You will get the “Auto Contrast” feature exactly below the “Auto Colour” option, in the “Colour Contrast” drop-down panel.
● Change the level of your image to make it look more natural
You can readily make your images look more natural and realistic than ever. And that is possible through the “Colour Correction” feature of After Effects. Opt for the “Auto Levels” option present in the “Colour Correction” drop-down box.
Then right below the “Auto Contrast” option, you will find the “Auto-Levels” option. After you click on the option, your image will automatically get its colour adjusted by the tool, correctly adjusting all its required settings to make your image look as realistic and natural as possible.
● Bring a black-and-white effect on your image through the option in After effects
The Black-and-White effect on the images has been one of the most popular trends and styles one chooses to edit. And in order to make your efforts minimal and the quality of with the finest, the After Effects has a “Black & white” option as well.
So, if you want to edit your pictures in the black and white filter, you can readily do so in the highest quality and with the least effort. Open the “Colour Contrast” feature in After Effects and click on its drop-down box. The fourth option is the one that is below the “Auto Levels” option, and you will find the “Black & White” option present.
Click on that option, and you will find your image edited in the black-white hues, in the most impeccable shade, light, shadow and effect.
● Change the tint and the brightness or contrast
Under the “Black & White” option in the “Colour Correction” option of After effects, you can avail of the further edit option that is available under the “Black & White” option. There, the last option will be “Tint”. When you opt for the option of “Tint”. You can select the colour you want to be entirely dominant in your image.
And below the “Black & White” option, you will find the “Brightness & Contrast” option. Click on it to adjust and set the brightness and contrast of the image. It will make the image’s colour and shades look more vibrant because you can change its contrast according to your wish.
Part 3 Alternative to After Effects Color Match
And now, we will be introducing you to another video and image editing tool that will help you match the colours of your videos and images as proficiently as the colour matcher after effects plugin. And the tool is Wondershare Filmora Video Editor . Its incredible feature of “Colour Match” allows you to match the colours of your videos and images, making them more vibrancy, sometimes even monochromatic.
You can choose a particular theme or shade for the entire image or video and the “Colour Match” will help you bring your imagination into reality. If you want to edit or match colours in a particular clip or option of the video, you are all set to do so with Filmora 11.
For Win 7 or later (64-bit)
For macOS 10.12 or later
● Key Takeaways from This Episode →
● The advantages that you receive from “Colour Match” of After effects
● The quick steps of how to use “Colour Match” of “After Effects”
● The “Colour Match” feature of Filmora can readily make your videos alter colors and become more vibrant and incredible.
Ways to Learn Discord Game Bots – Even if You’re Just Starting Out
Ways to Learn Discord Game Bots – Even if You’re Just Starting out
An easy yet powerful editor
Numerous effects to choose from
Detailed tutorials provided by the official channel
Discord is free social communication service used by tens of millions of individuals aged 13 and above to socialize with their communities and friends. People use discord regularly to discuss various topics, from art projects and family vacations to homework and mental health help. It serves as a home for communities of different sizes but has become quite popular as discord bot games due to the rise in the gaming community.
The great majority of servers are private, invite-only locations where friends and communities may communicate and spend time together. More significant, more open groups based on specific themes like popular video games like PUBG and Genshin Impact. Because all discussions are opt-in, users have complete choice over who they connect with and how they use discord.
In this article
01 [What Are Discord Game Bots?](#Part 1)
02 [How Do You Add Bot Games to Discord?](#Part 2)
03 [Top 10 Picks of Discord Gaming Bots](#Part 3)
04 [Discord Game Bots FAQs](#Part 4)
Part 1 What Are Discord Game Bots?
Discord game bots are artificial intelligence (AI)-powered applications that automate processes and add music, games, welcome messages, memes, and other fun stuff to your server. These bots make it simple to interact with your audience, grow your community, and manage your server.
There is a plethora of game bots for discord to pick from, each with its purpose. Some may automatically welcome new users, while others utilize webhooks to interface with other apps—and it may be tough for novice users to figure out which ones will provide the most remarkable results for their requirements.
Part 2 How Do You Add Bot Games to Discord?
Follow the steps below to add game bots for discord successfully:
Step 1: To add a bot to your Discord server, go to the bot’s source page. We’ll be using ProBot for this lesson.
Step 2: Depending on the bot you’re adding, click Add to Discord or Invite Now.
Step 3: To grant the bot access, a pop-up window will appear asking you to check in to your Discord account.
Step 4: After you log in, you’ll see a box asking for account authorization. Locate and choose the Add to Server drop-down menu.
Step 5: This will bring up a list of discord servers where you can add a bot game discord. Continue after selecting your server.
Step 6: Examine the server permissions that the bot asks for. Select and deselect according to your requirements. When you’re ready, click Authorize.
For those who like to share their discord game bots experience through screen recordings and whatnot, a potent and convenient video editing tool to make your sessions look even more incredible is Filmora.
Wondershare Filmora Video Editor is a famous video editing program for those who wish to focus on editing and producing high-quality videos. The program supports 4K video editing. It’s a reasonably priced tool featuring effects for both video and audio. When it comes to designing, adding effects, and modifying movies, it provides users with many possibilities. You can use the tool to add overlays, create animations and objects, add music, and input text. Imagine sharing your experience in 4k!
For Win 7 or later (64-bit)
For macOS 10.12 or later
Part 3 Top 10 Picks of Discord Gaming Bots
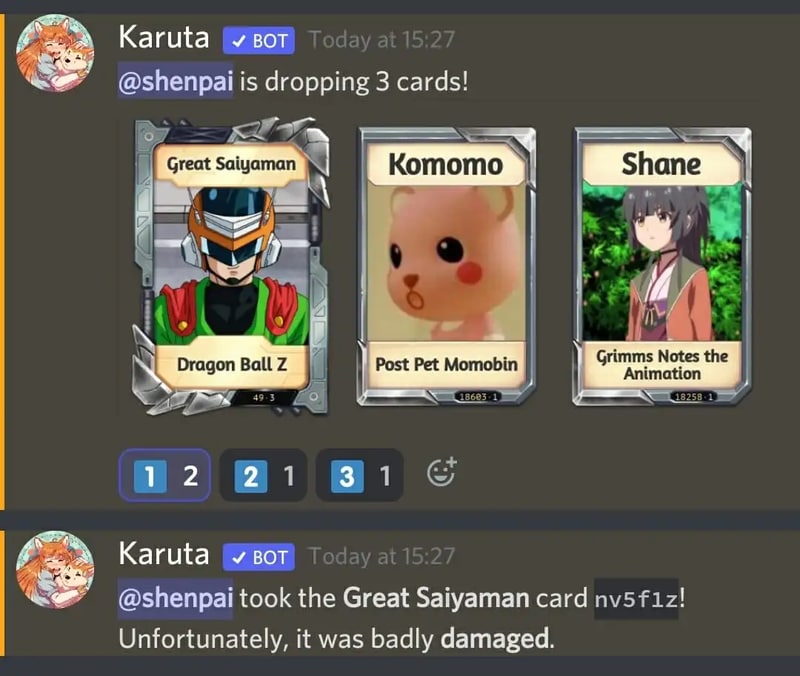
01Karuta
Karuta is a discord game bot where you gather anime characters. In Karuta, though, you collect characters using trading cards. Your cards and other objects may be customized, upgraded, and traded with other players. Better still, you maintain the same cards between servers, allowing you to play Karuta with the same deck on any server where the game discord bot is!
02Dragon Bot Z
Dragon Bot Z is the discord bot game that adds discord Ball Z, a multiplayer text-based RPG, to your server. Players in Discord Ball Z summon characters from the iconic Dragon Ball Z franchise, train them, fight foes, buy equipment, and trade with other players. This Discord game is ideal for Dragon Ball fans or anybody who likes text-based roleplaying games.

03Mudae
Mudae is a bot discord game with character-collecting. For example, you can claim popular anime and videogame characters as your “waifus” or “husbandos,” develop your harem, and compete for your favorite characters with other users. You can also trade the characters with other members.

04Rock Puppy
Rock Puppy is a basic yet entertaining game bots discord bot that incorporates several classic games. You can enjoy Discord games like ConnectFour, Truth or Dare, Trivia, Tic-Tac-Toe, Russian Roulette, and Would You Rather with Rock Puppy. You may also use magic 8-ball, dice, or tarot cards, play classic board and party games on your server with Rock Puppy.
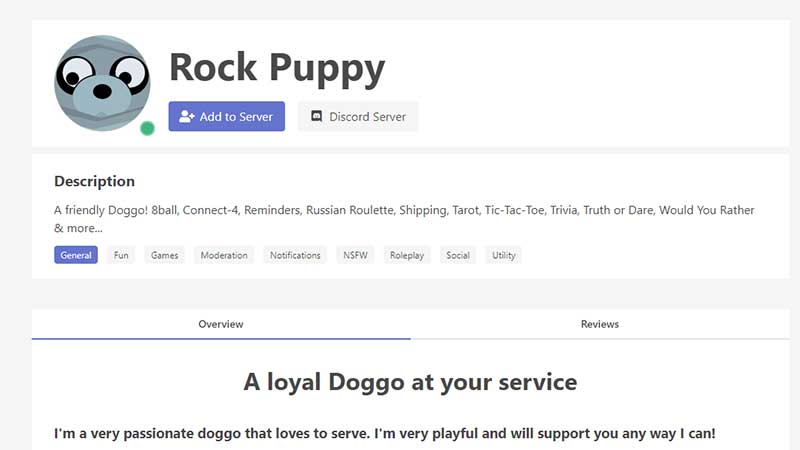
05GarticBOT
GarticBot is a bot game in discord that allows you to play the drawing game Gartic. GarticBot begins the Discord game by painting an image on your server. Members then compete against one another to predict the image the quickest. Others can guess your drawings if you submit them. Type the command g.draw, and Gartic will provide you with a URL to submit your artwork. GarticBot creates a fun Pictionary-style game for everyone on your server to play.

06TriviaBot
TriviaBot is the most popular trivia game discord bot. It has over 90,000 questions, and you can even submit your own for inclusion in the bot. Members can form and join teams to compete in competitions. You may also create a public leaderboard to display who performs the best on the server.

07GamesRob
The finest Uno discord game bot is GamesROB. ConnectFour, Trivia, Battleship, 2048, Tic-Tac-Toe, Minesweeper, and Hangman are the other traditional party games added to discord. You may also play “Detective,” a Discord game in which you try to figure out who is the “assassin” on your server, memory games, and Town, Country, River, a game in which you try to come up with as many phrases as possible within a theme.
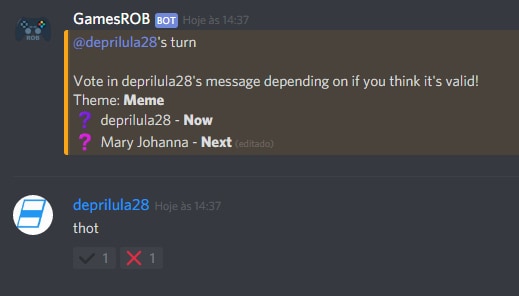
08Chess Reddit
Chess is a simple game that allows you to play chess on discord. You may play a chess game with other server members directly on the server. Instruct the bot on which pieces to move and where they should go. After each move, the Discord game bot creates a fresh graphic of the board so you can plot your next move. And, because the game hosts on your server, other users may watch and debate it!
09PokeMeow
PokeMeow is by far the most popular Pokemon game discord bot. With this Pokemon bot, you may capture Pokemon on your server, trade, battle with other players, and accomplish tasks for in-game currency and stuff. As you keep building up your Pokedex, the Pokemon bot also allows to compete with other users on the worldwide leaderboard! PokeMeow is the ideal Pokemon Discord bot for fans of the Pokemon series.
10IdleRPG
IdleRPG is a discord game where you may play a text-based roleplaying game. You may make your character complete with ethnicity and social status. Then, you can go on quests and combat beasts, purchase, and exchange mythic objects, join guilds, engage with gods, and even marry other players. Play through your character’s adventure while engaging with and creating stories with other players. IdleRPG is likely to provide your server with hundreds of hours of roleplaying pleasure.

Part 4 Discord Game Bots FAQs
Now, let us go through some FAQs about discord game bots:
Q. Is it possible to play games with discord bots?
A. You could indeed play discord games in-server with bots, challenge other members, and win prizes! A game bot is a terrific method to keep players engaged on your server, especially if it’s a gaming Discord channel.
Q. Do game bots spy on you?
A. No, game discord bots do not have inbuilt spyware.
Q. How many bots should a server have?
A. It’s best not to have more than 20 bots game on discord on a server at any moment. More bots than this may cause users to become confused and the service to seem suspicious.
Q. Are discord bots free?
A. All these discord game bots are free to use. However, some have premium upgrades.
Q. Which bot is the most popular game bot in discord?
A. Worddle
Q. Which bot is the best bot for gaming on discord?
A. Gawesome is an excellent alternative for adding a multifunctional bot to your discord server.
● Ending Thoughts →
● Discord is accessible communication and socializing service for individuals aged 13 and above.
● The platform extends to various servers, each with its users, rules, themes, and channels, but one underutilized feature is the ability to develop and code custom AI-powered bots.
● Game bots for discord are artificial intelligence (AI)-powered applications that automate processes and add games to your discord server.
● These game discord bots make it simple to interact with your audience, grow your community, and manage your server.
● Lastly, to enhance the discord game bots experience and bring your gaming videos to life, use the Filmora software.
Discord is free social communication service used by tens of millions of individuals aged 13 and above to socialize with their communities and friends. People use discord regularly to discuss various topics, from art projects and family vacations to homework and mental health help. It serves as a home for communities of different sizes but has become quite popular as discord bot games due to the rise in the gaming community.
The great majority of servers are private, invite-only locations where friends and communities may communicate and spend time together. More significant, more open groups based on specific themes like popular video games like PUBG and Genshin Impact. Because all discussions are opt-in, users have complete choice over who they connect with and how they use discord.
In this article
01 [What Are Discord Game Bots?](#Part 1)
02 [How Do You Add Bot Games to Discord?](#Part 2)
03 [Top 10 Picks of Discord Gaming Bots](#Part 3)
04 [Discord Game Bots FAQs](#Part 4)
Part 1 What Are Discord Game Bots?
Discord game bots are artificial intelligence (AI)-powered applications that automate processes and add music, games, welcome messages, memes, and other fun stuff to your server. These bots make it simple to interact with your audience, grow your community, and manage your server.
There is a plethora of game bots for discord to pick from, each with its purpose. Some may automatically welcome new users, while others utilize webhooks to interface with other apps—and it may be tough for novice users to figure out which ones will provide the most remarkable results for their requirements.
Part 2 How Do You Add Bot Games to Discord?
Follow the steps below to add game bots for discord successfully:
Step 1: To add a bot to your Discord server, go to the bot’s source page. We’ll be using ProBot for this lesson.
Step 2: Depending on the bot you’re adding, click Add to Discord or Invite Now.
Step 3: To grant the bot access, a pop-up window will appear asking you to check in to your Discord account.
Step 4: After you log in, you’ll see a box asking for account authorization. Locate and choose the Add to Server drop-down menu.
Step 5: This will bring up a list of discord servers where you can add a bot game discord. Continue after selecting your server.
Step 6: Examine the server permissions that the bot asks for. Select and deselect according to your requirements. When you’re ready, click Authorize.
For those who like to share their discord game bots experience through screen recordings and whatnot, a potent and convenient video editing tool to make your sessions look even more incredible is Filmora.
Wondershare Filmora Video Editor is a famous video editing program for those who wish to focus on editing and producing high-quality videos. The program supports 4K video editing. It’s a reasonably priced tool featuring effects for both video and audio. When it comes to designing, adding effects, and modifying movies, it provides users with many possibilities. You can use the tool to add overlays, create animations and objects, add music, and input text. Imagine sharing your experience in 4k!
For Win 7 or later (64-bit)
For macOS 10.12 or later
Part 3 Top 10 Picks of Discord Gaming Bots
01Karuta
Karuta is a discord game bot where you gather anime characters. In Karuta, though, you collect characters using trading cards. Your cards and other objects may be customized, upgraded, and traded with other players. Better still, you maintain the same cards between servers, allowing you to play Karuta with the same deck on any server where the game discord bot is!
02Dragon Bot Z
Dragon Bot Z is the discord bot game that adds discord Ball Z, a multiplayer text-based RPG, to your server. Players in Discord Ball Z summon characters from the iconic Dragon Ball Z franchise, train them, fight foes, buy equipment, and trade with other players. This Discord game is ideal for Dragon Ball fans or anybody who likes text-based roleplaying games.
03Mudae
Mudae is a bot discord game with character-collecting. For example, you can claim popular anime and videogame characters as your “waifus” or “husbandos,” develop your harem, and compete for your favorite characters with other users. You can also trade the characters with other members.
04Rock Puppy
Rock Puppy is a basic yet entertaining game bots discord bot that incorporates several classic games. You can enjoy Discord games like ConnectFour, Truth or Dare, Trivia, Tic-Tac-Toe, Russian Roulette, and Would You Rather with Rock Puppy. You may also use magic 8-ball, dice, or tarot cards, play classic board and party games on your server with Rock Puppy.
05GarticBOT
GarticBot is a bot game in discord that allows you to play the drawing game Gartic. GarticBot begins the Discord game by painting an image on your server. Members then compete against one another to predict the image the quickest. Others can guess your drawings if you submit them. Type the command g.draw, and Gartic will provide you with a URL to submit your artwork. GarticBot creates a fun Pictionary-style game for everyone on your server to play.
06TriviaBot
TriviaBot is the most popular trivia game discord bot. It has over 90,000 questions, and you can even submit your own for inclusion in the bot. Members can form and join teams to compete in competitions. You may also create a public leaderboard to display who performs the best on the server.
07GamesRob
The finest Uno discord game bot is GamesROB. ConnectFour, Trivia, Battleship, 2048, Tic-Tac-Toe, Minesweeper, and Hangman are the other traditional party games added to discord. You may also play “Detective,” a Discord game in which you try to figure out who is the “assassin” on your server, memory games, and Town, Country, River, a game in which you try to come up with as many phrases as possible within a theme.
08Chess Reddit
Chess is a simple game that allows you to play chess on discord. You may play a chess game with other server members directly on the server. Instruct the bot on which pieces to move and where they should go. After each move, the Discord game bot creates a fresh graphic of the board so you can plot your next move. And, because the game hosts on your server, other users may watch and debate it!
09PokeMeow
PokeMeow is by far the most popular Pokemon game discord bot. With this Pokemon bot, you may capture Pokemon on your server, trade, battle with other players, and accomplish tasks for in-game currency and stuff. As you keep building up your Pokedex, the Pokemon bot also allows to compete with other users on the worldwide leaderboard! PokeMeow is the ideal Pokemon Discord bot for fans of the Pokemon series.
10IdleRPG
IdleRPG is a discord game where you may play a text-based roleplaying game. You may make your character complete with ethnicity and social status. Then, you can go on quests and combat beasts, purchase, and exchange mythic objects, join guilds, engage with gods, and even marry other players. Play through your character’s adventure while engaging with and creating stories with other players. IdleRPG is likely to provide your server with hundreds of hours of roleplaying pleasure.
Part 4 Discord Game Bots FAQs
Now, let us go through some FAQs about discord game bots:
Q. Is it possible to play games with discord bots?
A. You could indeed play discord games in-server with bots, challenge other members, and win prizes! A game bot is a terrific method to keep players engaged on your server, especially if it’s a gaming Discord channel.
Q. Do game bots spy on you?
A. No, game discord bots do not have inbuilt spyware.
Q. How many bots should a server have?
A. It’s best not to have more than 20 bots game on discord on a server at any moment. More bots than this may cause users to become confused and the service to seem suspicious.
Q. Are discord bots free?
A. All these discord game bots are free to use. However, some have premium upgrades.
Q. Which bot is the most popular game bot in discord?
A. Worddle
Q. Which bot is the best bot for gaming on discord?
A. Gawesome is an excellent alternative for adding a multifunctional bot to your discord server.
● Ending Thoughts →
● Discord is accessible communication and socializing service for individuals aged 13 and above.
● The platform extends to various servers, each with its users, rules, themes, and channels, but one underutilized feature is the ability to develop and code custom AI-powered bots.
● Game bots for discord are artificial intelligence (AI)-powered applications that automate processes and add games to your discord server.
● These game discord bots make it simple to interact with your audience, grow your community, and manage your server.
● Lastly, to enhance the discord game bots experience and bring your gaming videos to life, use the Filmora software.
Best 20 Slideshow Makers for Win/Mac/Online Review
Top Slideshow Makers for WinMacOnline Review
An easy yet powerful editor
Numerous effects to choose from
Detailed tutorials provided by the official channel
To create slideshow, multiple tools and elements are required. Generally, people look for a tool that’s easy to use and that’s rich in features. Even if such a tool is found, the immediate problem is the operating system. Not every system is compatible with Windows or Mac.
Here, this article is all about cutting the efforts to search for the best app for slide show making. All the top tools are listed in this single article that can serve the purpose for Windows and Mac users along with online users.
In this article
01 [Top 10 Slideshow Makers for Windows](#Part 1)
02 [Top 5 Slideshow Makers for Mac](#Part 2)
03 [Top 5 Online Slideshow Makers](#Part 3)
Part 1 Top 10 Slideshow Makers for Windows
01Adobe Spark
Adobe Spark or Adobe Creative Cloud Express is a top-notch software for creating a slideshow in Windows 8.1 or newer versions. As Adobe is always been a promising platform to create unique designs, with this application as well, users can flaunt their thoughts through different features.

● A simple UI assists beginners to understand all the functionalities before using it without much hassle. It also increases the speed to make a slide show with simple yet efficient tools.
● It is totally compatible with other Adobe products, making it flexible for any kind of use.
● You can create slide show on your PC without any watermark and with different existing templates and elements.
02Movavi Slideshow Maker
Movavi brings some unique features to create a slideshow with enhanced video quality and modern tool arrangement for all of the people who love to create a better presentation. Even with a seamless platform, all the necessary tools are arranged in a familiar pattern to make it comfortable.

● Full slideshow wizard is available with Movavi slide show maker to assist the beginners to create a quality presentation.
● With the screen recording feature, you can add live demonstration in the presentation with 150+ filters and visual effects.
● This slide show app includes multiple ready-made templates, music functionalities, etc. for a professional slideshow-making setup.
03MiniTool MovieMaker
MiniTool MovieMaker is a comparatively new tool as a free slideshow maker for all Windows users. It consists of quirky features like cartoon clips, animated elements, etc. along with modern transition and video processing tools.

● As this is a new platform, the latest features are added on frequently and the users can apply them for an up-to-the-minute slideshow. From trimming a video to adding a transition to a photo slideshow, everything is available on a single software.
● Even if you don’t know anything about video editing or creating a slideshow, this tool would guide you through everything with a simple arrangement and a wide range of options.
● You can export a video in different formats like MP4, MOV, WMV, etc., and get watermark-free projects.
04PhotoStage Slideshow Software
To make a slide show quickly, you can go with PhotoStage Slideshow software without any doubt. This software is not only useful for beginners but has exciting features for intermediate video editors. This slideshow app is compatible with Windows XP, Vista, 7, 8, 8.1, 10, and 11.

● There is a slideshow wizard feature to add themes, transitions, and music to the slides easily.
● Built-in DVD HD video authoring and YouTube sharing are available for wide usability of the slideshows for multiple purposes.
● Different audio tools and photo optimization tools are available to add a classy look to the presentation.
05Icecream Slideshow Maker
For the most simple yet efficient slideshow maker online, choose Icecream software that comes with a very beginner-friendly interface and options. For learning video editing and create a slideshow This software can be a good tool to start with. However, the features are very minimum and the professional creators might not find it very exciting. But for beginners or students, this would be a great choice.

● It supports various audio formats including MP3, WAV, WMA, and TIFF. Also, image formats including JPG, JPEG, and PNG are supported.
● Along with YouTube uploading, DVD transfer, cloud storage (Dropbox or Google Drive) is supported.
● slideshow is supported in this free slide show maker.
06Kizoa
It’s become a hassle often to find the suitable aspect for a slideshow for different screens like laptops, TV, or smartphone. Kizoa slide show maker is eliminating this problem with 7 different aspect ratios for the slideshows. And this can be an effective advantage when making a slideshow for any professional purpose.

● This app for slide show is available for Windows 7 or higher versions till Windows 10. There’s not been an update till now for Windows 11.
● Bulk collection of 2D and 3D transitions, effects, and GIFs are available to use in the slides as per the requirement.
● This software is intended to create slideshow only and all the features are added according to that unlike any slideshow creator cum video editor app.
07Magix Photostory Deluxe
For a high-quality professional slideshow maker online, Magix Photostory Deluxe is a good option. This editor has almost 1,500 built-in effects, 200+ decorative elements, and 100+ pre-designed templates to assist users with the slideshows in lesser time.

● Built-in DVD and Blu-ray burning features along with a 4K resolution feature are present with this application.
● Unique camera tracking and zooming features are available to add more latest elements to the slideshow.
● All-in-one platform to create slideshow, edit photos, and videos.
08Slideshow Maker
The name in itself defines this as one of the best slideshow makers with high-quality results. 4K Slideshow maker is available for Windows 7 and higher versions. Those who don’t want to compromise with the video resolution in the slideshow can try this slideshow app. However other features like tool arrangement and UI is slightly poor compared to other software.

● This software supports different file formats and makes this platform flexible for multiple uses.
● All the projects are saved in high resolution, i.e., 1080p or 4K.
09SmartSHOW 3D
SmartSHOW 3D is an efficient free slideshow maker for high-quality, 3D slideshows. This is another beginner-friendly software with multiple tools and effects. Some latest addition like pan & zoom effect creation, the audio waveform in the music section, and customized picture frames would help to add extra effect to the slideshow.

● free templates and 200+ free music tracks are available in this free slide show maker to enhance the whole presentation properly.
● You can also make mobile-optimized videos using the SmartSHOW 3D editor.
● Add a soundtrack to the slideshow and use existing templates in the free trial before buying the subscription.
● Multiple formats are supported to download the project after creating a slideshow.
Part 2 Top 5 Slideshow Makers for Mac
01PowerDirector
PowerDirector is one of the best free slideshow makers on Mac systems, enabling the pro features of the storyboard, timeline, and slideshow interfaces. There’s a wide capability of visual effects that can boost the whole quality of the slideshow in no time.

02iMovie
iMovie slide show maker is available for both macOS and iOS systems, to let the creators make some elegant and high-resolution slideshows. It includes professional-looking themes and interfaces to add a classy look to the whole presentation. It’s simple for beginners as there’s no complicated tool arrangement in the UI.

03Photostage
Photostage is a complete package for slideshow creation, including the seamless options for photo arrangement, special effects, audio set-up, etc. For beginners, it might be a bit confusing but with time, it will be easier to use. This free slide show maker is equally compatible with both Windows and Mac, unlike much other software.

04Videopad
Videopad is another top slideshow maker on Mac systems that has 50+ transition effects, third-party plugin support, and all popular file format compatibility. The slides would be made as with a movie effect on this platform with various latest templates and features.

05Keynote
For real-time collaboration and PowerPoint features, Keynote would be the best choice to create slide show. It has the integration with Adobe Photoshop which extends the creativity range more. You can also find an in-built large library for pre-made templates to apply in the slideshow. However, for beginners, Keynote can a be hurdle.

Part 3 Top 5 Online Slideshow Makers
To be independent of any system, users might also want to make slideshow online. To support this choice, the following five best slideshow creators are mentioned.
01Canva
Canva is a popular online slide show maker that has everything you need to make a perfect presentation. From various templates to elements, graphics to custom frames, special social media templates, and versatile file formats- the free version itself has many features to serve.

02Animoto
With an user-friendly interface and quick processing, Animoto is a favorite platform to make slideshow online. However, there is a problem with the watermark in some cases. You can automatically apply any modification to all the sections by applying the filters in one section. Note that, there’s no free subscription with this platform.

03FlexClip
Flexclip is a beginner-friendly online slideshow maker with numerous templates and assets to choose from. In the free version, you can download a video in 480p only. Also, there’s no undo button for slideshow creation. So, you need to be sure about any modification in this editor.

04Kapwing
Kapwing is a multipurpose online free slideshow maker for intermediate users. Different video editing tools are available along with subtitle and AI subtitle support. Note that, the content in free version is public and cannot be stored for more than 7 days.

05Visme
Visme is a quick slideshow maker with five easy steps to master. Companies like IBM and Accenture use Visme to create slideshows and infographics. Undoubtedly this can be a perfect pick for seamless, professional slideshow cration.

How to use Filmora?
Filmora is all-in-one software to create slide show for literary any purpose, in any operating system, providing all the features a creator might need while making a perfect slideshow. A slideshow can be for academic or professional purposes, to decorate some beautiful moments, or to create something unique. And for every separate aim, different tools and features are required in a slideshow maker. To fulfil all such requirements with the latest tools, Filomora has a versatile platform.
As in this article, we have already mentioned some of the best slideshow makers, you may find some restrictions like system boundaries, not being beginner-friendly, or missing the latest features in the free slideshow makers. That’s why the best possible solution is presented here with all the following advantages.
Advantages of Wondershare Filmora Video Editor Slideshow Maker:
● This software is compatible with both Windows (7 or later versions) and Mac OS (10.12 or later versions), giving flexible usability to all the slideshow enthusiasts.
For Win 7 or later (64-bit)
For macOS 10.12 or later
● It takes lesser time to create a slideshow in Filomra using the top-notch transitions and effects. Also, there’s a split-screen option to make a slideshow more efficiently.
● All the popular file formats are supported including images, audio, and video. And, it’s also easy to upload a project on any social media directly from Filmora.
● Numerous motion effects, titles, filters, effects, and overlays are available for free in this slide show app.
● The built-in audio library provides suitable music with the slideshows to make it better as a complete presentation.
● Ending Thoughts →
● This article consists of all the top slideshow makers with their features to choose the most suitable one without any doubt.
● Suggestions are available both for Windows and Mac in the case of the slideshow creators.
● You can go for any of this software based on your requirements, editing experience, and system compatibility. Gradually, the best slideshow can be created in no time.
To create slideshow, multiple tools and elements are required. Generally, people look for a tool that’s easy to use and that’s rich in features. Even if such a tool is found, the immediate problem is the operating system. Not every system is compatible with Windows or Mac.
Here, this article is all about cutting the efforts to search for the best app for slide show making. All the top tools are listed in this single article that can serve the purpose for Windows and Mac users along with online users.
In this article
01 [Top 10 Slideshow Makers for Windows](#Part 1)
02 [Top 5 Slideshow Makers for Mac](#Part 2)
03 [Top 5 Online Slideshow Makers](#Part 3)
Part 1 Top 10 Slideshow Makers for Windows
01Adobe Spark
Adobe Spark or Adobe Creative Cloud Express is a top-notch software for creating a slideshow in Windows 8.1 or newer versions. As Adobe is always been a promising platform to create unique designs, with this application as well, users can flaunt their thoughts through different features.
● A simple UI assists beginners to understand all the functionalities before using it without much hassle. It also increases the speed to make a slide show with simple yet efficient tools.
● It is totally compatible with other Adobe products, making it flexible for any kind of use.
● You can create slide show on your PC without any watermark and with different existing templates and elements.
02Movavi Slideshow Maker
Movavi brings some unique features to create a slideshow with enhanced video quality and modern tool arrangement for all of the people who love to create a better presentation. Even with a seamless platform, all the necessary tools are arranged in a familiar pattern to make it comfortable.
● Full slideshow wizard is available with Movavi slide show maker to assist the beginners to create a quality presentation.
● With the screen recording feature, you can add live demonstration in the presentation with 150+ filters and visual effects.
● This slide show app includes multiple ready-made templates, music functionalities, etc. for a professional slideshow-making setup.
03MiniTool MovieMaker
MiniTool MovieMaker is a comparatively new tool as a free slideshow maker for all Windows users. It consists of quirky features like cartoon clips, animated elements, etc. along with modern transition and video processing tools.
● As this is a new platform, the latest features are added on frequently and the users can apply them for an up-to-the-minute slideshow. From trimming a video to adding a transition to a photo slideshow, everything is available on a single software.
● Even if you don’t know anything about video editing or creating a slideshow, this tool would guide you through everything with a simple arrangement and a wide range of options.
● You can export a video in different formats like MP4, MOV, WMV, etc., and get watermark-free projects.
04PhotoStage Slideshow Software
To make a slide show quickly, you can go with PhotoStage Slideshow software without any doubt. This software is not only useful for beginners but has exciting features for intermediate video editors. This slideshow app is compatible with Windows XP, Vista, 7, 8, 8.1, 10, and 11.
● There is a slideshow wizard feature to add themes, transitions, and music to the slides easily.
● Built-in DVD HD video authoring and YouTube sharing are available for wide usability of the slideshows for multiple purposes.
● Different audio tools and photo optimization tools are available to add a classy look to the presentation.
05Icecream Slideshow Maker
For the most simple yet efficient slideshow maker online, choose Icecream software that comes with a very beginner-friendly interface and options. For learning video editing and create a slideshow This software can be a good tool to start with. However, the features are very minimum and the professional creators might not find it very exciting. But for beginners or students, this would be a great choice.
● It supports various audio formats including MP3, WAV, WMA, and TIFF. Also, image formats including JPG, JPEG, and PNG are supported.
● Along with YouTube uploading, DVD transfer, cloud storage (Dropbox or Google Drive) is supported.
● slideshow is supported in this free slide show maker.
06Kizoa
It’s become a hassle often to find the suitable aspect for a slideshow for different screens like laptops, TV, or smartphone. Kizoa slide show maker is eliminating this problem with 7 different aspect ratios for the slideshows. And this can be an effective advantage when making a slideshow for any professional purpose.
● This app for slide show is available for Windows 7 or higher versions till Windows 10. There’s not been an update till now for Windows 11.
● Bulk collection of 2D and 3D transitions, effects, and GIFs are available to use in the slides as per the requirement.
● This software is intended to create slideshow only and all the features are added according to that unlike any slideshow creator cum video editor app.
07Magix Photostory Deluxe
For a high-quality professional slideshow maker online, Magix Photostory Deluxe is a good option. This editor has almost 1,500 built-in effects, 200+ decorative elements, and 100+ pre-designed templates to assist users with the slideshows in lesser time.
● Built-in DVD and Blu-ray burning features along with a 4K resolution feature are present with this application.
● Unique camera tracking and zooming features are available to add more latest elements to the slideshow.
● All-in-one platform to create slideshow, edit photos, and videos.
08Slideshow Maker
The name in itself defines this as one of the best slideshow makers with high-quality results. 4K Slideshow maker is available for Windows 7 and higher versions. Those who don’t want to compromise with the video resolution in the slideshow can try this slideshow app. However other features like tool arrangement and UI is slightly poor compared to other software.
● This software supports different file formats and makes this platform flexible for multiple uses.
● All the projects are saved in high resolution, i.e., 1080p or 4K.
09SmartSHOW 3D
SmartSHOW 3D is an efficient free slideshow maker for high-quality, 3D slideshows. This is another beginner-friendly software with multiple tools and effects. Some latest addition like pan & zoom effect creation, the audio waveform in the music section, and customized picture frames would help to add extra effect to the slideshow.
● free templates and 200+ free music tracks are available in this free slide show maker to enhance the whole presentation properly.
● You can also make mobile-optimized videos using the SmartSHOW 3D editor.
● Add a soundtrack to the slideshow and use existing templates in the free trial before buying the subscription.
● Multiple formats are supported to download the project after creating a slideshow.
Part 2 Top 5 Slideshow Makers for Mac
01PowerDirector
PowerDirector is one of the best free slideshow makers on Mac systems, enabling the pro features of the storyboard, timeline, and slideshow interfaces. There’s a wide capability of visual effects that can boost the whole quality of the slideshow in no time.
02iMovie
iMovie slide show maker is available for both macOS and iOS systems, to let the creators make some elegant and high-resolution slideshows. It includes professional-looking themes and interfaces to add a classy look to the whole presentation. It’s simple for beginners as there’s no complicated tool arrangement in the UI.
03Photostage
Photostage is a complete package for slideshow creation, including the seamless options for photo arrangement, special effects, audio set-up, etc. For beginners, it might be a bit confusing but with time, it will be easier to use. This free slide show maker is equally compatible with both Windows and Mac, unlike much other software.
04Videopad
Videopad is another top slideshow maker on Mac systems that has 50+ transition effects, third-party plugin support, and all popular file format compatibility. The slides would be made as with a movie effect on this platform with various latest templates and features.
05Keynote
For real-time collaboration and PowerPoint features, Keynote would be the best choice to create slide show. It has the integration with Adobe Photoshop which extends the creativity range more. You can also find an in-built large library for pre-made templates to apply in the slideshow. However, for beginners, Keynote can a be hurdle.
Part 3 Top 5 Online Slideshow Makers
To be independent of any system, users might also want to make slideshow online. To support this choice, the following five best slideshow creators are mentioned.
01Canva
Canva is a popular online slide show maker that has everything you need to make a perfect presentation. From various templates to elements, graphics to custom frames, special social media templates, and versatile file formats- the free version itself has many features to serve.
02Animoto
With an user-friendly interface and quick processing, Animoto is a favorite platform to make slideshow online. However, there is a problem with the watermark in some cases. You can automatically apply any modification to all the sections by applying the filters in one section. Note that, there’s no free subscription with this platform.
03FlexClip
Flexclip is a beginner-friendly online slideshow maker with numerous templates and assets to choose from. In the free version, you can download a video in 480p only. Also, there’s no undo button for slideshow creation. So, you need to be sure about any modification in this editor.
04Kapwing
Kapwing is a multipurpose online free slideshow maker for intermediate users. Different video editing tools are available along with subtitle and AI subtitle support. Note that, the content in free version is public and cannot be stored for more than 7 days.
05Visme
Visme is a quick slideshow maker with five easy steps to master. Companies like IBM and Accenture use Visme to create slideshows and infographics. Undoubtedly this can be a perfect pick for seamless, professional slideshow cration.
How to use Filmora?
Filmora is all-in-one software to create slide show for literary any purpose, in any operating system, providing all the features a creator might need while making a perfect slideshow. A slideshow can be for academic or professional purposes, to decorate some beautiful moments, or to create something unique. And for every separate aim, different tools and features are required in a slideshow maker. To fulfil all such requirements with the latest tools, Filomora has a versatile platform.
As in this article, we have already mentioned some of the best slideshow makers, you may find some restrictions like system boundaries, not being beginner-friendly, or missing the latest features in the free slideshow makers. That’s why the best possible solution is presented here with all the following advantages.
Advantages of Wondershare Filmora Video Editor Slideshow Maker:
● This software is compatible with both Windows (7 or later versions) and Mac OS (10.12 or later versions), giving flexible usability to all the slideshow enthusiasts.
For Win 7 or later (64-bit)
For macOS 10.12 or later
● It takes lesser time to create a slideshow in Filomra using the top-notch transitions and effects. Also, there’s a split-screen option to make a slideshow more efficiently.
● All the popular file formats are supported including images, audio, and video. And, it’s also easy to upload a project on any social media directly from Filmora.
● Numerous motion effects, titles, filters, effects, and overlays are available for free in this slide show app.
● The built-in audio library provides suitable music with the slideshows to make it better as a complete presentation.
● Ending Thoughts →
● This article consists of all the top slideshow makers with their features to choose the most suitable one without any doubt.
● Suggestions are available both for Windows and Mac in the case of the slideshow creators.
● You can go for any of this software based on your requirements, editing experience, and system compatibility. Gradually, the best slideshow can be created in no time.
Also read:
- In 2024, The Only Guide Youll Ever Need to Learn GIF Design
- In 2024, Ultimate Guide on Converting Word to SRT
- Updated 2024 Approved Ideas That Will Help You Out in Making Transparent Image
- In 2024, How Do You Use the Splice App on Android and Which Useful Video Splice Apps Are Best Suited? This Article Expands More on It
- 2024 Approved Guide Add LUTs in Premiere Pro with Ease
- Updated Step-by-Step Guide to Storyboard
- 2024 Approved Are You Looking for Software to Convert Word to SRT Format? Here Is a Complete Guide About It
- New Video in Text Cinematic Intro【Filmora Tutorial】
- Updated 2 Practical Ways to Combine Videos on TikTok for 2024
- Ways to Merge Videos in HandBrake? Expectation Vs. Reality
- 2024 Approved How To Remove Audio From Video
- In 2024, 20 Best Video Background Templates
- New Best GIF to AVI Converters (Online + Software Solutions)
- New In 2024, Detailed Steps to Resize Video in Davinci Resolve
- Updated 2024 Approved Best Ai Generated Memes
- Does Your Video Shake so Much? Shaking Movement on Your Camera Is Often Inevitable, Especially if You Dont Use a Camera Stabilizer or a Camera with No Built-In Image Stabilization. As a Result, It Can Make Your Video Look Distracting and Difficult to Watch
- Updated A Guide to Effective Video Marketing
- New 2024 Approved 11 Best Video Editing Apps for iPhone
- Updated We All Know Very Well that a 1-Second-Video Has Several Images in a Single Row. Even with iMovie Time-Lapse, You Can Create This! So, without Any Further Ado, Lets Learn How to Make a Timelapse in iMovie
- New 2024 Approved Learning Some Perfect Ways to Convert a Slow-Motion Video to Normal
- New 4 Ways to Loop a Video on Vimeo
- Updated 3D Ray Traced Settings In After Effects A Comprehensive Guide for 2024
- Updated How to Use Visual Effect for Zoom
- Updated Create Realistic Fire Effects by Filmora for 2024
- New 2024 Approved Tips to Make Cinematic Color Grading
- Updated Keyframes Interval Everything You Need To Know for 2024
- In 2024, How to Make Coin Magic With Filmora
- New How to Trim Video in Quicktime Player on Mac for 2024
- Updated 2024 Approved Step by Step to Add Border to Video Using Premiere Pro
- Updated In 2024, How to Use Frame Blending in Adobe Premiere Pro
- New Are You a Vlogger Looking for Good Color Correction and Video Grading Presets? Here Youll Find Different Vlog LUTs that You Can Use for Your Videos
- New 2024 Approved Best Practical Tips to Improve Your Lighting in the Sun
- In 2024, Change Speed of a Video on iPhone
- 2024 Approved Ultimate Guide on How to Film Better in Public
- In 2024, The Way to Quick and Efficient Editing | Keyboard Shortcuts in Filmora
- New 2024 Approved Customize PowerPoint Slideshow Icon in Simple Ways
- Updated How to Make After Effects Gifs
- Get 15 Absolutely-Free LUTs From This Article as Well as Get an Insight on How Cinematic LUTs Affect Your Film
- Adding Shake Effects to Your Video With Alight Motion for 2024
- Updated Create an Awesome Logo Reveal with Logo Intro Templates
- Updated Easy Guide to Use a Stabilization Tool in Filmora for 2024
- New An Ultimate Guide To Edit a Music Video Aspect Ratio and First Cut for 2024
- In 2024, You Can Make Attractive Videos by Adding Text Behind Objects. This Article Will Explain How to Use Wondershare Filmora to Create These Videos
- New In 2024, 100+ Best TikTok Captions Enhance Your Content
- Updated In 2024, Best Tips on How to Design Travel Slideshow
- Top Applications That Can Help Apply The Best VHS Camera Effect
- How to share/fake gps on Uber for Nokia C02 | Dr.fone
- Super Easy Ways To Deal with Vivo G2 Unresponsive Screen | Dr.fone
- In 2024, Recommended Best Applications for Mirroring Your Poco X6 Screen | Dr.fone
- In 2024, A Quick Guide to Samsung Galaxy M34 FRP Bypass Instantly
- In 2024, 8 Best Apps for Screen Mirroring Samsung Galaxy A14 5G PC | Dr.fone
- How to Unlock Infinix Note 30 VIP PIN Code/Pattern Lock/Password
- 4 Ways to Fix Android Blue Screen of Death On Vivo V27e | Dr.fone
- A Complete Guide To OEM Unlocking on Vivo S17
- Easy Fixes How To Recover Forgotten iCloud Password On your Apple iPhone 13 mini
- My Videos Arent Playing on Samsung Galaxy F15 5G – What Can I Do? | Dr.fone
- Complete Guide to Hard Reset Your Oppo Reno 9A | Dr.fone
- In 2024, Unlocking the Power of Smart Lock A Beginners Guide for Infinix Smart 8 Users
- In 2024, How to Change Location On Facebook Dating for your Oppo Reno 10 Pro 5G | Dr.fone
- A Step-by-Step Guide on Using ADB and Fastboot to Remove FRP Lock from your Vivo X Fold 2
- New What Is Emoji, In 2024
- Different Methods for Resetting Nubia Red Magic 9 Pro Phones with Screen Locked and Not | Dr.fone
- In 2024, Your Account Has Been Disabled in the App Store and iTunes From iPhone 6s?
- In 2024, How does the stardust trade cost In pokemon go On Tecno Pova 6 Pro 5G? | Dr.fone
- How to Show Wi-Fi Password on Xiaomi Redmi Note 13 Pro 5G
- In 2024, How to Check Distance and Radius on Google Maps For your Vivo Y77t | Dr.fone
- In 2024, The Updated Method to Bypass Vivo X100 FRP
- What is Fake GPS Location Pro and Is It Good On Vivo Y28 5G? | Dr.fone
- 9 Mind-Blowing Tricks to Hatch Eggs in Pokemon Go Without Walking On Itel A05s | Dr.fone
- Reasons for OnePlus 11 5G Stuck on Startup Screen and Ways To Fix Them | Dr.fone
- How to Downgrade iPhone 15 Plus to an Older Version? | Dr.fone
- In 2024, Ultimate Guide to Catch the Regional-Located Pokemon For Vivo V29e | Dr.fone
- In 2024, Top IMEI Unlokers for Your Vivo Y28 5G Phone
- Can Life360 Track Or See Text Messages? What Can You Do with Life360 On Motorola Razr 40 Ultra? | Dr.fone
- Reliable User Guide to Fix Honor V Purse Running Slow and Freezing | Dr.fone
- Life360 Learn How Everything Works On Oppo Find X7 | Dr.fone
- In 2024, How To Track IMEI Number Of Poco X5 Through Google Earth?
- In 2024, Top 6 Apps/Services to Trace Any Xiaomi 14 Location By Mobile Number | Dr.fone
- Here Are Some Reliable Ways to Get Pokemon Go Friend Codes For Honor 90 | Dr.fone
- Hacks to do pokemon go trainer battles For Oppo Find N3 | Dr.fone
- In 2024, Two Ways to Track My Boyfriends Realme GT 5 Pro without Him Knowing | Dr.fone
- Why Does My Infinix Hot 30i Keep Turning Off By Itself? 6 Fixes Are Here | Dr.fone
- Title: How to Convert Videos to Slow Motion?
- Author: Chloe
- Created at : 2024-05-20 03:37:21
- Updated at : 2024-05-21 03:37:21
- Link: https://ai-editing-video.techidaily.com/how-to-convert-videos-to-slow-motion/
- License: This work is licensed under CC BY-NC-SA 4.0.
