:max_bytes(150000):strip_icc():format(webp)/DTS-Virtual-X-logo-w-illustration-xxbb-59403d7b3df78c537b1ef6b2.jpg)
How to Create an Alternate Reality Effect

How to Create an Alternate Reality Effect
Ditch boring one-dimensional videos and create a mesmerizing video with this alternative reality effect you can easily create using Wondershare Filmora.
This cool effect enables you to show a dream-like scene where two mirrored footages appear within the same frame using the Masking feature. But why stop there?
Keep reading to find out how you can use this style of effect to spice up your daily vlog bumper intro or even for your upcoming sci-fi content.

Preparing the footage
There are not many restrictions on preparing the footage for this effect. However, depending on the results you’re aiming for, you might need to consider a few things.
First, a wider view and some camera panning, or tilting will deliver a better result as it provides angle variations. This will later enhance the dynamic of the scene, making it feels even more uncanny.
Then, while you’re at it, you need to also figure out the purpose of the video itself. If you want to upload it to certain platforms where vertical videos are more popular, you will want to work on that as well. When you’re shooting your footage, make sure that you’re taking it at the correct angle that would fit the ratio you’re aiming for.
Last but not least, consider the length of the footage. If you’re planning to make a bumper video, you might want a quick yet comprehensive shot of the objects you want to highlight. You can always trim and adjust the timing later, but it is better to also plan it early.
Editing the video
If you have your footage or stock video ready, then you can start editing. Follow this simple step-by-step guide to create your own alternate reality using Filmora .
Free Download For Win 7 or later(64-bit)
Free Download For macOS 10.14 or later
Step 1: Drag and drop the video footage into the timeline - this will be the bottom part of the scene. Go to Effect > Utility > Image Mask. Drag and drop it onto the video footage.

Step 2: Adjust the mask by double-clicking the video footage. Go to Setting > Mask Setting and choose any shape you like. Set the feather number to 100.

Step 3: Scroll up the Setting > Transform. Adjust the position of the video footage on the x and y-axis to ensure that the mask shows the bottom of the landscape view. Click Ok.

Step 4: Drag and drop the same video footage onto the timeline next to the first video footage. Place an Image Mask as well on this footage. This will be the upper part of the scene.

Step 5: Double-click the second footage to open the Setting menu on the top left. Choose Transform > Vertical Flip.

Step 6: Scroll down the Setting menu to find the mask settings. Choose an opposing mask shape for this second footage then set the feather number to 100 as well.

Step 7: Adjust the video footage position by dragging the second footage to the second video track and aligning it with the first video footage.

Step 8: Double-click to open the Setting > Transform, then, adjust the x and y-axis numbers to ensure that the mask reveals only the top half of the landscape. Click Ok.

You can recheck the preview at this stage and just save it as it is if you’re already satisfied with the result. However, if you want a more dynamic alternate reality scene, continue reading to see advanced tips you can follow to make your video looks even more otherworldly.
Enhancing the effect with rotation keyframes
If you’re using stock videos or encountering limitations when making your footage, chances are your alternate reality is not looking as dynamic as you want it to be. Go all out by adding the rotation keyframes to the video footage so that the alternate reality looks more unreal.
Step 1: Double-click the video footage on the first video track to open the Animation Settings > Customize.

Step 2: Move the playhead to the beginning of the first video footage and add a keyframe by clicking on the Add button. Set the rotation of this keyframe at 0 and the scale at 100.

Step 3: Now move the playhead to the end of the video footage and add another keyframe. This time, set the rotation to 20 and adjust the scale number to 115.

Step 4: Do Steps 1 to 3 to the second video footage. Don’t forget to preview the result to see if both footages are rotated properly.

Your alternate reality is now more dynamic with more movement. You can also add more filters or effects to further enhance the sci-fi ambiance. Once you’re satisfied, you can export the file to a format that is compatible with your destination platform.
Conclusion
Wondershare Filmora aims to empower your inner video creator with its robust yet easy-to-use editing suite. You can easily mimic the scenes from the latest blockbuster superhero movies with some simple clicks.
Not only it offers a strapping video editing menu with simple visual effects plug-ins and beginner-friendly smart templates, but you can also access its rich royalty-free stock media library. You can operate the program on both Windows and Mac. Install the program and let it do wonders to your content.
Free Download For macOS 10.14 or later
Step 1: Drag and drop the video footage into the timeline - this will be the bottom part of the scene. Go to Effect > Utility > Image Mask. Drag and drop it onto the video footage.

Step 2: Adjust the mask by double-clicking the video footage. Go to Setting > Mask Setting and choose any shape you like. Set the feather number to 100.

Step 3: Scroll up the Setting > Transform. Adjust the position of the video footage on the x and y-axis to ensure that the mask shows the bottom of the landscape view. Click Ok.

Step 4: Drag and drop the same video footage onto the timeline next to the first video footage. Place an Image Mask as well on this footage. This will be the upper part of the scene.

Step 5: Double-click the second footage to open the Setting menu on the top left. Choose Transform > Vertical Flip.

Step 6: Scroll down the Setting menu to find the mask settings. Choose an opposing mask shape for this second footage then set the feather number to 100 as well.

Step 7: Adjust the video footage position by dragging the second footage to the second video track and aligning it with the first video footage.

Step 8: Double-click to open the Setting > Transform, then, adjust the x and y-axis numbers to ensure that the mask reveals only the top half of the landscape. Click Ok.

You can recheck the preview at this stage and just save it as it is if you’re already satisfied with the result. However, if you want a more dynamic alternate reality scene, continue reading to see advanced tips you can follow to make your video looks even more otherworldly.
Enhancing the effect with rotation keyframes
If you’re using stock videos or encountering limitations when making your footage, chances are your alternate reality is not looking as dynamic as you want it to be. Go all out by adding the rotation keyframes to the video footage so that the alternate reality looks more unreal.
Step 1: Double-click the video footage on the first video track to open the Animation Settings > Customize.

Step 2: Move the playhead to the beginning of the first video footage and add a keyframe by clicking on the Add button. Set the rotation of this keyframe at 0 and the scale at 100.

Step 3: Now move the playhead to the end of the video footage and add another keyframe. This time, set the rotation to 20 and adjust the scale number to 115.

Step 4: Do Steps 1 to 3 to the second video footage. Don’t forget to preview the result to see if both footages are rotated properly.

Your alternate reality is now more dynamic with more movement. You can also add more filters or effects to further enhance the sci-fi ambiance. Once you’re satisfied, you can export the file to a format that is compatible with your destination platform.
Conclusion
Wondershare Filmora aims to empower your inner video creator with its robust yet easy-to-use editing suite. You can easily mimic the scenes from the latest blockbuster superhero movies with some simple clicks.
Not only it offers a strapping video editing menu with simple visual effects plug-ins and beginner-friendly smart templates, but you can also access its rich royalty-free stock media library. You can operate the program on both Windows and Mac. Install the program and let it do wonders to your content.
Do You Want to Explore some Available Opportunities to Create Slow Motion? Discover the Best Slow-Motion Video Editors for Desktop, Android, and iPhone Here
In 2024, people believe in effects and filters to elevate content instead of keeping it real. With the increasing demand for video editing, slow motion has gained both creator’s and viewers’ attention. Such videos are responsible for adding a creativity layer to content via slow-motion video editors.
In this article, we are going to discuss some leading slow-motion video editors and their features. Some of these tools are online and hence require internet access to operate. On the other hand, some slo-mo video editors are smartphone applications. All have their advantages and drawbacks; however, we’ll discuss a desktop tool that is more efficient than all and offers nothing but benefits.
Slow Motion Video Maker Slow your video’s speed with better control of your keyframes to create unique cinematic effects!
Make A Slow Motion Video Make A Slow Motion Video More Features

Part 1: Top 5 Online Slow-Motion Video Editors to Use in 2024
This section of the article discusses some slow -motion video makers that are available online. We’ll mention their pros and cons along with their prices. This will make selection easy for those who prefer computer editing over smartphones. Following are the top online tools to use if you want to create a slow-motion effect :
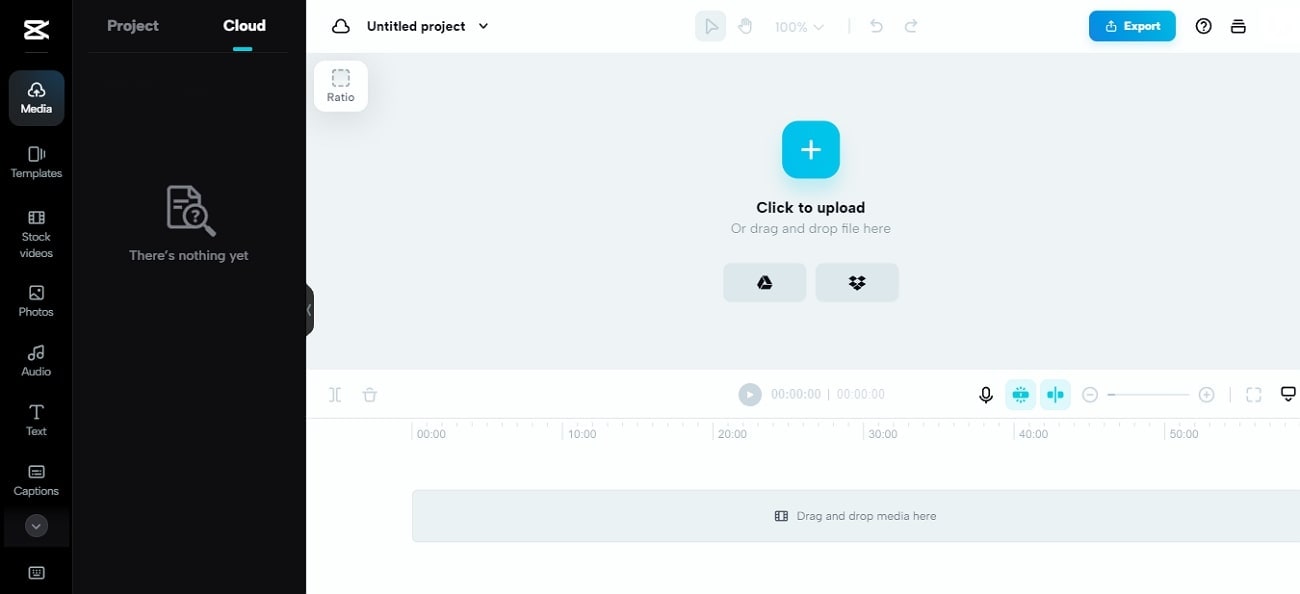
1. CapCut
Do you want a customized editing experience while creating slow-motion videos? CapCut is the right slow motion video editor for you, enabling you to set the slow-mo speed at any point. If there were any jitters in your recording, you can fix them by changing the playback speed. In addition, the tool offers post-production effects, AI visual enhancers, and more.
Pros
- It has a timeline panel for editing to ensure smooth and precise editing.
- The tool has a modest yet well-organized user interface to facilitate beginners and professionals.
Cons
- There is a limitation of advanced and upgraded features that are used these days.
Pricing
Free
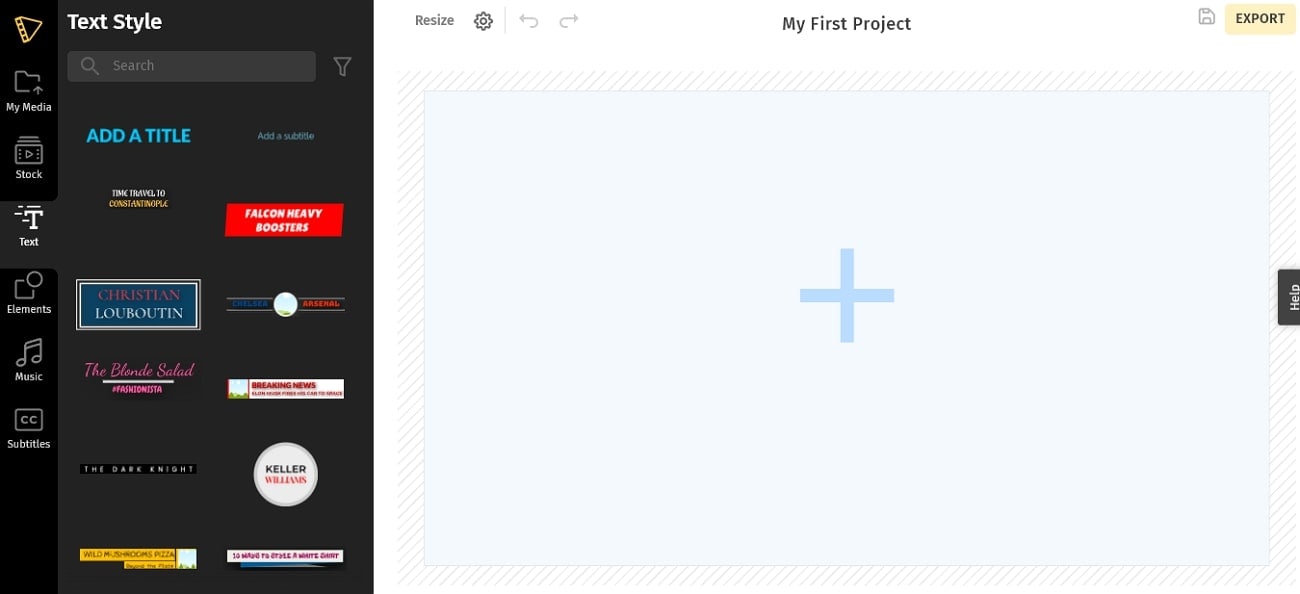
2. Typito
Say goodbye to the long hours of waiting with your slow-mo editor ’s slow processing. Typito allows users to craft a slow-motion video in 3 steps and a high processing rate. The tool shows compatibility across 20+ video formats. In addition, you can also adjust the video ratio using its built-in ratio presets. In this editor, 1.5x is the normal playback speed, and below this are the slow-motion ones.
Pros
- The tool offers multiple video formats for editing videos while fitting the right context.
- With its cloud collaboration, you can access your incomplete and edited projects where you left off.
Cons
- The advanced features are not available in the free version, and some users don’t prefer that.
Pricing
| Pricing Plan | Annual Pricing |
|---|---|
| Solo | $15 |
| Pro | $29 |
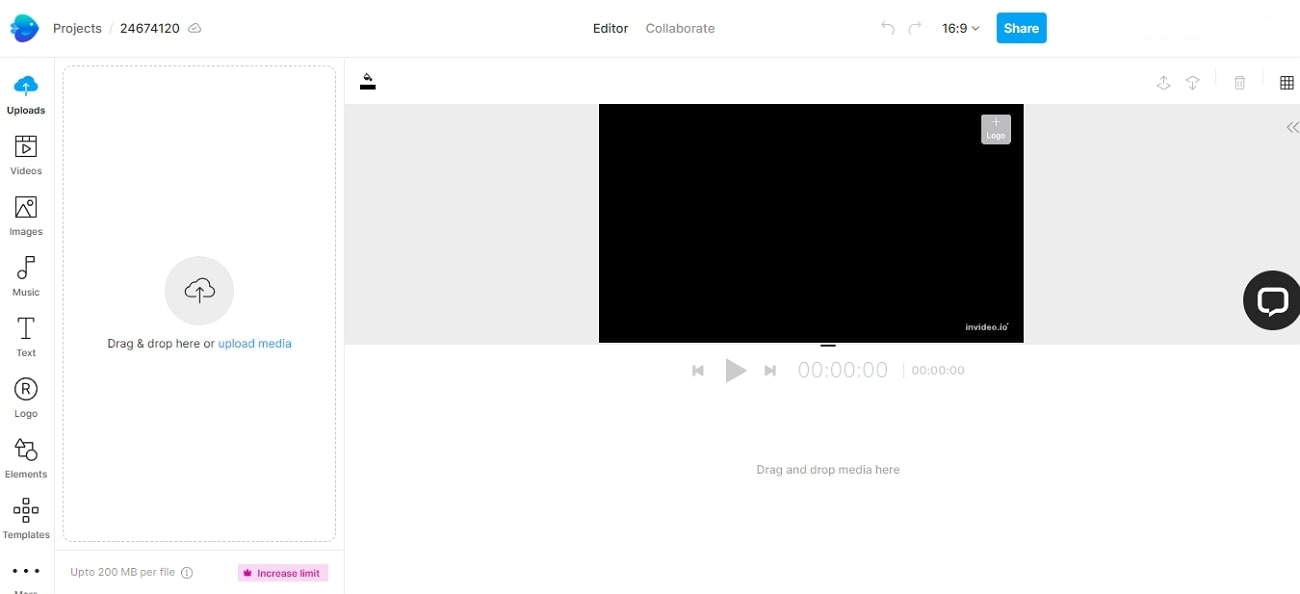
3. InVideo.ai
Editing with a multifeatured tool is fun as you can do more than just one thing. As the name indicates, this is an AI-driven tool with speed change integration. You can adjust the playback speed and set duration preferences for your video. With its minimal user interface, you can do further cutting and trimming afterward across this slow-mo video editor.
Pros
- Its stock footage library has over 8M+ media to help with video creation.
- It has a removable watermark option that is very important for personal branding.
Cons
- The majority of the AI features are available in the paid version.
Pricing
| Pricing Plan | Annual Pricing |
|---|---|
| Business | $15/month |
| Unlimited | $30/month |
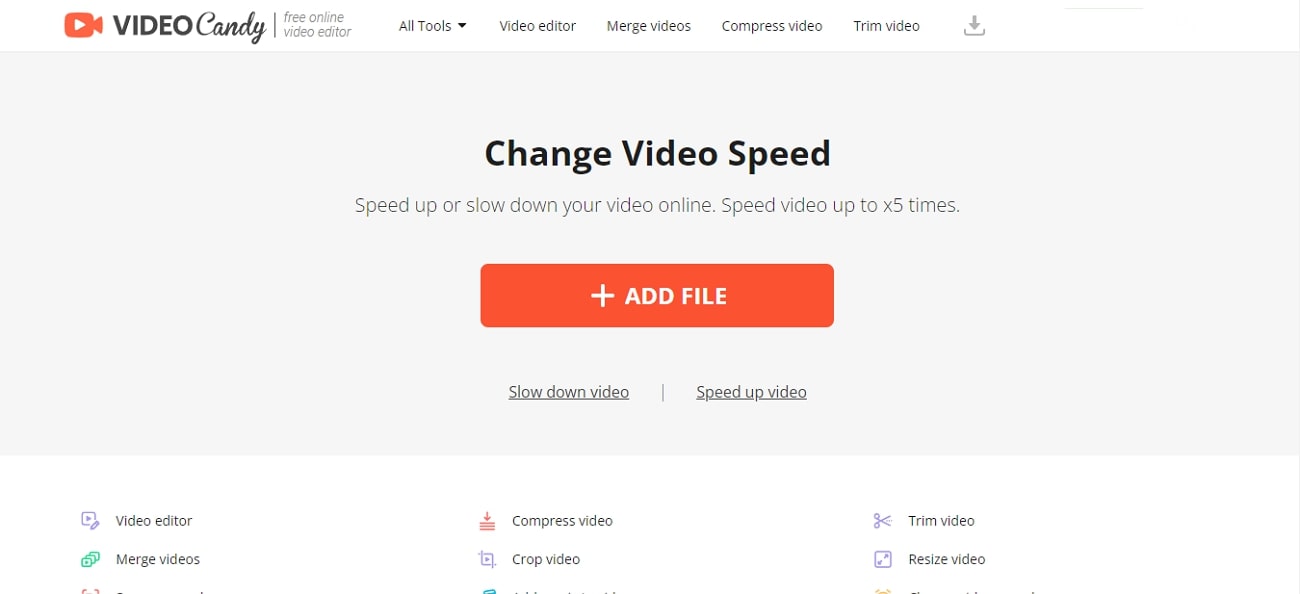
4. Video Candy
If you are looking for a slow-motion editor without having to log in or go through a technical procedure, this tool is for you. Interacting with the tool is easy as the user interface has an intuitive design, and you can start by uploading a file. It has 3 playback speed options: 0.75x, 0.5x, and 0.25x for creating a slomo. In addition, you can also incorporate a high playback speed option to unlock more creativity.
Pros
- It supports 4K resolution, which means high-quality content editing.
- The tool can support large files of 3GB size, which means you don’t have to split up results.
Cons
- The tool doesn’t ask for a Gmail account, which means no record of history and storage.
Pricing
| Pricing Plan | Annual Pricing |
|---|---|
| Yearly | $4/month |
| Month | $8/month |
| Lifetime | $99/pay once |
5. Wave.video
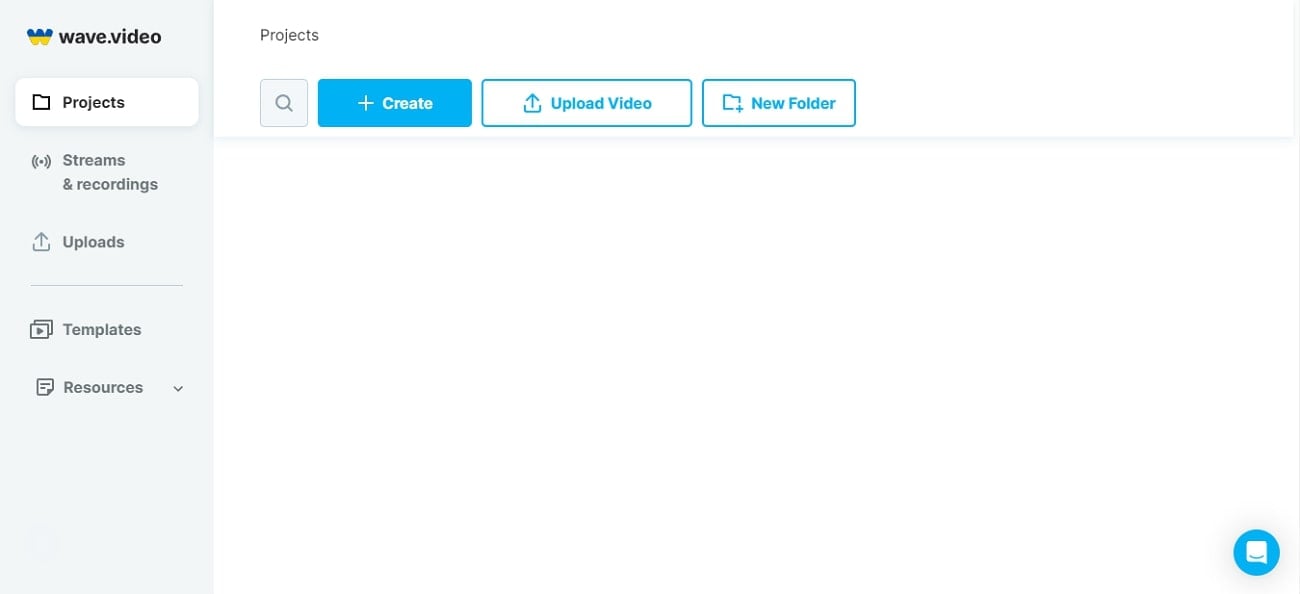
This online platform facilitates the alteration of video playback speed effortlessly. It features three distinct playback options, 0.75x, 0.5x, and 0.25x, to ensure precise editing capabilities. Possessing an uncomplicated user interface, the tool extends beyond speed adjustments, offering comprehensive audio modifications. If you want to elevate your videography, use its time-lapse effect to enrich the aesthetics.
Pros
- Continuously offers advanced features with an easy-to-understand interface.
- The drag-and-drop functionality makes it quick to edit videos and increases productivity.
Cons
- The watermark addition in the free version of the slow-mo editor is not good for personal branding and visuals.
Pricing
| Pricing Plan | Annual Pricing |
|---|---|
| Streamer | $16/month |
| Creator | $24/month |
| Business | $48/month |
Part 2: Top 5 Android Apps for Editing Slow-Motion Videos
While professionals prefer editing on a desktop, some people prefer Android editing. It is easier to use smartphones for editing because they come in handy. Moreover, let’s admit that we are on our phones half of the time, and a computer might seem out of our comfort zone. This section has gathered some of the slow-mo maker s to operate on your Android:
- [Slow Motion Video – Fast&Slow Mo](#android app1)
- [Slow Motion Video Maker](#android app2)
- [Video Editor and Maker – InShot](#android app3)
- [Video Editor and Maker – Vidma](#android app4)
- [VivaVideo – Video Editor&Maker](#android app5)
1. Slow Motion Video – Fast&Slow Mo
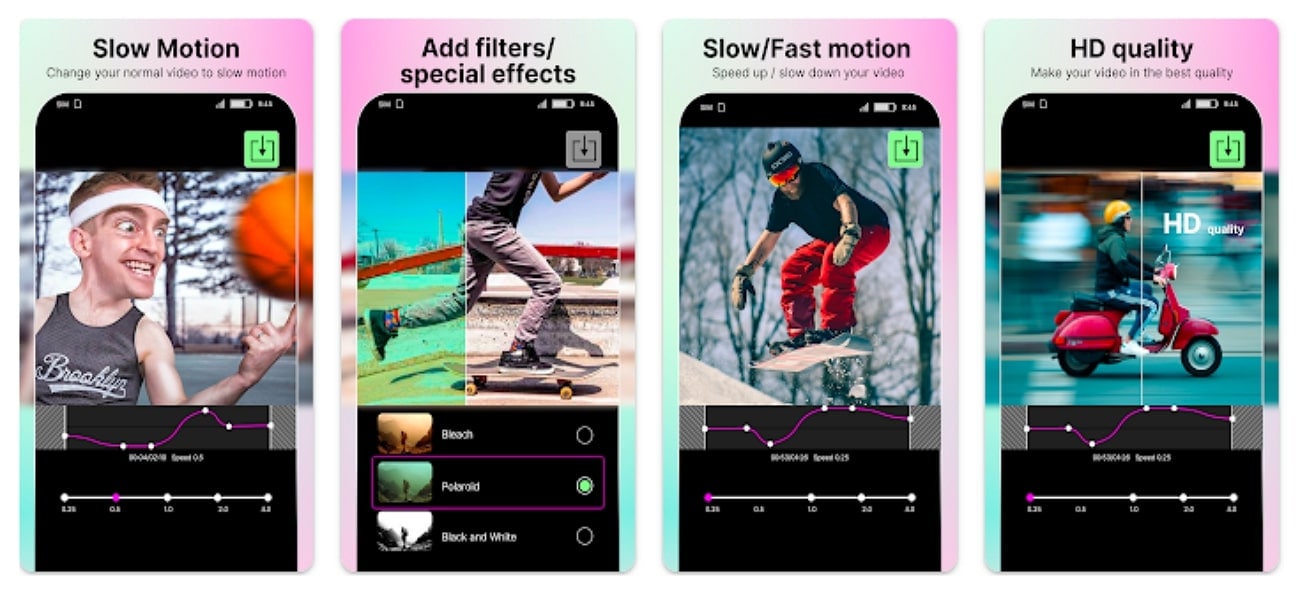
Becoming the favorite of many, this slow-motion video converter offers an interactive user interface. Editing a slow motion is all about dragging and setting the slider in the downward direction. To slow down a video, you can set its playback speed from 0.25x to 4.0x. In addition, you can also curate a specific portion of your video in slow or fast motion.
Key Features
- This slow-motion video creator offers a pre-built filter and special effects to improve aesthetics.
- This application maintains the video quality and can convert video resolution to HD.
- Never miss a chance to integrate good music in your videos with it, as it has built-in options.
2. Slow Motion Video Maker
This free slo-mo video editor regulates its algorithm to introduce advanced features. It features a timeline editing interface, making it easy to apply slow-motion effects on a definite video section. It displays 3 slow motion speed options: 0.5x, 0.3x, and 0.25x to achieve precision in creating a slomo.

Key Features
- You can fasten your video up to 4x, which is helpful in short-time learning, data compression, and more.
- The premium video trim feature and timeline editing help with the accurate parting of a video.
- This slow-motion video maker has pre-developed music tracks and effects for maximum creativity.
3. Video Editor & Maker – InShot
Step into the realm of this free slo-mo video editor for crafting slo-mos full of creativity. It proposes a simple method to slow down video speed by using a slider. The timeline editing and selective playhead options enable you to create beyond basic. You can alter the speed of specific parts of the video, which means you can do much more than just a plain slo-mo.

Key Features
- Take your vision up a notch by introducing its integral collection of animations and text in your content.
- Make your reels more interesting with its intuitive and numerous transition effects.
- The slow-motion edito r has AI abilities to help you remove image backgrounds with accuracy.
4. Video Editor & Maker – Vidma
This is for you if you are looking for a slow-motion video editor that generates as precise results as those in trending videos. The editing application offers a “Velocity Edit” option with detailed playback speed and positioning options. The application has a velocity graph-like interface for adjusting speed, and you can also see the time you are applying this effect.

Key Features
- Bids an automated “Keep Audio Pitch” option to maintain the audio quality during speed change.
- Infuse your pictures and videos with its immersive collection of text and stickers.
- Features multiple visual filters categorized according to contexts with custom intensities.
5. VivaVideo – Video Editor&Maker
If you are looking for a slow-motion video editor with additional features to elevate your content, use it. The tool has multiple speed setting presets to help you create a perfect slomo along with fast motion. Among Montage, Hero, Bullet, and other presets, it offers a Custom preset option to edit according to your imagination.

Key Features
- An extensive timeline editing interface with multiple tracks option for smooth transitions.
- The stock media has a wide array of texts, animations, themes, effects, and music.
- This slow-mo video maker also has a “Voice Editor” to maintain the quality of audio tracks afterward.
Part 3: Top 5 iOS Apps for Editing Slow Motion Videos
Multiple people prefer shooting and editing with an iPhone instead of a Mac or desktop. This is because it helps them keep up with the video quality without declining any pixels. In addition, you can share a video directly to social sites from your iPhone instead of transferring them first. This part of the article focuses on some iOS slow-mo video maker s applications here:
- [Velomingo: Velocity Edit Maker](#ios app1)
- [Vizmato: Velocity Edit Maker](#ios app2)
- [Slow Motion Video Editor SLOMO](#ios app3)
- [Slow Motion Video Editor](#ios app4)
- [SloMo Slow Motion Video Editor](#ios app5)
1. Velomingo: Velocity Edit Maker
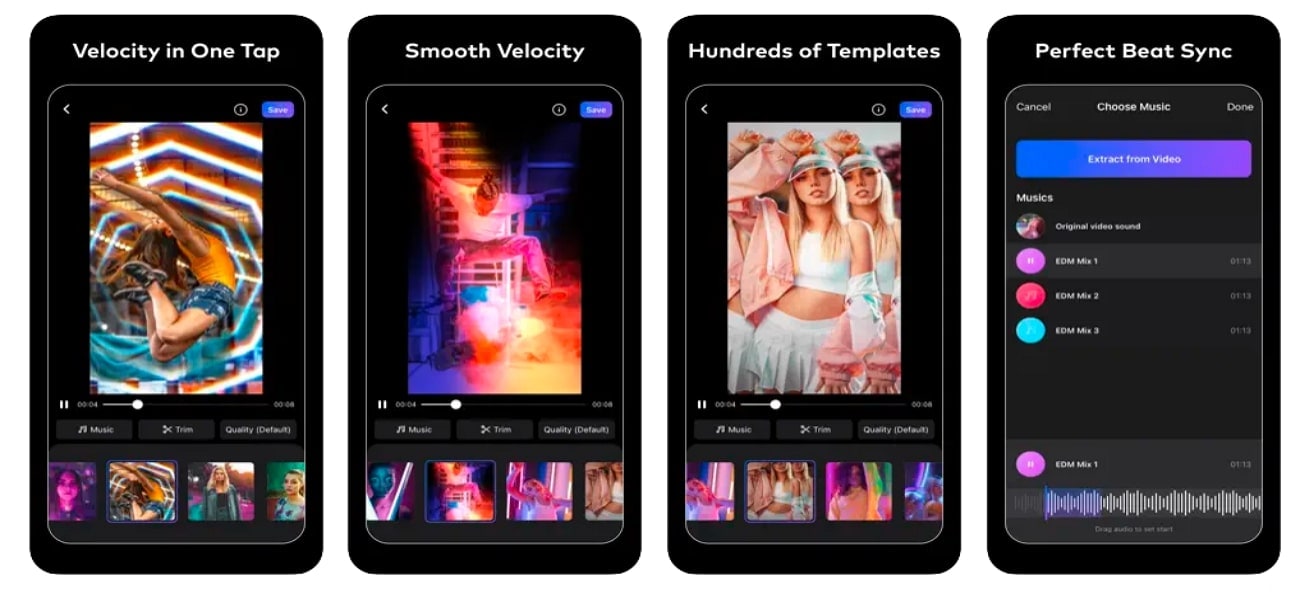
Creating a slo-mo as a beginner has never been this easy with this slow-mo editor. Users have the opportunity to apply its built-in velocity presets on their videos for a slo-mo effect. Although you cannot customize these presets, the application handles slow-mo quality. Not only does it generate mesmerizing slo-mos, but it also brings them smoothness.
Key Features
- Trim feature for creating transitions or eliminating unnecessary parts of video.
- Make videos creative just by offering hundreds of modern templates.
- This slow-mo maker can feature your video straight to WhatsApp, Instagram, TikTok, and Facebook.
2. Vizmato: Video Editor & Filter
Vizmato is a versatile video editor providing slow-motion services along with other speed editing options. Along with creating a Slow-mo, you can also reverse a video speed to add dramatic effect or enable fast motion. Moreover, it offers a speed manipulation option to customize a video according to your taste.

Key Features
- This slow video editor’s asset collection includes 20+ themes and 40+ visual effects.
- Elevate your slo-mos with its pre-developed music collection featuring 140+ music tracks.
- Along with a slo-mo video converter, it also converts images into a video using the slideshow.
3. Slow Motion Video Editor SLOMO
Customize your slow-motion sequences according to background music and context with this slow-motion editor. The editor offers a timeline editing panel, which provides an organized editing experience. In addition, you can enhance the graphic quality of your slo-mo using its pre-assembled filters. To preserve the video quality, share your slo-mo videos on social applications using its share options.

Key Features
- Choose the text option from its toolbar to customize the color, size, and other elements of text.
- Add other graphical elements like stickers and emojis to express your video context or dialogues.
- Resize your video within this application to fit the requirements of social platforms.
4. Slow Motion Video Editor
Wondering about how to achieve a professional-level effect on your iPhone? This slow-motion video converter is full of speed custom setting options to help with that. It uses a timeline bar and velocity graph to adjust the speed settings. The downward slide dragging will slow down your video and vice versa. You can also adjust the video duration via timeline or reset it to set again.

Key Features
- Create a time-lapse or speed up your video by altering its playback speed to 10x, fast or slow.
- Collaborates with iTunes for a seamless integration of music tracks in videos.
- The slow-mo video editor is compatible with social platforms like Instagram, YouTube, and more.
5. SloMo Slow Motion Video Editor
Are you looking for an application just to create slow-mo with a creative user interface? This slow-motion video editor has been developed to help you with speed-alteration tasks. The interface is simple, and you can start creating a slomo just by importing a video. Designed to create professional and cinematic level slo-mos, it offers high video frame rates like 120 fps and 240 fps.

Key Features
- Along with the frame rate, you can manipulate the playback speed range to 12x for both slow and fast.
- With this slow-mo editor’s 40+ illustrative filter, you’ll never run out of creativity.
- Fit your video into different ratios for multiple social media platforms or to your preference.
Bonus Part: Get the Perfect Results of Slow-Motion Video with Wondershare Filmora - Desktop Solution
In this section, you have read about so many slow-mo editors that you might be bored by now. However, one common drawback that all of them had was versatility. They offered high-speed manipulation settings but with limited additional features. Wondershare Filmora is a world-class, all-in-one video editing software. Anyone can use it, from a beginner to a professional or from an Android user to an iOS user.
When you enter this slow-motion video converter, it displays two types of speed modification. One is the Uniform Speed option, while the other one is Speed Ramping. Both of them excel at their tasks and offer custom speed and duration settings. Filmora has recently introduced the “Optical Flow” option in its latest V13 upgrade. This helps to smoothen out a slo-mo video by adding frame rates.
Free Download For Win 7 or later(64-bit)
Free Download For macOS 10.14 or later
Steps to Slow Down Video in Filmora
In this section, we will discuss the Filmora Speed Ramping feature to create a slo-mo. If you are a beginner and have never edited before, this feature suits you the best. It has over 6-speed ramping templates for adding creative speed change effects. You can modify these models to fashion a slo-mo, and here is how to do it:
Step 1Access the Speed Feature
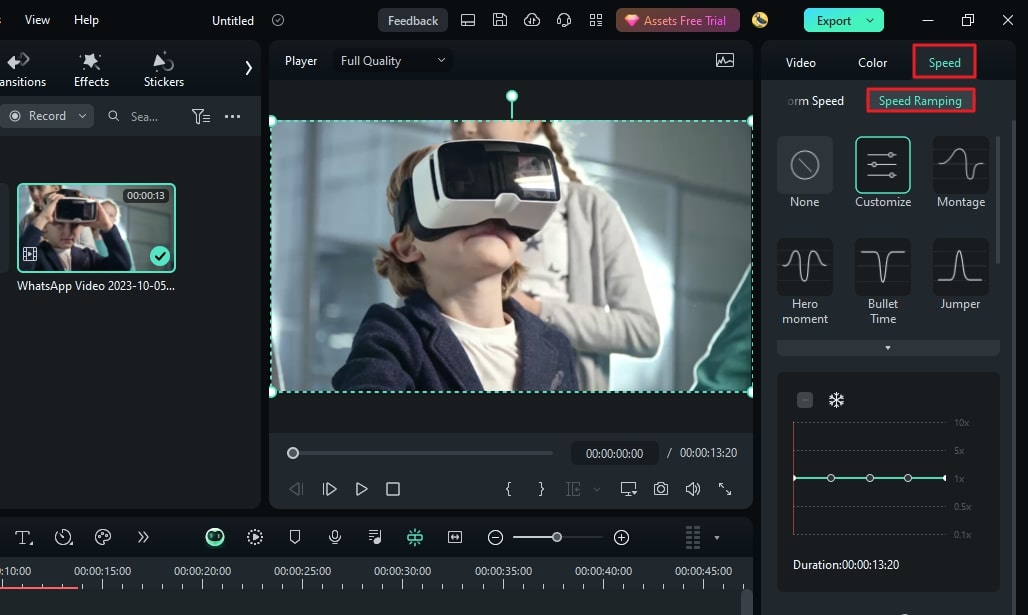
After opening Filmora and opening a project, select the clip in the timeline and go to the settings panel. From there, reach the “Speed” > “Speed Ramping” tabs and select a preset. If you don’t like the featured presets, click on “Customize” for manual editing.
Step 2Add Video Frames
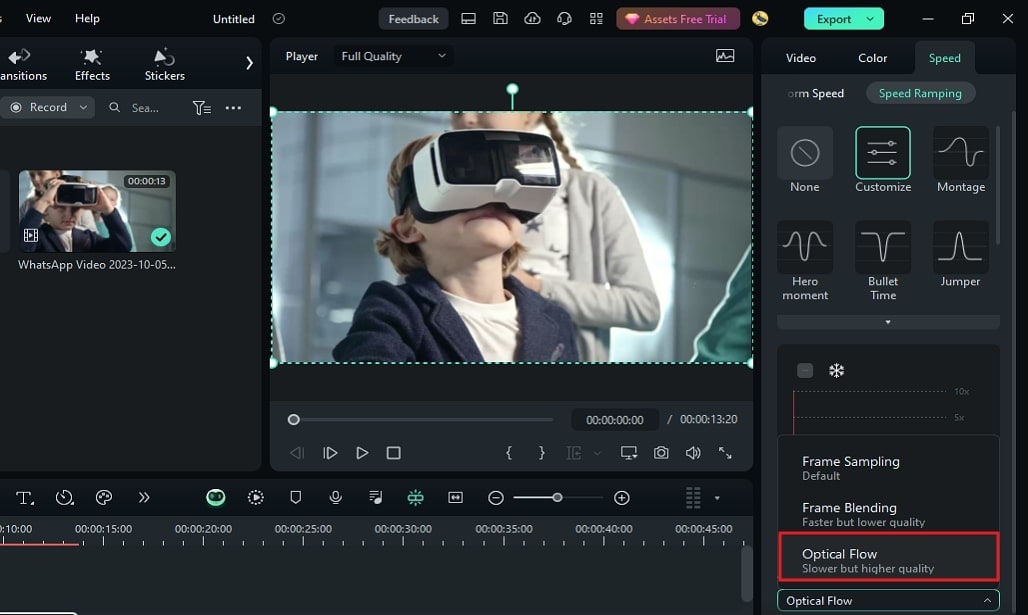
Once you have set the slo-mo speed, reach the “AI Frame Interpolation” section at the bottom. Click on the navigation icon and select “Optical Flow” from there.
Step 3Render Preview to Observe the Outcome
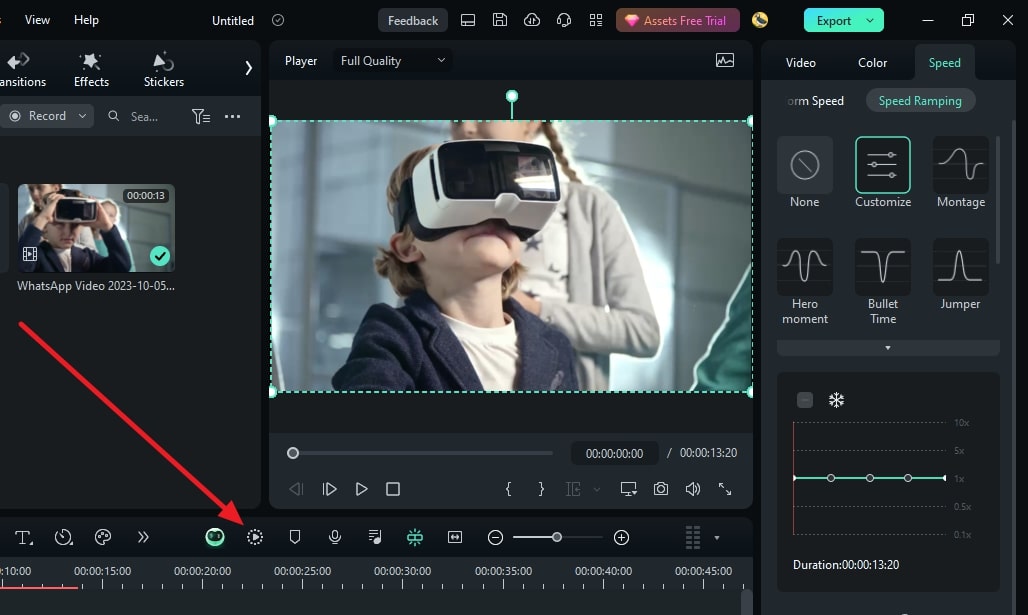
To ensure that the optical flow has worked, click the “Render Preview” option in the timeline toolbar. Once rendering is complete, play the video and finalize it by clicking “Export.”
AI Key Features of Filmora
As discussed before, Filmora offers an extensive interface with a wide collection of features. Users can use these features to generate high-quality images, videos, and more. In this section, the focus is on a few of its features discussed below:
1. AI Smart Masking
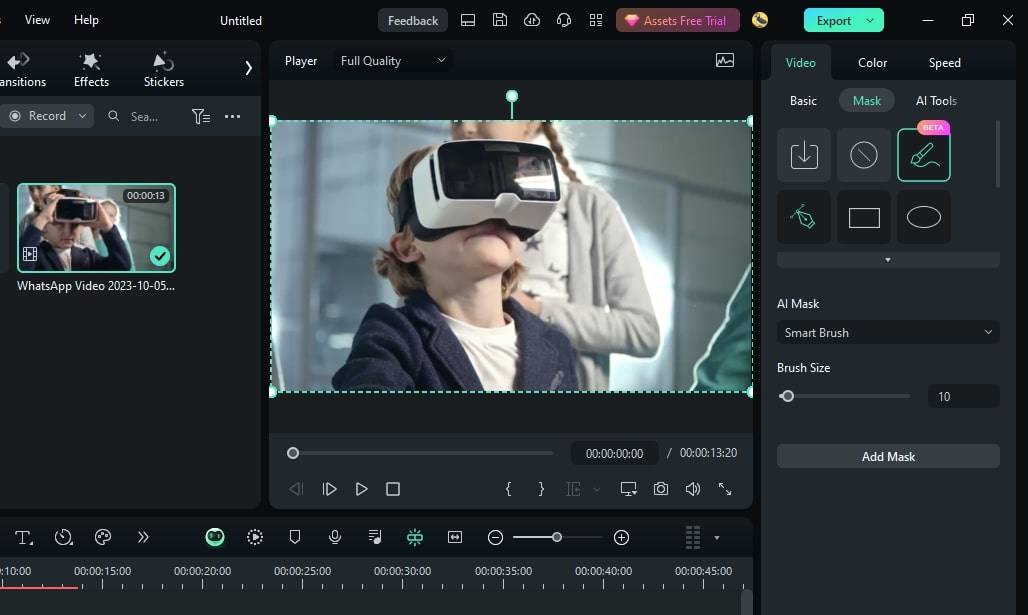
Want to create amazing transitions or apply stunning effects on specific video sections? Filmora’s AI mask feature will mask out the unnecessary parts, and you can edit freely. Just enable this feature from its settings panel under AI Tools and select the masking area.
2. AI Text-to-Video
Dive into the realm of Filmora, where there is no limitation on graphics and visuals for videos. This generative AI feature can craft videos from prompts along with suited graphics. You just need to add proper instructions, and AI will do the rest. It enhances the interactive element of your videos via AI voice integration.

3. Motion Tracking
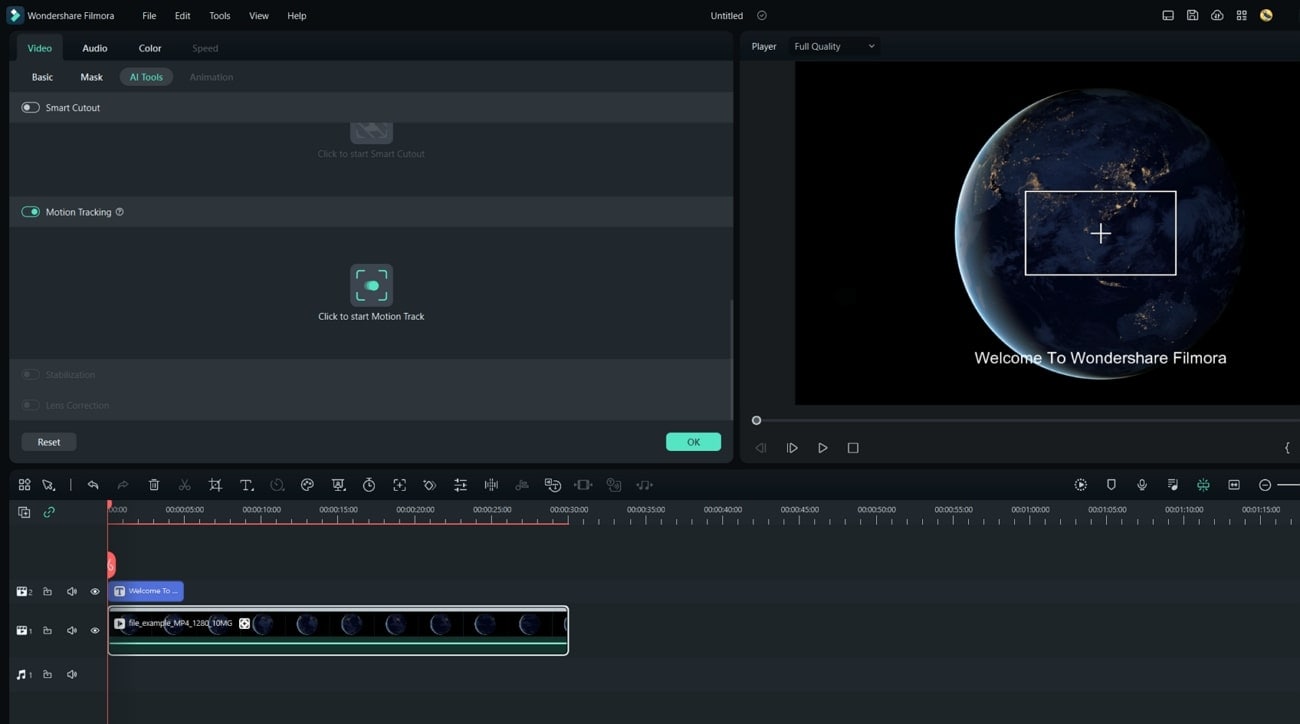
Create animations from mere graphics to insert in your videos using this AI. Just add any graphical emoji, text, or sticker and link it with a moving object. Once you enable the motion tracking option, you will see them come to life. You can also apply an effect or filter to a specific portion throughout the video using making and motion-tracking options.
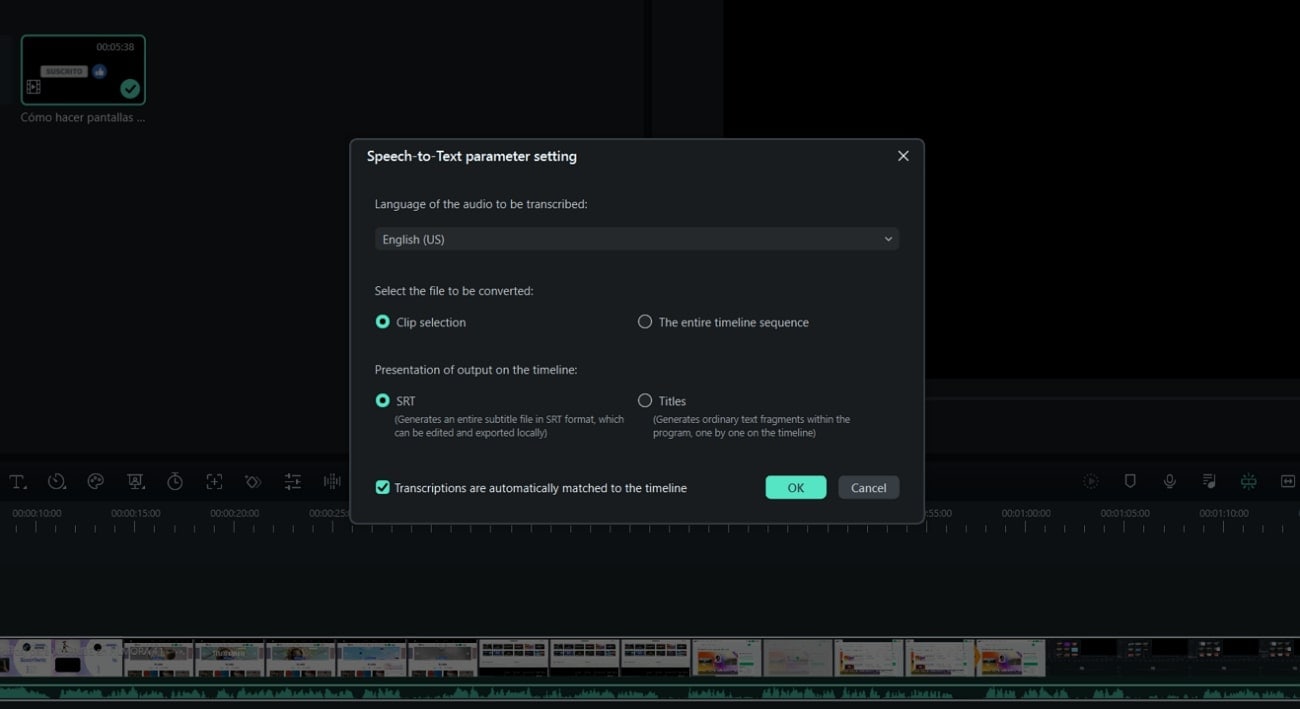
4. Speech-to-Text
Subtitles and captions have become an important part of cinema or videography. To ensure that your content reaches an international audience, use Filmora’s STT feature. With its automated speech recognition and NLP systems, it transforms any speech into text. Moreover, it has multilingual support to make content accessible at international levels.
Conclusion
In this article, you have read about different slow-motion video editor s and their features. Sometimes, they’re amazing editors, while other times, they may show glitches. However, if you want to try an editor that combines all the properties in one place, we suggest Wondershare Filmora. With its amazing content editing features and assets, you can rely on it for Slomo creation or other editing tasks.
Make A Slow Motion Video Make A Slow Motion Video More Features

Part 1: Top 5 Online Slow-Motion Video Editors to Use in 2024
This section of the article discusses some slow -motion video makers that are available online. We’ll mention their pros and cons along with their prices. This will make selection easy for those who prefer computer editing over smartphones. Following are the top online tools to use if you want to create a slow-motion effect :
1. CapCut
Do you want a customized editing experience while creating slow-motion videos? CapCut is the right slow motion video editor for you, enabling you to set the slow-mo speed at any point. If there were any jitters in your recording, you can fix them by changing the playback speed. In addition, the tool offers post-production effects, AI visual enhancers, and more.

Pros
- It has a timeline panel for editing to ensure smooth and precise editing.
- The tool has a modest yet well-organized user interface to facilitate beginners and professionals.
Cons
- There is a limitation of advanced and upgraded features that are used these days.
Pricing
Free
2. Typito
Say goodbye to the long hours of waiting with your slow-mo editor ’s slow processing. Typito allows users to craft a slow-motion video in 3 steps and a high processing rate. The tool shows compatibility across 20+ video formats. In addition, you can also adjust the video ratio using its built-in ratio presets. In this editor, 1.5x is the normal playback speed, and below this are the slow-motion ones.

Pros
- The tool offers multiple video formats for editing videos while fitting the right context.
- With its cloud collaboration, you can access your incomplete and edited projects where you left off.
Cons
- The advanced features are not available in the free version, and some users don’t prefer that.
Pricing
| Pricing Plan | Annual Pricing |
|---|---|
| Solo | $15 |
| Pro | $29 |
3. InVideo.ai
Editing with a multifeatured tool is fun as you can do more than just one thing. As the name indicates, this is an AI-driven tool with speed change integration. You can adjust the playback speed and set duration preferences for your video. With its minimal user interface, you can do further cutting and trimming afterward across this slow-mo video editor.

Pros
- Its stock footage library has over 8M+ media to help with video creation.
- It has a removable watermark option that is very important for personal branding.
Cons
- The majority of the AI features are available in the paid version.
Pricing
| Pricing Plan | Annual Pricing |
|---|---|
| Business | $15/month |
| Unlimited | $30/month |
4. Video Candy
If you are looking for a slow-motion editor without having to log in or go through a technical procedure, this tool is for you. Interacting with the tool is easy as the user interface has an intuitive design, and you can start by uploading a file. It has 3 playback speed options: 0.75x, 0.5x, and 0.25x for creating a slomo. In addition, you can also incorporate a high playback speed option to unlock more creativity.

Pros
- It supports 4K resolution, which means high-quality content editing.
- The tool can support large files of 3GB size, which means you don’t have to split up results.
Cons
- The tool doesn’t ask for a Gmail account, which means no record of history and storage.
Pricing
| Pricing Plan | Annual Pricing |
|---|---|
| Yearly | $4/month |
| Month | $8/month |
| Lifetime | $99/pay once |
5. Wave.video
This online platform facilitates the alteration of video playback speed effortlessly. It features three distinct playback options, 0.75x, 0.5x, and 0.25x, to ensure precise editing capabilities. Possessing an uncomplicated user interface, the tool extends beyond speed adjustments, offering comprehensive audio modifications. If you want to elevate your videography, use its time-lapse effect to enrich the aesthetics.

Pros
- Continuously offers advanced features with an easy-to-understand interface.
- The drag-and-drop functionality makes it quick to edit videos and increases productivity.
Cons
- The watermark addition in the free version of the slow-mo editor is not good for personal branding and visuals.
Pricing
| Pricing Plan | Annual Pricing |
|---|---|
| Streamer | $16/month |
| Creator | $24/month |
| Business | $48/month |
Part 2: Top 5 Android Apps for Editing Slow-Motion Videos
While professionals prefer editing on a desktop, some people prefer Android editing. It is easier to use smartphones for editing because they come in handy. Moreover, let’s admit that we are on our phones half of the time, and a computer might seem out of our comfort zone. This section has gathered some of the slow-mo maker s to operate on your Android:
- [Slow Motion Video – Fast&Slow Mo](#android app1)
- [Slow Motion Video Maker](#android app2)
- [Video Editor and Maker – InShot](#android app3)
- [Video Editor and Maker – Vidma](#android app4)
- [VivaVideo – Video Editor&Maker](#android app5)
1. Slow Motion Video – Fast&Slow Mo
Becoming the favorite of many, this slow-motion video converter offers an interactive user interface. Editing a slow motion is all about dragging and setting the slider in the downward direction. To slow down a video, you can set its playback speed from 0.25x to 4.0x. In addition, you can also curate a specific portion of your video in slow or fast motion.

Key Features
- This slow-motion video creator offers a pre-built filter and special effects to improve aesthetics.
- This application maintains the video quality and can convert video resolution to HD.
- Never miss a chance to integrate good music in your videos with it, as it has built-in options.
2. Slow Motion Video Maker
This free slo-mo video editor regulates its algorithm to introduce advanced features. It features a timeline editing interface, making it easy to apply slow-motion effects on a definite video section. It displays 3 slow motion speed options: 0.5x, 0.3x, and 0.25x to achieve precision in creating a slomo.

Key Features
- You can fasten your video up to 4x, which is helpful in short-time learning, data compression, and more.
- The premium video trim feature and timeline editing help with the accurate parting of a video.
- This slow-motion video maker has pre-developed music tracks and effects for maximum creativity.
3. Video Editor & Maker – InShot
Step into the realm of this free slo-mo video editor for crafting slo-mos full of creativity. It proposes a simple method to slow down video speed by using a slider. The timeline editing and selective playhead options enable you to create beyond basic. You can alter the speed of specific parts of the video, which means you can do much more than just a plain slo-mo.

Key Features
- Take your vision up a notch by introducing its integral collection of animations and text in your content.
- Make your reels more interesting with its intuitive and numerous transition effects.
- The slow-motion edito r has AI abilities to help you remove image backgrounds with accuracy.
4. Video Editor & Maker – Vidma
This is for you if you are looking for a slow-motion video editor that generates as precise results as those in trending videos. The editing application offers a “Velocity Edit” option with detailed playback speed and positioning options. The application has a velocity graph-like interface for adjusting speed, and you can also see the time you are applying this effect.

Key Features
- Bids an automated “Keep Audio Pitch” option to maintain the audio quality during speed change.
- Infuse your pictures and videos with its immersive collection of text and stickers.
- Features multiple visual filters categorized according to contexts with custom intensities.
5. VivaVideo – Video Editor&Maker
If you are looking for a slow-motion video editor with additional features to elevate your content, use it. The tool has multiple speed setting presets to help you create a perfect slomo along with fast motion. Among Montage, Hero, Bullet, and other presets, it offers a Custom preset option to edit according to your imagination.

Key Features
- An extensive timeline editing interface with multiple tracks option for smooth transitions.
- The stock media has a wide array of texts, animations, themes, effects, and music.
- This slow-mo video maker also has a “Voice Editor” to maintain the quality of audio tracks afterward.
Part 3: Top 5 iOS Apps for Editing Slow Motion Videos
Multiple people prefer shooting and editing with an iPhone instead of a Mac or desktop. This is because it helps them keep up with the video quality without declining any pixels. In addition, you can share a video directly to social sites from your iPhone instead of transferring them first. This part of the article focuses on some iOS slow-mo video maker s applications here:
- [Velomingo: Velocity Edit Maker](#ios app1)
- [Vizmato: Velocity Edit Maker](#ios app2)
- [Slow Motion Video Editor SLOMO](#ios app3)
- [Slow Motion Video Editor](#ios app4)
- [SloMo Slow Motion Video Editor](#ios app5)
1. Velomingo: Velocity Edit Maker
Creating a slo-mo as a beginner has never been this easy with this slow-mo editor. Users have the opportunity to apply its built-in velocity presets on their videos for a slo-mo effect. Although you cannot customize these presets, the application handles slow-mo quality. Not only does it generate mesmerizing slo-mos, but it also brings them smoothness.

Key Features
- Trim feature for creating transitions or eliminating unnecessary parts of video.
- Make videos creative just by offering hundreds of modern templates.
- This slow-mo maker can feature your video straight to WhatsApp, Instagram, TikTok, and Facebook.
2. Vizmato: Video Editor & Filter
Vizmato is a versatile video editor providing slow-motion services along with other speed editing options. Along with creating a Slow-mo, you can also reverse a video speed to add dramatic effect or enable fast motion. Moreover, it offers a speed manipulation option to customize a video according to your taste.

Key Features
- This slow video editor’s asset collection includes 20+ themes and 40+ visual effects.
- Elevate your slo-mos with its pre-developed music collection featuring 140+ music tracks.
- Along with a slo-mo video converter, it also converts images into a video using the slideshow.
3. Slow Motion Video Editor SLOMO
Customize your slow-motion sequences according to background music and context with this slow-motion editor. The editor offers a timeline editing panel, which provides an organized editing experience. In addition, you can enhance the graphic quality of your slo-mo using its pre-assembled filters. To preserve the video quality, share your slo-mo videos on social applications using its share options.

Key Features
- Choose the text option from its toolbar to customize the color, size, and other elements of text.
- Add other graphical elements like stickers and emojis to express your video context or dialogues.
- Resize your video within this application to fit the requirements of social platforms.
4. Slow Motion Video Editor
Wondering about how to achieve a professional-level effect on your iPhone? This slow-motion video converter is full of speed custom setting options to help with that. It uses a timeline bar and velocity graph to adjust the speed settings. The downward slide dragging will slow down your video and vice versa. You can also adjust the video duration via timeline or reset it to set again.

Key Features
- Create a time-lapse or speed up your video by altering its playback speed to 10x, fast or slow.
- Collaborates with iTunes for a seamless integration of music tracks in videos.
- The slow-mo video editor is compatible with social platforms like Instagram, YouTube, and more.
5. SloMo Slow Motion Video Editor
Are you looking for an application just to create slow-mo with a creative user interface? This slow-motion video editor has been developed to help you with speed-alteration tasks. The interface is simple, and you can start creating a slomo just by importing a video. Designed to create professional and cinematic level slo-mos, it offers high video frame rates like 120 fps and 240 fps.

Key Features
- Along with the frame rate, you can manipulate the playback speed range to 12x for both slow and fast.
- With this slow-mo editor’s 40+ illustrative filter, you’ll never run out of creativity.
- Fit your video into different ratios for multiple social media platforms or to your preference.
Bonus Part: Get the Perfect Results of Slow-Motion Video with Wondershare Filmora - Desktop Solution
In this section, you have read about so many slow-mo editors that you might be bored by now. However, one common drawback that all of them had was versatility. They offered high-speed manipulation settings but with limited additional features. Wondershare Filmora is a world-class, all-in-one video editing software. Anyone can use it, from a beginner to a professional or from an Android user to an iOS user.
When you enter this slow-motion video converter, it displays two types of speed modification. One is the Uniform Speed option, while the other one is Speed Ramping. Both of them excel at their tasks and offer custom speed and duration settings. Filmora has recently introduced the “Optical Flow” option in its latest V13 upgrade. This helps to smoothen out a slo-mo video by adding frame rates.
Free Download For Win 7 or later(64-bit)
Free Download For macOS 10.14 or later
Steps to Slow Down Video in Filmora
In this section, we will discuss the Filmora Speed Ramping feature to create a slo-mo. If you are a beginner and have never edited before, this feature suits you the best. It has over 6-speed ramping templates for adding creative speed change effects. You can modify these models to fashion a slo-mo, and here is how to do it:
Step 1Access the Speed Feature
After opening Filmora and opening a project, select the clip in the timeline and go to the settings panel. From there, reach the “Speed” > “Speed Ramping” tabs and select a preset. If you don’t like the featured presets, click on “Customize” for manual editing.

Step 2Add Video Frames
Once you have set the slo-mo speed, reach the “AI Frame Interpolation” section at the bottom. Click on the navigation icon and select “Optical Flow” from there.

Step 3Render Preview to Observe the Outcome
To ensure that the optical flow has worked, click the “Render Preview” option in the timeline toolbar. Once rendering is complete, play the video and finalize it by clicking “Export.”

AI Key Features of Filmora
As discussed before, Filmora offers an extensive interface with a wide collection of features. Users can use these features to generate high-quality images, videos, and more. In this section, the focus is on a few of its features discussed below:
1. AI Smart Masking
Want to create amazing transitions or apply stunning effects on specific video sections? Filmora’s AI mask feature will mask out the unnecessary parts, and you can edit freely. Just enable this feature from its settings panel under AI Tools and select the masking area.

2. AI Text-to-Video
Dive into the realm of Filmora, where there is no limitation on graphics and visuals for videos. This generative AI feature can craft videos from prompts along with suited graphics. You just need to add proper instructions, and AI will do the rest. It enhances the interactive element of your videos via AI voice integration.

3. Motion Tracking
Create animations from mere graphics to insert in your videos using this AI. Just add any graphical emoji, text, or sticker and link it with a moving object. Once you enable the motion tracking option, you will see them come to life. You can also apply an effect or filter to a specific portion throughout the video using making and motion-tracking options.

4. Speech-to-Text
Subtitles and captions have become an important part of cinema or videography. To ensure that your content reaches an international audience, use Filmora’s STT feature. With its automated speech recognition and NLP systems, it transforms any speech into text. Moreover, it has multilingual support to make content accessible at international levels.

Conclusion
In this article, you have read about different slow-motion video editor s and their features. Sometimes, they’re amazing editors, while other times, they may show glitches. However, if you want to try an editor that combines all the properties in one place, we suggest Wondershare Filmora. With its amazing content editing features and assets, you can rely on it for Slomo creation or other editing tasks.
Best Ways to Slow Down Motion in CapCut
Since the slow-motion trend captured everyone’s attention, it never went out of fashion. Keeping this in view, many content creators followed the trend and created slo-mos. In filmmaking, slow motion assisted in emphasizing high-action scenes and details. Many tools and software like Adobe After Effects or Adobe Premiere Pro can do this.
Smartphone video editors were introduced to enhance the application of slow motion. One of these editors is CapCut , a multifunctional video editor capable of slo-mo creation. This article will focus on how to do slow-mo in CapCut. With tools brief review, you can find the detailed guide on the CapCut slow-mo effect . Along with learning how to do some in CapCut, we’ll look into its alternative.
Slow Motion Video Maker Slow your video’s speed with better control of your keyframes to create unique cinematic effects!
Make A Slow Motion Video Make A Slow Motion Video More Features

Part 1: CapCut Video Editor: An Exceptional Mobile App for Video Editing
CapCut is an editing application that caters to the needs of both Android and iPhone users. Whether you are working as a seasoned editor or a team member, it assists all. It harbors numerous video editing tools like the CapCut slow-motion effect. Moreover, users can also access keyframe editor, effects and filters, stock videos, and more.

The tool offers a sleek user interface with cutting-edge AI technology for automated editing. The interface looks artistic and organized for accessible editing. Along with video editing, users can perform audio, text, and image editing. You can access its Resource collection on its site, which is full of tips and tutorials. To give you a broader vision of CapCut slow-mo effect, here are some of its features:
- Video Filters and Effects: CapCut has a free collection of effects and filters to enhance your footage. The video effects and filters add uniqueness and hide any irregularities in videos. The collection keeps updating, and you can use Business, Ads, and other categories.
- Stock Videos: Use CapCut’s free stock media instead of roaming through the internet. If you must show your abilities as an editor, then try its royalty-free videos. These videos are editable, and you can apply multiple pre-installed animations and stickers to them.
- Keyframe Animation: Although CapCut offers a range of stock animations, you can create one. With its keyframe functioning, users can create custom animations. It offers custom settings like scale, position, opacity, and more adjustments.
- Background Remover: If you want to erase messy backgrounds and replace them, CapCut can assist. Its background remover eliminates video backgrounds with accuracy. Moreover, you can replace them with solid or gradient colors, images, and videos.
- Video Upscaler: This tool is available online and enhances video resolution up to 4K. The tool is compatible with diverse video contexts and gives professional outcomes. The tool is backed by AI, and hence, you just need to upload the video for upscaling.
Part 2: How to Create a Slow Mo on CapCut? A Guide
There are two seamless methods of creating slow-mo on CapCut via “Normal” and “Curve” options. The normal method involves slowing down videos via basic playback speed alteration. However, the Curve method involves multiple speed templates for this. If you do not find an expected speed template, you can utilize the “Custom” option. Following is the procedural guide to the CapCut slow-mo effect:
Step 1
After downloading and launching CapCut on your device, access its main menu. From the main menu, click the “New Project” option and upload a video.

Step 2
Once you have added the video, navigate towards the toolbar at the bottom. From there, locate and select the “Edit” option.

Step 3
From the appearing options, select the “Speed” option for the CapCut slow-mo effect.

Step 4
In the speed display, adjust the position of the slider to add the slo-mo effect. Further, go to the “Normal” section to start speed manipulation.

Step 5
Drag the playback speed slider toward the left side of the screen. This will add a slow-mo effect and will increase the video’s duration. In this section, you can also expand the “Make it smoother” option to enhance the quality. Moreover, you can also enable the “Pitch” option to maintain audio quality. Afterward, click the “ü” icon at the bottom right corner to finalize the slo-mo effect.

Part 3: CapCut Slow Mo Alternative: Wondershare Filmora for Smartphone Users
After seeing how to slow down videos on CapCut, you must think that it is so easy. However, there is an alternative editor that offers a minimal interface with similar qualities. Wondershare Filmora is a professional slow-motion creator catered to your needs. Whether you are skilled or just beginning your journey, it can assist you.
Using this CapCut slow-motion video has its benefits, as it offers multiple speed change options. You can change video speed using Normal playback speed or speed “Curve” alteration. In this section, we’ll teach you how to create a slow motion in Filmora. We are going to use the Curve technique to manipulate speed professionally.
Step-by-Step Guide to Slow Down Video in Filmora App
You can find multiple speed templates here to craft a cinematic-level slow motion. By utilizing the Custom speed setting options, this effect is possible. To fashion professional-grade and artistic slow motion in Filmora, follow these steps:
Step 1Import Videos After Creating a New Project
Download the Filmora app from the Play Store or App Store and launch it. Then, click the “New Project” tab and import a video from the device gallery.

Step 2Access the Speed Curve Option
After importing the video, navigate towards the timeline panel and select the video. From the options appearing in the bar at the bottom, select “Speed.” In the speed section, select the “Curve” section to access speed settings.

Step 3Adjust the Speed Curve Settings
From the appearing options, click the “Customize” option and start editing. To create the slo-mo effect, drag the slider in the downward direction. If you notice, the slider points are distant from each other. It is to edit videos and slow down videos at different durations. Once you are done editing in this CapCut slow-mo effect alternative, hit “Export.”

Bonus Part: Edit Your Slow Mo Video on Desktop with Filmora Desktop
No doubt Wondershare Filmora offers precise editing features compared to other apps. However, skilled and professional editors just prefer the desktop version to bring precision. In addition, there is an optical flow option and an extensive timeline panel. Both these features ensure professional outcomes and a smooth slow-motion effect.
Wondershare Filmora is a powerful alternative to CapCut slow-motion download. The software has a range of video editing features that open unlimited editing opportunities. With its various effects and filters, you can seize the audience’s attention. In addition, the software is compatible with Linux and macOS devices for diversity.
Free Download For Win 7 or later(64-bit)
Free Download For macOS 10.14 or later
Step-by-Step Guide to Create Slow Motion in Filmora for Desktop
In this method, we’ll use Filmora’s Uniform Speed functionality to generate a slow-motion video. This feature uses a simple speed slider to enhance or decelerate video speed. Find the guide to Filmora’s Uniform Speed feature attached below:
Step 1Access the Speed Tab to Start Editing
After opening a project in Filmora, select the video in the timeline and access the settings panel. From there, go to the “Speed” > “Uniform Speed” option and change the slider’s position. By dragging it towards the left side, you can add a slow-motion effect.

Step 2Add Optical Flow Effect
To add a layer of smoothness to your slow-motion video, access “AI Frame Interpolation.” You can find this option at the bottom of the Uniform Speed tab. Expand this option and select the “Optical Flow” option.

Step 3Activate Rendering and Export Video
To analyze the outcome of activating optical flow, navigate towards the timeline panel. From the given options, click on the “Render Preview” icon and wait for its completion. Once the rendering is complete, click the “Export” button after the preview.

Video Editing Features of Filmora
CapCut and Wondershare Filmora both possess AI powers to ensure seamless video creation. However, Filmora offers more video editing features, and all of them offer customization. The interface is just perfect for every professional or non-professional. With its accessible interface, you must try the following video editing tools:
1. Screen Recorder
For the seamless generation of tutorials and ‘How to” videos, this editor offers a screen recorder. The recorder is embedded with custom settings to cater to each user’s requirements. You can accommodate screen resolution, microphone settings, and cam settings with it.
2. Keyframing
Transform your illustrations into reality using Filmora’s keyframe editing feature. You can add keyframes at different points in the timeline to adjust the movements. There are custom settings like position, scale, opacity, color, and more for each keyframe.
3. Split Screen
Make your videos happening and captivating simultaneously with Filmora’s split screen option. This allows you to add distinct videos and auto-adjust them at different split screens. You can also enable manual visual, audio, and AI editing for each split video.
4. Assets Backup & Sync
Why worry about finishing a project at once when you can edit it later with Filmora? With its cloud backup option, you can start editing a video where you left off. In addition, the tool also offers synchronization across devices. This means you can access your videos, downloaded assets, and other storage data with a simple login.
5. AI Text-Based Editing
As discussed earlier, the AI algorithms allow you to edit with full efficiency. This feature of Filmora enhances productivity via text-to-speech function. It creates captions out of a video and allows you to seamlessly cut videos by removing text.
Conclusion
In conclusion, this article considered how to do slow-mo in CapCut. In addition, we saw how you can create a slow-motion video on a smartphone using CapCut. During times that demand the creation of sophisticated slow-motion content, we suggest Filmora. This editing software offers a myriad of editing tools and techniques, facilitating the creation and adjustment of slow motion.
Make A Slow Motion Video Make A Slow Motion Video More Features

Part 1: CapCut Video Editor: An Exceptional Mobile App for Video Editing
CapCut is an editing application that caters to the needs of both Android and iPhone users. Whether you are working as a seasoned editor or a team member, it assists all. It harbors numerous video editing tools like the CapCut slow-motion effect. Moreover, users can also access keyframe editor, effects and filters, stock videos, and more.

The tool offers a sleek user interface with cutting-edge AI technology for automated editing. The interface looks artistic and organized for accessible editing. Along with video editing, users can perform audio, text, and image editing. You can access its Resource collection on its site, which is full of tips and tutorials. To give you a broader vision of CapCut slow-mo effect, here are some of its features:
- Video Filters and Effects: CapCut has a free collection of effects and filters to enhance your footage. The video effects and filters add uniqueness and hide any irregularities in videos. The collection keeps updating, and you can use Business, Ads, and other categories.
- Stock Videos: Use CapCut’s free stock media instead of roaming through the internet. If you must show your abilities as an editor, then try its royalty-free videos. These videos are editable, and you can apply multiple pre-installed animations and stickers to them.
- Keyframe Animation: Although CapCut offers a range of stock animations, you can create one. With its keyframe functioning, users can create custom animations. It offers custom settings like scale, position, opacity, and more adjustments.
- Background Remover: If you want to erase messy backgrounds and replace them, CapCut can assist. Its background remover eliminates video backgrounds with accuracy. Moreover, you can replace them with solid or gradient colors, images, and videos.
- Video Upscaler: This tool is available online and enhances video resolution up to 4K. The tool is compatible with diverse video contexts and gives professional outcomes. The tool is backed by AI, and hence, you just need to upload the video for upscaling.
Part 2: How to Create a Slow Mo on CapCut? A Guide
There are two seamless methods of creating slow-mo on CapCut via “Normal” and “Curve” options. The normal method involves slowing down videos via basic playback speed alteration. However, the Curve method involves multiple speed templates for this. If you do not find an expected speed template, you can utilize the “Custom” option. Following is the procedural guide to the CapCut slow-mo effect:
Step 1
After downloading and launching CapCut on your device, access its main menu. From the main menu, click the “New Project” option and upload a video.

Step 2
Once you have added the video, navigate towards the toolbar at the bottom. From there, locate and select the “Edit” option.

Step 3
From the appearing options, select the “Speed” option for the CapCut slow-mo effect.

Step 4
In the speed display, adjust the position of the slider to add the slo-mo effect. Further, go to the “Normal” section to start speed manipulation.

Step 5
Drag the playback speed slider toward the left side of the screen. This will add a slow-mo effect and will increase the video’s duration. In this section, you can also expand the “Make it smoother” option to enhance the quality. Moreover, you can also enable the “Pitch” option to maintain audio quality. Afterward, click the “ü” icon at the bottom right corner to finalize the slo-mo effect.

Part 3: CapCut Slow Mo Alternative: Wondershare Filmora for Smartphone Users
After seeing how to slow down videos on CapCut, you must think that it is so easy. However, there is an alternative editor that offers a minimal interface with similar qualities. Wondershare Filmora is a professional slow-motion creator catered to your needs. Whether you are skilled or just beginning your journey, it can assist you.
Using this CapCut slow-motion video has its benefits, as it offers multiple speed change options. You can change video speed using Normal playback speed or speed “Curve” alteration. In this section, we’ll teach you how to create a slow motion in Filmora. We are going to use the Curve technique to manipulate speed professionally.
Step-by-Step Guide to Slow Down Video in Filmora App
You can find multiple speed templates here to craft a cinematic-level slow motion. By utilizing the Custom speed setting options, this effect is possible. To fashion professional-grade and artistic slow motion in Filmora, follow these steps:
Step 1Import Videos After Creating a New Project
Download the Filmora app from the Play Store or App Store and launch it. Then, click the “New Project” tab and import a video from the device gallery.

Step 2Access the Speed Curve Option
After importing the video, navigate towards the timeline panel and select the video. From the options appearing in the bar at the bottom, select “Speed.” In the speed section, select the “Curve” section to access speed settings.

Step 3Adjust the Speed Curve Settings
From the appearing options, click the “Customize” option and start editing. To create the slo-mo effect, drag the slider in the downward direction. If you notice, the slider points are distant from each other. It is to edit videos and slow down videos at different durations. Once you are done editing in this CapCut slow-mo effect alternative, hit “Export.”

Bonus Part: Edit Your Slow Mo Video on Desktop with Filmora Desktop
No doubt Wondershare Filmora offers precise editing features compared to other apps. However, skilled and professional editors just prefer the desktop version to bring precision. In addition, there is an optical flow option and an extensive timeline panel. Both these features ensure professional outcomes and a smooth slow-motion effect.
Wondershare Filmora is a powerful alternative to CapCut slow-motion download. The software has a range of video editing features that open unlimited editing opportunities. With its various effects and filters, you can seize the audience’s attention. In addition, the software is compatible with Linux and macOS devices for diversity.
Free Download For Win 7 or later(64-bit)
Free Download For macOS 10.14 or later
Step-by-Step Guide to Create Slow Motion in Filmora for Desktop
In this method, we’ll use Filmora’s Uniform Speed functionality to generate a slow-motion video. This feature uses a simple speed slider to enhance or decelerate video speed. Find the guide to Filmora’s Uniform Speed feature attached below:
Step 1Access the Speed Tab to Start Editing
After opening a project in Filmora, select the video in the timeline and access the settings panel. From there, go to the “Speed” > “Uniform Speed” option and change the slider’s position. By dragging it towards the left side, you can add a slow-motion effect.

Step 2Add Optical Flow Effect
To add a layer of smoothness to your slow-motion video, access “AI Frame Interpolation.” You can find this option at the bottom of the Uniform Speed tab. Expand this option and select the “Optical Flow” option.

Step 3Activate Rendering and Export Video
To analyze the outcome of activating optical flow, navigate towards the timeline panel. From the given options, click on the “Render Preview” icon and wait for its completion. Once the rendering is complete, click the “Export” button after the preview.

Video Editing Features of Filmora
CapCut and Wondershare Filmora both possess AI powers to ensure seamless video creation. However, Filmora offers more video editing features, and all of them offer customization. The interface is just perfect for every professional or non-professional. With its accessible interface, you must try the following video editing tools:
1. Screen Recorder
For the seamless generation of tutorials and ‘How to” videos, this editor offers a screen recorder. The recorder is embedded with custom settings to cater to each user’s requirements. You can accommodate screen resolution, microphone settings, and cam settings with it.
2. Keyframing
Transform your illustrations into reality using Filmora’s keyframe editing feature. You can add keyframes at different points in the timeline to adjust the movements. There are custom settings like position, scale, opacity, color, and more for each keyframe.
3. Split Screen
Make your videos happening and captivating simultaneously with Filmora’s split screen option. This allows you to add distinct videos and auto-adjust them at different split screens. You can also enable manual visual, audio, and AI editing for each split video.
4. Assets Backup & Sync
Why worry about finishing a project at once when you can edit it later with Filmora? With its cloud backup option, you can start editing a video where you left off. In addition, the tool also offers synchronization across devices. This means you can access your videos, downloaded assets, and other storage data with a simple login.
5. AI Text-Based Editing
As discussed earlier, the AI algorithms allow you to edit with full efficiency. This feature of Filmora enhances productivity via text-to-speech function. It creates captions out of a video and allows you to seamlessly cut videos by removing text.
Conclusion
In conclusion, this article considered how to do slow-mo in CapCut. In addition, we saw how you can create a slow-motion video on a smartphone using CapCut. During times that demand the creation of sophisticated slow-motion content, we suggest Filmora. This editing software offers a myriad of editing tools and techniques, facilitating the creation and adjustment of slow motion.
5 Tools to Create a Time-Lapse Video Online
If you’re looking for a way to create a time-lapse video online, you have come to the right place. There are different reasons why people use online time-lapse video makers. Let us take an example, if you want to make a time-lapse video of someone holding a phone in their hand then this would be pretty easy to do with the help of an online time-lapse maker.
Why do people use an online time-lapse maker because they want to get some good quality videos without spending much money on them? That’s something that many people who are just starting their business can do easily since it can be done by anyone who knows how to use online time-lapse makers properly! Let’s have a look at some online tools on which you can make time-lapse videos online.
1. Clideo Timelapse Video Tool
A video timelapse video is a type of video that shows the progression of time. It allows you to create an engaging experience for your viewers, and it can also be used to promote your business. Whether you’re a content creator, brand manager, or just a fan of videos, creating a time-lapse video is one of the most popular and effective ways to produce impressive content.
With Clideo Time-lapse Video Tool you can create incredible videos with ease. You can choose from dozens of beautiful templates, music tracks, transitions, and more. You can also add your photos or video clips and make your unique time-lapse video. By using this tool, you can:
- Capture your events in real-time and save them for later. Once captured, you can use the timeline function to move backward or forwards through the events of your day.
- Add filters and effects such as blur or freeze frame.
- Share your videos on social media with ease!
Steps to make a time-lapse video on Clideo:
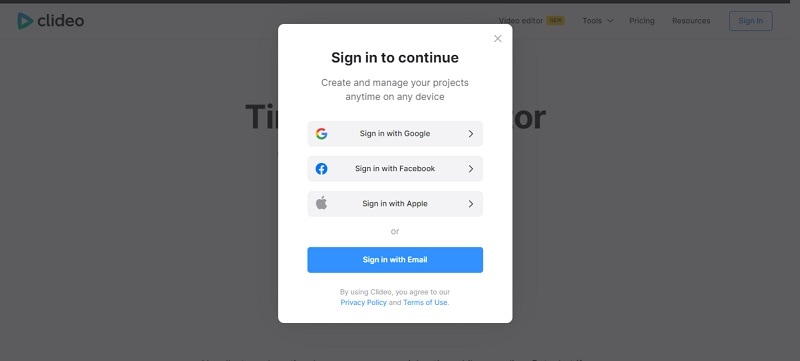
Step1 Open Clideo and Create an account
You can use this online time-lapse maker from any browser e.g Google Chrome, Mozilla Firefox, Internet Explorer, etc. After that you don’t have an account on it then you have to create it first. You can Sign in by using different platforms like Google, Facebook, apple, etc.
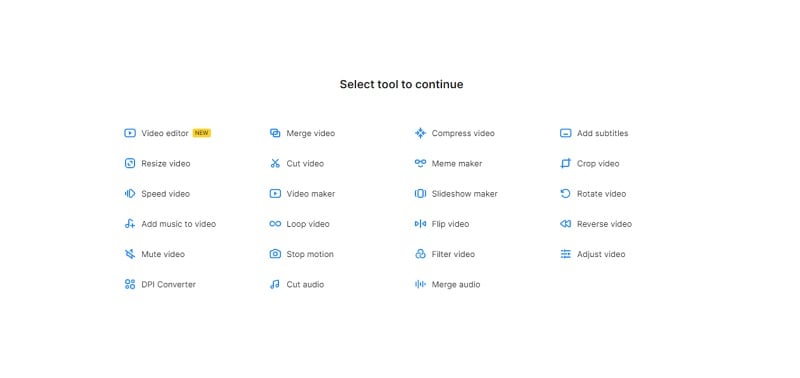
Step2 Create a project and select a tool
When you create an account on Clideo, a page appears where you will get the option of creating a project. A list of several features will be provided by this online time-lapse video maker. You will get to add subtitles, compress videos, resize the video, and many more features in it.
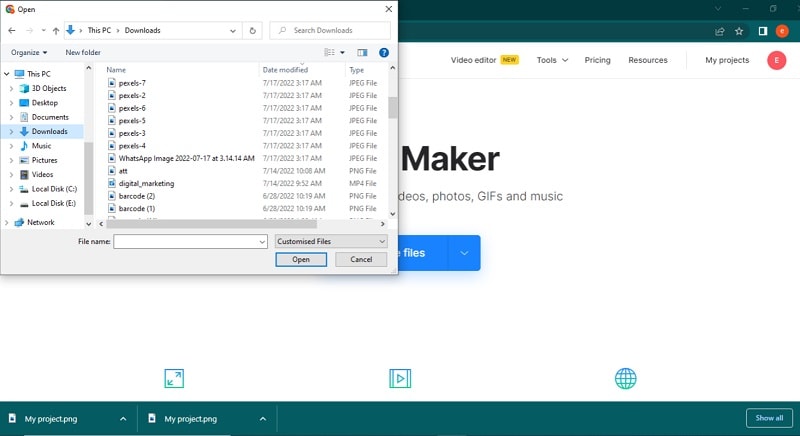
Step3 Create a video on Clideo
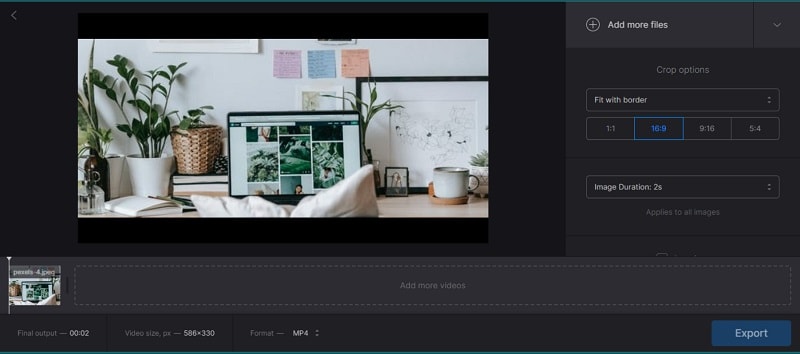
If you want to create a video then click on video maker and after that choose a file whether it is an image, video, gif, or music.
Step4 Edit the video and export
With Clideo, you can make amazing videos with just one click. You can choose the length of your video, as well as the format, and save it to your computer’s hard drive.
You can also adjust the duration of your video and add music to make it more interesting. This way you can make sure that your video is the right length for the content you’re putting in it.
2. Flixier Timelapse Video Maker
Flixier Timelapse Video Maker is the easiest way to create beautiful timelapse videos. You can create beautiful, high-quality videos with ease. What’s more, you don’t have to know any programming languages! You’ll be able to export your videos in just one step.
The program’s intuitive user interface makes it easy for beginners to get started while still providing advanced features that professionals will love. The program supports drag-and-drop editing and has an intuitive layout designed for maximum efficiency.
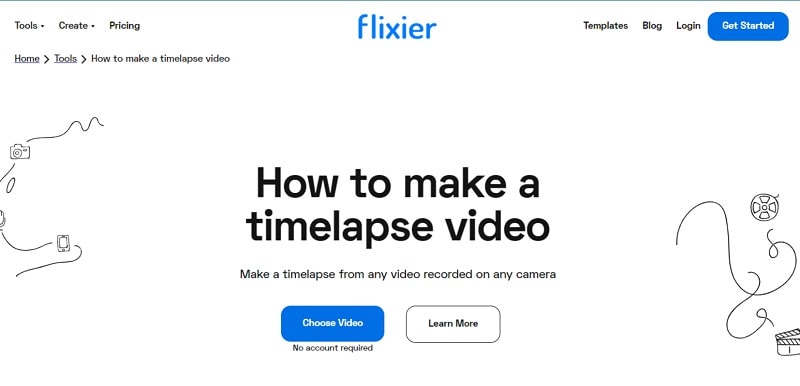
Step1 Create a video without having an account
Flixier Timelapse Video Maker is a powerful video editing tool that allows you to create beautiful, high-quality timelapse videos. The best thing about Flixier is it does not require any account. You can easily click on Get Started and move on to the next step.
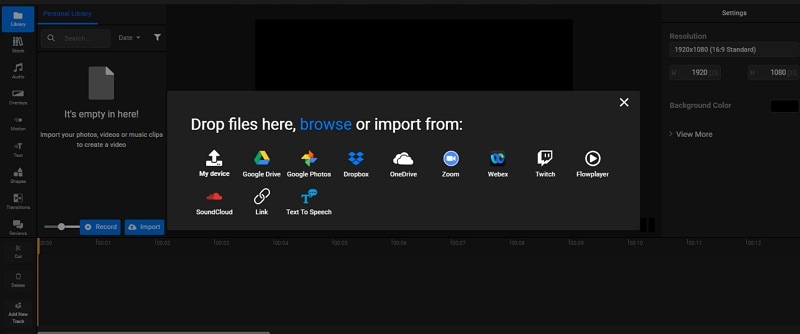
Step2 Drop and Browse any file
The Flixier Timelapse Video Maker is a new and exciting way to create HD videos from your favorite photos. It makes it easy for you to choose the photo you want to use, and then attach it to your video.
Flixier works with all of your favorite services: Google Drive, Google Photos, Dropbox, Flowplayer, and more! Flixier has a massive library of videos that you can use as inspiration for your project. There are thousands of them, some of which are free.
Step3 Edit the video and save it
This online time-lapse maker is easy to use, and it allows you to edit your videos in a few simple steps. You can add text, motion, position, and scale to your videos in just a few clicks. After that, you can export it to your hard drive.
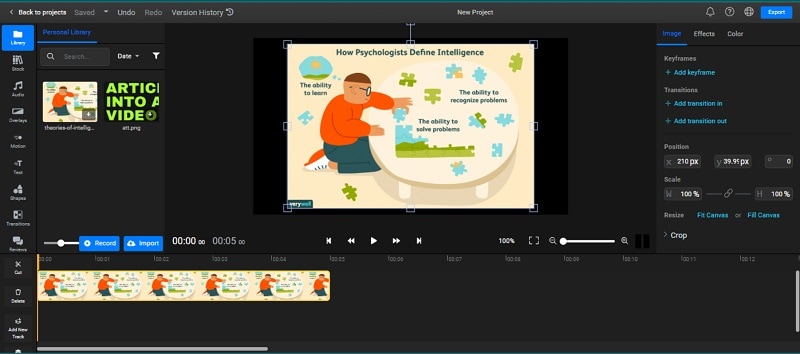
Flixier has tons of useful features for creating content for social media marketing. You can upload multiple clips at once and easily customize the length and format of each clip. You can also add music to your videos and adjust the volume levels for each clip individually so that they blend seamlessly when viewed as a whole.
3. Kapwing
Are you looking for a way to speed up and down your video without having to rewind and fast-forward? Kapwing is the tool that can help you do just that. With Kapwing, you can change the speed of your video from 1x to 10x faster. And because it’s easy to use and can be used on any device, you can take your videos anywhere!
There’s nothing worse than having your video slowdown in the middle of a high-speed chase. That’s why, this tool can speed up and down your videos as much as you want, whenever you want it. Now move to steps that how can we use it:
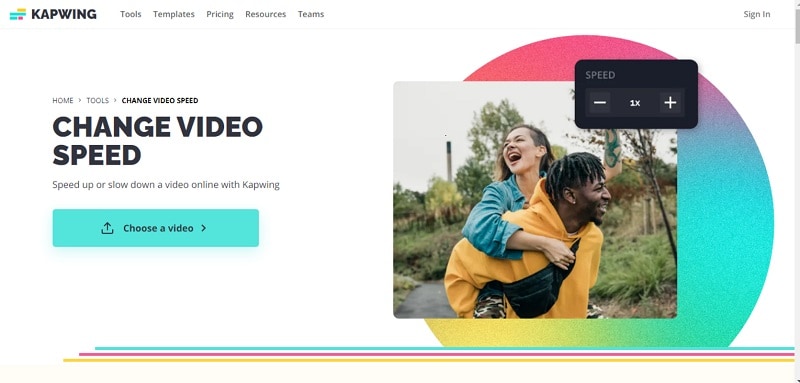
Step1 Sign in and export the file
If you’re looking for a way to speed up your video editing process, look no further. Kapwing Video Speed Changer is here to help!
With Kapwing, you have to create an account, add media like pictures and videos, and then easily tweak the speed of your video without ever having to create a new one.
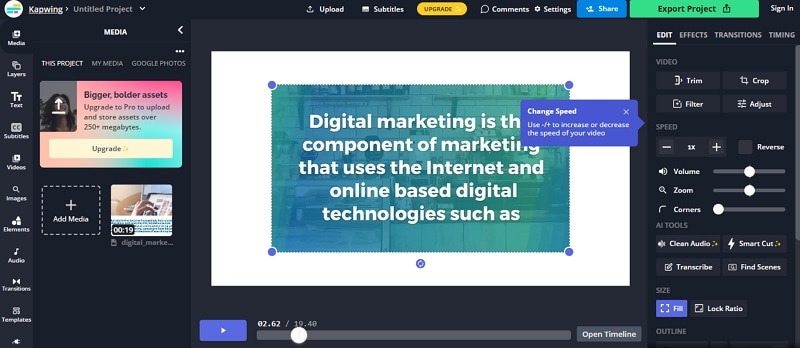
Step2 Create video and change speed
Kapwing is a video editing software that lets you create videos as well as control the speed according to your needs. This feature makes it easy for you to create videos with different features. You can create videos with size, transitions, layers, and fonts. You can add text to your video as well as record audio from your computer’s microphone.
The software also includes other tools such as watermarking and adding subtitles to your video.
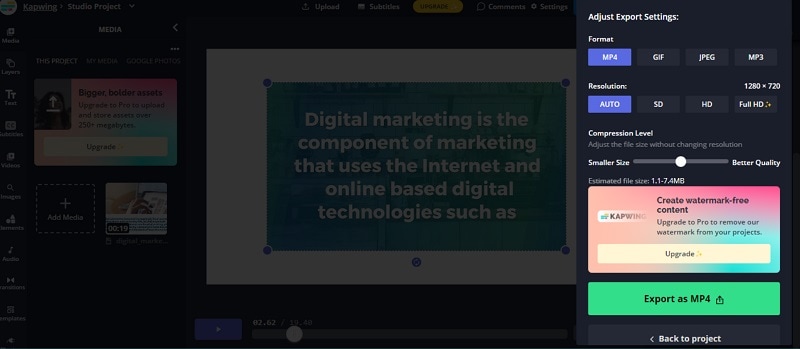
Step3 Export the video
This online tool provides you with different formats to export your video like mp4, mp3, GIF, and JPEG. You can download or export your video in full HD form. It provides you full resolution video.
4. Veed.io Video Speed Controller
Are you looking to speed up or slow down your videos? We’ve got you covered. With Veed.io, you can easily adjust the speed of your video to your liking. You can also use a slider to control the speed of the video itself, which allows for more flexibility and control.
To use this tool, all you have to do is enter the URL of your video and select how fast you want it to be played back. And if you need even more flexibility, go ahead and add buttons so that you can easily change between faster and slower speeds without having to pause or rewind your video at all!
How can we control the speed on Veed.io let’s have a look at some steps:
Step1 Open the tool and create an account
Check out Veed.io Video Speed Controller, a new tool that allows you to control the speed of your videos. It’s super easy to use and can be accessed from any browser. Just create an account and you’ll be able to adjust the speed of your video on the go!

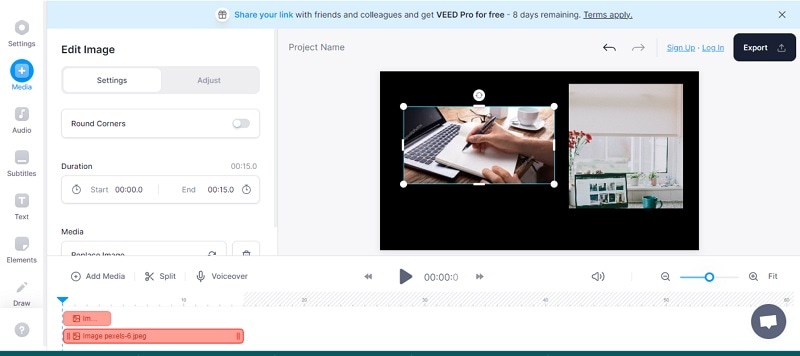
Step2 Create, edit the video and add subtitles
Veed.io is a video speed controller that allows you to create videos, edit your footage, and add voice-over in one simple app.
This is perfect for content creators who want to create more engaging videos and increase their profits by selling subscriptions or advertising within their content. With Veed.io, you can use the built-in editor to easily add text overlays, adjust the speed of your video, and add voice-over effects to create professional videos that people will love watching!
Step3 Add elements, and emojis in the video
Are you tired of your videos just being boring? Worried that they’re not engaging enough? Don’t worry, Veed.io has a solution for that.
With this editor, you can add elements to your videos to increase engagement and make them more interesting. You can also select the size and color of each element, so you can customize the look of your video to stand out from the crowd!
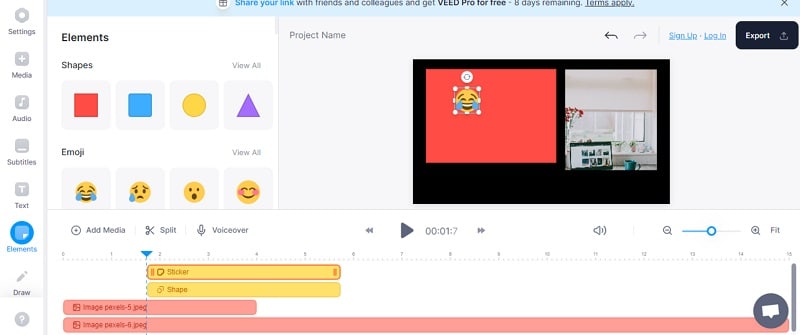
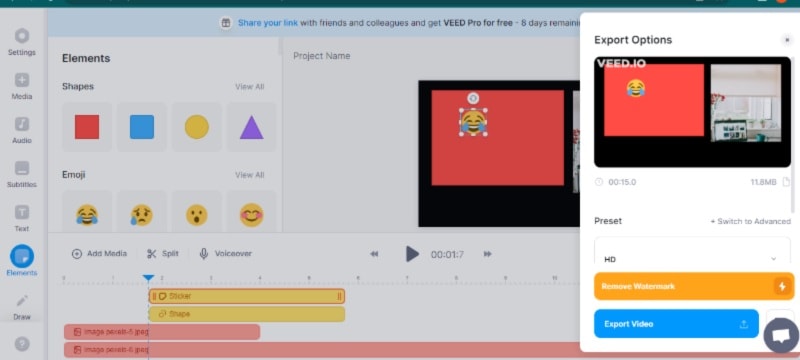
Step4 Export video without the watermark
After all the editing you can export or download the video without watermarks. The resolution of the video will be HD.
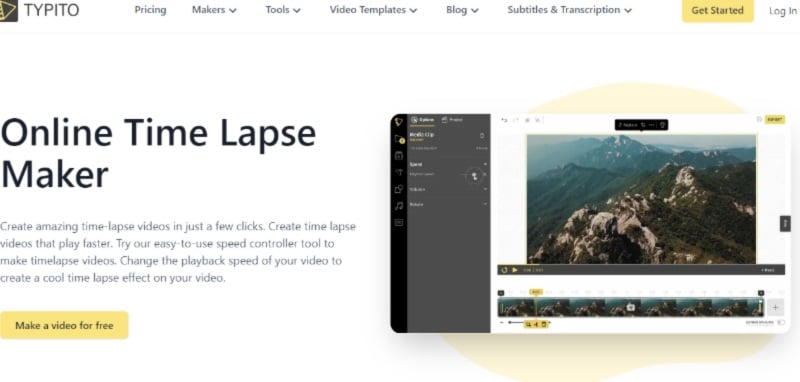
5. Typito Time Lapse Maker
Typito Time Lapse Maker is a tool that allows you to create videos with a timelapse effect. It is easy to use, and the interface is extremely simple. The first step is to select your video source and output format. You can choose from several different video formats, including MP4, MOV, and AVI.
Next, you’ll be prompted to select what you want your video to do. You have the option of creating a looping video or not it’s up to you! Once you’ve made your choices, you will be taken to the final step: entering text into the text editor for your video. This is where you can add captions or text overlays to spice up your video’s storyline.
Move to steps to create a lapse video online:
Step1 Create an account and make a video
Firstly, create an account on Typito and once you are done with the creation of the account click on the “Create Video” button in the middle of the screen. The video creation tool will begin loading, so please be patient!
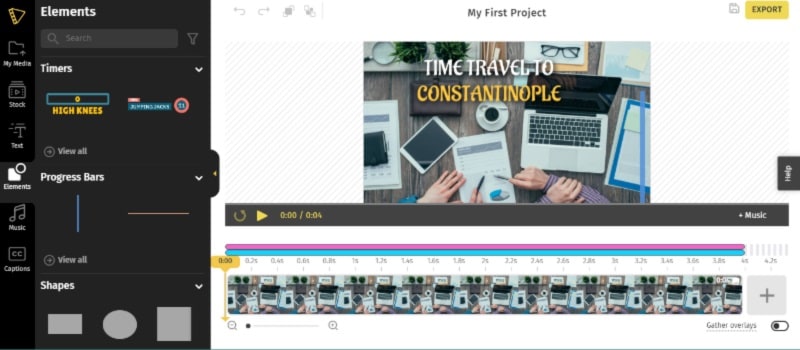
Step2 Add media, title, elements, music
Time-lapse is a great way to create visual content. But how do you do it without spending a fortune? Typito Time Lapse Maker can help you make your time-lapse videos with the click of a button!
Just select media, add titles, elements, and anything else you want, and we’ll handle the rest—whether you’re using your music or not. You can add music according to your taste.
Step3 Export video and re-edit
When you are done with the video export it. And the great thing is video can be re-edited again and again. You can apply changes many times.

Conclusion
We hope that these ideas can motivate you to make timelapse videos. If you want to create a time-lapse video but don’t want to use a big and expensive camera just set up your online time-lapse. Moreover, there are lots of excellent platforms out there to share the finished product. Refer to the above recommendations to choose your favorite one.
Free Download For Win 7 or later(64-bit)
Free Download For macOS 10.14 or later
Free Download For macOS 10.14 or later
Also read:
- Do You Have an Idea on How to Zoom in on Snapchat? Using This Article, You Will Find the Easiest Way to Zoom in and Out on Snapchat Videos for Different Purposes
- Updated How to Animate Designs With Canva GIF
- Adobe Lightroom Color Grading Tutorial for 2024
- New In 2024, Detailed Guide to Crop Video in Sony Vegas Pro
- New Top 5 Solutions on How to Add Emojis to iPhone for 2024
- New Add Neon Effects to Your Dance Videos with the Help of Wondershare Filmora After Reading This Article. It Will Give a More Thrilling and Exciting Appearance for 2024
- Finding the Best GIF Websites Was Never Easier
- Updated 2024 Approved Detailed Tutorial to Resize Your Video in VLC
- New How To Use Speed Ramping to Create an Intense Action Footage
- New Text Animation Intro Tutorial in Filmora
- New Creative Ways to Add Green Screen Effects In Photoshop
- 2024 Approved A Complete Guideline About QuickTime Player
- Updated This Guide Will Help You to Understand Everything About the Zoho Show. Also, Know What the Zoho Show Slide Is, Why It Is Used and All Related Information
- New How to Clone Yourself in Videos with Filmora, In 2024
- Do You Seek a Guide to Add Motion in Blender? This Article Explains the Blender Motion Blur Effect in Detail and Helps You Master It
- In 2024, Where To Find The Best Free Canon LUTs? Learn More
- New How To Use Virtual Green Screen to Shoot Video for 2024
- 2024 Approved Got No Luck with MP4 Video Joining Software? Try These 6 Best MP4 Mergers to Combine Videos on Your MAC and Windows
- How to Merge Audio and Video Using FFmpeg for 2024
- New How to Livestream Zoom on Facebook?
- Updated Video Maker with Song
- How to Create Video Contents That Convert Sales for 2024
- Updated Practical Way to Resize Video in Handbrake for 2024
- Updated In 2024, Steps to Add Subtitles in Canva
- Updated 2024 Approved How to Do Velocity Edits on PC
- New Start Your Creative Journey Now. Follow This Step-by-Step Guide on How to Add Double Exposure Effects to Your Personal Videos by Using the Filmora Video Editor
- New Creating Motivational Videos with AI Comprehensive Guide 2024
- 2024 Approved How To Fix Slow Playback Issues in DaVinci Resolve Finding the Best Solutions
- Best Online YouTube Video Trimmer
- In 2024, If the Phenomenon of Augmented Reality Fascinates You, Consider Entering Into the Gaming World with the Best AR Games You Will Ever Come Across
- Updated 2024 Approved Split Audio From Video in Adobe Premiere Pro Step by Step
- 2024 Approved Learn How to Create Your Own Custom Animated Text Intro in the Filmora Video Editor. Follow a Few Simple Steps to Create Something that Looks Incredible
- In 2024, Step by Step to Resize Video in Davinci Resolve
- New Create Chroma Key Written Text Effects in Filmora
- A Complete Guideline To Better Use QuickTime Player for 2024
- Updated Hitfilm Express Video Editor Review for 2024
- In 2024, Everything That You Need to Know About Video Montages- Ideas, Techniqu
- In 2024, Steps to Rotate Videos in Lightworks
- How to Record Shots and Edit Them Using Wonderware Filmora to Create the Super Jump Effect? A Complete Guide for Beginners
- 2024 Approved 4 Ways for Rotating Your GoPro Videos Professionally
- New Detailed Guide to Merge Videos in VLC Media Player
- Discover the Essential Steps for Editing a Music Video in This Guide. Learn About Aspect Ratio and the First Cut Process to Create a Visually Captivating Video
- The Way to Quick and Efficient Editing | Keyboard Shortcuts in Filmora for 2024
- New 2024 Approved Gimp Green Screen
- New 2 Solutions to Cut Video in VLC on Windows for 2024
- How to Unlock iCloud lock from your iPhone SE and iPad?
- Complete Tutorial for Tecno Spark Go (2023) Hard Reset | Dr.fone
- In 2024, Still Using Pattern Locks with Infinix Note 30? Tips, Tricks and Helpful Advice
- How to Stop My Spouse from Spying on My OnePlus Ace 2V | Dr.fone
- In 2024, How to Copy Contacts from Apple iPhone 15 to SIM? | Dr.fone
- In 2024, A Step-by-Step Guide on Using ADB and Fastboot to Remove FRP Lock from your Vivo T2 Pro 5G
- Updated 2024 Approved Beginners Guide for Learning 3D Animation
- In 2024, Can I use iTools gpx file to catch the rare Pokemon On Xiaomi Redmi Note 12 5G | Dr.fone
- In 2024, How to Remove a Previously Synced Google Account from Your Infinix Hot 30i
- In 2024, How to Transfer Contacts from Infinix Note 30 5G to Other Android Devices Using Bluetooth? | Dr.fone
- Title: How to Create an Alternate Reality Effect
- Author: Chloe
- Created at : 2024-05-20 03:37:22
- Updated at : 2024-05-21 03:37:22
- Link: https://ai-editing-video.techidaily.com/how-to-create-an-alternate-reality-effect/
- License: This work is licensed under CC BY-NC-SA 4.0.

