
:max_bytes(150000):strip_icc():format(webp)/Cleaningrobotonlaptop_HuberandStarke_GettyImages-1448733073_EVANCROP-8ed67f08b9c4430db8e47c51fde78feb.jpg)
How to Create Emoji on Mac That Take Less Than 10 Mins for 2024
How to Create Emoji on Mac That Take Less Than 10 Mins
How to Put Emoji on Mac That Take Less Than 10 Mins
An easy yet powerful editor
Numerous effects to choose from
Detailed tutorials provided by the official channel
Emojis are expressive graphic elements that backup your content for catering to an engaging information delivery. Be here to know the how’s and why’s!
In this article
01 [The Power of Emojis in Marketing](#Part 1)
02 [How to Add Emoji on MacBook Efficiently?](#Part 2)
03 [How to Enable and Access Emoji Characters on a Mac?](#Part 3)
04 [Putting Emoji on Mac Q&A](#Part 4)
Part 1 The Power of Emojis in Marketing
Emojis are one elusive means to express the feel behind a content that is being presented, regardless of the diversities in the platform and information aspects. While the common beliefs with respect these graphic uplifts are restricted within personal boundaries of fun and entertainment, the professional credibility of emojis is no less.
When the talk is about marketing and business strategies, the significance of these elements cannot be limited within the constraints of domain and time. Entering into the application varieties, you can work with emojis everywhere, from promotional advertisements to promote your brand, to devising strategic video presentations and slideshows to showcase your company utilities in front of a target audience.
Beginning our discussion towards the same, let us look through the different aspects and benefits of including emojis as a compliment to business marketing strategies in the following section:
Merits of Using Emojis as a Marketing Tactic
01Social Media Utility
Considering the fact that social media is turning into a content sharing hub, irrespective of information genres, the business marketing arena is obviously not left untouched. With the revolutionary expansion in the concept and credibility of digital marketing, social media platforms have become a significant space for product advertisement and brand promotion.
Speaking in the light of the above, the fact that emojis have long been a part of social media conversations is something that cannot be ignored. Using a combination of emojis and social media can thus, work to deliver a more effective presentation of your brands, products and company services, while keeping the audience captivated by making them connect with the feel of the utility they are viewing at.
02Making the Brand Come Alive
It is a known fact that a trusted brand name works to earn a hoard of loyal customers in the long run. Adding an emoji in your brand promotion strategies helps to establish a great deal of emotional connection of the same with your target audience, while making them relate to the regular inclusion of these graphic elements in their social media conversations.
Working towards adding emojis in your product or company presentations or ad campaigns caters to convey the product information in a unique style of its own by adding an extra bit of liveliness to your brand.
You should however, be cautious while using emojis to promote your brand, lest these may end up crowding the presentation snippet. It is a wise decision to use a single or couple of emojis at the end of a text based content, rather than stuffing the same with a series of emojis to avoid the distraction of audience.
Another way of making an impressive use of emojis in your promotional media posts is creating engaging feature lists of your brand, or adding the same to the product headlines, while giving them an extra impact. Such graphic creativity will surely put your brand ahead of the numerous counterparts on promotional business sites.
03Enhanced Viewer Engagement
It is a common practice to include emojis within personal chats and social media conversations to ensure an improved peer engagement, while uplifting the degree of fun and entertainment. The same concept can be applied to brand promotion strategies for bringing in an increased number of interested audiences.
Supplementing your promotional content with emojis helps the latter to gain a casual and informal presentation approach that suits the audience in a much better way. Speaking in the light of the current social media and digital market trends, emojis have managed to achieve a universal credibility that is far ahead of video and image centered promotional elements.
As a product or business marketer, you can work with these conveying graphic utilities to initiate thematic conversations with your viewers and potential customers. Care should however be taken to make an intelligent and smart usage of emojis, to ensure that the latter works to uplift and compliment your promotional strategies, lest you would end up distracting your audiences.
04Supplementing the Content With a Cohesive Context
When aiming at creating a brand awareness of your product or company via promotional messaging, emojis can help to convey an emotional exactness that a text based content often falls short of adhering to.
While using emojis alone can make the task a bit difficult, an intelligent combination of the latter with cohesive text elements can effectively cater towards delivering a top rated promotional output, while adding an extra bit of meaning and depth to the same.
When promoting your product across social media platforms that have a restriction on the maximum number of characters within a single post or message, using emojis can compensate for the text you would otherwise prefer to add. The additional benefit of this inclusion lies in supplementing your text with the missing emotional connect and feel that works to build an emphasis of your brand among the viewers.
Part 2 How to Add Emoji on MacBook Efficiently?
As already stated, emojis are an expressive set of graphic elements that work to enhance the context and credibility of the otherwise ordinary text messages. Whether used in casual conversations and personal chats on social media platforms for fun and entertainment, or included in promotional strategies to create brand awareness across the digital market, emojis cater to one and all concerns with the same effectiveness and credibility.
Working with emojis is one aspect, but the latter’s interface compatibility is also of considerable importance. When proceeding to use the elements, you should take care to check the accessibility of these elements with the system you are working on. While most of the emojis are platform independent, some of the latest ones may or may not be available on dated versions of applications and devices.
By now, you must have understood the significance of working with emojis to uplift the promotional content of a brand while ensuring a significant viewer engagement. Let us move ahead with our discussion to talk about the most effective ways of how to add emoji on MacBook in what follows next:
User’s Guide to Include the Emoji Picker Tool on the Menu Bar of a MacBook
Step 1: Access the Apple Icon
For a quick and convenient access to emoji elements on a MacBook, it is advisable to add the ‘Emoji Picker’ utility to the ‘Menu Bar’ of your device’s screen. To do this, start with navigating to the top left corner of the MacBook’s opening screen and clicking on the ‘Apple’ icon.

Step 2: Open System Preferences
As you click on the ‘Apple’ icon in step 1, proceed to select the ‘System Preferences’ option from the drop down menu that appears next.

Step 3: Pick the Keyboard Option
Selecting the ‘Preferences’ option caters to display a series of input choice icons on your MacBook screen. From the available options, tap on the ‘Keyboard’ icon to select the same.

Step 4: Choose the Show Option
The ‘Keyboard Options’ at the top of the screen now present a list of functions and accessibilities that you can work upon. Click the checkbox beside the ‘Show Keyboard and Emoji Viewer in Menu Bar’ option to add the ‘Emoji Picker’ tool to the ‘Menu Bar’.

Part 3 How to Enable and Access Emoji Characters on a Mac?
Emoji characters are highly effective in expressing the emotions and feel behind your message that words often fall short of conveying. While these elements are easily accessible across devices working on almost all popular operating systems, addressing the query of how to get emoticons on Mac is many a time an element of surprise.
Diving deep into the means and ways of working with emojis on a MacOS utility, let us try hands at understanding the knowhow of enabling and accessing emoji characters on Mac compatible devices in the following section:
User’s Guide to Enable and Access Emoji Characters on Mac Devices
Step 1: Launch the Application
Start with launching the preferred application in your device in which you want to use the emoji. Within the latter’s text field, drag and point the cursor to the place where the emoji needs to be added.
Step 2: Enter the Command Combination
As you complete the first step, proceed to tap the ‘Command + Ctrl + Spacebar’ key combination on your device’s keyboard to see the ‘Emoji Picker’ overlay window pop up on the screen. If your desired emoji does not seem to find a place within the displayed lists of emoji categories, head to the ‘Search Bar’ at the top and type a relatable keyword to look for the required graphic representation.
Step 3: Select the Emoji
You can now pick a desired emoji from the displayed overlay, followed by double clicking on the same to add the element at the current cursor position.

Part 4 Putting Emoji on Mac Q&A
● What is the difference between emoticons and emojis?
Graphic smiley faces that involve a keyboard character, like that of a letter, digit or punctuation, are referred to as emoticons; while the caricaturized images that do have a character or punctuation inclusion, belong to the category of emojis.
● What does the UwU emoji stand for?
This one is an emoticon that represents a cute looking face. You can use it in your conversations and social media posts to depict a happy, affectionate and warm emotional expression. You can use to this to complement your conversations and uplift the customary text messages.
● How can you avail a bank of the latest emojis for free?
When looking for convenient sources to access the latest and most expressive emojis for free, you are offered a series of graphic galleries across the web, from where you can either download the emoji package or even add the elements directly from the site to your conversations.
● Why can’t you access some of the emojis on your Mac device?
To access the latest emojis on your Mac device, make sure that the device is updated to the most recent version of the MacOs operating system. You can also opt to restart and update the device by navigating to and launching the ‘Apple Menu’, followed by selecting the ‘System the device in ‘Safe Mode’.
● What is the best software alternative access the latest emoji bank?
When looking for a software solution to sort the concern of how to put emoji on Mac, while taking suitable emoji suggestions, you can conveniently rely on the Wondershare Filmora Video Editor graphic editor program, which houses an extensive inventory of various graphic elements, including emojis. You can browse through the same and proceed to search the one that you that you like across a web utility.
For Win 7 or later (64-bit)
For macOS 10.12 or later
● Ending Thoughts →
● Emojis are an expressive element of marketing strategies aiming at brand promotion, along with establishing company credibility among the potential audience.
● Working towards the concern of MacOS insert emoji requires the inclusion of the ‘Emoji Picker’ tool on the latter’s menu bar.
● If you are in search of an affordable software program to access the latest collection of emojis, Wondershare Filmora can be a smart choice.
Emojis are expressive graphic elements that backup your content for catering to an engaging information delivery. Be here to know the how’s and why’s!
In this article
01 [The Power of Emojis in Marketing](#Part 1)
02 [How to Add Emoji on MacBook Efficiently?](#Part 2)
03 [How to Enable and Access Emoji Characters on a Mac?](#Part 3)
04 [Putting Emoji on Mac Q&A](#Part 4)
Part 1 The Power of Emojis in Marketing
Emojis are one elusive means to express the feel behind a content that is being presented, regardless of the diversities in the platform and information aspects. While the common beliefs with respect these graphic uplifts are restricted within personal boundaries of fun and entertainment, the professional credibility of emojis is no less.
When the talk is about marketing and business strategies, the significance of these elements cannot be limited within the constraints of domain and time. Entering into the application varieties, you can work with emojis everywhere, from promotional advertisements to promote your brand, to devising strategic video presentations and slideshows to showcase your company utilities in front of a target audience.
Beginning our discussion towards the same, let us look through the different aspects and benefits of including emojis as a compliment to business marketing strategies in the following section:
Merits of Using Emojis as a Marketing Tactic
01Social Media Utility
Considering the fact that social media is turning into a content sharing hub, irrespective of information genres, the business marketing arena is obviously not left untouched. With the revolutionary expansion in the concept and credibility of digital marketing, social media platforms have become a significant space for product advertisement and brand promotion.
Speaking in the light of the above, the fact that emojis have long been a part of social media conversations is something that cannot be ignored. Using a combination of emojis and social media can thus, work to deliver a more effective presentation of your brands, products and company services, while keeping the audience captivated by making them connect with the feel of the utility they are viewing at.
02Making the Brand Come Alive
It is a known fact that a trusted brand name works to earn a hoard of loyal customers in the long run. Adding an emoji in your brand promotion strategies helps to establish a great deal of emotional connection of the same with your target audience, while making them relate to the regular inclusion of these graphic elements in their social media conversations.
Working towards adding emojis in your product or company presentations or ad campaigns caters to convey the product information in a unique style of its own by adding an extra bit of liveliness to your brand.
You should however, be cautious while using emojis to promote your brand, lest these may end up crowding the presentation snippet. It is a wise decision to use a single or couple of emojis at the end of a text based content, rather than stuffing the same with a series of emojis to avoid the distraction of audience.
Another way of making an impressive use of emojis in your promotional media posts is creating engaging feature lists of your brand, or adding the same to the product headlines, while giving them an extra impact. Such graphic creativity will surely put your brand ahead of the numerous counterparts on promotional business sites.
03Enhanced Viewer Engagement
It is a common practice to include emojis within personal chats and social media conversations to ensure an improved peer engagement, while uplifting the degree of fun and entertainment. The same concept can be applied to brand promotion strategies for bringing in an increased number of interested audiences.
Supplementing your promotional content with emojis helps the latter to gain a casual and informal presentation approach that suits the audience in a much better way. Speaking in the light of the current social media and digital market trends, emojis have managed to achieve a universal credibility that is far ahead of video and image centered promotional elements.
As a product or business marketer, you can work with these conveying graphic utilities to initiate thematic conversations with your viewers and potential customers. Care should however be taken to make an intelligent and smart usage of emojis, to ensure that the latter works to uplift and compliment your promotional strategies, lest you would end up distracting your audiences.
04Supplementing the Content With a Cohesive Context
When aiming at creating a brand awareness of your product or company via promotional messaging, emojis can help to convey an emotional exactness that a text based content often falls short of adhering to.
While using emojis alone can make the task a bit difficult, an intelligent combination of the latter with cohesive text elements can effectively cater towards delivering a top rated promotional output, while adding an extra bit of meaning and depth to the same.
When promoting your product across social media platforms that have a restriction on the maximum number of characters within a single post or message, using emojis can compensate for the text you would otherwise prefer to add. The additional benefit of this inclusion lies in supplementing your text with the missing emotional connect and feel that works to build an emphasis of your brand among the viewers.
Part 2 How to Add Emoji on MacBook Efficiently?
As already stated, emojis are an expressive set of graphic elements that work to enhance the context and credibility of the otherwise ordinary text messages. Whether used in casual conversations and personal chats on social media platforms for fun and entertainment, or included in promotional strategies to create brand awareness across the digital market, emojis cater to one and all concerns with the same effectiveness and credibility.
Working with emojis is one aspect, but the latter’s interface compatibility is also of considerable importance. When proceeding to use the elements, you should take care to check the accessibility of these elements with the system you are working on. While most of the emojis are platform independent, some of the latest ones may or may not be available on dated versions of applications and devices.
By now, you must have understood the significance of working with emojis to uplift the promotional content of a brand while ensuring a significant viewer engagement. Let us move ahead with our discussion to talk about the most effective ways of how to add emoji on MacBook in what follows next:
User’s Guide to Include the Emoji Picker Tool on the Menu Bar of a MacBook
Step 1: Access the Apple Icon
For a quick and convenient access to emoji elements on a MacBook, it is advisable to add the ‘Emoji Picker’ utility to the ‘Menu Bar’ of your device’s screen. To do this, start with navigating to the top left corner of the MacBook’s opening screen and clicking on the ‘Apple’ icon.
Step 2: Open System Preferences
As you click on the ‘Apple’ icon in step 1, proceed to select the ‘System Preferences’ option from the drop down menu that appears next.
Step 3: Pick the Keyboard Option
Selecting the ‘Preferences’ option caters to display a series of input choice icons on your MacBook screen. From the available options, tap on the ‘Keyboard’ icon to select the same.
Step 4: Choose the Show Option
The ‘Keyboard Options’ at the top of the screen now present a list of functions and accessibilities that you can work upon. Click the checkbox beside the ‘Show Keyboard and Emoji Viewer in Menu Bar’ option to add the ‘Emoji Picker’ tool to the ‘Menu Bar’.
Part 3 How to Enable and Access Emoji Characters on a Mac?
Emoji characters are highly effective in expressing the emotions and feel behind your message that words often fall short of conveying. While these elements are easily accessible across devices working on almost all popular operating systems, addressing the query of how to get emoticons on Mac is many a time an element of surprise.
Diving deep into the means and ways of working with emojis on a MacOS utility, let us try hands at understanding the knowhow of enabling and accessing emoji characters on Mac compatible devices in the following section:
User’s Guide to Enable and Access Emoji Characters on Mac Devices
Step 1: Launch the Application
Start with launching the preferred application in your device in which you want to use the emoji. Within the latter’s text field, drag and point the cursor to the place where the emoji needs to be added.
Step 2: Enter the Command Combination
As you complete the first step, proceed to tap the ‘Command + Ctrl + Spacebar’ key combination on your device’s keyboard to see the ‘Emoji Picker’ overlay window pop up on the screen. If your desired emoji does not seem to find a place within the displayed lists of emoji categories, head to the ‘Search Bar’ at the top and type a relatable keyword to look for the required graphic representation.
Step 3: Select the Emoji
You can now pick a desired emoji from the displayed overlay, followed by double clicking on the same to add the element at the current cursor position.
Part 4 Putting Emoji on Mac Q&A
● What is the difference between emoticons and emojis?
Graphic smiley faces that involve a keyboard character, like that of a letter, digit or punctuation, are referred to as emoticons; while the caricaturized images that do have a character or punctuation inclusion, belong to the category of emojis.
● What does the UwU emoji stand for?
This one is an emoticon that represents a cute looking face. You can use it in your conversations and social media posts to depict a happy, affectionate and warm emotional expression. You can use to this to complement your conversations and uplift the customary text messages.
● How can you avail a bank of the latest emojis for free?
When looking for convenient sources to access the latest and most expressive emojis for free, you are offered a series of graphic galleries across the web, from where you can either download the emoji package or even add the elements directly from the site to your conversations.
● Why can’t you access some of the emojis on your Mac device?
To access the latest emojis on your Mac device, make sure that the device is updated to the most recent version of the MacOs operating system. You can also opt to restart and update the device by navigating to and launching the ‘Apple Menu’, followed by selecting the ‘System the device in ‘Safe Mode’.
● What is the best software alternative access the latest emoji bank?
When looking for a software solution to sort the concern of how to put emoji on Mac, while taking suitable emoji suggestions, you can conveniently rely on the Wondershare Filmora Video Editor graphic editor program, which houses an extensive inventory of various graphic elements, including emojis. You can browse through the same and proceed to search the one that you that you like across a web utility.
For Win 7 or later (64-bit)
For macOS 10.12 or later
● Ending Thoughts →
● Emojis are an expressive element of marketing strategies aiming at brand promotion, along with establishing company credibility among the potential audience.
● Working towards the concern of MacOS insert emoji requires the inclusion of the ‘Emoji Picker’ tool on the latter’s menu bar.
● If you are in search of an affordable software program to access the latest collection of emojis, Wondershare Filmora can be a smart choice.
Trailer Guide for Creators and Developers
Trailers are a popular means to showcase a product you are about to release to the market. Teasers and trailers are traditionally created for movies, but have eventually evolved to include book trailers, game trailers, and app trailers. In this article, we will explain the key details of a trailer, highlight some examples, and show you how to create an effective trailer.
Part 1. What is a Trailer?
A trailer is a type of video commercial advertisement made to advertise and inform audiences about a specific program or item. To persuade customers to view or use the product, it includes a brief series of previews of the entire material. It also serves as a means of creating anticipation for a show or product that is about to hit the market.

Trailers were originally made for cinema movies. Nowadays, trailers are created for different forms of media like shows, apps, programs, video games, and book videos. A typical traditional trailer lasts between 1 to 3 minutes.
Part 2. What Are the Similarities and Differences Between a Teaser and Trailer?
Teasers and trailers can often be confused with each other. After all, they pretty much have the same objective.
Both are created for the purpose of advertising an upcoming show, product, or service. Teasers and trailers are similarly shown to audiences prior to the release of the thing they are advertising. They are meant to show a small portion of the full experience to create curiosity and excitement towards a targeted market. Both videos are typically short in length - taking up only a maximum of 3 minutes in duration.

The differences between them lie in their content, timeline, and duration. A teaser is much shorter than a trailer - the former runs for only 20-30 seconds while the latter can go between 1-3 minutes in length. This is because teasers are typically made before or during the production process of a movie or feature, whilst trailers are commonly made at the end.
For films, movies, and shows, teasers generally capture only a single part of that media. It focuses on the most intense or impactful scene. Trailers are formed from a series of clips depicting striking scenes derived from the beginning, middle, and end of the show. These scenes are normally arranged in a nonlinear structure, allowing viewers to have a general understanding of the story without revealing the entirety of the plot.
Part 3. Examples of good trailers
An excellent trailer is one who can effectively attract and maintain the audience’s attention. It satisfies its objective of showcasing striking and captivating pieces of the main product and entices viewers to experience its entirety. Here are some examples of trailers who have well fulfilled the criteria of a good trailer.
1. The Suicide Squad
The Suicide Squad is a fresh take featuring DC’s anti-heroes assemble in a single chaotic and unconventional team. James Gunn’s iteration on these characters is brought to life in the trailer with a majestic cast including John Cena, Idris Elba, Margot Robbie, and David Dastmalchian. Several key scenes are shown, highlighting its standout characters in the process while portraying the movie’s setting.
2. Raya and the Last Dragon
The trailer starts out innocently and comes with an adorable and surprising twist. The brief 2-minute trailer is packed with relevant scenes that depict the character’s quest without revealing too much. Many action-packed scenes and emotional interactions are satisfactorily squeezed into the trailer. Excitement builds further with Tamara Bubble’s “I’m That Good” playing in the background on the last minute of the video.
3. Men (2022)
Ingenious combination of sound effects and background music play a distinct role in this 2022 trailer. The female lead’s voice echoing from a tunnel, the haunting piano keys gradually building up the suspense, and the common but cleverly used horror audio effects create a chilling ensemble of haunting scenes in the movie. The sounds gradually rise up as more aggressive and energized scenes flash on the screen, and eventually end back into the sombre intro that leaves the audience with questions.
4. The Farewell
Lulu Wang’s dramatic comedy The Farewell is all about a family hiding the truth of a family member’s terminal illness from the person herself. What makes the trailer special is that it steers away from the sad, melancholic direction and veers toward a feel-good movie vibe. The conflict, struggle, and the beliefs featured in the movie are depicted in the trailer. However, the clever placement of interactions and the uplifting music tug at the audience’s heartstrings and urge them to want to see more.
5. Pokémon Go
Pokémon has become a culture to several generations. Becoming a Pokémon trainer is a secret dream that almost all of us have, even as adults. Niantic’s collaboration with the Pokémon franchise brings people closer to that reality by introducing its AR and location-powered app Pokémon Go. The trailer shows people of all ages living out their trainer dreams in the real world and interacting with Pokémon. The different features of the game are dramatized in a real-life setting, inciting more excitement, and pulling out the nostalgia from its market. The trailer keeps the actual app showcase to a minimum, instead focusing on once again selling that dream to audiences and bringing out the inner child in everyone.
Part 4. How to bring your trailer to the next level?
While it may seem intimidating to create a trailer for your upcoming product, there is no need to worry. It is now easier than ever to create a well-crafted trailer by taking advantage of a program’s tools and templates.
- Stock media
Filmora makes it easy to craft a trailer with only a few clicks. Make use of the program’s media library to gain access to a wealth of resources like stock photos, videos, music, and audio files.
- Keyframing
Keyframing lets you smoothly transition from one scene to another, making it an effective tool for trailers. It is particularly appealing for shows that highlight motion like sports, dancing, and action. Experiment with more than 80 preset templates and create smooth scene transitions with ease.
- Speed Ramping
Speed Ramping is a feature that works perfectly with keyframing. Increase the energy and dynamics in your trailer with 6 preset speed types. You can also customize these templates. There is also no need for concern about the audio - Filmora lets you maintain the audio pitch even when using these features.
- FX Effects
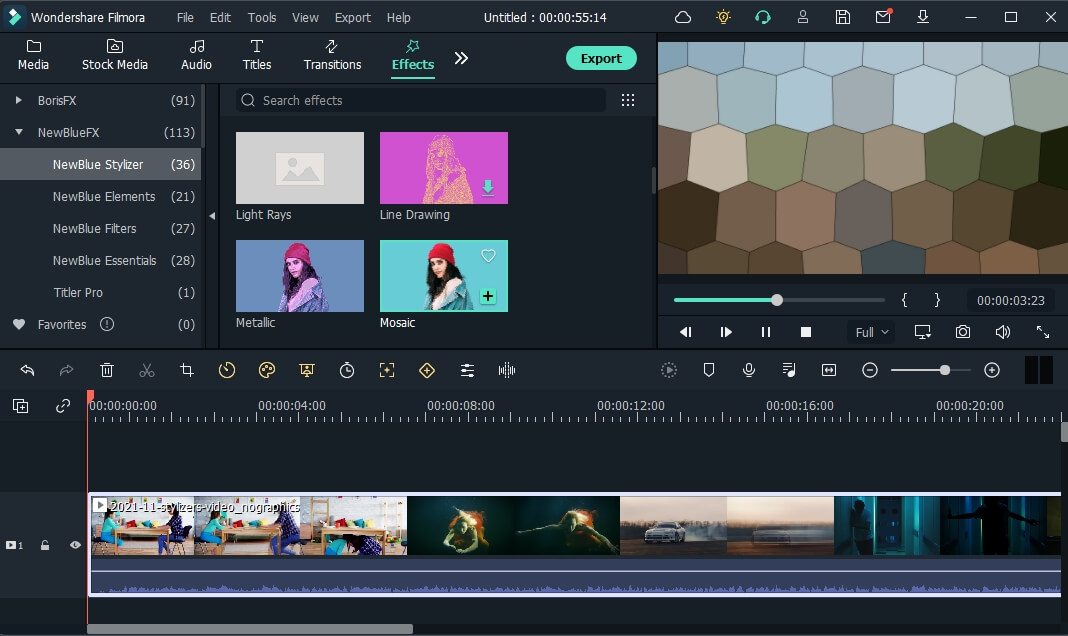
The program also offers many effects and filters for an extra element in your trailer. The Borix FX is an example of that. Designed in collaboration with the award-winning developer of the same name, Boris FX and its extension Continuum features a wide array of tasteful effects for your convenience. There are over 91 customizable and adjustable presets including types like blurs, stylization, and lights. NewBlue is another option that carries choices of filters, titlers, and stylizers.
Filmora offers different features, tools, and effects to explore that can help make your trailer editing objectives easier and more convenient. Save time and resources by taking advantage of its powerful yet easy-to-use tools.
Free Download For Win 7 or later(64-bit)
Free Download For macOS 10.14 or later
2. Raya and the Last Dragon
The trailer starts out innocently and comes with an adorable and surprising twist. The brief 2-minute trailer is packed with relevant scenes that depict the character’s quest without revealing too much. Many action-packed scenes and emotional interactions are satisfactorily squeezed into the trailer. Excitement builds further with Tamara Bubble’s “I’m That Good” playing in the background on the last minute of the video.
3. Men (2022)
Ingenious combination of sound effects and background music play a distinct role in this 2022 trailer. The female lead’s voice echoing from a tunnel, the haunting piano keys gradually building up the suspense, and the common but cleverly used horror audio effects create a chilling ensemble of haunting scenes in the movie. The sounds gradually rise up as more aggressive and energized scenes flash on the screen, and eventually end back into the sombre intro that leaves the audience with questions.
4. The Farewell
Lulu Wang’s dramatic comedy The Farewell is all about a family hiding the truth of a family member’s terminal illness from the person herself. What makes the trailer special is that it steers away from the sad, melancholic direction and veers toward a feel-good movie vibe. The conflict, struggle, and the beliefs featured in the movie are depicted in the trailer. However, the clever placement of interactions and the uplifting music tug at the audience’s heartstrings and urge them to want to see more.
5. Pokémon Go
Pokémon has become a culture to several generations. Becoming a Pokémon trainer is a secret dream that almost all of us have, even as adults. Niantic’s collaboration with the Pokémon franchise brings people closer to that reality by introducing its AR and location-powered app Pokémon Go. The trailer shows people of all ages living out their trainer dreams in the real world and interacting with Pokémon. The different features of the game are dramatized in a real-life setting, inciting more excitement, and pulling out the nostalgia from its market. The trailer keeps the actual app showcase to a minimum, instead focusing on once again selling that dream to audiences and bringing out the inner child in everyone.
Part 4. How to bring your trailer to the next level?
While it may seem intimidating to create a trailer for your upcoming product, there is no need to worry. It is now easier than ever to create a well-crafted trailer by taking advantage of a program’s tools and templates.
- Stock media
Filmora makes it easy to craft a trailer with only a few clicks. Make use of the program’s media library to gain access to a wealth of resources like stock photos, videos, music, and audio files.
- Keyframing
Keyframing lets you smoothly transition from one scene to another, making it an effective tool for trailers. It is particularly appealing for shows that highlight motion like sports, dancing, and action. Experiment with more than 80 preset templates and create smooth scene transitions with ease.
- Speed Ramping
Speed Ramping is a feature that works perfectly with keyframing. Increase the energy and dynamics in your trailer with 6 preset speed types. You can also customize these templates. There is also no need for concern about the audio - Filmora lets you maintain the audio pitch even when using these features.
- FX Effects
The program also offers many effects and filters for an extra element in your trailer. The Borix FX is an example of that. Designed in collaboration with the award-winning developer of the same name, Boris FX and its extension Continuum features a wide array of tasteful effects for your convenience. There are over 91 customizable and adjustable presets including types like blurs, stylization, and lights. NewBlue is another option that carries choices of filters, titlers, and stylizers.
Filmora offers different features, tools, and effects to explore that can help make your trailer editing objectives easier and more convenient. Save time and resources by taking advantage of its powerful yet easy-to-use tools.
Free Download For Win 7 or later(64-bit)
Free Download For macOS 10.14 or later
Want to Know the Full Process of Adding the Falling Text Effect as a Video Introduction? Detailed Guidelines on All the Steps Are Mentioned Here for Filmora Users
Indeed, there are different elements of a video that has the potential to make it stand out to viewers. The title you add to the video, content information in the slides, and other elements are some parts that capture one’s interest.
But seeing only the text in single lines or paragraphs can get repetitive and unappealing, especially with so many videos having the same style. In this context, the fun falling text effect is a unique and exciting approach to making your titles in videos engaging. It creates a fun look when the viewer clicks into the video and is met with this styling title effect.
On Wondershare Filmora , there is a feature available for users to apply this effect to videos in a more straightforward sequence of steps than other editors. Yet, knowing how it works is still valid, even for experienced editing professionals. In this post, we shall detail all of the steps that go into creating this effect in videos, with examples.
Launch Filmora on the Device
Before getting started with the editing steps, you need to download and install this third-party editing software into your device. Filmora works on both Mac and Windows-based computers. (Download here:
Free Download For Win 7 or later(64-bit)
Free Download For macOS 10.14 or later
After switching on your device and going to your preferred browser, search for Wonderhsare Filmora’s official website. Upon accessing it, you will see the “Download” button at the top of the screen. Click on it, and the respective Filmora installer will download into your device instantly, depending on your OS type.
Then, you have to double-click on the installer file you will find in the Downloads folder. This will open the software installation problem window. Click on the Install button and then tap the Agree option for the terms & conditions that appear next on the screen. After that, the software will begin installing automatically.

Finally, press the Start Now button on the installation complete prompt window. The software will then launch automatically.
Adjust the project settings
After the software launches on your device, you should tap on the Create New Project button. Before you add the video file you will edit from your device through; you should take time to change some aspects of the project settings.
For this, click on the File tab at the top-most toolbar in the editor window. You should click on the Project Settings option from the drop-down menu, which will open the dialog box. Under the resolution option, you will see the Frame Rate element. Click on the drop-down menu and adjust the video’s frame rate to 25 FPS. After you are done, tap the OK button.

Add the Title
Following this, you must click on the Titles tab at the top toolbar on the editor. Different title templates, like Custom, Openers, End Credits, etc., will appear. Choose the default title of your liking and download it.
Next, hold the title that appears in the library window and then drag it to the first layer of the editing timeline. Clip the title short by moving the play head to the 3-second and 15 frames mark and shape the title to that length. Then, delete the rest of the part.

Edit the Title
After this, you have to double-click on the top of the default title in your Track 1 timeline. A window will appear for editing the title. Click on the Text tab in this window and tap on the Font options. You should change the font of your title to Futura Bold or any other option that you would prefer.

Animate the characters
When this part is done, in the text field, add the first letter of the text you will add to your animated introduction. After inserting the first letter only, click on the Animation tab next. Following that, you have to move the playhead on your timeline to the very front. You will see the Position parameter in the Animation settings and change the number in the Y axis until it goes out of the top frame of the video.

Next, you must move the play head to the 1-second position in the timeline. Here, you must change the number Y axis to a lower position and adjust the Rotate element as per your preference. After that, move the playhead again to 15 frames from the 1-second mark. It would be best if you changed the Y-axis position digit to 0 and adjusted the Rotation value slightly.
Following that, move the playhead again by 15 frames ahead. Rotate the letter again and change the Y-axis value until the letter rests at the bottom of the screen. Again, you have to move the play head on the timeline to 10 frames ahead and adjust the Y-axis and Rotation values to a higher point. Then, continue the step like this at ten frames forward, this time making the character move to the ground again. Press the OK button to complete.

Repeat for the next letters
After you are done with this editing process for the first letter, hold the default title in the library and drag and drop it into Track 2 on the timeline. Adjust the starting point for this layer to frame five from the beginning, and move the file to that starting point. In the end, cut the title length at the same position as layer one was, at 3.15 seconds.
Follow the process explained in the previous section for the first letter, i.e., moving the playhead at specific frames and changing the Y-axis and Rotation value multiple times.
After editing the second letter in the title, repeat the process of holding and dragging the default title to Track 3 in the timeline and adjusting starting position at the 10th frame. Again, follow the process of animating the letter like for Letter 1 and Letter 2. Continue doing this process for multiple more letters in your title text.

Tap on the Play button under the Preview screen to see how the letters have the falling text effect.
Add Screenshot
Next, you have to click on the hide button for Tracks 2 and up. Tap on the Snapshot icon in the editing timeline of the first letter. Then, when it appears in the library window, click on it and move it beside the Track 1 Title file that you were editing. Move the play head to the 1-second position of this file in the timeline.
Hide Track 1 again and click the Unhide button on Track 2. Repeat the snapshot function and add it to Layer 2. Adjust the end as per Track 1. After this, follow these steps for the subsequent letters as well.

Adjust Keyframing
Follow the animation process for all of the title clips and screenshots you did before. Move the play head to the point where the Tracks end and the Screenshots on the timeline start. Choose the first letter and click on the Keyframe icon in the editing window under Animation. Then, make adjustments to the values of Position, Rotation, etc.
Continue this keyframing step for all of the letters in sequence. After you are done here, click on the Render Preview icon on the right-hand side of the toolbar above the editing timeline. See how the falling text effects line up.

After that, you can export the final file to your device or do further editing work through the Export button.
Final Words
Indeed, adding the falling text effect should allow you to create a stunning, dynamic, and engaging video project. While the feature is available in many other editing software, you can expect a better user experience on Filmora, especially as a beginner-level user.
The UI on this software is simple to navigate, with all features easily accessible. Besides the falling text customization benefits, you will also use other effects, filters, and title presets in videos with some simple taps. So, install it soon and give it a try.
Free Download For macOS 10.14 or later
After switching on your device and going to your preferred browser, search for Wonderhsare Filmora’s official website. Upon accessing it, you will see the “Download” button at the top of the screen. Click on it, and the respective Filmora installer will download into your device instantly, depending on your OS type.
Then, you have to double-click on the installer file you will find in the Downloads folder. This will open the software installation problem window. Click on the Install button and then tap the Agree option for the terms & conditions that appear next on the screen. After that, the software will begin installing automatically.
Finally, press the Start Now button on the installation complete prompt window. The software will then launch automatically.
Adjust the project settings
After the software launches on your device, you should tap on the Create New Project button. Before you add the video file you will edit from your device through; you should take time to change some aspects of the project settings.
For this, click on the File tab at the top-most toolbar in the editor window. You should click on the Project Settings option from the drop-down menu, which will open the dialog box. Under the resolution option, you will see the Frame Rate element. Click on the drop-down menu and adjust the video’s frame rate to 25 FPS. After you are done, tap the OK button.
Add the Title
Following this, you must click on the Titles tab at the top toolbar on the editor. Different title templates, like Custom, Openers, End Credits, etc., will appear. Choose the default title of your liking and download it.
Next, hold the title that appears in the library window and then drag it to the first layer of the editing timeline. Clip the title short by moving the play head to the 3-second and 15 frames mark and shape the title to that length. Then, delete the rest of the part.
Edit the Title
After this, you have to double-click on the top of the default title in your Track 1 timeline. A window will appear for editing the title. Click on the Text tab in this window and tap on the Font options. You should change the font of your title to Futura Bold or any other option that you would prefer.
Animate the characters
When this part is done, in the text field, add the first letter of the text you will add to your animated introduction. After inserting the first letter only, click on the Animation tab next. Following that, you have to move the playhead on your timeline to the very front. You will see the Position parameter in the Animation settings and change the number in the Y axis until it goes out of the top frame of the video.
Next, you must move the play head to the 1-second position in the timeline. Here, you must change the number Y axis to a lower position and adjust the Rotate element as per your preference. After that, move the playhead again to 15 frames from the 1-second mark. It would be best if you changed the Y-axis position digit to 0 and adjusted the Rotation value slightly.
Following that, move the playhead again by 15 frames ahead. Rotate the letter again and change the Y-axis value until the letter rests at the bottom of the screen. Again, you have to move the play head on the timeline to 10 frames ahead and adjust the Y-axis and Rotation values to a higher point. Then, continue the step like this at ten frames forward, this time making the character move to the ground again. Press the OK button to complete.
Repeat for the next letters
After you are done with this editing process for the first letter, hold the default title in the library and drag and drop it into Track 2 on the timeline. Adjust the starting point for this layer to frame five from the beginning, and move the file to that starting point. In the end, cut the title length at the same position as layer one was, at 3.15 seconds.
Follow the process explained in the previous section for the first letter, i.e., moving the playhead at specific frames and changing the Y-axis and Rotation value multiple times.
After editing the second letter in the title, repeat the process of holding and dragging the default title to Track 3 in the timeline and adjusting starting position at the 10th frame. Again, follow the process of animating the letter like for Letter 1 and Letter 2. Continue doing this process for multiple more letters in your title text.
Tap on the Play button under the Preview screen to see how the letters have the falling text effect.
Add Screenshot
Next, you have to click on the hide button for Tracks 2 and up. Tap on the Snapshot icon in the editing timeline of the first letter. Then, when it appears in the library window, click on it and move it beside the Track 1 Title file that you were editing. Move the play head to the 1-second position of this file in the timeline.
Hide Track 1 again and click the Unhide button on Track 2. Repeat the snapshot function and add it to Layer 2. Adjust the end as per Track 1. After this, follow these steps for the subsequent letters as well.
Adjust Keyframing
Follow the animation process for all of the title clips and screenshots you did before. Move the play head to the point where the Tracks end and the Screenshots on the timeline start. Choose the first letter and click on the Keyframe icon in the editing window under Animation. Then, make adjustments to the values of Position, Rotation, etc.
Continue this keyframing step for all of the letters in sequence. After you are done here, click on the Render Preview icon on the right-hand side of the toolbar above the editing timeline. See how the falling text effects line up.
After that, you can export the final file to your device or do further editing work through the Export button.
Final Words
Indeed, adding the falling text effect should allow you to create a stunning, dynamic, and engaging video project. While the feature is available in many other editing software, you can expect a better user experience on Filmora, especially as a beginner-level user.
The UI on this software is simple to navigate, with all features easily accessible. Besides the falling text customization benefits, you will also use other effects, filters, and title presets in videos with some simple taps. So, install it soon and give it a try.
How to Create Intro Video with Filmora
If you’re just starting out as a YouTuber, you should have an introductory video, especially when people don’t know you that well yet. When you want to start a YouTube career one of the things you need to think about is How to make a YouTube intro video.
Whether you’re a beginner or a pro, knowing how to create a video intro for YouTube can help you introduce your audience to your content, pique their interest and boost your brand. Stand out and engage your audience with quick and easy YouTube intro animations. Not sure how to make a YouTube intro? We’ve built this guide on how to make a video intro using Wondershare Filmora an editing software.
- Start by introducing yourself
- Get into details
- Add a call to action
- Add personalization to your video
- Video length
What is Intro Video
There are also different ways of using the intro video, it can be used in business, in YouTube channels and others.
Introductory videos are short videos which you personally introduce yourself, your business, your brands and your brand’s mission and show your personality to your audience.
Introductory videos can help you stand out from the competition and gain favorability because you’re talking to your users on a personal level. People love seeing faces behind a brand, having an introductory video will ensure that people remember you.
YouTube intro videos are short, introductory clips that play at the beginning of a YouTube channel. They usually include the tittle of the YouTube channel, brand features like logos and colors animation and an accompanying snippet of music.
As the word suggest, intro are visuals that mark the beginning of a video. Likewise, outro are the closing visuals that appear at the end of the video. The two are widely used in educational, entertaining, business videos, webcasts, podcast, corporate presentations and the like. There are several reasons why an intro are vital elements of any professional video.
It goes without saying that intros should not be too complicated or to confusing. Other wise they will fail in their purpose and will drive the audience away. Instead, they should be simply but thoughtfully designed.
YouTube intro Videos usually include:
- Memorable background music
- Text and titles
- Stickers and GIFs
- Emojis

Goal of a Video Introduction to Follow
Making intro video is not just only in doing a YouTube channel but you can also use this guide for any businesses like brand presentation, educational etc.
Step1 Start by introducing yourself.
Step2 Get into details.
Step3 Add a call to action.
Step4 Add personalization to your video.
Step5 Video Length.
1. Start by introducing yourself
You can always start your intro by introducing yourself but don’t just state your name and what
you do, tell them why you do it, what your core values are and what motivates and dives you to
do this kind of career. Because you all know doing vlog on YouTube is a job, work, and a career.
Share emotions with your audience, and help them relate to you. Doing so is going to help you stand out immediately from the crowd and get audiences interested enough to watch the remainder of your video’s content.
2. Get into details
Tip is always direct to the point, add a few facts about yourself, like your interest or previous experiences or who you are as a person. If you are a business owner and would want to talk about your business you can always share how it started.
If we are talking about the YouTube intro video. Every good YouTube intro video usually includes beneficial information for subscribers and viewers. Add any short important text that you feel is necessary from the video titles, your YouTube channel name, and social media handles. Keep your informative text in a consistent format and branding style.
3. Add a call to action
if you have successfully maintained the interest of your viewer until the very end of your video, use this opportunity to invite them to engage with your content more. It’s worth including a call to action in each video. Take a full advantage of YouTube to provide your audience with your social media channels and maybe a link or two to your other videos that might interest them,
4. Add personalization to your video
Even though an intro can be more than logo animation, the latter should still be a part of it. Otherwise, there’s a sense that something is messing. Include eye catchy visuals effects to your videos to stands out, so that people can easily remember your YouTube channel.

5. Video length
A long intro, even if it’s spectacular, can get boring once your audience has seen it a few times. An ideal length for intros is up to 8-10 seconds only. Just enough time to deliver your message and branding, and hook audiences in for the rest of the video. Any longer than that, and you might lose viewers who are waiting to see the video that they clicked on.
In the era of social media, tempting distractions and short attention spans, it’s critical to keep your content as short and sharp as you can.
How to Create Intro Video using Filmora
Wondershare Filmora is an editing software that is available to download in google. This software is easy to use and includes products for a range of users from beginner to intermediate. Common features of Filmora include a timeline, preview window and effects library that you can use to create a nice and creative introduction video for your YouTube channel.
Free Download For Win 7 or later(64-bit)
Free Download For macOS 10.14 or later
Free trails are available to demo the product before purchasing. Pricing options for the various programs are available on the official Filmora website.

Start your own design from scratch or you can search for a YouTube video template
Select the best video that you like to be your intro, either create a video introducing yourself or just a video with some creative effects.
First you can check the Stock Media and go click some GIFs find your best fit and start customizing. You can always download some free template online that you think much better to used.

Add ready made animated graphic stickers to your YouTube intro videos by dragging and dropping them into design. Just choose “Elements” and then “Stickers” to browse a library of options.

Change the image on your YouTube intro video by uploading your own or choosing from millions of free photos, graphics, and illustration in Filmora library.
Start editing your videos to make them look seamless and professional on any platforms. Whether it’s on a widescreen, tablet, or mobile device. Click some effects to add some creative design on your intro videos.
You can split, resize trim or cut your videos to tailor it to your needs.
Change the text and insert your own channel title and tagline. You can also change the font style, color, and size to better suit your brand look.
Finally, add music to your YouTube intro video by uploading a clip from a stock music of Filmora library. You can also make your own YouTube intro music using instrument or digital tools

Conclusion
Hope with these tips, you’ll be able to create quality video introductions that draw the audience in and help them get to know you better. Introduce your brand, explain your business, and connect with your prospective customers like never before. Whether your intro clips start off your YouTube videos or plays after the teaser clip, YouTube intro videos can be a valuable tool for any creator.
Remember your video doesn’t have to be a high-budget production or you don’t have to spend a lot of money on making a creative video. You could create a video that works with pretty much of any smartphone today. Have fun creating your introductions videos, set a positive mind and positive creation will come out.
What is Intro Video
There are also different ways of using the intro video, it can be used in business, in YouTube channels and others.
Introductory videos are short videos which you personally introduce yourself, your business, your brands and your brand’s mission and show your personality to your audience.
Introductory videos can help you stand out from the competition and gain favorability because you’re talking to your users on a personal level. People love seeing faces behind a brand, having an introductory video will ensure that people remember you.
YouTube intro videos are short, introductory clips that play at the beginning of a YouTube channel. They usually include the tittle of the YouTube channel, brand features like logos and colors animation and an accompanying snippet of music.
As the word suggest, intro are visuals that mark the beginning of a video. Likewise, outro are the closing visuals that appear at the end of the video. The two are widely used in educational, entertaining, business videos, webcasts, podcast, corporate presentations and the like. There are several reasons why an intro are vital elements of any professional video.
It goes without saying that intros should not be too complicated or to confusing. Other wise they will fail in their purpose and will drive the audience away. Instead, they should be simply but thoughtfully designed.
YouTube intro Videos usually include:
- Memorable background music
- Text and titles
- Stickers and GIFs
- Emojis
Goal of a Video Introduction to Follow
Making intro video is not just only in doing a YouTube channel but you can also use this guide for any businesses like brand presentation, educational etc.
Step1 Start by introducing yourself.
Step2 Get into details.
Step3 Add a call to action.
Step4 Add personalization to your video.
Step5 Video Length.
1. Start by introducing yourself
You can always start your intro by introducing yourself but don’t just state your name and what
you do, tell them why you do it, what your core values are and what motivates and dives you to
do this kind of career. Because you all know doing vlog on YouTube is a job, work, and a career.
Share emotions with your audience, and help them relate to you. Doing so is going to help you stand out immediately from the crowd and get audiences interested enough to watch the remainder of your video’s content.
2. Get into details
Tip is always direct to the point, add a few facts about yourself, like your interest or previous experiences or who you are as a person. If you are a business owner and would want to talk about your business you can always share how it started.
If we are talking about the YouTube intro video. Every good YouTube intro video usually includes beneficial information for subscribers and viewers. Add any short important text that you feel is necessary from the video titles, your YouTube channel name, and social media handles. Keep your informative text in a consistent format and branding style.
3. Add a call to action
if you have successfully maintained the interest of your viewer until the very end of your video, use this opportunity to invite them to engage with your content more. It’s worth including a call to action in each video. Take a full advantage of YouTube to provide your audience with your social media channels and maybe a link or two to your other videos that might interest them,
4. Add personalization to your video
Even though an intro can be more than logo animation, the latter should still be a part of it. Otherwise, there’s a sense that something is messing. Include eye catchy visuals effects to your videos to stands out, so that people can easily remember your YouTube channel.
5. Video length
A long intro, even if it’s spectacular, can get boring once your audience has seen it a few times. An ideal length for intros is up to 8-10 seconds only. Just enough time to deliver your message and branding, and hook audiences in for the rest of the video. Any longer than that, and you might lose viewers who are waiting to see the video that they clicked on.
In the era of social media, tempting distractions and short attention spans, it’s critical to keep your content as short and sharp as you can.
How to Create Intro Video using Filmora
Wondershare Filmora is an editing software that is available to download in google. This software is easy to use and includes products for a range of users from beginner to intermediate. Common features of Filmora include a timeline, preview window and effects library that you can use to create a nice and creative introduction video for your YouTube channel.
Free Download For Win 7 or later(64-bit)
Free Download For macOS 10.14 or later
Free trails are available to demo the product before purchasing. Pricing options for the various programs are available on the official Filmora website.
Start your own design from scratch or you can search for a YouTube video template
Select the best video that you like to be your intro, either create a video introducing yourself or just a video with some creative effects.
First you can check the Stock Media and go click some GIFs find your best fit and start customizing. You can always download some free template online that you think much better to used.
Add ready made animated graphic stickers to your YouTube intro videos by dragging and dropping them into design. Just choose “Elements” and then “Stickers” to browse a library of options.
Change the image on your YouTube intro video by uploading your own or choosing from millions of free photos, graphics, and illustration in Filmora library.
Start editing your videos to make them look seamless and professional on any platforms. Whether it’s on a widescreen, tablet, or mobile device. Click some effects to add some creative design on your intro videos.
You can split, resize trim or cut your videos to tailor it to your needs.
Change the text and insert your own channel title and tagline. You can also change the font style, color, and size to better suit your brand look.
Finally, add music to your YouTube intro video by uploading a clip from a stock music of Filmora library. You can also make your own YouTube intro music using instrument or digital tools
Conclusion
Hope with these tips, you’ll be able to create quality video introductions that draw the audience in and help them get to know you better. Introduce your brand, explain your business, and connect with your prospective customers like never before. Whether your intro clips start off your YouTube videos or plays after the teaser clip, YouTube intro videos can be a valuable tool for any creator.
Remember your video doesn’t have to be a high-budget production or you don’t have to spend a lot of money on making a creative video. You could create a video that works with pretty much of any smartphone today. Have fun creating your introductions videos, set a positive mind and positive creation will come out.
Also read:
- Best Method to Split Video Into Parts Online
- In 2024, How to Shoot Cinematic Footage with Phone
- Updated In 2024, 2 Methods to Crop a Video in VLC
- Updated How to Create LUTs with LUTs Generator for 2024
- In 2024, Ultimate Guide on Magic Effects Video Making
- New Top 12 AI Video Generators to Pick
- New FLV Editor for Windows 11/10/8.1/8/7 Easily Edit FLV Videos on PC for 2024
- New Create a Brand Video to Make Your Business Shine for 2024
- New 2024 Approved How to Create a Vacation Slideshow in 5 Minutes
- How to Do Datamoshing Effect in After Effects for 2024
- Updated In 2024, Easy Way to Add Transitions to Videos
- New In 2024, How to Make a Slow Motion Video in Wondershare Filmora
- Updated 2024 Approved 2 Solutions to Crop a Video Using After Effects
- How to Find a High-Quality Video Marketing Agency?
- In 2024, Looking for the Simple Steps to Add a Filter to Your Video in Premiere Pro? Here Are the Complete Steps Along with the List of Free Premiere Filter Presets to Use
- 2024 Approved Adobe After Effects Review
- Updated In 2024, How to Make Vintage Film Effect 1950S
- New Step by Step to Cut a Video in Lightworks
- New What Is MOV Format and How to Edit MOV Video Better, In 2024
- 2024 Approved Step by Step to Rotate Videos in Davinci Resolve
- Updated How to Create Sports Intro and Outro for YouTube Video?
- 2024 Approved This Article Aims to Provide a Step-by-Step Guide to Changing a Videos Speed by Using the Speed Adjustment Panel and Duration Panel on Wondershare Filmora
- Updated 2024 Approved Funny Content Ideas for YouTube Videos
- In 2024, Using AI to Replace Skies Finding the Right Methods
- Updated 2024 Approved How to Be a YouTube Vlogger
- New Best Ever Ways Make Tiktok Slideshow Solved
- New How to Use Zoom in Google
- Best Cloud Storage Service for Videos for 2024
- Updated Guide To Selecting and Using the Best Braw Luts
- New 8 Best Video Editor with Useful Masking for 2024
- Are You Ready to Learn About Something Free yet Amazing? We Are Talking About All Format Video Players for PC that You Should Know , Lets Begin for 2024
- Updated In 2024, How to Resize FLV Videos EfficientlyWindows, Mac, Android, iPhone & Online
- Updated In 2024, Adobe Premiere Pro Download and Use Guide In Depth
- What Is HDRI? Everything You Need to Know About HDRI
- New Do You Know Anything About the Video Format Supported by WhatsApp? If Not, Then This Is the Right Time to Learn About WhatsApp-Supported Video Formats for 2024
- 5 Ways to Denoise a Video
- Learn Top Best Free LUTs For Premiere Pro
- In 2024, Are You Looking for an Ideal Halloween Countdown Video Clip for Your Video? This Article Will Walk You Through the Best Ones You Can Use to Get the Job Done Perfectly
- New In 2024, Top 15 Best Free MP4 Video Rotators Windows, Mac, Android, iPhone & Online
- In 2024, 4 Ways to Add White Border to Video on Mobile and Desktop
- New In 2024, Detailed Steps to Rotate Video Using KMPlayer
- In 2024, Lava Blaze 2 5G ADB Format Tool for PC vs. Other Unlocking Tools Which One is the Best?
- Authentication Error Occurred on Vivo S17t? Here Are 10 Proven Fixes | Dr.fone
- Google Play Services Wont Update? 12 Fixes are Here on Samsung Galaxy S24 Ultra | Dr.fone
- Easily Unlock Your Asus ROG Phone 7 Device SIM
- In 2024, How Can I Catch the Regional Pokémon without Traveling On Apple iPhone 6s Plus | Dr.fone
- 3 Ways to Fake GPS Without Root On Xiaomi 14 Ultra | Dr.fone
- How To Recover Lost Data of iPhone X? | Dr.fone
- In 2024, How to Unlock Oppo Reno 11F 5G Bootloader Easily
- Forgotten The Voicemail Password Of Nubia Z50 Ultra? Try These Fixes
- How to Reset Apple ID and Apple Password On Apple iPhone 15 Pro Max
- New Best Text-to-Audio Converters of All Times
- How to Mirror Apple iPhone 14 to iPad? | Dr.fone
- In 2024, 2 Ways to Monitor Xiaomi Redmi Note 12 Pro+ 5G Activity | Dr.fone
- How to Fix the Soft Bricked Itel A70? | Dr.fone
- In 2024, How To Pause Life360 Location Sharing For Nokia 130 Music | Dr.fone
- How to Transfer Data from Samsung Galaxy A05 to Samsung Phone | Dr.fone
- 10 Easy-to-Use FRP Bypass Tools for Unlocking Google Accounts On Xiaomi 13T
- Why Does My Xiaomi Civi 3 Keep Turning Off By Itself? 6 Fixes Are Here | Dr.fone
- Android Screen Stuck General Samsung Galaxy F54 5G Partly Screen Unresponsive | Dr.fone
- In 2024, Full Guide to Fix iToolab AnyGO Not Working On Infinix Note 30 | Dr.fone
- Fake the Location to Get Around the MLB Blackouts on Motorola Moto G23 | Dr.fone
- How to Factory Reset Vivo Y200e 5G in 5 Easy Ways | Dr.fone
- Ultimate guide to get the meltan box pokemon go For Motorola Moto G34 5G | Dr.fone
- How to Samsung Galaxy A15 5G Get Deleted Pictures Back with Ease and Safety?
- 8 Solutions to Solve YouTube App Crashing on Vivo Y55s 5G (2023) | Dr.fone
- Best 10 Mock Location Apps Worth Trying On Samsung Galaxy A14 4G | Dr.fone
- In 2024, How to Successfully Bypass iCloud Activation Lock from iPhone XS Max
- Infinix Note 30 VIP Racing Edition Messages Recovery - Recover Deleted Messages from Infinix Note 30 VIP Racing Edition
- In 2024, Pokemon Go Error 12 Failed to Detect Location On Vivo S18? | Dr.fone
- How Can We Unlock Our Poco F5 Pro 5G Phone Screen?
- In 2024, What Is a SIM Network Unlock PIN? Get Your Gionee Phone Network-Ready
- In 2024, Hassle-Free Ways to Remove FRP Lock from Samsung Galaxy A34 5G Phones with/without a PC
- In 2024, How to Transfer Apps from Realme C51 to Another | Dr.fone
- Title: How to Create Emoji on Mac That Take Less Than 10 Mins for 2024
- Author: Chloe
- Created at : 2024-05-20 03:38:34
- Updated at : 2024-05-21 03:38:34
- Link: https://ai-editing-video.techidaily.com/how-to-create-emoji-on-mac-that-take-less-than-10-mins-for-2024/
- License: This work is licensed under CC BY-NC-SA 4.0.
