:max_bytes(150000):strip_icc():format(webp)/GettyImages-1139232374-700d343900854115ad26acf3f1dd80b3.jpg)
How to Create Your Own LUTs for Your Video with Filmora

How to Create Your Own LUTs for Your Video with Filmora
Create High-Quality Video - Wondershare Filmora
An easy and powerful YouTube video editor
Numerous video and audio effects to choose from
Detailed tutorials are provided by the official channel
Color grading can feel daunting, especially if you don’t have much experience grading footage. Fortunately, LUTs can help you grade your footage almost effortlessly. Like your favorite Snapchat or Instagram filters, a LUT can instantly transform dull-looking footage into something more vibrant. So, what is a LUT?
LUT is an acronym for “look up table.” A LUT is a preset color that you can apply to footage to transform how it looks. Video editors, colorists, and filmmakers use LUTs to speed up color grading. However, you don’t need to be an experienced professional to use them. With minimal color grading and video editing experience, you can easily apply LUTs to your footage.
LUTs are usually denoted by the .LUT, .CUBE, or. 3DL file extensions. You can create LUTs using several video editing and color grading applications, such as Adobe Premiere Pro, Final Cut Pro, DaVinci Resolve, and Filmora. In this guide, we’ll explore how to create your own LUT and use custom LUTs in Filmora.
In this article
01 Why We Need to Create Our Own LUT
03 How to Use Custom LUTs in Filmora
Why We Need to Create Our Own LUT
Many video editing tools usually come with pre-installed LUTs that you can quickly apply to footage. However, you may need to create your own LUT in some cases. Here are some reasons why you may need to create your own LUT:
1. To Create a Particular Feeling
Clients may want their videos to evoke a particular emotion. If the pre-installed LUTs that come with your video editing software can’t evoke the particular feeling the client wants, you may need to create your own LUT. Some key questions to ask yourself when creating the LUT include:
- What is the genre of the video project?
- What kind of atmosphere do you want to create?
- Are there any colors or tones that you should emphasize?
- Once you ask yourself these questions, you’ll be able to create an appropriate LUT for the client.
For instance, if the genre of the video project is a comedy, you may want to create a LUT that highlights orange, yellow, and its tones to create a cheerful atmosphere.
On the other hand, if the project’s genre is an action video, you may want to create a LUT that highlights blue, green, and other similar tones to evoke a serious feeling.
2. To Showcase Several Looks
Color grading often comes down to preference. There isn’t a one-size-fits-all solution when grading footage, especially if the video project is on a neutral topic.
Creating custom LUTs can allow you to preview different looks for clients and allow them to choose the footage they like.
3. To Speed Up the Color Grading Process
Perhaps the biggest pro of LUTs is their ability to speed up the color grading process. Creating your own LUTs can allow you to use the same LUT for multiple projects that are similar and save time during color grading.
In addition, since color grading can take a considerable amount of time, creating your own LUTs can be helpful if you regularly work on projects with tight deadlines.
And if you’re working with an editor or team of editors, adding your own LUT to the footage can speed up editing and give the final cut a more refined look.
4. When Working with Multiple Editing Tools
Nearly all popular video editing applications support LUTs. If you regularly use several applications for editing and color grading, LUTs can help you quickly achieve the same colors across all the various applications you use.
All editing applications have different color grading tools, so it’s relatively challenging to achieve the same colors across several applications. Creating your own LUTs can make it easier to transfer color values between different software.
How to Create Your Own LUT
Creating LUTs is fairly simple. However, to create effective LUTs, ensure you prepare your source footage to avoid issues down the line when applying the LUT to your footage.
Here are some crucial things you should do when prepping your source footage:
- Ensure your exposure is perfect.
- Ensure your white balance is correct.
- Ensure your lighting reflects an accurate balance of highlights and shadows.
By ensuring these things are in order, you will be able to create a versatile LUT that you can apply across a wide variety of footage.
After prepping your source footage, you can then create your own LUT. Here’s how you can create a LUT in Filmora following a few simple steps:
Tips for Filmora New Version Users
Due to the updating of Filmora, some of the following operations may be different from the operations of the new version, new version users can click on the latest operation guide - Apply 3D LUT in color correction in the User Guide section.
Step 1. Import the Footage
Launch Filmora and click on New Project. In the New Project window that opens, import your footage by clicking on Import and selecting one of the drop-down options.
Step 2. Add the Footage to the Timeline
Drag and drop the footage into your project’s timeline.
Step 3. Open the Color Tab
Double click on the video on the timeline to select it. Then, navigate to the top left panel and click on the Color tab.

Step 4. Create Your LUT
Under the Color tab, choose the ‘3D LUT’ in Basic to customize your own LUTs.

Since you’re creating your own LUT instead of using the pre-built LUTs, scroll down to adjust various things, such as the White Balance, Color, Light, HSL, and Vignette.

Tweak these settings until you’re satisfied with the results. To help you make the adjustments and balance the intensity of the colors in your footage, check the color histogram located at the top right corner of the window.
Step 5. Save Your LUT
If you’re satisfied with the results, click on the ![]() Save button locate in the menu bar.
Save button locate in the menu bar.
You’ll need to name and save your LUT in the new window that opens. Give your LUT a descriptive name and click on OK to save it.

And that’s it! You’ve successfully created your own LUT.
How to Use Custom LUTs in Filmora
Step 1. Import the Footage
Follow steps 1, 2, and 3 in the section on creating your own LUT to launch Filmora, import your footage, add it to the project timeline, and open the Color tab.
Step 2. Apply the Custom LUT
Under the Color tab, click on the All Presets drop-down menu to view all the available preset options.

Click on the Custom option to view the LUT you created. To apply the custom LUT, simply click on it to apply it to your footage.

Step 3. Save the Changes
If you’re pleased with the results, click on the OK button to save the changes.
Filmora will apply the custom LUT to the video in the Preview Monitor.
Step 4. Export the Footage
Finally, you can export the footage by clicking on the Export tab on the main menu and selecting one of the available options on the drop-down menu.
For Win 7 or later (64-bit)
For macOS 10.12 or later
Conclusion
LUTs can make the color grading process easier and quicker. They can prove incredibly useful, especially if you’re unfamiliar with the color grading workflow or hard-pressed for time. They can also elevate your footage and make it look more cinematic.
While many video editing applications come with several pre-installed LUTs, try to create your custom LUTs using the steps above. Creating your LUTs from scratch may take you slightly more time than using pre-created LUTs, but creating the perfect LUT could save you time grading future projects.
When creating your own LUTs, try to create and apply several different LUTs to see which one is suitable for your footage. There usually isn’t a one-size-fits-all LUT option, so creating and testing out different LUTs is the best way to find the perfect custom LUT for your projects.
Color grading can feel daunting, especially if you don’t have much experience grading footage. Fortunately, LUTs can help you grade your footage almost effortlessly. Like your favorite Snapchat or Instagram filters, a LUT can instantly transform dull-looking footage into something more vibrant. So, what is a LUT?
LUT is an acronym for “look up table.” A LUT is a preset color that you can apply to footage to transform how it looks. Video editors, colorists, and filmmakers use LUTs to speed up color grading. However, you don’t need to be an experienced professional to use them. With minimal color grading and video editing experience, you can easily apply LUTs to your footage.
LUTs are usually denoted by the .LUT, .CUBE, or. 3DL file extensions. You can create LUTs using several video editing and color grading applications, such as Adobe Premiere Pro, Final Cut Pro, DaVinci Resolve, and Filmora. In this guide, we’ll explore how to create your own LUT and use custom LUTs in Filmora.
In this article
01 Why We Need to Create Our Own LUT
03 How to Use Custom LUTs in Filmora
Why We Need to Create Our Own LUT
Many video editing tools usually come with pre-installed LUTs that you can quickly apply to footage. However, you may need to create your own LUT in some cases. Here are some reasons why you may need to create your own LUT:
1. To Create a Particular Feeling
Clients may want their videos to evoke a particular emotion. If the pre-installed LUTs that come with your video editing software can’t evoke the particular feeling the client wants, you may need to create your own LUT. Some key questions to ask yourself when creating the LUT include:
- What is the genre of the video project?
- What kind of atmosphere do you want to create?
- Are there any colors or tones that you should emphasize?
- Once you ask yourself these questions, you’ll be able to create an appropriate LUT for the client.
For instance, if the genre of the video project is a comedy, you may want to create a LUT that highlights orange, yellow, and its tones to create a cheerful atmosphere.
On the other hand, if the project’s genre is an action video, you may want to create a LUT that highlights blue, green, and other similar tones to evoke a serious feeling.
2. To Showcase Several Looks
Color grading often comes down to preference. There isn’t a one-size-fits-all solution when grading footage, especially if the video project is on a neutral topic.
Creating custom LUTs can allow you to preview different looks for clients and allow them to choose the footage they like.
3. To Speed Up the Color Grading Process
Perhaps the biggest pro of LUTs is their ability to speed up the color grading process. Creating your own LUTs can allow you to use the same LUT for multiple projects that are similar and save time during color grading.
In addition, since color grading can take a considerable amount of time, creating your own LUTs can be helpful if you regularly work on projects with tight deadlines.
And if you’re working with an editor or team of editors, adding your own LUT to the footage can speed up editing and give the final cut a more refined look.
4. When Working with Multiple Editing Tools
Nearly all popular video editing applications support LUTs. If you regularly use several applications for editing and color grading, LUTs can help you quickly achieve the same colors across all the various applications you use.
All editing applications have different color grading tools, so it’s relatively challenging to achieve the same colors across several applications. Creating your own LUTs can make it easier to transfer color values between different software.
How to Create Your Own LUT
Creating LUTs is fairly simple. However, to create effective LUTs, ensure you prepare your source footage to avoid issues down the line when applying the LUT to your footage.
Here are some crucial things you should do when prepping your source footage:
- Ensure your exposure is perfect.
- Ensure your white balance is correct.
- Ensure your lighting reflects an accurate balance of highlights and shadows.
By ensuring these things are in order, you will be able to create a versatile LUT that you can apply across a wide variety of footage.
After prepping your source footage, you can then create your own LUT. Here’s how you can create a LUT in Filmora following a few simple steps:
Tips for Filmora New Version Users
Due to the updating of Filmora, some of the following operations may be different from the operations of the new version, new version users can click on the latest operation guide - Apply 3D LUT in color correction in the User Guide section.
Step 1. Import the Footage
Launch Filmora and click on New Project. In the New Project window that opens, import your footage by clicking on Import and selecting one of the drop-down options.
Step 2. Add the Footage to the Timeline
Drag and drop the footage into your project’s timeline.
Step 3. Open the Color Tab
Double click on the video on the timeline to select it. Then, navigate to the top left panel and click on the Color tab.

Step 4. Create Your LUT
Under the Color tab, choose the ‘3D LUT’ in Basic to customize your own LUTs.

Since you’re creating your own LUT instead of using the pre-built LUTs, scroll down to adjust various things, such as the White Balance, Color, Light, HSL, and Vignette.

Tweak these settings until you’re satisfied with the results. To help you make the adjustments and balance the intensity of the colors in your footage, check the color histogram located at the top right corner of the window.
Step 5. Save Your LUT
If you’re satisfied with the results, click on the ![]() Save button locate in the menu bar.
Save button locate in the menu bar.
You’ll need to name and save your LUT in the new window that opens. Give your LUT a descriptive name and click on OK to save it.

And that’s it! You’ve successfully created your own LUT.
How to Use Custom LUTs in Filmora
Step 1. Import the Footage
Follow steps 1, 2, and 3 in the section on creating your own LUT to launch Filmora, import your footage, add it to the project timeline, and open the Color tab.
Step 2. Apply the Custom LUT
Under the Color tab, click on the All Presets drop-down menu to view all the available preset options.

Click on the Custom option to view the LUT you created. To apply the custom LUT, simply click on it to apply it to your footage.

Step 3. Save the Changes
If you’re pleased with the results, click on the OK button to save the changes.
Filmora will apply the custom LUT to the video in the Preview Monitor.
Step 4. Export the Footage
Finally, you can export the footage by clicking on the Export tab on the main menu and selecting one of the available options on the drop-down menu.
For Win 7 or later (64-bit)
For macOS 10.12 or later
Conclusion
LUTs can make the color grading process easier and quicker. They can prove incredibly useful, especially if you’re unfamiliar with the color grading workflow or hard-pressed for time. They can also elevate your footage and make it look more cinematic.
While many video editing applications come with several pre-installed LUTs, try to create your custom LUTs using the steps above. Creating your LUTs from scratch may take you slightly more time than using pre-created LUTs, but creating the perfect LUT could save you time grading future projects.
When creating your own LUTs, try to create and apply several different LUTs to see which one is suitable for your footage. There usually isn’t a one-size-fits-all LUT option, so creating and testing out different LUTs is the best way to find the perfect custom LUT for your projects.
Color grading can feel daunting, especially if you don’t have much experience grading footage. Fortunately, LUTs can help you grade your footage almost effortlessly. Like your favorite Snapchat or Instagram filters, a LUT can instantly transform dull-looking footage into something more vibrant. So, what is a LUT?
LUT is an acronym for “look up table.” A LUT is a preset color that you can apply to footage to transform how it looks. Video editors, colorists, and filmmakers use LUTs to speed up color grading. However, you don’t need to be an experienced professional to use them. With minimal color grading and video editing experience, you can easily apply LUTs to your footage.
LUTs are usually denoted by the .LUT, .CUBE, or. 3DL file extensions. You can create LUTs using several video editing and color grading applications, such as Adobe Premiere Pro, Final Cut Pro, DaVinci Resolve, and Filmora. In this guide, we’ll explore how to create your own LUT and use custom LUTs in Filmora.
In this article
01 Why We Need to Create Our Own LUT
03 How to Use Custom LUTs in Filmora
Why We Need to Create Our Own LUT
Many video editing tools usually come with pre-installed LUTs that you can quickly apply to footage. However, you may need to create your own LUT in some cases. Here are some reasons why you may need to create your own LUT:
1. To Create a Particular Feeling
Clients may want their videos to evoke a particular emotion. If the pre-installed LUTs that come with your video editing software can’t evoke the particular feeling the client wants, you may need to create your own LUT. Some key questions to ask yourself when creating the LUT include:
- What is the genre of the video project?
- What kind of atmosphere do you want to create?
- Are there any colors or tones that you should emphasize?
- Once you ask yourself these questions, you’ll be able to create an appropriate LUT for the client.
For instance, if the genre of the video project is a comedy, you may want to create a LUT that highlights orange, yellow, and its tones to create a cheerful atmosphere.
On the other hand, if the project’s genre is an action video, you may want to create a LUT that highlights blue, green, and other similar tones to evoke a serious feeling.
2. To Showcase Several Looks
Color grading often comes down to preference. There isn’t a one-size-fits-all solution when grading footage, especially if the video project is on a neutral topic.
Creating custom LUTs can allow you to preview different looks for clients and allow them to choose the footage they like.
3. To Speed Up the Color Grading Process
Perhaps the biggest pro of LUTs is their ability to speed up the color grading process. Creating your own LUTs can allow you to use the same LUT for multiple projects that are similar and save time during color grading.
In addition, since color grading can take a considerable amount of time, creating your own LUTs can be helpful if you regularly work on projects with tight deadlines.
And if you’re working with an editor or team of editors, adding your own LUT to the footage can speed up editing and give the final cut a more refined look.
4. When Working with Multiple Editing Tools
Nearly all popular video editing applications support LUTs. If you regularly use several applications for editing and color grading, LUTs can help you quickly achieve the same colors across all the various applications you use.
All editing applications have different color grading tools, so it’s relatively challenging to achieve the same colors across several applications. Creating your own LUTs can make it easier to transfer color values between different software.
How to Create Your Own LUT
Creating LUTs is fairly simple. However, to create effective LUTs, ensure you prepare your source footage to avoid issues down the line when applying the LUT to your footage.
Here are some crucial things you should do when prepping your source footage:
- Ensure your exposure is perfect.
- Ensure your white balance is correct.
- Ensure your lighting reflects an accurate balance of highlights and shadows.
By ensuring these things are in order, you will be able to create a versatile LUT that you can apply across a wide variety of footage.
After prepping your source footage, you can then create your own LUT. Here’s how you can create a LUT in Filmora following a few simple steps:
Tips for Filmora New Version Users
Due to the updating of Filmora, some of the following operations may be different from the operations of the new version, new version users can click on the latest operation guide - Apply 3D LUT in color correction in the User Guide section.
Step 1. Import the Footage
Launch Filmora and click on New Project. In the New Project window that opens, import your footage by clicking on Import and selecting one of the drop-down options.
Step 2. Add the Footage to the Timeline
Drag and drop the footage into your project’s timeline.
Step 3. Open the Color Tab
Double click on the video on the timeline to select it. Then, navigate to the top left panel and click on the Color tab.

Step 4. Create Your LUT
Under the Color tab, choose the ‘3D LUT’ in Basic to customize your own LUTs.

Since you’re creating your own LUT instead of using the pre-built LUTs, scroll down to adjust various things, such as the White Balance, Color, Light, HSL, and Vignette.

Tweak these settings until you’re satisfied with the results. To help you make the adjustments and balance the intensity of the colors in your footage, check the color histogram located at the top right corner of the window.
Step 5. Save Your LUT
If you’re satisfied with the results, click on the ![]() Save button locate in the menu bar.
Save button locate in the menu bar.
You’ll need to name and save your LUT in the new window that opens. Give your LUT a descriptive name and click on OK to save it.

And that’s it! You’ve successfully created your own LUT.
How to Use Custom LUTs in Filmora
Step 1. Import the Footage
Follow steps 1, 2, and 3 in the section on creating your own LUT to launch Filmora, import your footage, add it to the project timeline, and open the Color tab.
Step 2. Apply the Custom LUT
Under the Color tab, click on the All Presets drop-down menu to view all the available preset options.

Click on the Custom option to view the LUT you created. To apply the custom LUT, simply click on it to apply it to your footage.

Step 3. Save the Changes
If you’re pleased with the results, click on the OK button to save the changes.
Filmora will apply the custom LUT to the video in the Preview Monitor.
Step 4. Export the Footage
Finally, you can export the footage by clicking on the Export tab on the main menu and selecting one of the available options on the drop-down menu.
For Win 7 or later (64-bit)
For macOS 10.12 or later
Conclusion
LUTs can make the color grading process easier and quicker. They can prove incredibly useful, especially if you’re unfamiliar with the color grading workflow or hard-pressed for time. They can also elevate your footage and make it look more cinematic.
While many video editing applications come with several pre-installed LUTs, try to create your custom LUTs using the steps above. Creating your LUTs from scratch may take you slightly more time than using pre-created LUTs, but creating the perfect LUT could save you time grading future projects.
When creating your own LUTs, try to create and apply several different LUTs to see which one is suitable for your footage. There usually isn’t a one-size-fits-all LUT option, so creating and testing out different LUTs is the best way to find the perfect custom LUT for your projects.
Color grading can feel daunting, especially if you don’t have much experience grading footage. Fortunately, LUTs can help you grade your footage almost effortlessly. Like your favorite Snapchat or Instagram filters, a LUT can instantly transform dull-looking footage into something more vibrant. So, what is a LUT?
LUT is an acronym for “look up table.” A LUT is a preset color that you can apply to footage to transform how it looks. Video editors, colorists, and filmmakers use LUTs to speed up color grading. However, you don’t need to be an experienced professional to use them. With minimal color grading and video editing experience, you can easily apply LUTs to your footage.
LUTs are usually denoted by the .LUT, .CUBE, or. 3DL file extensions. You can create LUTs using several video editing and color grading applications, such as Adobe Premiere Pro, Final Cut Pro, DaVinci Resolve, and Filmora. In this guide, we’ll explore how to create your own LUT and use custom LUTs in Filmora.
In this article
01 Why We Need to Create Our Own LUT
03 How to Use Custom LUTs in Filmora
Why We Need to Create Our Own LUT
Many video editing tools usually come with pre-installed LUTs that you can quickly apply to footage. However, you may need to create your own LUT in some cases. Here are some reasons why you may need to create your own LUT:
1. To Create a Particular Feeling
Clients may want their videos to evoke a particular emotion. If the pre-installed LUTs that come with your video editing software can’t evoke the particular feeling the client wants, you may need to create your own LUT. Some key questions to ask yourself when creating the LUT include:
- What is the genre of the video project?
- What kind of atmosphere do you want to create?
- Are there any colors or tones that you should emphasize?
- Once you ask yourself these questions, you’ll be able to create an appropriate LUT for the client.
For instance, if the genre of the video project is a comedy, you may want to create a LUT that highlights orange, yellow, and its tones to create a cheerful atmosphere.
On the other hand, if the project’s genre is an action video, you may want to create a LUT that highlights blue, green, and other similar tones to evoke a serious feeling.
2. To Showcase Several Looks
Color grading often comes down to preference. There isn’t a one-size-fits-all solution when grading footage, especially if the video project is on a neutral topic.
Creating custom LUTs can allow you to preview different looks for clients and allow them to choose the footage they like.
3. To Speed Up the Color Grading Process
Perhaps the biggest pro of LUTs is their ability to speed up the color grading process. Creating your own LUTs can allow you to use the same LUT for multiple projects that are similar and save time during color grading.
In addition, since color grading can take a considerable amount of time, creating your own LUTs can be helpful if you regularly work on projects with tight deadlines.
And if you’re working with an editor or team of editors, adding your own LUT to the footage can speed up editing and give the final cut a more refined look.
4. When Working with Multiple Editing Tools
Nearly all popular video editing applications support LUTs. If you regularly use several applications for editing and color grading, LUTs can help you quickly achieve the same colors across all the various applications you use.
All editing applications have different color grading tools, so it’s relatively challenging to achieve the same colors across several applications. Creating your own LUTs can make it easier to transfer color values between different software.
How to Create Your Own LUT
Creating LUTs is fairly simple. However, to create effective LUTs, ensure you prepare your source footage to avoid issues down the line when applying the LUT to your footage.
Here are some crucial things you should do when prepping your source footage:
- Ensure your exposure is perfect.
- Ensure your white balance is correct.
- Ensure your lighting reflects an accurate balance of highlights and shadows.
By ensuring these things are in order, you will be able to create a versatile LUT that you can apply across a wide variety of footage.
After prepping your source footage, you can then create your own LUT. Here’s how you can create a LUT in Filmora following a few simple steps:
Tips for Filmora New Version Users
Due to the updating of Filmora, some of the following operations may be different from the operations of the new version, new version users can click on the latest operation guide - Apply 3D LUT in color correction in the User Guide section.
Step 1. Import the Footage
Launch Filmora and click on New Project. In the New Project window that opens, import your footage by clicking on Import and selecting one of the drop-down options.
Step 2. Add the Footage to the Timeline
Drag and drop the footage into your project’s timeline.
Step 3. Open the Color Tab
Double click on the video on the timeline to select it. Then, navigate to the top left panel and click on the Color tab.

Step 4. Create Your LUT
Under the Color tab, choose the ‘3D LUT’ in Basic to customize your own LUTs.

Since you’re creating your own LUT instead of using the pre-built LUTs, scroll down to adjust various things, such as the White Balance, Color, Light, HSL, and Vignette.

Tweak these settings until you’re satisfied with the results. To help you make the adjustments and balance the intensity of the colors in your footage, check the color histogram located at the top right corner of the window.
Step 5. Save Your LUT
If you’re satisfied with the results, click on the ![]() Save button locate in the menu bar.
Save button locate in the menu bar.
You’ll need to name and save your LUT in the new window that opens. Give your LUT a descriptive name and click on OK to save it.

And that’s it! You’ve successfully created your own LUT.
How to Use Custom LUTs in Filmora
Step 1. Import the Footage
Follow steps 1, 2, and 3 in the section on creating your own LUT to launch Filmora, import your footage, add it to the project timeline, and open the Color tab.
Step 2. Apply the Custom LUT
Under the Color tab, click on the All Presets drop-down menu to view all the available preset options.

Click on the Custom option to view the LUT you created. To apply the custom LUT, simply click on it to apply it to your footage.

Step 3. Save the Changes
If you’re pleased with the results, click on the OK button to save the changes.
Filmora will apply the custom LUT to the video in the Preview Monitor.
Step 4. Export the Footage
Finally, you can export the footage by clicking on the Export tab on the main menu and selecting one of the available options on the drop-down menu.
For Win 7 or later (64-bit)
For macOS 10.12 or later
Conclusion
LUTs can make the color grading process easier and quicker. They can prove incredibly useful, especially if you’re unfamiliar with the color grading workflow or hard-pressed for time. They can also elevate your footage and make it look more cinematic.
While many video editing applications come with several pre-installed LUTs, try to create your custom LUTs using the steps above. Creating your LUTs from scratch may take you slightly more time than using pre-created LUTs, but creating the perfect LUT could save you time grading future projects.
When creating your own LUTs, try to create and apply several different LUTs to see which one is suitable for your footage. There usually isn’t a one-size-fits-all LUT option, so creating and testing out different LUTs is the best way to find the perfect custom LUT for your projects.
How to Record Super Slow Motion Videos on Your Huawei/Samsung/iPhone?
Super Slow Motion has long been among the finest (and most exploited) video effects. The method was initially limited to high-end lenses, but super slo-mo has become increasingly superior as smartphone technology advances.
Super slo-mo is a terrific technique to learn how to use if you want to accentuate a dramatic moment or extend the humiliation of a friend you captured in an embarrassing scenario. This article has stepwise guides and tips for recording super slo-mo on your phone. Let’s get going!
In this article
01 What’s the Difference Between Slow-Mo and Super Slow-Mo?
02 How to Record Super Slo-Mo Videos with Samsung Galaxy S20 and Later models?
03 How to Edit Super Slow Motion Video in Samsung Galaxy S21?
04 How to Record Super Slow Motion Video with Huawei Mate 20 and Later Phones?
05 How to Shoot Slo-Mo Videos on iPhone?
06 Tips for Recording Super Slow Motion Video
Part 1: What’s the Difference Between Slow-Mo and Super Slow-Mo?
Super Slow-Mo (960fps) is a technology that allows users to shoot films at 960fps using a top-speed lens, capturing events that the naked eye cannot ordinarily notice by viewing them 32 times slower than regular videos (30fps) and four times slower than videos produced using the current Slow Motion feature (240fps).
Super Slow-mo movie may be displayed as 6-12 sec long on old smartphones, such as Galaxy S9/S9+ and Note9. However, the newer versions, such as Galaxy S10 Series, can play super slow-mo movies up to 14.8 sec.
You’ll understand the difference between the Slow-Mo and Super Slow-Mo better after reading the below information:
Slow Motion
Video is produced at an 8-times slower rate than usual, equivalent to the speed of a movie, advertisement, or sporting event.
Super Slow Motion
Videos are played 32 times slower than usual, catching minute changes in facial gestures and fast-moving elements.
Part 2: How to Record Super Slo-Mo Videos with Samsung Galaxy S20 and Later models?
Models That Support Super Slow-Mo: Galaxy S20, Galaxy S20+, Galaxy S20+ Ultra, Galaxy Z Flip, and later models.
Slow-motion video is often created by filming at a fast frame per second (fps) speed and then playing back at a far slower pace. This results in intriguing videos with slowed-down motion. The event is captured at 960 frames per second with the Super Slow-mo function, four times quicker than conventional slow motion. When it’s replayed at 30 frames per second, it’s 32 times slower, making mundane moments appear spectacular.
To capture super slow-motion videos with your Samsung Galaxy S20 and later models, follow the instructions below:
Step 1: Launch the camera on your phone by tapping the Camera app.
Step 2: Now, click on the Super Slow-Mo option to proceed.
Step 3: Press the White Circle in the center to start the recording and press it again to stop when you are done.
Note: Make sure that your phone’s video resolution is already on HD because Super Slow-Mo only supports HD resolutions.
Part 3: How to Edit Super Slow Motion Video in Samsung Galaxy S21?
Only capturing the super slow-motion videos is not enough, especially if you are a content creator. Even in the super slow-mo, there might be some unnecessary parts (since it is more detailed) that you need to cut out or the parts that need some enhancements to make the video look captivating.
However, not every phone is eligible to edit super slow-mo videos by not degrading the video resolutions. But Samsung Galaxy S21 allows you to do that by keeping the video resolution intact. You can edit the Super Slow-Mo videos with Galaxy S21 by following these instructions:
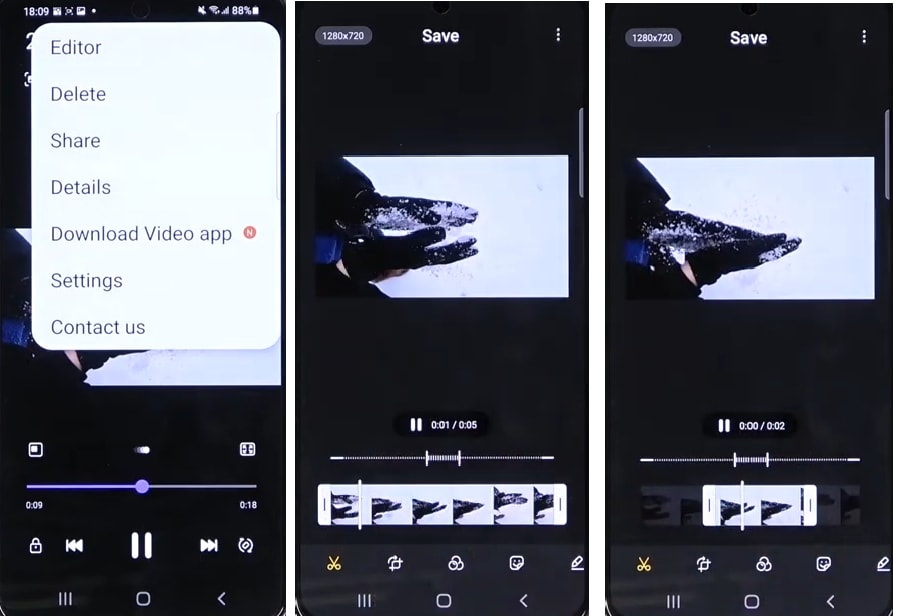
Step 1: Open the Camera app and navigate the super slow-mo video you wish to edit.
Step 2: Now, play it and tap the screen. You will see three vertical dots in the right corner. Click on them.
Step 3: Select the Editor option from the dropdown menu that appears.
Step 4: After that, you can adjust the length, crop the video, add effects, add stickers, add music, etc., by selecting from the bottom menu.
Step 5: After you’re done editing, click on the Save option at the top to save the video to your Gallery.
Part 4: How to Record Super Slow Motion Video with Huawei Mate 20 and Later Phones?
Models That Support Super Slow-Mo: Huawei Mate 20/20 Pro/20 X and later Mate models.
Before we demonstrate how to capture a super slow-mo with a Huawei Mate 20 and later models, we’ll explain this popular capture mode.
To begin, you should be aware that a camera/camera sensor collects a specific number of frames per second. The movie becomes legible by combining these pictures; the more images there are, the more fluent the video will be. The naked eye is thought to decipher about 60 pictures every second.
The benefit of improved camera sensors is that you can capture a maximum number of photos per second (some smartphones can record up to 960 / second) and slow down the sampling rate to produce a super slow-motion effect on the Huawei Mate 20 or later models.
Now, follow the stepwise guide to record super slow-mo with Huawei Mate 40 or later models:
Step 1: Launch your phone’s Camera go to More to select the Slow-Mo option.
Step 2: By default, you will see 4x on the slow-mo capture mode, which means the video will be recorded at 120FPS. Huawei Mate 40 allows you to capture up to 128X, i.e, 3840FPS for fast moving objects. To enable the Super Slo-Mo feature, select the 32X or 128X in this mode.
Step 3: Click on the Circle in the center to start and stop the recording. The video will be saved in your Gallery.
Part 5: How to Shoot Slo-Mo Videos on iPhone?
Slow-motion film on your iPhone essentially means slowing the fps so that everything appears to move slower inside the video. It is a popular effect employed by artists to produce one-of-a-kind video clips of sports footage, natural scenes, or sequences with a lot of dramatic motion.
Slow-motion films are supported by all iPhones, beginning with the 5S model, and the capability gets more robust and more stable with each successive generation. Shooting slow-motion films with your iPhone are addicting and enjoyable, and it adds drama to various settings.
Here is a step-by-step method for filming slow-mo with an iPhone, regardless of model.
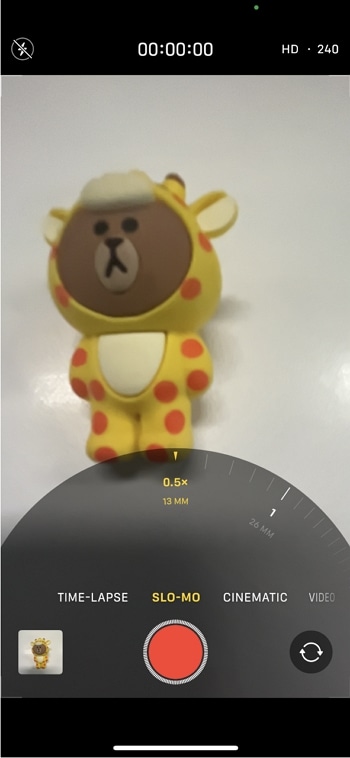
Step 1: Launch the Camera app on your iPhone and go to the Slow-Mo effect by sliding from the options above. Change the frame rate on the upper right corner to 120, 240, 720, depending on the iPhone models you’re using.
Step 2: Now, start the recording by clicking the Red Circle in the center or either of the Volume button.
Step 3: After you’re done recording, press the Red Circle again and head towards the Gallery to view the recorded video.
For more details, check: How to make slo-mo video on your iPhone.
Part 6: Tips for Recording Super Slow Motion Video
Although super slow-motion videos are easy to record, they can be challenging for a content creator. But don’t worry, with the following tips, we have got you covered:
Utilize A Tripod
It’s critical to keep your phone as steady as possible when filming in Super Slow-mo since shaking might conflict with your video and hinder it from recognizing motions when set to auto-record. To get the most out of Super Slow-mo, we recommend using a tripod whenever feasible.
You can check these tripods for iPhone
Transition Between Single and Multi-Takes
To boost your chances of catching the ideal timing in Super Slow-mo, your phone allows you to record in Multi-Take mode, which can capture many bursts of Super Slow-mo in one video.
When combined with an auto record, additional Super Slow-mo videos will be captured as much as the focus box senses activity and will end only when you end filming. The manual record works similarly. However, you’ll have to physically hit the trigger each time you wish to record a picture in Super Slow-mo.
As the name indicates, Single-Take will record a single Super Slow-mo clip and then cease recording a moment or two later. Because Multi-Take clips are often more extensive, this could save a large storage capacity.
Readjust the Focus
The focus or auto-recording is tiny by default. Fortunately, you can enlarge it to improve its odds of recognizing movement. To adjust the size of the box, hold it until only its edges are visible, then move any corner from the others to expand the box’s area. Simply tap anywhere outside the borders to verify the adjustment when you’re happy with the size.
Capture in Natural Light
Because of the large number of frames it collects, Super Slow-mo works the best in natural daylight situations. Though not visible to the human eye, indoor lighting, especially LED bulbs and tiny fluorescents, seems to flash at very high rates. Even if the environment is well-lit, Super Slow-mo detects this and shows your subject in a substantially darker tone.
View the Video at Normal Speed
If you wish to watch your Super Slow-mo movies at regular speed, deactivate Super Slow-mo playing by tapping on the option directly below the video. This will give you a greater understanding of your phone’s incredible capacity to bring the world to a halt.
Learn more about : How to Convert normal video to slo-mo video?
Besides the tips mentioned above, you can also watch this video to get some tips and tricks in recording slo-mo video with iPhone.
Conclusion
Super Slow Motion videos are excellent for showcasing the action and conveying tales, and they are also entertaining and straightforward to create. Your only constraints are time and imagination. However, your Android or iPhone’s camera has many more tricks in its sleeve: Live images, time-lapse, Panoramas, and Portrait mode let you express yourself freely!
02 How to Record Super Slo-Mo Videos with Samsung Galaxy S20 and Later models?
03 How to Edit Super Slow Motion Video in Samsung Galaxy S21?
04 How to Record Super Slow Motion Video with Huawei Mate 20 and Later Phones?
05 How to Shoot Slo-Mo Videos on iPhone?
06 Tips for Recording Super Slow Motion Video
Part 1: What’s the Difference Between Slow-Mo and Super Slow-Mo?
Super Slow-Mo (960fps) is a technology that allows users to shoot films at 960fps using a top-speed lens, capturing events that the naked eye cannot ordinarily notice by viewing them 32 times slower than regular videos (30fps) and four times slower than videos produced using the current Slow Motion feature (240fps).
Super Slow-mo movie may be displayed as 6-12 sec long on old smartphones, such as Galaxy S9/S9+ and Note9. However, the newer versions, such as Galaxy S10 Series, can play super slow-mo movies up to 14.8 sec.
You’ll understand the difference between the Slow-Mo and Super Slow-Mo better after reading the below information:
Slow Motion
Video is produced at an 8-times slower rate than usual, equivalent to the speed of a movie, advertisement, or sporting event.
Super Slow Motion
Videos are played 32 times slower than usual, catching minute changes in facial gestures and fast-moving elements.
Part 2: How to Record Super Slo-Mo Videos with Samsung Galaxy S20 and Later models?
Models That Support Super Slow-Mo: Galaxy S20, Galaxy S20+, Galaxy S20+ Ultra, Galaxy Z Flip, and later models.
Slow-motion video is often created by filming at a fast frame per second (fps) speed and then playing back at a far slower pace. This results in intriguing videos with slowed-down motion. The event is captured at 960 frames per second with the Super Slow-mo function, four times quicker than conventional slow motion. When it’s replayed at 30 frames per second, it’s 32 times slower, making mundane moments appear spectacular.
To capture super slow-motion videos with your Samsung Galaxy S20 and later models, follow the instructions below:
Step 1: Launch the camera on your phone by tapping the Camera app.
Step 2: Now, click on the Super Slow-Mo option to proceed.
Step 3: Press the White Circle in the center to start the recording and press it again to stop when you are done.
Note: Make sure that your phone’s video resolution is already on HD because Super Slow-Mo only supports HD resolutions.
Part 3: How to Edit Super Slow Motion Video in Samsung Galaxy S21?
Only capturing the super slow-motion videos is not enough, especially if you are a content creator. Even in the super slow-mo, there might be some unnecessary parts (since it is more detailed) that you need to cut out or the parts that need some enhancements to make the video look captivating.
However, not every phone is eligible to edit super slow-mo videos by not degrading the video resolutions. But Samsung Galaxy S21 allows you to do that by keeping the video resolution intact. You can edit the Super Slow-Mo videos with Galaxy S21 by following these instructions:
Step 1: Open the Camera app and navigate the super slow-mo video you wish to edit.
Step 2: Now, play it and tap the screen. You will see three vertical dots in the right corner. Click on them.
Step 3: Select the Editor option from the dropdown menu that appears.
Step 4: After that, you can adjust the length, crop the video, add effects, add stickers, add music, etc., by selecting from the bottom menu.
Step 5: After you’re done editing, click on the Save option at the top to save the video to your Gallery.

Part 4: How to Record Super Slow Motion Video with Huawei Mate 20 and Later Phones?
Models That Support Super Slow-Mo: Huawei Mate 20/20 Pro/20 X and later Mate models.
Before we demonstrate how to capture a super slow-mo with a Huawei Mate 20 and later models, we’ll explain this popular capture mode.
To begin, you should be aware that a camera/camera sensor collects a specific number of frames per second. The movie becomes legible by combining these pictures; the more images there are, the more fluent the video will be. The naked eye is thought to decipher about 60 pictures every second.
The benefit of improved camera sensors is that you can capture a maximum number of photos per second (some smartphones can record up to 960 / second) and slow down the sampling rate to produce a super slow-motion effect on the Huawei Mate 20 or later models.
Now, follow the stepwise guide to record super slow-mo with Huawei Mate 40 or later models:
Step 1: Launch your phone’s Camera go to More to select the Slow-Mo option.
Step 2: By default, you will see 4x on the slow-mo capture mode, which means the video will be recorded at 120FPS. Huawei Mate 40 allows you to capture up to 128X, i.e, 3840FPS for fast moving objects. To enable the Super Slo-Mo feature, select the 32X or 128X in this mode.
Step 3: Click on the Circle in the center to start and stop the recording. The video will be saved in your Gallery.
Part 5: How to Shoot Slo-Mo Videos on iPhone?
Slow-motion film on your iPhone essentially means slowing the fps so that everything appears to move slower inside the video. It is a popular effect employed by artists to produce one-of-a-kind video clips of sports footage, natural scenes, or sequences with a lot of dramatic motion.
Slow-motion films are supported by all iPhones, beginning with the 5S model, and the capability gets more robust and more stable with each successive generation. Shooting slow-motion films with your iPhone are addicting and enjoyable, and it adds drama to various settings.
Here is a step-by-step method for filming slow-mo with an iPhone, regardless of model.
Step 1: Launch the Camera app on your iPhone and go to the Slow-Mo effect by sliding from the options above. Change the frame rate on the upper right corner to 120, 240, 720, depending on the iPhone models you’re using.
Step 2: Now, start the recording by clicking the Red Circle in the center or either of the Volume button.
Step 3: After you’re done recording, press the Red Circle again and head towards the Gallery to view the recorded video.

For more details, check: How to make slo-mo video on your iPhone.
Part 6: Tips for Recording Super Slow Motion Video
Although super slow-motion videos are easy to record, they can be challenging for a content creator. But don’t worry, with the following tips, we have got you covered:
Utilize A Tripod
It’s critical to keep your phone as steady as possible when filming in Super Slow-mo since shaking might conflict with your video and hinder it from recognizing motions when set to auto-record. To get the most out of Super Slow-mo, we recommend using a tripod whenever feasible.
You can check these tripods for iPhone
Transition Between Single and Multi-Takes
To boost your chances of catching the ideal timing in Super Slow-mo, your phone allows you to record in Multi-Take mode, which can capture many bursts of Super Slow-mo in one video.
When combined with an auto record, additional Super Slow-mo videos will be captured as much as the focus box senses activity and will end only when you end filming. The manual record works similarly. However, you’ll have to physically hit the trigger each time you wish to record a picture in Super Slow-mo.
As the name indicates, Single-Take will record a single Super Slow-mo clip and then cease recording a moment or two later. Because Multi-Take clips are often more extensive, this could save a large storage capacity.
Readjust the Focus
The focus or auto-recording is tiny by default. Fortunately, you can enlarge it to improve its odds of recognizing movement. To adjust the size of the box, hold it until only its edges are visible, then move any corner from the others to expand the box’s area. Simply tap anywhere outside the borders to verify the adjustment when you’re happy with the size.
Capture in Natural Light
Because of the large number of frames it collects, Super Slow-mo works the best in natural daylight situations. Though not visible to the human eye, indoor lighting, especially LED bulbs and tiny fluorescents, seems to flash at very high rates. Even if the environment is well-lit, Super Slow-mo detects this and shows your subject in a substantially darker tone.
View the Video at Normal Speed
If you wish to watch your Super Slow-mo movies at regular speed, deactivate Super Slow-mo playing by tapping on the option directly below the video. This will give you a greater understanding of your phone’s incredible capacity to bring the world to a halt.
Learn more about : How to Convert normal video to slo-mo video?
Besides the tips mentioned above, you can also watch this video to get some tips and tricks in recording slo-mo video with iPhone.
Conclusion
Super Slow Motion videos are excellent for showcasing the action and conveying tales, and they are also entertaining and straightforward to create. Your only constraints are time and imagination. However, your Android or iPhone’s camera has many more tricks in its sleeve: Live images, time-lapse, Panoramas, and Portrait mode let you express yourself freely!
02 How to Record Super Slo-Mo Videos with Samsung Galaxy S20 and Later models?
03 How to Edit Super Slow Motion Video in Samsung Galaxy S21?
04 How to Record Super Slow Motion Video with Huawei Mate 20 and Later Phones?
05 How to Shoot Slo-Mo Videos on iPhone?
06 Tips for Recording Super Slow Motion Video
Part 1: What’s the Difference Between Slow-Mo and Super Slow-Mo?
Super Slow-Mo (960fps) is a technology that allows users to shoot films at 960fps using a top-speed lens, capturing events that the naked eye cannot ordinarily notice by viewing them 32 times slower than regular videos (30fps) and four times slower than videos produced using the current Slow Motion feature (240fps).
Super Slow-mo movie may be displayed as 6-12 sec long on old smartphones, such as Galaxy S9/S9+ and Note9. However, the newer versions, such as Galaxy S10 Series, can play super slow-mo movies up to 14.8 sec.
You’ll understand the difference between the Slow-Mo and Super Slow-Mo better after reading the below information:
Slow Motion
Video is produced at an 8-times slower rate than usual, equivalent to the speed of a movie, advertisement, or sporting event.
Super Slow Motion
Videos are played 32 times slower than usual, catching minute changes in facial gestures and fast-moving elements.
Part 2: How to Record Super Slo-Mo Videos with Samsung Galaxy S20 and Later models?
Models That Support Super Slow-Mo: Galaxy S20, Galaxy S20+, Galaxy S20+ Ultra, Galaxy Z Flip, and later models.
Slow-motion video is often created by filming at a fast frame per second (fps) speed and then playing back at a far slower pace. This results in intriguing videos with slowed-down motion. The event is captured at 960 frames per second with the Super Slow-mo function, four times quicker than conventional slow motion. When it’s replayed at 30 frames per second, it’s 32 times slower, making mundane moments appear spectacular.
To capture super slow-motion videos with your Samsung Galaxy S20 and later models, follow the instructions below:
Step 1: Launch the camera on your phone by tapping the Camera app.
Step 2: Now, click on the Super Slow-Mo option to proceed.
Step 3: Press the White Circle in the center to start the recording and press it again to stop when you are done.
Note: Make sure that your phone’s video resolution is already on HD because Super Slow-Mo only supports HD resolutions.
Part 3: How to Edit Super Slow Motion Video in Samsung Galaxy S21?
Only capturing the super slow-motion videos is not enough, especially if you are a content creator. Even in the super slow-mo, there might be some unnecessary parts (since it is more detailed) that you need to cut out or the parts that need some enhancements to make the video look captivating.
However, not every phone is eligible to edit super slow-mo videos by not degrading the video resolutions. But Samsung Galaxy S21 allows you to do that by keeping the video resolution intact. You can edit the Super Slow-Mo videos with Galaxy S21 by following these instructions:
Step 1: Open the Camera app and navigate the super slow-mo video you wish to edit.
Step 2: Now, play it and tap the screen. You will see three vertical dots in the right corner. Click on them.
Step 3: Select the Editor option from the dropdown menu that appears.
Step 4: After that, you can adjust the length, crop the video, add effects, add stickers, add music, etc., by selecting from the bottom menu.
Step 5: After you’re done editing, click on the Save option at the top to save the video to your Gallery.

Part 4: How to Record Super Slow Motion Video with Huawei Mate 20 and Later Phones?
Models That Support Super Slow-Mo: Huawei Mate 20/20 Pro/20 X and later Mate models.
Before we demonstrate how to capture a super slow-mo with a Huawei Mate 20 and later models, we’ll explain this popular capture mode.
To begin, you should be aware that a camera/camera sensor collects a specific number of frames per second. The movie becomes legible by combining these pictures; the more images there are, the more fluent the video will be. The naked eye is thought to decipher about 60 pictures every second.
The benefit of improved camera sensors is that you can capture a maximum number of photos per second (some smartphones can record up to 960 / second) and slow down the sampling rate to produce a super slow-motion effect on the Huawei Mate 20 or later models.
Now, follow the stepwise guide to record super slow-mo with Huawei Mate 40 or later models:
Step 1: Launch your phone’s Camera go to More to select the Slow-Mo option.
Step 2: By default, you will see 4x on the slow-mo capture mode, which means the video will be recorded at 120FPS. Huawei Mate 40 allows you to capture up to 128X, i.e, 3840FPS for fast moving objects. To enable the Super Slo-Mo feature, select the 32X or 128X in this mode.
Step 3: Click on the Circle in the center to start and stop the recording. The video will be saved in your Gallery.
Part 5: How to Shoot Slo-Mo Videos on iPhone?
Slow-motion film on your iPhone essentially means slowing the fps so that everything appears to move slower inside the video. It is a popular effect employed by artists to produce one-of-a-kind video clips of sports footage, natural scenes, or sequences with a lot of dramatic motion.
Slow-motion films are supported by all iPhones, beginning with the 5S model, and the capability gets more robust and more stable with each successive generation. Shooting slow-motion films with your iPhone are addicting and enjoyable, and it adds drama to various settings.
Here is a step-by-step method for filming slow-mo with an iPhone, regardless of model.
Step 1: Launch the Camera app on your iPhone and go to the Slow-Mo effect by sliding from the options above. Change the frame rate on the upper right corner to 120, 240, 720, depending on the iPhone models you’re using.
Step 2: Now, start the recording by clicking the Red Circle in the center or either of the Volume button.
Step 3: After you’re done recording, press the Red Circle again and head towards the Gallery to view the recorded video.

For more details, check: How to make slo-mo video on your iPhone.
Part 6: Tips for Recording Super Slow Motion Video
Although super slow-motion videos are easy to record, they can be challenging for a content creator. But don’t worry, with the following tips, we have got you covered:
Utilize A Tripod
It’s critical to keep your phone as steady as possible when filming in Super Slow-mo since shaking might conflict with your video and hinder it from recognizing motions when set to auto-record. To get the most out of Super Slow-mo, we recommend using a tripod whenever feasible.
You can check these tripods for iPhone
Transition Between Single and Multi-Takes
To boost your chances of catching the ideal timing in Super Slow-mo, your phone allows you to record in Multi-Take mode, which can capture many bursts of Super Slow-mo in one video.
When combined with an auto record, additional Super Slow-mo videos will be captured as much as the focus box senses activity and will end only when you end filming. The manual record works similarly. However, you’ll have to physically hit the trigger each time you wish to record a picture in Super Slow-mo.
As the name indicates, Single-Take will record a single Super Slow-mo clip and then cease recording a moment or two later. Because Multi-Take clips are often more extensive, this could save a large storage capacity.
Readjust the Focus
The focus or auto-recording is tiny by default. Fortunately, you can enlarge it to improve its odds of recognizing movement. To adjust the size of the box, hold it until only its edges are visible, then move any corner from the others to expand the box’s area. Simply tap anywhere outside the borders to verify the adjustment when you’re happy with the size.
Capture in Natural Light
Because of the large number of frames it collects, Super Slow-mo works the best in natural daylight situations. Though not visible to the human eye, indoor lighting, especially LED bulbs and tiny fluorescents, seems to flash at very high rates. Even if the environment is well-lit, Super Slow-mo detects this and shows your subject in a substantially darker tone.
View the Video at Normal Speed
If you wish to watch your Super Slow-mo movies at regular speed, deactivate Super Slow-mo playing by tapping on the option directly below the video. This will give you a greater understanding of your phone’s incredible capacity to bring the world to a halt.
Learn more about : How to Convert normal video to slo-mo video?
Besides the tips mentioned above, you can also watch this video to get some tips and tricks in recording slo-mo video with iPhone.
Conclusion
Super Slow Motion videos are excellent for showcasing the action and conveying tales, and they are also entertaining and straightforward to create. Your only constraints are time and imagination. However, your Android or iPhone’s camera has many more tricks in its sleeve: Live images, time-lapse, Panoramas, and Portrait mode let you express yourself freely!
02 How to Record Super Slo-Mo Videos with Samsung Galaxy S20 and Later models?
03 How to Edit Super Slow Motion Video in Samsung Galaxy S21?
04 How to Record Super Slow Motion Video with Huawei Mate 20 and Later Phones?
05 How to Shoot Slo-Mo Videos on iPhone?
06 Tips for Recording Super Slow Motion Video
Part 1: What’s the Difference Between Slow-Mo and Super Slow-Mo?
Super Slow-Mo (960fps) is a technology that allows users to shoot films at 960fps using a top-speed lens, capturing events that the naked eye cannot ordinarily notice by viewing them 32 times slower than regular videos (30fps) and four times slower than videos produced using the current Slow Motion feature (240fps).
Super Slow-mo movie may be displayed as 6-12 sec long on old smartphones, such as Galaxy S9/S9+ and Note9. However, the newer versions, such as Galaxy S10 Series, can play super slow-mo movies up to 14.8 sec.
You’ll understand the difference between the Slow-Mo and Super Slow-Mo better after reading the below information:
Slow Motion
Video is produced at an 8-times slower rate than usual, equivalent to the speed of a movie, advertisement, or sporting event.
Super Slow Motion
Videos are played 32 times slower than usual, catching minute changes in facial gestures and fast-moving elements.
Part 2: How to Record Super Slo-Mo Videos with Samsung Galaxy S20 and Later models?
Models That Support Super Slow-Mo: Galaxy S20, Galaxy S20+, Galaxy S20+ Ultra, Galaxy Z Flip, and later models.
Slow-motion video is often created by filming at a fast frame per second (fps) speed and then playing back at a far slower pace. This results in intriguing videos with slowed-down motion. The event is captured at 960 frames per second with the Super Slow-mo function, four times quicker than conventional slow motion. When it’s replayed at 30 frames per second, it’s 32 times slower, making mundane moments appear spectacular.
To capture super slow-motion videos with your Samsung Galaxy S20 and later models, follow the instructions below:
Step 1: Launch the camera on your phone by tapping the Camera app.
Step 2: Now, click on the Super Slow-Mo option to proceed.
Step 3: Press the White Circle in the center to start the recording and press it again to stop when you are done.
Note: Make sure that your phone’s video resolution is already on HD because Super Slow-Mo only supports HD resolutions.
Part 3: How to Edit Super Slow Motion Video in Samsung Galaxy S21?
Only capturing the super slow-motion videos is not enough, especially if you are a content creator. Even in the super slow-mo, there might be some unnecessary parts (since it is more detailed) that you need to cut out or the parts that need some enhancements to make the video look captivating.
However, not every phone is eligible to edit super slow-mo videos by not degrading the video resolutions. But Samsung Galaxy S21 allows you to do that by keeping the video resolution intact. You can edit the Super Slow-Mo videos with Galaxy S21 by following these instructions:
Step 1: Open the Camera app and navigate the super slow-mo video you wish to edit.
Step 2: Now, play it and tap the screen. You will see three vertical dots in the right corner. Click on them.
Step 3: Select the Editor option from the dropdown menu that appears.
Step 4: After that, you can adjust the length, crop the video, add effects, add stickers, add music, etc., by selecting from the bottom menu.
Step 5: After you’re done editing, click on the Save option at the top to save the video to your Gallery.

Part 4: How to Record Super Slow Motion Video with Huawei Mate 20 and Later Phones?
Models That Support Super Slow-Mo: Huawei Mate 20/20 Pro/20 X and later Mate models.
Before we demonstrate how to capture a super slow-mo with a Huawei Mate 20 and later models, we’ll explain this popular capture mode.
To begin, you should be aware that a camera/camera sensor collects a specific number of frames per second. The movie becomes legible by combining these pictures; the more images there are, the more fluent the video will be. The naked eye is thought to decipher about 60 pictures every second.
The benefit of improved camera sensors is that you can capture a maximum number of photos per second (some smartphones can record up to 960 / second) and slow down the sampling rate to produce a super slow-motion effect on the Huawei Mate 20 or later models.
Now, follow the stepwise guide to record super slow-mo with Huawei Mate 40 or later models:
Step 1: Launch your phone’s Camera go to More to select the Slow-Mo option.
Step 2: By default, you will see 4x on the slow-mo capture mode, which means the video will be recorded at 120FPS. Huawei Mate 40 allows you to capture up to 128X, i.e, 3840FPS for fast moving objects. To enable the Super Slo-Mo feature, select the 32X or 128X in this mode.
Step 3: Click on the Circle in the center to start and stop the recording. The video will be saved in your Gallery.
Part 5: How to Shoot Slo-Mo Videos on iPhone?
Slow-motion film on your iPhone essentially means slowing the fps so that everything appears to move slower inside the video. It is a popular effect employed by artists to produce one-of-a-kind video clips of sports footage, natural scenes, or sequences with a lot of dramatic motion.
Slow-motion films are supported by all iPhones, beginning with the 5S model, and the capability gets more robust and more stable with each successive generation. Shooting slow-motion films with your iPhone are addicting and enjoyable, and it adds drama to various settings.
Here is a step-by-step method for filming slow-mo with an iPhone, regardless of model.
Step 1: Launch the Camera app on your iPhone and go to the Slow-Mo effect by sliding from the options above. Change the frame rate on the upper right corner to 120, 240, 720, depending on the iPhone models you’re using.
Step 2: Now, start the recording by clicking the Red Circle in the center or either of the Volume button.
Step 3: After you’re done recording, press the Red Circle again and head towards the Gallery to view the recorded video.

For more details, check: How to make slo-mo video on your iPhone.
Part 6: Tips for Recording Super Slow Motion Video
Although super slow-motion videos are easy to record, they can be challenging for a content creator. But don’t worry, with the following tips, we have got you covered:
Utilize A Tripod
It’s critical to keep your phone as steady as possible when filming in Super Slow-mo since shaking might conflict with your video and hinder it from recognizing motions when set to auto-record. To get the most out of Super Slow-mo, we recommend using a tripod whenever feasible.
You can check these tripods for iPhone
Transition Between Single and Multi-Takes
To boost your chances of catching the ideal timing in Super Slow-mo, your phone allows you to record in Multi-Take mode, which can capture many bursts of Super Slow-mo in one video.
When combined with an auto record, additional Super Slow-mo videos will be captured as much as the focus box senses activity and will end only when you end filming. The manual record works similarly. However, you’ll have to physically hit the trigger each time you wish to record a picture in Super Slow-mo.
As the name indicates, Single-Take will record a single Super Slow-mo clip and then cease recording a moment or two later. Because Multi-Take clips are often more extensive, this could save a large storage capacity.
Readjust the Focus
The focus or auto-recording is tiny by default. Fortunately, you can enlarge it to improve its odds of recognizing movement. To adjust the size of the box, hold it until only its edges are visible, then move any corner from the others to expand the box’s area. Simply tap anywhere outside the borders to verify the adjustment when you’re happy with the size.
Capture in Natural Light
Because of the large number of frames it collects, Super Slow-mo works the best in natural daylight situations. Though not visible to the human eye, indoor lighting, especially LED bulbs and tiny fluorescents, seems to flash at very high rates. Even if the environment is well-lit, Super Slow-mo detects this and shows your subject in a substantially darker tone.
View the Video at Normal Speed
If you wish to watch your Super Slow-mo movies at regular speed, deactivate Super Slow-mo playing by tapping on the option directly below the video. This will give you a greater understanding of your phone’s incredible capacity to bring the world to a halt.
Learn more about : How to Convert normal video to slo-mo video?
Besides the tips mentioned above, you can also watch this video to get some tips and tricks in recording slo-mo video with iPhone.
Conclusion
Super Slow Motion videos are excellent for showcasing the action and conveying tales, and they are also entertaining and straightforward to create. Your only constraints are time and imagination. However, your Android or iPhone’s camera has many more tricks in its sleeve: Live images, time-lapse, Panoramas, and Portrait mode let you express yourself freely!
10 Best Mp3 Visualizers [Windows, Mac, Android, iPhone & Online]
Best Audio Visualizer and Video Editor
Make your music video come alive with Filmora Audio Visualizer. The effect will intelligently match the sound in your video while also adding dynamic effects.
Free Download Free Download Free Download Learn More >
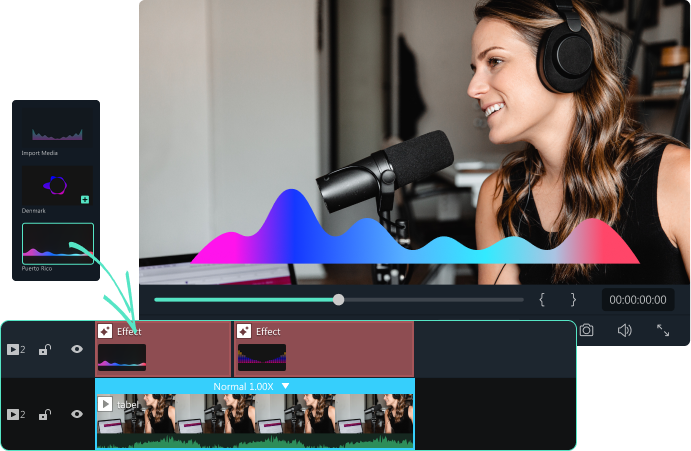
A music visualizer application produces animated graphics based on beats, volume, rhythm, and frequency spectrum. These apps show various animations for various photographs and even provide templates for creating a particular animation. Music visualizers turn music into numbers highlighted in lines, circles, and other visuals using a mathematical formulae-based algorithm.
The 10 best mp3 visualizers for Windows, Mac, Android, iPhone and Online are listed below:
1. Offeo
Supported system: Online
Introduction:
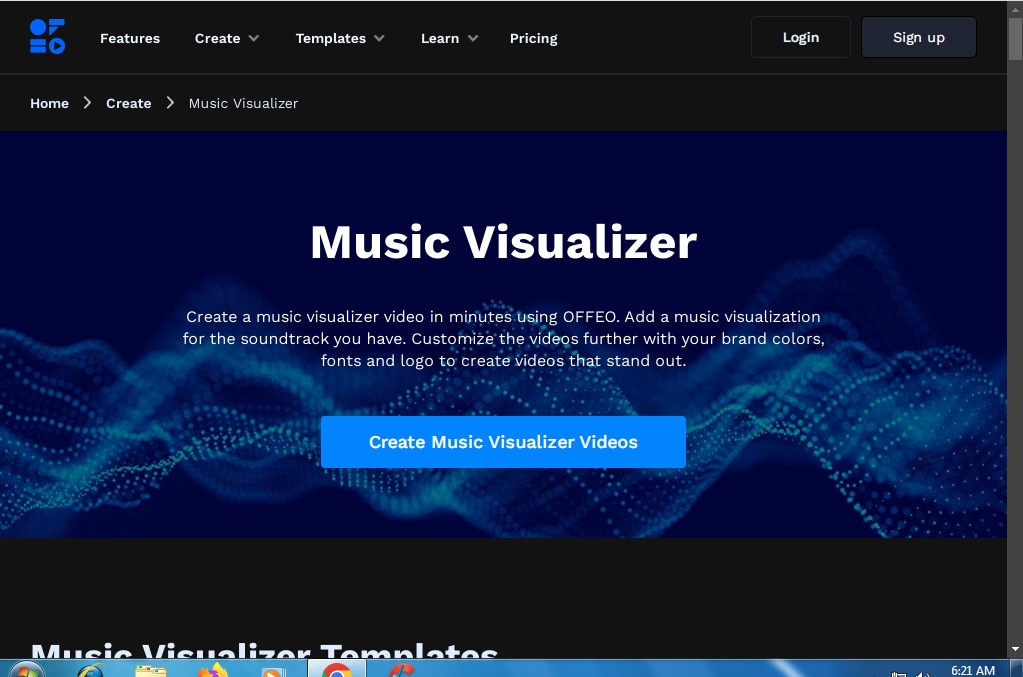
OFFEO is a music visualizer that allows you to generate visuals. In addition, beats and audio tracks can be synced with this application.
Features:
- Assists you in improving your music track.
- Professional design templates are available.
- It has a simple drag-and-drop interface.
- It does not require the installation of any software.
- Each video frame has customizable choices.
Price: Offeo offers a 30-day free trial, and a premium account costs around $19/month.
Cons:
- Most of the templates are for short videos (5-7 seconds).
2. Magic Music Visuals
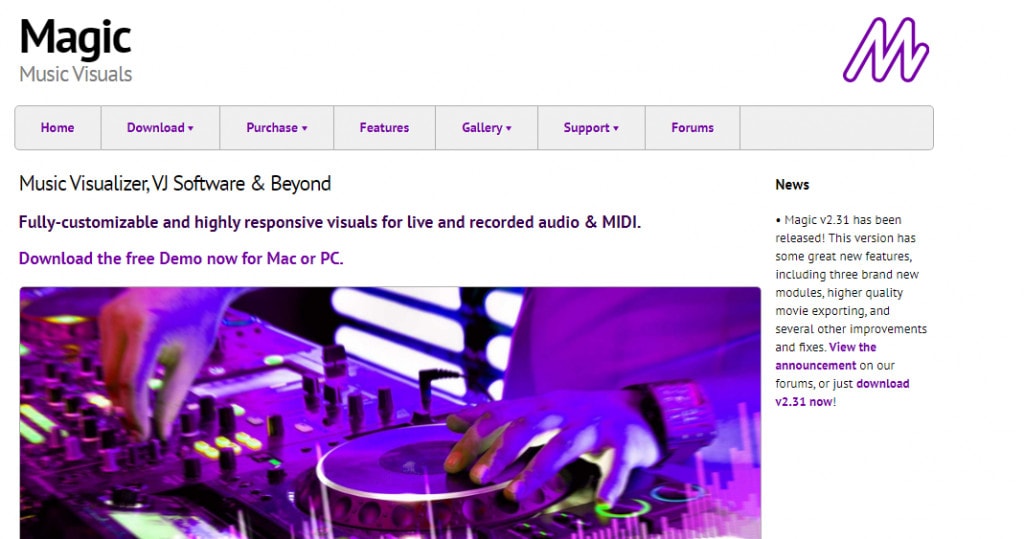
Supported system: Windows
Introduction:
Magic Music Visuals is a powerful audio visualizer for Windows that allows users to create whatever they want. The program is entirely customizable and includes MIDI and live audio capability. In addition, the program generates a variety of designs that spin in different directions depending on the volume and frequency of sound.
Features:
- It shows rotating pictures and 3D models that move to the beat of the music.
- A basic UI makes it simple to use.
- Users can upload cover art.
- Allows for live camera modification in real-time.
Price: A free trial version with nearly full functionality is available, and a $44.95 premium version for one PC.
Cons:
- It requires the ideal software configuration of the system.
3. Musicvid

Supported system: Windows/Mac
Introduction:
A web-based application called Musicvid is another music visualizer for Windows and Mac. It has a long history and is extremely popular all around the world. It enables users to create professional-looking graphics that include sound and animation. Because it is a web-based application, users do not need to install it on their computer; however, they will require a decent internet connection. There are a variety of templates available to aid in the creation process.
Features:
- Chrome and Firefox are supported.
- It includes comprehensive instruction.
- Users can export the final visualization directly from the browser.
Price: $0
Cons:
- Requires fast internet speed to function.
4. Kapwing

Supported system: Windows/Mac
Introduction:
Kapwing is a video editing application that adds a professional-looking waveform to any video. It assists you in changing the color, speed, and position of your waves.
Features:
- Your videos can be shared on any social media platform.
- There are no advertisements in this application.
- The video does not contain any watermarks.
- You can use any browser to see your clips.
- Allows you to include a logo in your video.
- Shapes can be used in your video clips.
Price: Free to use but can be upgraded to PRO at $16/month (Limited time offer).
Cons:
- Although the application can upload 4K UHD videos, it cannot export files simultaneously.
5. AudioVision Music Player
Supported system: Android
Introduction:
This program is a music player that helps you filter music by genres, playlists, or artists and be a great music visualization tool. The music visualizer from AudioVision comes with six different visual skins that are entirely customizable and provide nearly limitless visualization options. For example, you can adjust the Sensitivity, Bar and Border Width, and Color settings to match the music genre you’re now listening to. In addition, the software is only 1.6MB in size, so even if you don’t have a lot of storage space on your phone, you can visualize music and make unique screensavers.
Features:
- It offers a vast collection of customizable options
- User-friendly application with easy to use interface
- Customize sound wave appearance
Price: $0
Cons:
- Difficult to refresh songs
- Poor functionality
6. Alien Worlds - Music Visualizer

Supported system: Android, iOS
Introduction:
If you opt to install this music visualizer on your mobile device, you will undoubtedly be stunning. Choose from 47 radio channels in the Alien Worlds app, which play a variety of music genres such as rock, techno, trance, and ambient. As a result, its musical representations are always one-of-a-kind. Your results will be different each time you use the program. Furthermore, there are over a hundred different settings to personalize and adjust visuals in almost any way you like. To unlock all of the app’s features, you’ll need to upgrade to the $1.99 Premium version.
Features:
- Digital Impulse has 47 radio channels with music styles such as a house, trance, disco, ambient, rock, and techno.
- Use the up and down arrow buttons to adjust the speed of the visual effects.
- The visual effects are generated at random, which means that the effects shown will differ each time the program is used.
Price: The software is free; however, in-app purchases are available.
Cons:
- Lacks variations in tools and limited product quality.
7. Staella
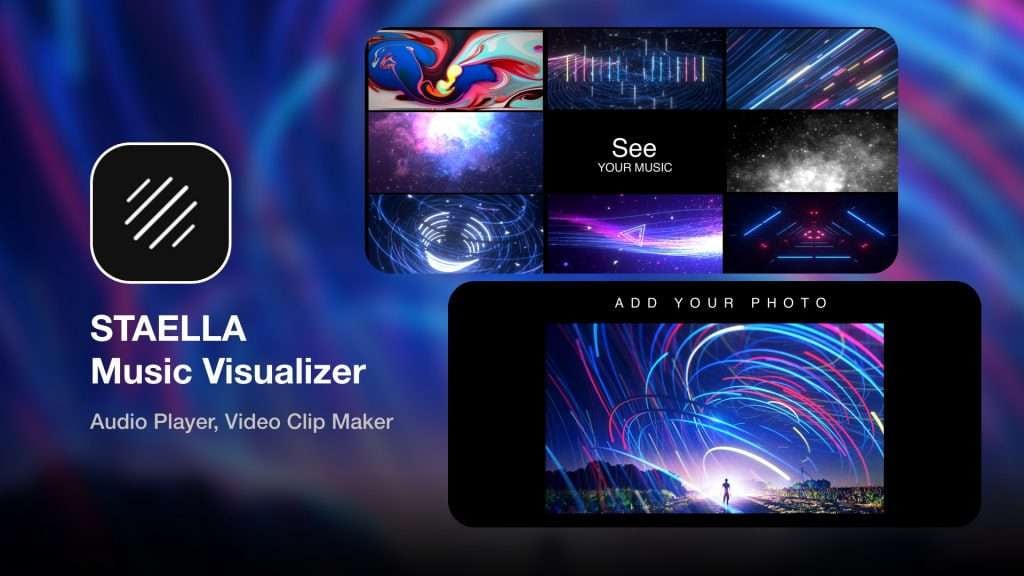
Supported system: iOS
Introduction:
Controlling the noir, hue, and contrast of the colors are just a few of the settings available in the STAELLA app. There are various graphic packages, but you can only get them if you pay for them in-app. STAELLA is incredibly simple to use; all you have to do is choose a song and enjoy the software’s images. The app’s real-time audio-reactive engine generates visuals from sounds exceptionally instantly. If you upgrade to the Pro edition, you’ll record all of your music visualizations and save them as GIF or MOV files.
Features:
- Generate instant sound visuals
- Music Video Maker and Visual Music Player without Editing
- Music and photos can be imported. Visuals that can be changed.
- Audio Reactive System in Real-Time
- Boost your musical experience
Price: The software is free; however, in-app purchases are available.
Cons:
- Derails the music quality
8. Veed
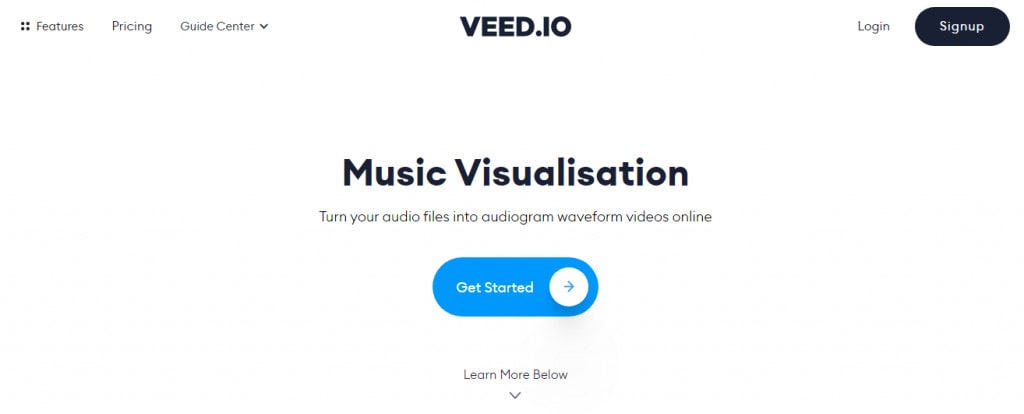
Supported system: Online
Introduction:
Veed, which is an effective way to turn your music into videos with waveform, is next on the list of music visualizer software. The entire procedure is completed online, with the finished product saved in MP4 format. It was created to promote music on social media by adding waveforms, audio spectrums, and audiograms to make it look and sound more engaging.
Features:
- Choose your waveforms and animated audiograms.
- In the final video, add your photos or sketches.
- A cloud-based online application.
- Share your material on social media sites like Twitter, Instagram, and Facebook.
Price: Limited version is free, basic is $12, and Pro is $24 per month.
Cons:
- Limited options are available in the free plan.
9. Renderforest Music Visualizer
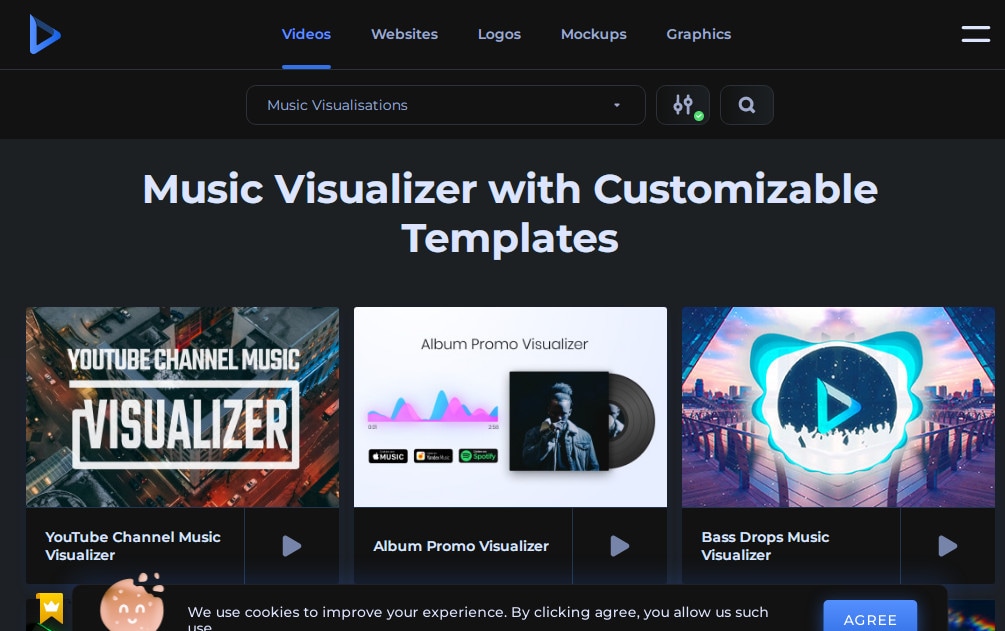
Supported system: Windows/Mac
Introduction:
Renderforest is a free music visualizer that makes it simple to produce visually appealing material. It’s a web-based application that works with a variety of browsers. YouTubers use it to create professional-looking intros and outros. There are numerous visualization templates from which to pick.
Features:
- It has a large selection of visualization templates.
- This online music visualizer application sends you your final video through email.
- Create professional YouTube channel intros and outros.
- Animations and presentations that explain things.
- Business video editing tools that save you time.
- Use commercial videos or upload your video files.
Price: With limited possibilities, it’s free. Individualized plans are offered for a fee.
Cons:
- Limited styles when creating audio visualizations.
10. Project M - Music Visualizer

Supported system: Android/iOs
Introduction:
One notable difference exists between the iOS and Android versions of the ProjectM app. The iOS version of the app has a media player; however, the Android version does not. Regardless, both program versions have excellent audio visualization features that let you generate images from a wide range of music types. As a result, ProjectM is one of the most excellent music visualization apps for Android and iOS.
Features:
- It has hundreds of visual effects, multi-touch interactive visualizations, and Chromecast compatibility.
- Various additional modes available, like the Immersive Option for KitKat smartphones
- Live Wallpaper mode, which generates animated wallpapers for your Smartphone.
- Visual Effect Browser & Search
- Auto-detects sound from Microphone and Music Players
Price: On the Google Play Store, it’s free, but there are adverts; on the App Store, it’s $2.99.
Cons:
- There are no presets included with the projectM library.

A music visualizer application produces animated graphics based on beats, volume, rhythm, and frequency spectrum. These apps show various animations for various photographs and even provide templates for creating a particular animation. Music visualizers turn music into numbers highlighted in lines, circles, and other visuals using a mathematical formulae-based algorithm.
The 10 best mp3 visualizers for Windows, Mac, Android, iPhone and Online are listed below:
1. Offeo

Supported system: Online
Introduction:
OFFEO is a music visualizer that allows you to generate visuals. In addition, beats and audio tracks can be synced with this application.
Features:
- Assists you in improving your music track.
- Professional design templates are available.
- It has a simple drag-and-drop interface.
- It does not require the installation of any software.
- Each video frame has customizable choices.
Price: Offeo offers a 30-day free trial, and a premium account costs around $19/month.
Cons:
- Most of the templates are for short videos (5-7 seconds).
2. Magic Music Visuals

Supported system: Windows
Introduction:
Magic Music Visuals is a powerful audio visualizer for Windows that allows users to create whatever they want. The program is entirely customizable and includes MIDI and live audio capability. In addition, the program generates a variety of designs that spin in different directions depending on the volume and frequency of sound.
Features:
- It shows rotating pictures and 3D models that move to the beat of the music.
- A basic UI makes it simple to use.
- Users can upload cover art.
- Allows for live camera modification in real-time.
Price: A free trial version with nearly full functionality is available, and a $44.95 premium version for one PC.
Cons:
- It requires the ideal software configuration of the system.
3. Musicvid

Supported system: Windows/Mac
Introduction:
A web-based application called Musicvid is another music visualizer for Windows and Mac. It has a long history and is extremely popular all around the world. It enables users to create professional-looking graphics that include sound and animation. Because it is a web-based application, users do not need to install it on their computer; however, they will require a decent internet connection. There are a variety of templates available to aid in the creation process.
Features:
- Chrome and Firefox are supported.
- It includes comprehensive instruction.
- Users can export the final visualization directly from the browser.
Price: $0
Cons:
- Requires fast internet speed to function.
4. Kapwing

Supported system: Windows/Mac
Introduction:
Kapwing is a video editing application that adds a professional-looking waveform to any video. It assists you in changing the color, speed, and position of your waves.
Features:
- Your videos can be shared on any social media platform.
- There are no advertisements in this application.
- The video does not contain any watermarks.
- You can use any browser to see your clips.
- Allows you to include a logo in your video.
- Shapes can be used in your video clips.
Price: Free to use but can be upgraded to PRO at $16/month (Limited time offer).
Cons:
- Although the application can upload 4K UHD videos, it cannot export files simultaneously.
5. AudioVision Music Player
Supported system: Android
Introduction:
This program is a music player that helps you filter music by genres, playlists, or artists and be a great music visualization tool. The music visualizer from AudioVision comes with six different visual skins that are entirely customizable and provide nearly limitless visualization options. For example, you can adjust the Sensitivity, Bar and Border Width, and Color settings to match the music genre you’re now listening to. In addition, the software is only 1.6MB in size, so even if you don’t have a lot of storage space on your phone, you can visualize music and make unique screensavers.
Features:
- It offers a vast collection of customizable options
- User-friendly application with easy to use interface
- Customize sound wave appearance
Price: $0
Cons:
- Difficult to refresh songs
- Poor functionality
6. Alien Worlds - Music Visualizer

Supported system: Android, iOS
Introduction:
If you opt to install this music visualizer on your mobile device, you will undoubtedly be stunning. Choose from 47 radio channels in the Alien Worlds app, which play a variety of music genres such as rock, techno, trance, and ambient. As a result, its musical representations are always one-of-a-kind. Your results will be different each time you use the program. Furthermore, there are over a hundred different settings to personalize and adjust visuals in almost any way you like. To unlock all of the app’s features, you’ll need to upgrade to the $1.99 Premium version.
Features:
- Digital Impulse has 47 radio channels with music styles such as a house, trance, disco, ambient, rock, and techno.
- Use the up and down arrow buttons to adjust the speed of the visual effects.
- The visual effects are generated at random, which means that the effects shown will differ each time the program is used.
Price: The software is free; however, in-app purchases are available.
Cons:
- Lacks variations in tools and limited product quality.
7. Staella

Supported system: iOS
Introduction:
Controlling the noir, hue, and contrast of the colors are just a few of the settings available in the STAELLA app. There are various graphic packages, but you can only get them if you pay for them in-app. STAELLA is incredibly simple to use; all you have to do is choose a song and enjoy the software’s images. The app’s real-time audio-reactive engine generates visuals from sounds exceptionally instantly. If you upgrade to the Pro edition, you’ll record all of your music visualizations and save them as GIF or MOV files.
Features:
- Generate instant sound visuals
- Music Video Maker and Visual Music Player without Editing
- Music and photos can be imported. Visuals that can be changed.
- Audio Reactive System in Real-Time
- Boost your musical experience
Price: The software is free; however, in-app purchases are available.
Cons:
- Derails the music quality
8. Veed

Supported system: Online
Introduction:
Veed, which is an effective way to turn your music into videos with waveform, is next on the list of music visualizer software. The entire procedure is completed online, with the finished product saved in MP4 format. It was created to promote music on social media by adding waveforms, audio spectrums, and audiograms to make it look and sound more engaging.
Features:
- Choose your waveforms and animated audiograms.
- In the final video, add your photos or sketches.
- A cloud-based online application.
- Share your material on social media sites like Twitter, Instagram, and Facebook.
Price: Limited version is free, basic is $12, and Pro is $24 per month.
Cons:
- Limited options are available in the free plan.
9. Renderforest Music Visualizer

Supported system: Windows/Mac
Introduction:
Renderforest is a free music visualizer that makes it simple to produce visually appealing material. It’s a web-based application that works with a variety of browsers. YouTubers use it to create professional-looking intros and outros. There are numerous visualization templates from which to pick.
Features:
- It has a large selection of visualization templates.
- This online music visualizer application sends you your final video through email.
- Create professional YouTube channel intros and outros.
- Animations and presentations that explain things.
- Business video editing tools that save you time.
- Use commercial videos or upload your video files.
Price: With limited possibilities, it’s free. Individualized plans are offered for a fee.
Cons:
- Limited styles when creating audio visualizations.
10. Project M - Music Visualizer

Supported system: Android/iOs
Introduction:
One notable difference exists between the iOS and Android versions of the ProjectM app. The iOS version of the app has a media player; however, the Android version does not. Regardless, both program versions have excellent audio visualization features that let you generate images from a wide range of music types. As a result, ProjectM is one of the most excellent music visualization apps for Android and iOS.
Features:
- It has hundreds of visual effects, multi-touch interactive visualizations, and Chromecast compatibility.
- Various additional modes available, like the Immersive Option for KitKat smartphones
- Live Wallpaper mode, which generates animated wallpapers for your Smartphone.
- Visual Effect Browser & Search
- Auto-detects sound from Microphone and Music Players
Price: On the Google Play Store, it’s free, but there are adverts; on the App Store, it’s $2.99.
Cons:
- There are no presets included with the projectM library.

A music visualizer application produces animated graphics based on beats, volume, rhythm, and frequency spectrum. These apps show various animations for various photographs and even provide templates for creating a particular animation. Music visualizers turn music into numbers highlighted in lines, circles, and other visuals using a mathematical formulae-based algorithm.
The 10 best mp3 visualizers for Windows, Mac, Android, iPhone and Online are listed below:
1. Offeo

Supported system: Online
Introduction:
OFFEO is a music visualizer that allows you to generate visuals. In addition, beats and audio tracks can be synced with this application.
Features:
- Assists you in improving your music track.
- Professional design templates are available.
- It has a simple drag-and-drop interface.
- It does not require the installation of any software.
- Each video frame has customizable choices.
Price: Offeo offers a 30-day free trial, and a premium account costs around $19/month.
Cons:
- Most of the templates are for short videos (5-7 seconds).
2. Magic Music Visuals

Supported system: Windows
Introduction:
Magic Music Visuals is a powerful audio visualizer for Windows that allows users to create whatever they want. The program is entirely customizable and includes MIDI and live audio capability. In addition, the program generates a variety of designs that spin in different directions depending on the volume and frequency of sound.
Features:
- It shows rotating pictures and 3D models that move to the beat of the music.
- A basic UI makes it simple to use.
- Users can upload cover art.
- Allows for live camera modification in real-time.
Price: A free trial version with nearly full functionality is available, and a $44.95 premium version for one PC.
Cons:
- It requires the ideal software configuration of the system.
3. Musicvid

Supported system: Windows/Mac
Introduction:
A web-based application called Musicvid is another music visualizer for Windows and Mac. It has a long history and is extremely popular all around the world. It enables users to create professional-looking graphics that include sound and animation. Because it is a web-based application, users do not need to install it on their computer; however, they will require a decent internet connection. There are a variety of templates available to aid in the creation process.
Features:
- Chrome and Firefox are supported.
- It includes comprehensive instruction.
- Users can export the final visualization directly from the browser.
Price: $0
Cons:
- Requires fast internet speed to function.
4. Kapwing

Supported system: Windows/Mac
Introduction:
Kapwing is a video editing application that adds a professional-looking waveform to any video. It assists you in changing the color, speed, and position of your waves.
Features:
- Your videos can be shared on any social media platform.
- There are no advertisements in this application.
- The video does not contain any watermarks.
- You can use any browser to see your clips.
- Allows you to include a logo in your video.
- Shapes can be used in your video clips.
Price: Free to use but can be upgraded to PRO at $16/month (Limited time offer).
Cons:
- Although the application can upload 4K UHD videos, it cannot export files simultaneously.
5. AudioVision Music Player
Supported system: Android
Introduction:
This program is a music player that helps you filter music by genres, playlists, or artists and be a great music visualization tool. The music visualizer from AudioVision comes with six different visual skins that are entirely customizable and provide nearly limitless visualization options. For example, you can adjust the Sensitivity, Bar and Border Width, and Color settings to match the music genre you’re now listening to. In addition, the software is only 1.6MB in size, so even if you don’t have a lot of storage space on your phone, you can visualize music and make unique screensavers.
Features:
- It offers a vast collection of customizable options
- User-friendly application with easy to use interface
- Customize sound wave appearance
Price: $0
Cons:
- Difficult to refresh songs
- Poor functionality
6. Alien Worlds - Music Visualizer

Supported system: Android, iOS
Introduction:
If you opt to install this music visualizer on your mobile device, you will undoubtedly be stunning. Choose from 47 radio channels in the Alien Worlds app, which play a variety of music genres such as rock, techno, trance, and ambient. As a result, its musical representations are always one-of-a-kind. Your results will be different each time you use the program. Furthermore, there are over a hundred different settings to personalize and adjust visuals in almost any way you like. To unlock all of the app’s features, you’ll need to upgrade to the $1.99 Premium version.
Features:
- Digital Impulse has 47 radio channels with music styles such as a house, trance, disco, ambient, rock, and techno.
- Use the up and down arrow buttons to adjust the speed of the visual effects.
- The visual effects are generated at random, which means that the effects shown will differ each time the program is used.
Price: The software is free; however, in-app purchases are available.
Cons:
- Lacks variations in tools and limited product quality.
7. Staella

Supported system: iOS
Introduction:
Controlling the noir, hue, and contrast of the colors are just a few of the settings available in the STAELLA app. There are various graphic packages, but you can only get them if you pay for them in-app. STAELLA is incredibly simple to use; all you have to do is choose a song and enjoy the software’s images. The app’s real-time audio-reactive engine generates visuals from sounds exceptionally instantly. If you upgrade to the Pro edition, you’ll record all of your music visualizations and save them as GIF or MOV files.
Features:
- Generate instant sound visuals
- Music Video Maker and Visual Music Player without Editing
- Music and photos can be imported. Visuals that can be changed.
- Audio Reactive System in Real-Time
- Boost your musical experience
Price: The software is free; however, in-app purchases are available.
Cons:
- Derails the music quality
8. Veed

Supported system: Online
Introduction:
Veed, which is an effective way to turn your music into videos with waveform, is next on the list of music visualizer software. The entire procedure is completed online, with the finished product saved in MP4 format. It was created to promote music on social media by adding waveforms, audio spectrums, and audiograms to make it look and sound more engaging.
Features:
- Choose your waveforms and animated audiograms.
- In the final video, add your photos or sketches.
- A cloud-based online application.
- Share your material on social media sites like Twitter, Instagram, and Facebook.
Price: Limited version is free, basic is $12, and Pro is $24 per month.
Cons:
- Limited options are available in the free plan.
9. Renderforest Music Visualizer

Supported system: Windows/Mac
Introduction:
Renderforest is a free music visualizer that makes it simple to produce visually appealing material. It’s a web-based application that works with a variety of browsers. YouTubers use it to create professional-looking intros and outros. There are numerous visualization templates from which to pick.
Features:
- It has a large selection of visualization templates.
- This online music visualizer application sends you your final video through email.
- Create professional YouTube channel intros and outros.
- Animations and presentations that explain things.
- Business video editing tools that save you time.
- Use commercial videos or upload your video files.
Price: With limited possibilities, it’s free. Individualized plans are offered for a fee.
Cons:
- Limited styles when creating audio visualizations.
10. Project M - Music Visualizer

Supported system: Android/iOs
Introduction:
One notable difference exists between the iOS and Android versions of the ProjectM app. The iOS version of the app has a media player; however, the Android version does not. Regardless, both program versions have excellent audio visualization features that let you generate images from a wide range of music types. As a result, ProjectM is one of the most excellent music visualization apps for Android and iOS.
Features:
- It has hundreds of visual effects, multi-touch interactive visualizations, and Chromecast compatibility.
- Various additional modes available, like the Immersive Option for KitKat smartphones
- Live Wallpaper mode, which generates animated wallpapers for your Smartphone.
- Visual Effect Browser & Search
- Auto-detects sound from Microphone and Music Players
Price: On the Google Play Store, it’s free, but there are adverts; on the App Store, it’s $2.99.
Cons:
- There are no presets included with the projectM library.

A music visualizer application produces animated graphics based on beats, volume, rhythm, and frequency spectrum. These apps show various animations for various photographs and even provide templates for creating a particular animation. Music visualizers turn music into numbers highlighted in lines, circles, and other visuals using a mathematical formulae-based algorithm.
The 10 best mp3 visualizers for Windows, Mac, Android, iPhone and Online are listed below:
1. Offeo

Supported system: Online
Introduction:
OFFEO is a music visualizer that allows you to generate visuals. In addition, beats and audio tracks can be synced with this application.
Features:
- Assists you in improving your music track.
- Professional design templates are available.
- It has a simple drag-and-drop interface.
- It does not require the installation of any software.
- Each video frame has customizable choices.
Price: Offeo offers a 30-day free trial, and a premium account costs around $19/month.
Cons:
- Most of the templates are for short videos (5-7 seconds).
2. Magic Music Visuals

Supported system: Windows
Introduction:
Magic Music Visuals is a powerful audio visualizer for Windows that allows users to create whatever they want. The program is entirely customizable and includes MIDI and live audio capability. In addition, the program generates a variety of designs that spin in different directions depending on the volume and frequency of sound.
Features:
- It shows rotating pictures and 3D models that move to the beat of the music.
- A basic UI makes it simple to use.
- Users can upload cover art.
- Allows for live camera modification in real-time.
Price: A free trial version with nearly full functionality is available, and a $44.95 premium version for one PC.
Cons:
- It requires the ideal software configuration of the system.
3. Musicvid

Supported system: Windows/Mac
Introduction:
A web-based application called Musicvid is another music visualizer for Windows and Mac. It has a long history and is extremely popular all around the world. It enables users to create professional-looking graphics that include sound and animation. Because it is a web-based application, users do not need to install it on their computer; however, they will require a decent internet connection. There are a variety of templates available to aid in the creation process.
Features:
- Chrome and Firefox are supported.
- It includes comprehensive instruction.
- Users can export the final visualization directly from the browser.
Price: $0
Cons:
- Requires fast internet speed to function.
4. Kapwing

Supported system: Windows/Mac
Introduction:
Kapwing is a video editing application that adds a professional-looking waveform to any video. It assists you in changing the color, speed, and position of your waves.
Features:
- Your videos can be shared on any social media platform.
- There are no advertisements in this application.
- The video does not contain any watermarks.
- You can use any browser to see your clips.
- Allows you to include a logo in your video.
- Shapes can be used in your video clips.
Price: Free to use but can be upgraded to PRO at $16/month (Limited time offer).
Cons:
- Although the application can upload 4K UHD videos, it cannot export files simultaneously.
5. AudioVision Music Player
Supported system: Android
Introduction:
This program is a music player that helps you filter music by genres, playlists, or artists and be a great music visualization tool. The music visualizer from AudioVision comes with six different visual skins that are entirely customizable and provide nearly limitless visualization options. For example, you can adjust the Sensitivity, Bar and Border Width, and Color settings to match the music genre you’re now listening to. In addition, the software is only 1.6MB in size, so even if you don’t have a lot of storage space on your phone, you can visualize music and make unique screensavers.
Features:
- It offers a vast collection of customizable options
- User-friendly application with easy to use interface
- Customize sound wave appearance
Price: $0
Cons:
- Difficult to refresh songs
- Poor functionality
6. Alien Worlds - Music Visualizer

Supported system: Android, iOS
Introduction:
If you opt to install this music visualizer on your mobile device, you will undoubtedly be stunning. Choose from 47 radio channels in the Alien Worlds app, which play a variety of music genres such as rock, techno, trance, and ambient. As a result, its musical representations are always one-of-a-kind. Your results will be different each time you use the program. Furthermore, there are over a hundred different settings to personalize and adjust visuals in almost any way you like. To unlock all of the app’s features, you’ll need to upgrade to the $1.99 Premium version.
Features:
- Digital Impulse has 47 radio channels with music styles such as a house, trance, disco, ambient, rock, and techno.
- Use the up and down arrow buttons to adjust the speed of the visual effects.
- The visual effects are generated at random, which means that the effects shown will differ each time the program is used.
Price: The software is free; however, in-app purchases are available.
Cons:
- Lacks variations in tools and limited product quality.
7. Staella

Supported system: iOS
Introduction:
Controlling the noir, hue, and contrast of the colors are just a few of the settings available in the STAELLA app. There are various graphic packages, but you can only get them if you pay for them in-app. STAELLA is incredibly simple to use; all you have to do is choose a song and enjoy the software’s images. The app’s real-time audio-reactive engine generates visuals from sounds exceptionally instantly. If you upgrade to the Pro edition, you’ll record all of your music visualizations and save them as GIF or MOV files.
Features:
- Generate instant sound visuals
- Music Video Maker and Visual Music Player without Editing
- Music and photos can be imported. Visuals that can be changed.
- Audio Reactive System in Real-Time
- Boost your musical experience
Price: The software is free; however, in-app purchases are available.
Cons:
- Derails the music quality
8. Veed

Supported system: Online
Introduction:
Veed, which is an effective way to turn your music into videos with waveform, is next on the list of music visualizer software. The entire procedure is completed online, with the finished product saved in MP4 format. It was created to promote music on social media by adding waveforms, audio spectrums, and audiograms to make it look and sound more engaging.
Features:
- Choose your waveforms and animated audiograms.
- In the final video, add your photos or sketches.
- A cloud-based online application.
- Share your material on social media sites like Twitter, Instagram, and Facebook.
Price: Limited version is free, basic is $12, and Pro is $24 per month.
Cons:
- Limited options are available in the free plan.
9. Renderforest Music Visualizer

Supported system: Windows/Mac
Introduction:
Renderforest is a free music visualizer that makes it simple to produce visually appealing material. It’s a web-based application that works with a variety of browsers. YouTubers use it to create professional-looking intros and outros. There are numerous visualization templates from which to pick.
Features:
- It has a large selection of visualization templates.
- This online music visualizer application sends you your final video through email.
- Create professional YouTube channel intros and outros.
- Animations and presentations that explain things.
- Business video editing tools that save you time.
- Use commercial videos or upload your video files.
Price: With limited possibilities, it’s free. Individualized plans are offered for a fee.
Cons:
- Limited styles when creating audio visualizations.
10. Project M - Music Visualizer

Supported system: Android/iOs
Introduction:
One notable difference exists between the iOS and Android versions of the ProjectM app. The iOS version of the app has a media player; however, the Android version does not. Regardless, both program versions have excellent audio visualization features that let you generate images from a wide range of music types. As a result, ProjectM is one of the most excellent music visualization apps for Android and iOS.
Features:
- It has hundreds of visual effects, multi-touch interactive visualizations, and Chromecast compatibility.
- Various additional modes available, like the Immersive Option for KitKat smartphones
- Live Wallpaper mode, which generates animated wallpapers for your Smartphone.
- Visual Effect Browser & Search
- Auto-detects sound from Microphone and Music Players
Price: On the Google Play Store, it’s free, but there are adverts; on the App Store, it’s $2.99.
Cons:
- There are no presets included with the projectM library.
Also read:
- Updated In 2024, Slow-Motion Innovation with Sony S&Q Feature
- What Is TS Format and How To Play TS Files?
- In 2024, The After-Effects Match Colour Feature Bestows Numerous Benefits. Thus, in the Following Discussion, We Will Discuss This Feature and an Equally Proficient Efficient Alternative Tool for Colour Matching
- Working Out All Important Details of Slowing Down Video in After Effects
- Updated Top 5 Best Video Denoisers
- Learn to Merge Clips in DaVinci Resolve with Simple Steps for 2024
- Updated In 2024, Final Cut Pro - How to Download and Install It
- In 2024, Do You Know About some Efficient Slow-Motion Video Editors? Read This Article to Find Out the Best Slow-Motion Video Editing Tools that You Can Try
- 6 Ways to Mimic Professional Filming Gears for 2024
- Updated In 2024, How Long Does It Take To Edit Videos
- Top 7 Best GoPro Video Editors for Mac
- Things You Need to Know About Color Grading in Photography
- New Are You Looking for Different Solutions to Add VHS Effects to Your Videos? Dont Worry; This Article Will Provide Easy Solutions to Apply VHS
- In Todays Article, We Are Going to Show You How Adding a Simple Lower Third to Your Video Can Add a Degree of Professionalism and Polish to Your Videos While Giving It a Higher Perceived Value
- New In 2024, Best Image (JPG/PNG) to GIF Converters
- 2024 Approved How to Resize FLV Videos EfficientlyWindows, Mac, Android, iPhone & Online
- Updated In 2024, How to Create Loop Videos with Filmora
- Updated How to Add Filters on iMovie
- Updated 2024 Approved Comprehensive Guide to Add LUTs in Premiere Pro with Ease
- How to Speed Up Video on Instagram Reels, In 2024
- 2024 Approved Complete How-To Tutorials of Kapwing Collage Maker
- Updated Have You Ever Watched a Movie Where You Felt the Filmmakers Left You Hanging? Yea, Thats What Freeze Frame Does. Here We Will Enlighten You on What It Is, Freeze Frame Examples Where It Has Been Helpful to Drive Our Point Home
- Updated Creating Flawless Slow-Motion Videos Is Every Content Creators Dream. Learn About DaVinci Resolve Slow-Motion Video Creation, Amongst Other Tools
- New How to Add Text Behind Objects in Video
- New Best Tools To Create Blend Image Collage for 2024
- New 2024 Approved A Complete Guide to the Best Brand Story Videos |2023|
- New In 2024, Create Motion Effect with Path Blur In Photoshop
- New KineMaster Templates 101 How to Get the Most Out of Video Templates
- Updated In 2024, How to Create The Best Video Collages ?
- 2024 Approved Cropping Videos in Final Cut Pro Step by Step
- In 2024, How to Turn Text Into a Podcast
- New How to Resize FLV Video EfficientlyWindows, Mac, Android, iPhone &
- Updated TOP 10 Types of Video Framing From Novice to Master for 2024
- New In 2024, Hitfilm Express - A Guide to Download, Install, Key Features
- Basic Introduction for LumaFusion Color Grading for 2024
- In 2024, How to Make an Instant Slideshow on Mac
- Updated How to Add Zoom Blur Effect In Photoshop
- In 2024, What You Want To Know About Two-Factor Authentication for iCloud On your iPhone X
- In 2024, How to Change Location On Facebook Dating for your Realme 11X 5G | Dr.fone
- 3 Effective Methods to Fake GPS location on Android For your Infinix Note 30 VIP Racing Edition | Dr.fone
- How to Downgrade iPhone 6 Plus without Losing Data? | Dr.fone
- Complete Tutorial for Samsung Galaxy S24 Ultra Hard Reset | Dr.fone
- In 2024, A Guide Realme GT Neo 5 Wireless and Wired Screen Mirroring | Dr.fone
- Updated In 2024, AI Voice | Online
- New In 2024, Top 4 Elon Musk Voice Generator Programs to Make You Sound Like the Billionaire
- New Distracted Boyfriend Meme Generator
- In 2024, Top 10 Telegram Spy Tools On OnePlus Nord CE 3 5G for Parents | Dr.fone
- In 2024, Why Apple Account Disabled From your Apple iPhone 14 Plus? How to Fix
- Will the iPogo Get You Banned and How to Solve It On Oppo Find X7 Ultra | Dr.fone
- How Can We Bypass Asus ROG Phone 8 Pro FRP?
- In 2024, Reasons why Pokémon GPS does not Work On Motorola Moto G84 5G? | Dr.fone
- Epic Formula to Animate Photos From These 10 Animate Pictures App
- 2024 Approved Have You Seen the Facebook Cartoon App Everyones Using Recently
- In 2024, How Can We Bypass Vivo V27 FRP?
- Title: How to Create Your Own LUTs for Your Video with Filmora
- Author: Chloe
- Created at : 2024-05-20 03:37:28
- Updated at : 2024-05-21 03:37:28
- Link: https://ai-editing-video.techidaily.com/how-to-create-your-own-luts-for-your-video-with-filmora/
- License: This work is licensed under CC BY-NC-SA 4.0.

