
:max_bytes(150000):strip_icc():format(webp)/how-to-use-a-mobile-boarding-pass-eb61458058f44011ad7ed012566127e4.jpg)
How to Denoise in Final Cut Pro – Reduce Video and Audio Noise
How to Denoise in Final Cut Pro – Reduce Video and Audio Noise
Whenever it comes to the term denoise, we usually get kind of “lost in translation” – does it mean to remove or reduce just the background noise in terms of audio, or does it intend noise effect on the actual scene which we see visually? Anyway, using video editors, denoising is possible in both ways. And why should we denoise at all? – to find out, we will touch upon both issues, and learn how to do those two things in Final Cut Pro.
How to remove background noise in Final Cut Pro?
It doesn’t really matter if you are preparing a video for youtube, a podcast, or any other content with audio in it – for your listeners to be engaged, you need a clear audio, but sometimes that is not the case. You might even find unnecessary background noise after recording the video or audio, and it can be really annoying – that kind of recording gives your audio tracks an unprofessional touch, which can lead to disengaged listeners, the viewers who just don’t want to listen to it anymore. But it’s always possible to turn the tables – and for it, using video editors might really give us a hand. So, Final Cut Pro, which is developed only for Macs (so, you will not be able to use this software on the PC), can solve this problem for you.
So, if you are using Final Cut Pro 10.6, it’s possible to achieve your goal without using any plug-ins. In such a case, there are special effects to use. First of all, let us say that you have an audio file which you want to be corrected because it has some echo, hum, background noise; so you import that one into the programme, namely, timeline.

You will need to first use Equalatization, which is under the Audio Enhancements.

You will need to check the square that opens the equalizer and shows graphics for it. The high frequencies are on the right, and the low ones you will find on the left. Lower the highs and raise the points a little on the left side.

Next step would be to level out the lows and highs of the voice using a Compressor. You will find this effect in Installed Effects, which you need to drag and drop on the audio, and it will raise the whispers and lower the shouts in the audio.

Some background noise will still be there, so you then can find Channel EQ effect you will find in the effects. You need to drag it on the clip, then click on the equalize button in the inspector, and this time, reduce the lower levels on the left, while you also lower the highs on the right.

Lastly, you will need to use the Noise Gate effect. This will cut out all of the sounds between words, so when someone in the audio is not speaking, there will be no background noise at all.

In case this kind of cutting noise out doesn’t sound natural, you can look into Noise Gate Parameters and concentrate on two of them – reduction and release. If you drag the latter right, the noise will raise, and reduction will also raise noise a little, in order to reduce the clipping.
How to denoise a video in Final Cut Pro?
But what is noise in terms of videos? It means that the video is not clear, but instead, the clip has grains on it, which is not so pleasant to see (unless you use noise/grain effect with some purpose!). the noise usually appear when the shot was taken in an environment with not enough white, or, in other cases, when the video was taken with small-sensory equipment, for example, smartphone or action camera.
And Final Cut Pro is one of the video editors where you can remove or reduce the noise and make your footage look clearer than it would have been originally, and it will guarantee that people who are interested and watch your clip will have a better experience. So, let’s learn step by step how to denoise the video in our beloved Final Cut Pro, which added this feature only starting from Final Cut Pro 10.4.4 – it means that before, the task was only done by using some expensive plug-ins, but starting from this version of the program, the software has video noise reduction effect itself.
So, choose the video which has some noise and grain and you wish to edit. Bring it in the program, and click on it in the timeline, in order to select it. The video should appear in the viewer, and you will be able to see the noise right away or whenever you zoom in a little. Then, you will need to find the Effects – you can just use the shortcut and click on Command and 5, or find the panel in the top-right corner of the timeline. Whenever Effects appear, you will need to select the Basic category, and then double-click the icon to apply the noise reduction filter, and close the window. It might take a while to analyze the clip for noise.


In the inspector, you will find the controls for noise reduction, which only include the Amount and Sharpness.

You might as well boost the amount to high, then you can take a look at the image to evaluate the result. One way to do the last step is to uncheck the box next to the Noise Reduction as well, which will disable the filter until you check the box again.
You can also change the Sharpness to Medium, which will compensate for the soft look the effect produces.
And, there is also a noise reduction effect dedicated to 360 viewers, which is called 360 Noise Reduction. As you can see, the effect removes a lot of noise and makes the grainy video look clearer and more enjoyable, besides, if you move around the sphere in the viewer, the effect seems quite seamless!


Bonus tip: how to remove audio noise in video with Filmora
In case you don’t own Mac or just want to operate in another computer program, then Wondershare Filmora would make a great alternative – it’s one of the software that can help you get rid of the background noise. How to do it there? Follow this guideline:
First off, of course, you need to drag and drop the video into the timeline. Then, in order to edit the audio of the video separately, you’ll need to right-click on the video and find Detach Audio.

Double-clicking on the audio track in the sequence will show the editing panel, where you can find – Remove background noise, which, as it is obvious, will remove the noise directly.

So, in this article, we learned how to denoise in Final Cut Pro – both in terms of audio background noise, and noise and grain on the video, and we learned how to get rid of audio noise in Wondershare Filmora in the easiest and fastest way!
You will need to first use Equalatization, which is under the Audio Enhancements.
You will need to check the square that opens the equalizer and shows graphics for it. The high frequencies are on the right, and the low ones you will find on the left. Lower the highs and raise the points a little on the left side.
Next step would be to level out the lows and highs of the voice using a Compressor. You will find this effect in Installed Effects, which you need to drag and drop on the audio, and it will raise the whispers and lower the shouts in the audio.
Some background noise will still be there, so you then can find Channel EQ effect you will find in the effects. You need to drag it on the clip, then click on the equalize button in the inspector, and this time, reduce the lower levels on the left, while you also lower the highs on the right.
Lastly, you will need to use the Noise Gate effect. This will cut out all of the sounds between words, so when someone in the audio is not speaking, there will be no background noise at all.
In case this kind of cutting noise out doesn’t sound natural, you can look into Noise Gate Parameters and concentrate on two of them – reduction and release. If you drag the latter right, the noise will raise, and reduction will also raise noise a little, in order to reduce the clipping.
How to denoise a video in Final Cut Pro?
But what is noise in terms of videos? It means that the video is not clear, but instead, the clip has grains on it, which is not so pleasant to see (unless you use noise/grain effect with some purpose!). the noise usually appear when the shot was taken in an environment with not enough white, or, in other cases, when the video was taken with small-sensory equipment, for example, smartphone or action camera.
And Final Cut Pro is one of the video editors where you can remove or reduce the noise and make your footage look clearer than it would have been originally, and it will guarantee that people who are interested and watch your clip will have a better experience. So, let’s learn step by step how to denoise the video in our beloved Final Cut Pro, which added this feature only starting from Final Cut Pro 10.4.4 – it means that before, the task was only done by using some expensive plug-ins, but starting from this version of the program, the software has video noise reduction effect itself.
So, choose the video which has some noise and grain and you wish to edit. Bring it in the program, and click on it in the timeline, in order to select it. The video should appear in the viewer, and you will be able to see the noise right away or whenever you zoom in a little. Then, you will need to find the Effects – you can just use the shortcut and click on Command and 5, or find the panel in the top-right corner of the timeline. Whenever Effects appear, you will need to select the Basic category, and then double-click the icon to apply the noise reduction filter, and close the window. It might take a while to analyze the clip for noise.
In the inspector, you will find the controls for noise reduction, which only include the Amount and Sharpness.
You might as well boost the amount to high, then you can take a look at the image to evaluate the result. One way to do the last step is to uncheck the box next to the Noise Reduction as well, which will disable the filter until you check the box again.
You can also change the Sharpness to Medium, which will compensate for the soft look the effect produces.
And, there is also a noise reduction effect dedicated to 360 viewers, which is called 360 Noise Reduction. As you can see, the effect removes a lot of noise and makes the grainy video look clearer and more enjoyable, besides, if you move around the sphere in the viewer, the effect seems quite seamless!
Bonus tip: how to remove audio noise in video with Filmora
In case you don’t own Mac or just want to operate in another computer program, then Wondershare Filmora would make a great alternative – it’s one of the software that can help you get rid of the background noise. How to do it there? Follow this guideline:
First off, of course, you need to drag and drop the video into the timeline. Then, in order to edit the audio of the video separately, you’ll need to right-click on the video and find Detach Audio.
Double-clicking on the audio track in the sequence will show the editing panel, where you can find – Remove background noise, which, as it is obvious, will remove the noise directly.
So, in this article, we learned how to denoise in Final Cut Pro – both in terms of audio background noise, and noise and grain on the video, and we learned how to get rid of audio noise in Wondershare Filmora in the easiest and fastest way!
Ways to Learn Discord Game Bots – Even if You’re Just Starting Out
Ways to Learn Discord Game Bots – Even if You’re Just Starting out
An easy yet powerful editor
Numerous effects to choose from
Detailed tutorials provided by the official channel
Discord is free social communication service used by tens of millions of individuals aged 13 and above to socialize with their communities and friends. People use discord regularly to discuss various topics, from art projects and family vacations to homework and mental health help. It serves as a home for communities of different sizes but has become quite popular as discord bot games due to the rise in the gaming community.
The great majority of servers are private, invite-only locations where friends and communities may communicate and spend time together. More significant, more open groups based on specific themes like popular video games like PUBG and Genshin Impact. Because all discussions are opt-in, users have complete choice over who they connect with and how they use discord.
In this article
01 [What Are Discord Game Bots?](#Part 1)
02 [How Do You Add Bot Games to Discord?](#Part 2)
03 [Top 10 Picks of Discord Gaming Bots](#Part 3)
04 [Discord Game Bots FAQs](#Part 4)
Part 1 What Are Discord Game Bots?
Discord game bots are artificial intelligence (AI)-powered applications that automate processes and add music, games, welcome messages, memes, and other fun stuff to your server. These bots make it simple to interact with your audience, grow your community, and manage your server.
There is a plethora of game bots for discord to pick from, each with its purpose. Some may automatically welcome new users, while others utilize webhooks to interface with other apps—and it may be tough for novice users to figure out which ones will provide the most remarkable results for their requirements.
Part 2 How Do You Add Bot Games to Discord?
Follow the steps below to add game bots for discord successfully:
Step 1: To add a bot to your Discord server, go to the bot’s source page. We’ll be using ProBot for this lesson.
Step 2: Depending on the bot you’re adding, click Add to Discord or Invite Now.
Step 3: To grant the bot access, a pop-up window will appear asking you to check in to your Discord account.
Step 4: After you log in, you’ll see a box asking for account authorization. Locate and choose the Add to Server drop-down menu.
Step 5: This will bring up a list of discord servers where you can add a bot game discord. Continue after selecting your server.
Step 6: Examine the server permissions that the bot asks for. Select and deselect according to your requirements. When you’re ready, click Authorize.
For those who like to share their discord game bots experience through screen recordings and whatnot, a potent and convenient video editing tool to make your sessions look even more incredible is Filmora.
Wondershare Filmora Video Editor is a famous video editing program for those who wish to focus on editing and producing high-quality videos. The program supports 4K video editing. It’s a reasonably priced tool featuring effects for both video and audio. When it comes to designing, adding effects, and modifying movies, it provides users with many possibilities. You can use the tool to add overlays, create animations and objects, add music, and input text. Imagine sharing your experience in 4k!
For Win 7 or later (64-bit)
For macOS 10.12 or later
Part 3 Top 10 Picks of Discord Gaming Bots
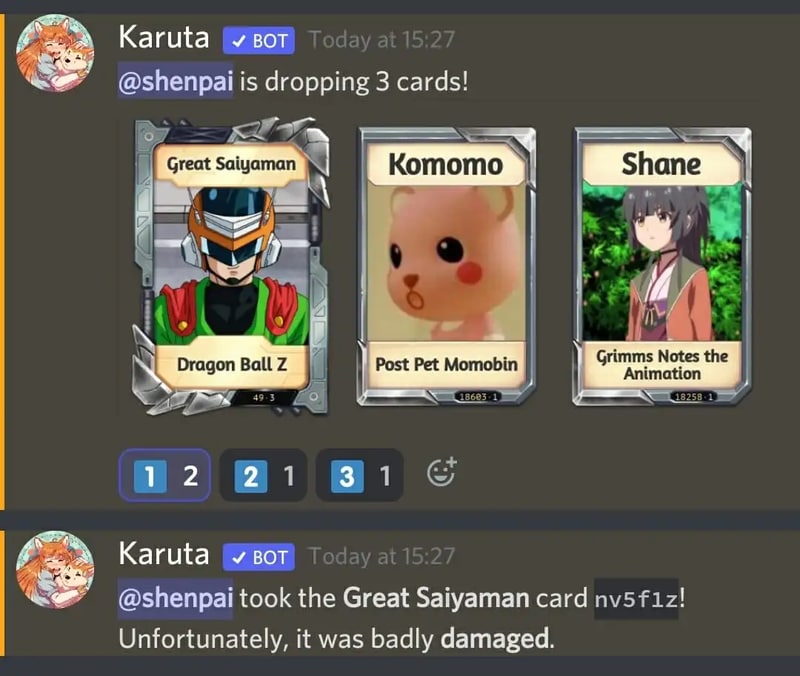
01Karuta
Karuta is a discord game bot where you gather anime characters. In Karuta, though, you collect characters using trading cards. Your cards and other objects may be customized, upgraded, and traded with other players. Better still, you maintain the same cards between servers, allowing you to play Karuta with the same deck on any server where the game discord bot is!
02Dragon Bot Z
Dragon Bot Z is the discord bot game that adds discord Ball Z, a multiplayer text-based RPG, to your server. Players in Discord Ball Z summon characters from the iconic Dragon Ball Z franchise, train them, fight foes, buy equipment, and trade with other players. This Discord game is ideal for Dragon Ball fans or anybody who likes text-based roleplaying games.

03Mudae
Mudae is a bot discord game with character-collecting. For example, you can claim popular anime and videogame characters as your “waifus” or “husbandos,” develop your harem, and compete for your favorite characters with other users. You can also trade the characters with other members.

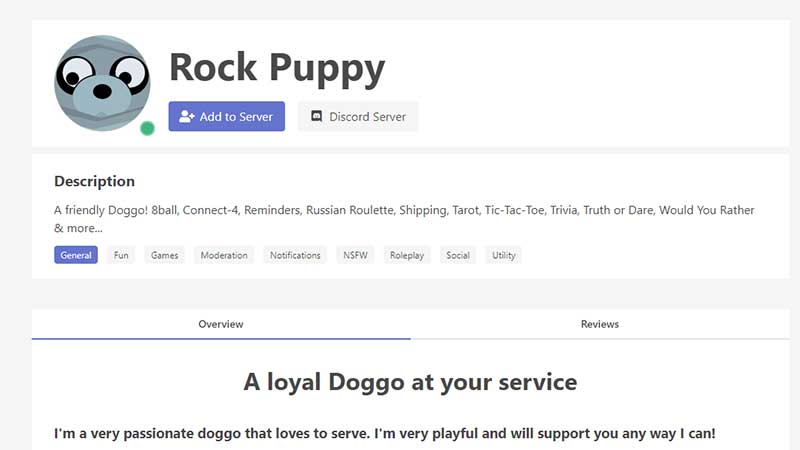
04Rock Puppy
Rock Puppy is a basic yet entertaining game bots discord bot that incorporates several classic games. You can enjoy Discord games like ConnectFour, Truth or Dare, Trivia, Tic-Tac-Toe, Russian Roulette, and Would You Rather with Rock Puppy. You may also use magic 8-ball, dice, or tarot cards, play classic board and party games on your server with Rock Puppy.
05GarticBOT
GarticBot is a bot game in discord that allows you to play the drawing game Gartic. GarticBot begins the Discord game by painting an image on your server. Members then compete against one another to predict the image the quickest. Others can guess your drawings if you submit them. Type the command g.draw, and Gartic will provide you with a URL to submit your artwork. GarticBot creates a fun Pictionary-style game for everyone on your server to play.

06TriviaBot
TriviaBot is the most popular trivia game discord bot. It has over 90,000 questions, and you can even submit your own for inclusion in the bot. Members can form and join teams to compete in competitions. You may also create a public leaderboard to display who performs the best on the server.

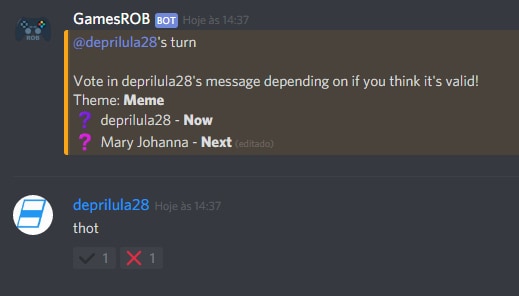
07GamesRob
The finest Uno discord game bot is GamesROB. ConnectFour, Trivia, Battleship, 2048, Tic-Tac-Toe, Minesweeper, and Hangman are the other traditional party games added to discord. You may also play “Detective,” a Discord game in which you try to figure out who is the “assassin” on your server, memory games, and Town, Country, River, a game in which you try to come up with as many phrases as possible within a theme.
08Chess Reddit
Chess is a simple game that allows you to play chess on discord. You may play a chess game with other server members directly on the server. Instruct the bot on which pieces to move and where they should go. After each move, the Discord game bot creates a fresh graphic of the board so you can plot your next move. And, because the game hosts on your server, other users may watch and debate it!
09PokeMeow
PokeMeow is by far the most popular Pokemon game discord bot. With this Pokemon bot, you may capture Pokemon on your server, trade, battle with other players, and accomplish tasks for in-game currency and stuff. As you keep building up your Pokedex, the Pokemon bot also allows to compete with other users on the worldwide leaderboard! PokeMeow is the ideal Pokemon Discord bot for fans of the Pokemon series.
10IdleRPG
IdleRPG is a discord game where you may play a text-based roleplaying game. You may make your character complete with ethnicity and social status. Then, you can go on quests and combat beasts, purchase, and exchange mythic objects, join guilds, engage with gods, and even marry other players. Play through your character’s adventure while engaging with and creating stories with other players. IdleRPG is likely to provide your server with hundreds of hours of roleplaying pleasure.

Part 4 Discord Game Bots FAQs
Now, let us go through some FAQs about discord game bots:
Q. Is it possible to play games with discord bots?
A. You could indeed play discord games in-server with bots, challenge other members, and win prizes! A game bot is a terrific method to keep players engaged on your server, especially if it’s a gaming Discord channel.
Q. Do game bots spy on you?
A. No, game discord bots do not have inbuilt spyware.
Q. How many bots should a server have?
A. It’s best not to have more than 20 bots game on discord on a server at any moment. More bots than this may cause users to become confused and the service to seem suspicious.
Q. Are discord bots free?
A. All these discord game bots are free to use. However, some have premium upgrades.
Q. Which bot is the most popular game bot in discord?
A. Worddle
Q. Which bot is the best bot for gaming on discord?
A. Gawesome is an excellent alternative for adding a multifunctional bot to your discord server.
● Ending Thoughts →
● Discord is accessible communication and socializing service for individuals aged 13 and above.
● The platform extends to various servers, each with its users, rules, themes, and channels, but one underutilized feature is the ability to develop and code custom AI-powered bots.
● Game bots for discord are artificial intelligence (AI)-powered applications that automate processes and add games to your discord server.
● These game discord bots make it simple to interact with your audience, grow your community, and manage your server.
● Lastly, to enhance the discord game bots experience and bring your gaming videos to life, use the Filmora software.
Discord is free social communication service used by tens of millions of individuals aged 13 and above to socialize with their communities and friends. People use discord regularly to discuss various topics, from art projects and family vacations to homework and mental health help. It serves as a home for communities of different sizes but has become quite popular as discord bot games due to the rise in the gaming community.
The great majority of servers are private, invite-only locations where friends and communities may communicate and spend time together. More significant, more open groups based on specific themes like popular video games like PUBG and Genshin Impact. Because all discussions are opt-in, users have complete choice over who they connect with and how they use discord.
In this article
01 [What Are Discord Game Bots?](#Part 1)
02 [How Do You Add Bot Games to Discord?](#Part 2)
03 [Top 10 Picks of Discord Gaming Bots](#Part 3)
04 [Discord Game Bots FAQs](#Part 4)
Part 1 What Are Discord Game Bots?
Discord game bots are artificial intelligence (AI)-powered applications that automate processes and add music, games, welcome messages, memes, and other fun stuff to your server. These bots make it simple to interact with your audience, grow your community, and manage your server.
There is a plethora of game bots for discord to pick from, each with its purpose. Some may automatically welcome new users, while others utilize webhooks to interface with other apps—and it may be tough for novice users to figure out which ones will provide the most remarkable results for their requirements.
Part 2 How Do You Add Bot Games to Discord?
Follow the steps below to add game bots for discord successfully:
Step 1: To add a bot to your Discord server, go to the bot’s source page. We’ll be using ProBot for this lesson.
Step 2: Depending on the bot you’re adding, click Add to Discord or Invite Now.
Step 3: To grant the bot access, a pop-up window will appear asking you to check in to your Discord account.
Step 4: After you log in, you’ll see a box asking for account authorization. Locate and choose the Add to Server drop-down menu.
Step 5: This will bring up a list of discord servers where you can add a bot game discord. Continue after selecting your server.
Step 6: Examine the server permissions that the bot asks for. Select and deselect according to your requirements. When you’re ready, click Authorize.
For those who like to share their discord game bots experience through screen recordings and whatnot, a potent and convenient video editing tool to make your sessions look even more incredible is Filmora.
Wondershare Filmora Video Editor is a famous video editing program for those who wish to focus on editing and producing high-quality videos. The program supports 4K video editing. It’s a reasonably priced tool featuring effects for both video and audio. When it comes to designing, adding effects, and modifying movies, it provides users with many possibilities. You can use the tool to add overlays, create animations and objects, add music, and input text. Imagine sharing your experience in 4k!
For Win 7 or later (64-bit)
For macOS 10.12 or later
Part 3 Top 10 Picks of Discord Gaming Bots
01Karuta
Karuta is a discord game bot where you gather anime characters. In Karuta, though, you collect characters using trading cards. Your cards and other objects may be customized, upgraded, and traded with other players. Better still, you maintain the same cards between servers, allowing you to play Karuta with the same deck on any server where the game discord bot is!
02Dragon Bot Z
Dragon Bot Z is the discord bot game that adds discord Ball Z, a multiplayer text-based RPG, to your server. Players in Discord Ball Z summon characters from the iconic Dragon Ball Z franchise, train them, fight foes, buy equipment, and trade with other players. This Discord game is ideal for Dragon Ball fans or anybody who likes text-based roleplaying games.
03Mudae
Mudae is a bot discord game with character-collecting. For example, you can claim popular anime and videogame characters as your “waifus” or “husbandos,” develop your harem, and compete for your favorite characters with other users. You can also trade the characters with other members.
04Rock Puppy
Rock Puppy is a basic yet entertaining game bots discord bot that incorporates several classic games. You can enjoy Discord games like ConnectFour, Truth or Dare, Trivia, Tic-Tac-Toe, Russian Roulette, and Would You Rather with Rock Puppy. You may also use magic 8-ball, dice, or tarot cards, play classic board and party games on your server with Rock Puppy.
05GarticBOT
GarticBot is a bot game in discord that allows you to play the drawing game Gartic. GarticBot begins the Discord game by painting an image on your server. Members then compete against one another to predict the image the quickest. Others can guess your drawings if you submit them. Type the command g.draw, and Gartic will provide you with a URL to submit your artwork. GarticBot creates a fun Pictionary-style game for everyone on your server to play.
06TriviaBot
TriviaBot is the most popular trivia game discord bot. It has over 90,000 questions, and you can even submit your own for inclusion in the bot. Members can form and join teams to compete in competitions. You may also create a public leaderboard to display who performs the best on the server.
07GamesRob
The finest Uno discord game bot is GamesROB. ConnectFour, Trivia, Battleship, 2048, Tic-Tac-Toe, Minesweeper, and Hangman are the other traditional party games added to discord. You may also play “Detective,” a Discord game in which you try to figure out who is the “assassin” on your server, memory games, and Town, Country, River, a game in which you try to come up with as many phrases as possible within a theme.
08Chess Reddit
Chess is a simple game that allows you to play chess on discord. You may play a chess game with other server members directly on the server. Instruct the bot on which pieces to move and where they should go. After each move, the Discord game bot creates a fresh graphic of the board so you can plot your next move. And, because the game hosts on your server, other users may watch and debate it!
09PokeMeow
PokeMeow is by far the most popular Pokemon game discord bot. With this Pokemon bot, you may capture Pokemon on your server, trade, battle with other players, and accomplish tasks for in-game currency and stuff. As you keep building up your Pokedex, the Pokemon bot also allows to compete with other users on the worldwide leaderboard! PokeMeow is the ideal Pokemon Discord bot for fans of the Pokemon series.
10IdleRPG
IdleRPG is a discord game where you may play a text-based roleplaying game. You may make your character complete with ethnicity and social status. Then, you can go on quests and combat beasts, purchase, and exchange mythic objects, join guilds, engage with gods, and even marry other players. Play through your character’s adventure while engaging with and creating stories with other players. IdleRPG is likely to provide your server with hundreds of hours of roleplaying pleasure.
Part 4 Discord Game Bots FAQs
Now, let us go through some FAQs about discord game bots:
Q. Is it possible to play games with discord bots?
A. You could indeed play discord games in-server with bots, challenge other members, and win prizes! A game bot is a terrific method to keep players engaged on your server, especially if it’s a gaming Discord channel.
Q. Do game bots spy on you?
A. No, game discord bots do not have inbuilt spyware.
Q. How many bots should a server have?
A. It’s best not to have more than 20 bots game on discord on a server at any moment. More bots than this may cause users to become confused and the service to seem suspicious.
Q. Are discord bots free?
A. All these discord game bots are free to use. However, some have premium upgrades.
Q. Which bot is the most popular game bot in discord?
A. Worddle
Q. Which bot is the best bot for gaming on discord?
A. Gawesome is an excellent alternative for adding a multifunctional bot to your discord server.
● Ending Thoughts →
● Discord is accessible communication and socializing service for individuals aged 13 and above.
● The platform extends to various servers, each with its users, rules, themes, and channels, but one underutilized feature is the ability to develop and code custom AI-powered bots.
● Game bots for discord are artificial intelligence (AI)-powered applications that automate processes and add games to your discord server.
● These game discord bots make it simple to interact with your audience, grow your community, and manage your server.
● Lastly, to enhance the discord game bots experience and bring your gaming videos to life, use the Filmora software.
Discord is free social communication service used by tens of millions of individuals aged 13 and above to socialize with their communities and friends. People use discord regularly to discuss various topics, from art projects and family vacations to homework and mental health help. It serves as a home for communities of different sizes but has become quite popular as discord bot games due to the rise in the gaming community.
The great majority of servers are private, invite-only locations where friends and communities may communicate and spend time together. More significant, more open groups based on specific themes like popular video games like PUBG and Genshin Impact. Because all discussions are opt-in, users have complete choice over who they connect with and how they use discord.
In this article
01 [What Are Discord Game Bots?](#Part 1)
02 [How Do You Add Bot Games to Discord?](#Part 2)
03 [Top 10 Picks of Discord Gaming Bots](#Part 3)
04 [Discord Game Bots FAQs](#Part 4)
Part 1 What Are Discord Game Bots?
Discord game bots are artificial intelligence (AI)-powered applications that automate processes and add music, games, welcome messages, memes, and other fun stuff to your server. These bots make it simple to interact with your audience, grow your community, and manage your server.
There is a plethora of game bots for discord to pick from, each with its purpose. Some may automatically welcome new users, while others utilize webhooks to interface with other apps—and it may be tough for novice users to figure out which ones will provide the most remarkable results for their requirements.
Part 2 How Do You Add Bot Games to Discord?
Follow the steps below to add game bots for discord successfully:
Step 1: To add a bot to your Discord server, go to the bot’s source page. We’ll be using ProBot for this lesson.
Step 2: Depending on the bot you’re adding, click Add to Discord or Invite Now.
Step 3: To grant the bot access, a pop-up window will appear asking you to check in to your Discord account.
Step 4: After you log in, you’ll see a box asking for account authorization. Locate and choose the Add to Server drop-down menu.
Step 5: This will bring up a list of discord servers where you can add a bot game discord. Continue after selecting your server.
Step 6: Examine the server permissions that the bot asks for. Select and deselect according to your requirements. When you’re ready, click Authorize.
For those who like to share their discord game bots experience through screen recordings and whatnot, a potent and convenient video editing tool to make your sessions look even more incredible is Filmora.
Wondershare Filmora Video Editor is a famous video editing program for those who wish to focus on editing and producing high-quality videos. The program supports 4K video editing. It’s a reasonably priced tool featuring effects for both video and audio. When it comes to designing, adding effects, and modifying movies, it provides users with many possibilities. You can use the tool to add overlays, create animations and objects, add music, and input text. Imagine sharing your experience in 4k!
For Win 7 or later (64-bit)
For macOS 10.12 or later
Part 3 Top 10 Picks of Discord Gaming Bots
01Karuta
Karuta is a discord game bot where you gather anime characters. In Karuta, though, you collect characters using trading cards. Your cards and other objects may be customized, upgraded, and traded with other players. Better still, you maintain the same cards between servers, allowing you to play Karuta with the same deck on any server where the game discord bot is!
02Dragon Bot Z
Dragon Bot Z is the discord bot game that adds discord Ball Z, a multiplayer text-based RPG, to your server. Players in Discord Ball Z summon characters from the iconic Dragon Ball Z franchise, train them, fight foes, buy equipment, and trade with other players. This Discord game is ideal for Dragon Ball fans or anybody who likes text-based roleplaying games.
03Mudae
Mudae is a bot discord game with character-collecting. For example, you can claim popular anime and videogame characters as your “waifus” or “husbandos,” develop your harem, and compete for your favorite characters with other users. You can also trade the characters with other members.
04Rock Puppy
Rock Puppy is a basic yet entertaining game bots discord bot that incorporates several classic games. You can enjoy Discord games like ConnectFour, Truth or Dare, Trivia, Tic-Tac-Toe, Russian Roulette, and Would You Rather with Rock Puppy. You may also use magic 8-ball, dice, or tarot cards, play classic board and party games on your server with Rock Puppy.
05GarticBOT
GarticBot is a bot game in discord that allows you to play the drawing game Gartic. GarticBot begins the Discord game by painting an image on your server. Members then compete against one another to predict the image the quickest. Others can guess your drawings if you submit them. Type the command g.draw, and Gartic will provide you with a URL to submit your artwork. GarticBot creates a fun Pictionary-style game for everyone on your server to play.
06TriviaBot
TriviaBot is the most popular trivia game discord bot. It has over 90,000 questions, and you can even submit your own for inclusion in the bot. Members can form and join teams to compete in competitions. You may also create a public leaderboard to display who performs the best on the server.
07GamesRob
The finest Uno discord game bot is GamesROB. ConnectFour, Trivia, Battleship, 2048, Tic-Tac-Toe, Minesweeper, and Hangman are the other traditional party games added to discord. You may also play “Detective,” a Discord game in which you try to figure out who is the “assassin” on your server, memory games, and Town, Country, River, a game in which you try to come up with as many phrases as possible within a theme.
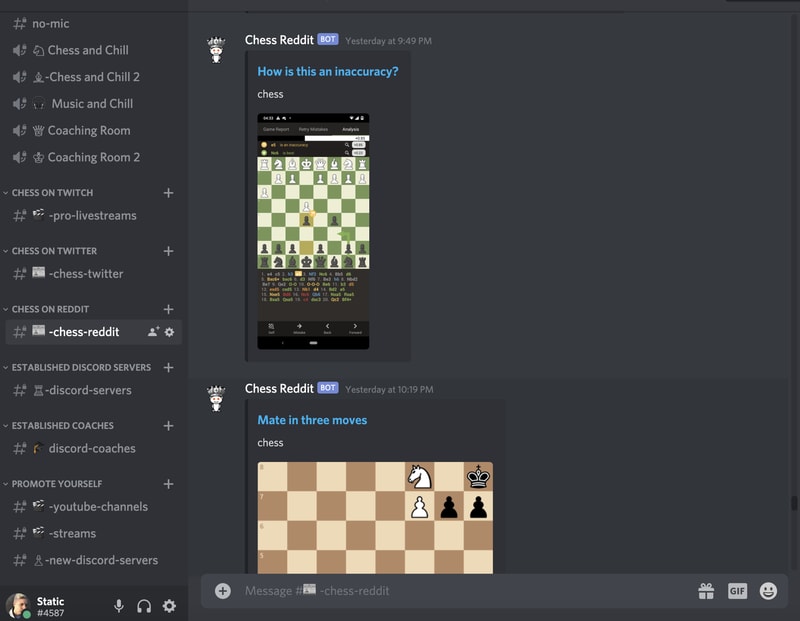
08Chess Reddit
Chess is a simple game that allows you to play chess on discord. You may play a chess game with other server members directly on the server. Instruct the bot on which pieces to move and where they should go. After each move, the Discord game bot creates a fresh graphic of the board so you can plot your next move. And, because the game hosts on your server, other users may watch and debate it!
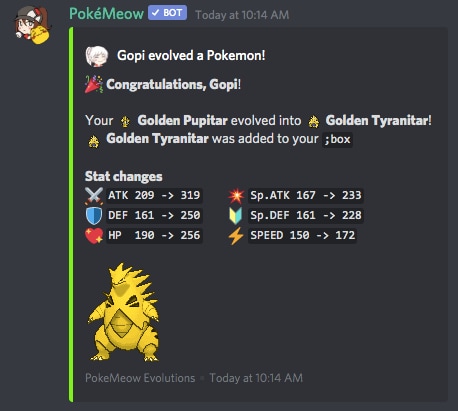
09PokeMeow
PokeMeow is by far the most popular Pokemon game discord bot. With this Pokemon bot, you may capture Pokemon on your server, trade, battle with other players, and accomplish tasks for in-game currency and stuff. As you keep building up your Pokedex, the Pokemon bot also allows to compete with other users on the worldwide leaderboard! PokeMeow is the ideal Pokemon Discord bot for fans of the Pokemon series.
10IdleRPG
IdleRPG is a discord game where you may play a text-based roleplaying game. You may make your character complete with ethnicity and social status. Then, you can go on quests and combat beasts, purchase, and exchange mythic objects, join guilds, engage with gods, and even marry other players. Play through your character’s adventure while engaging with and creating stories with other players. IdleRPG is likely to provide your server with hundreds of hours of roleplaying pleasure.
Part 4 Discord Game Bots FAQs
Now, let us go through some FAQs about discord game bots:
Q. Is it possible to play games with discord bots?
A. You could indeed play discord games in-server with bots, challenge other members, and win prizes! A game bot is a terrific method to keep players engaged on your server, especially if it’s a gaming Discord channel.
Q. Do game bots spy on you?
A. No, game discord bots do not have inbuilt spyware.
Q. How many bots should a server have?
A. It’s best not to have more than 20 bots game on discord on a server at any moment. More bots than this may cause users to become confused and the service to seem suspicious.
Q. Are discord bots free?
A. All these discord game bots are free to use. However, some have premium upgrades.
Q. Which bot is the most popular game bot in discord?
A. Worddle
Q. Which bot is the best bot for gaming on discord?
A. Gawesome is an excellent alternative for adding a multifunctional bot to your discord server.
● Ending Thoughts →
● Discord is accessible communication and socializing service for individuals aged 13 and above.
● The platform extends to various servers, each with its users, rules, themes, and channels, but one underutilized feature is the ability to develop and code custom AI-powered bots.
● Game bots for discord are artificial intelligence (AI)-powered applications that automate processes and add games to your discord server.
● These game discord bots make it simple to interact with your audience, grow your community, and manage your server.
● Lastly, to enhance the discord game bots experience and bring your gaming videos to life, use the Filmora software.
Discord is free social communication service used by tens of millions of individuals aged 13 and above to socialize with their communities and friends. People use discord regularly to discuss various topics, from art projects and family vacations to homework and mental health help. It serves as a home for communities of different sizes but has become quite popular as discord bot games due to the rise in the gaming community.
The great majority of servers are private, invite-only locations where friends and communities may communicate and spend time together. More significant, more open groups based on specific themes like popular video games like PUBG and Genshin Impact. Because all discussions are opt-in, users have complete choice over who they connect with and how they use discord.
In this article
01 [What Are Discord Game Bots?](#Part 1)
02 [How Do You Add Bot Games to Discord?](#Part 2)
03 [Top 10 Picks of Discord Gaming Bots](#Part 3)
04 [Discord Game Bots FAQs](#Part 4)
Part 1 What Are Discord Game Bots?
Discord game bots are artificial intelligence (AI)-powered applications that automate processes and add music, games, welcome messages, memes, and other fun stuff to your server. These bots make it simple to interact with your audience, grow your community, and manage your server.
There is a plethora of game bots for discord to pick from, each with its purpose. Some may automatically welcome new users, while others utilize webhooks to interface with other apps—and it may be tough for novice users to figure out which ones will provide the most remarkable results for their requirements.
Part 2 How Do You Add Bot Games to Discord?
Follow the steps below to add game bots for discord successfully:
Step 1: To add a bot to your Discord server, go to the bot’s source page. We’ll be using ProBot for this lesson.
Step 2: Depending on the bot you’re adding, click Add to Discord or Invite Now.
Step 3: To grant the bot access, a pop-up window will appear asking you to check in to your Discord account.
Step 4: After you log in, you’ll see a box asking for account authorization. Locate and choose the Add to Server drop-down menu.
Step 5: This will bring up a list of discord servers where you can add a bot game discord. Continue after selecting your server.
Step 6: Examine the server permissions that the bot asks for. Select and deselect according to your requirements. When you’re ready, click Authorize.
For those who like to share their discord game bots experience through screen recordings and whatnot, a potent and convenient video editing tool to make your sessions look even more incredible is Filmora.
Wondershare Filmora Video Editor is a famous video editing program for those who wish to focus on editing and producing high-quality videos. The program supports 4K video editing. It’s a reasonably priced tool featuring effects for both video and audio. When it comes to designing, adding effects, and modifying movies, it provides users with many possibilities. You can use the tool to add overlays, create animations and objects, add music, and input text. Imagine sharing your experience in 4k!
For Win 7 or later (64-bit)
For macOS 10.12 or later
Part 3 Top 10 Picks of Discord Gaming Bots
01Karuta
Karuta is a discord game bot where you gather anime characters. In Karuta, though, you collect characters using trading cards. Your cards and other objects may be customized, upgraded, and traded with other players. Better still, you maintain the same cards between servers, allowing you to play Karuta with the same deck on any server where the game discord bot is!
02Dragon Bot Z
Dragon Bot Z is the discord bot game that adds discord Ball Z, a multiplayer text-based RPG, to your server. Players in Discord Ball Z summon characters from the iconic Dragon Ball Z franchise, train them, fight foes, buy equipment, and trade with other players. This Discord game is ideal for Dragon Ball fans or anybody who likes text-based roleplaying games.
03Mudae
Mudae is a bot discord game with character-collecting. For example, you can claim popular anime and videogame characters as your “waifus” or “husbandos,” develop your harem, and compete for your favorite characters with other users. You can also trade the characters with other members.
04Rock Puppy
Rock Puppy is a basic yet entertaining game bots discord bot that incorporates several classic games. You can enjoy Discord games like ConnectFour, Truth or Dare, Trivia, Tic-Tac-Toe, Russian Roulette, and Would You Rather with Rock Puppy. You may also use magic 8-ball, dice, or tarot cards, play classic board and party games on your server with Rock Puppy.
05GarticBOT
GarticBot is a bot game in discord that allows you to play the drawing game Gartic. GarticBot begins the Discord game by painting an image on your server. Members then compete against one another to predict the image the quickest. Others can guess your drawings if you submit them. Type the command g.draw, and Gartic will provide you with a URL to submit your artwork. GarticBot creates a fun Pictionary-style game for everyone on your server to play.
06TriviaBot
TriviaBot is the most popular trivia game discord bot. It has over 90,000 questions, and you can even submit your own for inclusion in the bot. Members can form and join teams to compete in competitions. You may also create a public leaderboard to display who performs the best on the server.
07GamesRob
The finest Uno discord game bot is GamesROB. ConnectFour, Trivia, Battleship, 2048, Tic-Tac-Toe, Minesweeper, and Hangman are the other traditional party games added to discord. You may also play “Detective,” a Discord game in which you try to figure out who is the “assassin” on your server, memory games, and Town, Country, River, a game in which you try to come up with as many phrases as possible within a theme.
08Chess Reddit
Chess is a simple game that allows you to play chess on discord. You may play a chess game with other server members directly on the server. Instruct the bot on which pieces to move and where they should go. After each move, the Discord game bot creates a fresh graphic of the board so you can plot your next move. And, because the game hosts on your server, other users may watch and debate it!
09PokeMeow
PokeMeow is by far the most popular Pokemon game discord bot. With this Pokemon bot, you may capture Pokemon on your server, trade, battle with other players, and accomplish tasks for in-game currency and stuff. As you keep building up your Pokedex, the Pokemon bot also allows to compete with other users on the worldwide leaderboard! PokeMeow is the ideal Pokemon Discord bot for fans of the Pokemon series.
10IdleRPG
IdleRPG is a discord game where you may play a text-based roleplaying game. You may make your character complete with ethnicity and social status. Then, you can go on quests and combat beasts, purchase, and exchange mythic objects, join guilds, engage with gods, and even marry other players. Play through your character’s adventure while engaging with and creating stories with other players. IdleRPG is likely to provide your server with hundreds of hours of roleplaying pleasure.
Part 4 Discord Game Bots FAQs
Now, let us go through some FAQs about discord game bots:
Q. Is it possible to play games with discord bots?
A. You could indeed play discord games in-server with bots, challenge other members, and win prizes! A game bot is a terrific method to keep players engaged on your server, especially if it’s a gaming Discord channel.
Q. Do game bots spy on you?
A. No, game discord bots do not have inbuilt spyware.
Q. How many bots should a server have?
A. It’s best not to have more than 20 bots game on discord on a server at any moment. More bots than this may cause users to become confused and the service to seem suspicious.
Q. Are discord bots free?
A. All these discord game bots are free to use. However, some have premium upgrades.
Q. Which bot is the most popular game bot in discord?
A. Worddle
Q. Which bot is the best bot for gaming on discord?
A. Gawesome is an excellent alternative for adding a multifunctional bot to your discord server.
● Ending Thoughts →
● Discord is accessible communication and socializing service for individuals aged 13 and above.
● The platform extends to various servers, each with its users, rules, themes, and channels, but one underutilized feature is the ability to develop and code custom AI-powered bots.
● Game bots for discord are artificial intelligence (AI)-powered applications that automate processes and add games to your discord server.
● These game discord bots make it simple to interact with your audience, grow your community, and manage your server.
● Lastly, to enhance the discord game bots experience and bring your gaming videos to life, use the Filmora software.
Best Tools To Create Blend Image Collage
Best Tools To Create Blend Image Collage
An easy yet powerful editor
Numerous effects to choose from
Detailed tutorials provided by the official channel
While creating a photo collage, the blending of images needs to be perfect so that the final outcome is impressive. Though creating a collage may sound as simple as placing one image next to the other, it requires thoughtful placing and positioning of the images along with additional editing to create a visually impressive frame. To help you with this task, a good collage maker can be used.
Though there are several tools making tall claims, not all deliver what they promise. So, to make your tool selection task a little easier, we have shortlisted the best ones in the following parts.
In this article
01 [Top blended collage maker tool](#Part 1)
02 [Best tool for stock media and video editing- Wondershare Filmora](#Part 2)
Part 1 Top blended collage maker tool
A roundup of the top 5 tools to create blended photo collage is given below.
01PicMonkey
This is a free collage-making tool by Shutterstock that can let you blend images to create wonderful freestyle as well as grid-based collages. If needed, you can even add videos to the collage.
Key features
● Create freestyle grid-based blend collage using images and videos.
● Wide range of layouts to choose from.
● Offer flexible resizing of the cells for proper blending of the images.
● Support drag-and-drop.
● This photo blend collage maker allows adding graphics, text, effects, and other elements.
● Comes with a free stock of photos and videos.

02Photo Collage Maker
This is an integrated mask tool that supports blending your images to create an impressive collage.
Key features
● Simple and intuitive interface.
● Allows creating blend collage in a few simple steps.
● More than 100 templates in different themes and designs are available.
● Enhance the collage by adding masks, clip-arts, captions, and other effects.
● Created collage can be saved in all key image formats like JPEG, PNG, GIF, and TIFF.

03Blend Collage Free
Developed by KDN Soft this is a free Android-based blend collage apk for blending images perfectly and creating an interesting collage.
Key features
● Allows to blend images and create a collage in HD quality.
● Collage can be shared over Instagram, Facebook, and other sites.
● Simple interface that makes the process easy and quick.
● Add images from your device, capture them using the camera or even use the stock collection at the app.
● Decent editing options supported.

04Photo Blend
With a 3.6 rating, this is a decent blend collage app for iOS devices to blend images and create a collage.
Key features
● Blend and add images to create an impressive collage.
● Create a double-exposure effect by blending images.
● A wide range of filters is available to enhance the collage.
● Created collage can be shared with dear ones.

05Blend Collage Photo Editor
To create an impressive collage with a blending effect, this is a good tool to consider.
Key features
● Free to use tool for creating blend collage.
● Comes with more than 50 customized shapes to crop the images.
● Support multiple filters to be used on images.
● Allows cropping the images free-hand as well.
● Save the created collage on the system or share it over Twitter, Facebook, and other sites.

Part 2 Best tool for stock media and video editing- Wondershare Filmora
A lot of blend-collage makers also allow adding videos, and in such situations, the need for a good video editing tool may also arise to edit the video before adding. One such excellent tool that we recommend here is Wondershare Filmora. This is a Windows and Mac-based software that supports all basic as well as advanced video editing features. Files in almost all formats can be quickly processed using the tool.
Additionally, if you are not able to find your choice of image or video, Wondershare Filmora is a great place to checkout as it has a huge collection of media files in an array of categories and themes. You are surely going to get something of your choice and requirement.
There are several other useful features of the software like split-screen-video making, advanced editing, audio editing, and more. Check out more in detail about the software at this this link

● Key Takeaways from This Episode →
● Blend collage allows you to blend your images for creating a smooth and interesting-looking collage.
● Several online tools, desktop programs, and apps are available to create a photo blend collage.
● To get a collection of media files and edit your video professionally, Wondershare Filmora works as the best software.
While creating a photo collage, the blending of images needs to be perfect so that the final outcome is impressive. Though creating a collage may sound as simple as placing one image next to the other, it requires thoughtful placing and positioning of the images along with additional editing to create a visually impressive frame. To help you with this task, a good collage maker can be used.
Though there are several tools making tall claims, not all deliver what they promise. So, to make your tool selection task a little easier, we have shortlisted the best ones in the following parts.
In this article
01 [Top blended collage maker tool](#Part 1)
02 [Best tool for stock media and video editing- Wondershare Filmora](#Part 2)
Part 1 Top blended collage maker tool
A roundup of the top 5 tools to create blended photo collage is given below.
01PicMonkey
This is a free collage-making tool by Shutterstock that can let you blend images to create wonderful freestyle as well as grid-based collages. If needed, you can even add videos to the collage.
Key features
● Create freestyle grid-based blend collage using images and videos.
● Wide range of layouts to choose from.
● Offer flexible resizing of the cells for proper blending of the images.
● Support drag-and-drop.
● This photo blend collage maker allows adding graphics, text, effects, and other elements.
● Comes with a free stock of photos and videos.
02Photo Collage Maker
This is an integrated mask tool that supports blending your images to create an impressive collage.
Key features
● Simple and intuitive interface.
● Allows creating blend collage in a few simple steps.
● More than 100 templates in different themes and designs are available.
● Enhance the collage by adding masks, clip-arts, captions, and other effects.
● Created collage can be saved in all key image formats like JPEG, PNG, GIF, and TIFF.
03Blend Collage Free
Developed by KDN Soft this is a free Android-based blend collage apk for blending images perfectly and creating an interesting collage.
Key features
● Allows to blend images and create a collage in HD quality.
● Collage can be shared over Instagram, Facebook, and other sites.
● Simple interface that makes the process easy and quick.
● Add images from your device, capture them using the camera or even use the stock collection at the app.
● Decent editing options supported.
04Photo Blend
With a 3.6 rating, this is a decent blend collage app for iOS devices to blend images and create a collage.
Key features
● Blend and add images to create an impressive collage.
● Create a double-exposure effect by blending images.
● A wide range of filters is available to enhance the collage.
● Created collage can be shared with dear ones.
05Blend Collage Photo Editor
To create an impressive collage with a blending effect, this is a good tool to consider.
Key features
● Free to use tool for creating blend collage.
● Comes with more than 50 customized shapes to crop the images.
● Support multiple filters to be used on images.
● Allows cropping the images free-hand as well.
● Save the created collage on the system or share it over Twitter, Facebook, and other sites.
Part 2 Best tool for stock media and video editing- Wondershare Filmora
A lot of blend-collage makers also allow adding videos, and in such situations, the need for a good video editing tool may also arise to edit the video before adding. One such excellent tool that we recommend here is Wondershare Filmora. This is a Windows and Mac-based software that supports all basic as well as advanced video editing features. Files in almost all formats can be quickly processed using the tool.
Additionally, if you are not able to find your choice of image or video, Wondershare Filmora is a great place to checkout as it has a huge collection of media files in an array of categories and themes. You are surely going to get something of your choice and requirement.
There are several other useful features of the software like split-screen-video making, advanced editing, audio editing, and more. Check out more in detail about the software at this this link
● Key Takeaways from This Episode →
● Blend collage allows you to blend your images for creating a smooth and interesting-looking collage.
● Several online tools, desktop programs, and apps are available to create a photo blend collage.
● To get a collection of media files and edit your video professionally, Wondershare Filmora works as the best software.
2 Effective Ways to Make SRT File Translation Like a Pro
Whether you download YouTube SRT in Spanish or want to add translated subtitles to your favorite cartoon video, having an SRT translator will come in handy. The SRT subtitle file is based on texts divided into multiple sections. When you add it to a video, the texts will be displayed as you wrote in the file.
As most people find the translation work tedious, we have presented the two easiest ways of SRT file translation so without anyone’s assistance or prior training.
- Method 2 Translate subtitle .srt file without Downloading Any Software
- [Optional] If you hope to Edit SRT file for Video, here is the Best Way
Method 1 Translate SRT subtitles with third-party translator software
As there are so many different translator software platforms you can try to convert the SRT file to another language, you may be unable to choose the right one. That’s why we have explained the proper process for better clarification.
1. Redokun
One of the best software platforms you can use to translate the SRT file into another language is Redokun. It comes with a machine-automated translation that will automatically translate one language to another within minutes, increasing the overall productivity by 60%. It accurately processes the translation and ensures the texts don’t change during translation. Besides, this SRT file translator comes with a Translator Memory to help you quickly check past files.

Pros
- Easy to use software
- Supports smart revisions for last-minute alterations
- Precise and accurate translator
Cons
- Supports only 14 days of trial
How to translate SRT files?
- Visit Redokun and open the translator.
- Upload the SRT file from local or cloud storage and wait for the document to get uploaded.
- Set the input and output languages and click on the Translate button.
- The new SRT file will get generated with translated text.
Supported OS: Mac and Windows
Supported language translation: English, German, Chinese, and so on.
2. Smartcat
Another outstanding online tool you can use is Smartcat. It supports eight different translator engines, including Amazon and Google. It also accepts multiple file formats and supports over 240 languages, ensuring the SRT file can be translated within minutes.

Pros
- Does not require any expert knowledge
- Translates through AI program for more accuracy
- Support extracting the text from .xml
Cons
- Might not be suitable for beginners
How to translate SRT files?
- Log in to Smartcat and click on Upload. Choose the SRT file and click on Open.
- As the document downloads on the translator, set its language if the default language is not the same. Also, set the new language in which you want the translation.
- Click on Translate and wait for a couple of minutes.
- After a certain time, the new file will be generated with texts written in the language you have set.
Supported OS: Windows and Mac
Supported language translation: English, Mexican, Spanish, Brazilian, and more
3. SDL Trados Studio
SDL Trados Studio is a perfect tool for SRT file translation into another language in no time. It features an AI-powered algorithm that ensures the maximum accuracy in the translated file.

Pros
- Supports multiple languages for translation
- Has free plans
- Accurate translation with no error
Cons
- Not suitable for pros
How to translate SRT files?
- Upload the SRT file on SDL Trados Studio and select the original language from the dropdown.
- Open the language dropdown from the output window and choose the desired language.
- Click on Translate and wait for the new file to be generated.
Supported OS: Mac and Windows
Supported language translation: English, Japanese, Spanish, French, and Italian
4. MemoQ Translator Pro
Based on a computer-based program, this translator software makes the work easier, ensuring easy usage without any hurdles. You won’t have to worry about the texts changing their meaning or getting corrupted during translation.

Pros
- Remembers the past translations
- Increases productivity with faster translation
- Open-source platform
Cons
- Not ideal for beginners
How to translate SRT files?
- Once you upload the file to the software, the texts will be displayed on one side. Choose the language in which you want the final file and click on Translate.
- Each text block will be translated at a time. Once it is over, a green mark will be shown on the side.
Supported OS: Windows
Supported language translation: English, French, Italian, Greek, and Hindi
5. Lokalise
Used even by professional companies, this excellent online tool SRT translator is perfect for Windows and Mac and allows hassle-free translation. It comes with an intuitive UI, ensuring beginners can also efficiently work on the SRT file translation.

Pros
- Easy user interface
- Supports multiple languages
- Allows export of the translated file
Cons
- Does not allow editing of the SRT file
How to translate SRT files?
- Choose the languages for both sides from the dropdown and then upload the concerned SRT file.
- Click on the Translate button and wait for the new file to be generated.
- Once the translation is completed, it will generate the file, and you can download it.
Supported OS: Windows and Mac
Supported language translation: French, Italian, Korean, Spanish, Chinese, etc.
6. Text United
This online platform allows you to translate and upload SRT files easily. It ensures maximum accuracy and does not introduce any error in the translated file.

Pros
- Interface is easy-to-use with clear translating process
- Faster translation for more productivity
- Free software
Cons
- Not an open-source platform
How to translate SRT files?
- Upload the original SRT file and select the input language.
- Once done, select the output language and click on Translate.
- The new subtitles will be generated in the new language after a couple of minutes.
Supported OS: Mac and Windows
Supported language translation: English, German, French
Method 2 Translate subtitle .srt file without Downloading Any Software
The other method for translating the SRT files from one language to another is Notepad (for Windows) or TextEdit (for Mac). As these are simple text editor applications built into the OS, you don’t require any downloading or another person’s help to complete the job.
Note: TextEdit and Notebook are best suited for translating short SRT files from one language to another, especially if the subtitles present are not that much complicated.
Step-by-step guide for SRT translation on Notepad
- Go to the drive where you have stored the file and right-click on the same. Click on “Open with” and choose Notepad from the list of options displayed.

- The file will open in Notepad. Now, edit the SRT file according to the subtitle positions and the text you want to add to the video. Check the time codes because they need to be in sync with the video file.

- Once done, save the file and open Google Translate. Copy each text line and paste the same into the translator’s input box. If the language of the original text is not English, change the language from the dropdown in the translator for easier and more accurate interpretation.

- Click on Translate and wait till the translated text is generated. You need to select the language of the output section according to the required language of the translated SRT file.

- Once the translated text is generated, copy the new text and paste it in place of the original text you copied.
Pros
- Does not need to know about the usage of any software
- Best for small SRT files
- Better for beginners
Cons
- Can change the text during translation
- Time consuming process
Step-by-step guide for SRT translation on TextEdit
- Go to the stored location of the SRT file and right-click on the selected file. Once the menu expands, click on “Open With” and then choose TextEdit as the option. You can also change the default file type to TextEdit. Right-click on the file and select Properties. Once the dialog box opens, click on the “Open With” option and select TextEdit from there. Click on Apply and then Save to change the default file type.

- Once you complete all the edits, open Google Translator and select the input and output languages. The input language will be the one in which your original text is written, and the output is the language you need to transfer the SRT file into.
- Copy and paste the text line from the beginning and click on Translate. Wait for the tool to evaluate and display the translated text.
- Copy it and paste the text into the SRT file. Ensure all the texts are adequately translated before saving and uploading the file to the video.
Pros
- No need to know about the technical use of a software
- Can convert the languages of a small file
- Best for immediate translation
Cons
- Errors can occur during translation
- Needs a lot of time
[Optional] If you hope to Edit SRT file for Video, here is the Best Way
Now that you know the best tools for high-quality video-based subtitle translation, you can choose. However, not all of them support the ability to edit SRT files; for that, you can rely on Wondershare Filmora .
The software is a desktop-based program that users can try out for varying levels of video editing work. You can optimize the videos with features like speed ramping, audio visualization, and speech-to-text. You can add subtitles to videos with the last feature or add external SRT files. Editing is possible as well.
How to Use Filmora to Edit SRT Subtitles for Videos?
Free Download For Win 7 or later(64-bit)
Free Download For macOS 10.14 or later
Step1 Open the Filmora software and add the video file.
Step2 Click on Media to upload SRT file.
Step3 Right-click your subtitle file on the editor timeline> Choose “Advanced Edit”.

Step4 Make changes to the time code, add/merge/remove the strips of subtitle, modify the SRT file, or change the font style similar to Filmora’s Advanced Edit-based text format.

Step5 Right-click on the SRT file in the timeline and press the “Export Subtitle File” option.

Step6 Make other video edits, like merging, equalization, etc.
Step7 Click on Export > Local > YouTube. Make changes in the settings and click the Export button.
Conclusion
We have given you the top six options if you are looking for the best online tool for SRT translation. You need to weigh the options according to your requirements and start translating your subtitle file to a language you want for the video.

Method 1 Translate SRT subtitles with third-party translator software
As there are so many different translator software platforms you can try to convert the SRT file to another language, you may be unable to choose the right one. That’s why we have explained the proper process for better clarification.
1. Redokun
One of the best software platforms you can use to translate the SRT file into another language is Redokun. It comes with a machine-automated translation that will automatically translate one language to another within minutes, increasing the overall productivity by 60%. It accurately processes the translation and ensures the texts don’t change during translation. Besides, this SRT file translator comes with a Translator Memory to help you quickly check past files.
Pros
- Easy to use software
- Supports smart revisions for last-minute alterations
- Precise and accurate translator
Cons
- Supports only 14 days of trial
How to translate SRT files?
- Visit Redokun and open the translator.
- Upload the SRT file from local or cloud storage and wait for the document to get uploaded.
- Set the input and output languages and click on the Translate button.
- The new SRT file will get generated with translated text.
Supported OS: Mac and Windows
Supported language translation: English, German, Chinese, and so on.
2. Smartcat
Another outstanding online tool you can use is Smartcat. It supports eight different translator engines, including Amazon and Google. It also accepts multiple file formats and supports over 240 languages, ensuring the SRT file can be translated within minutes.
Pros
- Does not require any expert knowledge
- Translates through AI program for more accuracy
- Support extracting the text from .xml
Cons
- Might not be suitable for beginners
How to translate SRT files?
- Log in to Smartcat and click on Upload. Choose the SRT file and click on Open.
- As the document downloads on the translator, set its language if the default language is not the same. Also, set the new language in which you want the translation.
- Click on Translate and wait for a couple of minutes.
- After a certain time, the new file will be generated with texts written in the language you have set.
Supported OS: Windows and Mac
Supported language translation: English, Mexican, Spanish, Brazilian, and more
3. SDL Trados Studio
SDL Trados Studio is a perfect tool for SRT file translation into another language in no time. It features an AI-powered algorithm that ensures the maximum accuracy in the translated file.
Pros
- Supports multiple languages for translation
- Has free plans
- Accurate translation with no error
Cons
- Not suitable for pros
How to translate SRT files?
- Upload the SRT file on SDL Trados Studio and select the original language from the dropdown.
- Open the language dropdown from the output window and choose the desired language.
- Click on Translate and wait for the new file to be generated.
Supported OS: Mac and Windows
Supported language translation: English, Japanese, Spanish, French, and Italian
4. MemoQ Translator Pro
Based on a computer-based program, this translator software makes the work easier, ensuring easy usage without any hurdles. You won’t have to worry about the texts changing their meaning or getting corrupted during translation.
Pros
- Remembers the past translations
- Increases productivity with faster translation
- Open-source platform
Cons
- Not ideal for beginners
How to translate SRT files?
- Once you upload the file to the software, the texts will be displayed on one side. Choose the language in which you want the final file and click on Translate.
- Each text block will be translated at a time. Once it is over, a green mark will be shown on the side.
Supported OS: Windows
Supported language translation: English, French, Italian, Greek, and Hindi
5. Lokalise
Used even by professional companies, this excellent online tool SRT translator is perfect for Windows and Mac and allows hassle-free translation. It comes with an intuitive UI, ensuring beginners can also efficiently work on the SRT file translation.
Pros
- Easy user interface
- Supports multiple languages
- Allows export of the translated file
Cons
- Does not allow editing of the SRT file
How to translate SRT files?
- Choose the languages for both sides from the dropdown and then upload the concerned SRT file.
- Click on the Translate button and wait for the new file to be generated.
- Once the translation is completed, it will generate the file, and you can download it.
Supported OS: Windows and Mac
Supported language translation: French, Italian, Korean, Spanish, Chinese, etc.
6. Text United
This online platform allows you to translate and upload SRT files easily. It ensures maximum accuracy and does not introduce any error in the translated file.
Pros
- Interface is easy-to-use with clear translating process
- Faster translation for more productivity
- Free software
Cons
- Not an open-source platform
How to translate SRT files?
- Upload the original SRT file and select the input language.
- Once done, select the output language and click on Translate.
- The new subtitles will be generated in the new language after a couple of minutes.
Supported OS: Mac and Windows
Supported language translation: English, German, French
Method 2 Translate subtitle .srt file without Downloading Any Software
The other method for translating the SRT files from one language to another is Notepad (for Windows) or TextEdit (for Mac). As these are simple text editor applications built into the OS, you don’t require any downloading or another person’s help to complete the job.
Note: TextEdit and Notebook are best suited for translating short SRT files from one language to another, especially if the subtitles present are not that much complicated.
Step-by-step guide for SRT translation on Notepad
- Go to the drive where you have stored the file and right-click on the same. Click on “Open with” and choose Notepad from the list of options displayed.
- The file will open in Notepad. Now, edit the SRT file according to the subtitle positions and the text you want to add to the video. Check the time codes because they need to be in sync with the video file.
- Once done, save the file and open Google Translate. Copy each text line and paste the same into the translator’s input box. If the language of the original text is not English, change the language from the dropdown in the translator for easier and more accurate interpretation.
- Click on Translate and wait till the translated text is generated. You need to select the language of the output section according to the required language of the translated SRT file.
- Once the translated text is generated, copy the new text and paste it in place of the original text you copied.
Pros
- Does not need to know about the usage of any software
- Best for small SRT files
- Better for beginners
Cons
- Can change the text during translation
- Time consuming process
Step-by-step guide for SRT translation on TextEdit
- Go to the stored location of the SRT file and right-click on the selected file. Once the menu expands, click on “Open With” and then choose TextEdit as the option. You can also change the default file type to TextEdit. Right-click on the file and select Properties. Once the dialog box opens, click on the “Open With” option and select TextEdit from there. Click on Apply and then Save to change the default file type.
- Once you complete all the edits, open Google Translator and select the input and output languages. The input language will be the one in which your original text is written, and the output is the language you need to transfer the SRT file into.
- Copy and paste the text line from the beginning and click on Translate. Wait for the tool to evaluate and display the translated text.
- Copy it and paste the text into the SRT file. Ensure all the texts are adequately translated before saving and uploading the file to the video.
Pros
- No need to know about the technical use of a software
- Can convert the languages of a small file
- Best for immediate translation
Cons
- Errors can occur during translation
- Needs a lot of time
[Optional] If you hope to Edit SRT file for Video, here is the Best Way
Now that you know the best tools for high-quality video-based subtitle translation, you can choose. However, not all of them support the ability to edit SRT files; for that, you can rely on Wondershare Filmora .
The software is a desktop-based program that users can try out for varying levels of video editing work. You can optimize the videos with features like speed ramping, audio visualization, and speech-to-text. You can add subtitles to videos with the last feature or add external SRT files. Editing is possible as well.
How to Use Filmora to Edit SRT Subtitles for Videos?
Free Download For Win 7 or later(64-bit)
Free Download For macOS 10.14 or later
Step1 Open the Filmora software and add the video file.
Step2 Click on Media to upload SRT file.
Step3 Right-click your subtitle file on the editor timeline> Choose “Advanced Edit”.
Step4 Make changes to the time code, add/merge/remove the strips of subtitle, modify the SRT file, or change the font style similar to Filmora’s Advanced Edit-based text format.
Step5 Right-click on the SRT file in the timeline and press the “Export Subtitle File” option.
Step6 Make other video edits, like merging, equalization, etc.
Step7 Click on Export > Local > YouTube. Make changes in the settings and click the Export button.
Conclusion
We have given you the top six options if you are looking for the best online tool for SRT translation. You need to weigh the options according to your requirements and start translating your subtitle file to a language you want for the video.
Also read:
- Updated 2024 Approved Best Ways to Merge FLV Files Windows, Mac,Android, iPhone & Online
- Updated In 2024, How to Set Up Twitch Green Screen
- 2024 Approved A Complete Guideline About QuickTime Player
- New In 2024, Practical Way to Resize Video in Handbrake
- Updated 2024 Approved How to Use Lumetri Color in Adobe After Effects
- If You Do Not Know How to QuickTime Trim Video Clips, You Are in the Right Place. We Have Provided Information that Will Help You Trim Videos with This Application and Make Them Engaging for Viewers
- In 2024, 5 Tools to Create a Time-Lapse Video Online
- Updated 2 Ways to Add Custom Subtitles to Netflix for 2024
- New Looking for Free Tools to Create Radial Blur Images Online? Read Our Full Guide to Learn About the 6 Best Programs to Add This Effect to Your Pictures
- In 2024, Want to Add a Motion Blur Effect to Your Photos? This Step-by-Step Tutorial Will Show You How to Use GIMP Software to Get the Effect You Want
- How to Make A Jaw-Dropping Time Lapse Video? Full Guide
- Updated Looking for Ways to Enhance Overall Look for Your Contents Professionally? Then Coming up with These Cool PowerPoint Templates Can Help You a Lot
- New Whats The Best Laptops For Video Editing for 2024
- Updated 2024 Approved How to Merge FLV Files Windows, Mac,Android, iPhone & Online
- So, in This Short Tutorial, Well Learn How to Create a Vintage 1980-Style Video with a Retro Effect that Will Leave Your Audience Yearning for More
- Updated 2024 Approved 15 Best LUTS to Buy
- Updated Create a Brand Video to Make Your Business Shine
- Different Ways To Trim Video In Premiere Pro
- In 2024, How to Use Lumetri Color in After Effects
- Updated 8 Best Sites to Get Glitch Transition for Premiere Pro for 2024
- 2024 Approved This Article Describes Different Ways for Removing Gif Backgrounds, How We Can Use Them, and How This Way Differs From One Another
- All Things About Adding Effects In Kinemaster
- 2024 Approved Confused About Which GoPro Should You Use? This Article Introduces and Provides a Detailed Overview of the Best GoPro for YouTubers You Can Find in the Market for Vlogging
- Repeated Text Animation Tutorial in Filmora
- Top 12 AI Video Generators to Pick for 2024
- Add Fade in Windows Video Editor
- In 2024, Create True 3D Text Effects Using After Effects
- Updated In 2024, Best 10 3D Slideshow Software Review
- Updated How to Add Slideshow in PowerPoint
- How to Change Spotify Location After Moving to Another Country On Motorola Moto G Stylus (2023) | Dr.fone
- Can I Bypass a Forgotten Phone Password Of Oppo Reno 10 Pro 5G?
- Looking For A Location Changer On Honor X50i+? Look No Further | Dr.fone
- How to Fix Unfortunately, Contacts Has Stopped Error on Oppo A78 | Dr.fone
- In 2024, Sim Unlock Samsung Galaxy S23 Phones without Code 2 Ways to Remove Android Sim Lock
- In 2024, How to Mirror Vivo X Fold 2 to Mac? | Dr.fone
- How To Stream Anything From Samsung Galaxy M14 4G to Apple TV | Dr.fone
- In 2024, 3 Ways to Track OnePlus Nord CE 3 5G without Them Knowing | Dr.fone
- How To Restore Missing Photos Files from Red Magic 8S Pro.
- How to recover old videos from your C12 Pro
- New 2024 Approved How to Make Your Characters Interactive in Unity Animation Rigging
- How to recover deleted contacts from Vivo S17t.
- How to Screen Mirroring Itel A60s? | Dr.fone
- Prank Your Friends! Easy Ways to Fake and Share Google Maps Location On Xiaomi Redmi Note 12R | Dr.fone
- Full Guide on Mirroring Your Honor Magic 5 to Your PC/Mac | Dr.fone
- Title: How to Denoise in Final Cut Pro – Reduce Video and Audio Noise
- Author: Chloe
- Created at : 2024-05-20 03:37:22
- Updated at : 2024-05-21 03:37:22
- Link: https://ai-editing-video.techidaily.com/how-to-denoise-in-final-cut-pro-reduce-video-and-audio-noise/
- License: This work is licensed under CC BY-NC-SA 4.0.
