
How to Download and Use Windows Movie Maker 10 for 2024

How to Download and Use Windows Movie Maker 10
Looking to create captivating movies from video clips? The best tool for the purpose can be the Windows movie maker 10. The program provides video editors with various tools to create professional-looking videos, including audio options, animations, transition overlays, and timeline narrations. Its functions are simple to use and enjoyable to explore, and its XML code enables users to create new effects and transitions or change current ones. Windows Movie Maker also allows for basic track editings, such as adding fade-in and fade-out features for audio tracks.
It’s also simple to upload finished Windows Movie Maker productions to social media platforms. One of the best benefits of using the Window Movie Maker is its user-friendliness, simple controls, and automatic preview. This program is perfect for beginners, and it comes free on the Windows PC with workflow and essential features in the video editing systems that are made for professionals. Let’s check out how you can download and use Windows Movie Maker and the alternative of this program.
Part 1. How to Download Windows Movie Maker on Win 10?
Who loved the older version of Windows Movie Maker, which was easy to use and a free editing tool? You might have searched “Where is movie maker in windows 10“ in google. If you are missing your favorite video editor, this article will help you download and install the Windows Movie Maker for your PC, which runs on Windows 10. You can download it from their official application; the best part is that it is free of cost. Now here are some steps by which you can download and install the Windows Movie Maker on your Windows 10:-
- Download the installer file of Movie Maker:- Authentic Movie Maker can be easily downloaded through Windows Essentials.
- Extract Zip file:- After completing your download process, you can extract the zip file and run the .exe file. Your Windows essentials will get started.
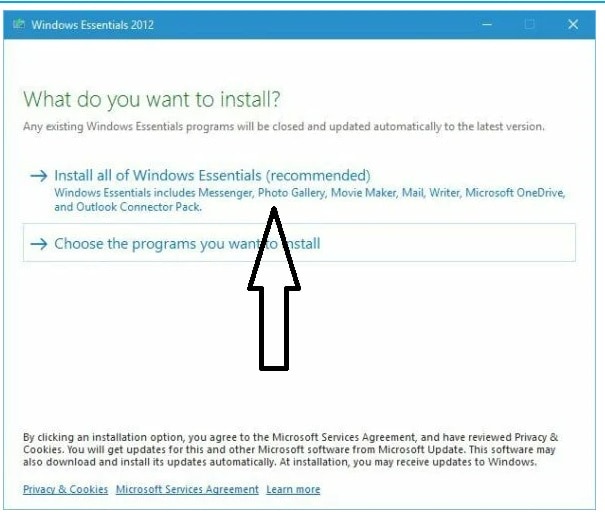
- Choose programs you wish to install:- You can install all Windows essentials, tap on select the programs you wish to install. Here you can have an option for selecting Movie Maker.
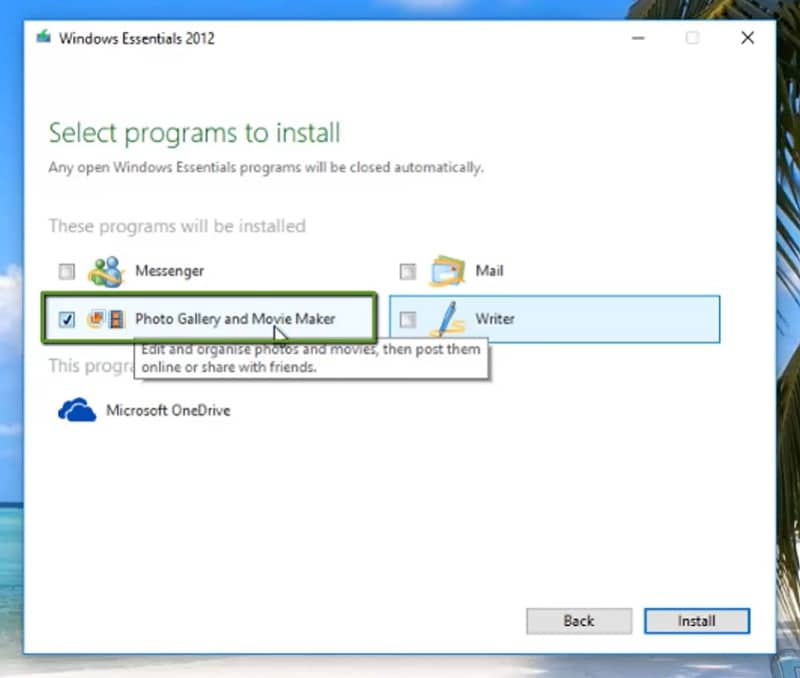
- Choose movie Maker and photo gallery:- On the screen, you must choose “Movie Maker and Photo Gallery” because you will install it on your PC. A simple tap on “Install,” and you will be ready, and the installation procedure will start.
- Launch Movie Maker:- Visit the Start menu and type Movie Maker to launch the app. Open the app and use it. It is a free and easy video editor.

Part 2. How to Edit Videos with Windows Movie Maker?
Before starting your editing on Win10 movie maker, you must ensure that the movie maker supports the format. It’s because it accepts a few formats that includes:- MP3, .WAV, .WMA, .AVI(DV-AVI), .MPG(MPEG-1), .ASF/.WMV. If the videos are not supported in the Moviemaker for Windows 10, you might need to use a converter to convert the video and import the files into it.
Step1 Import clips to movie maker
- To import the photo or video in Windows Movie Maker, click “Add Photos or Videos.” A window will get opened, and users might select a video from their computer.
- After you select the files, you can click on “OK” to import the files to the storyboard.
Step2 Combine/Split/Cut/Trim the videos
You can preview the clips in the preview box. Users can use the Next or Previous Frame to preview the clips. While editing the video, you might have to trim the unwanted part and combine multiple clips into a new one.
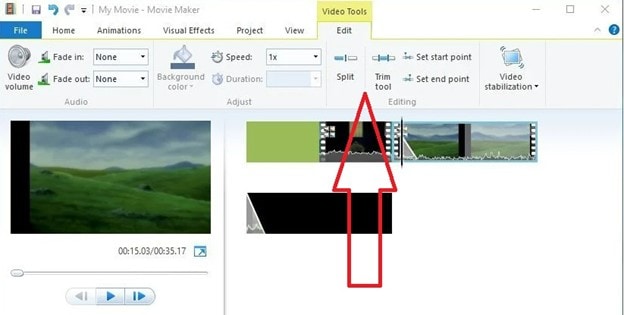
To remove the video parts, you can select the “Start frame” of the video you wish to eliminate, tap on a split button for splitting the segment, select the end frame you wish to remove, and tap on the “Split” option again. You can do it numerous times to edit the video.
Step3 Apply visual effects and transitions to the clips
Once you have the clips for your video, you can add transitions to your video. You can click on Animations to view various options. You will have to choose the clip and add some transitions which you wish.
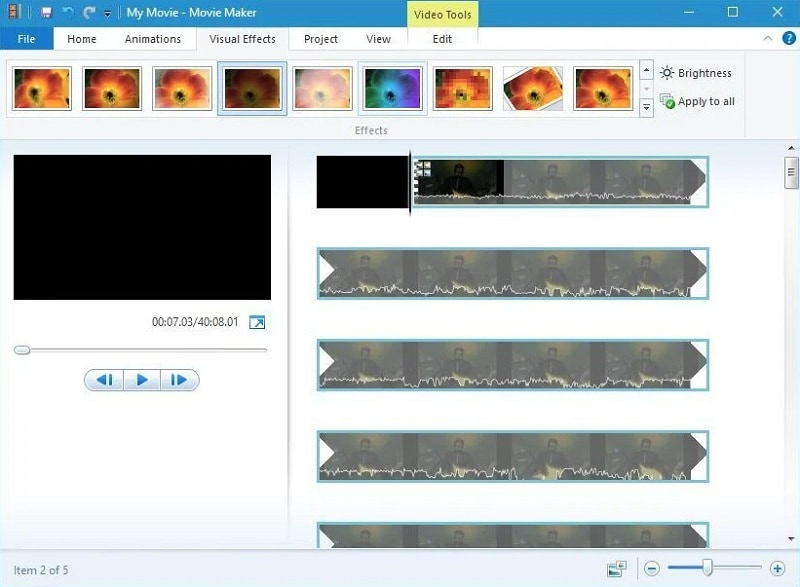
The software will do the work. You can preview the result by tapping on “Play.” After applying the visual effects, you will have to click on the Visual effects to add filter and overlays, and users can apply the effects to the clip.
Step4 Edit audio in the video
Are you planning to add some music to the video? You will have to double-click on your clip to enter into “Edit Panel” and click on the Volume button. You can mute or adjust the volume with the help of a volume slider, which will affect every sound of the clip.
After you adjust the sound of your clips, you can add your music to video clips. Add the music by tapping “Add Music” and choosing music for importing. One can even add the music from the PC.
Step5 Add text and title to the video
Windows Movie Maker allows users to add several types of texts to their videos. You can see three buttons that allow several types of texts to their video:- rolling credits, captions, and stationary title. Tap on the title; you will get options to add text before your video begins.
Choose a caption that you will add to your video frames and tap on the Credits to add effects to the video. After selecting the text type, one can enter the test and edit text effects. You can change the text visuals, duration, outline size, etc.
Step6 Save and Publish
After you have completed your edits, you can save your video by tapping on “File” and then clicking on Publish Movie. One can even choose the place where you wish to save your file.
You can even save the videos on your PC with various formats and resolutions. This editor allows users to save their videos for mobile devices or Email.
Part 3. Movie Maker Alternatives for Win 10 PC
If you want to create a polished clip for public consumption or if you want to experiment with your creativity while learning a new art form, Wondershare Filmora has swiftly established itself as one of the finest Windows 10 movie maker alternatives. Both seasoned and first-time users may successfully produce amazing videos with special effects thanks to Filmora’s user-friendly and straightforward interface. Wondershare Filmora supports a vast range of video formats, including AVCHD, MOV, AVI, MP4, and more. This allows you to combine, split, trim, crop and cut the clips in a few clicks. Now let’s see how you can edit your videos in Wondershare Filmora:-
Free Download For Win 7 or later(64-bit)
Free Download For macOS 10.14 or later
Step1 Create a new project and import the video
Tap “New Project” on the welcome screen and get into a video editor. Click on the “Register” option to register the product. Go to the “File” menu and tap on “Project Setting,” choose the ratio, and cut the video.

You can select from options like 4:3 or 16:9 ratios and customize the ratio according to your needs.
Step2 Place the audio and video files on the timeline and cut the unwanted parts
The raw clips mostly contain unwanted parts and mistakes which don’t belong in the video. If you want to trim or cut the videos, you can drag the video from your Media Tab and drop it on your timeline.

Users can add numerous video clips, but every file you will add will get placed after the previous clip. If you want to rearrange it, you can drag the clips to desired positions.
Step3 Apply the visual effects to your clips
Now that you have removed the unwanted parts from the video clips, you will have to detach the video and audio files, insert transitions, and add music to the clips or use a few visual effects of the Filmora software.

Click on the Credit or Text icon to add subtitles, end credits, or opening titles to the video. This software offers various text templates that you can utilize for your video.
Step4 Use color correction
You can utilize the hundreds of filters and overlays available under the Effects icon in your projects to give the colors in the clip a more vibrant appearance. Please drag & drop the filter you wish to use onto the timeline by clicking the icon and choosing it.
Simply sliding any end of a filter will change how long it lasts. After you are done with everything, save and publish it.
Conclusion
Now, you know the steps to download Windows Movie Maker on your PC. You can use it easily because of its friendly user interface. Editing and publishing videos with Windows Movie Maker becomes easy, and it is a perfect fit for beginners. But if you want something that supports everything, you can choose Wondershare Filmora because it is the best alternative to Windows movie maker. Wondershare Filmora offers limitless editing features and supports every video format. One can easily do professional-level editing in this user-friendly video editing software.
Free Download For macOS 10.14 or later
Step1 Create a new project and import the video
Tap “New Project” on the welcome screen and get into a video editor. Click on the “Register” option to register the product. Go to the “File” menu and tap on “Project Setting,” choose the ratio, and cut the video.

You can select from options like 4:3 or 16:9 ratios and customize the ratio according to your needs.
Step2 Place the audio and video files on the timeline and cut the unwanted parts
The raw clips mostly contain unwanted parts and mistakes which don’t belong in the video. If you want to trim or cut the videos, you can drag the video from your Media Tab and drop it on your timeline.

Users can add numerous video clips, but every file you will add will get placed after the previous clip. If you want to rearrange it, you can drag the clips to desired positions.
Step3 Apply the visual effects to your clips
Now that you have removed the unwanted parts from the video clips, you will have to detach the video and audio files, insert transitions, and add music to the clips or use a few visual effects of the Filmora software.

Click on the Credit or Text icon to add subtitles, end credits, or opening titles to the video. This software offers various text templates that you can utilize for your video.
Step4 Use color correction
You can utilize the hundreds of filters and overlays available under the Effects icon in your projects to give the colors in the clip a more vibrant appearance. Please drag & drop the filter you wish to use onto the timeline by clicking the icon and choosing it.
Simply sliding any end of a filter will change how long it lasts. After you are done with everything, save and publish it.
Conclusion
Now, you know the steps to download Windows Movie Maker on your PC. You can use it easily because of its friendly user interface. Editing and publishing videos with Windows Movie Maker becomes easy, and it is a perfect fit for beginners. But if you want something that supports everything, you can choose Wondershare Filmora because it is the best alternative to Windows movie maker. Wondershare Filmora offers limitless editing features and supports every video format. One can easily do professional-level editing in this user-friendly video editing software.
Using Slow Motion in Adobe After Effects: A Step-by-Step Procession
A slow-motion effect in the videos can enhance the viewing experience. It can highlight a certain action by providing closer details. Moreover, it also evokes an emotional impact in any video scene. Along with creating a dramatic effect, a slow-mo effect also brings aesthetic appeal. Thus, the slow-motion effect can grasp the attention of the audience in an effortless manner.
This article will discuss how to create a slow-motion effect with Adobe After Effects. It’s a well-recognized tool for modifying videos with its powerful features. Hence, keep reading this guide to learn about After Effects slow motion.
Slow Motion Video Maker Slow your video’s speed with better control of your keyframes to create unique cinematic effects!
Make A Slow Motion Video Make A Slow Motion Video More Features

Part 1: What Does A Perfect Slow Motion Video Contains?
To create a perfect slow-motion video, you must consider several factors. In this section, you can come across some elements through which you can generate an accurate slow-motion effect.
- Resolution: Make sure to record your video in high resolution. By doing so, the slow-motion effect will add more visual clarity. Thus, the minimum resolution should be 1080p or 4K.
- Accurate Lighting: Perfect lighting can make a video look impactful. You can either use natural or artificial lighting to make a well-exposed slow-mo effect.
- Choosing Subject: To grasp the attention, choose the subject carefully. A slow-motion effect in sports activities or water droplets can look eye-catching. Thus, you should choose a subject that looks appealing in a slow-mo effect.
- Sound Selection: A slow-mo effect will look more convincing with a relevant sound design. You should search for slow-mo sound effects to generate attractive results. Also, ensure that the speed of sound effects with the video is managed smartly.
- Frame Rate: A frame rate plays a vital role in creating slow-motion effect. Higher frame rates influence a smooth, slow-motion effect. Thus, use 240fps or higher to create a seamless slow-mo effect.
Part 2: Creating Slow Motion Effect in Adobe After Effects
Adobe After Effects is a famous program used in post-production of video making. It contains many motion graphics effects to enhance a video. You can add animated shapes and text to the video with this tool. Many people use this platform to create VFX in their videos to create stunning videos. It also supports 2D and 3D elements to produce realistic effects.
Furthermore, it offers many tools for compositing and keying. Users can change the color patterns in their videos with this robust software. Moreover, it can create After Effects slow motion with perfect accuracy. You can manually adjust the timing and speed of the slow-motion effect with this tool. Thus, Adobe After Effects is a comprehensive tool for video editing.
Here are the instructions that can guide you to produce slow-motion effects After Effects. Thus, let’s dig into the details:
Step 1
Start by uploading a video on After Effects. Drag it to the timeline and edit it in a desired manner. Now, place the cursor in the timeline to begin the process. Right-click on the timeline layer and select “Time” from the pop-up menu. From there, select “Time Stretch.” It will open a Time Stretch window on the screen.

Step 2
On the Time Stretch window, make the “Stretch Factor” value to 250. Once done, press the “OK” button.

Step 3
For high-quality results, enable the “Frame Blending” option. Right-click on the layer and select “Frame Blending” from the pop-up menu. Here, you can select two options: Frame Mix and Pixel Motion. After the frame blending, you can render the final output. Select a suitable format and then export the video.

Part 3: Quick and Unique Alternative: Making Slow Motion Effect with Wondershare Filmora
An excellent alternative to After Effects is Wondershare Filmora . With the release of its Volume 13, you can enjoy many premium features. To boost your productivity, the tool offers many AI features. You can use its AI copywriting feature to produce video outlines. By doing so, you can have AI-generated content for video production. Furthermore, it provides a smooth performance with its robust interface.
It contains a wide range of filters and overlays. It also allows you to apply transitions in the video clip from various options. To replace backgrounds in the video, try its Green Screen feature. This advanced feature can add realistic backgrounds to the videos easily. Moreover, you can color-correct the video to add perfect exposure properties. You can modify brightness, saturation, and other elements in the color-correct options.
Free Download For Win 7 or later(64-bit)
Free Download For macOS 10.14 or later
How to Add Slow-Motion Effect With Filmora
Are you ready to create a slow-mo effect in Filmora? Read the following section to learn how to create a slow-motion effect using this tool.
Step 1: Select New Project
Begin by launching this desktop tool on your PC. Choose the “Profile” icon from the top and sign into the tool. Continue to select the “New Project” button on the main screen to open a new editing window.

Step 2: Import Video to Filmora
On the main interface, press “Ctrl + I” from your keyboard. By doing so, you can import the video clip from your PC. Once done, drag and drop the imported video to the timeline.

Step 3: Choose Optical Flow
Now, select the video you have dragged to the timeline. Go to the right panel and choose the “Speed” tab. Look through the “Uniform Speed” tab and look for the “AI Frame Interpolation” option. By expanding this option, choose “Optical Flow.”

Step 4: Render and Export the Video
Now, head to the toolbar of the timeline. From there, tap on “Render Preview,” through which you can see the final results. Once done, you can export the video to the desired platform.

With the new upgrade, you can add an accurate slow-mo effect from Filmora. It uses AI technology to achieve the best results. Hence, this editing tool is a game-changer in the video production industry.
Exceptional Features of Filmora
AI Music Generator: This tool allows you to create custom music sounds. To do so, select your music style and genre from the given options. Afterward, you can edit the music by adjusting its volume and other parameters.
Screen Recorder: Do you want to capture the on-screen activities of your PC? The screen recorder of this software can capture any area of the screen. It also allows webcam and microphone recording. Afterward, you can edit the screen recording with its basic tools.
Silence Detection: To add more clarity to your videos, try the Silence Detection feature. This option removes the silent parts from your video. The process is automatic and does not need your manual efforts. Thus, with a single tap, you can eradicate unwanted parts from the video.
Speech-to-Text: The STT feature transcribes the video in the selected language. You can add subtitles to the videos in up to 26 languages. This feature increases your editing efficiency and offers great accuracy.
Conclusion
A slow-motion effect can highlight an action in a video clip. It can engage the viewers by generating a cinematic impact. The After Effects is a common program to add a slow-mo effect in videos. However, to create a more captivating slow-motion effect, we suggest Filmora. Its latest version has introduced many premium features for video editing. With AI algorithms, you can add a smooth, slow-motion effect to your videos. The process is automatic, which saves you from manual work.
Make A Slow Motion Video Make A Slow Motion Video More Features

Part 1: What Does A Perfect Slow Motion Video Contains?
To create a perfect slow-motion video, you must consider several factors. In this section, you can come across some elements through which you can generate an accurate slow-motion effect.
- Resolution: Make sure to record your video in high resolution. By doing so, the slow-motion effect will add more visual clarity. Thus, the minimum resolution should be 1080p or 4K.
- Accurate Lighting: Perfect lighting can make a video look impactful. You can either use natural or artificial lighting to make a well-exposed slow-mo effect.
- Choosing Subject: To grasp the attention, choose the subject carefully. A slow-motion effect in sports activities or water droplets can look eye-catching. Thus, you should choose a subject that looks appealing in a slow-mo effect.
- Sound Selection: A slow-mo effect will look more convincing with a relevant sound design. You should search for slow-mo sound effects to generate attractive results. Also, ensure that the speed of sound effects with the video is managed smartly.
- Frame Rate: A frame rate plays a vital role in creating slow-motion effect. Higher frame rates influence a smooth, slow-motion effect. Thus, use 240fps or higher to create a seamless slow-mo effect.
Part 2: Creating Slow Motion Effect in Adobe After Effects
Adobe After Effects is a famous program used in post-production of video making. It contains many motion graphics effects to enhance a video. You can add animated shapes and text to the video with this tool. Many people use this platform to create VFX in their videos to create stunning videos. It also supports 2D and 3D elements to produce realistic effects.
Furthermore, it offers many tools for compositing and keying. Users can change the color patterns in their videos with this robust software. Moreover, it can create After Effects slow motion with perfect accuracy. You can manually adjust the timing and speed of the slow-motion effect with this tool. Thus, Adobe After Effects is a comprehensive tool for video editing.
Here are the instructions that can guide you to produce slow-motion effects After Effects. Thus, let’s dig into the details:
Step 1
Start by uploading a video on After Effects. Drag it to the timeline and edit it in a desired manner. Now, place the cursor in the timeline to begin the process. Right-click on the timeline layer and select “Time” from the pop-up menu. From there, select “Time Stretch.” It will open a Time Stretch window on the screen.

Step 2
On the Time Stretch window, make the “Stretch Factor” value to 250. Once done, press the “OK” button.

Step 3
For high-quality results, enable the “Frame Blending” option. Right-click on the layer and select “Frame Blending” from the pop-up menu. Here, you can select two options: Frame Mix and Pixel Motion. After the frame blending, you can render the final output. Select a suitable format and then export the video.

Part 3: Quick and Unique Alternative: Making Slow Motion Effect with Wondershare Filmora
An excellent alternative to After Effects is Wondershare Filmora . With the release of its Volume 13, you can enjoy many premium features. To boost your productivity, the tool offers many AI features. You can use its AI copywriting feature to produce video outlines. By doing so, you can have AI-generated content for video production. Furthermore, it provides a smooth performance with its robust interface.
It contains a wide range of filters and overlays. It also allows you to apply transitions in the video clip from various options. To replace backgrounds in the video, try its Green Screen feature. This advanced feature can add realistic backgrounds to the videos easily. Moreover, you can color-correct the video to add perfect exposure properties. You can modify brightness, saturation, and other elements in the color-correct options.
Free Download For Win 7 or later(64-bit)
Free Download For macOS 10.14 or later
How to Add Slow-Motion Effect With Filmora
Are you ready to create a slow-mo effect in Filmora? Read the following section to learn how to create a slow-motion effect using this tool.
Step 1: Select New Project
Begin by launching this desktop tool on your PC. Choose the “Profile” icon from the top and sign into the tool. Continue to select the “New Project” button on the main screen to open a new editing window.

Step 2: Import Video to Filmora
On the main interface, press “Ctrl + I” from your keyboard. By doing so, you can import the video clip from your PC. Once done, drag and drop the imported video to the timeline.

Step 3: Choose Optical Flow
Now, select the video you have dragged to the timeline. Go to the right panel and choose the “Speed” tab. Look through the “Uniform Speed” tab and look for the “AI Frame Interpolation” option. By expanding this option, choose “Optical Flow.”

Step 4: Render and Export the Video
Now, head to the toolbar of the timeline. From there, tap on “Render Preview,” through which you can see the final results. Once done, you can export the video to the desired platform.

With the new upgrade, you can add an accurate slow-mo effect from Filmora. It uses AI technology to achieve the best results. Hence, this editing tool is a game-changer in the video production industry.
Exceptional Features of Filmora
AI Music Generator: This tool allows you to create custom music sounds. To do so, select your music style and genre from the given options. Afterward, you can edit the music by adjusting its volume and other parameters.
Screen Recorder: Do you want to capture the on-screen activities of your PC? The screen recorder of this software can capture any area of the screen. It also allows webcam and microphone recording. Afterward, you can edit the screen recording with its basic tools.
Silence Detection: To add more clarity to your videos, try the Silence Detection feature. This option removes the silent parts from your video. The process is automatic and does not need your manual efforts. Thus, with a single tap, you can eradicate unwanted parts from the video.
Speech-to-Text: The STT feature transcribes the video in the selected language. You can add subtitles to the videos in up to 26 languages. This feature increases your editing efficiency and offers great accuracy.
Conclusion
A slow-motion effect can highlight an action in a video clip. It can engage the viewers by generating a cinematic impact. The After Effects is a common program to add a slow-mo effect in videos. However, to create a more captivating slow-motion effect, we suggest Filmora. Its latest version has introduced many premium features for video editing. With AI algorithms, you can add a smooth, slow-motion effect to your videos. The process is automatic, which saves you from manual work.
15 Best Travel Vloggers That You Should Follow
Do you wish to travel to the best parts of the world? Have you found it difficult to travel to your dream places? There are multiple techniques of understanding the dynamics of traveling around the globe. One effective way is to follow vloggers who provide unique information about places they travel.
Since you are looking for information to travel, this article presents you with some of the best vloggers that you can see before traveling to your favorite places.
Part 1: 15 Most Popular Vloggers That You Should Follow for Travel
This part will introduce you to some of the top vloggers that can be followed for travel tips and videos. This list will surely help you prepare for your traveling perfectly.
1. Drew Binsky
Subscriber Count: 3.12M+
Are you fascinated by new cultures and traditions? Drew Binsky is the perfect vlogger that you can follow for deciding your next trip. This American travel vlogger designs the perfect documentary for enthusiasts like you, with a focus on discovering cultures across the world. As he makes his video perfect with assisted storylines, he can be the perfect option for you to get started with traveling.

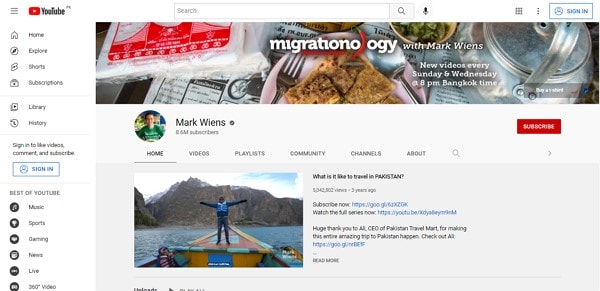
2. Mark Wiens
Subscriber Count: 8.6M+
A fan of both food and traveling? Migrationology is the perfect combination of YouTube vlogging that you can find across the Internet. Mark, the person behind this idea and venture, comes up with the best spots to travel and enjoy food. He accompanies his best visits with proper guides so that you can go through a perfect travel trip to the place you decide.
3. Sorelle Amore
Subscriber Count: 1.03M+
There are very few phenomenal female travel vloggers focused on providing exclusive content to their viewers. Being one powerhouse of excruciating content, Sorelle inspires her viewers with her experiences in traveling. With a greater motive to run her vlog channel, Sorelle Amore encourages her viewers to visit and endure the beauty of the world as it is. Her travel videos are always a step ahead.

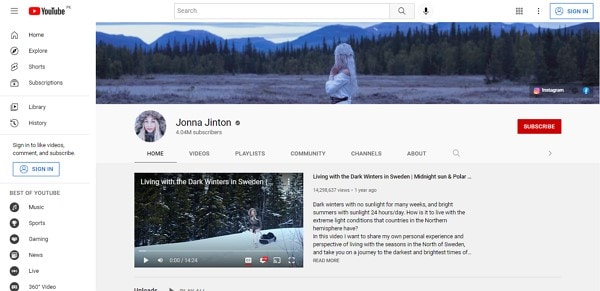
4. Jonna Jinton
Subscriber Count: 4.04M+
Jonna is a Swedish local that lives across the woods. While being an artist, musician, and filmmaker, Jonna has a very different perspective on life. Her idea of getting inspired by nature and finding the ‘right’ essence of nature are induced across her everyday travel videos. She accompanies her videos with music, painting, nature, ice baths, and much more, making her a different deal than the rest.
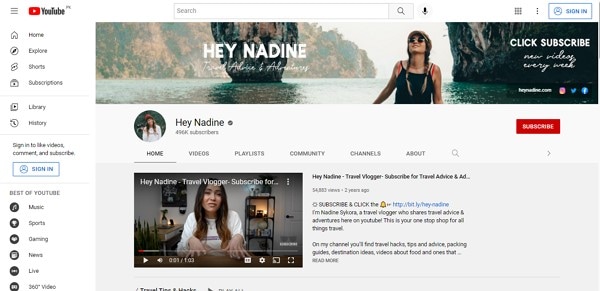
5. Hey Nadine
Subscriber Count: 496K+
This travel vlogger is probably among the first who started filming travel vlogs. While being the best in the market, Hey Nadine has been known for inspiring many people worldwide. Isn’t it great? Her videos are inclusive of the viewer’s desire, making people visit the places after looking at the videos. An authentic personality, combined with nature’s beauty, is what you’ll witness across her travel vlogs.
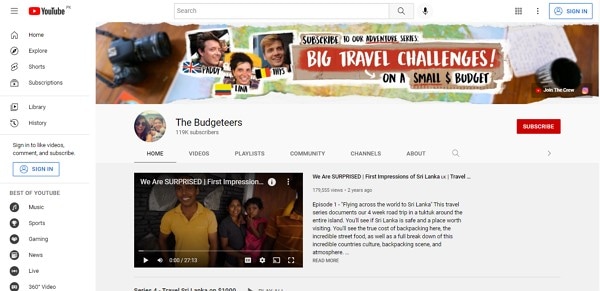
6. The Budgeteers
Subscriber Count: 119K+
The name says a lot about these travel vloggers. The Budgeteers work with wholesome travel vlogs across their channel, which represents a major keyword of ‘budget’ trips. As their objective is to cover trips on a low budget, it has been observed that most of their videos are based in the Southeast Asian region. A group of three people with great visuals and extensive presentation is everything you’ll find across this YouTube channel.
7. FunForLouis
Subscriber Count: 1.98M+
Do you seek diversity in selecting the best travel spot for your summer vacation? FunForLouis is a casual traveler and vlogger who builds up the idea of traveling with the desire to enjoy life. You will find extensive quality in his videos, making the viewers addicted to his videos. Louis Cole surely knows how to brand his travels and bring the best out for his viewers.

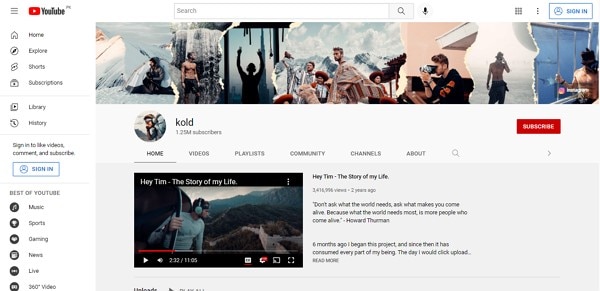
8. Kold
Subscriber Count: 1.25M+
Inspired by filmmakers and storytellers? Do you wish to hit the feeling of traveling to the best places worldwide? Kold is recognized among the best vloggers who essentially work in providing the best view of the location under effective transitions. Although he is not a regular vlogger, he surely brings the best content you can find across the Internet.
9. Vagabrothers
Subscriber Count: 1.13M+
Do you wish to find a fun side of traveling to the best sites in the world? Vagabrothers taps into a different aspect of traveling and helps viewers understand the beauty of being different. Their vlogging is inspired by fun shooting styles and a different perspective to showing the culture and traditions of the place they visit.

10. Fearless and Far
Subscriber Count: 969K+
Just as the name suggests, Mike Corey brings you some of the extreme travel vlogs. If you are a fan of going on extreme adventures, Mike will provide you with some of the best ideas to try. He will let you know the unheard parts of the world that you would want to visit after going through his videos. His sense of perfection in adventure makes him one of the top vloggers.

11. Jennelle Eliana
Subscriber Count: 2.44M+
Young blood is always inspiring. If you are curious how a person living in a van survives, this vlogger is the best choice to watch. Jennelle Eliana has not been an old player, yet her followers have been truly inspired by her motive and content. If you wish to be as inclusive to traveling as Jennelle, you should try out her ideology and style of traveling.

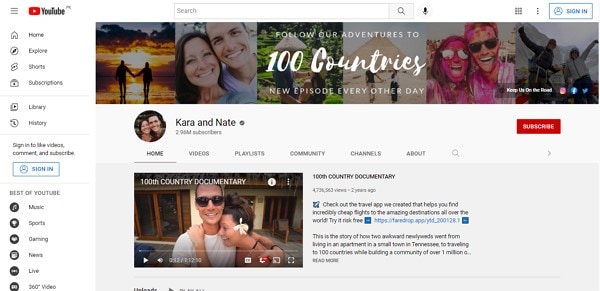
12. Kara and Nate
Subscriber Count: 2.96M+
Do you wish to spend traveling with your life partner, just like Kara and Nate present across their vlogging channel? This couple has been putting up content that is extremely exceptional in terms of vlogging; however, it puts them at the top amongst other best vloggers. Kara and Nate have tried to bring the better side to everything they face across their travel diaries, which can be clearly witnessed in their content.
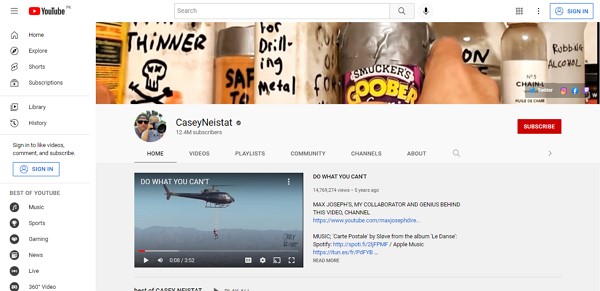
13. Casey Neistat
Subscriber Count: 12.4M+
A pioneer in YouTube vlogging, Casey Neistat brings up a different vibe to traveling. His videos are created with intent and desire, which drives a sensation across the viewers and builds an urge to travel. Casey has been inspiring people with his content, and by producing some masterpieces in travel vlogs, he has also put up his name in the top vloggers for travel.
14. Lost LeBlanc
Subscriber Count: 1.94M+
There is a whole different story to Christian LeBlanc when it comes across his traveling vlog channel. This vlogger has worked across his desire to get out of the corporate culture and work on his desire to explore the world. As he sold everything he owned, he has now been working as a travel vlogger, with the aim of inspiring people all along.

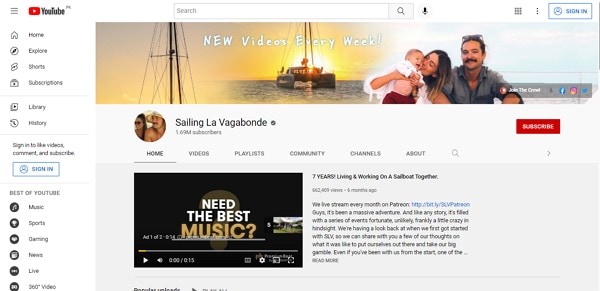
15. Sailing La Vagabonde
Subscriber Count: 1.69M+
If you wish to have a whole new traveling experience, you should see Elayna and Riley traveling the world across a boat. As they took a new lifestyle in their lives, they have presented a different perspective of traveling through water. Their idea of the environment is enticing, making them referred to among the best vloggers.
Closing Words
Have you gone through this extensive list of travel vloggers? Find out the best among them? We wish that you will be inspired by our list and would come across this industry with a new idea to travel vlogging. However, within this journey of video making, you should never forget the video editor that would help you. Wondershare Filmora is the perfect option that you may find in the market for putting up a nice travel vlog for your channel.
For Win 7 or later (64-bit)
For macOS 10.12 or later
For macOS 10.12 or later
For macOS 10.12 or later
For macOS 10.12 or later
2 Ways to Add Custom Subtitles to Netflix
Netflix is the most popular streaming service in the world. It offers loads of movies and series that you can watch on smartphones, tablets, and computers. Over the years, Netflix has become a one-stop destination for watching movies and TV shows in different languages.
While the user base of Netflix is quite diverse, the platform offers subtitles in limited languages for most movies and series. Suppose you want to view a Korean Drama on Netflix with French subtitles. However, you found that French subtitles are unavailable for that Korean Drama. In such a case, you might wonder if adding custom subtitles to Netflix is possible.
Well, you can add subtitles to Netflix, and there are two different methods to do the same. This guide will help you learn both methods available for adding custom subtitles to Netflix. So, let’s get started!
Method 1. Upload Your Custom Subtitle to Netflix
Before proceeding with this method, you must remember that it only works if you are a Netflix Premium user. Now, let’s discuss how to add subtitles to Netflix with this method.
Key Steps to Follow
Below are the steps for adding custom subtitles to Netflix.
Step 1 First of all, you need to install and add Language Learning with Netflix & YouTube™ extension to your web browser (Chrome or Edge).
Step 2 Make sure the extension is activated.
Step 3 Download the .srt file that contains the subtitles in your preferred language for a particular movie or TV show.
Step 4 Open Netflix on a Chrome or Edge browser and sign into your account.
Step 5 Play the movie or TV show for which you have downloaded the subtitles.
Step 6 Within the Netflix player, you will see a settings icon left to the Subtitles icon. Click on it.
Step 7 Among the various setting options, you need to choose the screen and find the one with the label “Lower Subtitles (Mother Language)”. You need to click on its field and select the “Upload Subtitle” option.
Step 8 You will see a pop-up window at the top of the screen where you need to click the “Choose File” button.
Step 9 You then need to navigate to the directory on your computer where you have downloaded the subtitles file, select it, and click the “Open” button.
Step 10 Click the “Okay” button to upload the subtitles to Netflix.
Step 11 Close the settings window and play the video. You can view the uploaded subtitles at the bottom of the player.
Method 2. Add Custom Subtitles to Netflix with Extensions
If you’re not a Netflix Premium user, you can still add subtitles to Netflix with the help of certain browser extensions. We’ll list them down and discuss the steps for using one of them; the basic steps for using all such extensions are pretty much the same.
1. Substital
Supported web browsers: C hrome | Firefox | Edge
Substital is among the most popular extensions that allow you to add subtitles to several online on-demand video streaming platforms, including Netflix. It has more than 100K users on the Chome Web Store.
Key Features
- Offers a built-in subtitles search feature.
- Supports .srt files and .zip files containing subtitles in the .srt format.
- You can manually sync the subtitles with the video.
- It allows you to customize the appearance of subtitles.
Steps to Add Custom Subtitles to Netflix with Substital
Following are the key steps to add custom subtitles to Netflix using the Substital extension:
Step 1 The first thing you need to do is to download and install the Substital extension on your browser.
Step 2 Open Netflix on the same browser and log in to your account.
Step 3 Play the movie or episode from a TV series for which you want to add custom subtitles.
Step 4 Download the subtitles file for the same movie or episode in your preferred language from the web.
Step 5 Now open the extensions menu in your browser and click on the Substital icon.
Step 6 You will see the name of the movie or TV show that you are watching on Netflix. Click on it.
Step 7 In this step, you need to drag and drop the subtitle file from your system (that you downloaded earlier) to the browser window.
Step 8 Finally, you can notice that the subtitles are loaded in the Netflix player.
2. Super Netflix
Web browsers: Chrome
Super Netflix is yet another reliable extension to add subtitles to Netflix. Apart from adding custom subtitles, this extension allows you to change the video playback speed. Like Substital, the Super Netflix extension on Chrome Web Store also has 100K+ users.
Key Features
- It can help you avoid spoilers by blurring images and episode descriptions.
- You can use the extension to skip intros automatically.
- Offers 5 different video modes.
- You get the option to change the Netflix streaming server.
3. Netflix SubStyler: customize subtitles
Web browsers: Chrome
Unlike the other two extensions mentioned above, Netflix SubStyler only allows you to change the styling of subtitles on Netflix. However, the thing that makes this extension worthy of your attention is that it comes loaded with several customization options.
Key Features
- You can choose a custom text color for the subtitles either with the help of an in-built color picker or by entering the RGB value of the color.
- The extension lets you add text outlines and change the size of the text.
- You can even add a text background and change its color and opacity.
Bonus Tip: How to Edit and Add Subtitles to Videos Available Offline
In certain cases, you may want to edit the subtitles of videos probably because either the subtitles are not available for a certain part of the video, or they are not correct. So, if you want to edit subtitles of videos that you have downloaded with ease, you can consider using Wondershare Filmora .
Free Download For Win 7 or later(64-bit)
Free Download For macOS 10.14 or later

Filmora is one of the most popular and powerful video editors out there. Developed by Wondershare, it allows you to import subtitle files in various formats, including .srt, and edit them directly. Some noteworthy features of Filmora for subtitles and video editing include the manual addition of subtitles, speech-to-text conversion, green screen, video stabilization, and color correction.
Wondershare Filmora also offers several advanced text editing tools that make it possible to customize the appearance of subtitles that you add to a video. You can change the color and size of the fonts and add a gradient effect to the text. Additionally, you can animate text to make it stand out.
Add Custom Subtitles with Filmora: A Step-by-Step Guide
If you want to add subtitles to any video using Filmora, you simply need to follow the steps mentioned below. Please note that for this tutorial, we’ll be using Filmora 11.
Step 1 Launch the Filmora app on your computer and create a new project.
Step 2 You can simply click the “Import media” button and load the video onto it.
Step 3 Hover over the video’s thumbnail and click on the (+) button to add it to the timeline.
Step 4 Now, you need to play the video and find the section of the video where you need to add subtitles. Pause the video and add a mark by pressing the M key on your keyboard. You can also do the same by clicking the marker button, which is located beside the microphone icon in the top right of the timeline tab.
Step 5 To add the subtitle, you need to click on the “Titles” button that you can see at the top of the Filmora window. You can see several subtitle templates available there.
Step 6 Download, preview, and choose a subtitle template that seems most appropriate.
Step 7 You can then drag and drop the subtitle to the timeline above the video timeline. You can also trim the subtitle length from any side of the subtitle timeline box.
Step 8 You need to double-click on the subtitle timeline box to add custom text, change font size, color, and alignment, and add animations.
Step 9 Once done, you can click on the “Ok” button to save the changes.
Step 10 Similarly, you can add subtitles for different sections of the video.
Conclusion
If you want to add custom subtitles to Netflix movies and TV shows, you can achieve the same with the two different methods mentioned above. For the first method to work, you must be a Netflix Premium user. On the other hand, the second method will work fine even if you aren’t a Netflix Premium user. Also, you can add custom subtitles to any offline videos using the Wondershare Filmora video editor.
Free Download For macOS 10.14 or later

Filmora is one of the most popular and powerful video editors out there. Developed by Wondershare, it allows you to import subtitle files in various formats, including .srt, and edit them directly. Some noteworthy features of Filmora for subtitles and video editing include the manual addition of subtitles, speech-to-text conversion, green screen, video stabilization, and color correction.
Wondershare Filmora also offers several advanced text editing tools that make it possible to customize the appearance of subtitles that you add to a video. You can change the color and size of the fonts and add a gradient effect to the text. Additionally, you can animate text to make it stand out.
Add Custom Subtitles with Filmora: A Step-by-Step Guide
If you want to add subtitles to any video using Filmora, you simply need to follow the steps mentioned below. Please note that for this tutorial, we’ll be using Filmora 11.
Step 1 Launch the Filmora app on your computer and create a new project.
Step 2 You can simply click the “Import media” button and load the video onto it.
Step 3 Hover over the video’s thumbnail and click on the (+) button to add it to the timeline.
Step 4 Now, you need to play the video and find the section of the video where you need to add subtitles. Pause the video and add a mark by pressing the M key on your keyboard. You can also do the same by clicking the marker button, which is located beside the microphone icon in the top right of the timeline tab.
Step 5 To add the subtitle, you need to click on the “Titles” button that you can see at the top of the Filmora window. You can see several subtitle templates available there.
Step 6 Download, preview, and choose a subtitle template that seems most appropriate.
Step 7 You can then drag and drop the subtitle to the timeline above the video timeline. You can also trim the subtitle length from any side of the subtitle timeline box.
Step 8 You need to double-click on the subtitle timeline box to add custom text, change font size, color, and alignment, and add animations.
Step 9 Once done, you can click on the “Ok” button to save the changes.
Step 10 Similarly, you can add subtitles for different sections of the video.
Conclusion
If you want to add custom subtitles to Netflix movies and TV shows, you can achieve the same with the two different methods mentioned above. For the first method to work, you must be a Netflix Premium user. On the other hand, the second method will work fine even if you aren’t a Netflix Premium user. Also, you can add custom subtitles to any offline videos using the Wondershare Filmora video editor.
Also read:
- [New] 2024 Approved How to Add Instagram Filter to Existing Photos and Videos?
- [New] In 2024, Dronemaker's Ultimate Sky Explore
- [Updated] Optimize TikTok Interaction Learning to Update Numbers
- 2024 Approved Beginning the Live Journey on Instagram
- 2024 Approved Use Path Blur In Photoshop To Create Motion Effect
- Deciphering the Buzz Surrounding the Next-Gen Google Pixel Fold : Rumored Costs, Launch Windows & Specs Leak Preview
- In 2024, How To Enable USB Debugging on a Locked Xiaomi Redmi K70 Pro Phone
- In 2024, Top 15 Apps To Hack WiFi Password On Realme C53
- LumaFusion – One of the Best Video Editors for iOS
- Mastering Skype Meetings Windows/OS X Record for 2024
- New Everything That You Need to Know About Video Montages- Ideas, Techniques, and Software
- New How to Add Miniature Effect in Video with Filmora for 2024
- New Step by Step to Split Clips in VLC for 2024
- What to Do When You're Not Getting Emails on Yahoo - A Step-by-Step Guide
- Title: How to Download and Use Windows Movie Maker 10 for 2024
- Author: Chloe
- Created at : 2025-01-20 00:19:53
- Updated at : 2025-01-24 01:58:21
- Link: https://ai-editing-video.techidaily.com/how-to-download-and-use-windows-movie-maker-10-for-2024/
- License: This work is licensed under CC BY-NC-SA 4.0.