
:max_bytes(150000):strip_icc():format(webp)/how-to-set-up-a-ps5-5088641-1bcc6bca24cd460bb2b276fdeb6cb830.jpg)
How To Fade Audio In Kinemaster
How To Fade Audio In Kinemaster
If you have been looking for video and audio editing tools then you have probably heard of Kinemaster. It is a great video editing app that allows users to edit all aspects of the video including any audio or music that may accompany the video. It has a lot of very useful features and the user interface is fairly easy to use.
One of the things that you can do with Kinemaster is to fade out audio, a useful feature that can help the ending of any video appear more authentic. In this article, we will be looking at how you can use Kinemaster to fade audio.
Kinemaster Fade Audio Steps
The following steps show you how you can easily fade audio in Kinemaster;
Step1If you don’t have Kinemaster already, start by downloading and installing the video editor on your computer.
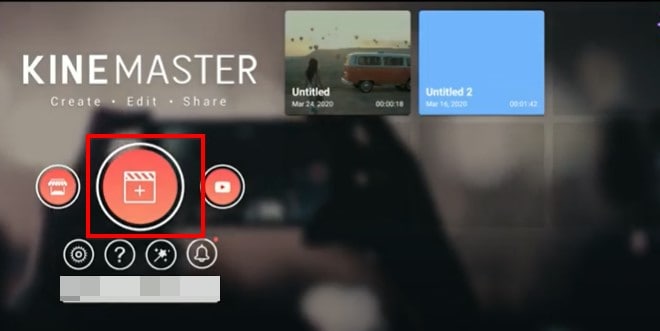
Step2Open Kinemaster on your computer and then click on the “New Project” icon to start. Select the aspect ratio that you would like to use. If you are not sure, we recommend choosing the “16:9” aspect ratio.
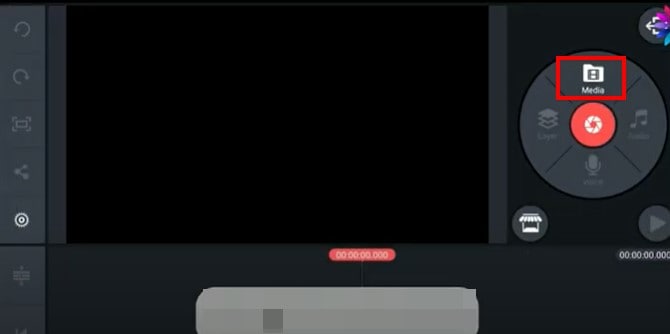
Step3In the next window, click on “Media” to select the clip you would like to add to the Kinemaster project that you have just created.
Step4To fade in and fade out the audio in the project, click on the gear icon from the options to the left of the screen.
![]()
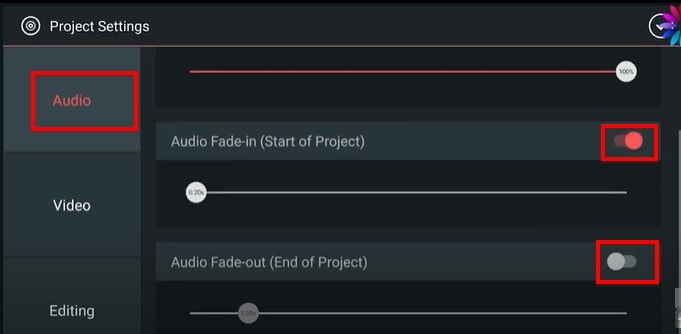
Step5Select the “Audio” tab on the next screen and then turn on the switch next to “Audio Fade-in (Start of Project)” and “Audio Fade-out (End of Project).” This will add a fade-in and fade-out effect at the beginning of the audio and at the end of it.
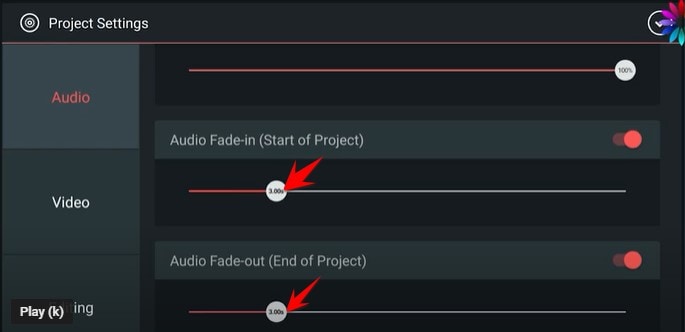
Step6You can then easily set the duration of the “Audio fade-in” and “Audio fade-out” by dragging the slider below each option. We recommend setting the duration to just a few seconds.
Don’t forget to save the project when you’re done.
Kinemaster Alternative to Edit Audio
Kinemaster is a good way to edit both audio and video on your computer, but the following options are just as good;
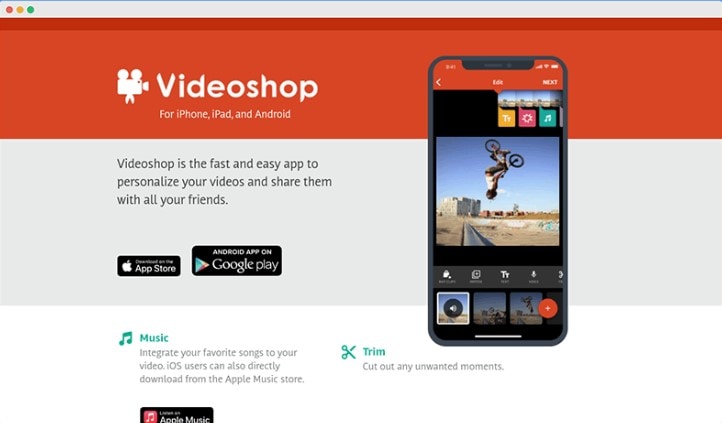
1. VideoShop
VideoShop is a simple to use and highly effective program that you can use to create and edit videos on your computer. The interface makes it easy to import any video project that you have into the program and the wealth of very useful features can help you edit the video in various ways.
For example, you can change the speed of the video, add transitions at various points in the video, add and remove text, add and remove music and so much more. Although there is a free trial version, you will only be able to access some of the more useful features when you purchase the premium version.
The Pro version of VideoShop goes for $3.99 a month, but you can get lifetime access to the program for only $39.99. One thing that VideoShop has over Kinemaster is that it is very easy to use, even beginner users find video editing a breeze with this tool.
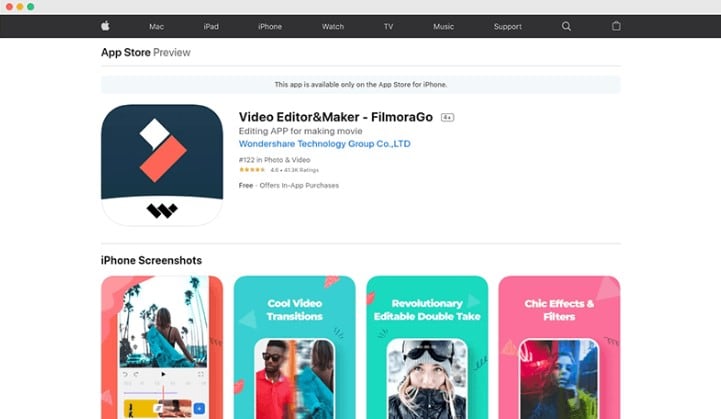
2. Filmora
If you are looking for a simple way to edit videos on Android or iOS devices, Filmora is one of the best options in the market. This mobile version of the very popular Filmora video editor is just as easy to use as its parent program. You can use it to create video projects from scratch or upload a video and make changes to it.
It offers you a lot of choices when it comes to editing features including trimming sections of the video, adding filters, adding music, adding or removing text, and even changing the canvas or the background of the video. Advanced options such as changing the speed of the video are also available.
One of the things that we love about Filmora is that you don’t even have to create an account to use it or remove the watermark added to the completed video project, watching a video ad can be enough. But this option is only available once every 24 hours, meaning that you can only remove a watermark on the free version once a day. Filmora is available for both iOS and Android and the yearly premium plan will cost you just $19.90.
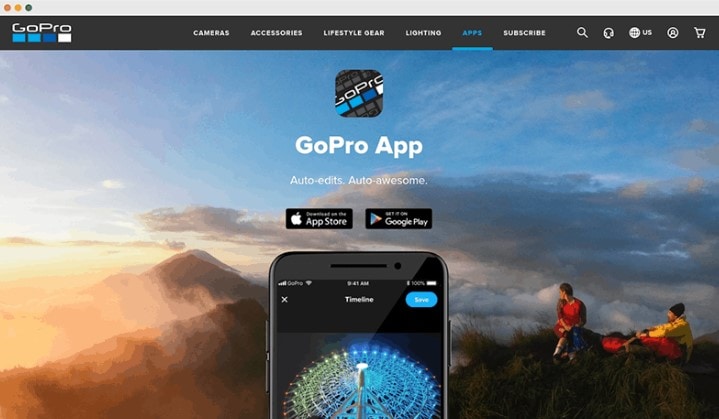
3. Quik
Quik is a video editing program created by GoPro for the purpose of editing GoPro videos, but that doesn’t mean that you will not be able to use it to edit other types of videos. You can use Quik to create a new project or edit an existing video and gives users a lot of different options when it comes to video editing.
One of the main benefits of using Quik is that you can easily add music, audio, and special effects to a video as well as change the length of the video, fade audio in and out and even change when the music starts. It is also one of the best ways to use images to create collages and slideshows very easily. There are a lot of slideshow and collage templates to choose from, and you can edit them easily by adding your music and images. Quik is completely free to use and you can upload your creation to the cloud ad share the link with others.
Conclusion
Kinemaster is one of the most popular video editing tools, especially since it simplifies the video editing process to make it very easy. All the alternative tools we have outlined here in this article are selected because they can make video editing quite simple.
Free Download For Win 7 or later(64-bit)
Free Download For macOS 10.14 or later
How to Overlay Video in Premiere Pro
In order to make it simple to combine the shot’s components into a sequence, video overlays are pieces of film that are often recorded in a dark studio. Using image overlays on a video production is fairly frequent. However, adding pictures to every video you export might be tiresome and time-consuming if you have several films to send. For instance, an overlay video in Premiere Pro might be preferred by you rather than a manual addition of the overlay media.
There is a quick and easy method to know how to overlay a video on a video in Premiere Pro and we’ve got it covered. However, depending on the kind of element, there may be some color blending that affects the components themselves. Overlays may be filmed on either a green screen or a blue screen. Snow components photographed against a green screen may have a green hue shift, necessitating further color grading before the footage might be used.
Part 1. How to Overlay Video in Premiere Pro
Videos sometimes need a splash of color to elevate them. With the built-in color effects in Adobe Premiere Pro, you can apply overlays to any video, whether you want to add a little drama to a clip or a splash of color to a social media post. We’ll demonstrate how to overlay videos in this article. To liven up your intros, make your outros stand out, and spruce up your summer social media posts, add a gradient video overlay effect. Adobe Premiere Pro and gorgeous video clips are all you need.
Steps to Overlay Video in Premiere Pro
Step1Activate Premiere Pro
To build a new sequence, start a new project in Premiere, import your footage, then drag your clip onto the timeline. The clip’s parameters will be reflected in the sequence.

Step2Select Overlay Effect
Secondly, choose the Effects workspace (located near the top of your window). This will guarantee that the tools we need are accessible. Alternately, you may go to Window > Workspaces > Effects.

Step3Create a layer of adjustments
Go to File > New > Adjustment Layer to begin. Make sure your Project panel is chosen if the option is not accessible. Your clip and sequence will show up in your Project panel with the adjustment layer. Add the timeline with the adjustment layer selected.

Step4Create the Video Overlay
Transitions, generators, audio effects, and video effects are all included under the Effects panel. We’ll begin by selecting the 4-Color Gradient from the “Generate” folder, which contains generators for patterns and gradients, to produce the video overlay effect. Right-click on the adjustment layer in the timeline and drag the appropriate effect there.

Step5Change the Effect Control
In the Effect Controls panel, you may manage and adjust effects. You may change the default effect settings for each element in your timeline, such as size and opacity, under the Effect Controls panel along with any additional effects you’ve added. To access an item’s effect controls, click on it in the timeline.

By selecting the ‘Show all properties’ next to the adjustment layer in your timeline, you can get a before-and-after comparison. Increase the value by selecting “blend with original.” To change the effect’s strength, move this up and down.
Step6Save the Project
Try switching the linear mode to radial. You can make a color transition for circles by doing this. You will be able to highlight various things with color after this transition. The circle’s starting point may be animated to follow a certain item in the scene.

To the right of the Presets drop-down menu, choose the Auto Save button. Check the Save Effects Settings box when the Choose a Name dialog box appears. Future exports made with this preset will automatically take into account any Image Overlay settings you’ve configured.
Part 2. Premiere Pro Easy Alternative to Overlay Video [Filmora ]
Any professional video editor may be interested in it since it offers the strength, complexity, and adaptability they need. Users need to be well-versed in a variety of editing techniques in order to use the tools properly. Therefore, it’s not really the best option for a novice or someone who hasn’t mastered video editing. We advise using Filmora as a substitute because of this. It is user-friendly for all users and is crammed with numerous theme effects shops to spruce up your video effects, such as transitions, filters, overlays, titles, etc.
Filmora is a powerful and creative video editing program that is really simple to use. With a wide variety of sophisticated video editing tools, Filmora boasts a highly user-friendly interface. Both novice and experienced video editors may utilize the many creative features that Filmora offers. Filmora is the best option if you’re looking for a video editing program that’s not only inexpensive but also offers a variety of features and functions. The program not only has a fantastic user interface, but it also offers strong capabilities that let video editors create precisely the films they desire.
Free Download For Win 7 or later(64-bit)
Free Download For macOS 10.14 or later
Steps to Use Filmora to Overlay Videos:
Step1Launch Filmora
Run the software and switch to Video editor mode. Next, add the image or movie to the media library. Now drag and drop the primary video into the video track or click the “Import Media” button to add it.

Step2Import Media to Overlay
Find the image or video in the media library that you want to overlay over the backdrop video and right-click on it. The image or video overlay may be resized and positioned here as desired.

Step3Spice up with Effects
There are several choices available for adding extra effects to the video. By selecting the effect tab, you may look for more effects as well. The decision to switch to a green screen or include other components into the film is entirely up to you.

Step4Customize Effects and Save
Inside the Effects window, press Ok and once you have applied the required effects to see the modifications appear on the screen. You may also add element movements to make the video seem more entertaining. Once the editing and effect adding are complete, you may export the video on the go.
Conclusion
An image or animation that you contribute to your movies as a video overlay will display below the video and cover the video. Overlay editing is the kind of editing that is most often utilized. It just covers over whatever is in the timeline at the location where you wish to add that clip. If necessary, you may also review the comprehensive instructions for adding images or movies as an overlay to a video, which helps in improving the video quality. With Filmora , video overlays allow for the sharing of additional information without interfering with the viewing of the video.
Free Download For macOS 10.14 or later
Steps to Use Filmora to Overlay Videos:
Step1Launch Filmora
Run the software and switch to Video editor mode. Next, add the image or movie to the media library. Now drag and drop the primary video into the video track or click the “Import Media” button to add it.
Step2Import Media to Overlay
Find the image or video in the media library that you want to overlay over the backdrop video and right-click on it. The image or video overlay may be resized and positioned here as desired.
Step3Spice up with Effects
There are several choices available for adding extra effects to the video. By selecting the effect tab, you may look for more effects as well. The decision to switch to a green screen or include other components into the film is entirely up to you.
Step4Customize Effects and Save
Inside the Effects window, press Ok and once you have applied the required effects to see the modifications appear on the screen. You may also add element movements to make the video seem more entertaining. Once the editing and effect adding are complete, you may export the video on the go.
Conclusion
An image or animation that you contribute to your movies as a video overlay will display below the video and cover the video. Overlay editing is the kind of editing that is most often utilized. It just covers over whatever is in the timeline at the location where you wish to add that clip. If necessary, you may also review the comprehensive instructions for adding images or movies as an overlay to a video, which helps in improving the video quality. With Filmora , video overlays allow for the sharing of additional information without interfering with the viewing of the video.
Things About Transparent PNG Remove and Convert
Things You Need to Know About Transparent PNG Remove and Convert
An easy yet powerful editor
Numerous effects to choose from
Detailed tutorials provided by the official channel
Are you thinking of merging two photos together with an identical background and no loss of quality? Or, do you have to remove the background color in a design? In such cases, PNG images work best for all.
PNG images are used at a broad level by web designers, graphic designers, and many other professionals around the world. It enables them to have a transparent background along with the finest image quality. It’s even possible to convert a JPG image to PNG transparent using any image editor. However, the process can seem a bit tedious and become complex if you are not using the right tool.
So, to help you out, we will reveal here the best way to remove the background of a photo and convert JPG image to PNG transparent.
In this article
01 [How to Remove the Background of a Photo in PowerPoint](#Part 1)
02 [How to Convert JPG to Transparent PNG](#Part 2)
Part 1 How to Remove the Background of a Photo in PowerPoint
If there is anything that a designer hates in his precious photo, then it’s the background. It hides and distracts from the main subject at hand. You can use various photo editing tools to remove the background from PNG images or JPG. However, they may not do the job as easily as you are thinking.
Yes, we know that you may be wondering about Adobe Photoshop now. It can be used for removing the background too but are you ready to pay for it? No, right? This is when you can depend on PowerPoint to erase the background of a photo without any hassle. Make sure you have PowerPoint 2010 or a later version installed before beginning. Because the earlier Microsoft PowerPoint versions don’t have a background removal feature.
Step 1: Open the image in a new tab
Launch PowerPoint on your desktop or Mac and change the layout of the slide to “Blank”. Next, insert your image, which has a solid or high-contrast background. Such pictures are easier to transform and edit.

Step 2: Select the “Remove Background” option
Click on your image to get the “Picture Format” in the menu toolbar. On the left top side, choose the “Remove Background” option. Now, PowerPoint will try to remove the background automatically. If the final picture that you are getting is not satisfactory, move to the next step.

Step 3: Select the Area
From the given options in the toolbar, mark the areas that you want to keep or remove in the final result. As you can view, how some parts of the pictures have been cut. So, spread the box to cover the entire area of the image, which you want to keep. Remember, purple-highlighted areas are removed automatically.

If you want to ensure a better result, use the cursor. Start hovering over the background and the main subject to get the plus and minus sign. These signs are useful for getting a precise image at the end. The Minus sign allows you to mark the areas to be removed. The plus sign can be used to keep the marked areas in the final picture.
Step 4: Finishing Touches
Check your image carefully and see whether any area is left to be removed or not. You can zoom in to find the tiniest spot. When you are satisfied with every detail, click anywhere outside of the image to stop further edits. Congratulations! Your transparent PNG is ready to save. Go to “File”>”Save As” and find the option to save your picture in PNG transparent format.
Part 2 How to Convert JPG to Transparent PNG
Ever wondered how logos in a graphic match with the background image color? It’s possible with transparent PNG images only. The transparent PNG images format contains superior quality and no background. Hence, it is pretty helpful for the designers to add them to graphics and videos.
In case you have some JPG images but you want it in PNG images format, don’t worry. You can use Kapwing as it’s a trusted content creation and video editing platform. It can bring your idea to life. It can convert JPG to PNG transparent easily. With the AI-powered facility, you can enjoy a seamless editing and conversion experience. Kapwing makes it really simple and fast, but the best part is that you can get it done for free.
Step 1: Add Your JPG
Launch Kapwing in any browser of your choice. Log in using your account or sign up with a new one. Now, you will be redirected to the Kapwing studio, where you can do all the editing and conversion. Upload your image to the “Kapwing Studio” and use the “Remove Image from Background” tool.

If the image is already saved on your device, simply hit “Click to Upload” or, if you wish, drag and drop the JPG image to initiate the conversion. On the other hand, in case the image is not available, you can copy and paste from a URL in the “Paste an image or video URL” box.
Step 2: Pick a Tool
After the image upload finishes, the next thing is to start removing its background. Go to the right side of the “Image” tab and click on the “Erase” button. Otherwise, you can use the “Remove Background from Image” tool to start.

You have two options to choose from – Erase and Magic Wand. The first tool gives you full control over what you want to remove or keep. Adjust the “eraser size” by sliding right on the dial. This way, you can remove the background precisely.
Apart from that, the Magic Wand tool is amazing for removing a particular area at once. You can remove the picture background in less time and effort. If you want to remove a certain area of the same color, then the Magic Wand is the best tool to use. It eliminates similar groups of pixels together. To modify the sensitivity, move the same dial to the right as you did while selecting the “Erase” tool.
For some impressive results, adjust the zoom and choose “Move” to select the pixels you want to remove.
Step 3: Make the PNG and Download
After everything has been set, it’s time to download your PNG transparent file. Click “Done” and then move back to the Kapwing Studio for additional features. You can add watermarks, text, and a lot more. Finally, hit the “Publish” button placed at the top right and “Download” to save the PNG file to your desktop.
You can do more with Wondershare Filmora Video Editor !
For Win 7 or later (64-bit)
For macOS 10.12 or later
Have you ever tried to extract images from a video file? Well, many of us wish to do so but lack the right tools or don’t have any idea of how to do it. Some people just take a screenshot of the video and crop it for use in memes, images, etc. However, doing this will reduce its overall resolution and quality.
If you want to preserve quality during the extraction of images from a video, use Wondershare Filmora. It lets you take images out of a video file frame by frame without any compromise on quality. It features many other tools to show your creativity.
It’s the latest update. Filmora V11 is here! Find out what’s new in this latest video editing software release and how it can help you create incredible videos and images. You can remove any unwanted object from an image, add filters and overlays, all on the go.
● Ending Thoughts →
● So there you have it: the full story on transparent PNGs, removing background, and conversion from JPG to PNG file format. As you can see, it’s not too hard to combine one image in your design. However, we don’t want you to forget anything. Hence, remember these things when you try to convert JPG to PNG transparent.
● Whichever method you choose to turn a PNG image into a JPG, make sure you are familiar with the tool. If not, first spend time figuring out the features. Seek out what suits you and then start. We would recommend following the above tips carefully instead of using any other tool.
● Beware of using third-party websites for background removal from a PNG. Many will store your pictures, which can be accessed by other users. They are not safe for you by any means.
● It’s not an easy job to convert JPG to transparent PNG using PowerPoint, especially when an image contains multiple images and colors. For such pictures, you can use Kapwing. It has plenty of additional features that you can use for creative work.
● If you have any questions or have different ways of accomplishing this, feel free to comment below. Thanks for reading.
Are you thinking of merging two photos together with an identical background and no loss of quality? Or, do you have to remove the background color in a design? In such cases, PNG images work best for all.
PNG images are used at a broad level by web designers, graphic designers, and many other professionals around the world. It enables them to have a transparent background along with the finest image quality. It’s even possible to convert a JPG image to PNG transparent using any image editor. However, the process can seem a bit tedious and become complex if you are not using the right tool.
So, to help you out, we will reveal here the best way to remove the background of a photo and convert JPG image to PNG transparent.
In this article
01 [How to Remove the Background of a Photo in PowerPoint](#Part 1)
02 [How to Convert JPG to Transparent PNG](#Part 2)
Part 1 How to Remove the Background of a Photo in PowerPoint
If there is anything that a designer hates in his precious photo, then it’s the background. It hides and distracts from the main subject at hand. You can use various photo editing tools to remove the background from PNG images or JPG. However, they may not do the job as easily as you are thinking.
Yes, we know that you may be wondering about Adobe Photoshop now. It can be used for removing the background too but are you ready to pay for it? No, right? This is when you can depend on PowerPoint to erase the background of a photo without any hassle. Make sure you have PowerPoint 2010 or a later version installed before beginning. Because the earlier Microsoft PowerPoint versions don’t have a background removal feature.
Step 1: Open the image in a new tab
Launch PowerPoint on your desktop or Mac and change the layout of the slide to “Blank”. Next, insert your image, which has a solid or high-contrast background. Such pictures are easier to transform and edit.
Step 2: Select the “Remove Background” option
Click on your image to get the “Picture Format” in the menu toolbar. On the left top side, choose the “Remove Background” option. Now, PowerPoint will try to remove the background automatically. If the final picture that you are getting is not satisfactory, move to the next step.
Step 3: Select the Area
From the given options in the toolbar, mark the areas that you want to keep or remove in the final result. As you can view, how some parts of the pictures have been cut. So, spread the box to cover the entire area of the image, which you want to keep. Remember, purple-highlighted areas are removed automatically.
If you want to ensure a better result, use the cursor. Start hovering over the background and the main subject to get the plus and minus sign. These signs are useful for getting a precise image at the end. The Minus sign allows you to mark the areas to be removed. The plus sign can be used to keep the marked areas in the final picture.
Step 4: Finishing Touches
Check your image carefully and see whether any area is left to be removed or not. You can zoom in to find the tiniest spot. When you are satisfied with every detail, click anywhere outside of the image to stop further edits. Congratulations! Your transparent PNG is ready to save. Go to “File”>”Save As” and find the option to save your picture in PNG transparent format.
Part 2 How to Convert JPG to Transparent PNG
Ever wondered how logos in a graphic match with the background image color? It’s possible with transparent PNG images only. The transparent PNG images format contains superior quality and no background. Hence, it is pretty helpful for the designers to add them to graphics and videos.
In case you have some JPG images but you want it in PNG images format, don’t worry. You can use Kapwing as it’s a trusted content creation and video editing platform. It can bring your idea to life. It can convert JPG to PNG transparent easily. With the AI-powered facility, you can enjoy a seamless editing and conversion experience. Kapwing makes it really simple and fast, but the best part is that you can get it done for free.
Step 1: Add Your JPG
Launch Kapwing in any browser of your choice. Log in using your account or sign up with a new one. Now, you will be redirected to the Kapwing studio, where you can do all the editing and conversion. Upload your image to the “Kapwing Studio” and use the “Remove Image from Background” tool.
If the image is already saved on your device, simply hit “Click to Upload” or, if you wish, drag and drop the JPG image to initiate the conversion. On the other hand, in case the image is not available, you can copy and paste from a URL in the “Paste an image or video URL” box.
Step 2: Pick a Tool
After the image upload finishes, the next thing is to start removing its background. Go to the right side of the “Image” tab and click on the “Erase” button. Otherwise, you can use the “Remove Background from Image” tool to start.
You have two options to choose from – Erase and Magic Wand. The first tool gives you full control over what you want to remove or keep. Adjust the “eraser size” by sliding right on the dial. This way, you can remove the background precisely.
Apart from that, the Magic Wand tool is amazing for removing a particular area at once. You can remove the picture background in less time and effort. If you want to remove a certain area of the same color, then the Magic Wand is the best tool to use. It eliminates similar groups of pixels together. To modify the sensitivity, move the same dial to the right as you did while selecting the “Erase” tool.
For some impressive results, adjust the zoom and choose “Move” to select the pixels you want to remove.
Step 3: Make the PNG and Download
After everything has been set, it’s time to download your PNG transparent file. Click “Done” and then move back to the Kapwing Studio for additional features. You can add watermarks, text, and a lot more. Finally, hit the “Publish” button placed at the top right and “Download” to save the PNG file to your desktop.
You can do more with Wondershare Filmora Video Editor !
For Win 7 or later (64-bit)
For macOS 10.12 or later
Have you ever tried to extract images from a video file? Well, many of us wish to do so but lack the right tools or don’t have any idea of how to do it. Some people just take a screenshot of the video and crop it for use in memes, images, etc. However, doing this will reduce its overall resolution and quality.
If you want to preserve quality during the extraction of images from a video, use Wondershare Filmora. It lets you take images out of a video file frame by frame without any compromise on quality. It features many other tools to show your creativity.
It’s the latest update. Filmora V11 is here! Find out what’s new in this latest video editing software release and how it can help you create incredible videos and images. You can remove any unwanted object from an image, add filters and overlays, all on the go.
● Ending Thoughts →
● So there you have it: the full story on transparent PNGs, removing background, and conversion from JPG to PNG file format. As you can see, it’s not too hard to combine one image in your design. However, we don’t want you to forget anything. Hence, remember these things when you try to convert JPG to PNG transparent.
● Whichever method you choose to turn a PNG image into a JPG, make sure you are familiar with the tool. If not, first spend time figuring out the features. Seek out what suits you and then start. We would recommend following the above tips carefully instead of using any other tool.
● Beware of using third-party websites for background removal from a PNG. Many will store your pictures, which can be accessed by other users. They are not safe for you by any means.
● It’s not an easy job to convert JPG to transparent PNG using PowerPoint, especially when an image contains multiple images and colors. For such pictures, you can use Kapwing. It has plenty of additional features that you can use for creative work.
● If you have any questions or have different ways of accomplishing this, feel free to comment below. Thanks for reading.
Some Effective Slow Motion Video Editors You Can Try
Slow-motion videos help in sports analysis to gain insights into the performance. Slow motion is beneficial for observing precise movements in instructional videos. Moreover, such videos are crucial for product showcasing in advertising and marketing. Due to the various uses of slow-motion videos, you may need to create one with an edit video slow motion online free.
Thus, this article will focus on some top-notch slow-motion video editors online for free. With these tools, you can produce slow-motion videos at the desired pace. Moreover, we will introduce a desktop tool that leaves behind all online video editors slow motion free.
Slow Motion Video Maker Slow your video’s speed with better control of your keyframes to create unique cinematic effects!
Make A Slow Motion Video Make A Slow Motion Video More Features

Part 1: [Top List] Best Slow Motion Video Editors To Work Within 2024
Have you ever worked with slow-motion video editors? In this section, we will shed light on some of the best online video editors that are slow-motion free. By using them, you can produce professional quality slow-motion videos with ease:
1. VEED.io
VEED.io is a prominent tool that you can access through a web browser. Along with its many features, this tool lets you slow down a video with proficiency. It lets you change the video speed to up to 0.5x. Moreover, you can enter the custom speed for more modification. For precision, you can slow down certain parts by splitting the clips. Hence, this tool gives you complete control for making slow-motion videos.

Pros
- This tool shows compatibility with many file formats. For example, you can import videos in MOV, MP3, AVI, and other formats.
- After slowing down a video, this tool lets you perform basic video editing. You can cut, crop, trim, and annotate the slow-motion video.
Cons
- This tool freezes and lacks fast processing speed.
2. Canva
Have you ever edited a video through Canva? This famous edit video slow motion online free tool offers many tools to execute basic and advanced editing. Among them, it contains the feature to add a slow-motion effect to a video. After uploading the video, you can reduce the speed to 0.1x. While adding a slow-motion effect, you can add comments to the video for more modification.

Pros
- This tool provides many options for uploading a video. For instance, you can upload videos from Facebook, Google Drive, Google Photos, or Dropbox.
- It includes a collaboration link to help your teammates access the video. You can also enter groups, people, and tags for collaboration.
Cons
- The options for template designs and export are limited.
3. Typito
Typito is a reliable tool that supports over 20 video file formats. With its video speed modifier, you can speed up or slow down a video file without hassle. Furthermore, it supports many aspect ratios, like a square letterbox, vertical, etc. Moreover, it contains a stock media library containing royalty-free videos and images. Thus, it’s a competent online tool featuring a reliable option to make slow-motion videos.

Pros
- You can display your own brand video with this tool. It allows you to upload your brand colors, designs, and fonts for brand marketing.
- It offers a real-time video preview to analyze the final result. By doing so, you can download satisfactory slow-motion videos.
Cons
- Sometimes, the tool encounters glitches, which can disrupt its overall performance.
4. Media.io
Media.io is a capable online tool famous for its flawless results. After importing the video, you can reduce it to the lowest speed, which is 0.25x. Meanwhile, you can also increase the video speed to 4x efficiently. One of the best things about this tool is that it can edit the motion effect to YouTube URLs directly. Hence, this slow down video online free can benefit you in making slow-motion videos.

Pros
- This tool contains many free additional features. For instance, it contains a video converter, letting you convert the file format into another one.
- To remove unwanted audio from a video, you can mute the video. Thus, with a single click, you can mute the video instantly.
Cons
- You cannot upload large file sizes on this tool. Thus, you can face file size restrictions on Media.io.
5. Flixier
This online video editor slow motion free tool has an easy-to-use interface that you can operate without watching tutorials. It can slow down a video at any frame rate without decreasing its quality. To reduce the video speed, you can drag the slider with great ease. Moreover, you can add powerful effects to enhance the slowed-down video. Hence, it’s an advanced tool for creating slow-motion videos.

Pros
- It contains an AI subtitle generator through which you can transcribe your videos. It supports all common languages for the generation of video subtitles.
- To make your video pleasing in a visual way, you can add many filters. This tool consists of many filters which can improve your facial appearance.
Cons
- Flixier takes extra time to process video files. Thus, making slow-motion videos with this tool is time-consuming.
6. Kapwing
This online tool uses advanced technology to slow down a video without losing quality. Whether your video is 4K or 1080p, the tool maintains the original resolution of the video. You can import the video from your device within a few seconds. It also allows you to paste the URL of the video quickly. Afterward, you can adjust the speed slider to manage the video speed in a preferred way.

Pros
- Kapwing is an all-round video editor offering many features. Using this video editor, users can combine and split video tracks.
- The AI audio enhancer of this tool can improve the sound quality of your audio. You can improve the quality of your voice recording and background music with this feature.
Cons
- To use its premium features, you must buy its subscription plans. However, its subscription plans can be expensive for some users.
7. Clideo
Do you want a basic tool for slowing down videos? Clideo is one of the simple tools that has intuitive controls to modify a video. It has a fast processing speed to offer users instant results. It provides six commonly used speeds for video clips. In addition, you can use the speed slider to adjust the speed in a personalized way. Meanwhile, the tool ensures complete security to protect your valuable video files.

Pros
- This slow down video online free can function as a great video compressor. It decreases the video file size without compromising its resolution.
- It acts as a video maker, allowing you to create videos from images. Moreover, you can produce videos with GIFs of desired quality.
Cons
- It adds a watermark to the videos in its free version.
8. Online Video Cutter
This comprehensive slow motion video online without watermark tool offers a great user experience in making slow-motion videos. Without adding a watermark, it can create slow-mo videos as best as possible. Along with various video speeds, it provides many file formats. Moreover, you can slow down videos without creating an account. Within a few taps, you can make slow-motion videos in high resolution.

Pros
- To describe your video clips, add text to them using this tool. It lets you select the desired text font, style, size, and color.
- It contains a screen recorder to capture the current activities of your desktop. After recording, you can edit and export the video flawlessly.
Cons
- The interface of this tool contains many pop-up ads, which can be annoying.
Part 2: Alternative For Better Results: Wondershare Filmora
After knowing the drawbacks of online tools, you must want an alternative. Wondershare Filmora is a skillful tool comprising good qualities as a video editor. It targets every need of a professional video editor with its robust features. With its friendly user interface, you can perform video editing without hurdles. It lets you apply effects, transitions, animations, and other modifications with ease.
Moreover, it allows users to control the speed of the videos. After dragging the video to the timeline, you can adjust its speed accordingly. It retains the frame rate of the video with high-end rendering. Also, it contains tons of AI options to improvise the video clip. Hence, Filmora is a must-have offline tool catering to all the needs of video editors.
Free Download For Win 7 or later(64-bit)
Free Download For macOS 10.14 or later
Directions to Make Slow-Motion Video
In this section, we will enlist the simple steps to create slow-motion videos. Thus, check the following instructions to generate slow-motion videos in a flawless way.
Step 1Sign Into Filmora
Start by launching Filmora on your PC. Once done, head to the top bar and select “Profile”. From there, sign into the account and select the “New Project” button.

Step 2Add Video on Timeline
Now, on the main interface of Filmora, press “Ctrl + I”. In this manner, you can import the video clips from your computer. Once done, drag and drop the video file to the timeline for editing.

Step 3Go to the Speed Tab
Select the video on the timeline and go to the right panel. Through this panel, click on the “Speed” tab and tap “Uniform Speed”.

Step 4Choose Optical Flow
Expand “AI Frame Interpolation” and tap “Optical Flow”. Now, stay on the timeline and select “Render Preview” from the top toolbar. By doing so, you can export the video in the selected file format.

Key Features Highlighting Filmora
AI Vocal Remover: This AI feature isolates the music from any song. It preserves the high resolution of the video while removing vocals. Also, it extracts other unwanted elements from audio. Hence, it automatically removes vocals from an audio file.
AI Copywriting: This feature is integrated with ChatGPT to produce AI-generated scripts. Content creators can generate YouTube descriptions and titles from this smart feature. To do so, you can enter the question in the given box. After some seconds, the AI tool will answer your queries.
AI Image: By using this feature, you can convert your text to images in an automated way. You can describe the image in the text in the given box. Afterward, the tool will create an AI image in three resolutions.
Part 3: What Are Some Major Drawbacks to Using Online Slow Motion Video Editors Compared to Offline Editors?
There are some disadvantages to using online slow-motion video editors as compared to offline tools. Here are some of the common drawbacks of slow motion video editor online free that you should consider:
Network Dependency
Online slow-motion video editors need credible and fast internet connections. You can’t access their website with a poor internet connection. If there is a poor network connection, the tool will take extra time to upload and process videos.
Limitations of Features
Unlike offline slow-motion video editors, online free tools have limited features. They don’t offer advanced options to make professional enhancements. Moreover, advanced tools need high-end computing sources. This may not be present on web-based slow-motion video editors.
Privacy Concerns
Desktop tools use enhanced encryption methods for data privacy. However, online sites may contain hidden malicious files which can harm your data. Hence, online users may face privacy threats when making slow-motion videos.
User Interface and Subscription Packages
It’s common that online slow-motion video editors lack intuitive controls. The interface of online tools is difficult to operate for beginners. Moreover, the subscription packages can be expensive for some users. In contrast, desktop tools have better user interface experience with affordable plans.
Conclusion
Slow-motion videos are useful for deep analysis. It helps in highlighting the minor details of a product. There are many online video editors slow motion free to create slow-motion effects. However, desktop tools like Filmora are a better alternative to such online tools. This tool uses high-end computing algorithms to make slow-motion videos with precision.
Make A Slow Motion Video Make A Slow Motion Video More Features
Part 1: [Top List] Best Slow Motion Video Editors To Work Within 2024
Have you ever worked with slow-motion video editors? In this section, we will shed light on some of the best online video editors that are slow-motion free. By using them, you can produce professional quality slow-motion videos with ease:
1. VEED.io
VEED.io is a prominent tool that you can access through a web browser. Along with its many features, this tool lets you slow down a video with proficiency. It lets you change the video speed to up to 0.5x. Moreover, you can enter the custom speed for more modification. For precision, you can slow down certain parts by splitting the clips. Hence, this tool gives you complete control for making slow-motion videos.
Pros
- This tool shows compatibility with many file formats. For example, you can import videos in MOV, MP3, AVI, and other formats.
- After slowing down a video, this tool lets you perform basic video editing. You can cut, crop, trim, and annotate the slow-motion video.
Cons
- This tool freezes and lacks fast processing speed.
2. Canva
Have you ever edited a video through Canva? This famous edit video slow motion online free tool offers many tools to execute basic and advanced editing. Among them, it contains the feature to add a slow-motion effect to a video. After uploading the video, you can reduce the speed to 0.1x. While adding a slow-motion effect, you can add comments to the video for more modification.
Pros
- This tool provides many options for uploading a video. For instance, you can upload videos from Facebook, Google Drive, Google Photos, or Dropbox.
- It includes a collaboration link to help your teammates access the video. You can also enter groups, people, and tags for collaboration.
Cons
- The options for template designs and export are limited.
3. Typito
Typito is a reliable tool that supports over 20 video file formats. With its video speed modifier, you can speed up or slow down a video file without hassle. Furthermore, it supports many aspect ratios, like a square letterbox, vertical, etc. Moreover, it contains a stock media library containing royalty-free videos and images. Thus, it’s a competent online tool featuring a reliable option to make slow-motion videos.
Pros
- You can display your own brand video with this tool. It allows you to upload your brand colors, designs, and fonts for brand marketing.
- It offers a real-time video preview to analyze the final result. By doing so, you can download satisfactory slow-motion videos.
Cons
- Sometimes, the tool encounters glitches, which can disrupt its overall performance.
4. Media.io
Media.io is a capable online tool famous for its flawless results. After importing the video, you can reduce it to the lowest speed, which is 0.25x. Meanwhile, you can also increase the video speed to 4x efficiently. One of the best things about this tool is that it can edit the motion effect to YouTube URLs directly. Hence, this slow down video online free can benefit you in making slow-motion videos.
Pros
- This tool contains many free additional features. For instance, it contains a video converter, letting you convert the file format into another one.
- To remove unwanted audio from a video, you can mute the video. Thus, with a single click, you can mute the video instantly.
Cons
- You cannot upload large file sizes on this tool. Thus, you can face file size restrictions on Media.io.
5. Flixier
This online video editor slow motion free tool has an easy-to-use interface that you can operate without watching tutorials. It can slow down a video at any frame rate without decreasing its quality. To reduce the video speed, you can drag the slider with great ease. Moreover, you can add powerful effects to enhance the slowed-down video. Hence, it’s an advanced tool for creating slow-motion videos.
Pros
- It contains an AI subtitle generator through which you can transcribe your videos. It supports all common languages for the generation of video subtitles.
- To make your video pleasing in a visual way, you can add many filters. This tool consists of many filters which can improve your facial appearance.
Cons
- Flixier takes extra time to process video files. Thus, making slow-motion videos with this tool is time-consuming.
6. Kapwing
This online tool uses advanced technology to slow down a video without losing quality. Whether your video is 4K or 1080p, the tool maintains the original resolution of the video. You can import the video from your device within a few seconds. It also allows you to paste the URL of the video quickly. Afterward, you can adjust the speed slider to manage the video speed in a preferred way.
Pros
- Kapwing is an all-round video editor offering many features. Using this video editor, users can combine and split video tracks.
- The AI audio enhancer of this tool can improve the sound quality of your audio. You can improve the quality of your voice recording and background music with this feature.
Cons
- To use its premium features, you must buy its subscription plans. However, its subscription plans can be expensive for some users.
7. Clideo
Do you want a basic tool for slowing down videos? Clideo is one of the simple tools that has intuitive controls to modify a video. It has a fast processing speed to offer users instant results. It provides six commonly used speeds for video clips. In addition, you can use the speed slider to adjust the speed in a personalized way. Meanwhile, the tool ensures complete security to protect your valuable video files.
Pros
- This slow down video online free can function as a great video compressor. It decreases the video file size without compromising its resolution.
- It acts as a video maker, allowing you to create videos from images. Moreover, you can produce videos with GIFs of desired quality.
Cons
- It adds a watermark to the videos in its free version.
8. Online Video Cutter
This comprehensive slow motion video online without watermark tool offers a great user experience in making slow-motion videos. Without adding a watermark, it can create slow-mo videos as best as possible. Along with various video speeds, it provides many file formats. Moreover, you can slow down videos without creating an account. Within a few taps, you can make slow-motion videos in high resolution.
Pros
- To describe your video clips, add text to them using this tool. It lets you select the desired text font, style, size, and color.
- It contains a screen recorder to capture the current activities of your desktop. After recording, you can edit and export the video flawlessly.
Cons
- The interface of this tool contains many pop-up ads, which can be annoying.
Part 2: Alternative For Better Results: Wondershare Filmora
After knowing the drawbacks of online tools, you must want an alternative. Wondershare Filmora is a skillful tool comprising good qualities as a video editor. It targets every need of a professional video editor with its robust features. With its friendly user interface, you can perform video editing without hurdles. It lets you apply effects, transitions, animations, and other modifications with ease.
Moreover, it allows users to control the speed of the videos. After dragging the video to the timeline, you can adjust its speed accordingly. It retains the frame rate of the video with high-end rendering. Also, it contains tons of AI options to improvise the video clip. Hence, Filmora is a must-have offline tool catering to all the needs of video editors.
Free Download For Win 7 or later(64-bit)
Free Download For macOS 10.14 or later
Directions to Make Slow-Motion Video
In this section, we will enlist the simple steps to create slow-motion videos. Thus, check the following instructions to generate slow-motion videos in a flawless way.
Step 1Sign Into Filmora
Start by launching Filmora on your PC. Once done, head to the top bar and select “Profile”. From there, sign into the account and select the “New Project” button.
Step 2Add Video on Timeline
Now, on the main interface of Filmora, press “Ctrl + I”. In this manner, you can import the video clips from your computer. Once done, drag and drop the video file to the timeline for editing.
Step 3Go to the Speed Tab
Select the video on the timeline and go to the right panel. Through this panel, click on the “Speed” tab and tap “Uniform Speed”.
Step 4Choose Optical Flow
Expand “AI Frame Interpolation” and tap “Optical Flow”. Now, stay on the timeline and select “Render Preview” from the top toolbar. By doing so, you can export the video in the selected file format.
Key Features Highlighting Filmora
AI Vocal Remover: This AI feature isolates the music from any song. It preserves the high resolution of the video while removing vocals. Also, it extracts other unwanted elements from audio. Hence, it automatically removes vocals from an audio file.
AI Copywriting: This feature is integrated with ChatGPT to produce AI-generated scripts. Content creators can generate YouTube descriptions and titles from this smart feature. To do so, you can enter the question in the given box. After some seconds, the AI tool will answer your queries.
AI Image: By using this feature, you can convert your text to images in an automated way. You can describe the image in the text in the given box. Afterward, the tool will create an AI image in three resolutions.
Part 3: What Are Some Major Drawbacks to Using Online Slow Motion Video Editors Compared to Offline Editors?
There are some disadvantages to using online slow-motion video editors as compared to offline tools. Here are some of the common drawbacks of slow motion video editor online free that you should consider:
Network Dependency
Online slow-motion video editors need credible and fast internet connections. You can’t access their website with a poor internet connection. If there is a poor network connection, the tool will take extra time to upload and process videos.
Limitations of Features
Unlike offline slow-motion video editors, online free tools have limited features. They don’t offer advanced options to make professional enhancements. Moreover, advanced tools need high-end computing sources. This may not be present on web-based slow-motion video editors.
Privacy Concerns
Desktop tools use enhanced encryption methods for data privacy. However, online sites may contain hidden malicious files which can harm your data. Hence, online users may face privacy threats when making slow-motion videos.
User Interface and Subscription Packages
It’s common that online slow-motion video editors lack intuitive controls. The interface of online tools is difficult to operate for beginners. Moreover, the subscription packages can be expensive for some users. In contrast, desktop tools have better user interface experience with affordable plans.
Conclusion
Slow-motion videos are useful for deep analysis. It helps in highlighting the minor details of a product. There are many online video editors slow motion free to create slow-motion effects. However, desktop tools like Filmora are a better alternative to such online tools. This tool uses high-end computing algorithms to make slow-motion videos with precision.
Also read:
- New In 2024, Guide to Making Cinematography for Music Video
- New How to Set Up Twitch Green Screen for 2024
- New In 2024, How To Cut Videos For Instagram On Mac
- Updated 2024 Approved 2 Ways to Add Custom Subtitles to Netflix
- Updated Top 10 Fun Discord Bots You Need for 2024
- Updated 2 Effective Ways to Easily Convert VTT to SRT
- New 2024 Approved Thousands Already Know Ezgif and So Can You
- Updated Quickly Turn Any Video Into a Paper Rip Effect for 2024
- New Fast Method to Match Color in Photoshop
- In 2024, Discover the Best Game Recording Software for Your PC in This Developing Industry. Record Your Gameplay in Real Time and Enjoy the Benefits that Come with It
- Progressive Solutions to Add VHS Effects to Video with Ease for 2024
- In 2024, Create Eye-Catching Slow-Motion Videos to Set Your Own Trend. For This Purpose, Read This Article to Find and Learn to Use CapCuts New Slow-Motion Templates
- 2024 Approved For Converting GIF to MOV Format, You Dont Need to Search From A-Z. Here Is an Amazing Guide, that Gives You Complete Details About Both Offline and Online Gif-to-MOV Converters. Catch Them Below and Experience a Pro Editing Time
- 2024 Approved How to Edit A Time Lapse Video on iPhone?
- Updated Do You Still Waste Time Making Transparent Background in Paint
- New 2024 Approved Looking For The Best Slow Motion Effect in Premiere Pro
- Updated Kinetic Typography Text Effect 【EASY&FAST】
- This Article Discusses What Is Adobe Premiere Pro, How to Download, Install and Use It, and Its Key Features. It Further Discusses Its Alternative for Editing Your Videos and More. Check Out Now
- New How to Add a Green Screen to Zoom for 2024
- Do You Wish to Make Changes Across Your Video? Are You Looking to Record Your Desktop Screen on Mac? Worry Not, as This Article Provides Details About QuickTime Player that Caters to All User Requirements
- Updated Techniques You Never Heard of for Learning AI Marketing YouTube
- New How to Create Text Animation for Videos
- 2024 Approved 15 Stunning GIF Splitter Examples You Need to Bookmark
- New Voice Changer for Discord | Use Voicemod on Discord
- Updated 2024 Approved 10 Catchy Pixel Art Wallpapers and How to Custom Your Own
- Updated Are You Looking to Store Your Videos Securely and Efficiently? Look No Further than Our Top Pick for the Best Cloud Storage Service for Videos
- New In 2024, How to Create Loop Videos Using Filmora
- New Little Tricks to Create Canva Slideshow No One Is Telling You for 2024
- New Cropping a Video in Final Cut Pro Step by Step for 2024
- New If You Want to Keep Your Memories in Form of Video or Slideshow Then Keynote Is Great App for You. It Has Amazing and Powerful Tools Which Give Your Slideshow a Great and Beautiful Look
- New In 2024, Best 15 Subtitle Apps 2023 Windows, Mac, iPhone, Android & Online
- How Can We Bypass Meizu 21 FRP?
- In 2024, How to Unlock a Network Locked Nokia G22 Phone?
- In 2024, CatchEmAll Celebrate National Pokémon Day with Virtual Location On Tecno Spark 20 | Dr.fone
- Prank Your Friends! Easy Ways to Fake and Share Google Maps Location On Vivo Y56 5G | Dr.fone
- How to Change Spotify Location After Moving to Another Country On Poco X5 | Dr.fone
- In 2024, How to Change GPS Location on Lenovo ThinkPhone Easily & Safely | Dr.fone
- Why is iPogo not working On Oppo Reno 11 5G? Fixed | Dr.fone
- In 2024, Detailed guide of ispoofer for pogo installation On Vivo T2x 5G | Dr.fone
- Trouble with iPhone 11 Swipe-Up? Try These 11 Solutions | Dr.fone
- How to Unlock Nokia C22 Phone without Google Account?
- In 2024, Everything You Need To Know About Unlocked iPhone 15 Plus
- Complete Fixes To Solve Apple iPhone 15 Randomly Asking for Apple ID Password | Dr.fone
- 6 Methods to Mirror Apple iPhone 8 to your Windows PC | Dr.fone
- How to Hard Reset Google Pixel 7a Without Password | Dr.fone
- Recover your photos after A05s has been deleted.
- Ultimate guide to get the meltan box pokemon go For Apple iPhone 13 | Dr.fone
- What Does Jailbreaking iPhone SE i Do? Get Answers here | Dr.fone
- Fixing Persistent Pandora Crashes on Poco C51 | Dr.fone
- Title: How To Fade Audio In Kinemaster
- Author: Chloe
- Created at : 2024-05-20 03:37:28
- Updated at : 2024-05-21 03:37:28
- Link: https://ai-editing-video.techidaily.com/how-to-fade-audio-in-kinemaster/
- License: This work is licensed under CC BY-NC-SA 4.0.
